Repeat guess speaker Bill Suon gave a presentaon at CWA’s February meeng on how to make banding for use in a variety of woodworking projects. Bill took some of the mystery out of banding by showing how they are made from repeve narrow cuts of a glued up “log”. While it may be more efficient to purchase pre-made banding Bill showed how you can have more control on the wood selecon for color and paern, use much of your various cutoffs from your other projects, and maybe save some money if not me. Bill showed how various banding paerns are made from a simple black veneer between two layers of holly up to more complex paerns. While the paerns may vary in complexity Bill showed they are essenally all made the same way with changes in angle of cuts to paern repeon. No maer the resulng end Banding as Presented By Bill Sutton Treasurer’s Report Deposits $1120 Checks $ 813 Closing Balance $3501 Memberships 109 In this issue: Cutting Lumber 1 Drying Lumber 2 Show & Tell 4 paern they begin as glued up “logs” - long strips of contrasng woods. These logs can contain two or more different colored woods. These logs are then cut into blocks. These blocks can be cut at any angle to create the desired paern. Any angle will work and does not have to be precise so long as it is cut consistently and repevely. The desired paern dictates the size of the blocks and the angle of the cut. While the angle must be consistent the size of the blocks can vary in order to create your paern. Once the blocks are cut, the next step is to lay our the blocks in your desired repeve paern. Bill showed how he uses a long length of MDF covered in packing tape and an inexpensive ruler as a straight-edge to lay out the blocks. Once the blocks are February’s Raffle Prizes 10” Irwin 100 tooth Saw Blade CA Glue w/ Activator Ryobi ROS Woodcraft $25 Gift Card Ryobi 90-piece Drill Bit Set The CWA meeting raffle could benefit from your donation. If you have any tools (old or new) or shop supplies you would like to donate to be raffled, please bring them to the meeting. Volume 21 February 2014

Welcome message from author
This document is posted to help you gain knowledge. Please leave a comment to let me know what you think about it! Share it to your friends and learn new things together.
Transcript

Repeat guess speaker Bill Sutton gave a presentation at CWA’s February meeting on how to make banding for use in a
variety of woodworking projects.
Bill took some of the mystery out of banding by showing how they are made from repetitive narrow cuts of a glued up “log”.
While it may be more efficient to purchase pre-made banding Bill showed how you can have more control on the wood selection for color and pattern, use much of your various cutoffs from your other projects, and maybe save some money if not time.
Bill showed how various banding patterns are made from a simple black veneer between two layers of holly up to more complex patterns. While the patterns may vary in complexity Bill
showed they are essentially all made the same way with changes in angle of cuts to pattern repetition.
No matter the resulting end
Banding as Presented By Bill Sutton
Treasurer’s Report
Deposits $1120
Checks $ 813
Closing Balance $3501
Memberships 109
In this issue:
Cutting Lumber 1
Drying Lumber 2
Show & Tell 4
pattern they begin as glued up “logs” - long strips of contrasting woods. These logs can contain two or more
different colored woods.
These logs are then cut into blocks. These blocks can be cut at any angle to create the desired pattern. Any angle will work and does not have to be precise so long as it is cut consistently and repetitively. The desired pattern dictates the size of the blocks and the angle of the cut. While the angle must be consistent the size of the blocks can
vary in order to create your pattern.
Once the blocks are cut,
the next step is to lay our the blocks in your desired repetitive pattern. Bill showed how he uses a long length of MDF covered in packing tape and an inexpensive ruler as a straight-edge to lay out the blocks. Once the blocks are
February’s Raffle
Prizes
10” Irwin 100 tooth Saw Blade CA Glue w/ Activator
Ryobi ROS Woodcraft $25 Gift Card
Ryobi 90-piece Drill Bit Set
The CWA meeting
raffle could benefit from
your donation. If you have
any tools (old or new) or
shop supplies you would
like to donate to be raffled,
please bring them to the
meeting.
Volume 21
February 2014
laid our in the desired pattern Bill used a stop block at either end to hold the new log in place while he again used packing tape to tape the blocks togeth-er on the top of the blocks.
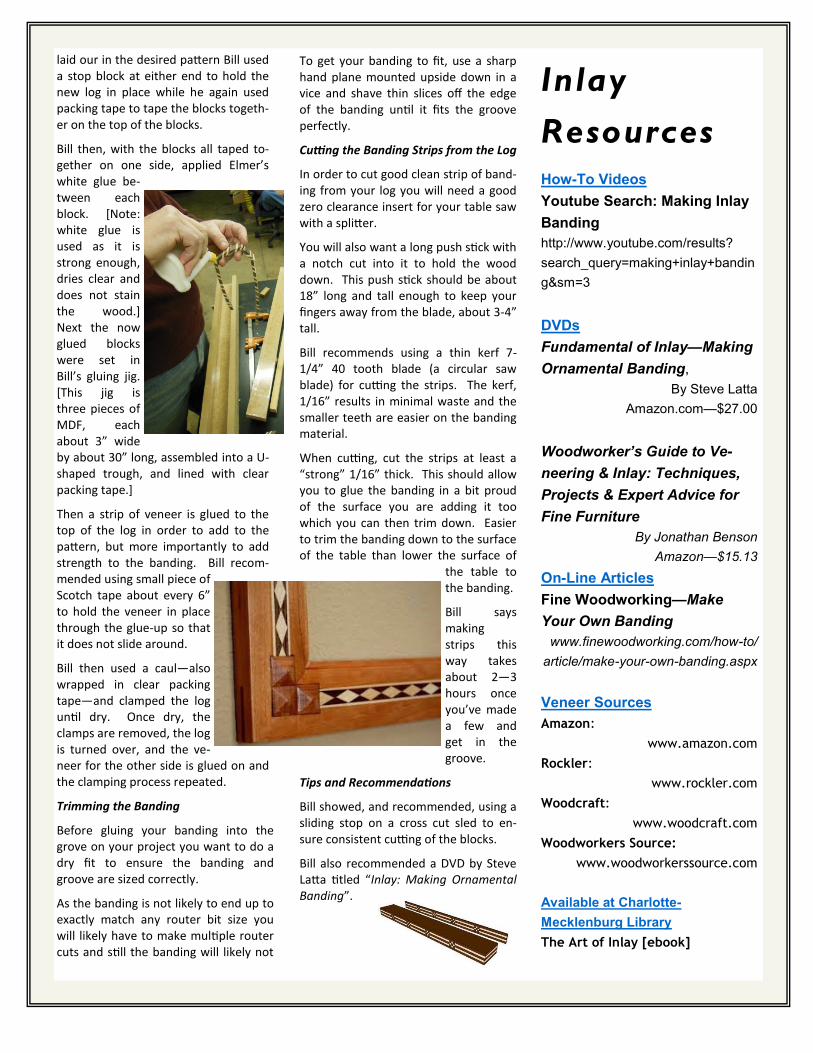
Bill then, with the blocks all taped to-gether on one side, applied Elmer’s white glue be-tween each block. [Note: white glue is used as it is strong enough, dries clear and does not stain the wood.] Next the now glued blocks were set in Bill’s gluing jig. [This jig is three pieces of MDF, each about 3” wide by about 30” long, assembled into a U-shaped trough, and lined with clear packing tape.]
Then a strip of veneer is glued to the top of the log in order to add to the pattern, but more importantly to add strength to the banding. Bill recom-mended using small piece of Scotch tape about every 6” to hold the veneer in place through the glue-up so that it does not slide around.
Bill then used a caul—also wrapped in clear packing tape—and clamped the log until dry. Once dry, the clamps are removed, the log is turned over, and the ve-neer for the other side is glued on and the clamping process repeated.
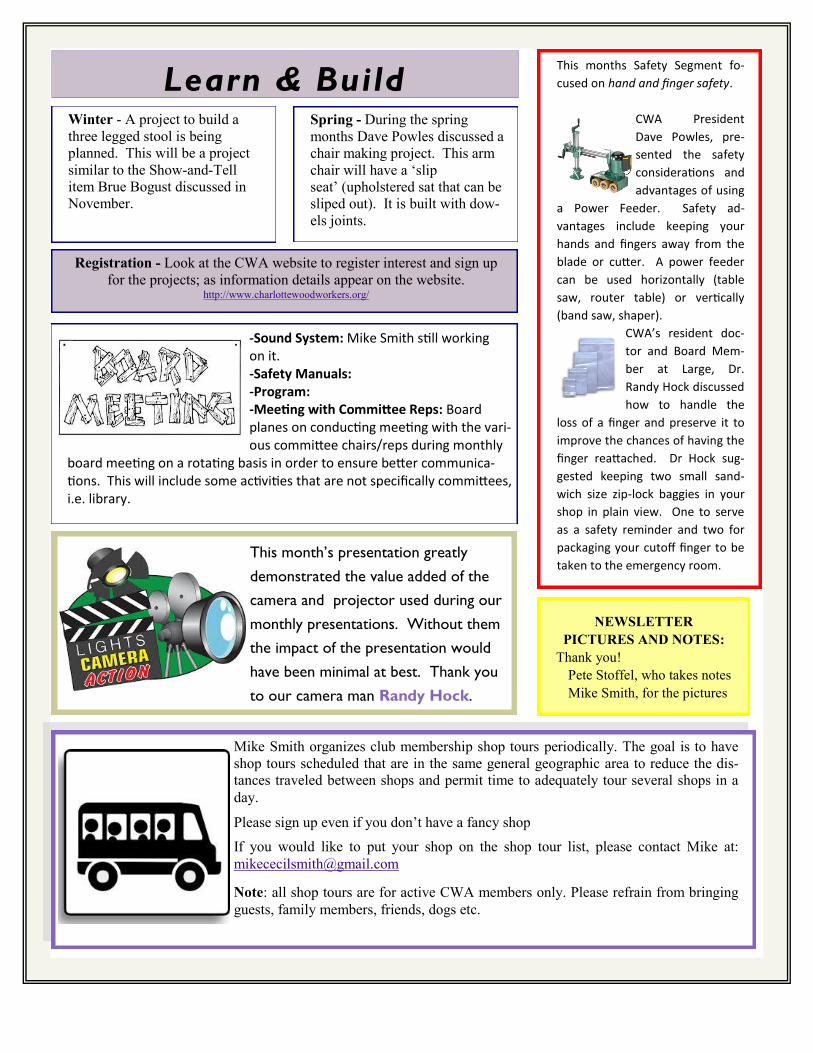
Trimming the Banding
Before gluing your banding into the grove on your project you want to do a dry fit to ensure the banding and groove are sized correctly.
As the banding is not likely to end up to exactly match any router bit size you will likely have to make multiple router cuts and still the banding will likely not
To get your banding to fit, use a sharp hand plane mounted upside down in a vice and shave thin slices off the edge of the banding until it fits the groove perfectly.
Cutting the Banding Strips from the Log
In order to cut good clean strip of band-ing from your log you will need a good zero clearance insert for your table saw with a splitter.
You will also want a long push stick with a notch cut into it to hold the wood down. This push stick should be about 18” long and tall enough to keep your fingers away from the blade, about 3-4” tall.
Bill recommends using a thin kerf 7-1/4” 40 tooth blade (a circular saw blade) for cutting the strips. The kerf, 1/16” results in minimal waste and the smaller teeth are easier on the banding material.
When cutting, cut the strips at least a “strong” 1/16” thick. This should allow you to glue the banding in a bit proud of the surface you are adding it too which you can then trim down. Easier to trim the banding down to the surface of the table than lower the surface of
the table to the banding.
Bill says making strips this way takes about 2—3 hours once you’ve made a few and get in the groove.
Tips and Recommendations
Bill showed, and recommended, using a sliding stop on a cross cut sled to en-sure consistent cutting of the blocks.
Bill also recommended a DVD by Steve Latta titled “Inlay: Making Ornamental Banding”.
How-To Videos
Youtube Search: Making Inlay
Banding
http://www.youtube.com/results?
search_query=making+inlay+bandin
g&sm=3
DVDs
Fundamental of Inlay—Making
Ornamental Banding,
By Steve Latta
Amazon.com—$27.00
Woodworker’s Guide to Ve-
neering & Inlay: Techniques,
Projects & Expert Advice for
Fine Furniture
By Jonathan Benson
Amazon—$15.13
On-Line Articles
Fine Woodworking—Make
Your Own Banding
www.finewoodworking.com/how-to/
article/make-your-own-banding.aspx
Veneer Sources
Amazon:
www.amazon.com
Rockler:
www.rockler.com
Woodcraft:
www.woodcraft.com
Woodworkers Source:
www.woodworkerssource.com
Available at Charlotte-
Mecklenburg Library
The Art of Inlay [ebook]
Inlay
Resources

Find CWA Online @
http://www.charlottewoodworkers.org/
https://www.facebook.com/pages/Charlotte-Woodworkers/244821488888300
https://groups.google.com/forum/?hl=en#!forum/charlotte-woodworkers
CWA Google
Groups
Communicate with other CWA colleagues on
With a single email you can let others know
what’s happening, share some information or
get an answer to a question.
Note: You Can Join This Group on Your Own!
To join:
Create a Google account, if necessary
(requires name, email and password).
Please save your password in a secure place
for future use.
Paste the entire line below in your web
browser’s address bar
http://groups.google.com/group/charlotte-woodworkers
“Sign in” Click the link "Join this Group" (on
the right).
Once "signed in" select the radio button
"Email" at the bottom and enter a nick-
name.
Send an email out to the group to introduce
yourself!
Use "charlotte-
[email protected]" as the
"send to" in an email to send a communica-
tion to all members of the group.

Show & Tell Stan Howell – Doll House Furniture (Present for his
Granddaughter); Oak & Walnut
Please Bring in Your Recent Project or an Item of Interest to our next CWA Meeting
Mike Dyer – Small Box; Ambrosia
Maple & Bloodwood Bill York – Folding Table for Trailer; Oak with biscuit joinery.
Randy Hock – Bench-on-a-Bench Woodworking Bench; goes on top of bench and
can be put away when not in use (never); Wooden Screws; Pine and Wormy Chest-nut.
Mike Pleso – Cabinet for Flat Screen TV and
DVD Player; Made from shop scraps, only bought the hinges; Plywood and Poplar; Am-ber Shellac and Two Coats of Poly
Winter - A project to build a
three legged stool is being
planned. This will be a project
similar to the Show-and-Tell
item Brue Bogust discussed in
November.
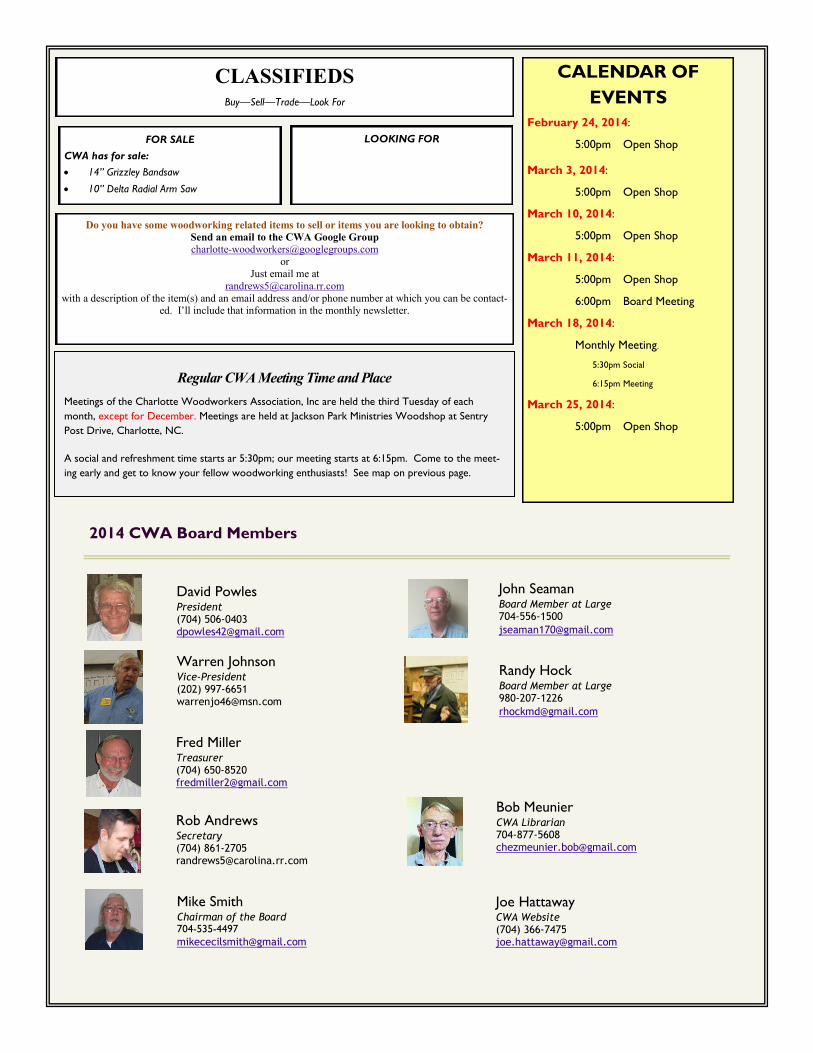
Learn & Build This months Safety Segment fo-
cused on hand and finger safety.
CWA President
Dave Powles, pre-
sented the safety
considerations and
advantages of using
a Power Feeder. Safety ad-
vantages include keeping your
hands and fingers away from the
blade or cutter. A power feeder
can be used horizontally (table
saw, router table) or vertically
(band saw, shaper).
CWA’s resident doc-
tor and Board Mem-
ber at Large, Dr.
Randy Hock discussed
how to handle the
loss of a finger and preserve it to
improve the chances of having the
finger reattached. Dr Hock sug-
gested keeping two small sand-
wich size zip-lock baggies in your
shop in plain view. One to serve
as a safety reminder and two for
packaging your cutoff finger to be
taken to the emergency room.
Spring - During the spring
months Dave Powles discussed a
chair making project. This arm
chair will have a ‘slip
seat’ (upholstered sat that can be
sliped out). It is built with dow-
els joints.
Registration - Look at the CWA website to register interest and sign up
for the projects; as information details appear on the website. http://www.charlottewoodworkers.org/
-Sound System: Mike Smith still working on it. -Safety Manuals: -Program: -Meeting with Committee Reps: Board planes on conducting meeting with the vari-ous committee chairs/reps during monthly
board meeting on a rotating basis in order to ensure better communica-tions. This will include some activities that are not specifically committees, i.e. library.
Mike Smith organizes club membership shop tours periodically. The goal is to have
shop tours scheduled that are in the same general geographic area to reduce the dis-
tances traveled between shops and permit time to adequately tour several shops in a
day.
Please sign up even if you don’t have a fancy shop
If you would like to put your shop on the shop tour list, please contact Mike at:
Note: all shop tours are for active CWA members only. Please refrain from bringing
guests, family members, friends, dogs etc.
NEWSLETTER
PICTURES AND NOTES:
Thank you!
Pete Stoffel, who takes notes
Mike Smith, for the pictures
This month’s presentation greatly
demonstrated the value added of the
camera and projector used during our
monthly presentations. Without them
the impact of the presentation would
have been minimal at best. Thank you
to our camera man Randy Hock.

CWA MEETING PRESENTATIONS
All members are asked to keep an eye out for anyone that might make be a suitable program presenter
for our CWA club meetings. Who knows, it might even be you!
Recent presentations have included:
Dulcimer making
Shaker Table Build Workshop
Wheel making
Windsor chair making
Spoon Carving
Fitting a Drawer
Power Carving
Bandsaw Boxes
Hide Glue
Tuning up a Wide Board
Workbenches
Intarsia Lidded Wood Boxes
Turning a Peppermill
Using SketchUp
Log Cabin Building
Cutting Ogee Style Feet on a Bandsaw
Building a Mantle Clock
Tools and Changes in the Industry
Workshop Design
Dust Collection 101
Saw Blades 101, Freud Blades and Router
Bits
“Easy Wood Tools" for Woodturning
Small Shops
Finishing
Product Development Presentation (by
Stanley Black & Decker)
Thomas Day Furniture Presentation
Tool Sharpening
Marquetry
Wooden Flute Making
Spoke Shavers
All About Wood
Inlay Stringing
Fixing Your Mistakes (Parts 1 and 2)
Cutting and Drying Lumber
Making Banding Inlay
If you know of someone with a woodworking skill that would be of inter-
est to CWA members please contact Warren Johnson @ warren-
Monday Night Open JPM
Shop Use
Any current CWA member who would like
to use the shop is welcome to do so.
CWA members are there on Monday
nights at 5:30 pm if you need any advice or
assistance with a project.
Ensure you have completed the CWA
‘waiver form’ before you use any of the
tools and equipment and follow the “Shop
Foreman’s” directions and safety proce-
dures.
C WA F R I E N D S A N D S P O N S O R S Please thank them every time you use their services.
Woodcraft
1725 Windsor Square Drive
Matthews, NC 28105
(704) 847-8300
Charlotte Store
Wholesale Tools
4200 Barringer Drive
Charlotte NC 28217
1-800-438-3580 (Service)
www.wttool.com 5% - 20% discount with current membership card.
Klingspor's Woodworking Shop
www.woodworkingshop.com
800-288-0000
Irwin Tools
http://www.irwin.com/
Farris Belt & Saw
235 Foster Ave.
Charlotte, NC 28203
www.farrisbelt.com
704-527-6166
Complete sharpening services and abrasives
Horizon Forest Products Greenville, S.C.
http://www.horizonforest.com/
Local Charlotte Salesman Chad Mitchell, 704-401-
6426
The Woodworking Source
184 Azalea Road
Mooresville, NC
http://www.thewoodworkingsource.com
Phone: 704-662-9663
Whiteside Machine Company
4506 Shook Road
Claremont, NC http://www.whitesiderouterbits.com
Phone: 828-459-2141
Please share your woodwork-
ing knowledge, interesting ex-
perience and/or a useful tip
with your CWA colleagues by
writing an article for the
CWA Newsletter.
Send your article to

Directions to Jackson Park Ministries
From the intersection of I-85 and Billy Graham Parkway:
Take Billy Graham Parkway South.
Turn Right on Paul Brown Blvd / West Blvd. (this will be after the main entrance to the airport)
Turn Right on Airport Drive.
First left on Sentry Post Drive.
At the end of Sentry Post Drive there is driveway on the left. Enter here. Using the photo above, drive down the
driveway and around to the warehouse with the “x” on the top.
From the intersection of South Tryon Street and Billy Graham Parkway (where Woodlawn turns in to Billy Graham). Also
exit 6 from I-77.):
Take Billy Graham Parkway North.
Turn Left on Paul Brown Blvd / West Blvd. (this will be at the light after the Tyvola Road exit)
Follow from Step 3 above…
2014 CWA Board Members
David Powles President (704) 506-0403 [email protected]
Warren Johnson Vice-President (202) 997-6651 [email protected]
Fred Miller Treasurer (704) 650-8520 [email protected]
Rob Andrews Secretary (704) 861-2705 [email protected]
Mike Smith Chairman of the Board 704-535-4497
John Seaman Board Member at Large 704-556-1500
Randy Hock Board Member at Large 980-207-1226
Bob Meunier CWA Librarian 704-877-5608 [email protected]
Joe Hattaway CWA Website (704) 366-7475 [email protected]
CLASSIFIEDS Buy—Sell—Trade—Look For
FOR SALE
CWA has for sale:
14” Grizzley Bandsaw
10” Delta Radial Arm Saw
LOOKING FOR
Do you have some woodworking related items to sell or items you are looking to obtain?
Send an email to the CWA Google Group
or Just email me at
with a description of the item(s) and an email address and/or phone number at which you can be contact-ed. I’ll include that information in the monthly newsletter.
CALENDAR OF
EVENTS
February 24, 2014:
5:00pm Open Shop
March 3, 2014:
5:00pm Open Shop
March 10, 2014:
5:00pm Open Shop
March 11, 2014:
5:00pm Open Shop
6:00pm Board Meeting
March 18, 2014:
Monthly Meeting.
5:30pm Social
6:15pm Meeting
March 25, 2014:
5:00pm Open Shop
Regular CWA Meeting Time and Place
Meetings of the Charlotte Woodworkers Association, Inc are held the third Tuesday of each
month, except for December. Meetings are held at Jackson Park Ministries Woodshop at Sentry
Post Drive, Charlotte, NC.
A social and refreshment time starts ar 5:30pm; our meeting starts at 6:15pm. Come to the meet-
ing early and get to know your fellow woodworking enthusiasts! See map on previous page.
Related Documents