Ch 10: Transforming Paths, Layers, and Smart Objects Photoshop CS6 Essentials By Scott Onstott

Welcome message from author
This document is posted to help you gain knowledge. Please leave a comment to let me know what you think about it! Share it to your friends and learn new things together.
Transcript
Ch 10: Transforming Paths, Layers, and Smart Objects
Photoshop CS6 EssentialsBy Scott Onstott
Ch 10: Transforming Paths, Layers, and Smart Objects
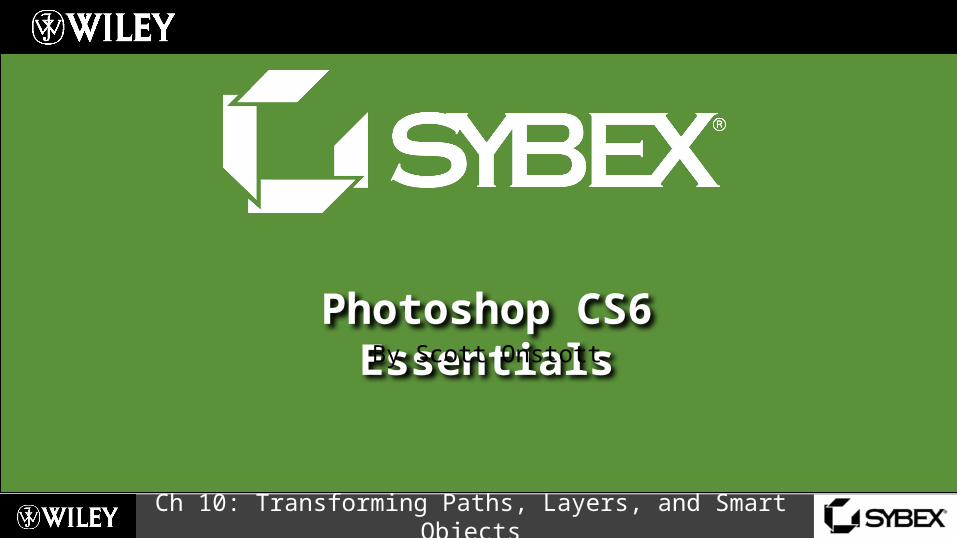
Setting Up Transformations• Guides and rulers can be helpful aids in
transforming objects• Right click the rulers to choose which
units you wish to use• Drag guides out from either ruler• Use the Move tool to reposition existing
guides• Drag guides back to the ruler to get rid of
them• Drag the upper left corner of the rulers to
set the origin point
Ch 10: Transforming Paths, Layers, and Smart Objects
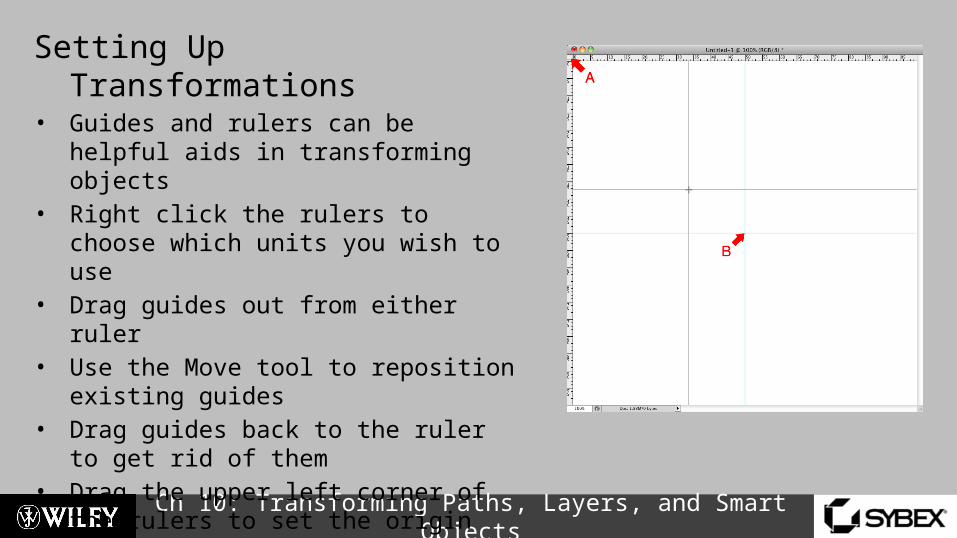
Aligning Using Guides• You can align objects to the guides as
long as Snap mode is on (toggle it in the View menu)
• Objects can be aligned from their centers and edges in relation to the guides
• Toggle guides by pressing Cmd+; (PC: Ctrl+;)
• Use the Move tool to align layers and smart objects
• Use the Path Selection tool to align sub-paths on shape layers
Ch 10: Transforming Paths, Layers, and Smart Objects
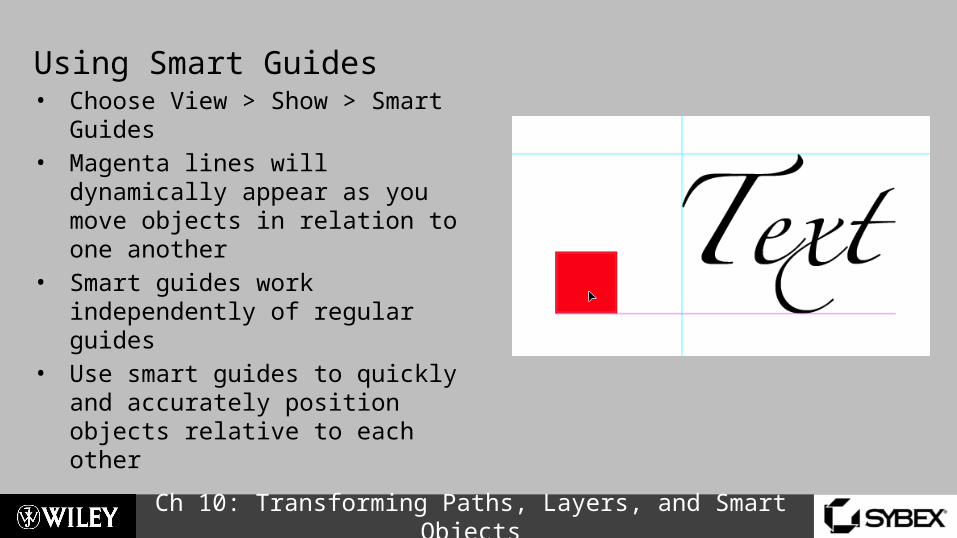
Using Smart Guides• Choose View > Show > Smart Guides• Magenta lines will dynamically appear
as you move objects in relation to one another
• Smart guides work independently of regular guides
• Use smart guides to quickly and accurately position objects relative to each other
Ch 10: Transforming Paths, Layers, and Smart Objects
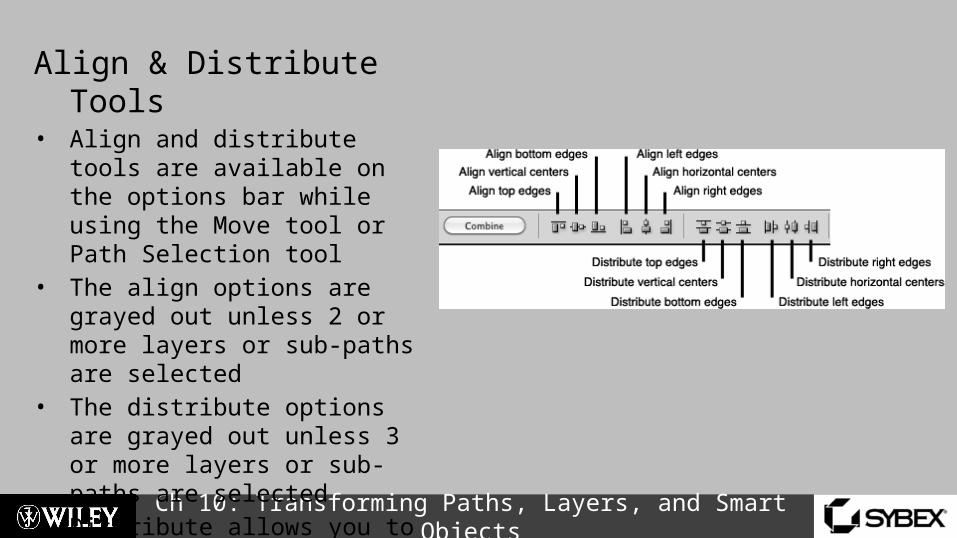
Align & Distribute Tools• Align and distribute tools are
available on the options bar while using the Move tool or Path Selection tool
• The align options are grayed out unless 2 or more layers or sub-paths are selected
• The distribute options are grayed out unless 3 or more layers or sub-paths are selected
• Distribute allows you to space layers or paths equally
Ch 10: Transforming Paths, Layers, and Smart Objects
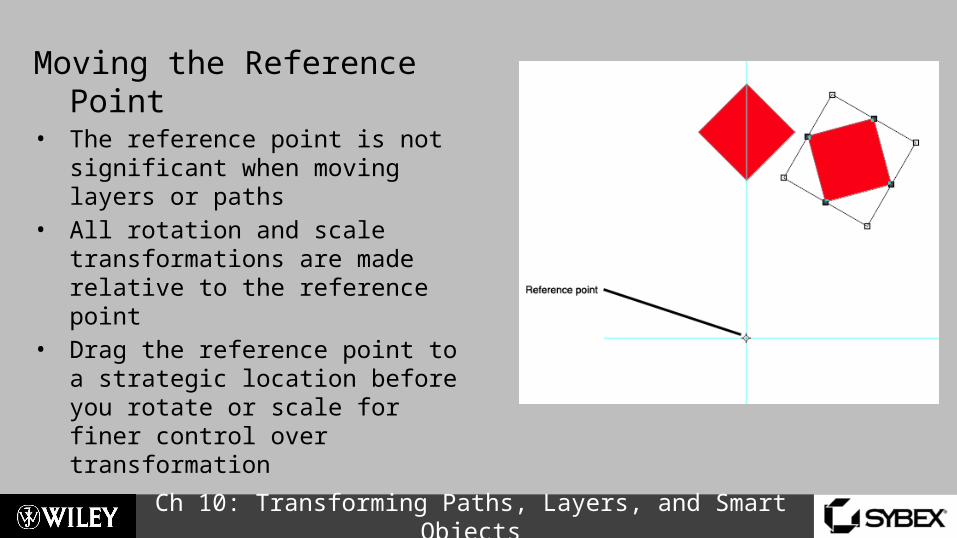
Moving the Reference Point• The reference point is not significant
when moving layers or paths• All rotation and scale transformations
are made relative to the reference point
• Drag the reference point to a strategic location before you rotate or scale for finer control over transformation

Ch 10: Transforming Paths, Layers, and Smart Objects
Transform Again• Choose Edit > Transform Again to repeat
the last transformation on the selected layer or path
• Transform Again respects the original reference point so you can quickly make polar arrays with this method
• The default shortcut for Transform Again is Shift+Cmd+T
• Transform Again does not work with the Move tool, only Free Transform mode
• You can transform displacements again by moving in free transform mode
Ch 10: Transforming Paths, Layers, and Smart Objects
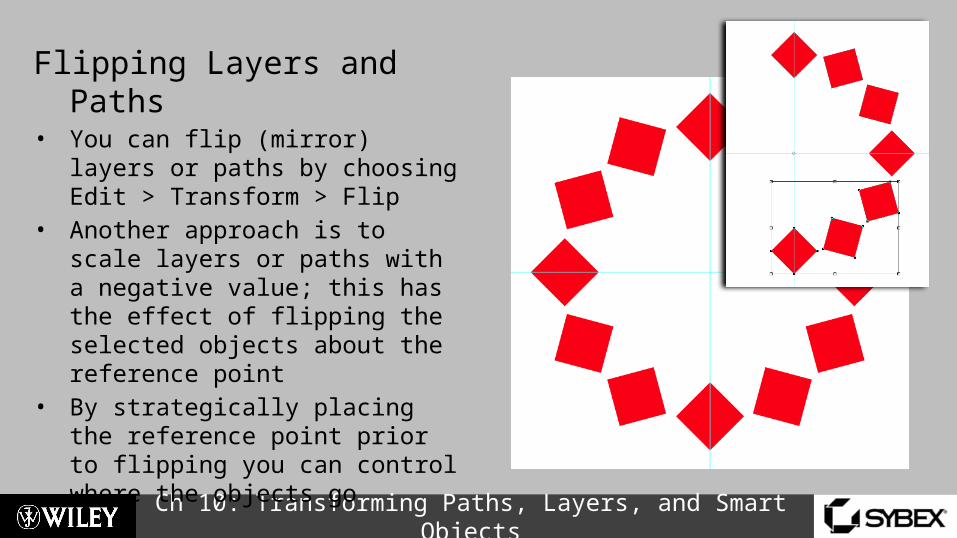
Flipping Layers and Paths• You can flip (mirror) layers or paths
by choosing Edit > Transform > Flip• Another approach is to scale layers
or paths with a negative value; this has the effect of flipping the selected objects about the reference point
• By strategically placing the reference point prior to flipping you can control where the objects go

Ch 10: Transforming Paths, Layers, and Smart Objects
Deforming Objects• You can change the shape, or
deform, layers and paths in free transform mode
• Right click in Free Transform mode to access a deformation shortcut menu
• You can non-uniformly scale, skew, distort, and change objects’ perspective by dragging their transformation handles
Ch 10: Transforming Paths, Layers, and Smart Objects
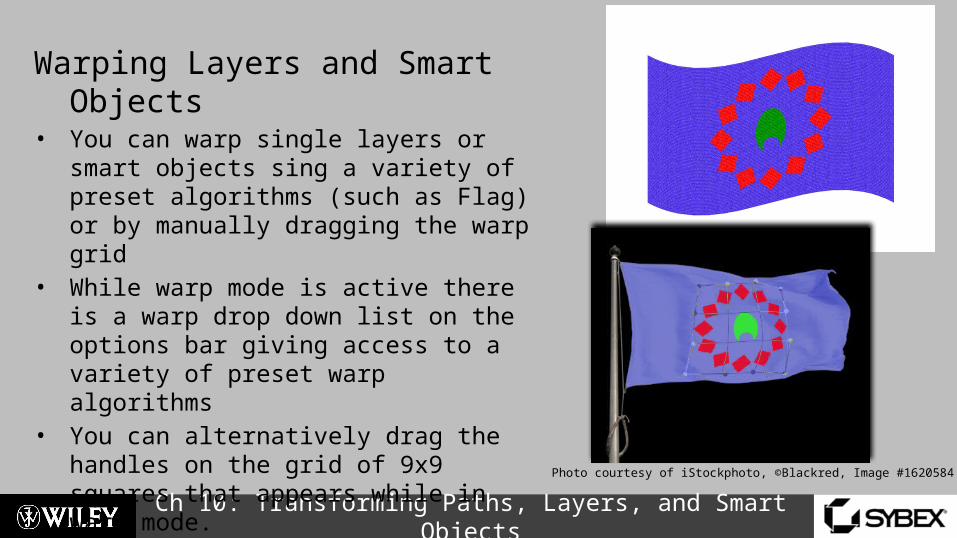
Warping Layers and Smart Objects• You can warp single layers or smart objects
sing a variety of preset algorithms (such as Flag) or by manually dragging the warp grid
• While warp mode is active there is a warp drop down list on the options bar giving access to a variety of preset warp algorithms
• You can alternatively drag the handles on the grid of 9x9 squares that appears while in warp mode.
• Drag the interior grid lines to change the shape of the warp grid
Photo courtesy of iStockphoto, ©Blackred, Image #1620584
Related Documents