Chapter 9: Database Connectivity to MySQL Informatics Practices Class XII By- Deepak Bhinde PGT Comp. Sc.

Welcome message from author
This document is posted to help you gain knowledge. Please leave a comment to let me know what you think about it! Share it to your friends and learn new things together.
Transcript

Chapter 9:
Database Connectivity to MySQL
Informatics Practices
Class XII
By- Deepak Bhinde
PGT Comp. Sc.

Introduction A real life application needs to manipulate data stored in a Database.
A database is a collection of related data in the form of Tables. Most of the database uses SQL (Structured Query Language) to Insert, Delete, Update or retrieve stored data.
In order to connect a Java application to a database designed in MySQL, Oracle, Sybase, MS SQL Server etc, you need a Bridge/Interface Driver Program.
Java Provides JDBC (Java Database Connection) and JDBC-ODBC interface/ Driver to connect a database. JDBC is commonly used to connect MySQL database.

What is JDBC ? JDBC is JAVA’s Database connection driver
interface which performs the following task for the application.
Establish a connection with a Database.
Send SQL request (Query) to a Database
Server.
Returns Result obtained against Query.
Some RDBMS like MS Access requires ODBC (Open Database Connection), which can be connect through JDBC-ODBC driver (jdbc.odbcbridge).

Architecture of JDBC JAVA Application
JDBC API handles communication
JDBC API
JDBC Driver Manager
JDBC Driver
Database
between JAVA Application and JDBC Driver Manager
JDBC Driver API handles communication between Driver
Manager and Database
Classes used for Database Connectivity
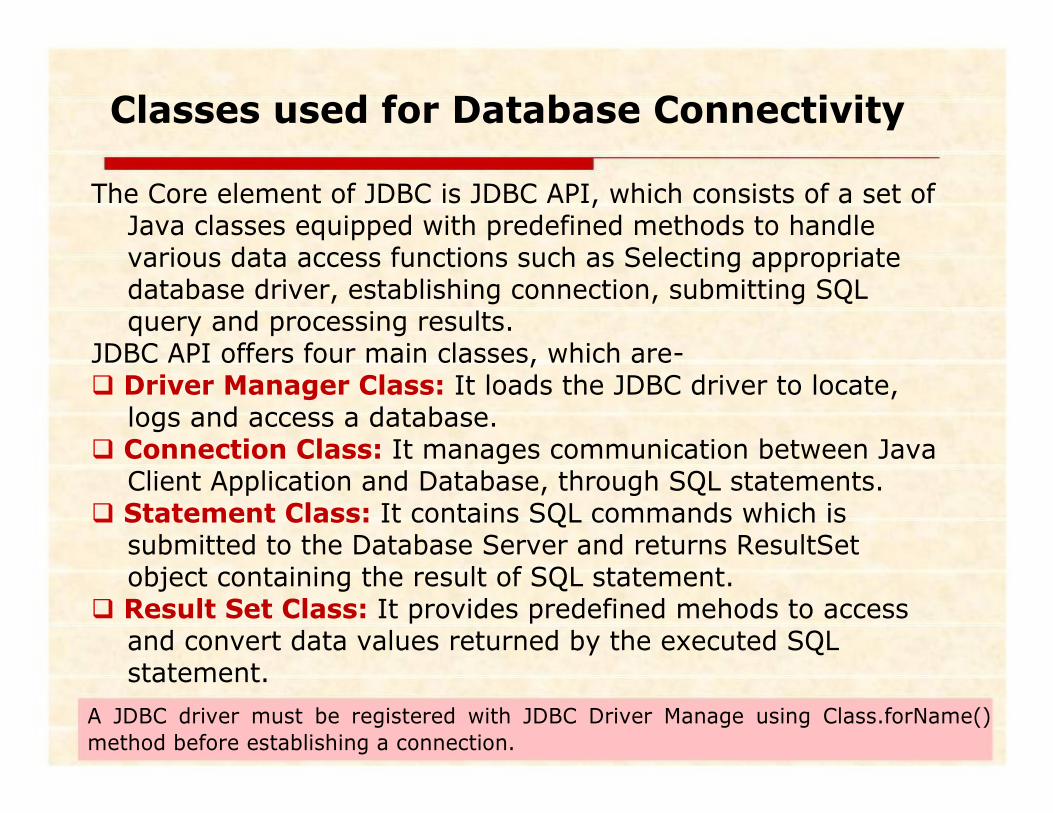
The Core element of JDBC is JDBC API, which consists of a set of Java classes equipped with predefined methods to handle various data access functions such as Selecting appropriate database driver, establishing connection, submitting SQL query and processing results. JDBC API offers four main classes, which are- Driver Manager Class: It loads the JDBC driver to locate, logs and access a database. Connection Class: It manages communication between Java Client Application and Database, through SQL statements. Statement Class: It contains SQL commands which is submitted to the Database Server and returns ResultSet object containing the result of SQL statement. Result Set Class: It provides predefined mehods to access and convert data values returned by the executed SQL statement.
A JDBC driver must be registered with JDBC Driver Manage using Class.forName()
method before establishing a connection.

Installing JDBC Driver in NetBeans IDE The Prerequisite for connecting a Java application to
MySQL is JDBC driver (also called MySQL Connector/J).
The MySQL Connector/J is freely available and can be
downloaded from the URL(dev.mysql.com/downloads/).
After download it can be installed with NetBeans with help of following steps-
Start NetBeans and Go to Tools->Libraries.
Library Manager will be open, check MySQL JDBC Driver under Class libraries. If it is not present, you can add it
by the following steps.
Click on Add Jar Folder button.
Specify downloaded uncompressed folder in the drive where JDBC is kept. Press Add Jar button and finally
Click OK button.

Installing MySQL JDBC Driver …. 1. Open Library Manager by Tools-> Libraries.
2. Press Add
JAR/Folder

Installing MySQL JDBC Driver …. 3. Locate MySQL driver and press Add Jar/folder button
4. Click Add Jar/Folder
to add Driver.

Connecting MySQL from JAVA Application After installing JDBC (MySQL Connector/J) Driver, you
may access MySQL database through JAVA Application.
The Following Six steps may be followed to establish a connection with MySQL database.
Step 1: Import Required package/classes in the
application.
Step 2: Register the JDBC Driver to JDBC Driver
Manager.
Step 3: Open a Connection.
Step 4: Execute a Query.
Step 5: Extract data from Result set
Step 6: Close Connection.

Step 1: Importing Required package/classes
This step consists of two sub-steps.
Import Java.sql Library package containing JDBC classes needed by following import statements.
import java.sql.Connection;
import java.sql.DriverManager;
import java.sql.Statement;
import java.sql.ResultSet;
Or import java.sql.*;
Add MySQL JDBC connector in the application.
In Project Window expand Libraries node by
clicking + icon.
If MySQL Connector is not present then Pres Add JAR/Folder and specify the location of Driver folder to add MySQL Driver.

Step 2: Registering the JDBC Driver
To open a Communacation channel, you require to
initialize driver by registering the JDBC driver with
JDBC river Manager.
Java offers a Class.forName() method in java.lang
package.
Class.forName(“java.sql.driver”);
Or
Class.forName(“com.mysql.jdbc.Driver”);

Step 3: Opening a Connection
DriverManager.getConnection() method is used to create a connection object that represents a physical connection
with database.
DriverManager.getConnection() requires the complete address of the database (Database URL), user name and password as a parameter.
A database URL can be formed as-
jdbc:mysql :// localhost/ <database name>
Ex. Sppose school is a database designed in MySQL.
jdbc:mysql://localhost/school
You can assign this string on a variable, which can be
used later in DriverManager.getConnection() method.
String DB_URL = “jdbc:mysql://localhost/school”;
Connection con = DriverManager.getConnection(DB_URL,”root”, ”abc”)
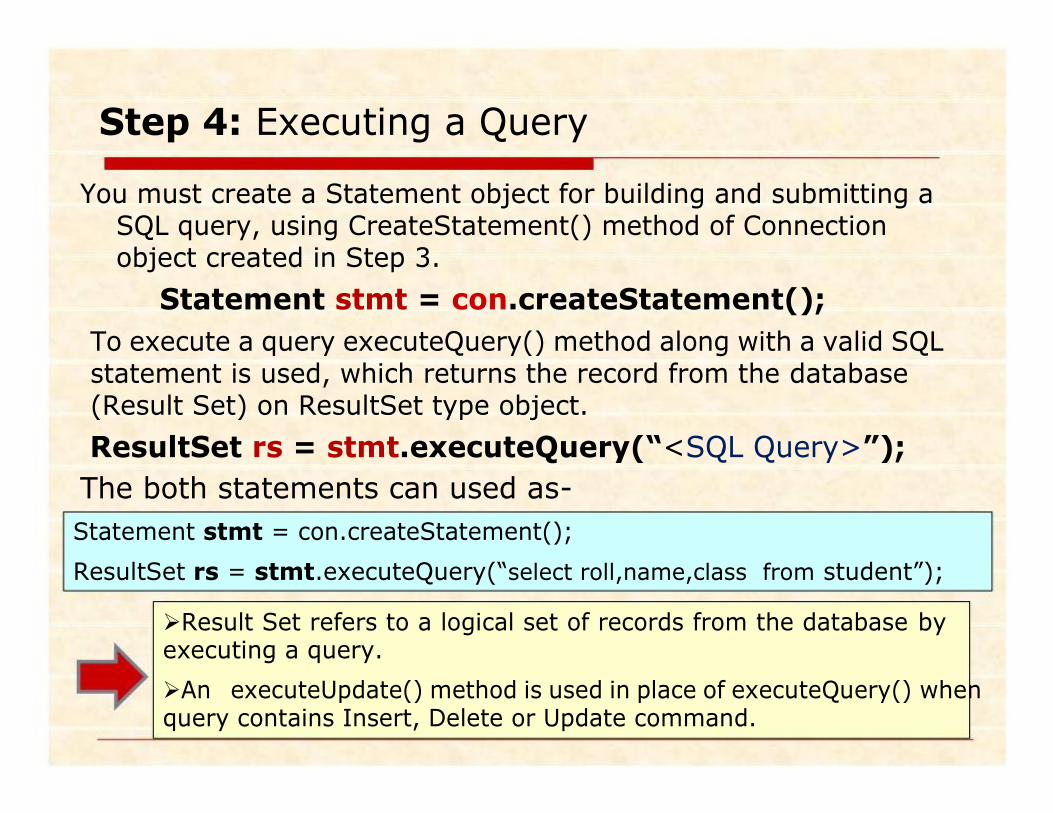
Step 4: Executing a Query You must create a Statement object for building and submitting a SQL query, using CreateStatement() method of Connection object created in Step 3.
Statement stmt = con.createStatement();
To execute a query executeQuery() method along with a valid SQL statement is used, which returns the record from the database (Result Set) on ResultSet type object.
ResultSet rs = stmt.executeQuery(“<SQL Query>”);
The both statements can used as-
Statement stmt = con.createStatement();
ResultSet rs = stmt.executeQuery(“select roll,name,class from student”);
Result Set refers to a logical set of records from the database by executing a query.
An executeUpdate() method is used in place of executeQuery() when query contains Insert, Delete or Update command.

Step 5: Extracting Data from ResultSet object To retrieve the data from the ResultSet object, which contains records, You may use the following method.
<ResulSet object>.get<type>(<column name/number>);
Where <type> may be Int, Long, String, float etc depending on the column type of the table.
In general the data values are assigned on the variables and later used in the TextField controls of the Form using setText().
int r= rs.getInt(“roll”);
String n= rs.getString(“name”);
int c= rs.getInt(“class”);
The variable can be used to display the values in the Text boxes like this-
jTextField1.setText(“”+r);
int r= rs.getInt(1);
String n= rs.getString(2);
int c= rs.getInt(3);
You can use Column number instead of
column name of the table
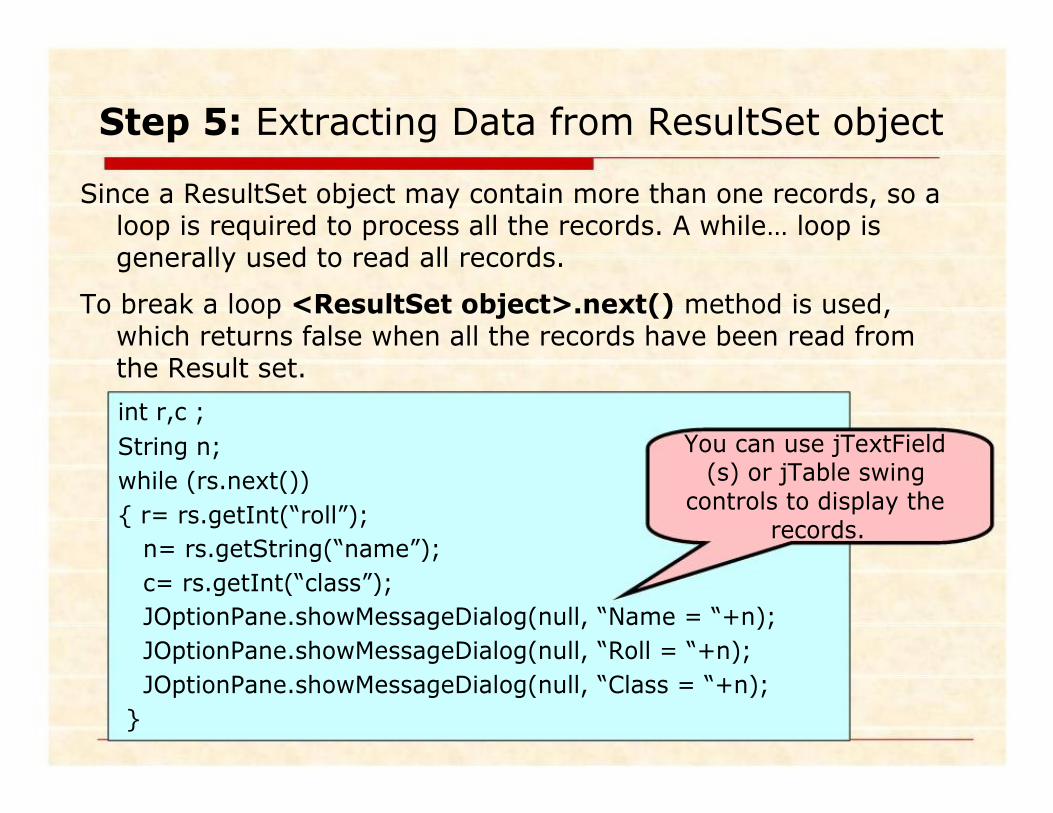
Step 5: Extracting Data from ResultSet object Since a ResultSet object may contain more than one records, so a loop is required to process all the records. A while… loop is generally used to read all records.
To break a loop <ResultSet object>.next() method is used, which returns false when all the records have been read from the Result set.
int r,c ;
String n;
while (rs.next())
{ r= rs.getInt(“roll”);
n= rs.getString(“name”);
c= rs.getInt(“class”);
You can use jTextField (s) or jTable swing
controls to display the records.
JOptionPane.showMessageDialog(null, “Name = “+n);
JOptionPane.showMessageDialog(null, “Roll = “+n);
JOptionPane.showMessageDialog(null, “Class = “+n);
}

Step 6: Closing connection After all the processing , the final step is to close the
environment by closing the Connection by close() method of ResultSet, Statement and Connection objects.
rs.close();
stmt.close(); con.close();
To handle errors during establishing connection all the required statements are kept in a try{…} catch (){…} block like this-
try{ …………………..
} catch (exception <varibale>) {
<error statement>; }

A Sample Code for Database Connectivity
import java.sql.*; // 1. import package at the top// /* The following code may be placed in ActionPerformed event of a button*/ try{ Class.forName(“java.sql.Driver”); // 2. Register Driver //
String db=“jdbc:mysql://loacalhost/school”); String qr= “select roll, name, class from student”;
Connection con=Driver.getConnection(db, ”root”, ”xyz”); Connection//
Statement stmt=con.createStatement(); ResultSet rs= stmt.executeQuery( qr);
int r, c; String n;
//3.Open
// 4. Execute Query//
while (rs.next()) { r= rs.getInt(“roll”); n= rs.getString(“name”);
c= rs.getInt(“class”); ……………………………….; // Code to manipulate data// }
// 5. Extract Data//
rs.close(); //6.Close Environment//
stmt.close();
con.close(); }
catch (Exception e)
{ JOptionPane.showMessageDialog(null, ”Error in connection”); }

Commonly used ResultSet Methods A Result set object maintains a cursor, which points to its current row of data. When it is created, cursor is positioned before the first row. You can move the cursor using the following methods. Method Purpose
next () Moves the cursor forward one row. It returns false when cursor is positioned after the last record.
previous() Moves cursor to previous record from current position. It returns false when cursor is positioned before the first record.
first() Moves cursor to first record. It returns true if it positioned at first record otherwise returns false.
last() Moves cursor to last record. It returns true if it positioned at last record otherwise returns false.
relative(n) Moves cursor relative to its current position i.e if it is on 2nd row, then relative(3) places cursor at 5th record.
obsolute(n) Moves cursor at nth record of result set irrespective to its current position.
getRow() Returns the current row number where cursor is positioned.

Example 1 - A Sample Application Let us design an Application as per the following screen shot. We assume that a Database named School containing a Student (Roll, Name, Class) table with some test records has been created already in MySQL.
A Simple Database Application using Table
TblStu [Jtable] BtnDisp
[Jbutton]
BtnExit [Jbutton]

Example 1: A Sample Application

Example- A Sample Application

Example 2- A Sample Application Let us Redesign design the Previous Application as per the following screen shot using Text Fields and Navigation Buttons. We assume the same Database named School containing a Student (Roll, Name, Class) table with some test records has been created already in MySQL.
JTextField (s) as TxtRoll, TxtName & TxtClass
JButtons as BtnFirst, BtnPrev,
BtnNext, BtnLast & BtnExit

Example 2: A Sample Application Ensure the
JDBC driver is present in the library
The following Swing Controls are
attached ( Name and Types)

Example 2- A Sample Application Object are
globally declared, so that they can be access in
all methods.
Connection is established and cursor is placed on first
record when Frame loads.

Example 2- A Sample Application Coding for
FIRST button to
locate and display first
record.
Coding for PREVIOUS button to
locate and
display previous
record from
current position.

Example 2- A Sample Application Coding for
NEXT button to locate and display next
record. Coding for
LAST button to locate and
display last
record

Example 2- A Sample Application Coding for
EXIT button to close
connection environment and Exit from application.
Related Documents
![Java Database Connectivity [JDBC]](https://static.cupdf.com/doc/110x72/58ef85011a28aba3668b45c5/java-database-connectivity-jdbc-58fcb041392b9.jpg)