Chapter 6: Creating Custom Forms Guide to Oracle 10g

Welcome message from author
This document is posted to help you gain knowledge. Please leave a comment to let me know what you think about it! Share it to your friends and learn new things together.
Transcript
Chapter 6:
Creating Custom Forms
Guide to Oracle 10g
Guide to Oracle 10g 2
Lesson A Objectives
After completing this lesson, you should be able to:
• Create and use custom forms
• Create command buttons that use form triggers to
manipulate data
• Use the Forms Debugger to find form logic and
runtime errors
• Work with form triggers
• Create form navigation triggers
3
Introduction to Custom Forms
• Custom form
– Displays data fields from variety of database tables
– Contains programs that support organizational
processes.
– Identify the processes the form needs to support, and
then you create the form
– Use lists of values (LOVs) to retrieve data values
– Manipulate data using form triggers that contain SQL
commands to insert, update, and delete data values.
• To create a custom form, you identify the business
processes and related database operations that the form
supports, design the interface, and then create the
form.
4
Identifying the Business Processes and
Database Operations • Identify processes that form supports
• Identify associated database tables
• The best way to start is to describe process
• For example,
– Suppose you need to create a custom form to support the
merchandise-receiving function at Clearwater Traders.
– When Clearwater Traders purchases new merchandise
from its suppliers, it keeps track of information about
anticipated shipments in the SHIPMENT and
SHIPMENT_LINE tables in the Clearwater Traders
database.
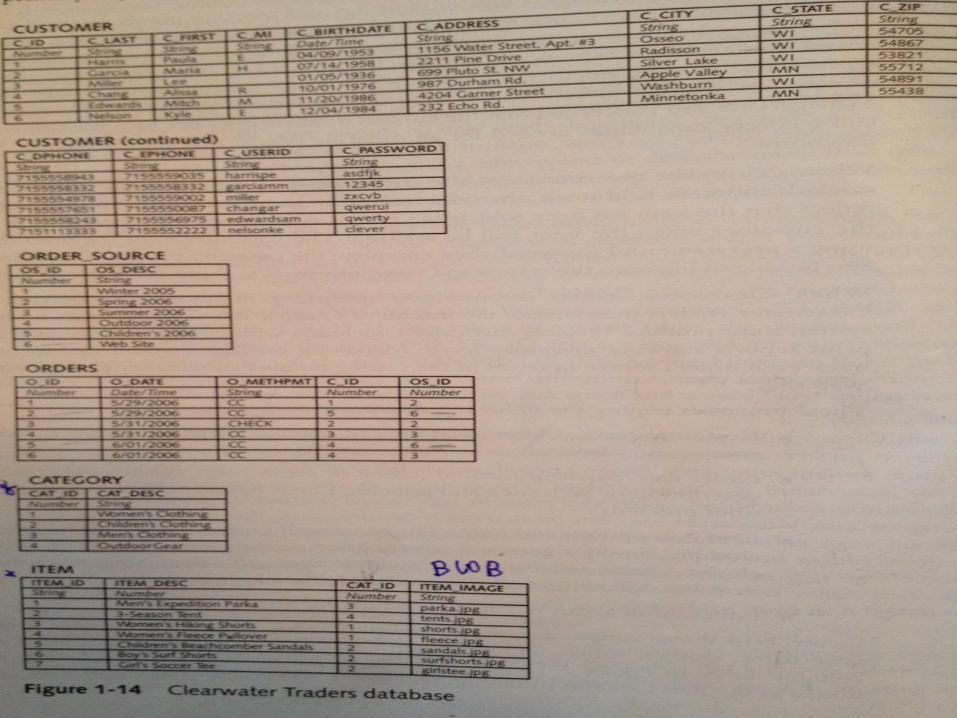
5

6
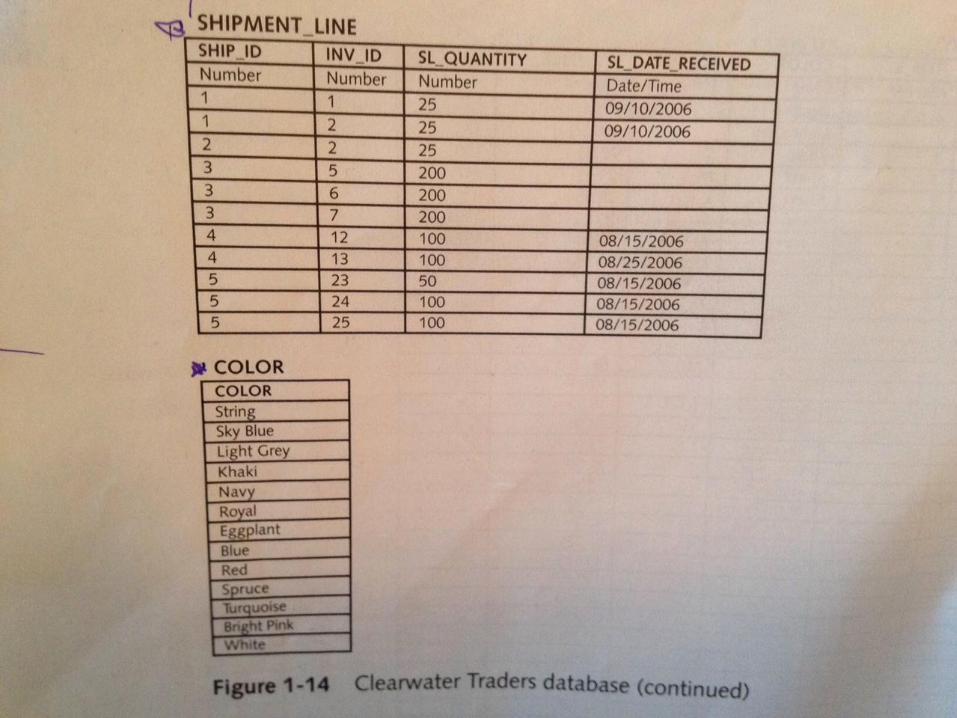
7

• Shipment information includes the shipment ID, the date
Clearwater Traders expects the shipment to arrive, the
inventory ID of the incoming item, and the expected shipment
quantity.
• When a new shipment arrives, the receiving clerk retrieves the
SHIPMENT_LINE record associated with the received
merchandise by identifying the shipment ID and the inventory
ID.
• The clerk confirms the shipment quantity, changes the quantity
if the shipment contains a different quantity than expected, and
updates the SL_DATE_RECEIVED field to the current date.
• The system must then also update the QOH field in the
INVENTORY table with the shipment quantity to reflect the
updated quantity on hand for the item.
8
9
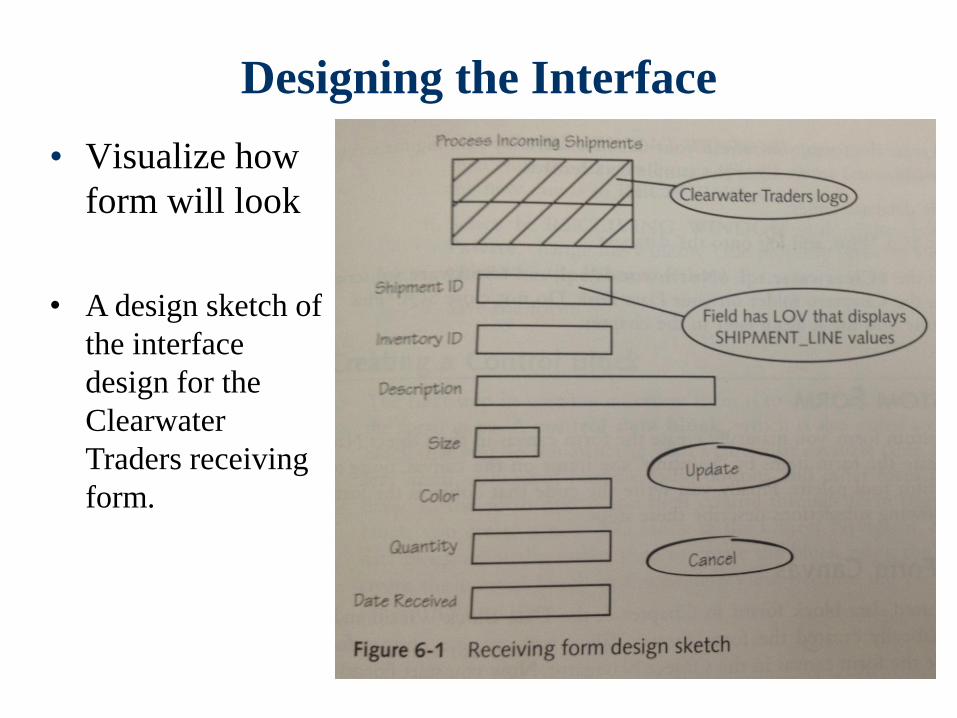
Designing the Interface
• Visualize how
form will look
• A design sketch of
the interface
design for the
Clearwater
Traders receiving
form.

Guide to Oracle 10g 10
Creating a Custom Form
1. Manually create form canvas in Object Navigator
2. Then, create form items by “painting” items on
canvas
‒ Using tools on Layout Editor tool palette
3. Write code that controls form functions
Guide to Oracle 10g 11
Creating the Form Canvas
• Manually create form canvas in Object Navigator
• Start Forms Builder
– Create and rename form canvas
– Rename form module and form window
– Change Title property of form window
• Perform in Visual View in Object Navigator

• To create the form canvas and rename the form objects:
1. Start the OC4J Instance, and then minimize the window.
2. Start Forms Builder. The Object Navigator window opens and
displays a new form module. Maximize the Object Navigator
window if necessary, change the form module name to
RECEIVING_FORM, and then save the form as
6AReceiving.fmb in the Chapter6\Tutorials folder on your
Solution Disk.
3. Click the Connect button on the Forms Builder toolbar, and
connect to the database in the usual way.
4. To open the Object Navigator in Visual View, click View on the
menu bar, and then click Visual View. The form objects appear
in VisualView.
12

5. Open the Windows node. Two windows appear: the
NULL_WINDOW and the default form window, which is
named WINDOW1. (Your default window name may be
different.) Recall that Forms Builder automatically creates the
NULL_WINDOW object.
6. Change the name of WINDOW1 to RECEIVING_WINDOW.
7. Open the RECEIVING_WINDOW node, select the Canvases
node, and then click the Create button to create a new
canvas. Change the name of the new canvas to
RECEIVING_CANVAS.
8. Select the RECEIVING_WINDOW node, right-click, click
Property Palette, change the window Title property value to
Clearwater Traders, then close the Property Palette.
9. Save the form.
13

14
Creating a Control Block
• Control data block
– Also called control block contains the form items
– Data block not associated with particular database
table
– A control block contains text items, command
buttons, radio buttons, and other form items that
you manually draw on the form canvas and then
control through form triggers.
• Create new data block in Object Navigator
– Specify data block created manually rather than to
create the block using the Data Block Wizard
– Use Ownership View

• To create the control block:
1. To view the form in Ownership View, click View on the menu
bar, and then click Ownership View.
2. Under the RECEIVING_FORM node, select the Data Blocks
node, and then click the Create button to create a new data
block. The New Data Block dialog box opens. Select the
Build a new data block manually option button, and then click
OK. The new data block appears in the Data Blocks list in the
Object Navigator window. Because you did not create the data
block using the Data Block Wizard and you have not
associated the block with a database table, it is a control block
rather than a data block.
3. Change the block name to RECEIVING_BLOCK, and then
save the form. 15
Guide to Oracle 10g 16
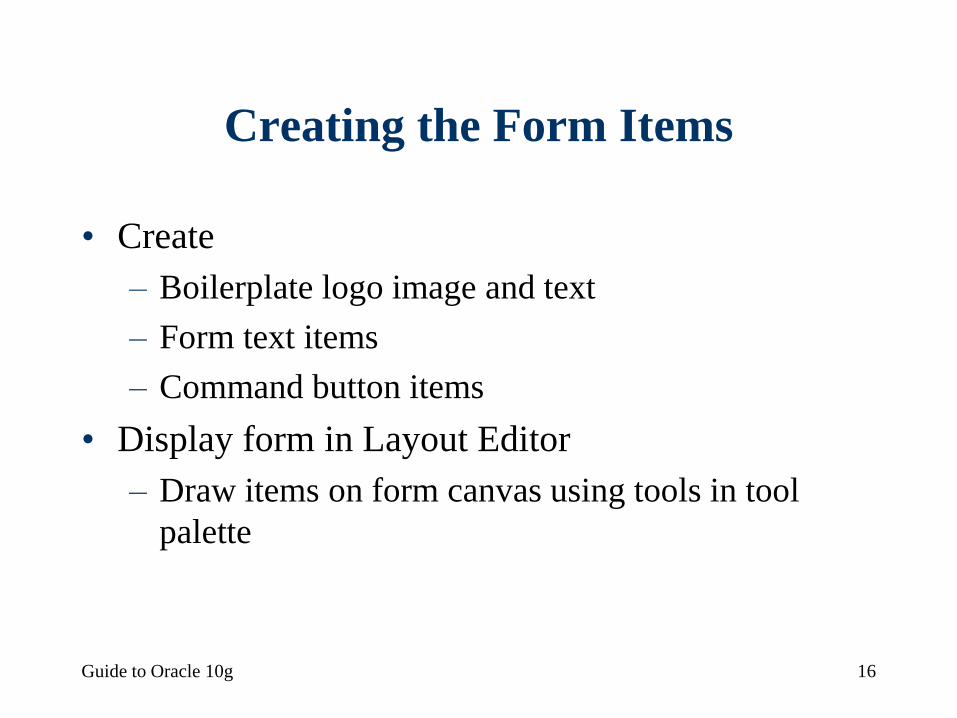
Creating the Form Items
• Create
– Boilerplate logo image and text
– Form text items
– Command button items
• Display form in Layout Editor
– Draw items on form canvas using tools in tool
palette

• First you create the boilerplate logo image and the
boilerplate text.
– To create boilerplate text on a form, you use the
Text tool on the tool palette to draw a field to
represent the text.
• Then you configure the text's properties.
• Add the logo image and boilerplate text to the
form.
17

To create the logo and boilerplate text:
1. Open the form in the Layout Editor by clicking Tools on the menu bar
and then clicking Layout Editor. The Layout Editor displays a blank
canvas and shows the current canvas and block in the Canvas and Block
lists at the top of the Layout Editor window. Make sure that
RECEIVING_CANVAS appears as the current canvas and
RECEIVING_BLOCK appears as the current block.
– HELP: If you are not working in RECEIVING_BLOCK, or if
RECEIVING_BLOCK is a data block rather than a control block, your form
will not work correctly. To move to a different block or canvas in the
Layout Editor window, open the Block or Canvas list, and select the desired
block or canvas.
2. To create the logo image, click Edit on the menu bar, point to Import,
click Image, click Browse, navigate to the Chapter6 folder on your Data
Disk, select Clearlogo.tif, click Open, and then click OK. The
Clearwater Traders logo appears on the form. Move the image so it
appears on the top left side of the form.
18
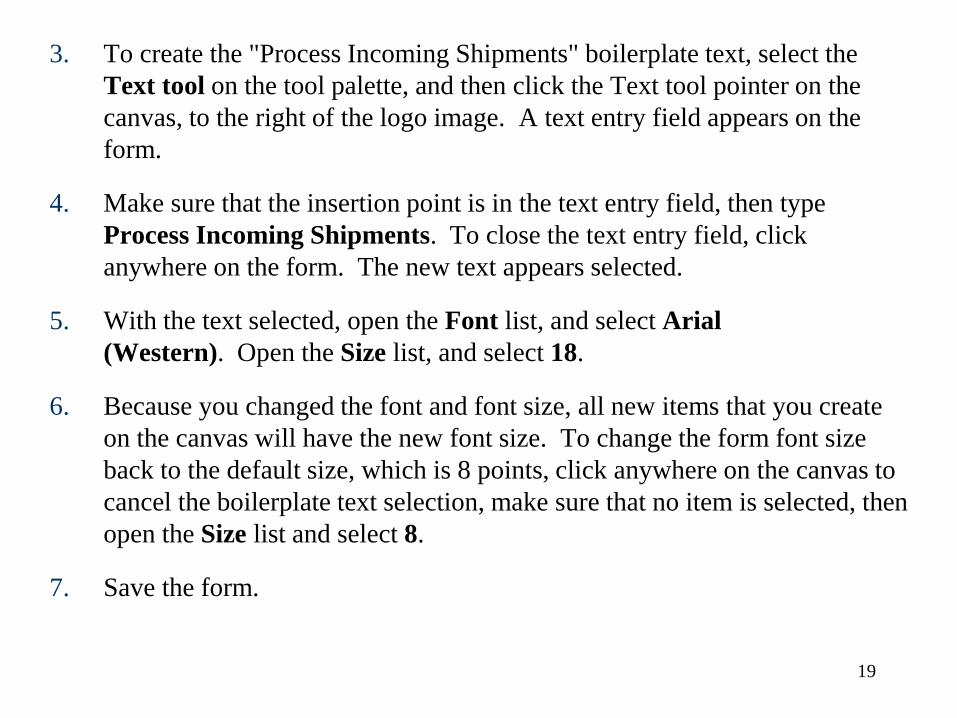
3. To create the "Process Incoming Shipments" boilerplate text, select the
Text tool on the tool palette, and then click the Text tool pointer on the
canvas, to the right of the logo image. A text entry field appears on the
form.
4. Make sure that the insertion point is in the text entry field, then type
Process Incoming Shipments. To close the text entry field, click
anywhere on the form. The new text appears selected.
5. With the text selected, open the Font list, and select Arial
(Western). Open the Size list, and select 18.
6. Because you changed the font and font size, all new items that you create
on the canvas will have the new font size. To change the form font size
back to the default size, which is 8 points, click anywhere on the canvas to
cancel the boilerplate text selection, make sure that no item is selected, then
open the Size list and select 8.
7. Save the form.
19

20

• Next, create the text items to represent the fields that display
database values.
• Select the Text Item tool on the Layout Editor tool palette, and
then draw the text item on the form.
• Then, configure the text item by modifying the following
properties:
– Name, which represents how Forms Builder internally references the
item. For items that represent database fields, this is usually the same name
as the database field.
– Data Type, which represents the type of data the text item displays. When
you create a text item to represent a database field, the text item must have
the same data type as the database field.
– Maximum Length, which represents the maximum width of the data that
the text item can display. When you create a text item to represent a
database field, the text item should have the same maximum width as the
associated database field, plus any formatting characters that you include in
the text item's Format Mask property.
– Prompt, which represents the label that appears beside the text item. 21
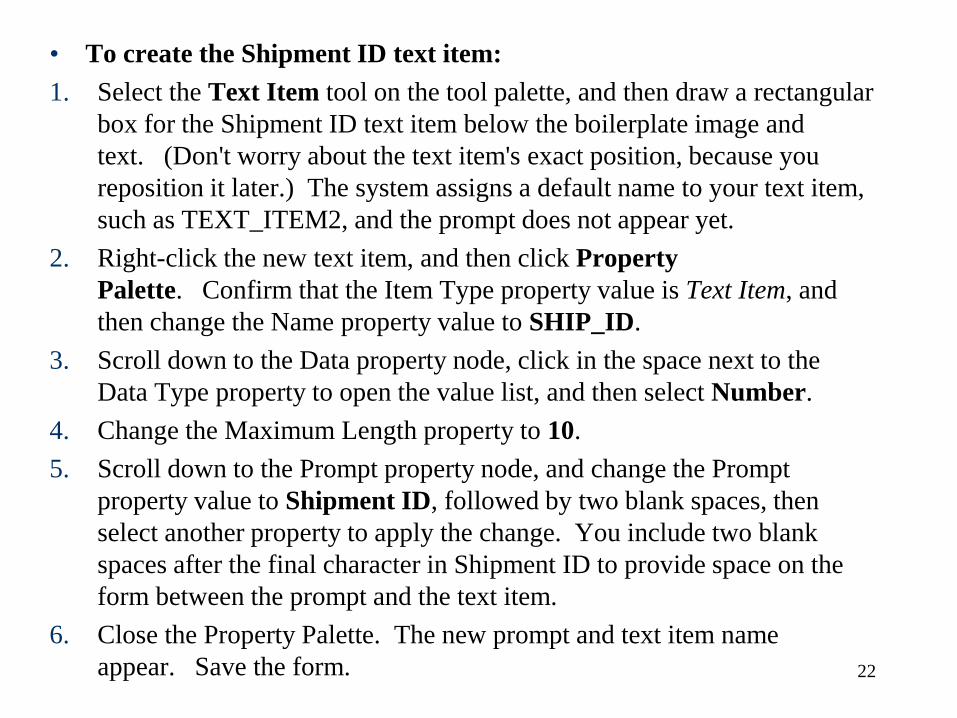
• To create the Shipment ID text item:
1. Select the Text Item tool on the tool palette, and then draw a rectangular
box for the Shipment ID text item below the boilerplate image and
text. (Don't worry about the text item's exact position, because you
reposition it later.) The system assigns a default name to your text item,
such as TEXT_ITEM2, and the prompt does not appear yet.
2. Right-click the new text item, and then click Property
Palette. Confirm that the Item Type property value is Text Item, and
then change the Name property value to SHIP_ID.
3. Scroll down to the Data property node, click in the space next to the
Data Type property to open the value list, and then select Number.
4. Change the Maximum Length property to 10.
5. Scroll down to the Prompt property node, and change the Prompt
property value to Shipment ID, followed by two blank spaces, then
select another property to apply the change. You include two blank
spaces after the final character in Shipment ID to provide space on the
form between the prompt and the text item.
6. Close the Property Palette. The new prompt and text item name
appear. Save the form.
22
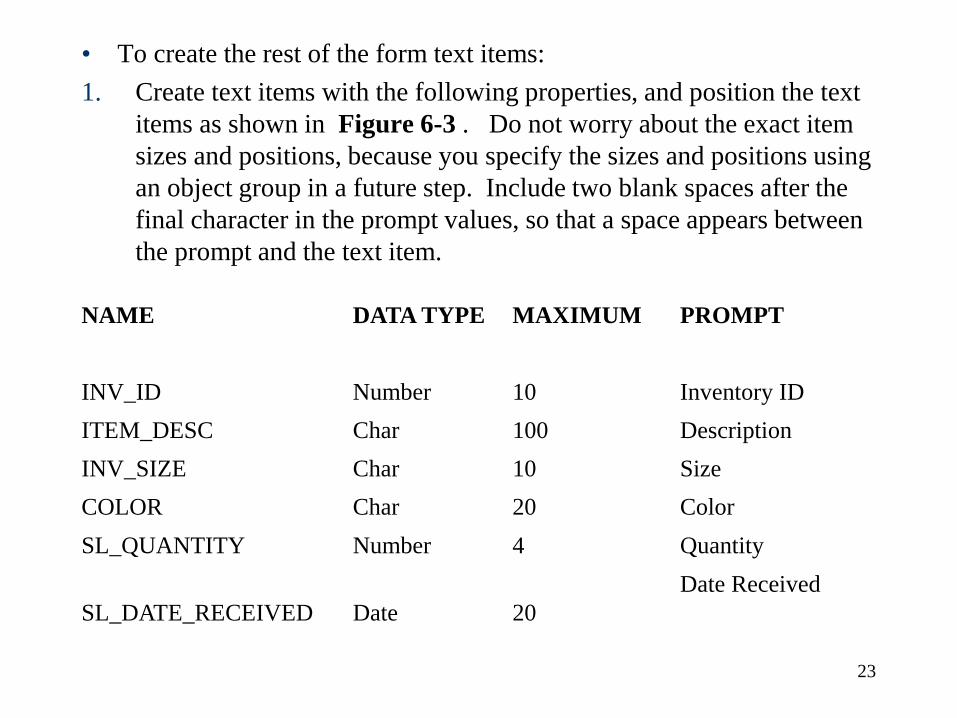
• To create the rest of the form text items:
1. Create text items with the following properties, and position the text
items as shown in Figure 6-3 . Do not worry about the exact item
sizes and positions, because you specify the sizes and positions using
an object group in a future step. Include two blank spaces after the
final character in the prompt values, so that a space appears between
the prompt and the text item.
23
NAME DATA TYPE MAXIMUM PROMPT
INV_ID Number 10 Inventory ID
ITEM_DESC Char 100 Description
INV_SIZE Char 10 Size
COLOR Char 20 Color
SL_QUANTITY Number 4 Quantity
SL_DATE_RECEIVED Date 20
Date Received
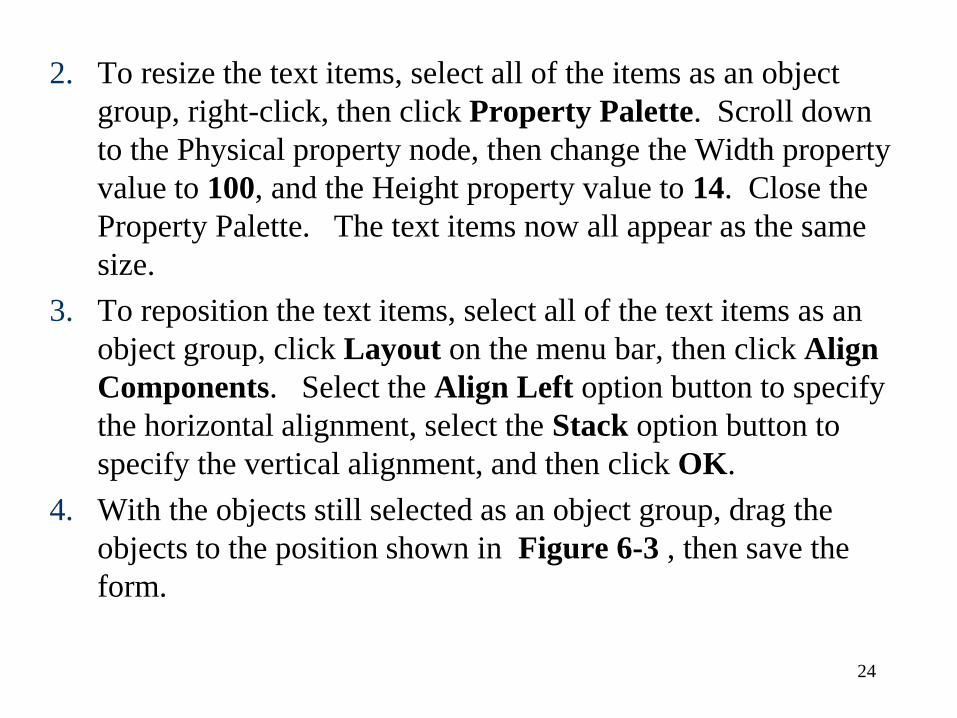
2. To resize the text items, select all of the items as an object
group, right-click, then click Property Palette. Scroll down
to the Physical property node, then change the Width property
value to 100, and the Height property value to 14. Close the
Property Palette. The text items now all appear as the same
size.
3. To reposition the text items, select all of the text items as an
object group, click Layout on the menu bar, then click Align
Components. Select the Align Left option button to specify
the horizontal alignment, select the Stack option button to
specify the vertical alignment, and then click OK.
4. With the objects still selected as an object group, drag the
objects to the position shown in Figure 6-3 , then save the
form.
24

25

Guide to Oracle 10g 26
Creating the LOVs
• LOV
– Retrieve data from database table
• Use LOV Wizard
• Run form
– To test LOV
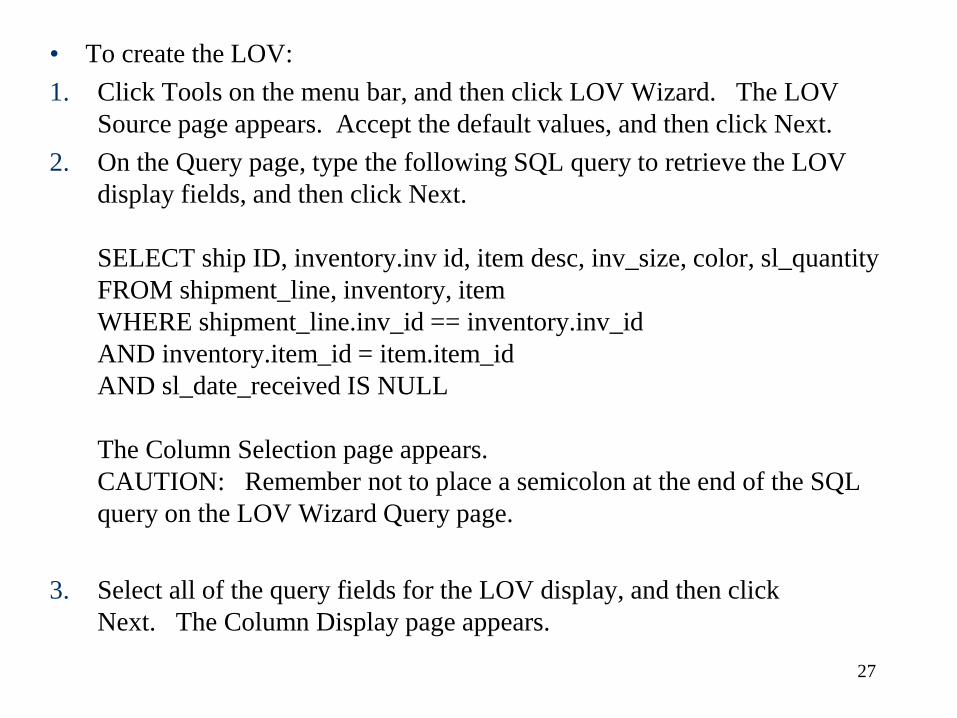
• To create the LOV:
1. Click Tools on the menu bar, and then click LOV Wizard. The LOV
Source page appears. Accept the default values, and then click Next.
2. On the Query page, type the following SQL query to retrieve the LOV
display fields, and then click Next.
SELECT ship ID, inventory.inv id, item desc, inv_size, color, sl_quantity
FROM shipment_line, inventory, item
WHERE shipment_line.inv_id == inventory.inv_id
AND inventory.item_id = item.item_id
AND sl_date_received IS NULL
The Column Selection page appears.
CAUTION: Remember not to place a semicolon at the end of the SQL
query on the LOV Wizard Query page.
3. Select all of the query fields for the LOV display, and then click
Next. The Column Display page appears.
27
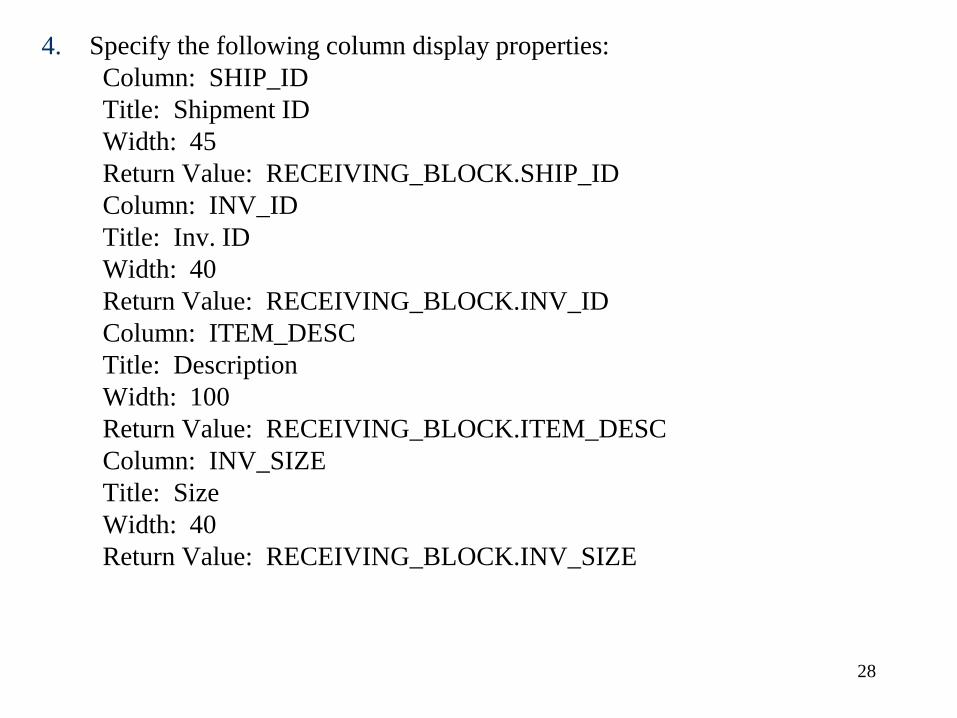
4. Specify the following column display properties:
Column: SHIP_ID
Title: Shipment ID
Width: 45
Return Value: RECEIVING_BLOCK.SHIP_ID
Column: INV_ID
Title: Inv. ID
Width: 40
Return Value: RECEIVING_BLOCK.INV_ID
Column: ITEM_DESC
Title: Description
Width: 100
Return Value: RECEIVING_BLOCK.ITEM_DESC
Column: INV_SIZE
Title: Size
Width: 40
Return Value: RECEIVING_BLOCK.INV_SIZE
28
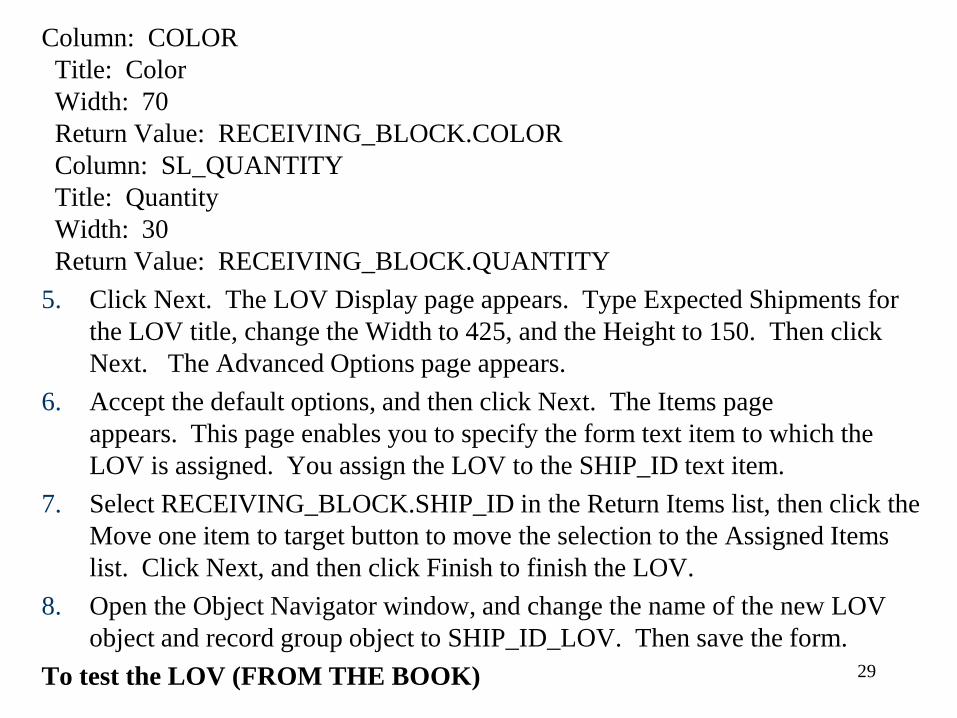
Column: COLOR
Title: Color
Width: 70
Return Value: RECEIVING_BLOCK.COLOR
Column: SL_QUANTITY
Title: Quantity
Width: 30
Return Value: RECEIVING_BLOCK.QUANTITY
5. Click Next. The LOV Display page appears. Type Expected Shipments for
the LOV title, change the Width to 425, and the Height to 150. Then click
Next. The Advanced Options page appears.
6. Accept the default options, and then click Next. The Items page
appears. This page enables you to specify the form text item to which the
LOV is assigned. You assign the LOV to the SHIP_ID text item.
7. Select RECEIVING_BLOCK.SHIP_ID in the Return Items list, then click the
Move one item to target button to move the selection to the Assigned Items
list. Click Next, and then click Finish to finish the LOV.
8. Open the Object Navigator window, and change the name of the new LOV
object and record group object to SHIP_ID_LOV. Then save the form.
To test the LOV (FROM THE BOOK) 29
Guide to Oracle 10g 30
Displaying System Date and Time
Values in Form Text Items
• Forms Builder provides system variables that you
can use to display system date and time values in
form text items
• System variable
– Variable representing value always available to any
form
• Display value in text item automatically
– Set text item’s Initial Value property to the desired
value.

Guide to Oracle 10g 31
Forms Builder Date and Time System
Variables
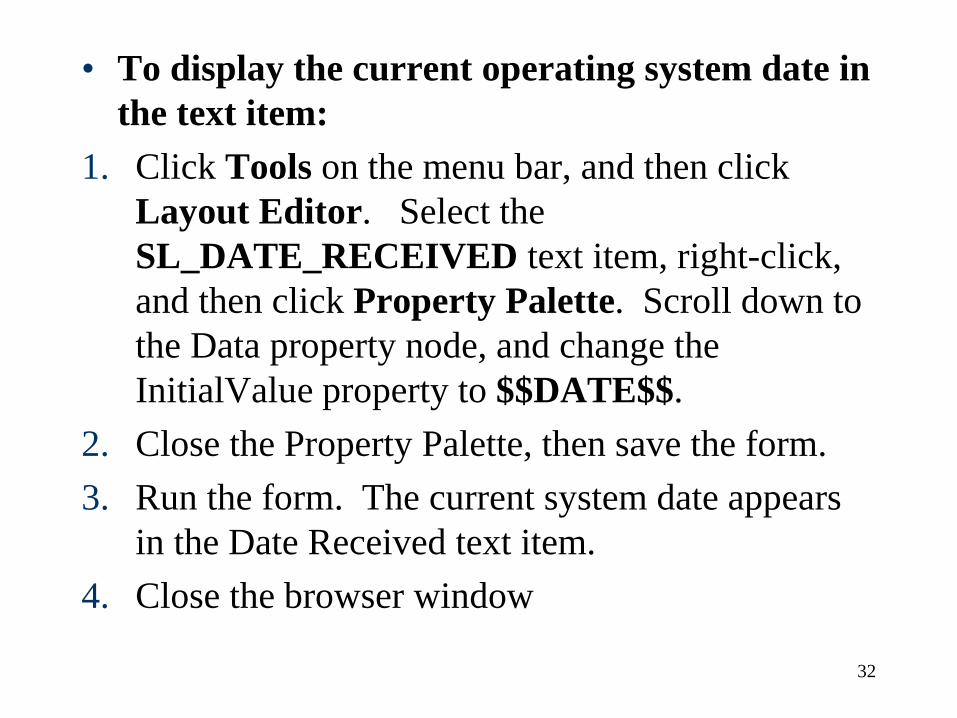
• To display the current operating system date in
the text item:
1. Click Tools on the menu bar, and then click
Layout Editor. Select the
SL_DATE_RECEIVED text item, right-click,
and then click Property Palette. Scroll down to
the Data property node, and change the
InitialValue property to $$DATE$$.
2. Close the Property Palette, then save the form.
3. Run the form. The current system date appears
in the Date Received text item.
4. Close the browser window
32

33
Creating Command Buttons
• Create and configure buttons
– by drawing the button on the canvas using the
Button tool on the tool palette.
• Create form triggers associated with buttons

34
Creating and Configuring Command
Buttons
• Draw button on canvas using Button tool
– Button tool on tool palette
• Button group
– Buttons should all be same size
• Wide enough to accommodate longest button’s label
– Draw button with longest label first and configure
its properties and size. Then copy and paste the
button to create the other buttons in the button
group.
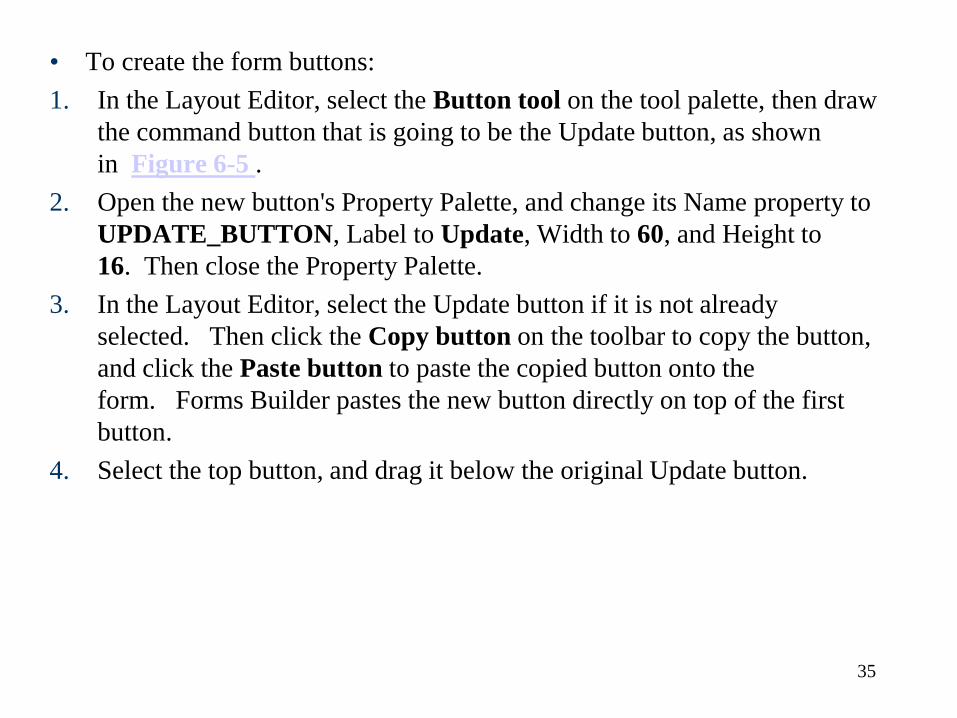
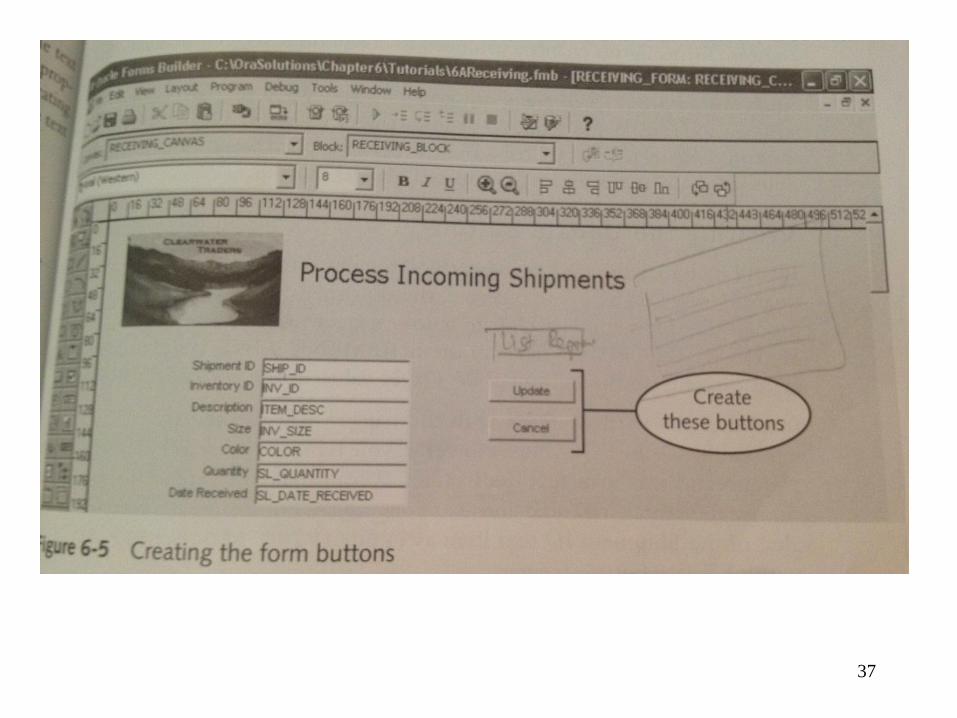
• To create the form buttons:
1. In the Layout Editor, select the Button tool on the tool palette, then draw
the command button that is going to be the Update button, as shown
in Figure 6-5 .
2. Open the new button's Property Palette, and change its Name property to
UPDATE_BUTTON, Label to Update, Width to 60, and Height to
16. Then close the Property Palette.
3. In the Layout Editor, select the Update button if it is not already
selected. Then click the Copy button on the toolbar to copy the button,
and click the Paste button to paste the copied button onto the
form. Forms Builder pastes the new button directly on top of the first
button.
4. Select the top button, and drag it below the original Update button.
35

5. Select both buttons as an object group, click Layout on
the menu bar, and then select Align Components. Select
the Align Left option button to align the buttons
horizontally, and select the Distribute option button to
evenly space the buttons vertically. Then click
OK. Position the button group on the form as shown in
Figure 6-5 .
6. Select the second button, open its Property Palette, change
its Name property to CANCEL_BUTTON and its Label
property to Cancel, and then close the Property Palette.
7. Save the form.
Guide to Oracle 10g 36
37

Guide to Oracle 10g 38
Creating the Button Triggers
• Select Triggers node under button in Object
Navigator
– Click Create button to create trigger
– Select trigger event
– Specify trigger code
• WHEN-BUTTON-PRESSED button event
– Trigger code executes when user clicks button
Guide to Oracle 10g 39
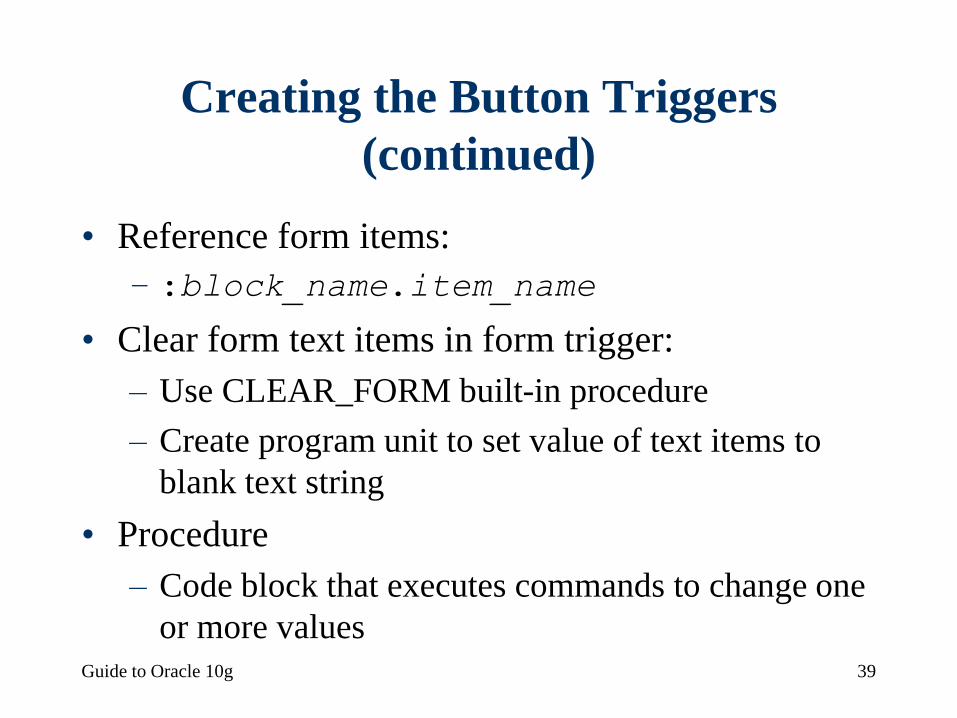
Creating the Button Triggers
(continued)
• Reference form items:
– :block_name.item_name
• Clear form text items in form trigger:
– Use CLEAR_FORM built-in procedure
– Create program unit to set value of text items to
blank text string
• Procedure
– Code block that executes commands to change one
or more values

• To create the Update button trigger:
1. Click Window on the menu bar, and then click Object
Navigator to open the Object Navigator. Open the
UPDATE_BUTTON node, select the Triggers node, and
then click the Create button to create a new
trigger. Scroll down the list of events, and double-click
WHEN-BUTTON-PRESSED. The PL/SQL Editor
opens.
2. In the PL/SQL Editor Source code pane, type the
commands in Figure 6-6 , click the Compile PL/SQL
code button to compile the trigger, and then close the
PL/SQL Editor. HELP: If your trigger has a syntax
error, refer to the section titled "Correcting Common
Trigger Syntax Errors" in Chapter 5.
3. Save the form
Test the trigger (from the book)
40

41
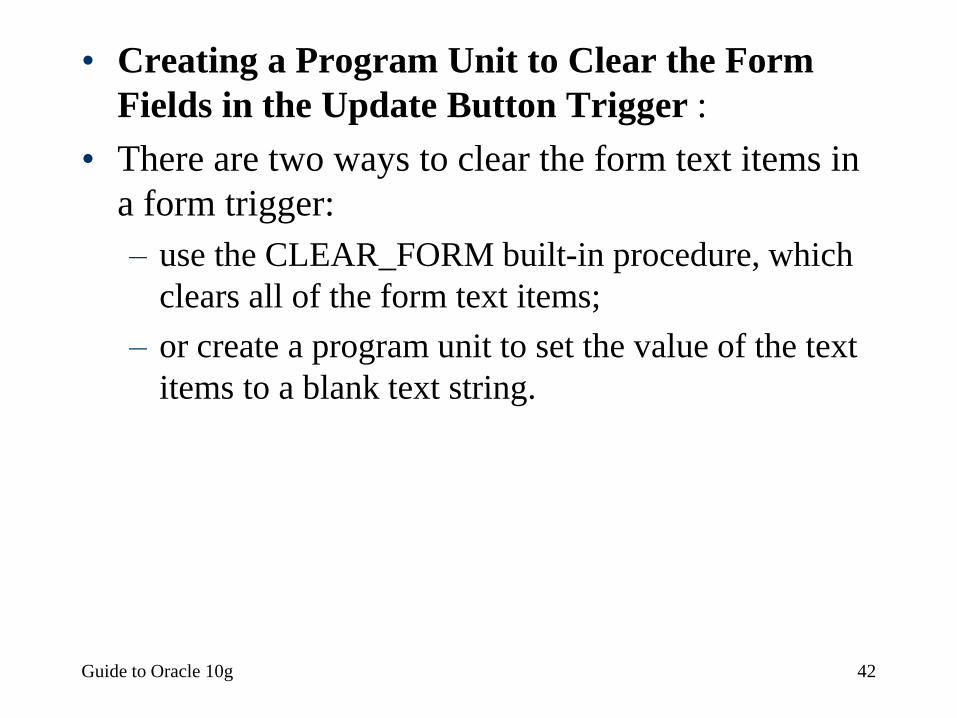
• Creating a Program Unit to Clear the Form
Fields in the Update Button Trigger :
• There are two ways to clear the form text items in
a form trigger:
– use the CLEAR_FORM built-in procedure, which
clears all of the form text items;
– or create a program unit to set the value of the text
items to a blank text string.
Guide to Oracle 10g 42
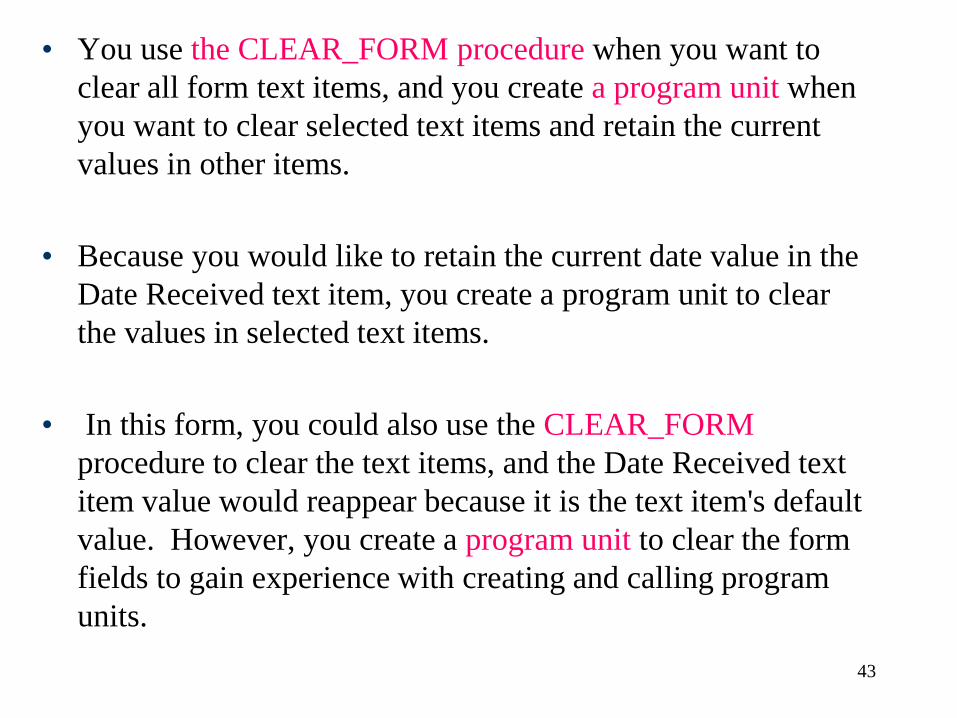
• You use the CLEAR_FORM procedure when you want to
clear all form text items, and you create a program unit when
you want to clear selected text items and retain the current
values in other items.
• Because you would like to retain the current date value in the
Date Received text item, you create a program unit to clear
the values in selected text items.
• In this form, you could also use the CLEAR_FORM
procedure to clear the text items, and the Date Received text
item value would reappear because it is the text item's default
value. However, you create a program unit to clear the form
fields to gain experience with creating and calling program
units.
43
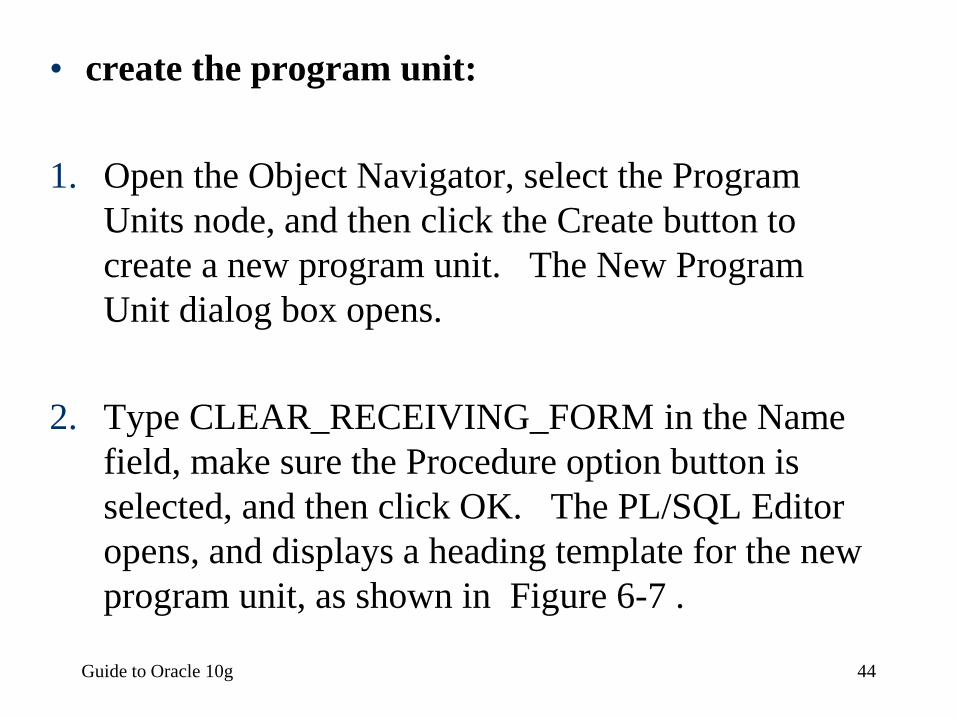
• create the program unit:
1. Open the Object Navigator, select the Program
Units node, and then click the Create button to
create a new program unit. The New Program
Unit dialog box opens.
2. Type CLEAR_RECEIVING_FORM in the Name
field, make sure the Procedure option button is
selected, and then click OK. The PL/SQL Editor
opens, and displays a heading template for the new
program unit, as shown in Figure 6-7 .
Guide to Oracle 10g 44

• To add the program unit commands:
1. Make sure that the insertion point is on the line
after the BEGIN keyword, then type the
following commands to clear the selected form
text items:
:receiving block.ship id := '';
:receiving_block.inv id := '';
:receiving_block.item_desc := '';
:receiving_block.inv_size := '';
:receiving_block.color := '';
:receiving_block.sl_quantity := '';
2. Compile the program unit, correct any syntax
errors, and then close the PL/SQL Editor. 45
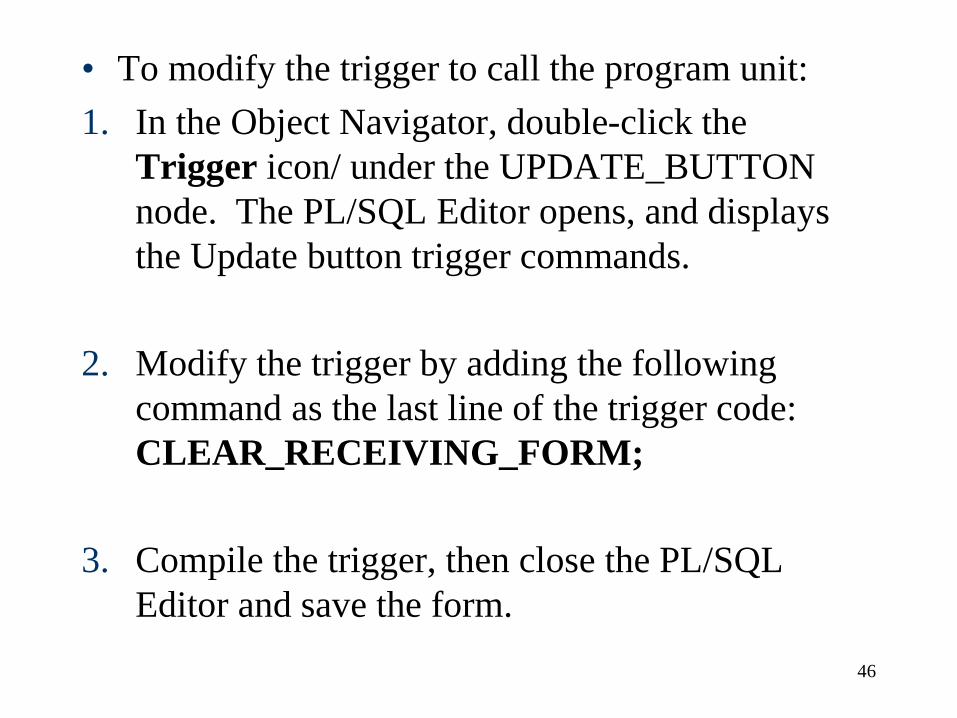
• To modify the trigger to call the program unit:
1. In the Object Navigator, double-click the
Trigger icon/ under the UPDATE_BUTTON
node. The PL/SQL Editor opens, and displays
the Update button trigger commands.
2. Modify the trigger by adding the following
command as the last line of the trigger code:
CLEAR_RECEIVING_FORM;
3. Compile the trigger, then close the PL/SQL
Editor and save the form.
46
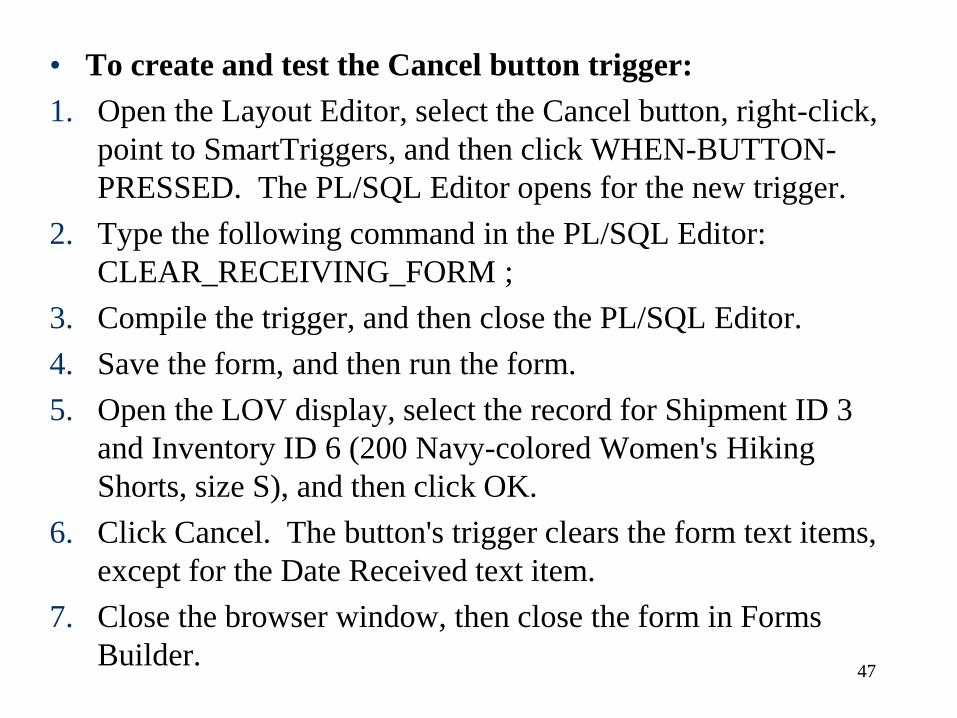
• To create and test the Cancel button trigger:
1. Open the Layout Editor, select the Cancel button, right-click,
point to SmartTriggers, and then click WHEN-BUTTON-
PRESSED. The PL/SQL Editor opens for the new trigger.
2. Type the following command in the PL/SQL Editor:
CLEAR_RECEIVING_FORM ;
3. Compile the trigger, and then close the PL/SQL Editor.
4. Save the form, and then run the form.
5. Open the LOV display, select the record for Shipment ID 3
and Inventory ID 6 (200 Navy-colored Women's Hiking
Shorts, size S), and then click OK.
6. Click Cancel. The button's trigger clears the form text items,
except for the Date Received text item.
7. Close the browser window, then close the form in Forms
Builder.
47

48
Using the Forms Debugger to Find
Runtime Errors • Runtime error
– Error that does not keep program from compiling
– Generates error while program running
– Often result of user error
– Such as entering an incorrect value or clicking a button
at an inappropriate time.
– Incorrect program commands that attempt to assign a
value to a variable that is the wrong data type, or that is
too large for the variable's maximum data size.
Using the Forms Debugger to Find
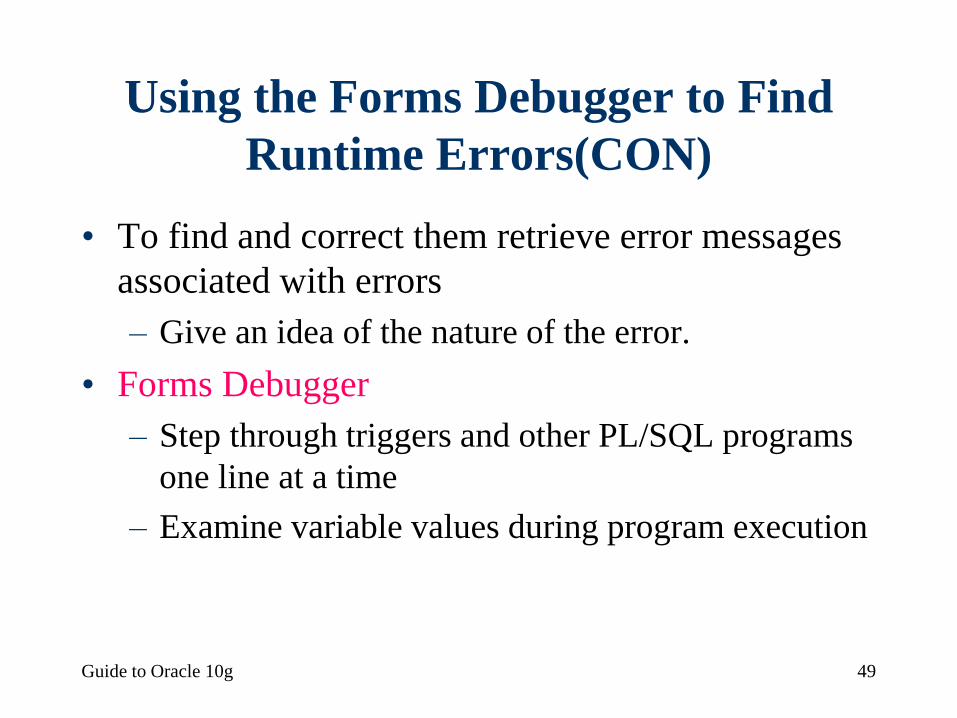
Runtime Errors(CON)
• To find and correct them retrieve error messages
associated with errors
– Give an idea of the nature of the error.
• Forms Debugger
– Step through triggers and other PL/SQL programs
one line at a time
– Examine variable values during program execution
Guide to Oracle 10g 49

Guide to Oracle 10g 50
Retrieving FRM- Error Messages
• Investigate nature of error by looking up error
code explanation
– Oracle Technology Network (OTN) Web site
• FRM- prefix
– Forms Builder error codes
• ORA- prefix
– Generated by the DBMS
51
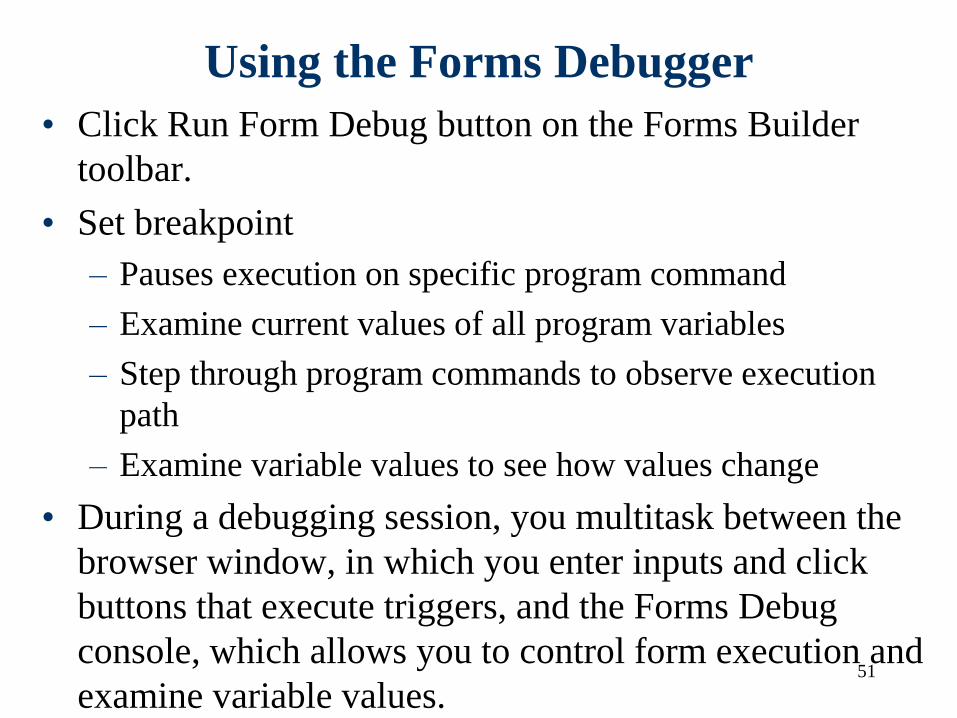
Using the Forms Debugger
• Click Run Form Debug button on the Forms Builder
toolbar.
• Set breakpoint
– Pauses execution on specific program command
– Examine current values of all program variables
– Step through program commands to observe execution
path
– Examine variable values to see how values change
• During a debugging session, you multitask between the
browser window, in which you enter inputs and click
buttons that execute triggers, and the Forms Debug
console, which allows you to control form execution and
examine variable values.

Guide to Oracle 10g 52
Using the Forms Debugger
(continued)
• Breakpoint
– Pauses execution on specific command
– Set on:
• Program lines that contain executable program
commands
• SQL queries
– To set:
• Double-click mouse pointer in gray shaded area on
left side of PL/SQL Editor window

53
54
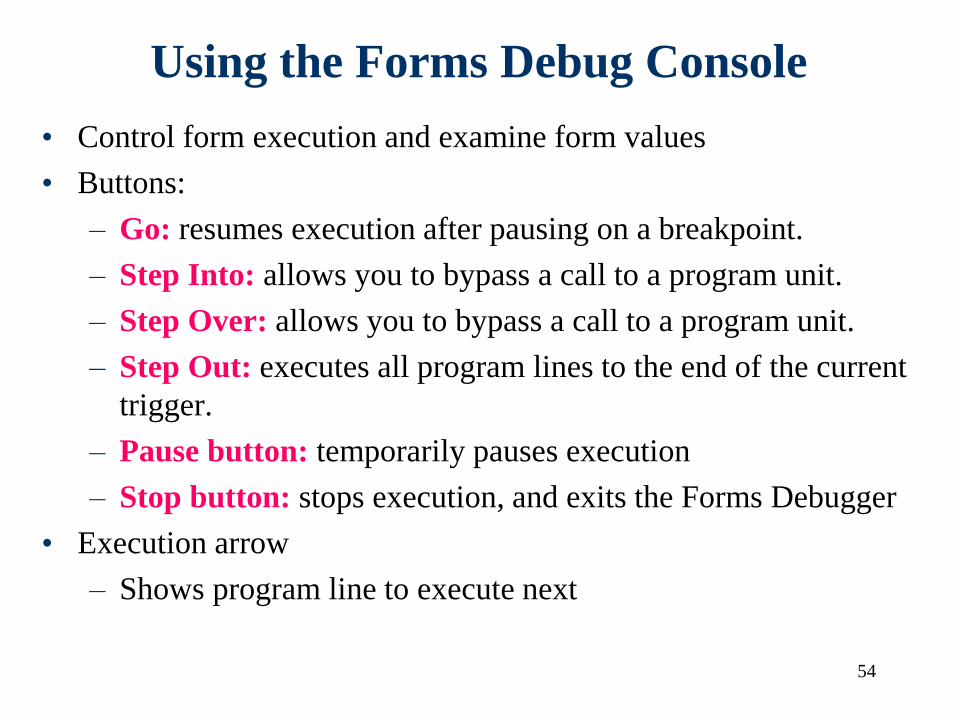
Using the Forms Debug Console
• Control form execution and examine form values
• Buttons:
– Go: resumes execution after pausing on a breakpoint.
– Step Into: allows you to bypass a call to a program unit.
– Step Over: allows you to bypass a call to a program unit.
– Step Out: executes all program lines to the end of the current
trigger.
– Pause button: temporarily pauses execution
– Stop button: stops execution, and exits the Forms Debugger
• Execution arrow
– Shows program line to execute next
Guide to Oracle 10g 55
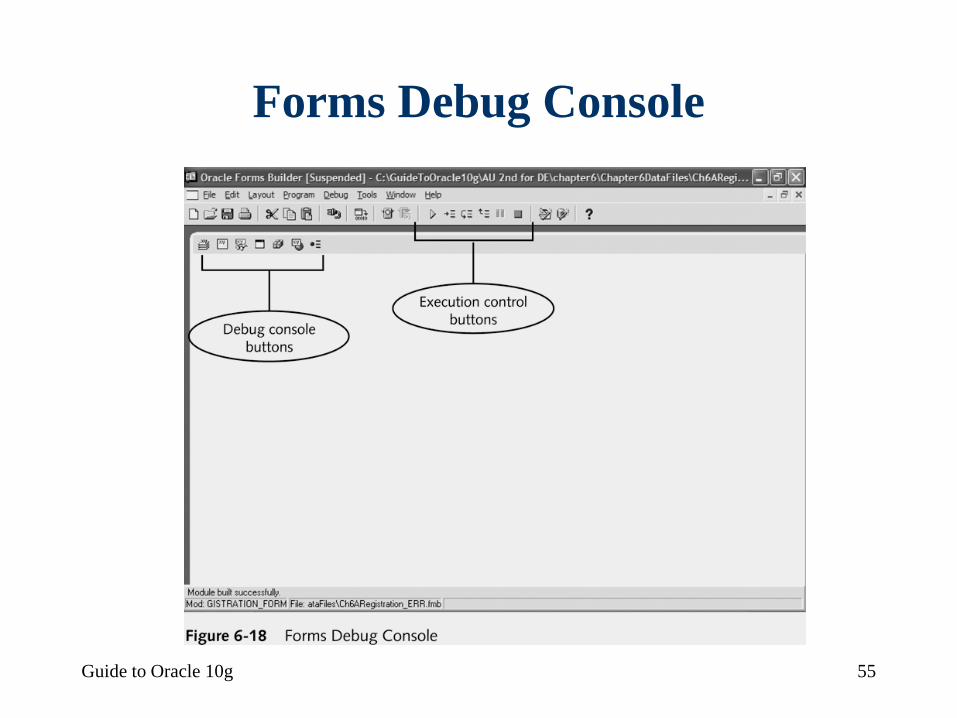
Forms Debug Console
Guide to Oracle 10g 56
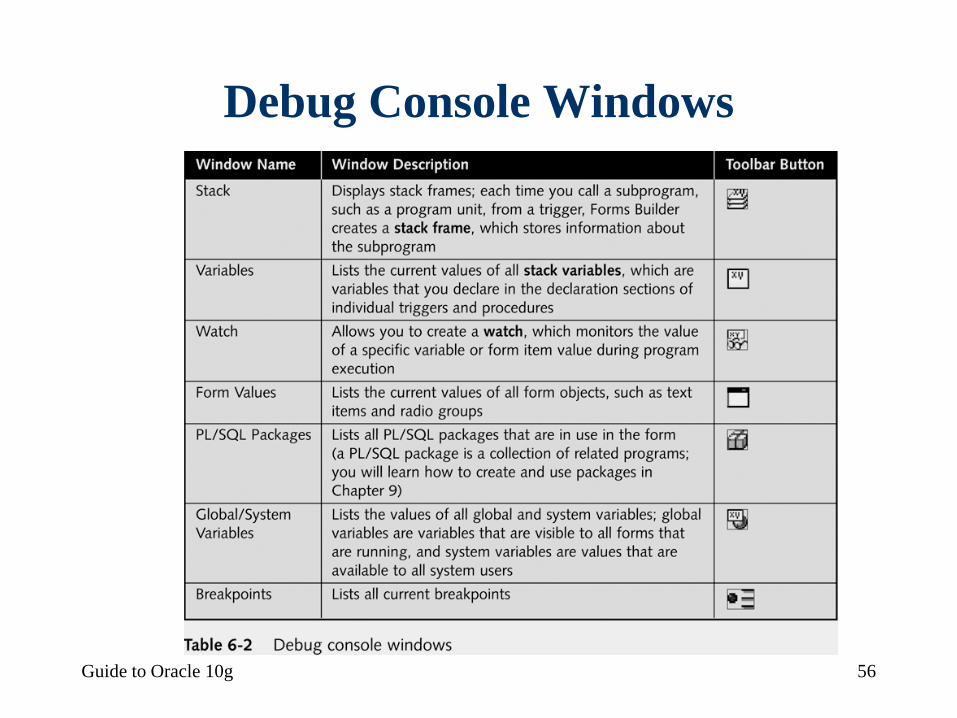
Debug Console Windows

• To open the Debug Console and view the values of the form text items:
1. Click Window on the menu bar, and then click Debug Console. The Debug
Console opens, and automatically displays the Stack window when you
execute a trigger.
2. To close the Stack window, click Debug on the menu bar, point to Debug
Windows, and then click Stack. , no windows should be open.
3. To open the Form Values window, click Debug on the menu bar, point to
Debug Windows, and then click Form Values. The Form Values window
appears docked in the Debug Console.
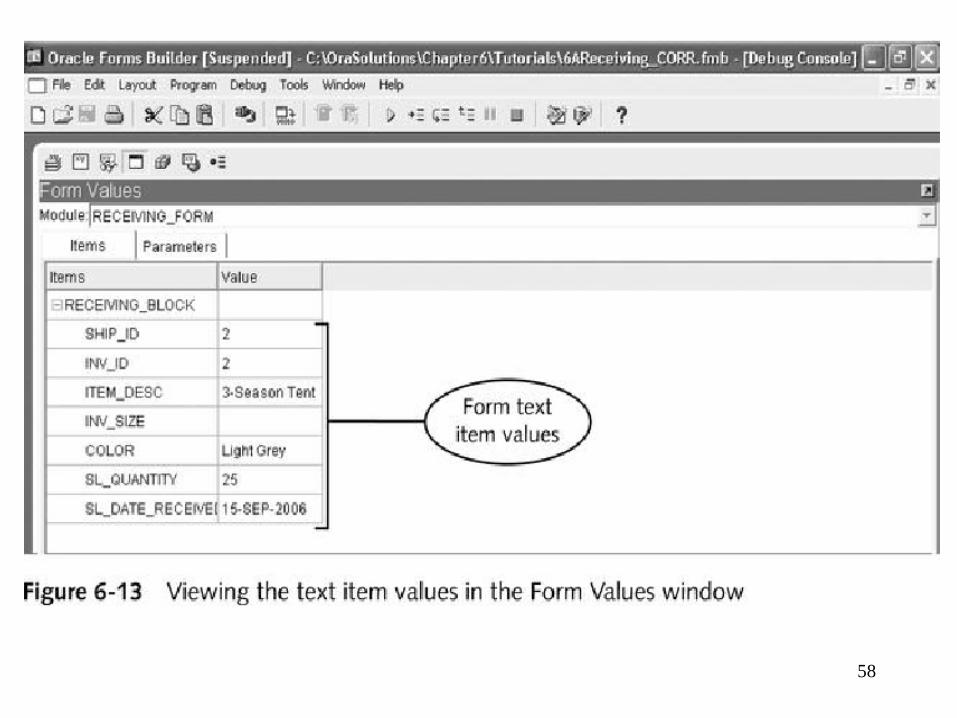
4. The Form Values window shows the values of all form data block
items. Currently, the Form Values window shows the
RECEIVING_BLOCK node. Open the RECEIVING_BLOCK node to
view the individual block item values. The form text item values appear as
shown in next figure (You may need to adjust the widths of the Items and
Value columns to view the values.
57
58
Guide to Oracle 10g 59
Form Trigger Properties
• Trigger activated
– In response to event such as clicking button
• Trigger name defines event that activates it
– For example, a button's WHEN-BUTTON-
PRESSED trigger activates the trigger's code.

60
Trigger Categories
61
Trigger Timing
• Specifies when trigger fires
• PRE-:Fire just before event successfully completes – For example, a PRE-FORM trigger fires just before a form appears in the
Forms Services window, and a PRE-BLOCK trigger fires just before the
user successfully navigates to a new form block.
• POST-: Fire just after event successfully completes – For example, a POST-QUERY trigger fires just after a query in a data
block form retrieves records.
• ON-,WHEN-, and KEY-: Fire in response to actions – For example, the ON-DELETE trigger fires in response to deleting a
record in a data block form, and the WHEN-BUTTON-PRESSED trigger
fires in response to a user clicking a button.
62
Trigger Scope
• Defines where event must occur in order for
associated trigger to fire
• Includes object to which trigger attached
– And objects within trigger object
– For example, suppose you create a KEY-F1 trigger
associated with a data block. This trigger fires
whenever the user presses the Fl key, as long as the
form insertion point is in any item in the
block. Similarly, if you create a KEY-F1 trigger
associated with a form, the trigger fires whenever
the user presses the Fl key anywhere in the form.
63
Trigger Execution Hierarchy
• Defines which trigger fires
– When object within form object contains same trigger
that form object contains
• By default trigger in higher-level object overrides
trigger in lower-level object
• Can specify custom execution hierarchy
• For example, suppose a data block has a KEY-F1 trigger, and a
text item within the data block also has a KEY-F1 trigger. By
default, the trigger in the higher-level object, which is the block,
overrides the trigger in the lower-level object, which is the text
item. If you anticipate a conflict and want both triggers to
execute, you can specify a custom execution hierarchy in the
Property Palettes of both triggers and have one trigger execute
immediately before or after the other.
64
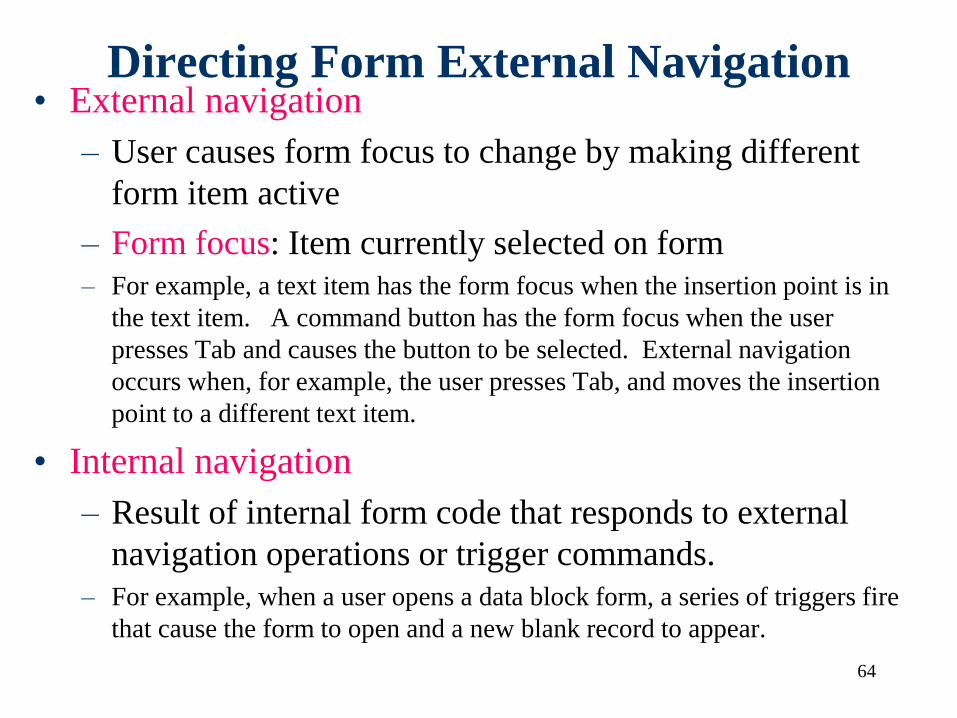
Directing Form External Navigation • External navigation
– User causes form focus to change by making different
form item active
– Form focus: Item currently selected on form
– For example, a text item has the form focus when the insertion point is in
the text item. A command button has the form focus when the user
presses Tab and causes the button to be selected. External navigation
occurs when, for example, the user presses Tab, and moves the insertion
point to a different text item.
• Internal navigation
– Result of internal form code that responds to external
navigation operations or trigger commands.
– For example, when a user opens a data block form, a series of triggers fire
that cause the form to open and a new blank record to appear.

Guide to Oracle 10g 65
Setting the Form Tab Order
• Set tab order
– Place items in correct order under Items node
• In Object Navigator window

• To adjust the tab order of the form items:
1. In the Object Navigator, open the Data Blocks node, open the
RECEIVING_BLOCK node, and then open the Items node to display
the block items.
2. Select the SHIP_ID node, drag it so the mouse pointer is on the Items
node, and drop it so it is the first item listed under the Items node in
RECEIVING_BLOCK.
3. Select the INV_ID node, drag it to the top of the Items list, and drop it
on the SHIP_ID node so that INV_ID appears as the second item
under the Items node.
4. Continue to move the form items until they are in the order shown
in Figure 6-15 .
5. Save the form, and then run the form to check the tab order. The
order in which the items receive the form focus should be the same as
the order in which the items appear in Figure 6-15 .
6. Close the browser window.
66

67
Guide to Oracle 10g 68
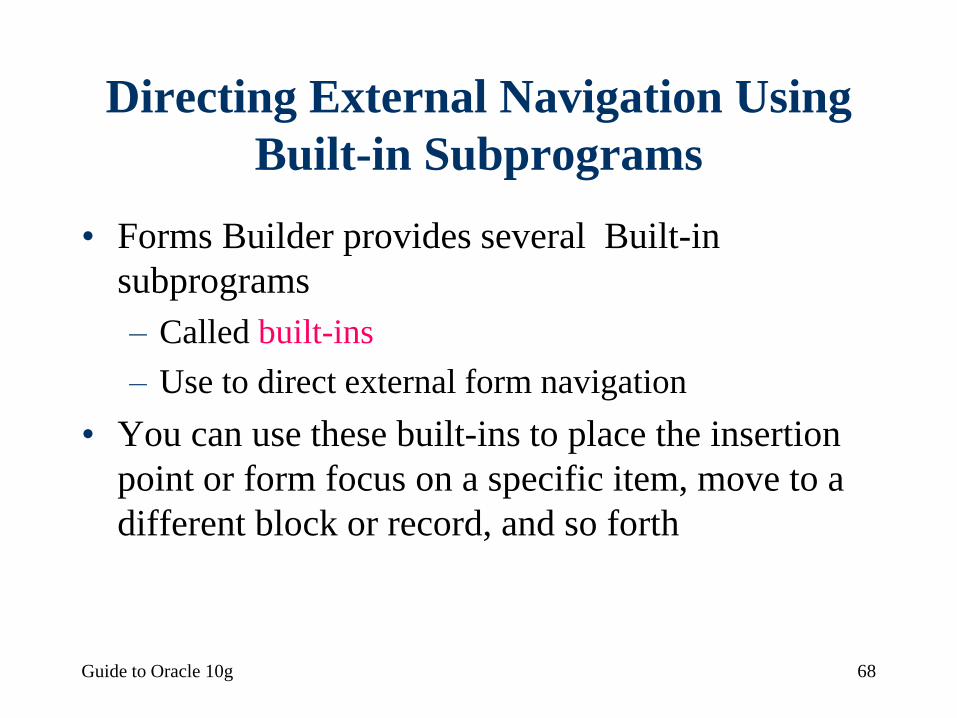
Directing External Navigation Using
Built-in Subprograms
• Forms Builder provides several Built-in
subprograms
– Called built-ins
– Use to direct external form navigation
• You can use these built-ins to place the insertion
point or form focus on a specific item, move to a
different block or record, and so forth

Guide to Oracle 10g 69
Built-in Subprograms to Control
External Navigation
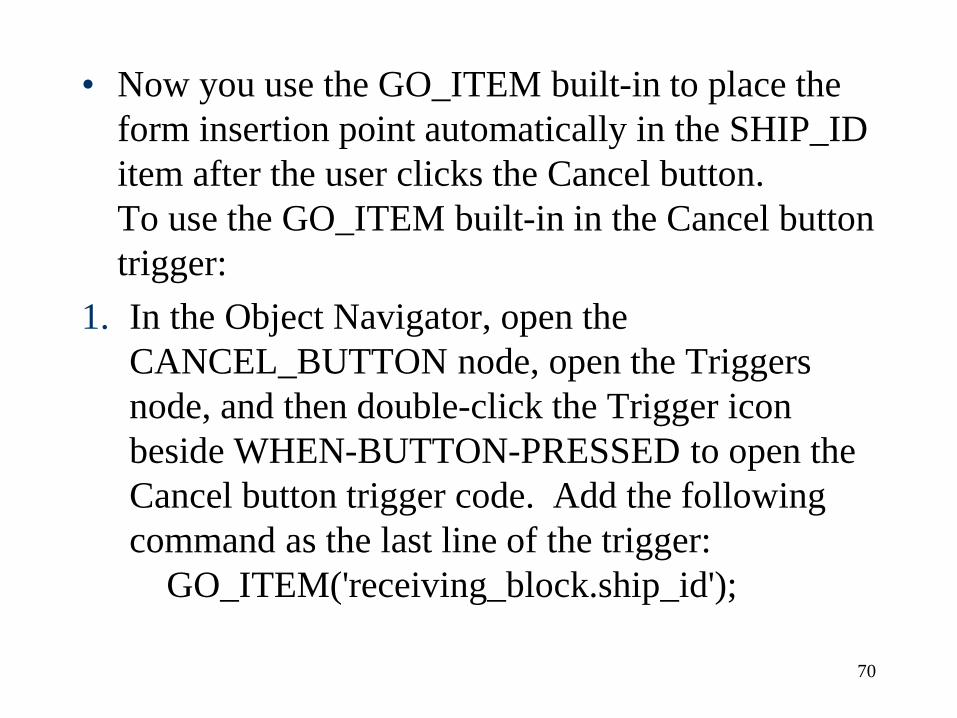
• Now you use the GO_ITEM built-in to place the
form insertion point automatically in the SHIP_ID
item after the user clicks the Cancel button.
To use the GO_ITEM built-in in the Cancel button
trigger:
1. In the Object Navigator, open the
CANCEL_BUTTON node, open the Triggers
node, and then double-click the Trigger icon
beside WHEN-BUTTON-PRESSED to open the
Cancel button trigger code. Add the following
command as the last line of the trigger:
GO_ITEM('receiving_block.ship_id');
70
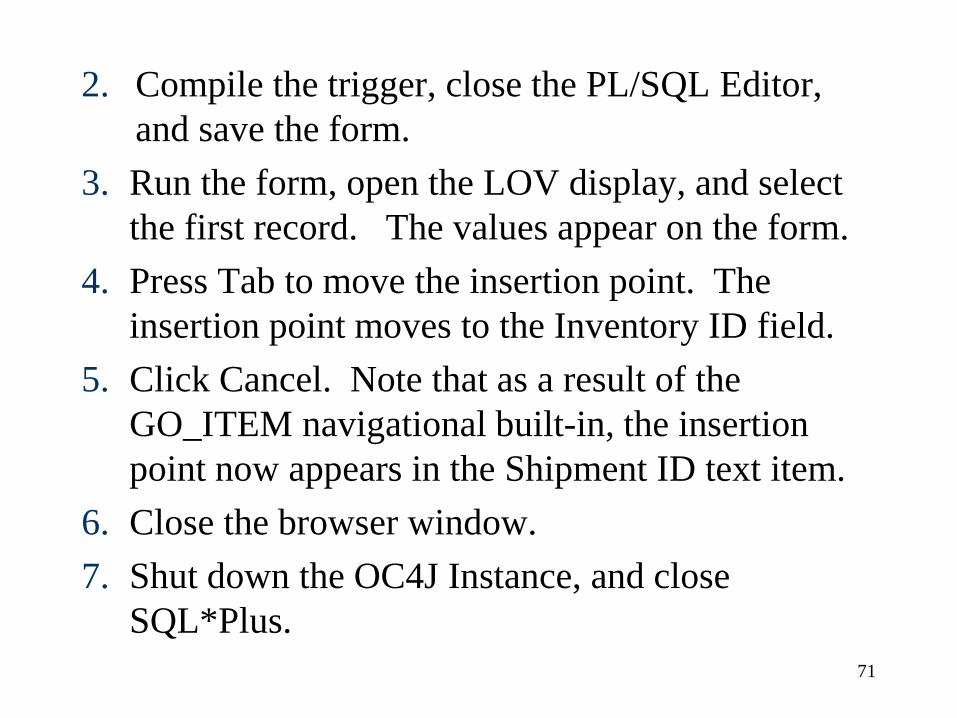
2. Compile the trigger, close the PL/SQL Editor,
and save the form.
3. Run the form, open the LOV display, and select
the first record. The values appear on the form.
4. Press Tab to move the insertion point. The
insertion point moves to the Inventory ID field.
5. Click Cancel. Note that as a result of the
GO_ITEM navigational built-in, the insertion
point now appears in the Shipment ID text item.
6. Close the browser window.
7. Shut down the OC4J Instance, and close
SQL*Plus.
71
Guide to Oracle 10g 72
Lesson A Summary
• Custom form
– Displays data fields from variety of database tables
– Processes data using triggers that contain SQL
commands
• Runtime errors
– Errors that occur while form running
• Forms Debugger
– Create breakpoints that pause execution

Guide to Oracle 10g 73
Lesson A Summary
• Form triggers support:
– Block processing
– Interface events
– Master-detail processing
– Message handling
– Navigational events
– Query processing
– Transaction processing
– Validation
Related Documents