64 Middle School Chemistry - www.middleschoolchemistry.com ©2016 American Chemical Society Chapter 2, Lesson 1: Heat, Temperature, and Conduction Key Concepts • Adding energy (heating) atoms and molecules increases their motion, resulting in an increase in temperature. • Removing energy (cooling) atoms and molecules decreases their motion, resulting in a decrease in temperature. • Energy can be added or removed from a substance through a process called conduction. • In conduction, faster-moving molecules contact slower-moving molecules and transfer energy to them. • During conduction the slower-moving molecules speed up and the faster-moving molecules slow down. • Temperature is a measure of the average kinetic energy of the atoms or molecules of a substance. • Heat is the transfer of energy from a substance at a higher temperature to a substance at a lower temperature. • Some materials are beer conductors of heat than others. Summary Students will do an activity in which heat is transferred from hot water to metal washers and then from hot metal washers to water. Students will view a molecular animation to beer understand the process of conduction at the molecular level. Students will also draw their own model of the process of conduction. Objective Students will be able to describe and draw a model, on the molecular level, showing how energy is transferred from one substance to another through conduction. Evaluation e activity sheet will serve as the “Evaluate” component of each 5-E lesson plan. e activity sheets are formative assessments of student progress and understanding. A more formal summa- tive assessment is included at the end of each chapter. Safety Make sure you and your students wear properly fiing goggles. Use caution when handling hot water. Materials for Each Group • 2 sets of large metal washers on a string • Styrofoam cup filled with hot water • Room-temperature water • 2 thermometers • Graduated cylinder or beaker Materials for the Teacher • 1 Styrofoam cup • ermometer • Hot plate or coffee maker • Large beaker or coffee pot

Welcome message from author
This document is posted to help you gain knowledge. Please leave a comment to let me know what you think about it! Share it to your friends and learn new things together.
Transcript
64 Middle School Chemistry - www.middleschoolchemistry.com ©2016 American Chemical Society
Chapter 2, Lesson 1: Heat, Temperature, and ConductionKey Concepts
• Adding energy (heating) atoms and molecules increases their motion, resulting in an increase in temperature.
• Removing energy (cooling) atoms and molecules decreases their motion, resulting in a decrease in temperature.
• Energy can be added or removed from a substance through a process called conduction.• In conduction, faster-moving molecules contact slower-moving molecules and transfer
energy to them. • During conduction the slower-moving molecules speed up and the faster-moving
molecules slow down. • Temperature is a measure of the average kinetic energy of the atoms or molecules of a
substance.• Heat is the transfer of energy from a substance at a higher temperature to a substance
at a lower temperature. • Some materials are better conductors of heat than others.
SummaryStudents will do an activity in which heat is transferred from hot water to metal washers and then from hot metal washers to water. Students will view a molecular animation to better understand the process of conduction at the molecular level. Students will also draw their own model of the process of conduction.
Objective Students will be able to describe and draw a model, on the molecular level, showing how energy is transferred from one substance to another through conduction.
EvaluationThe activity sheet will serve as the “Evaluate” component of each 5-E lesson plan. The activity sheets are formative assessments of student progress and understanding. A more formal summa-tive assessment is included at the end of each chapter.
SafetyMake sure you and your students wear properly fitting goggles. Use caution when handling hot water.
Materials for Each Group• 2 sets of large metal washers on a string• Styrofoam cup filled with hot water• Room-temperature water• 2 thermometers• Graduated cylinder or beaker
Materials for the Teacher• 1 Styrofoam cup• Thermometer• Hot plate or coffee maker• Large beaker or coffee pot

©2016 American Chemical Society Middle School Chemistry - www.middleschoolchemistry.com 65
Note: Energy can also be transferred through radiation and convection, but this chapter only deals with heat transfer through conduction.
ENGAGE1. Discuss what happens when a spoon is placed in a hot liquid like soup or hot
chocolate.
Ask students: • Did you ever put a metal spoon in hot soup or hot chocolate and then touch
the spoon to your mouth? What do you think might be happening, between the molecules in the soup and the atoms in the spoon, to make the spoon get hot? It’s not necessary for students to answer these questions completely at this time. It is more important that they begin to think that something is going on at the molecular level that causes one substance to be able to make another hotter.
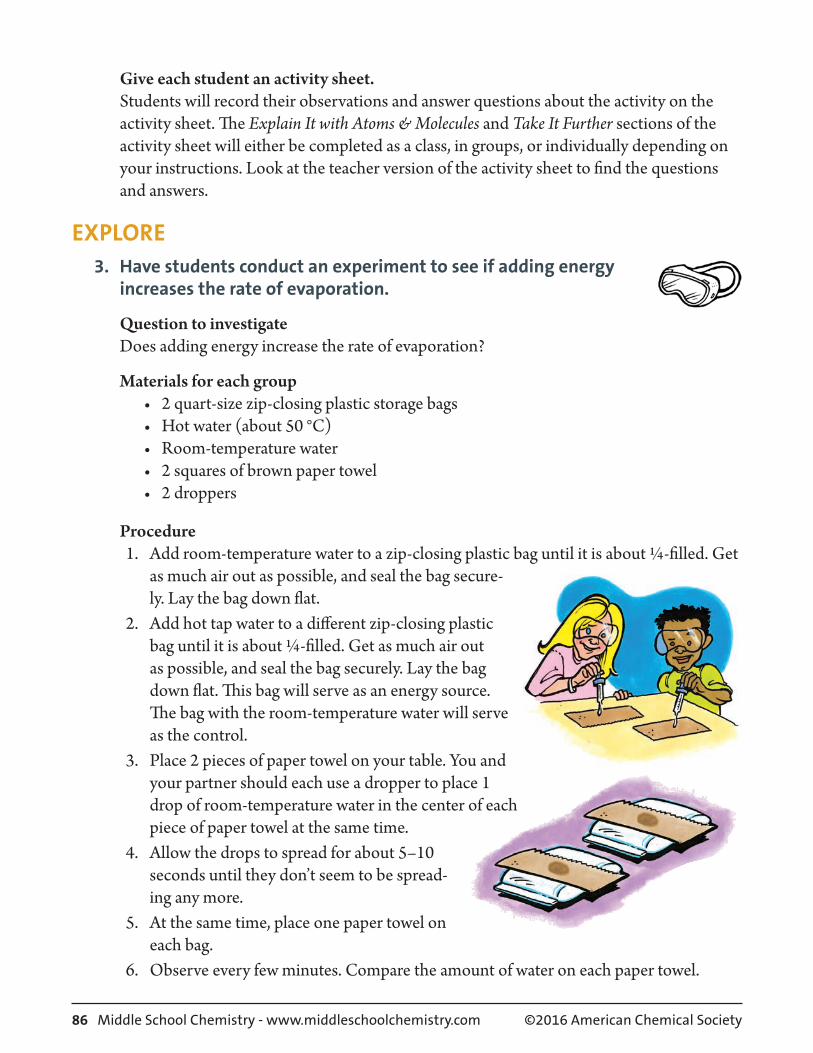
Give each student an activity sheet. Students will record their observations and answer questions about the activity on the activity sheet. The Explain It with Atoms & Molecules and Take It Further sections of the activity sheet will either be completed as a class, in groups, or individually depending on your instructions. Look at the teacher version of the activity sheet to find the questions and answers.
EXPLORE2. Have students explore what happens when room-temperature
metal is placed in hot water.
If you cannot get the materials for all groups to do this activity, you can do the activity as a demonstration or show students the videos: www.middleschoolchemistry.com/multimedia/chapter2/lesson1#heating_washerswww.middleschoolchemistry.com/multimedia/chapter2/lesson1#cooling_washers
Question to investigateWhy does the temperature of an object change when it is placed in hot water?
Materials for each group• 2 sets of large metal washers on a string• Styrofoam cup filled with hot water• Room-temperature water• 2 thermometers• Graduated cylinder or beaker

66 Middle School Chemistry - www.middleschoolchemistry.com ©2016 American Chemical Society
Materials for the teacher• 1 Styrofoam cup• Thermometer• Hot plate or coffee maker• Large beaker or coffee pot
Teacher preparation • Use a string to tie 5 or 6 metal washers together as shown. Each group of students
will need two sets of washers, each tied with a string. • Hang one set of washers for each group in hot water on a hot plate or in water in a
coffee maker so that the washers can get hot. These washers will need to remain hot until the second half of the activity.
• The other set should be left at room-temperature and may be distributed to students along with the materials for the activity.
• Immediately before the activity, pour about 30 milliliters (2 tablespoons) of hot water (about 50 °C) into a Styrofoam cup for each group. Be sure to pour one cup of hot water for you to use as a control.
Tell students that they are going to see if the temperature of hot water changes as a result of placing room-temperature metal washers in the water. The only way to tell if the wash-ers cause the temperature to change is to have a cup of hot water without washers. Explain that you will have this cup of hot water, which will be the control.
You will need to place your thermometer in the cup of hot water at the same time the students do. Have students record the initial temperature of the control in their charts on the activity sheet, along with the initial temperature of their own cup of hot water. The temperature of the two samples should be about the same.
Procedure1. Place a thermometer in your cup to measure the
initial temperature of the water. Record the tem-perature of the water in the “Before” column in the chart on the activity sheet. Be sure to also record the initial temperature of the water in the control cup.
2. Use another thermometer to measure the tempera-ture of the washers. Record this in the “Before” column.

©2016 American Chemical Society Middle School Chemistry - www.middleschoolchemistry.com 67
Note: It is a little awkward to take the temperature of the washers with a regular thermometer because there is such a small point of contact between the bulb of the thermometer and the sur-face of the washers. The washers should be about room-temperature.
Ask students to make a prediction:• What will happen to the temperature of the
water and the washers if you place the wash-ers into the hot water?
3. With the thermometer still in the water, hold the string and lower the metal washers all the way into the hot water.
4. Observe any change in the temperature of the water. Leave the washers in the water until the temperature stops changing. Record the tem-perature of the water in each cup in the “After” column.
5. Remove the washers from the water. Then take and record the temperature of the washers in the “After” column.
6. Empty the cup in a waste container or sink.
Expected resultsThe temperature of the water will decrease a bit and the temperature of the washers will increase a bit. The amount of temperature decrease and increase is really not that impor-tant. What is important is that there is a temperature decrease in the water and a tempera-ture increase in the washers.
Note: Eventually two objects at different temperatures that are in contact will come to the same temperature. In the activity, the washers and water will most likely be different temperatures. For the purposes of this activity, the washers and water are only in contact for a short time, so most likely will not come to the same temperature.
Read more about energy and tempera-ture in the additional teacher background section at the end of this lesson.
Room-temperature washers placed in hot water
Temperature of… Before AfterWater in your cup
Water in the control cup
Metal washers

68 Middle School Chemistry - www.middleschoolchemistry.com ©2016 American Chemical Society
Students may ask why the temperature of the water went down by a different amount than the temperature of the washers went up. The same amount of energy left the water as went into the washers, but it takes a different amount of energy to change the temperature of different substances.
3. Have students explore what happens when hot metal is placed in room-temperature water.
Ask students:• How do you think the temperature will change if you place hot washers into
room-temperature water?
Pour about 30 milliliters of room-temperature water into the control cup. Place a ther-mometer in the cup and tell students the temperature of the water. 1. Pour about 30 milliliters of room-temperature water into your Styrofoam cup.2. Place a thermometer into the water and record its temperature in the “Before” col-
umn in the chart on the activity sheet. Be sure to also record the initial temperature of the water in the control cup.
3. Remove the washers from the hot water where they have been heating and quickly use a thermometer to measure the temperature of the washers. Record this in the “Before” column on your activity sheet.
4. With the thermometer still in the water, hold the string and lower the hot metal wash-ers all the way into the water.
5. Observe any change in the temperature of the water. Leave the washers in the water until the temperature stops changing. Record the temperature of the water in your cup in the “After” column in the chart below. Also record the temperature of the water in the control cup.
6. Remove the washers from the water. Take and record the temperature of the washers.

©2016 American Chemical Society Middle School Chemistry - www.middleschoolchemistry.com 69
Hot washers placed in room-temperature water
Temperature of… Before After
Water in your cup
Water in the control cup
Metal washers
Expected resultsThe temperature of the water increases and the temperature of the washers decreases.
4. Discuss student observations and what may have caused the temperature of the metal washers and water to change.
Ask students:• How did the temperature of the washers and water change in both parts of the
activity? Based on their data, students should realize that the temperature of both the wash-ers and water changed.
• Knowing what you do about heating and cooling atoms and molecules, why do you think the temperature changed? If necessary, guide students’ thinking about why the temperature of each changed by asking them which were probably moving faster, the atoms in the metal washers or the molecules in the water. Tell students that the molecular model animation you will show next will show them why the temperature of both changed.
EXPLAIN 5. Show two animations to help students understand how
energy is transferred from one substance to another.
Show the molecular model animation Heated Spoon. www.middleschoolchemistry.com/multimedia/chapter2/lesson1#heated_spoonPoint out to students that the water molecules in the hot water are moving faster than the atoms in the spoon. The water molecules strike the atoms of the spoon and transfer some of their energy to these atoms. This is how the energy from the water is transferred to the spoon. This increases the motion of the atoms in the spoon. Since the motion of the atoms in the spoon increases, the temperature of the spoon increases.
It is not easy to notice, but when the fast-moving water molecules hit the spoon and speed up the atoms in the spoon, the water molecules slow down a little. So when energy is

70 Middle School Chemistry - www.middleschoolchemistry.com ©2016 American Chemical Society
transferred from the water to the spoon, the spoon gets warmer and the water gets cooler.
Explain to students that when fast-moving atoms or molecules hit slower-moving atoms or molecules and increase their speed, energy is transferred. The energy that is transferred is called heat. This energy transfer process is called conduction.
Show the molecular model animation Cooled Spoon. www.middleschoolchemistry.com/multimedia/chapter2/lesson1#cooled_spoonPoint out to students that in this case, the atoms in the spoon are mov-ing faster than the water molecules in the cold water. The faster-mov-ing atoms in the spoon transfer some of their energy to the water molecules. This causes the water molecules to move a little faster and the temperature of the water to increase. Since the atoms in the spoon transfer some of their energy to the water molecules, the atoms in the spoon slow down a little. This causes the temperature of the spoon to decrease.
Ask students:• Describe how the process of conduction caused the temperature of the wash-
ers and water to change in the activity. Room-temperature washers in hot water When the room-temperature washers are placed in hot water, the faster-moving water molecules hit the slower-moving metal atoms and make the atoms in the washers move a little faster. This causes the temperature of the washers to increase. Since some of the energy from the water was transferred to the metal to speed them up, the motion of the water molecules decreases. This causes the temperature of the water to decrease. Hot washers in room-temperature water When the hot metal washers are placed in the room temperature water, the faster-moving metal atoms hit the slower-moving water molecules and make the water molecules move a little faster. This causes the temperature of the water to increase. Since some of the energy from the metal atoms was transferred to the water mol-ecules to speed them up, the motion of the metal atoms decreases. This causes the temperature of the washers to decrease.

©2016 American Chemical Society Middle School Chemistry - www.middleschoolchemistry.com 71
6. Discuss the connection between molecular motion, temperature, and conduction.
Ask students:• How does the motion of the atoms or molecules of a substance affect the
temperature of the substance? If the atoms or molecules of a substance are moving faster, the substance has a higher temperature. If its atoms or molecules are moving slower, then it has a lower temperature.
• What is conduction? Conduction occurs when two substances at different temperatures are in contact. Energy is always transferred from the substance with the higher temperature to the one at lower temperature. As energy is transferred from the hotter substance to the colder one, the colder substance gets warmer and the hotter substance gets cooler. Eventually the two substances become the same temperature.
Students tend to understand heating but often have a misconception about how things are cooled. Just like heating a substance, cooling a substance also works by conduction. But instead of focusing on the slower-moving molecules speeding up, you focus on the faster-moving molecules slowing down. The faster-moving atoms or molecules of the hotter substance contact slower-moving atoms or molecules of the cooler substance. The faster-moving atoms and molecules transfer some of their energy to the slower-moving atoms and molecules. The atoms and molecules of the hotter substance slow down, and its temperature decreases. An object or substance can’t get colder by adding “coldness” to it. Something can only get colder by having its atoms and molecules transfer their energy to something that is colder.
3. Have students draw molecular models to show conduction between a spoon and water.
Note: In the model you will show students, the change in speed of both the water molecules and the atoms in the spoon is represented with different numbers of motion lines. Students may remember that when atoms or molecules move faster, they get further apart, and when they move slower, they get closer together. For this activity, the change in distance between water molecules or between atoms in the spoon is not the focus, and therefore it is not shown in the model. You could tell students that models can emphasize one feature over another, in order to help focus on the main point being represented.

72 Middle School Chemistry - www.middleschoolchemistry.com ©2016 American Chemical Society
Room-temperature spoon placed in hot waterProject the illustrations Spoon in Hot Water Before & After from the activity sheet.www.middleschoolchemistry.com/multimedia/chapter2/lesson1#spoon_in_hot_waterHave students look at the motion lines in the “Before” picture on their activity sheet. Then ask students how the motion of the atoms and molecules would change in the “After” picture. The activity sheet, along with the image you are projecting, does not have motion lines drawn in the “After” picture. Putting these in correctly is the students’ task.
Tell students to add motion lines to the “After” illustration and add descriptive words like “warmer” or “cooler” to describe the change in temperature of the water and the spoon.

©2016 American Chemical Society Middle School Chemistry - www.middleschoolchemistry.com 73
Hot spoon placed in room-temperature waterProject the illustrations Hot spoon in room-temperature water before & after from the activity sheetwww.middleschoolchemistry.com/chapter2/lesson1#spoon_in_room_temperature_waterHave students look at the second set of “Before” and “After” pictures. Tell students to add motion lines to the “After” illustration and add descriptive words like “warmer” or “cool-er” to describe the change in temperature of the water and the spoon.

74 Middle School Chemistry - www.middleschoolchemistry.com ©2016 American Chemical Society
4. Show a simulation to illustrate that temperature is the average kinetic energy of atoms or molecules.
The following simulation shows that at any temperature, the atoms or molecules of a sub-stance are moving at a variety of speeds. Some molecules are moving faster than others, some slower, but most are in-between.
Note: After pressing “Start”, the simulation works best if you cycle through all the buttons before using it for instruction with students..
Show the simulation Temperature.www.middleschoolchemistry.com/multimedia/temperature.php
• After cycling through the “Cold”, “Medium”, and “Hot” buttons, choose “Medium” to begin the discussion with students. Tell students that this simulation shows the relationship between energy, molecular motion, and temperature.
Tell students that anything that has mass and is moving, no matter how big or small, has a certain amount of energy, called kinetic energy. The temperature of a substance gives you information about the kinetic energy of its molecules. The faster the molecules of a sub-stance move, the higher the kinetic energy, and the higher the temperature. The slower the molecules move, the lower the kinetic energy, and the lower the temperature. But at any temperature, the molecules don’t all move at the same speed so temperature is actually a measure of the average kinetic energy of the molecules of a substance.
• These ideas apply to solids, liquids, and gases. The little balls in the simulation represent molecules and change color to help visualize their speed and kinetic energy. The slow ones are blue, the faster ones are purple or pink, and the fastest are red. Explain also that individual molecules change speed based on their collisions with other molecules. Molecules transfer their kinetic energy to other molecules through conduction. When a fast-moving molecule hits a slower-moving molecule, the slower molecule speeds up (and turns more red) and the faster molecule slows down (and turns more blue).
• Explain that at any temperature, most of the molecules are moving at about the same speed and have about the same kinetic energy, but there are always some that are moving slower and some that are moving faster. The temperature is actually a combination, or average, of the kinetic energy of the molecules. If you could place a thermometer in this simulation, it would be struck by molecules going at different speeds so it would register the average kinetic energy of the molecules.

©2016 American Chemical Society Middle School Chemistry - www.middleschoolchemistry.com 75
To add energy, start with “Cold” and then press “Medium” and then “Hot”.
Ask students:• What do you notice about the molecules as energy is added?
As energy is added, more molecules are moving faster. There are more pink and red molecules but there are still some slower-moving blue ones..
To remove energy, start with “Hot” and then press “Medium” and then “Cold”.
Ask students:• What do you notice about the molecules as energy is removed?
As energy is removed, more molecules are moving slower. There are more purple and blue molecules, but a few still change to pink.
EXTEND 9. Have students try one or more extensions and use conduction to explain
these common phenomena.
Compare the actual temperature and how the temperature feels for different objects in the room.
Ask students:• Touch the metal part of your chair or desk leg and then touch the cover of a text-
book. Do these surfaces feel like they are the same or a different temperature? They should feel different.
• Why does the metal feel colder even though it is the same temperature as the cardboard? Tell students that even though the metal feels colder, the metal and the cardboard are actually the same temperature. If students don’t believe this, they can use a ther-mometer to take the temperature of metal and cardboard in the room. After being in the same room with the same air temperature, both surfaces should be at the same temperature.
Show the animation Conducting Energy to help answer the question about why metal feels colder than cardboard. www.middleschoolchemistry.com/multimedia/chapter2/lesson1#conducting_energyTell students to watch the motion of the molecules in the metal, cardboard, and in the finger.
76 Middle School Chemistry - www.middleschoolchemistry.com ©2016 American Chemical Society
Explain that the molecules in your finger are moving faster than the molecules in the room-temperature metal. Therefore the energy from your finger is transferred to the metal. Because metal is a good conductor, the energy is transferred away from the surface through the metal. The molecules in your skin slow down as your finger continues to lose energy to the metal, so your finger feels cooler.
Like the metal, the molecules in your finger are moving faster than the molecules in the room-temperature cardboard. Energy is transferred from your finger to the surface of the cardboard. But because cardboard is a poor conductor, the energy is not easily transferred away from the surface through the cardboard. The molecules in your skin move at about the same speed. Because your finger does not lose much energy to the cardboard, your finger stays warm.
Compare the actual temperature and how the temperature feels for water and air.Have students use two thermometers to compare the temperature of room-temperature water and the temperature of the air. They should be about the same.
Ask students:• Put your finger in room-temperature water and another finger in the air.
Do the water and the air feel like they are the same or a different temperature? The finger in the water should feel colder.
• Why does the water feel cooler even though it is the same temperature as the air? Remind students that even though the water feels colder, the water and the air are actually about the same temperature. Students should realize that water is better than air at conducting energy. As energy is drawn more rapidly away from your finger, your skin feels colder.
Consider why cups of cold and hot water both come to room-temperature.Have students think about and explain the following situation:
• Let’s say that you put a cup of cold water in one room and a cup of hot water in another room. Both rooms are at the same room-temperature. Why does the cold water get warmer and the hot water get cooler? In both cases, energy will move from an area of higher temperature to an area of lower temperature. So, the energy from room-temperature air will move into the cold water, which warms the water. And the energy from the hot water will move into the cooler air, which cools the water.

©2016 American Chemical Society Middle School Chemistry 77
Activity Sheet Name _______________________Chapter 2, Lesson 1Heat, Temperature, and Conduction Date ________________________
In this activity, you will place a room-temperature set of washers in hot water and then place a set of hot washers in room-temperature water. Find out what happens to the temperature of each.
ACTIVITY
Question to investigateWhy does the temperature of an object change when it is placed in hot water?
Materials for each group• 2 sets of large metal washers on a string• Styrofoam cup filled with hot water• Room-temperature water• 2 thermometers• Graduated cylinder or beaker
Procedure
Room-temperature washers placed in hot water1. Place a thermometer in your cup to measure the initial
temperature of the water. Record the temperature of the water in the “Before” column in the chart on the activity sheet. Be sure to also record the initial temper-ature of the water in the control cup.
2. Use another thermometer to measure the temperature of the washers. Record this in the “Before” column.
3. With the thermometer still in the water, hold the string and lower the metal washers all the way into the water.
4. Observe any change in the temperature of the water. Leave the washers in the water until the temperature stops changing. Record the tem-perature of the water in each cup in the “After” column.
5. Remove the washers from the water. Then take and record the temperature of the washers in the “After” column.
6. Empty the cup in a waste container or sink.

78 Middle School Chemistry ©2016 American Chemical Society
Room-temperature washers placed in hot water
Temperature of… Before AfterWater in your cup
Water in the control cup
Metal washers
1. Why do you think the temperature of the water in your cup changes more than the water in the control cup?
Hot washers placed in room-temperature water
1. Pour about 30 milliliters of room-temperature water into your Styrofoam cup.
2. Place a thermometer into the water and record the temperature of the water in each cup in the “Before” column in the chart below.
3. Get a set of hot washers from your teacher and quickly use a thermometer to measure the temperature of the washers. Record this in the “Before” column.
4. With the thermometer still in the water, hold the string and lower the hot metal washers all the way into the water.
5. Observe any change in the temperature of the water. Leave the washers in the water until the temperature stops changing. Record the tem-perature of the water in the “After” column in the chart. Also record the temperature of the water in the control cup.
6. Remove the washers from the water. Then take and record the temperature of the washers.

©2016 American Chemical Society Middle School Chemistry 79
Hot washers placed in room-temperature water
Temperature of… Before After
Water in your cup
Water in the control cup
Metal Washers
EXPLAIN IT WITH ATOMS & MOLECULES
Room-temperature spoon placed in hot waterIn the first part of the animation, you saw what happens when a spoon is placed in hot water.
2. Explain, on the molecular level, how energy was transferred from the hot water to the room-temperature spoon.
3. Draw motion lines near the atoms and molecules in the “After” illustration to show how the speed of the molecules in the spoon and water changed.

80 Middle School Chemistry ©2016 American Chemical Society
4. Now that you know what happens when a spoon is placed in hot water, explain what happened in the activity:
• Why did the metal washers get warmer?
• Why did the water get cooler?
Hot spoon placed in room-temperature waterIn the next part of the animation, you saw what happens when a hot spoon is placed in room-temperature water.
5. Explain, on the molecular level, how the heat was conducted from the hot spoon to the room-temperature water.
6. Draw motion lines near the atoms and molecules in the “After” illustration to show how the speed of the atoms in the spoon and molecules in the water changed.

©2016 American Chemical Society Middle School Chemistry 81
7. Now that you know what happens when a hot spoon is placed in room-temperature water, explain what happened in the activity:
• Why did the hot metal washers get cooler?
• Why did the water get warmer?
8. You saw an animation that showed that temperature is a measure of the average kinetic energy of the atoms of molecules of a substance. Does this mean that all of the molecules in a cup of water are moving at the same speed or at a variety of speeds? Explain.
TAKE IT FURTHER
9. Touch your metal chair or desk leg and then touch your wooden or plastic desk top or some other wood or plastic.
• Which feels colder, the metal or the wood/plastic?
• Explain why the metal feels colder even though it is the same tempera-ture as the wood or plastic. Hint: Certain materials are better at conducting heat than others.

82 Middle School Chemistry ©2016 American Chemical Society
10. Even though room-temperature water and room-temperature air are about the same temperature, the water feels colder when you put your finger in it. Use what you know about conduction to explain why the water feels colder than the air. Hint: Certain materials are better at conducting heat than others.
11. Let’s say that you put a cup of cold water in one room and a cup of hot water in another room. Both rooms are room-temperature. Why does the cold water get warmer and the hot water get cooler?

©2016 American Chemical Society Middle School Chemistry - www.middleschoolchemistry.com 83
Additional Teacher BackgroundChapter 2 Lesson 1, p.65
Specific Heat and Heat Capacity
When room temperature metal washers are placed in hot water, the temperature of the washers goes up and the temperature of the water goes down. This makes sense because energy was trans-ferred from the hot water to the cooler washers. But the amount of temperature decrease of the water may not match the amount of temperature increase by the washers. Even though the same amount of energy left the water as went into the washers, the change in temperature of the two substances is different. This is because the water and the washers have a different specific heat.
Specific heat is the amount of energy required to raise the temperature of 1 gram of a substance by 1 °C. It makes sense that different substances have different specific heats because the size, mass, attractions, and arrangements of their atoms or molecules are different. Based on these dif-ferences, the amount of energy required to increase the motion of these atoms or molecules by a certain amount is different.
84 Middle School Chemistry - www.middleschoolchemistry.com ©2016 American Chemical Society
Chapter 2, Lesson 2: Changing State—Evaporation
Key Concepts• Evaporation occurs when molecules in a liquid gain enough energy that they overcome
attractions from other molecules and break away to become a gas.• Adding energy increases the rate of evaporation.• To conduct a valid experiment, variables need to be identified and controlled.
SummaryStudents will help design an experiment to see if adding energy (heating) affects the rate of evaporation. Students will look at molecular animations to help explain why the heating water increases the rate of evaporation. Students will be introduced to a more detailed model of the water molecule. Students will create 3-D Styrofoam models of water molecules.
ObjectiveStudents will be able to identify and control variables to design a test to see if heating water affects the rate of evaporation. Students will be able to explain, on the molecular level, why adding energy increases the rate of evaporation.
EvaluationThe activity sheet will serve as the “Evaluate” component of each 5-E lesson plan. The activity sheets are formative assessments of student progress and understanding. A more formal summa-tive assessment is included at the end of each chapter.
SafetyMake sure you and your students wear properly fitting goggles. Use caution when handling hot water.
Materials for Each Group• 2 quart-size zip-closing plastic storage bags• Hot water• Room-temperature water• 2 squares of brown paper towel• 2 droppers
Materials for each student• 2 Styrofoam balls (11/2-inch)• 4 Styrofoam balls (1-inch)• 2 flat toothpicks• School glue• Permanent marker
©2016 American Chemical Society Middle School Chemistry - www.middleschoolchemistry.com 85
ENGAGE1. Predict what might happen to a wet paper towel by the end of the class.
Show students two pieces of brown paper towel. Dampen one with water so that the color appears darker than the dry piece of paper towel. Select a student to feel the difference between the two paper towels now, and again at the end of the class period. Place both paper towels up in a prominent location.
Ask students: • At the end of class, do you think the paper towel will still be wet or will it be dry?
Students should agree that the wet paper towel will likely become dry. They may say that the water will evaporate. Explain to students that when water evaporates, it changes from a liquid to a gas. Point out that the word “evaporate” has the word “vapor” in it—water changes to water vapor but it is still water.
• What are some other examples of evaporation? Students may think of common examples of evaporation such as clothes in a dryer, wet hair drying on its own, or a puddle drying up in the sun.
• When water evaporates, where do the water molecules go? Make it clear that, although you can’t see the water anymore after it has dried up or evaporated, it still exists. The water molecules separate and are in the air as a gas called water vapor.
Tell students that they are going to find out what happens to water molecules as they evap-orate by exploring how to make water evaporate faster.
2. Help students design an experiment to find out whether adding energy increases the rate of evaporation.
Tell students that they will test the evaporation of just 1 drop of water on a brown paper towel so that they can see results quickly.
Ask students:• What could you do to make a small amount of water evaporate faster from a
paper towel? Students will know that they should somehow heat the water on the paper towel.
• Will you need to put a drop of water on just one paper towel or on two? As you listen to students, help them realize that they will need to wet two paper towel samples but that only one will be heated. The unheated paper towel is the “control.” If they wet two paper towels and heat one of them, they will be able to see whether adding energy affects the rate of evaporation.
86 Middle School Chemistry - www.middleschoolchemistry.com ©2016 American Chemical Society
Give each student an activity sheet. Students will record their observations and answer questions about the activity on the activity sheet. The Explain It with Atoms & Molecules and Take It Further sections of the activity sheet will either be completed as a class, in groups, or individually depending on your instructions. Look at the teacher version of the activity sheet to find the questions and answers.
EXPLORE3. Have students conduct an experiment to see if adding energy
increases the rate of evaporation.
Question to investigateDoes adding energy increase the rate of evaporation?
Materials for each group• 2 quart-size zip-closing plastic storage bags• Hot water (about 50 °C)• Room-temperature water• 2 squares of brown paper towel• 2 droppers
Procedure1. Add room-temperature water to a zip-closing plastic bag until it is about ¼-filled. Get
as much air out as possible, and seal the bag secure-ly. Lay the bag down flat.
2. Add hot tap water to a different zip-closing plastic bag until it is about ¼-filled. Get as much air out as possible, and seal the bag securely. Lay the bag down flat. This bag will serve as an energy source. The bag with the room-temperature water will serve as the control.
3. Place 2 pieces of paper towel on your table. You and your partner should each use a dropper to place 1 drop of room-temperature water in the center of each piece of paper towel at the same time.
4. Allow the drops to spread for about 5–10 seconds until they don’t seem to be spread-ing any more.
5. At the same time, place one paper towel on each bag.
6. Observe every few minutes. Compare the amount of water on each paper towel.

©2016 American Chemical Society Middle School Chemistry - www.middleschoolchemistry.com 87
Expected resultsThe water mark on the brown paper lying on the hot water bag should disappear faster than the mark on the paper lying on the room-temperature water bag. This will take about 3–5 minutes.
4. While waiting for evaporation, discuss the design of this experiment.
While students are waiting to see which drop of water evaporates faster, ask students about the design of the experiment.
Ask students:• How did we control variables?• Why did we use the same type of paper towel for each sample?• Why did we put the same amount of water on each piece of paper towel?• Both drops of water on the paper towels were originally the same temperature.
Was this a good idea?• Why did we put the drops on the paper towel at the same time and in the same
area?
The type of paper towel material, amount of water, initial temperature of the water, and where the water is placed on the paper towel may all have an effect on the rate of evapora-tion. All these different factors are variables in the experiment. All these variables need to be kept the same so that the experiment is as fair as possible.
• Why did we place one paper towel on a bag filled with room-temperature water? Even the surface each paper towel is placed on should be the same. This is why one paper towel is placed on a room-temperature bag instead of on a room-temperature table or desk. The only difference should be the amount of energy the paper towels are exposed to.
Be sure students understand the purpose of the control. The control is necessary because if there was only one sample that was heated, there would be nothing to compare it with. There would be no way of knowing whether adding energy made any difference in the rate of evaporation if there wasn’t another sample to compare it to that was not heated.
5. Discuss student observations.
Ask students:• Does adding energy increase the rate of evaporation? How do you know?
Yes. We can say that heating water increases the rate of evaporation because the drop of water that was heated evaporated first. Since the experiment controlled vari-ables, heating water must increase the rate of evaporation.

88 Middle School Chemistry - www.middleschoolchemistry.com ©2016 American Chemical Society
• Knowing what you do about energy and molecular motion, why do you think the water that was heated evaporated faster? Students should remember that adding energy increases the motion of molecules. They should realize that the water molecules on the paper towel on the warm bag are moving faster than the ones on the room-temperature bag. Students should conclude that more of these faster-moving molecules break away from the other molecules and go into the air.
EXPLAIN 6. Show an animation to explain why adding energy
increases the rate of evaporation.
Show the animation Evaporation. www.middleschoolchemistry.com/multimedia/chapter2/lesson2#evaporationTell students that adding energy to the water on the paper towel increases the motion of the water molecules. When the molecules have enough energy, they can move fast enough to break away from the attractions holding them to other molecules.
4. Have students describe their observations on the molecular level.
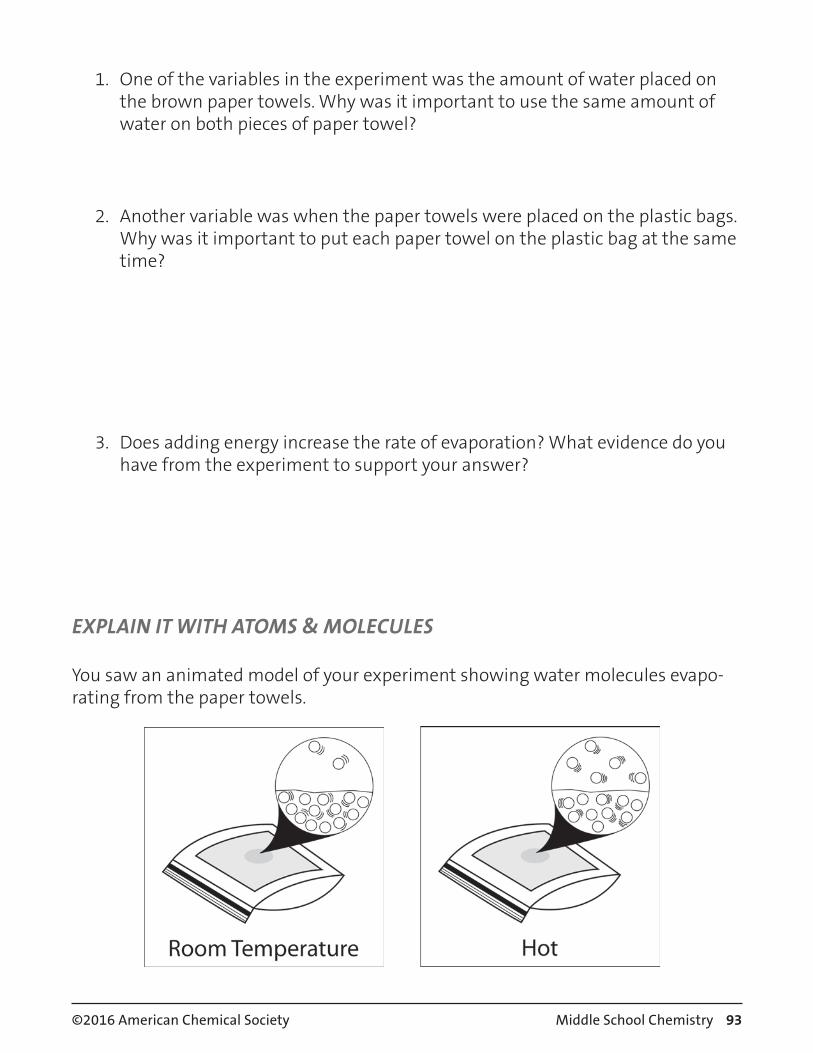
Project the image Heating and Evaporation from the activity sheet.www.middleschoolchemistry.com/multimedia/chapter2/lesson2#heating_and_evaporationPoint out the difference in the number of motion lines in the water on each paper towel. Explain that the heated water molecules have more energy and move faster than the room-temperature water. These faster moving molecules are able to overcome the attrac-tions they have for other water molecules and evaporate.
Have students include words or phrases with these pictures to indicate why heating the water on the paper towel increases the rate of evaporation.

©2016 American Chemical Society Middle School Chemistry - www.middleschoolchemistry.com 89
5. Look at the paper towels from the start of the lesson.
Have the student who felt the two pieces of brown paper towel at the beginning feel them again. This student should report that the moist paper towel is drier or is completely dry.
Ask students: • The wet paper towel was not heated. Why did the water evaporate?
Remind students of the model of average kinetic energy they saw in the last lesson. Explain to students that at room temperature, water molecules are moving at a vari-ety of different speeds but most are moving fast enough to evaporate. As the mol-ecules transfer energy between each other, even slower molecules will gain enough energy to evaporate.
6. Show a different model of a water molecule and review changes in state using this model.
Tell students that they have been using a very simple model of water as just a circle or sphere but there are other models of water that show more detail about the structure of the molecule. Show the animation of Models of Water Molecules.www.middleschoolchemistry.com/chapter2/lesson2#models_of_water_molecules
Show students that water is made up of 1 oxygen atom (red) and 2 hydrogen atoms (gray). Point out the ball and stick model and the space-filling model. The ball-and-stick model is used to highlight the angles at which the atoms are bonded together within a molecule. The space-filling model is used to highlight the space taken up by the electron cloud around the atoms within a molecule.
The shape of the water molecule and its atraction to other water molecules give water its characteristic properties.
Ball-and-stick model Space-filling model Liquid water
90 Middle School Chemistry - www.middleschoolchemistry.com ©2016 American Chemical Society
Project animation Liquid waterExplain that water molecules, as a liquid, are very close together because of their attrac-tions for one another but are able to slide past each other.
Note: You can mention to students that when water molecules attract each other, the oxygen part of one water molecule attracts the hydrogen part of another. The reason for this will be explored in detail in Chapter 5.
Project animation Water vaporExplain that water molecules, as a gas, are much further apart and usually just bounce off each other when they collide. Be sure to point out that when the water evaporated, the molecules themselves did not break apart into atoms. The molecules separated from other molecules but stayed intact as a molecule.
EXTEND7. Have students make their own space-filling models of water molecules using
Styrofoam balls.
Have each student make 2 water molecules.
Question to investigateHow do water molecules move as water freezes, melts, evaporates, and condenses?
Materials note:Styrofoam balls are available from craft stores and many science suppliers. You will need 1-inch and 1½-inch balls. These are available from Flinn Scientific, Product #AP2279 and AP2280. Each student will need 2 large and 4 small Styrofoam balls to make 2 water molecules each.
Point out that the large Styrofoam ball represents the oxygen atom and that the smaller Styrofoam balls represent the hydrogen atoms. Explain that the vast majority of each ball represents the electron cloud around the atom. Although it cannot be seen in the Styro-foam ball model, the center of each ball represents the extremely tiny nucleus where the protons and neutrons are. Almost the entire ball, except for the extremely tiny center, represents the area where the electrons are.
Materials for each student• 2 Styrofoam balls (11/2-inch)• 4 Styrofoam balls (1-inch)• 2 flat toothpicks• School glue• Permanent marker

©2016 American Chemical Society Middle School Chemistry - www.middleschoolchemistry.com 91
Procedure1. Break toothpicks in half so that there are 4 half-
toothpicks.2. Use a permanent marker to write an O on
each of the large balls and an H on each of the small balls.
3. Push a half-toothpick about halfway into each small ball.
4. Push two small balls onto each larger ball at the angle shown.
5. Add 1 or 2 drops of glue where the hydro-gen atoms meet the oxygen atoms. Allow the glue to dry over night.
6. Have students contribute their two water molecules to the group.

92 Middle School Chemistry ©2016 American Chemical Society
Activity Sheet Name __________________Chapter 2, Lesson 2Changing State—Evaporation Date ___________________
ACTIVITY
Question to investigateDoes adding energy increase the rate of evaporation?
Materials for each group• 2 quart-size zip-closing plastic storage bags• Hot water (about 50 ºC)• Room-temperature water• 2 squares of brown paper towel• 2 droppers
Procedure1. Add room-temperature water to a zip-closing plastic bag
until it is about ¼-filled. Get as much air out as possible, and seal the bag securely. Lay the bag down flat.
2. Add hot tap water to a different zip-closing plastic bag until it is about ¼-filled. Get as much air out as possible, and seal the bag securely. Lay the bag down flat. This bag will serve as a heat source. The bag with the room-temperature water will serve as the control.
3. Place 2 pieces of paper towel on your table. You and your partner should each use a dropper to place 1 drop of room-temperature water in the center of each piece of paper towel at the same time.
4. Allow the drops to spread for about 10 seconds until they don’t seem to be spreading any more.
5. At the same time, place one paper towel on each bag.
6. Observe every few minutes. Compare the amount of water on each paper towel.
©2016 American Chemical Society Middle School Chemistry 93
1. One of the variables in the experiment was the amount of water placed on the brown paper towels. Why was it important to use the same amount of water on both pieces of paper towel?
2. Another variable was when the paper towels were placed on the plastic bags. Why was it important to put each paper towel on the plastic bag at the same time?
3. Does adding energy increase the rate of evaporation? What evidence do you have from the experiment to support your answer?
EXPLAIN IT WITH ATOMS & MOLECULES
You saw an animated model of your experiment showing water molecules evapo-rating from the paper towels.
94 Middle School Chemistry ©2016 American Chemical Society
4. Explain, on the molecular level, why heating water increases the rate of evap-oration from the paper towel. Hint: In your answer, remember to include that water molecules are attracted to one another and that heat increases molecular motion.
TAKE IT FURTHER
5. The wet paper towel from the beginning of class was not heated. Why did the water evaporate anyway?
6. You saw an animation using space-filling models of water. When water evaporates do the water molecules themselves break apart or do whole water molecules separate from one another?

©2016 American Chemical Society Middle School Chemistry 95
ACTIVITY
Question to investigateHow do water molecules move as water freezes, melts, evaporates, and condenses?
Materials for each student• 2 Styrofoam balls (11/2-inch)• 4 Styrofoam balls (1-inch)• 2 flat toothpicks• School glue• Permanent marker
Procedure1. Break toothpicks in half so that there
are 4 half-toothpicks.2. Use a permanent marker to write an O
on each of the large balls and an H on each of the small balls.
3. Push a half-toothpick about half-way into each small ball.
4. Push two small balls onto each larger ball at the angle shown.
5. Add 1 or 2 drops of glue where the hydrogen atoms meet the Oxygen atom. Allow the glue to dry over night.
Have students contribute their two water molecules to the group.
96 Middle School Chemistry - www.middleschoolchemistry.com ©2016 American Chemical Society
Chapter 2, Lesson 3: Changing State—Condensation
Key Concepts• Condensation is the process in which molecules of a gas slow down, come together, and
form a liquid.• When gas molecules transfer their energy to something cooler, they slow down and their
attractions cause them to bond to become a liquid. • Making water vapor colder increases the rate of condensation. • Increasing the concentration of water vapor in the air increases the rate of condensation.
SummaryStudents investigate the condensation of water vapor on the inside of a plastic cup. Then they design an experiment to see if cooling water vapor even more affects the rate of condensation. Students also relate evaporation and condensation to the water cycle.
ObjectiveStudents will be able to describe on the molecular level how cooling water vapor causes conden-sation. Students will also describe the roles evaporation and condensation play in the water cycle.
EvaluationThe activity sheet will serve as the “Evaluate” component of each 5-E lesson plan. The activity sheets are formative assessments of student progress and understanding. A more formal summa-tive assessment is included at the end of each chapter.
SafetyMake sure you and your students wear properly fitting goggles.
Materials for Each Group• 1 short wide-rimmed clear plastic cup• 1 tall smaller-rimmed clear plastic cup• Hot water (about 50 °C)• Magnifier
About this LessonTry the demonstration before presenting it to your students because it will not work if the humidity is too low. You could instead show students the video Condensation on a Cold Cup at www.middleschoolchemistry.com/chapter2/lesson3#condensation_cup.
The activity for the students will work no matter how dry or humid the air.
Materials for the Demonstration• 2 clear plastic cups• Room-temperature water• Ice cubes• Gallon-size zip-closing plastic bag

©2016 American Chemical Society Middle School Chemistry - www.middleschoolchemistry.com 97
ENGAGE1. Prepare for the demonstration about 5–10 minutes before class.
Materials for the demonstration• 2 clear plastic cups• Room-temperature water• Ice cubes• Gallon-size zip-closing plastic bag
Procedure1. Place water and ice cubes into two identical
plastic cups. 2. Immediately place one of the cups in a zip-
closing plastic bag and get as much air out of the bag as possible. Close the bag securely.
3. Allow the cups to sit undisturbed for about 5–10 minutes.
Expected resultsThe cup inside the bag should have very little moisture on it because not much water vapor from the air was able to contact it. The cup exposed to air should have more mois-ture on the outside because it was exposed to the water vapor in the air, which condensed on the outside of the cup.
2. Show students the two cold cups of water and ask why water appears on the outside of only one of them.
Show students the two cups you prepared and ask:
• Which cup has the most moisture on the outside of it? Students should realize that the cup exposed to more air has the most moisture on the outside of it.
• Why do you think the cup that is exposed to more air has more water on the outside of it? Make sure students understand that this moisture came from water vapor in the air that condensed on the outside of the cup. Remind students that water vapor is one of the gases that makes up air. The cup in the bag has very little to no moisture on it because it is exposed to much less air. Less air means less water vapor.
• Some people think that the moisture that appears on the outside of a cold cup is water that has leaked through the cup. How does this demonstration prove that this idea is not true?

98 Middle School Chemistry - www.middleschoolchemistry.com ©2016 American Chemical Society
Because there is little to no moisture on the outside of the cup in the bag, students should conclude that water could not have leaked through the cup. If the moisture came from leaking, there would be water on the outside of both cups.
3. Introduce the process of condensation.
If students do not know what the process of condensation is, you can tell them it is the opposite of evaporation. In evaporation, a liquid (like water) changes state to become a gas (water vapor). In condensation, a gas (like water vapor) changes state to become a liquid (water).
Explain that as water molecules in the air cool and slow down, their attractions overcome their speed and they join together, forming liquid water. This is the process of condensa-tion.
Ask students: • What are some examples of condensation?
Coming up with examples of condensation is a bit harder than examples of evapora-tion. One common example is water that forms on the outside of a cold cup or the moisture that forms on car windows during a cool night. Other examples of con-densation are dew, fog, clouds, and the fog you see when you breathe out on a cold day.
• You may have made a cold window “cloudy” by breathing on it and then drawn on the window with your finger. Where do you think that cloudiness comes from? Help students realize that the moisture on the window, and all of the examples of condensation they gave, comes from water vapor in the air.
• A real cloud is made up of tiny droplets of water. Where do you think they come from? The water in a cloud comes from water vapor in the air that has condensed.
Give each student an activity sheet. Have students answer questions about the demonstration on the activ-ity sheet. They will also record their observations and answer questions about the activity. The Explain It with Atoms & Molecules and Take It Further sections of the activity sheet will either be completed as a class, in groups, or individually depending on your instructions. Look at the teacher version of the activity sheet to find the questions and answers.

©2016 American Chemical Society Middle School Chemistry - www.middleschoolchemistry.com 99
EXPLORE2. Have students collect a sample of water vapor and observe the
process of condensation.
Question to investigateWhat happens when water vapor condenses?
Materials for each group • 1 short wide-rimmed clear plastic cup• 1 tall smaller-rimmed clear plastic cup• Hot water (about 50°C)• Magnifier
Procedure1. Fill a wide clear plastic cup about 2/3 full of hot tap water.
Place the tall cup upside down inside the rim of the bot-tom cup as shown.
2. Watch the cups for 1–2 minutes. 3. Use a magnifier to look at the sides and top of the top
cup. 4. Take the top cup off and feel the inside surface.
Expected resultsThe top cup will become cloudy-looking as tiny drops of liquid water collect on the inside surface of the cup.
3. Discuss with students what they think is happening inside the cups.
Ask students:• What do you think is on the inside of the top cup?
Students should agree that the inside of the top cup is coated with tiny drops of liquid water.
• How do you think the drops of water on the inside of the top cup got there? Students should realize that some of the water in the cup evaporated, filling the inside of the top cup with invisible water vapor. Some of this water vapor condensed into tiny drops of liquid water when it condensed on the inside of the top cup.
Explain that water vapor leaves the hot water and fills the space above, contacting the inside surface of the top cup. Energy is transferred from the water vapor to the cup, which cools the water vapor. When the water vapor cools enough, the attractions between the mol-ecules bring them together. This causes the water vapor to change state and become tiny drops of liquid water. The process of changing from a gas to a liquid is called condensation.
100 Middle School Chemistry - www.middleschoolchemistry.com ©2016 American Chemical Society
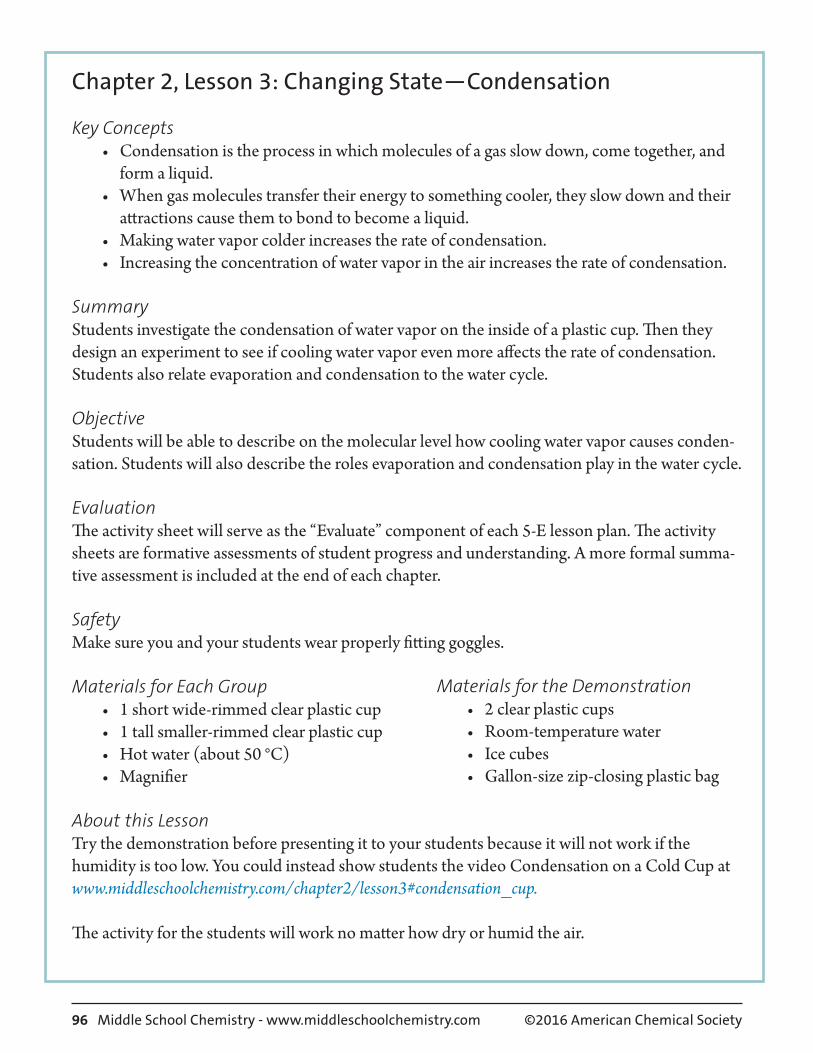
EXPLAIN4. Show an animation to help students understand what happens when gases
condense to their liquid state.
Show the animation Condensation.www.middleschoolchemistry.com/multimedia/chapter2/lesson3#condensation Explain that the fast-moving molecules of water vapor transfer their energy to the side of the cup, which is cooler. This causes the water vapor molecules to slow down. When they slow down enough, their attractions overcome their speed and they stay together as liquid water on the inside surface of the cup.
5. Discuss how to design an experiment to find out whether increased cooling of the water vapor affects the rate of condensation.
The goal of this discussion is to help students better understand the experimental design outlined in the procedure.
Ask students:How could we set up an experiment to see if making water vapor even colder affects the rate of condensation?
• How can we get the water vapor we need for this experiment? Students may suggest collecting water vapor as in the previous activity or collecting it over a pot of boiling water or some other way.
• Will we need more than one sample of water vapor? Should we cool one sample of water vapor, but not the other? Help students understand that they will need 2 samples of water vapor, only one of which is cooled.
• How will we cool the water vapor? Students may have many ideas for cooling water vapor, like placing a sample in a refrigerator or cooler filled with ice, or placing a sample of water vapor outside if the weather is cool enough.
• How will you know which sample of water vapor condensed faster? By comparing the size of the drops of water formed in both samples, students can determine whether cooling water vapor increases the rate of condensation.
©2016 American Chemical Society Middle School Chemistry - www.middleschoolchemistry.com 101
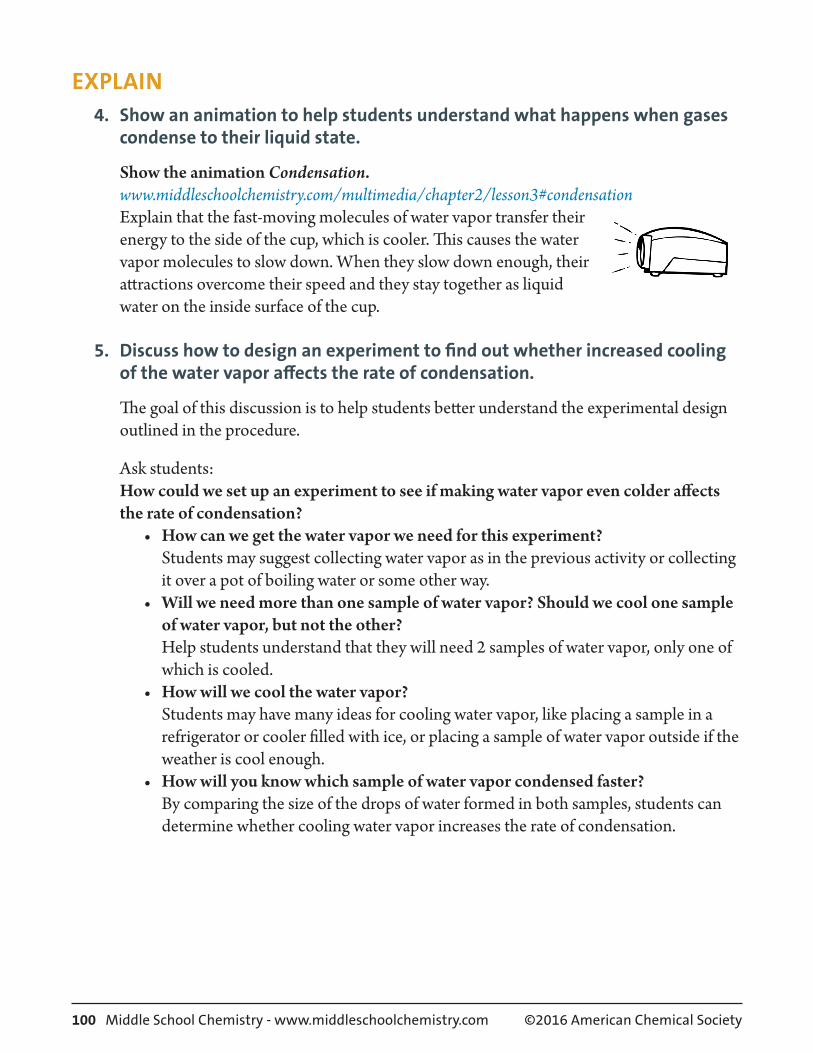
6. Have students do an activity to find out whether cooling water vapor increases the rate of condensation.
Question to investigateDoes making water vapor colder increase the rate of condensation?
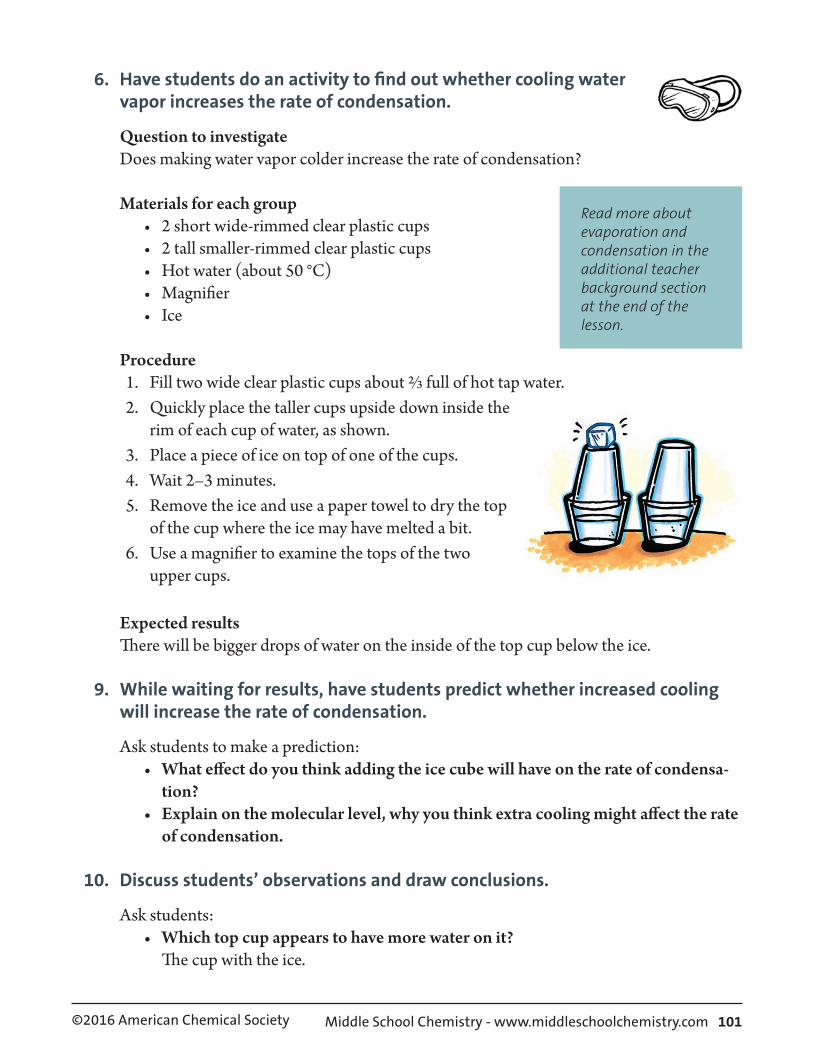
Materials for each group • 2 short wide-rimmed clear plastic cups• 2 tall smaller-rimmed clear plastic cups• Hot water (about 50 °C)• Magnifier• Ice
Procedure1. Fill two wide clear plastic cups about 2/3 full of hot tap water.2. Quickly place the taller cups upside down inside the
rim of each cup of water, as shown.3. Place a piece of ice on top of one of the cups.4. Wait 2–3 minutes.5. Remove the ice and use a paper towel to dry the top
of the cup where the ice may have melted a bit.6. Use a magnifier to examine the tops of the two
upper cups.
Expected resultsThere will be bigger drops of water on the inside of the top cup below the ice.
9. While waiting for results, have students predict whether increased cooling will increase the rate of condensation.
Ask students to make a prediction:• What effect do you think adding the ice cube will have on the rate of condensa-
tion?• Explain on the molecular level, why you think extra cooling might affect the rate
of condensation.
10. Discuss students’ observations and draw conclusions.
Ask students:• Which top cup appears to have more water on it?
The cup with the ice.
Read more about evaporation and condensation in the additional teacher background section at the end of the lesson.
102 Middle School Chemistry - www.middleschoolchemistry.com ©2016 American Chemical Society
• Why do you think the cup with the ice has bigger drops of water on the inside than the cup without ice? When the water vapor is cooled by the ice, the water molecules slow down more than in the cup without the ice. This allows their attractions to bring more mol-ecules together to become liquid water.
• Does cooling water vapor increase the rate of condensation? Yes. What evidence do you have from the activity to support your answer? Students should realize that the bigger drops of water on the top cup with the ice indicate a greater amount of condensation. Because the water vapor in both sets of cups was condensing for the same length of time, the water vapor in the cup with the bigger drops must have condensed at a faster rate.
11. Explain examples of condensation on the molecular level.
Ask students:• Fogging up a cold window
When you breathe out, there is water vapor in your breath. When you breathe on a cold window in the winter, the window gets tiny droplets of moisture on it or “fogs up.” What happens to the molecules of water vapor as they get near the cold window? The water molecules in your breath are the gas water vapor. They slow down as they transfer some of their energy to the cold window. The attractions between the slower-moving water vapor molecules bring them together to form tiny droplets of liquid water.
• Warm breath in cold air When you breathe out in the winter, you see “smoke,” which is really a fog of tiny droplets of liquid water. What happens to the molecules of water vapor from your breath when they hit the cold air? The water vapor in your breath is warmer than the outside air. The water vapor molecules transfer energy to the colder air. This makes the water vapor molecules move more slowly. Their attractions overcome their motion and they join together or condense to form liquid water.
12. Explain to students that the evaporation and condensation occur naturally in the water cycle.
Project the image Water Cycle from the activity sheet. www.middleschoolchemistry.com/multimedia/chapter2/lesson3#water_cycle One common place you see the results of evaporation and condensation is in the weather. Water vapor in the air (humidity), clouds, and rain are all the result of evaporation and condensation. What happens to the water molecules during the evaporation and conden-sation stages of the water cycle?
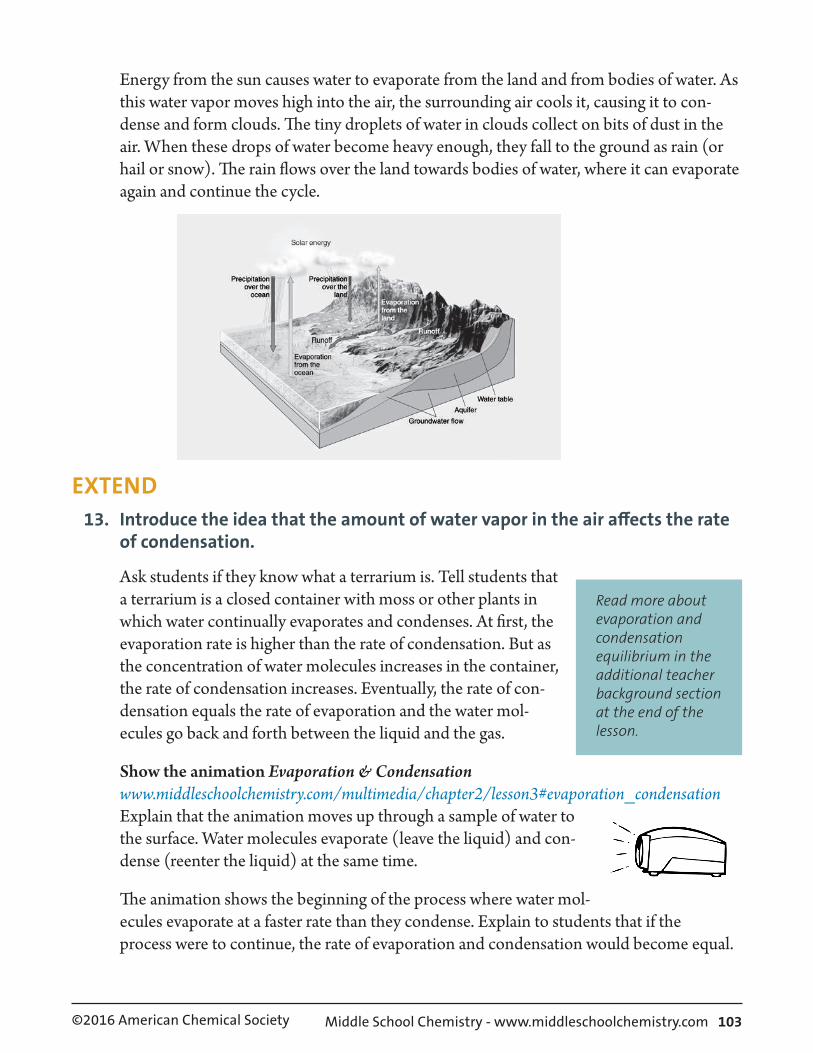
©2016 American Chemical Society Middle School Chemistry - www.middleschoolchemistry.com 103
Energy from the sun causes water to evaporate from the land and from bodies of water. As this water vapor moves high into the air, the surrounding air cools it, causing it to con-dense and form clouds. The tiny droplets of water in clouds collect on bits of dust in the air. When these drops of water become heavy enough, they fall to the ground as rain (or hail or snow). The rain flows over the land towards bodies of water, where it can evaporate again and continue the cycle.
EXTEND 13. Introduce the idea that the amount of water vapor in the air affects the rate
of condensation.
Ask students if they know what a terrarium is. Tell students that a terrarium is a closed container with moss or other plants in which water continually evaporates and condenses. At first, the evaporation rate is higher than the rate of condensation. But as the concentration of water molecules increases in the container, the rate of condensation increases. Eventually, the rate of con-densation equals the rate of evaporation and the water mol-ecules go back and forth between the liquid and the gas.
Show the animation Evaporation & Condensationwww.middleschoolchemistry.com/multimedia/chapter2/lesson3#evaporation_condensationExplain that the animation moves up through a sample of water to the surface. Water molecules evaporate (leave the liquid) and con-dense (reenter the liquid) at the same time.
The animation shows the beginning of the process where water mol-ecules evaporate at a faster rate than they condense. Explain to students that if the process were to continue, the rate of evaporation and condensation would become equal.
Read more about evaporation and condensation equilibrium in the additional teacher background section at the end of the lesson.
104 Middle School Chemistry - www.middleschoolchemistry.com ©2016 American Chemical Society
So temperature isn’t the only factor that affects condensation. The concentration of water molecules in the air is also an important factor. The higher the concentration of water molecules in the air (humidity), the higher the rate of condensation.
This is why clothes dry more slowly on a humid day. The high concentration of water vapor in the air causes water to condense on the clothes. So even though water is evapo-rating from the clothes, it is also condensing on them and slowing down the drying.
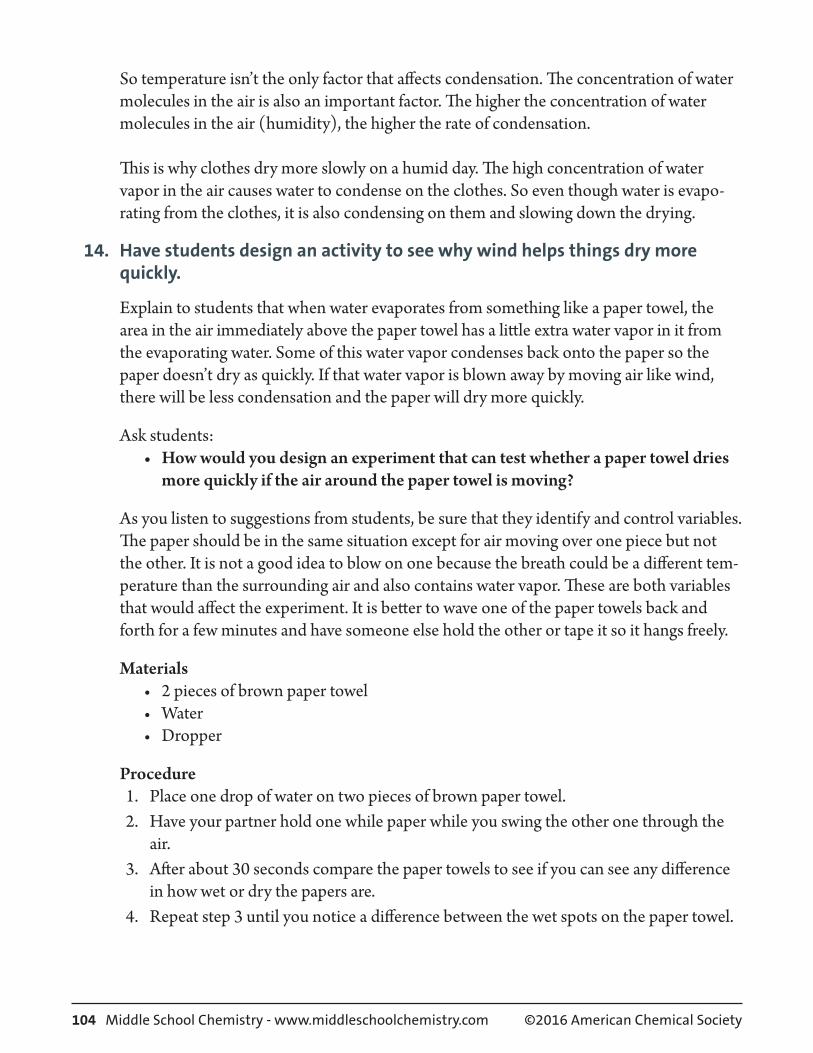
14. Have students design an activity to see why wind helps things dry more quickly.
Explain to students that when water evaporates from something like a paper towel, the area in the air immediately above the paper towel has a little extra water vapor in it from the evaporating water. Some of this water vapor condenses back onto the paper so the paper doesn’t dry as quickly. If that water vapor is blown away by moving air like wind, there will be less condensation and the paper will dry more quickly.
Ask students:• How would you design an experiment that can test whether a paper towel dries
more quickly if the air around the paper towel is moving?
As you listen to suggestions from students, be sure that they identify and control variables. The paper should be in the same situation except for air moving over one piece but not the other. It is not a good idea to blow on one because the breath could be a different tem-perature than the surrounding air and also contains water vapor. These are both variables that would affect the experiment. It is better to wave one of the paper towels back and forth for a few minutes and have someone else hold the other or tape it so it hangs freely.
Materials• 2 pieces of brown paper towel• Water• Dropper
Procedure1. Place one drop of water on two pieces of brown paper towel.2. Have your partner hold one while paper while you swing the other one through the
air.3. After about 30 seconds compare the paper towels to see if you can see any difference
in how wet or dry the papers are.4. Repeat step 3 until you notice a difference between the wet spots on the paper towel.

©2016 American Chemical Society Middle School Chemistry - www.middleschoolchemistry.com 105
Expected resultsThe water on the paper towel with more air moving over it should dry faster than the other paper towel on the table. The paper towel on the table had air with a little more humidity over it condensing back onto the paper. This slowed down the drying process. The paper waved in the air didn’t have humid air around it and condensing back on it as much so it dried more quickly.
EXTRA EXTEND 15. Use the processes of evaporation and condensation to purify water.
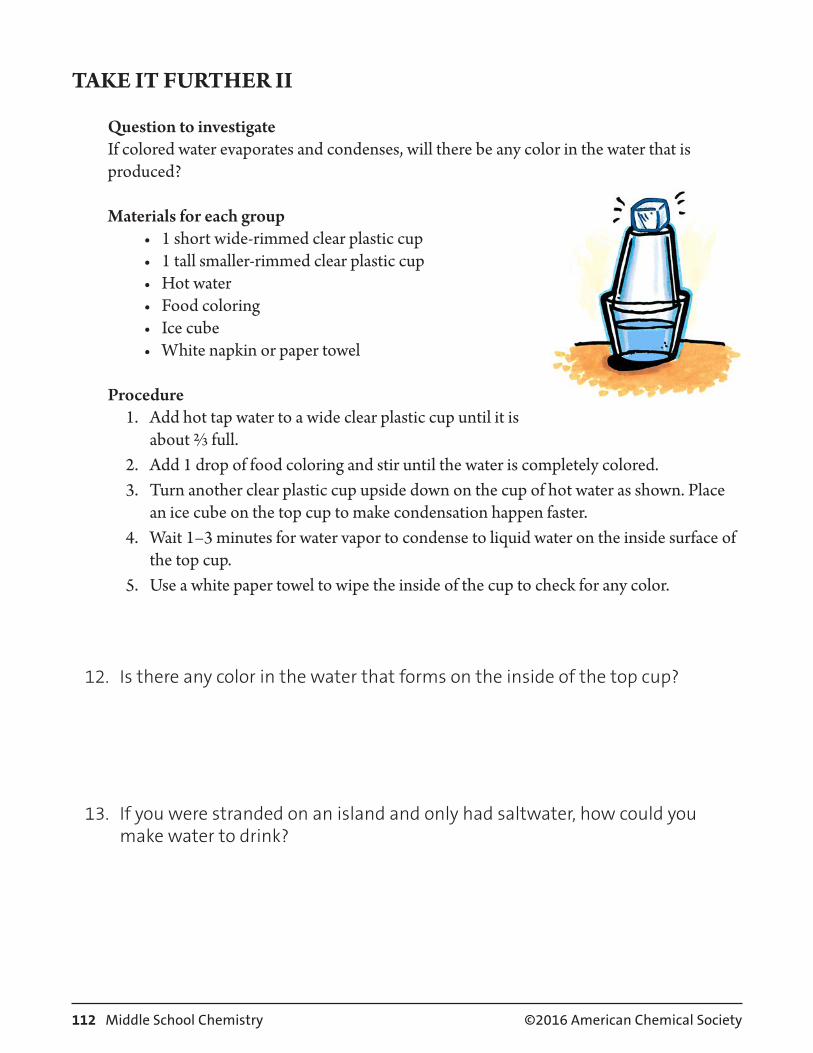
Evaporation and condensation can be used to purify water. Imagine what might happen if colored water evaporates and then condenses.
Question to investigateIf colored water evaporates and condenses, will there be any color in the water that is produced?
Materials for each group• 1 short wide-rimmed clear plastic cup• 1 tall smaller-rimmed clear plastic cup• Hot water• Food coloring• Ice cube• White napkin or paper towel
Procedure1. Add hot tap water to a wide clear plastic cup until it is
about 2/3 full.2. Add 1 drop of food coloring and stir until the water is completely colored.3. Turn another clear plastic cup upside down on the cup of hot water as shown. Place
an ice cube on the top cup to make condensation happen faster.4. Wait 1–3 minutes for water vapor to condense to liquid water on the inside surface of
the top cup. 5. Use a white paper towel to wipe the inside of the cup to check for any color.
Expected resultsThe water that collects on the inside of the top cup will be colorless. The color will remain in the bottom cup.
Explain that the process described in the procedure is called distillation. During distilla-tion, water that has substances dissolved in it can be purified (as long as these substances don’t easily evaporate). When the water evaporates and condenses, the food coloring is left behind and the pure water can be collected and used.

106 Middle School Chemistry ©2016 American Chemical Society
Activity Sheet Name __________________Chapter 2, Lesson 3Changing State—Condensation Date ___________________
DEMONSTRATION
1. Your teacher showed you two cups of water with ice in them. One cup was in a bag with as much air taken out as possible. The other cup was left out in the air. After a few minutes, water was on the outside of the cup left in the air. Much less water was on the outside of the cup in the bag. Why do you think the cup that is exposed to more air has water on the outside of it?
2. Condensation happens when water molecules in the air slow down so much that their attractions overcome their speed. This makes them join together, forming liquid water. List two common examples of condensation.

©2016 American Chemical Society Middle School Chemistry 107
ACTIVITY
Question to investigateWhat happens when water vapor condenses?
Materials for each group• 1 short wide-rimmed clear plastic cup• 1 tall smaller-rimmed clear plastic cup• Hot water (about 50 °C)• Magnifier
Procedure1. Fill a wide clear plastic cup about 2/3 full of hot tap water.
Place the tall cup upside down inside the rim of the bot-tom cup as shown.
2. Watch the cups for 1–2 minutes. 3. Use a magnifier to look at the sides and top of the top
cup. 4. Take the top cup off and feel the inside surface.
WHAT DID YOU OBSERVE?
3. After a couple of minutes, what did you observe on the inside of the top cup?
4. How could the tiny drops of water get to the inside of the top cup? Use ideas about evaporation and condensation in your explanation.

108 Middle School Chemistry ©2016 American Chemical Society
ACTIVITY
Question to investigateDoes making water vapor colder increase the rate of condensation?
Materials for each group • 2 short wide-rimmed clear plastic cups• 2 tall smaller-rimmed clear plastic cups• Hot water• Magnifier• Ice
Procedure1. Fill two wide clear plastic cups about 2/3 full of
hot tap water.2. Quickly place the taller cups upside down inside
the rim of each cup of water, as shown.3. Place a piece of ice on top of one of the cups.4. Wait 2–3 minutes.5. Remove the ice and use a paper towel to dry the
top of the cup where the ice may have melted a bit.6. Use a magnifier to examine the tops of the two upper cups.
WHAT DID YOU OBSERVE?
5. Does cooling water vapor increase the rate of condensation? What evidence do you have from the activity to support your answer?

©2016 American Chemical Society Middle School Chemistry 109
EXPLAIN IT WITH atoms & MOLECULES
6. The animation showed water molecules as a gas condensing to form liquid water on the inside of the top cup. Since the water molecules were all sepa-rated as a gas, why did they come together to form a liquid?
7. Why do you think the cup with the ice has bigger drops of water on the inside than the cup without ice?
TAKE IT FURTHER
Fogging up a cold window
8. When you breathe on a cold window in the winter, the window gets tiny droplets of moisture on it or “fogs up.” Using what you know about condensa-tion, explain why you think the cold window gets foggy. Hint: There is water vapor in your breath.

110 Middle School Chemistry ©2016 American Chemical Society
Warm breath in cold air
9. When you breathe out in the winter, you see “smoke,” which is really tiny droplets of liquid water. Using what you know about condensation, explain why you think this happens.
Evaporation and condensation in the water cycle
10. One common place you see the results of condensation is in the weather. Water vapor in the air (humidity), clouds, and rain are all the result of evapo-ration and condensation.
Using what you know about evaporation and condensation, explain what causes rain.

©2016 American Chemical Society Middle School Chemistry 111
TAKE IT FURTHER
Question to investigateWhy do damp things dry more quickly on a windy day?
Materials• 2 pieces of brown paper towel• Water• Dropper
Procedure1. Place one drop of water on two pieces of brown paper towel.2. Have your partner hold one while paper while you swing the other one through the
air.3. After about 30 seconds compare the paper towels to see if you can see any difference
in how wet or dry the papers are.4. Repeat step 3 until you notice a difference between the wet spots on the paper towel.
11. Why does moving air over a wet surface make it dry more quickly?Hint: your answer should mention both evaporation and condensation.
112 Middle School Chemistry ©2016 American Chemical Society
TAKE IT FURTHER II
Question to investigateIf colored water evaporates and condenses, will there be any color in the water that is produced?
Materials for each group• 1 short wide-rimmed clear plastic cup• 1 tall smaller-rimmed clear plastic cup• Hot water• Food coloring• Ice cube• White napkin or paper towel
Procedure1. Add hot tap water to a wide clear plastic cup until it is
about 2/3 full.2. Add 1 drop of food coloring and stir until the water is completely colored.3. Turn another clear plastic cup upside down on the cup of hot water as shown. Place
an ice cube on the top cup to make condensation happen faster.4. Wait 1–3 minutes for water vapor to condense to liquid water on the inside surface of
the top cup. 5. Use a white paper towel to wipe the inside of the cup to check for any color.
12. Is there any color in the water that forms on the inside of the top cup?
13. If you were stranded on an island and only had saltwater, how could you make water to drink?

©2016 American Chemical Society Middle School Chemistry - www.middleschoolchemistry.com 113
Additional Teacher BackgroundChapter 2, Lesson 3, p. 99
Exploring evaporation and condensation gives middle school students an opportunity to under-stand some common phenomena on the molecular level. It can also give you an opportunity to review and better understand some big ideas in chemistry and physical science that are relevant to evaporation and condensation as well as other contexts in chemistry.
Big idea 1:If two atoms or molecules, like water molecules, are attracted to each other and are “bonded”, it takes energy to pull them apart. If two atoms or molecules are attracted to each other and are not bonded, energy is released when they come together and bond. In chemistry, this concept is often stated as:
It takes energy to break bonds.Energy is released when bonds are formed.
Note: In the context of evaporation and condensation, the use of the term “bond” refers to the interaction and close association between water molecules. It does not refer to the covalent bond which holds the oxygen atom and the hydrogen atoms together within the water molecule. The bond breaking and bond making involved in evaporation and condensation deals with the attrac-tions and interactions between water molecules.
Big idea 2:Another big idea is that the energy atoms and molecules have based on their motion is called kinetic energy. The energy they have based on their attraction to each other is called potential energy.
Big idea 3:This is like a combination of Big ideas 1 and 2. When we say it takes energy to break bonds and energy is released when bonds are formed, it really means energy is converted between kinetic and potential energy. For example, it takes a certain amount of kinetic energy to separate two water molecules. When they are separated, the kinetic energy used to separate them is converted to the potential energy of attraction between them. If they come together again, this potential energy is converted back to kinetic energy. Energy is not created or destroyed; it is converted from one form to another.
These ideas can help explain why evaporation has a cooling effect and condensation has a warm-ing effect.

114 Middle School Chemistry - www.middleschoolchemistry.com ©2016 American Chemical Society
Think about a single water molecule in a sample of water. Assume that the molecule has aver-age kinetic energy. This molecule gets hit by some fast-moving water molecules and gains some extra kinetic energy. The water molecule now has above-average kinetic energy. This extra kinetic energy is “used” to break its “bonds” to other water molecules causing it to evaporate. This extra kinetic energy is converted to potential energy of attraction between the water molecule as a gas and the other water molecules in the liquid. The extra kinetic energy is not in the water anymore so the temperature of the water decreases.
Now imagine that same water molecule as a molecule of water vapor with average kinetic energy. As this molecule is attracted to other water molecules its potential energy decreases while its kinetic energy increases. The water molecule now has above-average kinetic energy. It hits other water molecules and transfers this extra kinetic energy to them which enables it to bond to other water molecules. The extra kinetic energy is now in the water so the temperature of the water increases.

©2016 American Chemical Society Middle School Chemistry - www.middleschoolchemistry.com 115
Additional Teacher BackgroundChapter 2, Lesson 3, p. 101Dynamic equilibrium
It is common to see a puddle of water or wet clothes dry up from evaporation. It is also common to see water vapor condense on a cold surface to form liquid water. In both these cases, there is a net change in one direction—either from a liquid to a gas (evaporation) or from a gas to a liquid (condensation).
But under certain conditions, evaporation and condensation balance each other so there is no net change in either direction. The classic example is water placed in a closed container at room tem-perature. Even at room temperature, some fraction of the water molecules at the surface will gain enough energy from other molecules to evaporate and will enter the air inside the container. And some fraction of these water vapor molecules will lose enough energy to molecules at the surface to condense and become part of the liquid water.
At first, there are not many molecules of water vapor so the rate of condensation is slower than the rate of evaporation. But as more molecules evaporate, the concentration of molecules in the vapor increases and more molecules are available to condense to liquid water. Eventually, the air inside the container has enough water vapor molecules that the number losing energy and con-densing equals the number gaining energy and evaporating. At this point, the air in the container is saturated and has a 100% relative humidity and evaporation and condensation are in equilib-rium. Even though there is no net change, evaporation and condensation are still occurring. For this reason, the equilibrium is referred to as a dynamic equilibrium.
Dynamic equilibrium at different temperatures
Evaporation and condensation achieve a dynamic equilibrium at any temperature. For exam-ple, if the room temperature container in the above example is cooled, the rate of evaporation decreases. This means that the rate of condensation is greater than the rate of evaporation. But as more water vapor molecules condense, there are fewer water vapor molecules in the air and the rate of condensation slows down. Eventually, the rate of condensation and evaporation become equal at the lower temperature with fewer water molecules evaporating and condensing than at room temperature.
If the temperature of the container was now increased above room temperature, the rate of evap-oration would again be greater than the rate of condensation. But as more water vapor molecules entered the air in the container, the rate of condensation would increase. Eventually, the rate of evaporation and condensation would become equal at the higher temperature with more water molecules evaporating and condensing than at room temperature.
116 Middle School Chemistry - www.middleschoolchemistry.com ©2016 American Chemical Society
Chapter 2, Lesson 4: Changing State—Freezing
Key Concepts• Freezing is the process that causes a substance to change from a liquid to a solid.• Freezing occurs when the molecules of a liquid slow down enough that their attractions
cause them to arrange themselves into fixed positions as a solid.
SummaryStudents will mix ice and salt in a metal can to make it very cold. They will then see liquid water and ice form on the outside of the can. Students will watch an animation of water molecules arranged as ice.
ObjectiveStudents will be able to explain on the molecular level why a low enough temperature can cause the water vapor in air to condense to liquid water and then freeze to form ice.
EvaluationThe activity sheet will serve as the “Evaluate” component of each 5-E lesson plan. The activity sheets are formative assessments of student progress and understanding. A more formal summa-tive assessment is included at the end of each chapter.
SafetyMake sure you and your students wear properly fitting goggles.
Materials for Each Group• Empty clean metal soup can • Salt• Ice• Metal spoon or sturdy stick• Teaspoon• Paper towel
Materials for the Teacher• Pliers• Duct tape
About this LessonIf the level of humidity in your classroom is too low, you cannot do the activities in the Explore section of this lesson. However, you can still teach the lesson by showing students the video Ice on a Can. It may be helpful to show students the difference in your results: www.middleschoolchemistry.com/chapter2/lesson4#ice_can

©2016 American Chemical Society Middle School Chemistry - www.middleschoolchemistry.com 117
ENGAGE1. Show students that liquid water expands when it freezes to become solid ice.
Teacher Preparation• Place 50 milliliters of water into a plastic 100 ml graduated cylinder and place it in
the freezer over night. • The next day, bring it into class and show students that the level of ice is higher
than the level of water you started with. Explain to students that as water freezes, it expands and takes up more space than it did as liquid water.
Show the movie Ice Bombwww.middleschoolchemistry.com/multimedia/chapter2/lesson4#ice_bombThis video is from the Chemistry Comes Alive! series and is used with permission from the Division of Chemical Education of the American Chemical Society.
Ask students:• Why do you think freezing water in the metal container caused it to burst?
Water molecules move further apart when water freezes. This movement caused the metal container to burst.
• Why are roads likely to develop potholes during cold winters? Hint: Think about what happened to the metal container. When water gets in small cracks in the road and freezes it expands and breaks the asphalt. When this continues to happen below the surface, it eventually forms a pothole.
Ask students:• What do you think happens to water molecules when liquid water changes to
solid ice? Students learned that when water vapor is cooled, attractions between water mol-ecules cause them to condense and become liquid water. Students may say that the water molecules slow down enough that their attractions hold them together as ice.
Note: Students may say that water molecules get closer together to form ice. Water is unusual because its molecules move further apart when it freezes. The molecules of just about every other substance move closer together when they freeze. This will be covered in more detail in Chapter 3, Density.
Give each student an activity sheet. Students will record their observations and answer questions about the activity on the activity sheet. The Explain It with Atoms & Molecules and Take It Further sections of the activity sheet will either be completed as a class, in groups, or individually depending on instructions. Look at the teacher guide to find the questions and answers.

118 Middle School Chemistry - www.middleschoolchemistry.com ©2016 American Chemical Society
EXPLORE2. Have students chill a metal can so that ice forms on it.
Question to investigateHow can you make the water vapor in air condense and then freeze?
Materials for each group• Empty clean metal soup can • Salt• Ice• Metal spoon or sturdy stick• Teaspoon• Paper towel
Materials for the teacher• Pliers• Duct tape
Teacher preparationUse pliers to bend sharp edges on the can down. Then cover the rim with 2–3 layers of duct tape to prevent possible injuries.
Procedure1. Dry the outside of a can with a paper towel.2. Place 3 heaping teaspoons of salt in the bottom of the
can. Fill the can about halfway with ice. 3. Add another 3 heaping teaspoons of salt. 4. Add more ice until the can is almost filled and add
another 3 teaspoons of salt. 5. Hold the can securely and mix the ice-salt mixture
with a metal spoon or sturdy stick for about 1 min-ute. Remove the spoon, and observe the outside of the can. Do not touch it yet.
6. Wait 3–5 minutes. While you wait, watch the anima-tions.
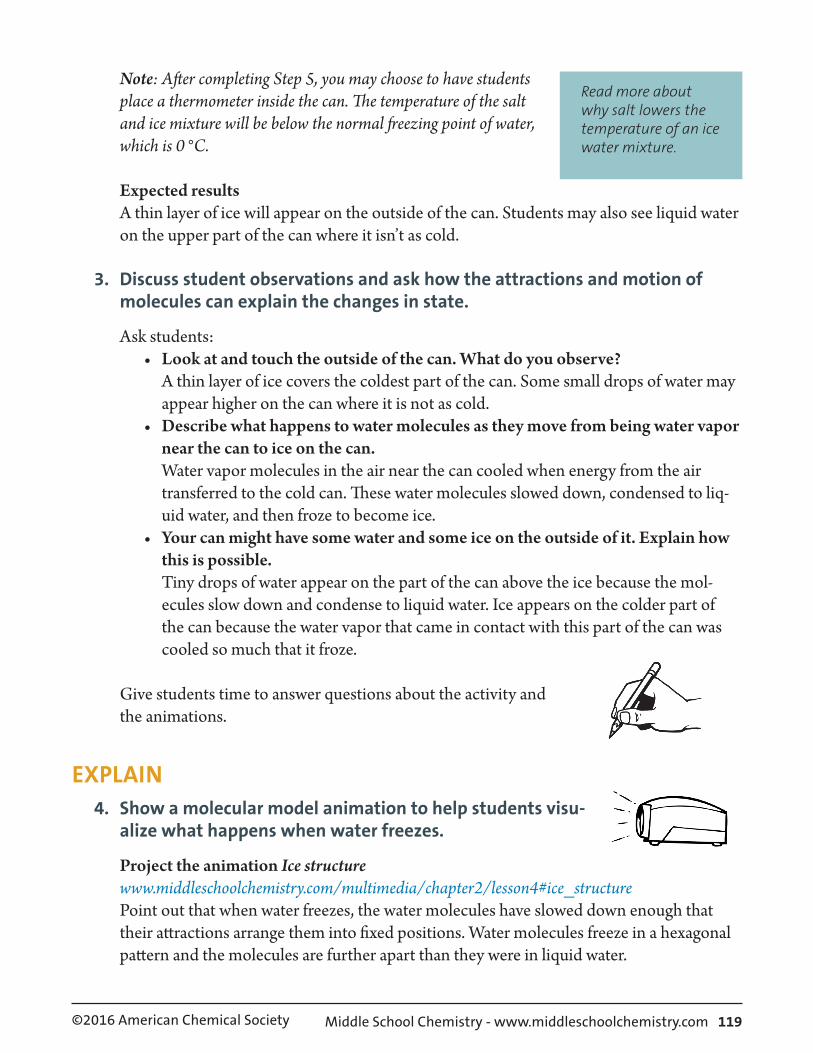
©2016 American Chemical Society Middle School Chemistry - www.middleschoolchemistry.com 119
Note: After completing Step 5, you may choose to have students place a thermometer inside the can. The temperature of the salt and ice mixture will be below the normal freezing point of water, which is 0 °C.
Expected resultsA thin layer of ice will appear on the outside of the can. Students may also see liquid water on the upper part of the can where it isn’t as cold.
3. Discuss student observations and ask how the attractions and motion of molecules can explain the changes in state.
Ask students:• Look at and touch the outside of the can. What do you observe?
A thin layer of ice covers the coldest part of the can. Some small drops of water may appear higher on the can where it is not as cold.
• Describe what happens to water molecules as they move from being water vapor near the can to ice on the can. Water vapor molecules in the air near the can cooled when energy from the air transferred to the cold can. These water molecules slowed down, condensed to liq-uid water, and then froze to become ice.
• Your can might have some water and some ice on the outside of it. Explain how this is possible. Tiny drops of water appear on the part of the can above the ice because the mol-ecules slow down and condense to liquid water. Ice appears on the colder part of the can because the water vapor that came in contact with this part of the can was cooled so much that it froze.
Give students time to answer questions about the activity and the animations.
EXPLAIN 4. Show a molecular model animation to help students visu-
alize what happens when water freezes.
Project the animation Ice structurewww.middleschoolchemistry.com/multimedia/chapter2/lesson4#ice_structurePoint out that when water freezes, the water molecules have slowed down enough that their attractions arrange them into fixed positions. Water molecules freeze in a hexagonal pattern and the molecules are further apart than they were in liquid water.
Read more about why salt lowers the temperature of an ice water mixture.

120 Middle School Chemistry - www.middleschoolchemistry.com ©2016 American Chemical Society
Note: The molecules in ice would be vibrating. The vibrations are not shown here but are shown on the next animation.
Project the animation Ice different angleswww.middleschoolchemistry.com/multimedia/chapter2/lesson4#ice_at_different_angles
Explain that this animation shows different views of the ice crystal. Point out that even though the ice is cold the molecules still have motion. They vibrate but cannot move past one another.
5. Have students compare molecular models of liquid water and ice.
Project the image Water and Icewww.middleschoolchemistry.com/multimedia/chapter2/lesson5#ice_and_waterzx
Ask students: • What are some of the differences between liquid water and solid ice?
The molecules in liquid water are closer together than they are in ice. Compared to other substances, water is unusual in this way. The molecules in the liquid are moving past one another. The hydrogen end of one water molecule is attracted to the oxygen end of anoth-er but only for a short time because they are moving.
The molecules in ice are further apart than in liquid water. This is why ice floats in water. The molecules in ice are in fixed positions but still vibrate.
6. Have each group arrange their water molecules into a six-sided ring of ice.
Students do not need to orient the molecules exactly as they are in the space-filling model but they should try to have a hydrogen atom of one molecule near an oxygen atom of another. Ask students to handle their models gently because they will need them for other lessons.

©2016 American Chemical Society Middle School Chemistry - www.middleschoolchemistry.com 121
7. Discuss why different liquids have different freezing points.
Tell students that the temperature at which a substance freezes is called the freezing point. The freezing point of water is 0 °C (32 °F). Corn oil and isopropyl alcohol have lower freezing points than water. This means that they need to be cooled to lower temperatures to make them freeze.
Water 0 °CCorn oil about –20 °C
Isopropyl alcohol –88.5 °C
Ask students:• Why do you think different liquids have different freezing points?
Help students realize that each liquid is made up of different molecules. The molecules of a liquid are attracted to each other by different amounts. The mole-cules have to slow down to different levels before their attractions can take hold and organize them into fixed positions as a solid.
8. Have students consider the freezing point of a gas.
Tell students that the air around them is made of different kinds of gases. The attractions between the molecules of gases in air (except water vapor) are so weak that they need to be cooled to very low temperatures in order to condense to a liquid or freeze to a solid.
Nitrogen gas makes up about 80% of the air. If nitrogen is made cold enough, the weak attractions between its molecules can cause it to condense to a liquid. Nitrogen condenses to a liquid at –196 °C and it freezes at –210 °C.
Show the video Liquid Nitrogen.Have students observe how cold liquid nitrogen is by watching the following video.www.middleschoolchemistry.com/multimedia/chapter2/lesson4#liquid_nitrogen
EXTEND 9. Show some pictures of frost and introduce how substances can sometimes
change directly from a gas to a solid.
Tell students that under some conditions a gas can turn directly to a solid without going through the liquid phase. Explain that this process is called deposition. Some of the ice that formed on the outside of the can may have been a result of deposition.

122 Middle School Chemistry - www.middleschoolchemistry.com ©2016 American Chemical Society
Project the image Frost.www.middleschoolchemistry.com/multimedia/chapter2/lesson4#frostTell students that the frost that forms on the ground, windows, or grass in winter is formed by deposition.
Give students time to answer questions about freezing points, nitrogen, and deposition to complete their activity sheets for this lesson.
You could also show students images of snowflakes from www.its.caltech/~atomic/snowcrystals and the video of a snowflake forming athttp://www.its.caltech.edu/~atomic/snowcrystals/movies/movies.htm.
Read more about how changes of state relate to the weather, in the additional teacher background section at the end of this lesson.

©2016 American Chemical Society Middle School Chemistry 123
Activity Sheet Name __________________Chapter 2, Lesson 4Changing State—Freezing Date ___________________
DEMONSTRATION
1. In the video, you saw a round metal container filled with water and placed in a very cold liquid mixed with dry ice. What happened when the water inside the container froze? What caused this to happen?
2. Use the example of what happens to the metal container to explain why roads are likely to develop potholes during cold winters?
ACTIVITY
Question to investigateHow can you make the water vapor in air condense and then freeze?
Materials for each group• Empty clean metal can • Salt• Ice• Metal spoon or sturdy stick• Teaspoon• Paper towel
Procedure1. Dry the outside of a can with a paper towel.2. Place 3 heaping teaspoons of salt in the bottom of the
can. Fill the can about halfway with ice. 3. Add another 3 heaping teaspoons of salt. 4. Add more ice until the can is almost filled and add
another 3 teaspoons of salt.

124 Middle School Chemistry ©2016 American Chemical Society
5. Hold the can securely and mix the ice-salt mixture with a metal spoon or sturdy stick for about 1 min-ute. Remove the spoon, and observe the outside of the can. Do not touch it yet.
6. Wait 3–5 minutes. Watch the animations while you wait.
EXPLAIN IT WITH ATOMS & MOLECULES
3. Look at and touch the outside of the can. What do you observe?
4. Describe what happened to the water vapor in the air when it came in con-tact with the cold surface of the can. Be sure to mention how the molecules change speed and how they are attracted to each other.
5. Your can might have some water and some ice on the outside of it. Explain how this can be possible.
6. You have seen molecular model animations of water and ice. Fill out the chart to compare how the molecules move in water and ice. Select one of the options in each row and write it under “water” or “ice” in the chart.

©2016 American Chemical Society Middle School Chemistry 125
Compare molecules in water and ice
Water Ice
Speed of molecules faster
slower
Amount of movementremain in fixed positions
move past each other
Arrangement of moleculesvery organized
random and unorganized
Distance between moleculescloser together
slightly further apart
7. Write captions under the pictures to explain how the movement and position of molecules changes as the water freezes to become ice.

126 Middle School Chemistry ©2016 American Chemical Society
8. The temperature at which a substance freezes is called the freezing point. Different liquids have different freezing points. Here are a few examples.
Water 0 °C
Corn oil about –20 °C
Isopropyl alcohol –88.5 °C
Why do you think different liquids have different freezing points?
9. Nitrogen is a gas at room temperature. It needs to be cooled to –196 °C to condense to a liquid and freezes at –210 °C. Do you think the attractions between nitrogen molecules are strong or weak? Why?
TAKE IT FURTHER
10. Freezing is the process that occurs when a liquid changes to a solid. Frost forms through a process called deposition. What happens during the process of deposition?

©2016 American Chemical Society Middle School Chemistry - www.middleschoolchemistry.com 127
Additional Teacher BackgroundChapter 2 Lesson 4, p. 116
Why does salt make ice colder?
There is a principle in chemistry that comes up in several different contexts. The simple version is that:
• It takes energy to break bonds• Energy is released when bonds are formed.
These ideas can be used to help explain why the temperature decreases when salt is added to ice.
If an ice-and-water mixture is placed in a well-insulated container, some ice melts but some water also freezes. The breaking of “bonds” between water molecules to melt the ice uses some energy so the process of melting makes the ice/water mixture colder. But the making of “bonds” between water molecules to form ice is energy-releasing so the process of freezing makes the ice/water mixture warmer. When these two processes happen at the same rate, the ice/water mix-ture stays at the same temperature. But when salt is added, it dissolves into the water and forms a salt water solution. The salt water does not refreeze as fast as the rate at which the ice melts. The energy used to melt the ice is not balanced by an equal amount of energy released by freezing so the ice/saltwater solution gets colder.
This would actually work with any substance that dissolves well in cold water. Salt dissolves pretty well in cold water and is pretty cheap, so it is a popular choice.

128 Middle School Chemistry - www.middleschoolchemistry.com ©2016 American Chemical Society
Additional Teacher BackgroundChapter 2, Lesson 4, p. 120
Relative humidityOne condition that you often hear in the weather report is relative humidity. Relative humidity is reported as a percentage, but a percentage of what? As you know, humidity refers to the amount of water vapor in the air. Relative humidity is the amount of water vapor in the air compared to, or relative to, the maximum amount the air could “hold” at that temperature.
For example, let’s say the relative humidity is 50% at a temperature of 60 °F. This means that the concentration of water vapor in the air is 50% of the maximum it could hold at that temperature. Since water vapor condenses more readily at lower temperatures, it can hold more water at higher temperatures. This means that air with a relative humidity of 50% at 80 °F would have more water vapor in it than air with a relative humidity of 50% at 60 °F.
Dew pointAnother condition in the weather report is dew point. Dew point is like the opposite of relative humidity. It is the temperature that it would need to be for the amount of water vapor in the air to condense.
For example, if the air had a certain concentration of water vapor, it might condense at 40 °F. Then the dew point would be 40 degrees. But if the air contained more water vapor, it might con-dense at 45 degrees so this temperature would be the dew point.
Conditions for frostWhen the relative humidity is low, the temperature required to make the water vapor in the air condense (dew point) is low. When a surface is at or below the dew point and the dew point is at or below the freezing point for water, frost can form on that surface.

©2016 American Chemical Society Middle School Chemistry - www.middleschoolchemistry.com 129
Chapter 2, Lesson 5: Changing State—Melting
Key Concepts• Melting is a process that causes a substance to change from a solid to a liquid.• Melting occurs when the molecules of a solid speed up enough that the motion over-
comes the attractions so that the molecules can move past each other as a liquid.
SummaryStudents will see a small piece of ice melt on an aluminum surface. Based on what they have cov-ered in Chapters 1 and 2, students will explain the energy transfer and molecular motion which cause the change in state from a solid to a liquid. Students will see and discuss an animation of ice melting and compare the state changes of water to the state changes of other substances. They will also investigate sublimation of dry ice through a teacher demonstration, or video if dry ice is not readily available.
ObjectiveStudents will be able to explain on the molecular level the process of heat transfer and molecular motion that causes a solid to melt to form a liquid. Students will also be able to explain how the arrangement of water molecules is different from most other substances when it changes state from a solid to a liquid.
EvaluationThe activity sheet will serve as the “Evaluate” component of each 5-E lesson plan. The activity sheets are formative assessments of student progress and understanding. A more formal summa-tive assessment is included at the end of each chapter.
SafetyMake sure you and your students wear properly fitting goggles.
Materials for Each Group• 2 small pieces of ice• 2 small clear plastic cups• Water
Materials for the Demonstration• Ice• Dry ice• Brown paper towel• Cold water• Hot water

130 Middle School Chemistry - www.middleschoolchemistry.com ©2016 American Chemical Society
ENGAGE1. Have students watch a small piece of ice melting.
Show students the video Ice Melting on Different Surfaces. www.middleschoolchemistry.com/multimedia/chapter2/lesson5#ice_melting_on_different_surfacesIn this video, ice is placed on two similar-looking black surfaces—one aluminum and the other plastic. The ice melts faster on the aluminum because it is a better thermal conduc-tor than the plastic.
2. Discuss student observations.
Ask students:• Where do you think the energy came from to
melt the ice? The energy comes from the air and from the sur-face that the ice is placed on, both of which are at room temperature. Since room temperature is warmer than the temperature of the ice, energy is transferred from the surface and the air to the ice.
• What do you think happened to the speed of the molecules in the ice when it was heated? The water molecules moved faster.
Give each student an acitivty sheet. Students will record their observations and answer questions about the activity on the activity sheet. The Explain It with Atoms & Molecules and Take It Further sections of the activity sheet will either be completed as a class, in groups, or individually depending on your instructions. Look at the teacher version of the activity sheet to find the questions and answers.
Give students time to answer the first two questions on the activity sheet.
EXPLORE3. Have students explore how to make ice melt faster.
Introduce the question to investigate:• How can you make the ice melt faster?

©2016 American Chemical Society Middle School Chemistry - www.middleschoolchemistry.com 131
Help students plan and conduct their experiment by asking:• How could you set up an experiment to test your method?
Students might suggest breathing on the ice, holding it in their hand, or placing the ice in room-temperature or warm water. Any of these methods are fine, but try to have students think about including a control as part of the experiment. In each case, they would need two similar size pieces of ice—one that they warm in some way and one that they don’t.
Here is one method students could try.
Question to investigateWill placing ice in water make ice melt faster?
Materials• 2 small pieces of ice• 2 small clear plastic cups• Water
Procedure1. Add room-temperature water to a cup
until it is about ½-full.2. Place a small piece of ice in the water and
another small piece of ice in a cup with-out water.
Expected resultsThe ice placed in the water will melt faster than the ice in air. Since the water and the air are both at room temperature, it may not be obvious why the ice melts faster in the water. There are so many more molecules in the water that can contact the ice that the transfer of heat to the ice is much more efficient and faster in the water than in the air.
Give students time to write their procedure and answer the question on the activity sheet.
EXPLAIN 4. Show an animation of ice melting.
Show the animation Melting Ice.www.middleschoolchemistry.com/multimedia/chapter2/lesson5#melting_ice

132 Middle School Chemistry - www.middleschoolchemistry.com ©2016 American Chemical Society
Point out that the water molecules in ice vibrate but don’t move past each other. As the temperature increases they begin to vibrate more. Eventually their movement overcomes their attractions and they can no longer stay in their orderly crystal structure. As the ice melts, the orderly arrangement collapses and the water molecules move past each other and actually get closer together as liquid water.
Project the image Ice and WaterAsk students
• How did the motion and arrangement of the water molecules change as the ice melted? As energy is transferred to the water molecules in the ice, the motion of the mole-cules increases. The motion of the molecules increases enough that it overcomes the attractions the water molecules have for each other causing the ice to melt.
5. Compare the motion and arrangement of the molecules of a substance (not water) for each state of matter.
Project the image States of Matter. www.middleschoolchemistry.com/multimedia/chapter2/lesson5#states_of_matterExplain that the diagram illustrates the motion and arrangement of atoms or molecules in a single substance (not water) when it changes between a solid, liquid, and gas.
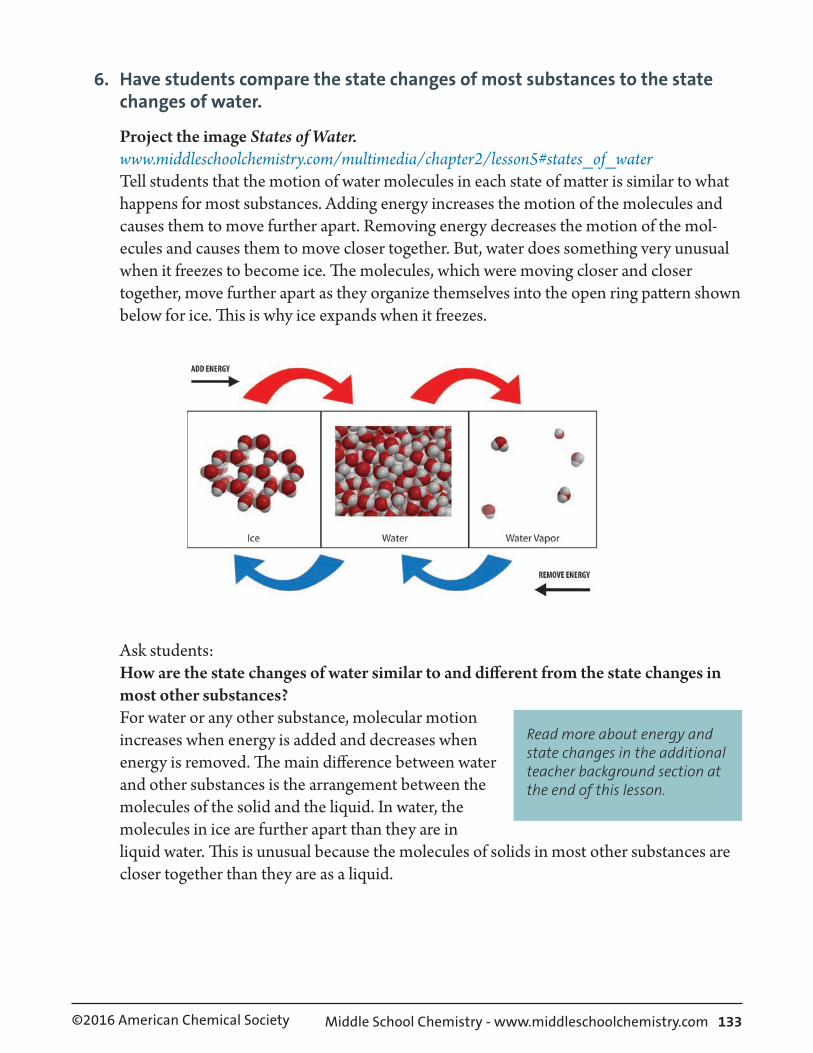
©2016 American Chemical Society Middle School Chemistry - www.middleschoolchemistry.com 133
6. Have students compare the state changes of most substances to the state changes of water.
Project the image States of Water.www.middleschoolchemistry.com/multimedia/chapter2/lesson5#states_of_waterTell students that the motion of water molecules in each state of matter is similar to what happens for most substances. Adding energy increases the motion of the molecules and causes them to move further apart. Removing energy decreases the motion of the mol-ecules and causes them to move closer together. But, water does something very unusual when it freezes to become ice. The molecules, which were moving closer and closer together, move further apart as they organize themselves into the open ring pattern shown below for ice. This is why ice expands when it freezes.
Ask students:How are the state changes of water similar to and different from the state changes in most other substances? For water or any other substance, molecular motion increases when energy is added and decreases when energy is removed. The main difference between water and other substances is the arrangement between the molecules of the solid and the liquid. In water, the molecules in ice are further apart than they are in liquid water. This is unusual because the molecules of solids in most other substances are closer together than they are as a liquid.
Read more about energy and state changes in the additional teacher background section at the end of this lesson.

134 Middle School Chemistry - www.middleschoolchemistry.com ©2016 American Chemical Society
7. Have groups use their water molecules to model freezing, melting, evapora-tion, and condensation.
Procedure• Project the image Ice.
www.middleschoolchemistry.com/multimedia/chapter2/lesson5#ice Have each group arrange their water molecules into a six-sided ring of ice. Ask stu-dents to handle their models gently because they will need them for other lessons.
• Ice Melts. Have students use their models to represent what happens when ice melts. Point out that the water molecules are closer together than they were as ice. Students could show the water molecules moving past each other.
• Water Evaporates Have students use their molecules to model what would happen if the water was heated and the molecules evaporated. Students should show the water molecules moving faster and breaking away from the other molecules and entering the air.
• Water Vapor Condenses Have students use their molecules to model what would happen if water vapor was cooled enough to cause it to condense. Students should show the water molecules in the air slowing down and joining together but still moving past one another as liquid water.
Collect the water molecules. These models will be used again in Chapter 5.
EXTEND 8. Do a demonstration to compare the melting of regular ice and dry ice.
Let students know that dry ice is frozen carbon dioxide gas. Carbon dioxide gas must be very cold in order to become a solid (about –78 °C or –109 °F).
PreparationYou will need some dry ice for this demonstration. If you cannot get any dry ice, show the video Dry Ice.www.middleschoolchemistry.com/multimedia/chapter2/lesson5#dry_ice

©2016 American Chemical Society Middle School Chemistry - www.middleschoolchemistry.com 135
Question to investigateDoes dry ice melt the way regular ice does?
Materials• Ice• Dry ice• Brown paper towel• Cold water• Hot water (about 50 °C)
Procedure1. Place a piece of dry ice and a piece of regular ice on a brown paper towel.
Expected resultsIn a short amount of time, the ice will begin to melt and the paper towel around the ice will become wet and darker. The paper towel around the dry ice will stay dry and will not get darker. If you notice a small dark spot on the paper towel near the dry ice, it is possible that water vapor from the air condensed on the dry ice and melted onto the paper towel.
If students see misty white fog coming from the dry ice, let them know that it is not the carbon dioxide gas itself. Carbon dioxide is colorless, odorless, and invisible. The misty smoke or fog is actually water vapor in the air that gets cold enough to condense. The water vapor is cooled by the dry ice and the cold carbon dioxide gas. The fog tends to drift downward because it is carried by the carbon dioxide gas, which is more dense than the air around it.
9. Discuss student observations and introduce the idea that some substances can change directly from a solid to a gas.
Ask students:• Do regular ice and dry ice melt in the same way?
No. The regular ice changes to a liquid, which you see on the brown paper towel. The dry ice does not seem to change to a liquid.
Explain to students that the reason that the dry ice does not make the paper towel wet is because it does not melt. When energy is transferred to dry ice, the solid carbon dioxide does not melt to liquid carbon dioxide. Instead, the solid changes directly to a gas. This process is called sublimation. Sublimation occurs when molecules of a solid move fast enough to overcome the attractions from other molecules and become a gas. Since frozen carbon dioxide never becomes a liquid under normal pressure, it is called dry ice.
136 Middle School Chemistry - www.middleschoolchemistry.com ©2016 American Chemical Society
10. Show students what happens when dry ice is placed in water.
Place a piece of dry ice in water or show the video Dry Ice in Water.www.middleschoolchemistry.com/multimedia/chapter2/lesson5#dry_ice_in_water
Expected resultsBubbles will form and a misty white fog will be produced. Since the water is much warmer than the dry ice, energy is transferred from the water to the dry ice, causing it to change from a solid to a gas and bubble through the water. After detergent is added, a mound of bubbles will form.
Students will be curious about all of the fog coming out of the cup. Tell them that some water changes to water vapor within the bubbles of carbon dioxide gas and then condens-es. This causes fog within the bubbles which escapes when the bubble pops.
Ask students: • You saw that the dry ice sublimates very quickly in water.
What could you do to make dry ice sublimate even faster? There are several ways to make dry ice sublimate faster. One option is to put the dry ice in hot water.
Place a piece of dry ice in 1/4 cup of cold water and another piece in 1/4 cup of hot water. Or show the video Dry Ice in Hot and Cold Water.www.middleschoolchemistry.com/multimedia/chapter2/lesson5#dry_ice_hot_cold_water
Expected results:Much more fog will be produced from the cup with hot water.
Tell students that more fog is produced when dry ice is placed in hot water because the transfer of energy and sublimation happens faster. This causes the fog to be produced at a faster rate.
©2016 American Chemical Society Middle School Chemistry 137
Activity Sheet Name __________________Chapter 2, Lesson 5Changing State—Melting Date ___________________
DEMONSTRATION
1. You watched a piece of ice melt. Where do you think the energy came from to melt the ice?
2. What do you think happened to the speed of the molecules in the ice when it was heated?
ACTIVITY
Work with your group to design a way to make ice melt faster. You will need to show that your method really does make ice melt faster, so be sure to use a control. Check with your teacher before conducting your experiment.
Question to investigate
Will _______________________________________ make ice melt faster?

138 Middle School Chemistry ©2016 American Chemical Society
3. Does your method make ice melt faster? How do you know?
EXPLAIN IT WITH MOLECULES
4. Write a caption underneath each picture to explain how the motion and arrangement of the water molecules changes as ice melts.
5. Look at the diagram below representing the motion and arrangement of the molecules of a substance (not water) when it is a solid, a liquid, and a gas. Write the name of the state change that takes place on each curved arrow.

©2016 American Chemical Society Middle School Chemistry 139
6. The following diagram uses the space-filling model of water to represent the arrangement of water molecules when it is a solid, liquid, and a gas.
How are the state changes of water similar to the state changes in most other substances?
How are state changes of water different from the state changes in most other substances?
TAKE IT FURTHER
7. Do regular ice and dry ice melt in the same way? How do you know?

140 Middle School Chemistry ©2016 American Chemical Society
8. You saw that the dry ice sublimates very quickly in water. Why does it subli-mate even faster in hot water?

©2016 American Chemical Society Middle School Chemistry - www.middleschoolchemistry.com 141
Additional Teacher BackgroundChapter 2, Lesson 5, p. 130
Heating/Cooling curve
Throughout chapter 2, students have seen that adding energy (heating) increases the rate of melting and evaporation. They have also seen that removing energy (cooling) increases the rate of condensation and freezing. There are other interesting phenomena related to state changes that are not as easily explored in a classroom setting. One has to do with the relative amount of energy it takes to cause a substance to change from one state to another. Another is that the tem-perature of a substance remains constant during state changes.
Both these factors can be displayed on a graph showing the change in temperature while water is heated or cooled. This type of graph is called a heating curve. (You may sometimes see it called a phase diagram but a phase diagram is technically different.) The graph shows the energy added or removed on the x-axis and the corresponding temperature change on the y-axis. The units of energy are in kilojoules. The actual number of kilojoules required for the different state changes is not as important as seeing that some changes require much more or less energy than others. The graph is easiest to interpret if you look at the different steps separately and then all together.
–20–10
0
10
10 20 30 40 50 60 70 80 90
100
110
120
130
140
150
160
170
180
190
200
210
220
230
240
250
260
270
280
290
300
310
320
20
30
40
50
60
70
80
90
100
110
120
Tem
pera
ture
( ˚C
)
Energy (kJoules)
Heat
ing
Cool
ing
Heat
ing
Cool
ing
12
3
4
5
Melting
Freezing
Vaporizing
CondensingH
eatin
g
Cool
ing
142 Middle School Chemistry - www.middleschoolchemistry.com ©2016 American Chemical Society
Step 1: Adding energy increases the temperature of ice from −20 °C to 0 °C.
This takes a relatively small amount of energy because the energy goes into vibrating the mol-ecules and not to break the bonds holding the molecules together. The molecules which are vibrating in fixed positions in the ice at -20 C are made to vibrate somewhat faster at 0 C.
Step 2: Adding energy causes the ice to change state by melting to liquid water with no change in temperature.
This process takes about 8 times as much energy as step 1. It makes sense that more energy is required because energy is being used to overcome the attractive forces holding the molecules in the crystal structure. The temperature does not change during this process because right at the melting point, the energy used in bond breaking does not increase the speed of the molecules, it just breaks the bond. The kinetic energy added is converted to potential energy which does not change the temperature.
Step 3: Adding energy increases the temperature of the water from 0 °C to 100 °C.
This process takes about 25% more energy than step 2. So it takes more energy to raise the tem-perature of water from 0 C to 100 C than it does to melt the same amount of ice to liquid water. To melt ice, energy is added which causes the molecules to vibrate until the orderly arrange-ment of water molecules in the crystal collapses. But as liquid water, the water molecules are still attracted to each other and are still close together (in fact they are closer together in liquid water than in ice) but are able to slide past one another.
Once the ice has turned to liquid water, the energy added must still work against the attrac-tions of the water molecules to raise the temperature of the water. This is why water has such a high specific heat which is the amount of energy required to raise 1 gram of a substance by 1 °C. Therefore raising liquid water from 0 °C to 100 °C takes a lot of energy.
Step 4: Adding energy causes the water to change state by vaporizing to become water vapor at the boiling point with no change in temperature.
This process takes nearly 5 times the amount of energy of step 3. Boiling takes more energy than the other processes because it is the only process in which the attractions between water molecules are completely overcome and water molecules are separated by relatively large dis-tances. The temperature does not change during this process because right at the boiling point, the energy used in bond breaking does not increase the speed of the molecules, it just breaks the bond. The kinetic energy added is converted to potential energy which does not change the temperature.

©2016 American Chemical Society Middle School Chemistry - www.middleschoolchemistry.com 143
Step 5: Adding energy causes the temperature of the water vapor to increase from 100 °C to 120 °C.
This process takes less energy than any of the other steps. Water molecules in the vapor phase are already far apart and do not feel significant attractions from one another. When energy is added to them, their motion readily increases.
Looking at the graph as a cooling curveThe entire graph can also be looked at as a cooling curve if you look at it in reverse.
Step 5: Removing energy (cooling) causes the temperature of water vapor to decrease from 120 °C to 100 °C.
It is exactly the same amount of energy removed that was added to cause the temperature to increase from 100 °C to 120 °C.
Step 4: Removing energy causes the water to change state by condensing to become liquid water at the boiling point with no change in temperature.
The temperature does not change during this phase change. This is because right at the condensa-tion point, the energy removed allows the molecules to “bond” but does not change their speed. Step 3: Removing energy from the liquid water causes its temperature to decrease from 100 °C to 0 °C.
It is exactly the same amount of energy removed that was added to cause the temperature to increase from 0 °C to 100 °C.
Step 2: Removing energy from water at 0 °C causes liquid water to change state by freezing to solid ice.
The temperature does not change during this process because right at the freezing point, the energy removed allows to molecules to form bonds but does not change their speed.
Step 1: Removing energy from ice causes the temperature of the ice to decrease from 0 °C to −20 °C.
It is exactly the same amount of energy removed as was added to cause the temperature to increase from −20 °C to 0 °C.

144 Middle School Chemistry ©2016 American Chemical Society
Chapter 2 — Student Reading
Atoms and molecules are in motion
We warm things up and cool things down all the time, but we usually don’t think much about what’s really happening. If you put a room-temperature metal spoon into a hot liquid like soup or hot chocolate, the metal gets hotter. But what actually has to happen for the hot liquid to make the metal hotter?
By now you know that substances are made of atoms and molecules. These atoms and molecules are always in motion. You also know that when atoms and molecules are heated, they move faster and when they are cooled, they move slower. But how do the atoms and molecules actu-ally get heated and cooled? In our example of heating a metal spoon in a hot liquid, what is the process that transfers energy from the water to the spoon?
Moving atoms and molecules have energy
To answer this question, you really have to think about the moving atoms and molecules as hav-ing energy. Anything that has mass and is moving, like a train, a moving ball, or an atom has a certain amount of energy. The energy of a moving object is called kinetic energy. If the speed of the object increases, its kinetic energy increases. If the speed of the object decreases, its kinetic energy decreases. So if the atoms or molecules of a substance are moving fast, they have more kinetic energy than when they are moving more slowly.
Energy can be transferred to make things warmer
In our example of a spoon in hot liquid, the molecules of hot liquid are moving quickly so they have a lot of kinetic energy. When the room-temperature spoon is placed in the liquid, the fast-moving molecules in the liquid contact the slower-moving atoms in the spoon. The fast-moving molecules hit the slower-moving atoms and speed them up. In this way, the fast-moving mol-ecules transfer some of their kinetic energy to the slower atoms so that these slower atoms now have more kinetic energy. This process of transferring energy by direct contact is called conduc-tion.
PHOTOS.COM PHOTOS.COM

©2016 American Chemical Society Middle School Chemistry 145
Energy can be transferred to make things cooler
Cooling things by conduction works the same way as warming but you just look at the substance losing energy instead of the substance gaining energy. This time, let’s say that you take a hot met-al spoon and put it in room-temperature water. The faster-moving atoms in the spoon contact the slower-moving molecules in the water. The atoms in the spoon transfer some of their energy to the molecules in the water. The spoon will get cooler and the water will get a little warmer.
Another example is cans of room-temperature soda pop placed in a cooler filled with ice. Kinetic energy is transferred from the warmer metal can to the cooler ice. This makes the can colder. Energy is then transferred from the warmer soda to the colder can. This transfer of energy from the soda results in slower motion of the molecules of the soda, which can be measured as a lower temperature and colder soda.

146 Middle School Chemistry ©2016 American Chemical Society
So the way to cool something is for its energy to be transferred to something colder. This is a rule about conduction: Energy can only be transferred from something at a higher temperature to something at a lower temperature. You can’t cool something by adding “coldness” to it. You can only make something colder by allowing its energy to be transferred to something colder.
Temperature is a measure of the average kinetic energy of the atoms or molecules of a substance.This brings up the question of what exactly is temperature. Temperature is related to the kinetic energy of the moving atoms or molecules of a substance. By taking the temperature of some-thing, you are actually getting information about the kinetic energy of its atoms and molecules, but not the kinetic energy of any particular one. There are more than a billion trillion atoms or molecules in even a small sample of a substance. They are constantly moving and bumping into each other and transferring little amounts of energy between each other. So at any time, the atoms and molecules don’t all have the same kinetic energy. Some are moving faster and some are moving slower than others but most are about the same. So when you measure the tempera-ture of something, you are actually measuring the average kinetic energy of its atoms or mol-ecules.
Heat is the energy that is transferred from a substance at a higher temperature to a substance at a lower temperature.If temperature is the average kinetic energy of atoms and molecules, then what is heat?The word “heat” has a specific meaning in science even though we use the word all the time to mean different things in our daily life. The scientific meaning of heat has to do with energy that is being transferred. During conduction, the energy transferred from faster-moving atoms to slow-er-moving atoms is called heat.
Changing State
Changing from a solid to a liquid—Melting
In solids, the atoms or molecules that make up the substance have strong attractions to each other and stay in fixed positions. These properties give solids their definite shape and volume.
When a solid is heated, the motion of the particles (atoms or molecules) increases. The atoms or molecules are still attracted to each other but their extra movement begins to compete with their attractions. If enough energy is added, the motion of the particles begins to overcome the attrac-tion and the particles move more freely. They begin to slide past each other as the substance begins to change state from a solid to a liquid. This process is called melting.

©2016 American Chemical Society Middle School Chemistry 147
The particles of the liquid are only slightly further apart than in the solid. (Water is the exception because the molecules in liquid water are actually closer together than they are in ice) The par-ticles of the liquid have more kinetic energy than they did as a solid but their attractions are still able to hold them together enough so that they retain their liquid state and do not become a gas.
Different solids melt at different temperatures
The temperature at which a substance begins to melt is called the melt-ing point. It makes sense that different substances have different melt-ing points. Since the atoms or molecules that substances are made of have a different amount of attraction for each other, a different amount of energy is required to make them change from a solid to a liquid. A good example is the melting point of salt and sugar. The melting point of sugar is 186 °C. The melting point for regular table salt is 801 °C. Metals like iron and lead also have different melting points. Lead melts at 327 °C and iron melts at 1,538 °C.
Some solids, like glass do not have a precise melting point but begin to melt over a range of temperatures. This is because the molecules that make up glass are not arranged in as orderly a way as those in crystals like salt or sugar or metals like iron. Depending on the type of glass, the melting point is usually between 1,200–1,600 °C.
Changing from a solid to a gas—Sublimation
Some substances can also change directly from a solid to a gas. This process is called sublimation. One of the more popular examples of sublimation is dry ice which is frozen carbon dioxide (CO2). To make dry ice, carbon dioxide gas is placed under high pressure and made very cold (about −78.5 °C). When a piece of dry ice is at room temperature and normal pressure, the molecules of CO2 move faster and break away from each other and go directly into the air as a gas. Regular ice cubes in the freezer will also sublimate but much more slowly than dry ice.
Changing from a liquid to a gas—Evaporation
You see evidence of evaporation all the time. Evaporation causes wet clothes to dry and the water in puddles to “disappear”. But the water doesn’t actually disappear. It changes state from a liquid to a gas.
The molecules in a liquid evaporate when they have enough energy to overcome the attractions of the molecules around them. The molecules of a liquid are moving and bumping into each oth-er all the time, transferring energy between one another. Some molecules will have more energy than others. If their motion is energetic enough, these molecules can completely overcome the attractions of the molecules around them. When this happens, the molecules go into the air as a gas. This process is called evaporation.
PHOTOS.COM

148 Middle School Chemistry ©2016 American Chemical Society
Heating increases the rate of evaporation
You’ve probably noticed that higher temperatures seem to make evaporation happen faster. Wet clothes and puddles seem to dry more quickly when they are heated by the sun or in some other way.
You can test whether heat affects the rate of evaporation by placing a drop of water on two paper towels. If one paper is heated and the other remains at room temperature, the water that is heated will evaporate faster.
When a liquid is heated, the motion of its molecules increases. The number of molecules that are moving fast enough to overcome the attractions of other molecules increases. Therefore, when water is heated, more molecules are able to break away from the liquid and the rate of evapora-tion increases.

©2016 American Chemical Society Middle School Chemistry 149
Different liquids have different rates of evaporation
It makes sense that different liquids have different rates of evaporation. Different liquids are made of different molecules. These molecules have their own characteristic strength of attraction to one another. These molecules require a different amount of energy to increase their motion enough to overcome the attractions to change from a liquid to a gas.
Liquids will evaporate over a wide range of temperatures
Even at room temperature, or lower, liquids will evaporate. You can test this by wetting a paper towel and hanging it up indoors at room temperature. Evaporation at room temperature might seem strange since the molecules of a liquid need to have a certain amount of energy to evapo-rate. Where do they get the energy if the liquid is not warmed? But remember that the tempera-ture of a substance is the average kinetic energy of its atoms or molecules. Even cold water, for instance, has a small percentage of molecules with much more kinetic energy than the others. With all the random bumping of a billion trillion molecules, there are always a few molecules which gain enough energy to evaporate. The rate of evaporation will be slow but it will happen.
Changing from a gas to a liquid—Condensation
If you have seen water form on the outside of a cold cup, you have seen an example of condensation. Water molecules from the air contact the cold cup and trans-fer some of their energy to the cup. These molecules slow down enough that their attractions can overcome their motion and hold them together as a liquid. This process is called condensation.
Cooling increases the rate of condensation
You can test to see if cooling water vapor increases the rate of condensation by making two similar samples of water vapor and cooling one more than the other. In the illustration, two samples of water vapor are trapped inside the cups. Ice is placed on one top cup but not the other.
In a few minutes, there are water drops on the inside top of both cups but more water can be seen on the inside of the top cup with the ice. This shows that cooling water vapor increases the rate of condensa-tion. When a gas is cooled, the motion of its molecules decreases. The number of molecules moving slow enough for their attractions to hold them together increases. More molecules join together to form a liquid and the rate of condensation increases.
PHOTOS.COM

150 Middle School Chemistry ©2016 American Chemical Society
The amount of water vapor in the air affects the rate of condensation
Temperature isn’t the only factor that affects the rate of condensation. At a given temperature, the more water molecules in the air, the greater the rate of condensation. If there are more mol-ecules, a greater number of molecules will be moving at these different speeds. More molecules will be moving slowly enough to condense.
Different gases condense at different temperatures
Each gas is made up of its own molecules which are attracted to each other a certain amount. Each gas needs to be cooled to a certain temperature in order for the molecules to slow down enough so that the attractions can hold them together as a liquid.
Changing from liquid to solid—Freezing
If a liquid is cooled enough, the molecules slow down to such an extent that their attractions begin to overcome their motion. The attractions between the molecules cause them to arrange themselves in more fixed and orderly positions to become a solid. This process is called freezing.
Water molecules move further apart as water freezes
The freezing of water is very unusual because water molecules move farther apart as they arrange themselves into the structure of ice as water freezes. The molecules of just about every other liquid move closer together when they freeze.
Different liquids have different freezing points
It makes sense that different liquids have different freezing points. Each liquid is made up of different molecules. The molecules of different liquids are attracted to each other by different amounts. These molecules have to slow down to different extents before their attractions can take hold and organize themselves into fixed positions as a solid.
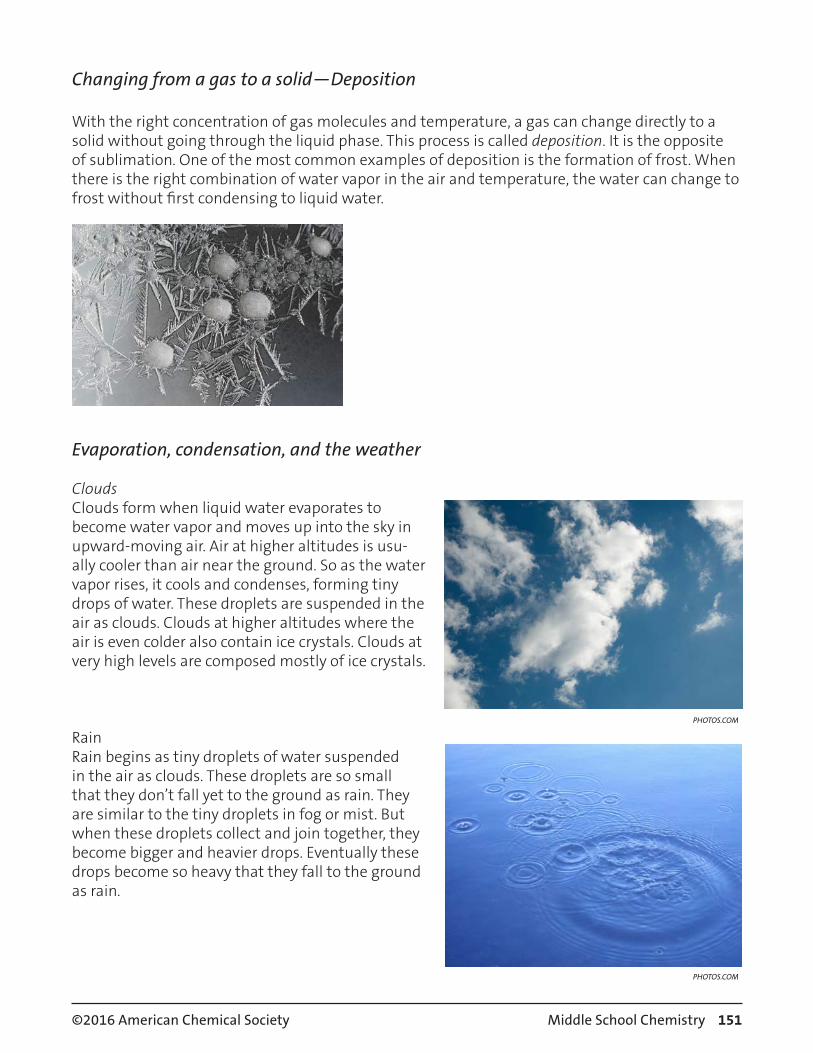
©2016 American Chemical Society Middle School Chemistry 151
Changing from a gas to a solid—Deposition
With the right concentration of gas molecules and temperature, a gas can change directly to a solid without going through the liquid phase. This process is called deposition. It is the opposite of sublimation. One of the most common examples of deposition is the formation of frost. When there is the right combination of water vapor in the air and temperature, the water can change to frost without first condensing to liquid water.
Evaporation, condensation, and the weather
Clouds Clouds form when liquid water evaporates to become water vapor and moves up into the sky in upward-moving air. Air at higher altitudes is usu-ally cooler than air near the ground. So as the water vapor rises, it cools and condenses, forming tiny drops of water. These droplets are suspended in the air as clouds. Clouds at higher altitudes where the air is even colder also contain ice crystals. Clouds at very high levels are composed mostly of ice crystals.
Rain Rain begins as tiny droplets of water suspended in the air as clouds. These droplets are so small that they don’t fall yet to the ground as rain. They are similar to the tiny droplets in fog or mist. But when these droplets collect and join together, they become bigger and heavier drops. Eventually these drops become so heavy that they fall to the ground as rain.
PHOTOS.COM
PHOTOS.COM

152 Middle School Chemistry ©2016 American Chemical Society
Snow Like rain, snow begins with condensing water vapor that forms clouds. However, when it’s cold enough, water vapor not only condenses but also freezes, forming tiny ice crystals. More and more water vapor condenses and freezes on these seed crystals, forming the beautiful ice crystals with six-sided symmetry that we know as snowflakes.
Hail Hail forms when a small drop of water freezes, falls, and then gets pushed back up into a cloud. More water droplets collect and freeze on this ice crystal, which makes it heavier, and it begins to fall again. The violent air in a thunder-cloud (cumulonimbus cloud) repeatedly bounces the ice crystal upward. Each time it gets another coating of freezing water. Finally, the ice crystal is so heavy that it falls all the way down to the ground as hail.
Dew Dew is produced when moist air close to the ground cools enough to condense and forms liquid water. Dew is different than rain because dew doesn’t fall onto the ground in drops. It slowly accumulates to form drops on objects near the ground. Dew often forms on blades of grass and leaves and can make beautiful designs on spider webs.
Frost If the temperature of surfaces on the ground is low enough, water vapor in the air can change directly to the solid frost without first condens-ing to a liquid.
PHOTOS.COM
PHOTOS.COM
PHOTOS.COM

©2016 American Chemical Society Middle School Chemistry 153
Fog Usually the air near the ground is warmer than the air above it, but the conditions that cause fog are just the reverse. Fog forms when warm, moist air passes over cold ground or snow. As the water vapor in the air cools, it condenses, forming very tiny drops of water suspended in the air. Fog is very much like a cloud, but closer to the ground.
Mist on a Pond Water evaporates even when the air is cold.To form mist, the water in a pond, pool, or hot tub must be warmer than the air above it and the air must be cold enough to cause the water vapor to condense as it rises. The mist seems to disappear as the water droplets evapo-rate to become water vapor again.
PHOTOS.COM
PHOTOS.COM
Related Documents