Linking inside your Google Document Why would I want to link in a Google Doc? *Share outside resources used in the document *Provide more information on another website *Share a lengthy URL *Provide an additional document or resource

Cep 812 Flipped PD ppt
Jul 15, 2015
Welcome message from author
This document is posted to help you gain knowledge. Please leave a comment to let me know what you think about it! Share it to your friends and learn new things together.
Transcript

Linking inside your Google Document
Why would I want to link in a Google Doc?
*Share outside resources used in the document
*Provide more information on another website
*Share a lengthy URL
*Provide an additional document or resource
Script: LinkingBesides having some of the basic functions as previously mentioned, Google Docs also has some very useful but more advanced functions. One of these functions is the ability to create links inside your documents. Why would you want to do this, you ask? For a couple of really great reasons, actually! (READ SLIDE ONE BULLETS!)
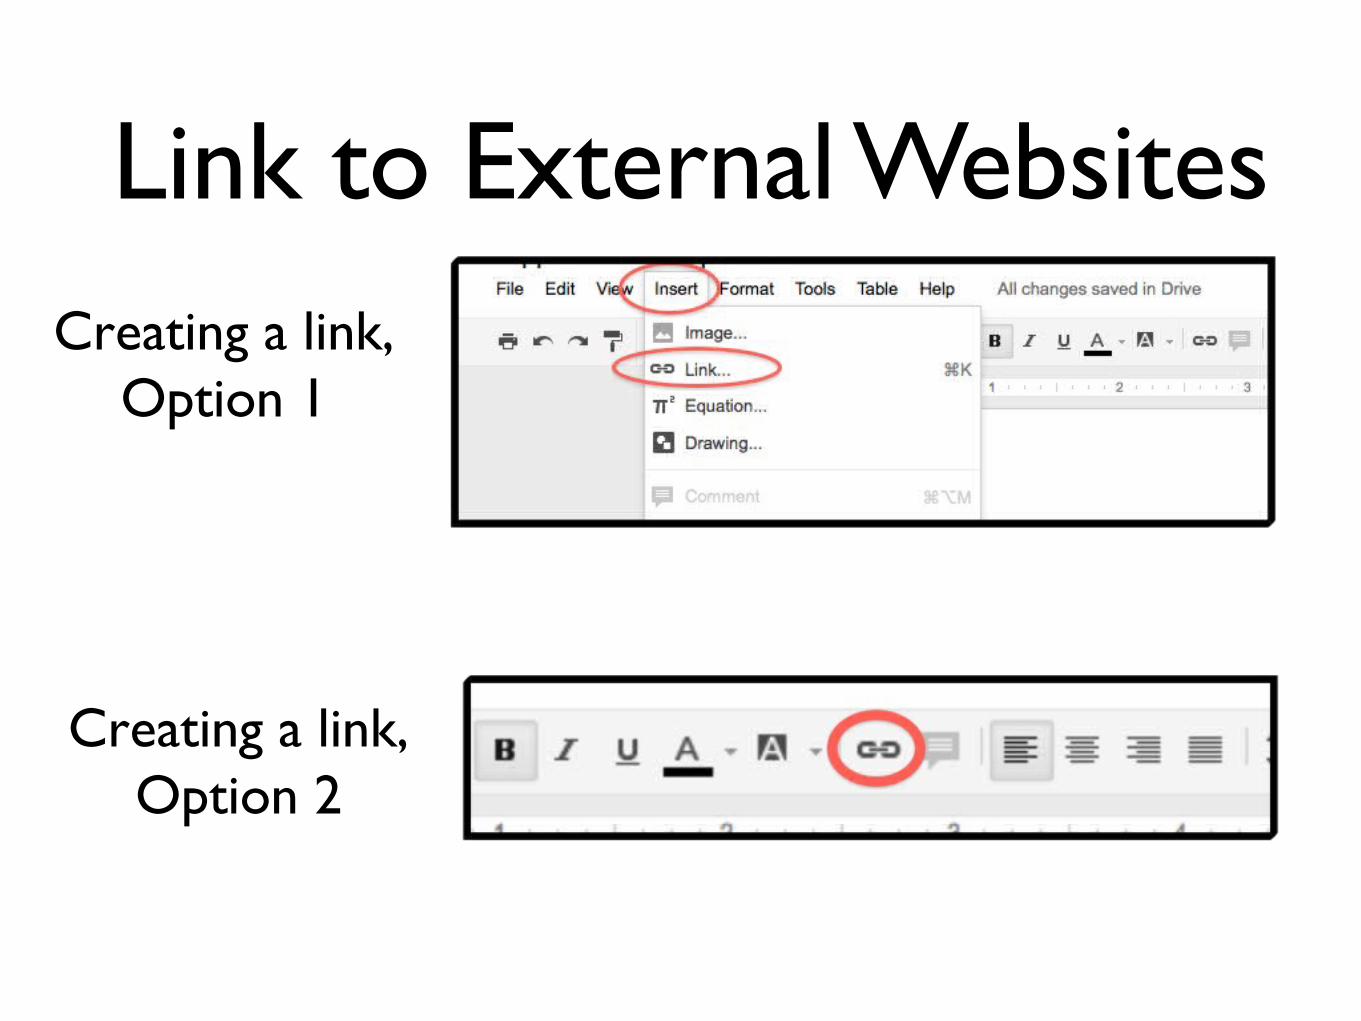
There are two simple ways to go about creating links in your document. The first way is to go to the Docs menu, click Insert, and then Link. You can also click directly to the icon that looks like a chain linking together in the toolbar.
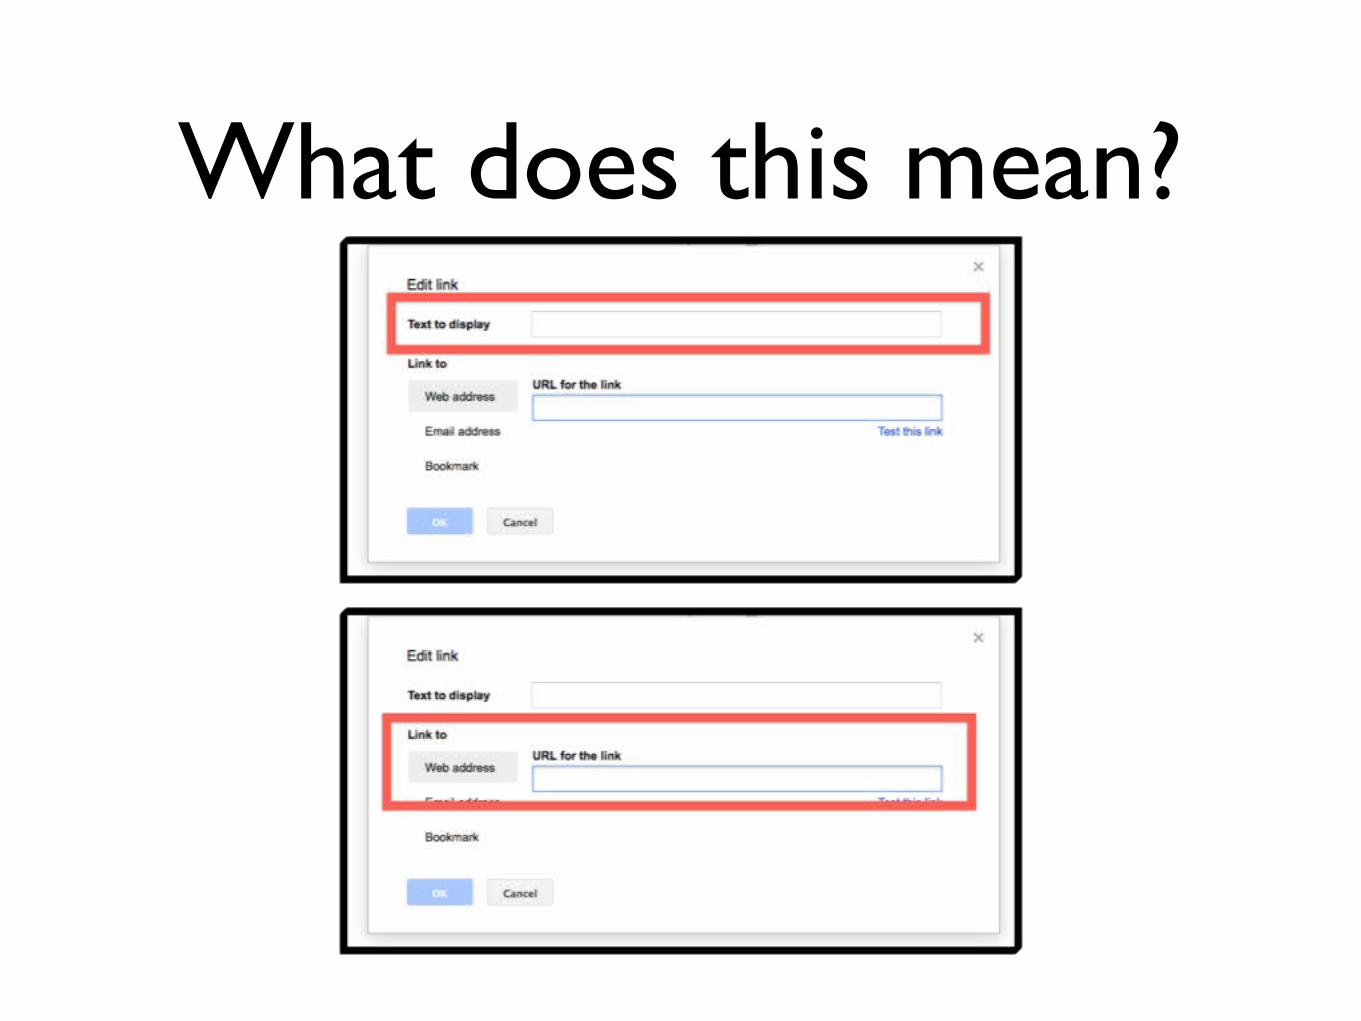
Once you click either of these options, a box will pop up and ask for the text you would like to display, meaning the actual words that will appear on your document and the URL of the website you’d like to link to. The easiest way to insert the link is by copying and pasting from the website you’d like to link to, however you can manually type the web address if you so choose.
Watch the following screencast to see in real-time how to create a link in your document.
Link to External WebsitesCreating a link,
Option 1
Creating a link, Option 2
What does this mean?
Link to Email Addresses
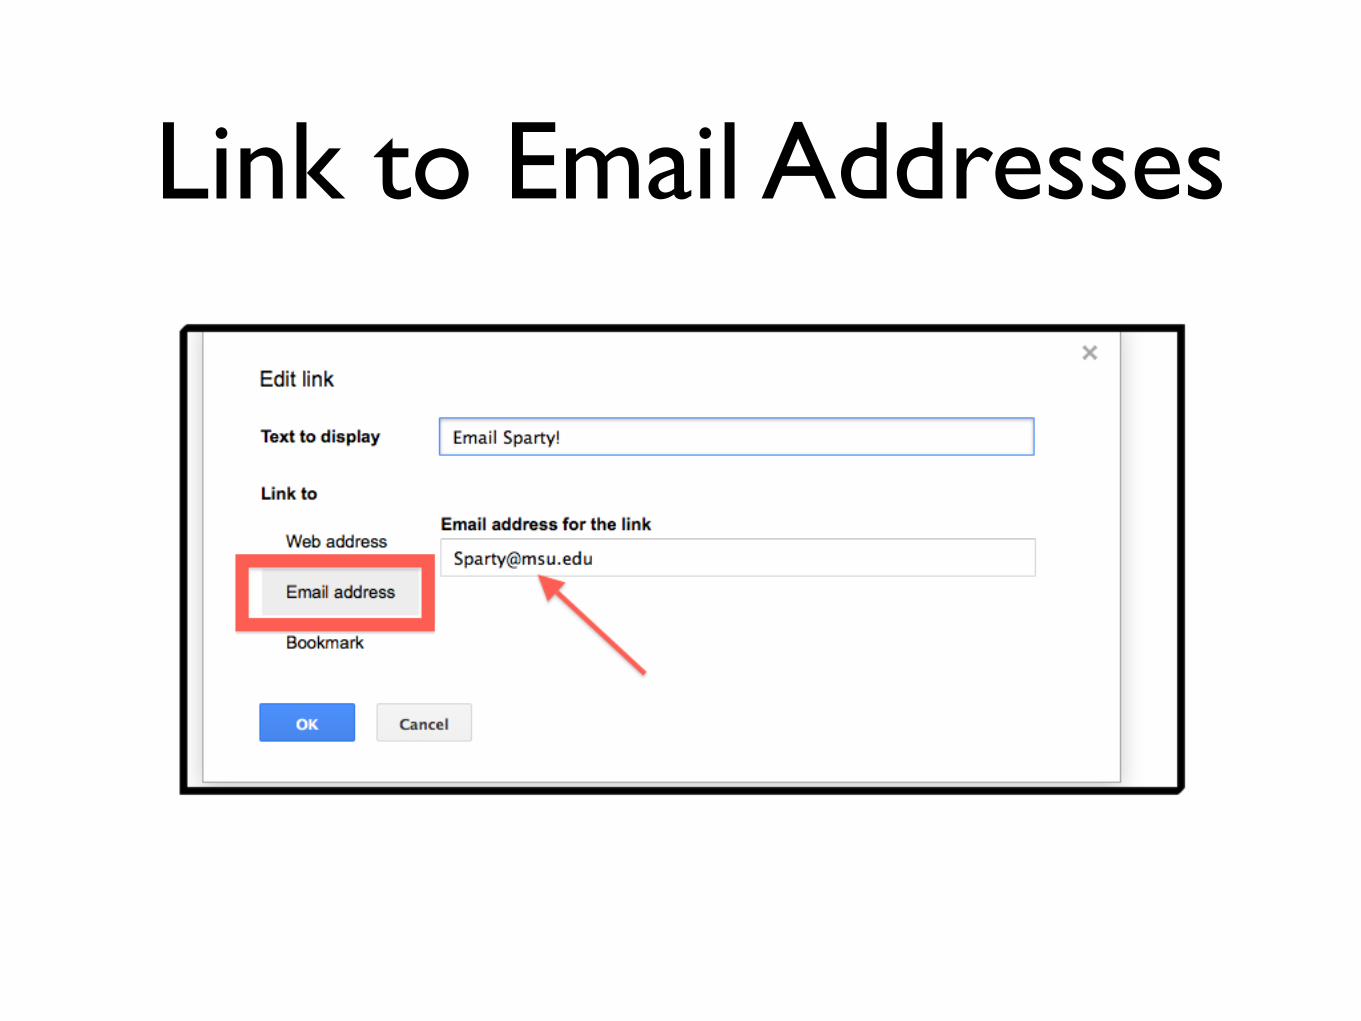
Script: Link to emailNot only can you link to external websites, but you can also include links to email addresses as well. The process is basically the same, except when you open the “Edit Link” text box, you will select “Email address” instead. At this point you can copy and paste or type in the email address you’d like to link to.
Again, you have the option of changing the words that will actually appear on your document, so that way there is not a long email to contend with. For example, I’d rather see “Email Sparty!” appear than his actual email address.
Script: Bookmark LinksThere is one other way to link in your document. This linking option is perfect for when you have a REALLY long document with a massive amount of information in it. If you have a very long document and do not want to have to keep scrolling through pages and pages looking for a special section or page, Bookmarking is an effective way to shorten this process.
The Bookmark function can be located by clicking on Insert in the Docs menu bar, then select Bookmark. It will be important for you to have highlighted the exact text you want to link to. What you highlighted will appear in the box “text to display.” If you have multiple bookmarks, select the one you’d like to link to, as I have done in my example.
When you click OK, a little blue “bookmark” will appear.
Watch as I create a Bookmark in real-time.

Really, I mean REALLY long document?
Step 1 Step 2

Screencast of inserting a Bookmark
Script: Privacy Settings
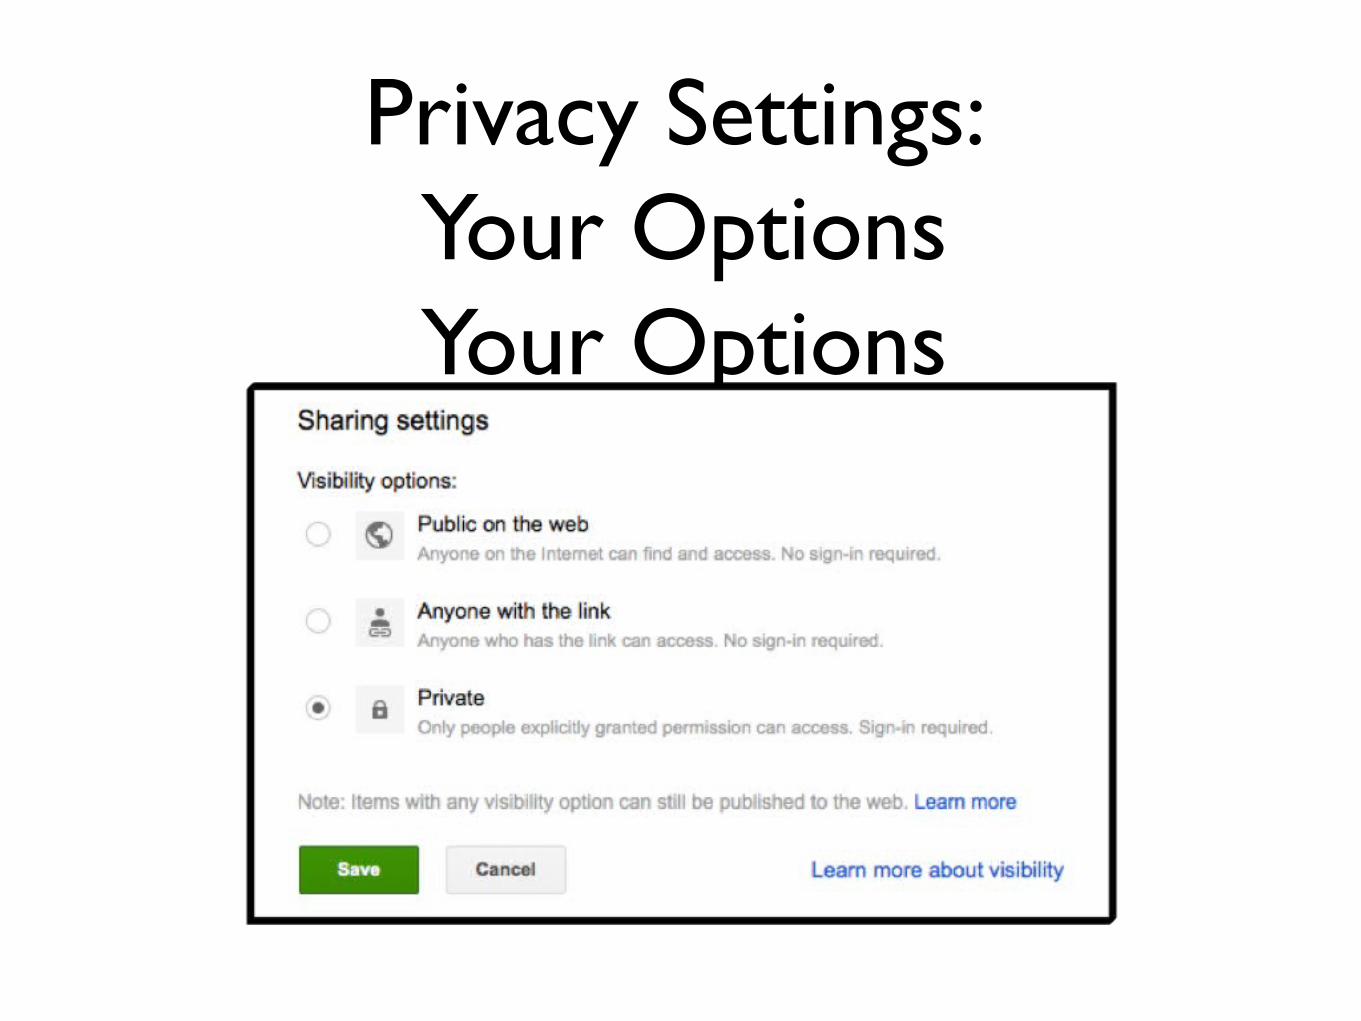
Google Docs is such a great collaboration tool because it allows you to share the document in many different ways. The wonderful thing is that YOU are in charge of who can view, edit, or comment on your document. Your document can be totally private, or it can be open to the whole world; however you can change these options through a few simple clicks. Your documents ALWAYS start out as private to only you. Until you make changes, you are the sole commander of the document.
If you decide to change the privacy settings, there are three options. The document can be private to you and anyone you specifically invited to collaborate on the document through email. These users will have to sign in to view or edit the document. The second option allows you to share the link of your document. Anyone who has that link will be able to access your document without signing into to their Google account. Lastly, if you’d like your document to be totally searchable and accessible to anyone who may stumble upon your work, you can select the “Public on the Web” option. This is the least restrictive privacy setting of the three.
Watch the following video as I show you how to limit your options even inside each of these three choices.
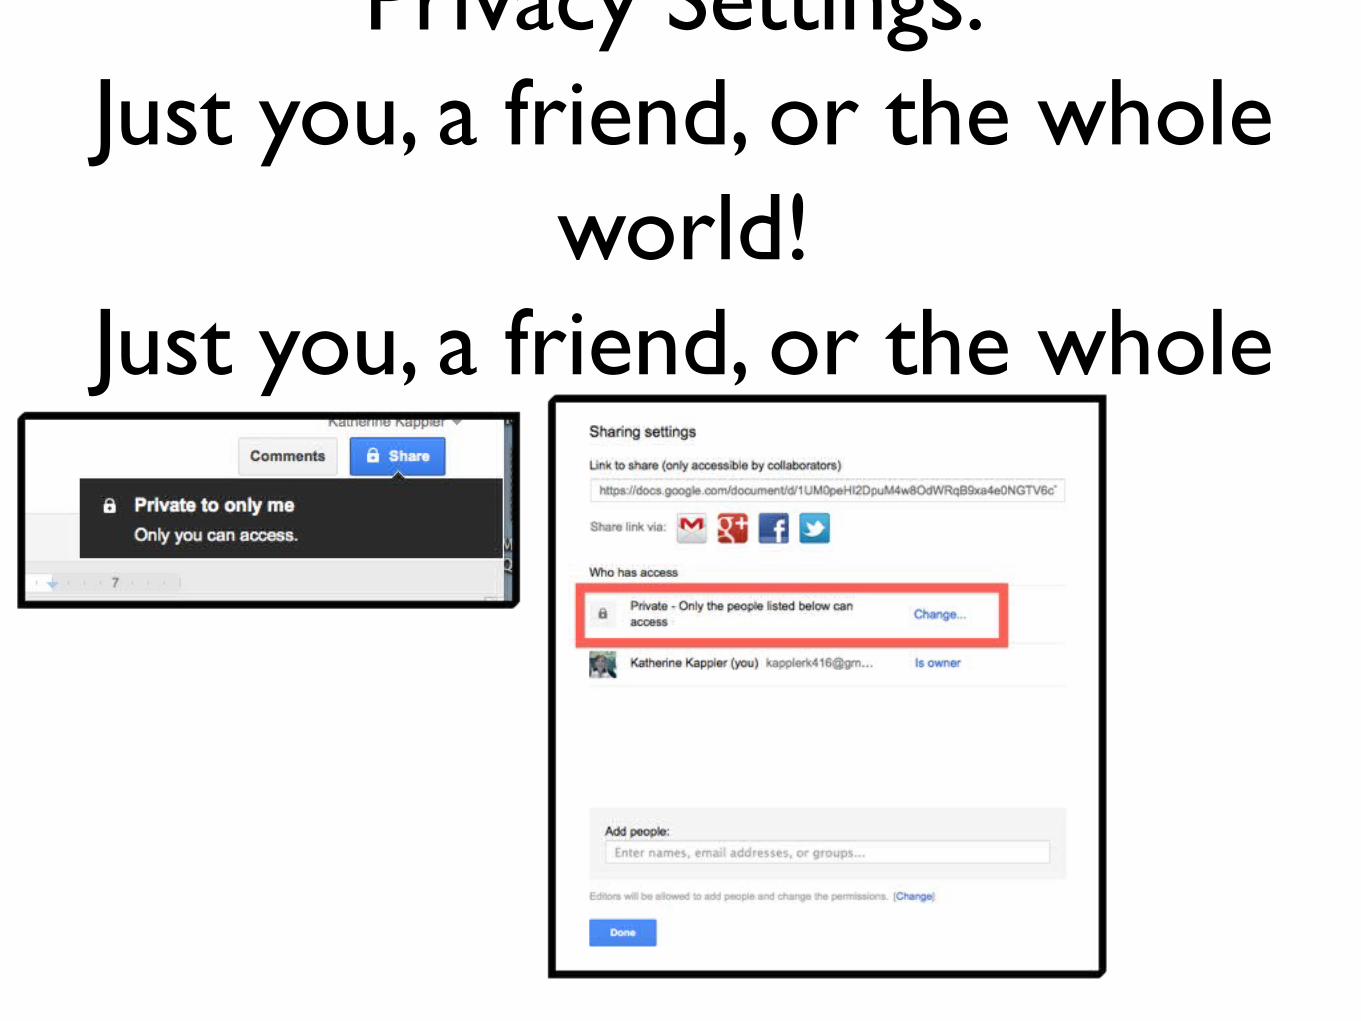
Privacy Settings: Just you, a friend, or the whole
world!Just you, a friend, or the whole
world!
Privacy Settings: Your OptionsYour Options
Screencast - Privacy Options and choices
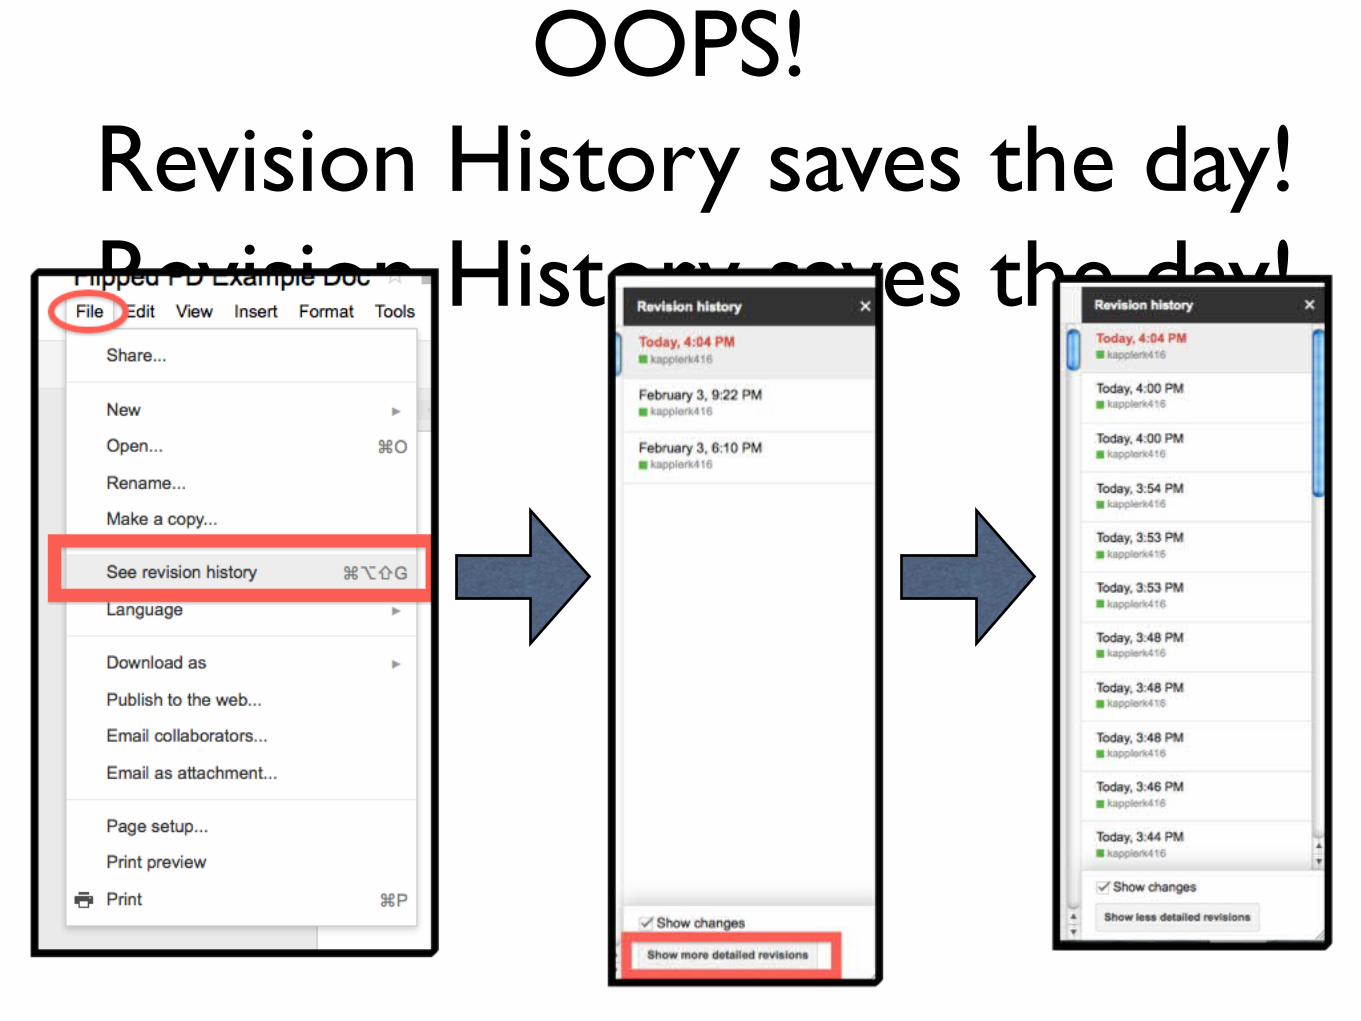
OOPS! Revision History saves the day!Revision History saves the day!

Script: Revision History
We all know that mistakes are a part of life. No one is perfect and it’s very easy to delete or undo hard work you’ve put into a document. That is a devastating feeling. Google Docs is on your side, though. One last advanced feature of Google Documents is something called “Revision History.” Revision History allows you to see all the stages of work done on the document from beginning up to the very moment you are in. Not only can you see each change that was made, but if you are working with multiple different people on the document, you can also see what each person contributed to the document.
You can view the Revision History of the document by going to the Document menu bar, clicking File, and then See Revision History. Once you do this, a box will open on the right-hand side of your window. It will show you the major changes made in different sessions. However, if you wish to see more detailed revisions, more minute by minute, then click “More Detailed Revisions” at the bottom of the open box.
Watch the following screencast to see the Revision History function in action!

Screencast of Revision History
Related Documents