Canning & Food Preservation GUIDE iamcountryside.com

Welcome message from author
This document is posted to help you gain knowledge. Please leave a comment to let me know what you think about it! Share it to your friends and learn new things together.
Transcript
1Countryside Canning & Food Preservation Guide
Canning & Food Preservation
guide
iamcountryside.com
2 Countryside Canning & Food Preservation Guide
Index~ Culture Clash Confuses Canners .........................................................3~ Planning For Canning .........................................................................4~ Home Canning Under Pressure, An Overview ...................................6~ Pickled Beets Recipes .........................................................................7~ Advice On Safe Canning ......................................................................8~ 6 Potentially Deadly Canning Sins .....................................................9~ Home Canning Simplified .................................................................10~ Dilled Green Beans ............................................................................11~ Canning Tips Kerr® And Ball® Don’t Tell You ....................................12~ Making Jam, Jelly & Marmalade .....................................................14~ Zucchini Jam Recipe .........................................................................14~ Strawberry Jam Recipe ....................................................................15~ Orange Marmalade...........................................................................15~ Not All Kraut Is Cabbage ..................................................................16~ Helpful Canning Tips From Kerr Glass ..............................................18~ Spaghetti Sauce Recipe ....................................................................20~ Dry It, You’ll Like It! ..........................................................................21~ Keep Foods From Discoloring ..........................................................24~ It’s Solar Food Drying Time! .............................................................27~ Freezing: A Fast Way To Preserve Tomatoes ..................................30~ Salsa Recipes .....................................................................................31
3Countryside Canning & Food Preservation Guide
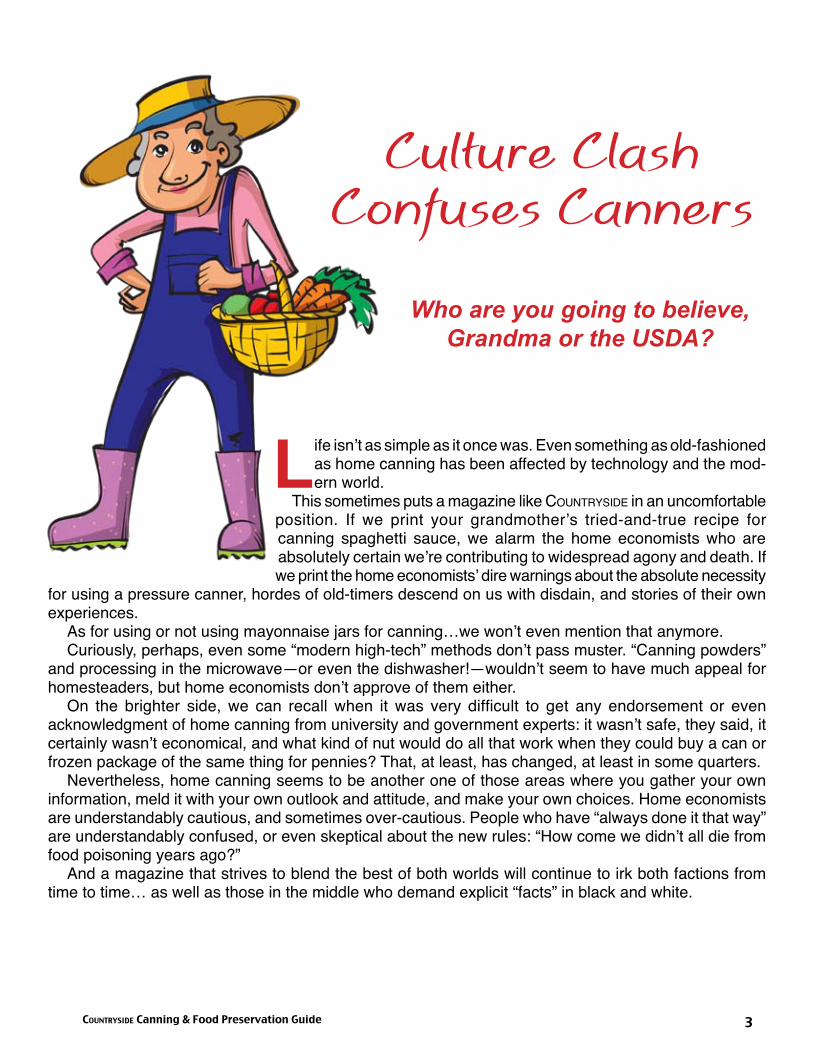
Who are you going to believe, Grandma or the USDA?
Life isn’t as simple as it once was. Even something as old-fashioned as home canning has been affected by technology and the mod-ern world.
This sometimes puts a magazine like Countryside in an uncomfortable position. If we print your grandmother’s tried-and-true recipe for canning spaghetti sauce, we alarm the home economists who are absolutely certain we’re contributing to widespread agony and death. If we print the home economists’ dire warnings about the absolute necessity
for using a pressure canner, hordes of old-timers descend on us with disdain, and stories of their own experiences.
As for using or not using mayonnaise jars for canning…we won’t even mention that anymore.Curiously, perhaps, even some “modern high-tech” methods don’t pass muster. “Canning powders”
and processing in the microwave—or even the dishwasher!—wouldn’t seem to have much appeal for homesteaders, but home economists don’t approve of them either.
On the brighter side, we can recall when it was very difficult to get any endorsement or even acknowledgment of home canning from university and government experts: it wasn’t safe, they said, it certainly wasn’t economical, and what kind of nut would do all that work when they could buy a can or frozen package of the same thing for pennies? That, at least, has changed, at least in some quarters.
Nevertheless, home canning seems to be another one of those areas where you gather your own information, meld it with your own outlook and attitude, and make your own choices. Home economists are understandably cautious, and sometimes over-cautious. People who have “always done it that way” are understandably confused, or even skeptical about the new rules: “How come we didn’t all die from food poisoning years ago?”
And a magazine that strives to blend the best of both worlds will continue to irk both factions from time to time… as well as those in the middle who demand explicit “facts” in black and white.
Culture ClashConfuses Canners

4 Countryside Canning & Food Preservation Guide
Marilyn B. noyes, PhD, hoMe econoMics PrograM leaDerJean alDer, Ms, hoMe econoMist
Many homemakers preserve food for their families. The most common method used is freezing, probably because it is quick and easy. Canning takes more time and energy, but is preferred by many for preserving the large quantities of fruits and vegetables available during the summer
season. Time spent preparing and planning for canning will make canning days go more smoothly and be more enjoyable.
Get Ready: Use Updated Canning Guides All canned food should be prepared following tested recipes. Research is done continually to provide
the basis for updated recommendations. Many new guidelines, especially for tomatoes, have been re-leased recently. Check your canning books and update them if necessary. The Extension office in your county has reliable, up-to-date low cost guides.
Assemble Equipment Review the equipment needed. A large deep pot is needed for processing fruits and a large pressure
canner is essential for vegetables, meats, poultry, fish and other low acid mixtures. Review the recipes you will be using and get the ingredients, jars and supplies ready in advance. Wash the estimated num-ber of jars needed the day before you will be canning. Set upside down on clean dishtowels or paper towels. Sterilization is usually not necessary.
A checklist of other equipment would include: Jars (not chipped), new lids, sharp knife, clean cloths, measuring cups, garbage container, cooling area, newspaper, pad, sugar, cardboard, racks or board, salt, hot pads, rings, funnel, and jar lifter.
Get Organized Plan to organize your family’s activities for canning days. Keep meals
simple but nutritious. Cook ahead if possible. Have laundry and other chores caught up. Check your appointment calendar and rearrange if necessary. Arrange for child care if possible, or plan activities to keep the young ones busy. Youngsters underfoot can add stress to an already busy day. Be reasonable in estimating the time required to complete canning. The time required for preparation, waiting for water
to boil, processing and cool down time will probably be at least 1-1/2 hours per canner load. You may need to process part of the produce one day and part the next. The reduction in quality is probably more acceptable than an overly stressed parent or overdoing to the point of exhaustion!
Planning For Canning Canning Is A Big job As With Any Big Job, It Pays To Plan Ahead

5Countryside Canning & Food Preservation Guide
Get Set Preparations on the day you can or freeze are important too. Sharpen knives if necessary. Start with
a clear and clean counter space, sink and table. In apartments with limited space, you may need to put canisters, spices or decorations usually found on the counter and table in a box and store them tem-porarily out of the way. Dress in clean, cool, and comfortable work clothes. Some fruits stain clothing, so don’t wear good clothes. Set up your work flow in an organized manner. Right handed people work more efficiently if tasks move from right to left. Left handed people work best from left to right.
Go Now is the time to get to work. Can you get others to help? Neighbors or friends can work together,
sharing costs and work effort. Spouses can accept responsibilities. Children should learn to help accord-ing to their ages and ability. Time spent working with our children is more fun, the children feel needed, and it can be a good time to talk and teach. Other work-saving hints include: Do as much of one task at a time as possible and practical (wash all jars, prepare all lids, etc.). Divide work into manageable parts (prepare one cooker load at a time). Don’t start more than you can finish. Fruits peeled too far in advance turn brown; also beets will turn dark. Heated products that are to be hot-packed will not be safe unless reheated before continuing. Clean up as you go.
Creative Recipes for Fermenting 64 Vegetables & Herbs
Fermented VegetablesBy Kristen K. Shockey & Christopher Shockey
Fermented foods are a delicious, healthy addition to any diet, including the Paleo diet. They’re full of nutritious bacteria and probiotics that aid in digestion and boost the immune system. This guide includes in-depth instruction for making kimchi, sauerkraut, and pickles and then of-fers more than 120 recipes, using the same basic meth-ods, for fermenting 64 different vegetables and herbs. You’ll discover how easy it is to make dozens of exciting dishes. The recipes are creative, delicious, and healthful, and many of them can be made in small batches—even just a single pint. 376 pages
iamcountryside.com/shop970-392-4419
6 Countryside Canning & Food Preservation Guide
An Overview
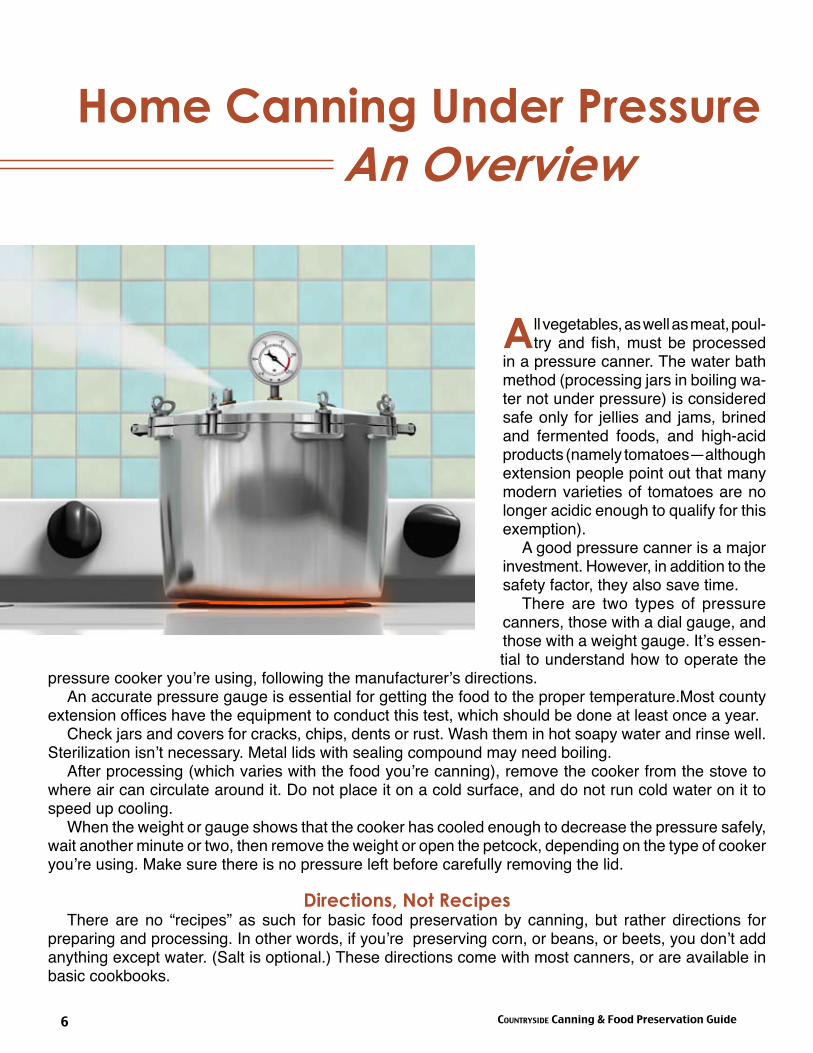
All vegetables, as well as meat, poul-try and fish, must be processed
in a pressure canner. The water bath method (processing jars in boiling wa-ter not under pressure) is considered safe only for jellies and jams, brined and fermented foods, and high-acid products (namely tomatoes—although extension people point out that many modern varieties of tomatoes are no longer acidic enough to qualify for this exemption).
A good pressure canner is a major investment. However, in addition to the safety factor, they also save time.
There are two types of pressure canners, those with a dial gauge, and those with a weight gauge. It’s essen-tial to understand how to operate the
pressure cooker you’re using, following the manufacturer’s directions.An accurate pressure gauge is essential for getting the food to the proper temperature.Most county
extension offices have the equipment to conduct this test, which should be done at least once a year.Check jars and covers for cracks, chips, dents or rust. Wash them in hot soapy water and rinse well.
Sterilization isn’t necessary. Metal lids with sealing compound may need boiling.After processing (which varies with the food you’re canning), remove the cooker from the stove to
where air can circulate around it. Do not place it on a cold surface, and do not run cold water on it to speed up cooling.
When the weight or gauge shows that the cooker has cooled enough to decrease the pressure safely, wait another minute or two, then remove the weight or open the petcock, depending on the type of cooker you’re using. Make sure there is no pressure left before carefully removing the lid.
Directions, Not RecipesThere are no “recipes” as such for basic food preservation by canning, but rather directions for
preparing and processing. In other words, if you’re preserving corn, or beans, or beets, you don’t add anything except water. (Salt is optional.) These directions come with most canners, or are available in basic cookbooks.
Home Canning Under Pressure

7Countryside Canning & Food Preservation Guide
1 gallon beets 2 cups sugar 1-1/2 teaspoon salt 2 sticks cinnamon 1 tablespoon allspice 1-1/2 cups water 3-1/2 cups vinegar
Cover beets with water. Cook until tender. Remove skins & ends.Add sugar, salt, spices and water to vinegar. Simmer 15 minutes. Pack beets into hot sterilized jars. If not enough liquid, add more vinegar. Process quarts or pints in a boiling water bath for 30 minutes.
PiCkled BeetsRecipe #1
10-20 medium sized beets 2 cups water 2 cups sugar 2 cups vinegar 2 cups beet juice (reserved from cooking liquid) 1 tablespoon cinnamon
Boil beets until fork-tender. Reserve cooking liquid. Peel the cooked beets and cut into bite-sized pieces. Pack into jars.
Meanwhile, combine remaining ingredients and bring to a boil. Pour hot liquid over beets . Put lids and rings on jars. Process 25-30 minutes in hot water bath. Makes 2-3 quarts.
Recipe #2
PiCkled Beets
8 Countryside Canning & Food Preservation Guide
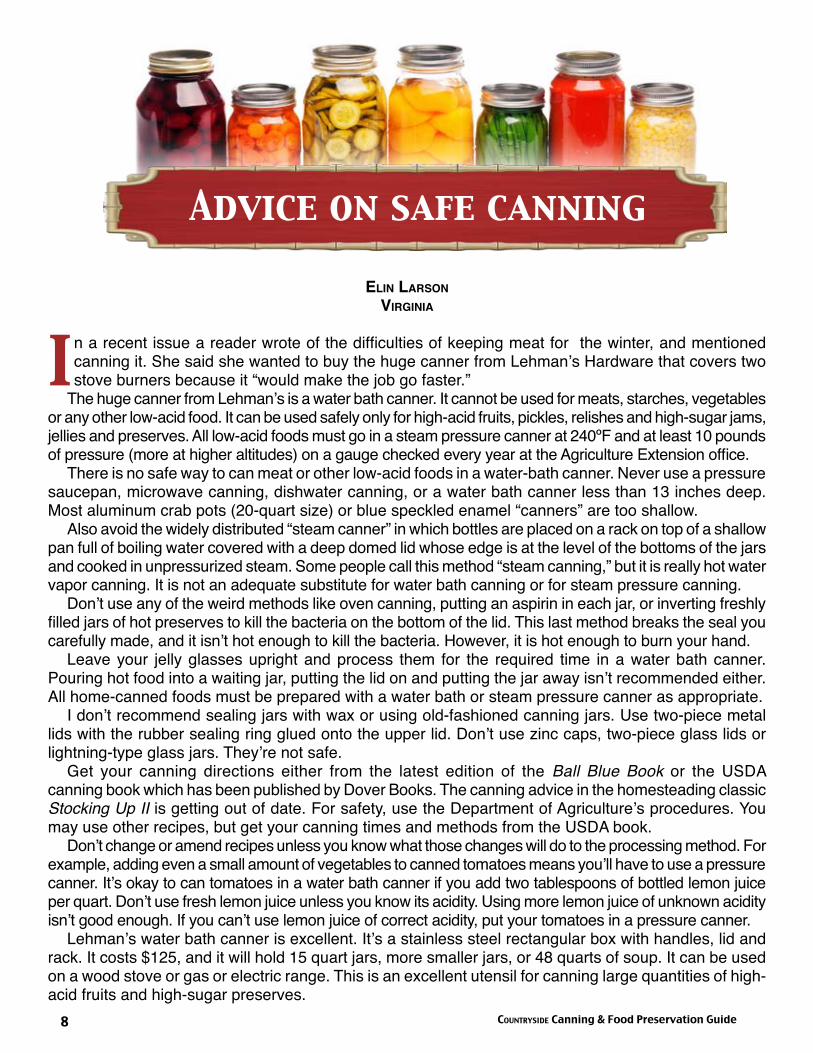
elin larsonVirginia
In a recent issue a reader wrote of the difficulties of keeping meat for the winter, and mentioned canning it. She said she wanted to buy the huge canner from Lehman’s Hardware that covers two stove burners because it “would make the job go faster.”
The huge canner from Lehman’s is a water bath canner. It cannot be used for meats, starches, vegetables or any other low-acid food. It can be used safely only for high-acid fruits, pickles, relishes and high-sugar jams, jellies and preserves. All low-acid foods must go in a steam pressure canner at 240ºF and at least 10 pounds of pressure (more at higher altitudes) on a gauge checked every year at the Agriculture Extension office.
There is no safe way to can meat or other low-acid foods in a water-bath canner. Never use a pressure saucepan, microwave canning, dishwater canning, or a water bath canner less than 13 inches deep. Most aluminum crab pots (20-quart size) or blue speckled enamel “canners” are too shallow.
Also avoid the widely distributed “steam canner” in which bottles are placed on a rack on top of a shallow pan full of boiling water covered with a deep domed lid whose edge is at the level of the bottoms of the jars and cooked in unpressurized steam. Some people call this method “steam canning,” but it is really hot water vapor canning. It is not an adequate substitute for water bath canning or for steam pressure canning.
Don’t use any of the weird methods like oven canning, putting an aspirin in each jar, or inverting freshly filled jars of hot preserves to kill the bacteria on the bottom of the lid. This last method breaks the seal you carefully made, and it isn’t hot enough to kill the bacteria. However, it is hot enough to burn your hand.
Leave your jelly glasses upright and process them for the required time in a water bath canner. Pouring hot food into a waiting jar, putting the lid on and putting the jar away isn’t recommended either. All home-canned foods must be prepared with a water bath or steam pressure canner as appropriate.
I don’t recommend sealing jars with wax or using old-fashioned canning jars. Use two-piece metal lids with the rubber sealing ring glued onto the upper lid. Don’t use zinc caps, two-piece glass lids or lightning-type glass jars. They’re not safe.
Get your canning directions either from the latest edition of the Ball Blue Book or the USDA canning book which has been published by Dover Books. The canning advice in the homesteading classic Stocking Up II is getting out of date. For safety, use the Department of Agriculture’s procedures. You may use other recipes, but get your canning times and methods from the USDA book.
Don’t change or amend recipes unless you know what those changes will do to the processing method. For example, adding even a small amount of vegetables to canned tomatoes means you’ll have to use a pressure canner. It’s okay to can tomatoes in a water bath canner if you add two tablespoons of bottled lemon juice per quart. Don’t use fresh lemon juice unless you know its acidity. Using more lemon juice of unknown acidity isn’t good enough. If you can’t use lemon juice of correct acidity, put your tomatoes in a pressure canner.
Lehman’s water bath canner is excellent. It’s a stainless steel rectangular box with handles, lid and rack. It costs $125, and it will hold 15 quart jars, more smaller jars, or 48 quarts of soup. It can be used on a wood stove or gas or electric range. This is an excellent utensil for canning large quantities of high-acid fruits and high-sugar preserves.
Advice on safe canning

9Countryside Canning & Food Preservation Guide
Lehman’s and your local farm supply store sell good quality steam pressure canners. They are also available at some hardware and discount stores. Get the largest size available, which holds 22 quarts of soup or seven quarts of home-canned food. While half gallons of fruit juice are sometimes canned, that is too large a size for food, since the heat doesn’t penetrate all the way to the middle, leaving some of the contents unsterilized. Some canning books list processing times for foods in half-gallon jars, but stick with quart or pint jars. Some dense foods such as pureed squash and pumpkin pie filling must be canned in small jars only.
Relishes and mixed vegetables without a high acid content must be canned in small jars, even in a steam pressure cooker. The old method of putting sliced cucumbers and spices in a jar, then pouring boiling vinegar, water and salt on them is no longer recommended.
You may still pack your pickles that way, but boil the pickles in a water bath canner for the required time after they are sealed.
Incidentally, a steam pressure canner can be used for water bath canning if it’s deep enough. Thirteen inches is sufficient. Just don’t pressur-ize it. The largest steam pressure canner now available will cover only one stove burner. Make sure that your canner(s) are used properly and are in good working order.
In my opinion, canners with the weight and the pressure gauge are better than the kind with the “rocker” weight that rattles to indicate the pressure and doesn’t have a separate pressure gauge. I wasn’t able to get a rocker weight canner to work properly, so I went back to the other kind.
Instead of buying new canners, I have been rehabbing old ones. Remember that Presto still has parts for even its 50-year-old canners, while other brands generally don’t. I bought a Magic Seal canner from an old lady. This is the canner shown in the harvest kitchen drawing as well as The Have More Plan.
The Magic Seal is so old that it has wooden handles instead of bakelite, so I guess it was made in the 1920s or ’30s. It was in excellent condition, but the gasket was old. A replacement was unavailable, but I went to an auto parts store and got a gasket making kit. It consists of a sheet of rubber material, a pattern for tracing the original gasket and instructions. Many older cars need gaskets that are no longer manufactured, so that’s why I was able to find the kit in an auto parts store.
All pressure canners and cookers (except for a few modern ones with a precise metal-to-metal fit) need a gasket. A gasket can easily be replaced when it wears out. I worry that the gasketless seal on a modern aluminum canner will become scratched, bent or otherwise unusable and unrepairable.
My next steam pressure canner came from a junkyard for $10. The place had several acres of car parts and an acre of other things, including household items. It was an old Presto Model 7, made about 1940, with no weight and an aged gasket. I knew I could get parts for it. I bought a new gasket, pressure plug and weight for $22.97 at the local appliance store. After a good bath and repairs, the old machine is equal to a new $150 pressure canner. It will only take quarts and smaller jars, but half gallons aren’t recommended anyway.
1. Making up your own canning recipe. Without scientific testing, you will not know how long the product needs to be processed to be safe.2. Adding extra starch, flour or other thickener to the recipe. This will change the rate of heat penetration into the product and can result in undercooking.3. Adding extra onions, chili, bell peppers, or other vegetables to salsas. The extra vegeta-bles dilute the acidity and can result in botulism poisoning.4. Using the oven instead of water bath. The product will be under processed since air pro-cessing is not as good a conductor of heat as water or steam. The jars also may blow up.5. Not making altitude adjustments. Since boil-ing temperatures are lower at high altitudes, the products will be undercooked.
6. Not venting pressure cooker first. Lack of venting can result in air pockets which will not reach as high a temperature.
Utah State University Extension
Potentially deadly Canning sins6

10 Countryside Canning & Food Preservation Guide
Home Canning Simplified: “Food preservation has to fit
into my everyday life.”
BeV carneyWisconsin
After putting up food for the winter for 18 years, I was somewhat surprised by the “Planning for Canning” article in 82/4. If I were a novice canner, I think I’d be afraid to tackle such a big project.
Canning food is time consuming, but unless you’re putting up bushels and bushels of food, it won’t take all day.
Much of the time required is spent waiting for water to boil before or after the food is in the canner. You can do other things then. If you grow your own vegetables, you’ll be canning small batches more frequently.
You can somewhat control the time spent preserving food by choosing the quickest method of putting that food up. Freezing tomatoes is almost effortless and takes virtually no time. Either chop and freeze, puree and freeze, or freeze whole. When frozen whole, there’s no need to peel—the peels will slip right off under running water.
Freezing works well if you want tomatoes for soups and stews. Frozen tomatoes are best used within six months. Dehydration is another option. All you need to do is slice, spread and dry.
If you want to can tomatoes, there are a variety of methods to choose. Tomato puree is pretty quick if you use a Victorio strainer. You’ll need to invest more time if you want chunk-canned tomatoes. Peel-ing tomatoes can be a snap if you follow the suggestions under canning tips. Once you’ve chosen your preservation method, here are some ideas to help speed up the process.
Freezing Tips• When blanching vegetables, steam blanch rather than water blanch. It’s much faster. I used the
water blanch method for years, figuring you could add a lot more produce to the pot, but I was wrong. I spent a lot of time waiting for the water to reboil. Now I run two four-quart pans with those cheap metal steamer racks side by side on the stove. The steamer always stays hot, and you can process a lot of food in a short period of time.
• Store chunks of ice in the freezer to use when cooling blanched produce. Old cottage cheese or milk cartons work well. Toss one or more into your cold water, and the food will cool quickly.
• Instead of dumping your vegetables directly into the cold water, put them in a colander inside the water sink. You won’t have to chase them around the sink.
• Suck the air out of plastic bags before closing. It’s a quick way to get the most air out to prevent freezer burn.
Canning Is Time-Consuming, But It Needn’t Take All Day If You’re
Organized, And Use Some Of These Tips
11Countryside Canning & Food Preservation Guide
• I f you only have enough food to make one or two frozen bags, process the food right before you make lunch or dinner. That way, you can use the pan and maybe even the hot water to prepare lunch.
• Don’t panic if you have to hold food in the refrigerator for a day or two. It will still freeze and taste fine.
Canning Tips• Peeling produce for the canner: The quickest method I know for peeling fruits and vegetables is to
boil a pot of water (10-12 quarts). Put the food to be peeled in the sink or your empty canner. Pour the boiling (not just hot, but boiling) water over the food. Let it sit in the water for a couple of minutes or until the peels look ready to be removed when pricked with a knife. Empty the water and peel away. The peels should slip right off. This works best for tomatoes, and it’s pretty good for ripe peaches. I haven’t found an easy way to peel pears.
• Be flexible. If you have just enough food to can three jars, look around to see if you have a smaller pot to use as a canner. Heating water takes time and energy, and a smaller canner will speed things up. We use an old enamel 12-quart pot with a pressure cooker rack in the bottom.
• Consider jar size. It takes almost as much time to can seven pints as it does to can seven quarts. If you will use a whole quart before the food goes bad, can in larger jars. It also saves money on lids.
• Run two canners side by side. Either invest in a second canner or borrow one from a neighbor. It’s amazing how fast it can make things go.
• On that same note, try to find a “fifth” burner—an electric or propane extra burner for heating can-ning liquids, etc., when your two canners are using up stovetop space.
• Start boiling canning water while eating dinner or making breakfast. Sterilize your jars by putting them right into the canner to heat along with the water. Once they’re hot, fill them one at a time and reinsert back into the canner. They often stay hot this way without a need to dip in hot water.
•Use your hot canning water to cover the jar lids for softening prior to screwing them on the jars. As you put up your own food, you’ll discover lots of ways to save time. It may seem like it takes forever
the first year, but it will get faster.
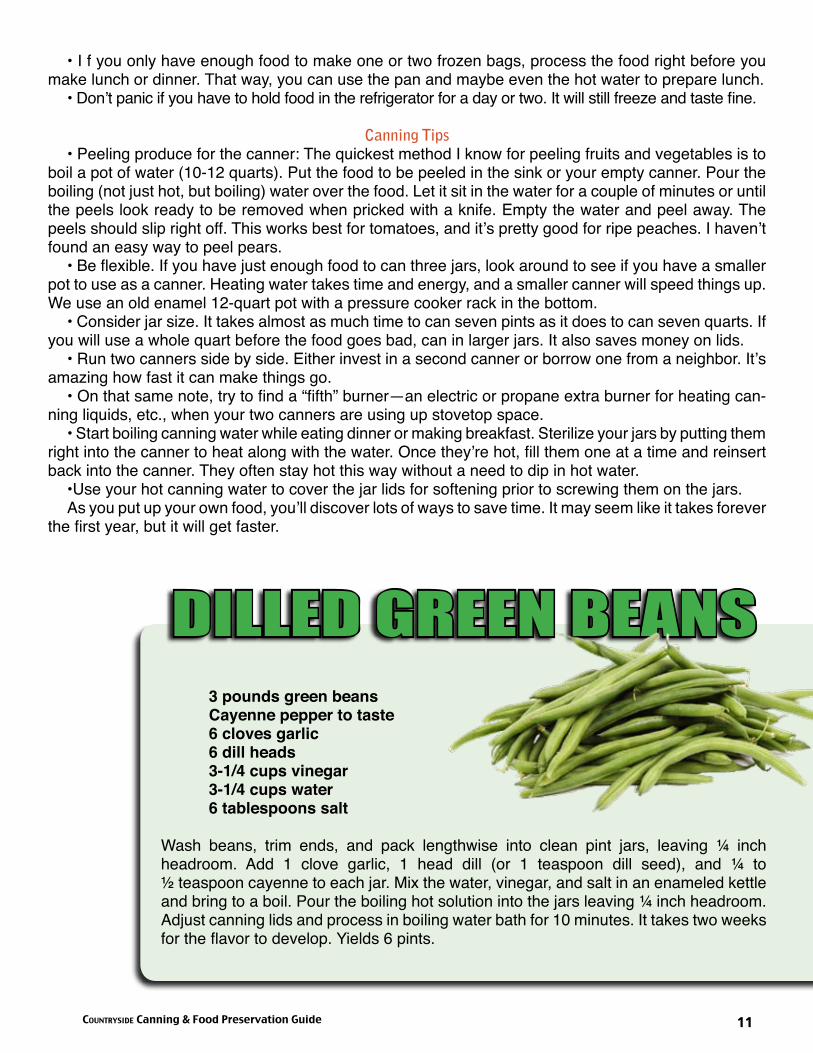
3 pounds green beans Cayenne pepper to taste 6 cloves garlic 6 dill heads 3-1/4 cups vinegar 3-1/4 cups water 6 tablespoons salt
Wash beans, trim ends, and pack lengthwise into clean pint jars, leaving ¼ inch headroom. Add 1 clove garlic, 1 head dill (or 1 teaspoon dill seed), and ¼ to ½ teaspoon cayenne to each jar. Mix the water, vinegar, and salt in an enameled kettle and bring to a boil. Pour the boiling hot solution into the jars leaving ¼ inch headroom. Adjust canning lids and process in boiling water bath for 10 minutes. It takes two weeks for the flavor to develop. Yields 6 pints.
dilled gReen Beans

12 Countryside Canning & Food Preservation Guide
DeBorah DeDenBach-MooreMichigan
After my letter on food storage appeared, I was besieged with requests for the sample inventory sheets I offered. I was amazed and delighted. Many letters included questions on canning, so I thought it might be a good subject to cover. Kerr and Ball both offer excellent books to use as a
guide, but they don’t include some of the tips I’d like to offer from 30 years of canning experience.
EquipmentKettles: I have two pressure canners that hold either seven quarts or nine pints. That’s pretty standard.
I also have a large water bath kettle for doing quarts and a smaller one that does pints and half pints. If you can only get one kettle, get the larger one. You can always put a pint in a quart kettle, but not a quart in a pint kettle. I like having both for speed of operation.
If you use a jiggle weight canner as I do, keep the weights in the same place all the time. The weight is small and easily lost, and your canner is virtually useless without it. During canning season, I keep the weights underneath or next to the propane grate I use for canning. During the off season, the weights are in the silverware drawer. No place else. Ever.
When storing your pressure kettles for the winter, remove and dry the gaskets and gently fold enough to place in a large zipper-type bag. Run the gasket under hot water the next season, and it will readily go back to its original shape when fitted into the lid. Before placing the lid on a full kettle, run the gasket under hot or cold water, and you’ll get a smoother seal. After the canning is done and the kettle has cooled down enough to remove the weight, loosen or remove the lid right away. I’ve had trouble getting the lid off when I let it sit too long. Besides, you want your food to start cooling down.
If you don’t have a pressure canner and you’re looking for one, those with gauges are the most ac-curate. They are more expensive, but if you get one that double stacks, you’ll only need one. If you can only get a jiggle weight canner, don’t be afraid of it. I’ve used mine safely for many, many years.
Other equipment (all manual): A juicer is indispensable to me, and I want to discuss the different types of juicers, food mills and food presses. I have found the paddle/crank style to be hard to handle and to need fre-quent cleaning. The same goes for the funnel-shaped one with a cone. I use mine only for jams and jellies.
The model I use and recommend is fed through a wide funnel on top, goes through a worm screw that presses out the juice and pulp (which comes out a screen down across a tray into a waiting bowl). The skin and seeds come out the other end. It never needs emptying and makes short work of a bushel of tomatoes. If you have a choice, this is the one to get. It’s worth the little extra money. Common brands are Victorio and Squeezo.
Other items to buy are a cherry pitter, an apple peeler/corer, and a meat grinder and sausage stuffer. Don’t forget jar tongs, a magnetic lid lifter (easily made by gluing a small magnet onto a short dowel; this keeps your fingers out of the hot water while fishing for a lid, and avoids the frustration of trying to pick up a single lid with tongs), a wide mouth funnel to fill jars, a 1-1/2 cup scoop, and a sturdy tray for carrying jars.
The list isn’t complete yet. Other items you’ll need are a grain grinder, candy thermometer, sap buck-ets and spouts, sugar forms, two crocks (pickles may come in while the kraut is still fermenting) and a kitchen or baby weight scale for weighing all that shredded cabbage, among other things.
Canning Tips KERR® And BALL® Don’t Tell You

13Countryside Canning & Food Preservation Guide
Other TipsIf you have a damp basement and rusty lids are a problem, try this: After the jar is completely cool
(give it 48 hours) remove the band, invert the jar and dip just enough melted paraffin to come about 1/8 inch on the glass. Don’t put the band back on the jar. After opening the jar, the wax on the glass should come off easily with a fingernail. The paraffin you’ve removed doesn’t touch any food directly. Some people have suggested coating the lid with Vaseline or using plastic wrap and a rubber band. Both methods may work, but they are more costly.
Another lid trick: When the jar is empty, washed and dried, put the lid back on upside down followed by the band. This will keep the jar perfectly clean in storage and the rubber seal on the lid won’t stick to the jar. How many times have you washed spiders out of your jars?
The screw-on caps from mayo or mustard jars can also be used. Putting a lid back on also prevents the jars from getting chipped. If you save your boxes, put the jars back in upside down to keep them cleaner.
More jar tips: Look where you are opening the jar. The threads on the jar come right to the top edge. If your can opener catches right on that glass thread, you will break off some of that glass and ruin the jar or get frustrated about not being able to open the jar. Always listen for the sound of the vacuum being released when opening a jar. If the vacuum is gone, the food is spoiled even if it doesn’t look bad yet. Throw it out! “If in doubt, throw it out” has been my motto for a long time.
Throwing out food is very discouraging. To me, it is better to can something in too small a jar than too large a jar and ending up pitching food out. For example, meats are best processed in pint jars (they are also safer to process), but soups and tomatoes do well in quarts because of the quantity you usually consume. If you cook your tomato juice down into sauce, process it in pints, not quarts.
I made the mistake of processing some of our wild mushrooms in pint jars. Now I have to wait and plan two menus back-to-back that use them, since wild mushrooms have a much stronger taste than commercial ones, and they can overpower a dish rather than adding a delicate taste. I’ll can only half pints from now on!
Labels are cute and, I admit, even helpful at times. But trying to get the glue off the glass is more trouble than I care to take. The lids will eventually get thrown out: put your labels there. Most of the time all you need is the date. After all, green beans are pretty recognizable.
StorageThis might seem like an odd topic to those who have canned in the past, but this is for the new kids on the
block. Jars have wide and small mouths and come in both pints and quarts. If you’re not using dividers (1/4 inch plywood cut 4” x 18”) to stack your jars, put the wide mouths on the bottom, as they are more stable. Never stack more than three jars high, or you’re inviting disaster.
As for wide mouth versus small mouth jars, the wide jars are easier for me to clean, and I take advantage of that. I try to can things that leave a residue (like meats) in wide mouth jars, because I can get my hand in them for scrubbing. I use the small mouth jars for things such as vegetables floating in water that don’t leave any residue behind. When I look to replace jars or buy more, I always go for the wide mouth jars for that reason. If the jars are free, I’ll take whatever is there and adjust what goes into them.
WorkplaceIt’s always nice to have a set area where you can have your stuff right there
and available. At present, I have a spot in the basement conveniently located next to the storage shelves. It’s a good-sized table, and I still have plenty of room to work and place jars when they come off the canner. Eventually, I’d like to have a summer kitchen off the back of the house that will also be the canning room, as propane smells. That will provide lots of table space to fill and cool jars.
Canning isn’t complicated or dangerous as long as you follow the rules.
14 Countryside Canning & Food Preservation Guide
sylVia J. Miller
For generations, making jelly or jam meant adding a sweetener to fruit or juice and cooking the combination until it jelled. Then came packaged pectin. No longer was the homemaker dependent on the vagaries of nature, nor did she wonder if there was enough pectin in that particular batch
of fruit to make jelly successfully.I’ve made many jars of jelly and jam with commercial pectin. One drawback has always been the fact
that so much sugar was needed that one had to have a good imagination to be sure just what kind of fruit was in the jelly. As people became more conscious of what they were eating and began wanting a diet with less sugar, some recipes were resurrected from the past. Some cooks began making jelly the “old-fashioned way” again. Not wishing to lose its market entirely, the pectin makers began making a “lite” pectin, which requires much less sugar.
Some fruits will do well the old way, for they contain enough pectin to make a good jell. Some fruits are borderline, and the growing conditions can make a difference. Others simply won’t jell, no matter how much sugar or honey is used or how long they cook. One sure thing is that barely ripe fruits will have the most pectin, while those that are riper will have more flavor. It is the balance between these two factors that makes a great jelly.
Among the fruits high in pectin are most apples, especially crab apples; tart blackberries and their cousins, the loganberries and boysenberries; Concord grapes; cranberries; green gooseberries; most plums, if not too ripe; quince; and red currants.
Fruits that tend to be low in pectin are apricots, blueberries, cherries, peaches, pears, pineapples, raspberries, and strawberries. An exception can be pointed out. I have had some strawberry jam that jelled too much even without using additional pectin. (I didn’t watch the thermometer closely enough.)
A good thermometer is a necessity when you’re not using a commercial pectin. While they can be slightly more expensive, a dairy thermometer might also be more accurate. The regular candy thermom-eter does a good job, and I have used one many times.
Making Jam, Jelly & Marmalade
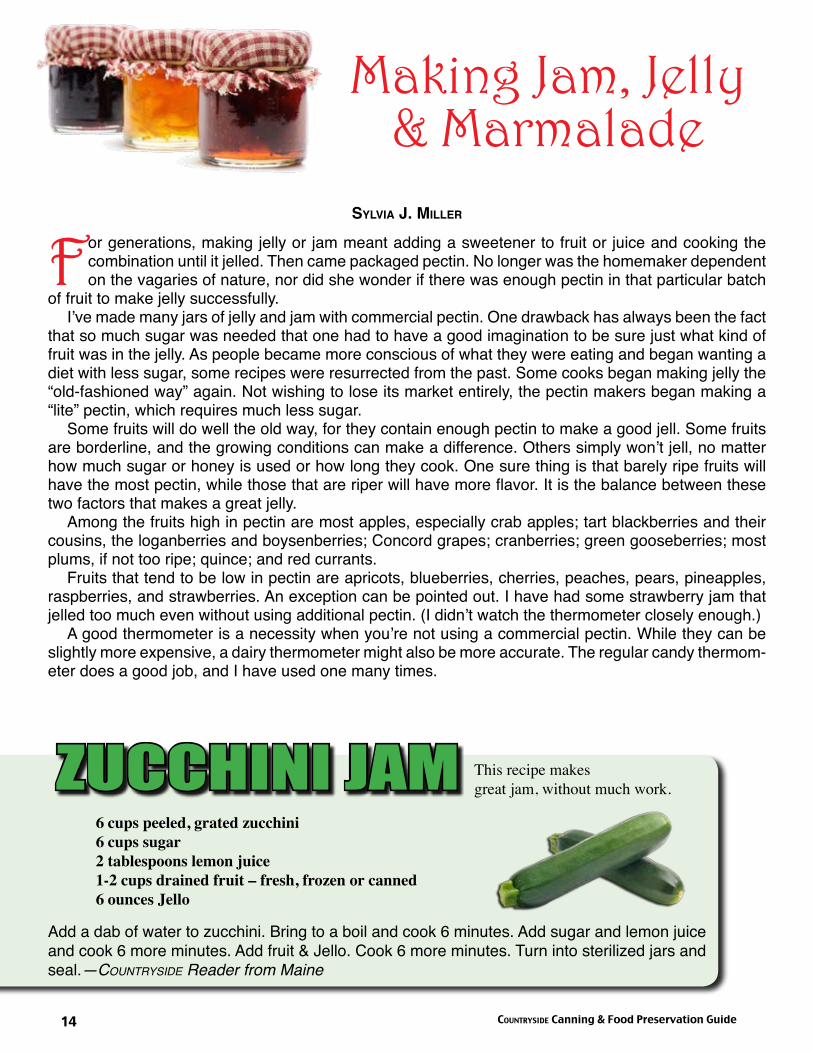
6 cups peeled, grated zucchini 6 cups sugar 2 tablespoons lemon juice 1-2 cups drained fruit – fresh, frozen or canned 6 ounces Jello
Add a dab of water to zucchini. Bring to a boil and cook 6 minutes. Add sugar and lemon juice and cook 6 more minutes. Add fruit & Jello. Cook 6 more minutes. Turn into sterilized jars and seal.—Countryside Reader from Maine
This recipe makes great jam, without much work.ZuCChini Jam
15Countryside Canning & Food Preservation Guide
Strawberry Jam 4 pints berries 2 -2 1/2 cups sugar
Wash and thoroughly rinse jars. You’ll need three or four half-pint jars or seven or eight four-ounce jars. Because there are only two of us and we like an assortment of choices of jelly or jam, we find the smaller jars serve us better. For a family, the larger half pint jars might be more appropriate.
Put the jars, lids and inserts (if using that type) into a pan large enough so they will be covered by water. Put on the stove, bring to a boil and simmer until you’re ready to use them.
Wash and crush four pints of berries—one pint that isn’t quite ripe and three pints that are ripe. This will yield about two to 2-1/2 cups of crushed fruit. Put these in a large (six-quart) pan. Add an equal or lesser amount of sugar (about two cups) and bring this to a rolling boil that can’t be stirred down.
Insert the thermometer and cook until the desired temperature is reached (your boiling point plus 8°F) Check your boiling water! Remove the jam from the heat, stir and skim. Ladle promptly into the clean, hot jars. Cover and seal snugly, or pour melted paraffin gently over the jam. Keep out of drafts until cool.
Makes about seven four-ounce jars.
Orange Marmalade 6 large oranges 2 lemons sugar
Peel the oranges and lemons, being careful not to get any of the white of the fruit with the peel. Cut this into strips and reserve.
Remove the white from the orange and lemon and chop the oranges. Slice the whole lemon into very thin slices. Measure the fruit and put
it into a six-quart pot or kettle. Add an equal amount of sugar.Heat this until the sugar has dissolved. Slowly bring it to a
rolling boil that can’t be stirred down. Insert the thermometer and cook until the desired temperature is reached.
Remove from the heat, skim and ladle into the previously prepared hot jars. Makes about four half-pints.
The first and most important step is to check the temperature at which water boils in your home. Al-titude plays a big part in this. To make a good jelly, jam or marmalade, add 8°F to whatever the boiling water temperature might be in your kitchen. Here, the boiling water temperature is 208°F. Adding the 8°F, I cook my jellies until they reach 216°F.
As the list indicates, there are good times to “do it the old way” and times to make use of some of the “modern” conveniences.
16 Countryside Canning & Food Preservation Guide
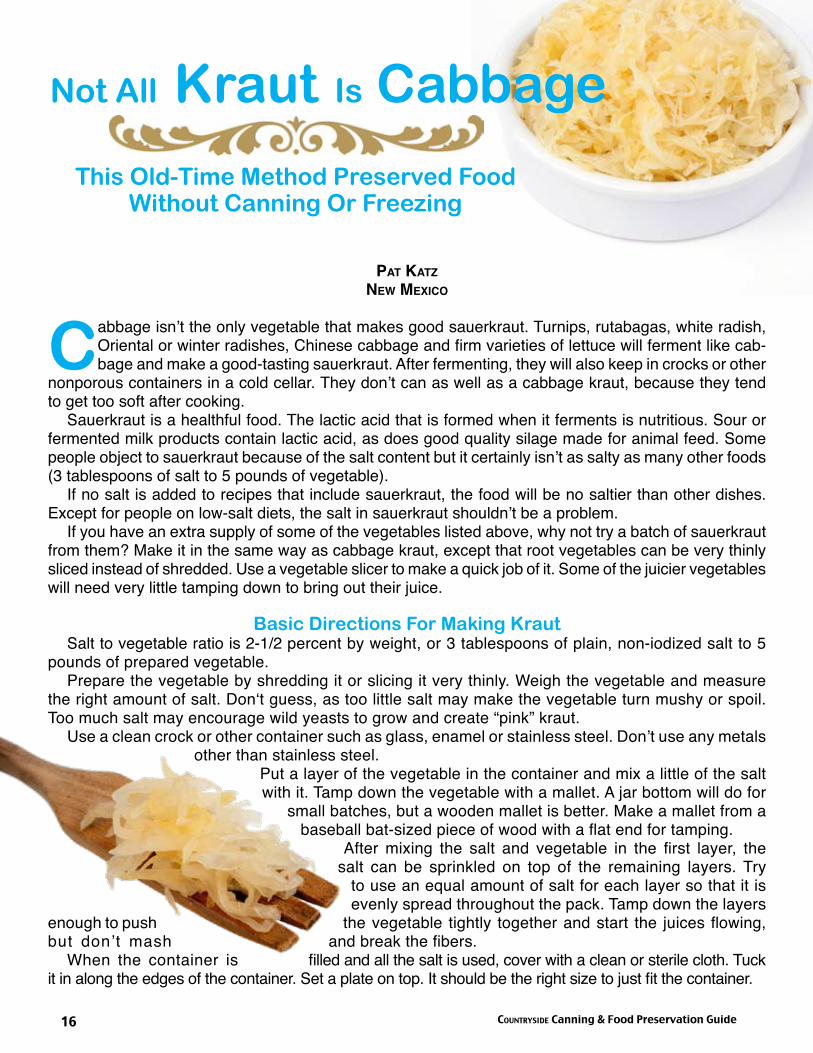
Pat KatzneW Mexico
Cabbage isn’t the only vegetable that makes good sauerkraut. Turnips, rutabagas, white radish, Oriental or winter radishes, Chinese cabbage and firm varieties of lettuce will ferment like cab-bage and make a good-tasting sauerkraut. After fermenting, they will also keep in crocks or other
nonporous containers in a cold cellar. They don’t can as well as a cabbage kraut, because they tend to get too soft after cooking.
Sauerkraut is a healthful food. The lactic acid that is formed when it ferments is nutritious. Sour or fermented milk products contain lactic acid, as does good quality silage made for animal feed. Some people object to sauerkraut because of the salt content but it certainly isn’t as salty as many other foods (3 tablespoons of salt to 5 pounds of vegetable).
If no salt is added to recipes that include sauerkraut, the food will be no saltier than other dishes. Except for people on low-salt diets, the salt in sauerkraut shouldn’t be a problem.
If you have an extra supply of some of the vegetables listed above, why not try a batch of sauerkraut from them? Make it in the same way as cabbage kraut, except that root vegetables can be very thinly sliced instead of shredded. Use a vegetable slicer to make a quick job of it. Some of the juicier vegetables will need very little tamping down to bring out their juice.
Basic Directions For Making KrautSalt to vegetable ratio is 2-1/2 percent by weight, or 3 tablespoons of plain, non-iodized salt to 5
pounds of prepared vegetable.Prepare the vegetable by shredding it or slicing it very thinly. Weigh the vegetable and measure
the right amount of salt. Don‘t guess, as too little salt may make the vegetable turn mushy or spoil. Too much salt may encourage wild yeasts to grow and create “pink” kraut.
Use a clean crock or other container such as glass, enamel or stainless steel. Don’t use any metals other than stainless steel.
Put a layer of the vegetable in the container and mix a little of the salt with it. Tamp down the vegetable with a mallet. A jar bottom will do for
small batches, but a wooden mallet is better. Make a mallet from a baseball bat-sized piece of wood with a flat end for tamping.
After mixing the salt and vegetable in the first layer, the salt can be sprinkled on top of the remaining layers. Try
to use an equal amount of salt for each layer so that it is evenly spread throughout the pack. Tamp down the layers
enough to push the vegetable tightly together and start the juices flowing, but don’t mash and break the fibers.
When the container is filled and all the salt is used, cover with a clean or sterile cloth. Tuck it in along the edges of the container. Set a plate on top. It should be the right size to just fit the container.
Not All Kraut Is Cabbage
This Old-Time Method Preserved FoodWithout Canning Or Freezing

17Countryside Canning & Food Preservation Guide
Put a weight such as a jar of water or a clean rock on the plate. A sealed plastic bag full of water is another option. Be sure the plastic bag is sturdy, as a leak would make a mess of things. Enough brine should rise to cover the vegetable in 24 hours. If it doesn’t add brine made with 2-1/2 teaspoons salt to a cup of cold water.
Set the container in a place where the temperature is 70°F or less. The ideal temperature for fer-mentation is often given as 65°F, but many people like the flavor of sauerkraut best when it ferments at temperatures a little below 70°F. It will take as long as 10 days for the vegetable to ferment at warmer temperatures, while it will take a month or longer in cooler environments. Don’t try to make sauerkraut in hot weather unless you have a cool basement or other cool spot in which to keep it. If the temperature is over 70°F, the kraut will get soft and have poor flavor.
As it ferments, the sauerkraut will bubble and may even overflow a full container.The kraut is done when fermentation ends. Check every few days to see if a scum has formed. Put
on a clean plate or sterilize the board before putting it back. Some directions say to change the cloth every day, but it usually isn’t necessary.
It’s a good idea to taste the sauerkraut when you check it. Many people enjoy eating kraut in a partially fermented state, so take some out for supper if you like it. The sauerkraut can be moved to cold storage when it has a pleasantly tart taste. Mild sauerkraut is usually enjoyed more than a very sour product, so you may want to move it before it is completely through with fermentation. Don’t can it until the taste is decidedly sour, of course.
To StoreTo store, remove the cloth, but keep the plate or board on it to hold the sauerkraut under the brine. Close
the container tightly. Some directions say to put a thin layer of oil or melted paraffin on the brine to seal out oxygen. Store at under 40°F, and the sauerkraut should keep all winter. If the storage place is below 55°F, the kraut should keep for a month or two.
When canning sauerkraut, it should be heated to just below boiling. Pack the hot kraut in canning jars and add enough hot juice to fill the jar. Leave a half-inch of head room. If there isn’t enough juice to fill the jars, make more brine at the ratio of 1-1/2 tablespoons salt to 2 cups of water. Process pints for 15 minutes and quarts for 20 minutes in a boiling water bath.
Seasoned SauerkrautVarious spices and flavors have been used to season sauerkraut. They are added when the cabbage
or other vegetable is packed in the crock before fermentation.Some possibilities are caraway, celery, dill seed, bay leaf and pickling spices.
For something different, try garlic, sliced onion, sliced apple, or horseradish. One book mentioned that sliced quince, horseradish, peppercorns, tarragon and dill were all added to the cabbage in Hungary. A few heads of whole cabbage were also put in to ferment with the shredded cabbage.
Sauerkraut RecipesThe tartness of different batches of sauerkraut can vary consider-
ably. If the taste is mild, use the juice instead of other liquids in a recipe. If the kraut is very sour, it may be necessary to drain it, rinse in fresh water, and then drain again. Use the sauerkraut juice when possible, as it contains many nutrients.
Sauerkraut juice can be added to vegetable juice mixtures and in soups where a bit of tartness is desirable. A mix of half sauerkraut juice and half tomato juice makes a good cocktail. A little Tabasco or Worcestershire is good for those who like things spicy.

18 Countryside Canning & Food Preservation Guide
Fried Kraut And Onions1 quart sauerkraut, drained2 to 3 cups sliced onions1/4 cup lard or oilRed or black pepper to taste
Gently fry the onions in the lard or oil for about 5 minutes until they are limp. Add the sauerkraut and continue frying over medium heat, stirring and turning often until the sauerkraut is lightly browned (10 to 15 minutes). Season to taste with pepper.
Kraut Biscuits Or RollsMake a batch of biscuit dough or save some dough when making bread. Fry sauerkraut and onions
as described above. When using biscuit dough, roll it out into a large rectangle. Spread the sauerkraut mixture on the dough. Roll it up starting on the longer side of the rectangle to make a long, narrow roll. Turn so the seam is down.
Make slices across the roll about one-half inch thick. They will look like pinwheels. Bake as for bis-cuits. Bits of sauerkraut that fall out can be tucked into the biscuits cut from the end of the roll where the stuffing is skimpy.
To use the bread dough, roll small pieces into circles. Put a spoon of sauerkraut mixture on each circle. Pinch closed over the filling by folding to make a half moon shape or pinch closed in the shape of a three-cornered hat by folding up three flaps of dough and pinching them closed where they meet. Bake as for rolls.
helPFul Canning tiPs FRom keRR glassHere is some practical advice from Kerr Glass manufacturing Co., maker of Kerr canning jars and lids:
• Use the oldest canning lids first. Leftovers from last year should be the first ones used this canning season. • Do your pickle jars still have an odor even after they’ve been washed? Add a teaspoon of baking soda to each jar and fill with hot water. Soak for 15 minutes before washing.
• To remove dark deposits on the inside of your canner, fill it above the darkened area with a solution of one teaspoon of cream or tartar to each quart of water. Place canner on stove and bring to a boil. Cover and boil until the dark deposits disappear. Stubborn stains may re-quire this treatment more than once. Be sure to wash the canner before reusing. • If lids are stuck together, slap them down on the counter and they will separate easily.

19Countryside Canning & Food Preservation Guide
Sauerkraut SaladSauerkraut is surprisingly good in salad. It can be added to any tossed salad. The amount of vinegar
in the dressing should usually be reduced. If the kraut is very sour it may need rinsing in fresh water and draining before it’s used. Drain well.
For a salad featuring sauerkraut, mix the drained kraut with other ingredients such as chopped onions, celery or green pepper. An equal mix of half sauerkraut and other ingredients is good. Add one of the fol-lowing dressings and serve on lettuce leaves.
Dressing 14 tablespoons salad oil1 teaspoon honey or sugarDash of paprika1/2 teaspoon dry mustard (optional)
Dressing 21/2 cup chili sauce or catsup, preferably homemade1 teaspoon paprikaJuice from 1/2 lemon or 1 tablespoon vinegar
Combine ingredients and pour over salad.
German-style Kraut In A Silk Dress2 to 4 cups sauerkraut1 to 2 pounds spareribs, pork shoulder or meaty pork bones1/2 teaspoon peppercorns1 bay leaf1 tablespoon caraway seeds1 to 2 onions, sliced1 apple, sliced1 potato, finely grated
If the sauerkraut is mild flavored, use it with its juice. Drain strong-tasting kraut. Put the sauerkraut in a heavy pot. Add the peppercorns, bay leaf, caraway seeds, onion and apple. Set the pork on top of all of this.
Add water to just cover the kraut, onion and apple. It doesn’t need to cover the meat. Cover and heat over a low fire. Simmer for 1—1-1/2 hours, or until the pork is well done.
Finely grate the potato and take the pork out of the pot and set aside. Stir in the potato and cook for about 15 minutes, or until the potato thickens the mixture. Put the pork back and cook long enough to reheat before serving. If pork bones were used, the meat can be picked from the bones and returned to the pot, discarding the bones.
Fattier kinds of game meat like possum, raccoon and bear can be used instead of pork in this recipe.
helPFul Canning tiPs FRom keRR glass

20 Countryside Canning & Food Preservation Guide
SpAGhEtti SAUCE
½ bushel tomatoes, not peeled, cut in quarters
7 green peppers
3 or 4 hot peppers
12 large onions
2 heads garlic
1 cup oil
Cook these ingredients until “mushy”. Put the “mushy”
vegetables through a blender or food mill then dump in
a large container that can be baked in the oven.
Add and mix well:
8 small cans tomato paste
1 cup oil
1 cup sugar
½ cup salt
1 tablespoon basil
½ cup oregano
1 tablespoon black pepper
10 tablespoons grated cheese
Mushrooms
Bake the mixture in the oven at 350 degrees for 6 hours
or until sauce is the desired consistency. Pack in hot
sterile jars and seal. Yields about 10 quarts.
Spaghetti Sauce
Dry It. You’ll Like It!

21Countryside Canning & Food Preservation Guide
Dry It. You’ll Like It!By Jerri cooK
countrysiDe staff
My introduction to the world of food processing and preservation was a harrowing one. At a young age, I watched in drop-jawed wonder as my well-intentioned, but seriously under-informed mother blew the gasket on a pressure cooker full of spaghetti sauce and meatballs. My wonder
was blunted by the pained verbiage of my high strung father as he tried desperately to take control of the situation, which was made all the more difficult by the blistering sauce that was spewing from the sides and the top of the cooker. He managed to get the cooker off the stove and into the sink without too much damage to him or my mother. The kitchen, however, would never be the same.
My mother never touched another pressure cooker or canner again. After bearing witness to such a culinary catastrophe, I was in no hurry to use one either. Nevertheless, as an adult, I found myself face-to-face with a pressure canner, compliments of my husband’s grandmother. Just the sight of the thing made my heart leap into my throat as if it were trying to escape. But I’m one tough cookie, and I wasn’t about to let an inanimate object stare me down.
With every ounce of will I could muster, I commanded my heart to quit pounding, and it resumed its place in my chest. I accepted the gift from Grandma and set about learning how to use it correctly. I paid close attention to Grandma’s instructions and read the original booklet that came with the canner back in 1944. I called my local extension office, and they sent me some helpful information on using a pressure canner. It wasn’t long before I had enough confidence to can the fruits and vegetables grow-ing in our garden.
Ok, maybe confidence is too strong of a word. Even though I took every precaution recommended by Grandma, the manufacturer and the extension agent, I still felt the bite of apprehension when it came time to break out the pressure canner.
For years my canning routine was the same: When the canner was on the stove, no one but me was allowed in the house; this included dogs and cats. Once the corn was cobbed and the beans were snipped, the screen door was locked from the inside. Outside, under a giant cottonwood, the baby played in her playpen, and the older kids sat on a stump licking homemade popsicles. Inside, the canning process went on. If anything went wrong, I only had to save myself. I guess that really isn’t confidence, but you have to admit it was a good plan.
The cottonwood grew bigger, the playpen fell apart, but for 14 years my canning procedure stayed the same, and I had no reason to believe it would ever change. Then, I received information from our extension agent about the Master Food Preserver Program.
The Master Food Preserver Program is one of the Cooperative Extension System’s outreach initia-tives like Master Gardener and Master Compost Instructor training. The three-day, hands-on program goes beyond the basics of home food preservation, teaching participants the most effective, up-to-date techniques to ensure safe food-handling and proper storage. When it was over, my relationship with my canner was forever changed. Yes, I learned a great deal about using pressure canners; I even went out and purchased a new aluminum model that heated faster and more evenly than the older one. I also learned something new, something that would allow me to unlatch the screen door.
I discovered that drying is a fast, economical and safe way to preserve food. It wasn’t long before dried fruits and vegetables found a place in the pantry. Tucked beside the jars of French-cut green beans and corn were one-gallon plastic bags full of corn, green beans, potatoes, tomatoes, apples, strawberries, raspberries, leeks, summer squash, dried beef and fruit leathers galore.

22 Countryside Canning & Food Preservation Guide
Dried food takes up considerably less space than canned food. It wasn’t long before the number of Mason jars in my pantry waned, and the shelves begin to fill up with bags of dried food. I began seeing less of my pressure canner and leaving the screen door unlatched more often.
Understanding The ProcessThe bacteria, yeasts and molds that cause most food spoilage require moisture to grow. Without it,
they go dormant or die. Drying removes moisture from food, allowing it to be stored for long periods of time with no refrigeration. Most dried foods will keep indefinitely if properly protected from sunlight and moisture.
Just like in the canning process, time and temperature are paramount considerations and must be combined in proper measure to guarantee the best results. The best temperature for drying fruits and vegetables is 140°F. Meat should be dried at 160°F. At temperatures higher than this, a condition known as “case hardening” occurs. The food cooks on the outside, forming a hard, dry crust that doesn’t allow moisture from the middle to escape. When this happens the food molds slowly from the inside out. For months all may appear well. Then, one day, you open the pantry to find a bag full of fuzzy beef jerky. It’s the hard way to learn the first lesson of food drying: Be patient; it takes awhile.
Location, Location, LocationFood can be dried indoors and outdoors, depending on location and type of equipment available.
Outdoor drying includes sun and fire drying. Because of its high acidity level, fruit is better suited to sun drying than meat or vegetables, which are better if dried over a fire. Indoor drying techniques include passive air drying, oven drying and the use of electric dehydrators.
Drying Fruit Outdoors Properly prepared fruit dries quite nicely outdoors. Small amounts of fruit, such as the green apples
that fall off the tree during a storm, can be dried in just a few days using nothing more than racks or screens placed on top of a couple of cement blocks—an instant solar dryer. Use only screens and racks made of stainless steel, Teflon-coated fiberglass or food-grade plastic. If you’re fortunate to have a paved driveway, set up your instant solar dryer there. Setting the blocks and racks up in the driveway will speed the drying process because the sun’s rays are converted to heat much more efficiently on pavement than on the grass or the porch.
This simple set-up works fine on warm sunny days with a light breeze and low-humidity. In my area those days are few and far between. Here, on the edge of the Chequamegon National Forest, the hu-midity is often oppressive in the late summer months, and we frequently go from no wind at all to gale force gusts with no warning whatsoever. Other parts of the country, where the humidity tends to be high in summer, like the Coastal South, are also difficult areas for a simple sun-drying rack. And don’t get me started on the insects. Although, it’s worth noting that if you have an abundance of flies, moths or other insects that might lay eggs on your drying fruit, you can “pasteurize” the fruit by placing it in a 160°F oven for 30 minutes. This will kill any eggs or tiny insects.
While these conditions present challenges, they don’t preclude the determined homesteader from drying fruit outdoors. Sue Robishaw of Manytracks proved this when she built an efficient solar dryer that works well in more humid conditions and can be moved inside if the weather warrants. This is by far the best design I’ve come across for drying outdoors. I highly recommend constructing a solar dehydrator of this type if you are considering drying large amounts fruit outdoors. For more information see “Building and Using a Midwest Solar Food Dryer” by Sue Robishaw, in the September/October 2006 issue of Countryside.
23Countryside Canning & Food Preservation Guide
Drying Vegetables And Meat OutdoorsWith the notable exception of sweet corn, most vegetables are low in sugar, and all are lacking in acid
content, making them much more susceptible to spoilage during the drying process than fruits. When drying vegetables outside it is best to place them on stainless steel racks or in cast iron pans over an open fire. Place the prepared vegetables on the racks, leaving enough space between each piece so no pieces touch. Racks and pans should be placed carefully above a well-controlled fire for the best results. Drying times will vary from fire to fire, but most vegetables will be done in a matter of hours.
A smoky, old-west style jerky can be made by slicing round steak into 1/8” strips and marinating them in your favorite mixture for a day or two. The strips can then be draped across racks or rods, or skewered and hung above a constant low fire. Because the meat will acquire some of the flavor from the smoke, it is important to avoid burning pine when drying meat over an open fire. To ensure even drying, the strips of meat should not touch each other. Old broiler pans work great for drying marinated meat over a fire because excess marinade and juices will flow into the drip pan allowing for even drying. Drying meat over a fire isn’t difficult, but it is an acquired skill, requiring patient tending of the fire.
Drying IndoorsDrying food indoors is accomplished in three ways: 1) room drying; 2) oven drying; and 3) with the
use of an electric dehydrator. Room drying is a convenient way to dry herbs, flowers and cayenne peppers. They can be dried on
racks in an undisturbed corner, or they can be hung from the rafters. If using racks for indoor drying it is important to spread flowers and herbs evenly to allow for proper air flow.
Another room drying technique is to simply tie the stems of a fistful of herbs or flowers together. Then, make a few incisions in a small paper bag and place it over the heads of the flowers or herbs and tie it loosely around the stems. The bag will keep dust from accumulating. Tie the stems to an indoor clothesline or the rafters in the garage and let the bagged-up bunch hang upside down for a couple of weeks. Place herbs in a Mason jar or in a plastic bag once they have dried.
To dry cayenne peppers, thread clean fishing line through the stems, fanning the skinny ends into a circle as you go. If you use a heavy test line, you can string up a couple of pounds of peppers. Hang them in a corner and in a couple of weeks, you’ll have a beautiful, edible homestead decoration. This is a great method for drying long, thin peppers; it doesn’t work well for the fatter types like jalapeño. If dust is a concern, you can cover the whole thing with low-grade cheese cloth (the kind you buy at most grocery stores) or thoroughly wash each pepper before use.
It’s been my experience that oven-drying produces an inferior product. Most modern ovens won’t let you set the temperature below 170°F; at this temperature the outside of the food cooks, resulting in case hardening. I would recommend drying over an open fire before I would recommend drying in an electric or gas oven. The oven-drying method is the choice of last resort.
However, if you are fortunate to have a wood cookstove, you will be able to dry food quite well simply by know-ing where the cool spots are. A wood stove is a far better choice for indoor drying than a conventional oven.
Electric dehydrators are designed to make drying efficient and uniform. They have a heating element that keeps the temperature constant and a fan for air circulation. Horizontal air flow dehydrators have a heating element and fan in the back of a square box. Vertical air flow dehydrators have a heating ele-ment and fan in the bottom of a cylinder-shaped container. Horizontal flow dehydrators have a greater drying capacity and produce a more uniform product than the vertical air flow-types.
Over the years, I’ve experimented with different drying techniques, settling on the ones that work best for me. In early spring, when we are cooking sap, we cut up a few pounds of round steak and dry it on the edges of the fire.
Herbs are dried on a wooden rack that sits in a shaded spot just beneath my kitchen window. I have a large, horizontal air flow dehydrator that I use for everything else. It runs non-stop from July through October.

24 Countryside Canning & Food Preservation Guide
Drying FruitThe fruits I dry most often are apples, strawberries, raspberries, plums, pears, peaches, pineapples
and bananas. We grow the apples, strawberries and raspberries; the rest I buy in bulk when they are in season or when I come across a sale. Buying in bulk and drying is a good way to hedge against the rising cost of food.
I can’t over emphasize the importance of using only firm, ripe fruit. With the exception of apples, un-ripe or overripe fruit, or fruit that is bruised or broken, is best pureed and then dried into fruit leather or made into jelly or jam. Un-ripened apples that fell off the tree in the storm, well they make a tart tangy treat when sprinkled with a little cinnamon sugar and then dried for 6-12 hours in an electric dehydrator. Because of the threat of insects, I wouldn’t dry sugared apples outdoors.
To prevent apples, pears, pineapples and bananas from darkening, I soak them in a solution of vita-min C (ascorbic acid) and water before placing them in the dehydrator. I buy 1,000 mg tablets of vitamin C in the largest bottle I can find. Then I grind six of them with a mortar and pestle and add the powder to a quart of water. The ratio is 6,000 mg (two teaspoons of the powdered type) vitamin C to one quart of cool water. I find that vitamin C slows down the darkening process much better than lemon juice or syrup blanching.
To ready apples for drying, I peel and core them using my handy-dandy apple peeler/corer/slicer and toss them into my vitamin C solution, which I keep waiting nearby. Fruit should soak in the vitamin C solution for at least 10 minutes before being placed in a dehydrator. If you are preparing apples by hand, slice them into 1/8-inch pieces. Apples will dry in 6-12 hours in an electric dehydrator. They are done when they bend but don’t snap. If you over-dry them, don’t worry; they’ll be a little dark, but they’ll be fine.
We enjoy our dried apples in oatmeal, crisps and out of the bag (especially the sugared ones) all winter long.
keeP Foods FRom disColoRing
• Peeled and cut up apples, apricots, nectarines, peaches and pears will discolor when exposed to air. While it’s important to can them as quickly as possible, discoloration can be retarded by keeping these fruits in a solution of 3 grams (about 1 level teaspoon) of ascorbic acid to 1 gallon of cold water.
• Ascorbic acid is usually found with other canning supplies in supermarkets. If you can’t find it, vitamin C tablets will do the same job. Crush and dissolve six 500 milligram tablets in a gallon of water.
• Citric acid powder is sometimes sold for this purpose, but it’s less effective.

25Countryside Canning & Food Preservation Guide
Whenever I find pineapples on sale, I buy them. Dehydrated pineapples are as sweet as candy and a very popular treat around my house. I package them up in pretty little cellophane bags and give them as gifts. To dry pineapple, peel and core each one. Then, cut into 1/2–inch pieces. Soak in the vitamin C solution for 10 minutes then dry for 36 hours in an electric dehydrator
I’m always on the lookout for deals on ripe bananas, too. Dried bananas never last long around here. I only use ripe bananas for drying, they can a have a few specks of brown on them, but beyond that, they are better eaten or used in banana bread. Slice bananas into 3/8-inch thick slices and soak for 10 minutes in the vitamin C solution. Bananas will dry in 8-10 hours in an electric dehydrator.
I buy pears, peaches and plums by the case when they are in season. I blanch them to remove their skins before I core them. I slice peaches and pears into ¼-inch pieces; the plums I leave whole unless they are large. I always soak pears in the vitamin C solution, but peaches and plums do fine without soaking. Pears, peaches and plums dry in 12-24 hours in an electric dehydrator.
Raspberries are the simplest fruit to dry. I pick them when they are at their firmest, wash them and place them in my horizontal air flow dehydrator for 12-18 hours depending on the moisture content and the humidity.
For strawberries, remove the tops and wash the berries. Slice them into 1/4” pieces and dry for 6-8 hours if using an electric dehydrator or until flexible but not brittle if drying outdoors.
If I have fruit that is damaged or old I make fruit leather out of it. I wash and prepare the fruit as if I were going to dry it; then I puree it. Sometimes I’ll add sugar or honey to sweeten the mixture before I spread it out on the dehydrator screen. Some dehydrators come with special leather screens. If yours doesn’t have one, you can use plastic wrap or wax paper. Use two cups of pureed fruit for each 13” x 15” leather. Spread the mixture so the outsides are thicker than the inside portion. The sides dry faster than the middle; by mak-ing them thicker the middle doesn’t become over-dry. Drying times for fruit leather vary, but I start checking mine after eight hours. Leather is done when it bends but doesn’t break and has a shiny underside.
Drying VegetablesThe list of vegetables that are suitable for drying is much shorter than the list of fruits. For years, I
dried only fruit and herbs, leaving vegetables for the kettle or canner. Then, a couple of years ago, a misunderstanding involving one-third of an acre of sweet corn led to a discovery.
I wanted to make sure I had enough open-pollinated sweet corn to freeze, with enough left over to save some seed. When I placed the order at the seed house, I specifically asked for open-pollinated, organic sweet corn. As far as I knew, that’s what I got.
But as the ears grew well past 12”, the skeptic in me began to wonder. Everyone knows open-pollinated varieties rarely have cobs that exceed 10” on a good year. I called the seed house and asked them to double check my order. Sure enough, they had sent me a hybrid; it was worthless as seed, which meant I was going to have to freeze an awful lot of corn, not one of my favorite jobs. The corn has to be removed from the cob, steamed or blanched, then cooled and packaged.
I don’t particularly care for frozen corn. I’ve tried several recipes and techniques (including adding sugar to the corn before freezing), but frozen corn tastes like frozen corn. It’s hardly worth the effort. Then, on heels of a whim, I decided to try drying some of it. What did I have to lose? It’s not like we would miss a few bushels if it didn’t work out.
I removed the kernels and put them straight into the dehydrator without blanching. To my absolute delight, eight hours later I had a
five-pound bag of the sweetest corn I had ever put up. Because the corn doesn’t lose its sugar in the blanching process, it stays in the corn. When the corn is reconstituted by covering with water and boiling for 15-20 minutes, it as sweet as the day it was picked. I made another discovery towards the end of the growing
season that same year: When you leave corn in the dehydrator for more than 24 hours, it turns deep-gold, almost brown. While it isn’t much for

26 Countryside Canning & Food Preservation Guide
eating, it makes wonderful cornmeal. I ground my over-dry kernels into cornmeal and used it to make corn bread, topping for apple crisp, and breading for fish and onion rings.
Every year I dry about half the potatoes we harvest. The other half is stored in the basement. I’ve tried several techniques. All of them involved peeling the potatoes, cutting them into strips or cubes, and then boiling them before putting them in the dryer. To save time, I boil the potatoes in their skins, then peel and cut into 1/4- to 3/8”-thick pieces. Potatoes are dry in 8-12 hours. I like Yukon gold potatoes best for drying. They retain their flavor and their color deepens nicely when they are reconstituted.
One thing to keep in mind is that rehydrated potatoes don’t make the best mashed potatoes. Try-ing to make mashed potatoes from reconstituted sliced potatoes will only get you a mixture of watery lumps. If you are dehydrating potatoes for mashed potatoes, it is better to actually make a pot of mashed potatoes and then dry the mixture as you would fruit leather.
While I still hot bath about half of the tomatoes I grow, I make sure the other half gets to the dehy-drator. After I blanch and core the tomatoes, I lay them on the dehydrator racks and lightly sprinkle them with coarse-ground black pepper and let them dry for 12-18 hours. They make wonderful snacks right out of the bag; they’re great added to casseroles and pasta dishes. Perhaps what I like best about them is how little space they take up compared to their canned counterparts.
Onions, leeks and peppers are a cinch to dry. Simply chop into 1/8- to 1/4” pieces and toss in the dehydrator. Onions and leeks dry in 4-6 hours; peppers can take up to 12 hours. One note here, when I dry onions and leeks, I dry only onions and leeks. Because of their pungent odor, they shouldn’t be combined with fruits or other vegetables that might absorb some of the odor and flavor.
Drying MeatDrying is an easy way to preserve meat. I’ve used my dehydrator to dry leftover turkey and ham.
There’s nothing worse than coming across a container of forgotten leftover turkey tucked in the back of the refrigerator and not remembering how old it is. I just pick the turkey down to the bone, chop the meat and put it in the dehydrator for 8-12 hours. It reconstitutes great for soups and casseroles.
When I dehydrate leftover ham, I’m careful to trim all of the visible fat away from the meat. Fat goes rancid, even dehydrated fat, so it is important to work with only lean pieces.
I turn most of our round steak into jerky. I cut across the grain because I like a tender jerky, but if you prefer a chewier jerky, cut with the grain. When dehydrating meat, the pieces should be no more than 1/4” thick. I soak the meat in a marinade of tamari and herbs overnight before placing in the dehydrator for 18-24 hours.
The Cooperative Extension Service highly recommends that game and pork be boiled in the marinade before it is placed in the dehydrator. This reduces the chances of food-borne pathogens like E. coli and trichinosis. It is important to remember that boiling the meat will drastically reduce the drying time.
We also dry meat outdoors when we are cooking sap in the spring. I marinate it; then we hang the strips of beef on the edges of the fire, suspended by metal racks. Drying time varies, and we have to keep a close eye on the meat, but the diligence is worth the effort. The sweet smell of the sap as it con-denses combined with the aroma of marinated beef and a hard wood fire is a reward in itself.
Putting It All TogetherSo, is there dust gathering on my pressure canner? Have I abandoned canning and freezing in favor
of drying? Hardly. Some things just aren’t meant to be dried. I’ve never had a dried beet that I liked. Beets have to be
processed in a canner; there’s just no way around it. Dried green beans work fine in green bean cas-serole, but they’re hard eating otherwise. I still freeze and can my beans. Drying is a great complement to canning and freezing, but it’s certainly not a replacement for these techniques.
These days my screen door is rarely latched, even when I’m canning. Not only did the Master Food Preserver course introduce me to drying, it made me much more certain of my canning abilities, which in turn gives me enough confidence to leave the screen door unlatched. Now that’s more like it.
For more information on home food preservation call your local Cooperative Extension Service.

27Countryside Canning & Food Preservation Guide
By eBen foDor
Solar food drying is more than a curiosity or a recreational hobby, it’s an ideal application of solar en-ergy. The sun produces lots of heat, and heat is exactly what you need to dry your food. Solar food drying can be used in most of the areas of the world where people live. If your climate is suitable for
growing a vegetable garden, then you should be able to use the sun to finish off its summer’s work. But do solar food dryers really work? Are they practical? And will they work for me? Answers in a minute,
but first let me put this topic in the context of creating a healthy, secure, and sustainable food supply. More and more people are recognizing the importance of food quality to our health. The freshest,
ripest, tastiest, most-nutritious food comes from your own garden or from local farmers. The fact that these high-quality fruits and vegetables are seasonal means that you will only have access to them for a few weeks or a few months a year. What do you plan to eat the rest of the year? Will you be relying on a network of “fresh” foods shipped thousands of miles from all over the world?
Some form of food preservation is the key to extending the summer’s precious bounty of locally-grown pro-duce throughout the year. If you are like me, you would prefer a method that’s easier and less energy-intensive than canning, and would like to keep as much of the raw natural flavors and nutrients as possible.
Freezing is commonly viewed as the most convenient preservation method, but frozen food can take up a lot of freezer space. If you want enough to last through the year, you may need more than one freezer. Freezing requires a constant energy input. Your valuable food will be vulnerable to power and mechanical failures. And freezer burn can limit the storage life.
Drying is an excellent method of food preservation that maintains a high level of flavors and nutrients while providing a convenient, compact, easy-to-store supply of all your favorite produce. Sure, electric dryers work fine, but I don’t care for the constant noise, heat, and odors they add to the house. They take up valuable counter space for weeks on end and can attract pests. The electricity costs about $1 to $2 a load and detracts from the savings of doing it yourself.
Disenchanted with electric drying, I began researching and experimenting with solar drying. With a background in engineering and solar energy, I soon designed and built my first solar dryer. It worked even better than I had expected, drying large batches of food in one to two days. I dried all my extra garden and orchard produce and nothing went to waste.
It was such a delight to watch the sun quickly dehydrating my organic fruits and veggies that I grew a larger garden the next year so I could dry even more food. I also added a small orchard of fruit trees for dried apples, pears, and plums.
Find Seasonal Bounty Of Local Produce At A Farmers Market
It’s Solar Food Drying Time!

28 Countryside Canning & Food Preservation Guide
Solar drying is fun and easy when the sun is shining, but it doesn’t take long to find out that a backup heating system is helpful for those times when the sun goes into hiding. I added a simple and inexpen-sive electric backup system using incandescent light bulbs (which produce 95% heat) so that I could plug the dyer in and finish drying my valuable produce any time the weather turns.
Where And When Can You Solar Dry? If you’re wondering if solar drying could be right for your location, consider that I am located in Eugene,
Oregon at a northern latitude equivalent to Bangor, Maine (44° N). Fortunately we get enough sunshine during the summer and fall harvest season to successfully dry all our crops with solar energy.
If you can get two days of sunshine in a row with some regularity, you are a good candidate for solar food drying. Most of the U.S. has plenty of sunshine for solar drying, however some northern, maritime climates that have predominantly overcast summers may be the exception. Your local relative humid-ity is not really a significant factor, because a good solar food dryer will heat up the air by 60 to 100°F, greatly increasing its ability to absorb moisture.
The solar food drying season is May through October in most of the U.S. This is plenty of time to dry most of your seasonal local foods. By October 21st, I declare the solar food drying season to be over for all but the most southern latitudes.
What Exactly is A Solar Food Dryer? There is a difference between sun drying and solar drying. Open-air sun drying is the ages-old practice of
placing foods out in the open sun to dry. This low-tech method has provided satisfactory results for thousands of years and is widely used today. There are some limitations to this method, however. It’s a fairly slow drying process that can take many days, or even weeks. Some foods will lose nutrients and flavor, and may even spoil before they get dry. It will be difficult to get some foods completely dry, which is essential for long-term storage. Cloudy weather, wind, and rain will be a significant challenge. There is the potential that your food will appeal to bugs, rodents, raccoons or birds and it can be contaminated by dust, dirt and bird droppings. Careful supervision, steady sunshine, and warm weather are required to get good results.
is a device that efficiently harnesses the sun’s energy to quickly dry food in a safe and reliable manner. There are many possible designs ranging from simple to complex and from small to large. For the home gardener, a simple, compact and portable unit is recommended. In addition to excellent drying performance, a good solar dryer should have all the following features:
• Adjustable venting for easy control of drying temperature and airflow; • Easy loading, unloading, and cleaning; • Easy set up and put away (with little or no assembly); • Relatively compact and lightweight for portability; • Adequate food-drying capacity for home gardeners; • Weather resistant to keep your food dry in the event of rain; • Sturdy and pest proof with all vent openings screened; • Food screens made from durable, non-stick, food-safe material; • Ability to add electric backup heating, if desired; • Tested and proven with many happy users.
A solar food dryer

29Countryside Canning & Food Preservation Guide
Now that you know what you want, where do you go for some plans? If you search the Internet, you will find plans for making solar dryers with cardboard boxes and duct tape. Skip these and stick with the handful of real dryers that meet the criteria listed above. My book, The Solar Food Dryer, provides information on some of the better dryer designs and includes complete plans for building the SunWorks dryer I designed.
Solar Drying Tips You don’t need to be a solar whiz to operate a solar dryer—just place it in a sunny spot and load it with
food. Orient the dryer towards the south and set the vents to the desired opening. If you will be around during the day, you can speed drying by pointing the dryer towards the sun and adjusting it a few times to track the sun as it moves across the sky. Many foods will dry completely in one day of sunshine. Wet foods, like tomatoes or pears, will require a second day. They should get dry enough the first day to begin the preservation process and will last the night without any problem.
Always start with fresh, ripe food that is at its peak. Simply wash and slice to your desired thickness in the morning and place in your solar dryer right away. I get great results without any blanching or pre-treatments. The dried food consistently looks and tastes great. The flavor is better than anything I find in the stores and it’s free of the sulfites and additives that are common in commercial dried foods.
Most people start thinking about food drying in August when they can’t keep up with the supply from their garden and are tossing zucchinis into the compost bin. But there’s lots of solar energy available in the spring and summer, so in May or June you can start capturing early season crops like strawberries, blueberries and peas.
You can grow more of your own food with a solar dryer to preserve the summer bounty your bumper crops of beans, plums, peaches, apples, and even squash (zucchini chips are great for dips). My solar dryer stays very busy from mid-summer to the end of the harvest season.
As you start thinking about how much fun you are going to be having with your solar food dryer, consider that you will be able to utilize more produce by preserving and storing it. You can expand your garden and grow more of the things you’d like to enjoy all year, like tomatoes. Dry your own basil and oregano too!
A solar food dryer is a great way to maintain a nutritious and tasty supply of high-quality, locally-grown foods all year long. A good solar dryer will produce outstanding results along with the satisfaction of saving energy and money by harnessing the power of the sun!
About The Author: Eben Fodor is the author of The Solar Food Dryer: How to Make and Use Your Own High-Performance, Sun-Powered Food Dehydrator, available from the Countryside Bookstore. He is an avid gardener, growing vegetables and a small fruit orchard. See his website at www.SolarFoodDryer.com for more info. Copyright 2012.
COUNTRYSIDE: For years we have frozen our unblanched tomatoes whole. A while back a bag of whole frozen tomatoes was removed from the freezer and to hurry their thawing they were placed, out of the bag, in lukewarm water. Almost instantly (less than a minute) we noticed that with mild handling the skin slipped away. “Freeze
peeling” may not be commercially viable, but for the individual it works well.—Reader from Ohio
FReeZing: a Fast way to PReseRve tomatoes

30 Countryside Canning & Food Preservation Guide
5 pounds ripe tomatoes 3 cups chopped onions 2 cups chopped hot pepper 1 cup vinegar 2 tablespoons minced garlic 1 tablespoon salt 1 tablespoon cumin 2-3 cans tomato paste
Parboil tomatoes to remove skins. Core and chop tomatoes. In a very large pot, combine all ingredients. Bring to a boil, stirring occasionally. Reduce heat and simmer for 30 minutes or to desired thickness. Fill 5-6 clean, hot, sterilized pint jars, leaving ½ inch headspace. Run a wooden or plastic utensil inside the jars to remove any air bubbles. Wipe jar tops and threads and cover with hot lids and rings. Process in boiling water bath for 15 minutes.
HINTS:• If you have too many tomatoes and not enough time to process them, tightly pack the whole tomatoes in freezer bags and put the bags in the freezer. When you are ready to use them, hold each tomato under warm running water and the skin will slip off. This saves a lot of time over parboiling.• When you are cutting up fresh tomatoes, put your cutting board inside a cookie sheet. The cookie sheet will catch the tomato juice and make cleanup easier.• To make really hot salsa, us ½ cup (or less) habanera peppers in your 2 cups of hot peppers.• When cutting up hot peppers, be sure to wear rubber gloves and do not touch your face or eyes. It’s also a good idea to wear eye protection to keep from getting shot in the eye with pepper juice.• This recipe also makes good taco sauce. When you need taco sauce, run a jar of cooled salsa through a blender or food processor.
—Reader from Georgia
6 pounds tomatoes – blanched, peeled and diced. 2 green bell peppers, chopped 2 red bell peppers, chopped 3 white onions, chopped 1 large bunch cilantro, chopped 2 – 7oz cans chopped green chiles 8 teaspoons minced garlic 3 teaspoons ground cumin 1-1/2 teaspoon salt 3 cups apple cider vinegar (5% acidity) ¾ cup lime juice
Combine all ingredients in a large saucepot and bring the mixture to a boil. Reduce heat and simmer for 10 minutes. Pack into sterile pint jars. Process in hot water bath for 15 minutes. Makes 11 pints.
Salsa Recipes
Related Documents