Camera Basics

Camera intro for non photography majors
Jul 19, 2015
Welcome message from author
This document is posted to help you gain knowledge. Please leave a comment to let me know what you think about it! Share it to your friends and learn new things together.
Transcript
Camera Basics
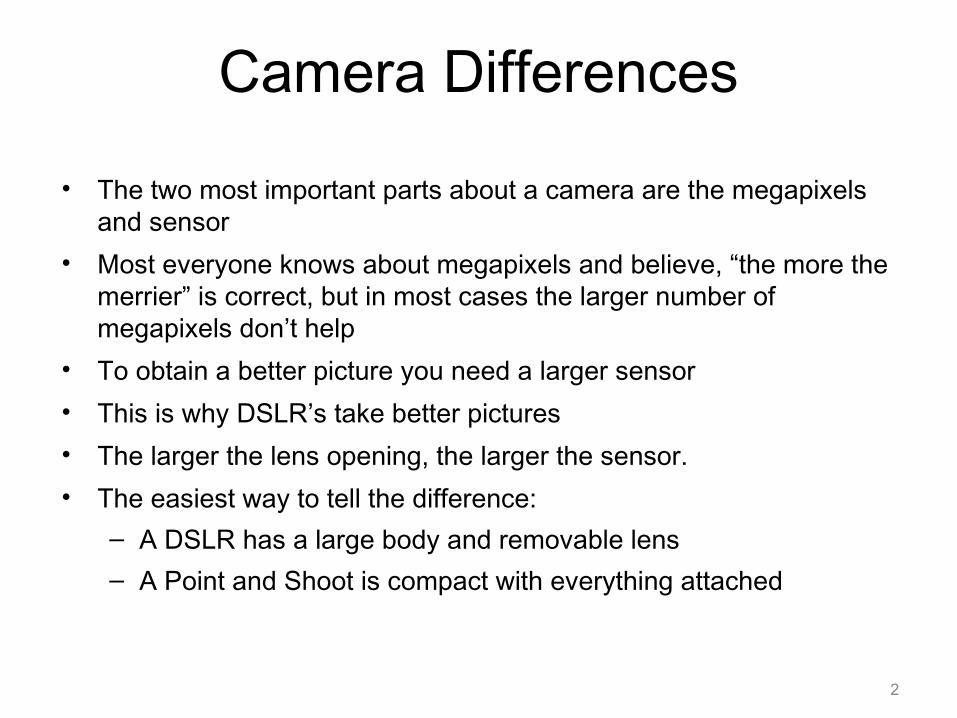
Camera Differences
• The two most important parts about a camera are the megapixels and sensor
• Most everyone knows about megapixels and believe, “the more the merrier” is correct, but in most cases the larger number of megapixels don’t help
• To obtain a better picture you need a larger sensor• This is why DSLR’s take better pictures• The larger the lens opening, the larger the sensor. • The easiest way to tell the difference:
– A DSLR has a large body and removable lens– A Point and Shoot is compact with everything attached
2
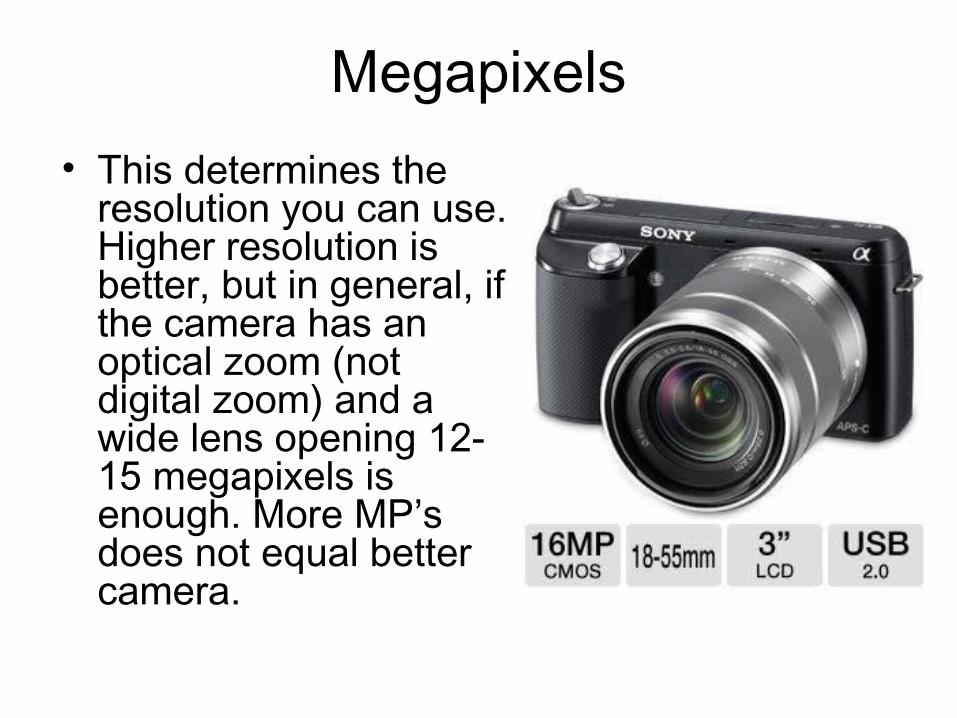
Megapixels• This determines the
resolution you can use. Higher resolution is better, but in general, if the camera has an optical zoom (not digital zoom) and a wide lens opening 12-15 megapixels is enough. More MP’s does not equal better camera.
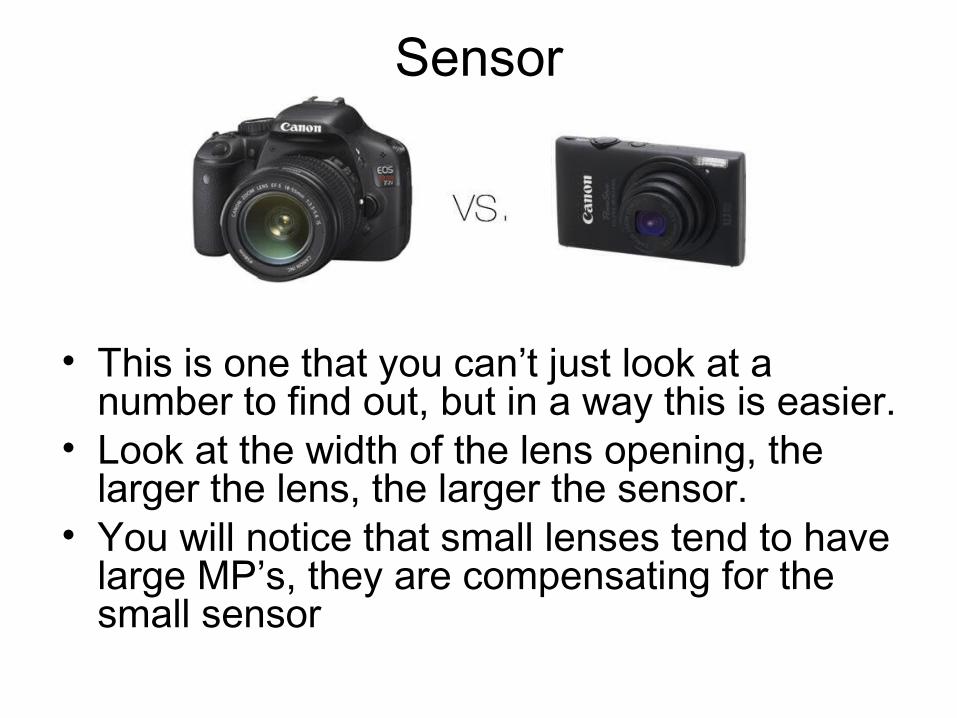
Sensor
• This is one that you can’t just look at a number to find out, but in a way this is easier.
• Look at the width of the lens opening, the larger the lens, the larger the sensor.
• You will notice that small lenses tend to have large MP’s, they are compensating for the small sensor
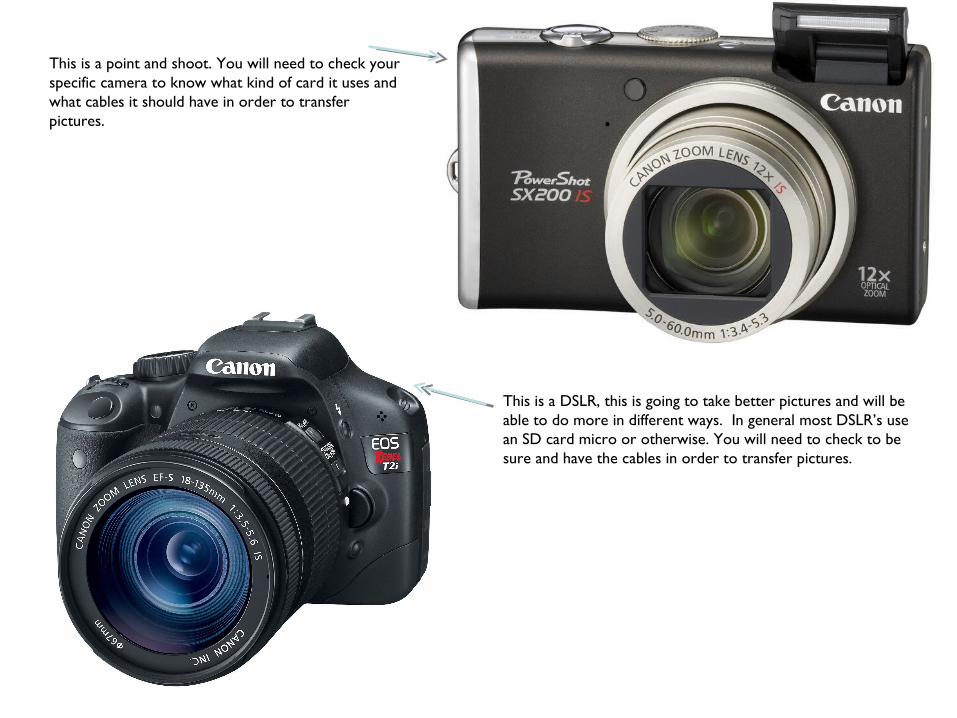
This is a point and shoot. You will need to check your specific camera to know what kind of card it uses and what cables it should have in order to transfer pictures.
This is a DSLR, this is going to take better pictures and will be able to do more in different ways. In general most DSLR’s use an SD card micro or otherwise. You will need to check to be sure and have the cables in order to transfer pictures.

Memory Cards
Card Readers
Cables
NOT ALL CARDS AND
CORDS WORK
WITH ALL CAMERAS!!
YOU HAVE TO CHECK
THE CAMERA

7
Camera settingsNot all cameras have these
•Turn Digital zoom OFF
•Turn the flash OFF
•Be sure the video is set to NTSC
•Have the white balance on auto
•Quality should be Large
•Color space Adobe RGB
•Picture Style Neutral
•For now have camera set to landscape mode
• Other setting such as Fstop/aperture/shutter speed etc only apply to people with a DSLR and a manual mode. These settings are addressed in the reading.
88
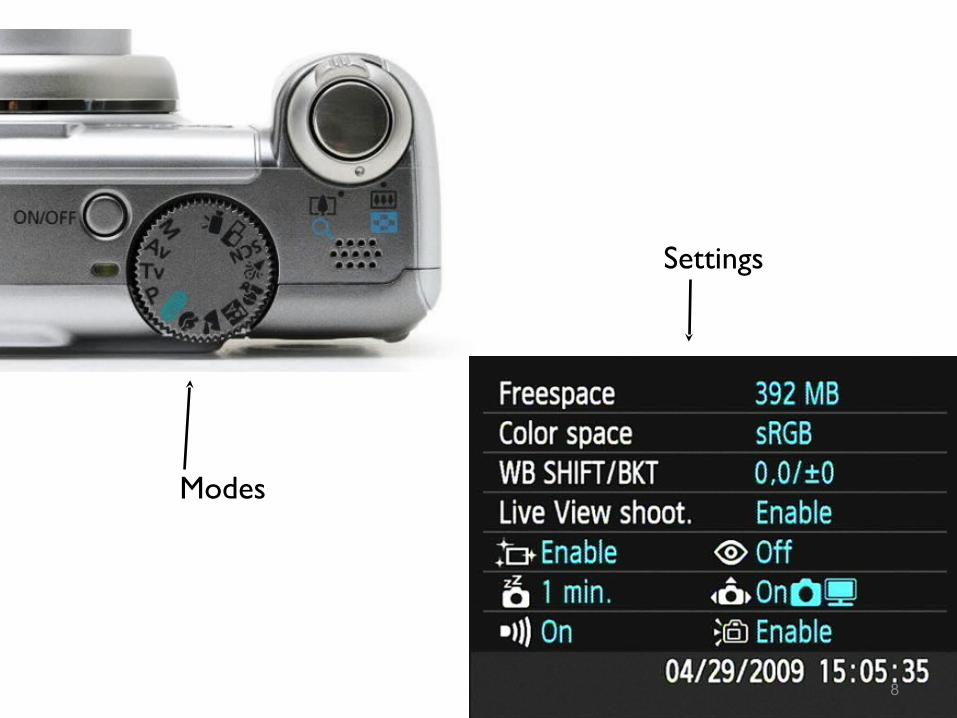
Modes
Settings

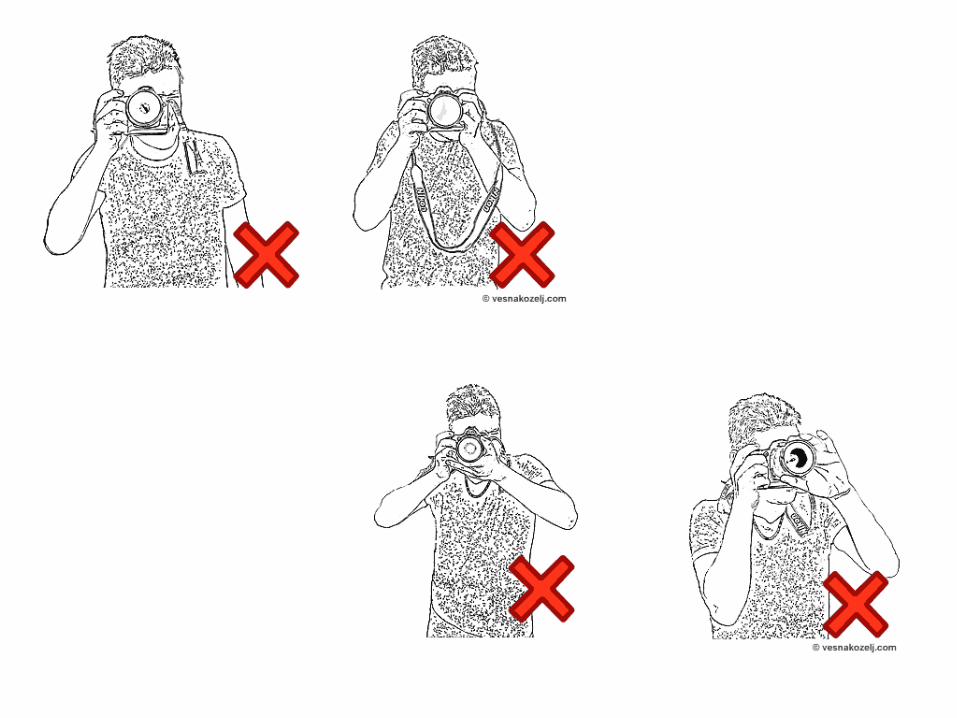
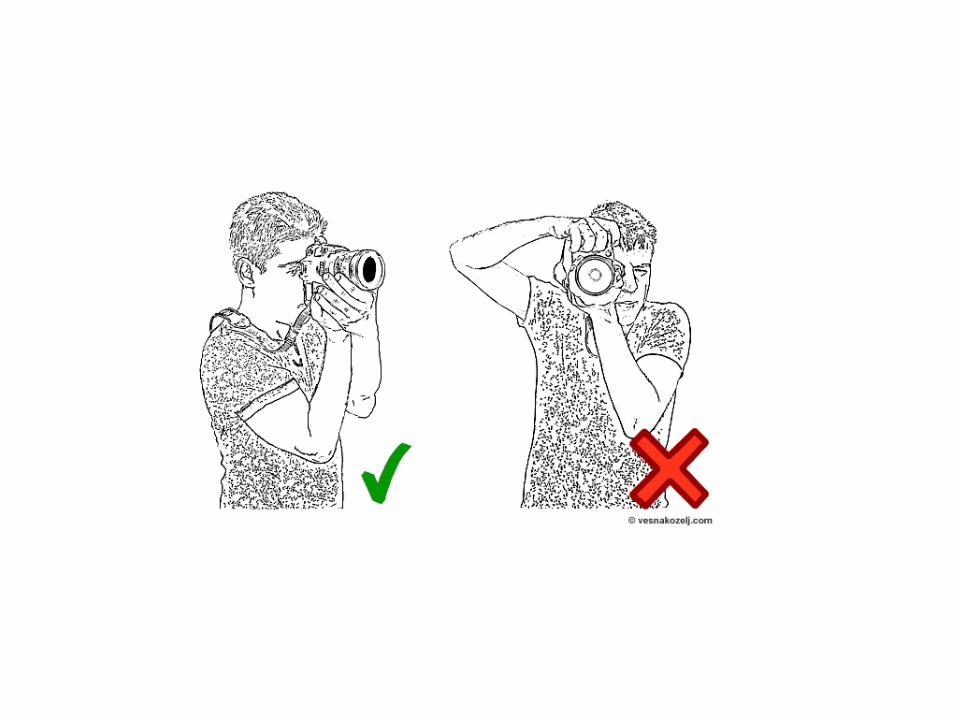
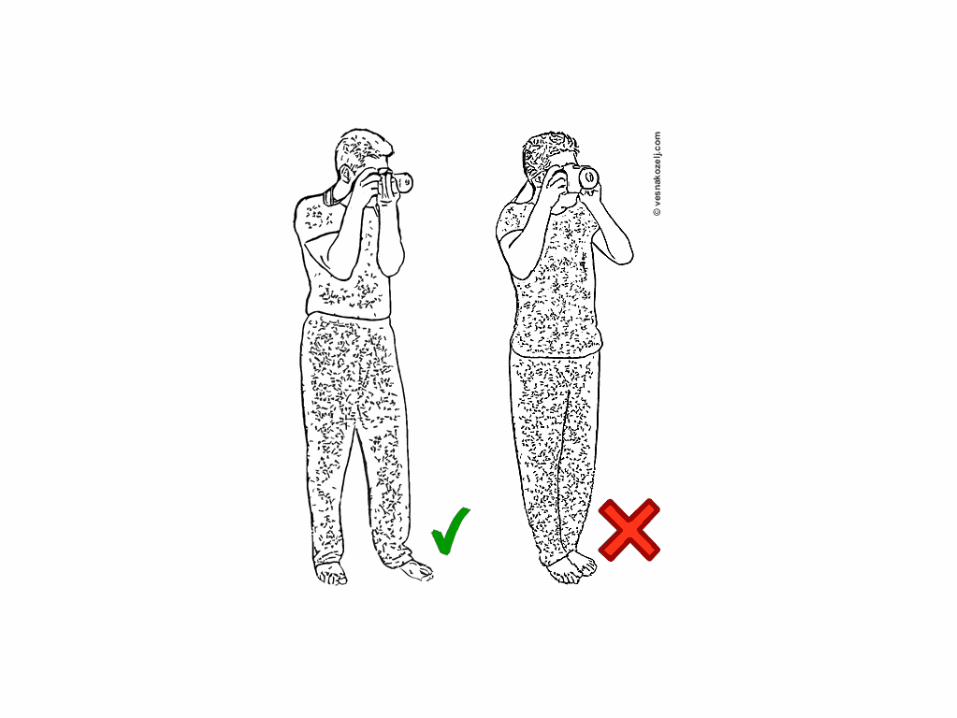
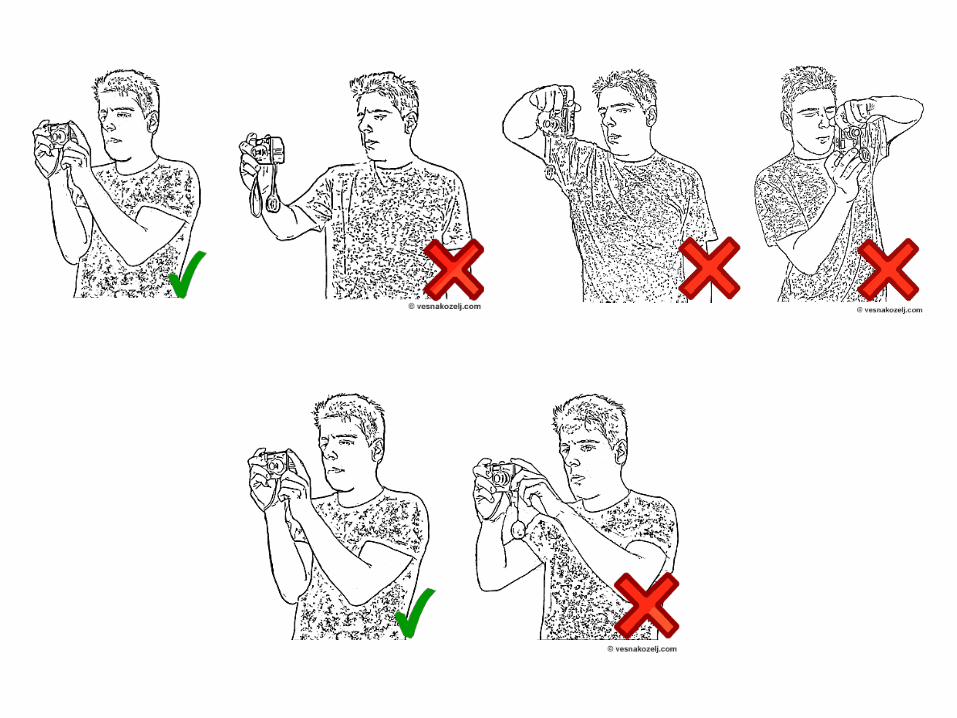
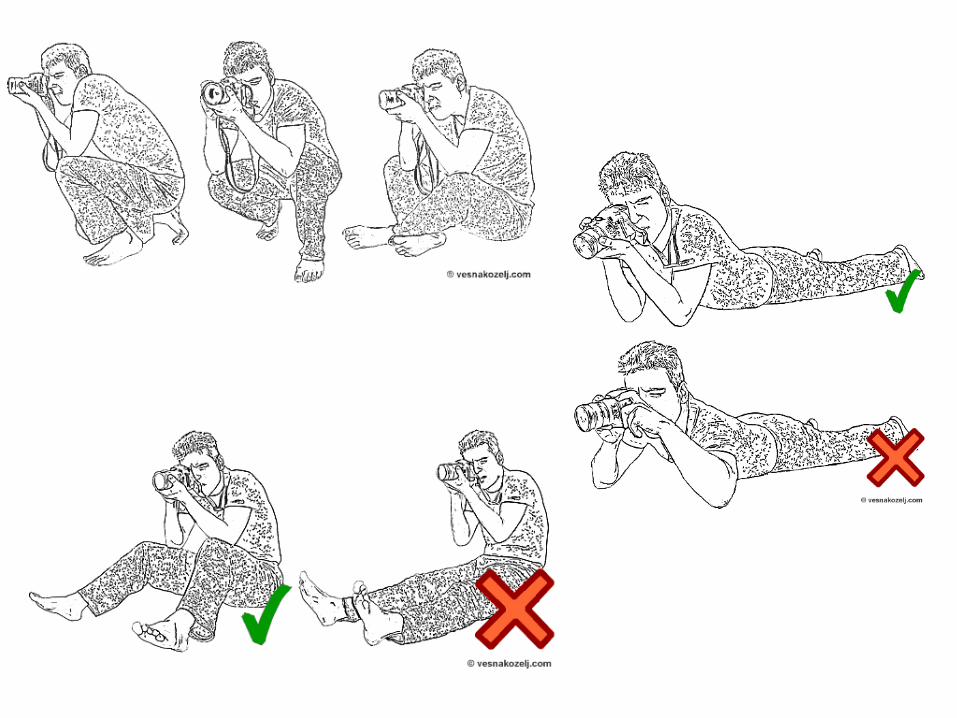
Shooting• Hold camera with both hands• Hold breath when shooting• Open stable stance• Be sure you are focused on the
subject• Be sure the focal point is in the
thirds• Turn the camera• Change your position• Support yourself


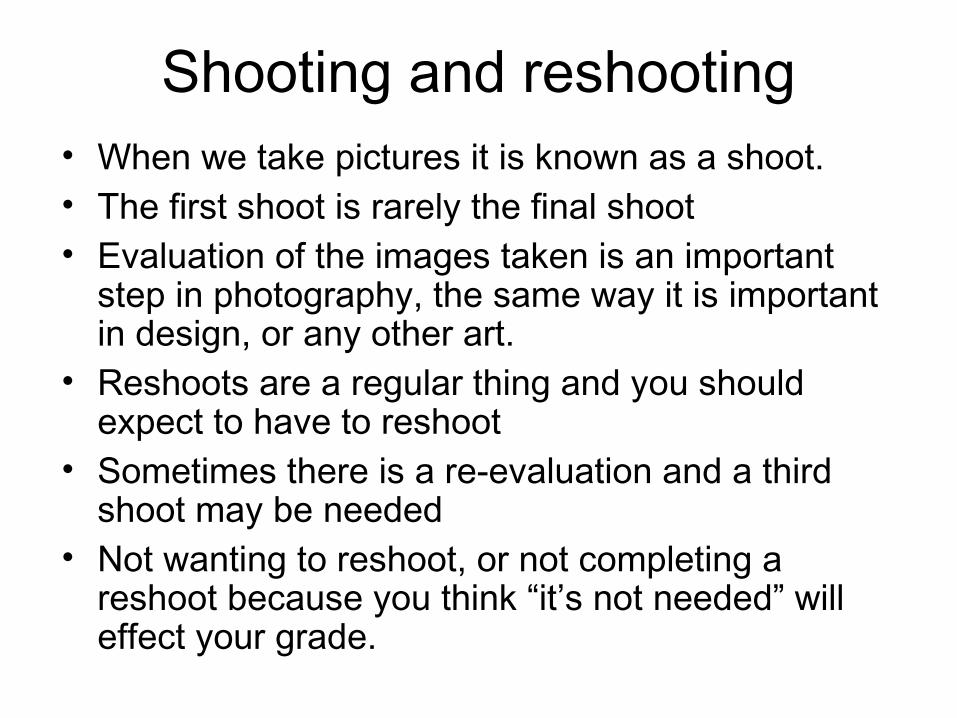
Shooting and reshooting• When we take pictures it is known as a shoot.• The first shoot is rarely the final shoot• Evaluation of the images taken is an important
step in photography, the same way it is important in design, or any other art.
• Reshoots are a regular thing and you should expect to have to reshoot
• Sometimes there is a re-evaluation and a third shoot may be needed
• Not wanting to reshoot, or not completing a reshoot because you think “it’s not needed” will effect your grade.

Shoot #1 Shoot #2

19
Before you upload anything, be sure you only have images that
are class appropriate as all images will upload
initially!
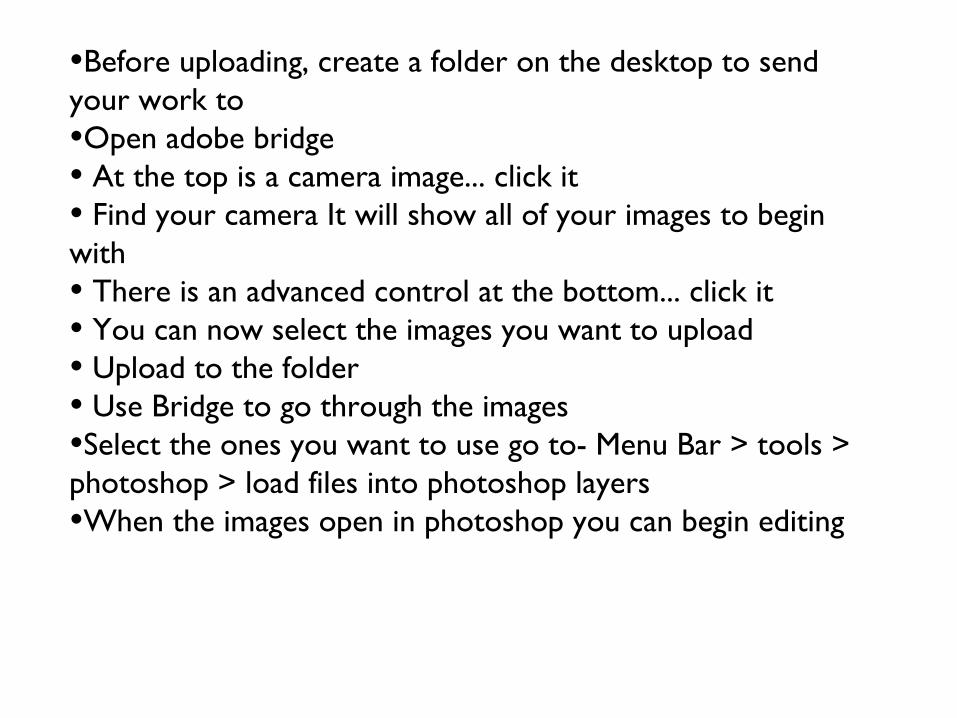
•Before uploading, create a folder on the desktop to send your work to•Open adobe bridge• At the top is a camera image... click it• Find your camera It will show all of your images to begin with• There is an advanced control at the bottom... click it• You can now select the images you want to upload• Upload to the folder• Use Bridge to go through the images•Select the ones you want to use go to- Menu Bar > tools > photoshop > load files into photoshop layers•When the images open in photoshop you can begin editing
Related Documents