EMS SAFETY SERVICES | WWW.EMSSAFETY.COM California Childcare CPR, AED and Pediatric First Aid INSTRUCTOR MANUAL SUPPLEMENT

Welcome message from author
This document is posted to help you gain knowledge. Please leave a comment to let me know what you think about it! Share it to your friends and learn new things together.
Transcript
EMS SAFETY SERVICES | WWW.EMSSAFETY.COM
California Childcare CPR, AED and Pediatric First Aid INSTRUCTOR MANUAL SUPPLEMENT
CA CHILDCARE INSTRUCTOR SUPPLEMENT
1
Program Approval and Resources ................................................................................................................. 1
Content Modifications .................................................................................................................................. 2
Use of Antibiotic Ointment or Cream ....................................................................................................... 2
Asthma and Inhaled Medications Training ............................................................................................... 2
Bone and Joint Injuries: Splinting Practice and Testing ............................................................................ 2
Marine Animal Stings ................................................................................................................................ 2
CA Childcare Administration and Rules ........................................................................................................ 3
Forms and Resources .................................................................................................................................... 5
CA EMSA Child Care Training Roster ......................................................................................................... 6
EMS Safety CA Childcare Skills Summary .................................................................................................. 8
EMS Safety Skill Sheet 5: Bone and Joint Injuries ..................................................................................... 9
California EMSA Sticker Order Form ....................................................................................................... 10
Marine Animal Stings .............................................................................................................................. 11
Nebulizer and Inhaler Medications Training Curriculum ........................................................................ 12
Use this supplement for additional content and forms when teaching CA Childcare Providers.
Copyright ©2015 EMS Safety Services, Inc.
All rights reserved. No part of this publication may be reproduced or used in any form, electronic or mechanical, including
photocopying, recording, or any information storage and retrieval system, without the prior written permission of the publisher.
Program Approval and Resources
When California childcare providers are certified in CPR, AED and Pediatric First Aid, the training must be
through a training program approved by the California Emergency Medical Services Authority (EMSA).
EMS Safety’s CPR, AED and First Aid for Childcare Providers course is approved by the California EMSA,
with the following modifications:
1. Course Roster
a. Use the EMSA Course Roster in place of page 1 of the EMS Safety Roster.
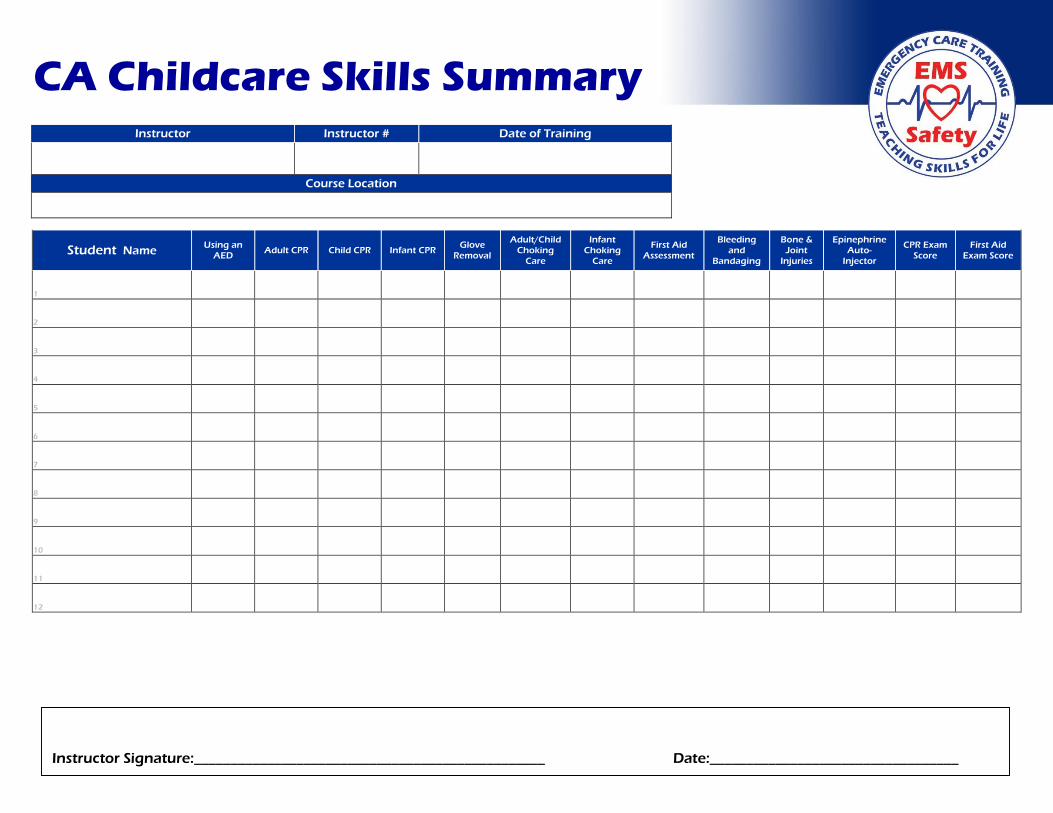
b. Use EMS Safety’s CA Childcare Skills Summary in place of page 2 of the EMS Safety roster.
2. Additional Lecture Content and Skills Training (see Content Modifications below)
CA CHILDCARE INSTRUCTOR SUPPLEMENT
2
EMS Safety Resources
CPR/AED and Basic First Aid Instructor Manuals: Child-specific content in grey shaded areas
Instructor Corner: Digital masters and course videos located at www.emssafety.com/login
California Childcare CPR, AED and First Aid Instructor Manual Supplement
EMSA Resources
EMSA Website: Forms, videos and regs located at http://www.emsa.ca.gov/child_care
EMSA Website: FAQs located at http://www.emsa.ca.gov/EMSA_Child_Care_Training_FAQs
Content Modifications
Use of Antibiotic Ointment or Cream
The use of antibiotic ointment or cream in the childcare setting is prohibited by the state of California
Emergency Medical Services Authority.
Do not teach or recommend the application of antibiotic ointment or cream when teaching the
following topics:
Minor Wound Care (page 40)
Burns (page 50)
Animal or Human Bites (page 64)
Tick Bites (page 66)
Asthma and Inhaled Medications Training
California childcare providers are allowed by California law to administer medications to treat asthma.
Specialized training is required. Childcare providers should be trained with the California EMSA DVD,
Asthma and Inhaled Medications and the handout Nebulizer and Inhaler Medications Training
Curriculum. Show the DVD and lecture on the handout in place of the Difficulty Breathing chapter in EMS
Safety’s First Aid DVD and student workbook (see Course Requirements below)
Bone and Joint Injuries: Splinting Practice and Testing
For California Childcare providers, splinting is a required skill. Use Skill Sheet 5: Bone and Joint Injuries
for practice and testing. Document skills testing on Skill Sheet 5 or Page 2 of the EMS Safety Childcare
Roster (see Forms and Resources below or download from the Instructor Corner at
www.emssafety.com/login).
Marine Animal Stings Marine Life, including marine animal stings and stingrays is a required topic for CA childcare providers.
Provide instruction from this Instructor Supplement or EMS Safety’s In-Depth Manual (see Forms and
Resources below or download from the Instructor Corner at www.emssafety.com/login).
CA CHILDCARE INSTRUCTOR SUPPLEMENT
3
CA Childcare Administration and Rules
Course Overview 1. EMS Safety Services’ CPR, AED and First Aid for Childcare Providers training course is approved by
the California Emergency Medical Services Authority (EMSA) for training employees of California-
licensed childcare facilities.
2. EMSA-approved training programs have minimum training requirements specified in the
California Code of Regulations.
Course Hours 1. Initial training
a. CPR/AED: At least 4 hours
b. Pediatric First Aid: At least 4 hours
2. Renewal Training
a. Same as initial training; no option for a shortened renewal course
b. CPR/AED: At least 4 hours
c. Pediatric First Aid: At least 4 hours
3. Courses that do not meet the minimum required hours will not be accepted.
Student Workbooks and Certification Cards 1. Only use the CPR, AED and First Aid for Childcare Providers student workbook to teach employees
of a licensed childcare facility. This is the EMSA-approved workbook.
2. Issue the Emergency Response for Childcare Providers card after successful course completion.
CPR, AED and First Aid Course Requirements 1. All content from the CPR, AED and Basic First Aid for Childcare Providers workbook.
a. Exclude teaching or recommending the application of antibiotic ointment.
2. Additional content on asthma and inhaled medications is required by EMSA
a. Show the EMSA DVD Asthma Care Training for Childcare Providers.
i. Located in CA Childcare Instructor Kit or online at www.emsa.ca.gov
b. Discuss the Nebulizer and Inhaler Medications Training Curriculum handout.
3. Additional content on marine animal stings
a. Located in Forms and Resources below or at www.emssafety.com/login.
4. Written testing is required
5. Skills practice and testing is required in:
a. Adult, child and infant CPR/AED use
b. Adult, child and infant choking care
c. Soiled glove removal
d. First aid assessment
e. Bleeding and bandaging
f. Use of an epinephrine auto-injector
g. Splinting suspected fractures (required; not optional)
CA CHILDCARE INSTRUCTOR SUPPLEMENT
4
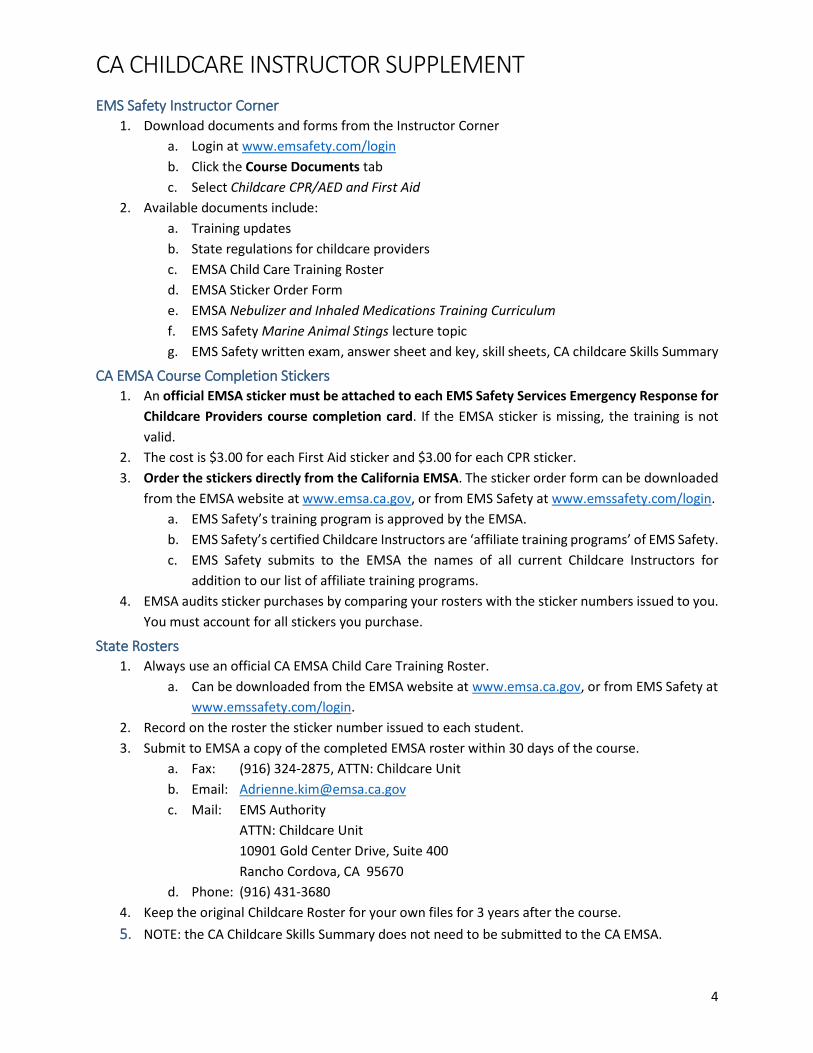
EMS Safety Instructor Corner 1. Download documents and forms from the Instructor Corner
a. Login at www.emsafety.com/login
b. Click the Course Documents tab
c. Select Childcare CPR/AED and First Aid
2. Available documents include:
a. Training updates
b. State regulations for childcare providers
c. EMSA Child Care Training Roster
d. EMSA Sticker Order Form
e. EMSA Nebulizer and Inhaled Medications Training Curriculum
f. EMS Safety Marine Animal Stings lecture topic
g. EMS Safety written exam, answer sheet and key, skill sheets, CA childcare Skills Summary
CA EMSA Course Completion Stickers 1. An official EMSA sticker must be attached to each EMS Safety Services Emergency Response for
Childcare Providers course completion card. If the EMSA sticker is missing, the training is not
valid.
2. The cost is $3.00 for each First Aid sticker and $3.00 for each CPR sticker.
3. Order the stickers directly from the California EMSA. The sticker order form can be downloaded
from the EMSA website at www.emsa.ca.gov, or from EMS Safety at www.emssafety.com/login.
a. EMS Safety’s training program is approved by the EMSA.
b. EMS Safety’s certified Childcare Instructors are ‘affiliate training programs’ of EMS Safety.
c. EMS Safety submits to the EMSA the names of all current Childcare Instructors for
addition to our list of affiliate training programs.
4. EMSA audits sticker purchases by comparing your rosters with the sticker numbers issued to you.
You must account for all stickers you purchase.
State Rosters 1. Always use an official CA EMSA Child Care Training Roster.
a. Can be downloaded from the EMSA website at www.emsa.ca.gov, or from EMS Safety at
www.emssafety.com/login.
2. Record on the roster the sticker number issued to each student.
3. Submit to EMSA a copy of the completed EMSA roster within 30 days of the course.
a. Fax: (916) 324-2875, ATTN: Childcare Unit
b. Email: [email protected]
c. Mail: EMS Authority
ATTN: Childcare Unit
10901 Gold Center Drive, Suite 400
Rancho Cordova, CA 95670
d. Phone: (916) 431-3680
4. Keep the original Childcare Roster for your own files for 3 years after the course.
5. NOTE: the CA Childcare Skills Summary does not need to be submitted to the CA EMSA.
CA CHILDCARE INSTRUCTOR SUPPLEMENT
5
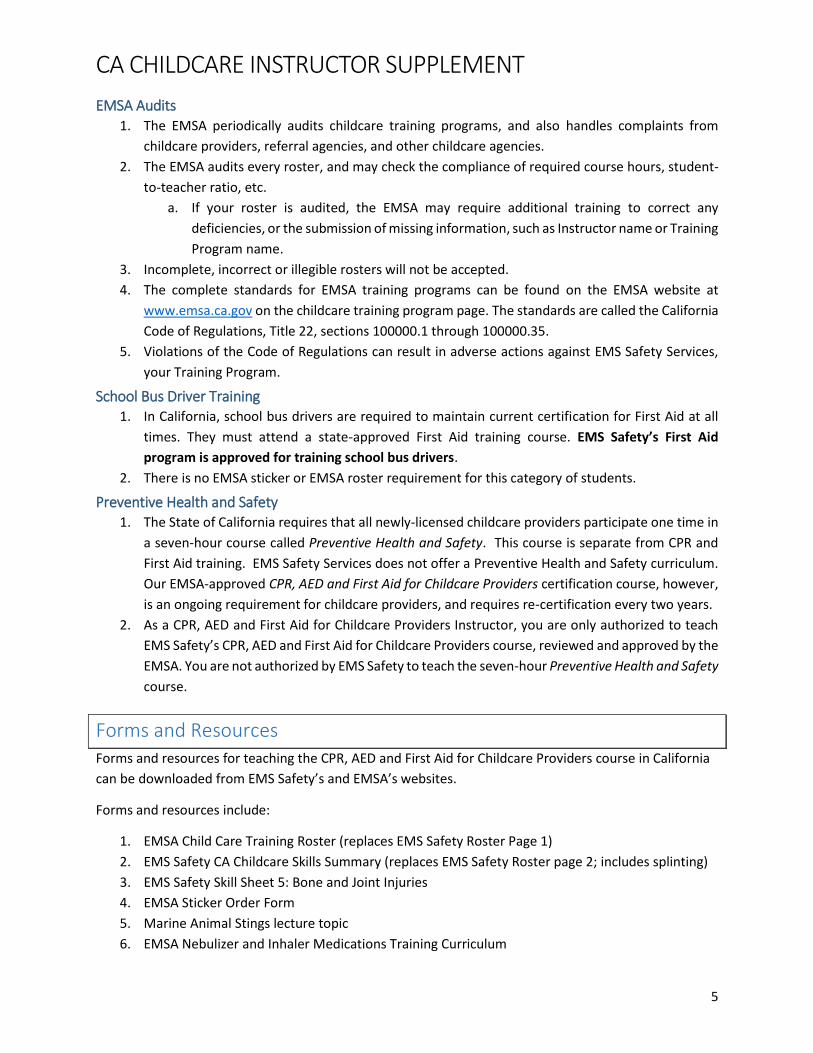
EMSA Audits 1. The EMSA periodically audits childcare training programs, and also handles complaints from
childcare providers, referral agencies, and other childcare agencies.
2. The EMSA audits every roster, and may check the compliance of required course hours, student-
to-teacher ratio, etc.
a. If your roster is audited, the EMSA may require additional training to correct any
deficiencies, or the submission of missing information, such as Instructor name or Training
Program name.
3. Incomplete, incorrect or illegible rosters will not be accepted.
4. The complete standards for EMSA training programs can be found on the EMSA website at
www.emsa.ca.gov on the childcare training program page. The standards are called the California
Code of Regulations, Title 22, sections 100000.1 through 100000.35.
5. Violations of the Code of Regulations can result in adverse actions against EMS Safety Services,
your Training Program.
School Bus Driver Training 1. In California, school bus drivers are required to maintain current certification for First Aid at all
times. They must attend a state-approved First Aid training course. EMS Safety’s First Aid
program is approved for training school bus drivers.
2. There is no EMSA sticker or EMSA roster requirement for this category of students.
Preventive Health and Safety 1. The State of California requires that all newly-licensed childcare providers participate one time in
a seven-hour course called Preventive Health and Safety. This course is separate from CPR and
First Aid training. EMS Safety Services does not offer a Preventive Health and Safety curriculum.
Our EMSA-approved CPR, AED and First Aid for Childcare Providers certification course, however,
is an ongoing requirement for childcare providers, and requires re-certification every two years.
2. As a CPR, AED and First Aid for Childcare Providers Instructor, you are only authorized to teach
EMS Safety’s CPR, AED and First Aid for Childcare Providers course, reviewed and approved by the
EMSA. You are not authorized by EMS Safety to teach the seven-hour Preventive Health and Safety
course.
Forms and Resources Forms and resources for teaching the CPR, AED and First Aid for Childcare Providers course in California
can be downloaded from EMS Safety’s and EMSA’s websites.
Forms and resources include:
1. EMSA Child Care Training Roster (replaces EMS Safety Roster Page 1)
2. EMS Safety CA Childcare Skills Summary (replaces EMS Safety Roster page 2; includes splinting)
3. EMS Safety Skill Sheet 5: Bone and Joint Injuries
4. EMSA Sticker Order Form
5. Marine Animal Stings lecture topic
6. EMSA Nebulizer and Inhaler Medications Training Curriculum
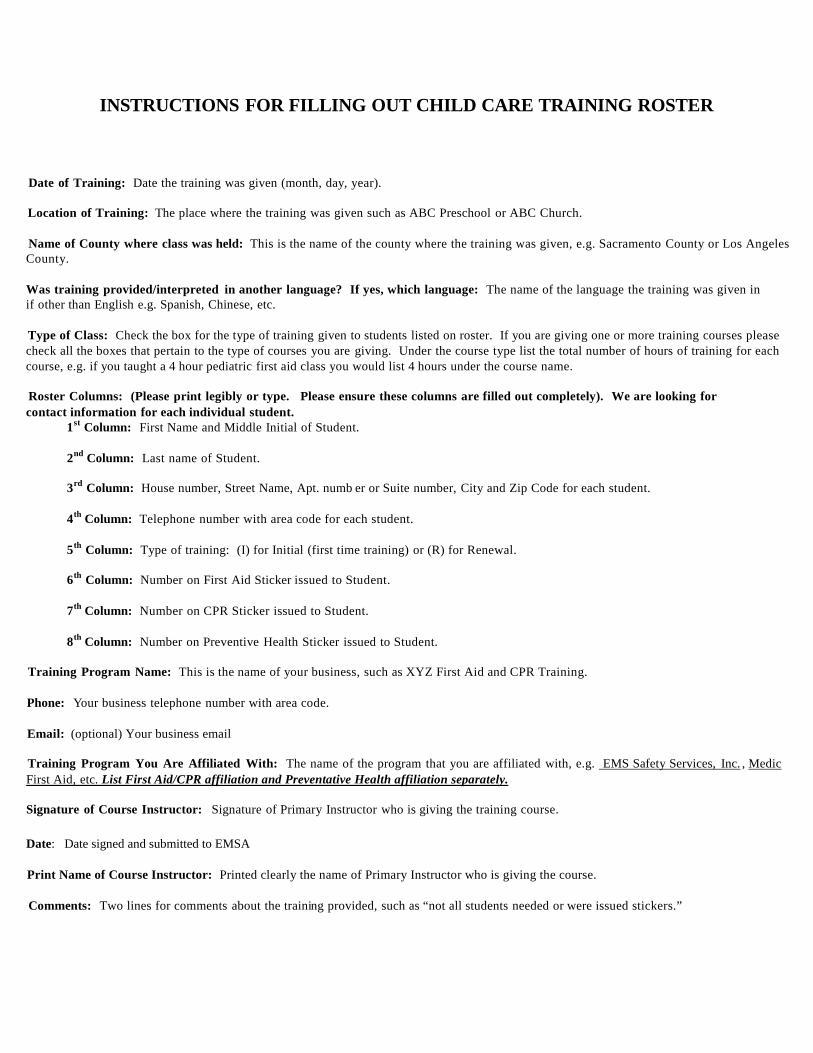
INSTRUCTIONS FOR FILLING OUT CHILD CARE TRAINING ROSTER
Date of Training: Date the training was given (month, day, year).
Location of Training: The place where the training was given such as ABC Preschool or ABC Church.
Name of County where class was held: This is the name of the county where the training was given, e.g. Sacramento County or Los Angeles County.
Was training provided/interpreted in another language? If yes, which language: The name of the language the training was given in if other than English e.g. Spanish, Chinese, etc.
Type of Class: Check the box for the type of training given to students listed on roster. If you are giving one or more training courses please check all the boxes that pertain to the type of courses you are giving. Under the course type list the total number of hours of training for each course, e.g. if you taught a 4 hour pediatric first aid class you would list 4 hours under the course name.
Roster Columns: (Please print legibly or type. Please ensure these columns are filled out completely). We are looking for contact information for each individual student.
1st Column: First Name and Middle Initial of Student.
2nd Column: Last name of Student.
3rd Column: House number, Street Name, Apt. numb er or Suite number, City and Zip Code for each student.
4th Column: Telephone number with area code for each student.
5th Column: Type of training: (I) for Initial (first time training) or (R) for Renewal.
6th Column: Number on First Aid Sticker issued to Student.
7th Column: Number on CPR Sticker issued to Student.
8th Column: Number on Preventive Health Sticker issued to Student.
Training Program Name: This is the name of your business, such as XYZ First Aid and CPR Training.
Phone: Your business telephone number with area code.
Email: (optional) Your business email
Training Program You Are Affiliated With: The name of the program that you are affiliated with, e.g. EMS Safety Services, Inc. , Medic First Aid, etc. List First Aid/CPR affiliation and Preventative Health affiliation separately.
Signature of Course Instructor: Signature of Primary Instructor who is giving the training course. Date: Date signed and submitted to EMSA
Print Name of Course Instructor: Printed clearly the name of Primary Instructor who is giving the course.
Comments: Two lines for comments about the training provided, such as “not all students needed or were issued stickers.”
Type of Class:
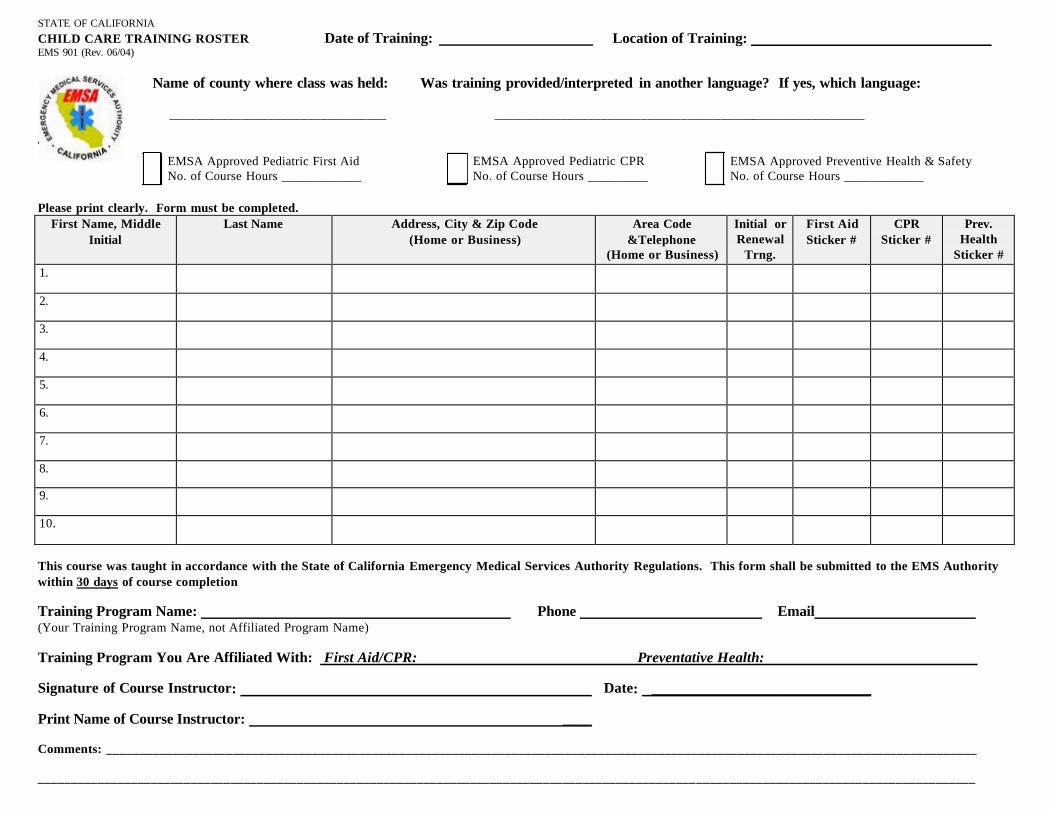
STATE OF CALIFORNIA CHILD CARE TRAINING ROSTER Date of Training: EMS 901 (Rev. 06/04)
Location of Training:
Name of county where class was held: Was training provided/interpreted in another language? If yes, which language:
_________________________________ ________________________________________________________
EMSA Approved Pediatric First Aid No. of Course Hours ____________
EMSA Approved Pediatric CPR No. of Course Hours _________
EMSA Approved Preventive Health & Safety No. of Course Hours ____________
Please print clearly. Form must be completed.
First Name, Middle Initial
Last Name Address, City & Zip Code (Home or Business)
Area Code &Telephone
(Home or Business)
Initial or Renewal
Trng.
First Aid Sticker #
CPR Sticker #
Prev. Health
Sticker # 1.
2.
3.
4.
5.
6.
7.
8.
9.
10.
This course was taught in accordance with the State of California Emergency Medical Services Authority Regulations. This form shall be submitted to the EMS Authority within 30 days of course completion
Training Program Name: (Your Training Program Name, not Affiliated Program Name)
Phone Email
Training Program You Are Affiliated With: First Aid/CPR: Preventative Health:
Signature of Course Instructor: Date: ______________________________
Print Name of Course Instructor: ____
Comments: ___________________________________________________________________________________________________________________________________
___________________________________________________________________________________________________ __________________________________________
[Type text] [Type text] [Type text]
Student Name Using an
AED Adult CPR Child CPR Infant CPR
Glove
Removal
Adult/Child
Choking
Care
Infant
Choking
Care
First Aid
Assessment
Bleeding
and
Bandaging
Bone &
Joint
Injuries
Epinephrine
Auto-
Injector
CPR Exam
Score
First Aid
Exam Score
1
2
3
4
5
6
7
8
9
10
11
12
CA Childcare Skills Summary Instructor Instructor # Date of Training
Course Location
Instructor Signature:________________________________________________ Date:__________________________________
©EMS Safety 2011 Basic First Aid Version A
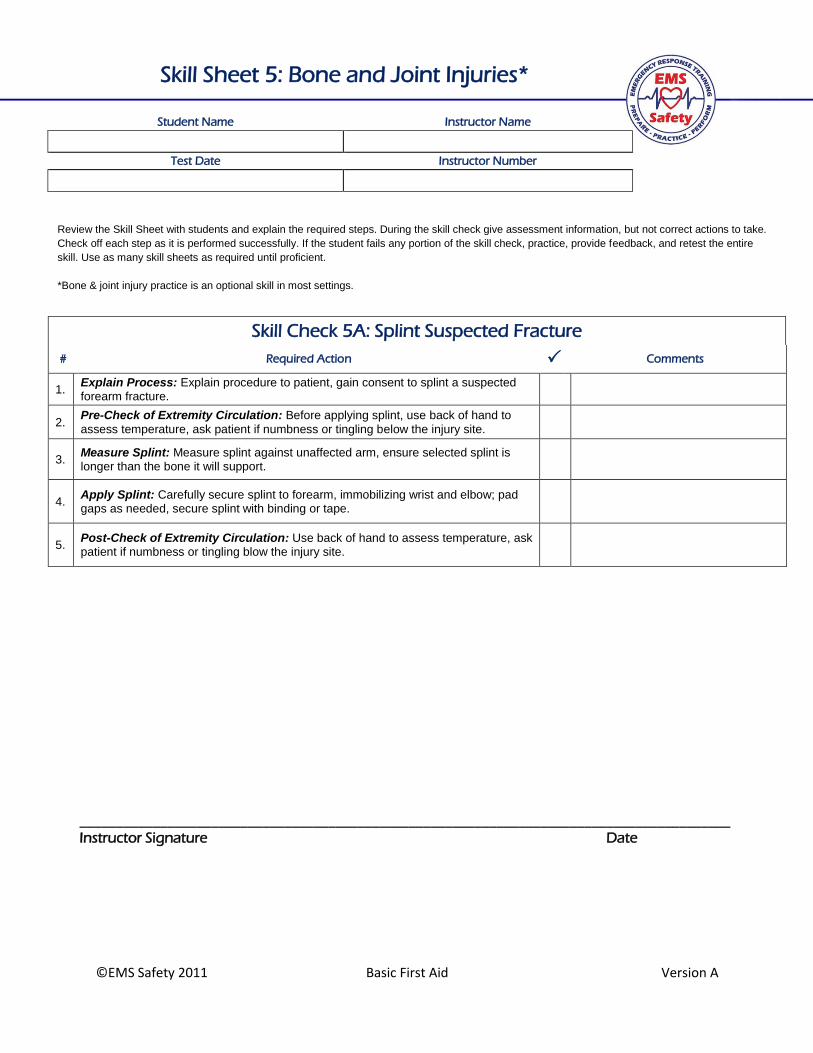
Review the Skill Sheet with students and explain the required steps. During the skill check give assessment information, but not correct actions to take.
Check off each step as it is performed successfully. If the student fails any portion of the skill check, practice, provide feedback, and retest the entire
skill. Use as many skill sheets as required until proficient.
*Bone & joint injury practice is an optional skill in most settings.
\
Student Name Instructor Name
Test Date Instructor Number
Skill Check 5A: Splint Suspected Fracture
# Required Action Comments
1. Explain Process: Explain procedure to patient, gain consent to splint a suspected forearm fracture.
2. Pre-Check of Extremity Circulation: Before applying splint, use back of hand to
assess temperature, ask patient if numbness or tingling below the injury site.
3. Measure Splint: Measure splint against unaffected arm, ensure selected splint is longer than the bone it will support.
4. Apply Splint: Carefully secure splint to forearm, immobilizing wrist and elbow; pad gaps as needed, secure splint with binding or tape.
5. Post-Check of Extremity Circulation: Use back of hand to assess temperature, ask patient if numbness or tingling blow the injury site.
Skill Sheet 5: Bone and Joint Injuries*
_________________________________________________________________________________________ Instructor Signature Date
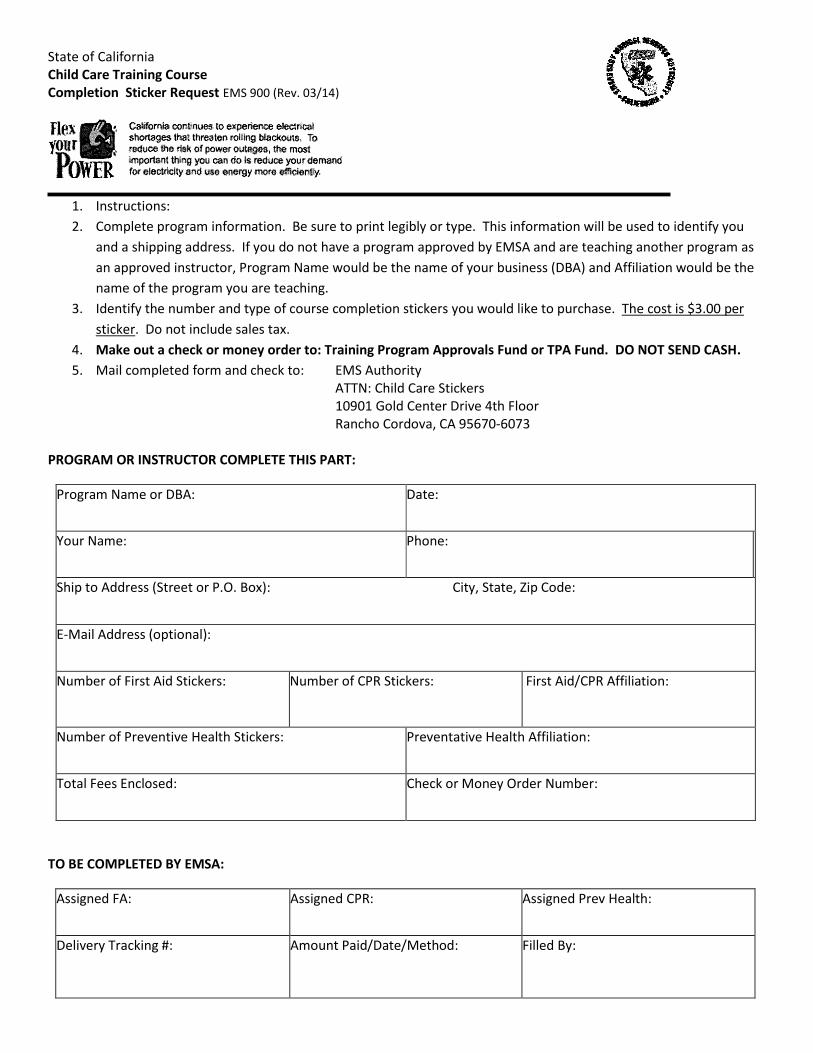
State of California Child Care Training Course Completion Sticker Request EMS 900 (Rev. 03/14)
1. Instructions:
2. Complete program information. Be sure to print legibly or type. This information will be used to identify you
and a shipping address. If you do not have a program approved by EMSA and are teaching another program as
an approved instructor, Program Name would be the name of your business (DBA) and Affiliation would be the
name of the program you are teaching.
3. Identify the number and type of course completion stickers you would like to purchase. The cost is $3.00 per
sticker. Do not include sales tax.
4. Make out a check or money order to: Training Program Approvals Fund or TPA Fund. DO NOT SEND CASH.
5. Mail completed form and check to: EMS Authority ATTN: Child Care Stickers 10901 Gold Center Drive 4th Floor Rancho Cordova, CA 95670-6073
PROGRAM OR INSTRUCTOR COMPLETE THIS PART:
Program Name or DBA: Date:
Your Name: Phone:
Ship to Address (Street or P.O. Box): City, State, Zip Code:
E-Mail Address (optional):
Number of First Aid Stickers: Number of CPR Stickers: First Aid/CPR Affiliation:
Number of Preventive Health Stickers: Preventative Health Affiliation:
Total Fees Enclosed:
Check or Money Order Number:
TO BE COMPLETED BY EMSA:
Assigned FA: Assigned CPR: Assigned Prev Health:
Delivery Tracking #: Amount Paid/Date/Method: Filled By:
CA CHILDCARE INSTRUCTOR SUPPLEMENT
11
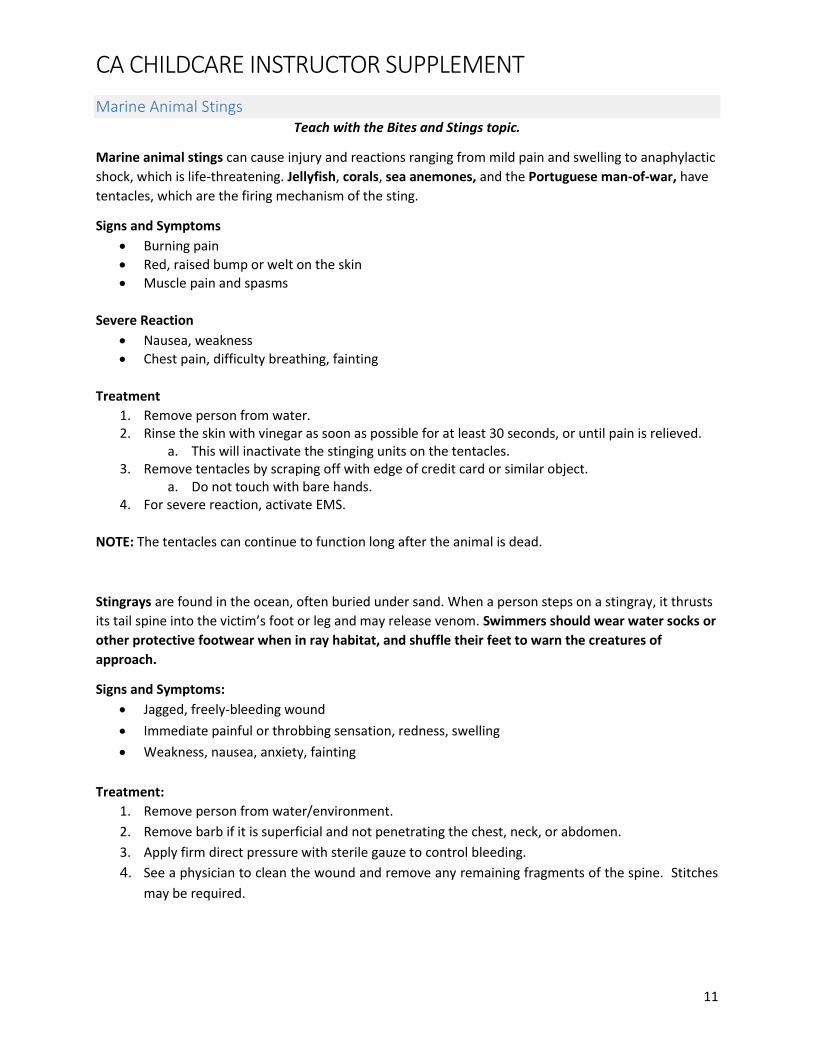
Marine Animal Stings Teach with the Bites and Stings topic.
Marine animal stings can cause injury and reactions ranging from mild pain and swelling to anaphylactic
shock, which is life-threatening. Jellyfish, corals, sea anemones, and the Portuguese man-of-war, have
tentacles, which are the firing mechanism of the sting.
Signs and Symptoms
Burning pain
Red, raised bump or welt on the skin
Muscle pain and spasms
Severe Reaction
Nausea, weakness
Chest pain, difficulty breathing, fainting
Treatment
1. Remove person from water. 2. Rinse the skin with vinegar as soon as possible for at least 30 seconds, or until pain is relieved.
a. This will inactivate the stinging units on the tentacles. 3. Remove tentacles by scraping off with edge of credit card or similar object.
a. Do not touch with bare hands. 4. For severe reaction, activate EMS.
NOTE: The tentacles can continue to function long after the animal is dead.
Stingrays are found in the ocean, often buried under sand. When a person steps on a stingray, it thrusts
its tail spine into the victim’s foot or leg and may release venom. Swimmers should wear water socks or
other protective footwear when in ray habitat, and shuffle their feet to warn the creatures of
approach.
Signs and Symptoms:
Jagged, freely-bleeding wound
Immediate painful or throbbing sensation, redness, swelling
Weakness, nausea, anxiety, fainting
Treatment:
1. Remove person from water/environment.
2. Remove barb if it is superficial and not penetrating the chest, neck, or abdomen.
3. Apply firm direct pressure with sterile gauze to control bleeding.
4. See a physician to clean the wound and remove any remaining fragments of the spine. Stitches
may be required.
1
January 1, 2000 Revised April 8, 2003
EMS Authority Inhaled Medications Training
SB 1663, Chapter 625, September 1998 California Health and Safety Code, 1596.798 (4)
The following will provide you with information on how to administer inhaled medications to children who are prescribed such medications for their respiratory needs. A parent and caregiver should communicate in order to share information regarding a child’s asthma triggers (allergens, substances or activities that cause respiratory problems) and symptoms. Learn to recognize a child’s earliest asthma symptoms, so the symptoms can be counteracted early.
WHAT TO DO WHEN A CHILD IS HAVING AN ASTHMA ATTACK
• Provide Rescue medication immediately. It is vital that rescue medication be kept close at hand because an asthma attack can quickly escalate. If the child is out on the playground, take the rescue medication to him and administer on site. Help the child use his prescribed inhaler or nebulizer the correct way and for the prescribed dose.
• A responsible adult must always remain with a child who is having an asthma attack; never leave the child alone.
• After administering the rescue medication, bring the child to a quiet place, out of the cold or extreme heat.
• Stay calm and reassure the child. • If a child is still having trouble breathing 5-10 minutes after taking his prescribed reliever
medication, then call 9-1-1. • After rescue medication is provided, if you notice any unusual reactions from the medication,
call 9-1-1 immediately.
WHAT TO DO AFTER A CHILD’S ASTHMA ATTACK HAS BEEN TREATED AND HAS SUBSIDED
• A child who has been given rescue medication for an asthma attack should be kept quiet and
his activity level should be kept to a minimum. • A child who has been treated for an asthma attack should also be closely supervised by a
responsible adult. • Record information about the attack in the child’s daily log that will be shared with parents at
the end of the day. Also, note the attack in the child’s asthma care plan. • Tell the parents about the attack and what medication was provided.
2
WHAT TO DO IN EMERGENCY CASES Serious asthma symptoms that require you to call 9-1-1 immediately are:
• Child’s wheeze, cough or shortness of breath worsens, even after medicines have had 5-10 minutes to work;
• Child’s neck and chest are “sucked in” with each breath; • Child has trouble talking or walking; • Child is struggling to breathe, hunching over; • Child’s lips or fingernails are grey or blue; • Child has an altered level of consciousness or confusion; or • Child is experiencing asthma symptoms and has no rescue medication available at the day
care home or facility. Treatment: 1. Call 9-1-1. 2. Provide emergency first aid as appropriate for respiratory distress. This may require the
administration of medication as directed by the child’s physician. 3. Call the child’s parents and physician to alert them that 9-1-1 has been activated, but do not
leave the child alone to make the call. If a child in your care has a lung disease such as asthma and does not have rescue
medication available at the child care facility, advocate for that child and explain to his/her parents or guardian that this type of medication must be provided each day the child is in day care.
PREVENTIVE MEASURES TO IMPROVE A CHILD’S ASTHMA SYMPTOMS
• Control molds, pollen, dust, dust mites, cockroaches, smoke from cigarettes, pipes, cigars,
fireplace fires, strong odors, insect allergens and animal dander. • Other triggers are paint, sprays, outdoor fires, agricultural burning, cleaning materials,
chemicals, perfumes, outdoor pollution, cold, wind, and exercise. • Follow a child’s specific diet if the child has food allergies. Food allergies may cause asthmatic
symptoms. Some foods that children may be allergic to are: milk, eggs, wheat, nuts, soy, seafood and legumes.
• Be sure the child has been taking adequate fluids.
3
RESPIRATORY CARE PLAN The child’s physician and parent/guardian should provide the child’s asthma care plan or respiratory care plan. This type of plan should identify: 1. The child’s specific known asthma triggers; 2. How to recognize the child’s asthma symptoms and warning signs; this may include measuring
a child’s peak expiratory flow (how well a child can move air out of his lungs) with a peak flow meter. A peak flow meter is an important tool in monitoring a child’s lung function. See page 18, “Using a Peak Flow Meter” and “Cleaning a Peak flow Meter.” A child’s peak flow should be measured and logged daily to map changes in his lung function. The peak flow meter should also be used when a child is having symptoms of breathing problems, in order to ascertain and record how serious the child’s breathing problems are. The peak flow daily log or chart can assist the child’s physician in adjusting the child’s treatment plan. A child’s doctor will instruct him in how to use the peak flow meter, how often to use it each day and how to log the peak flow readings. It is generally recommended to monitor peak flow in the morning when the child awakes;
3. Which medications to use routinely and on a schedule, and which to use as needed, at the earliest sign of symptoms - along with how, when, and the dosage for using each drug; and
4. Emergency information, including parent and physician phone numbers and insurance information.
Use a child’s specific respiratory care plan to prevent and control asthma episodes for that child. TYPES of ASTHMA MEDICATIONS The general goals of asthma therapy are to: 1. Prevent chronic asthma symptoms and asthma flare-ups during day or night; 2. Maintain normal activity levels; 3. Have normal, or near-normal lung function; and 4. Have no, or minimal, side effects. Asthma medications have three categories: rescuer/relievers (for immediate relief of an asthma attack), long-term relievers (do not work immediately), and controllers. Also, some of these medications must be mixed with a saline solution specific for the lungs. RESCUER/RELIEVERS (also known as bronchodilators) These medications reduce the swelling and relax the walls of the airway to allow increased airflow. These medications are known as the rescuers, because they quickly open the airways and ease the spasms of the airways and should help the child breath easier within 5-10 minutes. They reduce acute episodes of coughing and wheezing. Some examples of relievers are Albuterol, Proventil®, Ventolin®, Terbutaline, Metaproterenol, and Xopenex®. LONG-TERM RELIEVERS (long acting bronchodilators) Some reliever medications are not to be used for immediate relief of an acute asthma attack because they do not work quickly. One of these medications is Serevent®. This medication works over a period of twelve hours to reduce the swelling and relax the walls of the airways. Atrovent® is also a long-acting reliever. Atrovent® has a delayed reaction - it has an onset peak one hour after inhalation and it works over a period of six to eight hours.
4
CONTROLLERS (routine, scheduled preventive medicines) Controllers are asthma medications that reduce the swelling of the airways by keeping them from reacting to asthma triggers. These medications are typically given on a daily routine, to prevent asthma attacks. Controllers will not relieve wheezing during an asthma attack. They prevent the swelling (inflammation) of the airway on a long-term basis. These medications must be taken regularly to work well. During an asthma attack, the caregiver would deliver a rescue medication, not a controller medication (unless specified otherwise by a physician). Some examples of controllers are Intal®, Tilade®, or the inhaled steroids such as Vanceril®, Flovent®, Azmacort®, Aerobid®, Beclovent®, and Kenelog®. Advair® is a relatively new medication that is a combination of a steroid (a controller) and long-term reliever, or bronchodilator. Advair® is not an immediate reliever; during an asthma attack, the caregiver would not use Advair® to relieve an acute asthma episode. Oral controllers include Montelukast, Singulair®, Zafirlukast, and Accolate®. Singulair® and Accolate® are in tablet form. It is very important to carefully follow the specific treatment plans for each child. Missed treatments may result in an asthma attack or increased difficulty in breathing. Only prescription medications should be administered. These medications come in different forms such as liquid, powder, or pill in order to meet the needs of different children.
If you are unsure of which type of medication to give the child during an asthma attack, call 9-1-1.
HOW TO IDENTIFY SIDE EFFECTS OF THE MEDICATIONS Some common side effects of reliever medications (bronchodilators) are:
• Shaking; • Jittering; • Pounding heart; • Nervousness; and/or • Restlessness.
If the child develops a tremor (shaking) from the treatment, any play requiring hand-eye or foot-eye coordination may be frustrating. The tremor will wear off in 10-15 minutes. Other side effects not listed above may occur in some children. If you notice any unusual reaction, contact the child’s doctor and parents or 9-1-1. Some precautions when using reliever medications (bronchodilators) are:
• If the child still has trouble breathing after using the medication - or the condition worsens, call 9-1-1 and child’s physician immediately.
• Use medications only as directed. Do not increase the dose or how often it is given unless advised to do so by the child’s physician. To do so may increase side effects.
• Keep this and all other medications out of the reach of children. Some common side effects of controller asthma medications are:
• Dizziness • Headache • Nausea • Over time, the use of controller medications can cause the voice to be hoarse.
Other side effects not listed above may occur in some children. If you notice any unusual reaction, contact the child’s parents and doctor, or call 9-1-1.

5
Some precautions when using this type of asthma medication: • Use only as directed. • When taking inhaled steroids, the child must rinse his mouth with water to avoid a yeast
infection in the mouth.
HOW MEDICATIONS ARE DELIVERED A nebulizer delivers the liquid form of medication. Nebulized medications are generally safe, as the amount of medication the child is prescribed and actually receives is relatively small. This way of delivering the medication is relatively easy for all age groups. The medication can be either pre-mixed or require the user to dilute the medication with saline solution that is specifically manufactured for use in the lungs. An inhaler will deliver the liquid or powder form of medication. With inhalers, the delivered doses vary from one puff to four puffs. A spacer, which is a tool that makes the inhaler’s delivery more efficient, is strongly recommended to help deliver the medication. Spacers can be modified with a mask for delivery to an infant or small child. There are spacers available with a mask and a plastic connector that can be used together to deliver inhaled medication to young children. Spacers must be prescribed by a child’s physician. Prescription inhalers are safe if used according to the physician’s instructions. PROPER STORAGE OF THE INHALED MEDICATION Keep this and all other medications out of the reach of children. Store the inhalers at room temperature. Heat or refrigeration may cause a change in the dosing of the medication, because the contents are delivered with a gas propellant. Liquid medications for the nebulizer should not be refrigerated, as doing so can make the medication unstable. If these types of medications will be transported away from the child care facility on field trips, care must be taken to keep the medicines temperate. Be careful not to leave inhalers or nebulizer medication in a car. Extreme temperatures can cause the medication to become ineffective. Liquid nebulizer doses are stored at room temperature, away from direct sunlight. Some medications must remain in foil pouches, and some must be used within a specific time once they are removed from their wrappers (for example Xopenex® and Advair®). With some liquid medications, the solution should be colorless. If the solution is not colorless, the medication should be discarded. Always read the package inserts for specific information and follow the instructions on proper storage of the medication. Contact the pharmacist for more information.
USE OF THE EQUIPMENT For detailed information on how to use inhalers, nebulizers, spacers, Peak flow meters and how to clean them, read pages 9-18. A) NEBULIZER EQUIPMENT
Refer to pages 9 & 10, “Use and Care of a Nebulizer.” Refer to page 11, “The Nebulizer Equipment.”
B) INHALERS
Refer to page 12, “Steps for Using an Inhaler.” Refer to pages 13 & 14, “Using an Inhaler with a Spacer.”
Equipment Handout References: “Use and Care of a Nebulizer”
– National Institutes of Health The National Asthma Education
and Prevention Program (NAEPP) “Operating your Nebulizer”
– American Lung Association East Bay
“Inhalers” – NIH/NAEPP “Using an Inhaler with a Spacer”
– NIH/NAEPP “Steps for Using Your Inhaler”
– NIH/NAEPP
6
C) SPACER
Refer to page 13 “Using an Inhaler with a Spacer” D) PEAK FLOW METER
Refer to page 18, “Using a Peak Flow Meter” HOW TO CLEAN THE EQUIPMENT A) NEBULIZERS
Refer to pages 15 & 16, “Cleaning a Nebulizer.” B) INHALERS
Refer to page 17, “Care of an Inhaler.”
C) SPACERS Refer to page 14, “Cleaning a Spacer.”
D) PEAK FLOW METERS
Refer to page 18, “Cleaning a Peak Flow Meter.”
7
WHEN TO NOTIFY THE CHILD’S PARENTS AND PHYSICIAN A) THE PARENT/LEGAL GUARDIAN Inform the parent or guardian daily regarding the medications given to a child. A log for the administration of medication should be kept each day that medication is administered. The following information should be included in this log:
• The signs and symptoms the child had prior to needing medication; • The time the medicine was administered; • The amount of medication given; • The type of medication given; • Any side effects noted; • If required, note the time the parent, physician, or 9-1-1 was notified; • Were the signs and symptoms relieved after the medication was administered? • Who gave the medication?
Also communicate to the parent any possible side effects that you have noticed (see the list provided), and share any possible warning signs you have seen. Common asthma warning signs include:
• Coughing; • Wheezing; • Feeling the chest is “tight”; • Difficulty breathing, shortness of breath; • Sneezing; • An itchy throat or chin; • Not sleeping well; • Pale skin; • Stomachache/nausea; • Loss of appetite; • Raised shoulders; • Tiredness; and /or • Hoarseness
B) THE CHILD’S PHYSICIAN If the child still has trouble breathing 5-10 minutes after using the medication - or if the condition worsens - call 9-1-1. Call 9-1-1 right away if the child’s lips or fingernails are grey or blue. Then call the parent/guardian and physician to alert them that 9-1-1 has been called because the child is having a breathing emergency.
SUGGESTIONS FOR THE CHILD CARE PROVIDER 1. The child care provider should demonstrate the use of the nebulizer and inhaler equipment to
the parent’s/guardian’s satisfaction; and 2. The child care provider should have a written plan from the child’s doctor or parents regarding:
1. The type of medication, dosage, and frequency; 2. How to prepare the medication; and 3. How to use the child’s specific equipment.
8
REFERENCES, BASIC What Is Asthma?
Worksheet #1, NIH Teach Your Patients About Asthma - A Clinician’s Guide, 10/92 Asthma in Children, ALA, 8/97 My Child’s Asthma, a Caregiver’s Guide, Krames, 1998
What Everyone Should Know about Asthma Control NIH Practical Guide for the Diagnosis and Management of Asthma, 10/97
How to Control Things that Make Your Asthma Worse NIH Practical Guide for the Diagnosis and Management of Asthma, 10/97
Asthma Trigger Control Plan Worksheet #20, NIH Teach Your Patients About Asthma - A Clinician’s Guide, 10/92 (2) Pennsylvania Chapter, AAP
Sample Asthma Action Plan (1 & 2) NIH Expert Panel report 2, 7/97 (3) Pennsylvania Chapter, AAP (4 & 5) Practical Guide for the Diagnosis and Management of Asthma, 10/97 (6 & 7) NIH Expert Panel report 2, 7/97
If Your Infant Has Asthma You Will Have to Take Extra Care Worksheet #4, NIH Teach Your Patients About Asthma - A Clinician’s Guide, 10/92
Warning Signs of Asthma Episodes Worksheet #17, NIH Teach Your Patients About Asthma - A Clinician’s Guide, 10/92
Summary of Steps to Manage Asthma Episodes Worksheet # 19, NIH Teach Your Patients About Asthma - A Clinician’s Guide, 10/92
Clues for Deciding to Go to School Worksheet #26, NIH Teach Your Patients About Asthma - A Clinician’s Guide, 10/92
How Asthma-Friendly Is Your School? NIH, 9/99
REFERENCES, ADVANCED Sources of Patient Education Programs and Materials
NIH, Expert Panel Report 2, 7/97 Self-Learning Module on Asthma Management in Child Care Settings
Pennsylvania Chapter of AAP Asthma Delivery Devices
NIH, Expert Panel Report 2, 7/97 What You Need to Know About Medicines for Asthma
Worksheet #6, NIH Teach Your Patients About Asthma - A Clinician’s Guide, 10/92 Age-Appropriate Asthma Self-Management Skills for Children 3-5
ALA of the East Bay, 3/99
9
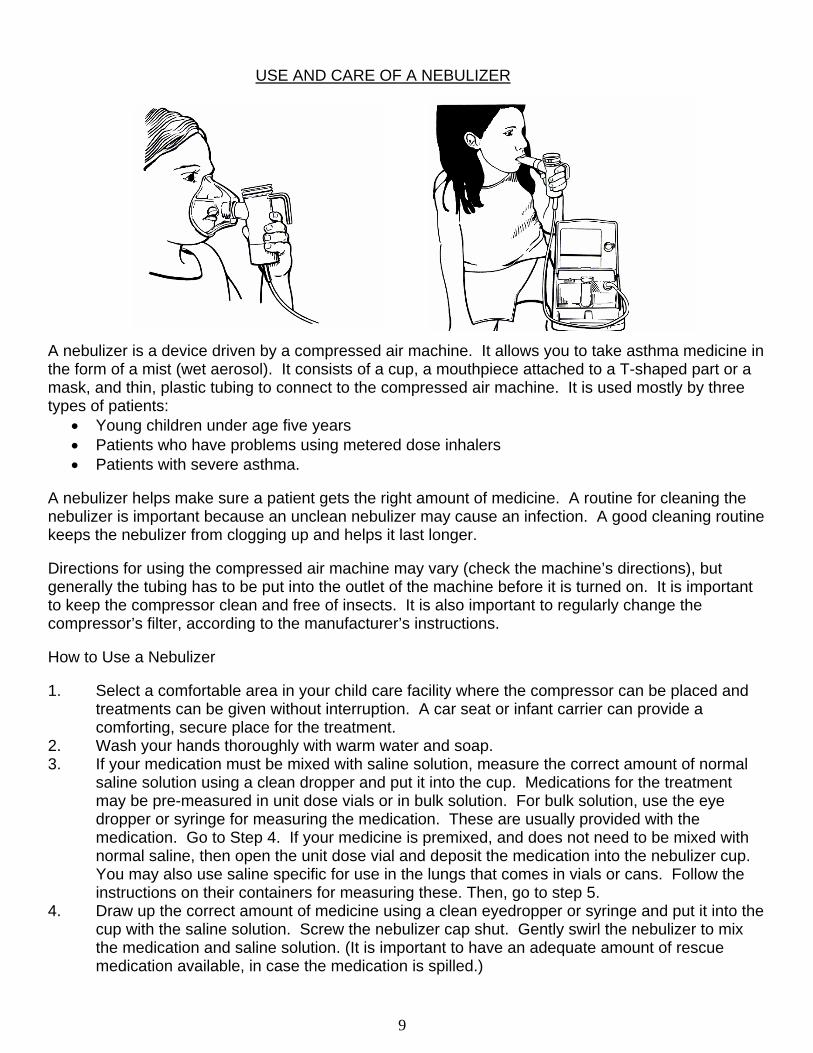
USE AND CARE OF A NEBULIZER A nebulizer is a device driven by a compressed air machine. It allows you to take asthma medicine in the form of a mist (wet aerosol). It consists of a cup, a mouthpiece attached to a T-shaped part or a mask, and thin, plastic tubing to connect to the compressed air machine. It is used mostly by three types of patients:
• Young children under age five years • Patients who have problems using metered dose inhalers • Patients with severe asthma.
A nebulizer helps make sure a patient gets the right amount of medicine. A routine for cleaning the nebulizer is important because an unclean nebulizer may cause an infection. A good cleaning routine keeps the nebulizer from clogging up and helps it last longer. Directions for using the compressed air machine may vary (check the machine’s directions), but generally the tubing has to be put into the outlet of the machine before it is turned on. It is important to keep the compressor clean and free of insects. It is also important to regularly change the compressor’s filter, according to the manufacturer’s instructions. How to Use a Nebulizer 1. Select a comfortable area in your child care facility where the compressor can be placed and
treatments can be given without interruption. A car seat or infant carrier can provide a comforting, secure place for the treatment.
2. Wash your hands thoroughly with warm water and soap. 3. If your medication must be mixed with saline solution, measure the correct amount of normal
saline solution using a clean dropper and put it into the cup. Medications for the treatment may be pre-measured in unit dose vials or in bulk solution. For bulk solution, use the eye dropper or syringe for measuring the medication. These are usually provided with the medication. Go to Step 4. If your medicine is premixed, and does not need to be mixed with normal saline, then open the unit dose vial and deposit the medication into the nebulizer cup. You may also use saline specific for use in the lungs that comes in vials or cans. Follow the instructions on their containers for measuring these. Then, go to step 5.
4. Draw up the correct amount of medicine using a clean eyedropper or syringe and put it into the cup with the saline solution. Screw the nebulizer cap shut. Gently swirl the nebulizer to mix the medication and saline solution. (It is important to have an adequate amount of rescue medication available, in case the medication is spilled.)
10
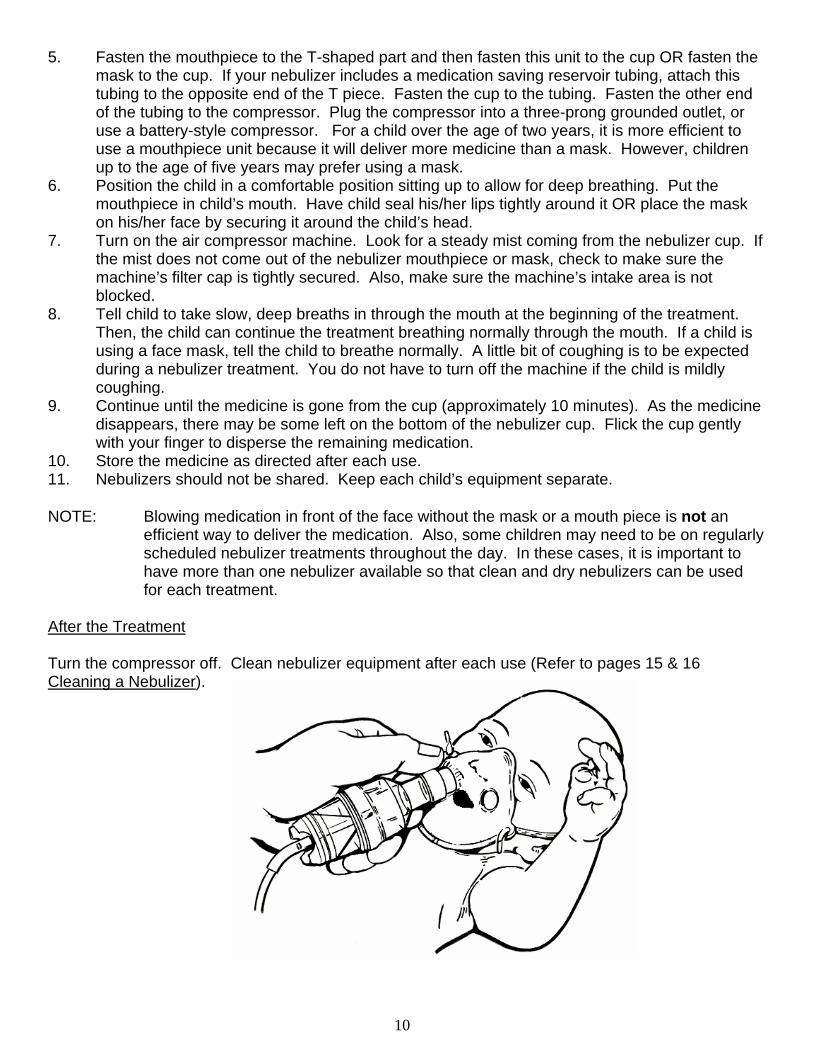
5. Fasten the mouthpiece to the T-shaped part and then fasten this unit to the cup OR fasten the mask to the cup. If your nebulizer includes a medication saving reservoir tubing, attach this tubing to the opposite end of the T piece. Fasten the cup to the tubing. Fasten the other end of the tubing to the compressor. Plug the compressor into a three-prong grounded outlet, or use a battery-style compressor. For a child over the age of two years, it is more efficient to use a mouthpiece unit because it will deliver more medicine than a mask. However, children up to the age of five years may prefer using a mask.
6. Position the child in a comfortable position sitting up to allow for deep breathing. Put the mouthpiece in child’s mouth. Have child seal his/her lips tightly around it OR place the mask on his/her face by securing it around the child’s head.
7. Turn on the air compressor machine. Look for a steady mist coming from the nebulizer cup. If the mist does not come out of the nebulizer mouthpiece or mask, check to make sure the machine’s filter cap is tightly secured. Also, make sure the machine’s intake area is not blocked.
8. Tell child to take slow, deep breaths in through the mouth at the beginning of the treatment. Then, the child can continue the treatment breathing normally through the mouth. If a child is using a face mask, tell the child to breathe normally. A little bit of coughing is to be expected during a nebulizer treatment. You do not have to turn off the machine if the child is mildly coughing.
9. Continue until the medicine is gone from the cup (approximately 10 minutes). As the medicine disappears, there may be some left on the bottom of the nebulizer cup. Flick the cup gently with your finger to disperse the remaining medication.
10. Store the medicine as directed after each use. 11. Nebulizers should not be shared. Keep each child’s equipment separate. NOTE: Blowing medication in front of the face without the mask or a mouth piece is not an
efficient way to deliver the medication. Also, some children may need to be on regularly scheduled nebulizer treatments throughout the day. In these cases, it is important to have more than one nebulizer available so that clean and dry nebulizers can be used for each treatment.
After the Treatment Turn the compressor off. Clean nebulizer equipment after each use (Refer to pages 15 & 16 Cleaning a Nebulizer).
11
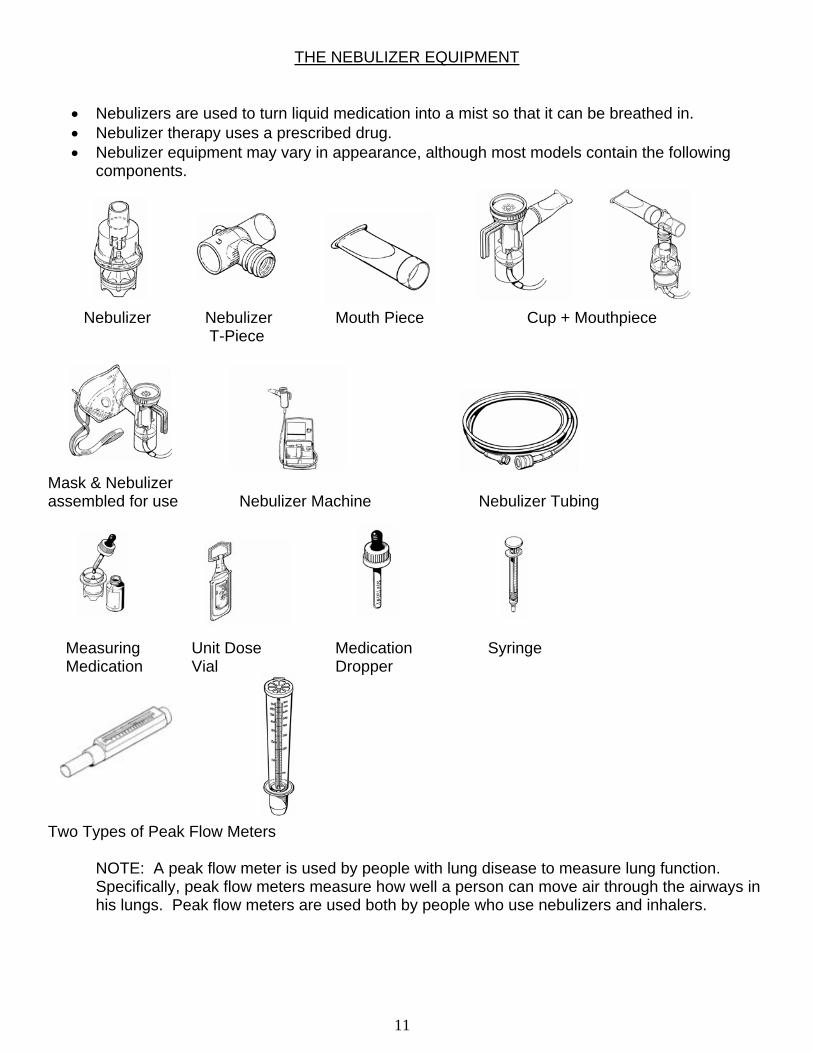
THE NEBULIZER EQUIPMENT
• Nebulizers are used to turn liquid medication into a mist so that it can be breathed in. • Nebulizer therapy uses a prescribed drug. • Nebulizer equipment may vary in appearance, although most models contain the following
components.
Nebulizer Nebulizer Mouth Piece Cup + Mouthpiece T-Piece
Mask & Nebulizer assembled for use Nebulizer Machine Nebulizer Tubing Measuring Unit Dose Medication Syringe Medication Vial Dropper
Two Types of Peak Flow Meters
NOTE: A peak flow meter is used by people with lung disease to measure lung function. Specifically, peak flow meters measure how well a person can move air through the airways in his lungs. Peak flow meters are used both by people who use nebulizers and inhalers.
12
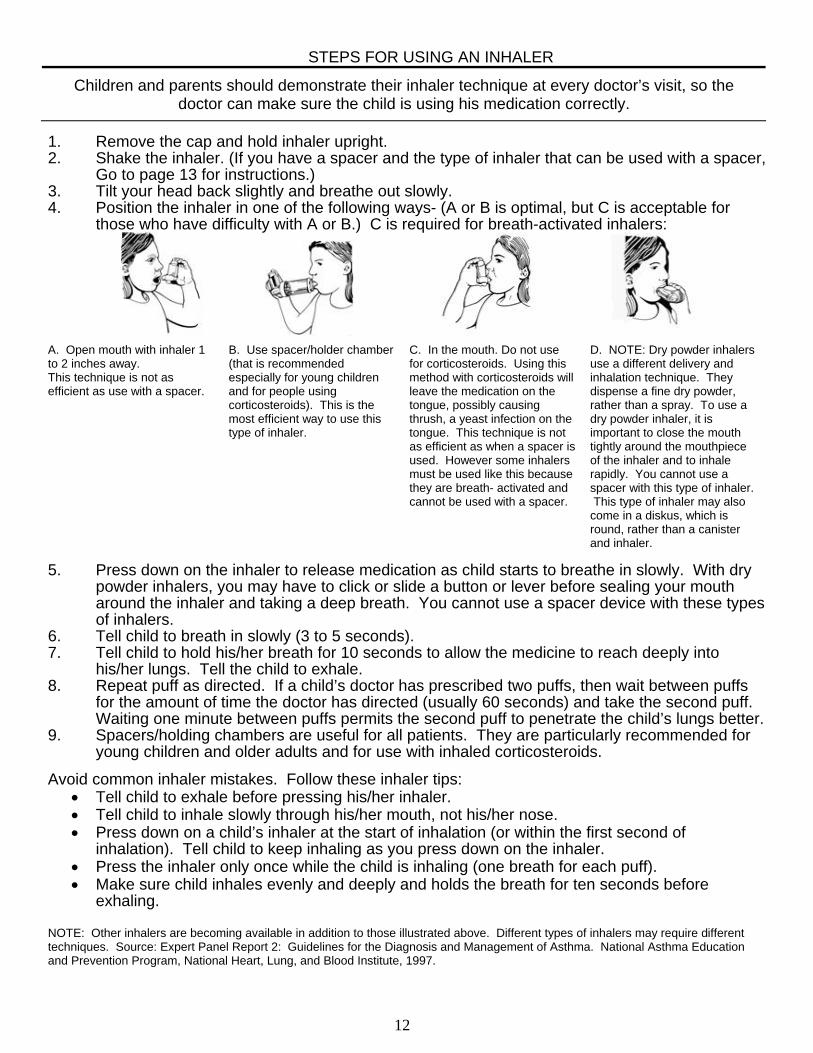
STEPS FOR USING AN INHALER
Children and parents should demonstrate their inhaler technique at every doctor’s visit, so the doctor can make sure the child is using his medication correctly.
1. Remove the cap and hold inhaler upright. 2. Shake the inhaler. (If you have a spacer and the type of inhaler that can be used with a spacer,
Go to page 13 for instructions.) 3. Tilt your head back slightly and breathe out slowly. 4. Position the inhaler in one of the following ways- (A or B is optimal, but C is acceptable for
those who have difficulty with A or B.) C is required for breath-activated inhalers: A. Open mouth with inhaler 1 to 2 inches away. This technique is not as efficient as use with a spacer.
B. Use spacer/holder chamber (that is recommended especially for young children and for people using corticosteroids). This is the most efficient way to use this type of inhaler.
C. In the mouth. Do not use for corticosteroids. Using this method with corticosteroids will leave the medication on the tongue, possibly causing thrush, a yeast infection on the tongue. This technique is not as efficient as when a spacer is used. However some inhalers must be used like this because they are breath- activated and cannot be used with a spacer.
D. NOTE: Dry powder inhalers use a different delivery and inhalation technique. They dispense a fine dry powder, rather than a spray. To use a dry powder inhaler, it is important to close the mouth tightly around the mouthpiece of the inhaler and to inhale rapidly. You cannot use a spacer with this type of inhaler. This type of inhaler may also come in a diskus, which is round, rather than a canister and inhaler.
5. Press down on the inhaler to release medication as child starts to breathe in slowly. With dry
powder inhalers, you may have to click or slide a button or lever before sealing your mouth around the inhaler and taking a deep breath. You cannot use a spacer device with these types of inhalers.
6. Tell child to breath in slowly (3 to 5 seconds). 7. Tell child to hold his/her breath for 10 seconds to allow the medicine to reach deeply into
his/her lungs. Tell the child to exhale. 8. Repeat puff as directed. If a child’s doctor has prescribed two puffs, then wait between puffs
for the amount of time the doctor has directed (usually 60 seconds) and take the second puff. Waiting one minute between puffs permits the second puff to penetrate the child’s lungs better.
9. Spacers/holding chambers are useful for all patients. They are particularly recommended for young children and older adults and for use with inhaled corticosteroids.
Avoid common inhaler mistakes. Follow these inhaler tips:
• Tell child to exhale before pressing his/her inhaler. • Tell child to inhale slowly through his/her mouth, not his/her nose. • Press down on a child’s inhaler at the start of inhalation (or within the first second of
inhalation). Tell child to keep inhaling as you press down on the inhaler. • Press the inhaler only once while the child is inhaling (one breath for each puff). • Make sure child inhales evenly and deeply and holds the breath for ten seconds before
exhaling.
NOTE: Other inhalers are becoming available in addition to those illustrated above. Different types of inhalers may require different techniques. Source: Expert Panel Report 2: Guidelines for the Diagnosis and Management of Asthma. National Asthma Education and Prevention Program, National Heart, Lung, and Blood Institute, 1997.
13
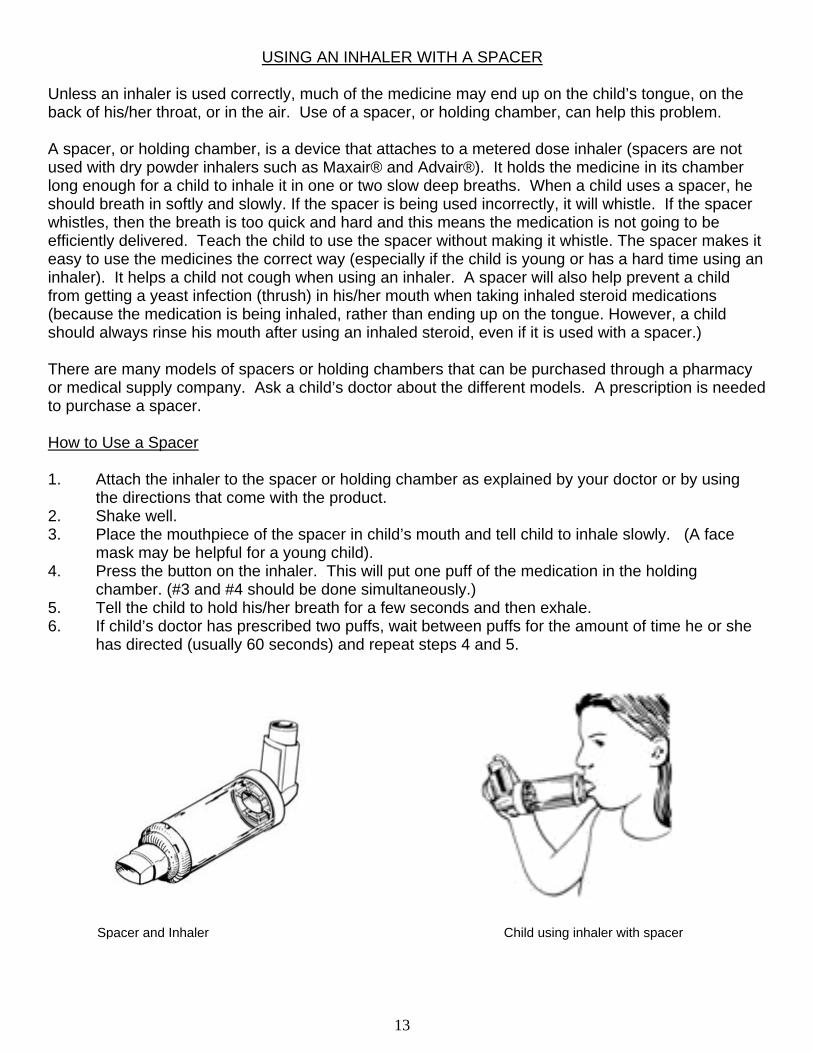
Spacer and Inhaler Child using inhaler with spacer
USING AN INHALER WITH A SPACER Unless an inhaler is used correctly, much of the medicine may end up on the child’s tongue, on the back of his/her throat, or in the air. Use of a spacer, or holding chamber, can help this problem. A spacer, or holding chamber, is a device that attaches to a metered dose inhaler (spacers are not used with dry powder inhalers such as Maxair® and Advair®). It holds the medicine in its chamber long enough for a child to inhale it in one or two slow deep breaths. When a child uses a spacer, he should breath in softly and slowly. If the spacer is being used incorrectly, it will whistle. If the spacer whistles, then the breath is too quick and hard and this means the medication is not going to be efficiently delivered. Teach the child to use the spacer without making it whistle. The spacer makes it easy to use the medicines the correct way (especially if the child is young or has a hard time using an inhaler). It helps a child not cough when using an inhaler. A spacer will also help prevent a child from getting a yeast infection (thrush) in his/her mouth when taking inhaled steroid medications (because the medication is being inhaled, rather than ending up on the tongue. However, a child should always rinse his mouth after using an inhaled steroid, even if it is used with a spacer.) There are many models of spacers or holding chambers that can be purchased through a pharmacy or medical supply company. Ask a child’s doctor about the different models. A prescription is needed to purchase a spacer. How to Use a Spacer 1. Attach the inhaler to the spacer or holding chamber as explained by your doctor or by using
the directions that come with the product. 2. Shake well. 3. Place the mouthpiece of the spacer in child’s mouth and tell child to inhale slowly. (A face
mask may be helpful for a young child). 4. Press the button on the inhaler. This will put one puff of the medication in the holding
chamber. (#3 and #4 should be done simultaneously.) 5. Tell the child to hold his/her breath for a few seconds and then exhale. 6. If child’s doctor has prescribed two puffs, wait between puffs for the amount of time he or she
has directed (usually 60 seconds) and repeat steps 4 and 5.
14
CLEANING A SPACER After each use, rinse the spacer. To do this, remove the rubber seal in which you place the inhaler. Use warm water to rinse the inside of the spacer then rinse the rubber seal. Do not remove the mouthpiece since it is permanently attached. Allow the spacer to air dry completely before the next use. Do not use paper or lint towels to dry the inside of the spacer, because small particles that remain may be inhaled the next time the spacer is used. Once a week, the spacer should be cleaned by using a cleaning solution made up of 1/3 part of distilled white vinegar and 2/3 parts water. Let the spacer soak in this solution for fifteen minutes and then rinse well and air dry completely before the next use.
15
CLEANING A NEBULIZER Don’t forget: Cleaning and disinfecting the nebulizer prevents infection. Cleaning also keeps the nebulizer from clogging up and helps it last longer. After Each Use 1. Remove the mask or the mouthpiece and T-shaped part from the cup. Remove the tubing
and set it aside. The tubing should not be washed or rinsed. Rinse the mask or mouthpiece, T-shaped part, and the eyedropper or syringe in warm running water for 30 seconds. Use distilled or sterile water for rinsing, if possible.
2. Shake off excess water. Air dry on a clean cloth or paper towel. 3. Put the mask or the mouthpiece and T-shaped part, cup, and tubing back together and
connect the device to the compressed air machine. Run the machine for 10 to 20 seconds to make sure the inside of the nebulizer is dried. If the inside of the tubing has moisture in it, connect the tubing to the machine and run it until the moisture disappears.
4. Disconnect the tubing from the compressed air machine. Store the nebulizer parts and the tubing in a clean ziploc plastic bag.
5. Place a cover over the compressed air machine. Cleaning Once Every Day 1. Remove the mask or the mouthpiece and T-shaped part from the cup. Remove the tubing
and set it aside. The tubing should not be washed or rinsed. 2. Wash the mask or the mouthpiece, T-shaped part, and the eyedropper or syringe - with a
mild dishwashing soap and warm water or with a cleaning solution made up of 1/3 part distilled white vinegar and 2/3 parts water. Let the nebulizer pieces soak in this solution for fifteen minutes, then rinse well and air dry. Using this solution will not leave a residue like some dish soaps may.
Note: Do not use dishwashing soap that is strongly scented, especially lemon-scented detergent. Doing so could cause the airways to be reactive the next time the nebulizer is used. If dishwashing soap is used, it should be one that rinses easily. Some dish soaps should not be used because they are so concentrated that they do not rinse well and can leave a residue.
3. Rinse under a strong stream of water for 30 seconds. Use distilled (or sterile) water if possible.
4. Shake off excess water. Air dry on a clean cloth or paper towel. 5. Put the mask or the mouthpiece and T-shaped part, cup, and tubing back together and
connect the device to the compressed air machine. Run the machine for 10 to 20 seconds to make sure the inside of the nebulizer is dried.
6. Disconnect the tubing from the compressed air machine. Store the nebulizer parts and the tubing in a ziploc plastic bag.
7. Place a cover over the compressed air machine. Additional Cleaning This cleaning should be done by a parent or guardian every other day. Scheduling cleaning on odd or even days may help a parent or guardian adhere to this cleaning schedule.
16
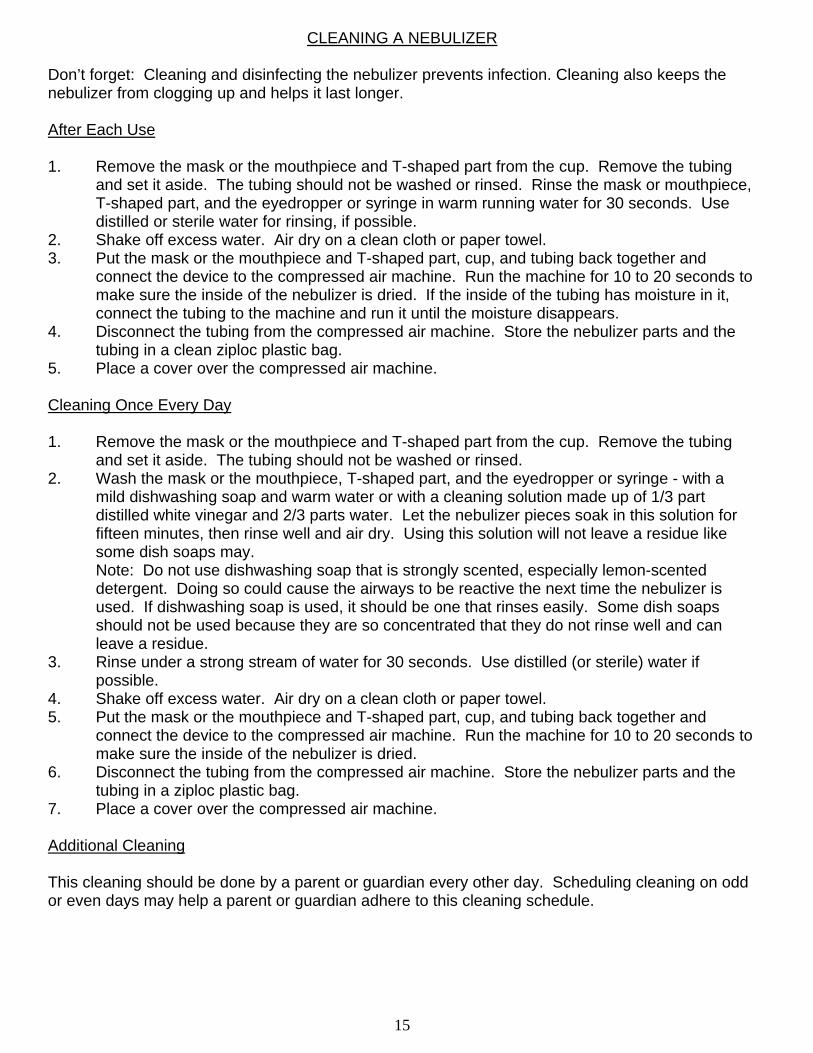
1. Remove the mask or the mouthpiece and T-shaped part from the cup. Remove the tubing
and set it aside. The tubing should not be washed or rinsed. Wash the mask or the mouthpiece, T-shaped part, and the eyedropper or syringe - with a mild detergent dishwashing soap (a non-scented detergent is best) and warm water.
2. Rinse under a strong stream of water for 30 seconds. 3. Soak for 30 minutes in a solution that is one part distilled white vinegar and two parts distilled
water. Throw out the vinegar water solution after use; do not reuse it. 4. Rinse the nebulizer parts and the eyedropper or syringe under warm running water for 1
minute. Use distilled or sterile water, if possible. 5. Shake off excess water. Air dry on a clean cloth or paper towel. 6. Put the mask or the mouthpiece and T-shaped parts, cup, and tubing back together and
connect the device to the compressed air machine. Run the machine for 10 to 20 seconds to dry the inside of the nebulizer thoroughly.
7. Disconnect the tubing from the compressed air machine. Store the nebulizer parts and tubing in a ziploc plastic bag.
8. Clean the surface of the compressed air machine with a well-wrung, soapy cloth or sponge. You could also use an alcohol or disinfectant wipe. NEVER PUT THE COMPRESSED AIR MACHINE IN WATER. Keep the compressor clean and free of insects.
9. Place a cover over the compressed air machine. 10. When the air filter in the compressor is grey in color, change to a new air filter. It is important
to change the compressor filter regularly as the manufacturer instructs. Be sure the filter cap is secured after replacing the filter. If the filter cap or closure is left loose, the air cannot pass through to the tubing correctly, and the nebulizer will not work.
NOTE: Some new nebulizer parts may be put into a dishwasher for the thorough cleaning. Ask the manufacturer of
the nebulizer whether this can be done with your model, and how often it can be done. Also, most nebulizers are not made to last indefinitely. Some nebulizers are not as efficient in delivering medication after several uses. Ask the child’s doctor and the nebulizer manufacturer how long a nebulizer should last under regular use.
17
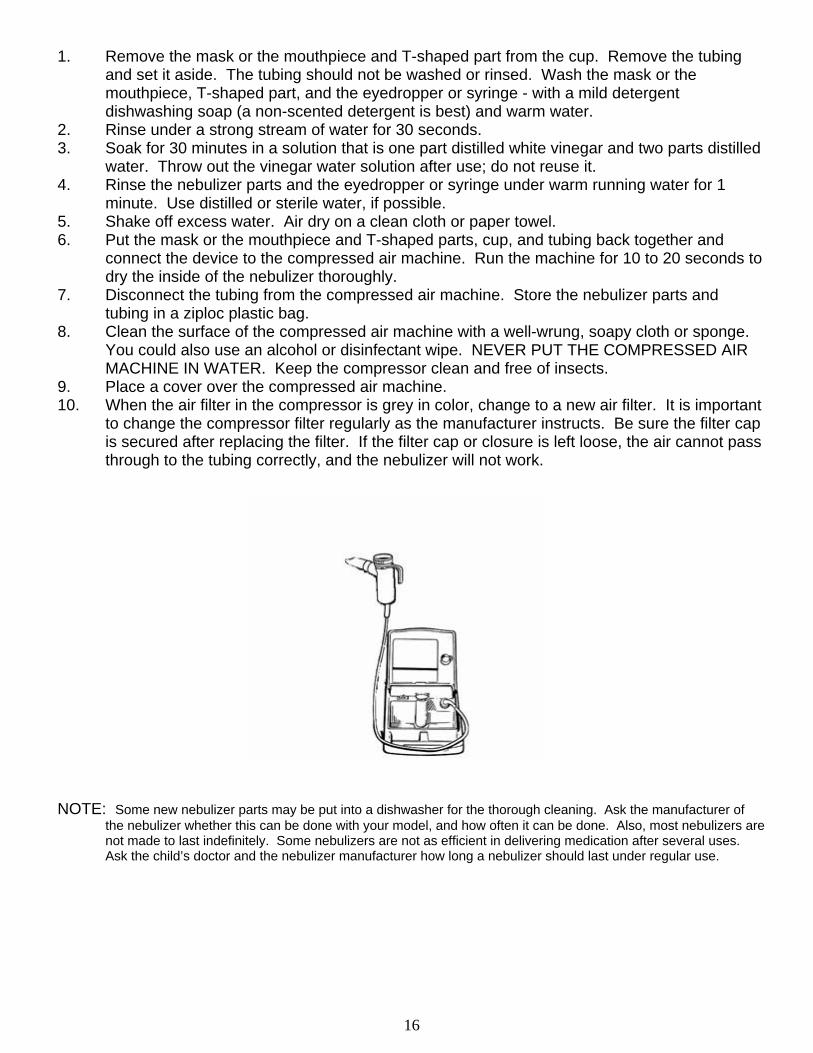
CARE OF AN INHALER Cleaning 1. Clean the inhaler once a day. Remove the medication canister before cleaning the inhaler.
Clean the plastic portion of the inhaler and plastic cap by rinsing it in warm running water. Let it air dry completely before you use it again. Have another inhaler to use while it is drying.
2. Twice a week, remove the canister and wash the plastic inhaler portion and cap with mild dishwashing soap (do not use scented detergent) and warm water. Rinse and air dry completely before putting the medication canister back inside.
Checking How Much Medicine Is Left in the Canister 1. If the canister is new, it is full. 2. An easy way to check the amount of medicine left in your metered dose inhaler is to place the
canister in a container of water and observe the position it takes in the water. Full ¾ Full ½ Full ¼ Full Empty Nebulizer and inhaler artwork done by John Fitzgerald of Fitzgerald & Company, Sacramento, California.
18
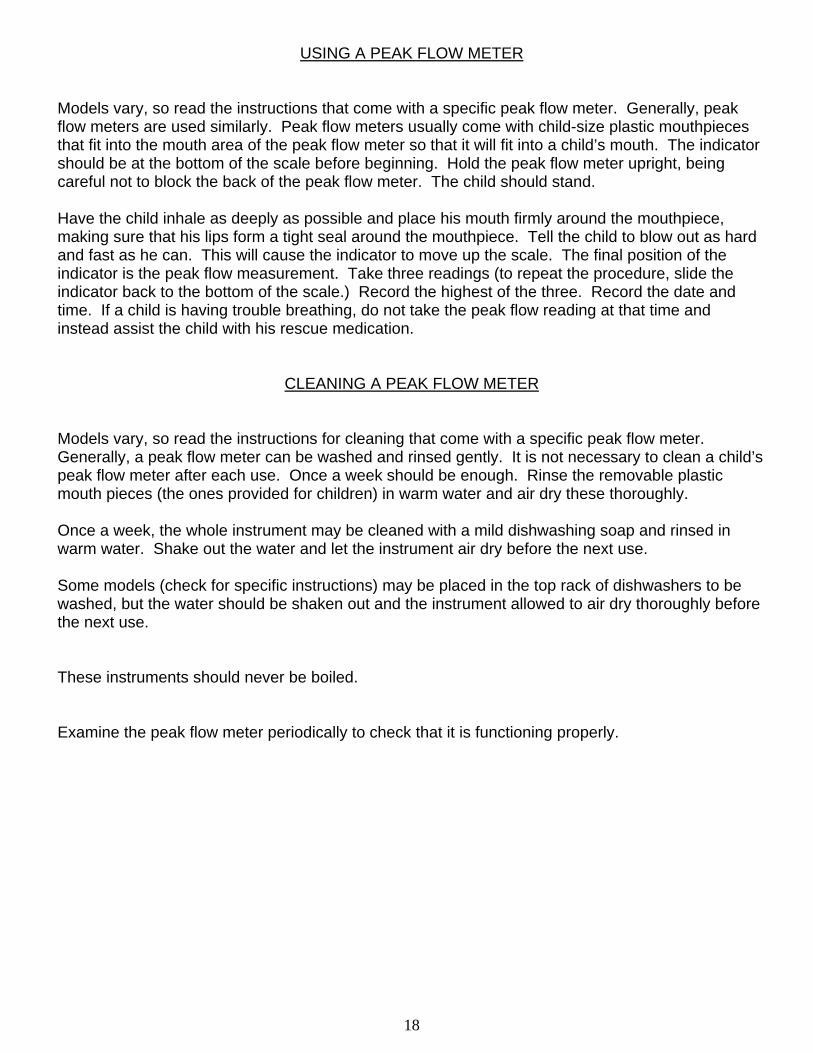
USING A PEAK FLOW METER
Models vary, so read the instructions that come with a specific peak flow meter. Generally, peak flow meters are used similarly. Peak flow meters usually come with child-size plastic mouthpieces that fit into the mouth area of the peak flow meter so that it will fit into a child’s mouth. The indicator should be at the bottom of the scale before beginning. Hold the peak flow meter upright, being careful not to block the back of the peak flow meter. The child should stand. Have the child inhale as deeply as possible and place his mouth firmly around the mouthpiece, making sure that his lips form a tight seal around the mouthpiece. Tell the child to blow out as hard and fast as he can. This will cause the indicator to move up the scale. The final position of the indicator is the peak flow measurement. Take three readings (to repeat the procedure, slide the indicator back to the bottom of the scale.) Record the highest of the three. Record the date and time. If a child is having trouble breathing, do not take the peak flow reading at that time and instead assist the child with his rescue medication.
CLEANING A PEAK FLOW METER
Models vary, so read the instructions for cleaning that come with a specific peak flow meter. Generally, a peak flow meter can be washed and rinsed gently. It is not necessary to clean a child’s peak flow meter after each use. Once a week should be enough. Rinse the removable plastic mouth pieces (the ones provided for children) in warm water and air dry these thoroughly. Once a week, the whole instrument may be cleaned with a mild dishwashing soap and rinsed in warm water. Shake out the water and let the instrument air dry before the next use. Some models (check for specific instructions) may be placed in the top rack of dishwashers to be washed, but the water should be shaken out and the instrument allowed to air dry thoroughly before the next use. These instruments should never be boiled. Examine the peak flow meter periodically to check that it is functioning properly.
19
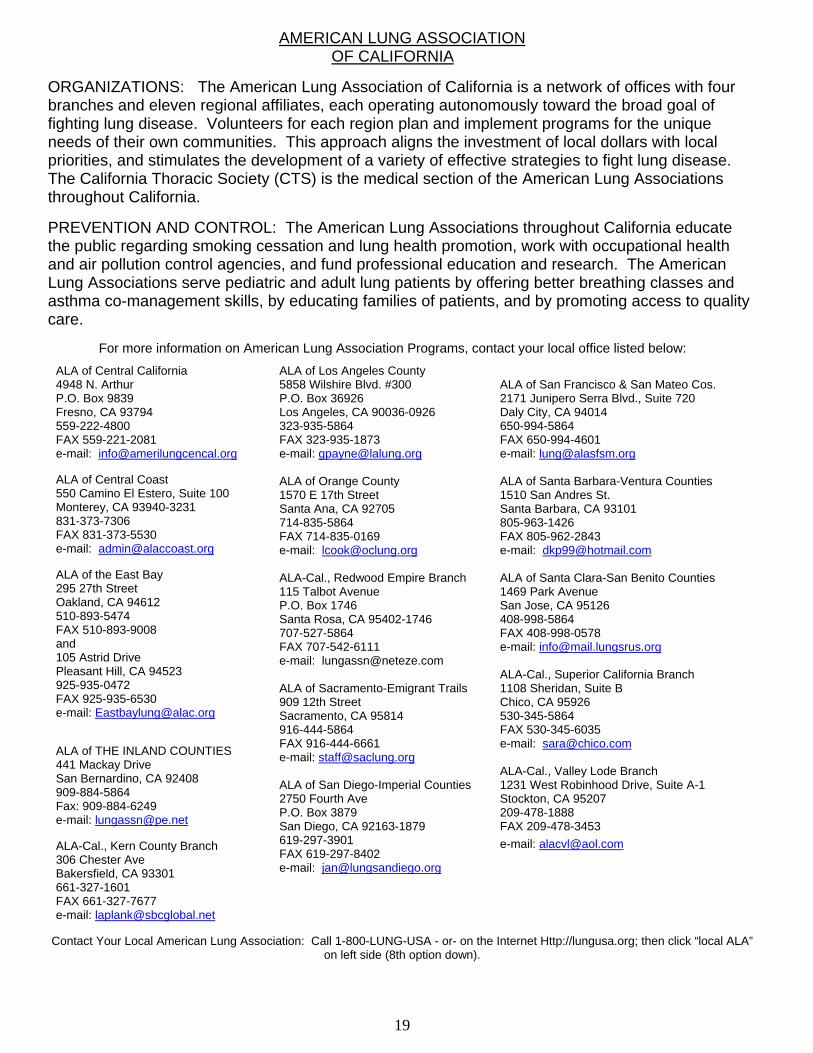
AMERICAN LUNG ASSOCIATION OF CALIFORNIA ORGANIZATIONS: The American Lung Association of California is a network of offices with four branches and eleven regional affiliates, each operating autonomously toward the broad goal of fighting lung disease. Volunteers for each region plan and implement programs for the unique needs of their own communities. This approach aligns the investment of local dollars with local priorities, and stimulates the development of a variety of effective strategies to fight lung disease. The California Thoracic Society (CTS) is the medical section of the American Lung Associations throughout California. PREVENTION AND CONTROL: The American Lung Associations throughout California educate the public regarding smoking cessation and lung health promotion, work with occupational health and air pollution control agencies, and fund professional education and research. The American Lung Associations serve pediatric and adult lung patients by offering better breathing classes and asthma co-management skills, by educating families of patients, and by promoting access to quality care. For more information on American Lung Association Programs, contact your local office listed below:
ALA of Central California 4948 N. Arthur P.O. Box 9839 Fresno, CA 93794 559-222-4800 FAX 559-221-2081 e-mail: [email protected] ALA of Central Coast 550 Camino El Estero, Suite 100 Monterey, CA 93940-3231 831-373-7306 FAX 831-373-5530 e-mail: [email protected] ALA of the East Bay 295 27th Street Oakland, CA 94612 510-893-5474 FAX 510-893-9008 and 105 Astrid Drive Pleasant Hill, CA 94523 925-935-0472 FAX 925-935-6530 e-mail: [email protected] ALA of THE INLAND COUNTIES 441 Mackay Drive San Bernardino, CA 92408 909-884-5864 Fax: 909-884-6249 e-mail: [email protected] ALA-Cal., Kern County Branch 306 Chester Ave Bakersfield, CA 93301 661-327-1601 FAX 661-327-7677 e-mail: [email protected]
ALA of Los Angeles County 5858 Wilshire Blvd. #300 P.O. Box 36926 Los Angeles, CA 90036-0926 323-935-5864 FAX 323-935-1873 e-mail: [email protected] ALA of Orange County 1570 E 17th Street Santa Ana, CA 92705 714-835-5864 FAX 714-835-0169 e-mail: [email protected] ALA-Cal., Redwood Empire Branch 115 Talbot Avenue P.O. Box 1746 Santa Rosa, CA 95402-1746 707-527-5864 FAX 707-542-6111 e-mail: [email protected] ALA of Sacramento-Emigrant Trails 909 12th Street Sacramento, CA 95814 916-444-5864 FAX 916-444-6661 e-mail: [email protected] ALA of San Diego-Imperial Counties 2750 Fourth Ave P.O. Box 3879 San Diego, CA 92163-1879 619-297-3901 FAX 619-297-8402 e-mail: [email protected]
ALA of San Francisco & San Mateo Cos. 2171 Junipero Serra Blvd., Suite 720 Daly City, CA 94014 650-994-5864 FAX 650-994-4601 e-mail: [email protected] ALA of Santa Barbara-Ventura Counties 1510 San Andres St. Santa Barbara, CA 93101 805-963-1426 FAX 805-962-2843 e-mail: [email protected] ALA of Santa Clara-San Benito Counties 1469 Park Avenue San Jose, CA 95126 408-998-5864 FAX 408-998-0578 e-mail: [email protected] ALA-Cal., Superior California Branch 1108 Sheridan, Suite B Chico, CA 95926 530-345-5864 FAX 530-345-6035 e-mail: [email protected] ALA-Cal., Valley Lode Branch 1231 West Robinhood Drive, Suite A-1 Stockton, CA 95207 209-478-1888 FAX 209-478-3453 e-mail: [email protected]
Contact Your Local American Lung Association: Call 1-800-LUNG-USA - or- on the Internet Http://lungusa.org; then click “local ALA”
on left side (8th option down).
Related Documents


