Bytom User manual V 1.0 (Mining + Wallet)

Welcome message from author
This document is posted to help you gain knowledge. Please leave a comment to let me know what you think about it! Share it to your friends and learn new things together.
Transcript

Bytom User manual V 1.0(Mining + Wallet)

Contents
1. Installation Guide
1.1. Download Instructions
1.2. Desktop Client Installation Instructions
1.3. WEB Client Installation Instructions
1.4. WEB Edition + SIMD Acceleration Client Installation Instructions
2. User Instructions
2.1. Default Account
2.2. Main InterfaceOverview
2.3. Block Synchronization
2.4. Mining
2.5. Transfer(New Transaction)
2.6. New Account
2.7. New Asset
2.8. Balance
2.9. New Key
2.10. Unspent output
2.11. Core Status
2.12. Backup and Restore
2.13. Access Control

1. Installation Guide

1.1 Download Instructions
Download address:
https://github.com/Bytom/bytom/releases
Select the latest version, currently V 1.0.0
Web ClientNeed a command lines to run mining and web wallets
Web Edition with SIMD Acceleration Client
SIMD acceleration, same functionality as Web Edition
client, but faster mining and synchronization
Desktop Client
No need command lines to run mining and
wallet
inexperienced User

1.1 Download Instructions
If you have installed a test version before, please clean the data before installing V1.0.
If you have not installed any version before, please go to the next page.
You need to clear the related data directory, the configuration file created by your test net will
influence your main net.
According to different OS, the location of the file is different:
- Mac: ~/Library/Bytom
- Linux: ~/.bytom
- Windows: %APPDATA%\Bytom
For example C:\Users\accountname\AppData\Roaming\Bytom
Also C:\Users\accountname\AppData\Roaming\BytomWallet,
Delete the folder, you will need to synchronize again the blocks.

1.2. Desktop Client Installation Instructions
For our example we will use the windows 64-bit client, other
systems are similar.
The desktop installation package contains a large number of
external libraries, so it is about 70 M.
Desktop has been updated to 1.0.0
Once we download the installation package, unzip it to the
your preference directory, and inside you will find the Bytom
Wallet.exe file.
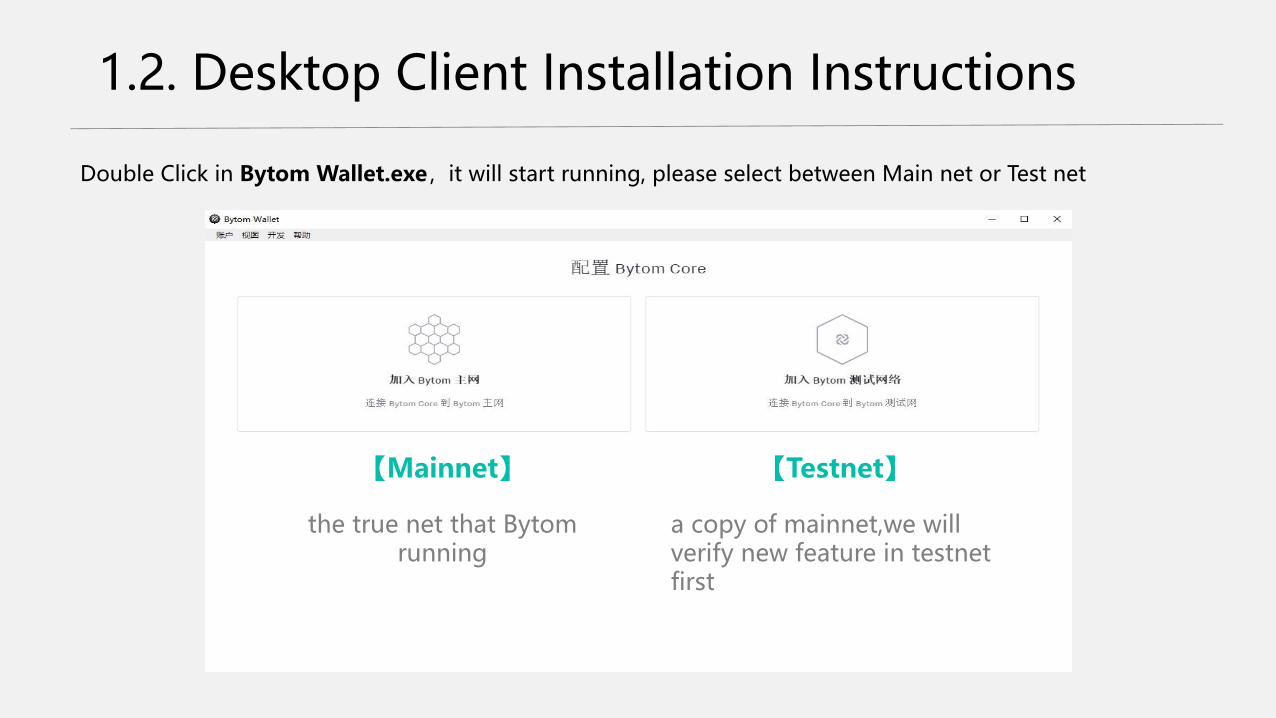
1.2. Desktop Client Installation Instructions
Double Click in Bytom Wallet.exe,it will start running, please select between Main net or Test net
the true net that Bytom running
a copy of mainnet,we will verify new feature in testnet first
【Mainnet】 【Testnet】

1.3. WEB Client Installation Instructions
For our example we use the windows 64-bit client, other OS similar.
We open the downloaded installation package and we can there are three files .exe
Md5 file: is used to verify the validity of the files
Bytomcli: command line tools
Bytomd: Main client program
miner:Currently not used
If you we do not use other requirements, we only extract bytomd-windows_amd64.exe file.Extract to the desktop or your preference used path.
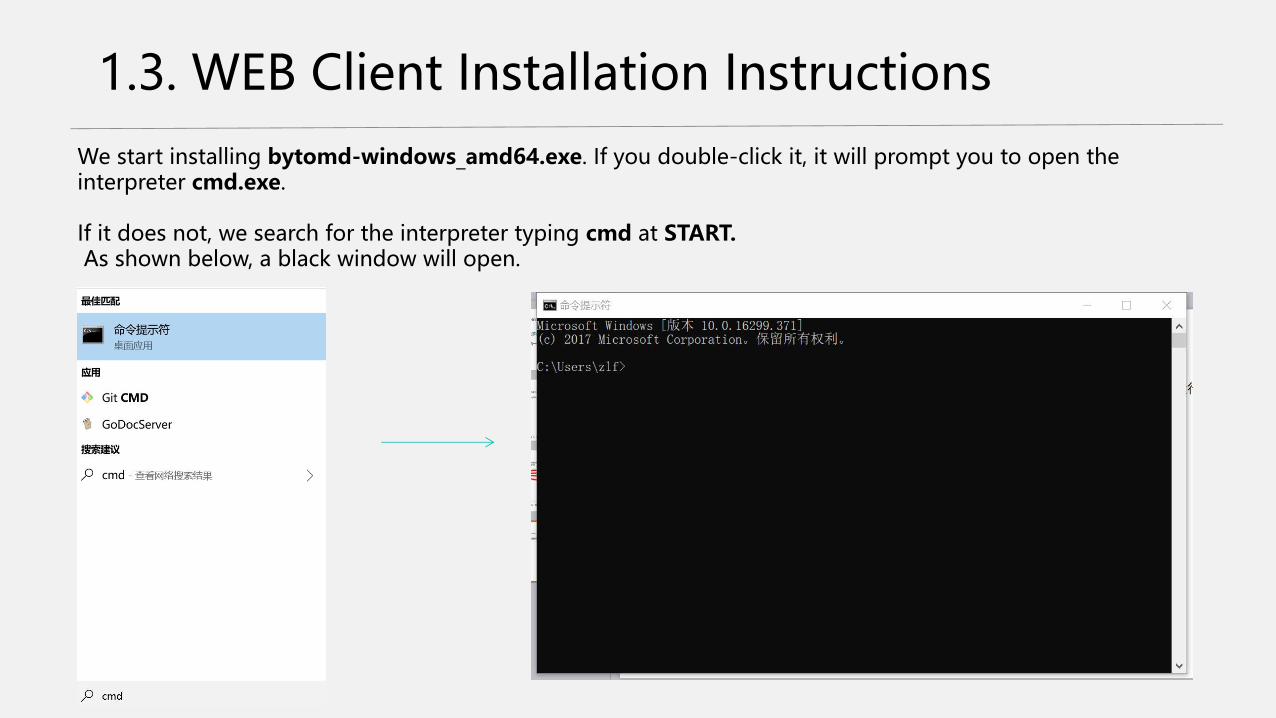
We start installing bytomd-windows_amd64.exe. If you double-click it, it will prompt you to open the interpreter cmd.exe.
If it does not, we search for the interpreter typing cmd at START. As shown below, a black window will open.
1.3. WEB Client Installation Instructions

We can see in cmd.exe, the current directory is C:\User\youraccount
You need to switch to the directory where you installed the software, use the cd (change directory) command.
For example, I my preferred path is the desktop, you can use> cd desktop ,
You can use the tab key to quickly navigate between the directories.
Then use the dir command to see if the installation software is in this directory.
The Start for the installation should look similar as below:
1.3. WEB Client Installation Instructions

First we will initialize the network and enter the following instructions:
> bytomd-windows_amd64.exe init --chain_id mainnet
If there is no error message, the operation is successful.
Mainnet is the main network currently running, testnet is the test network
1.3. WEB Client Installation Instructions

After the network is initialized, enter the following command in cmd.exe to run the node:
If you do not want to mine, enter the following command to run only the node
> bytomd-windows_amd64.exe node
If you want to mine, you need to add a mining parameter to run the node and miner
> bytomd-windows_amd64.exe node --mining
If the operation is successful, a dashboard will pop up, good! It works!
If you start mining, then you will hear the sound of the machine.
Notes:- Use the newest version for your browser.- We recommend to use Google Chrome, if you use Internet explorer it might not display.
1.3. WEB Client Installation Instructions

1.4. WEB Edition + SIMD Acceleration Client Installation Instructions
The process is the same as the WEB client installation method (section 1.3),
the installation file used is bytomd.exe

2. User instructions

2.1. Default Account
When the user uses the Bytom Client for the first time it is necessary to generate a new key.
Web versionDesktop version
You need to enter an account Alias, Key Alias and Password

2.1. Default Account
If you have previously created and backed up
your account and private key information, you
can recover the account and private key
directly from the stored .TXT file.
Click Restore to import the backup .TXT file.
After uploading the file, you can restore it and
enter the main page.
Note:You must use a .TXT file exported from another client, it might not be successful.

2.2. Main Interface Overview
Navigation Bar
Status Information
Top Menu(Only Desktop
version)
Content display area

2.2. Main Interface Overview
• Transactions: Only contains your own transaction
information.
If the sync block does not reach the packed block, the
transaction information will not be displayed.
• Accounts: Displays all current accounts information.
• Assets: Display all current assets information.
• Balances: Displays the current balances of various
assets and also requires the blocks synchronization to
be displayed.
• Keys: Show all key information, generate accounts and
assets to use.
• Documentation: Link to wiki documents.

2.2. Main Interface Overview
If you select advanced
navigation bar, you will see
more content.
Unspent outputs:
Unspent outputs will be
shown here, please refer to
the BUTXO model.
Turn on or off advanced navigation bar

2.3. Block Synchronization
After the node is running, it will first synchronize all the blocks.
You can't trade before the block synchronization is finished (even if someone send you a coin, you can't see it).
If you're mining, check whether the figures are the same before and after the synchronization.
Experienced users, is advise to use SIMD Acceleration Client to speed up sync blocks process.
Current block Height / Highest block : both need to be the same after synchronized
Number of Nodes connected

2.4. Mining
Enter the Settings (click the gear
button in the upper right corner of
the navigation bar).
Start/stop mining with mining
switch.
Mining earnings will show on the
balances
After you turn on, you can see that
your CPU usage is close to 100%Notes:
The current use of CPU mining as SOLO will be
difficult to generate a block, it is recommended
to consider the input/output before deciding to
mine.

2.5. Transfer(New Transaction)You can transfer money to other people by creating a new transaction
New Transaction Pending Transaction Transaction Record
Enter to transaction section, create a new transaction and enter the information.
Payment Account
Asset Type
Receiver Address
Payment Amount
If you can’t see the record of the transaction, check if the blocks are synchronized.
Transaction fee
Password

2.6. New Account
In addition to registered accounts, you can create new ones
Account Alias
Keys Quantity
Multiple keys for multi-sign accounts for different cases.
Provide an existing public key

2.6. New Account
In theory for security purposes, the account address should be changed after every transaction.The Bytom client provides the ability to generate new addresses.

2.7. New AssetGo to the Assets section and click New
Multiple support for assets.Only few people use it.

2.8. Balances
Only the balances of the assets you have will be displayed on the this page.
The balances will come from mining revenue or other people's transfer.

2.9. New Key
In addition to intial generated key, users can also generate other new keys.

2.10. Unspent Output
Compared to the original model based on BUTXO:
The balance is made up from an unspent input and can be compared to a change.

2.11. Core Status
You can enter the core state through the settings button to display the current advanced settings and network status.
Listening: Listen to other nodes.
Syncing: Are you synchronizing?
Mining: Are you mining?
Peer count: number of connected other nodes.
Current block: current locally synchronized block height.
Highest height: highest block height in the network.
Network ID: Displays the type of network, main network or test network.

2.12. Backup and Restore
The account and key information can be backed up.
This can be used to restored the wallet.

2.13. Access Control
If you want to access the wallet remotely, you need to create a token.
If you want to deploy the wallet to the server, you need to use the command line tool to generate the token.
Please refer to API :
https://github.com/Bytom/bytom/wiki/API-Reference#create-access-token

Thanks for reading
We hope to help you to understand better!
Comments or Suggestions contact the wechat account:matrix2140
Related Documents