BULLET PENCIL KIT INSTRUCTIONS The bullet pencil kit is based on using a regular 7mm slimline pencil kit. A long 7mm tube has been inserted in the bullet casing for you and all you have to do is glue on a pen blank and turn it down to meet the bullet cas- ing. After doing the finish work just assemble it as you would any 7mm pencil kit. Following are some tips on how to make this a simple job, and if you look at the photos they should give you all the help you need to complete the project easily. We offer the kit in .30/06 and .308 casings. The .30/06 kit with the deer antler pictured below has some op- tional parts to dress it up a bit. The extra parts can be purchased separately . The first thing you need to do is size the length of the pencil. The standard 7mm pencil kit is based on using (2) 2” tubes to turn the blanks, and connecting the tubes with a center band. The bullet kit is furnished with (1) solid tube and the center band is eliminated, so you will have to add the length of the center band to the length of the finished top blank. (about 3/16”) In theory the finished length without tip or cap is about 4-3/16”. The only critical part is that you need to leave the plunger long enough to click it and extend the lead for writing. If you look at the (2) pencils below you will see the .308 has the plunger left longer than on the .30/06. Both work fine and were done this way to show how you can vary the length of the upper blank. Once you have your total length figured out, just glue every- thing to the upper tube and make sure the blank is square to the top of the casing, with no gap. You may need to use a clamp to keep everything tight until the glue dries. After the glue is dry trim off the excess brass and square the top with a barrel trimmer so the cap that secures the clip will set square with no gap. (Cut the upper blank about 1/8” long to allow for squaring). Mount the pencil on the pen mandrel and turn it as you would any pen blank. (Take extra care when turning near the casing because brass is soft and will turn as easily as wood). We like to use a 7mm bushing for the cap end of the pencil and leave the material a little proud of the bushing. This makes a nice taper from the cas- ing to the top of the pencil cap. Once the diameters are matched where top & casing meet and you are satisfied with the final shape, begin your sanding regimen. Sand to at least 600 grit to remove imperfections from the upper blank and brass casing. Depending on the upper material you may need to sand in two different direc- tions to avoid the brass from contaminating it. Finish the upper half with your choice of finish and then put some masking tape on the upper half to protect it while you polish the brass. Some use “Brasso”, but a more aggressive metal polish will remove fine scratches left from sanding. You can find more abrasive polishes in auto parts stores or from jewelry supply houses. Af- ter polishing we like to spray the casing with “Lacquer for Brass” to give it a long lasting shine. Wood Craft sells it in a spray can for a reasonable price and one can will last a long time. When you are satisfied with the finish it’s time for assembly. You can use a pen press, drill press, a wood- workers bench vise, or your favorite method for pressing the parts together. Assembly will be the same as for any 7mm slimline pencil kit. Kit Designed & Distributed by : The Village Workshop www.thevillageworkshop.net Copyright, 2010 All rights reserved http://www.woodcraft.com Product # 149723

Welcome message from author
This document is posted to help you gain knowledge. Please leave a comment to let me know what you think about it! Share it to your friends and learn new things together.
Transcript
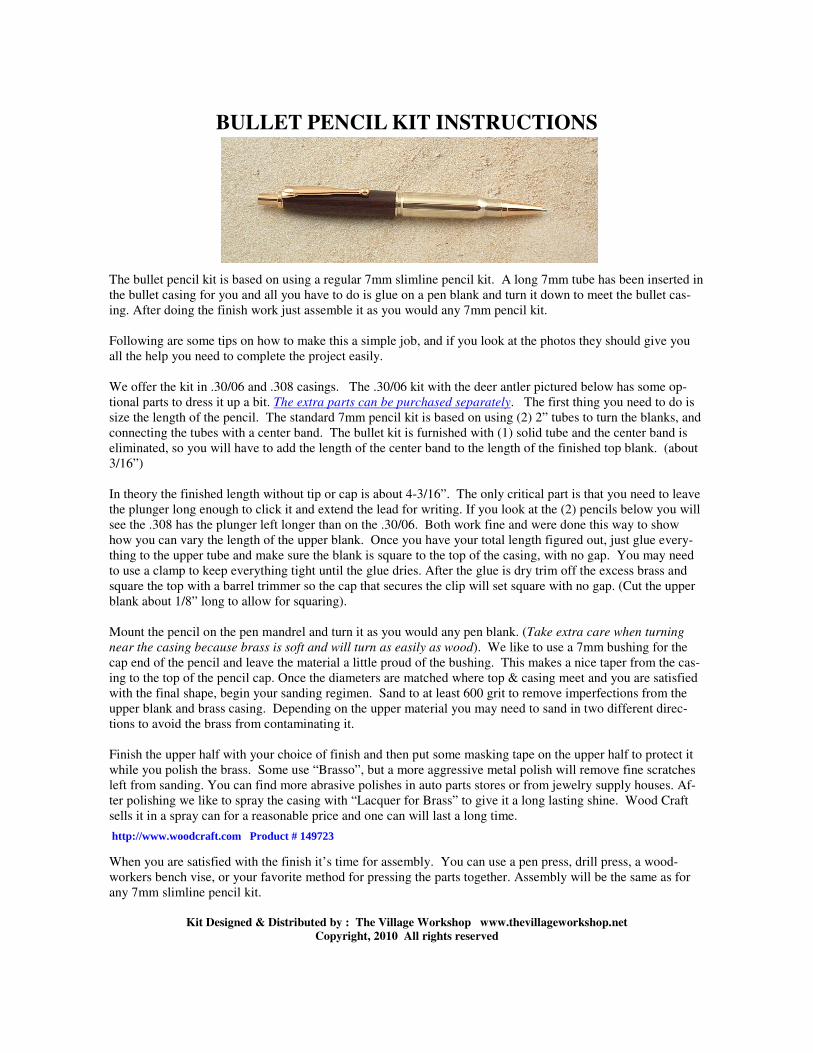
BULLET PENCIL KIT INSTRUCTIONS
The bullet pencil kit is based on using a regular 7mm slimline pencil kit. A long 7mm tube has been inserted in
the bullet casing for you and all you have to do is glue on a pen blank and turn it down to meet the bullet cas-
ing. After doing the finish work just assemble it as you would any 7mm pencil kit.
Following are some tips on how to make this a simple job, and if you look at the photos they should give you
all the help you need to complete the project easily.
We offer the kit in .30/06 and .308 casings. The .30/06 kit with the deer antler pictured below has some op-
tional parts to dress it up a bit. The extra parts can be purchased separately. The first thing you need to do is
size the length of the pencil. The standard 7mm pencil kit is based on using (2) 2” tubes to turn the blanks, and
connecting the tubes with a center band. The bullet kit is furnished with (1) solid tube and the center band is
eliminated, so you will have to add the length of the center band to the length of the finished top blank. (about
3/16”)
In theory the finished length without tip or cap is about 4-3/16”. The only critical part is that you need to leave
the plunger long enough to click it and extend the lead for writing. If you look at the (2) pencils below you will
see the .308 has the plunger left longer than on the .30/06. Both work fine and were done this way to show
how you can vary the length of the upper blank. Once you have your total length figured out, just glue every-
thing to the upper tube and make sure the blank is square to the top of the casing, with no gap. You may need
to use a clamp to keep everything tight until the glue dries. After the glue is dry trim off the excess brass and
square the top with a barrel trimmer so the cap that secures the clip will set square with no gap. (Cut the upper
blank about 1/8” long to allow for squaring).
Mount the pencil on the pen mandrel and turn it as you would any pen blank. (Take extra care when turning
near the casing because brass is soft and will turn as easily as wood). We like to use a 7mm bushing for the
cap end of the pencil and leave the material a little proud of the bushing. This makes a nice taper from the cas-
ing to the top of the pencil cap. Once the diameters are matched where top & casing meet and you are satisfied
with the final shape, begin your sanding regimen. Sand to at least 600 grit to remove imperfections from the
upper blank and brass casing. Depending on the upper material you may need to sand in two different direc-
tions to avoid the brass from contaminating it.
Finish the upper half with your choice of finish and then put some masking tape on the upper half to protect it
while you polish the brass. Some use “Brasso”, but a more aggressive metal polish will remove fine scratches
left from sanding. You can find more abrasive polishes in auto parts stores or from jewelry supply houses. Af-
ter polishing we like to spray the casing with “Lacquer for Brass” to give it a long lasting shine. Wood Craft
sells it in a spray can for a reasonable price and one can will last a long time.
http://www.woodcraft.com/Product/2021214/25928/Behlen-Brass-Lacquer-13oz.aspx
When you are satisfied with the finish it’s time for assembly. You can use a pen press, drill press, a wood-
workers bench vise, or your favorite method for pressing the parts together. Assembly will be the same as for
any 7mm slimline pencil kit.
Kit Designed & Distributed by : The Village Workshop www.thevillageworkshop.net
Copyright, 2010 All rights reserved
http://www.woodcraft.com Product # 149723

KIT INCLUDES:
Genuine Spent Rifle Cartridge
7mm Lead Pencil Mechanism
Slimline Gold Fittings.
REQUIRED ACCESSORIES:
7mm pen mandrel
Drill bit – 7mm
7mm Barrel Trimmer
2-part epoxy glue, or CA glue
(2) 7mm Bushings
.308 Pencil
.30/06 Pencil with deer clip
& split cartridge center band
Determine the finished length of
your pencil.
Cut the blank to length add
1/8” to square both ends.
Blank squared with bar-
rel trimmer
After glue is dry trim off brass
tube and square the end. Make sure there is no gap
before gluing.
Turn, sand & finish the pencil. Protect the top end and pol-
ish the brass. Spray with
“lacquer for brass” to pre-
serve the shine. Ready for assem-
bly. Press in the
tip coupler, the
cap and clip. In-
sert the pencil
mechanism and
screw on the tip.
Related Documents