Briefcase Documentation Release 0.3.8 Russell Keith-Magee Jun 27, 2022

Welcome message from author
This document is posted to help you gain knowledge. Please leave a comment to let me know what you think about it! Share it to your friends and learn new things together.
Transcript
Briefcase DocumentationRelease 0.3.8
Russell Keith-Magee
Jun 27, 2022

CONTENTS
1 Table of contents 31.1 Tutorial . . . . . . . . . . . . . . . . . . . . . . . . . . . . . . . . . . . . . . . . . . . . . . . . . . 31.2 How-to guides . . . . . . . . . . . . . . . . . . . . . . . . . . . . . . . . . . . . . . . . . . . . . . 31.3 Background . . . . . . . . . . . . . . . . . . . . . . . . . . . . . . . . . . . . . . . . . . . . . . . . 31.4 Reference . . . . . . . . . . . . . . . . . . . . . . . . . . . . . . . . . . . . . . . . . . . . . . . . . 3
2 Community 52.1 Tutorial . . . . . . . . . . . . . . . . . . . . . . . . . . . . . . . . . . . . . . . . . . . . . . . . . . 52.2 How-to guides . . . . . . . . . . . . . . . . . . . . . . . . . . . . . . . . . . . . . . . . . . . . . . 52.3 About Briefcase . . . . . . . . . . . . . . . . . . . . . . . . . . . . . . . . . . . . . . . . . . . . . 262.4 Reference . . . . . . . . . . . . . . . . . . . . . . . . . . . . . . . . . . . . . . . . . . . . . . . . . 36
i

ii
Briefcase Documentation, Release 0.3.8
Briefcase is a tool for converting a Python project into a standalone native application. It supports producing binariesfor:
• macOS, as a standalone .app;
• Windows, as an MSI installer;
• Linux, as an AppImage;
• iOS, as an XCode project; and
• Android, as a Gradle project.
It is also extensible, allowing for additional platforms and installation formats to be produced.
CONTENTS 1

Briefcase Documentation, Release 0.3.8
2 CONTENTS
CHAPTER
ONE
TABLE OF CONTENTS
1.1 Tutorial
Get started with a hands-on introduction for beginners
1.2 How-to guides
Guides and recipes for common problems and tasks, including how to contribute
1.3 Background
Explanation and discussion of key topics and concepts
1.4 Reference
Technical reference - commands, modules, classes, methods
3

Briefcase Documentation, Release 0.3.8
4 Chapter 1. Table of contents
CHAPTER
TWO
COMMUNITY
Briefcase is part of the BeeWare suite. You can talk to the community through:
• @pybeeware on Twitter
• Discord
• The Briefcase Github Discussions forum
2.1 Tutorial
Briefcase is a packaging tool - but first you need something to package. The best way to learn about Briefcase is to seeit working with the rest of the BeeWare suite of tools.
The BeeWare tutorial walks you through the process of building a native Python application from scratch.
Once you’ve done that tutorial, the Briefcase How-To Guides provide details on performing specific tasks with Brief-case.
2.2 How-to guides
How-to guides are recipes that take the user through steps in key subjects. They are more advanced than tutorials andassume a lot more about what the user already knows than tutorials do, and unlike documents in the tutorial they canstand alone.
2.2.1 Obtaining a Code Signing identity
If you are intending to distribute an application, it is advisable (and, on some platforms, necessary) to code sign your ap-plication. This is a cryptographic process that identifies you as a developer, and identifies your application as somethingthat has been distributed by you.
The process of obtaining a code signing identity is slightly different on every platform. The following are guides forevery platform that Briefcase supports:
5
Briefcase Documentation, Release 0.3.8
Android
Overview
Android requires that all apps be digitally signed with a certificate before they are installed on a device or updated.Android phones enforce a policy that updates to an app must come from the same signing key to validate. This allowsthe phone to be sure an update is fundamentally the same app, i.e., has the same author.
This documentation covers one way to sign your app where the Google Play Store maintains the authoritative key foryour app. This approach is called App Signing by Google Play.
You will need to generate a key on your development workstation to sign an app package before sending it to the GooglePlay store. If you use app signing by Google Play, the key on your workstation is called the upload key.
Generate a key
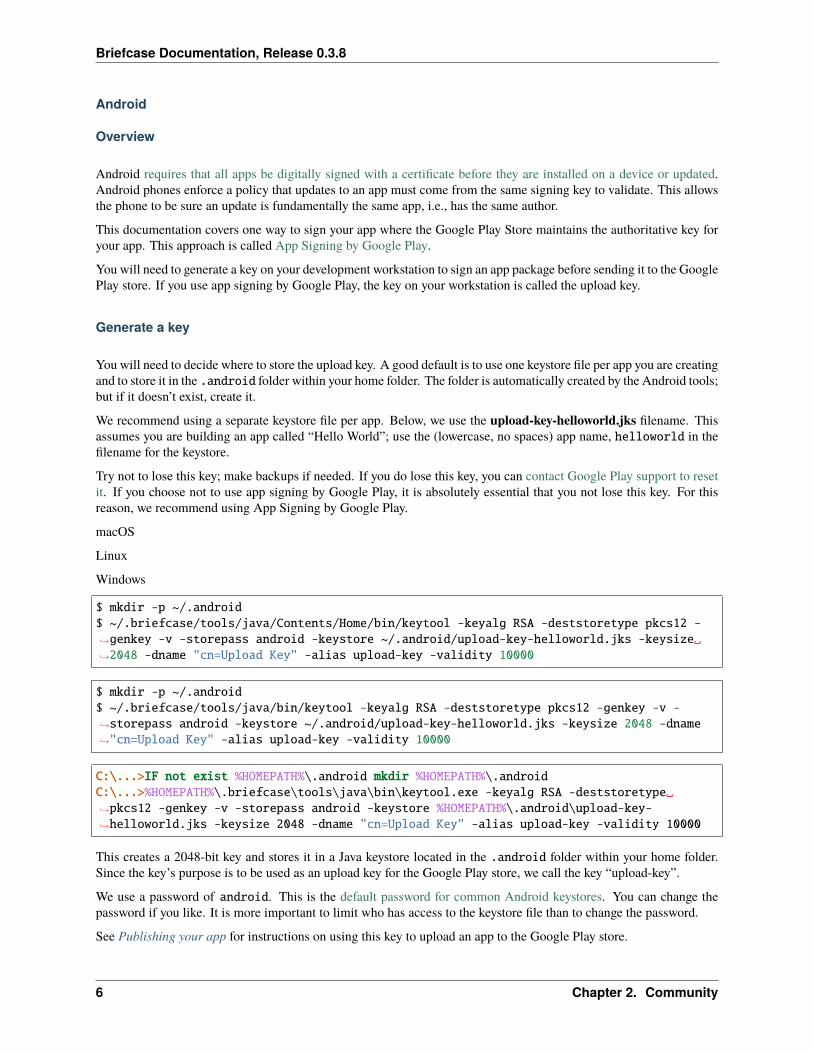
You will need to decide where to store the upload key. A good default is to use one keystore file per app you are creatingand to store it in the .android folder within your home folder. The folder is automatically created by the Android tools;but if it doesn’t exist, create it.
We recommend using a separate keystore file per app. Below, we use the upload-key-helloworld.jks filename. Thisassumes you are building an app called “Hello World”; use the (lowercase, no spaces) app name, helloworld in thefilename for the keystore.
Try not to lose this key; make backups if needed. If you do lose this key, you can contact Google Play support to resetit. If you choose not to use app signing by Google Play, it is absolutely essential that you not lose this key. For thisreason, we recommend using App Signing by Google Play.
macOS
Linux
Windows
$ mkdir -p ~/.android$ ~/.briefcase/tools/java/Contents/Home/bin/keytool -keyalg RSA -deststoretype pkcs12 -→˓genkey -v -storepass android -keystore ~/.android/upload-key-helloworld.jks -keysize␣→˓2048 -dname "cn=Upload Key" -alias upload-key -validity 10000
$ mkdir -p ~/.android$ ~/.briefcase/tools/java/bin/keytool -keyalg RSA -deststoretype pkcs12 -genkey -v -→˓storepass android -keystore ~/.android/upload-key-helloworld.jks -keysize 2048 -dname→˓"cn=Upload Key" -alias upload-key -validity 10000
C:\...>IF not exist %HOMEPATH%\.android mkdir %HOMEPATH%\.androidC:\...>%HOMEPATH%\.briefcase\tools\java\bin\keytool.exe -keyalg RSA -deststoretype␣→˓pkcs12 -genkey -v -storepass android -keystore %HOMEPATH%\.android\upload-key-→˓helloworld.jks -keysize 2048 -dname "cn=Upload Key" -alias upload-key -validity 10000
This creates a 2048-bit key and stores it in a Java keystore located in the .android folder within your home folder.Since the key’s purpose is to be used as an upload key for the Google Play store, we call the key “upload-key”.
We use a password of android. This is the default password for common Android keystores. You can change thepassword if you like. It is more important to limit who has access to the keystore file than to change the password.
See Publishing your app for instructions on using this key to upload an app to the Google Play store.
6 Chapter 2. Community
Briefcase Documentation, Release 0.3.8
macOS
Overview
In this tutorial, we’ll learn how to generate a macOS code signing identity, which is required to distribute your appli-cation across MacOS and iOS devices.
We will specifically focus on generating a Developer ID Application identity, which is used to distribute a macOSapplication outside of the Mac App store. However, the procedure for creating all other types of identities is exactlythe same. Once you familiarize yourself with the general process, you’ll be able to create identities required to uploadapplications to the Mac or iOS App stores without much trouble.
Getting the code signing identity will require five main steps, which you will be guided through in this tutorial:
1. Enrolling in the Apple Developer program
2. Generating a Certificate Signing Request on Keychain Access
3. Creating a Developer ID Application Certificate
4. Accessing the details of the Certificate on your Terminal
5. Anticipating potential issues with the identity in the future
Enrolling in the Apple Developer program
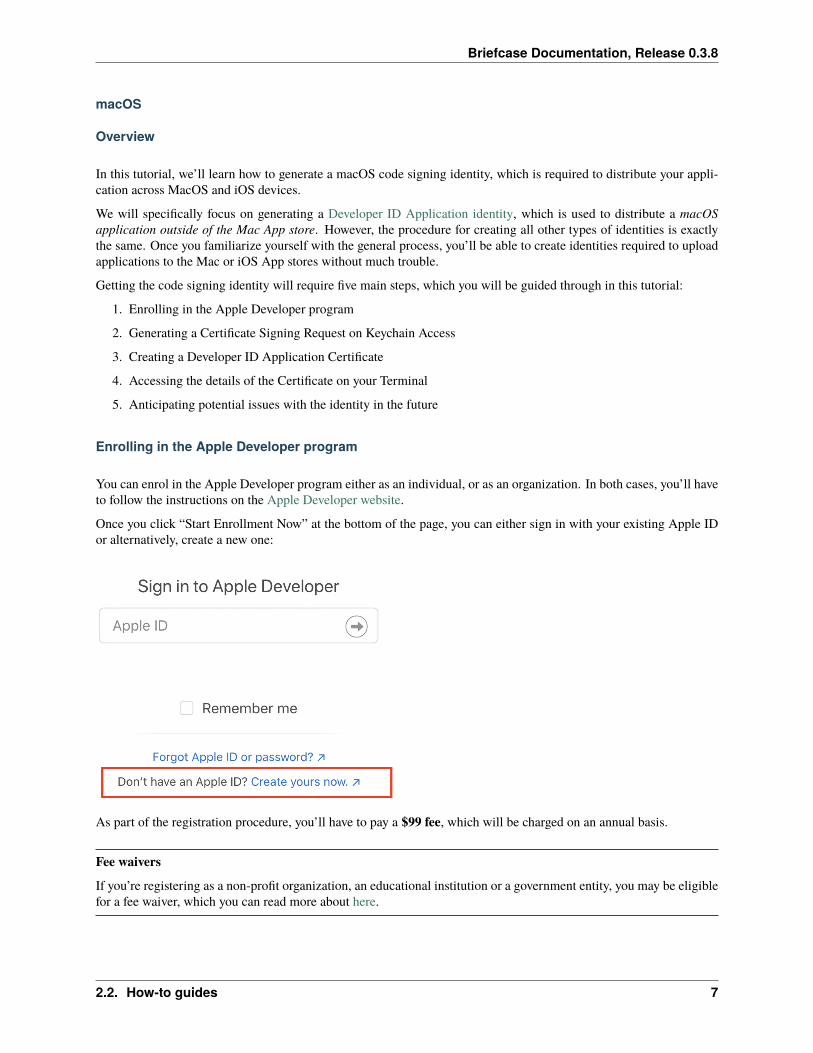
You can enrol in the Apple Developer program either as an individual, or as an organization. In both cases, you’ll haveto follow the instructions on the Apple Developer website.
Once you click “Start Enrollment Now” at the bottom of the page, you can either sign in with your existing Apple IDor alternatively, create a new one:
As part of the registration procedure, you’ll have to pay a $99 fee, which will be charged on an annual basis.
Fee waivers
If you’re registering as a non-profit organization, an educational institution or a government entity, you may be eligiblefor a fee waiver, which you can read more about here.
2.2. How-to guides 7
Briefcase Documentation, Release 0.3.8
Generating a certificate request on Keychain Access
Now that you’re set up with an Apple Developer ID, it’s time to create a certificate request, which you’ll then use togenerate a valid Developer ID certificate.
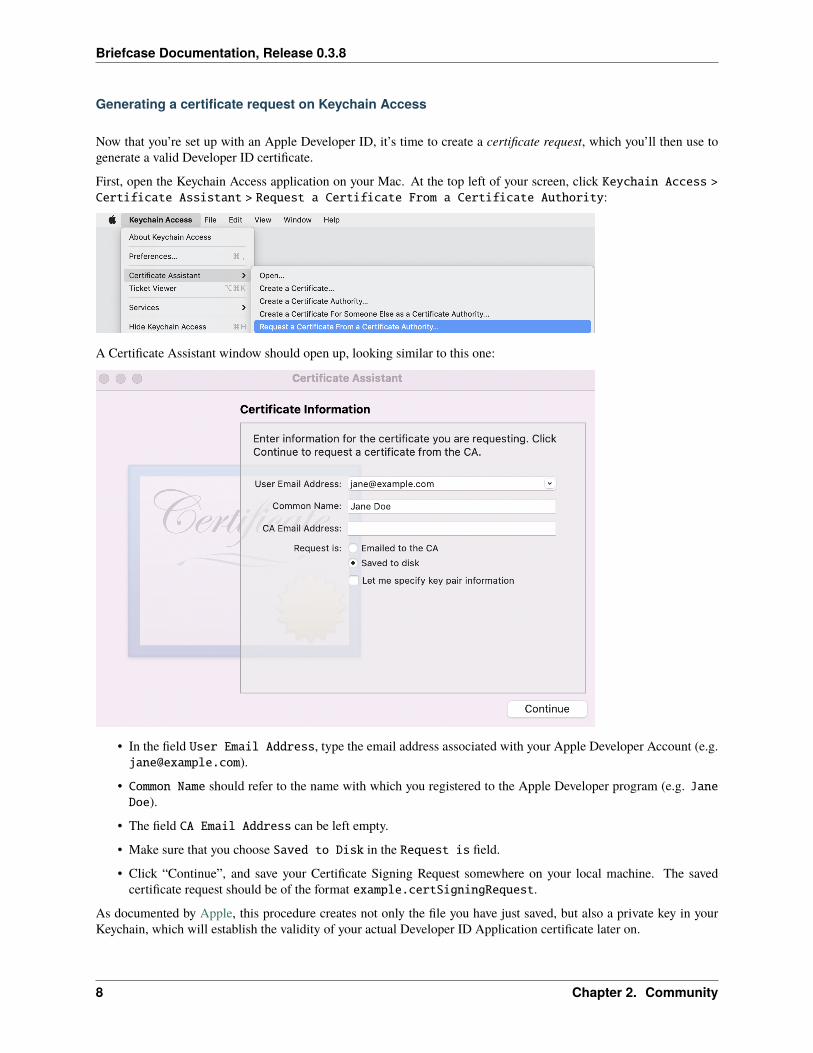
First, open the Keychain Access application on your Mac. At the top left of your screen, click Keychain Access >Certificate Assistant > Request a Certificate From a Certificate Authority:
A Certificate Assistant window should open up, looking similar to this one:
• In the field User Email Address, type the email address associated with your Apple Developer Account ([email protected]).
• Common Name should refer to the name with which you registered to the Apple Developer program (e.g. JaneDoe).
• The field CA Email Address can be left empty.
• Make sure that you choose Saved to Disk in the Request is field.
• Click “Continue”, and save your Certificate Signing Request somewhere on your local machine. The savedcertificate request should be of the format example.certSigningRequest.
As documented by Apple, this procedure creates not only the file you have just saved, but also a private key in yourKeychain, which will establish the validity of your actual Developer ID Application certificate later on.
8 Chapter 2. Community
Briefcase Documentation, Release 0.3.8
Creating a Developer ID Application Certificate
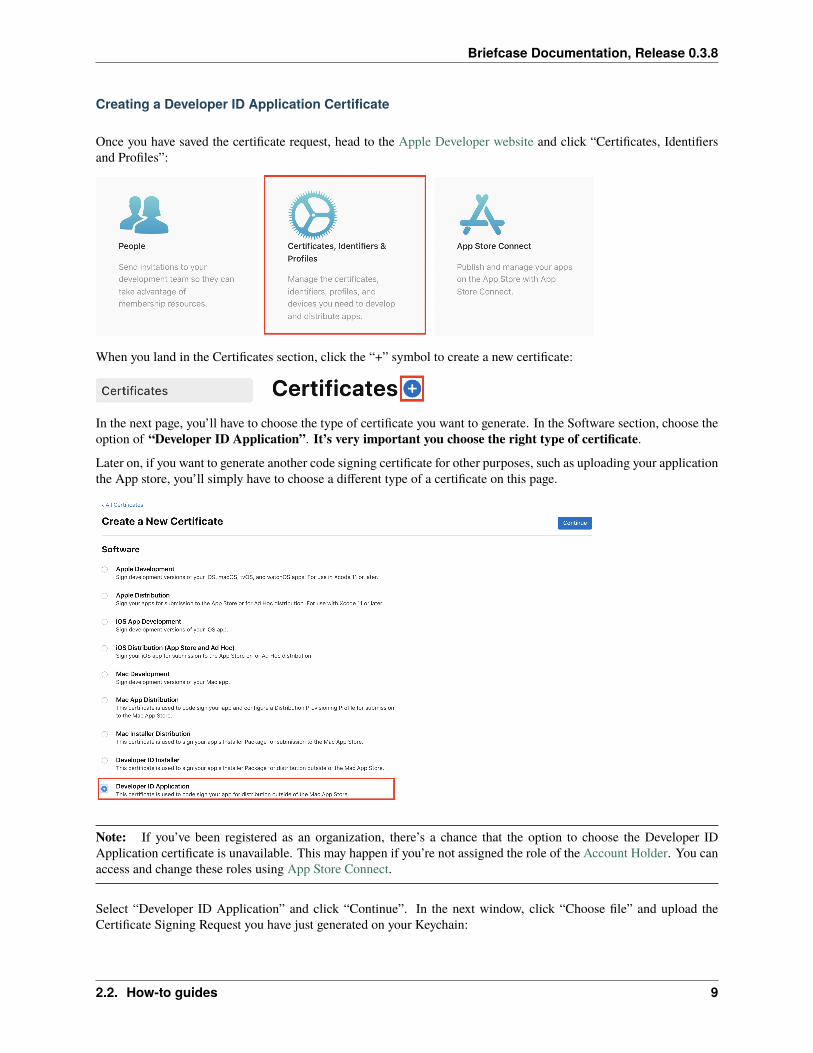
Once you have saved the certificate request, head to the Apple Developer website and click “Certificates, Identifiersand Profiles”:
When you land in the Certificates section, click the “+” symbol to create a new certificate:
In the next page, you’ll have to choose the type of certificate you want to generate. In the Software section, choose theoption of “Developer ID Application”. It’s very important you choose the right type of certificate.
Later on, if you want to generate another code signing certificate for other purposes, such as uploading your applicationthe App store, you’ll simply have to choose a different type of a certificate on this page.
Note: If you’ve been registered as an organization, there’s a chance that the option to choose the Developer IDApplication certificate is unavailable. This may happen if you’re not assigned the role of the Account Holder. You canaccess and change these roles using App Store Connect.
Select “Developer ID Application” and click “Continue”. In the next window, click “Choose file” and upload theCertificate Signing Request you have just generated on your Keychain:
2.2. How-to guides 9
Briefcase Documentation, Release 0.3.8
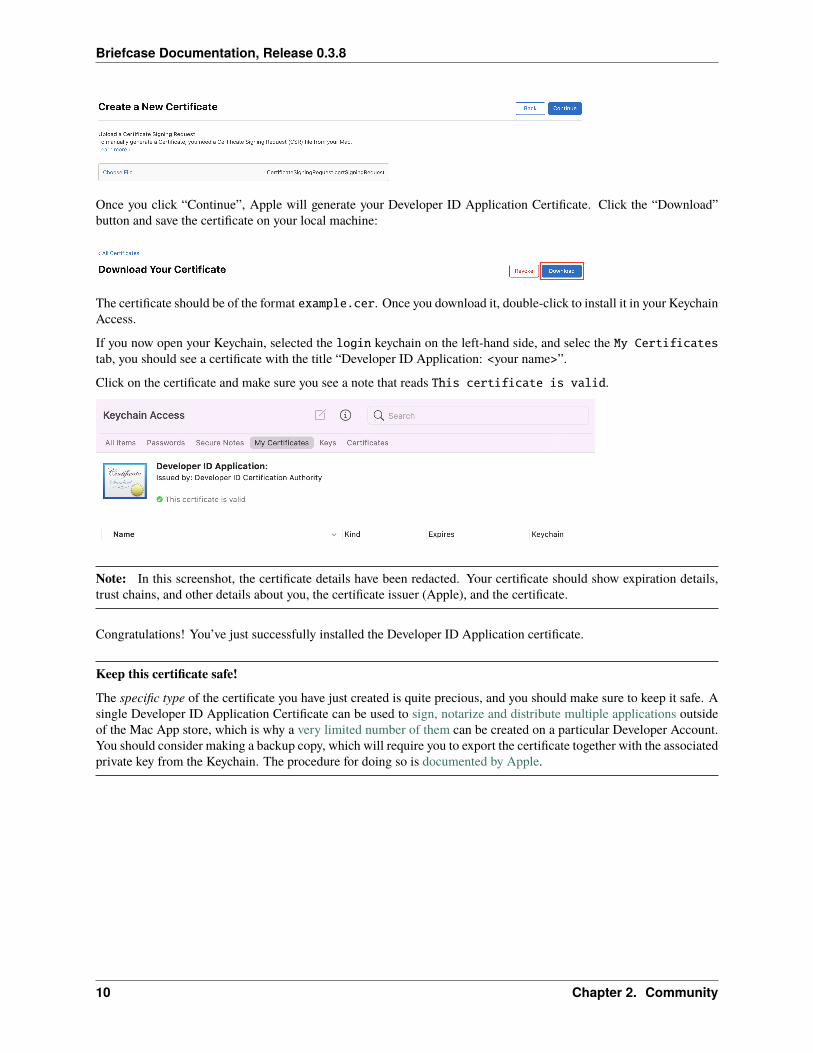
Once you click “Continue”, Apple will generate your Developer ID Application Certificate. Click the “Download”button and save the certificate on your local machine:
The certificate should be of the format example.cer. Once you download it, double-click to install it in your KeychainAccess.
If you now open your Keychain, selected the login keychain on the left-hand side, and selec the My Certificatestab, you should see a certificate with the title “Developer ID Application: <your name>”.
Click on the certificate and make sure you see a note that reads This certificate is valid.
Note: In this screenshot, the certificate details have been redacted. Your certificate should show expiration details,trust chains, and other details about you, the certificate issuer (Apple), and the certificate.
Congratulations! You’ve just successfully installed the Developer ID Application certificate.
Keep this certificate safe!
The specific type of the certificate you have just created is quite precious, and you should make sure to keep it safe. Asingle Developer ID Application Certificate can be used to sign, notarize and distribute multiple applications outsideof the Mac App store, which is why a very limited number of them can be created on a particular Developer Account.You should consider making a backup copy, which will require you to export the certificate together with the associatedprivate key from the Keychain. The procedure for doing so is documented by Apple.
10 Chapter 2. Community
Briefcase Documentation, Release 0.3.8
Next steps
Now it’s time to start using the Developer ID Application Certificate to sign, notarize, and distribute your application!
2.2.2 Upgrading from Briefcase v0.2
Briefcase v0.2 was built as a setuptools extension. The configuration for your project was contained in a setup.py orsetup.cfg file, and you invoked Briefcase using python setup.py <platform>.
Briefcase v0.3 represents a significant change in the development of Briefcase. Briefcase is now a PEP518-compliantbuild tool. It uses pyproject.toml for configuration, and is invoked using a standalone briefcase command. Thischange gives significantly improved flexibility in configuring Briefcase apps, and much better control over the devel-opment process.
However, this change is also backwards incompatible. If you have a project that was using Briefcase v0.2, you’ll needto make some major changes to your configuration and processes as part of upgrading to v0.3.
Configuration
To port your application’s configuration to Briefcase v0.3, you’ll need to add a pyproject.toml file (in, as the exten-sion suggests, TOML format). This file contains similar content to your setup.py or setup.cfg file.
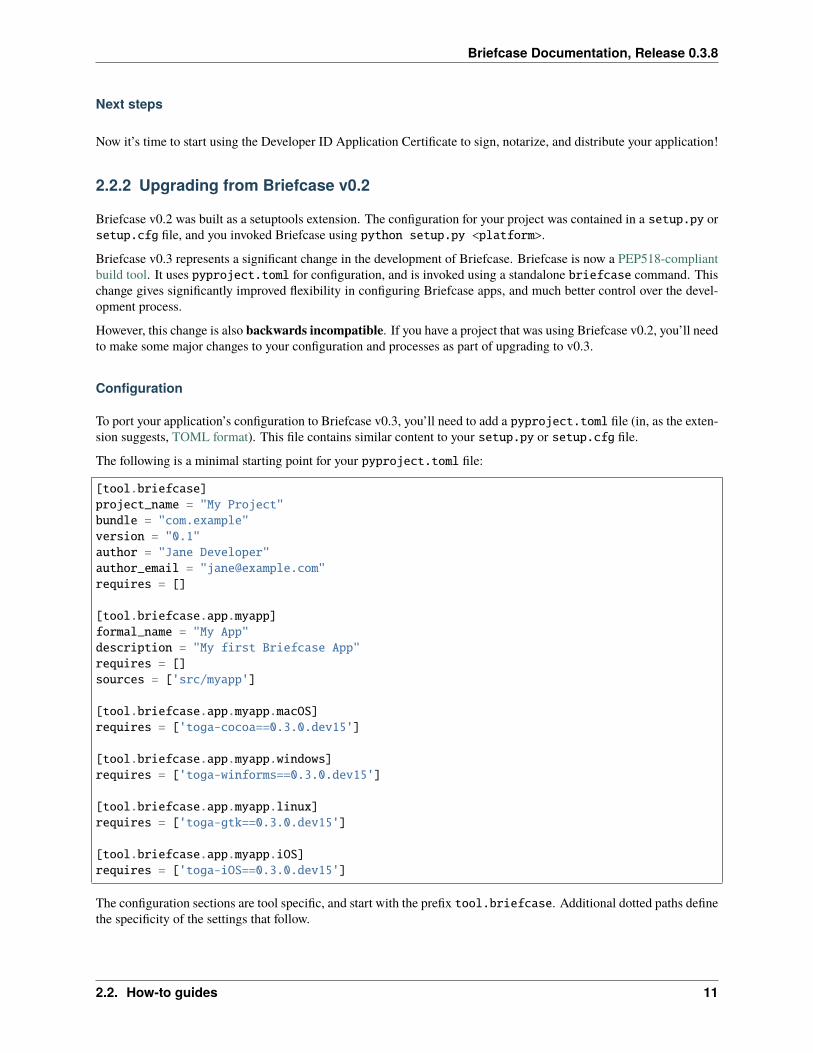
The following is a minimal starting point for your pyproject.toml file:
[tool.briefcase]project_name = "My Project"bundle = "com.example"version = "0.1"author = "Jane Developer"author_email = "[email protected]"requires = []
[tool.briefcase.app.myapp]formal_name = "My App"description = "My first Briefcase App"requires = []sources = ['src/myapp']
[tool.briefcase.app.myapp.macOS]requires = ['toga-cocoa==0.3.0.dev15']
[tool.briefcase.app.myapp.windows]requires = ['toga-winforms==0.3.0.dev15']
[tool.briefcase.app.myapp.linux]requires = ['toga-gtk==0.3.0.dev15']
[tool.briefcase.app.myapp.iOS]requires = ['toga-iOS==0.3.0.dev15']
The configuration sections are tool specific, and start with the prefix tool.briefcase. Additional dotted paths definethe specificity of the settings that follow.
2.2. How-to guides 11
Briefcase Documentation, Release 0.3.8
Most of the keys in your setup.py will map directly to the same key in your pyproject.toml (e.g., version,description). However, the following pointers may help port other values.
• Briefcase v0.2 assumed that a setup.py file described a single app. Briefcase v0.3 allows a project to definemultiple distributable applications. The project_name is the name for the collection of apps described by thispyproject.toml; formal_name is the name for a single app. If your project defines a single app, your formalname and project name will probably be the same.
• There is no explicit definition for the app’s name - the app name is derived from the section header name (i.e.,[tool.briefcase.app.myapp] defines the existence of an app named myapp).
• version must be defined as a string in your pyproject.toml file. If you need to know the version of yourapp (or the value of any other app metadata specified in pyproject.toml) at runtime, you should use im-portlib.metadata. Briefcase will create myapp.dist-info for your application (using your app name instead ofmyapp).
• Briefcase v0.3 configuration files are heirarchical. [tool.briefcase] describes configuration argumentsfor the entire project; [tool.briefcase.app.myapp] describes configuration arguments for the applica-tion named myapp; [tool.briefcase.app.myapp.macOS] describes configuration arguments for macOS de-ployments of myapp, and [tool.briefcase.app.myapp.macOS.dmg] describes configuration arguments forDMG deployments of myapp on macOS. The example above doesn’t contain a dmg section; generally, you won’tneed one unless you’re packaging for multiple output formats on a single platform.
For most keys, the “most specific” value wins - so, a value for description defined at the platform level willoverride any value at the app level, and so on. The two exceptions are requires and sources, which arecumulative - the values defined at the platform level will be appended to the values at the app level and theproject level.
• The install_requires and app_requires keys in setup.py are replaced by requires in your pyproject.toml. requires can be specified at the project level, the app level, the platform level, or the output format level.
• The packages (and other various source code and data-defining attributes) in setup.py have been replacedwith a single sources key. The paths specified in sources will be copied in their entirety into the packagedapplication.
Once you’ve created and tested your pyproject.toml, you can delete your setup.py file. You may also be able todelete your setup.cfg file, depending on whether it defines any tool configurations (e.g., flake8 or pytest config-urations).
Invocation
In Briefcase v0.2, there was only one entry point: python setup.py <platform>. This would generate a completeoutput artefact; and, if you provided the -s argument, would also start the app.
Briecase v0.3 uses it’s own briefcase entry point, with subcommands to perform specific functions:
• briefcase new - Bootstrap a new project (generating a pyproject.toml and other stub content).
• briefcase dev - Run the app in developer mode, using the current virtual environment.
• briefcase create - Use the platform template to generate the files needed to build a distributable artefact forthe platform.
• briefcase update - Update the source code of the application in the generated project.
• briefcase build - Run whatever compilation process is necessary to produce an executable file for the plat-form.
• briefcase run - Run the executable file for the platform.
12 Chapter 2. Community
Briefcase Documentation, Release 0.3.8
• briefcase package - Perform whatever post-processing is necessary to wrap the executable into a distributableartefact (e.g., an installer).
When using these commands, there is no need to specify the platform (i.e. macOSwhen on a Mac). The current platformwill be detected and the appropriate output format will be selected.
If you want to target a different platform, you can specify that platform as an argument. This will be required whenbuilding for mobile platforms (since you’ll never be running Briefcase where the mobile platform is “native”). Forexample, if you’re on a Mac, briefcase create macOS and briefcase create would perform the same task;briefcase create iOS would build an iOS project.
The exceptions to this platform specification are briefcase new and briefcase dev. These two commands areplatform agnostic.
The Briefcase subcommands will also detect if previous steps haven’t been executed, and invoke any prior steps that arerequired. For example, if you execute briefcase run on clean project, Briefcase will detect that there are no platformfiles, and will automatically run briefcase create and briefcase build. This won’t occur on subsequent runs.
Briefcase v0.3 also allows for multiple output formats on a single platform. The only platform that currently exposescapability is macOS, which supports both app and dmg output formats (with dmg being the platform default).
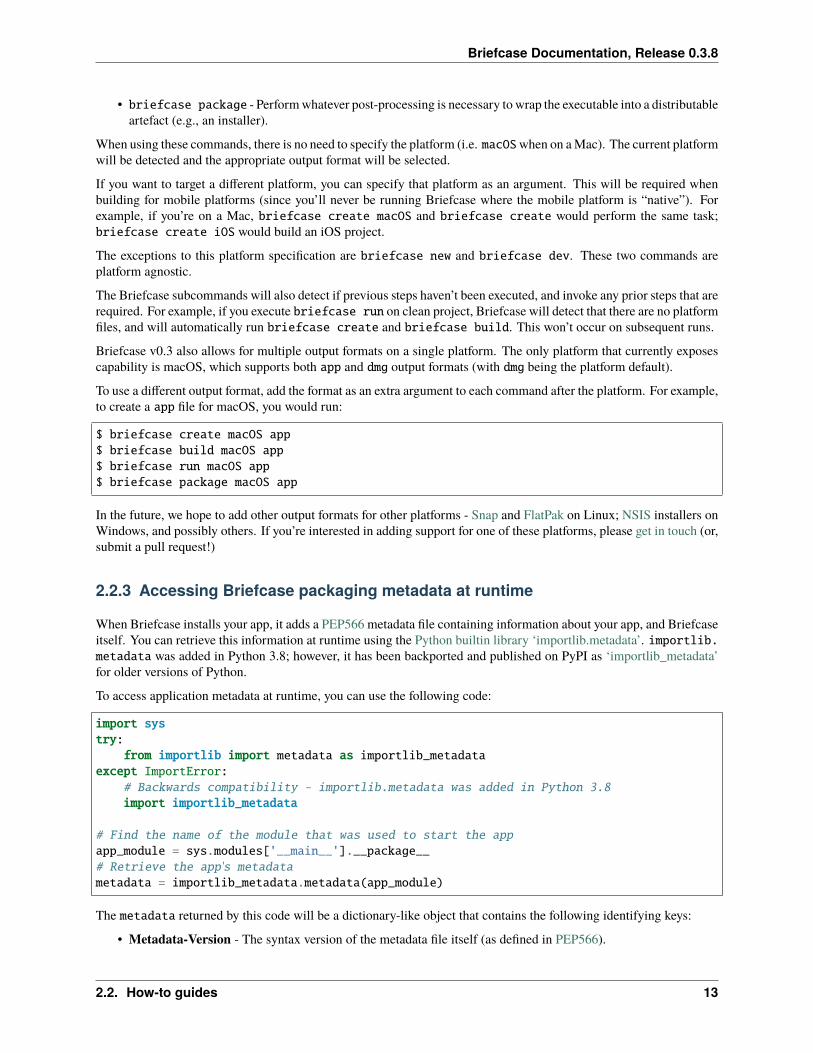
To use a different output format, add the format as an extra argument to each command after the platform. For example,to create a app file for macOS, you would run:
$ briefcase create macOS app$ briefcase build macOS app$ briefcase run macOS app$ briefcase package macOS app
In the future, we hope to add other output formats for other platforms - Snap and FlatPak on Linux; NSIS installers onWindows, and possibly others. If you’re interested in adding support for one of these platforms, please get in touch (or,submit a pull request!)
2.2.3 Accessing Briefcase packaging metadata at runtime
When Briefcase installs your app, it adds a PEP566 metadata file containing information about your app, and Briefcaseitself. You can retrieve this information at runtime using the Python builtin library ‘importlib.metadata’. importlib.metadata was added in Python 3.8; however, it has been backported and published on PyPI as ‘importlib_metadata’for older versions of Python.
To access application metadata at runtime, you can use the following code:
import systry:
from importlib import metadata as importlib_metadataexcept ImportError:
# Backwards compatibility - importlib.metadata was added in Python 3.8import importlib_metadata
# Find the name of the module that was used to start the appapp_module = sys.modules['__main__'].__package__# Retrieve the app's metadatametadata = importlib_metadata.metadata(app_module)
The metadata returned by this code will be a dictionary-like object that contains the following identifying keys:
• Metadata-Version - The syntax version of the metadata file itself (as defined in PEP566).
2.2. How-to guides 13
Briefcase Documentation, Release 0.3.8
• Briefcase-Version - The version of Briefcase used to package the app. The existence of this key in app metadatacan be used to identify if your application code is running in a Briecase container; it will only exist if the app hasbeen packaged by Briefcase.
It will also have the following keys, derived from your application’s pyproject.toml configuration:
• Name - app_name
• Formal-Name - formal_name
• App-ID - bundle and app_name, joined with a .
• Version - version
• Summary - description
The metadata may also contain the following keys, if they have been defined in your app’s pyproject.toml configu-ration:
• Home-page - url
• Author - author
• Author-email - author_email
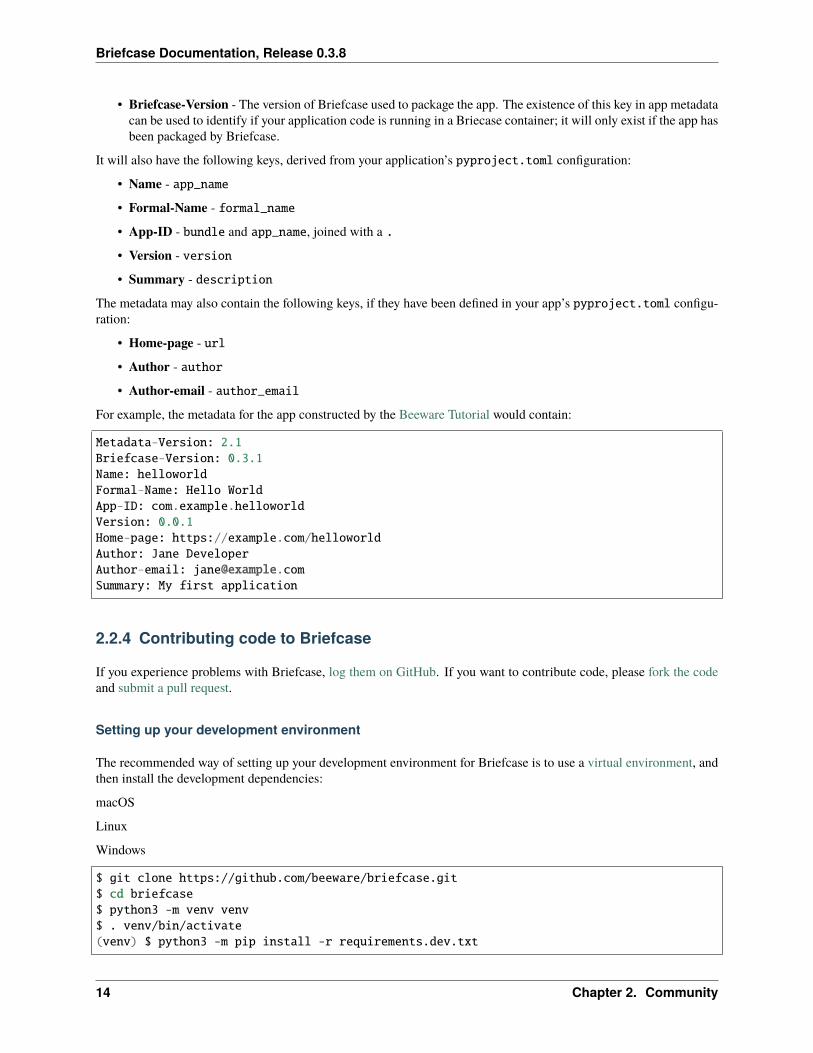
For example, the metadata for the app constructed by the Beeware Tutorial would contain:
Metadata-Version: 2.1Briefcase-Version: 0.3.1Name: helloworldFormal-Name: Hello WorldApp-ID: com.example.helloworldVersion: 0.0.1Home-page: https://example.com/helloworldAuthor: Jane DeveloperAuthor-email: [email protected]: My first application
2.2.4 Contributing code to Briefcase
If you experience problems with Briefcase, log them on GitHub. If you want to contribute code, please fork the codeand submit a pull request.
Setting up your development environment
The recommended way of setting up your development environment for Briefcase is to use a virtual environment, andthen install the development dependencies:
macOS
Linux
Windows
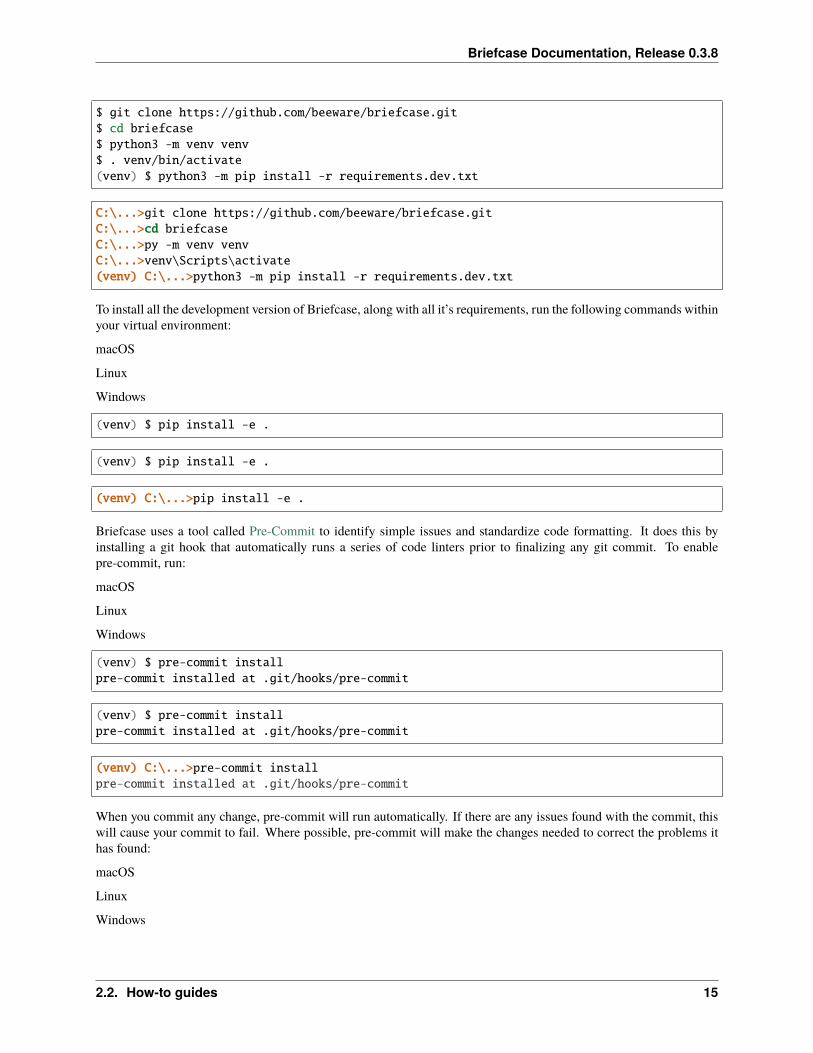
$ git clone https://github.com/beeware/briefcase.git$ cd briefcase$ python3 -m venv venv$ . venv/bin/activate(venv) $ python3 -m pip install -r requirements.dev.txt
14 Chapter 2. Community
Briefcase Documentation, Release 0.3.8
$ git clone https://github.com/beeware/briefcase.git$ cd briefcase$ python3 -m venv venv$ . venv/bin/activate(venv) $ python3 -m pip install -r requirements.dev.txt
C:\...>git clone https://github.com/beeware/briefcase.gitC:\...>cd briefcaseC:\...>py -m venv venvC:\...>venv\Scripts\activate(venv) C:\...>python3 -m pip install -r requirements.dev.txt
To install all the development version of Briefcase, along with all it’s requirements, run the following commands withinyour virtual environment:
macOS
Linux
Windows
(venv) $ pip install -e .
(venv) $ pip install -e .
(venv) C:\...>pip install -e .
Briefcase uses a tool called Pre-Commit to identify simple issues and standardize code formatting. It does this byinstalling a git hook that automatically runs a series of code linters prior to finalizing any git commit. To enablepre-commit, run:
macOS
Linux
Windows
(venv) $ pre-commit installpre-commit installed at .git/hooks/pre-commit
(venv) $ pre-commit installpre-commit installed at .git/hooks/pre-commit
(venv) C:\...>pre-commit installpre-commit installed at .git/hooks/pre-commit
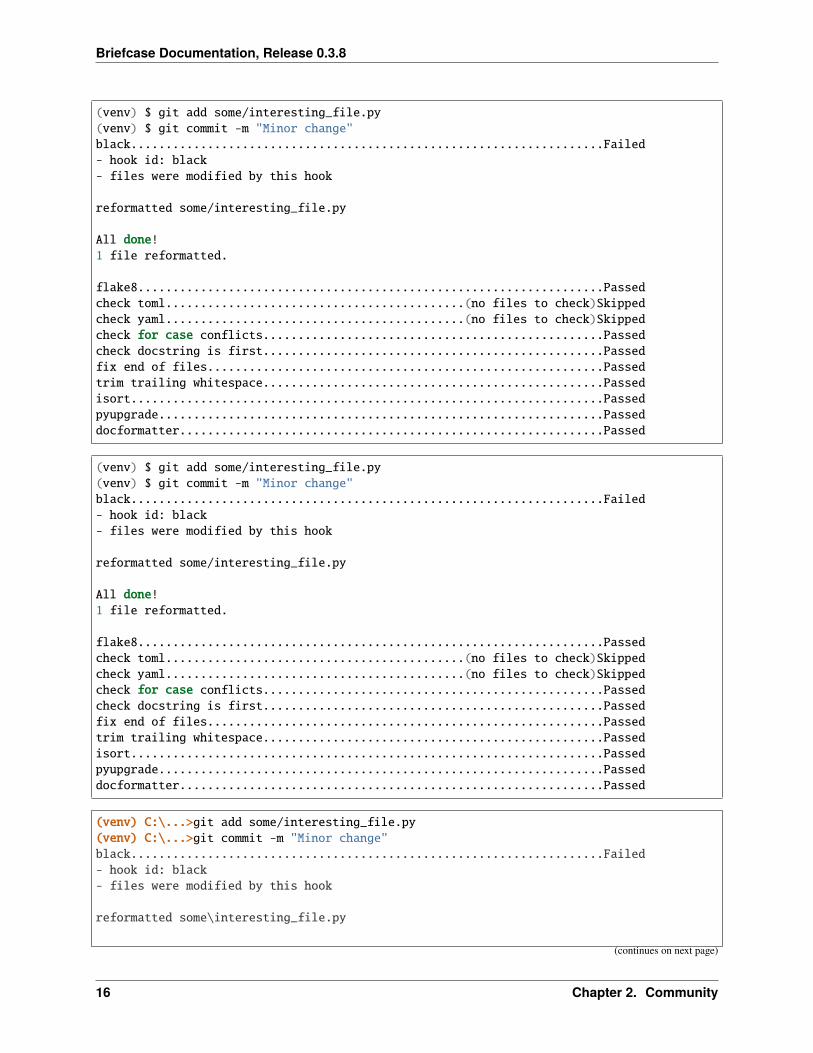
When you commit any change, pre-commit will run automatically. If there are any issues found with the commit, thiswill cause your commit to fail. Where possible, pre-commit will make the changes needed to correct the problems ithas found:
macOS
Linux
Windows
2.2. How-to guides 15
Briefcase Documentation, Release 0.3.8
(venv) $ git add some/interesting_file.py(venv) $ git commit -m "Minor change"black....................................................................Failed- hook id: black- files were modified by this hook
reformatted some/interesting_file.py
All done!1 file reformatted.
flake8...................................................................Passedcheck toml...........................................(no files to check)Skippedcheck yaml...........................................(no files to check)Skippedcheck for case conflicts.................................................Passedcheck docstring is first.................................................Passedfix end of files.........................................................Passedtrim trailing whitespace.................................................Passedisort....................................................................Passedpyupgrade................................................................Passeddocformatter.............................................................Passed
(venv) C:\...>git add some/interesting_file.py(venv) C:\...>git commit -m "Minor change"black....................................................................Failed- hook id: black- files were modified by this hook
reformatted some\interesting_file.py
(continues on next page)
16 Chapter 2. Community
Briefcase Documentation, Release 0.3.8
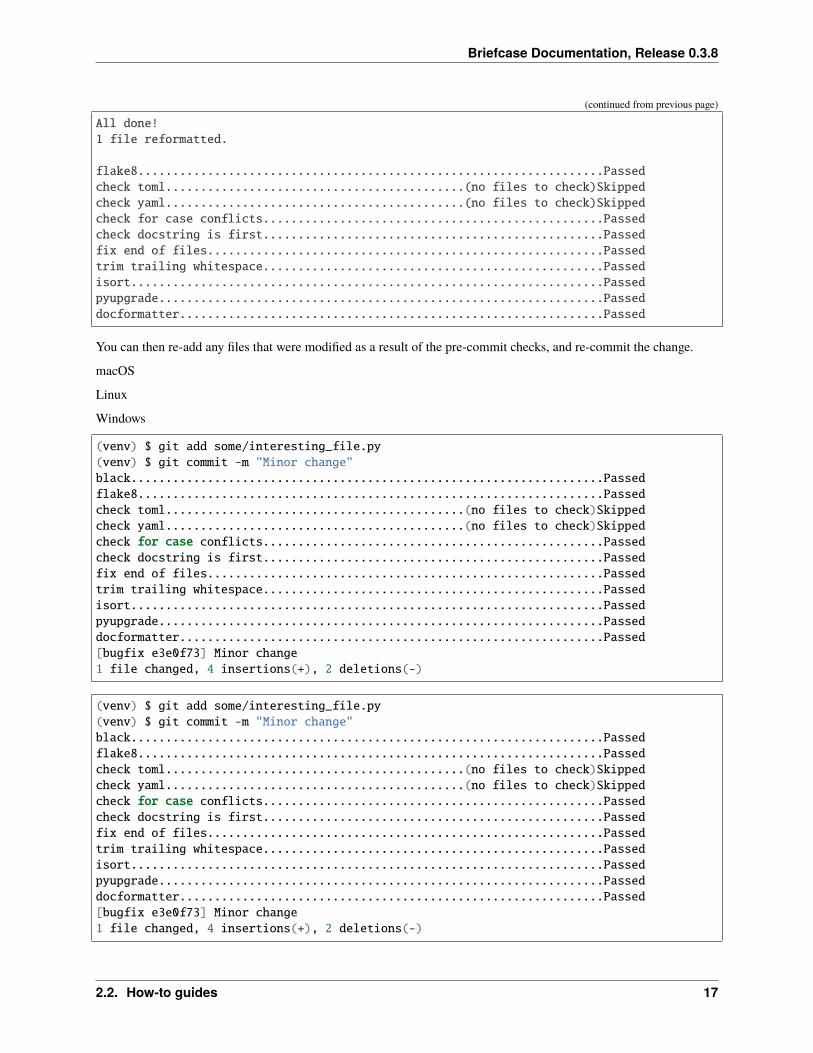
(continued from previous page)
All done!1 file reformatted.
flake8...................................................................Passedcheck toml...........................................(no files to check)Skippedcheck yaml...........................................(no files to check)Skippedcheck for case conflicts.................................................Passedcheck docstring is first.................................................Passedfix end of files.........................................................Passedtrim trailing whitespace.................................................Passedisort....................................................................Passedpyupgrade................................................................Passeddocformatter.............................................................Passed
You can then re-add any files that were modified as a result of the pre-commit checks, and re-commit the change.
macOS
Linux
Windows
(venv) $ git add some/interesting_file.py(venv) $ git commit -m "Minor change"black....................................................................Passedflake8...................................................................Passedcheck toml...........................................(no files to check)Skippedcheck yaml...........................................(no files to check)Skippedcheck for case conflicts.................................................Passedcheck docstring is first.................................................Passedfix end of files.........................................................Passedtrim trailing whitespace.................................................Passedisort....................................................................Passedpyupgrade................................................................Passeddocformatter.............................................................Passed[bugfix e3e0f73] Minor change1 file changed, 4 insertions(+), 2 deletions(-)
(venv) $ git add some/interesting_file.py(venv) $ git commit -m "Minor change"black....................................................................Passedflake8...................................................................Passedcheck toml...........................................(no files to check)Skippedcheck yaml...........................................(no files to check)Skippedcheck for case conflicts.................................................Passedcheck docstring is first.................................................Passedfix end of files.........................................................Passedtrim trailing whitespace.................................................Passedisort....................................................................Passedpyupgrade................................................................Passeddocformatter.............................................................Passed[bugfix e3e0f73] Minor change1 file changed, 4 insertions(+), 2 deletions(-)
2.2. How-to guides 17
Briefcase Documentation, Release 0.3.8
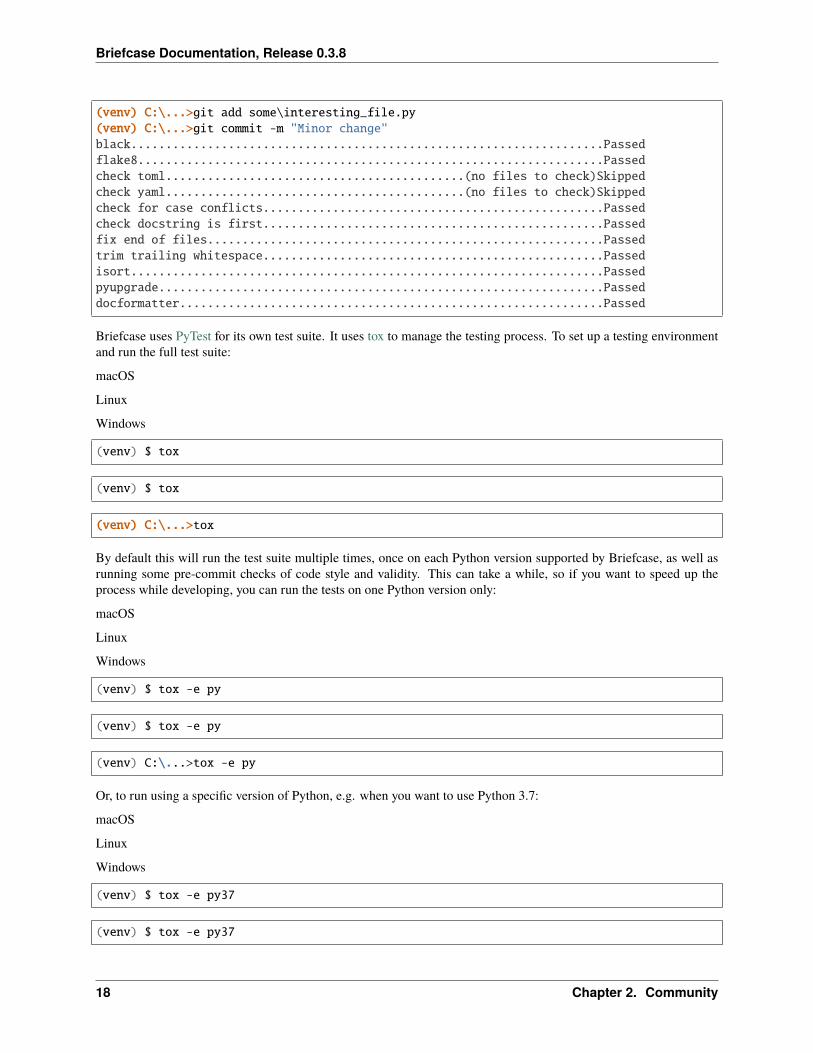
(venv) C:\...>git add some\interesting_file.py(venv) C:\...>git commit -m "Minor change"black....................................................................Passedflake8...................................................................Passedcheck toml...........................................(no files to check)Skippedcheck yaml...........................................(no files to check)Skippedcheck for case conflicts.................................................Passedcheck docstring is first.................................................Passedfix end of files.........................................................Passedtrim trailing whitespace.................................................Passedisort....................................................................Passedpyupgrade................................................................Passeddocformatter.............................................................Passed
Briefcase uses PyTest for its own test suite. It uses tox to manage the testing process. To set up a testing environmentand run the full test suite:
macOS
Linux
Windows
(venv) $ tox
(venv) $ tox
(venv) C:\...>tox
By default this will run the test suite multiple times, once on each Python version supported by Briefcase, as well asrunning some pre-commit checks of code style and validity. This can take a while, so if you want to speed up theprocess while developing, you can run the tests on one Python version only:
macOS
Linux
Windows
(venv) $ tox -e py
(venv) $ tox -e py
(venv) C:\...>tox -e py
Or, to run using a specific version of Python, e.g. when you want to use Python 3.7:
macOS
Linux
Windows
(venv) $ tox -e py37
(venv) $ tox -e py37
18 Chapter 2. Community
Briefcase Documentation, Release 0.3.8
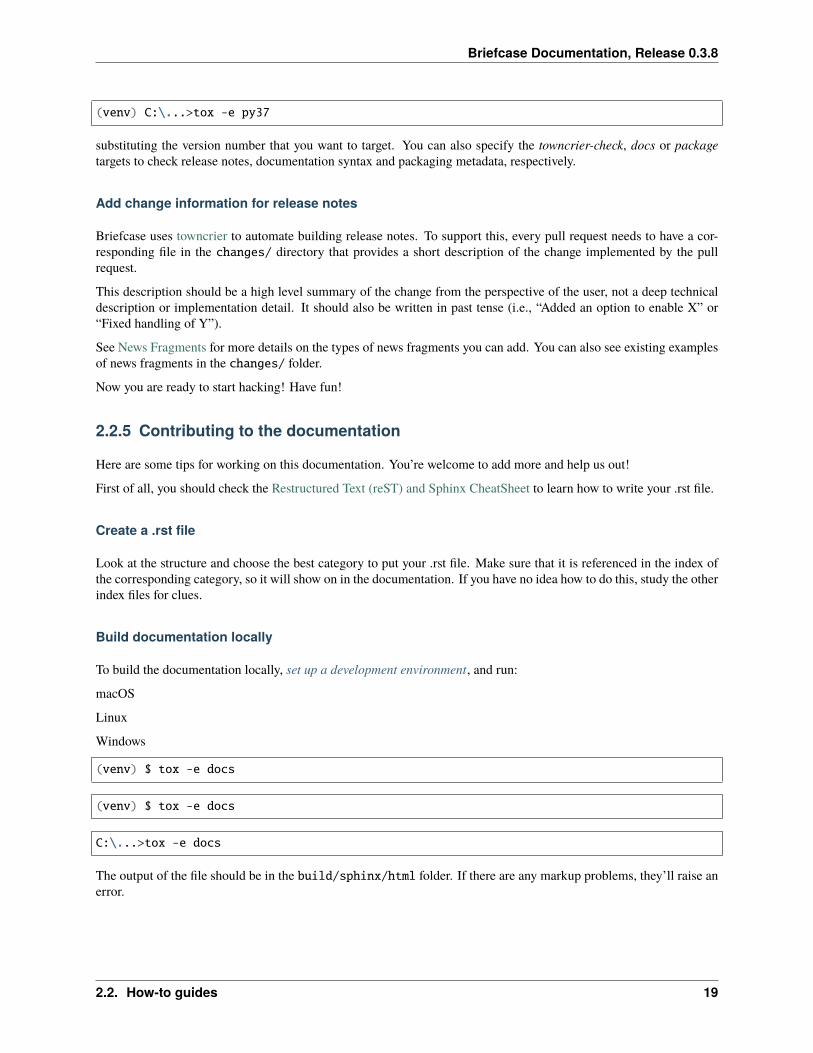
(venv) C:\...>tox -e py37
substituting the version number that you want to target. You can also specify the towncrier-check, docs or packagetargets to check release notes, documentation syntax and packaging metadata, respectively.
Add change information for release notes
Briefcase uses towncrier to automate building release notes. To support this, every pull request needs to have a cor-responding file in the changes/ directory that provides a short description of the change implemented by the pullrequest.
This description should be a high level summary of the change from the perspective of the user, not a deep technicaldescription or implementation detail. It should also be written in past tense (i.e., “Added an option to enable X” or“Fixed handling of Y”).
See News Fragments for more details on the types of news fragments you can add. You can also see existing examplesof news fragments in the changes/ folder.
Now you are ready to start hacking! Have fun!
2.2.5 Contributing to the documentation
Here are some tips for working on this documentation. You’re welcome to add more and help us out!
First of all, you should check the Restructured Text (reST) and Sphinx CheatSheet to learn how to write your .rst file.
Create a .rst file
Look at the structure and choose the best category to put your .rst file. Make sure that it is referenced in the index ofthe corresponding category, so it will show on in the documentation. If you have no idea how to do this, study the otherindex files for clues.
Build documentation locally
To build the documentation locally, set up a development environment, and run:
macOS
Linux
Windows
(venv) $ tox -e docs
(venv) $ tox -e docs
C:\...>tox -e docs
The output of the file should be in the build/sphinx/html folder. If there are any markup problems, they’ll raise anerror.
2.2. How-to guides 19
Briefcase Documentation, Release 0.3.8
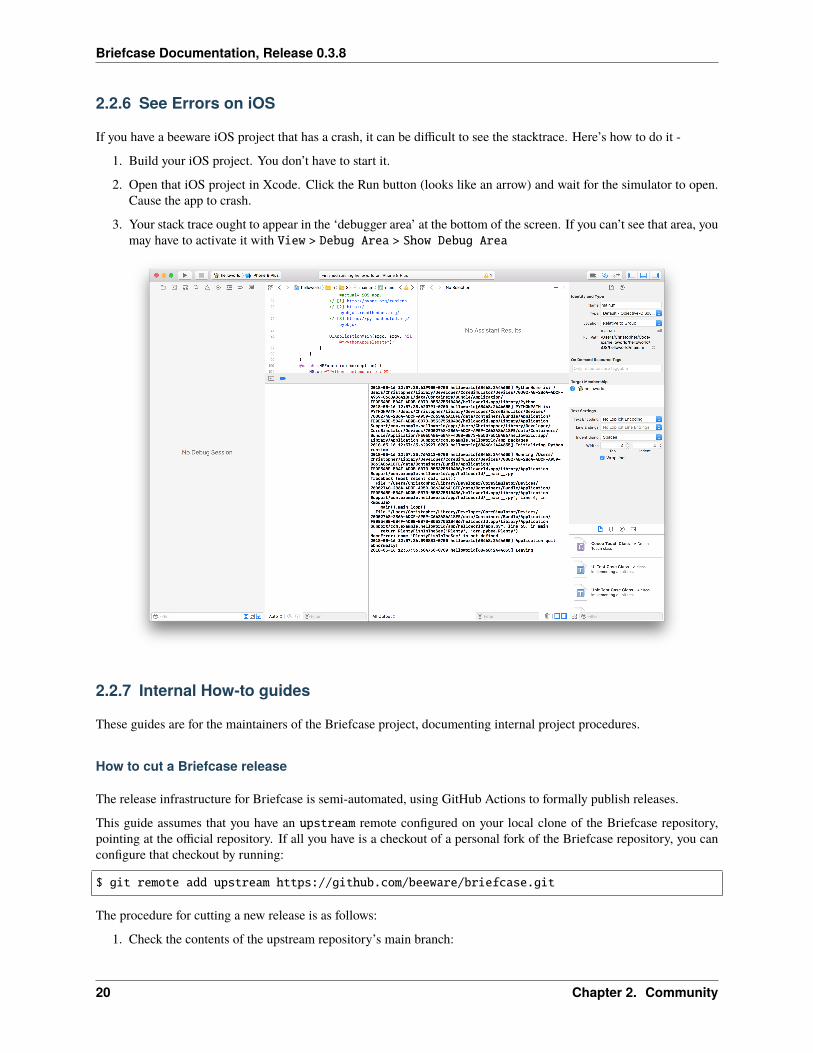
2.2.6 See Errors on iOS
If you have a beeware iOS project that has a crash, it can be difficult to see the stacktrace. Here’s how to do it -
1. Build your iOS project. You don’t have to start it.
2. Open that iOS project in Xcode. Click the Run button (looks like an arrow) and wait for the simulator to open.Cause the app to crash.
3. Your stack trace ought to appear in the ‘debugger area’ at the bottom of the screen. If you can’t see that area, youmay have to activate it with View > Debug Area > Show Debug Area
2.2.7 Internal How-to guides
These guides are for the maintainers of the Briefcase project, documenting internal project procedures.
How to cut a Briefcase release
The release infrastructure for Briefcase is semi-automated, using GitHub Actions to formally publish releases.
This guide assumes that you have an upstream remote configured on your local clone of the Briefcase repository,pointing at the official repository. If all you have is a checkout of a personal fork of the Briefcase repository, you canconfigure that checkout by running:
$ git remote add upstream https://github.com/beeware/briefcase.git
The procedure for cutting a new release is as follows:
1. Check the contents of the upstream repository’s main branch:
20 Chapter 2. Community
Briefcase Documentation, Release 0.3.8
$ git fetch upstream$ git checkout --detach upstream/main
Check that the HEAD of release now matches upstream/main.
2. Make sure the branch is ready for release. Ensure that:
1. The version number has been bumped.
2. The release notes are up to date. If they are, the changes directory should be empty, except for thetemplate.rst file.
These two changes (the version bump and release notes update) should go through the normal pull request andreview process. They should generally comprise the last PR merged before the release occurs.
If the version number hasn’t been updated, or changes directory isn’t empty, you need to create a PR (using thenormal development process) that contains these changes. Run:
$ tox -e towncrier -- --draft
to review the release notes that will be included, and then:
$ tox -e towncrier
to generate the updated release notes. Submit the PR; once it’s been reviewed and merged, you can restart therelease process from step 1.
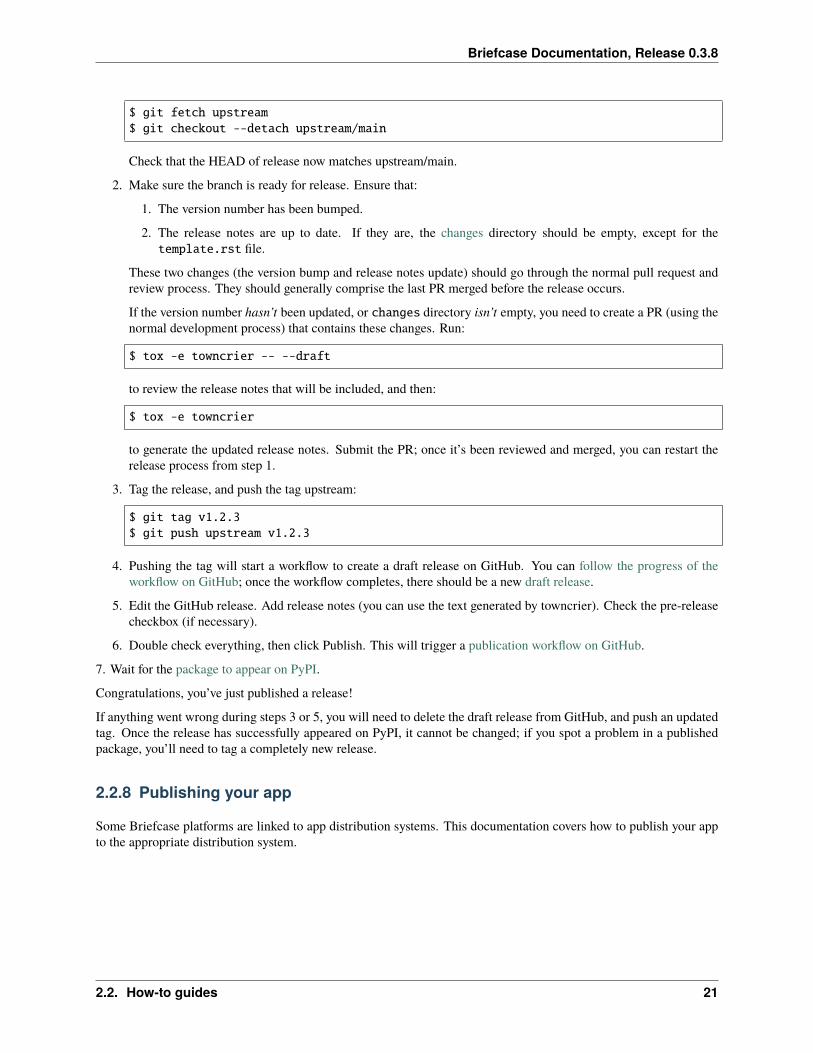
3. Tag the release, and push the tag upstream:
$ git tag v1.2.3$ git push upstream v1.2.3
4. Pushing the tag will start a workflow to create a draft release on GitHub. You can follow the progress of theworkflow on GitHub; once the workflow completes, there should be a new draft release.
5. Edit the GitHub release. Add release notes (you can use the text generated by towncrier). Check the pre-releasecheckbox (if necessary).
6. Double check everything, then click Publish. This will trigger a publication workflow on GitHub.
7. Wait for the package to appear on PyPI.
Congratulations, you’ve just published a release!
If anything went wrong during steps 3 or 5, you will need to delete the draft release from GitHub, and push an updatedtag. Once the release has successfully appeared on PyPI, it cannot be changed; if you spot a problem in a publishedpackage, you’ll need to tag a completely new release.
2.2.8 Publishing your app
Some Briefcase platforms are linked to app distribution systems. This documentation covers how to publish your appto the appropriate distribution system.
2.2. How-to guides 21
Briefcase Documentation, Release 0.3.8
Android
Overview
The Google Play Store is the most widely-used Android app store. This guide focuses on how to distribute a BeeWareapp on the Google Play Store.
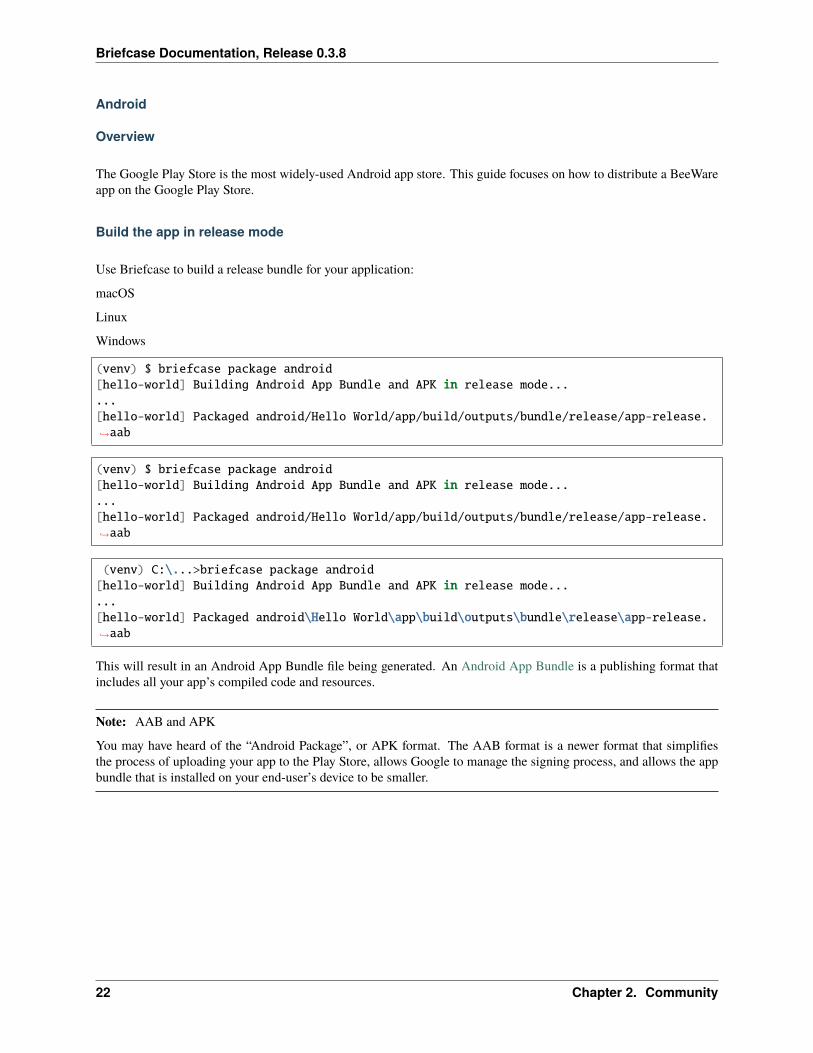
Build the app in release mode
Use Briefcase to build a release bundle for your application:
macOS
Linux
Windows
(venv) $ briefcase package android[hello-world] Building Android App Bundle and APK in release mode......[hello-world] Packaged android/Hello World/app/build/outputs/bundle/release/app-release.→˓aab
(venv) $ briefcase package android[hello-world] Building Android App Bundle and APK in release mode......[hello-world] Packaged android/Hello World/app/build/outputs/bundle/release/app-release.→˓aab
(venv) C:\...>briefcase package android[hello-world] Building Android App Bundle and APK in release mode......[hello-world] Packaged android\Hello World\app\build\outputs\bundle\release\app-release.→˓aab
This will result in an Android App Bundle file being generated. An Android App Bundle is a publishing format thatincludes all your app’s compiled code and resources.
Note: AAB and APK
You may have heard of the “Android Package”, or APK format. The AAB format is a newer format that simplifiesthe process of uploading your app to the Play Store, allows Google to manage the signing process, and allows the appbundle that is installed on your end-user’s device to be smaller.
22 Chapter 2. Community
Briefcase Documentation, Release 0.3.8
Sign the Android App Bundle
Create code signing identity
Before you sign the APK files, you need to create a code signing identity.
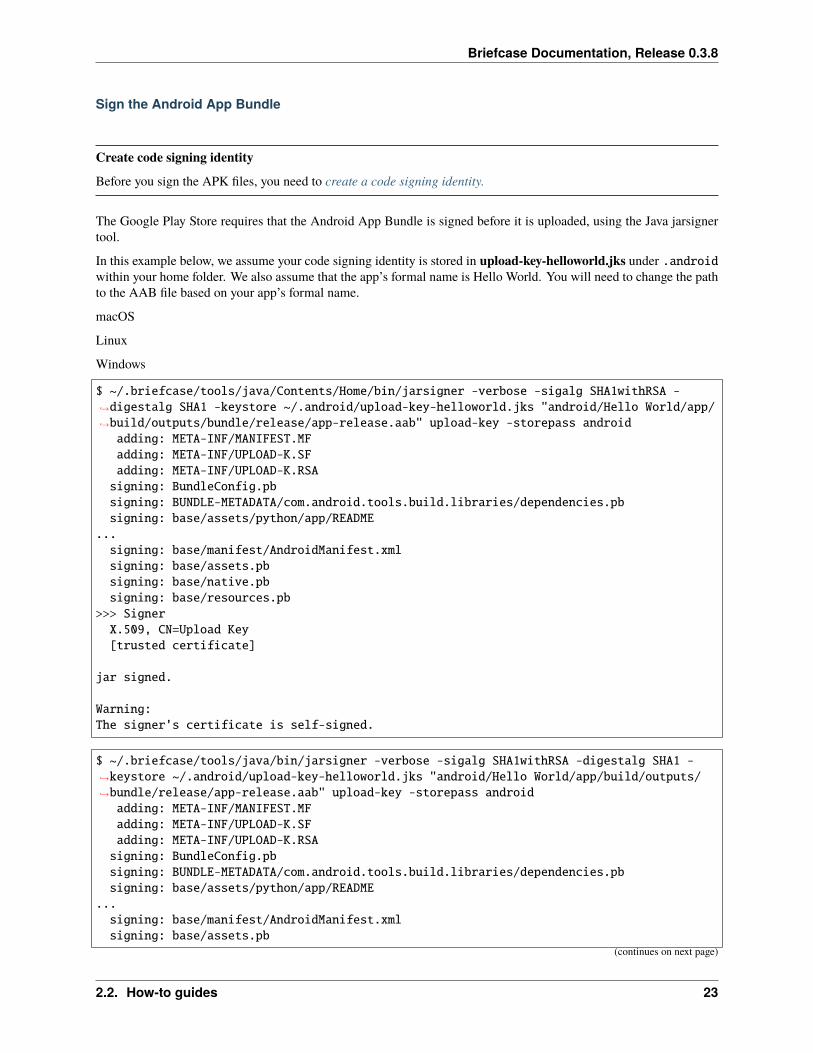
The Google Play Store requires that the Android App Bundle is signed before it is uploaded, using the Java jarsignertool.
In this example below, we assume your code signing identity is stored in upload-key-helloworld.jks under .androidwithin your home folder. We also assume that the app’s formal name is Hello World. You will need to change the pathto the AAB file based on your app’s formal name.
macOS
Linux
Windows
$ ~/.briefcase/tools/java/Contents/Home/bin/jarsigner -verbose -sigalg SHA1withRSA -→˓digestalg SHA1 -keystore ~/.android/upload-key-helloworld.jks "android/Hello World/app/→˓build/outputs/bundle/release/app-release.aab" upload-key -storepass android
adding: META-INF/MANIFEST.MFadding: META-INF/UPLOAD-K.SFadding: META-INF/UPLOAD-K.RSAsigning: BundleConfig.pbsigning: BUNDLE-METADATA/com.android.tools.build.libraries/dependencies.pbsigning: base/assets/python/app/README
...signing: base/manifest/AndroidManifest.xmlsigning: base/assets.pbsigning: base/native.pbsigning: base/resources.pb
>>> SignerX.509, CN=Upload Key[trusted certificate]
jar signed.
Warning:The signer's certificate is self-signed.
$ ~/.briefcase/tools/java/bin/jarsigner -verbose -sigalg SHA1withRSA -digestalg SHA1 -→˓keystore ~/.android/upload-key-helloworld.jks "android/Hello World/app/build/outputs/→˓bundle/release/app-release.aab" upload-key -storepass android
adding: META-INF/MANIFEST.MFadding: META-INF/UPLOAD-K.SFadding: META-INF/UPLOAD-K.RSAsigning: BundleConfig.pbsigning: BUNDLE-METADATA/com.android.tools.build.libraries/dependencies.pbsigning: base/assets/python/app/README
...signing: base/manifest/AndroidManifest.xmlsigning: base/assets.pb
(continues on next page)
2.2. How-to guides 23
Briefcase Documentation, Release 0.3.8
(continued from previous page)
signing: base/native.pbsigning: base/resources.pb
>>> SignerX.509, CN=Upload Key[trusted certificate]
jar signed.
Warning:The signer's certificate is self-signed.
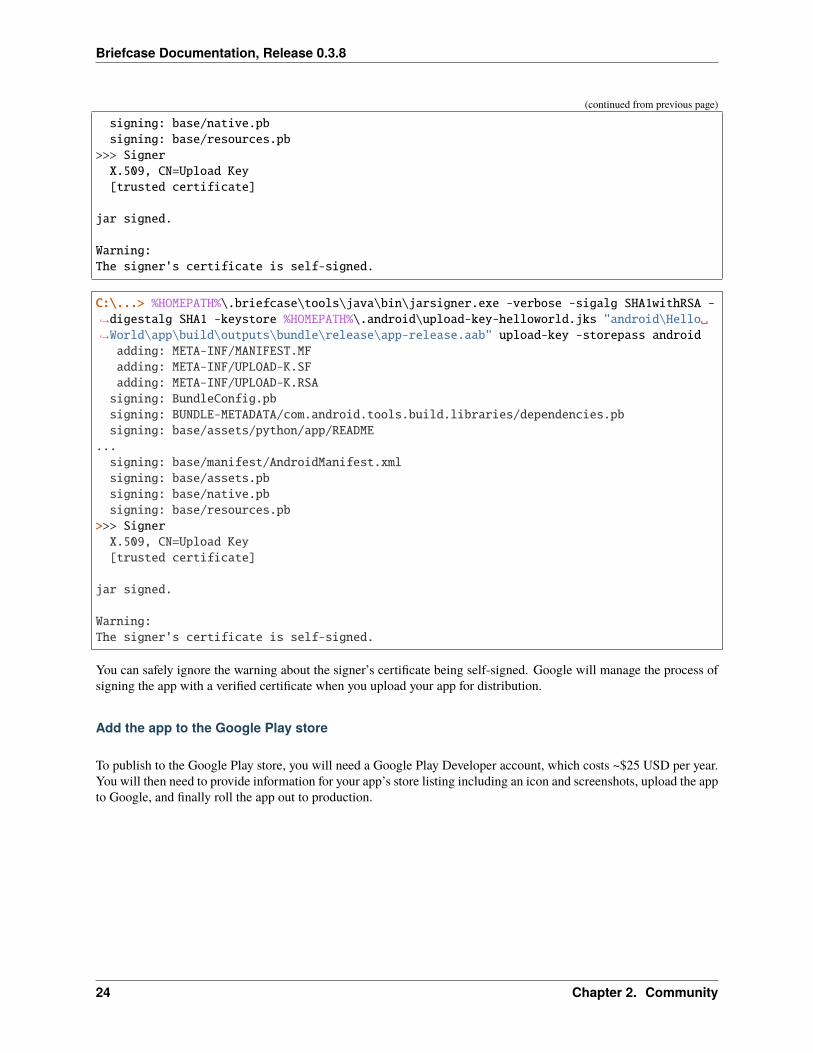
C:\...> %HOMEPATH%\.briefcase\tools\java\bin\jarsigner.exe -verbose -sigalg SHA1withRSA -→˓digestalg SHA1 -keystore %HOMEPATH%\.android\upload-key-helloworld.jks "android\Hello␣→˓World\app\build\outputs\bundle\release\app-release.aab" upload-key -storepass android
adding: META-INF/MANIFEST.MFadding: META-INF/UPLOAD-K.SFadding: META-INF/UPLOAD-K.RSAsigning: BundleConfig.pbsigning: BUNDLE-METADATA/com.android.tools.build.libraries/dependencies.pbsigning: base/assets/python/app/README
...signing: base/manifest/AndroidManifest.xmlsigning: base/assets.pbsigning: base/native.pbsigning: base/resources.pb
>>> SignerX.509, CN=Upload Key[trusted certificate]
jar signed.
Warning:The signer's certificate is self-signed.
You can safely ignore the warning about the signer’s certificate being self-signed. Google will manage the process ofsigning the app with a verified certificate when you upload your app for distribution.
Add the app to the Google Play store
To publish to the Google Play store, you will need a Google Play Developer account, which costs ~$25 USD per year.You will then need to provide information for your app’s store listing including an icon and screenshots, upload the appto Google, and finally roll the app out to production.
24 Chapter 2. Community
Briefcase Documentation, Release 0.3.8
Register for a Google Play Developer account
Registering for a Google Play Developer account requires a Google Account. You will need to pay registration fee andaccept an agreement in the process.
To check if you already have a Google Play Developer account, you can visit the Google Play console. If you see abutton to Publish an Android App on Google Play or a button to Create Application, you can skip this step.
To create your Google Play developer account, pay the fee, and review the agreements, follow Google’s documentation.
Create a listing
Visit the Google Play console. You will see a button labeled Publish an Android App on Google Play or a button toCreate Application. Click it.
Once you’ve done that, click Create Application. Choose a language and write a brief app title, up to 50 characters.We suggest making this the same as your app’s Formal Name in its pyproject.toml.
This will take you to Store Listing section of your app. You will need to provide a short app description (up to 80characters) and a full description (up to 4000 characters). Your app metadata may be helpful here.
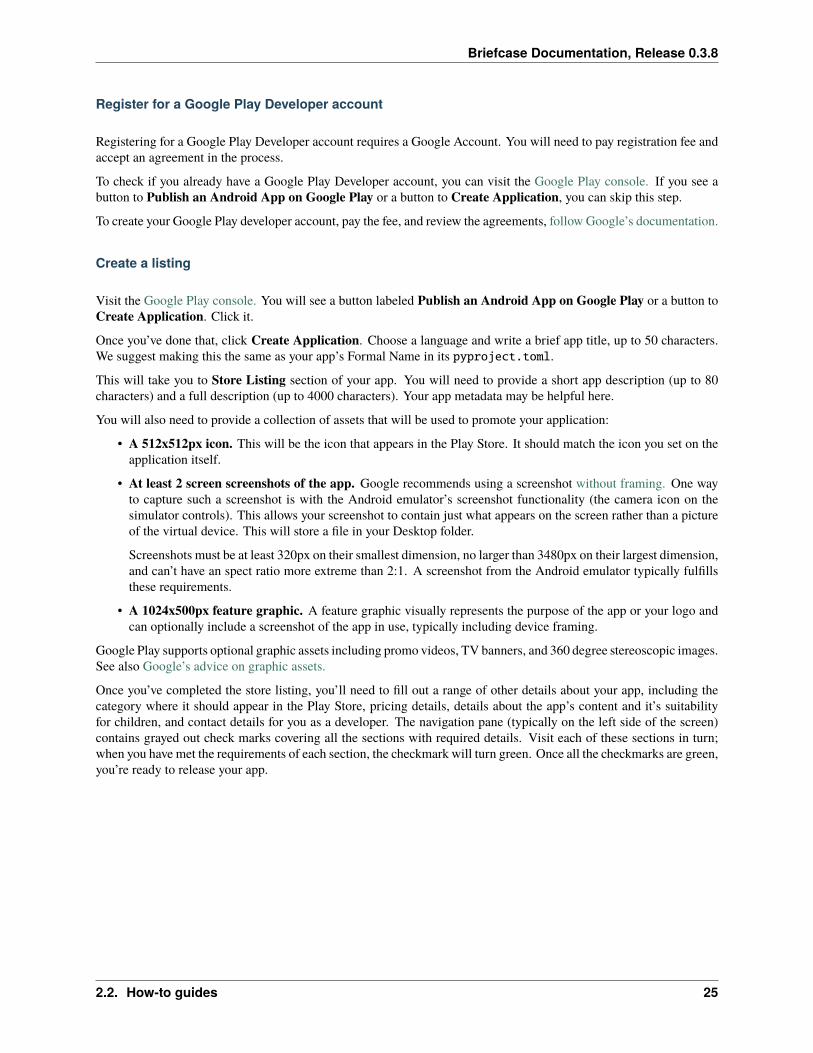
You will also need to provide a collection of assets that will be used to promote your application:
• A 512x512px icon. This will be the icon that appears in the Play Store. It should match the icon you set on theapplication itself.
• At least 2 screen screenshots of the app. Google recommends using a screenshot without framing. One wayto capture such a screenshot is with the Android emulator’s screenshot functionality (the camera icon on thesimulator controls). This allows your screenshot to contain just what appears on the screen rather than a pictureof the virtual device. This will store a file in your Desktop folder.
Screenshots must be at least 320px on their smallest dimension, no larger than 3480px on their largest dimension,and can’t have an spect ratio more extreme than 2:1. A screenshot from the Android emulator typically fulfillsthese requirements.
• A 1024x500px feature graphic. A feature graphic visually represents the purpose of the app or your logo andcan optionally include a screenshot of the app in use, typically including device framing.
Google Play supports optional graphic assets including promo videos, TV banners, and 360 degree stereoscopic images.See also Google’s advice on graphic assets.
Once you’ve completed the store listing, you’ll need to fill out a range of other details about your app, including thecategory where it should appear in the Play Store, pricing details, details about the app’s content and it’s suitabilityfor children, and contact details for you as a developer. The navigation pane (typically on the left side of the screen)contains grayed out check marks covering all the sections with required details. Visit each of these sections in turn;when you have met the requirements of each section, the checkmark will turn green. Once all the checkmarks are green,you’re ready to release your app.
2.2. How-to guides 25
Briefcase Documentation, Release 0.3.8
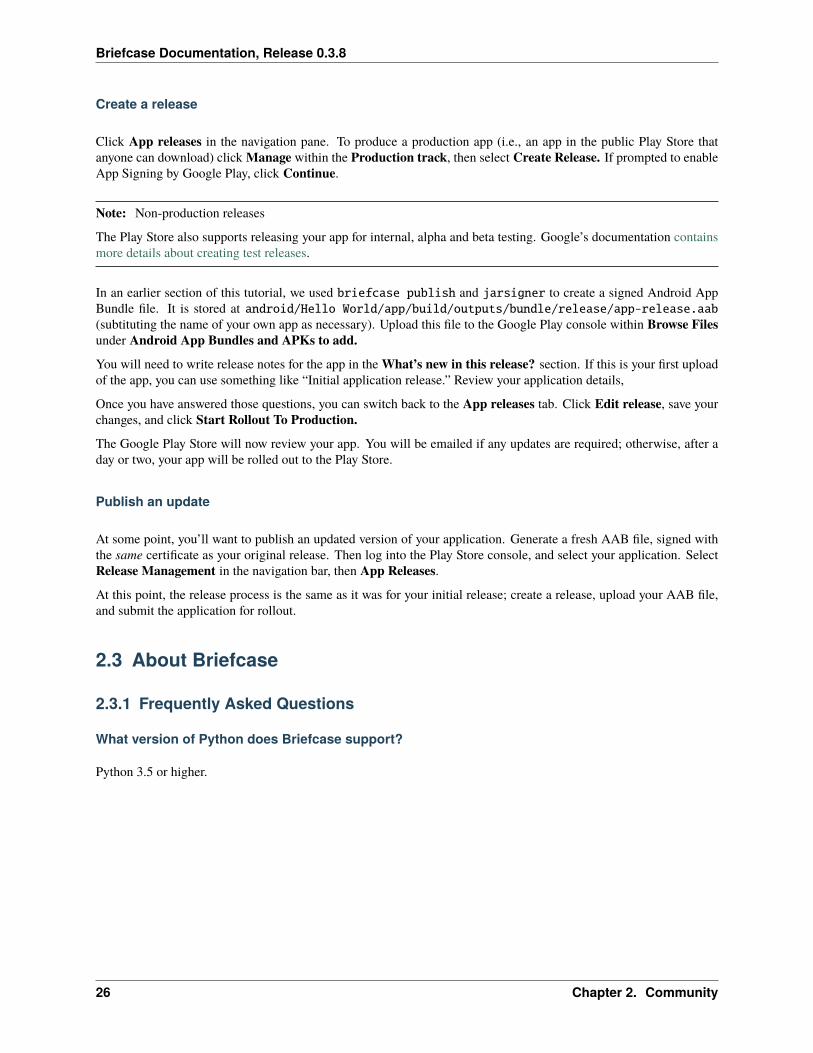
Create a release
Click App releases in the navigation pane. To produce a production app (i.e., an app in the public Play Store thatanyone can download) click Manage within the Production track, then select Create Release. If prompted to enableApp Signing by Google Play, click Continue.
Note: Non-production releases
The Play Store also supports releasing your app for internal, alpha and beta testing. Google’s documentation containsmore details about creating test releases.
In an earlier section of this tutorial, we used briefcase publish and jarsigner to create a signed Android AppBundle file. It is stored at android/Hello World/app/build/outputs/bundle/release/app-release.aab(subtituting the name of your own app as necessary). Upload this file to the Google Play console within Browse Filesunder Android App Bundles and APKs to add.
You will need to write release notes for the app in the What’s new in this release? section. If this is your first uploadof the app, you can use something like “Initial application release.” Review your application details,
Once you have answered those questions, you can switch back to the App releases tab. Click Edit release, save yourchanges, and click Start Rollout To Production.
The Google Play Store will now review your app. You will be emailed if any updates are required; otherwise, after aday or two, your app will be rolled out to the Play Store.
Publish an update
At some point, you’ll want to publish an updated version of your application. Generate a fresh AAB file, signed withthe same certificate as your original release. Then log into the Play Store console, and select your application. SelectRelease Management in the navigation bar, then App Releases.
At this point, the release process is the same as it was for your initial release; create a release, upload your AAB file,and submit the application for rollout.
2.3 About Briefcase
2.3.1 Frequently Asked Questions
What version of Python does Briefcase support?
Python 3.5 or higher.
26 Chapter 2. Community
Briefcase Documentation, Release 0.3.8
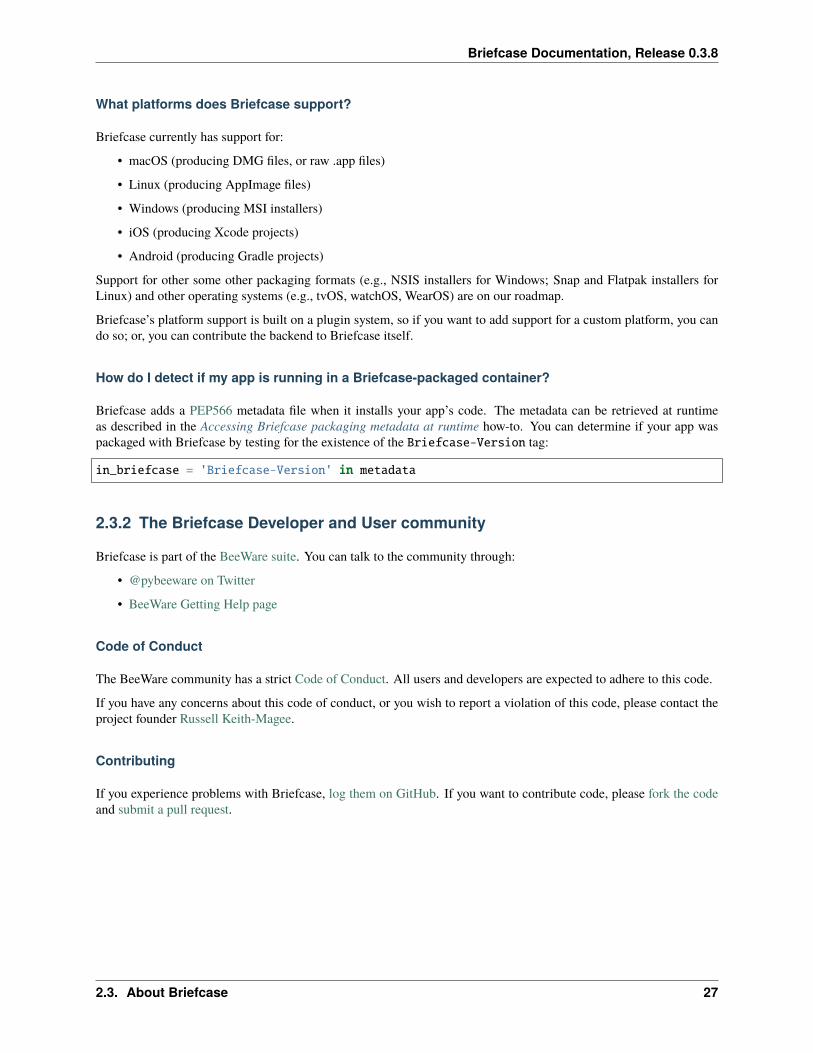
What platforms does Briefcase support?
Briefcase currently has support for:
• macOS (producing DMG files, or raw .app files)
• Linux (producing AppImage files)
• Windows (producing MSI installers)
• iOS (producing Xcode projects)
• Android (producing Gradle projects)
Support for other some other packaging formats (e.g., NSIS installers for Windows; Snap and Flatpak installers forLinux) and other operating systems (e.g., tvOS, watchOS, WearOS) are on our roadmap.
Briefcase’s platform support is built on a plugin system, so if you want to add support for a custom platform, you cando so; or, you can contribute the backend to Briefcase itself.
How do I detect if my app is running in a Briefcase-packaged container?
Briefcase adds a PEP566 metadata file when it installs your app’s code. The metadata can be retrieved at runtimeas described in the Accessing Briefcase packaging metadata at runtime how-to. You can determine if your app waspackaged with Briefcase by testing for the existence of the Briefcase-Version tag:
in_briefcase = 'Briefcase-Version' in metadata
2.3.2 The Briefcase Developer and User community
Briefcase is part of the BeeWare suite. You can talk to the community through:
• @pybeeware on Twitter
• BeeWare Getting Help page
Code of Conduct
The BeeWare community has a strict Code of Conduct. All users and developers are expected to adhere to this code.
If you have any concerns about this code of conduct, or you wish to report a violation of this code, please contact theproject founder Russell Keith-Magee.
Contributing
If you experience problems with Briefcase, log them on GitHub. If you want to contribute code, please fork the codeand submit a pull request.
2.3. About Briefcase 27
Briefcase Documentation, Release 0.3.8
2.3.3 Success Stories
Want to see examples of Briefcase in use? Here’s some:
• Travel Tips is an app in the iOS App Store that was packaged for distribution using Briefcase.
• Mu is a simple code editor for beginner programmers. It uses Briefcase to prepare a macOS installer.
• Napari is a multi-dimensional image viewer for python. It uses Briefcase to prepare bundled Windows, MacOS,and Linux installers.
2.3.4 Release History
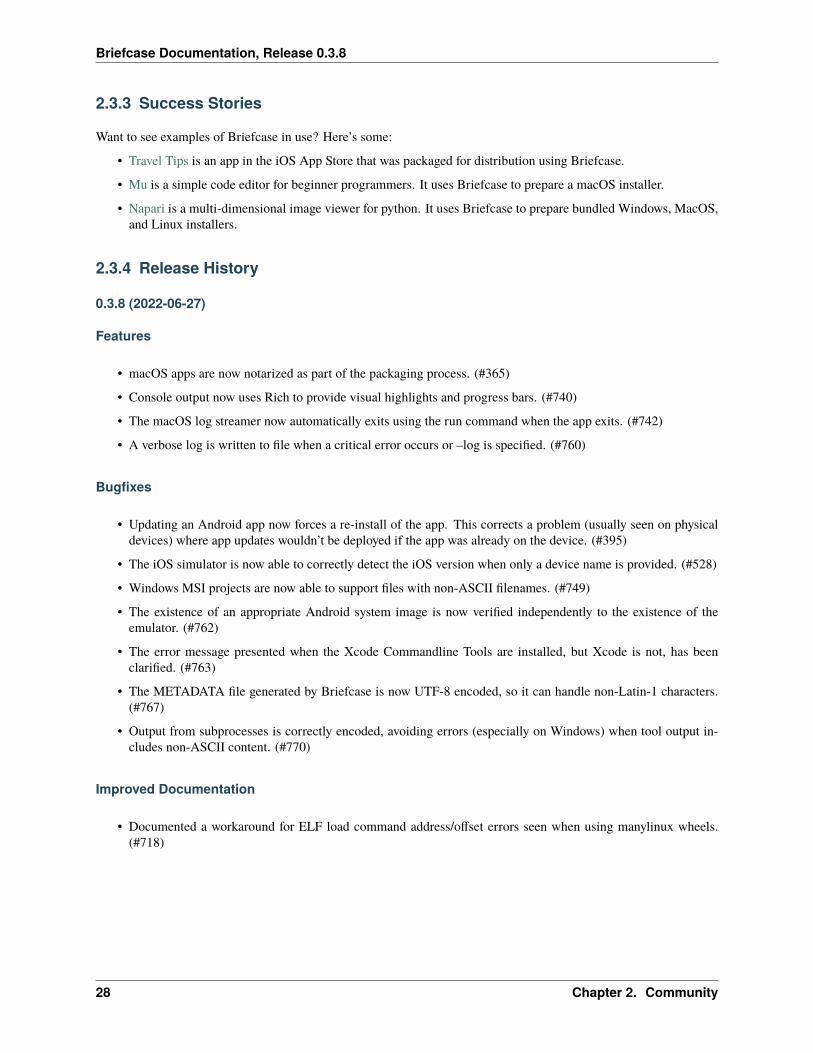
0.3.8 (2022-06-27)
Features
• macOS apps are now notarized as part of the packaging process. (#365)
• Console output now uses Rich to provide visual highlights and progress bars. (#740)
• The macOS log streamer now automatically exits using the run command when the app exits. (#742)
• A verbose log is written to file when a critical error occurs or –log is specified. (#760)
Bugfixes
• Updating an Android app now forces a re-install of the app. This corrects a problem (usually seen on physicaldevices) where app updates wouldn’t be deployed if the app was already on the device. (#395)
• The iOS simulator is now able to correctly detect the iOS version when only a device name is provided. (#528)
• Windows MSI projects are now able to support files with non-ASCII filenames. (#749)
• The existence of an appropriate Android system image is now verified independently to the existence of theemulator. (#762)
• The error message presented when the Xcode Commandline Tools are installed, but Xcode is not, has beenclarified. (#763)
• The METADATA file generated by Briefcase is now UTF-8 encoded, so it can handle non-Latin-1 characters.(#767)
• Output from subprocesses is correctly encoded, avoiding errors (especially on Windows) when tool output in-cludes non-ASCII content. (#770)
Improved Documentation
• Documented a workaround for ELF load command address/offset errors seen when using manylinux wheels.(#718)
28 Chapter 2. Community
Briefcase Documentation, Release 0.3.8
Misc
• #743, #744, #755
0.3.7 (2022-05-17)
Features
• Apps can be updated as part of a call to package. (#473)
• The Android emulator can now be used on Apple M1 hardware. (#616)
• Names that are reserved words in Python (or other common programming languages) are now prevented whencreating apps. (#617)
• Names that are invalid on Windows as filenames (such as CON and LPT0) are now invalid as app names. (#685)
• Verbose logging via -v and -vv now includes the return code, output, and environment variables for shell com-mands (#704)
• When the output of a wrapped command cannot be parsed, full command output, and failure reason is nowlogged. (#728)
• The iOS emulator will now run apps natively on M1 hardware, rather than through Rosetta emulation. (#739)
Bugfixes
• Bundle identifiers are now validated to ensure they don’t contain reserved words. (#460)
• The error reporting when the user is on an unsupported platform or Python version has been improved. (#541)
• When the formal name uses non-Latin characters, the suggested Class and App names are now valid. (#612)
• The code signing process for macOS apps has been made more robust. (#652)
• macOS app binaries are now adhoc signed by default, ensuring they can run on M1 hardware. (#664)
• Xcode version checks are now more robust. (#668)
• Android projects that have punctuation in their formal names can now build without error. (#696)
• Bundle name validation no longer excludes valid country identifiers (like in.example). (#709)
• Application code and dist-info is now fully replaced during an update. (#720)
• Errors related to Java JDK detection now properly contain the value of JAVA_HOME instead of the word None(#727)
• All log entries will now be displayed for the run command on iOS and macOS; previously, initial log entries mayhave been omitted. (#731)
• Using CTRL+C to stop showing Android emulator logs while running the app will no longer cause the emulatorto shutdown. (#733)
2.3. About Briefcase 29
Briefcase Documentation, Release 0.3.8
Misc
• #680, #681, #699, #726, #734
0.3.6 (2022-02-28)
Features
• On macOS, iOS, and Android, briefcase run now displays the application logs once the application hasstarted. (#591)
• Xcode detection code now allows for Xcode to be installed in locations other than /Applications/Xcode.app.(#622)
• Deprecated support for Python 3.6. (#653)
Bugfixes
• Existing app packages are now cleared before reinstalling dependencies. (#644)
• Added binary patcher for linuxtools AppImage to increase compatibility. (#667)
Improved Documentation
• Documentation on creating macOS/iOS code signing identities has been added (#641)
Misc
• #587, #588, #592, #598, #621, #643, #654, #670
0.3.5 (2021-03-06)
Features
• macOS projects can now be generated as an Xcode project. (#523)
Bugfixes
• macOS apps are now built as an embedded native binary, rather than a shell script invoking a Python script. Thiswas necessary to provide better support for macOS app notarization and sandboxing. (#523)
• Fixed the registration of setuptools entry points caused by a change in case sensitivity handling in Setuptools53.1.0. (#574)
30 Chapter 2. Community
Briefcase Documentation, Release 0.3.8
Misc
• #562
0.3.4 (2021-01-03)
Features
• Added signing options for all platforms. App signing is only implemented on macOS, but --no-sign can nowbe used regardless of your target platform. (#486)
• Windows MSI installers can be configured to be per-machine, system-wide installers. (#498)
• Projects can specify a custom branch for the template used to generate the app. (#519)
• Added the –no-run flag to the dev command. This allows developers to install app dependencies without runningthe app. (#522)
• The new project wizard will now warn users when they select a platform that doesn’t support mobile deployment.(#539)
Bugfixes
• Modified the volume mounting process to allow for SELinux. (#500)
• Fixed missing signature for Python executable in macOS app bundle. This enables the packaged dmg to benotarized by Apple. (#514)
• Modified the Windows tests to allow them to pass on 32-bit machines. (#521)
• Fixed a crash when running with verbose output. (#532)
Improved Documentation
• Clarified documentation around system_requires dependencies on Linux. (#459)
Misc
• #465, #475, #496, #512, #518
0.3.3 (2020-07-18)
Features
• WiX is now auto-downloaded when the MSI backend is used. (#389)
• The upgrade command now provides a way to upgrade tools that Briefcase has downloaded, including WiX,Java, linuxdeploy, and the Android SDK. (#450)
2.3. About Briefcase 31
Briefcase Documentation, Release 0.3.8
Bugfixes
• Binary modules in Linux AppImages are now processed correctly, ensuring that no references to system librariesare retained in the AppImage. (#420)
• If pip is configured to use a per-user site_packages, this no longer clashes with the installation of applicationpackages. (#441)
• Docker-using commands now check whether the Docker daemon is running and if the user has permission toaccess it. (#442)
0.3.2 (2020-07-04)
Features
• Added pytest coverage to CI/CD process. (#417)
• Application metadata now contains a Briefcase-Version indicator. (#425)
• The device list returned by briefcase run android now uses the Android device model name and unique IDe.g. a Pixel 3a shows up as Pixel 3a (adbDeviceId). (#433)
• Android apps are now packaged in Android App Bundle format. This allows the Play Store to dynmically buildthe smallest APK appropriate to a device installing an app. (#438)
• PursuedPyBear is now included in the new project wizard. (#440)
Bugfixes
• iOS builds will now warn if the Xcode command line tools are the active. (#397)
• Linux Docker builds no longer use interactive mode, allowing builds to run on CI (or other TTY-less devices).(#439)
Improved Documentation
• Documented the process of signing Android apps & publishing them to the Google Play store. (#342)
Misc
• #428
0.3.1 (2020-06-13)
Features
• The Linux AppImage backend has been modified to use Docker. This ensures that the AppImage is always builtin an environment that is compatible with the support package. It also enables Linux AppImages to be built onmacOS and Windows. “Native” builds (i.e., builds that don’t use Docker) can be invoked using the --no-dockerargument. (#344)
• A PYTHONPATH property has been added to AppConfig that describes the sys.path changes needed to run theapp. (#401)
32 Chapter 2. Community
Briefcase Documentation, Release 0.3.8
• Ad-hoc code signing is now possible on macOS with briefcase package --adhoc-sign. (#409)
• Android apps can now use use - in their bundle name; we now convert - to _ in the resulting Android packageidentifier and Java package name. (#415)
• Mobile applications now support setting the background color of the splash screen, and setting a build identifier.(#422)
• Android now has a package command that produces the release APK. After manually signing this APK, it canbe published to the Google Play Store. (#423)
Bugfixes
• Some stray punctuation in the Android device helper output has been removed. (#396)
• An explicit version check for Docker is now performed. (#402)
• The Linux build process ensures the Docker user matches the UID/GID of the host user. (#403)
• Briefcase now ensures that the Python installation ecosystem tools (pip, setuptools, and wheel), are allpresent and up to date. (#421)
Improved Documentation
• Documented that Windows MSI builds produce per-user installable MSI installers, while still supporting per-maching installs via the CLI. (#382)
• CONTRIBUTING.md has been updated to link to Briefcase-specific documentation. (#404)
• Removed references to the build-system table in pyproject.toml. (#410)
Misc
• #380, #384
0.3.0 (2020-04-18)
Features
• Converted Briefcase to be a PEP518 tool, rather than a setuptools extension. (#266)
0.2.10
• Improved pre-detection of XCode and related tools
• Improved error handling when starting external tools
• Fixed iOS simulator integration
2.3. About Briefcase 33
Briefcase Documentation, Release 0.3.8
0.2.9
• Updated mechanism for starting the iOS simulator
• Added support for environment markers in install_requires
• Improved error handling when Wix isn’t found
0.2.8
• Corrects packaging problem with urllib3, caused by inconsistency between requests and boto3.
• Corrected problems with Start menu targets being created on Windows.
0.2.7
• Added support for launch images for iPhone X, Xs, Xr, Xs Max and Xr Max
• Completed removal of internal pip API dependencies.
0.2.6
• Added support for registering OS-level document type handlers.
• Removed dependency on an internal pip API.
• Corrected invocation of gradlew on Windows
• Addressed support for support builds greater than b9.
0.2.5
• Restored download progress bars when downloading support packages.
0.2.4
• Corrected a bug in the iOS backend that prevented iOS builds.
0.2.3
• Bugfix release, correcting the fix for pip 10 support.
0.2.2
• Added compatibility with pip 10.
• Improved Windows packaging to allow for multiple executables
• Added a --clean command line option to force a refresh of generated code.
• Improved error handling for bad builds
34 Chapter 2. Community
Briefcase Documentation, Release 0.3.8
0.2.1
• Improved error reporting when a support package isn’t available.
0.2.0
• Added -s option to launch projects
• Switch to using AWS S3 resources rather than Github Files.
0.1.9
• Added a full Windows installer backend
0.1.8
• Modified template rollout process to avoid API limits on Github.
0.1.7
• Added check for existing directories, with the option to replace existing content.
• Added a Linux backend.
• Added a Windows backend.
• Added a splash screen for Android
0.1.6
• Added a Django backend (@glasnt)
0.1.5
• Added initial Android template
• Force versions of pip (>= 8.1) and setuptools (>=27.0)
• Drop support for Python 2
0.1.4
• Added support for tvOS projects
• Moved to using branches in the project template repositories.
2.3. About Briefcase 35
Briefcase Documentation, Release 0.3.8
0.1.3
• Added support for Android projects using VOC.
0.1.2
• Added support for having multi-target support projects. This clears the way for Briefcase to be used for watchOSand tvOS projects, and potentially for Python-OSX-support and Python-iOS-support to be merged into a singlePython-Apple-support.
0.1.1
• Added support for app icons and splash screens.
0.1.0
Initial public release.
2.4 Reference
This is the technical reference for public APIs provided by Briefcase.
2.4.1 Configuration options
Briefcase is a PEP518-compliant build tool. It uses a pyproject.toml file, in the root directory of your project, toprovide build instructions for the packaged file.
If you have an application called “My App”, with source code in the src/myapp directory, the simplest possiblepyproject.toml Briefcase configuration file would be:
[tool.briefcase]project_name = "My Project"bundle = "com.example"version = "0.1"
[tool.briefcase.app.myapp]formal_name = "My App"description = "My first Briefcase App"sources = ['src/myapp']
The configuration sections are tool specific, and start with the prefix tool.briefcase.
The location of the pyproject.toml file is treated as the root of the project definition. Briefcase should be invoked ina directory that contains a pyproject.toml file, and all relative file path references contained in the pyproject.tomlfile will be interpreted relative to the directory that contains the pyproject.toml file.
36 Chapter 2. Community
Briefcase Documentation, Release 0.3.8
Configuration sections
A project that is packaged by Briefcase can declare multiple applications. Each application is a distributable productof the build process. A simple project will only have a single application. However, a complex project may containmultiple applications with shared code.
Each setting can be specified:
• At the level of an output format (e.g., settings specific to building macOS DMGs);
• At the level of an platform for an app (e.g., macOS specific settings);
• At the level of an individual app; or
• Globally, for all applications in the project.
When building an application in a particular output format, Briefcase will look for settings in the same order. Forexample, if you’re building a macOS DMG for an application called myapp, Briefcase will look for macOS DMGsettings for myapp, then for macOS settings for myapp, then for myapp settings, then for project-level settings.
[tool.briefcase]
The base [tool.briefcase] section declares settings that project specific, or are are common to all applications in thisrepository.
[tool.briefcase.app.<app name>]
Configuration options for a specific application.
<app name> must adhere to a valid Python distribution name as specified in PEP508. The app name must also not bea reserved word in Python, Java or JavaScript (i.e., app names like switch or pass would not be valid); and it may notinclude any of the filenames prohibited by Windows (i.e., CON, PRN, or LPT1).
[tool.briefcase.app.<app name>.<platform>]
Configuration options for an application that are platform specific. The platform must match a name for a platformsupported by Briefcase (e.g., macOS or windows). A list of the platforms supported by Briefcase can be obtained byrunning briefcase -h, and inspecting the help for the platform option
[tool.briefcase.app.<app name>.<platform>.<output format>]
Configuration options that are specific to a particular output format. For example, macOS applications can be generatedin app or dmg format.
2.4. Reference 37
Briefcase Documentation, Release 0.3.8
Project configuration
Required values
bundle
A reverse-domain name that can be used to identify resources for the application e.g., com.example. The bundleidentifier will be combined with the app name to produce a unique application identifier - e.g., if the bundle identifieris com.example and the app name is myapp`, the application will be identified as ``com.example.myapp.
project_name
The project is the collection of all applications that are described by the briefcase configuration. For projects with asingle app, this may be the same as the formal name of the solitary packaged app.
version
A PEP440 compliant version string.
Examples of valid version strings:
• 1.0
• 1.2.3
• 1.2.3.dev4 - A development release
• 1.2.3a5 - An alpha pre-release
• 1.2.3b6 - A Beta pre-release
• 1.2.3rc7 - A release candidate
• 1.2.3.post8 - A post-release
Optional values
author
The person or organization responsible for the project.
author_email
The contact email address for the person or organization responsible for the project.
38 Chapter 2. Community
Briefcase Documentation, Release 0.3.8
url
A URL where more details about the project can be found.
Application configuration
Required
description
A short, one-line description of the purpose of the application.
sources
A list of paths, relative to the pyproject.toml file, where source code for the application can be found. The contents ofany named files or folders will be copied into the application bundle. Parent directories in any named path will not beincluded. For example, if you specify src/myapp as a source, the contents of the myapp folder will be copied into theapplication bundle; the src directory will not be reproduced.
Unlike most other keys in a configuration file, sources is cumlative setting. If an application defines sources at theglobal level, application level, and platform level, the final set of sources will be the concatenation of sources from alllevels, starting from least to most specific.
Optional values
author
The person or organization responsible for the application.
author_email
The contact email address for the person or organization responsible for the application.
build
A build identifier. An integer, used in addition to the version specifier, to identify a specific compiled version of anapplication.
formal_name
The application name as it should be displayed to humans. This name may contain capitalization and punctuation. Ifit is not specified, the name will be used.
2.4. Reference 39
Briefcase Documentation, Release 0.3.8
icon
A path, relative to the directory where the pyproject.toml file is located, to an image to use as the icon for theapplication. The path should exclude the extension; Briefcase will append a platform appropriate extension whenconfiguring the application. For example, an icon specification of icon = "resources/icon" will use resources/icon.icns on macOS, and resources/icon.ico on Windows.
Some platforms require multiple icons, at different sizes; these will be handled by appending the required size to theprovided icon name. For example, iOS requires multiple icon sizes (ranging from 20px to 1024px); Briefcase will lookfor resources/icon-20.png, resources/icon-1024.png, and so on. The sizes that are required are determinedby the platform template.
installer_icon
A path, relative to the directory where the pyproject.toml file is located, to an image to use as the icon for theinstaller. As with icon, the path should exclude the extension, and a platform-appropriate extension will be appendedwhen the application is built.
installer_background
A path, relative to the directory where the pyproject.toml file is located, to an image to use as the background forthe installer. As with splash, the path should exclude the extension, and a platform-appropriate extension will beappended when the application is built.
requires
A list of packages that must be packaged with this application.
Unlike most other keys in a configuration file, requires is cumlative setting. If an application defines requirementsat the global level, application level, and platform level, the final set of requirements will be the concatenation ofrequirements from all levels, starting from least to most specific.
splash
A path, relative to the directory where the pyproject.toml file is located, to an image to use as the splash screen forthe application. The path should exclude the extension; Briefcase will append a platform appropriate extension whenconfiguring the application.
Some platforms require multiple splash images, at different sizes; these will be handled by appending the required sizeto the provided icon name. For example, iOS requires multiple splash images, (1024px, 2048px and 3072px); with asplash setting of resources/my_splash, Briefcase will look for resources/my_splash-1024.png, resources/my_splash-2045.png, and resources/my_splash-3072.png. The sizes that are required are determined by theplatform template.
Some platforms also require different variants. For example, Android requires splash screens for “normal”, “large”and “xlarge” devices. These variants can be specified by qualifying the splash specification:
splash.normal = “resource/normal-splash” splash.large = “resource/large-splash” splash.xlarge =“resource/xlarge-splash”
These settings can, if you wish, all use the same prefix.
40 Chapter 2. Community

Briefcase Documentation, Release 0.3.8
If the platform requires different sizes for each variant (as Android does), those size will be appended topath provided by the variant specifier. For example, using the previous example, Android would look forresource/normal-splash-320.png, resource/normal-splash-480.png, resource/large-splash.480.png, resource/xlarge-splash-720.png, amongst others.
If the platform output format does not use a splash screen, the splash setting is ignored.
splash_background_color
A hexidecimal RGB color value (e.g., #6495ED) to use as the background color for splash screens.
If the platform output format does not use a splash screen, this setting is ignored.
support_package
A file path or URL pointing at a tarball containing a Python support package. (i.e., a precompiled, embeddable Pythoninterpreter for the platform)
If this setting is not provided, Briefcase will use the default support package for the platform.
support_revision
The specific revision of a support package that should be used. By default, Briefcase will always use the most recentlyreleased support package; if you specify a support revision, the support package will be pinned to that version for yourapp.
If the support package is a URL, a query argument of revision=<support_revision> will be added to the supportpackage URL when it is downloaded.
If the support package is a file path, this argument is ignored.
supported
Indicates that the platform is not supported. For example, if you know that the app cannot be deployed to Androidfor some reason, you can explicitly prevent deployment by setting supported=False in the Android section of the appconfiguration file.
If supported is set to false, the create command will fail, advising the user of the limitation.
template
A file path or URL pointing at a cookiecutter template for the output format.
If this setting is not provided, Briefcase will use a default template for the output format and Python version.
2.4. Reference 41
Briefcase Documentation, Release 0.3.8
template_branch
The branch of the project template to use when generating the app. If the template is a local file, this attribute will beignored. If not specified, Briefcase will use a branch matching the Python version in use (i.e., the 3.8 branch will beused when Python 3.8 is used to generate the app).
url
A URL where more details about the application can be found.
Document types
Applications in a project can register themselves with the operating system as handlers for specific document typesby adding a document_type configuration section for each document type the application can support. This sectionfollows the format:
[tool.briefcase.app.<app name>.document_type.<extension>]
or, for a platform specific definition:
[tool.briefcase.app.<app name>.<platform>.document_type.<extension>]
where extension is the file extension to register. For example, myapp could register as a handler for PNG image filesby defining the configuration section [tool.briefcase.app.myapp.document_type.png].
The document type declaration requires the following settings:
description
A short, one-line description of the document format.
icon
A path, relative to the directory where the pyproject.toml file is located, to an image for an icon to register for usewith documents of this type. The path should exclude the extension; Briefcase will append a platform appropriateextension when configuring the applcation. For example, an icon specification of:
icon = "resources/icon"
will use resources/icon.icns on macOS, and resources/icon.ico on Windows.
Some platforms also require different variants (e.g., both square and round icons). These variants can be specified byqualifying the icon specification:
icon.round = “resource/round-icon” icon.square = “resource/square-icon”
Some platforms require multiple icons, at different sizes; these will be handled by appending the required size to theprovided icon name. For example, iOS requires multiple icon sizes (ranging from 20px to 1024px); Briefcase will lookfor resources/icon-20.png, resources/icon-1024.png, and so on. The sizes that are required are determinedby the platform template.
If a platform requires both different sizes and variants, the variant handling and size handling will be combined.For example, Android requires round and square icons, in sizes ranging from 48px to 192px; Briefcase will lookfor resource/round-icon-42.png, resource/square-icon-42.png, resource/round-icon-192.png, andso on.
42 Chapter 2. Community
Briefcase Documentation, Release 0.3.8
url
A URL for help related to the document format.
2.4.2 Command reference
new
Start a new Briefcase project. Runs a wizard to ask questions about your new application, and creates a stub projectusing the details provided.
Usage
To start a new application, run:
$ briefcase new
Options
The following options can be provided at the command line.
-t <template> / --template <template>
A local directory path or URL to use as a cookiecutter template for the new project.
If a URL is provided, the master branch of the referenced repository will be used.
dev
Run the application in developer mode.
Usage
To run the app, run:
$ briefcase dev
The first time the application runs in developer mode, any dependencies listed in a requires configuration item inpyproject.toml will be installed into the current environment.
2.4. Reference 43
Briefcase Documentation, Release 0.3.8
Options
The following options can be provided at the command line.
-a <app name> / --app <app name
Run a specific application target in your project. This argument is only required if your project contains more than oneapplication target. The app name specified should be the machine-readable package name for the app.
-d / --update-dependencies
Update application dependencies.
create
Create a scaffold for an application installer. By default, targets the current platform’s default output format.
Usage
To create a scaffold for the default output format for the current platform:
$ briefcase create
To create a scaffold for a different platform:
$ briefcase create <platform>
To create a scaffold for a specific output format:
$ briefcase create <platform> <output format>
If a scaffold for the nominated platform already exists, you’ll be prompted to delete and regenerate the app.
Options
There are no additional command line options.
update
While you’re developing an application, you may need to rapidly iterate on the code, making small changes and thenre-building. The update command applies any changes you’ve made to your codebase to the packaged application code.
It will not update dependencies or installer resources unless specifically requested.
44 Chapter 2. Community
Briefcase Documentation, Release 0.3.8
Usage
To repackage your application’s code for the current platform’s default output format:
$ briefcase update
To repackage your application’s code for a different platform:
$ briefcase update <platform>
To repackage your application’s code for a specific output format:
$ briefcase update <platform> <output format>
Options
The following options can be provided at the command line.
-d / --update-dependencies
Update application dependencies.
-r / --update-resources
Update application resources (e.g., icons and splash screens).
build
Compile/build an application. By default, targets the current platform’s default output format.
This will only compile the components necessary to run the application. It won’t necessarily result in the generationof an installable artefact.
Usage
To build the application for the default output format for the current platform:
$ briefcase build
To build the application for a different platform:
$ briefcase build <platform>
To build the application for a specific output format:
$ briefcase build <platform> <output format>
2.4. Reference 45
Briefcase Documentation, Release 0.3.8
Build tool dependencies
Building for some platforms depends on the build tools for the platform you’re targetting being available on the platformyou’re using. For example, you will only be able to create iOS applications on macOS. Briefcase will check for anyrequired tools, and will report an error if the platform you’re targetting is not supported.
Options
The following options can be provided at the command line.
-u / --update
Update the application’s source code before running. Equivalent to running:
$ briefcase update$ briefcase build
run
Starts the application, using the packaged version of the application code. By default, targets the current platform’sdefault output format.
If the output format is an executable (e.g., a macOS .app file), the run command will start that executable. If the outputis an installer, run will attempt to replicate as much as possible of the runtime environment that would be installed,but will not actually install the app. For example, on Windows, run will use the interpreter that will be included in theinstaller, and the versions of code and dependencies that will be installed, but won’t run the installer to produce StartMenu items, registry records, etc.
Usage
To run your application on the current platform’s default output format:
$ briefcase run
To run your application for a different platform:
$ briefcase run <platform>
To run your application using a specific output format:
$ briefcase run <platform> <output format>
46 Chapter 2. Community
Briefcase Documentation, Release 0.3.8
Options
The following options can be provided at the command line.
-a <app name> / --app <app name
Run a specific application target in your project. This argument is only required if your project contains more than oneapplication target. The app name specified should be the machine-readable package name for the app.
-u / --update
Update the application’s source code before running. Equivalent to running:
$ briefcase update$ briefcase run
package
Compile/build an application installer. By default, targets the current platform’s default output format.
This will produce an installable artefact.
Usage
To build an installer of the default output format for the current platform:
$ briefcase package
To build an installer for a different platform:
$ briefcase package <platform>
To build an installer for a specific output format:
$ briefcase package <platform> <output format>
Packaging tool dependencies
Building installers for some platforms depends on the build tools for the platform you’re targetting being available onthe platform you’re using. For example, you will only be able to create iOS applications on macOS. Briefcase willcheck for any required tools, and will report an error if the platform you’re targetting is not supported.
2.4. Reference 47
Briefcase Documentation, Release 0.3.8
Options
The following options can be provided at the command line.
-u / --update
Update and recompile the application’s code before running. Equivalent to running:
$ briefcase update$ briefcase package
-p <format>, --packaging-format <format>
The format to use for packaging. The available packaging formats are platform dependent.
--no-sign
Don’t perform code signing on the app.
--adhoc-sign
Sign app with adhoc identity.
-i <identity> / --identity <identity>
The code signing identity to use when signing the app.
publish
COMING SOON
Uploads your application to a publication channel. By default, targets the current platform’s default output format,using that format’s default publication channel.
You may need to provide additional configuration details (e.g., authentication credentials), depending on the publicationchannel selected.
Usage
To publish the application artefacts for the current platform’s default output format to the default publication channel:
$ briefcase publish
To publish the application artefacts for a different platform:
$ briefcase publish <platform>
To publish the application artefacts for a specifif output format:
48 Chapter 2. Community
Briefcase Documentation, Release 0.3.8
$ briefcase publish <platform> <output format>
Options
The following options can be provided at the command line.
-c <channel> / --channel <channel>
Nominate a publication channel to use.
upgrade
Briefcase uses external tools to manage the process of packaging apps. Where possible, Briefcase will manage theprocess of obtaining those tools. This is currently done for
• WiX (used by the Windows MSI backend)
• linuxdeploy (used by the Linux AppImage backend)
• Java JDK (used by the Android backed)
• Android SDK (used by the Android backend)
Over time, it may be necessary to upgrade these tools. The upgrade command provides a way to perform theseupgrades.
If you are managing your own version of these tools (e.g., if you have downloaded a version of WiX and have set theWIX_HOME environment variable), you must manage any upgrades on your own.
Usage
To see what tools are currently being managed by Briefcase:
$ briefcase upgrade --list
To upgrade all the tools that are currently being managed by Briefcase:
$ briefcase upgrade
To upgrade a specific tool:
$ briefcase upgrade <tool_name>
2.4. Reference 49
Briefcase Documentation, Release 0.3.8
Options
The following options can be provided at the command line.
-l / --list
List the tools that are currently being managed by Briefcase.
2.4.3 Platform support
macOS
The default output format for macOS is an app.
Briefcase also supports creating an .Xcode project which in turn can be used to build an app.
Both output formats support packaging as a macOS DMG or as a standalone signed app bundle.
.app bundle
A macOS .app bundle is a collection of directory with a specific layout, and with some key metadata. If this structureand metadata exists, macOS treats the folder as an executable file, giving it an icon.
.app bundles can be copied around as if they are a single file. They can also be compressed to reduce their size fortransport.
By default, apps will be both signed and notarized when they are packaged.
The .app bundle is a distributable artefact. Alternatively, the .app bundle can be packaged as a .dmg that containsthe .app bundle. The default packaging format is .dmg.
Icon format
macOS .app bundles use .icns format icons.
Splash Image format
macOS .app bundles do not support splash screens or installer images.
Additional options
The following options can be provided at the command line when packaging macOS apps.
50 Chapter 2. Community
Briefcase Documentation, Release 0.3.8
--no-notarize
Do not submit the application for notarization. By default, apps will be submitted for notarization unless they havebeen signed with an ad-hoc signing identity.
Xcode project
Briefcase supports creating a full Xcode project for a macOS app. This project can then be used to build an actual appbundle, with the briefcase build command or directly from Xcode.
By default, apps will be both signed and notarized when they are packaged.
The Xcode project will produce a .app bundle is a distributable artefact. Alternatively, this .app bundle can bepackaged as a .dmg that contains the .app bundle. The default packaging format is .dmg.
Icon format
macOS Xcode projects use .png format icons. An application must provide icons of the following sizes:
• 16px
• 32px
• 64px
• 128px
• 256px
• 512px
• 1024px
Splash Image format
macOS Xcode projects do not support splash screens.
Additional options
The following options can be provided at the command line when packaging macOS apps.
--no-notarize
Do not submit the application for notarization. By default, apps will be submitted for notarization unless they havebeen signed with an ad-hoc signing identity.
2.4. Reference 51
Briefcase Documentation, Release 0.3.8
Windows
The default output format for Windows is an MSI Installer.
MSI Installer
An MSI installer is a common format used for the installation, maintenance, and removal of Windows software. Itcontains the files to be distributed, along with metadata supporting the files to be installed, including details such asregistry entries. It includes a GUI installer, and automated generation of the uninstallation sequence.
Briefcase uses the WiX Toolset to build installers. WiX, in turn, requires that .NET Framework 3.5 is enabled. Toensure .NET Framework 3.5 is enabled:
1. Open the Windows Control Panel
2. Traverse to Programs -> Programs and Features
3. Select “Turn Windows features On or Off”
4. Ensure that “.NET framework 3.5 (includes .NET 2.0 and 3.0)” is selected.
Icon format
MSI installers use .ico format icons.
Splash Image format
MSI installers do not support splash screens or installer images.
Application configuration
The following options can be added to the tool.briefcase.app.<appname>.windows section of your pyproject.toml file.
system_installer
Controls whether the app will be installed as a per-user or per-machine app. Per-machine apps are “system” apps,and require admin permissions to run the installer; however, they are installed once and shared between all users on acomputer.
If true the installer will attempt to install the app as a per-machine app, available to all users. Defaults to a per-userinstall.
52 Chapter 2. Community
Briefcase Documentation, Release 0.3.8
version_triple
Python and Briefcase allow any valid PEP440 version number as a version specifier. However, MSI installers require astrict integer triple version number. Many PEP440-compliant version numbers, such as “1.2”, “1.2.3b3”, and “1.2.3.4”,are invalid for MSI installers.
Briefcase will attempt to convert your version into a valid MSI value by extracting the first three parts of the mainseries version number (excluding pre, post and dev version indicators), padding with zeros if necessary:
• 1.2 becomes 1.2.0
• 1.2b4 becomes 1.2.0
• 1.2.3b3 becomes 1.2.3
• 1.2.3.4 becomes 1.2.3.
However, if you need to override this default value, you can define version_triple in your app settings. If provided,this value will be used in the MSI configuration file instead of the auto-generated value.
Features
Briefcase produced MSI installers do not require elevated privileges for installation; they default to per-user installs.The installer can be installed for all users using the CLI, with:
> msiexec.exe /i <msi-filename> MSIINSTALLPERUSER=""
Linux
The default output format for Linux is AppImage.
Linux AppImage
AppImage provides a way for developers to provide “native” binaries for Linux users. It allow packaging applicationsfor any common Linux based operating system, including Ubuntu, Debian, Fedora, and more. AppImages contain allthe dependencies that cannot be assumed to be part of each target system, and will run on most Linux distributionswithout further modifications.
Packaging binaries for Linux is complicated, because of the inconsistent library versions present on each distribution.An AppImage can be executed on any Linux distribution with a version of libc greater than or equal the version ofthe distribution where the AppImage was created.
To simplify the packaging process, Briefcase provides a pre-compiled Python support library. This support library wascompiled on Ubuntu 18.04, which means the AppImages build by Briefcase can be used on any Linux distribution ofabout the same age or newer - but those AppImages must be compiled on Ubuntu 18.04.
This means you have four options for using Briefcase to compile a Linux AppImage:
1. Run the version-sensitive parts of the build process inside Docker. This is the default behavior of Briefcase. Thisalso means that it is possible to build Linux binaries on any platform that can run Docker.
2. Install Ubuntu 18.04 on your own machine.
3. Find a cloud or CI provider that can provide you an Ubuntu 18.04 machine for build purposes. Github Actions,for example, provides Ubuntu 18.04 as a build option. Again, you’ll need to use the --no-docker commandline option.
2.4. Reference 53
Briefcase Documentation, Release 0.3.8
4. Build your own version of the BeeWare Python support libraries. If you take this approach, be aware that yourAppImage will only be as portable as the version of libc that is available on the distribution you use. If youbuild using Ubuntu 19.10, for example, you can expect that only people on the most recent versions of anotherdistribution will be able to run your AppImage.
Icon format
AppImages use .png format icons.
Splash Image format
AppImages do not support splash screens or installer images.
Additional options
The following options can be provided at the command line when producing AppImages.
--no-docker
Use native execution, rather than using Docker to start a container.
Application configuration
The following options can be added to the tool.briefcase.app.<appname>.linux section of your pyproject.toml file.
system_requires
A list of operating system packages that must be installed for the AppImage build to succeed. If a Docker build isrequested, this list will be passed to the Docker context when building the container for the app build. By default,entries should be Ubuntu 18.04 apt package requirements. For example,
system_requires = [‘libgirepository1.0-dev’, ‘libcairo2-dev’]
would make the GTK GI and Cairo operating system libraries available to your app.
If you see errors during briefcase build of the form:
Could not find dependency: libSomething.so.1
but the app works under briefcase dev, the problem may be an incomplete system_requires definition. Thebriefcase build process generates a new environment that is completely isolated from your development environ-ment, so if your app has any operating system dependencies, they must be listed in your system_requires definition.
54 Chapter 2. Community
Briefcase Documentation, Release 0.3.8
Runtime issues with AppImages
Packaging on Linux is a difficult problem - especially when it comes to binary libraries. The following are somecommon problems you may see, and ways that they can be mitigated.
ELF load command address/offset not properly aligned
The process of building an AppImage involves using a tool named linuxdeploy. linuxdeploy processes all thelibraries used by an app so that they can be relocated into the final packaged binary. Building a manylinux binarywheel involves a tool called auditwheel that performs a very similar process. Unfortunately, processing a binarywith linuxdeploy after it has been processed by auditwheel can result in a binary library that cannot be loaded atruntime.
This is particularly common when a module installed as a binary wheel has a dependency on external libraries. Forexample, Pillow is a Python library that contains a binary submodule; that submodule uses libpng, libtiff, andother system libraries for image manipulation. If you install Pillow from a manylinux wheel, you may see an errorsimilar to the following at runtime:
Traceback (most recent call last):File "/tmp/.mount_TestbewwDi98/usr/app/testbed/app.py", line 54, in maintest()
File "/tmp/.mount_TestbewwDi98/usr/app/testbed/linux.py", line 94, in test_pillowfrom PIL import Image
File "/tmp/.mount_TestbewwDi98/usr/app_packages/PIL/Image.py", line 132, in <module>from . import _imaging as core
ImportError: libtiff-d0580107.so.5.7.0: ELF load command address/offset not properly␣→˓aligned
This indicates that one of the libraries that has been included in the AppImage has become corrupted as a result ofdouble processing.
The solution is to ask Briefcase to install the affected library from source. This can be done by adding a "--no-binary"entry to the requires declaration for your app. For example, if your app includes Pillow as a requirement:
requires = ["pillow==9.1.0"]
You can force Briefcase to install Pillow from source by adding:
requires = ["pillow==9.1.0","--no-binary", "pillow",
]
Since the library will be installed from source, you also need to add any system requirements that are needed to compilethe binary library. For example, Pillow requires the development libraries for the various image formats that it uses:
system_requires = [... other system requirements ..."libjpeg-dev","libpng-dev","libtiff-dev",
]
If you are missing a system requirement, the call to briefcase build will fail with an error:
2.4. Reference 55
Briefcase Documentation, Release 0.3.8
error: subprocess-exited-with-error
× pip subprocess to install build dependencies did not run successfully.exit code: 1
> See above for output.
note: This error originates from a subprocess, and is likely not a problem with pip.>>> Return code: 1
Unable to install dependencies. This may be because one of yourdependencies is invalid, or because pip was unable to connectto the PyPI server.
You must add a separate --no-binary option for every binary library you want to install from source. For example,if your app also includes the cryptography library, and you want to install that library from source, you would add:
requires = ["pillow==9.1.0","cryptography==37.0.2","--no-binary", "pillow","--no-binary", "cryptography",
]
If you want to force all packages to be installed from source, you can add a single :all declaration:
requires = ["pillow==9.1.0","cryptography==37.0.2","--no-binary", ":all:",
]
The --no-binary declaration doesn’t need to be added to the same requires declaration that defines the require-ment. For example, if you have a library that is used on all platforms, the declaration will probably be in the top-levelrequires, not the platform-specific requires. If you add --no-binary in the top-level requires, the use of a binarywheel would be prevented on all platforms. To avoid this, you can add the requirement in the top-level requires, butadd the --no-binary declaration to the linux-specific requirements:
[tool.briefcase.app.helloworld]formal_name = "Hello World"...requires = [
"pillow",]
[tool.briefcase.app.helloworld.linux]requires = [
"--no-binary", "pillow"]
56 Chapter 2. Community
Briefcase Documentation, Release 0.3.8
iOS
When generating an iOS project, Briefcase produces an Xcode project.
Icon format
iOS projects use .png format icons. An application must provide icons of the following sizes:
• 20px
• 29px
• 40px
• 58px
• 60px
• 76px
• 80px
• 87px
• 120px
• 152px
• 167px
• 180px
• 1024px
Splash Image format
iOS projects use .png format splash screen images. A splash screen should be a square, transparent image, providedin the following sizes:
• 1024px
• 2048px
• 3072px
You can specify a background color for the splash screen using the splash_background_color configuration setting.
iOS projects do not support installer images.
Additional options
The following options can be provided at the command line when producing iOS projects
2.4. Reference 57
Briefcase Documentation, Release 0.3.8
build
-d <device> / --device <device>
The device simulator to target. Can be either a UDID, a device name (e.g., "iPhone 11"), or a device name and OSversion ("iPhone 11::13.3").
run
The device simulator to target. Can be either a UDID, a device name (e.g., "iPhone 11"), or a device name and OSversion ("iPhone 11::13.3").
Android
When generating an Android project, Briefcase produces a Gradle project.
Icon format
Android projects use .png format icons, in round and square variants. An application must provide the icons in thefollowing sizes, for 2 variants:
• round:
– 48px
– 72px
– 96px
– 144px
– 192px
• square:
– 48px
– 72px
– 96px
– 144px
– 192px
Splash Image format
Android projects use .png format splash screen images. A splash screen should be a square image with a transparentbackground. It must be specified in a range of sizes and variants, to suit different possible device sizes and devicedisplay densities:
• normal (typical phones; up to 480 density-independent pixels):
– 320px
– 480px (hdpi)
– 640px (xhdpi)
58 Chapter 2. Community
Briefcase Documentation, Release 0.3.8
– 1280px (xxxhdpi)
• large (large format phones, or phone-tablet “phablet” hybrids; up to 720 density-indpendent pixels):
– 480px
– 720px (hdpi)
– 960px (xhdpi)
– 1920px (xxxhdpi)
• xlarge (tablets; larger than 720 density-independent pixels)
– 720px
– 1080px (hdpi)
– 1440px (xhdpi)
– 2880px (xxxhdpi)
Consult the Android documentation for more details on devices, sizes, and display densities. This list of commondevices with their sizes and DPI may also be helpful.
You can specify a background color for the splash screen using the splash_background_color configuration setting.
Android projects do not support installer images.
Application configuration
The following options can be added to the tool.briefcase.app.<appname>.android section of your pyproject.toml file.
version_code
In addition to a version number, Android projects require a version “code”. This code is an integer version of yourversion number that must increase with every new release pushed to the Play Store.
Briefcase will attempt to generate a version code by combining the version number with the build number. It does thisby using each part of the main version number (padded to 3 digits if necessary) and the build number as 2 significantdigits of the final version code:
• Version 1.0, build 1 becomes 1000001 (i.e, 1, 00, 00, 01)
• Version 1.2, build 37 becomes 1020037 (i.e., 1, 02, 00, 37)
• Version 1.2.37, build 42 becomes 1023742 (i.e, 1, 02, 37, 42)
• Version 2020.6, build 4 becomes 2020060004 (i.e., 2020, 06, 00, 04)
If you want to manually specify a version code by defining version_code in your application configuration. If pro-vided, this value will override any auto-generated value.
2.4. Reference 59
Briefcase Documentation, Release 0.3.8
Additional options
The following options can be provided at the command line when producing Android projects
build
-d <device> / --device <device>
The device simulator to target. Can be either a device ID, or a device name.
run
The device simulator to target. Can be either a device ID, or a device name.
60 Chapter 2. Community
Related Documents