Blendshape & Tails EULA & Manual ZADE Matumit Sombunjaroen V1.1 2015/01/29

Welcome message from author
This document is posted to help you gain knowledge. Please leave a comment to let me know what you think about it! Share it to your friends and learn new things together.
Transcript
Blendshape & Tails
EULA & Manual
ZADE
Matumit Sombunjaroen
V1.1 2015/01/29
Packages
Character [Juno JuneBride] Free Package
Character [Juno JuneBride]
Motions
Substance Materials and Scripts
Blendshape & Tails Package
All of the Contents in Free Package
BlendShape Controller Components
Tail Control Components

License
The Packages provided are licensed under Unity`s
Asset Store Terms of Service and EULA
http://unity3d.com/legal/as_terms
Author: Matumit Sombunjaroen
www.zodiac-alliance.com

Juno JuneBride
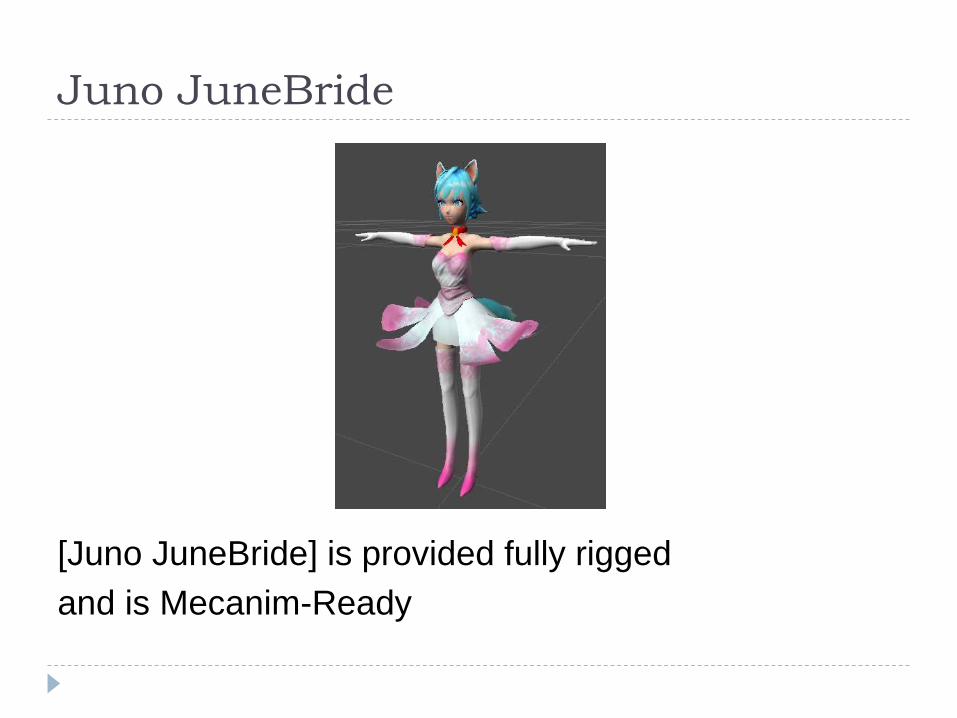
Juno JuneBride
[Juno JuneBride] is provided fully rigged
and is Mecanim-Ready
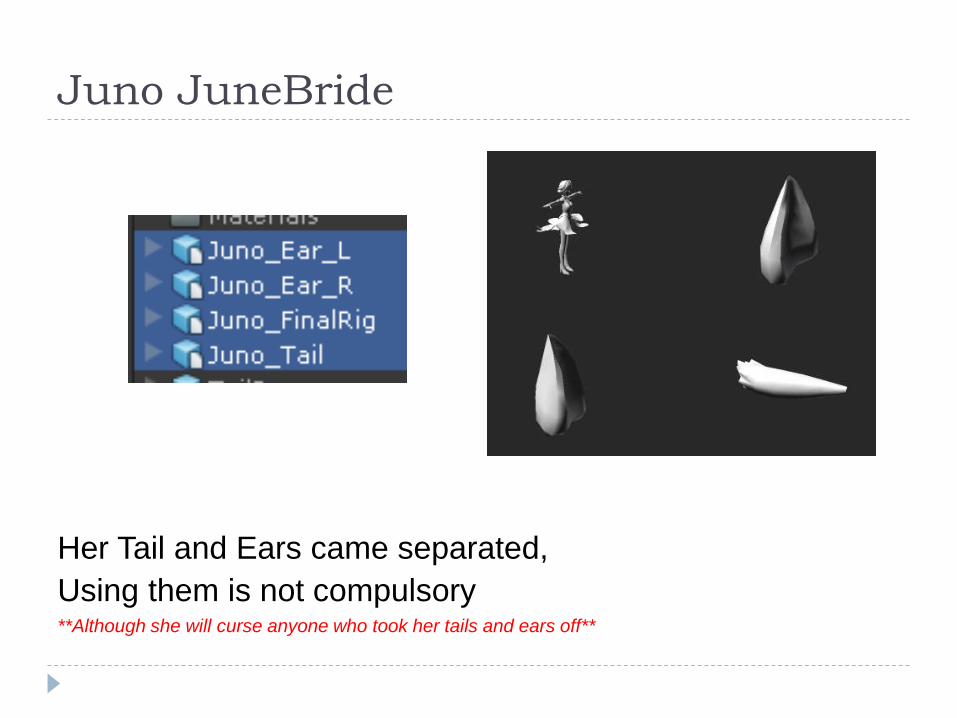
Juno JuneBride
Her Tail and Ears came separated,
Using them is not compulsory**Although she will curse anyone who took her tails and ears off**

Juno JuneBride
Textures came provided in Substance.
Using Substance Material is not Compulsory
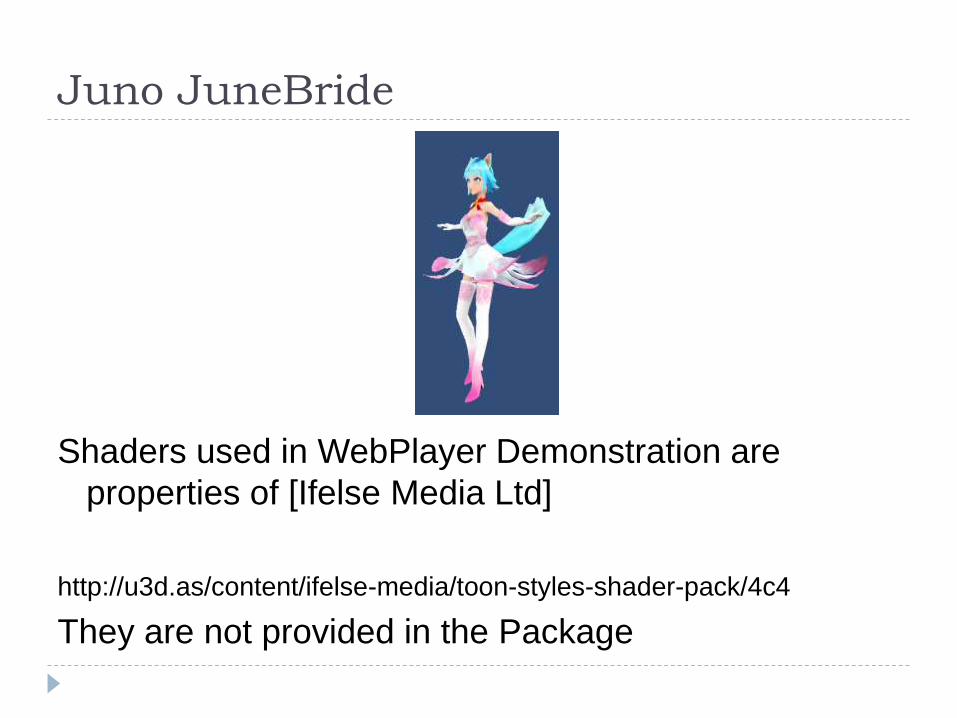
Juno JuneBride
Shaders used in WebPlayer Demonstration are
properties of [Ifelse Media Ltd]
http://u3d.as/content/ifelse-media/toon-styles-shader-pack/4c4
They are not provided in the Package

BlendShape
Controller

Prepare Mesh
The Component require Mesh with BlendShapes built-in to it.
Please refer to your 3DCG software`s manual on how to export
BlendShapes

Select Mesh
The Component can be attached to any Transform.
1. Add Character`s transform to Ref Transform
1. If this is null, the transform the component is attached to will be use instead.
2. Type in the name of the Mesh, Click [Get Skinned Mesh]
3. Needed SkinnedMesh will be reference automatically.
1. It is possible to manually select the SkinnedMesh directly instead.
**Mesh that is
going to get
BlendShape**

Index Range
Index Range will determine which BlendShape Node will be controlled
Setup Index Range as needed, then click [Setup BlendShape Indexed]
For Juno,
0-5 are used for Eyes
6-9 are used for Mouth

Index Range
The Control for each Node will be setup
Alternatively, it is possible to
manually change the index here
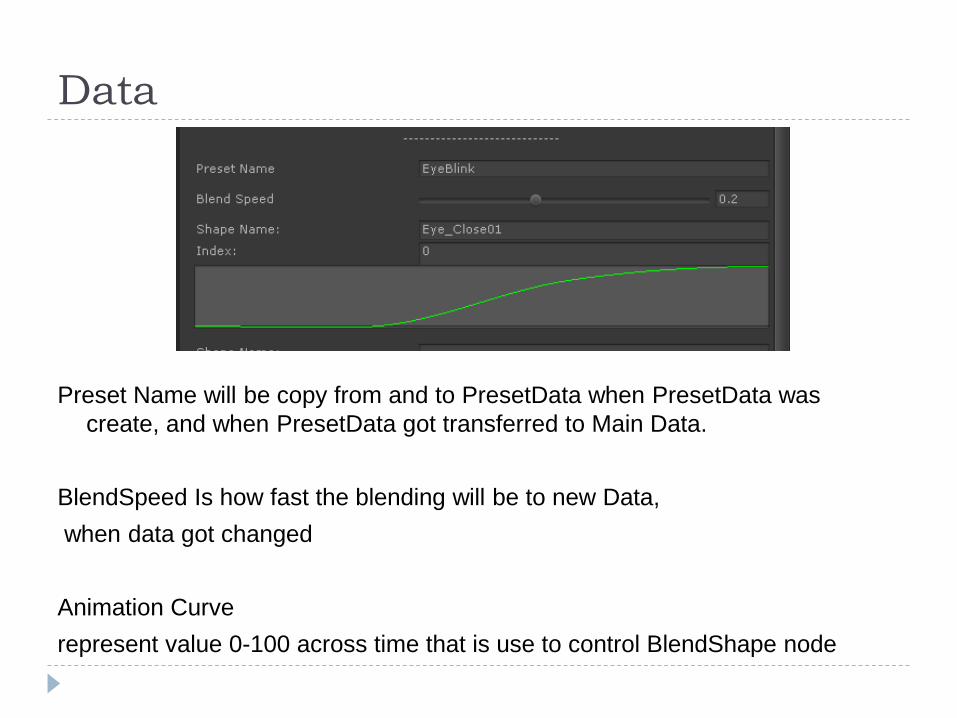
Data
Preset Name will be copy from and to PresetData when PresetData was
create, and when PresetData got transferred to Main Data.
BlendSpeed Is how fast the blending will be to new Data,
when data got changed
Animation Curve
represent value 0-100 across time that is use to control BlendShape node

Presets
Click [Create Preset Data from Current Value] will create a Preset
Scriptable Objects inside a designated file path
If there is any Preset file inside any
Resource folder,
that has [New] in its name,
the file will be override instead.

Set Data from Presets from Editor
To Set Data via Editor, add Preset Data to PresetList,
Choose PresetIndex, then click on [Copy Preset Data to Target]
Preset Data from ScriptableObject will be transfer to current data
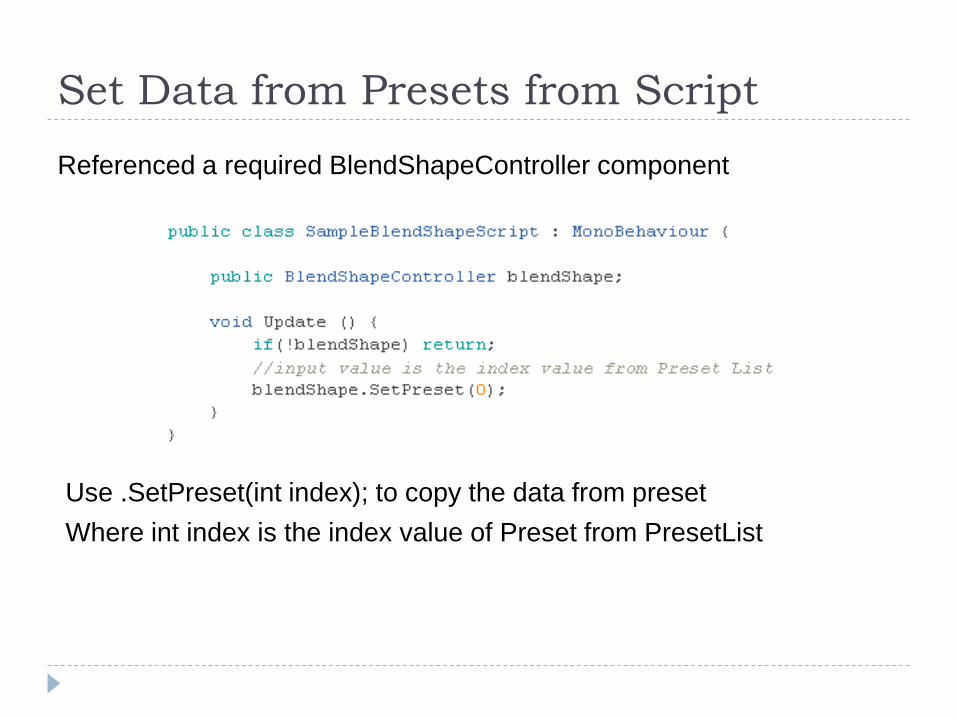
Set Data from Presets from Script
Referenced a required BlendShapeController component
Use .SetPreset(int index); to copy the data from preset
Where int index is the index value of Preset from PresetList

Tail Control

Prepare Mesh
Tail_Base is the root of Tail Transform,
[IT IS EXPECTED TO STAY STILL AND WILL NOT BE MOVED BY SCRIPT]
Tail_1 to Tail_n must contain sequential name for SetupEditor to work
Interval distance between each Transforms are expected to be the same
Tail_Bas
e
Tail_1 Tail_2 Tail_n
d d d
Mesh
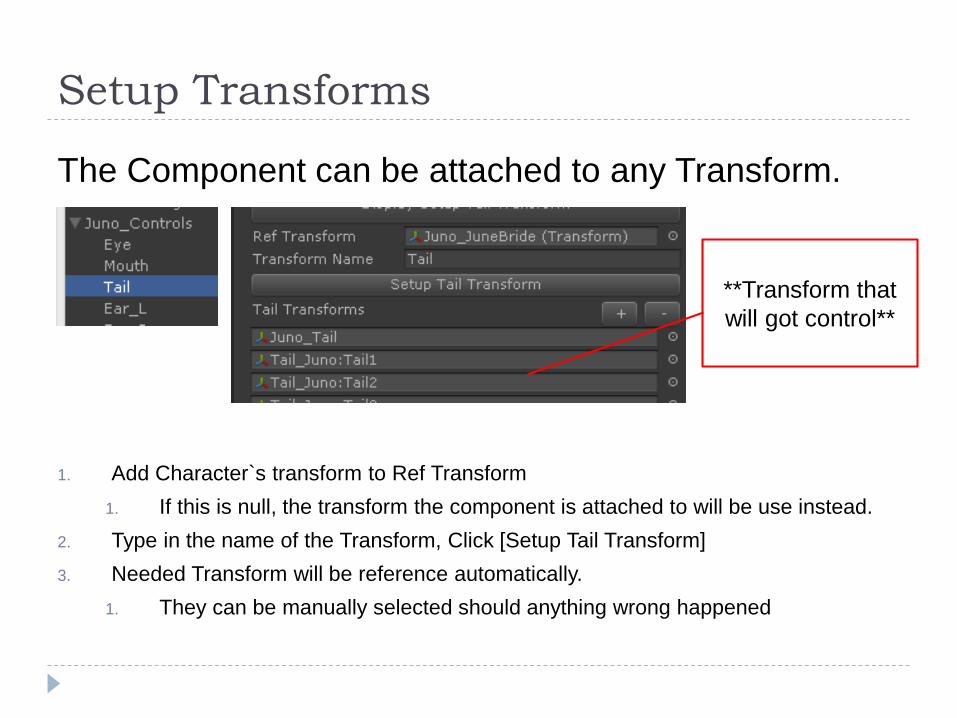
Setup Transforms
The Component can be attached to any Transform.
1. Add Character`s transform to Ref Transform
1. If this is null, the transform the component is attached to will be use instead.
2. Type in the name of the Transform, Click [Setup Tail Transform]
3. Needed Transform will be reference automatically.
1. They can be manually selected should anything wrong happened
**Transform that
will got control**

Data
Oscillation Mode => Maintain BendValue or Oscillate between Range
BendValue => The Rotation Value that the Transform will rotate to
Falloff => value of Tail_n+1 = Tail_n*FallOff
Oscillate Range => will not be use if Oscillation Mode is Still
Determine the Ranges value that the Transform rotation will oscillate
Speed & Cycle Offset => How fast the rotation will be made

Presets
Click [Create Preset Data from Current Value] will create a Preset
Scriptable Objects inside a designated file path
If there is any Preset file inside any
Resource folder,
that has [New] in its name,
the file will be override instead.

Set Data from Presets from Editor
To Set Data via Editor, add Preset Data to PresetList,
Choose PresetIndex, then click on [Copy Preset Data to Target]
Preset Data from ScriptableObject will be transfer to current data

Set Data from Presets from Script
Referenced a required BlendShapeController component
Use .SetPreset(int index); to copy the data from preset
Where int index is the index value of Preset from PresetList
Related Documents