Welcome message from author
This document is posted to help you gain knowledge. Please leave a comment to let me know what you think about it! Share it to your friends and learn new things together.
Transcript


Contents
1 64-bit or 32-bit installation 5
2 Introduction 72.1 Purpose . . . . . . . . . . . . . . . . . . . . . . . . . . . . . . . . . . . . . . . . . . 72.2 Target audience . . . . . . . . . . . . . . . . . . . . . . . . . . . . . . . . . . . . . 72.3 Overview . . . . . . . . . . . . . . . . . . . . . . . . . . . . . . . . . . . . . . . . . 7
3 System requirements 93.1 Hardware requirements . . . . . . . . . . . . . . . . . . . . . . . . . . . . . . . . . 9
3.1.1 Minimum hardware requirements . . . . . . . . . . . . . . . . . . . . . . . 93.1.2 Recommended hardware configuration . . . . . . . . . . . . . . . . . . . . 9
3.2 Operating system . . . . . . . . . . . . . . . . . . . . . . . . . . . . . . . . . . . . 103.3 Microsoft Visual C++ 2012 Redistributable . . . . . . . . . . . . . . . . . . . . . . 103.4 Permissions . . . . . . . . . . . . . . . . . . . . . . . . . . . . . . . . . . . . . . . 113.5 Security software . . . . . . . . . . . . . . . . . . . . . . . . . . . . . . . . . . . . 11
3.5.1 Anti-Virus . . . . . . . . . . . . . . . . . . . . . . . . . . . . . . . . . . . . . 113.5.2 Firewall and proxy servers . . . . . . . . . . . . . . . . . . . . . . . . . . . 11
4 Installation procedure 134.1 Installing a new BIONUMERICS instance . . . . . . . . . . . . . . . . . . . . . . . 13
4.1.1 Existing instances detected . . . . . . . . . . . . . . . . . . . . . . . . . . . 134.1.2 Prerequisites . . . . . . . . . . . . . . . . . . . . . . . . . . . . . . . . . . . 144.1.3 Welcome dialog . . . . . . . . . . . . . . . . . . . . . . . . . . . . . . . . . 144.1.4 Software End User License Agreement . . . . . . . . . . . . . . . . . . . . 144.1.5 Customer information . . . . . . . . . . . . . . . . . . . . . . . . . . . . . . 154.1.6 Setup Type . . . . . . . . . . . . . . . . . . . . . . . . . . . . . . . . . . . . 164.1.7 Choose destination location . . . . . . . . . . . . . . . . . . . . . . . . . . 164.1.8 Select features . . . . . . . . . . . . . . . . . . . . . . . . . . . . . . . . . . 184.1.9 NetKey+ connection settings . . . . . . . . . . . . . . . . . . . . . . . . . . 194.1.10 Confirm installation . . . . . . . . . . . . . . . . . . . . . . . . . . . . . . . 204.1.11 NetKey+ configuration . . . . . . . . . . . . . . . . . . . . . . . . . . . . . . 204.1.12 Setup INI XML file . . . . . . . . . . . . . . . . . . . . . . . . . . . . . . . . 21
4.2 Updating a BIONUMERICS instance . . . . . . . . . . . . . . . . . . . . . . . . . . 214.2.1 Welcome dialog . . . . . . . . . . . . . . . . . . . . . . . . . . . . . . . . . 214.2.2 Software End User License Agreement . . . . . . . . . . . . . . . . . . . . 224.2.3 Customer information . . . . . . . . . . . . . . . . . . . . . . . . . . . . . . 234.2.4 Choose destination location . . . . . . . . . . . . . . . . . . . . . . . . . . 234.2.5 Select features . . . . . . . . . . . . . . . . . . . . . . . . . . . . . . . . . . 234.2.6 NetKey+ connection settings . . . . . . . . . . . . . . . . . . . . . . . . . . 264.2.7 Confirm update . . . . . . . . . . . . . . . . . . . . . . . . . . . . . . . . . 26
4.3 Maintenance installation . . . . . . . . . . . . . . . . . . . . . . . . . . . . . . . . . 274.3.1 Select instance to maintain . . . . . . . . . . . . . . . . . . . . . . . . . . . 274.3.2 Maintenance options . . . . . . . . . . . . . . . . . . . . . . . . . . . . . . 27
iii
4.3.3 Modify maintenance mode . . . . . . . . . . . . . . . . . . . . . . . . . . . 284.3.4 Repair maintenance mode . . . . . . . . . . . . . . . . . . . . . . . . . . . 294.3.5 Remove maintenance mode . . . . . . . . . . . . . . . . . . . . . . . . . . 29
4.4 Installing Protection Keys . . . . . . . . . . . . . . . . . . . . . . . . . . . . . . . . 304.4.1 Protection Key Types . . . . . . . . . . . . . . . . . . . . . . . . . . . . . . 304.4.2 Install Protection Key Driver . . . . . . . . . . . . . . . . . . . . . . . . . . 304.4.3 Activate Sentinel HASP SL key . . . . . . . . . . . . . . . . . . . . . . . . . 31
4.5 Setup log . . . . . . . . . . . . . . . . . . . . . . . . . . . . . . . . . . . . . . . . . 374.6 Silent installation . . . . . . . . . . . . . . . . . . . . . . . . . . . . . . . . . . . . . 39
4.6.1 Purpose . . . . . . . . . . . . . . . . . . . . . . . . . . . . . . . . . . . . . 394.6.2 Procedure . . . . . . . . . . . . . . . . . . . . . . . . . . . . . . . . . . . . 394.6.3 Setup INI XML file format . . . . . . . . . . . . . . . . . . . . . . . . . . . . 40
4.7 Silent un-installation . . . . . . . . . . . . . . . . . . . . . . . . . . . . . . . . . . . 414.7.1 Purpose . . . . . . . . . . . . . . . . . . . . . . . . . . . . . . . . . . . . . 414.7.2 Procedure . . . . . . . . . . . . . . . . . . . . . . . . . . . . . . . . . . . . 41
5 NetKey+ configuration 435.1 Introduction . . . . . . . . . . . . . . . . . . . . . . . . . . . . . . . . . . . . . . . . 435.2 Installing and starting the NetKey+ service on the server . . . . . . . . . . . . . . 435.3 Configuring licenses . . . . . . . . . . . . . . . . . . . . . . . . . . . . . . . . . . . 475.4 Running sessions on the clients . . . . . . . . . . . . . . . . . . . . . . . . . . . . 515.5 Monitoring sessions . . . . . . . . . . . . . . . . . . . . . . . . . . . . . . . . . . . 525.6 Logging data . . . . . . . . . . . . . . . . . . . . . . . . . . . . . . . . . . . . . . . 535.7 Resetting the NetKey+ settings . . . . . . . . . . . . . . . . . . . . . . . . . . . . . 545.8 Repairing the NetKey+ service . . . . . . . . . . . . . . . . . . . . . . . . . . . . . 555.9 Overview of configuration rights . . . . . . . . . . . . . . . . . . . . . . . . . . . . 555.10 Usage statistics . . . . . . . . . . . . . . . . . . . . . . . . . . . . . . . . . . . . . 55
5.10.1 Usage information parse tool . . . . . . . . . . . . . . . . . . . . . . . . . . 555.10.2 Example . . . . . . . . . . . . . . . . . . . . . . . . . . . . . . . . . . . . . 57
6 Installation process 616.1 Overview . . . . . . . . . . . . . . . . . . . . . . . . . . . . . . . . . . . . . . . . . 616.2 Setup dialog list . . . . . . . . . . . . . . . . . . . . . . . . . . . . . . . . . . . . . 616.3 Setup processes . . . . . . . . . . . . . . . . . . . . . . . . . . . . . . . . . . . . . 62
6.3.1 Read command line options . . . . . . . . . . . . . . . . . . . . . . . . . . 626.3.2 Read global variables . . . . . . . . . . . . . . . . . . . . . . . . . . . . . . 626.3.3 Write global variables . . . . . . . . . . . . . . . . . . . . . . . . . . . . . . 636.3.4 Save Setup INI XML file . . . . . . . . . . . . . . . . . . . . . . . . . . . . . 636.3.5 Read requested features . . . . . . . . . . . . . . . . . . . . . . . . . . . . 636.3.6 Save Setup Log . . . . . . . . . . . . . . . . . . . . . . . . . . . . . . . . . 636.3.7 OnMoveData . . . . . . . . . . . . . . . . . . . . . . . . . . . . . . . . . . . 636.3.8 Feature functions . . . . . . . . . . . . . . . . . . . . . . . . . . . . . . . . 63
6.4 Setup Process list . . . . . . . . . . . . . . . . . . . . . . . . . . . . . . . . . . . . 66
7 Command line options 697.1 Running BIONUMERICS from the command line . . . . . . . . . . . . . . . . . . . 697.2 Running the startup program from the command line . . . . . . . . . . . . . . . . . 70
8 Granting access to BIONUMERICS databases 73
iv
NOTES
SUPPORT BY APPLIED MATHS
While the best efforts have been made in preparing this manuscript, no liability is assumed by theauthors with respect to the use of the information provided.
Applied Maths will provide support to research laboratories in developing new and highly special-ized applications, as well as to diagnostic laboratories where speed, efficiency and continuity areof primary importance. Our software thanks its current status for a part to the response of manycustomers worldwide. Please contact us if you have any problems or questions concerning theuse of BIONUMERICS R©, or suggestions for improvement, refinement or extension of the softwareto your specific applications:
Applied Maths NV Applied Maths, Inc.Keistraat 120 11940 Jollyville Road, Suite 115N9830 Sint-Martens-Latem Austin, Texas 78759Belgium U.S.A.PHONE: +32 9 2222 100 PHONE: +1 512-482-9700FAX: +32 9 2222 102 FAX: +1 512-482-9708E-MAIL: [email protected] E-MAIL: [email protected]: https://www.applied-maths.com
LIMITATIONS ON USE
The BIONUMERICS R© software, its plugin tools and their accompanying guides are subject to theterms and conditions outlined in the License Agreement. The support, entitlement to upgradesand the right to use the software automatically terminate if the user fails to comply with any of thestatements of the License Agreement. No part of this guide may be reproduced by any meanswithout prior written permission of the authors.
Copyright c©1998-2020, Applied Maths NV. All rights reserved.
BIONUMERICS R© is a registered trademark of Applied Maths NV. All other product names ortrademarks are the property of their respective owners.
2
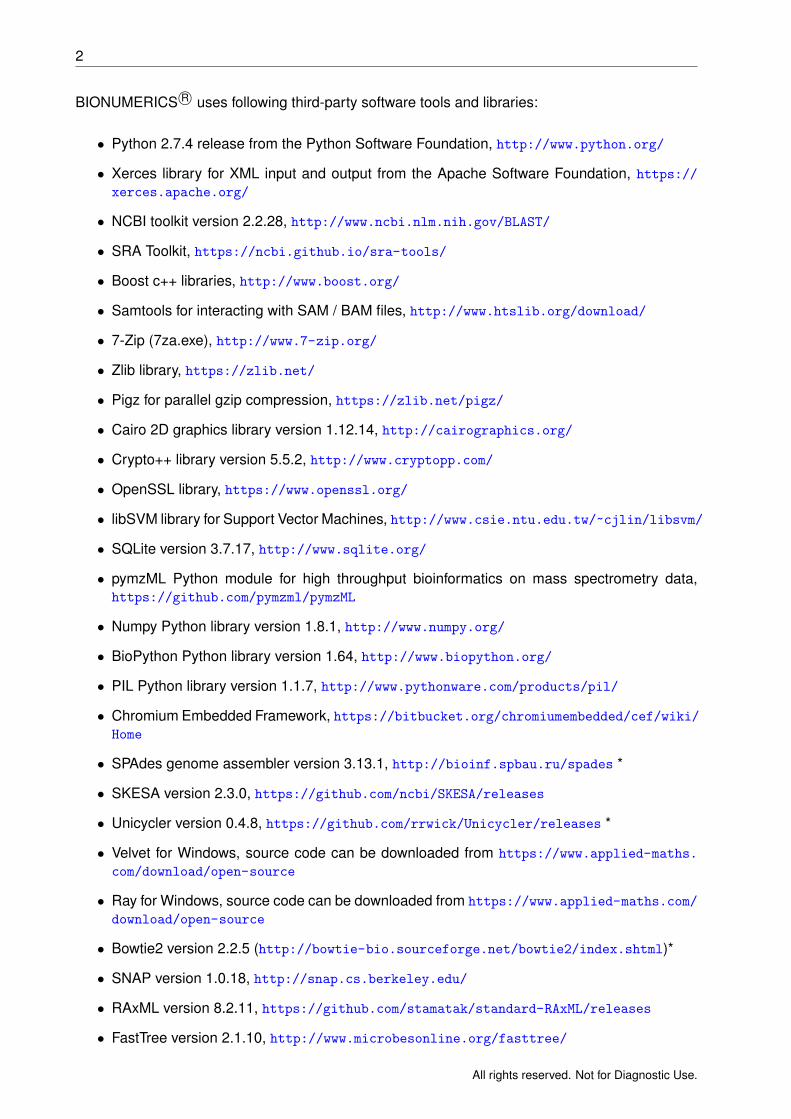
BIONUMERICS R© uses following third-party software tools and libraries:
• Python 2.7.4 release from the Python Software Foundation, http://www.python.org/
• Xerces library for XML input and output from the Apache Software Foundation, https://xerces.apache.org/
• NCBI toolkit version 2.2.28, http://www.ncbi.nlm.nih.gov/BLAST/
• SRA Toolkit, https://ncbi.github.io/sra-tools/
• Boost c++ libraries, http://www.boost.org/
• Samtools for interacting with SAM / BAM files, http://www.htslib.org/download/
• 7-Zip (7za.exe), http://www.7-zip.org/
• Zlib library, https://zlib.net/
• Pigz for parallel gzip compression, https://zlib.net/pigz/
• Cairo 2D graphics library version 1.12.14, http://cairographics.org/
• Crypto++ library version 5.5.2, http://www.cryptopp.com/
• OpenSSL library, https://www.openssl.org/
• libSVM library for Support Vector Machines, http://www.csie.ntu.edu.tw/~cjlin/libsvm/
• SQLite version 3.7.17, http://www.sqlite.org/
• pymzML Python module for high throughput bioinformatics on mass spectrometry data,https://github.com/pymzml/pymzML
• Numpy Python library version 1.8.1, http://www.numpy.org/
• BioPython Python library version 1.64, http://www.biopython.org/
• PIL Python library version 1.1.7, http://www.pythonware.com/products/pil/
• Chromium Embedded Framework, https://bitbucket.org/chromiumembedded/cef/wiki/Home
• SPAdes genome assembler version 3.13.1, http://bioinf.spbau.ru/spades *
• SKESA version 2.3.0, https://github.com/ncbi/SKESA/releases
• Unicycler version 0.4.8, https://github.com/rrwick/Unicycler/releases *
• Velvet for Windows, source code can be downloaded from https://www.applied-maths.
com/download/open-source
• Ray for Windows, source code can be downloaded from https://www.applied-maths.com/
download/open-source
• Bowtie2 version 2.2.5 (http://bowtie-bio.sourceforge.net/bowtie2/index.shtml)*
• SNAP version 1.0.18, http://snap.cs.berkeley.edu/
• RAxML version 8.2.11, https://github.com/stamatak/standard-RAxML/releases
• FastTree version 2.1.10, http://www.microbesonline.org/fasttree/
All rights reserved. Not for Diagnostic Use.
3
• CFSAN SNP pipeline version 0.8.2, https://github.com/CFSAN-Biostatistics/snp-pipeline*
• Prokka version 1.12, https://github.com/tseemann/prokka *
*: On Calculation Engine only
All rights reserved. Not for Diagnostic Use.

Chapter 1
64-bit or 32-bit installation
BIONUMERICS can only be downloaded from the Applied Maths website as 64-bit version setupfile, as this provides the best performance when working with large datasets. Running the down-loaded bionumerics 8.0 <DetailedVersion> setup x64.exe file will install the 64-bit version ofBIONUMERICS on a supported 64-bit Windows operating system.
On a 32-bit Windows operating system, the 32-bit BIONUMERICS version should be installed,which is available on request.
On 64-bit Windows systems, it is recommended to install the 64-bit BIONUMERICS version. How-ever, since BIONUMERICS 64-bit is not compatible with MS Access (see the Reference manual,Chapter The BIONUMERICS relational database), it is not recommended to install the 64-bitversion in any of the following scenarios:
• Data from one or more external MS Access databases should be imported in a BIONUMER-ICS database on a routine basis.
• When using an MS Access connected database in BIONUMERICS that is shared by otherapplications (e.g. data in the database are manipulated directly in MS Access, via a webservice, etc.).
When in doubt, please contact the BIONUMERICS support team ([email protected]).
Please note that the 64-bit BIONUMERICS version requires 64-bit ODBC drivers whenusing relational databases such as MS SQL Server, MySQL or Oracle (see the Refer-ence manual, Chapter The BIONUMERICS relational database).

6 1. 64-bit or 32-bit installation
All rights reserved. Not for Diagnostic Use.
Chapter 2
Introduction
2.1 Purpose
The purpose of this document is to provide understandable and detailed information on how toinstall the various features of BIONUMERICS. These features include the application software,the NetKey+ server program and the Sentinel drivers.
2.2 Target audience
The target audience for this document is anyone who is responsible for installing and configur-ing BIONUMERICS or the NetKey+ licensing server program. This document assumes that theperson who will install BIONUMERICS or the NetKey+ service has a basic knowledge on how toadminister a Windows client computer.
2.3 Overview
The BIONUMERICS Setup program is an InstallShield installation wizard that allows a person withAdministrator privileges to install the BIONUMERICS application or the NetKey+ licensing serverprogram on a target computer. In addition, the Setup program will optionally install or upgrade theSentinel and HASP drivers.
The BIONUMERICS Setup package is regularly updated and can be delivered on DVD, or canbe downloaded from the Applied Maths website (https://www.applied-maths.com/download/software).

8 2. Introduction
All rights reserved. Not for Diagnostic Use.
Chapter 3
System requirements
3.1 Hardware requirements
3.1.1 Minimum hardware requirements
The minimum hardware requirements for running the BIONUMERICS application are the cumula-tive requirements needed to run the Operating System, the BIONUMERICS application and anythird-party software that will run concurrently (e.g. Microsoft Office).
The typical minimum hardware requirements for a computer running Windows Vista, MicrosoftOffice 2010 and the BIONUMERICS application are:
• Processor: 2 gigahertz (GHz) processor or higher
• Processor Type: Intel Core i5 or higher compatible processor, 64-bit architecture
• Memory: 8 GB or higher
• Hard disk: 2 GB of free disk space (application files only)
• Display: WXGA+ (1440 x 900) or higher resolution monitor, True Color (32 bit)
• USB port: Depending on the license type a free USB port may be required
For standalone licenses, each computer that will run BIONUMERICS must have an available USBport for connecting the Sentinel hardware security key. For network licenses, the computer thatwill be running the NetKey+ server program must have a free USB port for attaching the hardwaresecurity key. Internet licenses do not require a hardware security key, hence an USB port is notneeded.
A 64-bit processor and Windows version are required for systems with more than 4 GB of RAMinstalled.
The actual hardware requirements will largely depend on the features that will be usedin BIONUMERICS, the database platform used to store the BIONUMERICS data andthe size of the data.
3.1.2 Recommended hardware configuration
The recommended hardware configuration for a computer running the latest Windows and Officeversions, and the BIONUMERICS application are:
10 3. System requirements
• Processor: 2.6 gigahertz (GHz) processor or higher
• Processor Type: Intel Core i7 or higher compatible processor, 64-bit architecture
• Memory: 16 GB or higher
• Hard disk: Solid state hard drive (SSD) with 2 GB of free disk space (application files only)
• Display: Full HD display (1920 x 1080) or higher resolution monitor, True Color (32 bit)
• USB port: Depending on the license type a free USB port may be required
A recent graphics card with dedicated video memory is recommended.
A more powerful system shall be required should the user want to make use of thelocal calculation engine (see the WGS tools plugin, Chapter The Calculation Engine),especially a minimum of 32 GB RAM memory and a much larger disk storage for datadownloads and temporary file storage (48 GB recommended but depending entirely onusage).
3.2 Operating system
Generally, Applied Maths will support installing BIONUMERICS on Windows operating systemversions for which the Microsoft Extended Support Phase (see https://support.microsoft.
com/en-us/lifecycle/search) has not been retired. This will allow you to obtain support andsecurity updates from Microsoft for the target operating system.
• Windows 10
• Windows 8.1
• Windows Server 2019
• Windows Server 2016
• Windows Server 2012 R2
Applied Maths recommends installing BIONUMERICS on a workstation or server with the latestMicrosoft service packs installed.
The NetKey+ licensing server program should preferably be installed on a computer running Win-dows Server 2019, 2016 or 2012 R2 with the latest service pack and security updates installed.If a Windows Server computer is not available, then the NetKey+ program can be installed on aWindows 8.1 or later client operating system.
3.3 Microsoft Visual C++ 2012 Redistributable
The Setup will install the Microsoft Visual C++ 2012 Redistributable Package on the target com-puter prior to installing any application files. The redistributable is required to be able to run C++applications like BIONUMERICS.
On 32-bit computers only the x86 version will be installed. On 64-bit computers the x86 and x64version of the Microsoft Visual C++ 2012 Redistributable Package will be installed.
All rights reserved. Not for Diagnostic Use.
3.4. Permissions 11
3.4 Permissions
The user running the BIONUMERICS Setup package must have full Administrator privileges onthe computer(s) where the Setup program will run. In addition the user must have MODIFY NTFSfolder permissions and FULL CONTROL share permissions (if applicable) on the database homedirectory, for example when this folder will be located on a file server and will be accessed via afile share.
3.5 Security software
3.5.1 Anti-Virus
To optimize the performance of the BIONUMERICS Setup program it is recommended to tem-porarily disable the real-time protection or on-access scanning features while running the installer.
Anti-virus software may also affect the performance of the BIONUMERICS application. If younotice a significant difference in responsiveness when the anti-virus tool is enabled compared towhen the tool is disabled, it may be recommended to exclude the anti-virus tool from scanning theBIONUMERICS executables (bnstart.exe and bn.exe), the DLL and BXT sub-folders and specificfile extensions (*.dll, *.mdb, *.bpl) in the application and database folders.
In addition, the anti-virus software must be properly configured to be compatible with the databaseplatform used to host the BIONUMERICS databases. Most database software vendors require thatthe directories containing data and log files are excluded from anti-virus scanning.
3.5.2 Firewall and proxy servers
For BIONUMERICS internet and evaluation licenses, network filtering software and firewall de-vices may need to be configured to allow access to TCP port 80 on the Applied Maths licenseservers.
Currently, the following license servers are active to verify internet licenses:
• license1.applied-maths.com (81.246.4.66)
• license2.applied-maths.com (81.246.4.69)
• license3.applied-maths.com (71.42.72.154)
• license4.applied-maths.com (71.42.72.154)
The BIONUMERICS application requires access to the above internet domain names and publicIP addresses to be able to validate internet and evaluation licenses. Note that the IP addresses ofthe license servers may change in the future, hence firewall exception rules based on the internetdomain name should be preferred.
In addition, several BIONUMERICS plugins require access to specific internet domains to be ableto download relevant data:
• .applied-maths.com
• .pubmlst.org (for the MLST online plugin)
All rights reserved. Not for Diagnostic Use.
12 3. System requirements
• .pasteur.fr (for the MLST online plugin)
• .mlst.ucc.ie (for the MLST online plugin)
• .ridom.de (for the Spa typing plugin)
If applicable for your configuration, you may need to grant the BIONUMERICS application internetaccess to the above domain names.
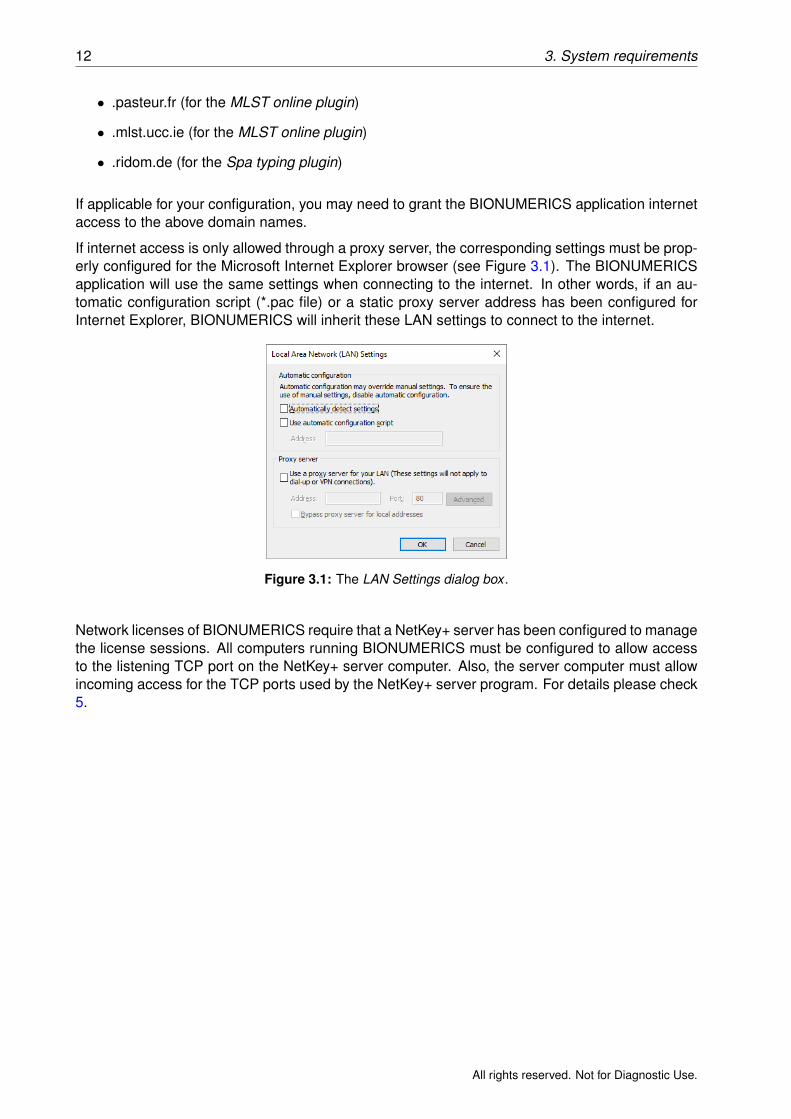
If internet access is only allowed through a proxy server, the corresponding settings must be prop-erly configured for the Microsoft Internet Explorer browser (see Figure 3.1). The BIONUMERICSapplication will use the same settings when connecting to the internet. In other words, if an au-tomatic configuration script (*.pac file) or a static proxy server address has been configured forInternet Explorer, BIONUMERICS will inherit these LAN settings to connect to the internet.
Figure 3.1: The LAN Settings dialog box .
Network licenses of BIONUMERICS require that a NetKey+ server has been configured to managethe license sessions. All computers running BIONUMERICS must be configured to allow accessto the listening TCP port on the NetKey+ server computer. Also, the server computer must allowincoming access for the TCP ports used by the NetKey+ server program. For details please check5.
All rights reserved. Not for Diagnostic Use.
Chapter 4
Installation procedure
4.1 Installing a new BIONUMERICS instance
4.1.1 Existing instances detected
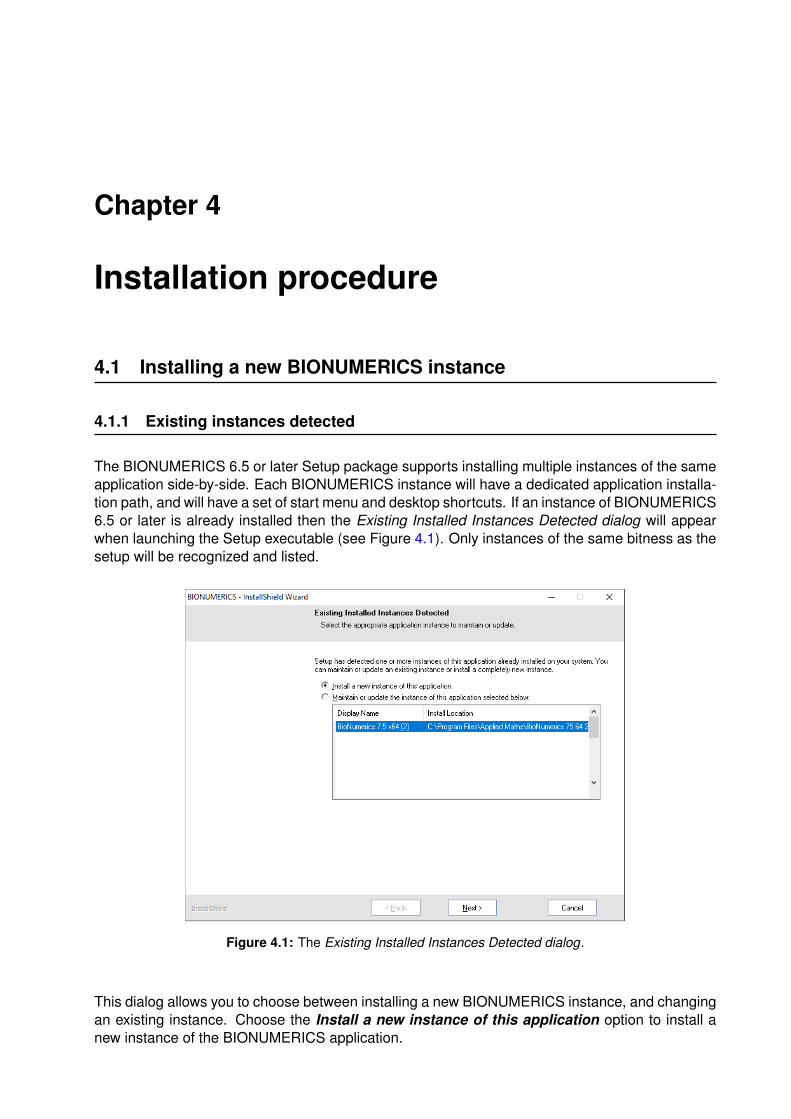
The BIONUMERICS 6.5 or later Setup package supports installing multiple instances of the sameapplication side-by-side. Each BIONUMERICS instance will have a dedicated application installa-tion path, and will have a set of start menu and desktop shortcuts. If an instance of BIONUMERICS6.5 or later is already installed then the Existing Installed Instances Detected dialog will appearwhen launching the Setup executable (see Figure 4.1). Only instances of the same bitness as thesetup will be recognized and listed.
Figure 4.1: The Existing Installed Instances Detected dialog.
This dialog allows you to choose between installing a new BIONUMERICS instance, and changingan existing instance. Choose the Install a new instance of this application option to install anew instance of the BIONUMERICS application.
14 4. Installation procedure
The above dialog will not appear if BIONUMERICS 6.1 or older versions are alreadyinstalled since these applications were installed with a Setup program that was not yetmulti-instance aware. In this case the welcome dialog will be displayed with an updatemessage.
4.1.2 Prerequisites
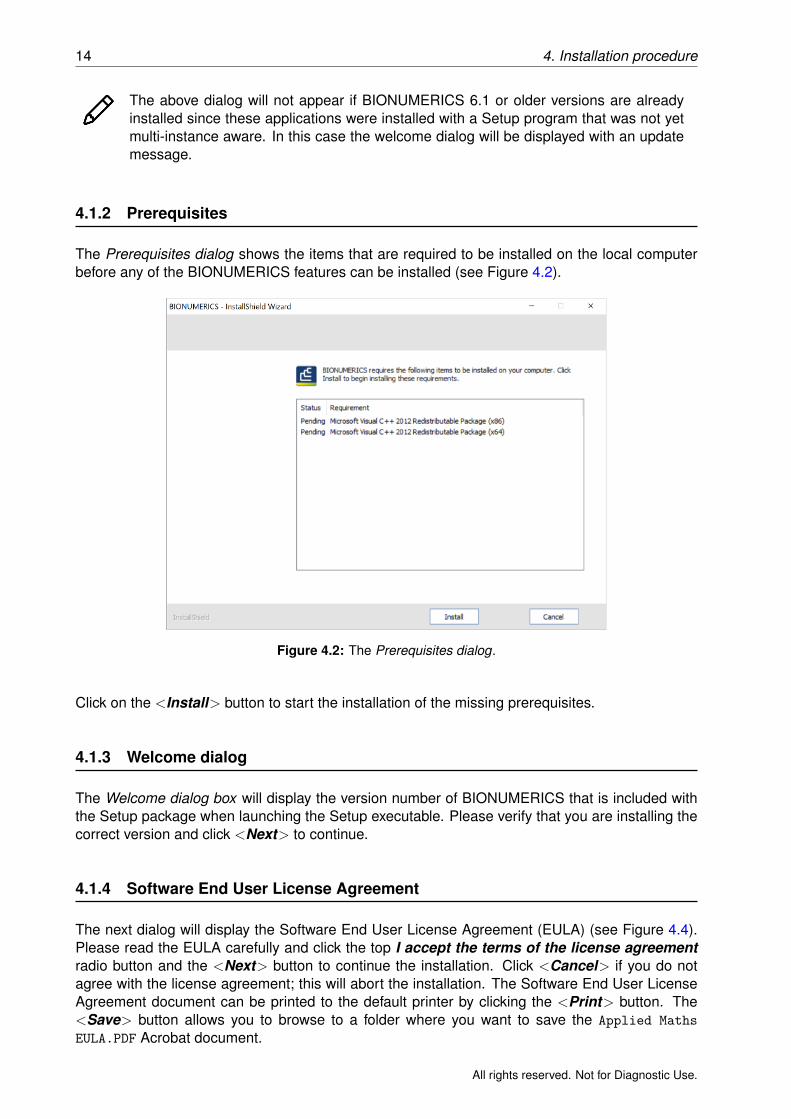
The Prerequisites dialog shows the items that are required to be installed on the local computerbefore any of the BIONUMERICS features can be installed (see Figure 4.2).
Figure 4.2: The Prerequisites dialog.
Click on the <Install> button to start the installation of the missing prerequisites.
4.1.3 Welcome dialog
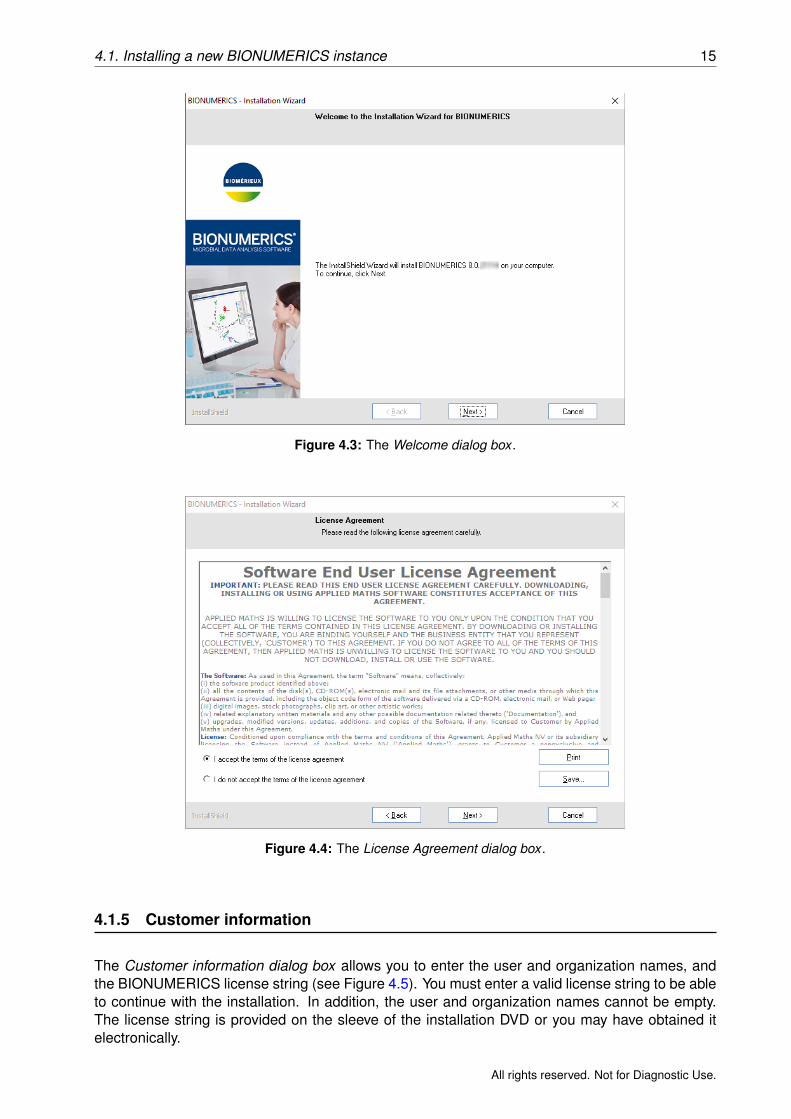
The Welcome dialog box will display the version number of BIONUMERICS that is included withthe Setup package when launching the Setup executable. Please verify that you are installing thecorrect version and click <Next> to continue.
4.1.4 Software End User License Agreement
The next dialog will display the Software End User License Agreement (EULA) (see Figure 4.4).Please read the EULA carefully and click the top I accept the terms of the license agreementradio button and the <Next> button to continue the installation. Click <Cancel> if you do notagree with the license agreement; this will abort the installation. The Software End User LicenseAgreement document can be printed to the default printer by clicking the <Print> button. The<Save> button allows you to browse to a folder where you want to save the Applied Maths
EULA.PDF Acrobat document.
All rights reserved. Not for Diagnostic Use.
4.1. Installing a new BIONUMERICS instance 15
Figure 4.3: The Welcome dialog box .
Figure 4.4: The License Agreement dialog box .
4.1.5 Customer information
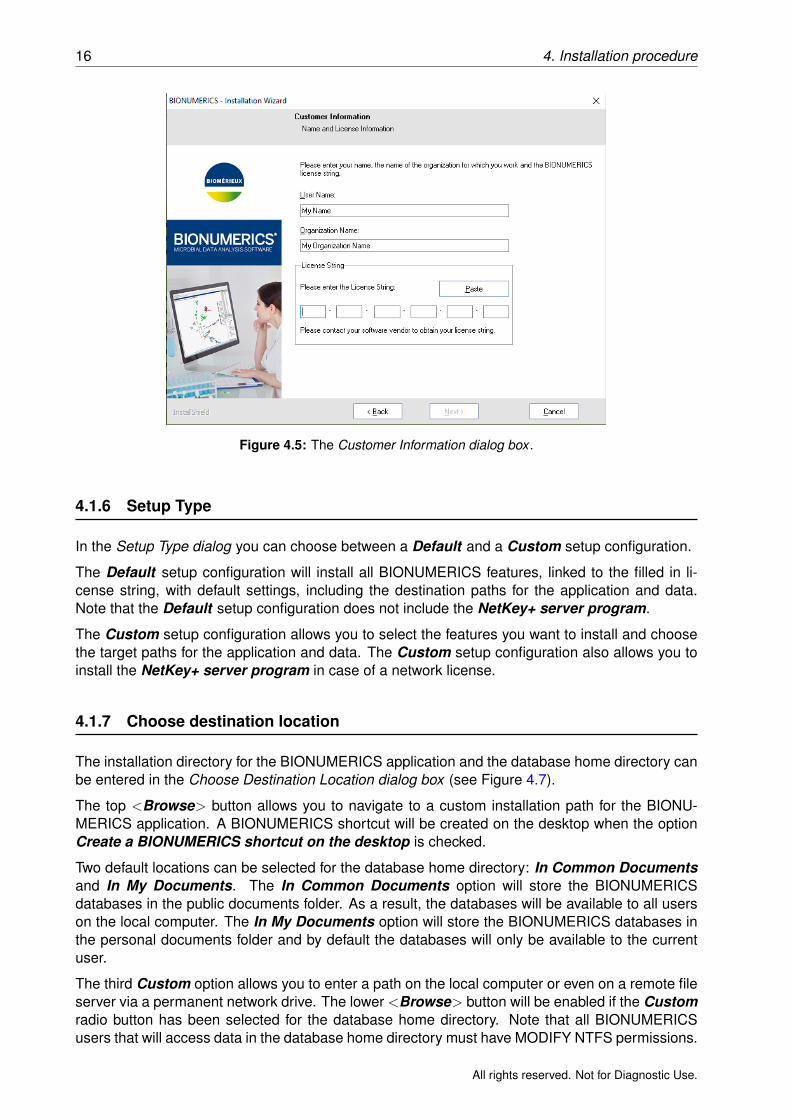
The Customer information dialog box allows you to enter the user and organization names, andthe BIONUMERICS license string (see Figure 4.5). You must enter a valid license string to be ableto continue with the installation. In addition, the user and organization names cannot be empty.The license string is provided on the sleeve of the installation DVD or you may have obtained itelectronically.
All rights reserved. Not for Diagnostic Use.
16 4. Installation procedure
Figure 4.5: The Customer Information dialog box .
4.1.6 Setup Type
In the Setup Type dialog you can choose between a Default and a Custom setup configuration.
The Default setup configuration will install all BIONUMERICS features, linked to the filled in li-cense string, with default settings, including the destination paths for the application and data.Note that the Default setup configuration does not include the NetKey+ server program.
The Custom setup configuration allows you to select the features you want to install and choosethe target paths for the application and data. The Custom setup configuration also allows you toinstall the NetKey+ server program in case of a network license.
4.1.7 Choose destination location
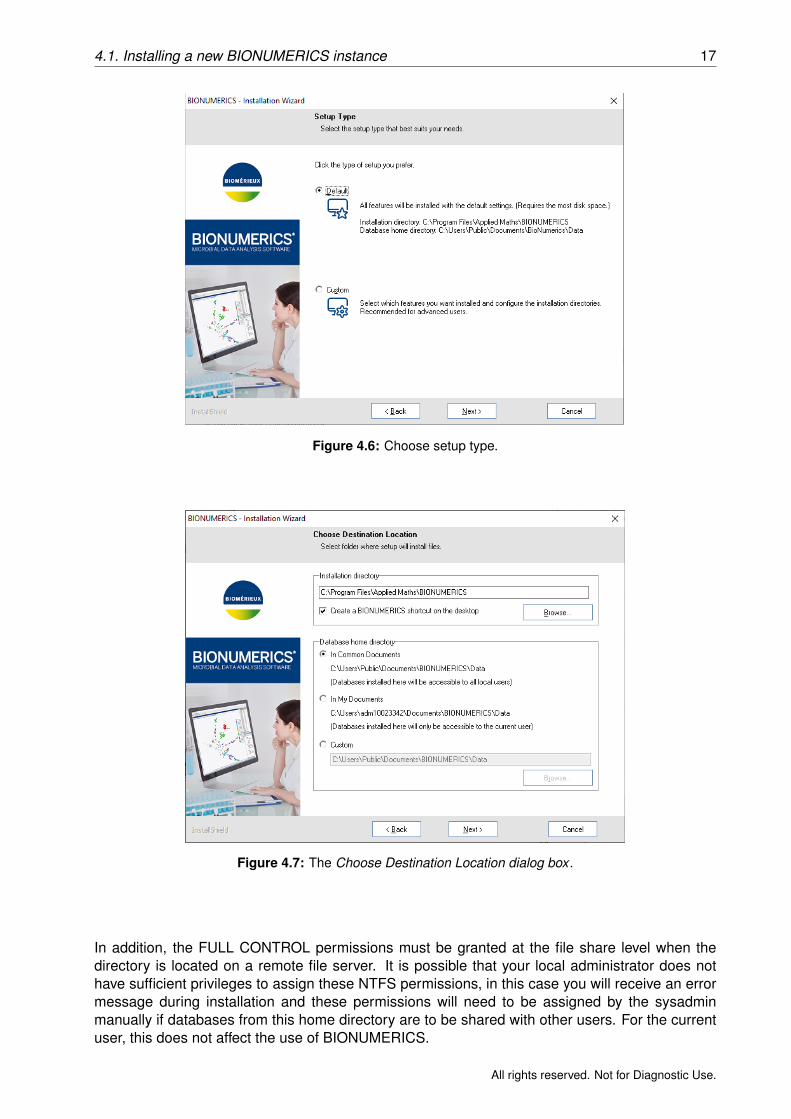
The installation directory for the BIONUMERICS application and the database home directory canbe entered in the Choose Destination Location dialog box (see Figure 4.7).
The top <Browse> button allows you to navigate to a custom installation path for the BIONU-MERICS application. A BIONUMERICS shortcut will be created on the desktop when the optionCreate a BIONUMERICS shortcut on the desktop is checked.
Two default locations can be selected for the database home directory: In Common Documentsand In My Documents. The In Common Documents option will store the BIONUMERICSdatabases in the public documents folder. As a result, the databases will be available to all userson the local computer. The In My Documents option will store the BIONUMERICS databases inthe personal documents folder and by default the databases will only be available to the currentuser.
The third Custom option allows you to enter a path on the local computer or even on a remote fileserver via a permanent network drive. The lower <Browse> button will be enabled if the Customradio button has been selected for the database home directory. Note that all BIONUMERICSusers that will access data in the database home directory must have MODIFY NTFS permissions.
All rights reserved. Not for Diagnostic Use.
4.1. Installing a new BIONUMERICS instance 17
Figure 4.6: Choose setup type.
Figure 4.7: The Choose Destination Location dialog box .
In addition, the FULL CONTROL permissions must be granted at the file share level when thedirectory is located on a remote file server. It is possible that your local administrator does nothave sufficient privileges to assign these NTFS permissions, in this case you will receive an errormessage during installation and these permissions will need to be assigned by the sysadminmanually if databases from this home directory are to be shared with other users. For the currentuser, this does not affect the use of BIONUMERICS.
All rights reserved. Not for Diagnostic Use.
18 4. Installation procedure
4.1.8 Select features
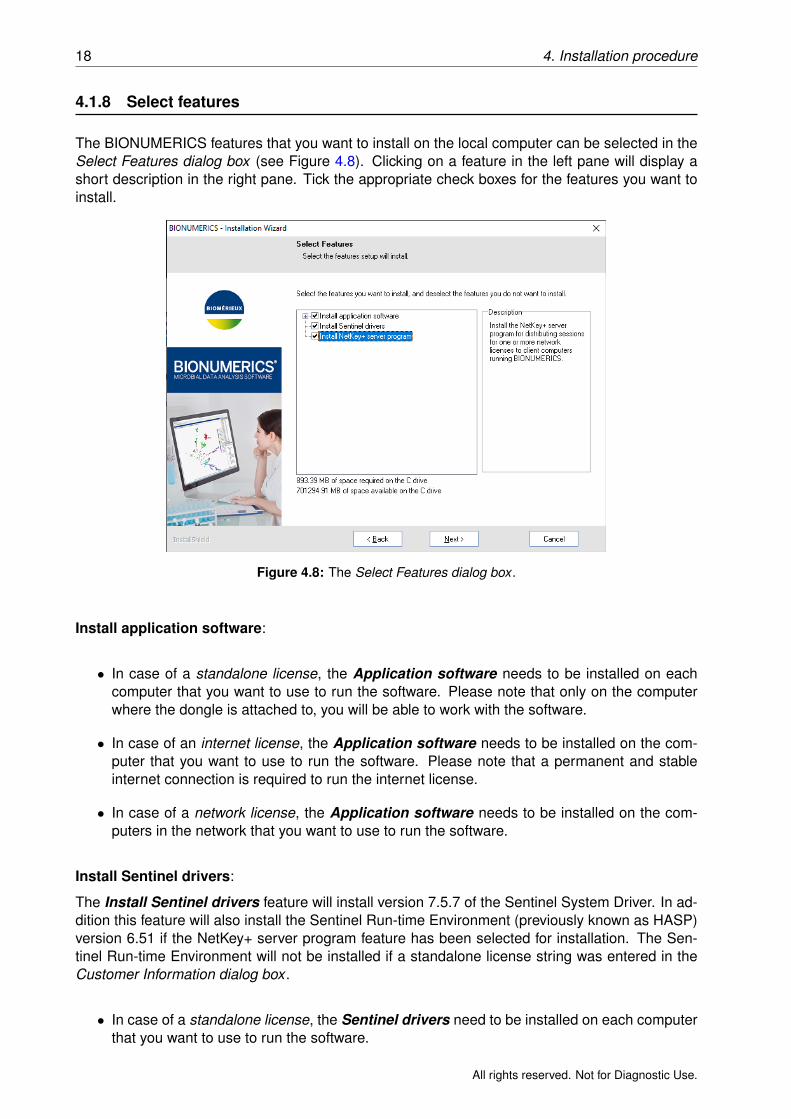
The BIONUMERICS features that you want to install on the local computer can be selected in theSelect Features dialog box (see Figure 4.8). Clicking on a feature in the left pane will display ashort description in the right pane. Tick the appropriate check boxes for the features you want toinstall.
Figure 4.8: The Select Features dialog box .
Install application software:
• In case of a standalone license, the Application software needs to be installed on eachcomputer that you want to use to run the software. Please note that only on the computerwhere the dongle is attached to, you will be able to work with the software.
• In case of an internet license, the Application software needs to be installed on the com-puter that you want to use to run the software. Please note that a permanent and stableinternet connection is required to run the internet license.
• In case of a network license, the Application software needs to be installed on the com-puters in the network that you want to use to run the software.
Install Sentinel drivers:
The Install Sentinel drivers feature will install version 7.5.7 of the Sentinel System Driver. In ad-dition this feature will also install the Sentinel Run-time Environment (previously known as HASP)version 6.51 if the NetKey+ server program feature has been selected for installation. The Sen-tinel Run-time Environment will not be installed if a standalone license string was entered in theCustomer Information dialog box .
• In case of a standalone license, the Sentinel drivers need to be installed on each computerthat you want to use to run the software.
All rights reserved. Not for Diagnostic Use.
4.1. Installing a new BIONUMERICS instance 19
• In case of an internet license, you only need an internet connection to run the software. TheInstall Sentinel drivers option does not need to be checked.
• In case of a network license, the Sentinel drivers only need to be installed on the NetKey+server computer in the network.
Install NetKey+ server program:
• The NetKey+ server program feature will only be visible and available for installation if anetwork license string has been entered in the Customer Information dialog box (see Figure4.5). The NetKey+ server program feature must only be installed on the computer in thenetwork where the hardware security key will be connected to or where the software securitykey will be installed on.
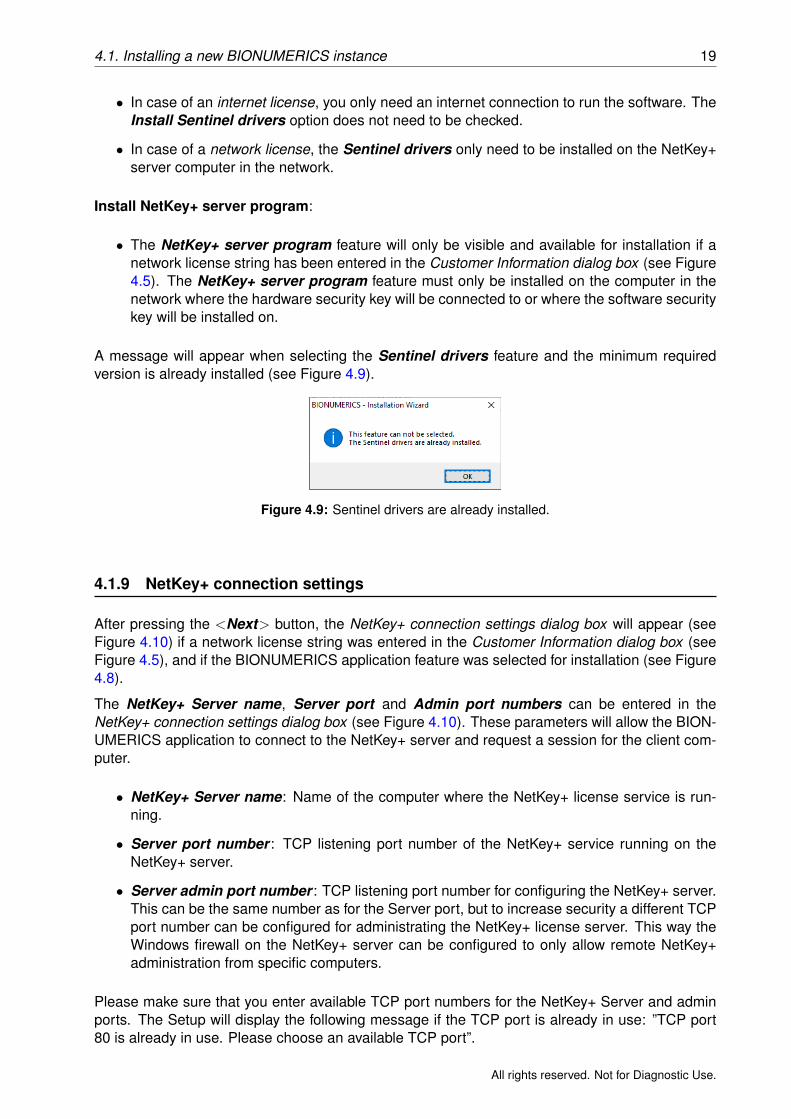
A message will appear when selecting the Sentinel drivers feature and the minimum requiredversion is already installed (see Figure 4.9).
Figure 4.9: Sentinel drivers are already installed.
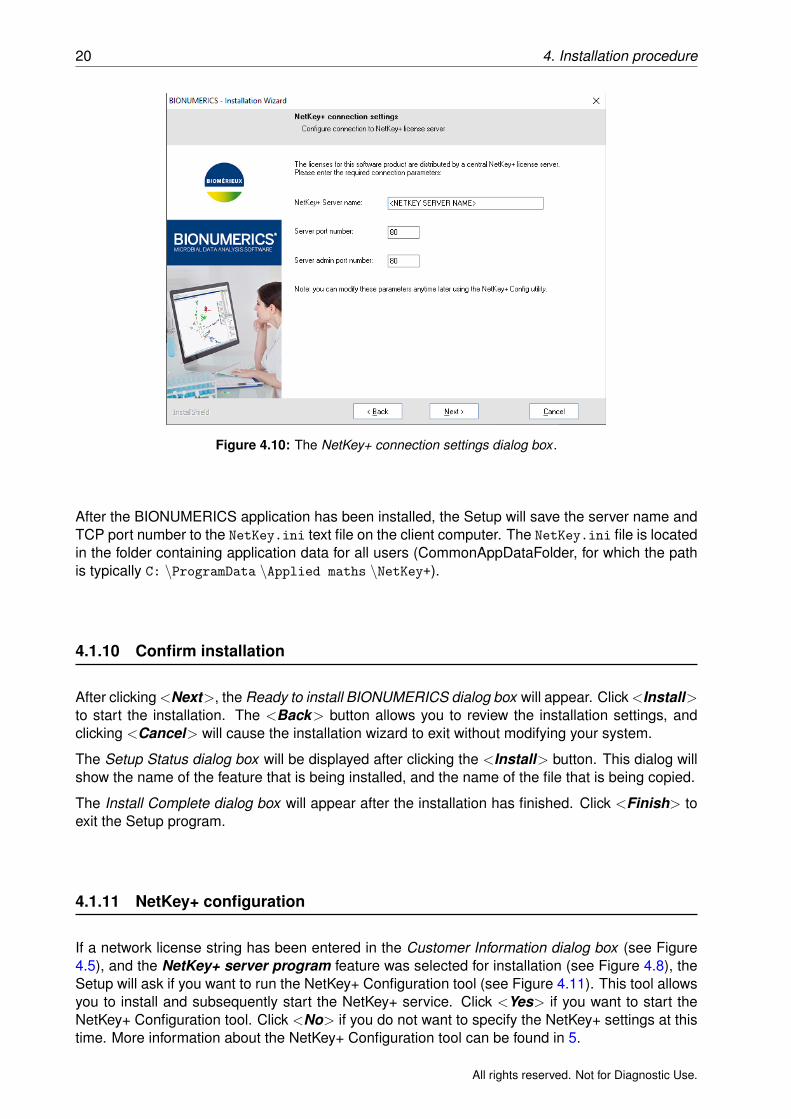
4.1.9 NetKey+ connection settings
After pressing the <Next> button, the NetKey+ connection settings dialog box will appear (seeFigure 4.10) if a network license string was entered in the Customer Information dialog box (seeFigure 4.5), and if the BIONUMERICS application feature was selected for installation (see Figure4.8).
The NetKey+ Server name, Server port and Admin port numbers can be entered in theNetKey+ connection settings dialog box (see Figure 4.10). These parameters will allow the BION-UMERICS application to connect to the NetKey+ server and request a session for the client com-puter.
• NetKey+ Server name: Name of the computer where the NetKey+ license service is run-ning.
• Server port number : TCP listening port number of the NetKey+ service running on theNetKey+ server.
• Server admin port number : TCP listening port number for configuring the NetKey+ server.This can be the same number as for the Server port, but to increase security a different TCPport number can be configured for administrating the NetKey+ license server. This way theWindows firewall on the NetKey+ server can be configured to only allow remote NetKey+administration from specific computers.
Please make sure that you enter available TCP port numbers for the NetKey+ Server and adminports. The Setup will display the following message if the TCP port is already in use: ”TCP port80 is already in use. Please choose an available TCP port”.
All rights reserved. Not for Diagnostic Use.
20 4. Installation procedure
Figure 4.10: The NetKey+ connection settings dialog box .
After the BIONUMERICS application has been installed, the Setup will save the server name andTCP port number to the NetKey.ini text file on the client computer. The NetKey.ini file is locatedin the folder containing application data for all users (CommonAppDataFolder, for which the pathis typically C: \ProgramData \Applied maths \NetKey+).
4.1.10 Confirm installation
After clicking <Next>, the Ready to install BIONUMERICS dialog box will appear. Click <Install>to start the installation. The <Back> button allows you to review the installation settings, andclicking <Cancel> will cause the installation wizard to exit without modifying your system.
The Setup Status dialog box will be displayed after clicking the <Install> button. This dialog willshow the name of the feature that is being installed, and the name of the file that is being copied.
The Install Complete dialog box will appear after the installation has finished. Click <Finish> toexit the Setup program.
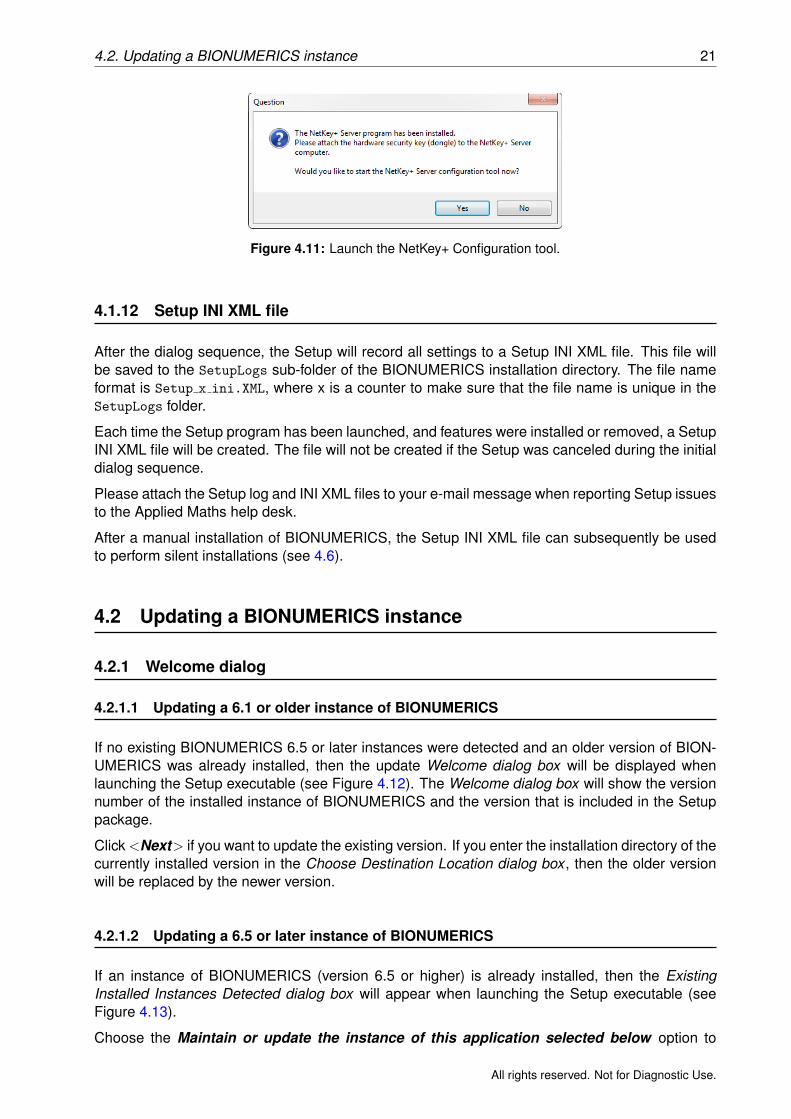
4.1.11 NetKey+ configuration
If a network license string has been entered in the Customer Information dialog box (see Figure4.5), and the NetKey+ server program feature was selected for installation (see Figure 4.8), theSetup will ask if you want to run the NetKey+ Configuration tool (see Figure 4.11). This tool allowsyou to install and subsequently start the NetKey+ service. Click <Yes> if you want to start theNetKey+ Configuration tool. Click <No> if you do not want to specify the NetKey+ settings at thistime. More information about the NetKey+ Configuration tool can be found in 5.
All rights reserved. Not for Diagnostic Use.
4.2. Updating a BIONUMERICS instance 21
Figure 4.11: Launch the NetKey+ Configuration tool.
4.1.12 Setup INI XML file
After the dialog sequence, the Setup will record all settings to a Setup INI XML file. This file willbe saved to the SetupLogs sub-folder of the BIONUMERICS installation directory. The file nameformat is Setup x ini.XML, where x is a counter to make sure that the file name is unique in theSetupLogs folder.
Each time the Setup program has been launched, and features were installed or removed, a SetupINI XML file will be created. The file will not be created if the Setup was canceled during the initialdialog sequence.
Please attach the Setup log and INI XML files to your e-mail message when reporting Setup issuesto the Applied Maths help desk.
After a manual installation of BIONUMERICS, the Setup INI XML file can subsequently be usedto perform silent installations (see 4.6).
4.2 Updating a BIONUMERICS instance
4.2.1 Welcome dialog
4.2.1.1 Updating a 6.1 or older instance of BIONUMERICS
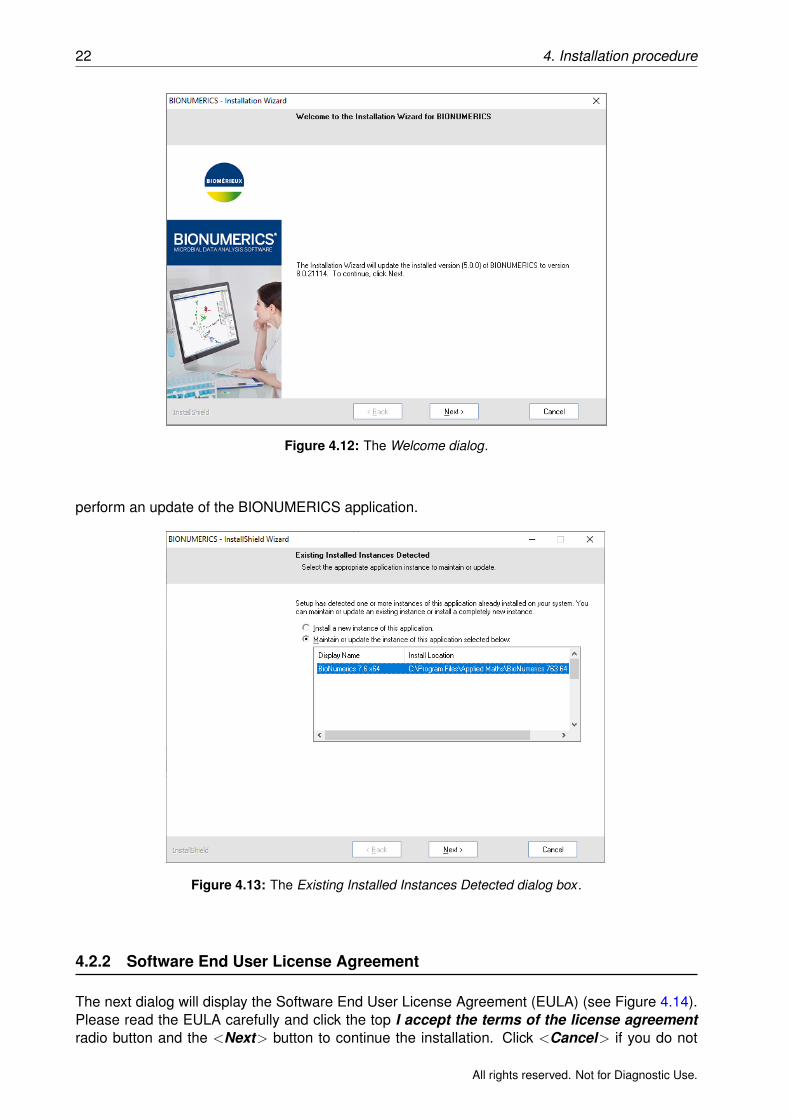
If no existing BIONUMERICS 6.5 or later instances were detected and an older version of BION-UMERICS was already installed, then the update Welcome dialog box will be displayed whenlaunching the Setup executable (see Figure 4.12). The Welcome dialog box will show the versionnumber of the installed instance of BIONUMERICS and the version that is included in the Setuppackage.
Click <Next> if you want to update the existing version. If you enter the installation directory of thecurrently installed version in the Choose Destination Location dialog box , then the older versionwill be replaced by the newer version.
4.2.1.2 Updating a 6.5 or later instance of BIONUMERICS
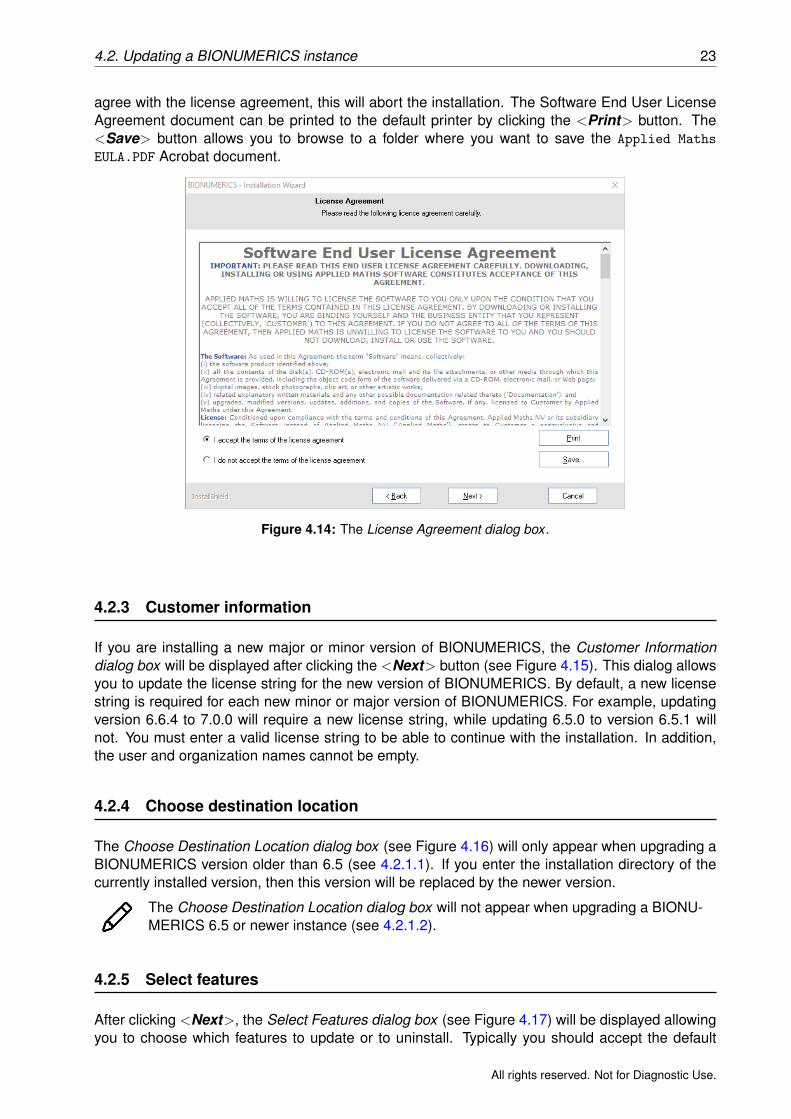
If an instance of BIONUMERICS (version 6.5 or higher) is already installed, then the ExistingInstalled Instances Detected dialog box will appear when launching the Setup executable (seeFigure 4.13).
Choose the Maintain or update the instance of this application selected below option to
All rights reserved. Not for Diagnostic Use.
22 4. Installation procedure
Figure 4.12: The Welcome dialog.
perform an update of the BIONUMERICS application.
Figure 4.13: The Existing Installed Instances Detected dialog box .
4.2.2 Software End User License Agreement
The next dialog will display the Software End User License Agreement (EULA) (see Figure 4.14).Please read the EULA carefully and click the top I accept the terms of the license agreementradio button and the <Next> button to continue the installation. Click <Cancel> if you do not
All rights reserved. Not for Diagnostic Use.
4.2. Updating a BIONUMERICS instance 23
agree with the license agreement, this will abort the installation. The Software End User LicenseAgreement document can be printed to the default printer by clicking the <Print> button. The<Save> button allows you to browse to a folder where you want to save the Applied Maths
EULA.PDF Acrobat document.
Figure 4.14: The License Agreement dialog box .
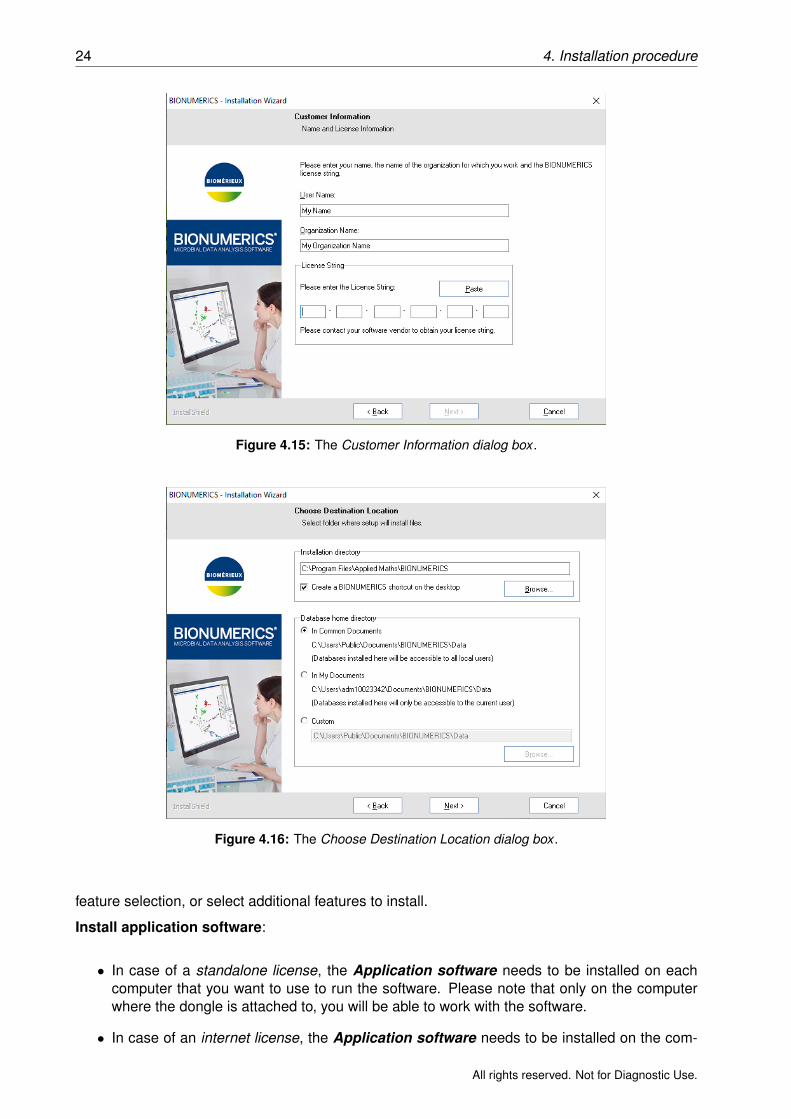
4.2.3 Customer information
If you are installing a new major or minor version of BIONUMERICS, the Customer Informationdialog box will be displayed after clicking the <Next> button (see Figure 4.15). This dialog allowsyou to update the license string for the new version of BIONUMERICS. By default, a new licensestring is required for each new minor or major version of BIONUMERICS. For example, updatingversion 6.6.4 to 7.0.0 will require a new license string, while updating 6.5.0 to version 6.5.1 willnot. You must enter a valid license string to be able to continue with the installation. In addition,the user and organization names cannot be empty.
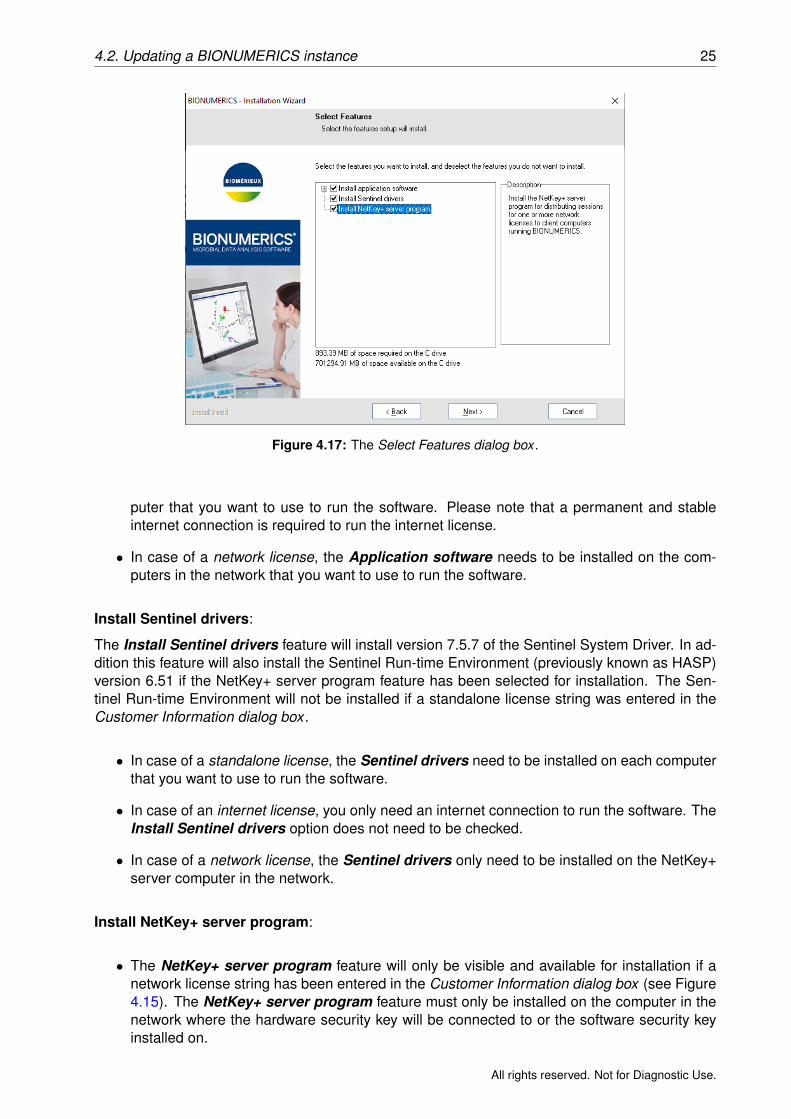
4.2.4 Choose destination location
The Choose Destination Location dialog box (see Figure 4.16) will only appear when upgrading aBIONUMERICS version older than 6.5 (see 4.2.1.1). If you enter the installation directory of thecurrently installed version, then this version will be replaced by the newer version.
The Choose Destination Location dialog box will not appear when upgrading a BIONU-MERICS 6.5 or newer instance (see 4.2.1.2).
4.2.5 Select features
After clicking <Next>, the Select Features dialog box (see Figure 4.17) will be displayed allowingyou to choose which features to update or to uninstall. Typically you should accept the default
All rights reserved. Not for Diagnostic Use.
24 4. Installation procedure
Figure 4.15: The Customer Information dialog box .
Figure 4.16: The Choose Destination Location dialog box .
feature selection, or select additional features to install.
Install application software:
• In case of a standalone license, the Application software needs to be installed on eachcomputer that you want to use to run the software. Please note that only on the computerwhere the dongle is attached to, you will be able to work with the software.
• In case of an internet license, the Application software needs to be installed on the com-
All rights reserved. Not for Diagnostic Use.
4.2. Updating a BIONUMERICS instance 25
Figure 4.17: The Select Features dialog box .
puter that you want to use to run the software. Please note that a permanent and stableinternet connection is required to run the internet license.
• In case of a network license, the Application software needs to be installed on the com-puters in the network that you want to use to run the software.
Install Sentinel drivers:
The Install Sentinel drivers feature will install version 7.5.7 of the Sentinel System Driver. In ad-dition this feature will also install the Sentinel Run-time Environment (previously known as HASP)version 6.51 if the NetKey+ server program feature has been selected for installation. The Sen-tinel Run-time Environment will not be installed if a standalone license string was entered in theCustomer Information dialog box .
• In case of a standalone license, the Sentinel drivers need to be installed on each computerthat you want to use to run the software.
• In case of an internet license, you only need an internet connection to run the software. TheInstall Sentinel drivers option does not need to be checked.
• In case of a network license, the Sentinel drivers only need to be installed on the NetKey+server computer in the network.
Install NetKey+ server program:
• The NetKey+ server program feature will only be visible and available for installation if anetwork license string has been entered in the Customer Information dialog box (see Figure4.15). The NetKey+ server program feature must only be installed on the computer in thenetwork where the hardware security key will be connected to or the software security keyinstalled on.
All rights reserved. Not for Diagnostic Use.
26 4. Installation procedure
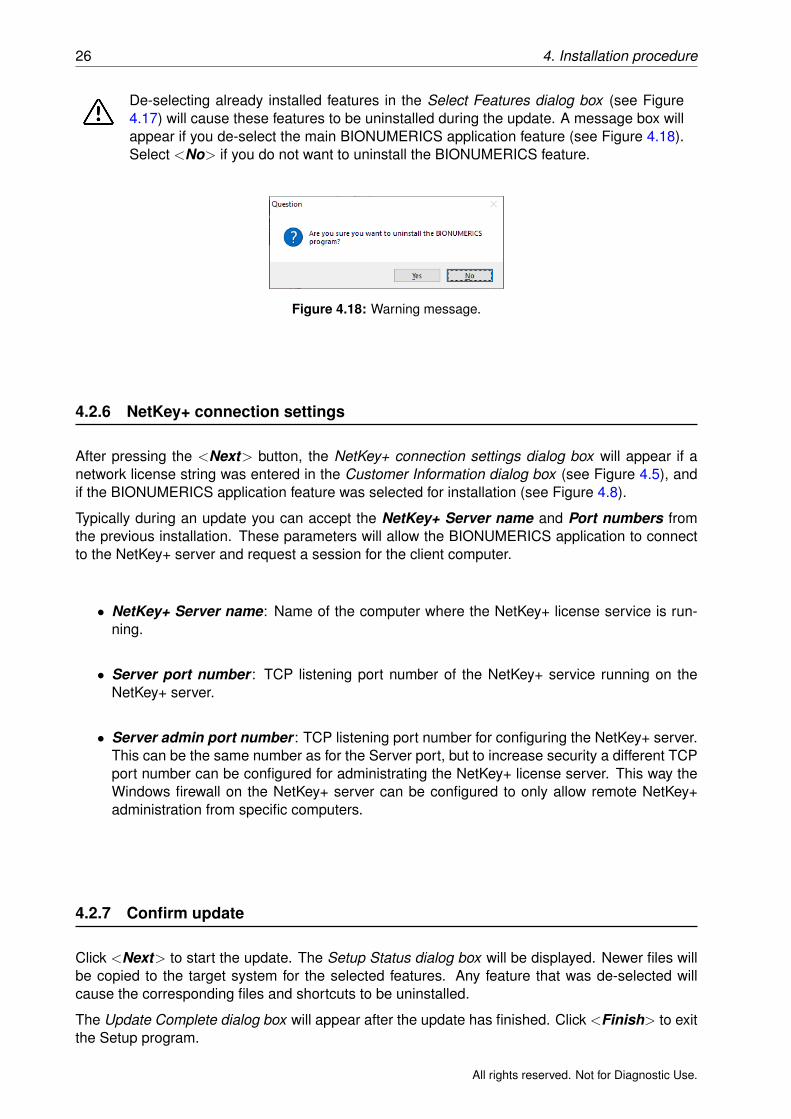
De-selecting already installed features in the Select Features dialog box (see Figure4.17) will cause these features to be uninstalled during the update. A message box willappear if you de-select the main BIONUMERICS application feature (see Figure 4.18).Select <No> if you do not want to uninstall the BIONUMERICS feature.
Figure 4.18: Warning message.
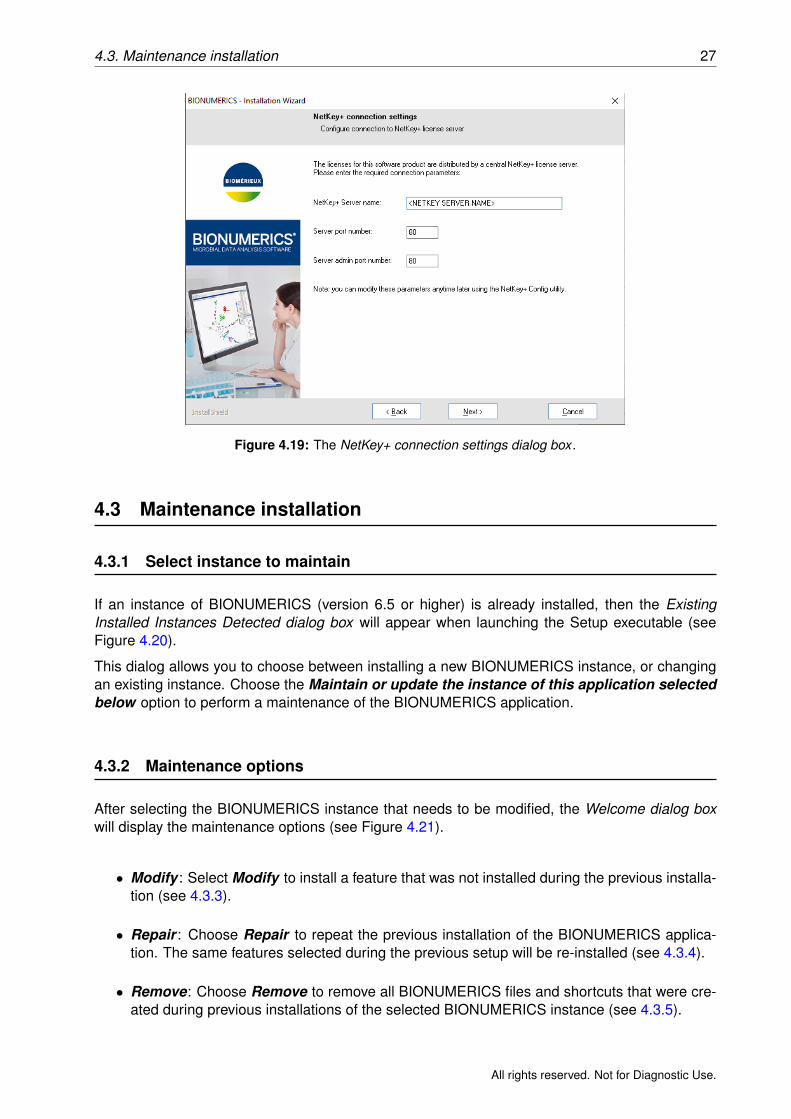
4.2.6 NetKey+ connection settings
After pressing the <Next> button, the NetKey+ connection settings dialog box will appear if anetwork license string was entered in the Customer Information dialog box (see Figure 4.5), andif the BIONUMERICS application feature was selected for installation (see Figure 4.8).
Typically during an update you can accept the NetKey+ Server name and Port numbers fromthe previous installation. These parameters will allow the BIONUMERICS application to connectto the NetKey+ server and request a session for the client computer.
• NetKey+ Server name: Name of the computer where the NetKey+ license service is run-ning.
• Server port number : TCP listening port number of the NetKey+ service running on theNetKey+ server.
• Server admin port number : TCP listening port number for configuring the NetKey+ server.This can be the same number as for the Server port, but to increase security a different TCPport number can be configured for administrating the NetKey+ license server. This way theWindows firewall on the NetKey+ server can be configured to only allow remote NetKey+administration from specific computers.
4.2.7 Confirm update
Click <Next> to start the update. The Setup Status dialog box will be displayed. Newer files willbe copied to the target system for the selected features. Any feature that was de-selected willcause the corresponding files and shortcuts to be uninstalled.
The Update Complete dialog box will appear after the update has finished. Click <Finish> to exitthe Setup program.
All rights reserved. Not for Diagnostic Use.
4.3. Maintenance installation 27
Figure 4.19: The NetKey+ connection settings dialog box .
4.3 Maintenance installation
4.3.1 Select instance to maintain
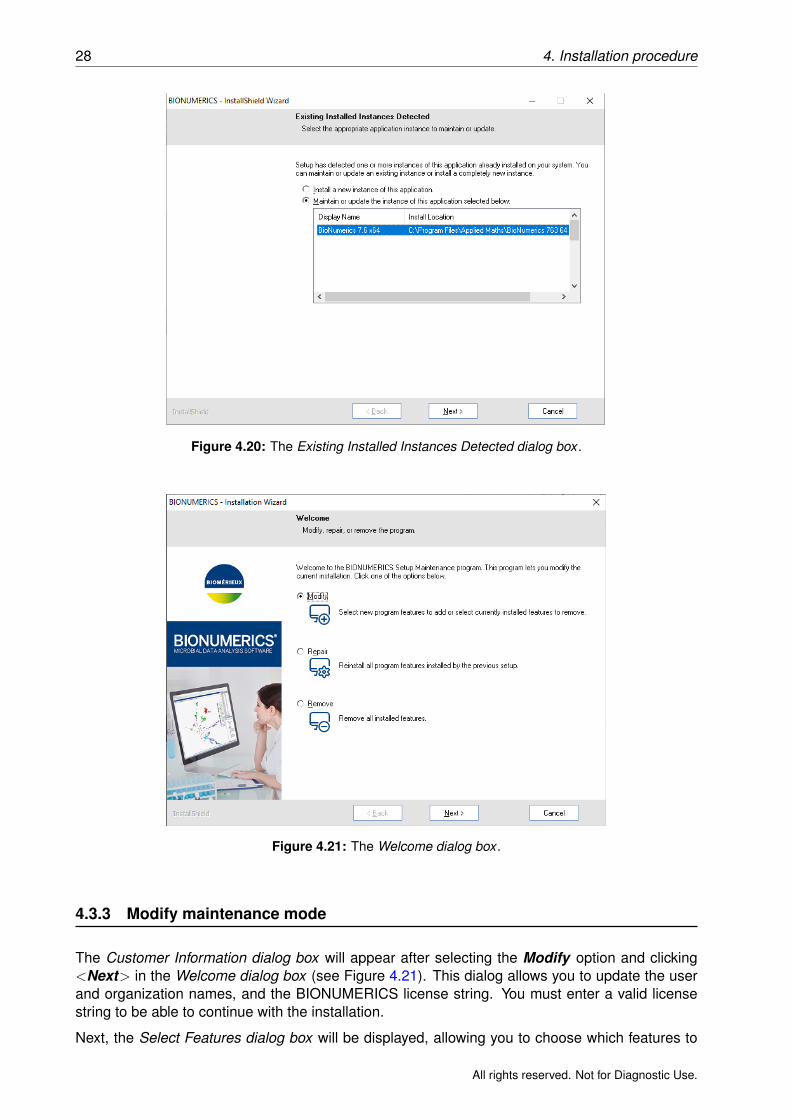
If an instance of BIONUMERICS (version 6.5 or higher) is already installed, then the ExistingInstalled Instances Detected dialog box will appear when launching the Setup executable (seeFigure 4.20).
This dialog allows you to choose between installing a new BIONUMERICS instance, or changingan existing instance. Choose the Maintain or update the instance of this application selectedbelow option to perform a maintenance of the BIONUMERICS application.
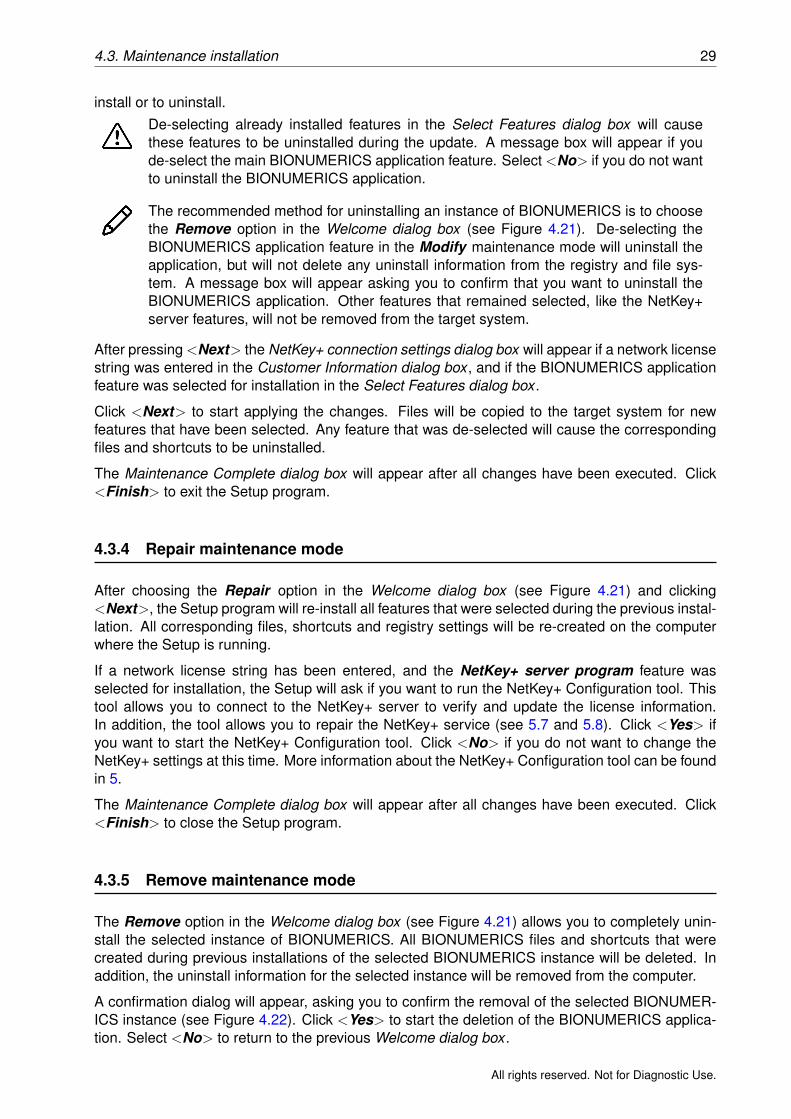
4.3.2 Maintenance options
After selecting the BIONUMERICS instance that needs to be modified, the Welcome dialog boxwill display the maintenance options (see Figure 4.21).
• Modify : Select Modify to install a feature that was not installed during the previous installa-tion (see 4.3.3).
• Repair : Choose Repair to repeat the previous installation of the BIONUMERICS applica-tion. The same features selected during the previous setup will be re-installed (see 4.3.4).
• Remove: Choose Remove to remove all BIONUMERICS files and shortcuts that were cre-ated during previous installations of the selected BIONUMERICS instance (see 4.3.5).
All rights reserved. Not for Diagnostic Use.
28 4. Installation procedure
Figure 4.20: The Existing Installed Instances Detected dialog box .
Figure 4.21: The Welcome dialog box .
4.3.3 Modify maintenance mode
The Customer Information dialog box will appear after selecting the Modify option and clicking<Next> in the Welcome dialog box (see Figure 4.21). This dialog allows you to update the userand organization names, and the BIONUMERICS license string. You must enter a valid licensestring to be able to continue with the installation.
Next, the Select Features dialog box will be displayed, allowing you to choose which features to
All rights reserved. Not for Diagnostic Use.
4.3. Maintenance installation 29
install or to uninstall.De-selecting already installed features in the Select Features dialog box will causethese features to be uninstalled during the update. A message box will appear if youde-select the main BIONUMERICS application feature. Select <No> if you do not wantto uninstall the BIONUMERICS application.
The recommended method for uninstalling an instance of BIONUMERICS is to choosethe Remove option in the Welcome dialog box (see Figure 4.21). De-selecting theBIONUMERICS application feature in the Modify maintenance mode will uninstall theapplication, but will not delete any uninstall information from the registry and file sys-tem. A message box will appear asking you to confirm that you want to uninstall theBIONUMERICS application. Other features that remained selected, like the NetKey+server features, will not be removed from the target system.
After pressing <Next> the NetKey+ connection settings dialog box will appear if a network licensestring was entered in the Customer Information dialog box , and if the BIONUMERICS applicationfeature was selected for installation in the Select Features dialog box .
Click <Next> to start applying the changes. Files will be copied to the target system for newfeatures that have been selected. Any feature that was de-selected will cause the correspondingfiles and shortcuts to be uninstalled.
The Maintenance Complete dialog box will appear after all changes have been executed. Click<Finish> to exit the Setup program.
4.3.4 Repair maintenance mode
After choosing the Repair option in the Welcome dialog box (see Figure 4.21) and clicking<Next>, the Setup program will re-install all features that were selected during the previous instal-lation. All corresponding files, shortcuts and registry settings will be re-created on the computerwhere the Setup is running.
If a network license string has been entered, and the NetKey+ server program feature wasselected for installation, the Setup will ask if you want to run the NetKey+ Configuration tool. Thistool allows you to connect to the NetKey+ server to verify and update the license information.In addition, the tool allows you to repair the NetKey+ service (see 5.7 and 5.8). Click <Yes> ifyou want to start the NetKey+ Configuration tool. Click <No> if you do not want to change theNetKey+ settings at this time. More information about the NetKey+ Configuration tool can be foundin 5.
The Maintenance Complete dialog box will appear after all changes have been executed. Click<Finish> to close the Setup program.
4.3.5 Remove maintenance mode
The Remove option in the Welcome dialog box (see Figure 4.21) allows you to completely unin-stall the selected instance of BIONUMERICS. All BIONUMERICS files and shortcuts that werecreated during previous installations of the selected BIONUMERICS instance will be deleted. Inaddition, the uninstall information for the selected instance will be removed from the computer.
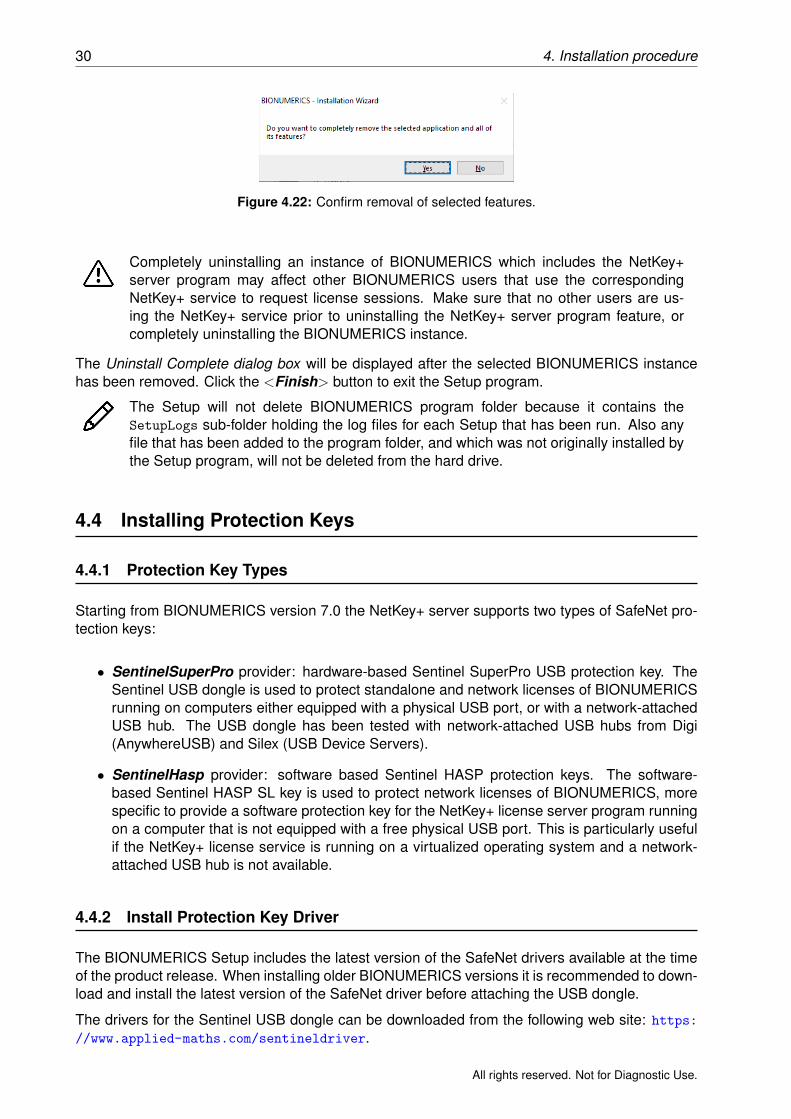
A confirmation dialog will appear, asking you to confirm the removal of the selected BIONUMER-ICS instance (see Figure 4.22). Click <Yes> to start the deletion of the BIONUMERICS applica-tion. Select <No> to return to the previous Welcome dialog box .
All rights reserved. Not for Diagnostic Use.
30 4. Installation procedure
Figure 4.22: Confirm removal of selected features.
Completely uninstalling an instance of BIONUMERICS which includes the NetKey+server program may affect other BIONUMERICS users that use the correspondingNetKey+ service to request license sessions. Make sure that no other users are us-ing the NetKey+ service prior to uninstalling the NetKey+ server program feature, orcompletely uninstalling the BIONUMERICS instance.
The Uninstall Complete dialog box will be displayed after the selected BIONUMERICS instancehas been removed. Click the <Finish> button to exit the Setup program.
The Setup will not delete BIONUMERICS program folder because it contains theSetupLogs sub-folder holding the log files for each Setup that has been run. Also anyfile that has been added to the program folder, and which was not originally installed bythe Setup program, will not be deleted from the hard drive.
4.4 Installing Protection Keys
4.4.1 Protection Key Types
Starting from BIONUMERICS version 7.0 the NetKey+ server supports two types of SafeNet pro-tection keys:
• SentinelSuperPro provider: hardware-based Sentinel SuperPro USB protection key. TheSentinel USB dongle is used to protect standalone and network licenses of BIONUMERICSrunning on computers either equipped with a physical USB port, or with a network-attachedUSB hub. The USB dongle has been tested with network-attached USB hubs from Digi(AnywhereUSB) and Silex (USB Device Servers).
• SentinelHasp provider: software based Sentinel HASP protection keys. The software-based Sentinel HASP SL key is used to protect network licenses of BIONUMERICS, morespecific to provide a software protection key for the NetKey+ license server program runningon a computer that is not equipped with a free physical USB port. This is particularly usefulif the NetKey+ license service is running on a virtualized operating system and a network-attached USB hub is not available.
4.4.2 Install Protection Key Driver
The BIONUMERICS Setup includes the latest version of the SafeNet drivers available at the timeof the product release. When installing older BIONUMERICS versions it is recommended to down-load and install the latest version of the SafeNet driver before attaching the USB dongle.
The drivers for the Sentinel USB dongle can be downloaded from the following web site: https://www.applied-maths.com/sentineldriver.
All rights reserved. Not for Diagnostic Use.
4.4. Installing Protection Keys 31
The Sentinel Run-time Environment for the HASP SL or HL protection keys can be downloadedfrom the following web page: https://www.applied-maths.com/haspdriver.
The above URLs will redirect you to the appropriate download page on the SafeNet Sentinelcustomer web site.
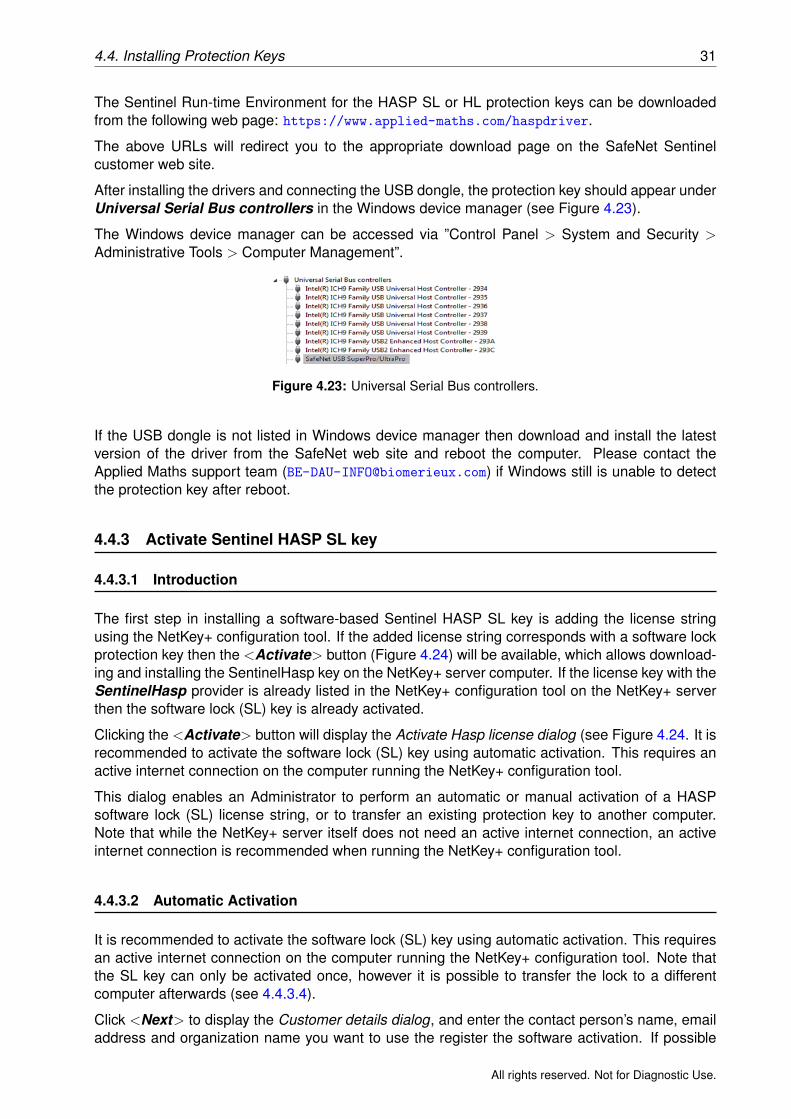
After installing the drivers and connecting the USB dongle, the protection key should appear underUniversal Serial Bus controllers in the Windows device manager (see Figure 4.23).
The Windows device manager can be accessed via ”Control Panel > System and Security >Administrative Tools > Computer Management”.
Figure 4.23: Universal Serial Bus controllers.
If the USB dongle is not listed in Windows device manager then download and install the latestversion of the driver from the SafeNet web site and reboot the computer. Please contact theApplied Maths support team ([email protected]) if Windows still is unable to detectthe protection key after reboot.
4.4.3 Activate Sentinel HASP SL key
4.4.3.1 Introduction
The first step in installing a software-based Sentinel HASP SL key is adding the license stringusing the NetKey+ configuration tool. If the added license string corresponds with a software lockprotection key then the <Activate> button (Figure 4.24) will be available, which allows download-ing and installing the SentinelHasp key on the NetKey+ server computer. If the license key with theSentinelHasp provider is already listed in the NetKey+ configuration tool on the NetKey+ serverthen the software lock (SL) key is already activated.
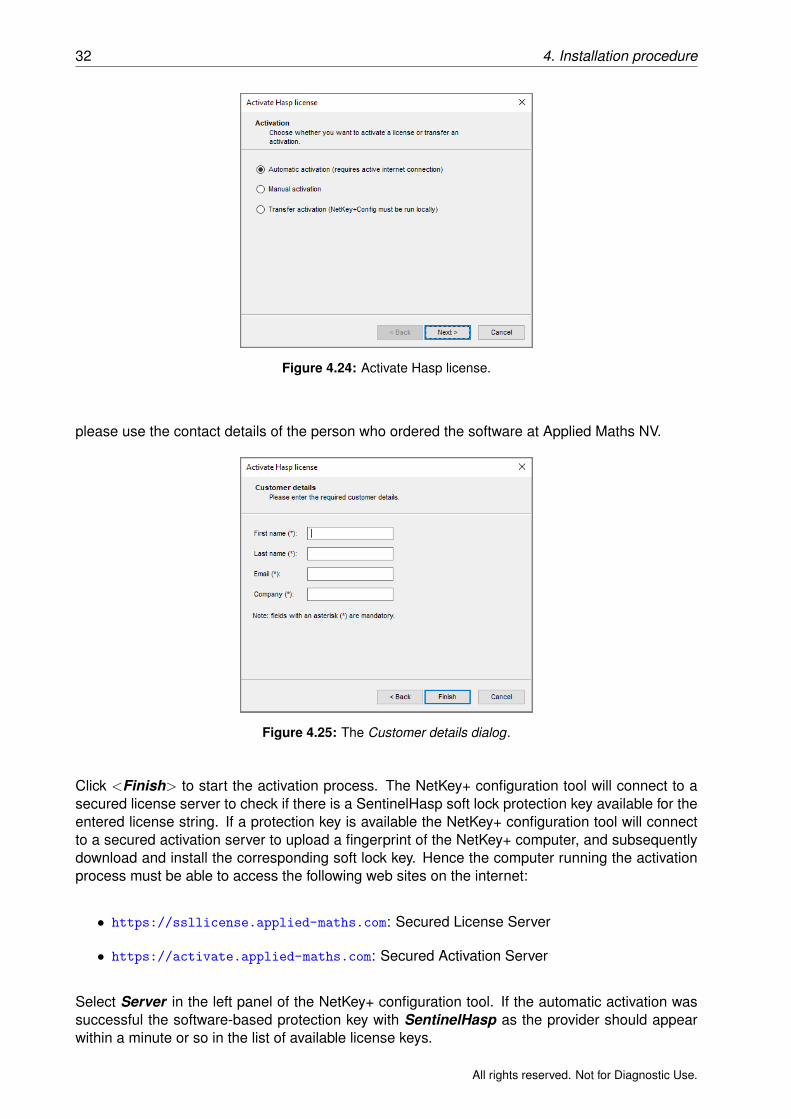
Clicking the <Activate> button will display the Activate Hasp license dialog (see Figure 4.24. It isrecommended to activate the software lock (SL) key using automatic activation. This requires anactive internet connection on the computer running the NetKey+ configuration tool.
This dialog enables an Administrator to perform an automatic or manual activation of a HASPsoftware lock (SL) license string, or to transfer an existing protection key to another computer.Note that while the NetKey+ server itself does not need an active internet connection, an activeinternet connection is recommended when running the NetKey+ configuration tool.
4.4.3.2 Automatic Activation
It is recommended to activate the software lock (SL) key using automatic activation. This requiresan active internet connection on the computer running the NetKey+ configuration tool. Note thatthe SL key can only be activated once, however it is possible to transfer the lock to a differentcomputer afterwards (see 4.4.3.4).
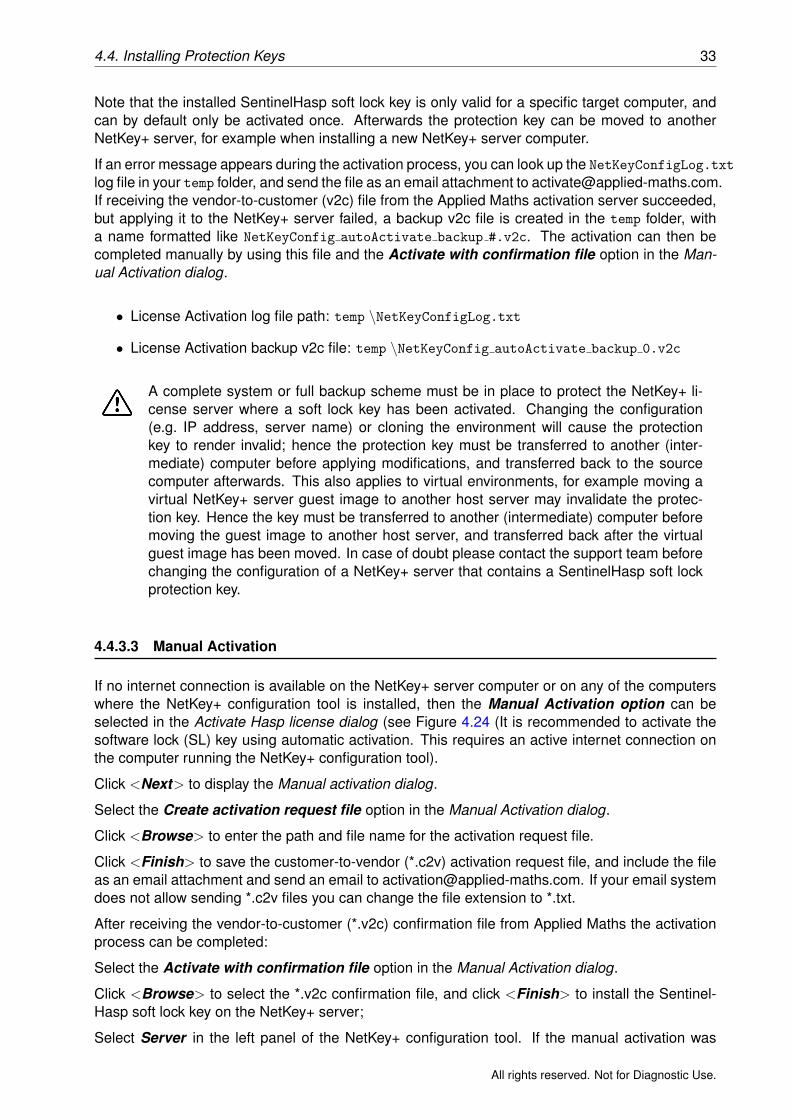
Click <Next> to display the Customer details dialog, and enter the contact person’s name, emailaddress and organization name you want to use the register the software activation. If possible
All rights reserved. Not for Diagnostic Use.
32 4. Installation procedure
Figure 4.24: Activate Hasp license.
please use the contact details of the person who ordered the software at Applied Maths NV.
Figure 4.25: The Customer details dialog.
Click <Finish> to start the activation process. The NetKey+ configuration tool will connect to asecured license server to check if there is a SentinelHasp soft lock protection key available for theentered license string. If a protection key is available the NetKey+ configuration tool will connectto a secured activation server to upload a fingerprint of the NetKey+ computer, and subsequentlydownload and install the corresponding soft lock key. Hence the computer running the activationprocess must be able to access the following web sites on the internet:
• https://ssllicense.applied-maths.com: Secured License Server
• https://activate.applied-maths.com: Secured Activation Server
Select Server in the left panel of the NetKey+ configuration tool. If the automatic activation wassuccessful the software-based protection key with SentinelHasp as the provider should appearwithin a minute or so in the list of available license keys.
All rights reserved. Not for Diagnostic Use.
4.4. Installing Protection Keys 33
Note that the installed SentinelHasp soft lock key is only valid for a specific target computer, andcan by default only be activated once. Afterwards the protection key can be moved to anotherNetKey+ server, for example when installing a new NetKey+ server computer.
If an error message appears during the activation process, you can look up the NetKeyConfigLog.txt
log file in your temp folder, and send the file as an email attachment to [email protected] receiving the vendor-to-customer (v2c) file from the Applied Maths activation server succeeded,but applying it to the NetKey+ server failed, a backup v2c file is created in the temp folder, witha name formatted like NetKeyConfig autoActivate backup #.v2c. The activation can then becompleted manually by using this file and the Activate with confirmation file option in the Man-ual Activation dialog.
• License Activation log file path: temp \NetKeyConfigLog.txt
• License Activation backup v2c file: temp \NetKeyConfig autoActivate backup 0.v2c
A complete system or full backup scheme must be in place to protect the NetKey+ li-cense server where a soft lock key has been activated. Changing the configuration(e.g. IP address, server name) or cloning the environment will cause the protectionkey to render invalid; hence the protection key must be transferred to another (inter-mediate) computer before applying modifications, and transferred back to the sourcecomputer afterwards. This also applies to virtual environments, for example moving avirtual NetKey+ server guest image to another host server may invalidate the protec-tion key. Hence the key must be transferred to another (intermediate) computer beforemoving the guest image to another host server, and transferred back after the virtualguest image has been moved. In case of doubt please contact the support team beforechanging the configuration of a NetKey+ server that contains a SentinelHasp soft lockprotection key.
4.4.3.3 Manual Activation
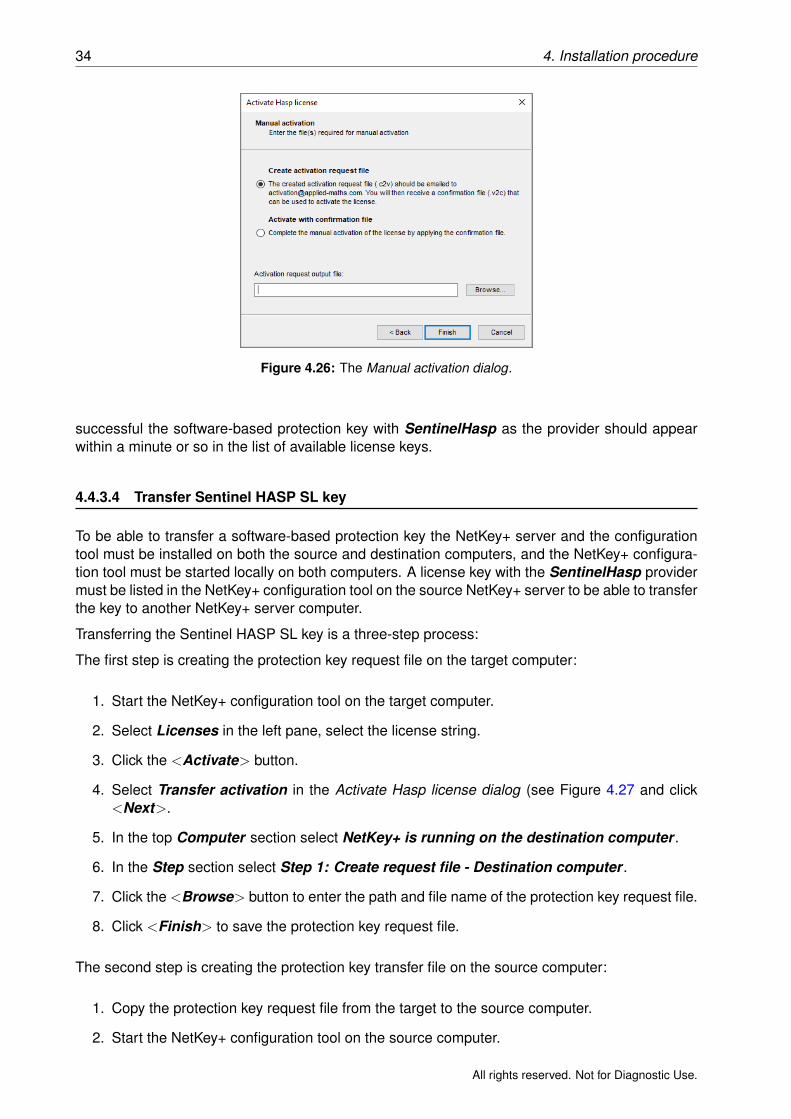
If no internet connection is available on the NetKey+ server computer or on any of the computerswhere the NetKey+ configuration tool is installed, then the Manual Activation option can beselected in the Activate Hasp license dialog (see Figure 4.24 (It is recommended to activate thesoftware lock (SL) key using automatic activation. This requires an active internet connection onthe computer running the NetKey+ configuration tool).
Click <Next> to display the Manual activation dialog.
Select the Create activation request file option in the Manual Activation dialog.
Click <Browse> to enter the path and file name for the activation request file.
Click <Finish> to save the customer-to-vendor (*.c2v) activation request file, and include the fileas an email attachment and send an email to [email protected]. If your email systemdoes not allow sending *.c2v files you can change the file extension to *.txt.
After receiving the vendor-to-customer (*.v2c) confirmation file from Applied Maths the activationprocess can be completed:
Select the Activate with confirmation file option in the Manual Activation dialog.
Click <Browse> to select the *.v2c confirmation file, and click <Finish> to install the Sentinel-Hasp soft lock key on the NetKey+ server;
Select Server in the left panel of the NetKey+ configuration tool. If the manual activation was
All rights reserved. Not for Diagnostic Use.
34 4. Installation procedure
Figure 4.26: The Manual activation dialog.
successful the software-based protection key with SentinelHasp as the provider should appearwithin a minute or so in the list of available license keys.
4.4.3.4 Transfer Sentinel HASP SL key
To be able to transfer a software-based protection key the NetKey+ server and the configurationtool must be installed on both the source and destination computers, and the NetKey+ configura-tion tool must be started locally on both computers. A license key with the SentinelHasp providermust be listed in the NetKey+ configuration tool on the source NetKey+ server to be able to transferthe key to another NetKey+ server computer.
Transferring the Sentinel HASP SL key is a three-step process:
The first step is creating the protection key request file on the target computer:
1. Start the NetKey+ configuration tool on the target computer.
2. Select Licenses in the left pane, select the license string.
3. Click the <Activate> button.
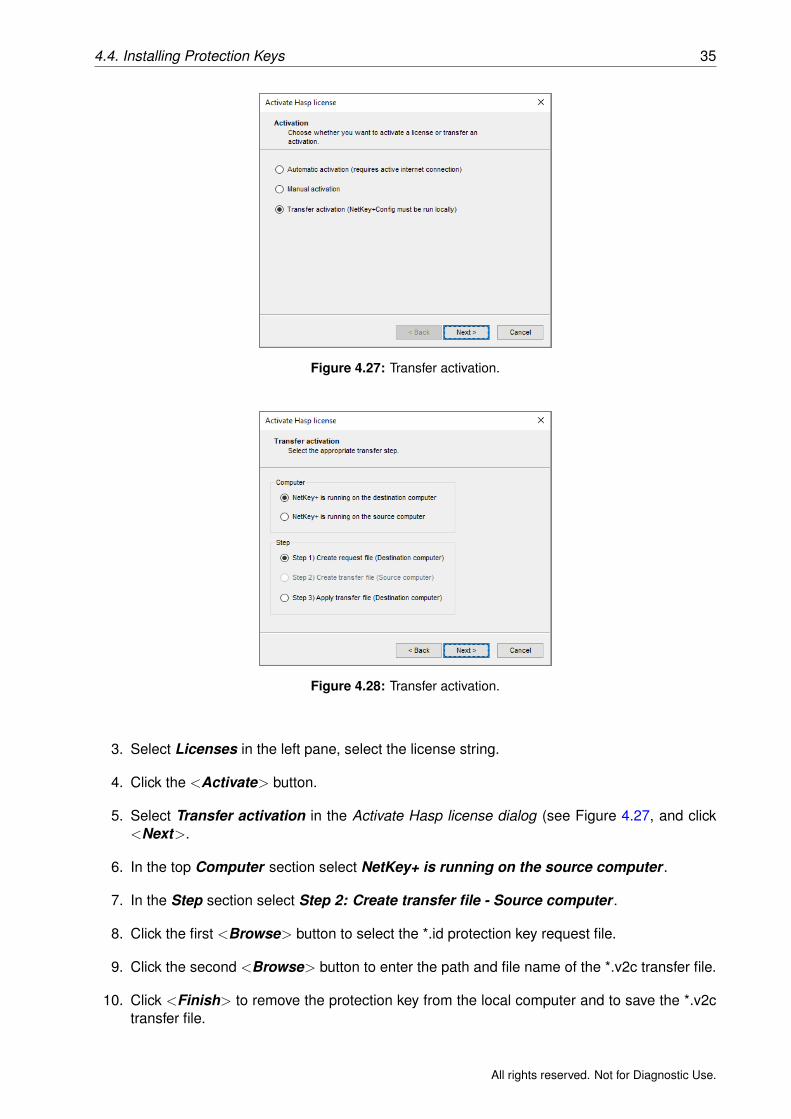
4. Select Transfer activation in the Activate Hasp license dialog (see Figure 4.27 and click<Next>.
5. In the top Computer section select NetKey+ is running on the destination computer .
6. In the Step section select Step 1: Create request file - Destination computer .
7. Click the <Browse> button to enter the path and file name of the protection key request file.
8. Click <Finish> to save the protection key request file.
The second step is creating the protection key transfer file on the source computer:
1. Copy the protection key request file from the target to the source computer.
2. Start the NetKey+ configuration tool on the source computer.
All rights reserved. Not for Diagnostic Use.
4.4. Installing Protection Keys 35
Figure 4.27: Transfer activation.
Figure 4.28: Transfer activation.
3. Select Licenses in the left pane, select the license string.
4. Click the <Activate> button.
5. Select Transfer activation in the Activate Hasp license dialog (see Figure 4.27, and click<Next>.
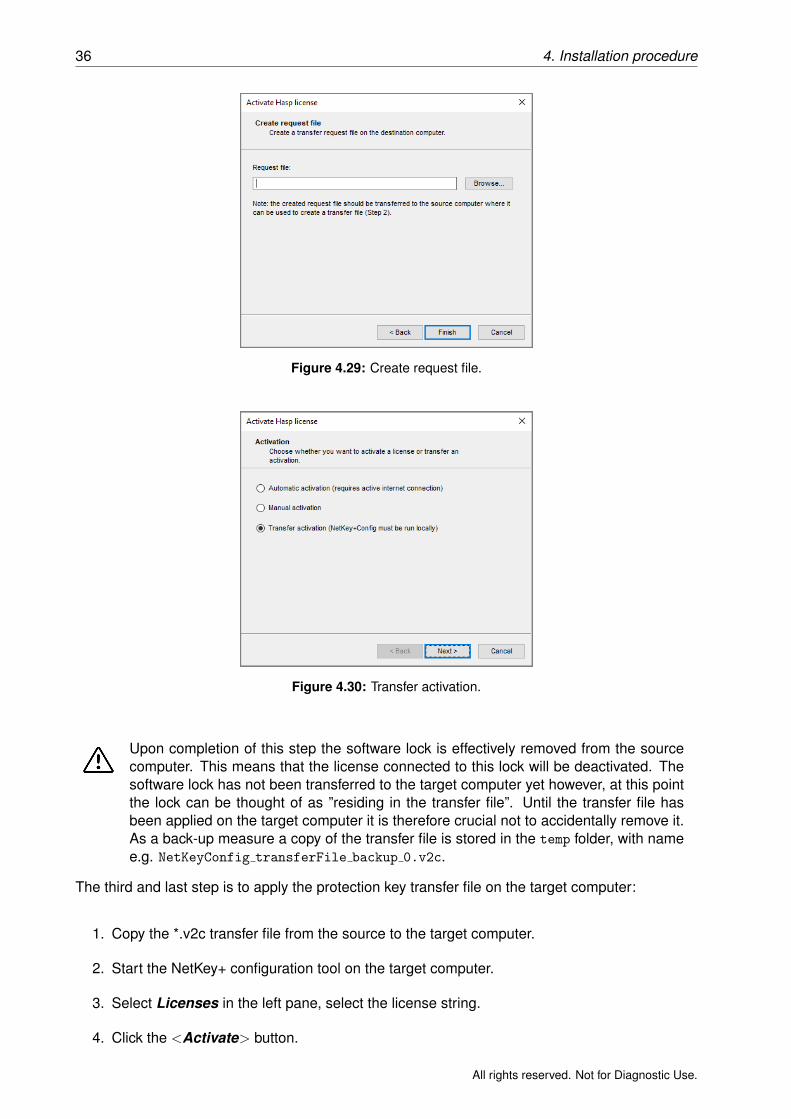
6. In the top Computer section select NetKey+ is running on the source computer .
7. In the Step section select Step 2: Create transfer file - Source computer .
8. Click the first <Browse> button to select the *.id protection key request file.
9. Click the second <Browse> button to enter the path and file name of the *.v2c transfer file.
10. Click <Finish> to remove the protection key from the local computer and to save the *.v2ctransfer file.
All rights reserved. Not for Diagnostic Use.
36 4. Installation procedure
Figure 4.29: Create request file.
Figure 4.30: Transfer activation.
Upon completion of this step the software lock is effectively removed from the sourcecomputer. This means that the license connected to this lock will be deactivated. Thesoftware lock has not been transferred to the target computer yet however, at this pointthe lock can be thought of as ”residing in the transfer file”. Until the transfer file hasbeen applied on the target computer it is therefore crucial not to accidentally remove it.As a back-up measure a copy of the transfer file is stored in the temp folder, with namee.g. NetKeyConfig transferFile backup 0.v2c.
The third and last step is to apply the protection key transfer file on the target computer:
1. Copy the *.v2c transfer file from the source to the target computer.
2. Start the NetKey+ configuration tool on the target computer.
3. Select Licenses in the left pane, select the license string.
4. Click the <Activate> button.
All rights reserved. Not for Diagnostic Use.
4.5. Setup log 37
Figure 4.31: Transfer activation.
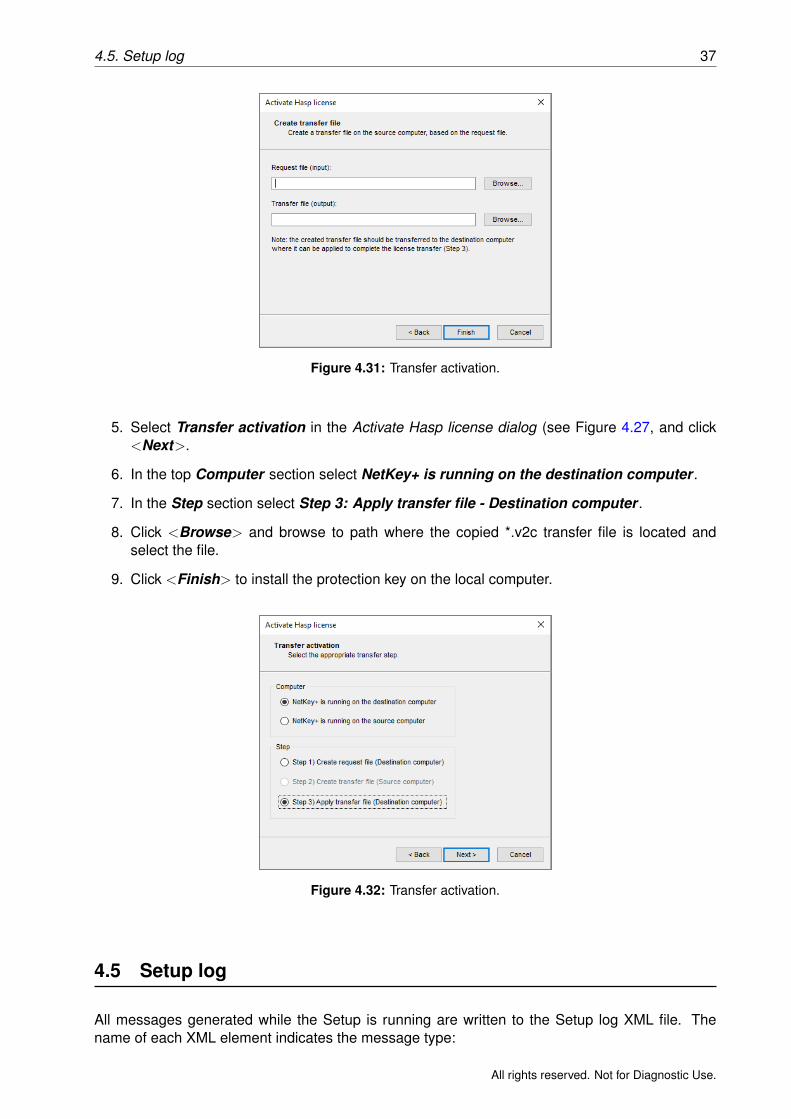
5. Select Transfer activation in the Activate Hasp license dialog (see Figure 4.27, and click<Next>.
6. In the top Computer section select NetKey+ is running on the destination computer .
7. In the Step section select Step 3: Apply transfer file - Destination computer .
8. Click <Browse> and browse to path where the copied *.v2c transfer file is located andselect the file.
9. Click <Finish> to install the protection key on the local computer.
Figure 4.32: Transfer activation.
4.5 Setup log
All messages generated while the Setup is running are written to the Setup log XML file. Thename of each XML element indicates the message type:
All rights reserved. Not for Diagnostic Use.
38 4. Installation procedure
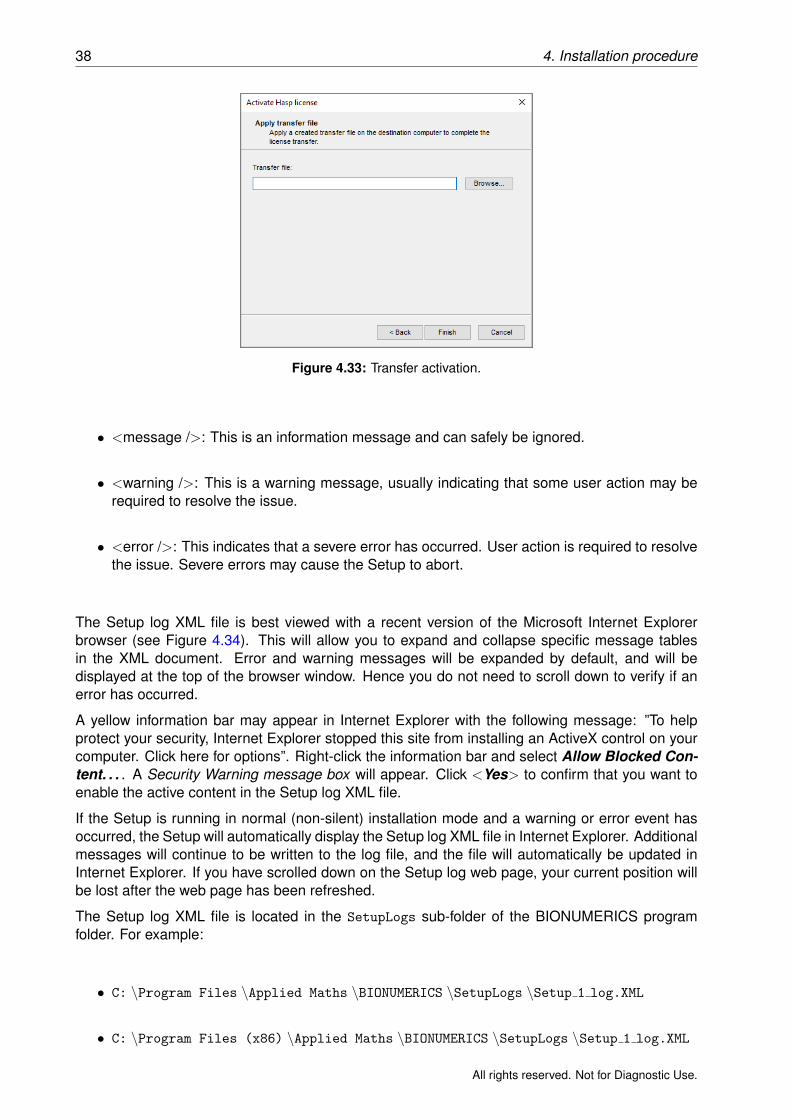
Figure 4.33: Transfer activation.
• <message />: This is an information message and can safely be ignored.
• <warning />: This is a warning message, usually indicating that some user action may berequired to resolve the issue.
• <error />: This indicates that a severe error has occurred. User action is required to resolvethe issue. Severe errors may cause the Setup to abort.
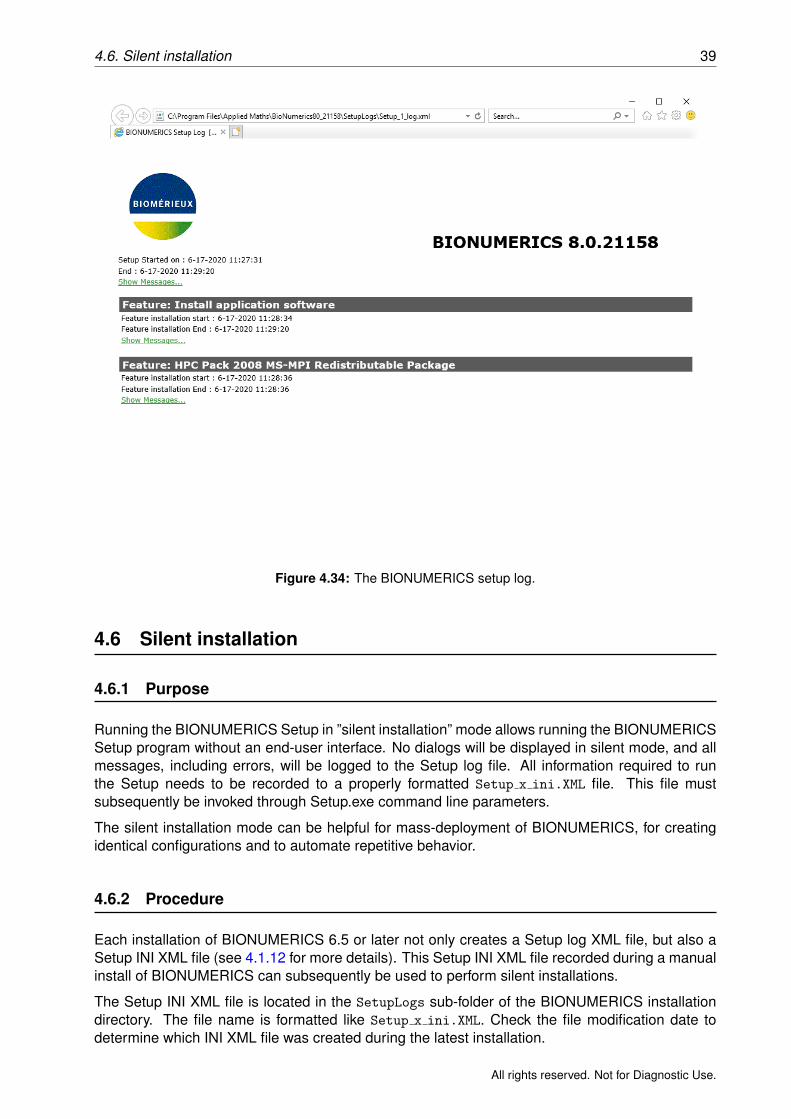
The Setup log XML file is best viewed with a recent version of the Microsoft Internet Explorerbrowser (see Figure 4.34). This will allow you to expand and collapse specific message tablesin the XML document. Error and warning messages will be expanded by default, and will bedisplayed at the top of the browser window. Hence you do not need to scroll down to verify if anerror has occurred.
A yellow information bar may appear in Internet Explorer with the following message: ”To helpprotect your security, Internet Explorer stopped this site from installing an ActiveX control on yourcomputer. Click here for options”. Right-click the information bar and select Allow Blocked Con-tent. . . . A Security Warning message box will appear. Click <Yes> to confirm that you want toenable the active content in the Setup log XML file.
If the Setup is running in normal (non-silent) installation mode and a warning or error event hasoccurred, the Setup will automatically display the Setup log XML file in Internet Explorer. Additionalmessages will continue to be written to the log file, and the file will automatically be updated inInternet Explorer. If you have scrolled down on the Setup log web page, your current position willbe lost after the web page has been refreshed.
The Setup log XML file is located in the SetupLogs sub-folder of the BIONUMERICS programfolder. For example:
• C: \Program Files \Applied Maths \BIONUMERICS \SetupLogs \Setup 1 log.XML
• C: \Program Files (x86) \Applied Maths \BIONUMERICS \SetupLogs \Setup 1 log.XML
All rights reserved. Not for Diagnostic Use.
4.6. Silent installation 39
Figure 4.34: The BIONUMERICS setup log.
4.6 Silent installation
4.6.1 Purpose
Running the BIONUMERICS Setup in ”silent installation” mode allows running the BIONUMERICSSetup program without an end-user interface. No dialogs will be displayed in silent mode, and allmessages, including errors, will be logged to the Setup log file. All information required to runthe Setup needs to be recorded to a properly formatted Setup x ini.XML file. This file mustsubsequently be invoked through Setup.exe command line parameters.
The silent installation mode can be helpful for mass-deployment of BIONUMERICS, for creatingidentical configurations and to automate repetitive behavior.
4.6.2 Procedure
Each installation of BIONUMERICS 6.5 or later not only creates a Setup log XML file, but also aSetup INI XML file (see 4.1.12 for more details). This Setup INI XML file recorded during a manualinstall of BIONUMERICS can subsequently be used to perform silent installations.
The Setup INI XML file is located in the SetupLogs sub-folder of the BIONUMERICS installationdirectory. The file name is formatted like Setup x ini.XML. Check the file modification date todetermine which INI XML file was created during the latest installation.
All rights reserved. Not for Diagnostic Use.
40 4. Installation procedure
The BIONUMERICS 6.5 or later versions of the Setup program accept the following command lineparameters to invoke the silent installation mode:
"<path to Setup files>\Setup.exe" /s --ini="<path to Setup x ini.XML file>"
• The /s command line parameter instructs the InstallShield runtime engine to suppress theExisting Installed Instances Detected dialog box if BIONUMERICS version 6.5 or later isalready installed.
• The --ini parameter instructs the Setup script to read the installation settings from the INIXML file, and to hide all dialogs.
• The double hyphen is required to differentiate between InstallShield runtime engine andcustom InstallScript command line parameters.
• The slash parameters are used by the runtime engine.
• The double hyphen custom parameters are used by the installation script.
• Optionally the --logdir command line parameter can be specified to override the log dirpath recorded in the Setup INI XML file.
"<path to Setup files>\Setup.exe" /s --ini="<path to Setup x ini.XML file>" --logdir="<path
to log folder>"
Example (all command line parameters should be on a single line):
"C:\Users\Public\Documents\Applied Maths\BIONUMERICS \Setup.exe" /s
--ini="C:\Users\Public\Documents\Applied Maths\Setup 1 ini.XML"
--logdir="C:\Users\Public\Documents\Applied Maths\SetupLogs"
During silent installations, no error or warning messages are displayed when the Setup is running.The installation Administrator should check the Setup log XML file to verify that no errors haveoccurred, and that no further action is required to complete the BIONUMERICS installation on thetarget computer.
4.6.3 Setup INI XML file format
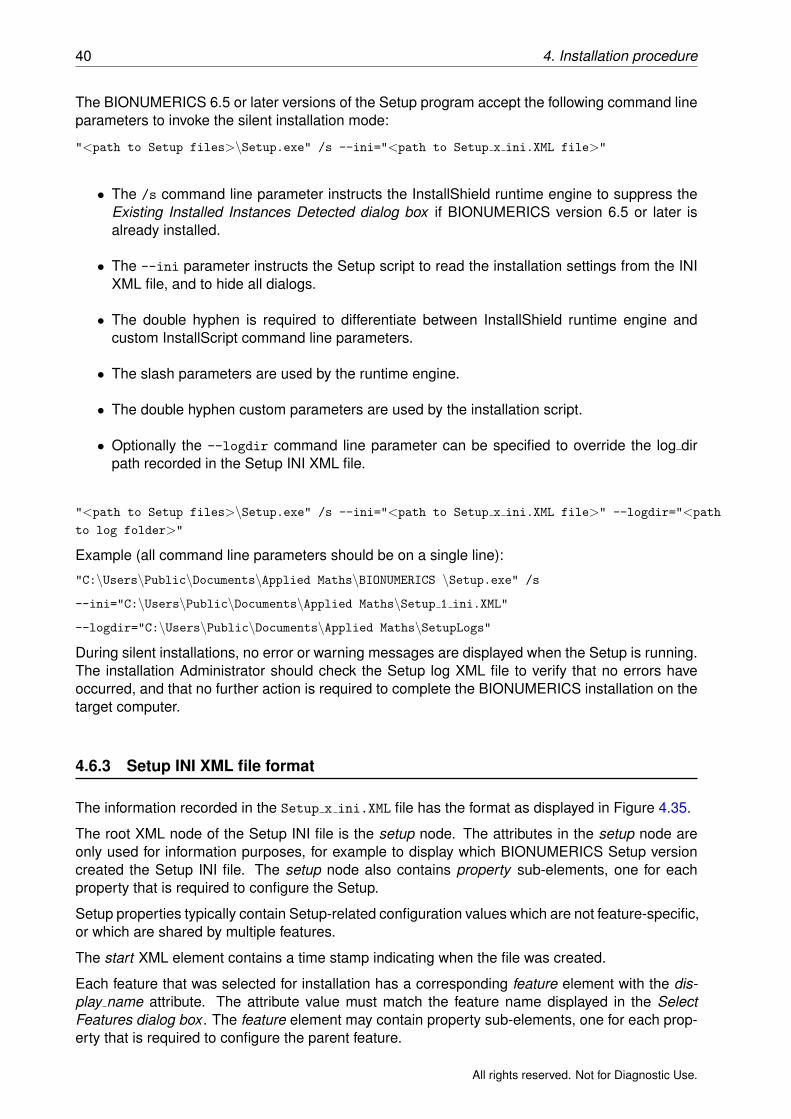
The information recorded in the Setup x ini.XML file has the format as displayed in Figure 4.35.
The root XML node of the Setup INI file is the setup node. The attributes in the setup node areonly used for information purposes, for example to display which BIONUMERICS Setup versioncreated the Setup INI file. The setup node also contains property sub-elements, one for eachproperty that is required to configure the Setup.
Setup properties typically contain Setup-related configuration values which are not feature-specific,or which are shared by multiple features.
The start XML element contains a time stamp indicating when the file was created.
Each feature that was selected for installation has a corresponding feature element with the dis-play name attribute. The attribute value must match the feature name displayed in the SelectFeatures dialog box . The feature element may contain property sub-elements, one for each prop-erty that is required to configure the parent feature.
All rights reserved. Not for Diagnostic Use.
4.7. Silent un-installation 41
Figure 4.35: Setup INI XML file format.
4.7 Silent un-installation
4.7.1 Purpose
The silent un-installation procedure uninstalls the BIONUMERICS program without displaying thegraphical user interface.
4.7.2 Procedure
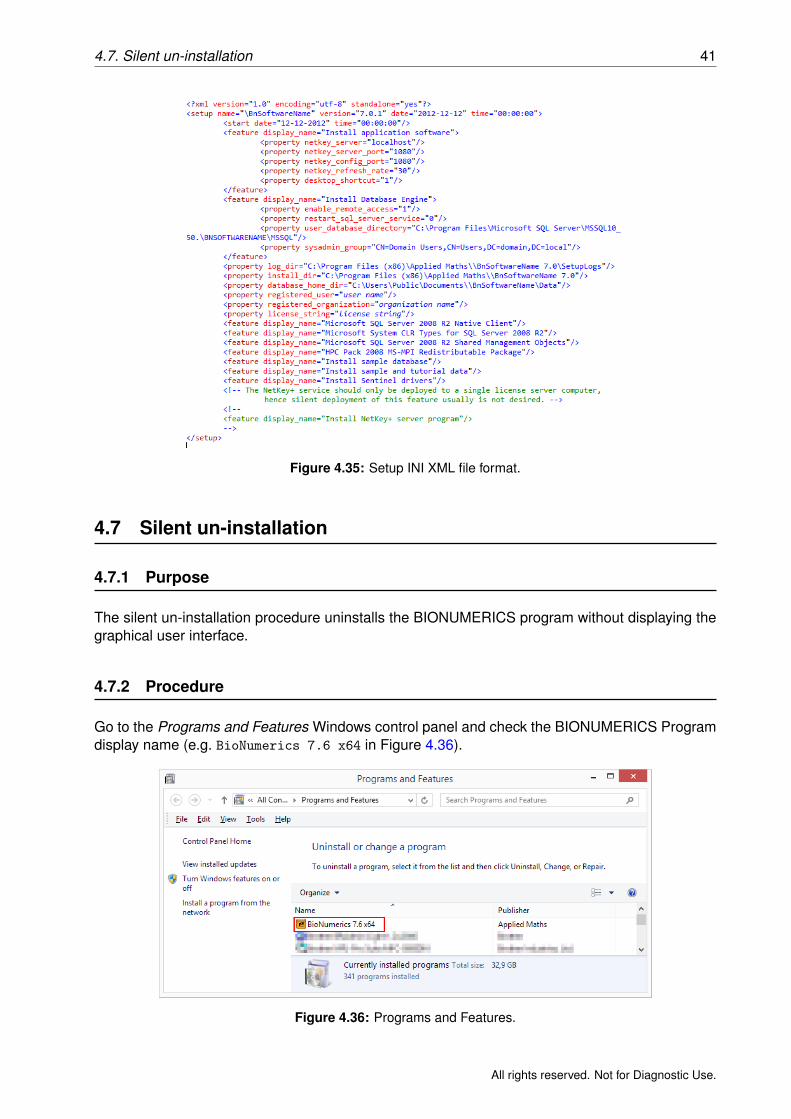
Go to the Programs and Features Windows control panel and check the BIONUMERICS Programdisplay name (e.g. BioNumerics 7.6 x64 in Figure 4.36).
Figure 4.36: Programs and Features.
All rights reserved. Not for Diagnostic Use.
42 4. Installation procedure
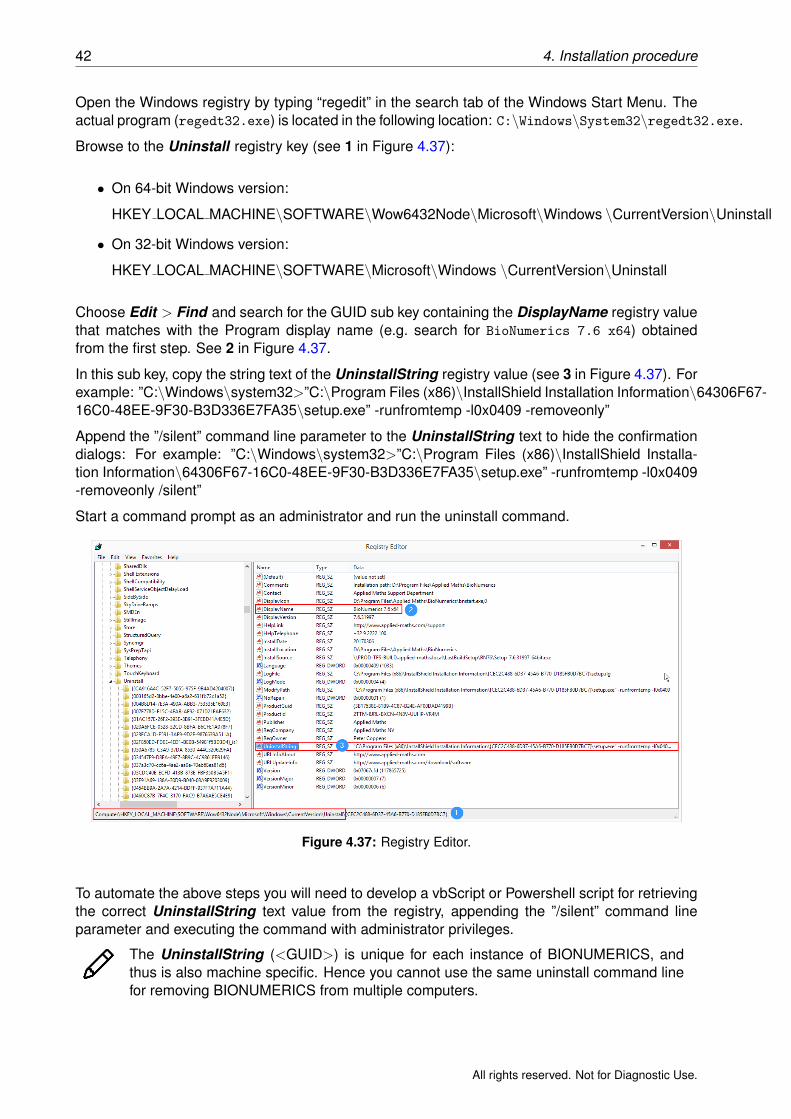
Open the Windows registry by typing “regedit” in the search tab of the Windows Start Menu. Theactual program (regedt32.exe) is located in the following location: C:\Windows\System32\regedt32.exe.
Browse to the Uninstall registry key (see 1 in Figure 4.37):
• On 64-bit Windows version:
HKEY LOCAL MACHINE\SOFTWARE\Wow6432Node\Microsoft\Windows \CurrentVersion\Uninstall
• On 32-bit Windows version:
HKEY LOCAL MACHINE\SOFTWARE\Microsoft\Windows \CurrentVersion\Uninstall
Choose Edit > Find and search for the GUID sub key containing the DisplayName registry valuethat matches with the Program display name (e.g. search for BioNumerics 7.6 x64) obtainedfrom the first step. See 2 in Figure 4.37.
In this sub key, copy the string text of the UninstallString registry value (see 3 in Figure 4.37). Forexample: ”C:\Windows\system32>”C:\Program Files (x86)\InstallShield Installation Information\64306F67-16C0-48EE-9F30-B3D336E7FA35\setup.exe” -runfromtemp -l0x0409 -removeonly”
Append the ”/silent” command line parameter to the UninstallString text to hide the confirmationdialogs: For example: ”C:\Windows\system32>”C:\Program Files (x86)\InstallShield Installa-tion Information\64306F67-16C0-48EE-9F30-B3D336E7FA35\setup.exe” -runfromtemp -l0x0409-removeonly /silent”
Start a command prompt as an administrator and run the uninstall command.
Figure 4.37: Registry Editor.
To automate the above steps you will need to develop a vbScript or Powershell script for retrievingthe correct UninstallString text value from the registry, appending the ”/silent” command lineparameter and executing the command with administrator privileges.
The UninstallString (<GUID>) is unique for each instance of BIONUMERICS, andthus is also machine specific. Hence you cannot use the same uninstall command linefor removing BIONUMERICS from multiple computers.
All rights reserved. Not for Diagnostic Use.
Chapter 5
NetKey+ configuration
5.1 Introduction
If a network license has been purchased, the NetKey+ server program and the Sentinel driversmust be installed on a computer where the hardware security will be connected to (i.e. the servercomputer) (see 4).
After installation of these features on the server computer, the NetKey+ service needs to be in-stalled and started using the NetKey+ Configuration tool (NetKey+Config.exe) (see 5.2).
Once started, the license(s) can be configured in the NetKey+ Configuration tool (see 5.3) andthe NetKey+ service can start distributing sessions to the requesting BIONUMERICS applicationsrunning on the client computers (i.e. the computers with the application software installed) (see5.4).
5.2 Installing and starting the NetKey+ service on the server
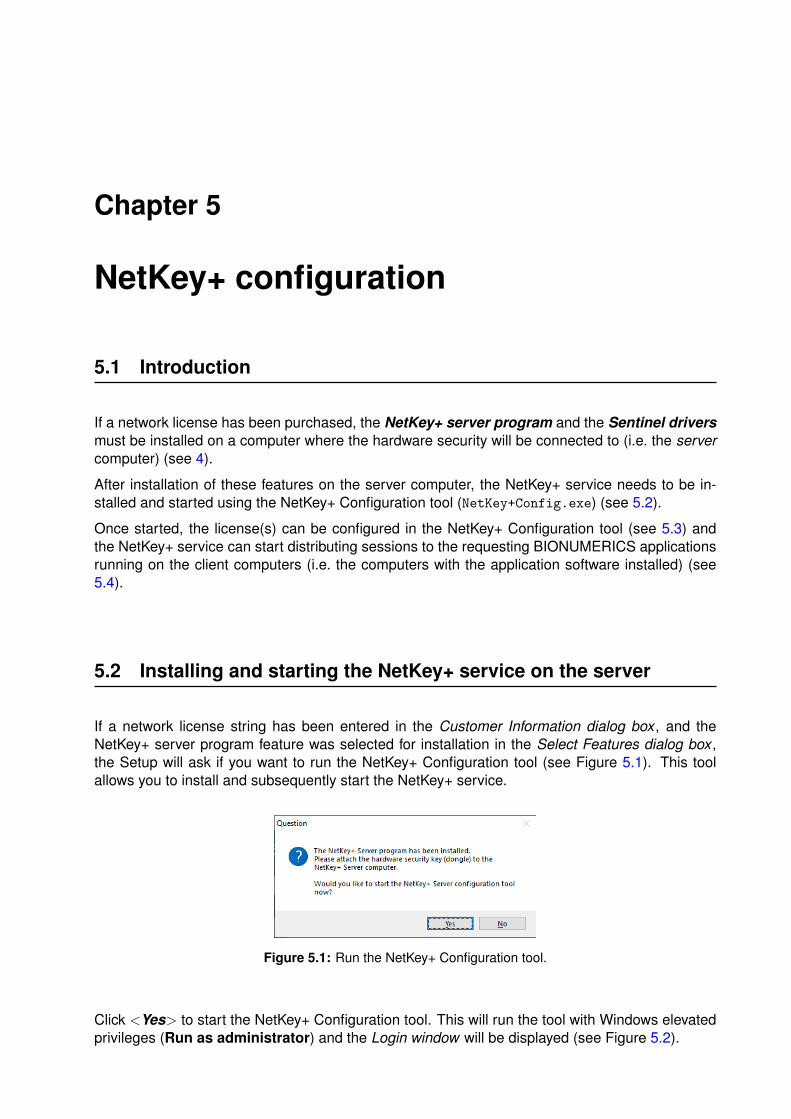
If a network license string has been entered in the Customer Information dialog box , and theNetKey+ server program feature was selected for installation in the Select Features dialog box ,the Setup will ask if you want to run the NetKey+ Configuration tool (see Figure 5.1). This toolallows you to install and subsequently start the NetKey+ service.
Figure 5.1: Run the NetKey+ Configuration tool.
Click <Yes> to start the NetKey+ Configuration tool. This will run the tool with Windows elevatedprivileges (Run as administrator) and the Login window will be displayed (see Figure 5.2).
44 5. NetKey+ configuration
The NetKey+ Configuration tool can also be called by (double-)clicking on theNetKey+Config.exe application in the installation directory of BIONUMERICS. Alter-
natively, press the <Settings> button ( ) in the startup window of BIONUMERICS-if the application software has been installed - and select NetKey+ configuration fromthe drop-down list.
The configuration tool can be run as NetKey+ User or NetKey+ Administrator in com-bination with or without Windows elevated privileges. An overview of all tools that areaccessible in the NetKey+ Configuration program for the four different login options isgiven in 5.9.
To run a program with Windows elevated privileges, right-click on the application andselect ”Run as administrator”.
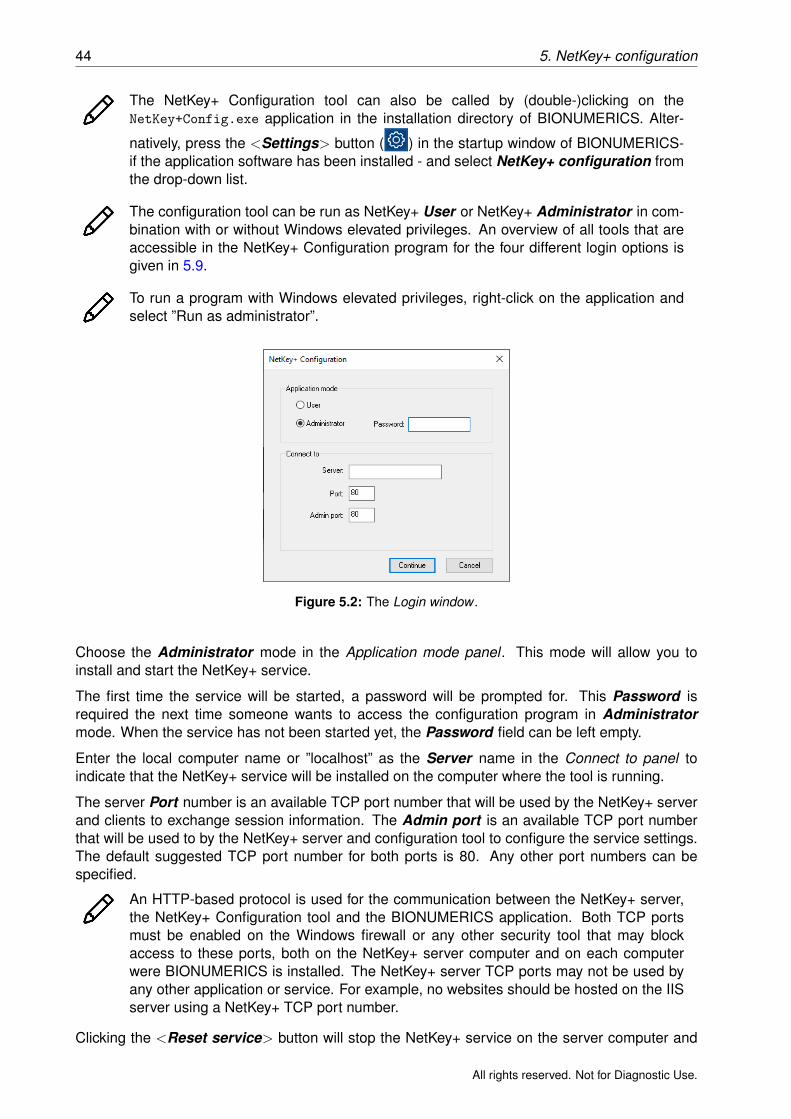
Figure 5.2: The Login window .
Choose the Administrator mode in the Application mode panel . This mode will allow you toinstall and start the NetKey+ service.
The first time the service will be started, a password will be prompted for. This Password isrequired the next time someone wants to access the configuration program in Administratormode. When the service has not been started yet, the Password field can be left empty.
Enter the local computer name or ”localhost” as the Server name in the Connect to panel toindicate that the NetKey+ service will be installed on the computer where the tool is running.
The server Port number is an available TCP port number that will be used by the NetKey+ serverand clients to exchange session information. The Admin port is an available TCP port numberthat will be used to by the NetKey+ server and configuration tool to configure the service settings.The default suggested TCP port number for both ports is 80. Any other port numbers can bespecified.
An HTTP-based protocol is used for the communication between the NetKey+ server,the NetKey+ Configuration tool and the BIONUMERICS application. Both TCP portsmust be enabled on the Windows firewall or any other security tool that may blockaccess to these ports, both on the NetKey+ server computer and on each computerwere BIONUMERICS is installed. The NetKey+ server TCP ports may not be used byany other application or service. For example, no websites should be hosted on the IISserver using a NetKey+ TCP port number.
Clicking the <Reset service> button will stop the NetKey+ service on the server computer and
All rights reserved. Not for Diagnostic Use.
5.2. Installing and starting the NetKey+ service on the server 45
will delete all current NetKey+ settings, including the Administrator password (see 5.7 for moreinformation). This operation is not applicable if the service is not already installed.
Clicking the <Continue> button will save the connection settings to the NetKey.ini text file, andto the NetKey+ Config.txt XML file. These files are located in the folder containing applica-tion data for all users (CommonAppDataFolder, for which the path is typically C: \ProgramData\Applied maths \NetKey+).
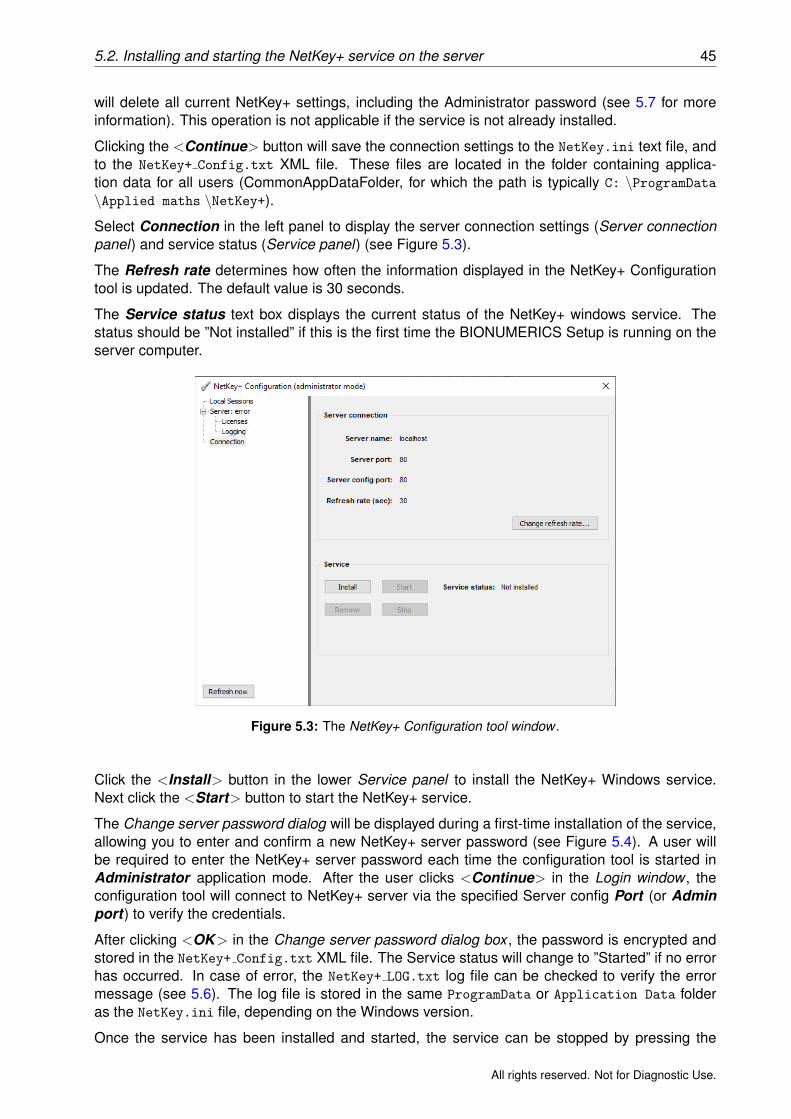
Select Connection in the left panel to display the server connection settings (Server connectionpanel) and service status (Service panel) (see Figure 5.3).
The Refresh rate determines how often the information displayed in the NetKey+ Configurationtool is updated. The default value is 30 seconds.
The Service status text box displays the current status of the NetKey+ windows service. Thestatus should be ”Not installed” if this is the first time the BIONUMERICS Setup is running on theserver computer.
Figure 5.3: The NetKey+ Configuration tool window .
Click the <Install> button in the lower Service panel to install the NetKey+ Windows service.Next click the <Start> button to start the NetKey+ service.
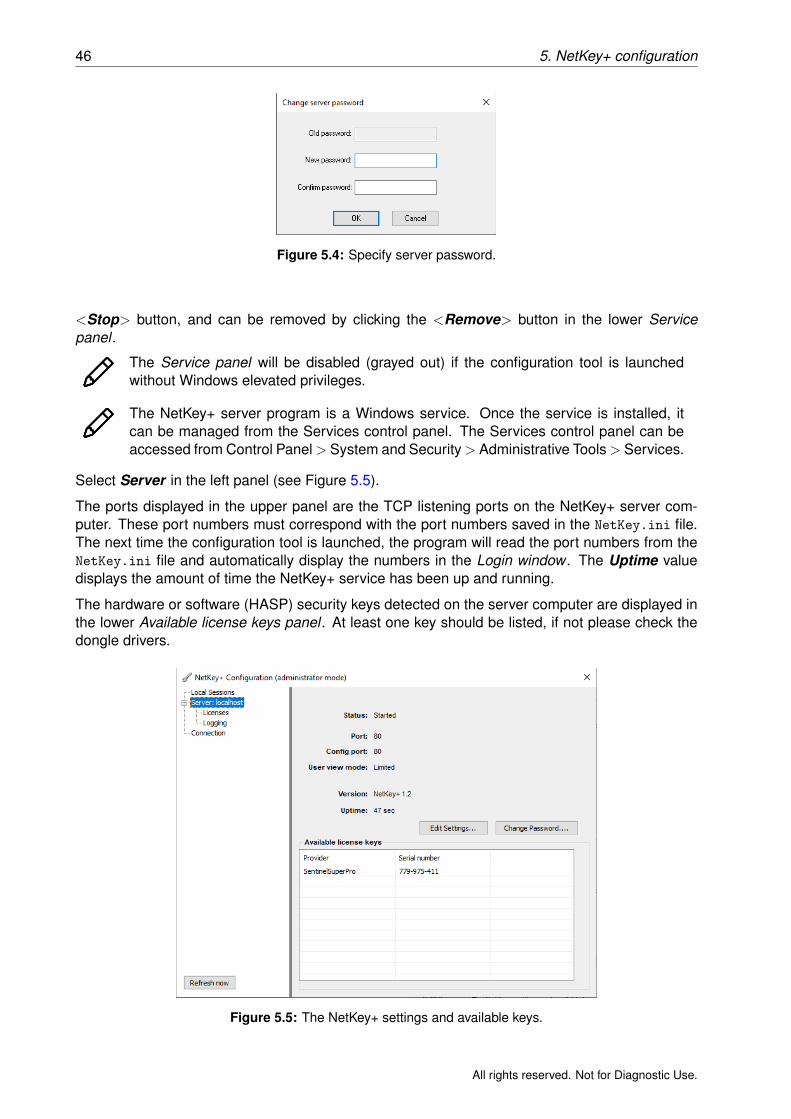
The Change server password dialog will be displayed during a first-time installation of the service,allowing you to enter and confirm a new NetKey+ server password (see Figure 5.4). A user willbe required to enter the NetKey+ server password each time the configuration tool is started inAdministrator application mode. After the user clicks <Continue> in the Login window , theconfiguration tool will connect to NetKey+ server via the specified Server config Port (or Adminport) to verify the credentials.
After clicking <OK> in the Change server password dialog box , the password is encrypted andstored in the NetKey+ Config.txt XML file. The Service status will change to ”Started” if no errorhas occurred. In case of error, the NetKey+ LOG.txt log file can be checked to verify the errormessage (see 5.6). The log file is stored in the same ProgramData or Application Data folderas the NetKey.ini file, depending on the Windows version.
Once the service has been installed and started, the service can be stopped by pressing the
All rights reserved. Not for Diagnostic Use.
46 5. NetKey+ configuration
Figure 5.4: Specify server password.
<Stop> button, and can be removed by clicking the <Remove> button in the lower Servicepanel .
The Service panel will be disabled (grayed out) if the configuration tool is launchedwithout Windows elevated privileges.
The NetKey+ server program is a Windows service. Once the service is installed, itcan be managed from the Services control panel. The Services control panel can beaccessed from Control Panel > System and Security > Administrative Tools > Services.
Select Server in the left panel (see Figure 5.5).
The ports displayed in the upper panel are the TCP listening ports on the NetKey+ server com-puter. These port numbers must correspond with the port numbers saved in the NetKey.ini file.The next time the configuration tool is launched, the program will read the port numbers from theNetKey.ini file and automatically display the numbers in the Login window . The Uptime valuedisplays the amount of time the NetKey+ service has been up and running.
The hardware or software (HASP) security keys detected on the server computer are displayed inthe lower Available license keys panel . At least one key should be listed, if not please check thedongle drivers.
Figure 5.5: The NetKey+ settings and available keys.
All rights reserved. Not for Diagnostic Use.
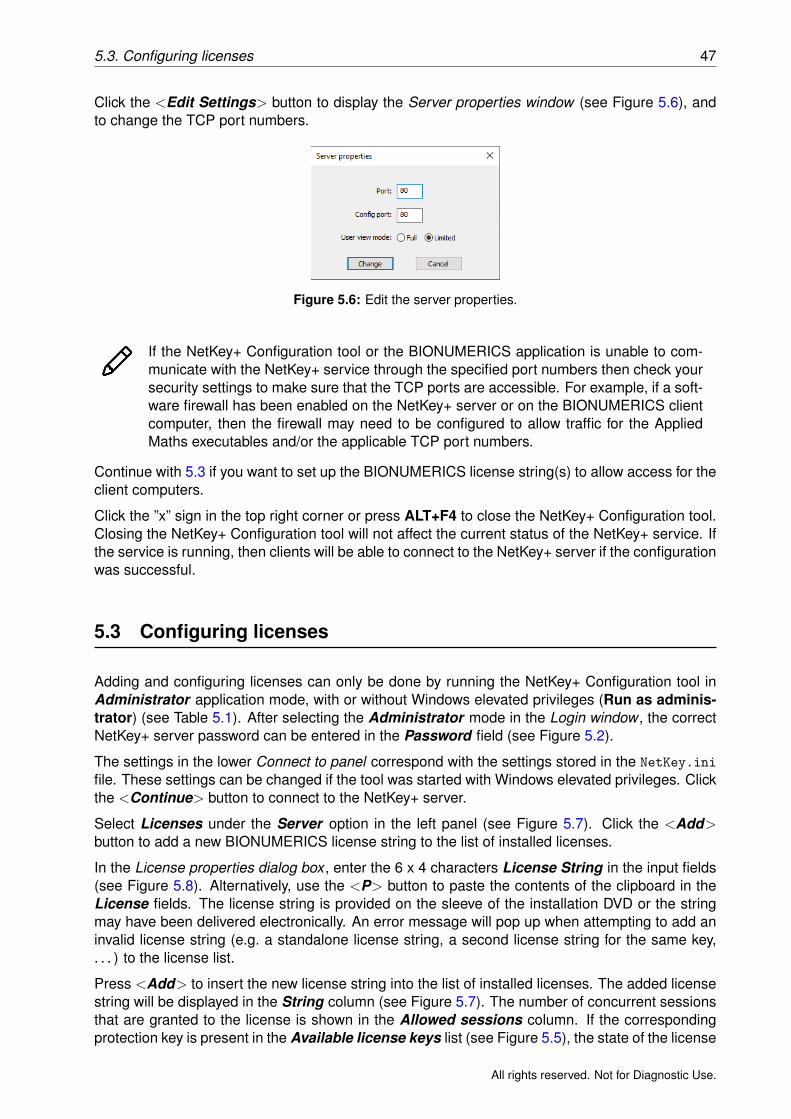
5.3. Configuring licenses 47
Click the <Edit Settings> button to display the Server properties window (see Figure 5.6), andto change the TCP port numbers.
Figure 5.6: Edit the server properties.
If the NetKey+ Configuration tool or the BIONUMERICS application is unable to com-municate with the NetKey+ service through the specified port numbers then check yoursecurity settings to make sure that the TCP ports are accessible. For example, if a soft-ware firewall has been enabled on the NetKey+ server or on the BIONUMERICS clientcomputer, then the firewall may need to be configured to allow traffic for the AppliedMaths executables and/or the applicable TCP port numbers.
Continue with 5.3 if you want to set up the BIONUMERICS license string(s) to allow access for theclient computers.
Click the ”x” sign in the top right corner or press ALT+F4 to close the NetKey+ Configuration tool.Closing the NetKey+ Configuration tool will not affect the current status of the NetKey+ service. Ifthe service is running, then clients will be able to connect to the NetKey+ server if the configurationwas successful.
5.3 Configuring licenses
Adding and configuring licenses can only be done by running the NetKey+ Configuration tool inAdministrator application mode, with or without Windows elevated privileges (Run as adminis-trator) (see Table 5.1). After selecting the Administrator mode in the Login window , the correctNetKey+ server password can be entered in the Password field (see Figure 5.2).
The settings in the lower Connect to panel correspond with the settings stored in the NetKey.ini
file. These settings can be changed if the tool was started with Windows elevated privileges. Clickthe <Continue> button to connect to the NetKey+ server.
Select Licenses under the Server option in the left panel (see Figure 5.7). Click the <Add>button to add a new BIONUMERICS license string to the list of installed licenses.
In the License properties dialog box , enter the 6 x 4 characters License String in the input fields(see Figure 5.8). Alternatively, use the <P> button to paste the contents of the clipboard in theLicense fields. The license string is provided on the sleeve of the installation DVD or the stringmay have been delivered electronically. An error message will pop up when attempting to add aninvalid license string (e.g. a standalone license string, a second license string for the same key,. . . ) to the license list.
Press <Add> to insert the new license string into the list of installed licenses. The added licensestring will be displayed in the String column (see Figure 5.7). The number of concurrent sessionsthat are granted to the license is shown in the Allowed sessions column. If the correspondingprotection key is present in the Available license keys list (see Figure 5.5), the state of the license
All rights reserved. Not for Diagnostic Use.
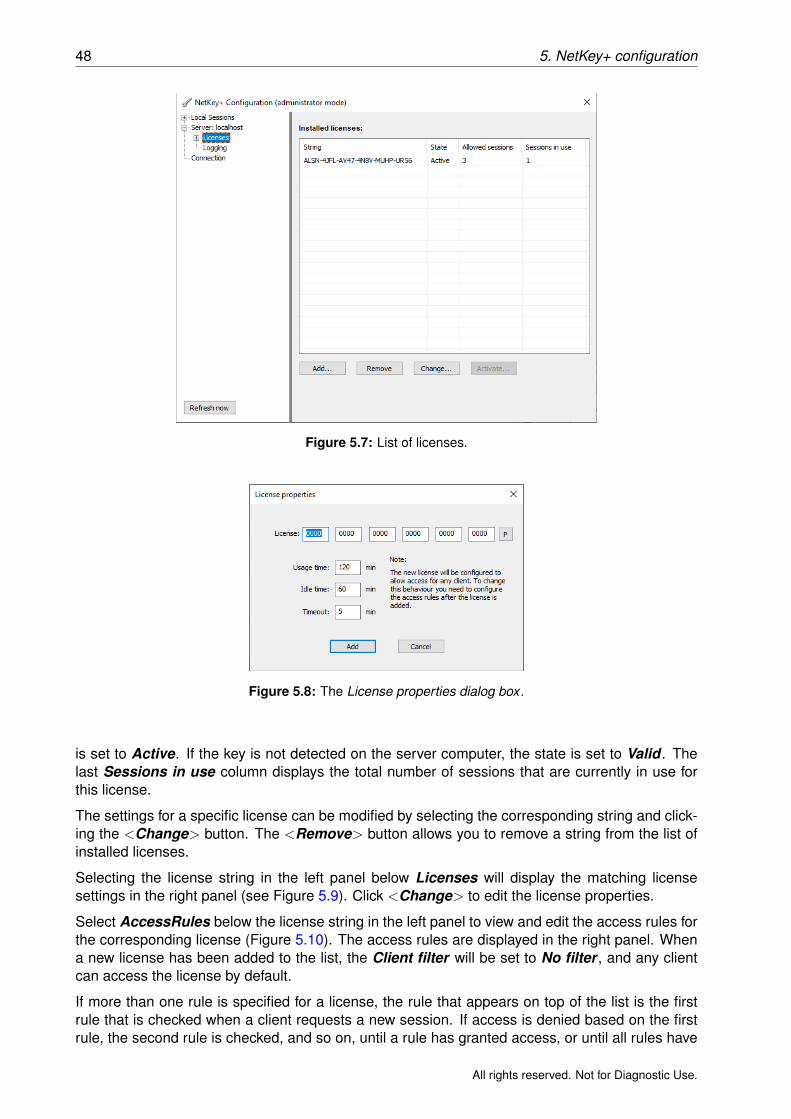
48 5. NetKey+ configuration
Figure 5.7: List of licenses.
Figure 5.8: The License properties dialog box .
is set to Active. If the key is not detected on the server computer, the state is set to Valid . Thelast Sessions in use column displays the total number of sessions that are currently in use forthis license.
The settings for a specific license can be modified by selecting the corresponding string and click-ing the <Change> button. The <Remove> button allows you to remove a string from the list ofinstalled licenses.
Selecting the license string in the left panel below Licenses will display the matching licensesettings in the right panel (see Figure 5.9). Click <Change> to edit the license properties.
Select AccessRules below the license string in the left panel to view and edit the access rules forthe corresponding license (Figure 5.10). The access rules are displayed in the right panel. Whena new license has been added to the list, the Client filter will be set to No filter , and any clientcan access the license by default.
If more than one rule is specified for a license, the rule that appears on top of the list is the firstrule that is checked when a client requests a new session. If access is denied based on the firstrule, the second rule is checked, and so on, until a rule has granted access, or until all rules have
All rights reserved. Not for Diagnostic Use.
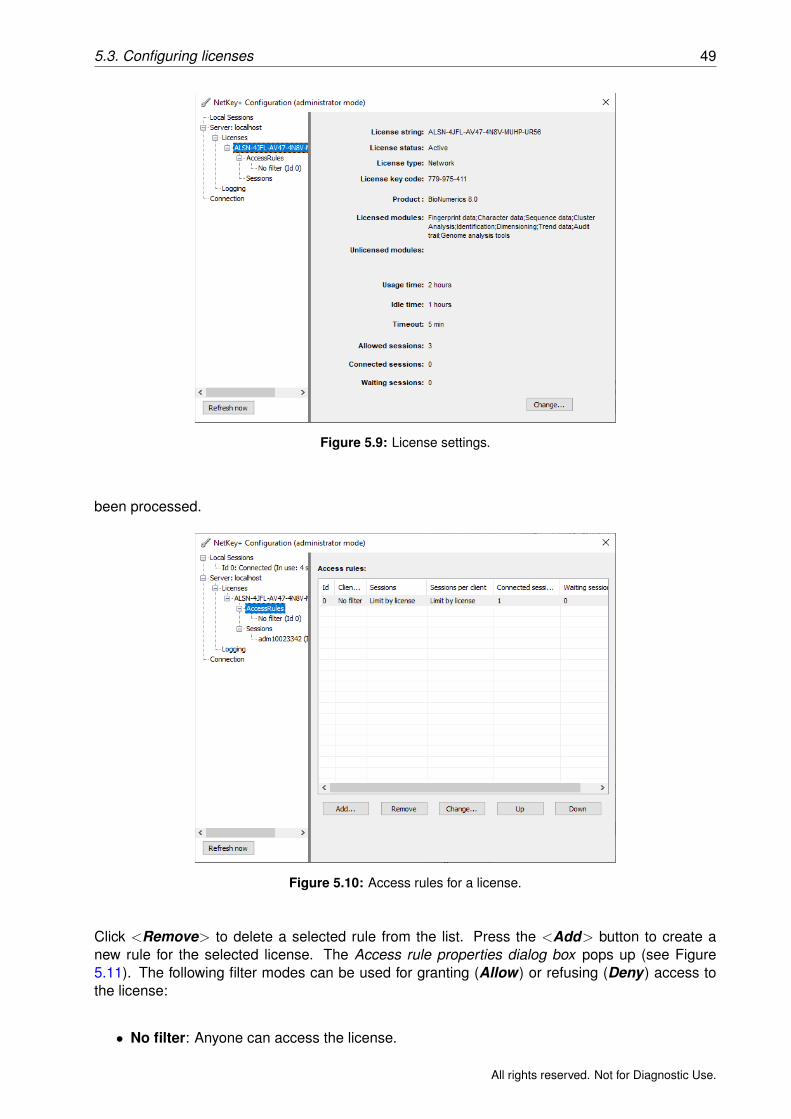
5.3. Configuring licenses 49
Figure 5.9: License settings.
been processed.
Figure 5.10: Access rules for a license.
Click <Remove> to delete a selected rule from the list. Press the <Add> button to create anew rule for the selected license. The Access rule properties dialog box pops up (see Figure5.11). The following filter modes can be used for granting (Allow ) or refusing (Deny) access tothe license:
• No filter: Anyone can access the license.
All rights reserved. Not for Diagnostic Use.

50 5. NetKey+ configuration
• Filter by ClientId: Physical Address (MAC) of the client network adapter.
• Filter by Computer Name: TCP/IP Host name of the client computer (with or without domainname).
• Filter by User Name: Windows login name without domain name.
• Filter by IP: Single or a range of IPv4 addresses of client computers.
Figure 5.11: The Access rule properties dialog box .
A range of IPv4 addresses can be specified if the Range option is checked in the upper Clientidentification panel . Optionally a limit on the number of allowed concurrent sessions can be spec-ified in the lower Access specification panel when the Allow option is checked (see Figure 5.11).Note that NetKey+ does not support the Filter by IP filter mode for IPv6 addresses.
Pressing the <Add> button adds the rule to the Access rules list (see Figure 5.10). Each accessrule is identified by an unique identifier (Id). The filter mode is displayed in the Client filter column,and the Sessions column displays the number of allowed concurrent sessions to all clients. If nolimit has been set this column will display Limit by license. The Sessions per client columndisplays the number of allowed concurrent sessions for each client. If no limit has been set thiscolumn will also display Limit by license. Both these sessions columns will display Deny if thishas been specified as the Access specification. The Connected sessions column shows thenumber of currently connected sessions. The number of sessions that are queued on a waitinglist are shown in the last Waiting sessions column.
The access properties for a selected rule can be modified by clicking the <Change> button. Ifmultiple access rules have been specified for a license, the order of the rules can be changed withthe <Up> and <Down> buttons.
When a client tries to open a session, a session request is sent to the server, containing computerinformation of the client (computer name, Windows user name, IP address, and MAC address)and the license string. The server checks the access rules of the license string that is sent withthe session request, and based on the access rules, the server grants or denies the client accessto the license. Each session that is granted access to a license is identified by a unique identifier,the session ID. The session identifier is sent to the client, and the session is launched on theclient computer or the session is put on a waiting list in case the number of allowed sessions (onthe client) is reached. The client stores the session ID of the session and closes the connectionwith the server computer. On regular time intervals, a renew session request of each connectedsession and session that is put on hold is sent to the server. Based on these renew sessionrequests, the server keeps track of the status of the sessions on the client computers. The servermight disconnect a session if the Usage time, Idle time or Timeout value for a session is reached:
All rights reserved. Not for Diagnostic Use.
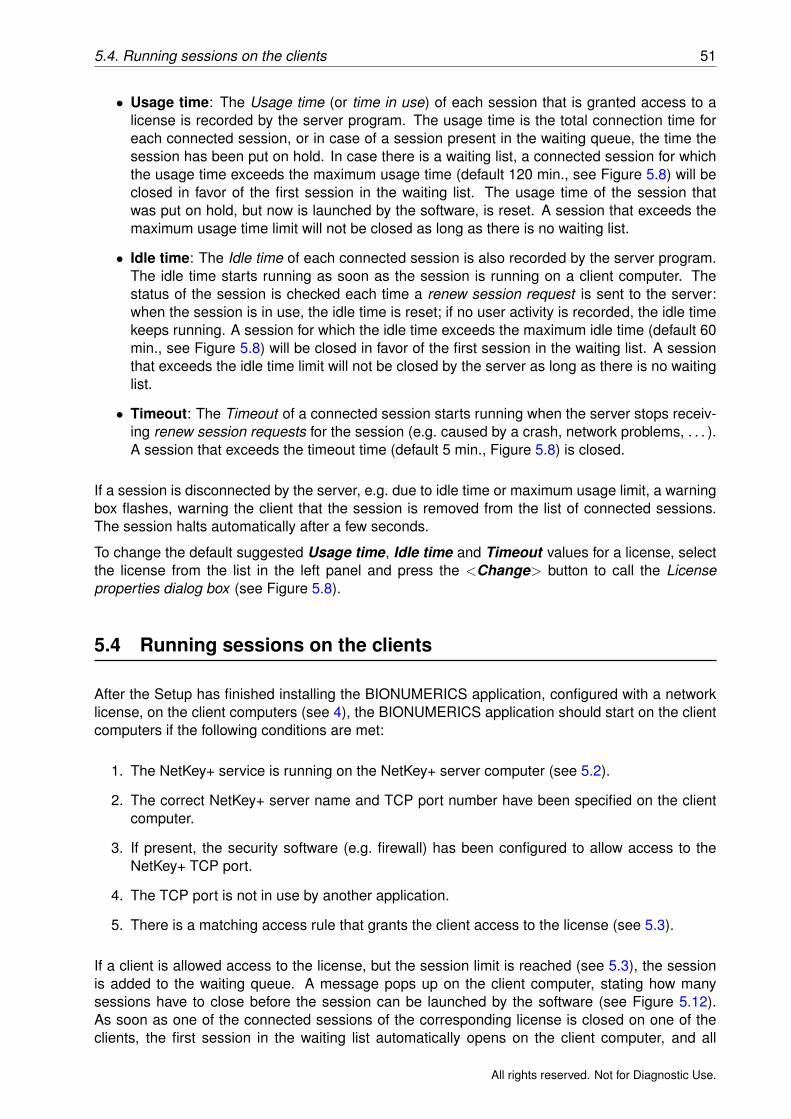
5.4. Running sessions on the clients 51
• Usage time: The Usage time (or time in use) of each session that is granted access to alicense is recorded by the server program. The usage time is the total connection time foreach connected session, or in case of a session present in the waiting queue, the time thesession has been put on hold. In case there is a waiting list, a connected session for whichthe usage time exceeds the maximum usage time (default 120 min., see Figure 5.8) will beclosed in favor of the first session in the waiting list. The usage time of the session thatwas put on hold, but now is launched by the software, is reset. A session that exceeds themaximum usage time limit will not be closed as long as there is no waiting list.
• Idle time: The Idle time of each connected session is also recorded by the server program.The idle time starts running as soon as the session is running on a client computer. Thestatus of the session is checked each time a renew session request is sent to the server:when the session is in use, the idle time is reset; if no user activity is recorded, the idle timekeeps running. A session for which the idle time exceeds the maximum idle time (default 60min., see Figure 5.8) will be closed in favor of the first session in the waiting list. A sessionthat exceeds the idle time limit will not be closed by the server as long as there is no waitinglist.
• Timeout: The Timeout of a connected session starts running when the server stops receiv-ing renew session requests for the session (e.g. caused by a crash, network problems, . . . ).A session that exceeds the timeout time (default 5 min., Figure 5.8) is closed.
If a session is disconnected by the server, e.g. due to idle time or maximum usage limit, a warningbox flashes, warning the client that the session is removed from the list of connected sessions.The session halts automatically after a few seconds.
To change the default suggested Usage time, Idle time and Timeout values for a license, selectthe license from the list in the left panel and press the <Change> button to call the Licenseproperties dialog box (see Figure 5.8).
5.4 Running sessions on the clients
After the Setup has finished installing the BIONUMERICS application, configured with a networklicense, on the client computers (see 4), the BIONUMERICS application should start on the clientcomputers if the following conditions are met:
1. The NetKey+ service is running on the NetKey+ server computer (see 5.2).
2. The correct NetKey+ server name and TCP port number have been specified on the clientcomputer.
3. If present, the security software (e.g. firewall) has been configured to allow access to theNetKey+ TCP port.
4. The TCP port is not in use by another application.
5. There is a matching access rule that grants the client access to the license (see 5.3).
If a client is allowed access to the license, but the session limit is reached (see 5.3), the sessionis added to the waiting queue. A message pops up on the client computer, stating how manysessions have to close before the session can be launched by the software (see Figure 5.12).As soon as one of the connected sessions of the corresponding license is closed on one of theclients, the first session in the waiting list automatically opens on the client computer, and all
All rights reserved. Not for Diagnostic Use.
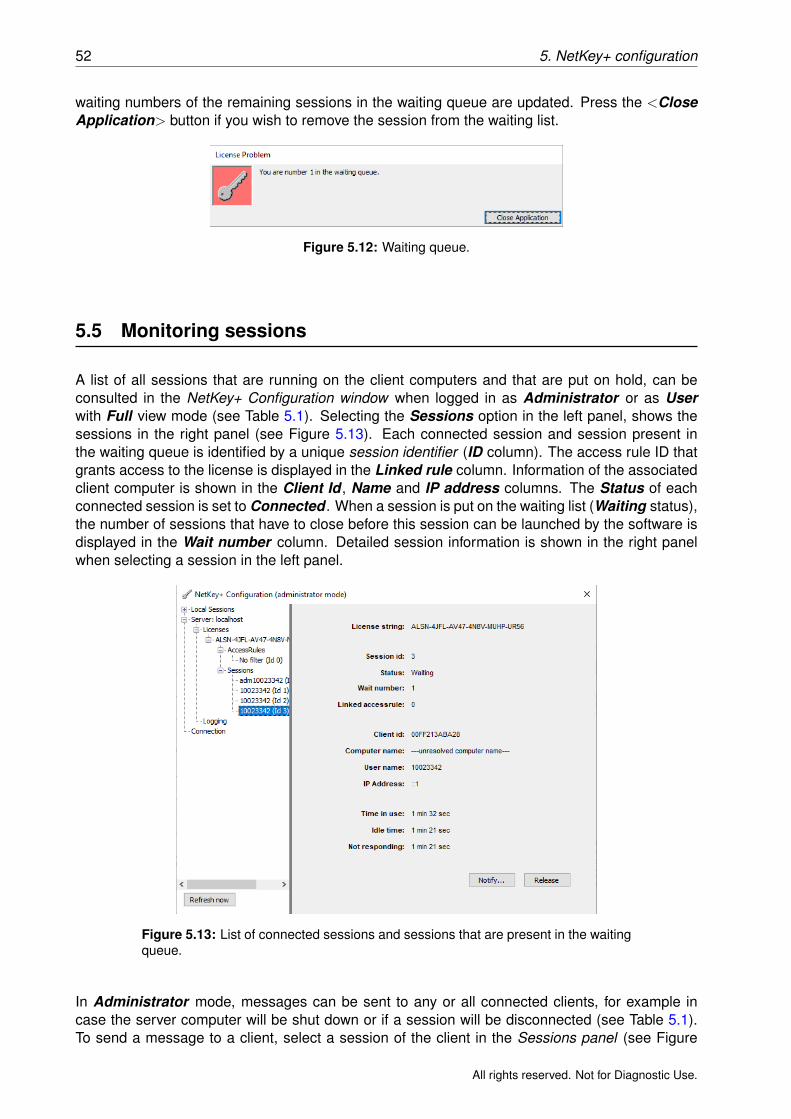
52 5. NetKey+ configuration
waiting numbers of the remaining sessions in the waiting queue are updated. Press the <CloseApplication> button if you wish to remove the session from the waiting list.
Figure 5.12: Waiting queue.
5.5 Monitoring sessions
A list of all sessions that are running on the client computers and that are put on hold, can beconsulted in the NetKey+ Configuration window when logged in as Administrator or as Userwith Full view mode (see Table 5.1). Selecting the Sessions option in the left panel, shows thesessions in the right panel (see Figure 5.13). Each connected session and session present inthe waiting queue is identified by a unique session identifier (ID column). The access rule ID thatgrants access to the license is displayed in the Linked rule column. Information of the associatedclient computer is shown in the Client Id , Name and IP address columns. The Status of eachconnected session is set to Connected . When a session is put on the waiting list (Waiting status),the number of sessions that have to close before this session can be launched by the software isdisplayed in the Wait number column. Detailed session information is shown in the right panelwhen selecting a session in the left panel.
Figure 5.13: List of connected sessions and sessions that are present in the waitingqueue.
In Administrator mode, messages can be sent to any or all connected clients, for example incase the server computer will be shut down or if a session will be disconnected (see Table 5.1).To send a message to a client, select a session of the client in the Sessions panel (see Figure
All rights reserved. Not for Diagnostic Use.
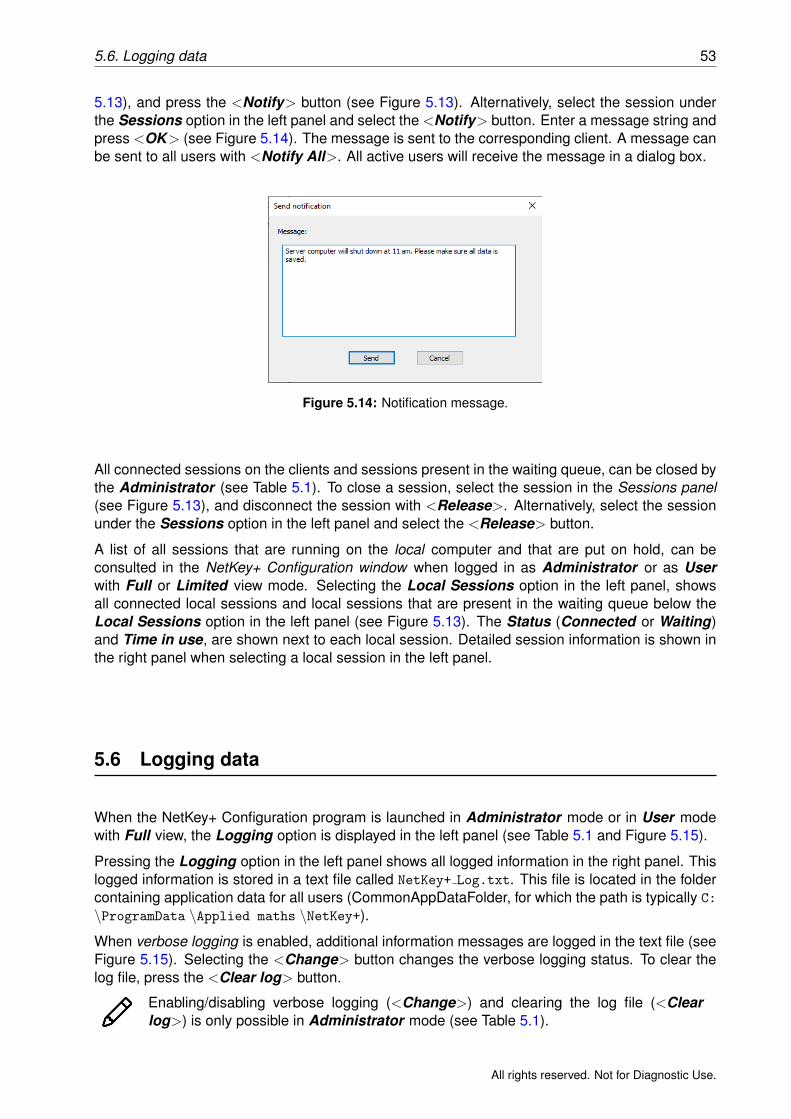
5.6. Logging data 53
5.13), and press the <Notify> button (see Figure 5.13). Alternatively, select the session underthe Sessions option in the left panel and select the <Notify> button. Enter a message string andpress <OK> (see Figure 5.14). The message is sent to the corresponding client. A message canbe sent to all users with <Notify All>. All active users will receive the message in a dialog box.
Figure 5.14: Notification message.
All connected sessions on the clients and sessions present in the waiting queue, can be closed bythe Administrator (see Table 5.1). To close a session, select the session in the Sessions panel(see Figure 5.13), and disconnect the session with <Release>. Alternatively, select the sessionunder the Sessions option in the left panel and select the <Release> button.
A list of all sessions that are running on the local computer and that are put on hold, can beconsulted in the NetKey+ Configuration window when logged in as Administrator or as Userwith Full or Limited view mode. Selecting the Local Sessions option in the left panel, showsall connected local sessions and local sessions that are present in the waiting queue below theLocal Sessions option in the left panel (see Figure 5.13). The Status (Connected or Waiting)and Time in use, are shown next to each local session. Detailed session information is shown inthe right panel when selecting a local session in the left panel.
5.6 Logging data
When the NetKey+ Configuration program is launched in Administrator mode or in User modewith Full view, the Logging option is displayed in the left panel (see Table 5.1 and Figure 5.15).
Pressing the Logging option in the left panel shows all logged information in the right panel. Thislogged information is stored in a text file called NetKey+ Log.txt. This file is located in the foldercontaining application data for all users (CommonAppDataFolder, for which the path is typically C:
\ProgramData \Applied maths \NetKey+).
When verbose logging is enabled, additional information messages are logged in the text file (seeFigure 5.15). Selecting the <Change> button changes the verbose logging status. To clear thelog file, press the <Clear log> button.
Enabling/disabling verbose logging (<Change>) and clearing the log file (<Clearlog>) is only possible in Administrator mode (see Table 5.1).
All rights reserved. Not for Diagnostic Use.
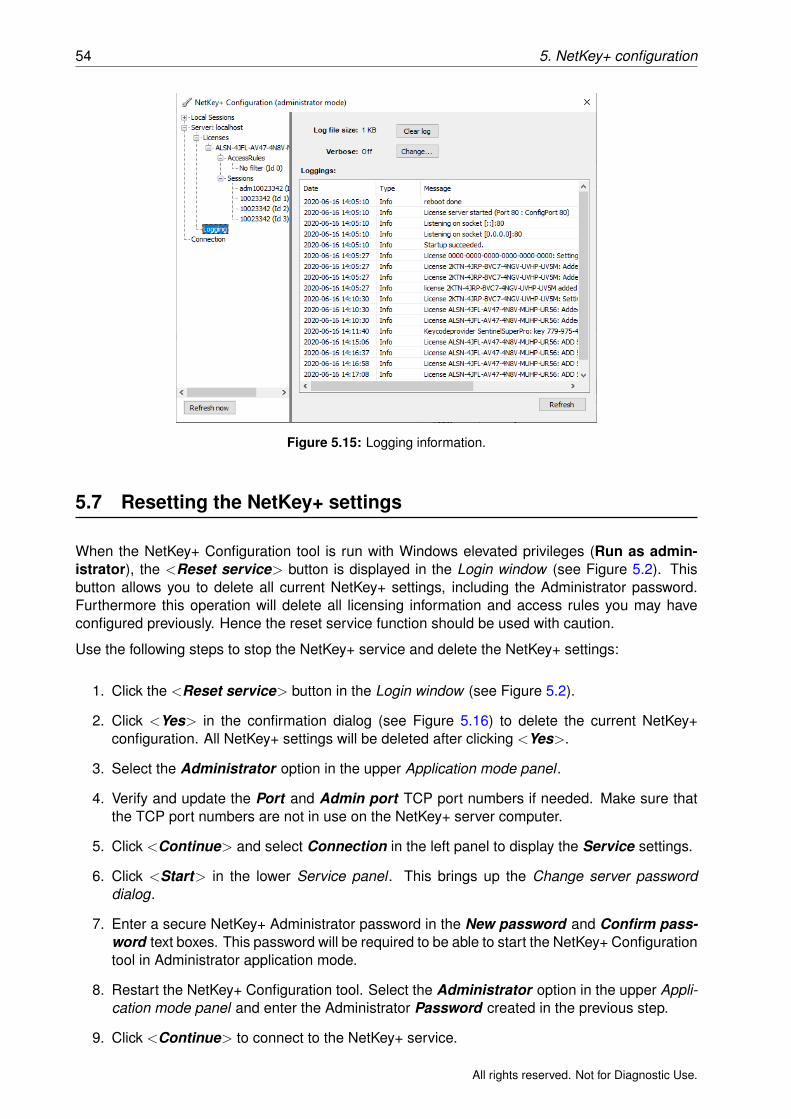
54 5. NetKey+ configuration
Figure 5.15: Logging information.
5.7 Resetting the NetKey+ settings
When the NetKey+ Configuration tool is run with Windows elevated privileges (Run as admin-istrator), the <Reset service> button is displayed in the Login window (see Figure 5.2). Thisbutton allows you to delete all current NetKey+ settings, including the Administrator password.Furthermore this operation will delete all licensing information and access rules you may haveconfigured previously. Hence the reset service function should be used with caution.
Use the following steps to stop the NetKey+ service and delete the NetKey+ settings:
1. Click the <Reset service> button in the Login window (see Figure 5.2).
2. Click <Yes> in the confirmation dialog (see Figure 5.16) to delete the current NetKey+configuration. All NetKey+ settings will be deleted after clicking <Yes>.
3. Select the Administrator option in the upper Application mode panel .
4. Verify and update the Port and Admin port TCP port numbers if needed. Make sure thatthe TCP port numbers are not in use on the NetKey+ server computer.
5. Click <Continue> and select Connection in the left panel to display the Service settings.
6. Click <Start> in the lower Service panel . This brings up the Change server passworddialog.
7. Enter a secure NetKey+ Administrator password in the New password and Confirm pass-word text boxes. This password will be required to be able to start the NetKey+ Configurationtool in Administrator application mode.
8. Restart the NetKey+ Configuration tool. Select the Administrator option in the upper Appli-cation mode panel and enter the Administrator Password created in the previous step.
9. Click <Continue> to connect to the NetKey+ service.
All rights reserved. Not for Diagnostic Use.
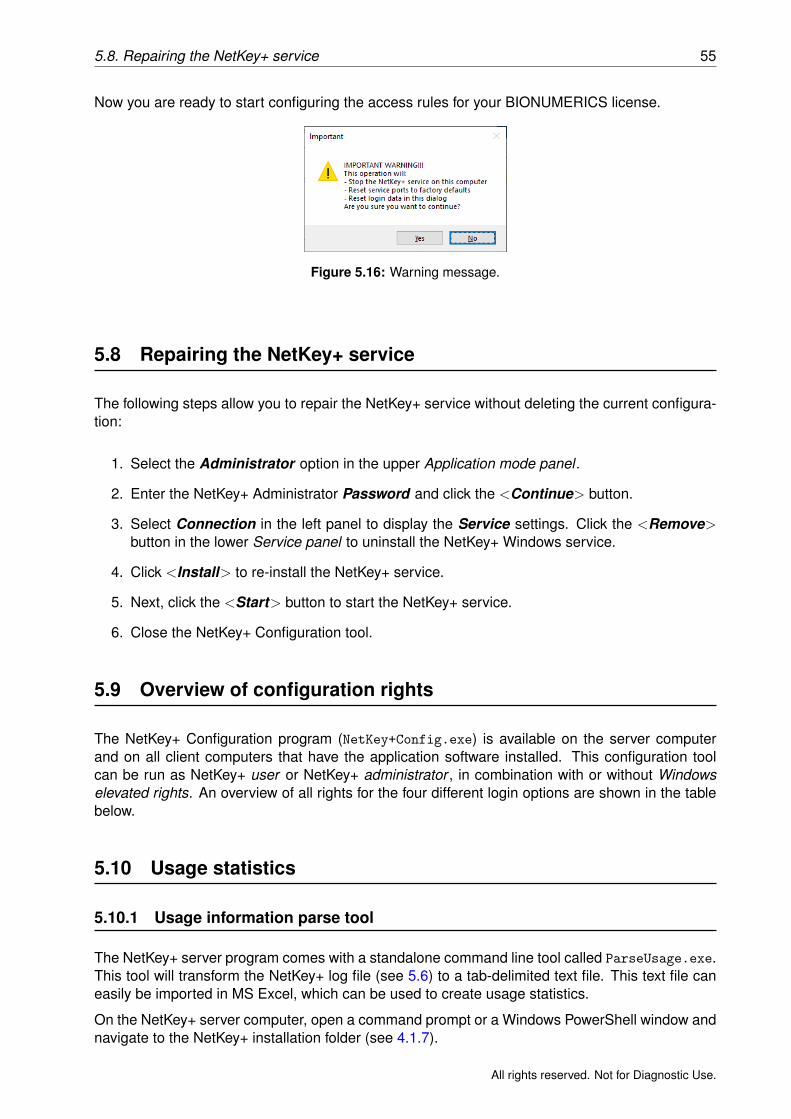
5.8. Repairing the NetKey+ service 55
Now you are ready to start configuring the access rules for your BIONUMERICS license.
Figure 5.16: Warning message.
5.8 Repairing the NetKey+ service
The following steps allow you to repair the NetKey+ service without deleting the current configura-tion:
1. Select the Administrator option in the upper Application mode panel .
2. Enter the NetKey+ Administrator Password and click the <Continue> button.
3. Select Connection in the left panel to display the Service settings. Click the <Remove>button in the lower Service panel to uninstall the NetKey+ Windows service.
4. Click <Install> to re-install the NetKey+ service.
5. Next, click the <Start> button to start the NetKey+ service.
6. Close the NetKey+ Configuration tool.
5.9 Overview of configuration rights
The NetKey+ Configuration program (NetKey+Config.exe) is available on the server computerand on all client computers that have the application software installed. This configuration toolcan be run as NetKey+ user or NetKey+ administrator , in combination with or without Windowselevated rights. An overview of all rights for the four different login options are shown in the tablebelow.
5.10 Usage statistics
5.10.1 Usage information parse tool
The NetKey+ server program comes with a standalone command line tool called ParseUsage.exe.This tool will transform the NetKey+ log file (see 5.6) to a tab-delimited text file. This text file caneasily be imported in MS Excel, which can be used to create usage statistics.
On the NetKey+ server computer, open a command prompt or a Windows PowerShell window andnavigate to the NetKey+ installation folder (see 4.1.7).
All rights reserved. Not for Diagnostic Use.
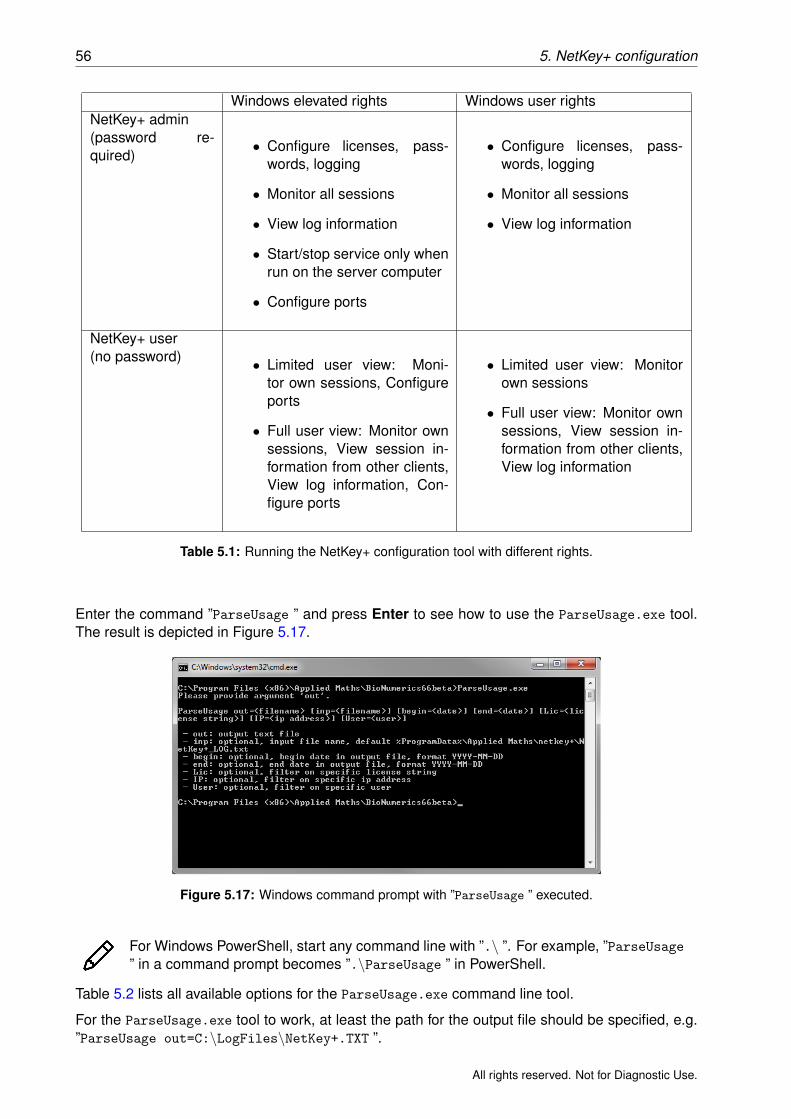
56 5. NetKey+ configuration
Windows elevated rights Windows user rightsNetKey+ admin(password re-quired)
• Configure licenses, pass-words, logging
• Monitor all sessions
• View log information
• Start/stop service only whenrun on the server computer
• Configure ports
• Configure licenses, pass-words, logging
• Monitor all sessions
• View log information
NetKey+ user(no password) • Limited user view: Moni-
tor own sessions, Configureports
• Full user view: Monitor ownsessions, View session in-formation from other clients,View log information, Con-figure ports
• Limited user view: Monitorown sessions
• Full user view: Monitor ownsessions, View session in-formation from other clients,View log information
Table 5.1: Running the NetKey+ configuration tool with different rights.
Enter the command ”ParseUsage ” and press Enter to see how to use the ParseUsage.exe tool.The result is depicted in Figure 5.17.
Figure 5.17: Windows command prompt with ”ParseUsage ” executed.
For Windows PowerShell, start any command line with ”.\ ”. For example, ”ParseUsage” in a command prompt becomes ”.\ParseUsage ” in PowerShell.
Table 5.2 lists all available options for the ParseUsage.exe command line tool.
For the ParseUsage.exe tool to work, at least the path for the output file should be specified, e.g.”ParseUsage out=C:\LogFiles\NetKey+.TXT ”.
All rights reserved. Not for Diagnostic Use.
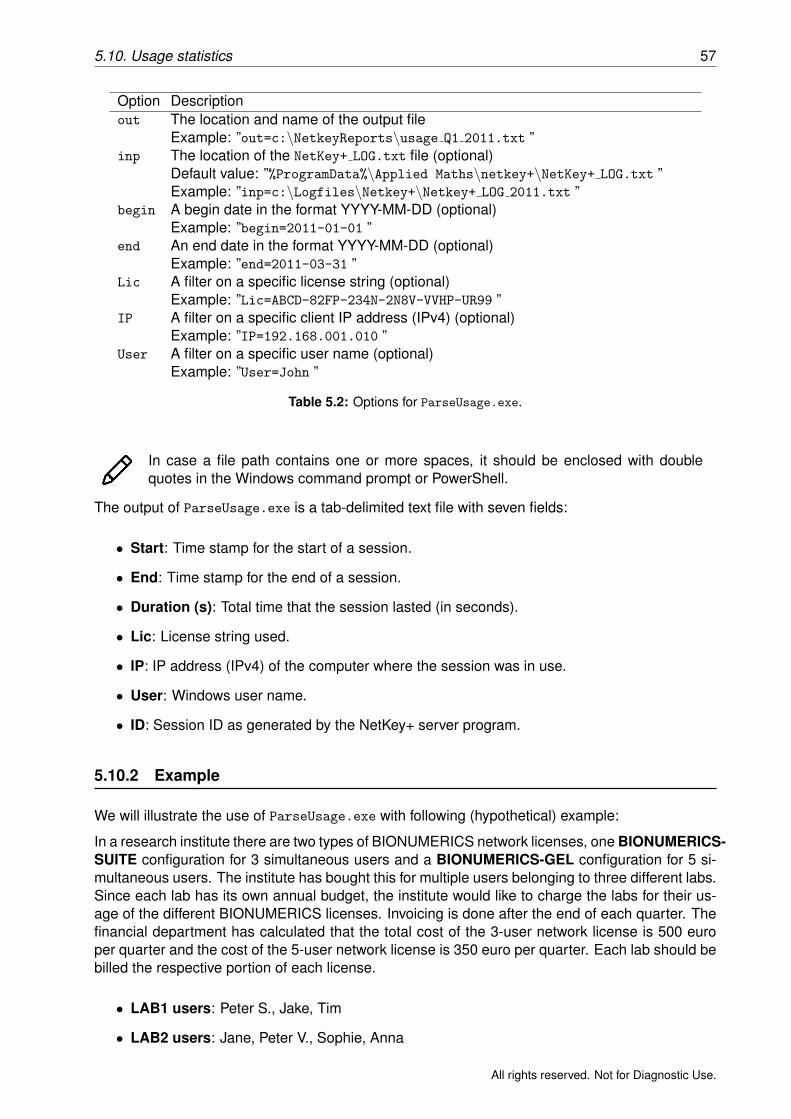
5.10. Usage statistics 57
Option Descriptionout The location and name of the output file
Example: ”out=c:\NetkeyReports\usage Q1 2011.txt ”inp The location of the NetKey+ LOG.txt file (optional)
Default value: ”%ProgramData%\Applied Maths\netkey+\NetKey+ LOG.txt ”Example: ”inp=c:\Logfiles\Netkey+\Netkey+ LOG 2011.txt ”
begin A begin date in the format YYYY-MM-DD (optional)Example: ”begin=2011-01-01 ”
end An end date in the format YYYY-MM-DD (optional)Example: ”end=2011-03-31 ”
Lic A filter on a specific license string (optional)Example: ”Lic=ABCD-82FP-234N-2N8V-VVHP-UR99 ”
IP A filter on a specific client IP address (IPv4) (optional)Example: ”IP=192.168.001.010 ”
User A filter on a specific user name (optional)Example: ”User=John ”
Table 5.2: Options for ParseUsage.exe.
In case a file path contains one or more spaces, it should be enclosed with doublequotes in the Windows command prompt or PowerShell.
The output of ParseUsage.exe is a tab-delimited text file with seven fields:
• Start: Time stamp for the start of a session.
• End: Time stamp for the end of a session.
• Duration (s): Total time that the session lasted (in seconds).
• Lic: License string used.
• IP: IP address (IPv4) of the computer where the session was in use.
• User: Windows user name.
• ID: Session ID as generated by the NetKey+ server program.
5.10.2 Example
We will illustrate the use of ParseUsage.exe with following (hypothetical) example:
In a research institute there are two types of BIONUMERICS network licenses, one BIONUMERICS-SUITE configuration for 3 simultaneous users and a BIONUMERICS-GEL configuration for 5 si-multaneous users. The institute has bought this for multiple users belonging to three different labs.Since each lab has its own annual budget, the institute would like to charge the labs for their us-age of the different BIONUMERICS licenses. Invoicing is done after the end of each quarter. Thefinancial department has calculated that the total cost of the 3-user network license is 500 europer quarter and the cost of the 5-user network license is 350 euro per quarter. Each lab should bebilled the respective portion of each license.
• LAB1 users: Peter S., Jake, Tim
• LAB2 users: Jane, Peter V., Sophie, Anna
All rights reserved. Not for Diagnostic Use.
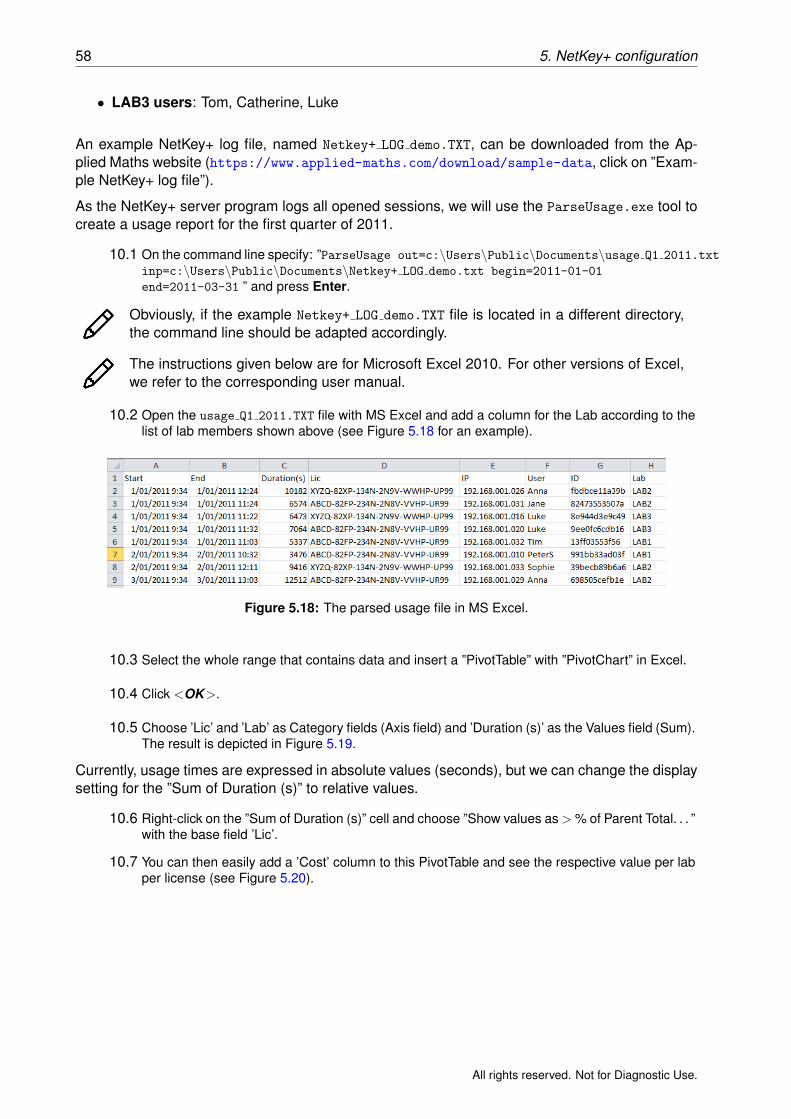
58 5. NetKey+ configuration
• LAB3 users: Tom, Catherine, Luke
An example NetKey+ log file, named Netkey+ LOG demo.TXT, can be downloaded from the Ap-plied Maths website (https://www.applied-maths.com/download/sample-data, click on ”Exam-ple NetKey+ log file”).
As the NetKey+ server program logs all opened sessions, we will use the ParseUsage.exe tool tocreate a usage report for the first quarter of 2011.
10.1 On the command line specify: ”ParseUsage out=c:\Users\Public\Documents\usage Q1 2011.txt
inp=c:\Users\Public\Documents\Netkey+ LOG demo.txt begin=2011-01-01
end=2011-03-31 ” and press Enter.
Obviously, if the example Netkey+ LOG demo.TXT file is located in a different directory,the command line should be adapted accordingly.
The instructions given below are for Microsoft Excel 2010. For other versions of Excel,we refer to the corresponding user manual.
10.2 Open the usage Q1 2011.TXT file with MS Excel and add a column for the Lab according to thelist of lab members shown above (see Figure 5.18 for an example).
Figure 5.18: The parsed usage file in MS Excel.
10.3 Select the whole range that contains data and insert a ”PivotTable” with ”PivotChart” in Excel.
10.4 Click <OK>.
10.5 Choose ’Lic’ and ’Lab’ as Category fields (Axis field) and ’Duration (s)’ as the Values field (Sum).The result is depicted in Figure 5.19.
Currently, usage times are expressed in absolute values (seconds), but we can change the displaysetting for the ”Sum of Duration (s)” to relative values.
10.6 Right-click on the ”Sum of Duration (s)” cell and choose ”Show values as > % of Parent Total. . . ”with the base field ’Lic’.
10.7 You can then easily add a ’Cost’ column to this PivotTable and see the respective value per labper license (see Figure 5.20).
All rights reserved. Not for Diagnostic Use.
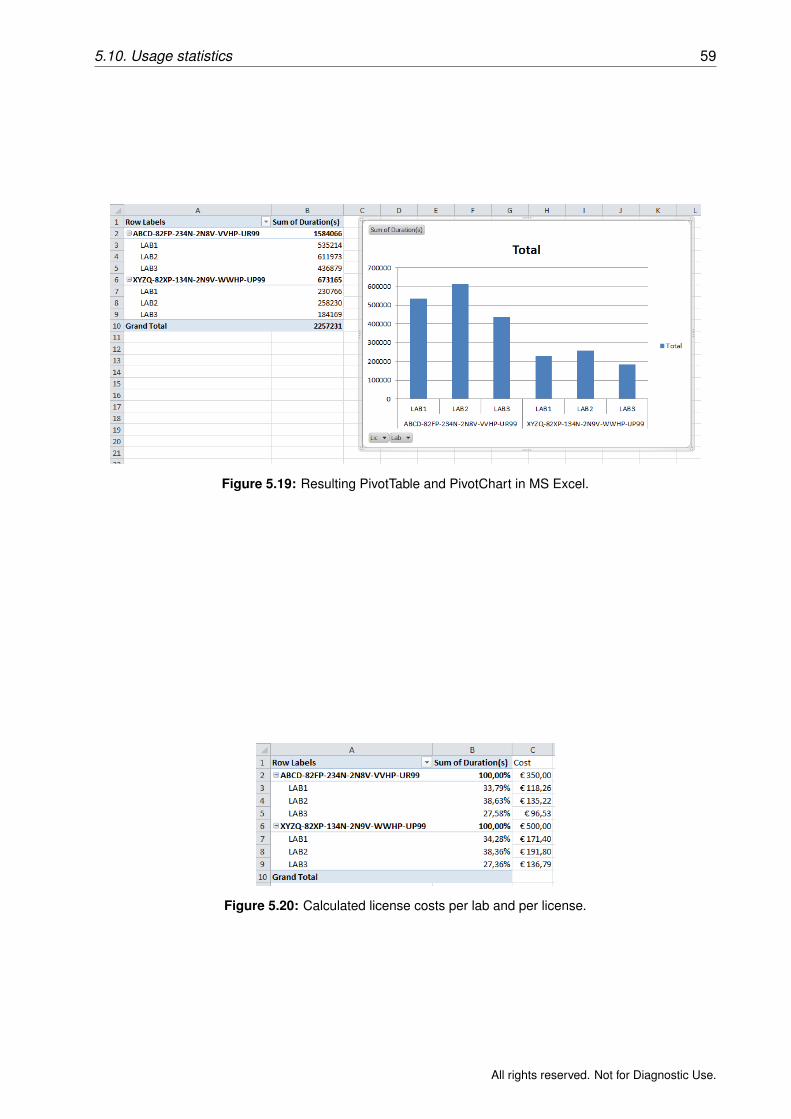
5.10. Usage statistics 59
Figure 5.19: Resulting PivotTable and PivotChart in MS Excel.
Figure 5.20: Calculated license costs per lab and per license.
All rights reserved. Not for Diagnostic Use.

60 5. NetKey+ configuration
All rights reserved. Not for Diagnostic Use.
Chapter 6
Installation process
6.1 Overview
The purpose of this chapter is to provide a general technical explanation on the Setup behavior,and a basic Setup flow diagram of the installation processes. This chapter contains a partial listof the main functions that are applied in the InstallShield installation script. It is not intended toprovide a detailed description of all functions implemented in the installation script.
The BIONUMERICS installation process can be divided into three main blocks: the initial dialogsequence, the feature installation or removal processes and a final sequence running a cleanupprocess and showing the finish dialog. A subset of dialogs D1 to D9 is displayed during the initialdialog sequence when the Setup is running in normal (non-silent) mode. Next, the OnMoveDataprocess will install the selected features, and uninstall the de-selected features.
The Setup will call the appropriate functions for each feature that is being installed or removed:<feature> Installing and <feature> Installed during installation, and <feature> UnInstalling and<feature> UnInstalled during removal. Each <feature> * feature function will either call the Fea-tureStart or the FeatureEnd function to create the feature node in the Setup log XML file withthe proper time stamp elements. The feature nodes contain the information, warning and errormessages for a specific feature.
In normal (non-silent) mode the final sequence will display the finish dialog. The CleanUp functionwill display the Setup log file in Internet Explorer if warning or error messages were written to theSetup log file.
6.2 Setup dialog list
The following table lists the dialogs that are displayed during a normal Setup, and that are invokedby the InstallShield engine and installation script (see Table 6.1). This does not include the dialogsfrom the NetKey+ Configuration tool.
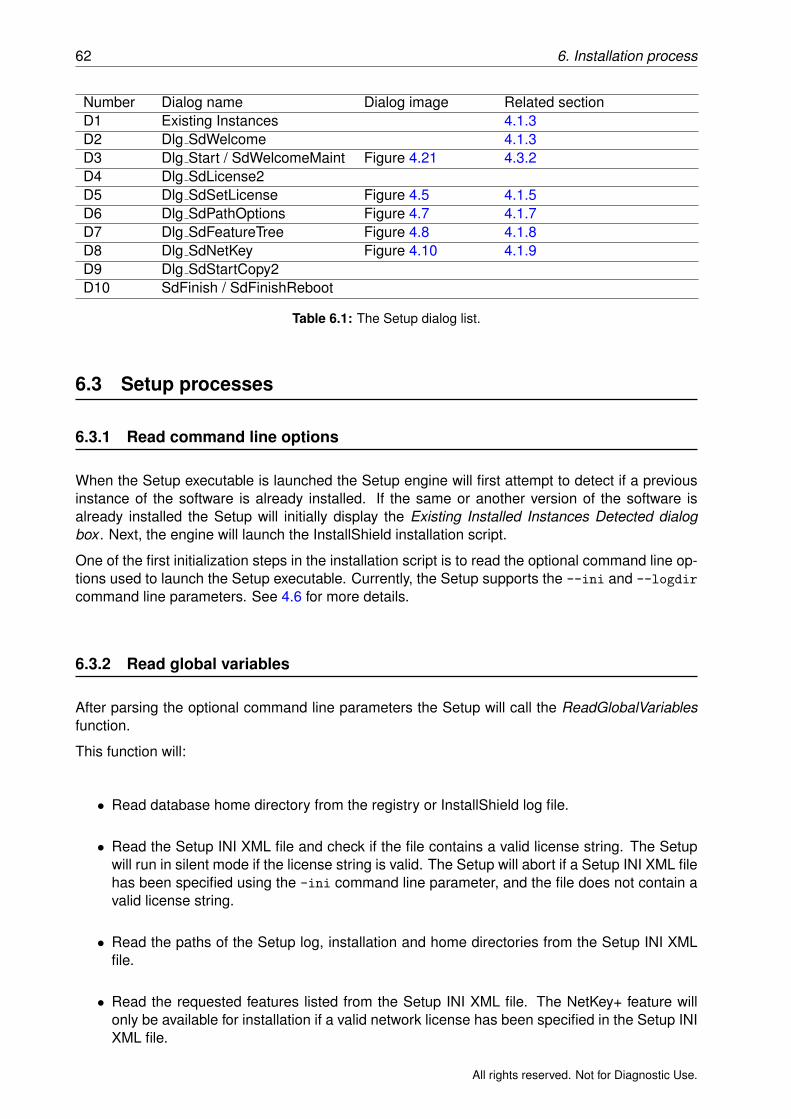
62 6. Installation process
Number Dialog name Dialog image Related sectionD1 Existing Instances 4.1.3D2 Dlg SdWelcome 4.1.3D3 Dlg Start / SdWelcomeMaint Figure 4.21 4.3.2D4 Dlg SdLicense2D5 Dlg SdSetLicense Figure 4.5 4.1.5D6 Dlg SdPathOptions Figure 4.7 4.1.7D7 Dlg SdFeatureTree Figure 4.8 4.1.8D8 Dlg SdNetKey Figure 4.10 4.1.9D9 Dlg SdStartCopy2D10 SdFinish / SdFinishReboot
Table 6.1: The Setup dialog list.
6.3 Setup processes
6.3.1 Read command line options
When the Setup executable is launched the Setup engine will first attempt to detect if a previousinstance of the software is already installed. If the same or another version of the software isalready installed the Setup will initially display the Existing Installed Instances Detected dialogbox . Next, the engine will launch the InstallShield installation script.
One of the first initialization steps in the installation script is to read the optional command line op-tions used to launch the Setup executable. Currently, the Setup supports the --ini and --logdir
command line parameters. See 4.6 for more details.
6.3.2 Read global variables
After parsing the optional command line parameters the Setup will call the ReadGlobalVariablesfunction.
This function will:
• Read database home directory from the registry or InstallShield log file.
• Read the Setup INI XML file and check if the file contains a valid license string. The Setupwill run in silent mode if the license string is valid. The Setup will abort if a Setup INI XML filehas been specified using the -ini command line parameter, and the file does not contain avalid license string.
• Read the paths of the Setup log, installation and home directories from the Setup INI XMLfile.
• Read the requested features listed from the Setup INI XML file. The NetKey+ feature willonly be available for installation if a valid network license has been specified in the Setup INIXML file.
All rights reserved. Not for Diagnostic Use.

6.3. Setup processes 63
6.3.3 Write global variables
The WriteGlobalVariables function will save the paths of the Setup log, installation and homedirectories to the Setup INI XML object, if the Setup is running in normal (non-silent) mode. Thisfunction will also save the registered user and organization names, and the license string to theSetup INI XML object.
6.3.4 Save Setup INI XML file
If the Setup is running in normal (non-silent) mode, the XML SaveIni function will save the contentsof the INI XML object from memory to the Setup INI XML file.
6.3.5 Read requested features
In silent mode, the ReadGlobalVariables function will read the requested features listed in theSetup INI XML file. The NetKey+ server program feature will only be available for installation if avalid network license has been specified in the Setup INI XML file.
6.3.6 Save Setup Log
The first time the XML SaveLogFile function is called the Setup will generate a unique file namefor the Setup log XML file. Next, the Setup will copy the following style sheet files to the Setup logfolder: processlogs.xsl, applied-maths.css, amheader.jpg and amlogo.gif.
Finally, the XML SaveLogFile function will save the contents of the Setup log XML object frommemory to the Setup log XML file.
6.3.7 OnMoveData
The OnMoveData function is the main Setup process that handles the file transfer. First, thefunction will display the progress bar dialog and create the uninstall information in the registry.Next, the function will call the CheckLicense function to check and save the license string to theHKEY LOCAL MACHINE hive of the registry (if a valid license string was entered).
Subsequently, the OnMoveData process will call the FeatureTransferData function to install orremove feature files. The FeatureTransferData function will launch the <feature> Installing or<feature> UnInstalling function before installing or removing a feature. After a feature has beeninstalled or removed the Setup will call the <feature> Installed or <feature> UnInstalled function.
Finally, the OnMoveData function will call the LaunchNetKey function to launch the NetKey+ serverconfiguration tool if the corresponding feature was selected for installation.
6.3.8 Feature functions
Each feature can be linked to four event handlers:
• The OnInstalling event handler responds to the Installing event that is generated just be-fore the corresponding feature is installed. This handler is linked to a <feature> Installingfunction.
All rights reserved. Not for Diagnostic Use.

64 6. Installation process
• The OnUnInstalling event handler responds to the UnInstalling event generated just beforethe corresponding feature is removed from the target system. This handler is linked to a<feature> UnInstalling function.
• The OnInstalled event handler responds to the Installed event that is generated just afterthe corresponding feature has been installed. This handler is linked to a <feature> Installedfunction.
• The OnUnInstalled event handler responds to the UnInstalled event generated just after thecorresponding feature has been removed from the target system. This handler is linked to a<feature> UnInstalled function.
Each <feature> Installing and <feature> UnInstalling function will call the FeatureStart functionto create a feature node and a start time stamp element in the Setup log XML file. In addition,each <feature> Installed and <feature> UnInstalled function will call the FeatureEnd function tocreate an end time stamp element in the Setup log XML file.
The feature event handler functions that call other function in addition to the FeatureStart andFeatureEnd function are described in the next sections.
The Application Installing event handler function is called by the Setup just before the main BION-UMERICS application feature is installed. First, this process will call the DeleteOldFiles functionto delete legacy files from the BIONUMERICS program folder, which are no longer included in thecurrent Setup package.
Next, the Application Installing function will run the vcredist x86.exe executable to install the Mi-crosoft Visual C++ 2008 Redistributable Package (x86).
The Application Installed event handler function is called by the Setup immediately after the ap-plication feature has been installed. This function will write the database home directory to theHKEY CURRENT USER hive.
If a network license string was entered, the Application Installed function will read the NetKey+server properties from the Setup INI XML file, and create or overwrite the NetKey.ini file in thecommon application data folder.
Finally, the function will create the shortcuts in the Startup menu and desktop folder.
The Application UnInstalled event handler function is called by the Setup just after the main BION-UMERICS application feature has been removed. This function will call the DeleteOldFiles functionto delete legacy files from the BIONUMERICS program folder, which are no longer included in thecurrent Setup package.
The Sentinel Installed event handler function is called by the Setup after the Sentinel driversplace holder feature has been installed. This process will first call the IsSentinelInstalled functionto check if the minimum required version of the Sentinel System Drivers is already installed. If therequired version is not installed, or in repair maintenance mode, the Sentinel Installed functionwill call the HasDongles function to check if hardware security keys are connected to the targetcomputer. The appropriate warning messages will appear if existing hardware security keys weredetected.
Next, the function will call the MSI InstallProduct function to install the Sentinel System DriverWindows Installer package (e.g. Sentinel System Driver Installer 7.5.1.msi).
The NetKey Installing event handler function is called by the Setup just before the NetKey+ serverprogram feature is installed. First, this function will stop the NetKey+ service if it already exists onthe target system. This will make sure that existing files are no longer in use, and will allow theSetup to overwrite these files if needed.
All rights reserved. Not for Diagnostic Use.
6.3. Setup processes 65
Next, the NetKey Installing process will call the IsOldNetKeyInstalled function to delete conflictingversions of the NetKey+ service.
Finally, the function will grant full NTFS permissions to the built-in ”NT AUTHORITY\SYSTEM”account for the Applied Maths common application data folder. This way the NetKey+ servicerunning with the SYSTEM account will have sufficient privileges to create and modify files in theNetKey+ sub-folder.
The NetKey Installed handler function is called by the Setup just after the NetKey+ server pro-gram feature has been installed. If the NetKey+ sub-folder in the Applied Maths common ap-plication data folder already contains a NetKey+ CONFIG.txt file, then the Setup will call theWMI ServiceStart function to start the NetKey+ service.
The NetKey UnInstalling event handler function is called by the Setup just before the NetKey+server program feature is removed from the target system. This process will first call the WMI ServiceExistsfunction to verify if the NetKey+ service exists. If the service exists, then the Setup will check if thepath of the service executable matches the program folder configured for the current instance. Ifboth paths are equal then the function will call WMI ServiceStop to stop the NetKey+ service.
If the running NetKey+ service is installed in a different folder then the program folder of the currentBIONUMERICS instance then the service will not be stopped.
The NetKey UnInstalled event handler function is called by the Setup just after the NetKey+ serverprogram feature has been removed. This process will first call the WMI ServiceExists function toverify if the NetKey+ service exists. If the service exists, then the Setup will check if the path of theservice executable matches the program folder configured for the current instance. If both pathsare equal, then the function will call the built-in ServiceRemoveService InstallShield function toremove the NetKey+ service.
If the running NetKey+ service is installed in a different folder then the program folder of the currentBIONUMERICS instance, then the service will not be removed.
The DeleteOldFiles function will delete legacy files from the BIONUMERICS program folder, whichare no longer included in the current Setup package. Only legacy files with the following fileextensions will be deleted from the program folder: .BXT,.DLL,.EXE,.AVI,.PYC and .XML.
The IsSentinelInstalled function will check the Windows Installer database to verify if the minimumrequired version of the Sentinel System Driver Installer is already installed. If the USB Driverfeature is not installed, then the function assumes that the Sentinel System Driver package isincomplete, and will instruct the Setup to re-install the package.
The HasDongles function will launch the setlic.exe executable to verify if hardware security keys ordongles are connected to the target system. The function will check the exit code of the setlic.exeprogram to verify if dongles were detected.
In silent mode, the CheckLicense function will first attempt to read the license string from the SetupINI XML file. Next, the function will read the license string from the HKEY LOCAL MACHINE hiveof the registry if the current string is empty. If the license string is still empty, the Setup will use thelicense string from the previous installation (in maintenance mode).
If the license string has the correct length, the Setup will launch the setlic.exe tool to get the licensetype of the entered string. The setlic.exe license tool will return one of the following constants:LIC STANDALONE, LIC NETWORK, LIC INTERNET or LIC INVALID.
If the CheckLicense function was called by the OnMoveData function, and the license type is valid(not LIC INVALID), then the Setup will save the license string to the HKEY LOCAL MACHINE hiveof the registry.
The LaunchNetKey function is called by the OnMoveData function to start the NetKey+ config-uration tool after the NetKey+ server program feature has been installed, repaired or updated.
All rights reserved. Not for Diagnostic Use.
66 6. Installation process
The function will use the built-in LaunchApp InstallShield function to start the NetKey+Config.exeexecutable. The Setup will continue after the tool has been launched.
The IsOldNetKeyInstalled function will use Windows Management Instrumentation (WMI) queriesto verify if other instances of the NetKey+ service are already installed. Optionally, this functioncan also be used to delete the service if the service name does not match, or if the installationpath does not match the current BIONUMERICS program folder.
The service will not be deleted if the service name is NetKey+, and the path matches with thecurrent BIONUMERICS program folder.
The SetFilePermissions function will use the xcacls.vbs Microsoft Visual Basic script to grantNTFS folder permissions to a specific user. The Setup will launch the xcacls.vbs script usingthe cscript.exe application in the 32-bit version of the Windows system folder.
The MSI InstallProduct function will use the msiexec.exe Windows Installer tool to install an MSIpackage (e.g. Sentinel System Driver Installer 7.5.1.msi).
The WMI ServiceStop function will first call the WMI ServiceExists function to verify that the ser-vice exists. The function will attempt to stop the service if the service exists and is running. TheWMI ServiceStop function uses the built-in InstallShield functions to control the service on a localcomputer.
The WMI ServiceStart function will first call the WMI ServiceExists function to verify that the ser-vice exists. The function will attempt to start the service if the service exists and is not running.The WMI ServiceStart function uses the built-in InstallShield functions to control the service on alocal computer.
The CleanUp function will create the end time stamp element in the setup node of the Setup logXML file and close the progress bar dialog. Next, the CleanUp function will call the XML ShowLogFilefunction to save and optionally display the Setup log file in Internet Explorer.
Finally, the CleanUp function will unload the IsGetObj.dll file from memory and will delete the filefrom the temporary Setup folder.
6.4 Setup Process list
Table 6.2 shows the main processes and functions that are used in the installation script, and thatare displayed in the simplified Setup flow diagram (see Figure 6.1).
All rights reserved. Not for Diagnostic Use.
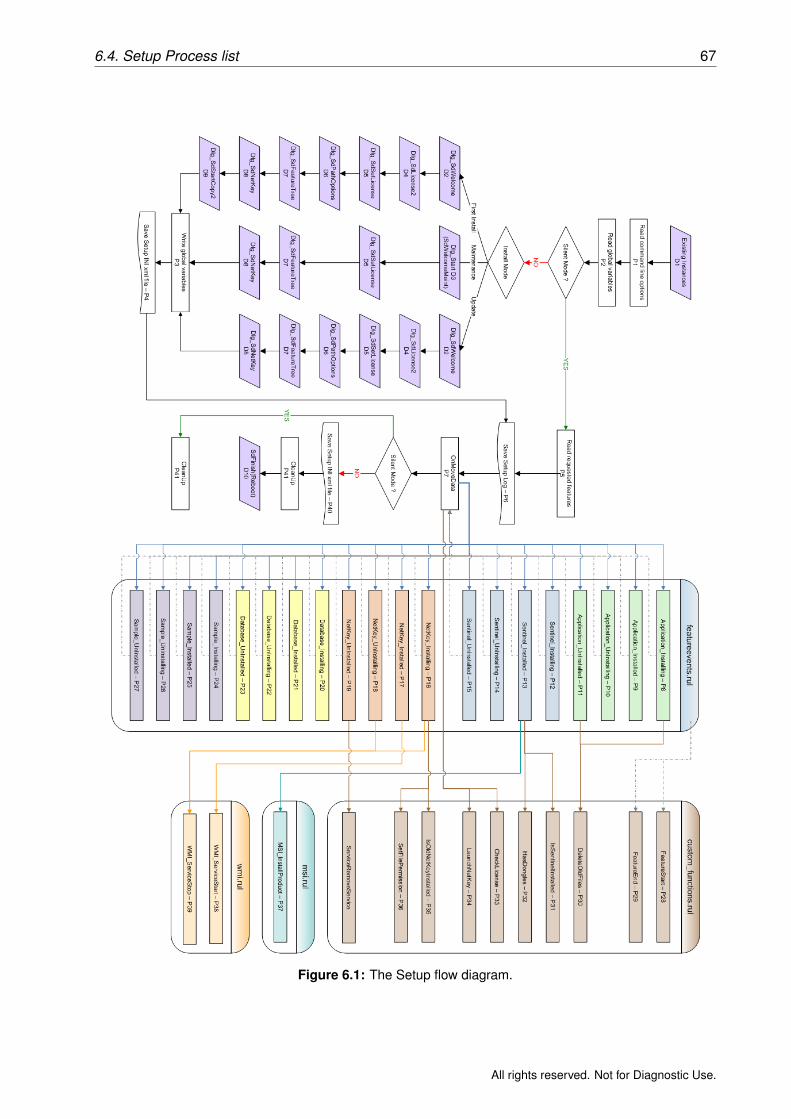
6.4. Setup Process list 67
Figure 6.1: The Setup flow diagram.
All rights reserved. Not for Diagnostic Use.
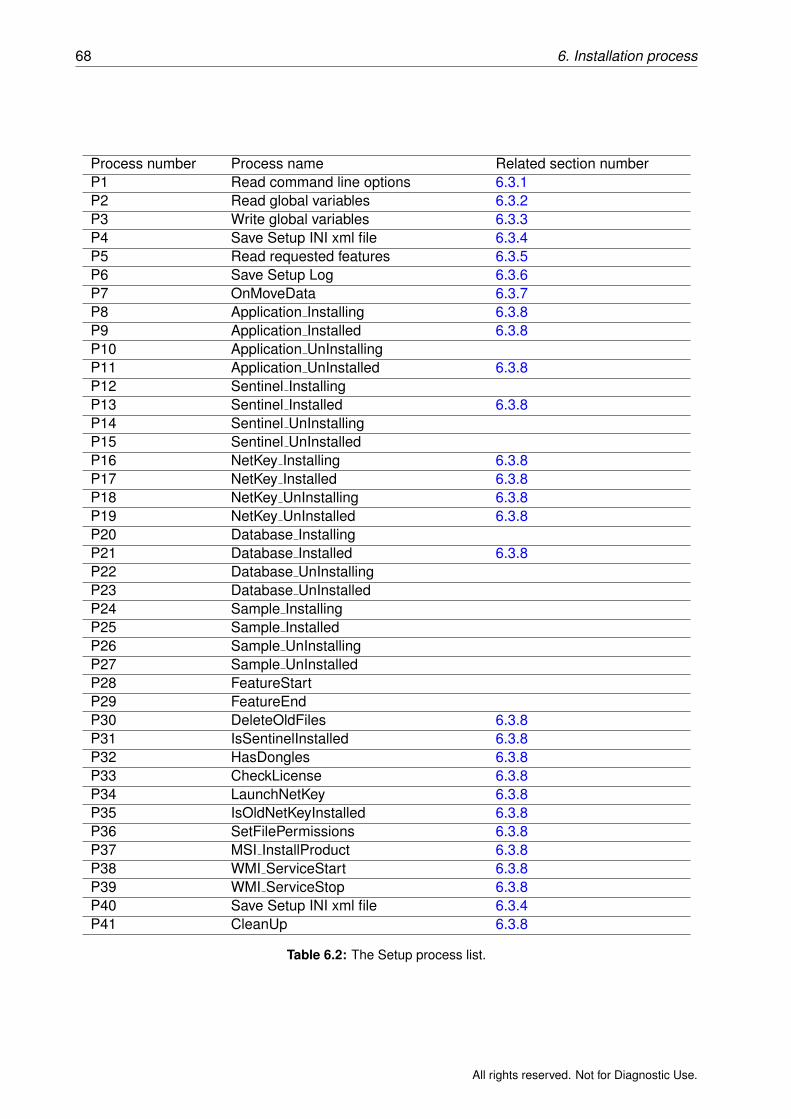
68 6. Installation process
Process number Process name Related section numberP1 Read command line options 6.3.1P2 Read global variables 6.3.2P3 Write global variables 6.3.3P4 Save Setup INI xml file 6.3.4P5 Read requested features 6.3.5P6 Save Setup Log 6.3.6P7 OnMoveData 6.3.7P8 Application Installing 6.3.8P9 Application Installed 6.3.8P10 Application UnInstallingP11 Application UnInstalled 6.3.8P12 Sentinel InstallingP13 Sentinel Installed 6.3.8P14 Sentinel UnInstallingP15 Sentinel UnInstalledP16 NetKey Installing 6.3.8P17 NetKey Installed 6.3.8P18 NetKey UnInstalling 6.3.8P19 NetKey UnInstalled 6.3.8P20 Database InstallingP21 Database Installed 6.3.8P22 Database UnInstallingP23 Database UnInstalledP24 Sample InstallingP25 Sample InstalledP26 Sample UnInstallingP27 Sample UnInstalledP28 FeatureStartP29 FeatureEndP30 DeleteOldFiles 6.3.8P31 IsSentinelInstalled 6.3.8P32 HasDongles 6.3.8P33 CheckLicense 6.3.8P34 LaunchNetKey 6.3.8P35 IsOldNetKeyInstalled 6.3.8P36 SetFilePermissions 6.3.8P37 MSI InstallProduct 6.3.8P38 WMI ServiceStart 6.3.8P39 WMI ServiceStop 6.3.8P40 Save Setup INI xml file 6.3.4P41 CleanUp 6.3.8
Table 6.2: The Setup process list.
All rights reserved. Not for Diagnostic Use.
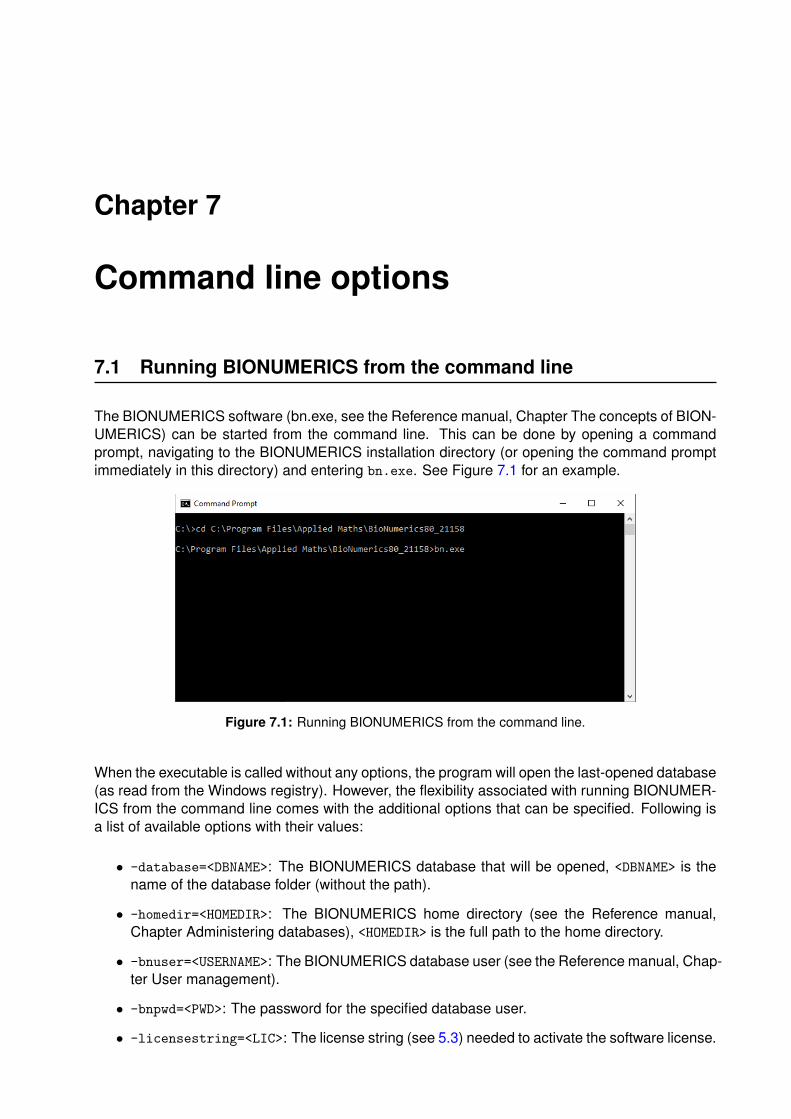
Chapter 7
Command line options
7.1 Running BIONUMERICS from the command line
The BIONUMERICS software (bn.exe, see the Reference manual, Chapter The concepts of BION-UMERICS) can be started from the command line. This can be done by opening a commandprompt, navigating to the BIONUMERICS installation directory (or opening the command promptimmediately in this directory) and entering bn.exe. See Figure 7.1 for an example.
Figure 7.1: Running BIONUMERICS from the command line.
When the executable is called without any options, the program will open the last-opened database(as read from the Windows registry). However, the flexibility associated with running BIONUMER-ICS from the command line comes with the additional options that can be specified. Following isa list of available options with their values:
• -database=<DBNAME>: The BIONUMERICS database that will be opened, <DBNAME> is thename of the database folder (without the path).
• -homedir=<HOMEDIR>: The BIONUMERICS home directory (see the Reference manual,Chapter Administering databases), <HOMEDIR> is the full path to the home directory.
• -bnuser=<USERNAME>: The BIONUMERICS database user (see the Reference manual, Chap-ter User management).
• -bnpwd=<PWD>: The password for the specified database user.
• -licensestring=<LIC>: The license string (see 5.3) needed to activate the software license.
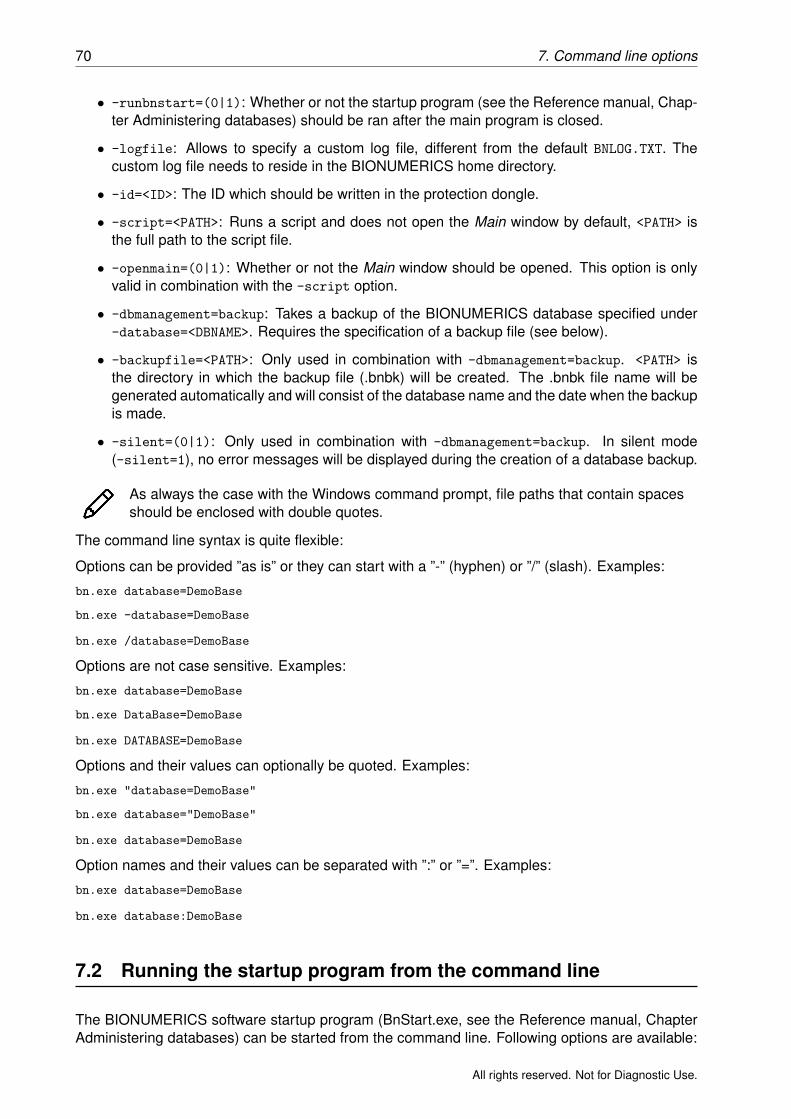
70 7. Command line options
• -runbnstart=(0|1): Whether or not the startup program (see the Reference manual, Chap-ter Administering databases) should be ran after the main program is closed.
• -logfile: Allows to specify a custom log file, different from the default BNLOG.TXT. Thecustom log file needs to reside in the BIONUMERICS home directory.
• -id=<ID>: The ID which should be written in the protection dongle.
• -script=<PATH>: Runs a script and does not open the Main window by default, <PATH> isthe full path to the script file.
• -openmain=(0|1): Whether or not the Main window should be opened. This option is onlyvalid in combination with the -script option.
• -dbmanagement=backup: Takes a backup of the BIONUMERICS database specified under-database=<DBNAME>. Requires the specification of a backup file (see below).
• -backupfile=<PATH>: Only used in combination with -dbmanagement=backup. <PATH> isthe directory in which the backup file (.bnbk) will be created. The .bnbk file name will begenerated automatically and will consist of the database name and the date when the backupis made.
• -silent=(0|1): Only used in combination with -dbmanagement=backup. In silent mode(-silent=1), no error messages will be displayed during the creation of a database backup.
As always the case with the Windows command prompt, file paths that contain spacesshould be enclosed with double quotes.
The command line syntax is quite flexible:
Options can be provided ”as is” or they can start with a ”-” (hyphen) or ”/” (slash). Examples:
bn.exe database=DemoBase
bn.exe -database=DemoBase
bn.exe /database=DemoBase
Options are not case sensitive. Examples:
bn.exe database=DemoBase
bn.exe DataBase=DemoBase
bn.exe DATABASE=DemoBase
Options and their values can optionally be quoted. Examples:
bn.exe "database=DemoBase"
bn.exe database="DemoBase"
bn.exe database=DemoBase
Option names and their values can be separated with ”:” or ”=”. Examples:
bn.exe database=DemoBase
bn.exe database:DemoBase
7.2 Running the startup program from the command line
The BIONUMERICS software startup program (BnStart.exe, see the Reference manual, ChapterAdministering databases) can be started from the command line. Following options are available:
All rights reserved. Not for Diagnostic Use.

7.2. Running the startup program from the command line 71
• -homedir=<HOMEDIR>: the BIONUMERICS home directory, <HOMEDIR> is the full path to thehome directory
• -licensestring=<LIC>: the license string (see 5.3), needed to activate the software license
These options will be passed on to bn.exe (see 7.1).
All rights reserved. Not for Diagnostic Use.

72 7. Command line options
All rights reserved. Not for Diagnostic Use.
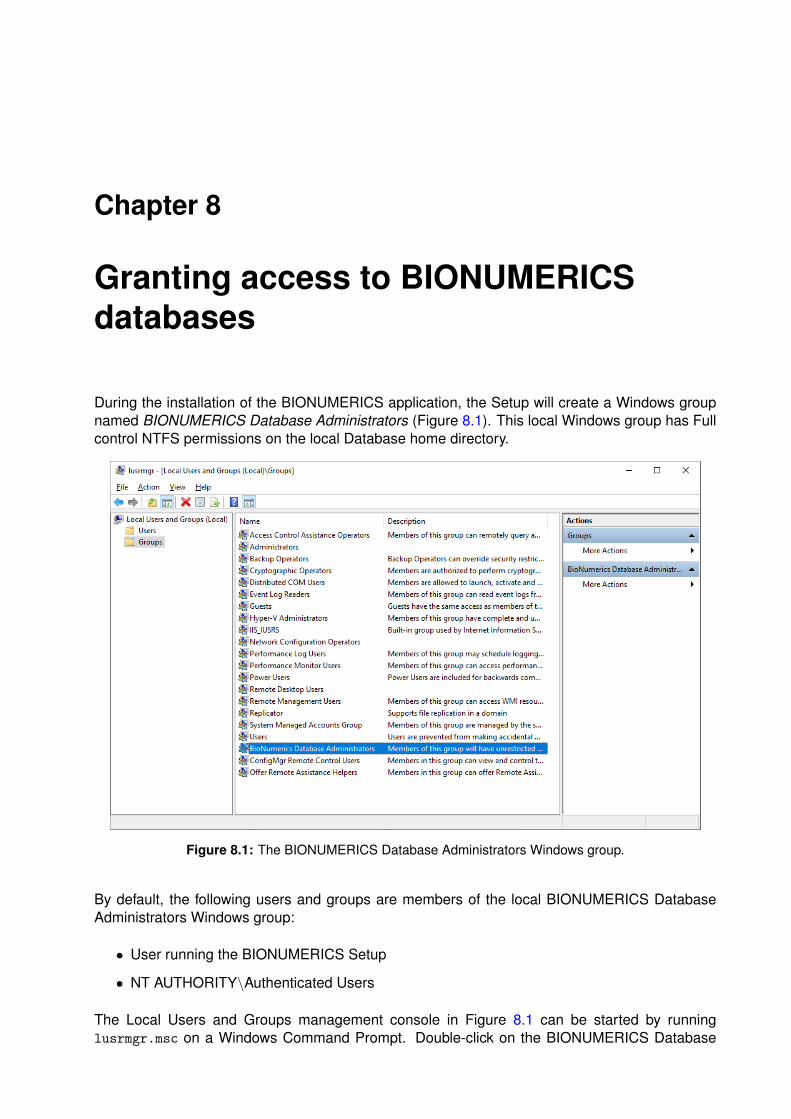
Chapter 8
Granting access to BIONUMERICSdatabases
During the installation of the BIONUMERICS application, the Setup will create a Windows groupnamed BIONUMERICS Database Administrators (Figure 8.1). This local Windows group has Fullcontrol NTFS permissions on the local Database home directory.
Figure 8.1: The BIONUMERICS Database Administrators Windows group.
By default, the following users and groups are members of the local BIONUMERICS DatabaseAdministrators Windows group:
• User running the BIONUMERICS Setup
• NT AUTHORITY\Authenticated Users
The Local Users and Groups management console in Figure 8.1 can be started by runninglusrmgr.msc on a Windows Command Prompt. Double-click on the BIONUMERICS Database
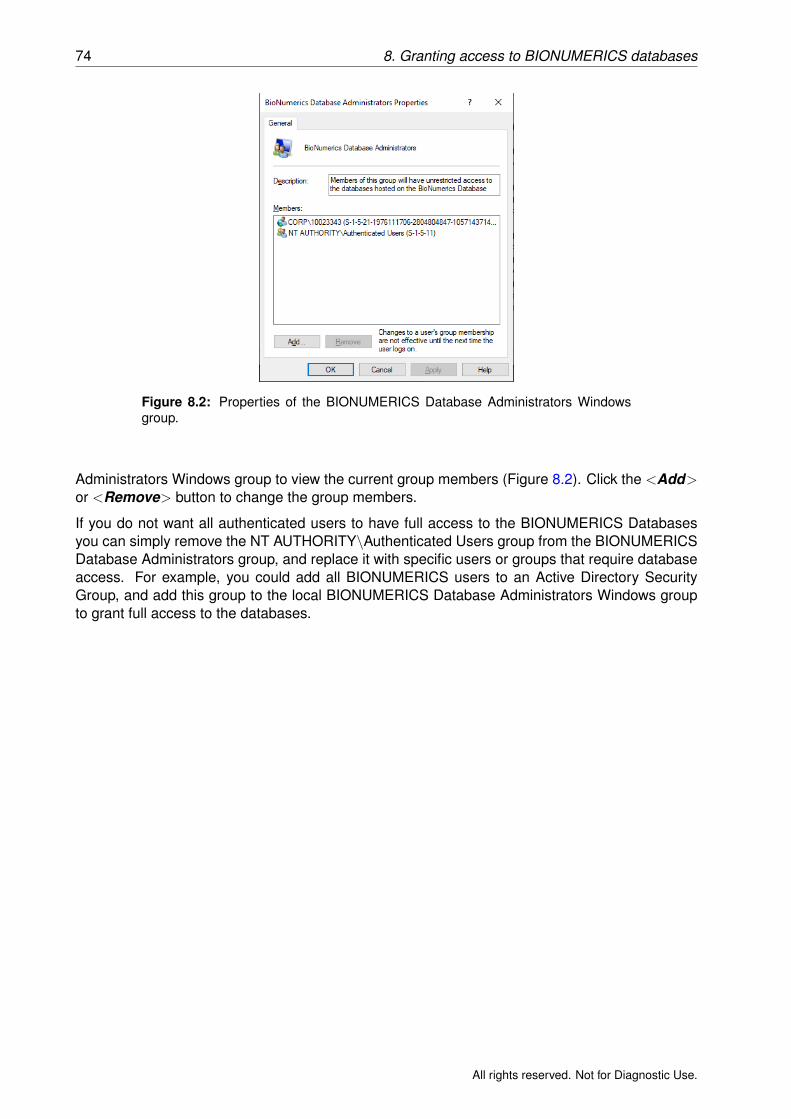
74 8. Granting access to BIONUMERICS databases
Figure 8.2: Properties of the BIONUMERICS Database Administrators Windowsgroup.
Administrators Windows group to view the current group members (Figure 8.2). Click the <Add>or <Remove> button to change the group members.
If you do not want all authenticated users to have full access to the BIONUMERICS Databasesyou can simply remove the NT AUTHORITY\Authenticated Users group from the BIONUMERICSDatabase Administrators group, and replace it with specific users or groups that require databaseaccess. For example, you could add all BIONUMERICS users to an Active Directory SecurityGroup, and add this group to the local BIONUMERICS Database Administrators Windows groupto grant full access to the databases.
All rights reserved. Not for Diagnostic Use.

75
All rights reserved. Not for Diagnostic Use.

bioMérieux S.A. • 69280 Marcy l’Étoile • France • Tel.: + 33 (0)4 78 87 20 00 • Fax: +33 (0)4 78 87 20 90 www.biomerieux.com
Related Documents