DENTAL VISIONIST 1 .9 EURO 6,50 . USD 8,20 . 5,20 GBP www.dental-visionist.com Best practice: Proven, lasting restoration concepts from practices and the laboratory Now let‘s learn more about the successful concepts of our colleagues! Intelligent layering concept for true-to-life results Dental technician Marcio Breda shows how he systematically repro- duces natural light dynamics through the intelligent use of various ceramic materials. > Page 32 Non-invasive microveneers made of hybrid ceramic A team of dentists from Taiwan ex- plain how they correct a diastema noninvasively and fully digitally with the hybrid ceramic VITA ENAMIC. > Page 14

Welcome message from author
This document is posted to help you gain knowledge. Please leave a comment to let me know what you think about it! Share it to your friends and learn new things together.
Transcript
1911
E/11
- 09
19(X
.)HO
- V
ERS
ION
(01)
D E N T A L
VISIONIST1.9
EURO 6,50 . USD 8,20 . 5,20 GBP www.dental-visionist.com
Best practice: Proven, lasting restoration concepts from practices and the laboratoryNow let‘s learn more about the successful concepts of our colleagues!
Intelligent layering conceptfor true-to-life results Dental technician Marcio Bredashows how he systematically repro-duces natural light dynamicsthrough the intelligent use of variousceramic materials. > Page 32
Non-invasive microveneersmade of hybrid ceramic A team of dentists from Taiwan ex-plain how they correct a diastema noninvasively and fully digitally with the hybrid ceramic VITA ENAMIC. > Page 14
Erfahren Sie mehr unter go.3shape.com/e4
* Ab Sommer 2019 erhältlich
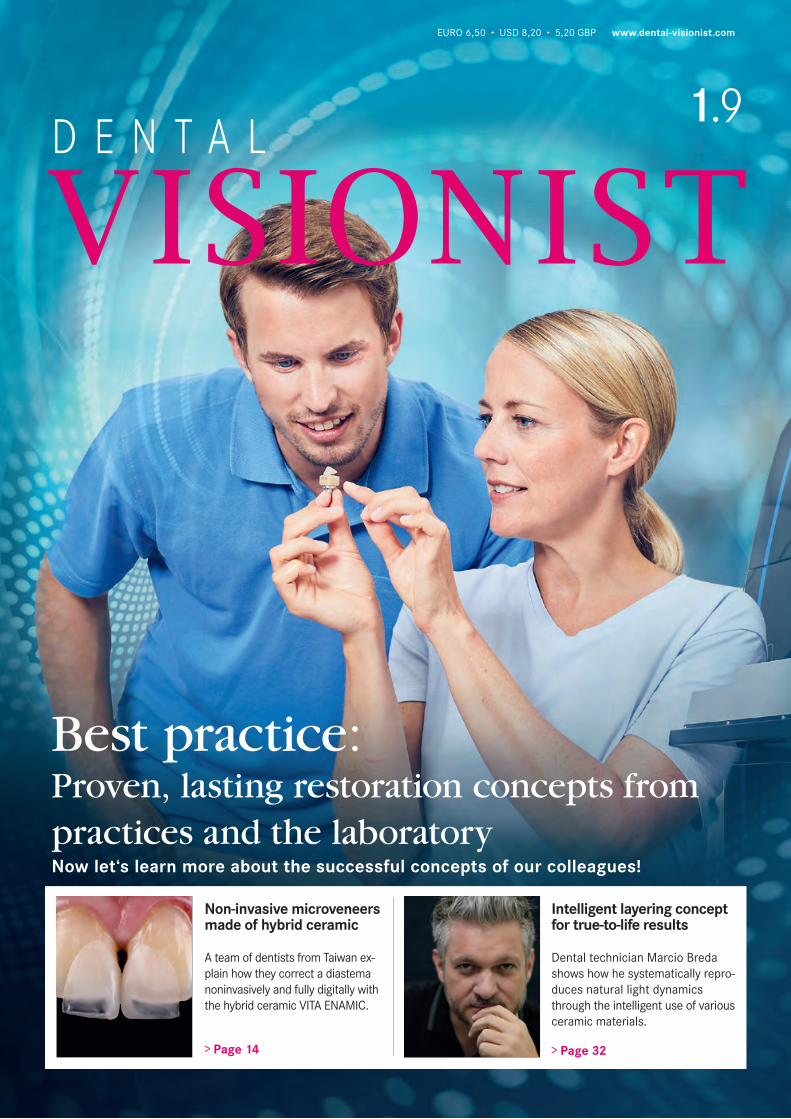
Doppelte GeschwindigkeitDer E4 scannt einen kompletten Kiefer in nur 11 Sekunden, damit ist er zweimal schneller als der E3 mit 22 Sekunden.
Doppelte PräzisionDer E4 liefert eine Präzision von 4 Mikrometern im Vergleich zu den 7 Mikrometern des E3.
Doppelt so viele Kameras Die 4 x 5 MP-Kameras ermöglichen das Scannen von Stümpfen direkt am Modell, wodurch zusätzliche Schritte für das individuelle Scannen der Stümpfe entfallen.
NEU 3Shape E4Ultimative Produktivität mit unserem bisher schnellsten Scanner
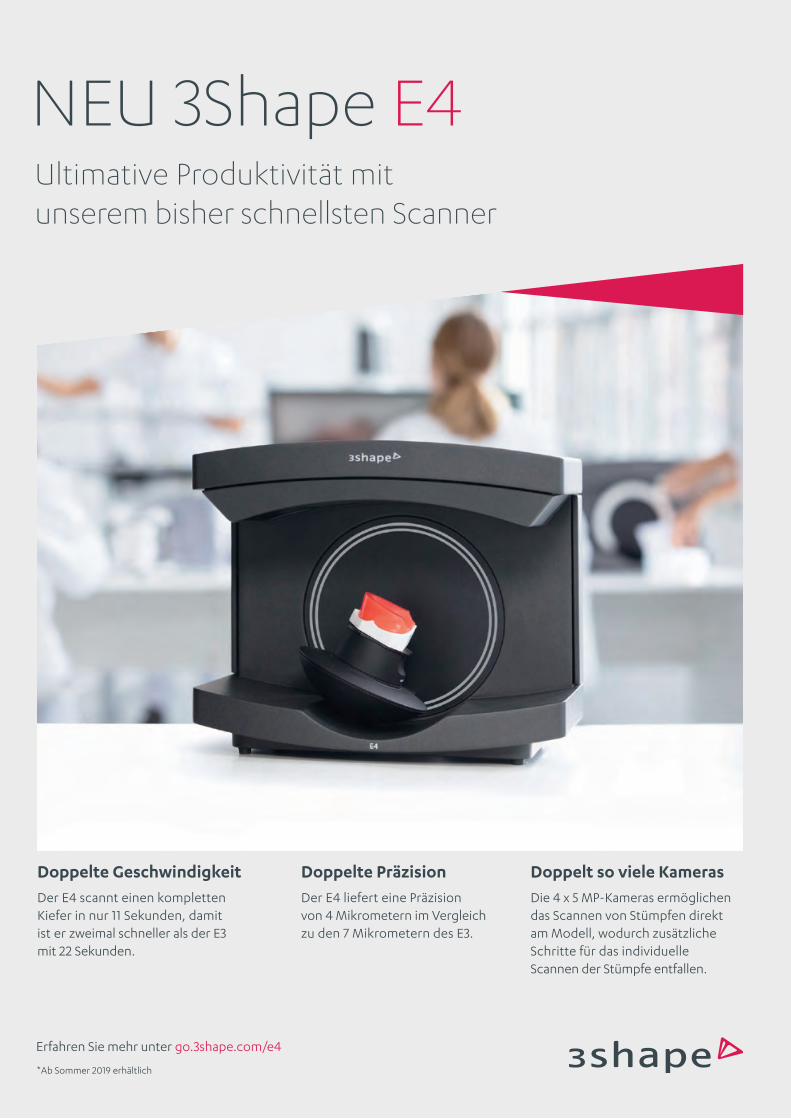
Proven, lasting restoration conceptsfrom dental practices and laboratories
Editorial
COMPANY DETAILS
PublisherVITA Zahnfabrik H. Rauter GmbH & Co. KG
Spitalgasse 3 | 79713 Bad Säckingen
Editing/Concept/Layout qu-int. marken | medien | kommunikation
Waldkircher Straße 12 | 79106 Freiburg
Chief editor
Felicitas Ledig
qu-int. marken | medien | kommunikation
Waldkircher Straße 12 | 79106 Freiburg
Published twice annually
NOTE
The testimonials by dentists and dental technicians
published in this magazine are based on practical
experience with the specified VITA materials gained during
the course of processing, and/or manufacturer infor-
mation, based on the data provided in technical and
scientific documentation (VITA Zahnfabrik, Bad Säckingen,
Germany; download from www.vita-zahnfabrik.com). The
statements of the named dentists and dental technicians
reflect the status of the report authorization of 07/2019.
The statements by developers or the technical marketing
department published in this magazine are based on
personal and/or internal studies conducted by VITA R&D
(VITA Zahnfabrik, Bad Säckingen, Germany) and/or on the
results of pilot testing.
Copyright and publishing law
Articles do not necessary reflect the views of the
editorial team. The product information published is
accurate to the best of our knowledge. This does not,
however, constitute a warranty. All rights reserved, in
particular the right to reproduction (in any form), as well
as the right to translation into foreign languages.
Trademark rights
VITA and VITA products are registered trademarks of
VITA Zahnfabrik H. Rauter GmbH & Co. KG, Bad
Säckingen, Germany. All other company names and/or
products mentioned in this journal are or may be
registered trademarks of the corresponding companies
and/or trademark holders.
Erfahren Sie mehr unter go.3shape.com/e4
* Ab Sommer 2019 erhältlich
Doppelte GeschwindigkeitDer E4 scannt einen kompletten Kiefer in nur 11 Sekunden, damit ist er zweimal schneller als der E3 mit 22 Sekunden.
Doppelte PräzisionDer E4 liefert eine Präzision von 4 Mikrometern im Vergleich zu den 7 Mikrometern des E3.
Doppelt so viele Kameras Die 4 x 5 MP-Kameras ermöglichen das Scannen von Stümpfen direkt am Modell, wodurch zusätzliche Schritte für das individuelle Scannen der Stümpfe entfallen.
NEU 3Shape E4Ultimative Produktivität mit unserem bisher schnellsten Scanner
Felicitas Ledig Chief Editor
Prosthetic composite solution of ZrO2 and hybrid ceramic How composite bridges can minimize the risk of fractures or chipping. > Page 12
Individually layeredveneer restoration Cosmetic reconstruction with individually layered veneers made of VITA VMK Master > > Page 36
Endocrown restoration made of proven feldspar ceramic Defect-oriented restoration of tooth 34 with a VITABLOCS endocrown > Page 22
Best practice means adopting and using treatment and restoration concepts already successfully established by colleagues. In this edition of DENTAL VISIONIST, practi-tioners and technicians from Europe, Asia and Latin America will present you with a number of their best practice examples.
For example, a Taiwanese team of dentists will show how you can correct a diastema with hybrid ceramic, fully digitally and non-invasively. Furthermore, a German team of practitioners and technicians explain why they use “prosthetic composite solutions“ for parafunctions and manifested bruxism. And a dentist from Russia ex-plains how he was able to achieve the desired result for his patient step by step using digital smile design and an analog mock-up.
These examples from everyday work in practices and laboratories are intended to show you proven, inspired concepts and help you provide your patients with lasting restorations.
DENTAL VISIONIST wishes you an enjoyable read
DENTAL VISIONIST 1.9
DV: What was your goal in investigating both procedures for shade determination?
Dr. Karl Lehmann: The goal of the study was to determine how reliably and reproducibly male and female study participants can deter-mine tooth shades using visual and digital pro-cesses. To do this, 100 subjects determined the shades of standardized VITA classical A1-D4
tooth shade tabs in various sessions under ideal lighting conditions, both visually and dig-itally.
DV: How exactly did you proceed with this in-vestigation?
Dr. Karl Lehmann: In the first step of this in-vestigation, the subjects had to visually deter-mine the tooth shades of 16 previously anon-ymized VITA classical A1-D4 shade tabs using the VITA classical A1-D4 shade guide and, in a second step, perform the procedure again digitally with the VITA Easyshade spectropho-tometer. Each participant had a maximum of eight seconds to determine the tooth shade. A total of 3200 visual and digital shade determi-nations were made.
DV: WWhat differences were you able to deter-mine between the digital and visual methods?
Dr. Karl Lehmann: In the digital procedure with the spectrophotometer VITA Easyshade, the correct tooth shade was determined in nearly 100 percent of the measurements. This showed a significantly greater precision for the digital procedure than for the visual method. When using the shade guide, the subjects de-termined the correct tooth shade in only about 72 percent of the shade determinations. The gender-specific analysis showed that fe-male subjects recognized the shade of the
“With VITA Easyshade,nearly 100% of the shade
measurements were correct.”
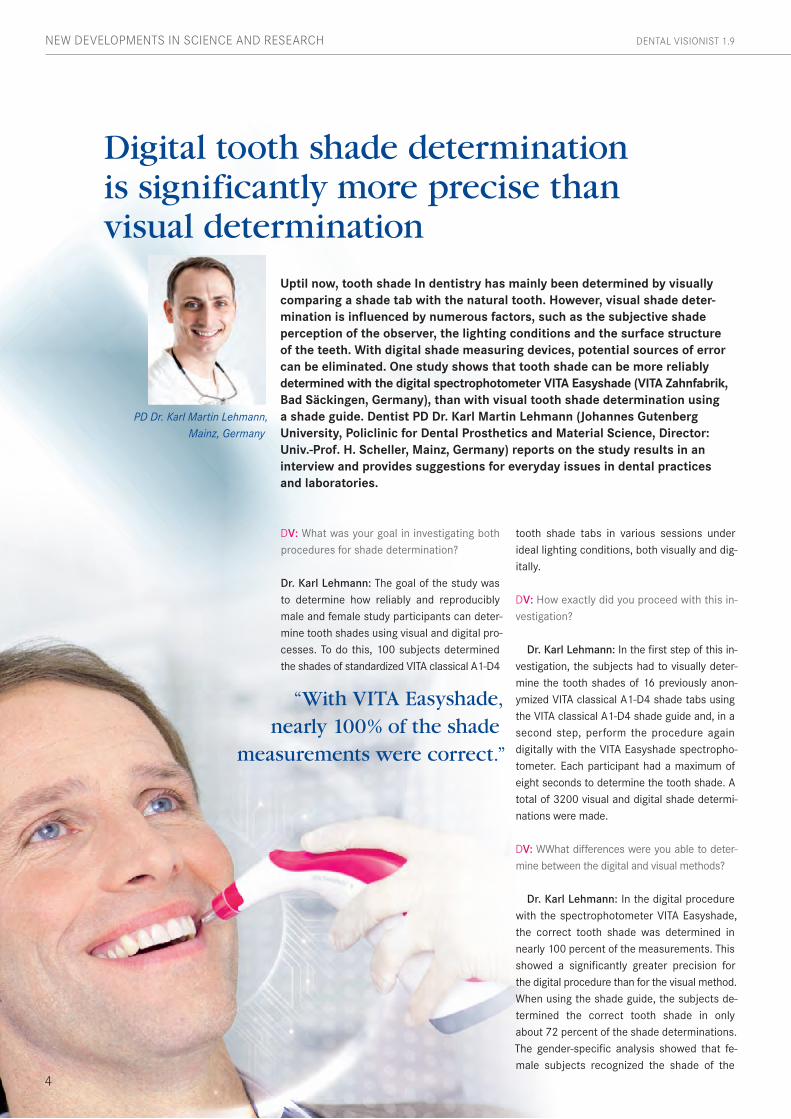
Uptil now, tooth shade In dentistry has mainly been determined by visually comparing a shade tab with the natural tooth. However, visual shade deter- mination is influenced by numerous factors, such as the subjective shade perception of the observer, the lighting conditions and the surface structure of the teeth. With digital shade measuring devices, potential sources of error can be eliminated. One study shows that tooth shade can be more reliably determined with the digital spectrophotometer VITA Easyshade (VITA Zahnfabrik, Bad Säckingen, Germany), than with visual tooth shade determination using a shade guide. Dentist PD Dr. Karl Martin Lehmann (Johannes Gutenberg University, Policlinic for Dental Prosthetics and Material Science, Director: Univ.-Prof. H. Scheller, Mainz, Germany) reports on the study results in an interview and provides suggestions for everyday issues in dental practices and laboratories.
PD Dr. Karl Martin Lehmann, Mainz, Germany
4
DENTAL VISIONIST 1.9NEW DEVELOPMENTS IN SCIENCE AND RESEARCH
Digital tooth shade determination is significantly more precise than visual determination
teeth in the visual shade determination more often than male participants. In contrast, there was no significant difference in the digi-tal shade determination.
DV: What recommendations can be derived from these results for dentists and technicians?
Dr. Karl Lehmann: Due to the high preci-sion of the digital method, the tooth shade de-termination should be as digital as possible, ideally complemented by photos of the in-traoral situation of the respective patient, which can provide further information on shape design and surface structures. Detailed information enables the dental laboratory to produce a high-precision, true-to-life shade re-production. With such tooth shade and image information, additional time and expense due to subsequent shade corrections or even com-pletely new productions, can be avoided.
DV: What should dentists and dental techni-cians watch out for with digital shade deter-mination?
Dr. Karl Lehmann: In principle, operating the VITA Easyshade is self-explanatory and very simple. You should just make sure that the measurement is carried out before the start of treatment and that the measuring tip rests perfectly flat on the tooth surface. Thanks to the use of standardized LED white light, neither the influence of the lighting con-ditions, nor the surrounding colors has to be considered.
Report 07/19
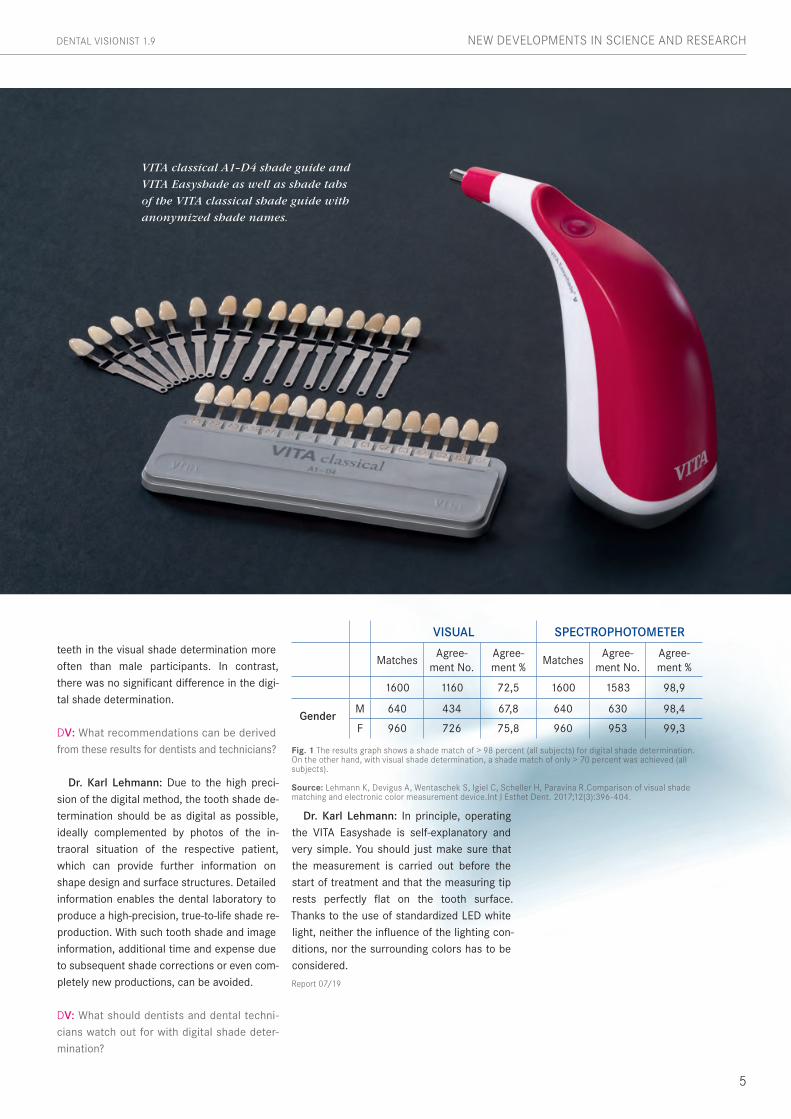
Fig. 1 The results graph shows a shade match of > 98 percent (all subjects) for digital shade determination. On the other hand, with visual shade determination, a shade match of only > 70 percent was achieved (all subjects). Source: Lehmann K, Devigus A, Wentaschek S, Igiel C, Scheller H, Paravina R.Comparison of visual shadematching and electronic color measurement device.Int J Esthet Dent. 2017;12(3):396-404.
VISUAL SPECTROPHOTOMETER
MatchesAgree-
ment No.Agree-ment %
MatchesAgree-
ment No.Agree-ment %
1600 1160 72,5 1600 1583 98,9
GenderM 640 434 67,8 640 630 98,4
F 960 726 75,8 960 953 99,3
5
DENTAL VISIONIST 1.9 NEW DEVELOPMENTS IN SCIENCE AND RESEARCH
VITA classical A1–D4 shade guide and
VITA Easyshade as well as shade tabs
of the VITA classical shade guide with
anonymized shade names.
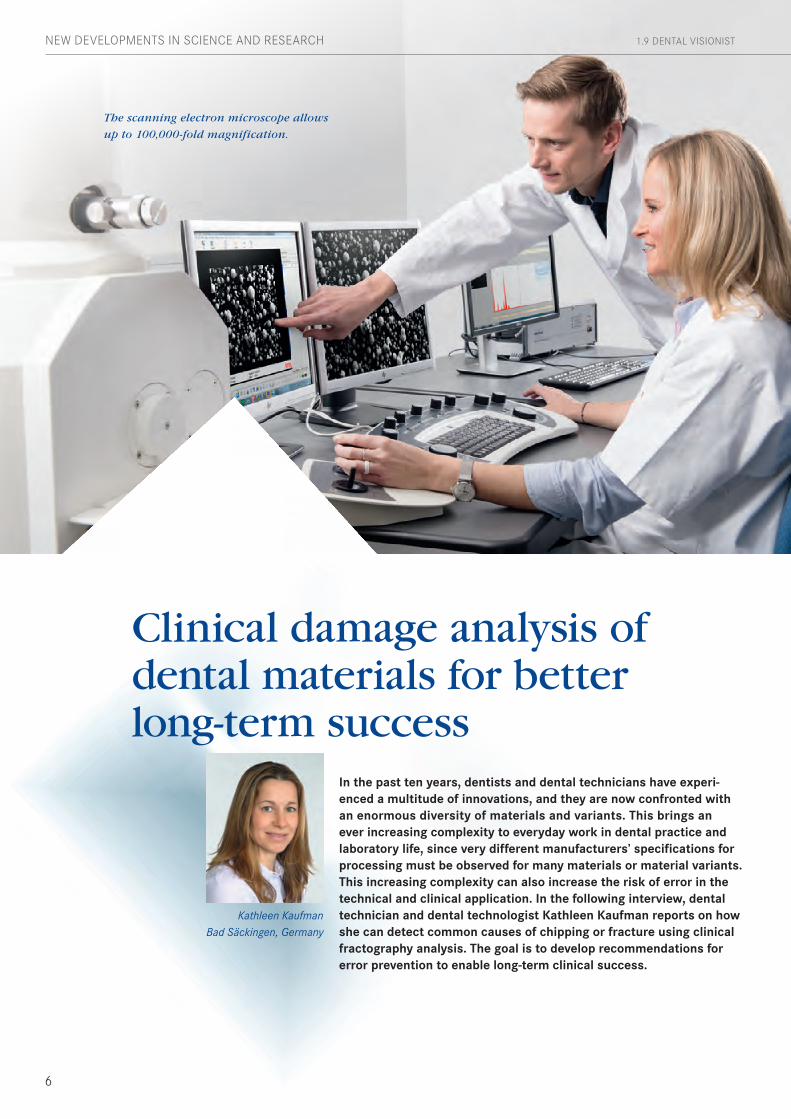
The scanning electron microscope allows
up to 100,000-fold magnification.
1.9 DENTAL VISIONIST
6
In the past ten years, dentists and dental technicians have experi-enced a multitude of innovations, and they are now confronted with an enormous diversity of materials and variants. This brings an ever increasing complexity to everyday work in dental practice and laboratory life, since very different manufacturers’ specifications for processing must be observed for many materials or material variants. This increasing complexity can also increase the risk of error in the technical and clinical application. In the following interview, dental technician and dental technologist Kathleen Kaufman reports on how she can detect common causes of chipping or fracture using clinical fractography analysis. The goal is to develop recommendations for error prevention to enable long-term clinical success.
Kathleen Kaufman Bad Säckingen, Germany
Clinical damage analysis of dental materials for better long-term success
NEW DEVELOPMENTS IN SCIENCE AND RESEARCH
DV: What is the procedure for clinical dam-age analysis and what procedures are used?
Kathleen Kaufman: In damage analysis, defective restorations are examined by means of different methods in order to deter-mine the cause of failure. Frequently, a scan-ning electron microscope (SEM) is used for this purpose. With this microscope, for exam-ple, we can analyze fracture surfaces of frac-tured restorations with up to 100,000x mag-nification. At this magnification, conclusions about the cause of the material failure can be derived from the type and structure of the fracture surface. On the basis of these find-ings, concrete recommendations for safe processing can then be created.
DV: How can fracture or chipping risks already be minimized during the planning and design of restorations?
Kathleen Kaufman: Material failure or chip-ping can actually have its origin in the plan-ning or design phase. In the SEM analysis of veneered zirconia restorations, it has been shown, for example, that ceramic spalling is often due to a lack of framework support for the veneer. Here, it is advisable to design the framework as anatomically as possible so that uniform coverage can always be achieved dur-ing veneering. Falling short of minimum wall
thicknesses, insufficiently large connector cross-sections, and incorrectly dimensioned connectors are further parameters that in-crease the risk of fracture.
DV: What findings does damage analysis offer for the safe and material-appropriate process-ing of zirconia?
Kathleen Kaufman: The fracture of zirco-nia substructures is often caused by puncti-form machining with worn diamond grinding wheels or with the separating wheel. When performing damage analysis with SEM, it can be seen that crack propagation often originates from these sites, which leads to material failure. In general, frameworks should always be finished before sintering and never on the connector itself. In addi-tion, take care to maintain a low speed and a low contact pressure to prevent overheat-ing. Finally, the framework should be de-signed so that it has no sharp corners and edges, as this can lead to tensions in the ve-neering ceramic.
DV: What potential sources of failure did you discover in your glass ceramic firing studies?
Kathleen Kaufman: For glass-ceramic res-torations, it has been shown that strict ad-herence to the manufacturer’s specifications
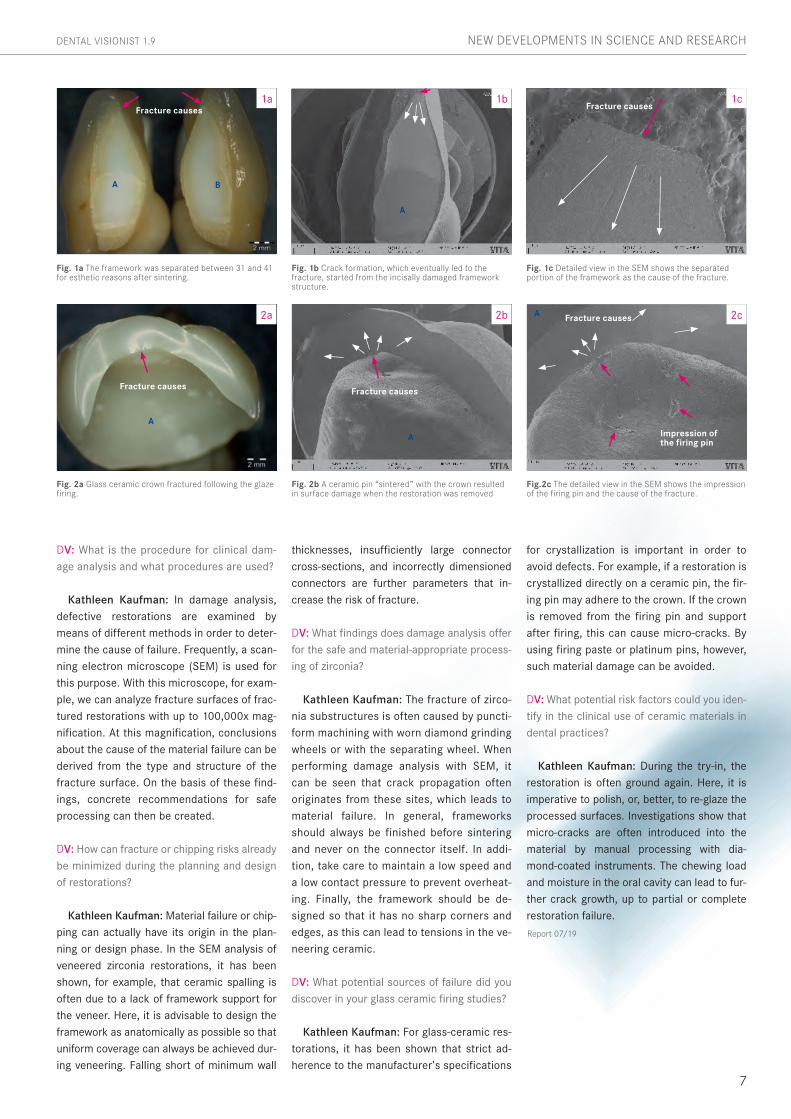
Fig. 1a The framework was separated between 31 and 41 for esthetic reasons after sintering.
Fig. 2a Glass ceramic crown fractured following the glaze firing.
Fig. 1b Crack formation, which eventually led to the fracture, started from the incisally damaged framework structure.
Fig. 2b A ceramic pin “sintered” with the crown resulted in surface damage when the restoration was removed
Fig.2c The detailed view in the SEM shows the impression of the firing pin and the cause of the fracture.
Fig. 1c Detailed view in the SEM shows the separated portion of the framework as the cause of the fracture.
1a
2a
1b
2b 2c
1c
for crystallization is important in order to avoid defects. For example, if a restoration is crystallized directly on a ceramic pin, the fir-ing pin may adhere to the crown. If the crown is removed from the firing pin and support after firing, this can cause micro-cracks. By using firing paste or platinum pins, however, such material damage can be avoided.
DV: What potential risk factors could you iden-tify in the clinical use of ceramic materials in dental practices?
Kathleen Kaufman: During the try-in, the restoration is often ground again. Here, it is imperative to polish, or, better, to re-glaze the processed surfaces. Investigations show that micro-cracks are often introduced into the material by manual processing with dia-mond-coated instruments. The chewing load and moisture in the oral cavity can lead to fur-ther crack growth, up to partial or complete restoration failure.
Report 07/19
7
DENTAL VISIONIST 1.9 NEW DEVELOPMENTS IN SCIENCE AND RESEARCH
Fracture causesFracture causes
A B
A
A
Fracture causes
A
Fracture causes
Fracture causes
Impression of the firing pin
A
.-
Ceramic network
86 % by weight
Polymer network
14 % by weight
En
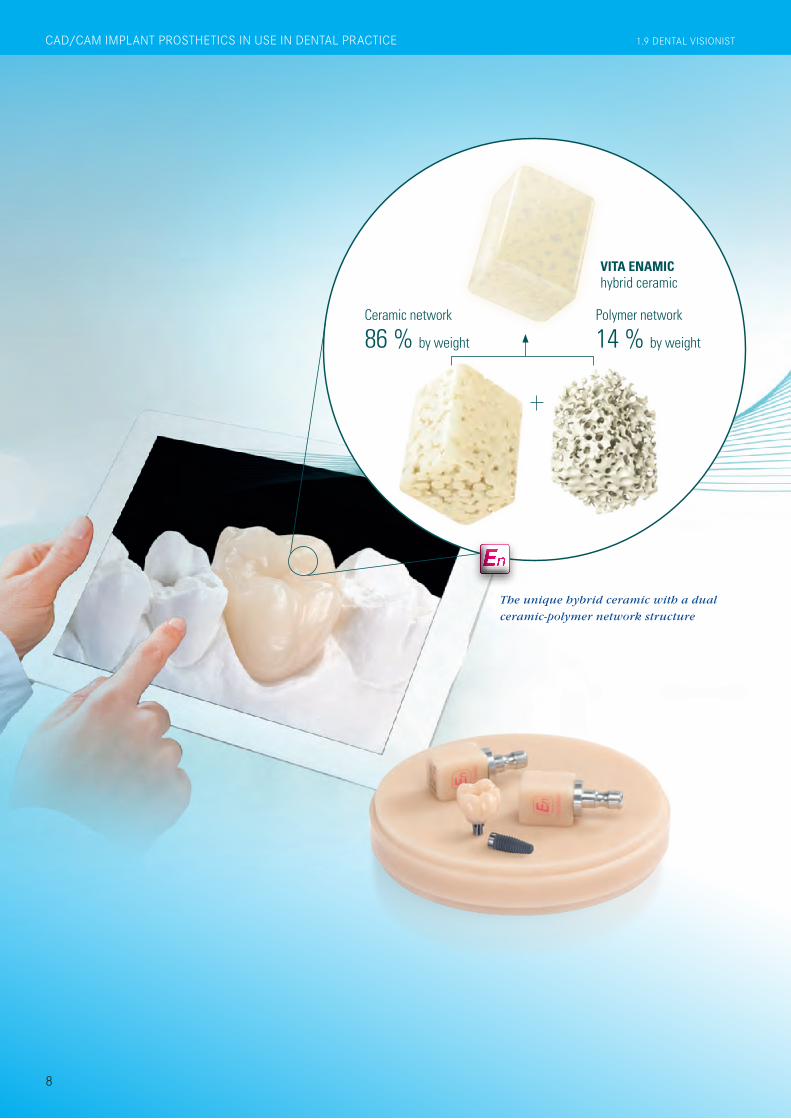
VITA ENAMIC hybrid ceramic
The unique hybrid ceramic with a dual
ceramic-polymer network structure
8
CAD/CAM IMPLANT PROSTHETICS IN USE IN DENTAL PRACTICE 1.9 DENTAL VISIONIST
.-
Polymer network
14 % by weight
VITA ENAMIC hybrid ceramic
A 53-year-old female patient came to the den-tal office because of bite problems. Radiolog-ically and clinically, a root fracture was diag-nosed on endodontically treated tooth 26. The tooth was then extracted in a bone-preserving manner. Since the patient rejected a removable denture and an invasive bridge preparation on teeth 25 and 27, it was decided to close the gap with an implanted restoration. An earlier periodontitis was treated in the patient, and the treatment result was stabilized with a close prophylaxis. In region 26, the jawbone was atrophied, which is why the VITA ENAMIC mul-tiColor polychrome hybrid ceramic blank in EMC-16 geometry was selected for the pa-tient’s CAD/CAM-supported restoration.
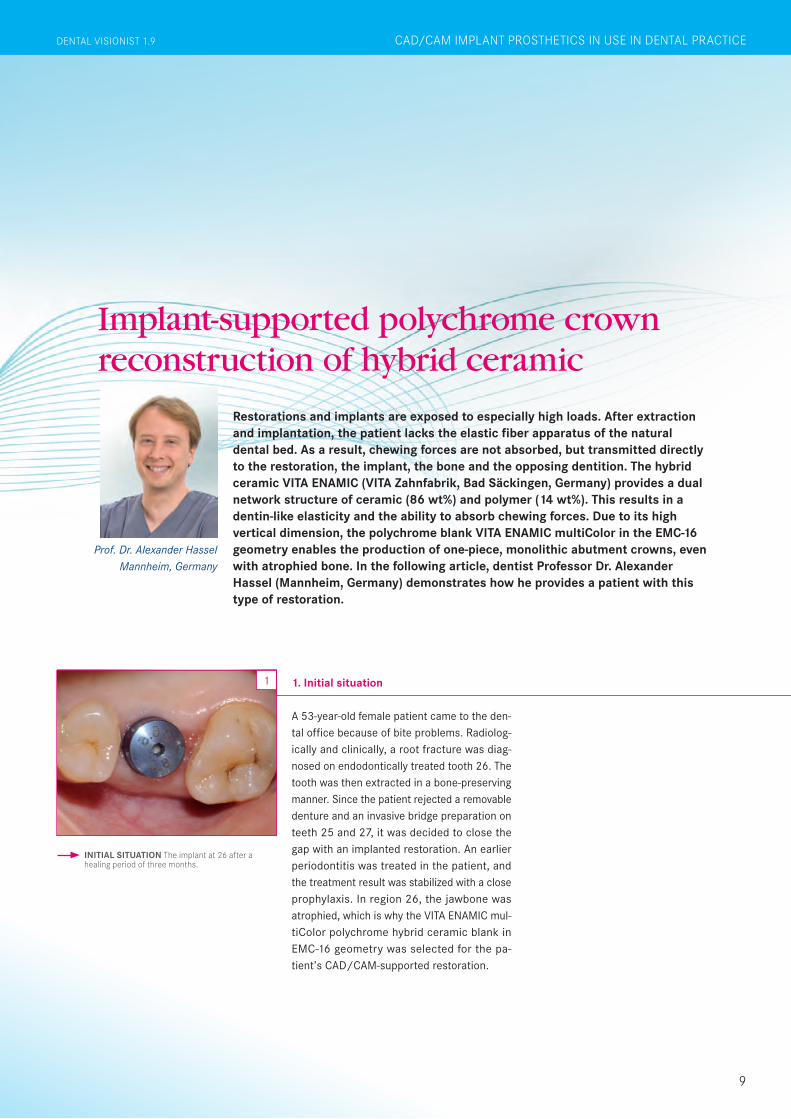
Restorations and implants are exposed to especially high loads. After extraction and implantation, the patient lacks the elastic fiber apparatus of the natural dental bed. As a result, chewing forces are not absorbed, but transmitted directly to the restoration, the implant, the bone and the opposing dentition. The hybrid ceramic VITA ENAMIC (VITA Zahnfabrik, Bad Säckingen, Germany) provides a dual network structure of ceramic (86 wt%) and polymer (14 wt%). This results in a dentin-like elasticity and the ability to absorb chewing forces. Due to its high vertical dimension, the polychrome blank VITA ENAMIC multiColor in the EMC-16 geometry enables the production of one-piece, monolithic abutment crowns, even with atrophied bone. In the following article, dentist Professor Dr. Alexander Hassel (Mannheim, Germany) demonstrates how he provides a patient with this type of restoration.
Prof. Dr. Alexander Hassel Mannheim, Germany
Implant-supported polychrome crown reconstruction of hybrid ceramic
INITIAL SITUATION The implant at 26 after a healing period of three months.
1
9
DENTAL VISIONIST 1.9 CAD/CAM IMPLANT PROSTHETICS IN USE IN DENTAL PRACTICE
1. Initial situation
The milling unit N4 (vhf camfacture, Ammerbuch, Germany) was used to grind out the abutment crown wet. The individual abutment was sand-blasted prior to adhesive bonding and condi-tioned with a metal primer. The adhesive sur-faces and the screw channel of the abutment crown were etched with hydrofluoric acid and then silanized. The cement gap and the abutment crown were finalized and polished under an air block after the composite cement had hardened. The prosthetic implant restoration was then screwed in intraorally, and the approximal con-tacts and occlusion were checked. After the insertion of Teflon tape, the screw channel could be adhesively closed with filling composite.
3. Fabrication of an abutment crown
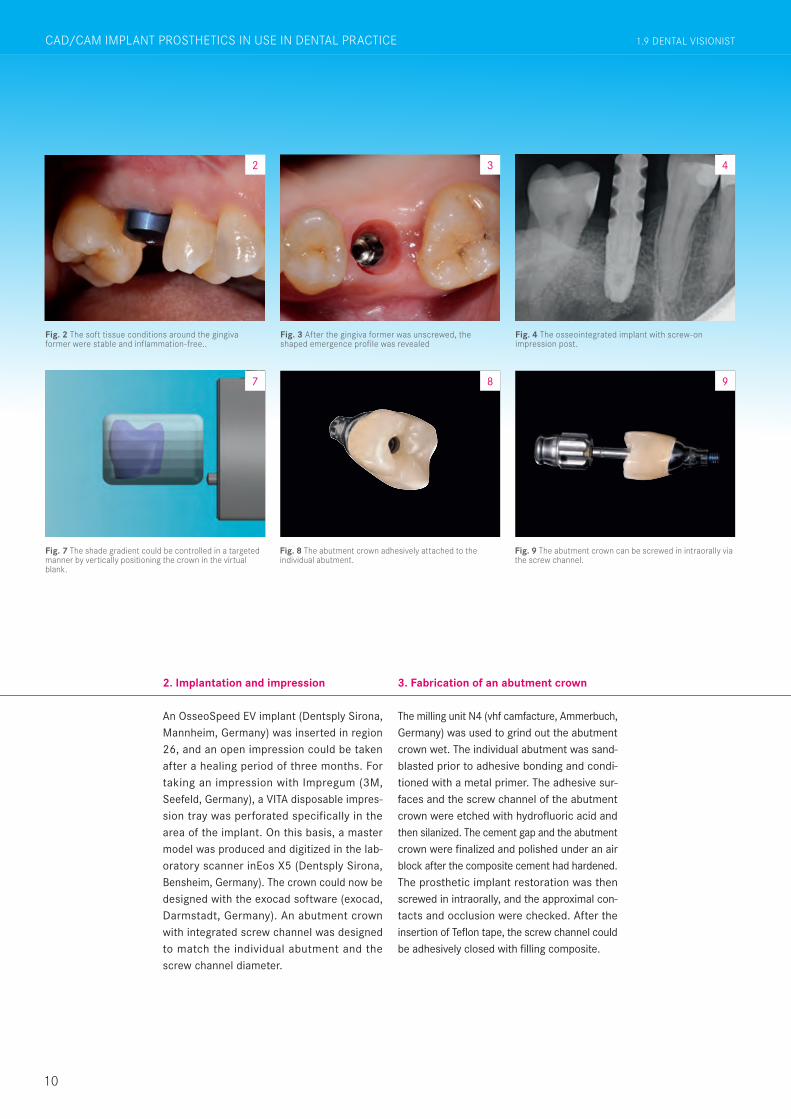
Fig. 2 The soft tissue conditions around the gingiva former were stable and inflammation-free..
2
An OsseoSpeed EV implant (Dentsply Sirona, Mannheim, Germany) was inserted in region 26, and an open impression could be taken after a healing period of three months. For taking an impression with Impregum (3M, Seefeld, Germany), a VITA disposable impres-sion tray was perforated specifically in the area of the implant. On this basis, a master model was produced and digitized in the lab-oratory scanner inEos X5 (Dentsply Sirona, Bensheim, Germany). The crown could now be designed with the exocad software (exocad, Darmstadt, Germany). An abutment crown with integrated screw channel was designed to match the individual abutment and the screw channel diameter.
2. Implantation and impression
10
Fig. 3 After the gingiva former was unscrewed, the shaped emergence profile was revealed
3
Fig. 4 The osseointegrated implant with screw-on impression post.
4
Fig. 7 The shade gradient could be controlled in a targeted manner by vertically positioning the crown in the virtual blank.
Fig. 8 The abutment crown adhesively attached to the individual abutment.
Fig. 9 The abutment crown can be screwed in intraorally via the screw channel.
7 8 9
1.9 DENTAL VISIONISTCAD/CAM IMPLANT PROSTHETICS IN USE IN DENTAL PRACTICE
4. Time-efficient, esthetic result
Thanks to the high vertical dimension of the VITA ENAMIC multiColor EMC-16 blank and the ex-cellent CAM processing properties of hybrid ceramics, an esthetic abutment crown was effi-ciently fabricated with CAD/CAM support de-spite the presence of bone atrophy in region 26. A monolithic restoration can significantly reduce the risk of chipping. Furthermore, laboratory tests show that the dual network structure of hybrid ceramics allows them to stop an initial crack formation that could potentially occur. This suggests good long-term clinical stability. The external bonding prevents cement residues in the sulcus and prevents peri-implantitis. At the follow-up after one week, the patient was enthu-siastic about the natural chewing sensation and the lifelike appearance of the hybrid ceramic
restoration. The inspection revealed an inflam-mation-free, esthetically shaped gingiva and a natural play of shade and light for the poly-chrome hybrid ceramic crown.Report 07/19
11
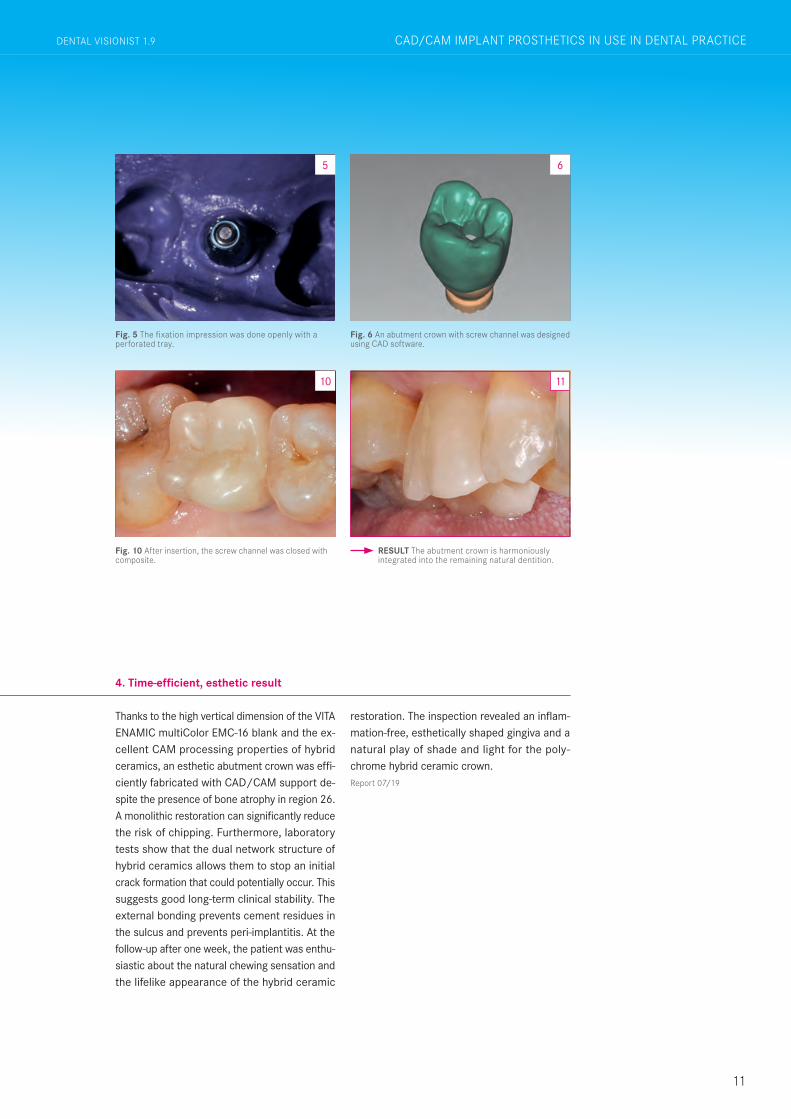
Fig. 5 The fixation impression was done openly with a perforated tray.
5
Fig. 6 An abutment crown with screw channel was designed using CAD software.
Fig. 10 After insertion, the screw channel was closed with composite.
6
10
RESULT The abutment crown is harmoniously integrated into the remaining natural dentition.
11
DENTAL VISIONIST 1.9 CAD/CAM IMPLANT PROSTHETICS IN USE IN DENTAL PRACTICE
1.8 DENTAL VISIONISTGERÜST-, VERBLENDMATERIALIEN UND MALFARBEN FÜR HOHE LEBENDIGKEIT
1. The assessment
A 52-year-old woman suffered from temporo-mandibular joint pain and showed clear signs of bruxism on the tooth substance. Despite successful splint therapy, a new all-ceramic bridge restoration was fractured from 43 and 44 to 47 in the fourth quadrant. Even a long-term temporary restoration made of PMMA could not withstand the increased chewing forces for long. The dentist and dental techni-cian discussed the case and decided to pro-vide the patient with composite bridges made of VITA YZ T zirconia and VITA ENAMIC multi-Color hybrid ceramic (both VITA Zahnfabrik, Bad Säckingen, Germany).
2.The composite concept
With flexural strengths of around 1200 MPa, zirconia has proven to be extremely effective as a high-strength framework material. How-ever, under extreme chewing force, fractures or chipping can occur, especially in the area of veneering, since all-ceramics have a high brittleness. Elastic materials with chewing force-absorbing properties like the hybrid ce-ramic VITA ENAMIC, are an interesting mate-rial alternative to consider here. In a compos-ite bridge, the high strength of a zirconia framework structure is intelligently combined with the elasticity of a hybrid ceramic veneering structure. The hybrid ceramic VITA ENAMIC is based on a structure-sintered glass ceramic matrix (86% by weight), which is then
1.9 DENTAL VISIONIST
12
IM FOKUS
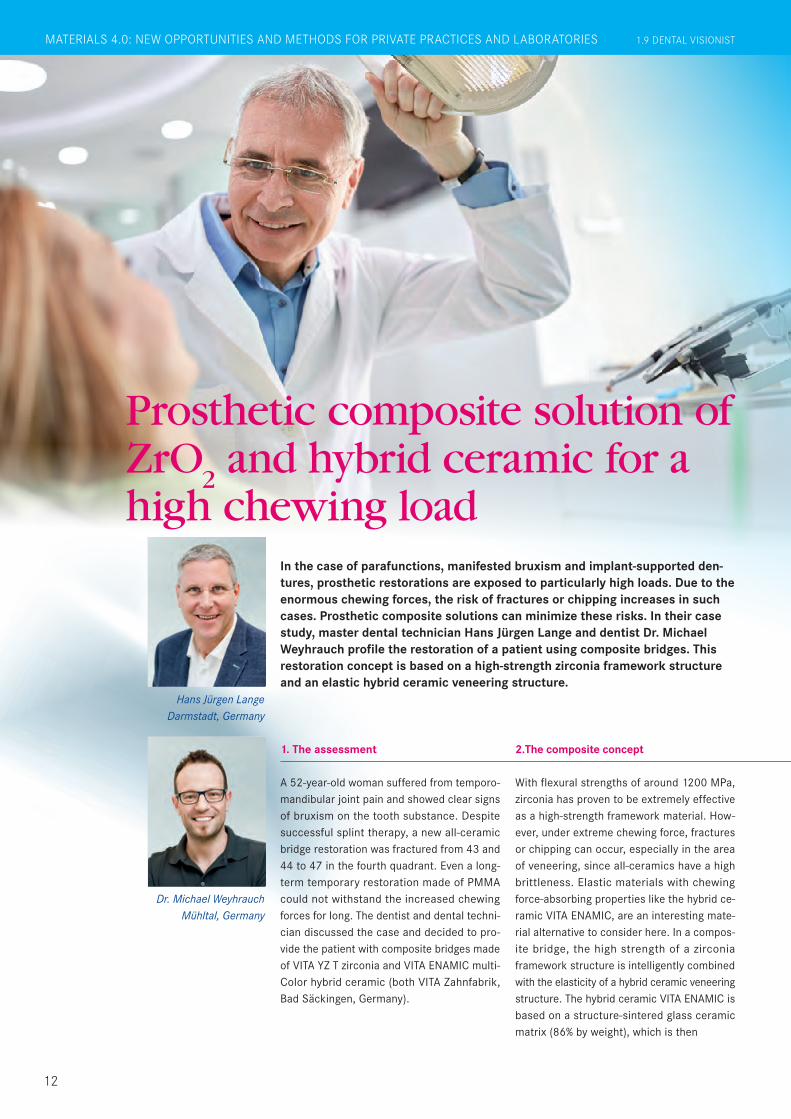
In the case of parafunctions, manifested bruxism and implant-supported den-tures, prosthetic restorations are exposed to particularly high loads. Due to the enormous chewing forces, the risk of fractures or chipping increases in such cases. Prosthetic composite solutions can minimize these risks. In their case study, master dental technician Hans Jürgen Lange and dentist Dr. Michael Weyhrauch profile the restoration of a patient using composite bridges. This restoration concept is based on a high-strength zirconia framework structure and an elastic hybrid ceramic veneering structure.
Hans Jürgen Lange Darmstadt, Germany
Dr. Michael Weyhrauch Mühltal, Germany
Prosthetic composite solution of ZrO
2 and hybrid ceramic for a
high chewing load
MATERIALS 4.0: NEW OPPORTUNITIES AND METHODS FOR PRIVATE PRACTICES AND LABORATORIES 1.9 DENTAL VISIONIST
DENTAL VISIONIST 1.8 GERÜST-, VERBLENDMATERIALIEN UND MALFARBEN FÜR HOHE LEBENDIGKEIT
3. Digital workflow
Impressions of the bridge abutments were tak-en analogously to make the composite bridge. Based on this, a master model was made and digitized with the inEos X5 laboratory scanner (Dentsply Sirona, Bensheim, Germany). On the virtual model, a fully anatomical bridge was first designed using the exocad software (exocad, Darmstadt, Germany), which was then anatom-ically reduced at the press of a button. The framework was milled, reworked, sintered and scanned again to construct six monolithic ve-neering structures on top and then also pro-duced with CAD/CAM support using the inLab MC XL System (Dentsply Sirona, Bensheim, Germany).
4. Finalization and integration
The hybrid-ceramic veneer structures were etched with hydrofluoric acid at the bonding surfaces and silanized, and the zirconia sub-structure was sandblasted. Adhesive bonding was performed with the dual-curing composite cement RelyX Unicem 2 Automix (3M, Seefeld, Germany). After the removal of composite res-idues, the final polishing was done with a goat hair brush and diamond polishing paste. Since 2017, when self-adhesive was integrated, the composite bridges have been complication-free in situ. The patient was enthusiastic about the pleasant chewing sensation, similar to that of natural teeth.
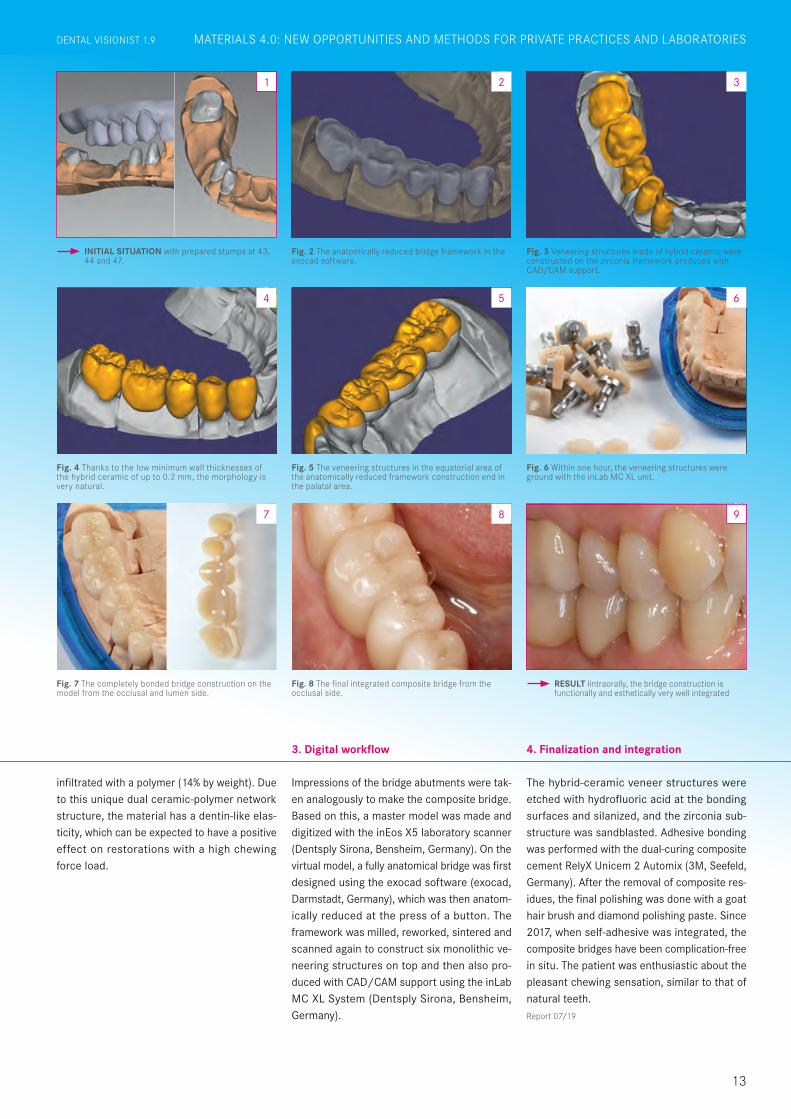
INITIAL SITUATION with prepared stumps at 43, 44 and 47.
Fig. 4 Thanks to the low minimum wall thicknesses of the hybrid ceramic of up to 0.2 mm, the morphology is very natural.
Fig. 2 The anatomically reduced bridge framework in the exocad software.
Fig. 3 Veneering structures made of hybrid ceramic were constructed on the zirconia framework produced with CAD/CAM support.
Fig. 5 The veneering structures in the equatorial area of the anatomically reduced framework construction end in the palatal area.
Fig. 6 Within one hour, the veneering structures were ground with the inLab MC XL unit.
Fig. 7 The completely bonded bridge construction on the model from the occlusal and lumen side.
4
2 3
5 6
Fig. 8 The final integrated composite bridge from the occlusal side.
RESULT Iintraorally, the bridge construction is functionally and esthetically very well integrated
8 9
infiltrated with a polymer (14% by weight). Due to this unique dual ceramic-polymer network structure, the material has a dentin-like elas-ticity, which can be expected to have a positive effect on restorations with a high chewing force load.
87
Report 07/19
1
13
DENTAL VISIONIST 1.9 IM FOKUSMATERIALS 4.0: NEW OPPORTUNITIES AND METHODS FOR PRIVATE PRACTICES AND LABORATORIESDENTAL VISIONIST 1.9
14
MATERIALS 4.0: NEW OPPORTUNITIES AND METHODS FOR PRIVATE PRACTICES AND LABORATORIES 1.9 DENTAL VISIONIST
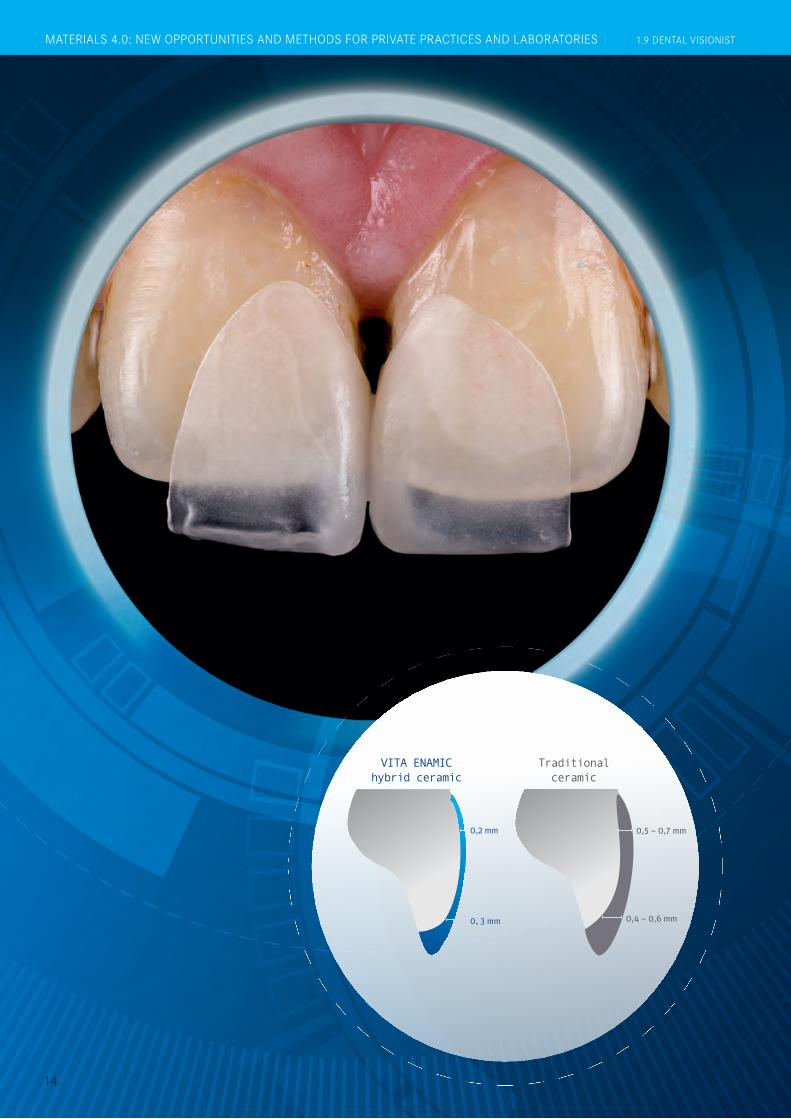
VITA ENAMIC hybrid ceramic
0, 3 mm
0,2 mm 0,5 – 0,7 mm
0,4 – 0,6 mm
Traditional ceramic
15
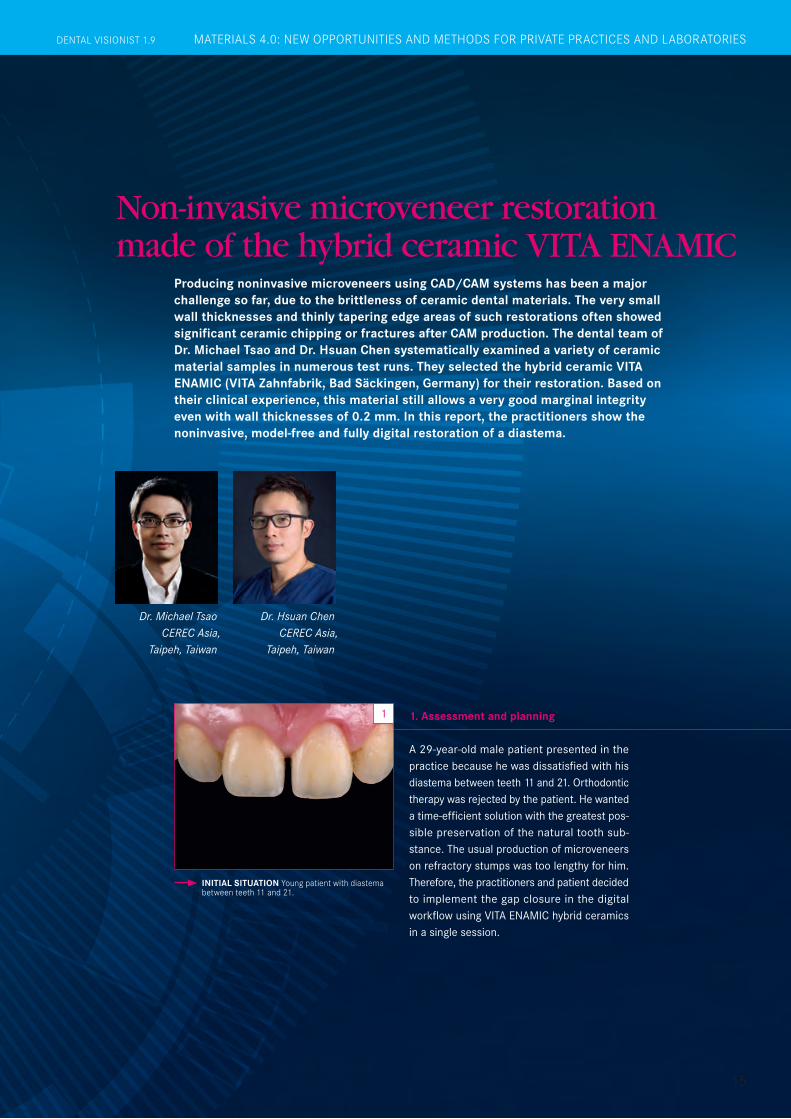
Producing noninvasive microveneers using CAD/CAM systems has been a major challenge so far, due to the brittleness of ceramic dental materials. The very small wall thicknesses and thinly tapering edge areas of such restorations often showed significant ceramic chipping or fractures after CAM production. The dental team of Dr. Michael Tsao and Dr. Hsuan Chen systematically examined a variety of ceramic material samples in numerous test runs. They selected the hybrid ceramic VITA ENAMIC (VITA Zahnfabrik, Bad Säckingen, Germany) for their restoration. Based on their clinical experience, this material still allows a very good marginal integrity even with wall thicknesses of 0.2 mm. In this report, the practitioners show the noninvasive, model-free and fully digital restoration of a diastema.
Dr. Michael Tsao CEREC Asia,
Taipeh, Taiwan
Dr. Hsuan Chen CEREC Asia,
Taipeh, Taiwan
Non-invasive microveneer restoration made of the hybrid ceramic VITA ENAMIC
A 29-year-old male patient presented in the practice because he was dissatisfied with his diastema between teeth 11 and 21. Orthodontic therapy was rejected by the patient. He wanted a time-efficient solution with the greatest pos-sible preservation of the natural tooth sub-stance. The usual production of microveneers on refractory stumps was too lengthy for him. Therefore, the practitioners and patient decided to implement the gap closure in the digital workflow using VITA ENAMIC hybrid ceramics in a single session.
1. Assessment and planning
INITIAL SITUATION Young patient with diastema between teeth 11 and 21.
1
MATERIALS 4.0: NEW OPPORTUNITIES AND METHODS FOR PRIVATE PRACTICES AND LABORATORIESDENTAL VISIONIST 1.9
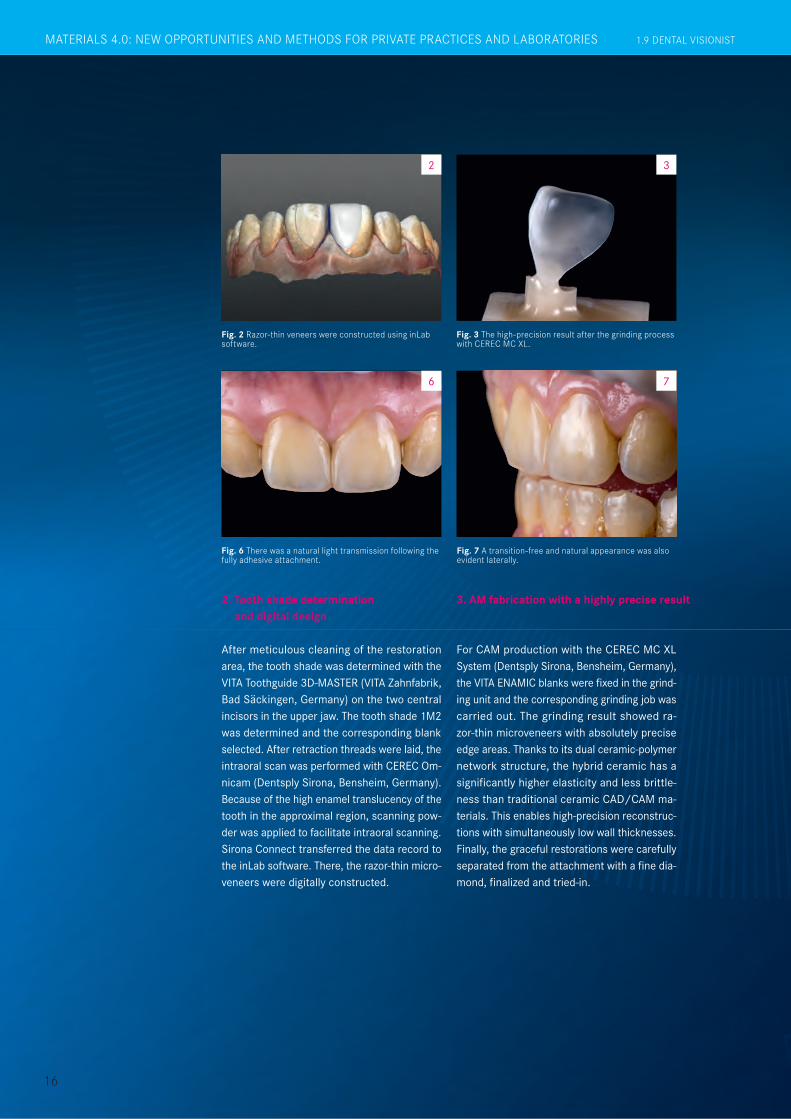
Fig. 2 Razor-thin veneers were constructed using inLab software.
2
Fig. 3 The high-precision result after the grinding process with CEREC MC XL.
3
Fig. 6 There was a natural light transmission following the fully adhesive attachment.
Fig. 7 A transition-free and natural appearance was also evident laterally.
6 7
1.9 DENTAL VISIONIST
16
After meticulous cleaning of the restoration area, the tooth shade was determined with the VITA Toothguide 3D-MASTER (VITA Zahnfabrik, Bad Säckingen, Germany) on the two central incisors in the upper jaw. The tooth shade 1M2 was determined and the corresponding blank selected. After retraction threads were laid, the intraoral scan was performed with CEREC Om-nicam (Dentsply Sirona, Bensheim, Germany). Because of the high enamel translucency of the tooth in the approximal region, scanning pow-der was applied to facilitate intraoral scanning. Sirona Connect transferred the data record to the inLab software. There, the razor-thin micro-veneers were digitally constructed.
For CAM production with the CEREC MC XL System (Dentsply Sirona, Bensheim, Germany), the VITA ENAMIC blanks were fixed in the grind-ing unit and the corresponding grinding job was carried out. The grinding result showed ra-zor-thin microveneers with absolutely precise edge areas. Thanks to its dual ceramic-polymer network structure, the hybrid ceramic has a significantly higher elasticity and less brittle-ness than traditional ceramic CAD/CAM ma-terials. This enables high-precision reconstruc-tions with simultaneously low wall thicknesses. Finally, the graceful restorations were carefully separated from the attachment with a fine dia-mond, finalized and tried-in.
2. Tooth shade determination and digital design
3. AM fabrication with a highly precise result
MATERIALS 4.0: NEW OPPORTUNITIES AND METHODS FOR PRIVATE PRACTICES AND LABORATORIES 1.9 DENTAL VISIONIST
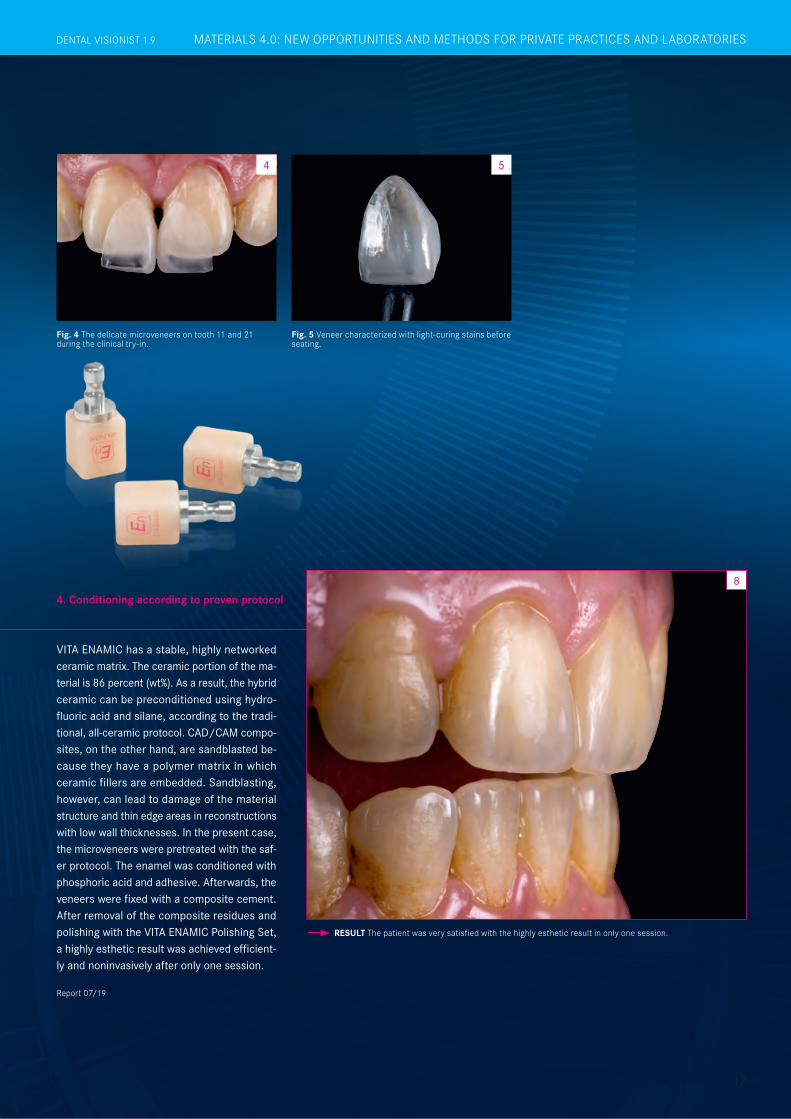
Fig. 4 The delicate microveneers on tooth 11 and 21 during the clinical try-in.
Fig. 5 Veneer characterized with light-curing stains before seating.
4 5
RESULT The patient was very satisfied with the highly esthetic result in only one session.
8
17
DENTAL VISIONIST 1.9
VITA ENAMIC has a stable, highly networked ceramic matrix. The ceramic portion of the ma-terial is 86 percent (wt%). As a result, the hybrid ceramic can be preconditioned using hydro-fluoric acid and silane, according to the tradi-tional, all-ceramic protocol. CAD/CAM compo- sites, on the other hand, are sandblasted be-cause they have a polymer matrix in which ceramic fillers are embedded. Sandblasting, however, can lead to damage of the material structure and thin edge areas in reconstructions with low wall thicknesses. In the present case, the microveneers were pretreated with the saf-er protocol. The enamel was conditioned with phosphoric acid and adhesive. Afterwards, the veneers were fixed with a composite cement. After removal of the composite residues and polishing with the VITA ENAMIC Polishing Set, a highly esthetic result was achieved efficient-ly and noninvasively after only one session.
4. Conditioning according to proven protocol
Report 07/19
MATERIALS 4.0: NEW OPPORTUNITIES AND METHODS FOR PRIVATE PRACTICES AND LABORATORIESDENTAL VISIONIST 1.9
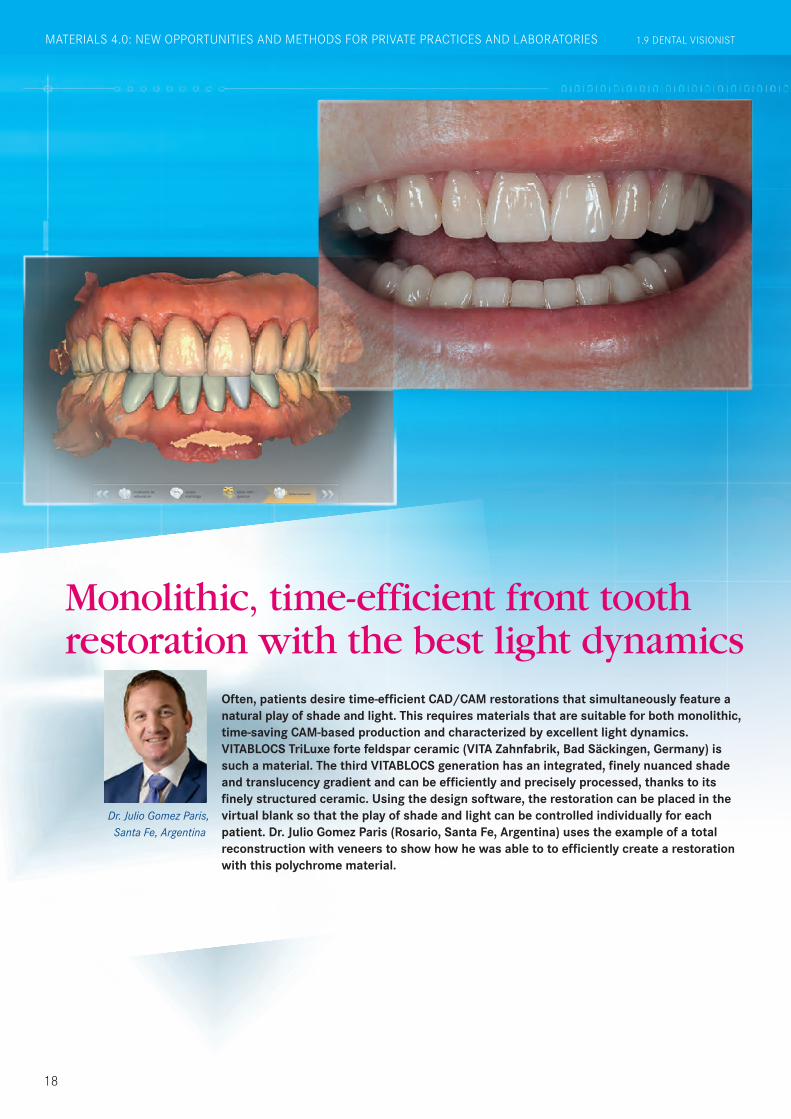
Dr. Julio Gomez Paris, Santa Fe, Argentina
MATERIALS 4.0: NEW OPPORTUNITIES AND METHODS FOR PRIVATE PRACTICES AND LABORATORIES 1.9 DENTAL VISIONIST
Monolithic, time-efficient front tooth restoration with the best light dynamics
Often, patients desire time-efficient CAD/CAM restorations that simultaneously feature a natural play of shade and light. This requires materials that are suitable for both monolithic, time-saving CAM-based production and characterized by excellent light dynamics. VITABLOCS TriLuxe forte feldspar ceramic (VITA Zahnfabrik, Bad Säckingen, Germany) is such a material. The third VITABLOCS generation has an integrated, finely nuanced shade and translucency gradient and can be efficiently and precisely processed, thanks to its finely structured ceramic. Using the design software, the restoration can be placed in the virtual blank so that the play of shade and light can be controlled individually for each patient. Dr. Julio Gomez Paris (Rosario, Santa Fe, Argentina) uses the example of a total reconstruction with veneers to show how he was able to to efficiently create a restoration with this polychrome material.
18
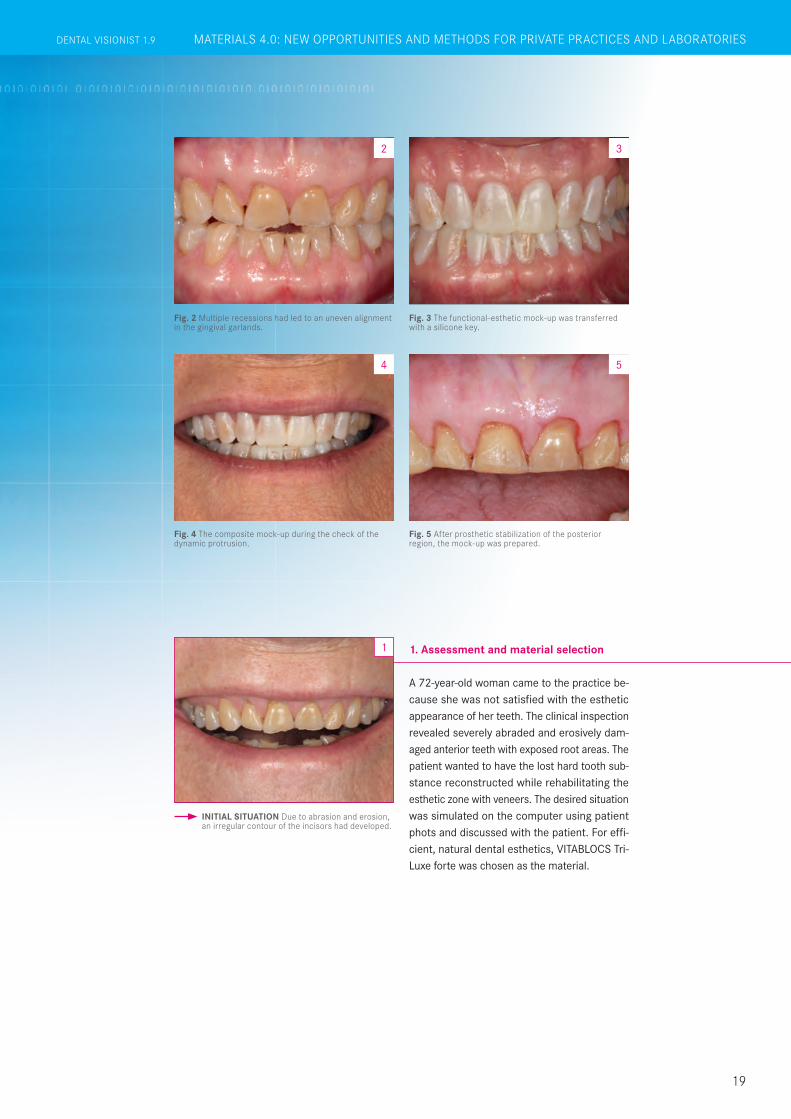
Fig. 3 The functional-esthetic mock-up was transferred with a silicone key.
3
Fig. 4 The composite mock-up during the check of the dynamic protrusion.
4
Fig. 2 Multiple recessions had led to an uneven alignment in the gingival garlands.
2
INITIAL SITUATION Due to abrasion and erosion, an irregular contour of the incisors had developed.
1
Fig. 5 After prosthetic stabilization of the posterior region, the mock-up was prepared.
5
MATERIALS 4.0: NEW OPPORTUNITIES AND METHODS FOR PRIVATE PRACTICES AND LABORATORIESDENTAL VISIONIST 1.9
A 72-year-old woman came to the practice be-cause she was not satisfied with the esthetic appearance of her teeth. The clinical inspection revealed severely abraded and erosively dam-aged anterior teeth with exposed root areas. The patient wanted to have the lost hard tooth sub-stance reconstructed while rehabilitating the esthetic zone with veneers. The desired situation was simulated on the computer using patient phots and discussed with the patient. For effi-cient, natural dental esthetics, VITABLOCS Tri-Luxe forte was chosen as the material.
1. Assessment and material selection
19
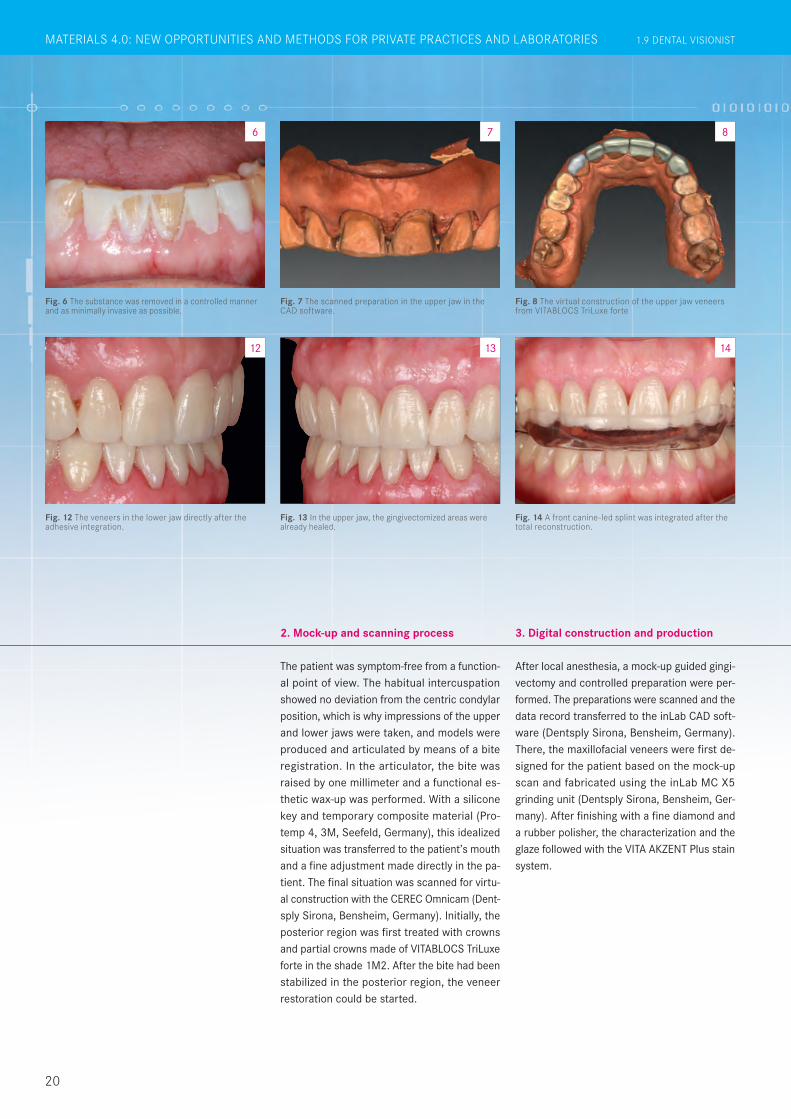
Fig. 8 The virtual construction of the upper jaw veneers from VITABLOCS TriLuxe forte
Fig. 12 The veneers in the lower jaw directly after the adhesive integration.
8
12
Fig. 13 In the upper jaw, the gingivectomized areas were already healed.
Fig. 6 The substance was removed in a controlled manner and as minimally invasive as possible.
Fig. 14 A front canine-led splint was integrated after the total reconstruction.
Fig. 7 The scanned preparation in the upper jaw in the CAD software.
14
7
13
6
MATERIALS 4.0: NEW OPPORTUNITIES AND METHODS FOR PRIVATE PRACTICES AND LABORATORIES 1.9 DENTAL VISIONIST
After local anesthesia, a mock-up guided gingi-vectomy and controlled preparation were per-formed. The preparations were scanned and the data record transferred to the inLab CAD soft-ware (Dentsply Sirona, Bensheim, Germany).There, the maxillofacial veneers were first de-signed for the patient based on the mock-up scan and fabricated using the inLab MC X5 grinding unit (Dentsply Sirona, Bensheim, Ger-many). After finishing with a fine diamond and a rubber polisher, the characterization and the glaze followed with the VITA AKZENT Plus stain system.
3. Digital construction and production
The patient was symptom-free from a function-al point of view. The habitual intercuspation showed no deviation from the centric condylar position, which is why impressions of the upper and lower jaws were taken, and models were produced and articulated by means of a bite registration. In the articulator, the bite was raised by one millimeter and a functional es-thetic wax-up was performed. With a silicone key and temporary composite material (Pro-temp 4, 3M, Seefeld, Germany), this idealized situation was transferred to the patient’s mouth and a fine adjustment made directly in the pa-tient. The final situation was scanned for virtu-al construction with the CEREC Omnicam (Dent-sply Sirona, Bensheim, Germany). Initially, the posterior region was first treated with crowns and partial crowns made of VITABLOCS TriLuxe forte in the shade 1M2. After the bite had been stabilized in the posterior region, the veneer restoration could be started.
2. Mock-up and scanning process
20
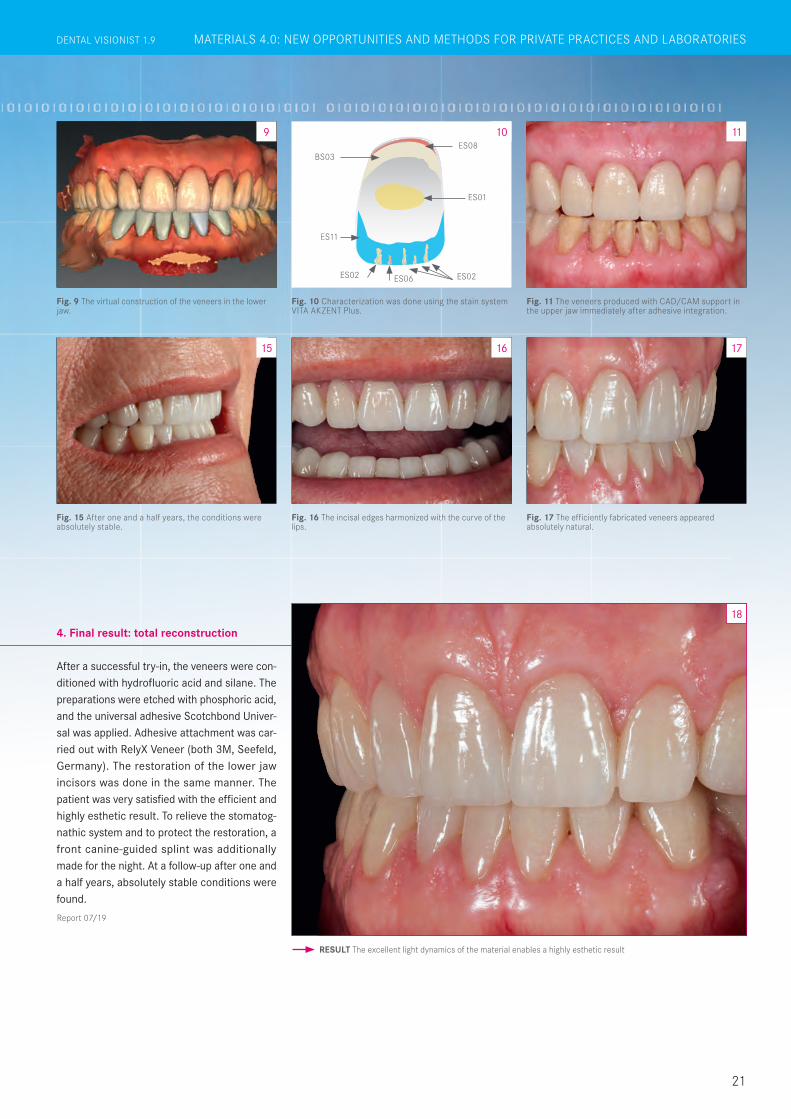
Fig. 15 After one and a half years, the conditions were absolutely stable.
15
Fig. 9 The virtual construction of the veneers in the lower jaw.
Fig. 16 The incisal edges harmonized with the curve of the lips.
Fig. 17 The efficiently fabricated veneers appeared absolutely natural.
Fig. 10 Characterization was done using the stain system VITA AKZENT Plus.
Fig. 11 The veneers produced with CAD/CAM support in the upper jaw immediately after adhesive integration.
10 119
16 17
RESULT The excellent light dynamics of the material enables a highly esthetic result
18
ES08BS03
ES01
ES02ES02 ES06
ES11
MATERIALS 4.0: NEW OPPORTUNITIES AND METHODS FOR PRIVATE PRACTICES AND LABORATORIESDENTAL VISIONIST 1.9
After a successful try-in, the veneers were con-ditioned with hydrofluoric acid and silane. The preparations were etched with phosphoric acid, and the universal adhesive Scotchbond Univer-sal was applied. Adhesive attachment was car-ried out with RelyX Veneer (both 3M, Seefeld, Germany). The restoration of the lower jaw incisors was done in the same manner. The patient was very satisfied with the efficient and highly esthetic result. To relieve the stomatog-nathic system and to protect the restoration, a front canine-guided splint was additionally made for the night. At a follow-up after one and a half years, absolutely stable conditions were found.
4. Final result: total reconstruction
21
Report 07/19
22
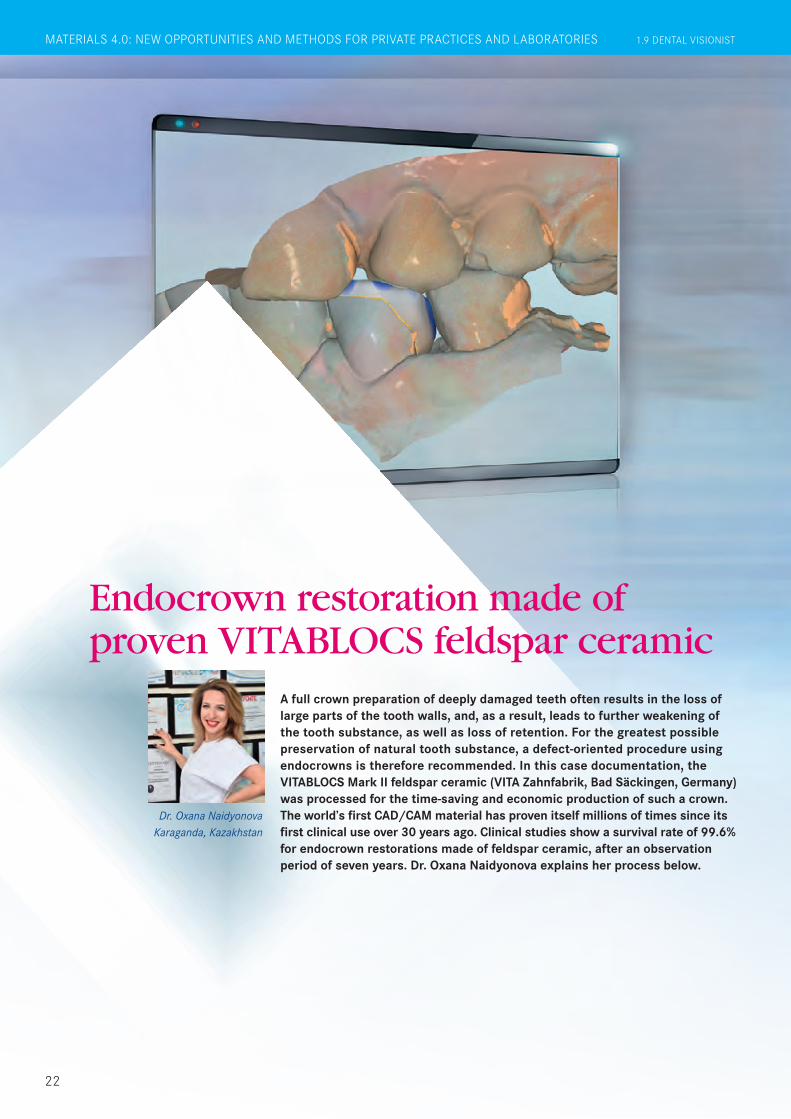
A full crown preparation of deeply damaged teeth often results in the loss of large parts of the tooth walls, and, as a result, leads to further weakening of the tooth substance, as well as loss of retention. For the greatest possible preservation of natural tooth substance, a defect-oriented procedure using endocrowns is therefore recommended. In this case documentation, the VITABLOCS Mark II feldspar ceramic (VITA Zahnfabrik, Bad Säckingen, Germany) was processed for the time-saving and economic production of such a crown. The world’s first CAD/CAM material has proven itself millions of times since its first clinical use over 30 years ago. Clinical studies show a survival rate of 99.6% for endocrown restorations made of feldspar ceramic, after an observation period of seven years. Dr. Oxana Naidyonova explains her process below.
Dr. Oxana Naidyonova Karaganda, Kazakhstan
Endocrown restoration made of proven VITABLOCS feldspar ceramic
MATERIALS 4.0: NEW OPPORTUNITIES AND METHODS FOR PRIVATE PRACTICES AND LABORATORIES 1.9 DENTAL VISIONIST
23
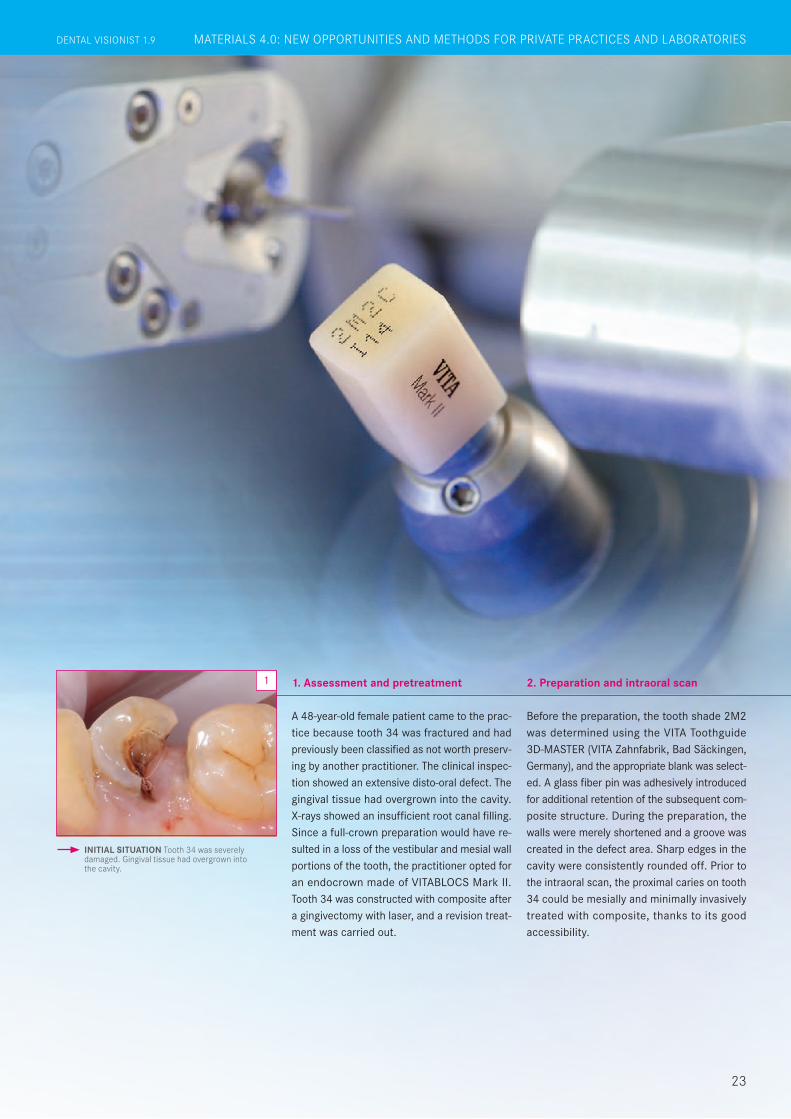
A 48-year-old female patient came to the prac-tice because tooth 34 was fractured and had previously been classified as not worth preserv-ing by another practitioner. The clinical inspec-tion showed an extensive disto-oral defect. The gingival tissue had overgrown into the cavity. X-rays showed an insufficient root canal filling. Since a full-crown preparation would have re-sulted in a loss of the vestibular and mesial wall portions of the tooth, the practitioner opted for an endocrown made of VITABLOCS Mark II. Tooth 34 was constructed with composite after a gingivectomy with laser, and a revision treat-ment was carried out.
1. Assessment and pretreatment1
Before the preparation, the tooth shade 2M2 was determined using the VITA Toothguide 3D-MASTER (VITA Zahnfabrik, Bad Säckingen, Germany), and the appropriate blank was select-ed. A glass fiber pin was adhesively introduced for additional retention of the subsequent com-posite structure. During the preparation, the walls were merely shortened and a groove was created in the defect area. Sharp edges in the cavity were consistently rounded off. Prior to the intraoral scan, the proximal caries on tooth 34 could be mesially and minimally invasively treated with composite, thanks to its good accessibility.
2. Preparation and intraoral scan
INITIAL SITUATION Tooth 34 was severely damaged. Gingival tissue had overgrown into the cavity.
Endocrown restoration made of proven VITABLOCS feldspar ceramic
MATERIALS 4.0: NEW OPPORTUNITIES AND METHODS FOR PRIVATE PRACTICES AND LABORATORIESDENTAL VISIONIST 1.9
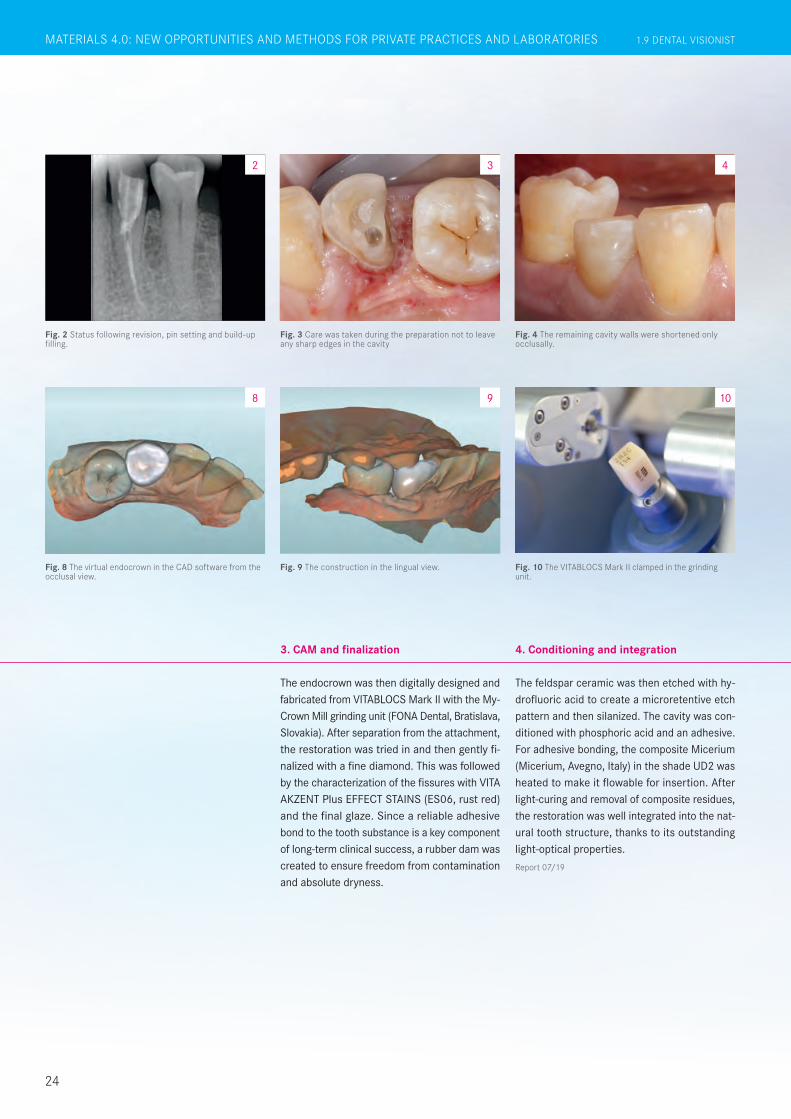
Fig. 2 Status following revision, pin setting and build-up filling.
2
Fig. 3 Care was taken during the preparation not to leave any sharp edges in the cavity
3
Fig. 4 The remaining cavity walls were shortened only occlusally.
4
Fig. 8 The virtual endocrown in the CAD software from the occlusal view.
Fig. 9 The construction in the lingual view. Fig. 10 The VITABLOCS Mark II clamped in the grinding unit.
8 9 10
1.9 DENTAL VISIONIST
24
IM FOKUS
The endocrown was then digitally designed and fabricated from VITABLOCS Mark II with the My-Crown Mill grinding unit (FONA Dental, Bratislava, Slovakia). After separation from the attachment, the restoration was tried in and then gently fi-nalized with a fine diamond. This was followed by the characterization of the fissures with VITA AKZENT Plus EFFECT STAINS (ES06, rust red) and the final glaze. Since a reliable adhesive bond to the tooth substance is a key component of long-term clinical success, a rubber dam was created to ensure freedom from contamination and absolute dryness.
The feldspar ceramic was then etched with hy-drofluoric acid to create a microretentive etch pattern and then silanized. The cavity was con-ditioned with phosphoric acid and an adhesive. For adhesive bonding, the composite Micerium (Micerium, Avegno, Italy) in the shade UD2 was heated to make it flowable for insertion. After light-curing and removal of composite residues, the restoration was well integrated into the nat-ural tooth structure, thanks to its outstanding light-optical properties.
3. CAM and finalization 4. Conditioning and integration
1.8 DENTAL VISIONISTGERÜST-, VERBLENDMATERIALIEN UND MALFARBEN FÜR HOHE LEBENDIGKEIT
Report 07/19
MATERIALS 4.0: NEW OPPORTUNITIES AND METHODS FOR PRIVATE PRACTICES AND LABORATORIES 1.9 DENTAL VISIONIST
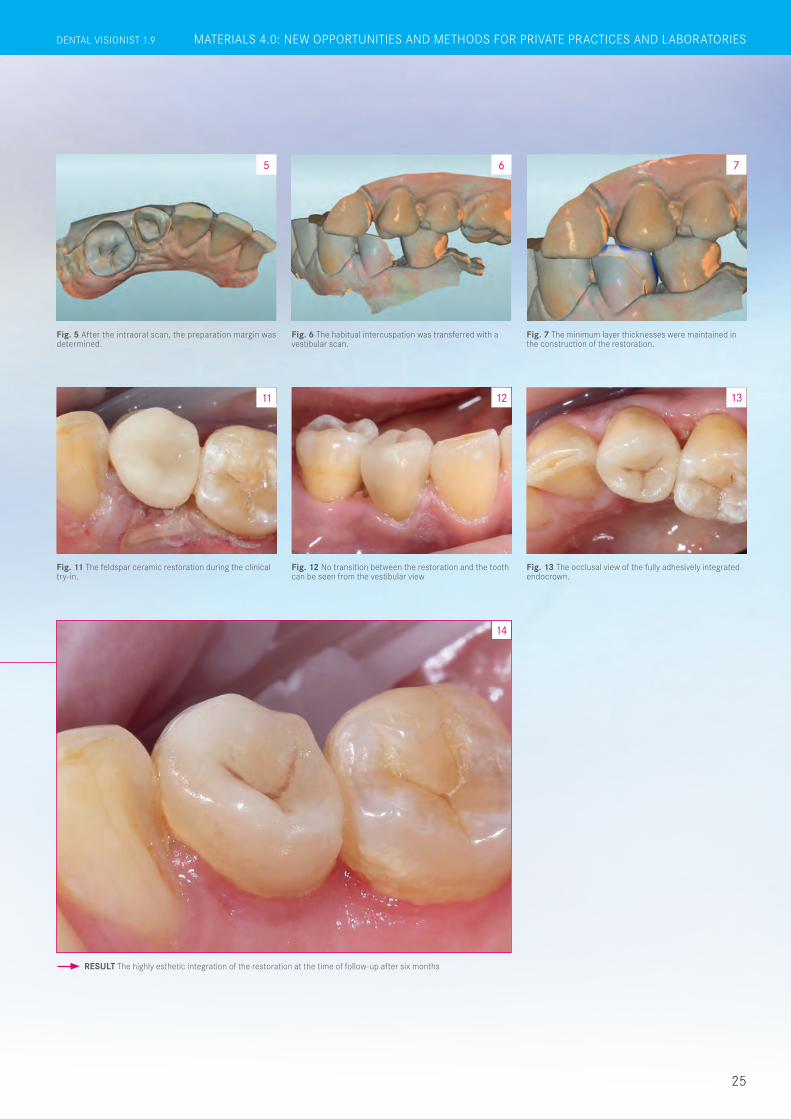
Fig. 5 After the intraoral scan, the preparation margin was determined.
5
Fig. 6 The habitual intercuspation was transferred with a vestibular scan.
Fig. 7 The minimum layer thicknesses were maintained in the construction of the restoration.
6 7
Fig. 11 The feldspar ceramic restoration during the clinical try-in.
Fig. 12 No transition between the restoration and the tooth can be seen from the vestibular view
RESULT The highly esthetic integration of the restoration at the time of follow-up after six months
Fig. 13 The occlusal view of the fully adhesively integrated endocrown.
14
1311 12
25
DENTAL VISIONIST 1.9 IM FOKUSDENTAL VISIONIST 1.8 GERÜST-, VERBLENDMATERIALIEN UND MALFARBEN FÜR HOHE LEBENDIGKEIT MATERIALS 4.0: NEW OPPORTUNITIES AND METHODS FOR PRIVATE PRACTICES AND LABORATORIESDENTAL VISIONIST 1.9
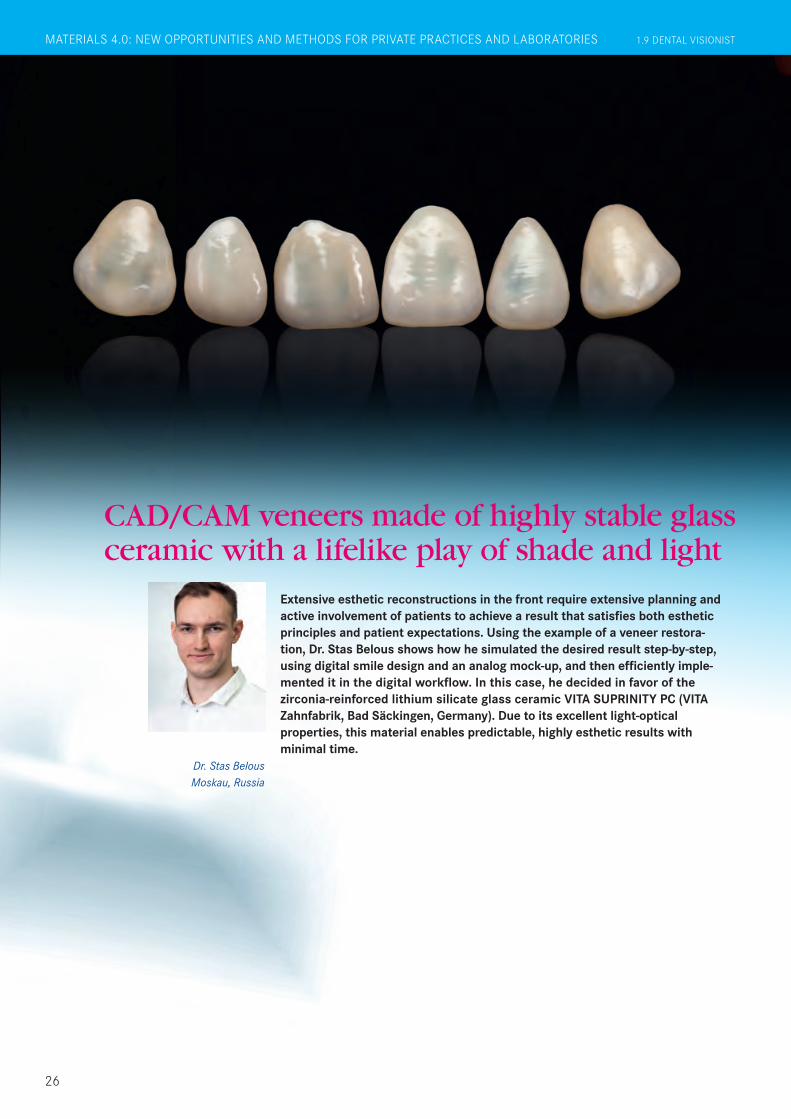
CAD/CAM veneers made of highly stable glass ceramic with a lifelike play of shade and light
Dr. Stas Belous Moskau, Russia
MATERIALS 4.0: NEW OPPORTUNITIES AND METHODS FOR PRIVATE PRACTICES AND LABORATORIES 1.9 DENTAL VISIONIST
26
Extensive esthetic reconstructions in the front require extensive planning and active involvement of patients to achieve a result that satisfies both esthetic principles and patient expectations. Using the example of a veneer restora-tion, Dr. Stas Belous shows how he simulated the desired result step-by-step, using digital smile design and an analog mock-up, and then efficiently imple-mented it in the digital workflow. In this case, he decided in favor of the zirconia-reinforced lithium silicate glass ceramic VITA SUPRINITY PC (VITA Zahnfabrik, Bad Säckingen, Germany). Due to its excellent light-optical properties, this material enables predictable, highly esthetic results with minimal time.
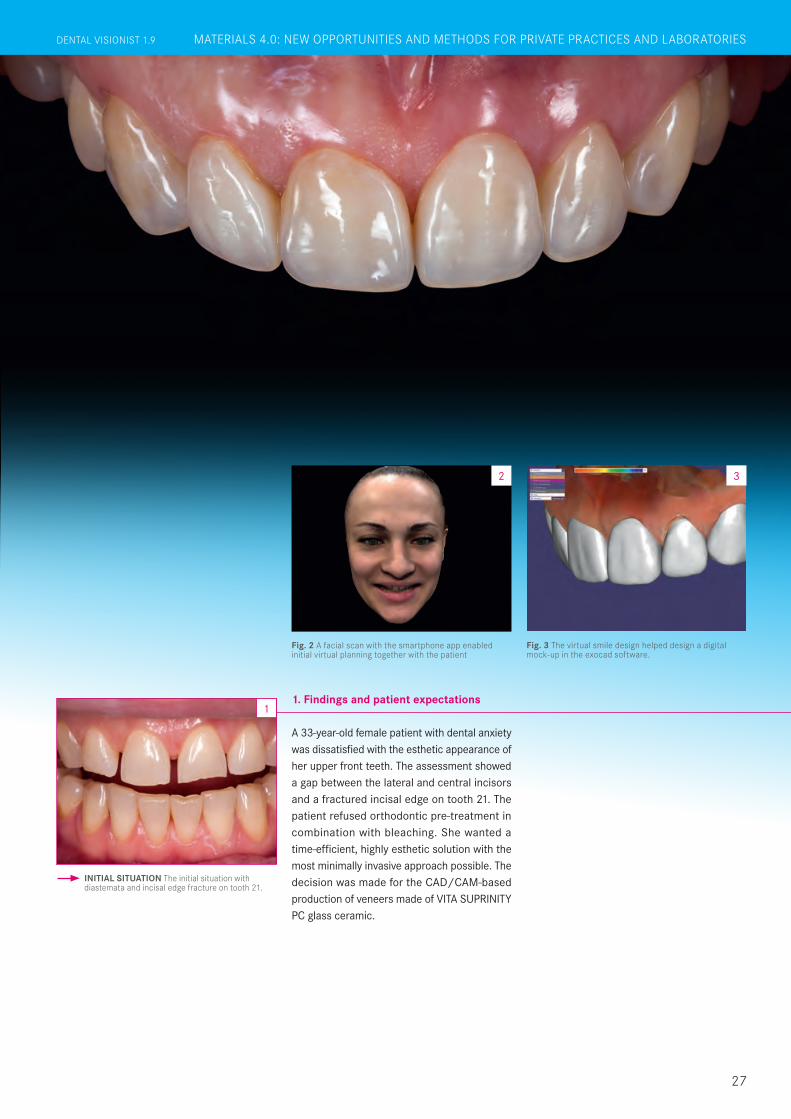
A 33-year-old female patient with dental anxiety was dissatisfied with the esthetic appearance of her upper front teeth. The assessment showed a gap between the lateral and central incisors and a fractured incisal edge on tooth 21. The patient refused orthodontic pre-treatment in combination with bleaching. She wanted a time-efficient, highly esthetic solution with the most minimally invasive approach possible. The decision was made for the CAD/CAM-based production of veneers made of VITA SUPRINITY PC glass ceramic.
1. Findings and patient expectations
INITIAL SITUATION The initial situation with diastemata and incisal edge fracture on tooth 21.
1
MATERIALS 4.0: NEW OPPORTUNITIES AND METHODS FOR PRIVATE PRACTICES AND LABORATORIESDENTAL VISIONIST 1.9
27
Fig. 2 A facial scan with the smartphone app enabled initial virtual planning together with the patient
2
Fig. 3 The virtual smile design helped design a digital mock-up in the exocad software.
3

For prosthetic planning in dialog with the pa-tient, the patient’s face and esthetic zone were scanned using the Bellus3D Dental Pro smart-phone app (Bellus3D, Campbell, California, USA). The morphology was subsequently trans-ferred to the exocad software (exocad, Darm-stadt, Germany). An idealized model could be printed based on the data record. An intraoral mock-up was created using a silicone key and temporary composite and discussed with the patient. This was used to make morphological corrections in the exocad software, and a print-ed model was used to create another intraoral mock-up that was approved by the patient and the practitioner. This result was subsequently scanned.
2. Comprehensive digital and analog planning phase
VITA SUPRINITY PC has excellent light dynamics, due to its true- to-nature translucence, fluores-cence and opalescence.
28
Fig. 4 A model incorporating the desired conditions was printed from the data record of the digital mock-up.
4
Fig. 5 Before preparation, the basic tooth shade was deter- mined precisely and quickly with the VITA Easyshade V.
5
Fig. 6 The mock-up model was transferred intraorally with a silicone key and temporary composite.
6
Fig. 10 Retraction threads were inserted into the sulcus for a smooth optical scan.
Fig. 11 The zirconia-reinforced lithium silicate ceramic VITA SUPRINITY PC can be ground very precisely, due to its fine grain.
Fig. 12 Characterization and glaze were done with the VITA AKZENT Plus stain system.
10 11 12
The digital workflow was managed with the MyCrown System (FONA-Dental, Bratislava, Slovakia). After local anesthesia, the VITA Easy-shade V (VITA Zahnfabrik, Bad Säckingen, Ger-many) was used to digitally determine tooth shade 2R1.5. This was followed by a mock-up preparation from tooth 13 to 23 in order to work as minimally invasively as possible. In a first step, deep grooves were created that provided orientation during the preparation. The situation was rescanned and the mock-up scan trans-ferred to the new situation to construct the veneers according to the patient’s request. For the blank selection, a lighter shade (1M2 T) was chosen, with the goal of later controlling the chroma of the restoration in a targeted manner via the shade of the composite cement.
3. Digital shade determination and CAM production
1.8 DENTAL VISIONISTGERÜST-, VERBLENDMATERIALIEN UND MALFARBEN FÜR HOHE LEBENDIGKEIT MATERIALS 4.0: NEW OPPORTUNITIES AND METHODS FOR PRIVATE PRACTICES AND LABORATORIES 1.9 DENTAL VISIONIST
Report 07/19
29
Fig. 7 The intraoral mock-up was scanned with the MyCrown System.
7
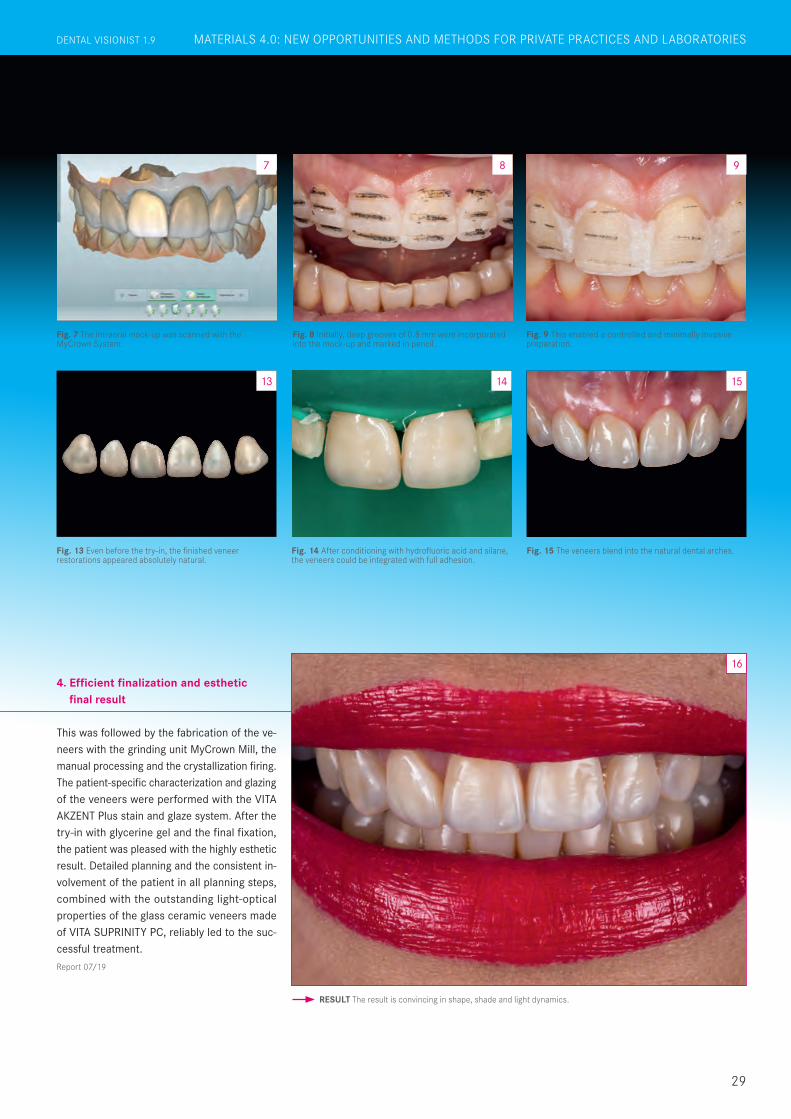
Fig. 8 Initially, deep grooves of 0.8 mm were incorporated into the mock-up and marked in pencil.
Fig. 9 This enabled a controlled and minimally invasive preparation.
Fig. 13 Even before the try-in, the finished veneer restorations appeared absolutely natural.
Fig. 14 After conditioning with hydrofluoric acid and silane, the veneers could be integrated with full adhesion.
Fig. 15 The veneers blend into the natural dental arches.
RESULT The result is convincing in shape, shade and light dynamics.
8 9
14 15
16
13
This was followed by the fabrication of the ve-neers with the grinding unit MyCrown Mill, the manual processing and the crystallization firing. The patient-specific characterization and glazing of the veneers were performed with the VITA AKZENT Plus stain and glaze system. After the try-in with glycerine gel and the final fixation, the patient was pleased with the highly esthetic result. Detailed planning and the consistent in-volvement of the patient in all planning steps, combined with the outstanding light-optical properties of the glass ceramic veneers made of VITA SUPRINITY PC, reliably led to the suc-cessful treatment.
4. Efficient finalization and esthetic final result
DENTAL VISIONIST 1.8 GERÜST-, VERBLENDMATERIALIEN UND MALFARBEN FÜR HOHE LEBENDIGKEIT MATERIALS 4.0: NEW OPPORTUNITIES AND METHODS FOR PRIVATE PRACTICES AND LABORATORIESDENTAL VISIONIST 1.9
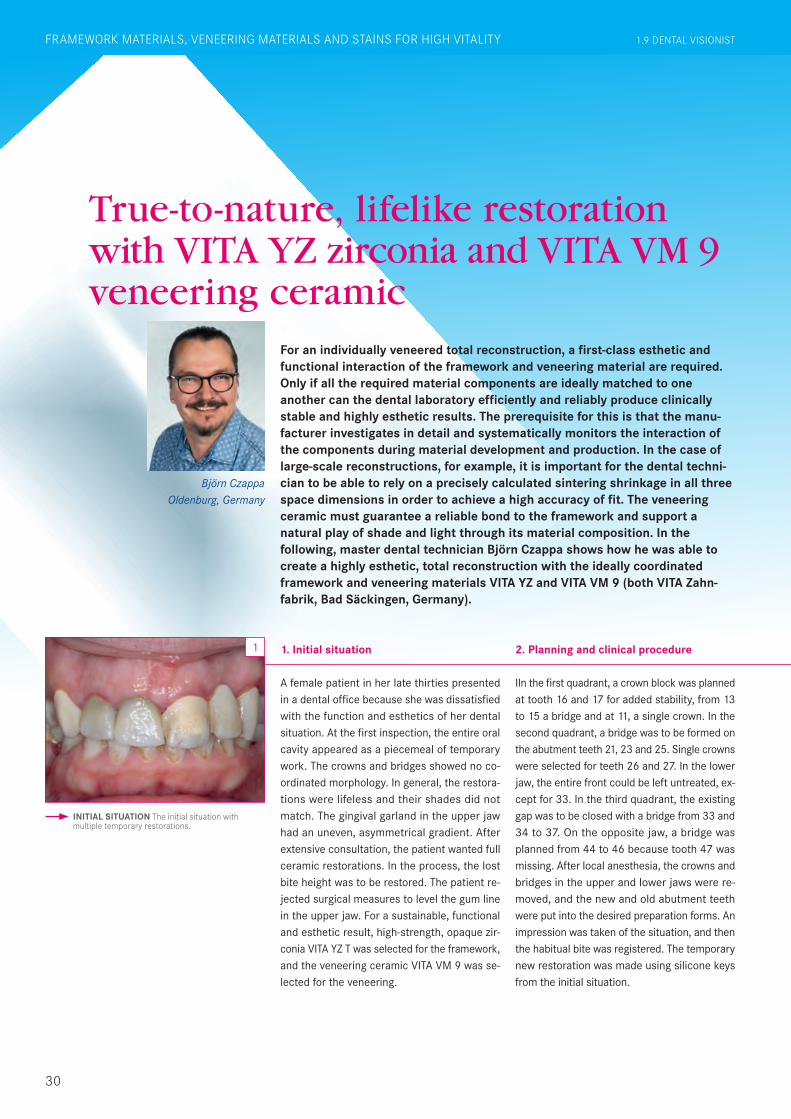
A female patient in her late thirties presented in a dental office because she was dissatisfied with the function and esthetics of her dental situation. At the first inspection, the entire oral cavity appeared as a piecemeal of temporary work. The crowns and bridges showed no co-ordinated morphology. In general, the restora-tions were lifeless and their shades did not match. The gingival garland in the upper jaw had an uneven, asymmetrical gradient. After extensive consultation, the patient wanted full ceramic restorations. In the process, the lost bite height was to be restored. The patient re-jected surgical measures to level the gum line in the upper jaw. For a sustainable, functional and esthetic result, high-strength, opaque zir-conia VITA YZ T was selected for the framework, and the veneering ceramic VITA VM 9 was se-lected for the veneering.
1. Initial situation
IIn the first quadrant, a crown block was planned at tooth 16 and 17 for added stability, from 13 to 15 a bridge and at 11, a single crown. In the second quadrant, a bridge was to be formed on the abutment teeth 21, 23 and 25. Single crowns were selected for teeth 26 and 27. In the lower jaw, the entire front could be left untreated, ex-cept for 33. In the third quadrant, the existing gap was to be closed with a bridge from 33 and 34 to 37. On the opposite jaw, a bridge was planned from 44 to 46 because tooth 47 was missing. After local anesthesia, the crowns and bridges in the upper and lower jaws were re-moved, and the new and old abutment teeth were put into the desired preparation forms. An impression was taken of the situation, and then the habitual bite was registered. The temporary new restoration was made using silicone keys from the initial situation.
2. Planning and clinical procedure
INITIAL SITUATION The initial situation with multiple temporary restorations.
1
For an individually veneered total reconstruction, a first-class esthetic and functional interaction of the framework and veneering material are required. Only if all the required material components are ideally matched to one another can the dental laboratory efficiently and reliably produce clinically stable and highly esthetic results. The prerequisite for this is that the manu-facturer investigates in detail and systematically monitors the interaction of the components during material development and production. In the case of large-scale reconstructions, for example, it is important for the dental techni-cian to be able to rely on a precisely calculated sintering shrinkage in all three space dimensions in order to achieve a high accuracy of fit. The veneering ceramic must guarantee a reliable bond to the framework and support a natural play of shade and light through its material composition. In the following, master dental technician Björn Czappa shows how he was able to create a highly esthetic, total reconstruction with the ideally coordinated framework and veneering materials VITA YZ and VITA VM 9 (both VITA Zahn-fabrik, Bad Säckingen, Germany).
Björn Czappa Oldenburg, Germany
True-to-nature, lifelike restoration with VITA YZ zirconia and VITA VM 9 veneering ceramic
30
1.8 DENTAL VISIONISTGERÜST-, VERBLENDMATERIALIEN UND MALFARBEN FÜR HOHE LEBENDIGKEIT 1.9 DENTAL VISIONISTFRAMEWORK MATERIALS, VENEERING MATERIALS AND STAINS FOR HIGH VITALITY
Report 07/19
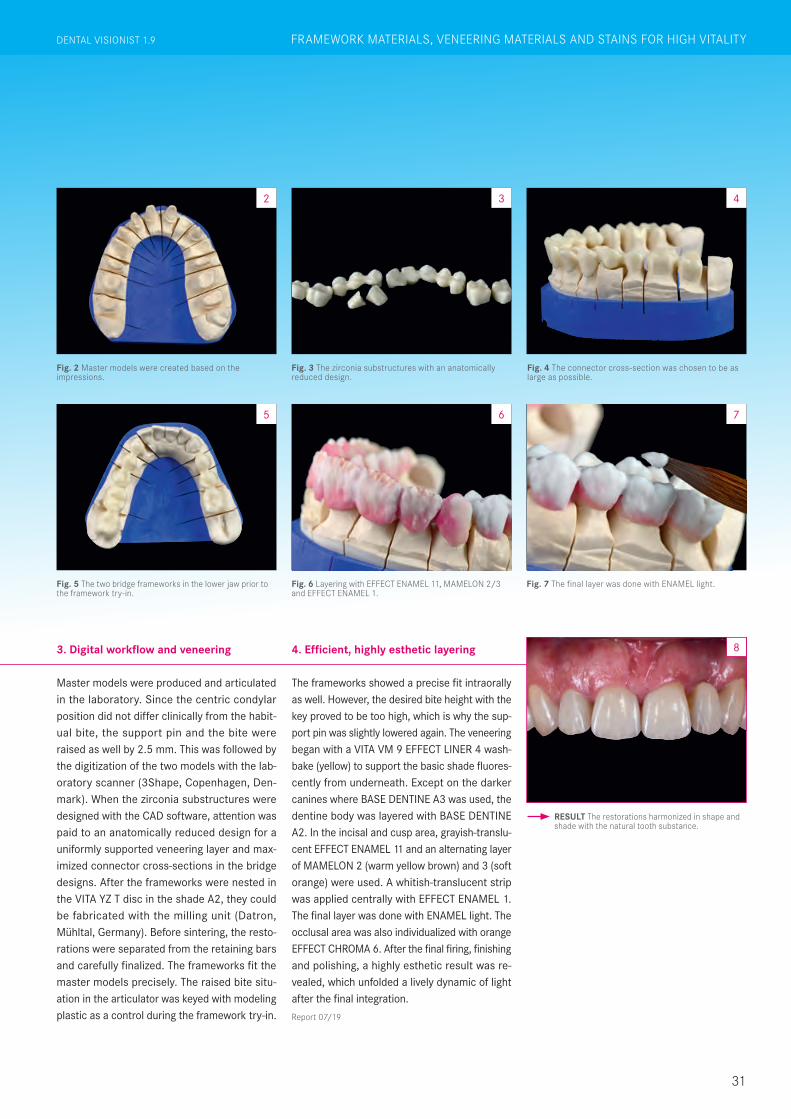
Master models were produced and articulated in the laboratory. Since the centric condylar position did not differ clinically from the habit-ual bite, the support pin and the bite were raised as well by 2.5 mm. This was followed by the digitization of the two models with the lab-oratory scanner (3Shape, Copenhagen, Den-mark). When the zirconia substructures were designed with the CAD software, attention was paid to an anatomically reduced design for a uniformly supported veneering layer and max-imized connector cross-sections in the bridge designs. After the frameworks were nested in the VITA YZ T disc in the shade A2, they could be fabricated with the milling unit (Datron, Mühltal, Germany). Before sintering, the resto-rations were separated from the retaining bars and carefully finalized. The frameworks fit the master models precisely. The raised bite situ-ation in the articulator was keyed with modeling plastic as a control during the framework try-in.
The frameworks showed a precise fit intraorally as well. However, the desired bite height with the key proved to be too high, which is why the sup-port pin was slightly lowered again. The veneering began with a VITA VM 9 EFFECT LINER 4 wash-bake (yellow) to support the basic shade fluores-cently from underneath. Except on the darker canines where BASE DENTINE A3 was used, the dentine body was layered with BASE DENTINE A2. In the incisal and cusp area, grayish-translu-cent EFFECT ENAMEL 11 and an alternating layer of MAMELON 2 (warm yellow brown) and 3 (soft orange) were used. A whitish-translucent strip was applied centrally with EFFECT ENAMEL 1. The final layer was done with ENAMEL light. The occlusal area was also individualized with orange EFFECT CHROMA 6. After the final firing, finishing and polishing, a highly esthetic result was re-vealed, which unfolded a lively dynamic of light after the final integration.
3. Digital workflow and veneering 4. Efficient, highly esthetic layering
31
Fig. 2 Master models were created based on the impressions.
2
Fig. 3 The zirconia substructures with an anatomically reduced design.
3
Fig. 4 The connector cross-section was chosen to be as large as possible.
4
Fig. 5 The two bridge frameworks in the lower jaw prior to the framework try-in.
5
Fig. 6 Layering with EFFECT ENAMEL 11, MAMELON 2/3 and EFFECT ENAMEL 1.
Fig. 7 The final layer was done with ENAMEL light.
RESULT The restorations harmonized in shape and shade with the natural tooth substance.
6 7
8
DENTAL VISIONIST 1.8 GERÜST-, VERBLENDMATERIALIEN UND MALFARBEN FÜR HOHE LEBENDIGKEIT DENTAL VISIONIST 1.9 FRAMEWORK MATERIALS, VENEERING MATERIALS AND STAINS FOR HIGH VITALITY
32
1.9 DENTAL VISIONISTFRAMEWORK MATERIALS, VENEERING MATERIALS AND STAINS FOR HIGH VITALITY
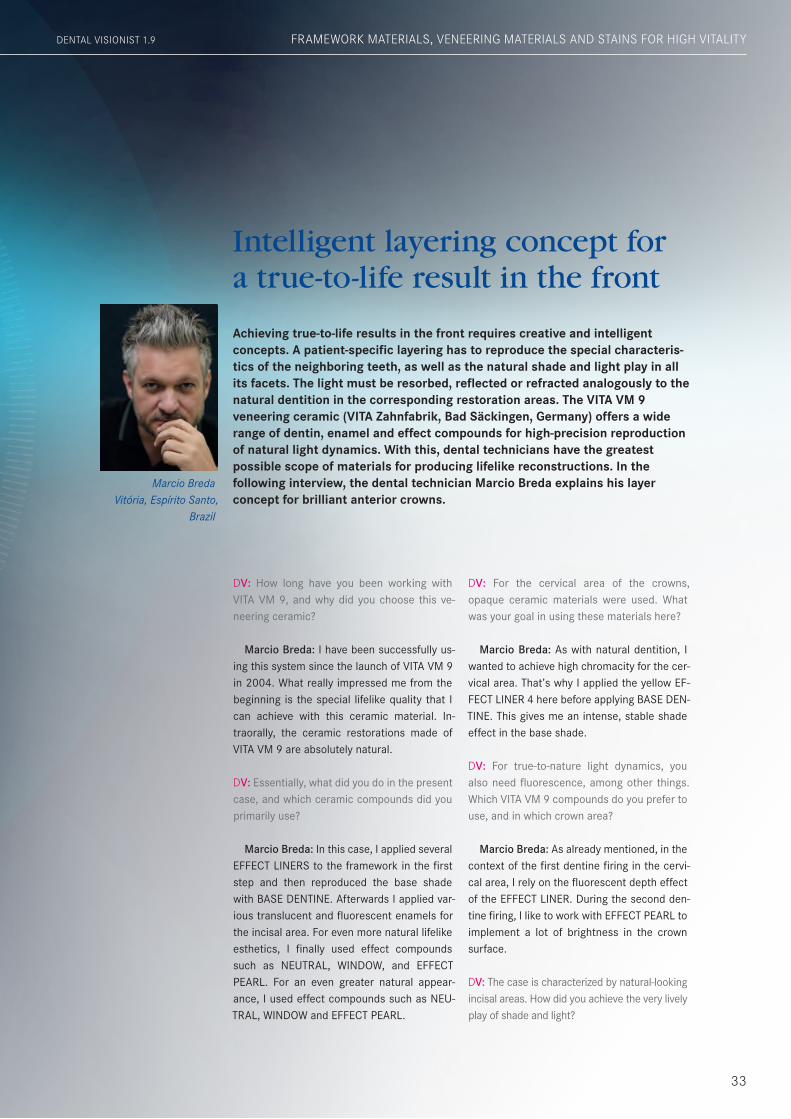
Marcio Breda Vitória, Espírito Santo,
Brazil
Achieving true-to-life results in the front requires creative and intelligent concepts. A patient-specific layering has to reproduce the special characteris-tics of the neighboring teeth, as well as the natural shade and light play in all its facets. The light must be resorbed, reflected or refracted analogously to the natural dentition in the corresponding restoration areas. The VITA VM 9 veneering ceramic (VITA Zahnfabrik, Bad Säckingen, Germany) offers a wide range of dentin, enamel and effect compounds for high-precision reproduction of natural light dynamics. With this, dental technicians have the greatest possible scope of materials for producing lifelike reconstructions. In the following interview, the dental technician Marcio Breda explains his layer concept for brilliant anterior crowns.
DV: How long have you been working with VITA VM 9, and why did you choose this ve-neering ceramic?
Marcio Breda: I have been successfully us-ing this system since the launch of VITA VM 9 in 2004. What really impressed me from the beginning is the special lifelike quality that I can achieve with this ceramic material. In-traorally, the ceramic restorations made of VITA VM 9 are absolutely natural.
DV: Essentially, what did you do in the present case, and which ceramic compounds did you primarily use?
Marcio Breda: In this case, I applied several EFFECT LINERS to the framework in the first step and then reproduced the base shade with BASE DENTINE. Afterwards I applied var-ious translucent and fluorescent enamels for the incisal area. For even more natural lifelike esthetics, I finally used effect compounds such as NEUTRAL, WINDOW, and EFFECT PEARL. For an even greater natural appear-ance, I used effect compounds such as NEU-TRAL, WINDOW and EFFECT PEARL.
DV: For the cervical area of the crowns, opaque ceramic materials were used. What was your goal in using these materials here?
Marcio Breda: As with natural dentition, I wanted to achieve high chromacity for the cer-vical area. That’s why I applied the yellow EF-FECT LINER 4 here before applying BASE DEN-TINE. This gives me an intense, stable shade effect in the base shade.
DV: For true-to-nature light dynamics, you also need fluorescence, among other things. Which VITA VM 9 compounds do you prefer to use, and in which crown area?
Marcio Breda: As already mentioned, in the context of the first dentine firing in the cervi-cal area, I rely on the fluorescent depth effect of the EFFECT LINER. During the second den-tine firing, I like to work with EFFECT PEARL to implement a lot of brightness in the crown surface.
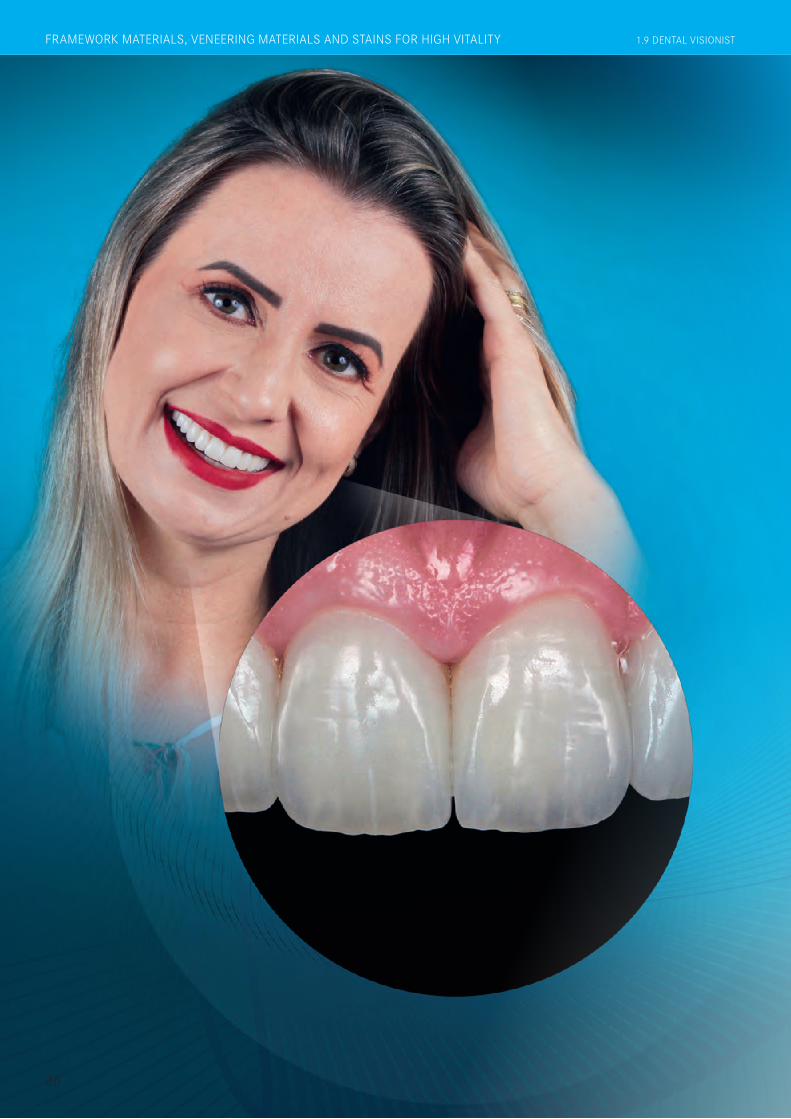
DV: The case is characterized by natural-looking incisal areas. How did you achieve the very lively play of shade and light?
33
Intelligent layering concept for a true-to-life result in the front
DENTAL VISIONIST 1.9 FRAMEWORK MATERIALS, VENEERING MATERIALS AND STAINS FOR HIGH VITALITY
Report 07/19
VITA VM 9 displays impressive natural shade effects, light dynamics and excellent mechanical properties.
“Light must be able to flow through the crown.”
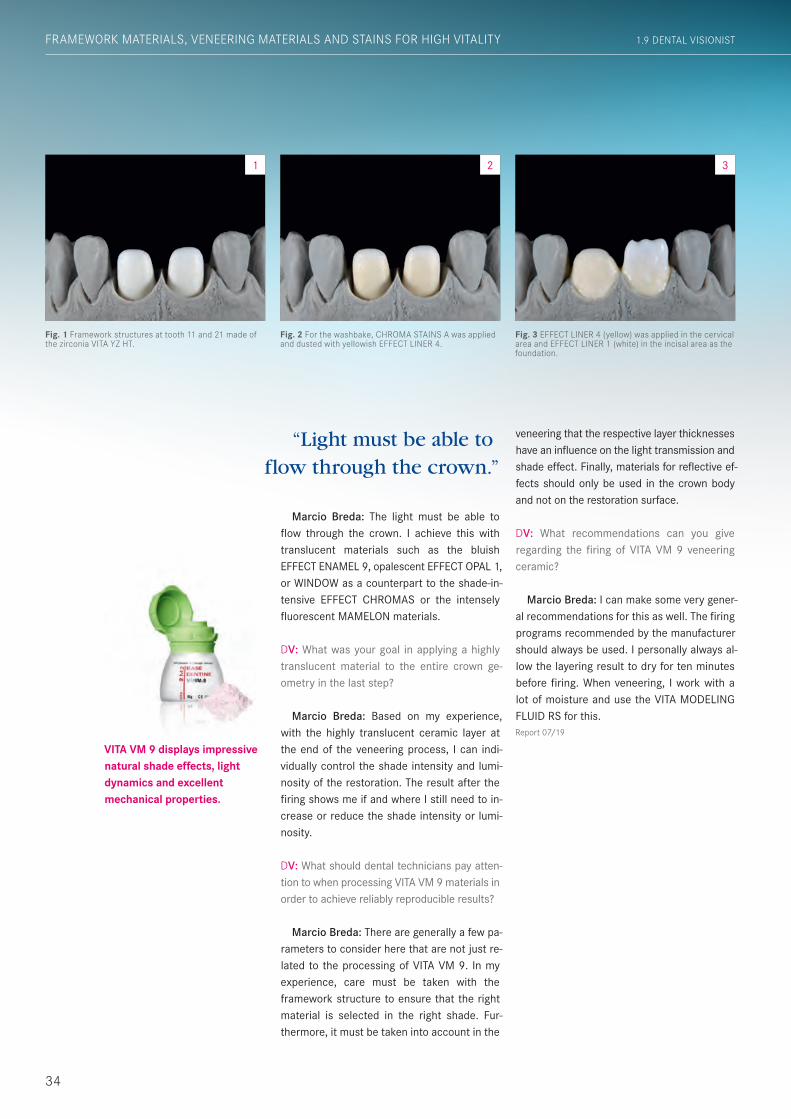
Fig. 2 For the washbake, CHROMA STAINS A was applied and dusted with yellowish EFFECT LINER 4.
Fig. 1 Framework structures at tooth 11 and 21 made of the zirconia VITA YZ HT.
21
Fig. 3 EFFECT LINER 4 (yellow) was applied in the cervical area and EFFECT LINER 1 (white) in the incisal area as the foundation.
3
Marcio Breda: The light must be able to flow through the crown. I achieve this with translucent materials such as the bluish EFFECT ENAMEL 9, opalescent EFFECT OPAL 1, or WINDOW as a counterpart to the shade-in-tensive EFFECT CHROMAS or the intensely fluorescent MAMELON materials.
DV: What was your goal in applying a highly translucent material to the entire crown ge-ometry in the last step?
Marcio Breda: Based on my experience, with the highly translucent ceramic layer at the end of the veneering process, I can indi-vidually control the shade intensity and lumi-nosity of the restoration. The result after the firing shows me if and where I still need to in-crease or reduce the shade intensity or lumi-nosity.
DV: What should dental technicians pay atten-tion to when processing VITA VM 9 materials in order to achieve reliably reproducible results?
Marcio Breda: There are generally a few pa-rameters to consider here that are not just re-lated to the processing of VITA VM 9. In my experience, care must be taken with the framework structure to ensure that the right material is selected in the right shade. Fur-thermore, it must be taken into account in the
veneering that the respective layer thicknesses have an influence on the light transmission and shade effect. Finally, materials for reflective ef-fects should only be used in the crown body and not on the restoration surface.
DV: What recommendations can you give regarding the firing of VITA VM 9 veneering ceramic?
Marcio Breda: I can make some very gener-al recommendations for this as well. The firing programs recommended by the manufacturer should always be used. I personally always al-low the layering result to dry for ten minutes before firing. When veneering, I work with a lot of moisture and use the VITA MODELING FLUID RS for this.
34
1.9 DENTAL VISIONISTFRAMEWORK MATERIALS, VENEERING MATERIALS AND STAINS FOR HIGH VITALITY
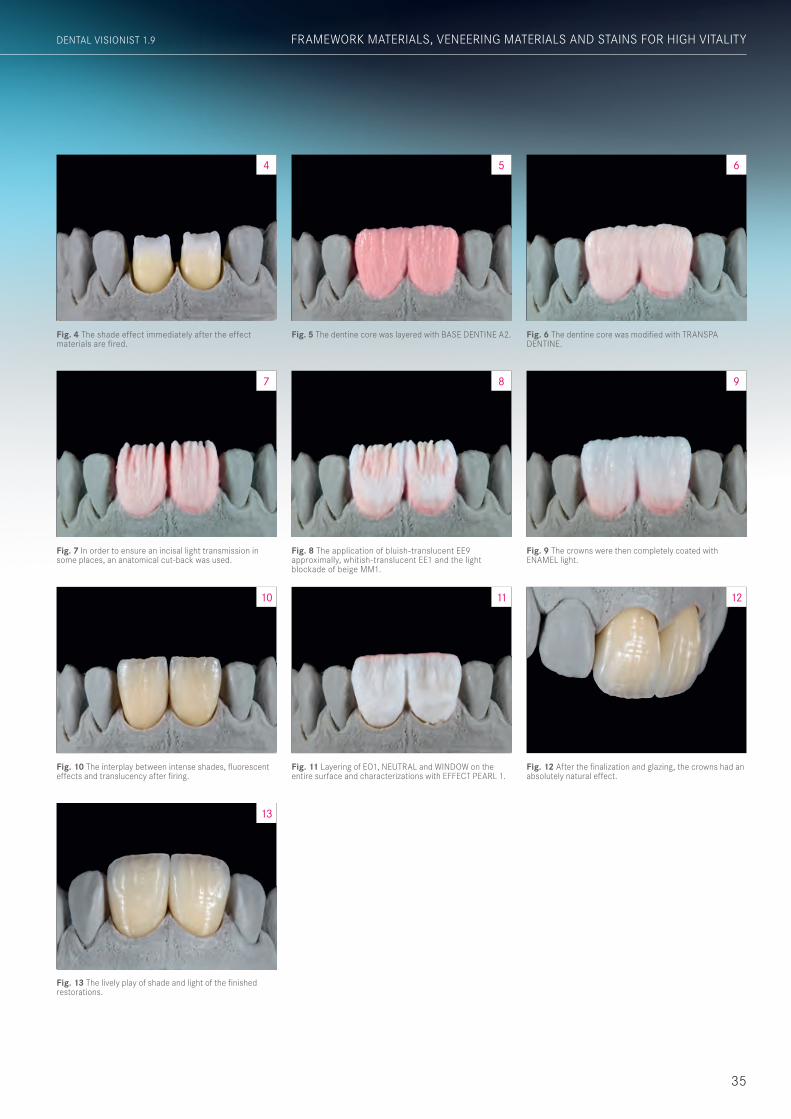
Fig. 4 The shade effect immediately after the effect materials are fired.
4
Fig. 5 The dentine core was layered with BASE DENTINE A2. Fig. 6 The dentine core was modified with TRANSPA DENTINE.
5 6
Fig. 10 The interplay between intense shades, fluorescent effects and translucency after firing.
Fig. 11 Layering of EO1, NEUTRAL and WINDOW on the entire surface and characterizations with EFFECT PEARL 1.
Fig. 12 After the finalization and glazing, the crowns had an absolutely natural effect.
Fig. 13 The lively play of shade and light of the finished restorations.
Fig. 7 In order to ensure an incisal light transmission in some places, an anatomical cut-back was used.
Fig. 8 The application of bluish-translucent EE9 approximally, whitish-translucent EE1 and the light blockade of beige MM1.
Fig. 9 The crowns were then completely coated with ENAMEL light.
7 8 9
12
13
10 11
35
DENTAL VISIONIST 1.9 FRAMEWORK MATERIALS, VENEERING MATERIALS AND STAINS FOR HIGH VITALITY
36
1.9 DENTAL VISIONISTFRAMEWORK MATERIALS, VENEERING MATERIALS AND STAINS FOR HIGH VITALITY
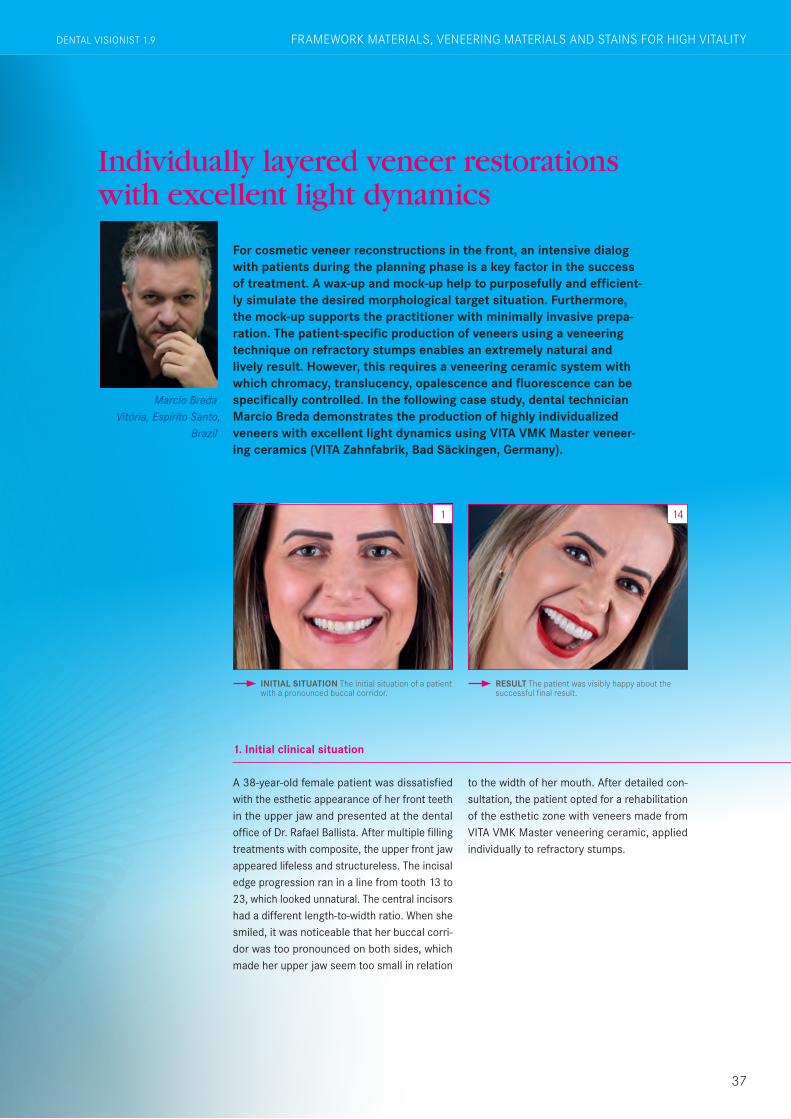
For cosmetic veneer reconstructions in the front, an intensive dialog with patients during the planning phase is a key factor in the success of treatment. A wax-up and mock-up help to purposefully and efficient-ly simulate the desired morphological target situation. Furthermore, the mock-up supports the practitioner with minimally invasive prepa-ration. The patient-specific production of veneers using a veneering technique on refractory stumps enables an extremely natural and lively result. However, this requires a veneering ceramic system with which chromacy, translucency, opalescence and fluorescence can be specifically controlled. In the following case study, dental technician Marcio Breda demonstrates the production of highly individualized veneers with excellent light dynamics using VITA VMK Master veneer-ing ceramics (VITA Zahnfabrik, Bad Säckingen, Germany).
Marcio Breda Vitória, Espírito Santo,
Brazil
A 38-year-old female patient was dissatisfied with the esthetic appearance of her front teeth in the upper jaw and presented at the dental office of Dr. Rafael Ballista. After multiple filling treatments with composite, the upper front jaw appeared lifeless and structureless. The incisal edge progression ran in a line from tooth 13 to 23, which looked unnatural. The central incisors had a different length-to-width ratio. When she smiled, it was noticeable that her buccal corri-dor was too pronounced on both sides, which made her upper jaw seem too small in relation
1. Initial clinical situation
INITIAL SITUATION The initial situation of a patient with a pronounced buccal corridor.
1
Individually layered veneer restorations with excellent light dynamics
to the width of her mouth. After detailed con-sultation, the patient opted for a rehabilitation of the esthetic zone with veneers made from VITA VMK Master veneering ceramic, applied individually to refractory stumps.
RESULT The patient was visibly happy about the successful final result.
14
37
DENTAL VISIONIST 1.9 FRAMEWORK MATERIALS, VENEERING MATERIALS AND STAINS FOR HIGH VITALITY
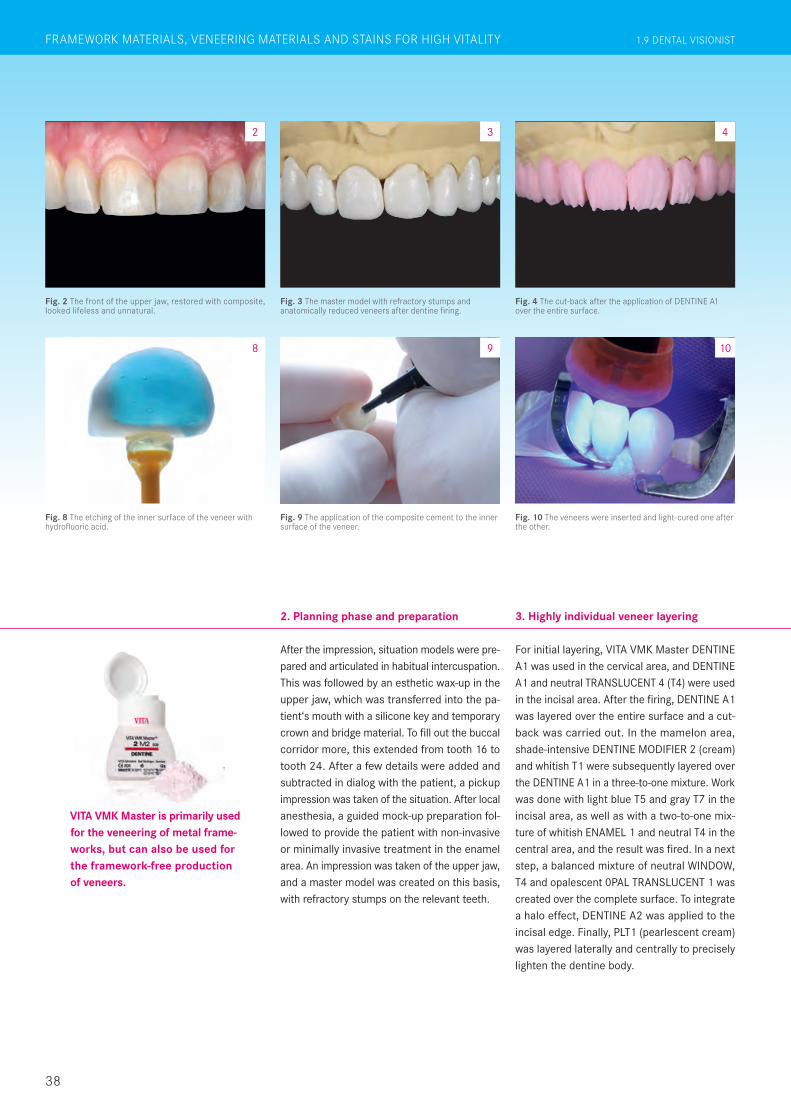
After the impression, situation models were pre-pared and articulated in habitual intercuspation. This was followed by an esthetic wax-up in the upper jaw, which was transferred into the pa-tient‘s mouth with a silicone key and temporary crown and bridge material. To fill out the buccal corridor more, this extended from tooth 16 to tooth 24. After a few details were added and subtracted in dialog with the patient, a pickup impression was taken of the situation. After local anesthesia, a guided mock-up preparation fol-lowed to provide the patient with non-invasive or minimally invasive treatment in the enamel area. An impression was taken of the upper jaw, and a master model was created on this basis, with refractory stumps on the relevant teeth.
For initial layering, VITA VMK Master DENTINE A1 was used in the cervical area, and DENTINE A1 and neutral TRANSLUCENT 4 (T4) were used in the incisal area. After the firing, DENTINE A1 was layered over the entire surface and a cut-back was carried out. In the mamelon area, shade-intensive DENTINE MODIFIER 2 (cream) and whitish T1 were subsequently layered over the DENTINE A1 in a three-to-one mixture. Work was done with light blue T5 and gray T7 in the incisal area, as well as with a two-to-one mix-ture of whitish ENAMEL 1 and neutral T4 in the central area, and the result was fired. In a next step, a balanced mixture of neutral WINDOW, T4 and opalescent 0PAL TRANSLUCENT 1 was created over the complete surface. To integrate a halo effect, DENTINE A2 was applied to the incisal edge. Finally, PLT1 (pearlescent cream) was layered laterally and centrally to precisely lighten the dentine body.
2. Planning phase and preparation 3. Highly individual veneer layering
VITA VMK Master is primarily used for the veneering of metal frame-works, but can also be used for the framework-free production of veneers.
Fig. 2 The front of the upper jaw, restored with composite, looked lifeless and unnatural.
2
Fig. 3 The master model with refractory stumps and anatomically reduced veneers after dentine firing.
Fig. 4 The cut-back after the application of DENTINE A1 over the entire surface.
3 4
Fig. 8 The etching of the inner surface of the veneer with hydrofluoric acid.
Fig. 9 The application of the composite cement to the inner surface of the veneer.
Fig. 10 The veneers were inserted and light-cured one after the other.
108 9
38
1.9 DENTAL VISIONISTFRAMEWORK MATERIALS, VENEERING MATERIALS AND STAINS FOR HIGH VITALITY
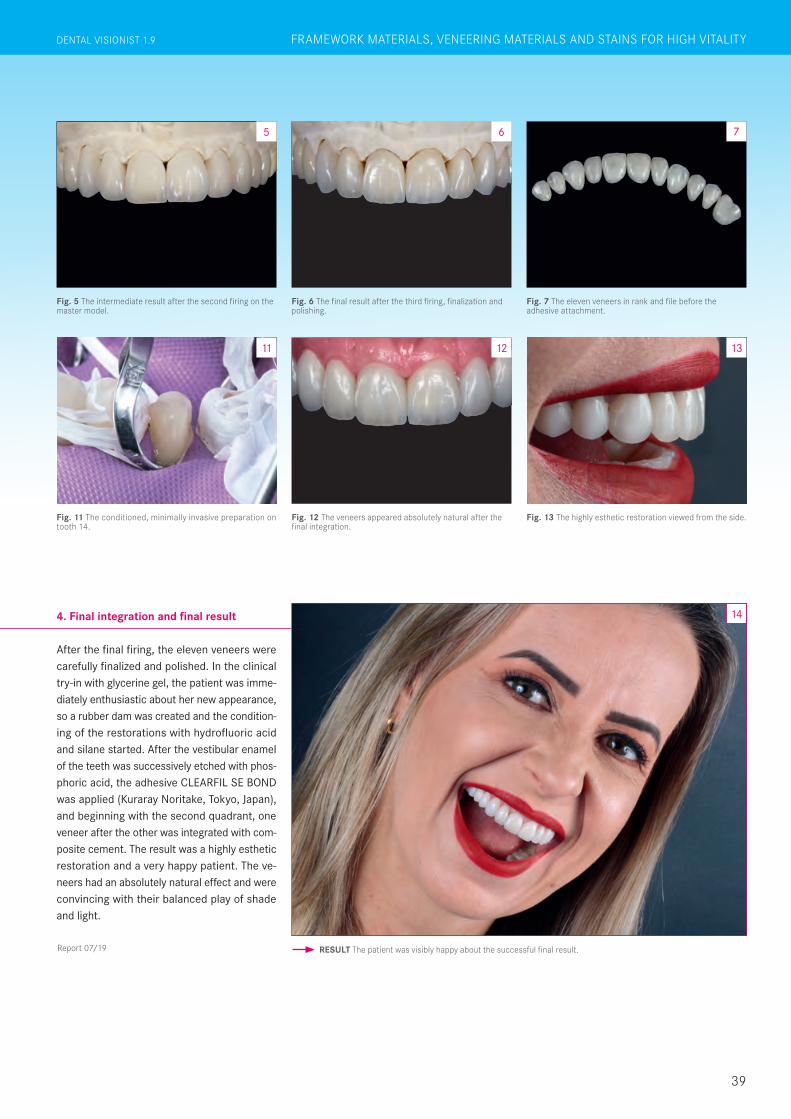
After the final firing, the eleven veneers were carefully finalized and polished. In the clinical try-in with glycerine gel, the patient was imme-diately enthusiastic about her new appearance, so a rubber dam was created and the condition-ing of the restorations with hydrofluoric acid and silane started. After the vestibular enamel of the teeth was successively etched with phos-phoric acid, the adhesive CLEARFIL SE BOND was applied (Kuraray Noritake, Tokyo, Japan), and beginning with the second quadrant, one veneer after the other was integrated with com-posite cement. The result was a highly esthetic restoration and a very happy patient. The ve-neers had an absolutely natural effect and were convincing with their balanced play of shade and light.
4. Final integration and final result
Report 07/19
Fig. 11 The conditioned, minimally invasive preparation on tooth 14.
11
Fig. 12 The veneers appeared absolutely natural after the final integration.
Fig. 13 The highly esthetic restoration viewed from the side.
12 13
RESULT The patient was visibly happy about the successful final result.
14
Fig. 5 The intermediate result after the second firing on the master model.
Fig. 6 The final result after the third firing, finalization and polishing.
Fig. 7 The eleven veneers in rank and file before the adhesive attachment.
75 6
39
DENTAL VISIONIST 1.9 FRAMEWORK MATERIALS, VENEERING MATERIALS AND STAINS FOR HIGH VITALITY
1911
E/11
- 09
19(X
.)HO
- V
ERS
ION
(01)
Now available to read online!
Read all the latest articles and archived topics from DENTAl VISIONIST and find exclusive online articles on www.dental-visionist.com.
www.dental-visionist.com
Related Documents