CHAPTER Send documentation comments to [email protected]. 2-1 Cisco MDS 9000 Family Configuration Guide OL-6973-03, Cisco MDS SAN-OS Release 2.x 2 Before You Begin This chapter prepares you to configure switches from the CLI. It also lists the information you need to have before you begin, and it describes the CLI command modes. This chapter includes the following sections: • About the Switch Prompt, page 2-2 Default Switch Roles, page 2-3 About the CLI Command Modes, page 2-3 CLI Command Hierarchy, page 2-4 CLI Command Navigation, page 2-8 About Flash Devices, page 2-20 Formatting Flash Devices and File Systems, page 2-21 Using the File System, page 2-22

Welcome message from author
This document is posted to help you gain knowledge. Please leave a comment to let me know what you think about it! Share it to your friends and learn new things together.
Transcript

Send documenta t ion comments to mdsfeedback -doc@c i sco .com.
CiscOL-6973-03, Cisco MDS SAN-OS Release 2.x
C H A P T E R 2
Before You BeginThis chapter prepares you to configure switches from the CLI. It also lists the information you need to have before you begin, and it describes the CLI command modes.
This chapter includes the following sections:
• About the Switch Prompt, page 2-2
Default Switch Roles, page 2-3
About the CLI Command Modes, page 2-3
CLI Command Hierarchy, page 2-4
CLI Command Navigation, page 2-8
About Flash Devices, page 2-20
Formatting Flash Devices and File Systems, page 2-21
Using the File System, page 2-22
2-1o MDS 9000 Family Configuration Guide
Chapter 2 Before You BeginAbout the Switch Prompt
About the Switch Prompt
Note Cisco MDS 9200 Series Hardware Installation Guide Cisco MDS 9500 Series Hardware Installation Guide
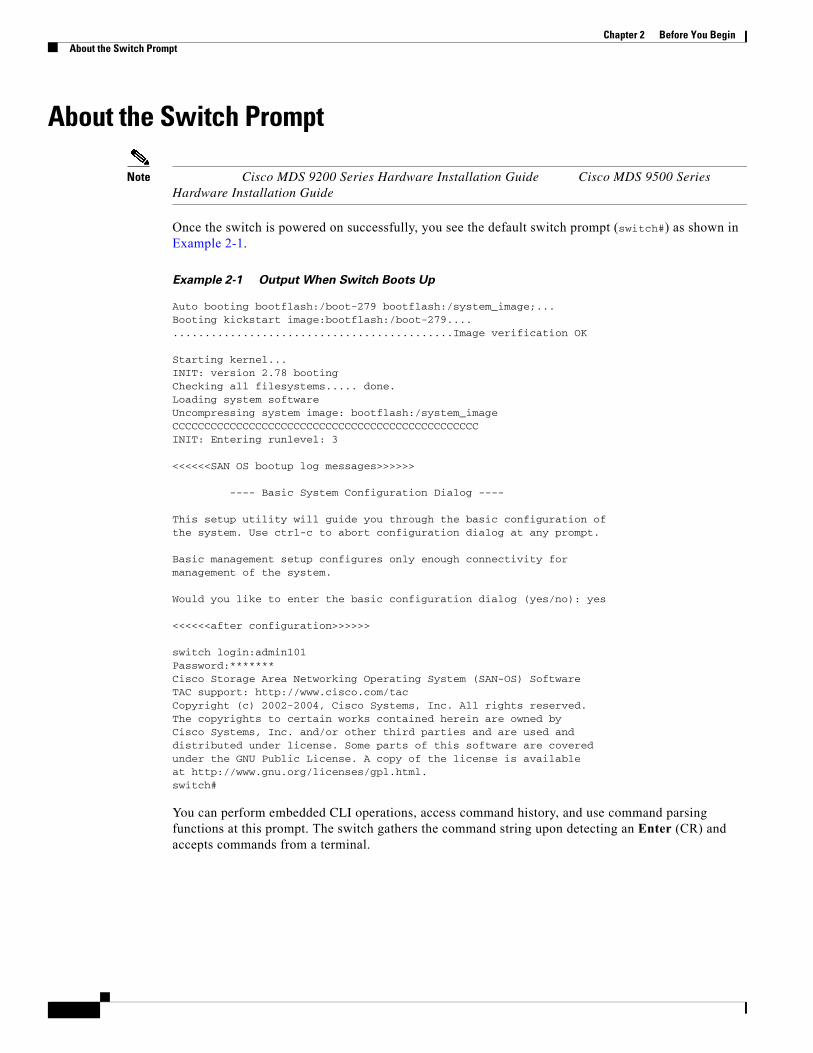
Once the switch is powered on successfully, you see the default switch prompt (switch#) as shown in Example 2-1.
Example 2-1 Output When Switch Boots Up
Auto booting bootflash:/boot-279 bootflash:/system_image;...Booting kickstart image:bootflash:/boot-279................................................Image verification OK Starting kernel...INIT: version 2.78 bootingChecking all filesystems..... done.Loading system softwareUncompressing system image: bootflash:/system_imageCCCCCCCCCCCCCCCCCCCCCCCCCCCCCCCCCCCCCCCCCCCCCCCCINIT: Entering runlevel: 3 <<<<<<SAN OS bootup log messages>>>>>>
---- Basic System Configuration Dialog ---- This setup utility will guide you through the basic configuration ofthe system. Use ctrl-c to abort configuration dialog at any prompt. Basic management setup configures only enough connectivity formanagement of the system. Would you like to enter the basic configuration dialog (yes/no): yes <<<<<<after configuration>>>>>>
switch login:admin101Password:*******Cisco Storage Area Networking Operating System (SAN-OS) SoftwareTAC support: http://www.cisco.com/tacCopyright (c) 2002-2004, Cisco Systems, Inc. All rights reserved.The copyrights to certain works contained herein are owned byCisco Systems, Inc. and/or other third parties and are used anddistributed under license. Some parts of this software are coveredunder the GNU Public License. A copy of the license is availableat http://www.gnu.org/licenses/gpl.html.switch#
You can perform embedded CLI operations, access command history, and use command parsing functions at this prompt. The switch gathers the command string upon detecting an Enter (CR) and accepts commands from a terminal.
Default Switch RolesBy default, two roles exist in all switches:
Network operator—Has permission to view the configuration.
Network administrator—Has permission to perform all functions and to set up to 64 permission levels based on user roles and groups.
When you execute a command, perform command completion, or obtain context sensitive help, the switch software allows the operation to progress if you have the correct permission as specified in the description of the command. see Chapter 26, “Configuring Users and Common Roles.”
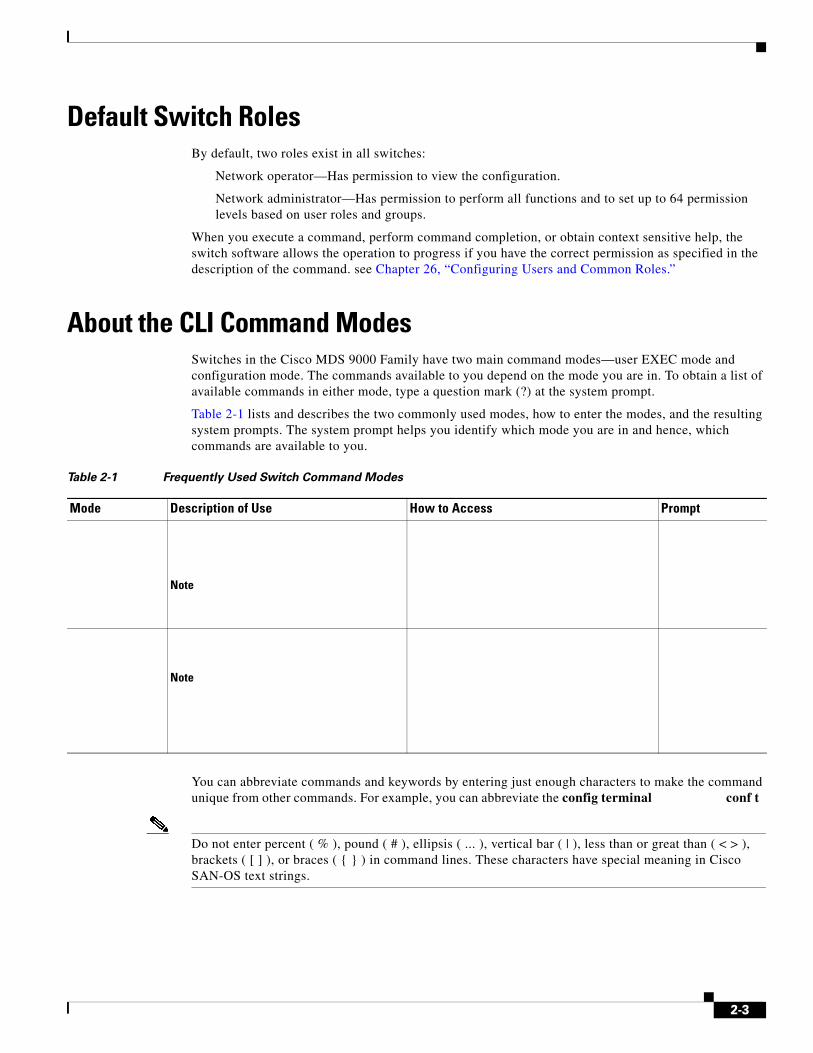
About the CLI Command ModesSwitches in the Cisco MDS 9000 Family have two main command modes—user EXEC mode and configuration mode. The commands available to you depend on the mode you are in. To obtain a list of available commands in either mode, type a question mark (?) at the system prompt.
Table 2-1 lists and describes the two commonly used modes, how to enter the modes, and the resulting system prompts. The system prompt helps you identify which mode you are in and hence, which commands are available to you.
You can abbreviate commands and keywords by entering just enough characters to make the command unique from other commands. For example, you can abbreviate the config terminal conf t
Do not enter percent ( % ), pound ( # ), ellipsis ( ... ), vertical bar ( | ), less than or great than ( < > ), brackets ( [ ] ), or braces ( { } ) in command lines. These characters have special meaning in Cisco SAN-OS text strings.
Table 2-1 Frequently Used Switch Command Modes
Mode Description of Use How to Access Prompt
Note
Note
2-3
Chapter 2 Before You BeginCLI Command Hierarchy
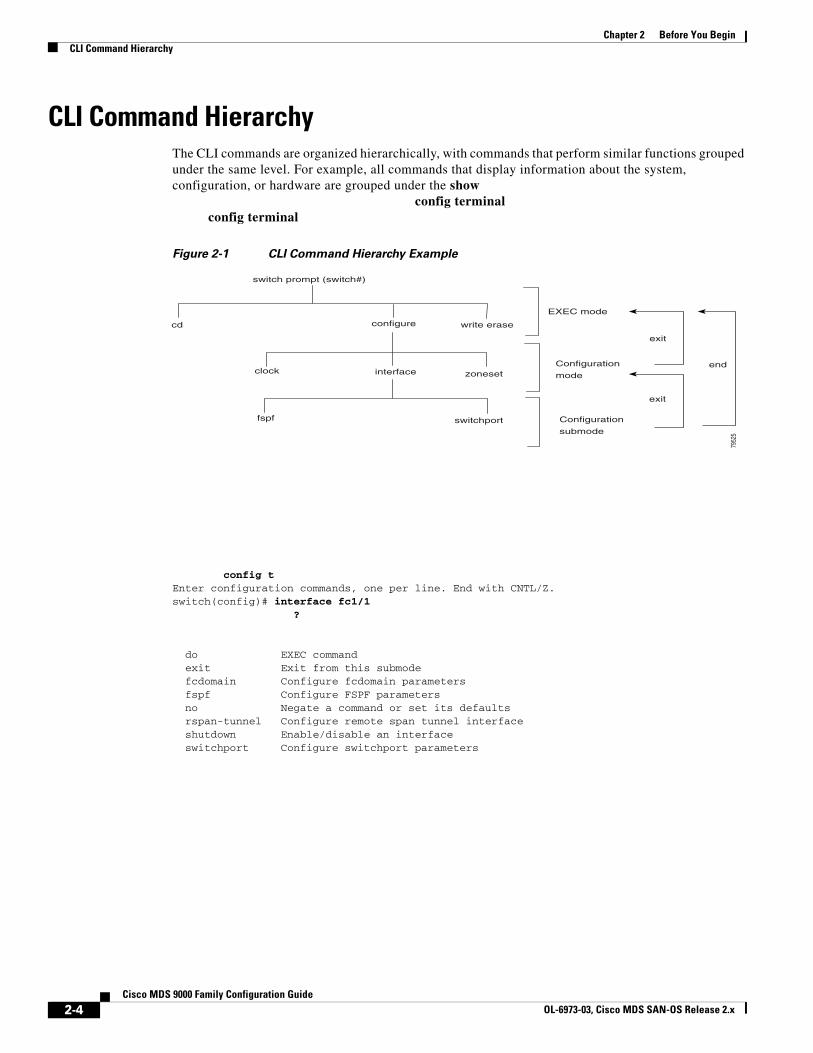
CLI Command HierarchyThe CLI commands are organized hierarchically, with commands that perform similar functions grouped under the same level. For example, all commands that display information about the system, configuration, or hardware are grouped under the show
config terminal config terminal
Figure 2-1 CLI Command Hierarchy Example
config tEnter configuration commands, one per line. End with CNTL/Z.switch(config)# interface fc1/1
?
do EXEC command exit Exit from this submode fcdomain Configure fcdomain parameters fspf Configure FSPF parameters no Negate a command or set its defaults rspan-tunnel Configure remote span tunnel interface shutdown Enable/disable an interface switchport Configure switchport parameters
switch prompt (switch#)
cd write eraseconfigure
clock zoneset interface
fspf switchport
EXEC mode
Configuration
mode
Configuration
submode
exit
exit
end
7952
5
2-4Cisco MDS 9000 Family Configuration Guide
OL-6973-03, Cisco MDS SAN-OS Release 2.x
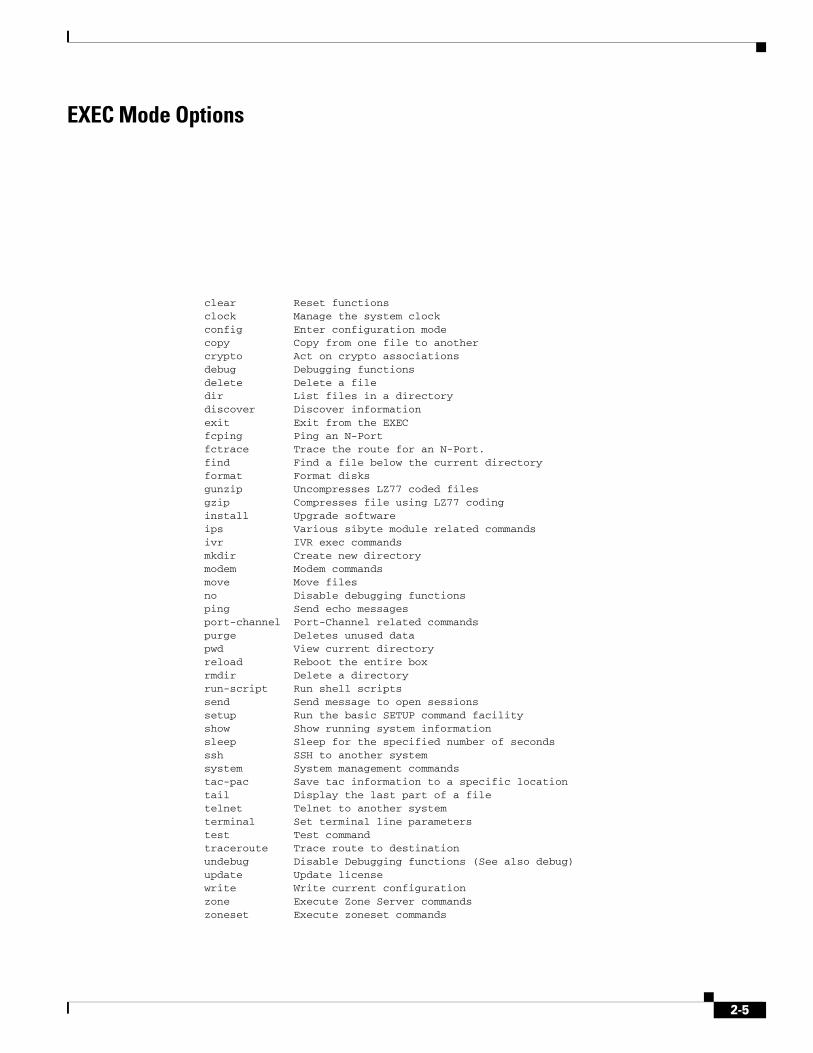
EXEC Mode Options
clear Reset functions clock Manage the system clock config Enter configuration mode copy Copy from one file to another crypto Act on crypto associations debug Debugging functions delete Delete a file dir List files in a directory discover Discover information exit Exit from the EXEC fcping Ping an N-Port fctrace Trace the route for an N-Port. find Find a file below the current directory format Format disks gunzip Uncompresses LZ77 coded files gzip Compresses file using LZ77 coding install Upgrade software ips Various sibyte module related commands ivr IVR exec commands mkdir Create new directory modem Modem commands move Move files no Disable debugging functions ping Send echo messages port-channel Port-Channel related commands purge Deletes unused data pwd View current directory reload Reboot the entire box rmdir Delete a directory run-script Run shell scripts send Send message to open sessions setup Run the basic SETUP command facility show Show running system information sleep Sleep for the specified number of seconds ssh SSH to another system system System management commands tac-pac Save tac information to a specific location tail Display the last part of a file telnet Telnet to another system terminal Set terminal line parameters test Test command traceroute Trace route to destination undebug Disable Debugging functions (See also debug) update Update license write Write current configuration zone Execute Zone Server commands zoneset Execute zoneset commands
2-5
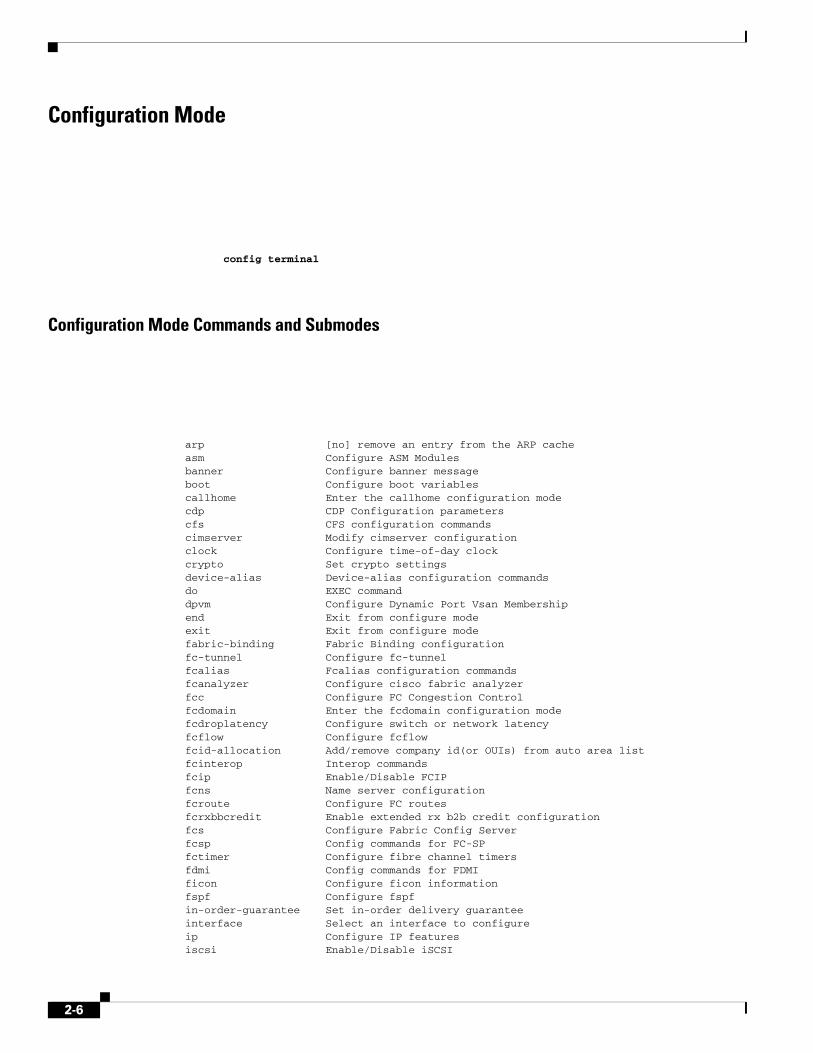
Configuration Mode
config terminal
Configuration Mode Commands and Submodes
arp [no] remove an entry from the ARP cache asm Configure ASM Modules banner Configure banner message boot Configure boot variables callhome Enter the callhome configuration mode cdp CDP Configuration parameters cfs CFS configuration commands cimserver Modify cimserver configuration clock Configure time-of-day clock crypto Set crypto settings device-alias Device-alias configuration commands do EXEC command dpvm Configure Dynamic Port Vsan Membership end Exit from configure mode exit Exit from configure mode fabric-binding Fabric Binding configuration fc-tunnel Configure fc-tunnel fcalias Fcalias configuration commands fcanalyzer Configure cisco fabric analyzer fcc Configure FC Congestion Control fcdomain Enter the fcdomain configuration mode fcdroplatency Configure switch or network latency fcflow Configure fcflow fcid-allocation Add/remove company id(or OUIs) from auto area list fcinterop Interop commands fcip Enable/Disable FCIP fcns Name server configuration fcroute Configure FC routes fcrxbbcredit Enable extended rx b2b credit configuration fcs Configure Fabric Config Server fcsp Config commands for FC-SP fctimer Configure fibre channel timers fdmi Config commands for FDMI ficon Configure ficon information fspf Configure fspf in-order-guarantee Set in-order delivery guarantee interface Select an interface to configure ip Configure IP features iscsi Enable/Disable iSCSI
2-6
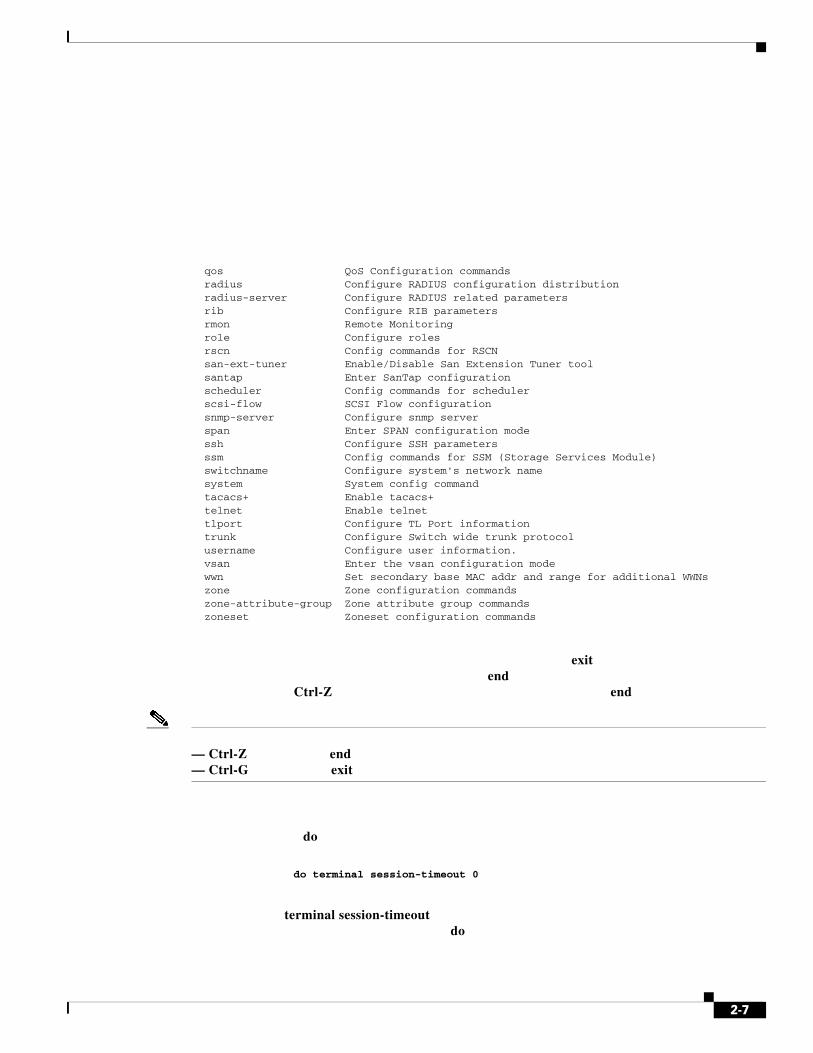
qos QoS Configuration commands radius Configure RADIUS configuration distribution radius-server Configure RADIUS related parameters rib Configure RIB parameters rmon Remote Monitoring role Configure roles rscn Config commands for RSCN san-ext-tuner Enable/Disable San Extension Tuner tool santap Enter SanTap configuration scheduler Config commands for scheduler scsi-flow SCSI Flow configuration snmp-server Configure snmp server span Enter SPAN configuration mode ssh Configure SSH parameters ssm Config commands for SSM (Storage Services Module) switchname Configure system's network name system System config command tacacs+ Enable tacacs+ telnet Enable telnet tlport Configure TL Port information trunk Configure Switch wide trunk protocol username Configure user information. vsan Enter the vsan configuration mode wwn Set secondary base MAC addr and range for additional WWNs zone Zone configuration commands zone-attribute-group Zone attribute group commands zoneset Zoneset configuration commands
exitend
Ctrl-Z end
— Ctrl-Z end— Ctrl-G exit
do
do terminal session-timeout 0
terminal session-timeoutdo
2-7
CLI Command Navigation
? Tab do
CLI Command NavigationUp Arrow
Up Arrow Down ArrowRight Arrow Left Arrow Delete
Getting Help
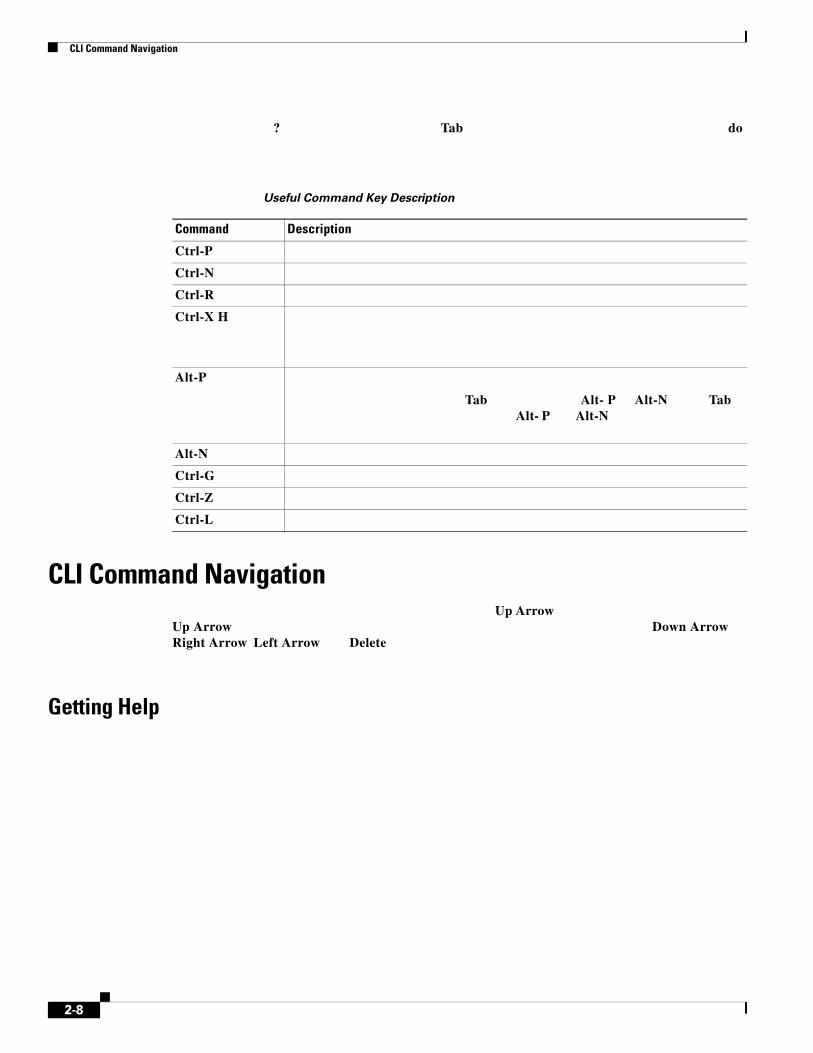
Useful Command Key Description
Command Description
Ctrl-P
Ctrl-N
Ctrl-R
Ctrl-X H
Alt-P
Tab Alt- P Alt-N TabAlt- P Alt-N
Alt-N
Ctrl-G
Ctrl-Z
Ctrl-L
2-8
Tip
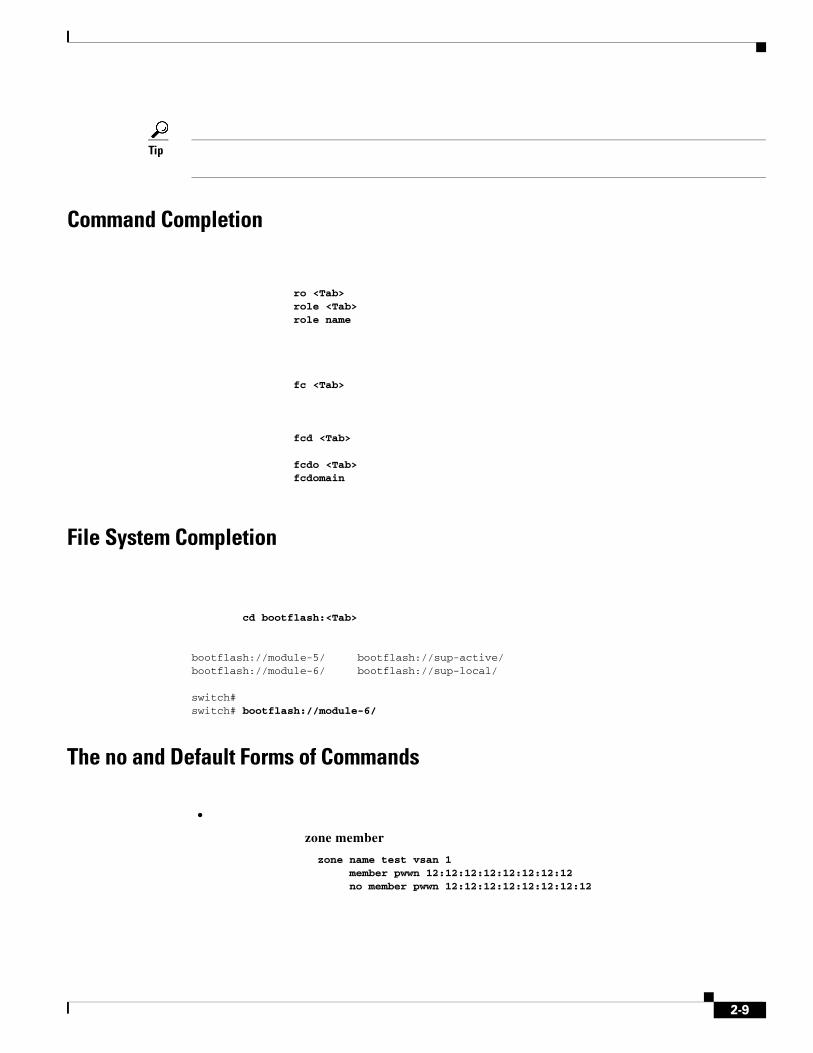
Command Completion
ro <Tab> role <Tab>role name
fc <Tab>
fcd <Tab>
fcdo <Tab>fcdomain
File System Completion
cd bootflash:<Tab>
bootflash://module-5/ bootflash://sup-active/bootflash://module-6/ bootflash://sup-local/
switch# switch# bootflash://module-6/
The no and Default Forms of Commands
•
zone member
zone name test vsan 1member pwwn 12:12:12:12:12:12:12:12no member pwwn 12:12:12:12:12:12:12:12
2-9
zone name test vsan 1exit
no zone name test vsan 1
CLI Command Configuration OptionsYou can configure the software in one of two ways:
•
•
Files” section on page 7-1).
Displaying the Switch Configuration
copy run startshow startup
showcommands. Configurations are displayed based on a specified feature, interface, module, or VSAN. Available commands for each feature are briefly described in this section and listed at the end of each chapter.
Examples 2-2 to 2-8 display a few command examples.
0 runts, 0 jabber, 0 too long, 0 too short 0 input errors, 0 CRC, 0 invalid transmission words 0 address id, 0 delimiter 0 EOF abort, 0 fragmented, 0 unknown class 0 frames output, 0 bytes, 0 discards Received 0 OLS, 0 LRR, 0 NOS, 0 loop inits Transmitted 0 OLS, 0 LRR, 0 NOS, 0 loop inits
2-10
Example 2-3 Displays the Software and Hardware Version
Example 2-4 Displays the Running Configuration
Example 2-5 Displays the Difference Between the Running and Startup Configuration
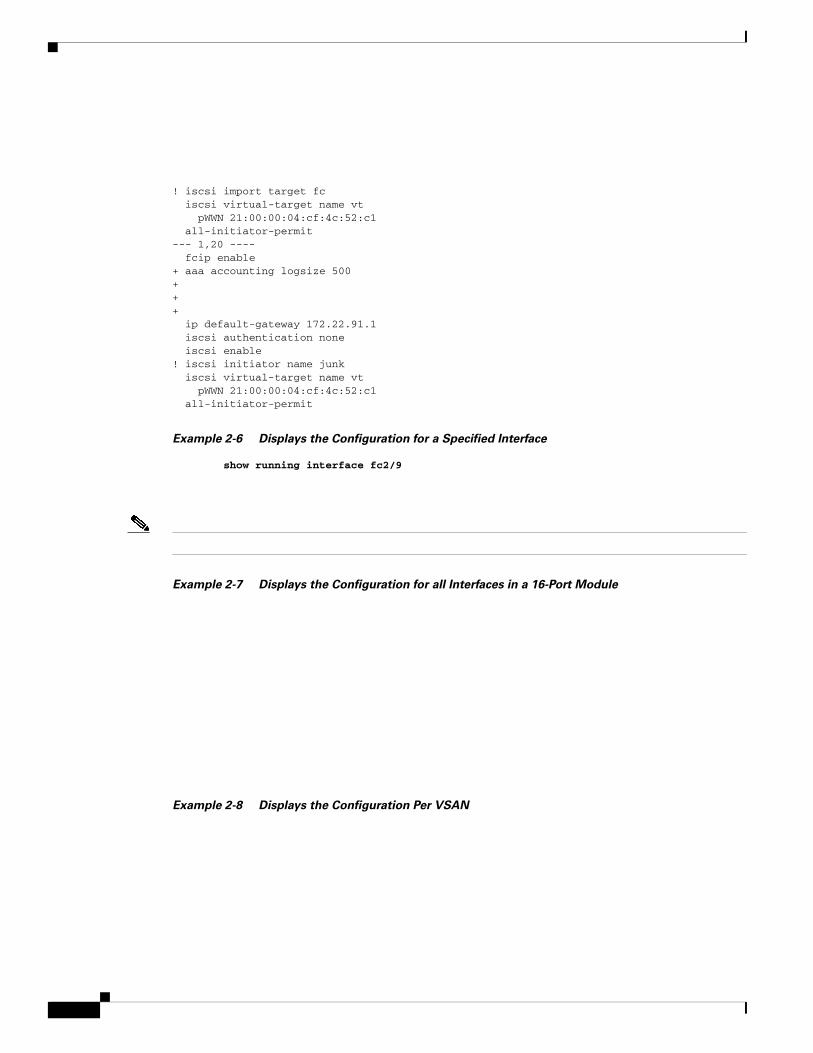
! iscsi import target fc iscsi virtual-target name vt pWWN 21:00:00:04:cf:4c:52:c1 all-initiator-permit--- 1,20 ---- fcip enable+ aaa accounting logsize 500+++ ip default-gateway 172.22.91.1 iscsi authentication none iscsi enable! iscsi initiator name junk iscsi virtual-target name vt pWWN 21:00:00:04:cf:4c:52:c1 all-initiator-permit
Example 2-6 Displays the Configuration for a Specified Interface
show running interface fc2/9
Example 2-7 Displays the Configuration for all Interfaces in a 16-Port Module
Example 2-8 Displays the Configuration Per VSAN
Chapter 2 Before You BeginCLI Command Navigation
Saving a Configuration
Clearing a Configurationcommand to clear a startup configuration. Once this command is issued, the switch’s
startup configuration reverts to factory defaults. The running configuration is not affected.
Caution
Displaying Users
admin pts/7 Jan 12 20:56 (10.77.202.149)admin pts/9 Jan 12 23:29 (modena.cisco.com)admin pts/11 Jan 13 01:53 (dhcp-171-71-49-49.cisco.com)
Sending Messages to Users
switch# send Shutting down the system in 2 minutes. Please log off.
Broadcast Message from admin@excal-112 (/dev/pts/3) at 16:50 ... Shutting down the system in 2 minutes. Please log off.
Cisco MDS 9000 Family Configuration GuideOL-6973-03, Cisco MDS SAN-OS Release 2.x
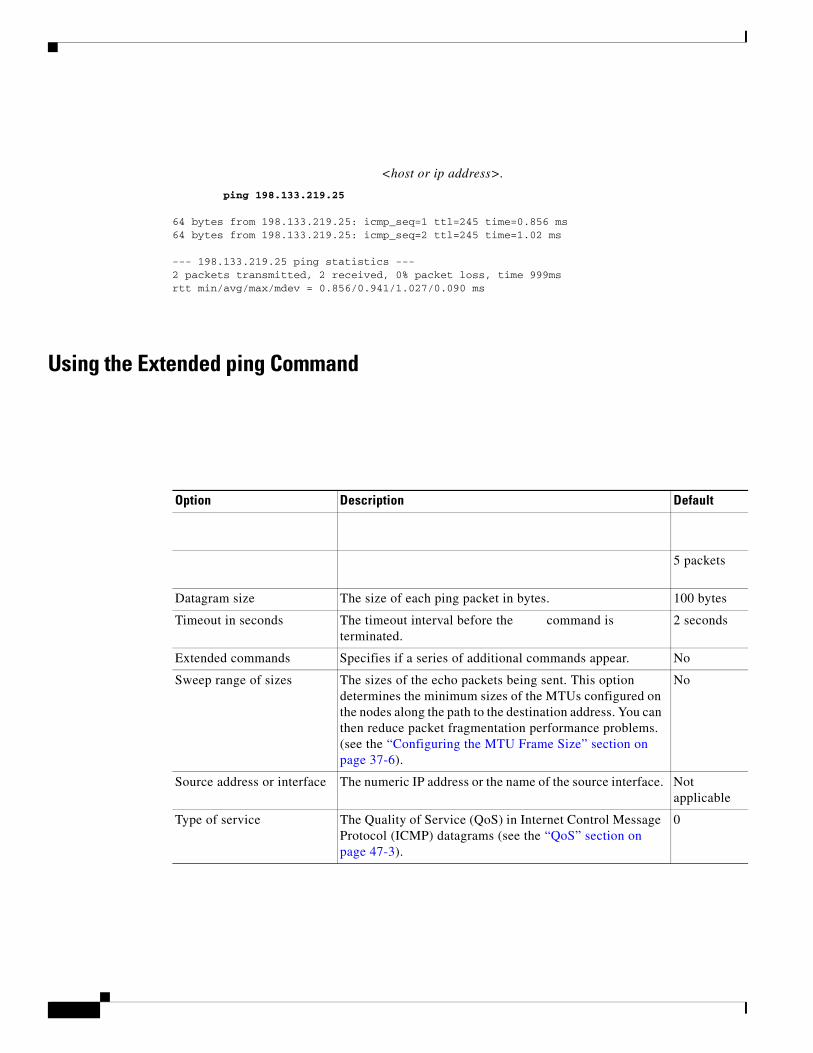
<host or ip address>.
ping 198.133.219.25
64 bytes from 198.133.219.25: icmp_seq=1 ttl=245 time=0.856 ms64 bytes from 198.133.219.25: icmp_seq=2 ttl=245 time=1.02 ms
--- 198.133.219.25 ping statistics ---2 packets transmitted, 2 received, 0% packet loss, time 999msrtt min/avg/max/mdev = 0.856/0.941/1.027/0.090 ms
Using the Extended ping Command
Option Description Default
5 packets
Datagram size The size of each ping packet in bytes. 100 bytes
Timeout in seconds The timeout interval before the command is terminated.
2 seconds
Extended commands Specifies if a series of additional commands appear. No
Sweep range of sizes The sizes of the echo packets being sent. This option determines the minimum sizes of the MTUs configured on the nodes along the path to the destination address. You can then reduce packet fragmentation performance problems. (see the “Configuring the MTU Frame Size” section on page 37-6).
No
Source address or interface The numeric IP address or the name of the source interface. Not applicable
Type of service The Quality of Service (QoS) in Internet Control Message Protocol (ICMP) datagrams (see the “QoS” section on page 47-3).
0
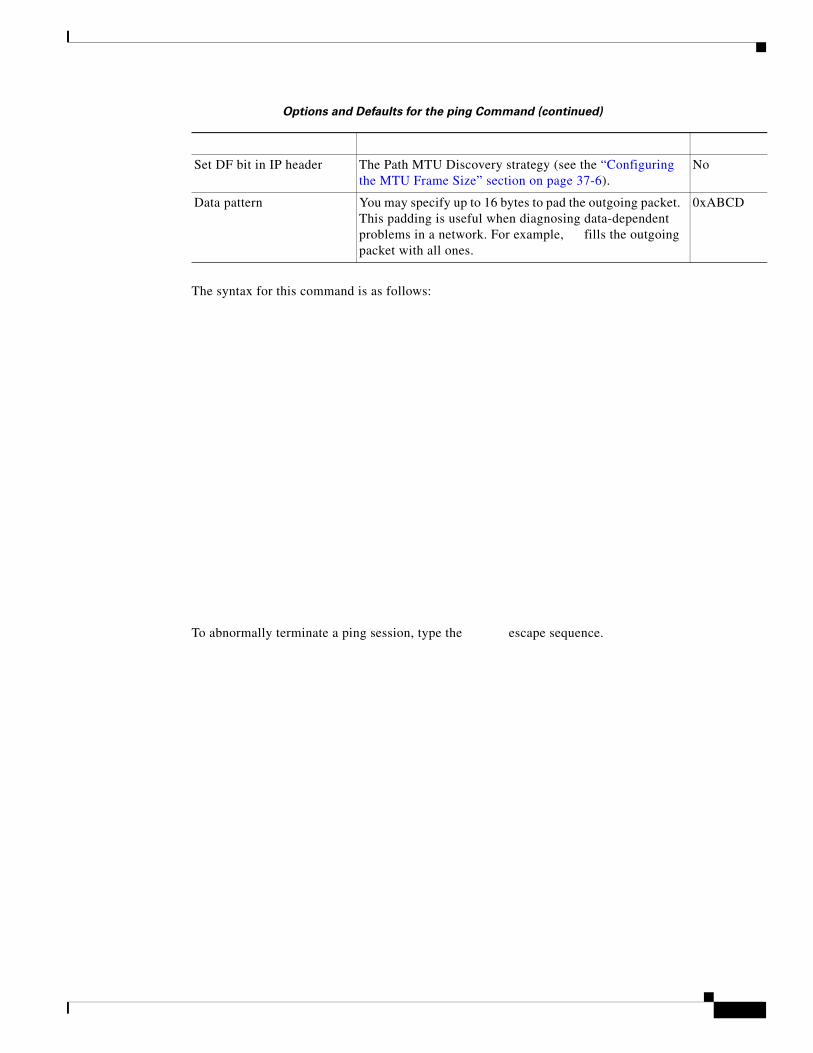
The syntax for this command is as follows:
To abnormally terminate a ping session, type the escape sequence.
Set DF bit in IP header The Path MTU Discovery strategy (see the “Configuring the MTU Frame Size” section on page 37-6).
No
Data pattern You may specify up to 16 bytes to pad the outgoing packet. This padding is useful when diagnosing data-dependent problems in a network. For example, fills the outgoing packet with all ones.
0xABCD
Options and Defaults for the ping Command (continued)

minutes.
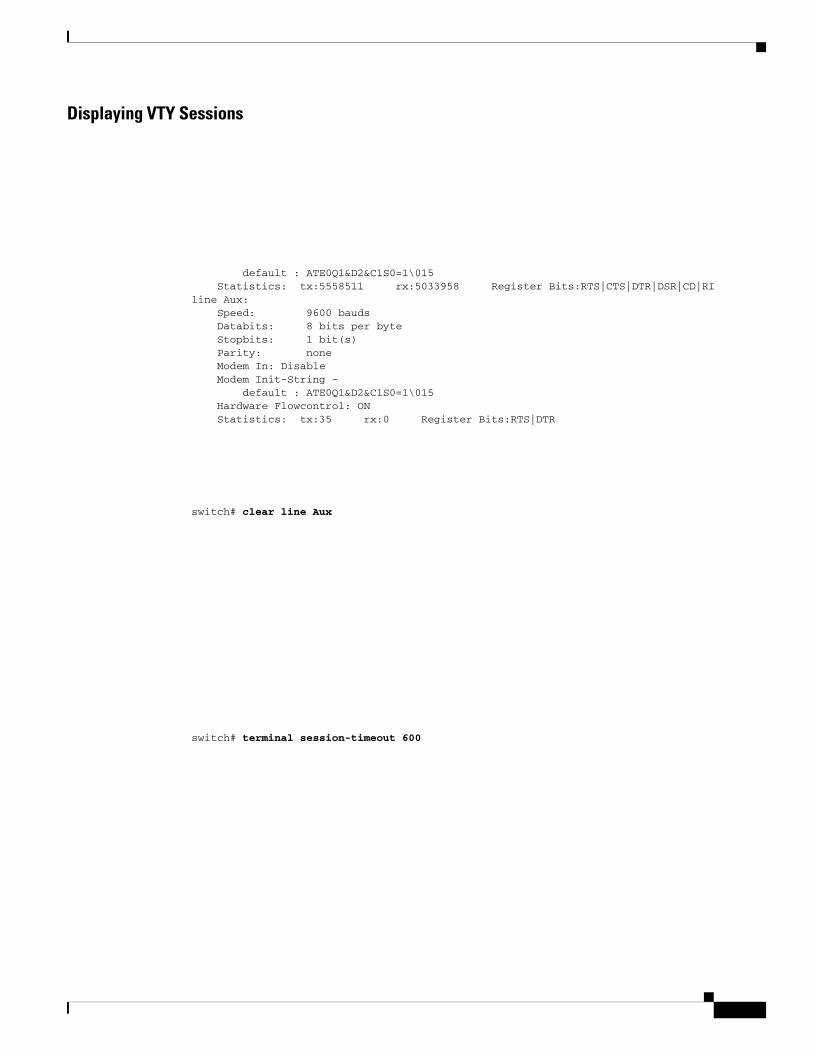
Displaying VTY Sessions
default : ATE0Q1&D2&C1S0=1\015 Statistics: tx:5558511 rx:5033958 Register Bits:RTS|CTS|DTR|DSR|CD|RIline Aux: Speed: 9600 bauds Databits: 8 bits per byte Stopbits: 1 bit(s) Parity: none Modem In: Disable Modem Init-String - default : ATE0Q1&D2&C1S0=1\015 Hardware Flowcontrol: ON Statistics: tx:35 rx:0 Register Bits:RTS|DTR
switch# clear line Aux
switch# terminal session-timeout 600

terminal-type.
terminal-type
lines.
Setting the Terminal Width
columns.
Displaying Terminal Settings
TTY: Type: “vt100”Length: 24 lines, Width: 80 columnsSession Timeout: 525600 minutes
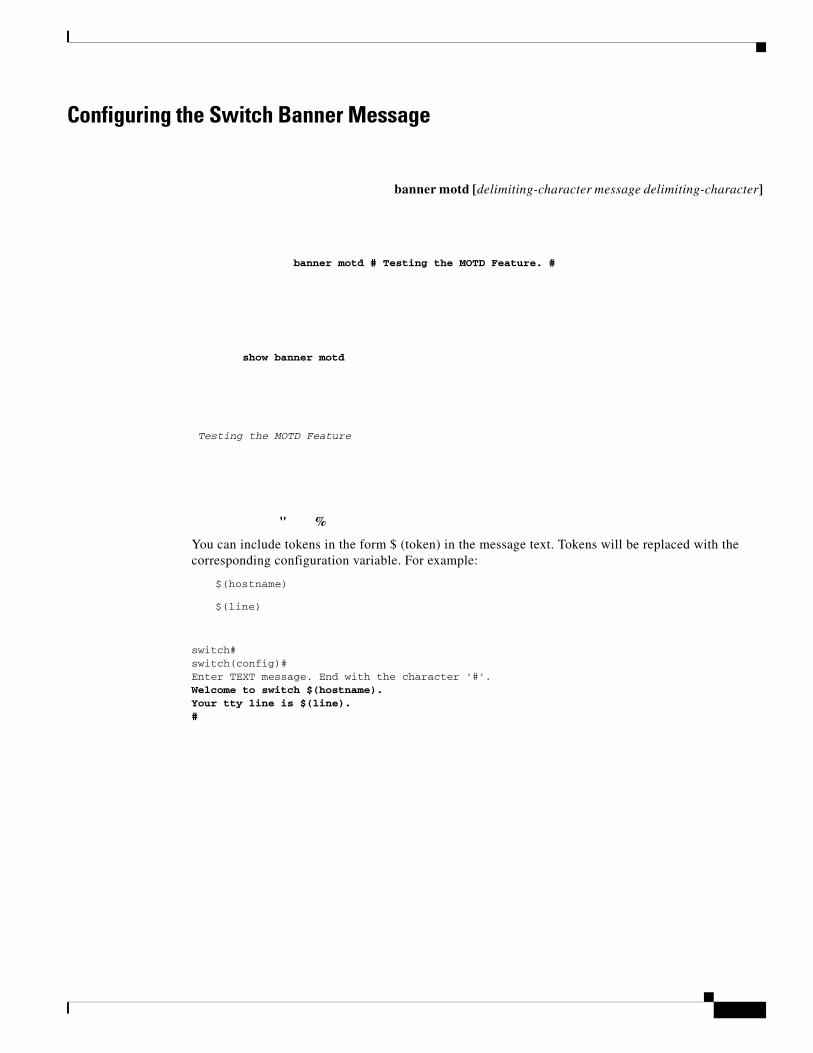
Configuring the Switch Banner Message
banner motd [delimiting-character message delimiting-character]
banner motd # Testing the MOTD Feature. #
show banner motd
Testing the MOTD Feature
" %
You can include tokens in the form $ (token) in the message text. Tokens will be replaced with the corresponding configuration variable. For example:
$(hostname)
$(line)
switch# switch(config)#Enter TEXT message. End with the character '#'.Welcome to switch $(hostname).Your tty line is $(line).#
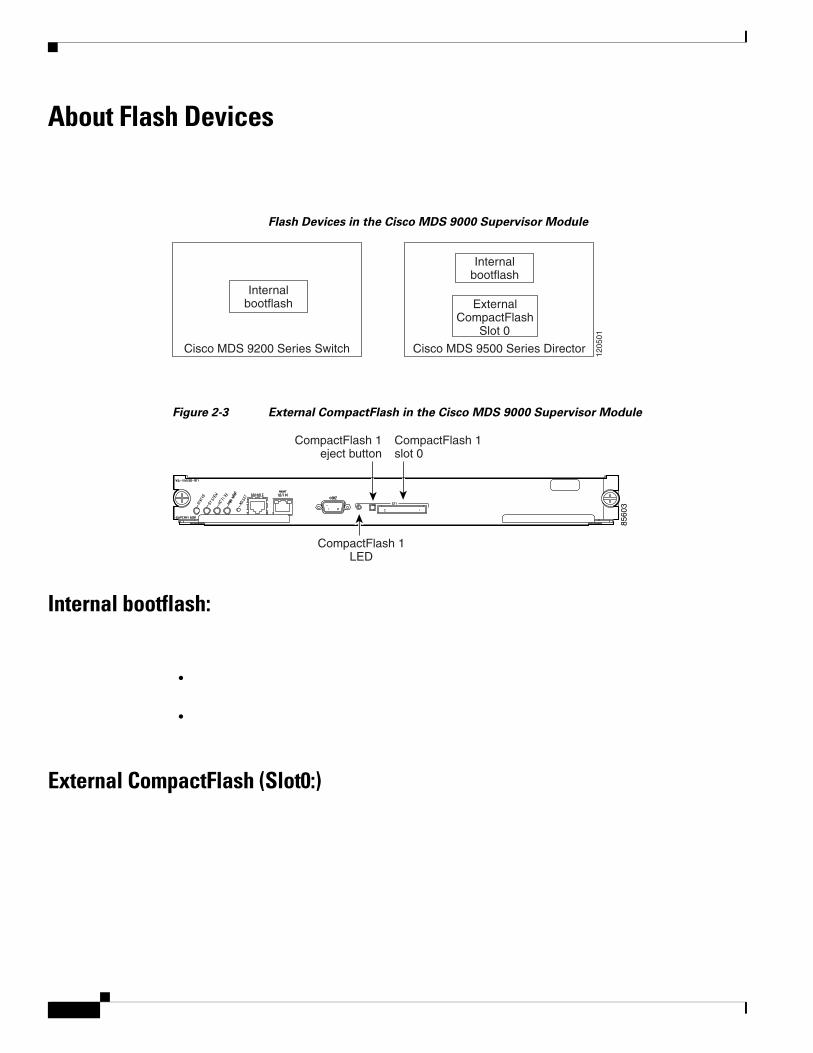
About Flash Devices
Flash Devices in the Cisco MDS 9000 Supervisor Module
Figure 2-3 External CompactFlash in the Cisco MDS 9000 Supervisor Module
Internal bootflash:
•
•
External CompactFlash (Slot0:)
ExternalCompactFlash
1205
01
Internalbootflash
Internalbootflash
Cisco MDS 9500 Series Director
Slot 0
Cisco MDS 9200 Series Switch
8560
3
CompactFlash 1LED
CompactFlash 1eject button
CompactFlash 1slot 0
Chapter 2 Before You BeginFormatting Flash Devices and File Systems
Formatting Flash Devices and File Systems
Initializing Internal bootflash:
Note
Caution
format bootflash: format bootflash:
format bootflash:
Formatting External CompactFlash
dir slot0:
format slot0:
Cisco MDS 9000 Family Configuration GuideOL-6973-03, Cisco MDS SAN-OS Release 2.x
Using the File System
Note
Caution
unpredictable consequences; formatting CompactFlash devices using other platforms may result in errors.
Using the File System
•
•
•
•
•
•
•
•
•
•
•
•
•
•
Setting the Current Directory
Tip
Chapter 2 Before You BeginUsing the File System
slot0:mydir/mystorage.
The command displays the current directory location. This example changes the directory and displays the current directory.
If you issue this command from the active supervisor module in a Cisco MDS 9500 Series (for example, ), then you cannot change the current working directory to the bootflash: of . See the
“Supervisor Modules” section on page 10-2.
Displaying File Checksumsfile md5sum
show file cksum
show file
show file bootflash://sup-1/ultimate_file.tar cksum
show file bootflash://sup-1/ultimate_file.tar md5sum
dir
Cisco MDS 9000 Family Configuration GuideOL-6973-03, Cisco MDS SAN-OS Release 2.x

mkdir slot0:test
mkdir test
rmdir slot0:testThis is a directory. Do you want to continue (y/n)? [y]
switch# This is a directory. Do you want to continue (y/n)? [y]
move

copy
copy
delete
delete
show file
show file file_name
> show interface > samplefile
dir
volatile: slot0:
bootflash:
pwd cd
gzip command compresses (zips) the specified file using LZ77 coding.
This example directs the output of the show tech-support command to a file (Samplefile) and then zips the file and displays the difference in the space used up in the volatile: directory:
The command uncompresses (unzips) LZ77 coded files.
This example unzips the file that was compressed in the previous example:

The command displays the last lines (tail end) of a specified file.
The syntax for this command is <file name> [<number of lines>]
file_name

<seconds>
Related Documents