
Welcome message from author
This document is posted to help you gain knowledge. Please leave a comment to let me know what you think about it! Share it to your friends and learn new things together.
Transcript

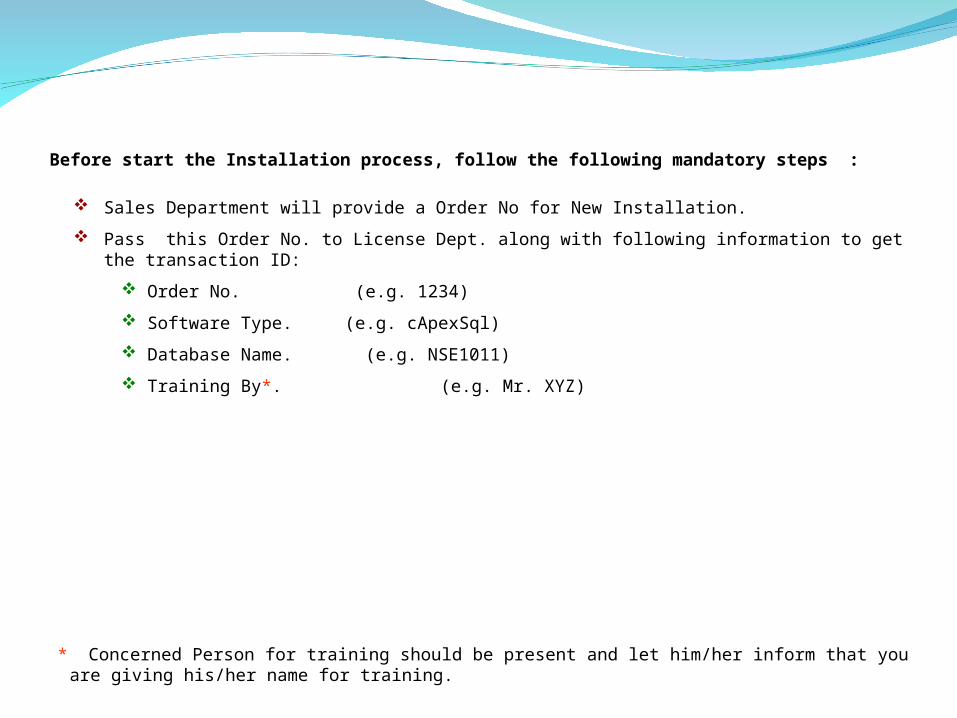
Before start the Installation process, follow the following mandatory steps :
Sales Department will provide a Order No for New Installation.
Pass this Order No. to License Dept. along with following information to get the transaction ID:
Order No. (e.g. 1234)
Software Type. (e.g. cApexSql)
Database Name. (e.g. NSE1011)
Training By*. (e.g. Mr. XYZ)
* Concerned Person for training should be present and let him/her inform that you are giving his/her name for training.

This PPT is for the installation of the following products:
Capexsql Comsql Fxsql
Note : In this PPT , installation of capexsql is described. Follow the same steps for other SQL products (comsql and fxsql).

For SQL Based Products:- Server / Client Machine Configuration:-
Windows XP Professional / Vista / Window7 (32 Bit) with SP 2 or 3. Min. Processor P-4 or above. RAM 1GB or above. Hard disk Free Space Min. 40 GB. CD ROM.
Note:- An Internet connection will be required on the system for regular product update and activation.

Download capexsql_setup in C Drive from http://www.shilpisoft.com/sunil/capexsql_setup.zip.

Go to C Drive:- Extract capexsql_setup.zip. Run extracted file (setup.exe). Following window will open.

Note: Do not cancel it.

Click on Next.

Click on Next.

Click on Install.
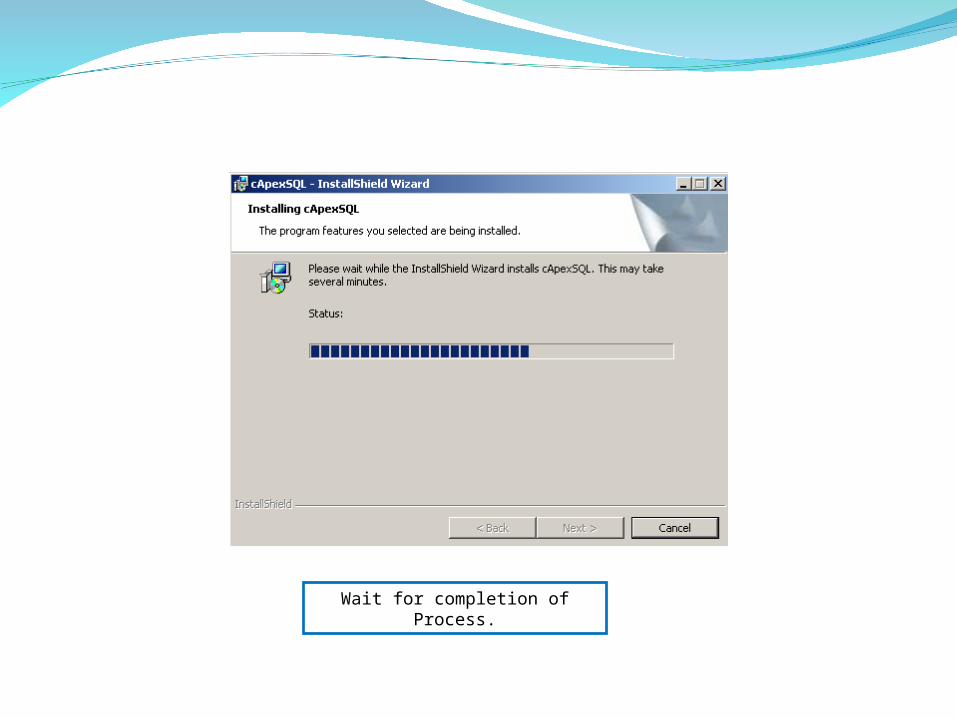
Wait for completion of Process.

Click on Finish.

Do not close it.

After completing the setup, there must be two folders capexsql and sql850 in C Drive.

Now, copy capexsql and sql850 folder in E* drive from C Drive.
*Copy these folders on other drive where software is to be installed except C Drive. In this PPT, E Drive is taken as an example for general purpose.

Delete capexsql from Control Panel. Follow the following steps to open
control panel: Click on start>>setting
>>control panel as shown left side:
OR Click on start>>Run as shown
below:
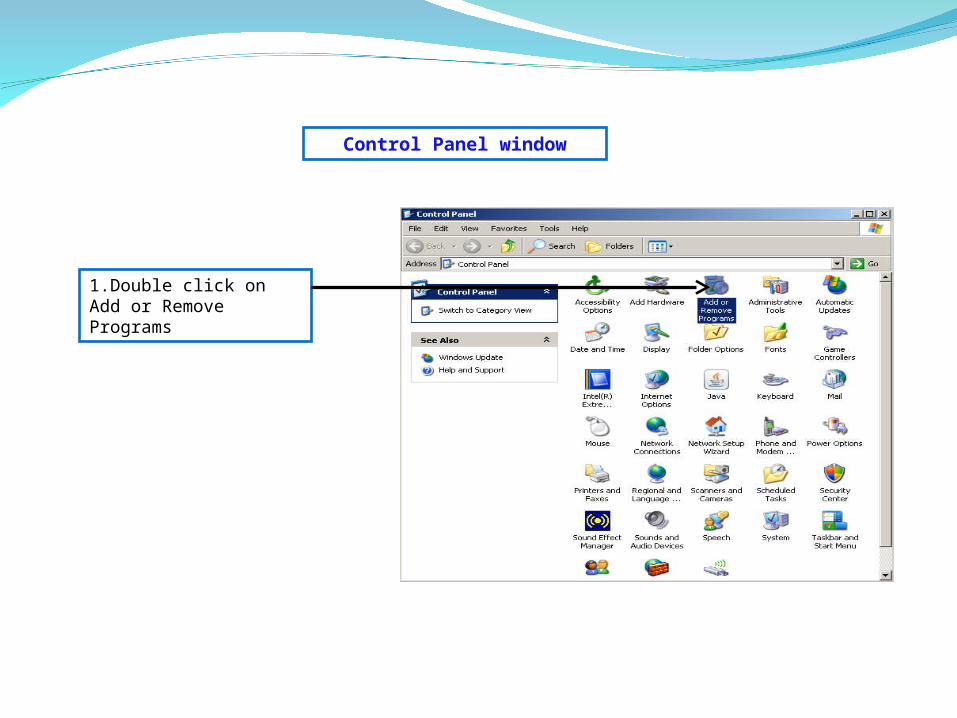
Control Panel window
1.Double click on Add or Remove Programs

3.Click on remove. It will reflect the following message
2.Select cApexsql
4.Click on Yes
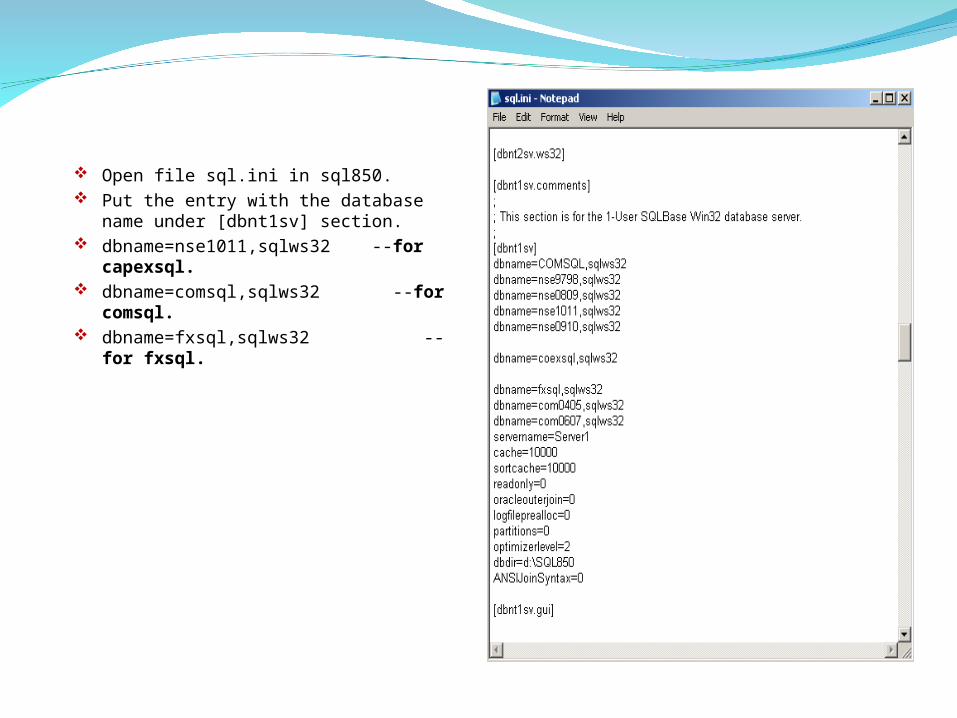
Open file sql.ini in sql850. Put the entry with the database name under
[dbnt1sv] section. dbname=nse1011,sqlws32 --for capexsql. dbname=comsql,sqlws32 --for comsql. dbname=fxsql,sqlws32 --for fxsql.

Open sql.ini from Sql850 and check the Drive letter (By default it is c:\).
By default path

Select Edit. Select Replace.
Enter default Drive letter i.e. c:\. Enter the drive letter where software is
being installed (e.g. : e:\). Click on replace all . It will replace the
Drive letter.
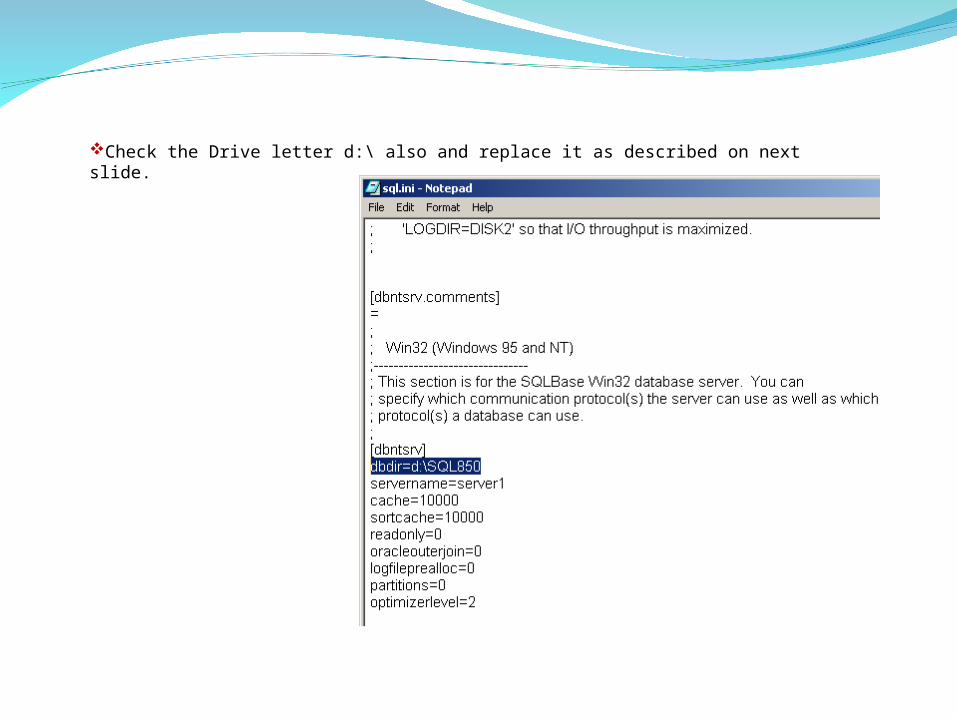
Check the Drive letter d:\ also and replace it as described on next slide.

Enter Drive letter i.e. d:\. Enter the drive letter where software is being installed (e.g. : e:\). Click on replace all . It will replace the Drive letter.
If software is being installed in drive d:\ then there is no need to change the Drive letter otherwise change it as given below:
Select Edit. Select Replace.
Note: Replace Drive letter C and D to E drive in Sql.ini file

* After save the changes made in sql.ini of Sql850, Copy Sql.ini to capexsql folder and replace the existing sql.ini file with this one.
Changed path

Download sqlclient.zip from Download Utilities files under Download option from www.shilpisoft.com.

Download Sqlclient.zip.

Extract sqlclient.zip in software folder. Run sqlclient.exe and Click on downloads. If connection was not successful then tell the Client to open the port 8089.
Click on Downloads
Note:- 2100 and 1467 Ports should be open to download these Files.

Following window will open. Download QRP and Blank database
2.Tick on QRP and Blank Database.
1.Select Product.
3. Click on Download. Following message will display
4. Click on Yes.
5. Click on OK.

6. Click on OK.

Unzip downloaded database (capexsqldbs.zip). It will ask for password. Enter Password (Password is maind123). After it database files will be extracted.

Create a folder in sql850 folder with the name NSE1011.
Created folder
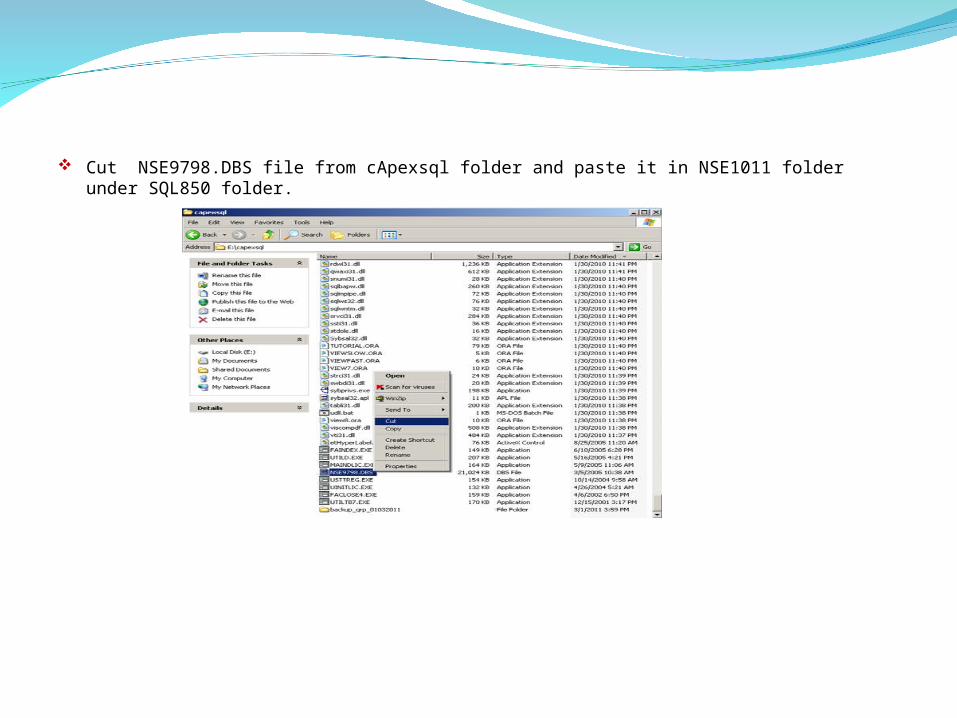
Cut NSE9798.DBS file from cApexsql folder and paste it in NSE1011 folder under SQL850 folder.

Rename file NSE9798.DBS to NSE101.DBS in NSE1011 folder under sql850 folder.
Renamed file.

Open sql850 folder, run/double click on dbnt1sv.exe.

Click on Display then Select Databases.
Following window will open. Database name must be displayed here:
Database name.
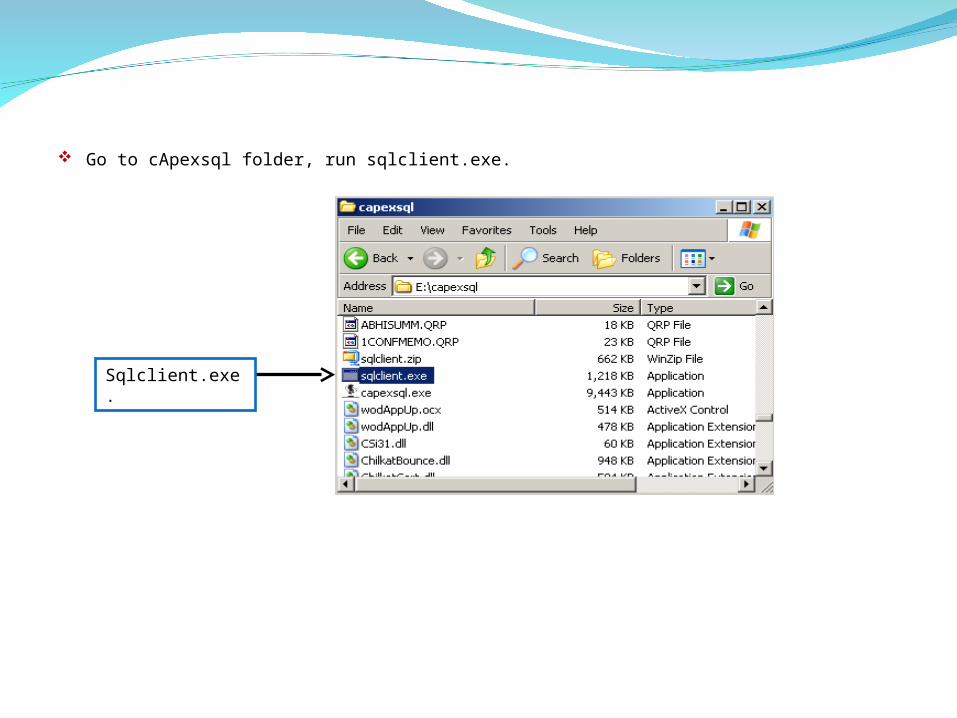
Go to cApexsql folder, run sqlclient.exe.
Sqlclient.exe.

Click on Test-i net connection to check internet connection. If Connection was not successful then tell the Client to open the port 8089.
Click on it to check the connection.
Click on OK.

Select New installation.
Select Product Type.
Enter database name.
Enter Installation Id given by license department.
Click on Get Activation . Following message will display:
Click on Product Activation Option. Following window will display :

Open a notepad & save as cofile.dll in the program folder (capexsql) and in which put entry with the database name and the company name/financial year as shown in the given window:
(For e.g.: nse1011 company name/ fin. year)
Note--This file is created only in case of capexsql installation, no need for comsql and fxsql.

Step10: Create a folder in E dive (same drive as of capexsql and sql850) named winback as shown below:
Winback.

Open Sql850 folder.
Copy Pkunzip.exe and Pkzip.exe file.

Paste in winback folder as shown below:

Open notepad. Write following commands
to make backup as here: Save the file with the name
winback.bat in winback folder. (e.g. : e:\winback).

Winback.bat in e:\winback.

Find capexsql.zip in capexsql folder and extract it.
* In case of Comsql and fxsql application file should be downloaded from www.shilpisoft.com.

Follow the following steps to make program shortcut
Go to software folder and find capex10.exe
Right click on it Click on Send to>>Desktop
(create shortcut). A shortcut will be created on the
desktop.
Now product is ready.

Double click on capexsql.exe. Following window will open.
Click here to login the database.

Click on Default to login the package.

Click here to logout the package

Close SQL engine.

Follow the following steps to take backup of cApexsql:
Go to winback folder (e:\winback).
Make shortcut of winback.bat on desktop as shown below:
Double click on winback.bat .

Following window will open. Don’t close it because backup of database is in processing :
Note: SQL Engine must be shutdown properly before taking backup, otherwise data will be corrupted.
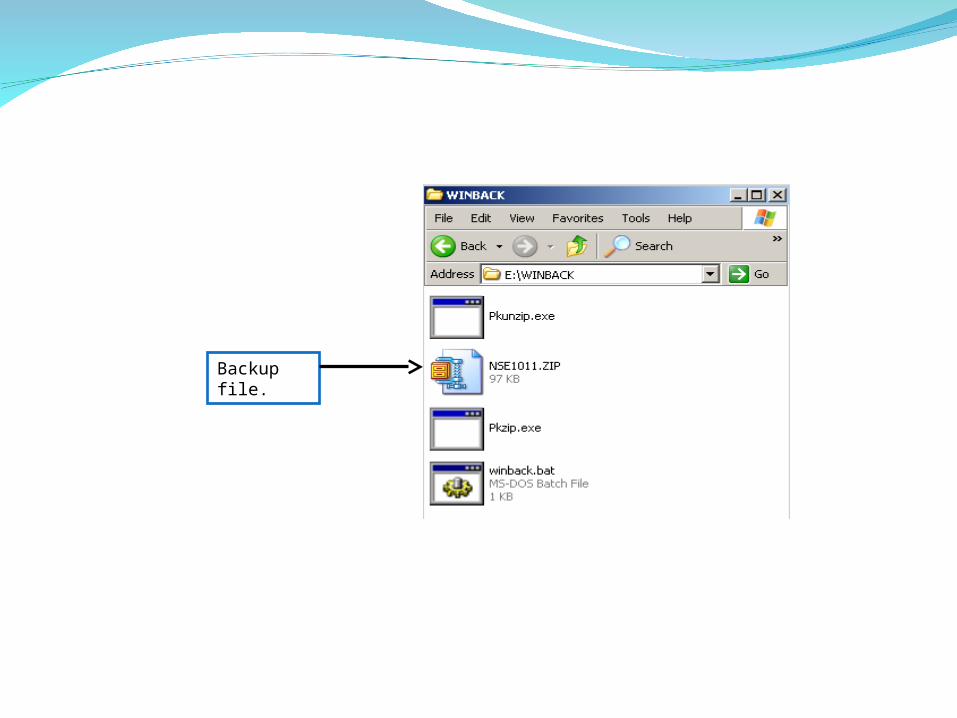
Backup file.

In Case Of Other Software’s Installation Database Name should be as following:
Software Name Database Name
Comsql Comsql
Fxsql Fxsql

Related Documents


![Installation of the Quick Pass Game[1]](https://static.cupdf.com/doc/110x72/577dad151a28ab223f8ec872/installation-of-the-quick-pass-game1.jpg)