1 Bee Keeping Training Kavula and Banikea Village, Bua 12 th – 13 th November, 2013 Capture: Kavula Women’s Club involved in beekeeping, beekeeping expert Darmend Prasad from the Dept. of Agriculture (middle), Naomi Folaukitoga from WCS, Kavula’s only male beekeeper Sikeli Roko (far left) and the beekeeper Pita Colasawiri from Bainikea village (far right). Photo © Sirkka Killmann/WCS Introduction The Wildlife Conservation Society (WCS) supports the conservation of Fiji’s unique biodiversity and culture and the livelihoods of communities. WCS sees the development of environmentally-friendly economic activities as a means of empowering local communities, diversifying their sources of income and reducing pressures to harvest and sell natural resources in an unsustainable manner.

Welcome message from author
This document is posted to help you gain knowledge. Please leave a comment to let me know what you think about it! Share it to your friends and learn new things together.
Transcript

1
Bee Keeping Training
Kavula and Banikea Village, Bua
12th – 13th November, 2013
Capture: Kavula Women’s Club involved in beekeeping, beekeeping expert Darmend Prasad from the Dept. of Agriculture (middle), Naomi Folaukitoga from WCS, Kavula’s only male beekeeper Sikeli Roko (far left) and the beekeeper Pita Colasawiri from Bainikea village (far right). Photo © Sirkka Killmann/WCS
Introduction
The Wildlife Conservation Society (WCS) supports the conservation of Fiji’s unique biodiversity and
culture and the livelihoods of communities. WCS sees the development of environmentally-friendly
economic activities as a means of empowering local communities, diversifying their sources of income
and reducing pressures to harvest and sell natural resources in an unsustainable manner.

2
A beekeeping training was held the 12th and 13th of November in the village of Kavula in the district of
Bua, Vanua Levu, sponsored by WCS in partnership with the Department of Agriculture. The group
consisted of ten ladies and one man from the village of Kavula and one beekeeper from the
neighbouring village Bainikea (participants list and contacts attached as App. II).
The objective was to support a Women’s group aiming to develop their honey production into a small
business. The women involved in beekeeping belong to a Women’s Club who until recently sold their
honey in bulks to the local Beekeeper’s Association in Labasa for a price that doesn’t allow them to
make any profit; additionally, sometimes the ladies have to wait for months to receive their monetary
share.
Nevertheless, the Kavula honey has great potential to be sold for a good profit, because of its
outstanding quality. Unlike many beekeeping areas in Viti Levu, the area around Kavula does not have
any sugar cane fields which are a favorite target for bees in search for sweet nectar. Honey produced
from bees targeting mainly burned sugar cane gives it a dark color and molassy taste containing less
beneficial properties, thus diminishing its quality. Also, Kavula honey can be classified as organic, due to
the fact that the Kavula farmers live in a rather pristine environment and refrain from using any
pesticides and other agrochemicals.
With WCS’s support, the ladies were able to sell 60L of honey in August 2013 to a Resort in Taveuni,
which was a valuable opportunity to make ties with potential business partners interested in their
product outside of Vanua Levu. Additionally, this process revealed the women’s level of “market
awareness” and indicated which challenges still had be to overcome if they were to expand their honey
business. The Ladies lacked basic marketing skills urgently needed to be able to meet the buyer’s
demands and faced problems regarding packaging and transporting the honey.
The lack of marketing skills had been already addressed at a business planning workshop facilitated by
WCS and the National Centre for Small and Micro Enterprises Development (NCSMED) that was held in
Nabouwalu on the 24th to 26th of September 2013, which some of the women involved in beekeeping
had attended.
Therefore, this training focused mainly on beekeeping skills - addressing specific needs the women had
expressed. The marketing aspect was left to a discussion at the end of the workshop.
A fundamental lack of knowledge in beekeeping denies the women to get maximum production out of
or expand the number of hives which in turn is the base for any profitable honey business.
Main challenges the women identified were:
Lack of basic knowledge in beehive maintenance
Lack of basic knowledge about bee’s health and production
Lack of basic knowledge in grafting, wax feeding and Queen breeding
Lack of access to and knowledge of the use of proper equipment
3
The two-day workshop consisted of a morning and afternoon session involving mostly hands-on practice
at the hives (Program attached as App. I). The sessions were lead by the beekeeping expert Mr.
Darmend Prasad from the Department of Agriculture in Labasa who had already conducted a basic
training in the neighboring village Bainikea several years ago and generally had a good connection with
the villagers.
The time in the village was also used – mainly during the kava sessions - to build up a better
understanding of the communities’ needs regarding conservation-friendly livelihoods in order to make
possible future projects in the area more successful.
Objectives
The objectives were to:
Provide the women with basic beekeeping skills to make their hives more productive
Provide the ladies with basic marketing skills and contacts
Give understanding of potential and opportunities and motivating the Kavula beekeepers to
build up their honey production
Empower local women to take the lead in environmentally friendly livelihoods activities
Session Day 1, 12th November 2013
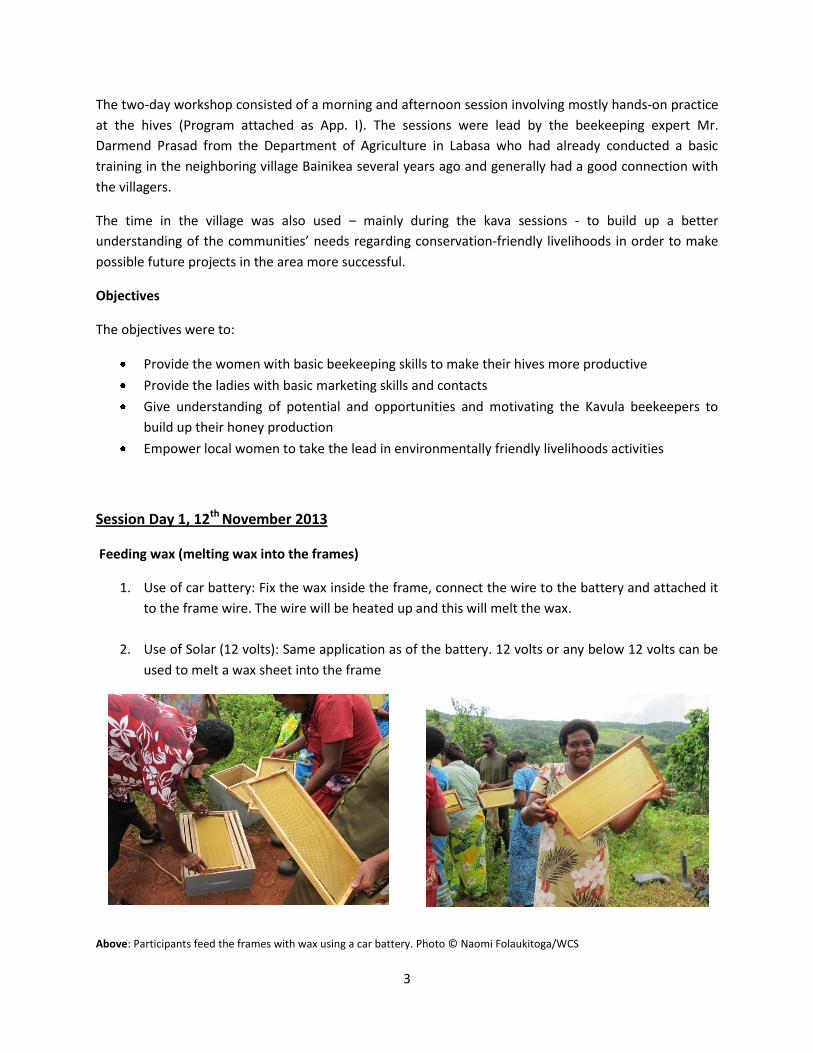
Feeding wax (melting wax into the frames)
1. Use of car battery: Fix the wax inside the frame, connect the wire to the battery and attached it
to the frame wire. The wire will be heated up and this will melt the wax.
2. Use of Solar (12 volts): Same application as of the battery. 12 volts or any below 12 volts can be
used to melt a wax sheet into the frame
Above: Participants feed the frames with wax using a car battery. Photo © Naomi Folaukitoga/WCS
4
If there is limited wax, the wax can be cut in half (one sheet of wax costs about $3). Insert one half in to
one frame and the other one in another frame. The bees will mend up the gap in the wax.
After melting the wax the frames should be placed in the shade immediately to protect it from direct
sunlight which melts it further down and can change its shape.
The Uses of Bees wax
Bees wax is a natural substance created by bees in their hives. Bees build honeycombs from wax to store
honey they create. Beekeepers remove wax honeycombs from bee hives and extract honey. After the
honey is extracted, the beeswax is cleaned and processed for further use, e.g. in cosmetic products, for
candles, soaps and lubricants for tools (see APP. IV). With few beehives, the wax can be collected and
stored over time until enough has accumulated to be further processed. In Fiji, there is a market for
beeswax candles and cosmetics and its marketing can be a valuable monetary contribution to
beekeeping.
Splitting Hives
The key objectives for splitting hives are to:
increase the number of hives;
raise more Queen bees;
increase honey production; and
prevent bees from swarming
In Kavula village, there are six double hives and five new boxes to be installed after this training. From
these six double hives, splitting technique was done in one of the boxes. Five frames of brood were
shifted to the new box and were replaced by five new frames. This was done to create an environment
where bees can create their own Queen Bee. The new box was taken to a different site so it could
capture as many bees as possible.
Grafting technique
Grafting is basically the relocation of larvae - that were intended to be workers - into Queen cell cups.
During this process, larvae is selected from the combs and placed into Queen cell cups. Then, the cups
are placed into a colony that will convert them into Queen cells. This enables the raising of an excellent
quality colony.
In order for grafting or splitting methods to be successful, good selection criteria should be followed.
First, a beekeeper should make observations of their different hives and note the observations.

5
Records should include:
the colony with the highest bee population;
which colony has most honey production; and
which is the least aggressive colony
Once this has been recorded, it is easy to pick out the larvae of the most productive and least aggressive
hive for grafting. This ensures the raising of a strong and healthy bee colony that is easy to work with.
Worker and Queen larvae obtain the same food for the first 48 hours, so until five days from the laying
of the egg. The aging of larvae is an important part of beekeeping, thus daily checking on the health of
the larvae is essential. For an egg to develop into an adult bee, it takes 16 days. With grafting, it only
takes six days for an egg to become an adult bee. In the process of grafting, the Queen cells with larvae
that is younger than 10 days, are taken out and inserted into a new hive which does not have a Queen
bee. If the 10th day is missed, then the Queen will emerge out before it has been transferred.
During grafting, the Queen bees can be marked using different colors for identification. For instance, a
green color can be used for the year 2013, while all Queen Bees from 2014 can be marked purple.
Above left: Cells provided for Queen Bee larvae. Photo ©Naomi Folaukitoga/WCS Above right: Picking of larvae for grafting. Photo ©Naomi Folaukitoga/WCS
6
Session Day 2, 13th November 2013
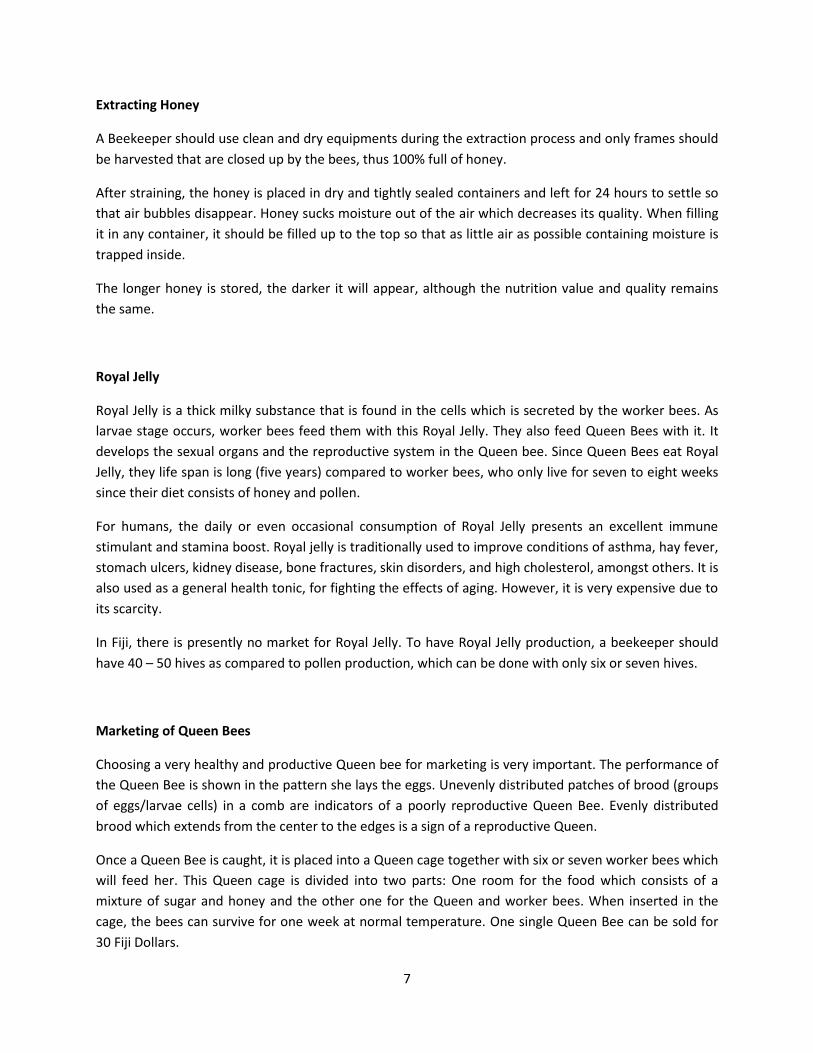
Life Cycle of a Queen Bee
It takes 21 days for an egg to become an adult worker bee but it only takes 16 days for an egg to become
a Queen bee.
In the first five days, the Queen bee will be eating and strengthening her wings. After five days, she goes
out for mating in the air. She will be flying around in circle and at the same time releasing a kind of smell
that will attract male bees. Only the strongest and the fastest male will mate the Queen bee. After
mating, this male dies. The Queen bee can mate with about 17 males until she is satisfied. Farmers can
select male bees from hives with tame and productive qualities that mate with the Queen bee to ensure
offspring with the same qualities.
A Queen bee lays fertile and infertile eggs. She can lay 2000 eggs per day and she has an average of five
years life span.
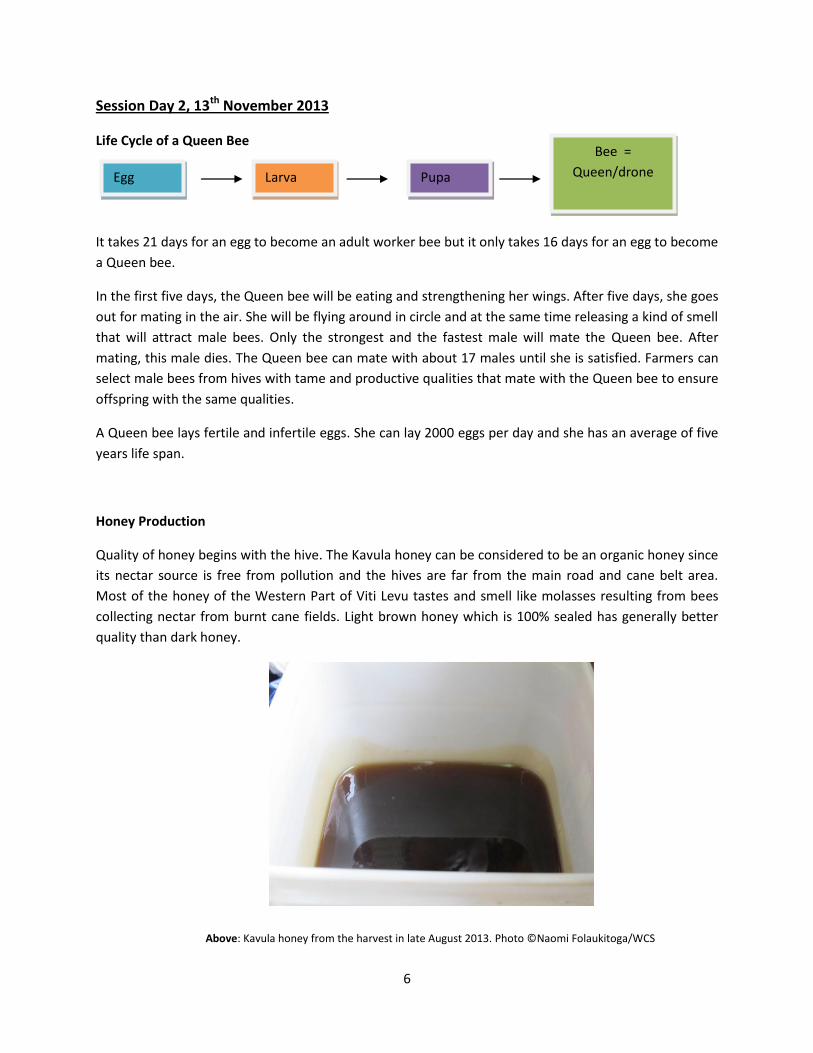
Honey Production
Quality of honey begins with the hive. The Kavula honey can be considered to be an organic honey since
its nectar source is free from pollution and the hives are far from the main road and cane belt area.
Most of the honey of the Western Part of Viti Levu tastes and smell like molasses resulting from bees
collecting nectar from burnt cane fields. Light brown honey which is 100% sealed has generally better
quality than dark honey.
Above: Kavula honey from the harvest in late August 2013. Photo ©Naomi Folaukitoga/WCS
Egg Larva Pupa
Bee =
Queen/drone
7
Extracting Honey
A Beekeeper should use clean and dry equipments during the extraction process and only frames should
be harvested that are closed up by the bees, thus 100% full of honey.
After straining, the honey is placed in dry and tightly sealed containers and left for 24 hours to settle so
that air bubbles disappear. Honey sucks moisture out of the air which decreases its quality. When filling
it in any container, it should be filled up to the top so that as little air as possible containing moisture is
trapped inside.
The longer honey is stored, the darker it will appear, although the nutrition value and quality remains
the same.
Royal Jelly
Royal Jelly is a thick milky substance that is found in the cells which is secreted by the worker bees. As
larvae stage occurs, worker bees feed them with this Royal Jelly. They also feed Queen Bees with it. It
develops the sexual organs and the reproductive system in the Queen bee. Since Queen Bees eat Royal
Jelly, they life span is long (five years) compared to worker bees, who only live for seven to eight weeks
since their diet consists of honey and pollen.
For humans, the daily or even occasional consumption of Royal Jelly presents an excellent immune
stimulant and stamina boost. Royal jelly is traditionally used to improve conditions of asthma, hay fever,
stomach ulcers, kidney disease, bone fractures, skin disorders, and high cholesterol, amongst others. It is
also used as a general health tonic, for fighting the effects of aging. However, it is very expensive due to
its scarcity.
In Fiji, there is presently no market for Royal Jelly. To have Royal Jelly production, a beekeeper should
have 40 – 50 hives as compared to pollen production, which can be done with only six or seven hives.
Marketing of Queen Bees
Choosing a very healthy and productive Queen bee for marketing is very important. The performance of
the Queen Bee is shown in the pattern she lays the eggs. Unevenly distributed patches of brood (groups
of eggs/larvae cells) in a comb are indicators of a poorly reproductive Queen Bee. Evenly distributed
brood which extends from the center to the edges is a sign of a reproductive Queen.
Once a Queen Bee is caught, it is placed into a Queen cage together with six or seven worker bees which
will feed her. This Queen cage is divided into two parts: One room for the food which consists of a
mixture of sugar and honey and the other one for the Queen and worker bees. When inserted in the
cage, the bees can survive for one week at normal temperature. One single Queen Bee can be sold for
30 Fiji Dollars.
8
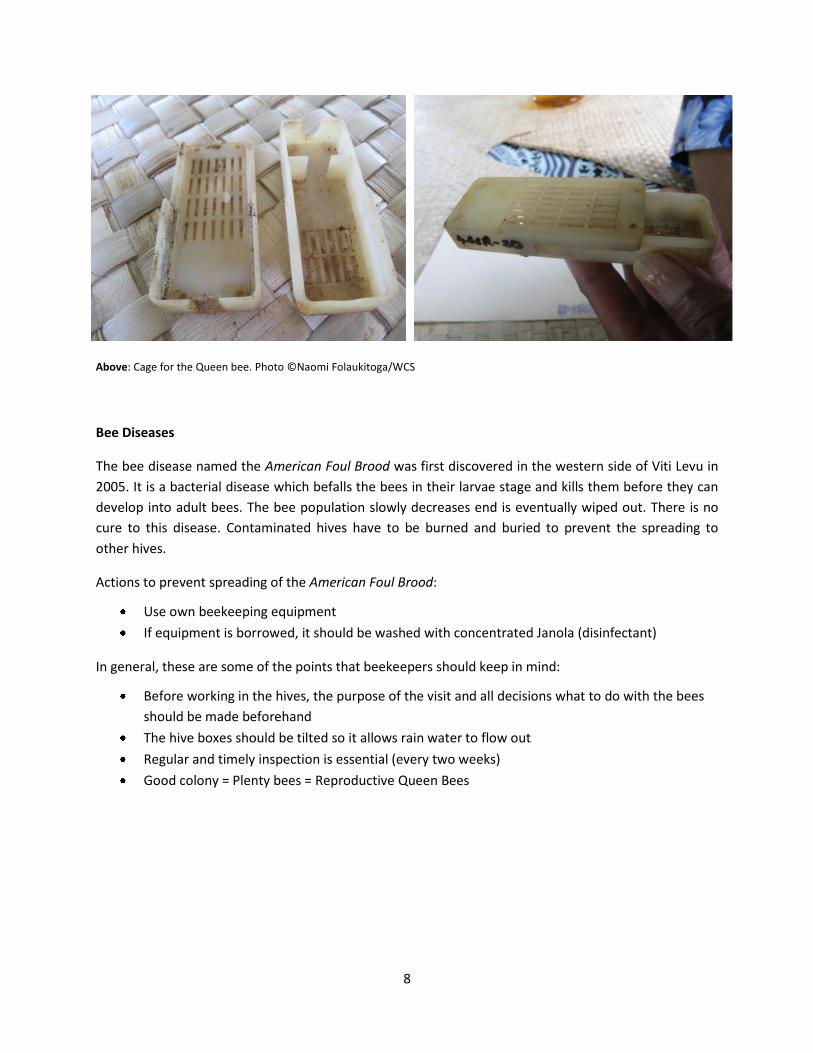
Above: Cage for the Queen bee. Photo ©Naomi Folaukitoga/WCS
Bee Diseases
The bee disease named the American Foul Brood was first discovered in the western side of Viti Levu in
2005. It is a bacterial disease which befalls the bees in their larvae stage and kills them before they can
develop into adult bees. The bee population slowly decreases end is eventually wiped out. There is no
cure to this disease. Contaminated hives have to be burned and buried to prevent the spreading to
other hives.
Actions to prevent spreading of the American Foul Brood:
Use own beekeeping equipment
If equipment is borrowed, it should be washed with concentrated Janola (disinfectant)
In general, these are some of the points that beekeepers should keep in mind:
Before working in the hives, the purpose of the visit and all decisions what to do with the bees
should be made beforehand
The hive boxes should be tilted so it allows rain water to flow out
Regular and timely inspection is essential (every two weeks)
Good colony = Plenty bees = Reproductive Queen Bees
9
Conclusion and output
Overall, the workshop was very well received by all participants. This became clear through observations
of the group dynamic during the training as well as in several individual conversations with the
beekeepers. Also, the evaluation at the end of the workshop (see APP. III) showed it to have been
especially motivating for the women to build up their honey production and invest more time into the
well-being of their bees and to re-invest into equipment. The women were inspired to also explore other
potential sources of income that they did not know about before, such as Queen Bee marketing and the
potential of bees wax marketing. Furthermore, the consumption of Royal Jelly – with health benefits the
community had not been aware of - presents an excellent nutrition substitution for children and elders
and can contribute to the resilience and prevention of sicknesses and malnutrition of the villagers.
Almost all participants stated that most information given and hands-on practice in the field was new to
them and provided them with a technical basis desperately needed to maintain and expand their bee
colonies in order to make a profitable business out of them in the future. This beekeeping training marks
an important step towards the development of environmentally friendly livelihoods which empower
especially women to contribute to a sustainable future for their community.
Recommendations for future steps include further workshops to build up further beekeeping and
marketing/business skills, especially in the area of hygienic packaging and re-investing into beekeeping.
We thank all of Kavula’s and Bainikea’s beekeepers for the eager and attentive participation in the
training. We would like to give special thanks to Darmend Prasad, who dedicated his time and expertise
to the villagers and without whom this workshop would not have been possible.
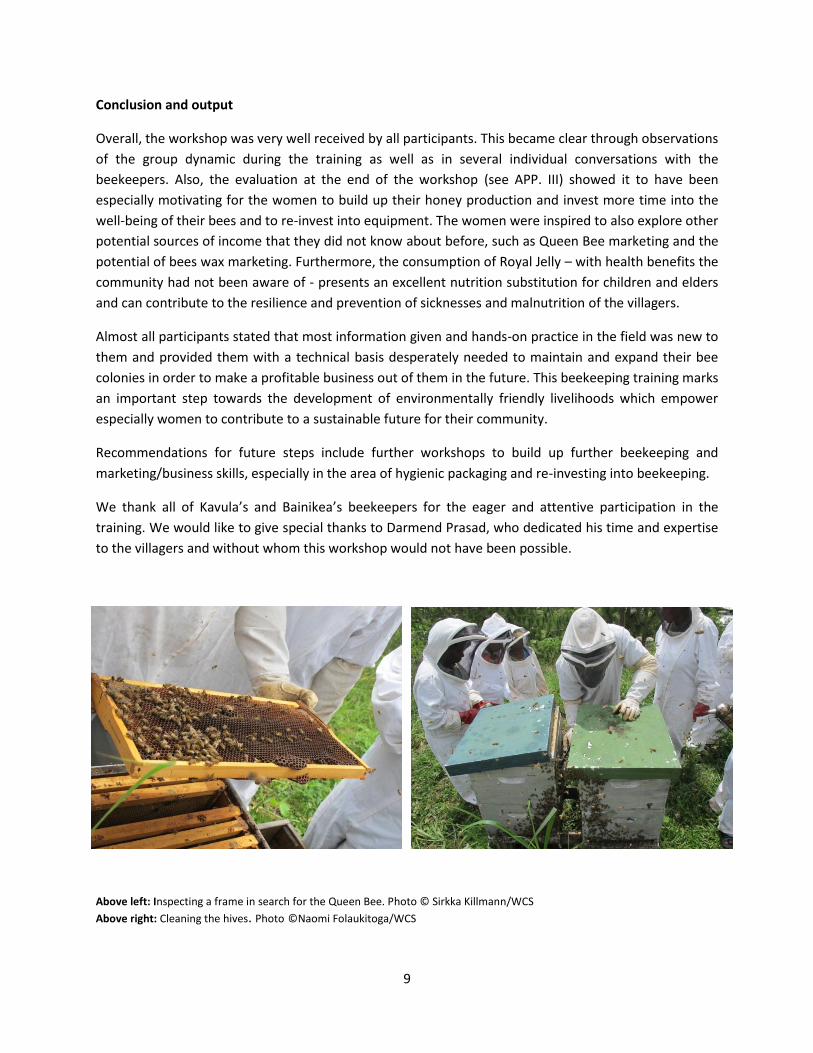
Above left: Inspecting a frame in search for the Queen Bee. Photo © Sirkka Killmann/WCS
Above right: Cleaning the hives. Photo ©Naomi Folaukitoga/WCS

10
Above left: Mr. Darmend Prasad explains wax feeding with a car battery. Photo © Sirkka Killmann/WCS Above right: Participants are practicing wax feeding. Photo ©Naomi Folaukitoga/WCS
Above: Mr. Darmend Prasad showing the participants the grafting technique. Photo ©Naomi Folaukitoga/WCS

11
APPENDIX I
Programme
Two days workshop: Hive construction, rewiring and waxing, Queen breeding and splitting of hives Venue: Kavula village (Korokadi Bua) Training leader: Darmend Prasad, Dpt. of Agriculture Labasa WCS facilitators: Naomi Folaukitoga, Sirkka Killmann
DAY 1: 12/11/2013
9-9:30am – Devotion/Introduction
9:30-10am – Morning tea
10am-1pm – Visit of hives: De-Queening, grafting techniques
1pm-2pm – Lunch
2pm-3:30pm – Reconstruction of frames, wiring and waxing, Queen Bee life cycle
3:30pm -4pm – General Discussion
DAY 2: 13/11/2013
8:30am – Devotion
8:45am-10am - Inspection of grafted cells, practicing grafting
10am-10:30am – Morning tea
10:30am-1pm – Splitting techniques, budded cells distribution
1pm-2pm – Lunch
2pm-3:30pm – Choosing of breed, mating-laying, Queen cageing, marketing of Queens, honey and other
bee products
3:30pm-4pm – General discussion including information about funding for equipment and close-up
End of the day – Vinaka

12
APPENDIX II
Participants List
NAME Village Contact
Laisenia Sunaki Kavula 9415342
Senimili Yameci Kavula 7132038
Virisila Uluibua Kavula 9639919
Rusia Kavula 9607225
Rejieli Loga Kavula -
Jokapeci Savotu Kavula 9714641
Kelera Naisere Kavula 9548586
Katarina Diba Kavula -
Alimaina Diuvu Kavula -
Vika Sokovei Kavula 8677316
Pita Colosawiri Bainkea 9032619
Sikeli Roko Kavula 9807989

13
APPENDIX III
Evaluation
Participants Comments
Sikeli Roko I’m really thankful to WCS for this timely workshop. It has been worth of what we were taught for this last two days, really encouraging. We will be in a position to uplift the standard of our honey productivity to the next level in future.
Rusia Rogoyani I liked the two days training very much. I learned a lot from it compared to before, I didn’t know what bee keeping is.
Vika sokovei I liked the two days training because it was a hands-on practice. Some of the things I didn’t know about raising bees, now I know it and I have seen it with my eyes. I know now how to manage beehives and also know that this is a good source of income.
Katarina Diba I liked the two days training very much. I learned a lot from it compared to before; I didn’t know what bee keeping is.
Kelera Naisere A big thanks to this team for the bee keeping training because I have learned a lot of things which helps us in beekeeping for the women’s group. A big thanks to the team for conducting the training.
Virisila Uluibua I want to thank the wildlife conservation society for your support in this training, I have learned a lot of things compared to before where lots of things were done blindly. After the training, I can say that now I can manage to look after the beehives and I will try to be the best bee keeper.
Pita Colasawiri Today, I liked the training very much because I learned how to melt the wax and the fittings and other things. I did not see any weaknesses in this training.
Laisenia Sunaki I liked the training because it gives us skills on how to manage and maintain our beehives which we did not know before. It boosts our knowledge and really enhances our skills in managing and keeping our beehives going.
Jokapeci Savotu I like the two days training that was held in our village because we learned a lot of new things on how to manage and maintain their beehives.
Alimaina Diuvu I want to show my appreciation for the two days training that was held in Kavula village. I learned how to manage hives and how to produce healthy bees and honey. I liked the training because it was hands-on practice.
14
APPENDIX IV
Uses for Beeswax
Baking Tool: Use a small amount of beeswax instead of shortening or other lubricants on baking molds to make it easier to remove the final product. Beeswax also may tend to give baked products a distinctive, crunchy crust.
Basket Component: For many years, fine basket makers have applied a thin coat of melted beeswax to the surface of their baskets. Brush a small amount of melted beeswax inside and outside the basket, place the basket in the oven (low heat) on a piece of tin foil, and allow the wax to work its way into the seams of the basket. This procedure is especially helpful for making pine needle baskets.
Beeswax Candles: Create smokeless candles that can be molded or sculptured into various shapes and sizes. Beeswax candles are virtually dripless and give off a pleasant honey aroma as they burn.
Concrete Counter Polish: Apply a small amount of wax to a chamois cloth and rub into polished concrete counter tops. This will help give the countertop a subtle natural-looking luster. Repeat as necessary, to achieve the desired look.
Cutting Board Conditioner: Add a small amount of beeswax to mineral oil (about half-teaspoon wax to one cup oil). Heat the substance or put in microwave until the wax melts. Rub into the cutting board with a soft cloth. Repeat the process occasionally, to help preserve the wooden cutting board.
Drawer Lubricant: Keep wooden drawers from sticking by rubbing some beeswax on the places where wood touches wood.
Hoof Healer: A melted mixture of beeswax and honey makes an excellent home remedy for cracked hoofs on horses and other animals. Ensure hoof and crack surfaces are clean, then apply liberal amounts of the natural healing compound.
Leather Waterproofing: Warm a mixture of equal parts beeswax, tallow, and neetsfoot oil until all is melted. Blend well and apply to leather with a rag while the mixture is warm. It works well for work boots and gloves, but may discolor decorative leather. Test a small area first to ensure you like the results.
Metal Preservative: Mix melted beeswax into turpentine. Paint the mixture on exposed metal, such as bronze or copper, to help prevent oxidation. After the mixture dries on the metal, buff it with an old towel until you have a hard, thin coat. Repeat, as necessary.
Rope Saver: Dip string in melted beeswax, then wrap the waxed string tightly around the end of a rope at least ten times to keep the ends from fraying. Tie the string and trim loose ends.
Screw Lubricant: Rub screw threads with beeswax to make it easier for the screw to go into wood. This treatment may also help prevent corrosion.
Window Lubricant: Rub a thin layer of beeswax on window sashes to help wooden windows open and close more smoothly.
Wood Wax: Melt beeswax and mix with equal parts linseed oil and turpentine to make an excellent wax for indoor exposed wood (like exposed ceiling beams) that needs to be preserved, but does not get much wear.
15
Beeswax in Cosmetics
When constructing a honeycomb, bees secrete a nutrient-rich substance called beeswax. Utilized in a variety of skin care products, beeswax improves the condition of skin. Completely nontoxic, beeswax is known for its healing properties. Beeswax is easily incorporated with water in oil or oil in water emulsions. Beeswax provides skin protective action, bestows consistency to emulsions and oil-gels and reinforces the action of detergents. Beeswax also sustains sunscreen action with its water repellent properties, combines well with multiple ingredients, contains elasticity and provides greater permanence on skin or lip surfaces. Because of the healing, softening and antiseptic properties associated with beeswax, numerous skin care lines incorporate it.
How to make Beeswax
Gather your beeswax. If you are collecting from beehives that are bee-free, soak the honeycombs in warm water to release the honey residue.
Boil the honeycombs to melt the wax and separate it out from the honey and other parts of the hive. Gently stir with a wooden spoon to release some of the wax. Some of the ingredients will settle at the bottom of the pot, while the wax collects as a layer above the water. Let cool to remove the wax. Gather your wax pieces and set aside.
Basic Recipes for the skin Lips, elbows, heels and hands all benefit from beeswax products. Beeswax blends well with most oils, including coconut oil, sweet almond oil and jojoba oil. Scrap beeswax is great for making lip balms.
Melt together 1 tbsp. beeswax, 2 tbsp. coconut oil and two capsules of vitamin E oil. Pour the melted mixture into a clean, recycled lip balm container or purchase one through a natural foods store or container supply store. Allow mixture to harden; the coconut oil keeps this recipe soft enough to apply to lips.
A basic beeswax hand lotion recipe is one part beeswax to four parts coconut oil (e.g., 1 oz. beeswax and 4 oz. coconut oil). Blend the oil into the beeswax with a wooden spoon or paddle that is used only for that recipe. This keeps the recipes pure and the beeswax out of food. Add scent by including a few drops of a favorite essential oil. When making gifts or creating larger amounts of product, keep in mind that 1 lb. equals 16 oz.
Basic Unscented Soap Recipes
Glycerin Soap and Beeswax Base: Using a double boiler, melt ½ cup of clear glycerin soap base over low heat. Once it is melted, add a tablespoon of grated beeswax. Stir the glycerin and beeswax until it is completely melted. This unscented soap base can be poured into molds and used, or scents and coloring can be added. Once you have added your scents or coloring, pour into molds and allow to harden. Note: For Fiji, any native flowers and herbs can be used to scent the soaps.
Related Documents