• Windows XP – Starts when computer is turned on – Elements of the desktop • Icon • Pointer • Desktop • Date/Time control • Taskbar • Start button • Notification area 1

Welcome message from author
This document is posted to help you gain knowledge. Please leave a comment to let me know what you think about it! Share it to your friends and learn new things together.
Transcript

• Windows XP– Starts when computer is turned on– Elements of the desktop
• Icon• Pointer• Desktop• Date/Time control• Taskbar• Start button• Notification area
1

Figure 1-1 shows the Windows XP desktop
2

• Windows XP desktop uses a graphical user interface• Graphical user interface (GUI)
– Displays icons to represent items stored on the computer• Icons: Pictures of familiar objects
• Desktop– Area that appears on the screen when Windows XP starts– A workspace for projects and tools– Uses default settings when the computer is first started
• Default settings: settings preset by the operating system– Appearance can be changed by the user
• A pointing device– Helps the user interact with objects on the computer screen– Comes in many shapes and sizes
• Mouse– Most common pointing device
3

• ScreenTips– Appear when the mouse pointer is positioned over certain objects– Display the purpose or function of the object– Figure 1-3 shows a ScreenTip
• Clicking– Pressing a mouse button and immediately releasing it
• Menu– A list of options which can be used to perform tasks– Submenus
• Start menu– Appears when the Start button is clicked– Provides access to programs, documents, etc.
4

• Clicking
Figure 1-3 shows the Start menu
5

• Selecting• Selecting a menu command
– Two possible ways of selecting objects in Windows XP• Pointing to an object• Pointing to and then clicking an object
– A selected object is highlighted
6

• Viewing the contents of the Recycle Bin
• Click the desktop, and then point to the Recycle Bin icon. After a few moments, a ScreenTip appears that describes the Recycle Bin
• Click the left mouse button twice quickly to double-click the Recycle Bin icon. The Recycle Bin opens
7

• Right-clicking– Clicking an object with the right button of the mouse– Selects an object and opens its shortcut menu
• Shortcut menu: a list of options directly related to the object
8

• Exploring the Start menu
9

• Starting and Closing a program
• Starting a program– A program must be started before it can be used– To start a program
• Click the Start button• Locate and click the program’s name in the submenus
• An open or running program– A program which has been started
10

• Program button– Appears on the taskbar for each open program– Click to switch between open programs
• Close button– Located in the upper-right corner of the program window– Click to close the program
11
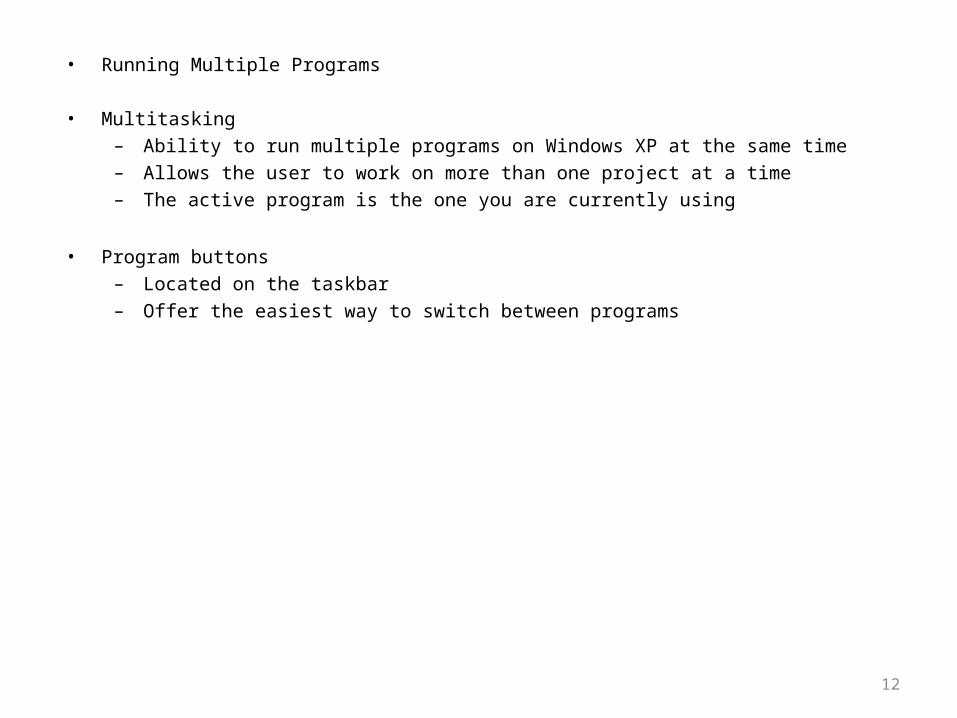
• Running Multiple Programs
• Multitasking– Ability to run multiple programs on Windows XP at the same time– Allows the user to work on more than one project at a time– The active program is the one you are currently using
• Program buttons– Located on the taskbar– Offer the easiest way to switch between programs
12

• Closing Inactive Programs from the Taskbar
• Options for closing a program– Use the Close button on the title bar of the program window– Use the shortcut menu associated with the program button on the taskbar
13

• Anatomy of a Window
• A window– A rectangular area of the screen that may contain
• A program• Text• Graphics• Data
• Controls– Located in a window– Graphical or textual objects used for
• Manipulating the window• Using the program
– Examples• Menu bar• Sizing buttons• Status bar• Title bar• Toolbar• Workspace
14

• Anatomy of Window
15

• Manipulating a Window
16
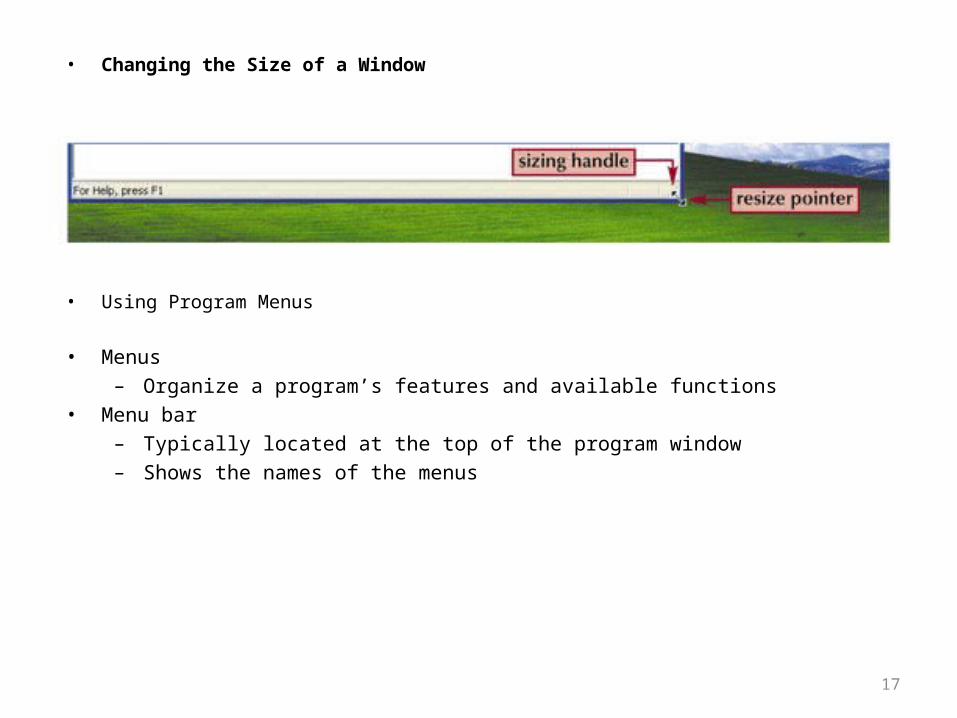
• Changing the Size of a Window
• Using Program Menus
• Menus– Organize a program’s features and available functions
• Menu bar– Typically located at the top of the program window– Shows the names of the menus
17
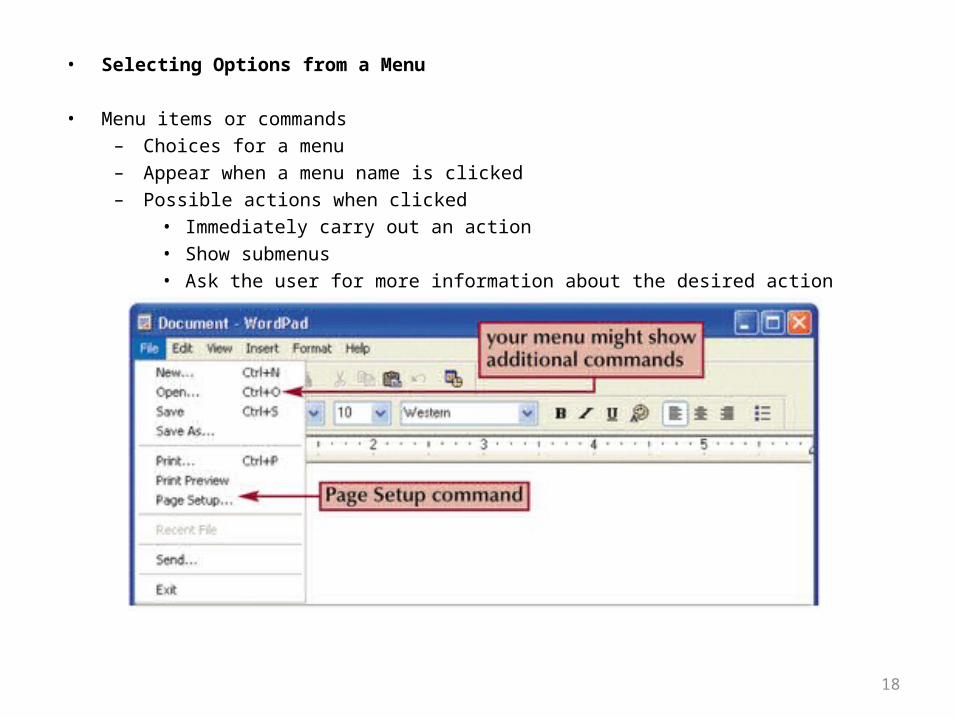
• Selecting Options from a Menu
• Menu items or commands– Choices for a menu– Appear when a menu name is clicked– Possible actions when clicked
• Immediately carry out an action• Show submenus• Ask the user for more information about the desired action
18

• Using List Boxes and Scroll Bars
• List box– Displays a list of available choices– Usually includes
• Array buttons• A scroll bar• A scroll box
19

• Using Dialog Box Controls
• Dialog box– Opens when a menu command or item followed by an ellipsis is selected– Allows the user to provide more information about how a program should carry out a task– Groups different kinds of information in panes
• Panes: bordered rectangular areas
20

• Exploring Your Computer
21

• Changing the View
Change the view by selecting an option from the View menu on the menu bar
22

Control Panel Overview
• Control Panel– Centralized location for management utilities
• Changes in XP:– New applets– New view
• Applet– Small application designed for a limited range of function or capability
23
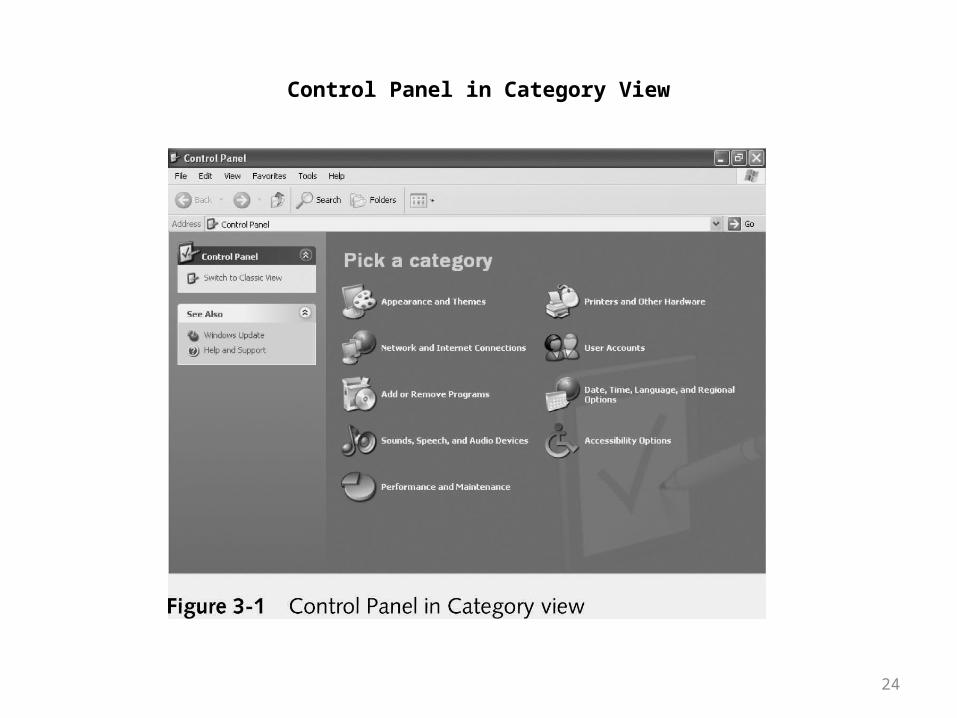
Control Panel in Category View
24

25

Accessibility Options
• Special interface features for the visual-, audio-, or movement-impaired user• Keyboard tab• Sound tab• Display tab• Mouse tab• General tab
26

Add Hardware
• System polls the entire computer for new devices• Attempts to identify them• Installs drivers automatically or prompts for alternative source path• Add Hardware Wizard
– Used for manual configuration• Device manager
– Used to manage, configure, and remove installed hardware devices
27

• Using Help
• Windows XP Help– Provides on-screen information about programs– Available by
• Clicking the Start button and selecting Help and Support from the Start menu• Windows Help and Support Center window
– Provides access to• Help files stored on the computer• Help information stored on Microsoft’s Web site
28

• Using help (continued)
29

• Shutting Down Windows XP
• Turn Off Computer option– Located on the Start menu– Turns off the computer
• Log Off option– Located on the Start menu– Logs off Windows XP but leaves the computer on
30
31

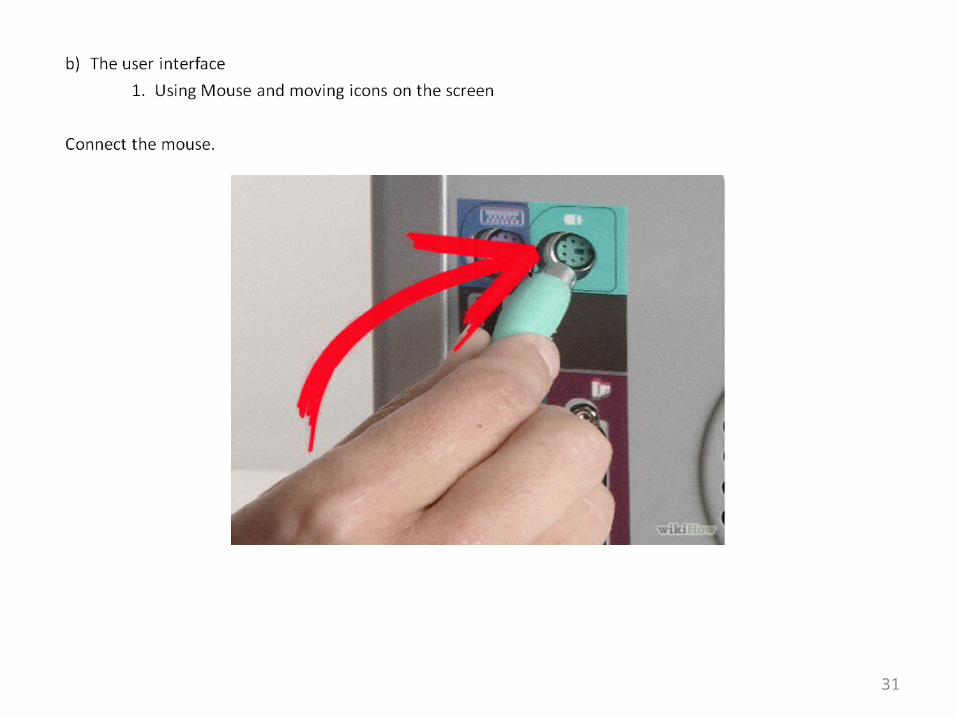
Using Mouse and moving icons on the screen (Continued)
2. Hold the mouse correctly. For Windows or PC users, place your pointer finger on the left button, and your ring finger on the right button. If your mouse has a button or 'wheel' in the middle, your middle finger can operate this. For Mac users, the mouse usually has only one button. Use any of your three center fingers to press the button.
3. To click, press the button (usually the left one, when there are two) and promptly release it. It should be a firm, quick tap, and the mouse should be still when you do it.
32

Using Mouse and moving icons on the screen (Continued)
4. To double click (for opening applications, documents or folders), you must click (the left button) twice in rapid succession. If you have physical trouble with the required double click speed, your computer can be adjusted to suit your needs.
33

Using Mouse and moving icons on the screen (Continued)
5. Moving Icons on the screenTo drag files, press and hold the (left) button, then move the mouse without letting the button go until the file is where you want it to be.
34

Using Mouse and moving icons on the screen (Continued)
2. Hold the mouse correctly. For Windows or PC users, place your pointer finger on the left button, and your ring finger on the right button. If your mouse has a button or 'wheel' in the middle, your middle finger can operate this. For Mac users, the mouse usually has only one button. Use any of your three center fingers to press the button.
35
Related Documents