Automic How to Install & Configure Apache on Windows

Welcome message from author
This document is posted to help you gain knowledge. Please leave a comment to let me know what you think about it! Share it to your friends and learn new things together.
Transcript

AutomicHow to Install & Configure
Apache on Windows
Apache Configuration on Windows for Application MangerInstallation Guide and NotesCopyright © 2007 Automic Software, Inc.All Rights Reserved. Printed in USARestricted Rights LegendUse, duplication, or disclosure of the Programs is subject to restrictions stated in your contractwith Automic Software. Use, duplication, or disclosure of the Programs by Government is subject to restrictions for commercial computer software and the Programs shall be deemed tobe licensed with Restricted Rights under Federal Law.The information contained in this document is subject to change without notice. Automic Software does not warrant that this documentation is error-free.If you find errors in this document, please contact Automic Software Documentation.Automic is a registered trademark of Automic Software.All other product names and services identified throughout this book are trademarks or registered trademarks of their respective companies.
Automic Software, Inc.14475 NE 24th StreetBellevue, WA 98007USATel: +1.(425).644.2121Fax: +1.(425).644.2266Email: office.us(at)Automic.com
Automic Software GmbHc/o SAP PartnerPort WalldorfAltrottstrasse 3169190 Walldorf/BadenGermanyTel: +49.(0)6227.381.180Fax: +49.(0)6227.381.200Email: office.wdf(at)Automic.com
Prepared by: Souny BaratiTitle : Sr Consultant at CA-Automic Software Inc.Date: September 13, 2017
Souny Barati 2
Table of ContentsApache for Application Manager v9.x..........................................................................................4
Assumptions.............................................................................................................................4Document Notes.......................................................................................................................4Procedures to Install/Configure Apache2.4.x...........................................................................4
Downloading Apache binary (pre-compiled) files for Windows........................................4Steps to Install and Configure Apache 2.4 VC15.........................................................................5
Installing Apache as a Service..................................................................................................6Removing an Apache service...................................................................................................7
Access Application Manger via Apache2.4.x...............................................................................8Installing Apache on its own Server.............................................................................................9Setting up SSL/HTTPS server on Windows...............................................................................11
Creating a self-signed SSL Certificate using OpenSSL.........................................................11Configuring Apache to run SSL/HTTPS server.....................................................................14
Souny Barati 3
Apache for Application Manager v9.xThis document will show you how to install and configure Apache on new version of Windows for Application Manger V9.x.
Assumptions
This document assumes that:
You have Windows server 64 bit, and you have installed lasted Java JRE. Automic Application Manager V9.x have been properly installed and configured on
Windows server. Assumption is that you are going to install Apache on the same server as Application
Manager Master server. The installation will be done by Automic Windows OS user with local administration, and
domain user privileges. For more detail information about Apache please refer to official Apache website project.
https://httpd.apache.org/docs/current/platform/windows.html#down
Document NotesThe examples in the document illustrate installation and configuration of Apache 2.4 on Windows 2008 Server using pre-compiled 64-bit binaries from Apache Lounge. These steps should apply to other Apache distributions, Windows versions, and pre-compiled binary sources.
Procedures to Install/Configure Apache2.4.x The Apache HTTP Server Project itself does not provide binary releases of software, only source code. Individual independent developers may provide binary packages as a convenience, but it is not a release deliverable. If you cannot compile the Apache HTTP Server yourself, you can obtain a binary package from numerous binary distributions availableon the Internet.
Popular options for deploying Apache httpd, and, optionally, PHP and MySQL, on Microsoft Windows, include:
Downloading Apache binary (pre-compiled) files for Windows
ApacheHaus
Apache Lounge
BitNami WAMP Stack
WampServer
XAMPP
Souny Barati 4
Steps to Install and Configure Apache 2.4 VC15
SECTION 1:
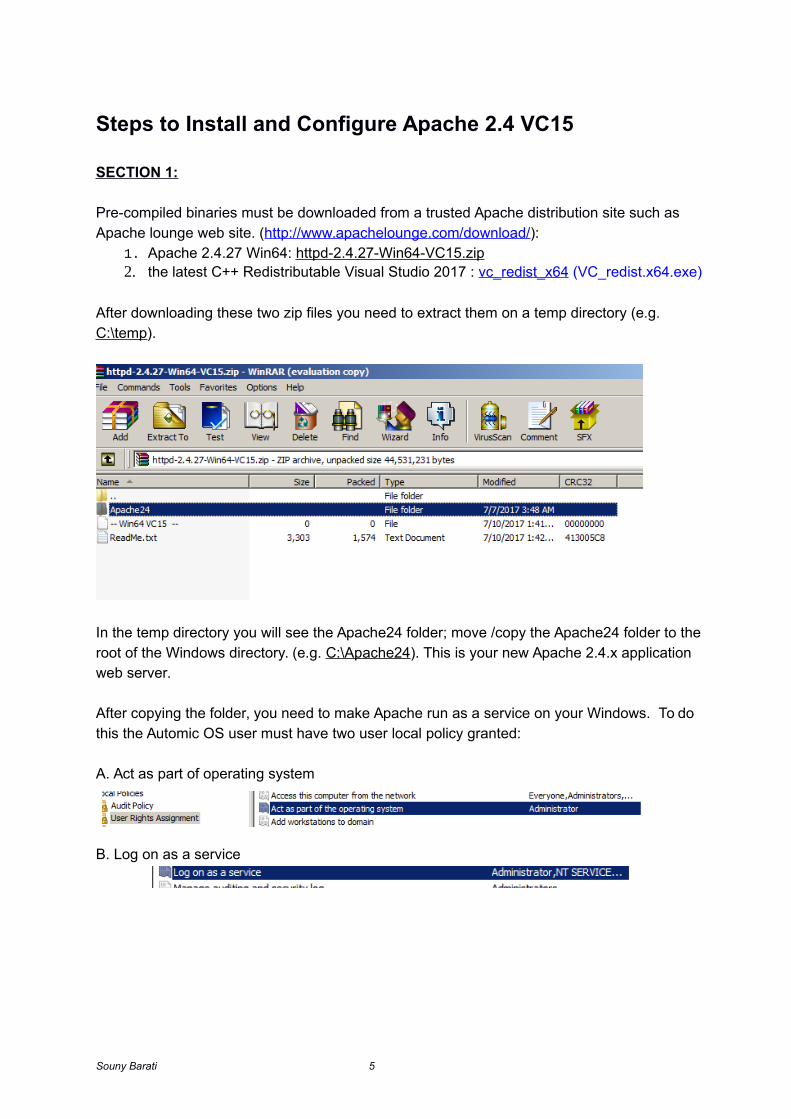
Pre-compiled binaries must be downloaded from a trusted Apache distribution site such as Apache lounge web site. (http://www.apachelounge.com/download/):
1. Apache 2.4.27 Win64: httpd-2.4.27-Win64-VC15.zip 2. the latest C++ Redistributable Visual Studio 2017 : vc_redist_x64 (VC_redist.x64.exe)
After downloading these two zip files you need to extract them on a temp directory (e.g. C:\temp).
In the temp directory you will see the Apache24 folder; move /copy the Apache24 folder to the root of the Windows directory. (e.g. C:\Apache24). This is your new Apache 2.4.x application web server.
After copying the folder, you need to make Apache run as a service on your Windows. To do this the Automic OS user must have two user local policy granted:
A. Act as part of operating system
B. Log on as a service
Souny Barati 5
Installing Apache as a Service
Apache comes with a utility called the Apache Service Monitor. With it you can see and manage the state of all installed Apache services on any machine on your network. To be ableto manage an Apache service with the monitor, you have to first install the service (either automatically via the installation or manually).
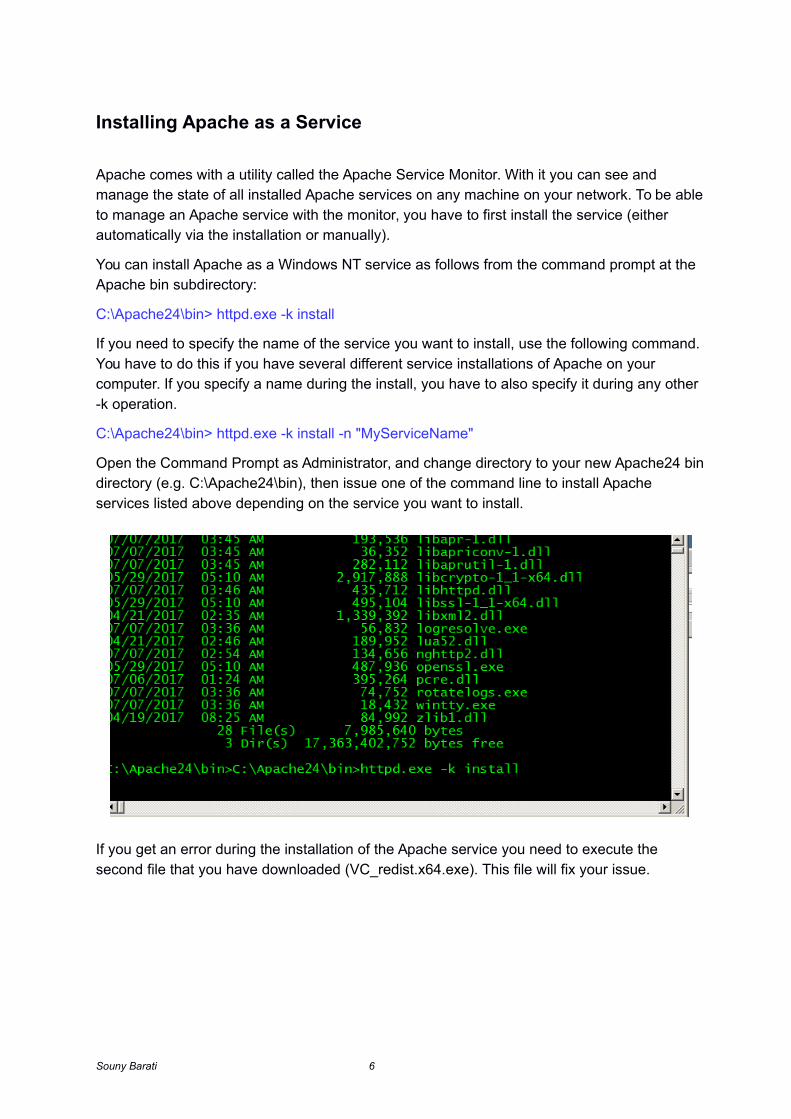
You can install Apache as a Windows NT service as follows from the command prompt at the Apache bin subdirectory:
C:\Apache24\bin> httpd.exe -k install
If you need to specify the name of the service you want to install, use the following command. You have to do this if you have several different service installations of Apache on your computer. If you specify a name during the install, you have to also specify it during any other -k operation.
C:\Apache24\bin> httpd.exe -k install -n "MyServiceName"
Open the Command Prompt as Administrator, and change directory to your new Apache24 bindirectory (e.g. C:\Apache24\bin), then issue one of the command line to install Apache services listed above depending on the service you want to install.
If you get an error during the installation of the Apache service you need to execute the second file that you have downloaded (VC_redist.x64.exe). This file will fix your issue.
Souny Barati 6

Removing an Apache service
If you made a mistake and need to remove the Apache service, you need to issue this command on the command line.
C:\Apache24\bin> httpd.exe -k uninstall
The specific Apache service to be uninstalled can be specified by using:
C:\Apache24\bin> httpd.exe -k uninstall -n "MyServiceName"
Now you can start your Apache service either from command line or Windows services:
C:\Apache24\bin> httpd.exe -k start -n "MyServiceName"
This concludes installation of Apache2.4.x on Windows. The next step is to configure the Apache2.4.x to access Application Manger v9.x.
Souny Barati 7
Access Application Manger via Apache2.4.x
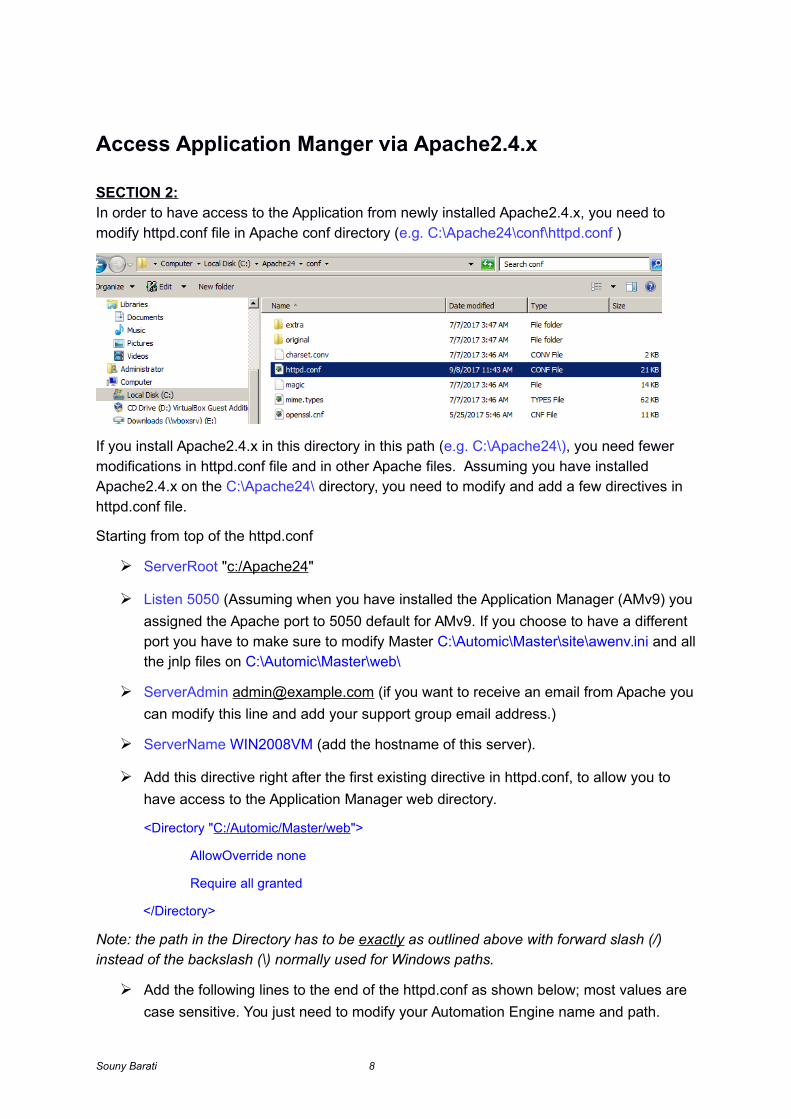
SECTION 2:In order to have access to the Application from newly installed Apache2.4.x, you need to modify httpd.conf file in Apache conf directory (e.g. C:\Apache24\conf\httpd.conf )
If you install Apache2.4.x in this directory in this path (e.g. C:\Apache24\), you need fewer modifications in httpd.conf file and in other Apache files. Assuming you have installed Apache2.4.x on the C:\Apache24\ directory, you need to modify and add a few directives in httpd.conf file.
Starting from top of the httpd.conf
ServerRoot "c:/Apache24"
Listen 5050 (Assuming when you have installed the Application Manager (AMv9) you
assigned the Apache port to 5050 default for AMv9. If you choose to have a different port you have to make sure to modify Master C:\Automic\Master\site\awenv.ini and all the jnlp files on C:\Automic\Master\web\
ServerAdmin [email protected] (if you want to receive an email from Apache you
can modify this line and add your support group email address.)
ServerName WIN2008VM (add the hostname of this server).
Add this directive right after the first existing directive in httpd.conf, to allow you to
have access to the Application Manager web directory.
<Directory "C:/Automic/Master/web">
AllowOverride none
Require all granted
</Directory>
Note: the path in the Directory has to be exactly as outlined above with forward slash (/) instead of the backslash (\) normally used for Windows paths.
Add the following lines to the end of the httpd.conf as shown below; most values are
case sensitive. You just need to modify your Automation Engine name and path.
Souny Barati 8
### Automic Alias Directive.
alias /AUTOPROD/ "C:/Automic/Master/web/"
AddType application/x-java-jnlp-file JNLP
AddType application/x-java-jnlp-file JNLP jnlp
AddType application/x-java-jnlp-file JNLP jnlp
AddType text/html .cfm
AddDefaultCharset utf-8
After you have modified the file, save it and restart the Apache24 service from Windows services. Now you can start AMv9 from your web browser application “Firefox “ like this:
http://WIN2008VM:5050/AUTOPROD/Intro.html
Now you have configured the Apache2.4.x to run Application Manger v9.
If you have decided to install Apache2.4.x on its own dedicated server, to be used for all Application Manager environments, you must follow these steps as mentioned below.
Installing Apache on its own ServerInstalling Apache2.4.x on a separate server is exactly the same as SECTION 1, but accessingthe Application Manager Master via Apache2.4.x will need different configurations. After installing the Apache 2.4.x do following steps:
Make a directory called Automic on your newly installed Apache2.4.x home on the
new server. (e.g. C:\Apache24\Automic\PROD\)
Copy the web directory (C:\Automic\Master\web\) from AMv9 Master server to (e.g.
C:\Apache24\Automic\PROD\)
Note: you can do above step for each instance of AMv9 (e.g.
C:\Apache24\Automic\TEST\)
After you copied the Web directory in the new Apache2.4.x server, you need to modify
all the jnlp files to point to new Apache2.4.x hostname . For instances edit the client.jnlp file and modify the line that has AM Master hostname to new Apache2.4.x hostname: you need to do this for all the jnlp files (AppMaster.jnlp, Client.jnlp, ClientExtensions.jnlp, Java_US_Export_Policy.jnlp, JavaHelp.jnlp, JavaMail.jnlp)
<jnlp codebase="http://newapachehost:5050/AUTOPROD/classes/" href="../Client.jnlp">
Next step is to modify your new Apache httpd.conf file and modify the apache host
name to your new Apache hostname. You must follow the section 2 in above.
ServerName newapachehost (add the hostname of this server) .
Add this directive right after first existing directive in httpd.conf
Souny Barati 9
### Adding AMv9 PROD
<Directory "C:/Apache24/Automic/PROD/web/>
AllowOverride none
Require all granted
</Directory>
### Adding AMv9 TEST
<Directory "C:/Apache24/Automic/TEST/web/>
AllowOverride none
Require all granted
</Directory>
Note:the path in the Directory has to be exactly the way it shows on the above with forward slash (/) instead of the backslash (\) normally used for Windows paths.
Add the following lines to the end of the httpd.conf as shown below; most values are
case sensitive. You just need to modify your Automation Engine name and path.
### Automic Alias Directive.
alias /AUTOPROD/ "C:/Apache24/Automic/PROD/web/"
alias /AUTOTEST/ "C:/Apache24/Automic/TEST/web/"
AddType application/x-java-jnlp-file JNLP
AddType application/x-java-jnlp-file JNLP jnlp
AddType application/x-java-jnlp-file JNLP jnlp
AddType text/html .cfm
AddDefaultCharset utf-8
After you have modified the file, save it and restart the Apache24 service from Windows services. Now you can start AMv9 from your web browser application Firefox like this:
http://newapachehost:5050/AUTOPROD/Intro.html
http://newapachehost:5050/AUTOTEST/Intro.html
For each additional instance of Application Manager (e.g. DEV or TRAIN), add the appropriateDirectory and alias.
If you want to have secure Apache SSL connection follow Section 3 below.
Souny Barati 10
Setting up SSL/HTTPS server on Windows
Section 3
Assuming that you already have Apache2.4 OpenSSL installed and configured to work on Windows (as mentioned in the section 1), there are two ways to get CA certificate:
Commercial one that you buy
Self-Signed Certificates that you create with OpenSSL
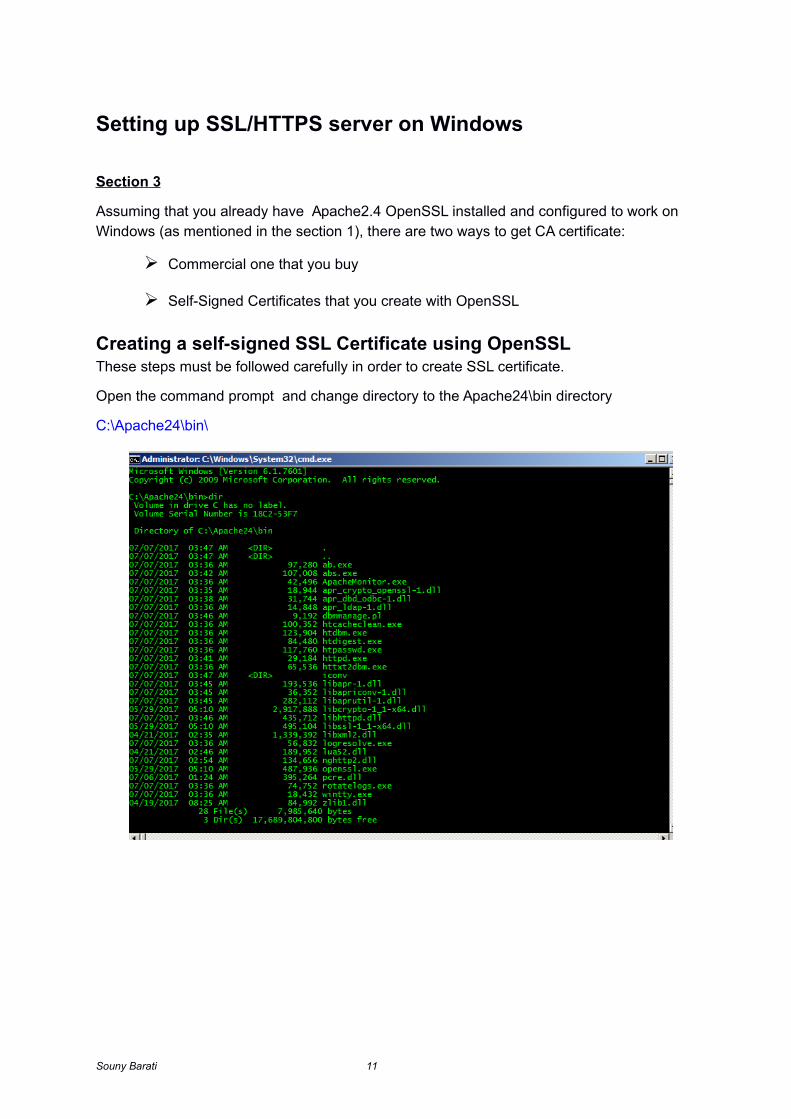
Creating a self-signed SSL Certificate using OpenSSLThese steps must be followed carefully in order to create SSL certificate.
Open the command prompt and change directory to the Apache24\bin directory
C:\Apache24\bin\
Souny Barati 11
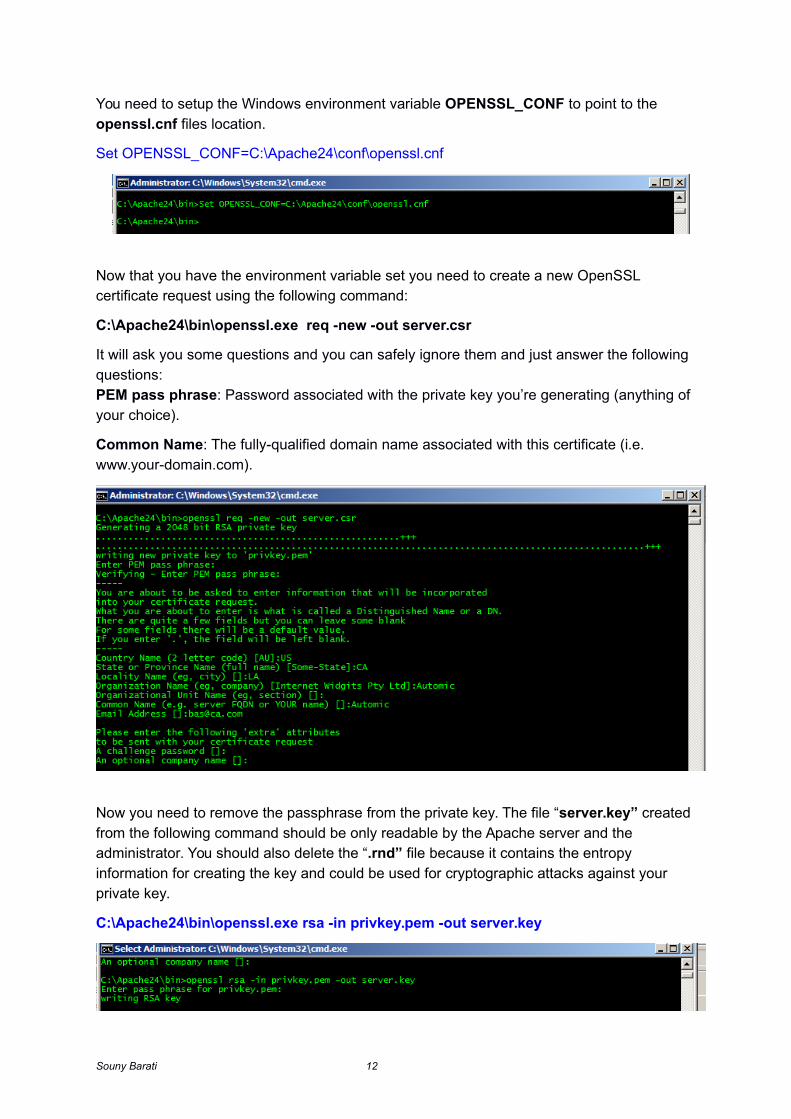
You need to setup the Windows environment variable OPENSSL_CONF to point to the openssl.cnf files location.
Set OPENSSL_CONF=C:\Apache24\conf\openssl.cnf
Now that you have the environment variable set you need to create a new OpenSSL certificate request using the following command:
C:\Apache24\bin\openssl.exe req -new -out server.csr
It will ask you some questions and you can safely ignore them and just answer the following questions: PEM pass phrase: Password associated with the private key you’re generating (anything of your choice).
Common Name: The fully-qualified domain name associated with this certificate (i.e. www.your-domain.com).
Now you need to remove the passphrase from the private key. The file “server.key” created from the following command should be only readable by the Apache server and the administrator. You should also delete the “.rnd” file because it contains the entropy information for creating the key and could be used for cryptographic attacks against your private key.
C:\Apache24\bin\openssl.exe rsa -in privkey.pem -out server.key
Souny Barati 12
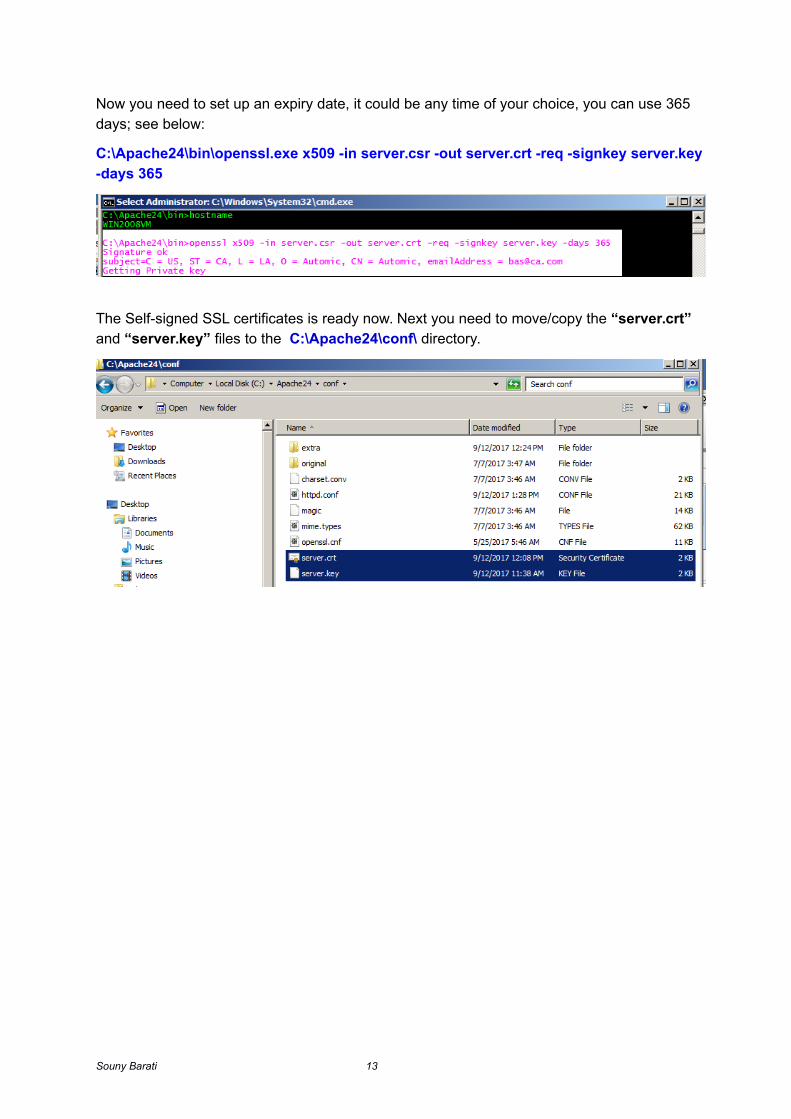
Now you need to set up an expiry date, it could be any time of your choice, you can use 365 days; see below:
C:\Apache24\bin\openssl.exe x509 -in server.csr -out server.crt -req -signkey server.key-days 365
The Self-signed SSL certificates is ready now. Next you need to move/copy the “server.crt” and “server.key” files to the C:\Apache24\conf\ directory.
Souny Barati 13
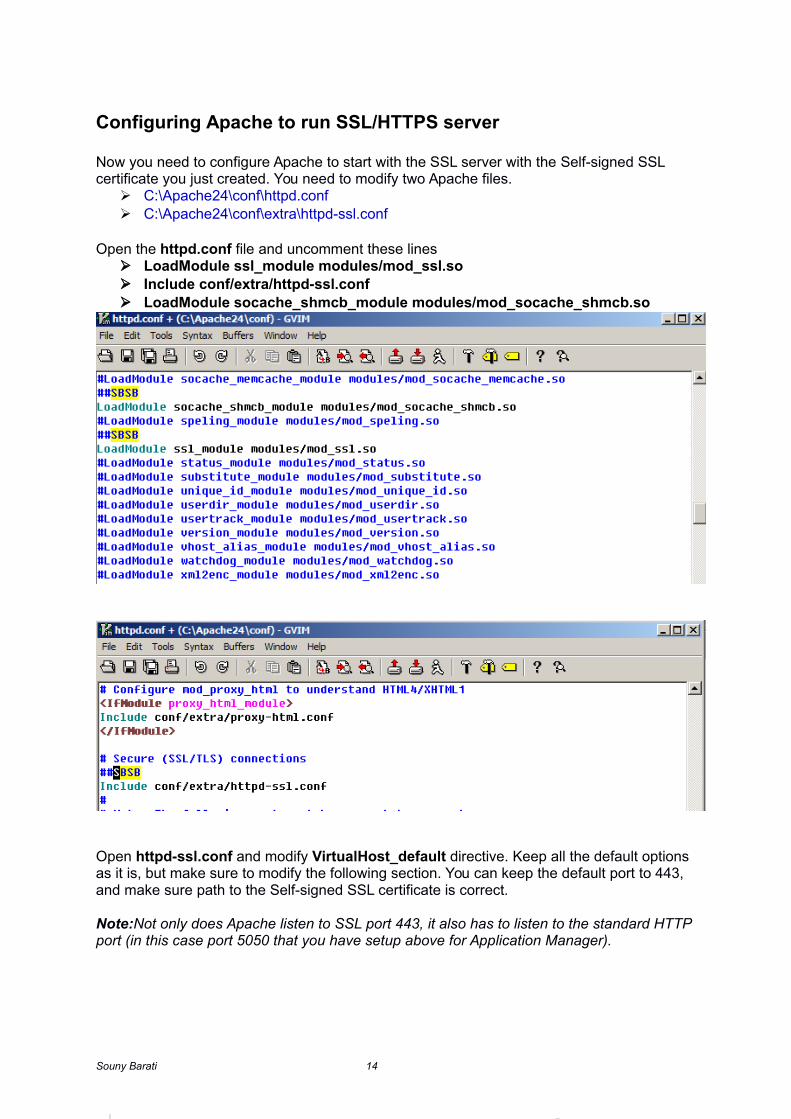
Configuring Apache to run SSL/HTTPS server
Now you need to configure Apache to start with the SSL server with the Self-signed SSL certificate you just created. You need to modify two Apache files.
C:\Apache24\conf\httpd.conf C:\Apache24\conf\extra\httpd-ssl.conf
Open the httpd.conf file and uncomment these lines LoadModule ssl_module modules/mod_ssl.so Include conf/extra/httpd-ssl.conf LoadModule socache_shmcb_module modules/mod_socache_shmcb.so
Open httpd-ssl.conf and modify VirtualHost_default directive. Keep all the default options as it is, but make sure to modify the following section. You can keep the default port to 443, and make sure path to the Self-signed SSL certificate is correct.
Note:Not only does Apache listen to SSL port 443, it also has to listen to the standard HTTP port (in this case port 5050 that you have setup above for Application Manager).
Souny Barati 14
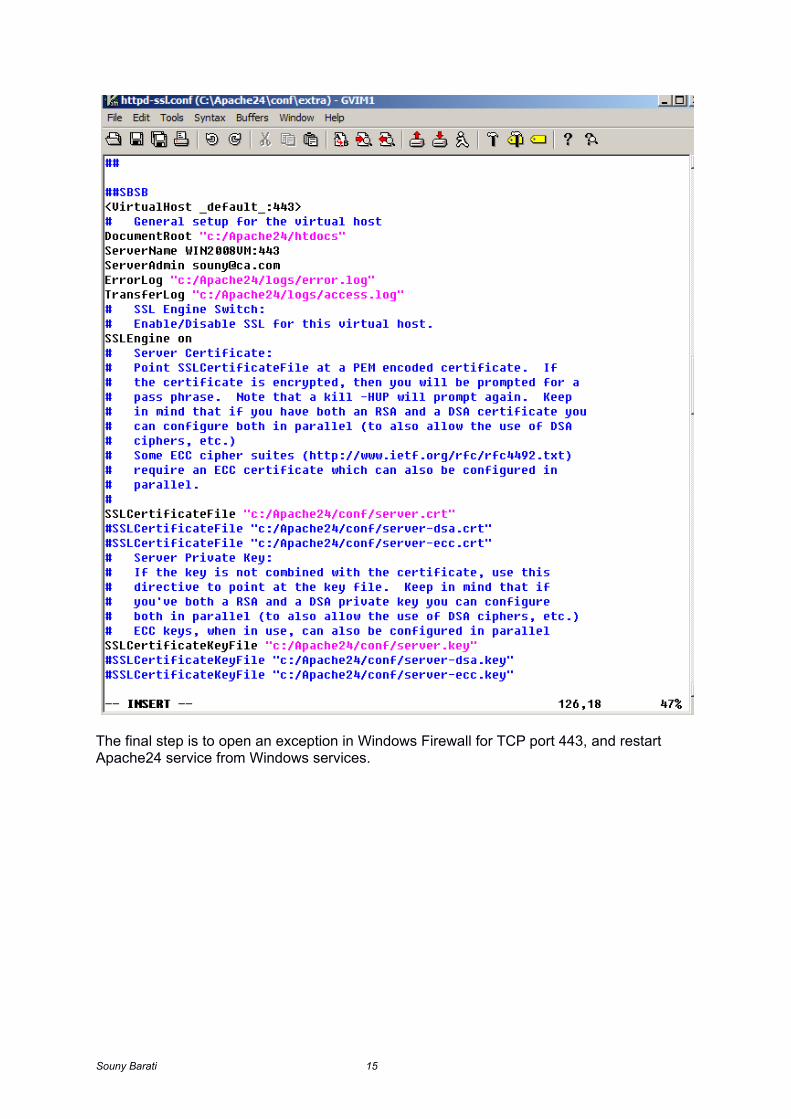
The final step is to open an exception in Windows Firewall for TCP port 443, and restart Apache24 service from Windows services.
Souny Barati 15
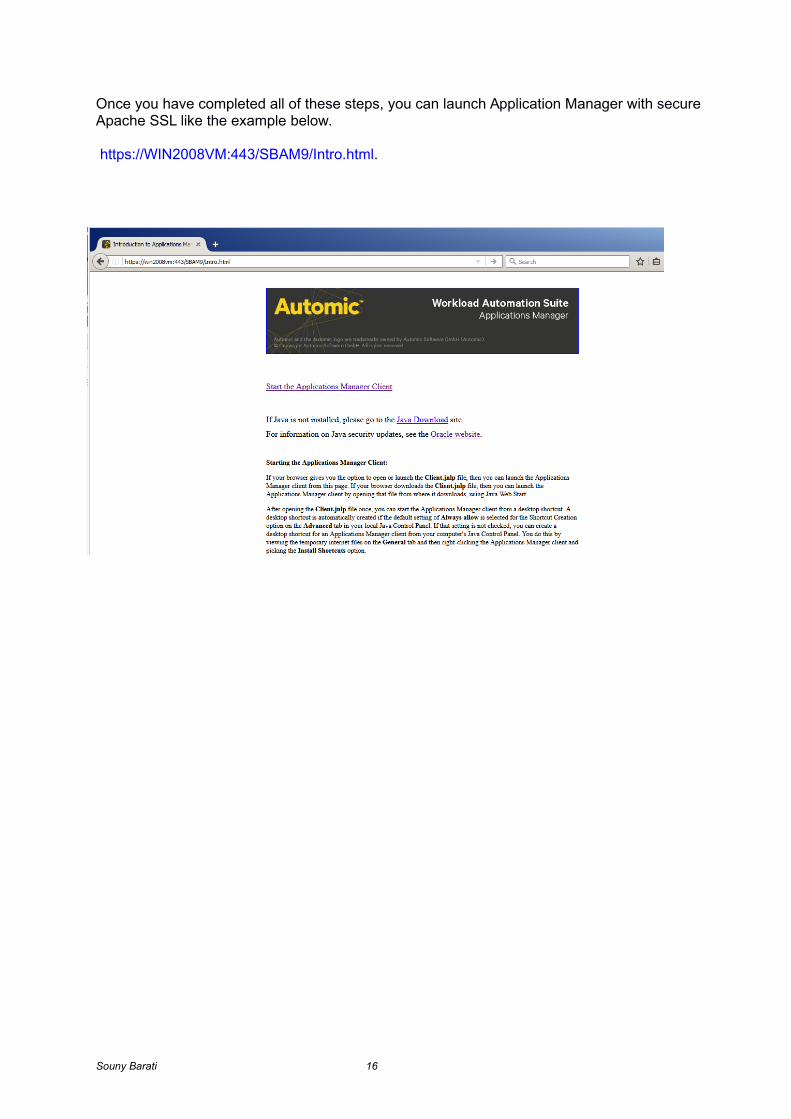
Once you have completed all of these steps, you can launch Application Manager with secure Apache SSL like the example below.
https://WIN2008VM:443/SBAM9/Intro.html.
Souny Barati 16
Related Documents