#9/3,Shree Lakshmi complex,2 nd Floor,Opp,To Vivekananda Park,Girinagar,Bangalore-5600852012 Author: Praveen Kumar.R Arduino IDE Running on Raspberry Pi

Arduino i de on Raspberry Pi
Feb 09, 2016
Arduino IDE running on raspberry pi.Simple steps to install arduino ide on raspberry pi.
Welcome message from author
This document is posted to help you gain knowledge. Please leave a comment to let me know what you think about it! Share it to your friends and learn new things together.
Transcript

#9/3,Shree Lakshmi complex,2nd
Floor,Opp,To Vivekananda Park,Girinagar,Bangalore-560085.www.tenettech.com
2012
Author: Praveen Kumar.R
Arduino IDE Running on Raspberry Pi

#9/3,Shree Lakshmi complex,2nd
Floor,Opp,To Vivekananda Park,Girinagar,Bangalore-560085.www.tenettech.com
Introduction:
In this blog I will show how to install Arduino IDE and work with Arduino
UNO on raspberry pi.Here you will find cheapest solution for running an Arduino IDE
in the SBC (Raspberry Pi).
Installation Step:
Step 1:
Install the Arduino ide using the following prompt:
sudo apt-get install arduino
Step 2:
We have to install the following library packages for accessing arduino
uno.For installing just type the following command prompt.
sudo apt-get install avr-libc
sudo apt-get install libftdi1
sudo apt-get install avrdude
sudo apt-get install openjdk-6-jre
sudo apt-get install librxtx-java

#9/3,Shree Lakshmi complex,2nd
Floor,Opp,To Vivekananda Park,Girinagar,Bangalore-560085.www.tenettech.com
Step 3:
cp /usr/bin/avrdude /home/pi/arduino
cp /etc/avrdude.conf /home/pi/arduino
**You should now able to run the Arduino IDE
Step 4:
Arduino IDE Window

#9/3,Shree Lakshmi complex,2nd
Floor,Opp,To Vivekananda Park,Girinagar,Bangalore-560085.www.tenettech.com
Step 5: Select an example sketch from basics.

#9/3,Shree Lakshmi complex,2nd
Floor,Opp,To Vivekananda Park,Girinagar,Bangalore-560085.www.tenettech.com
Step 6:
Here is an simple Analog Read Serial sketch from examples.
#9/3,Shree Lakshmi complex,2nd
Floor,Opp,To Vivekananda Park,Girinagar,Bangalore-560085.www.tenettech.com
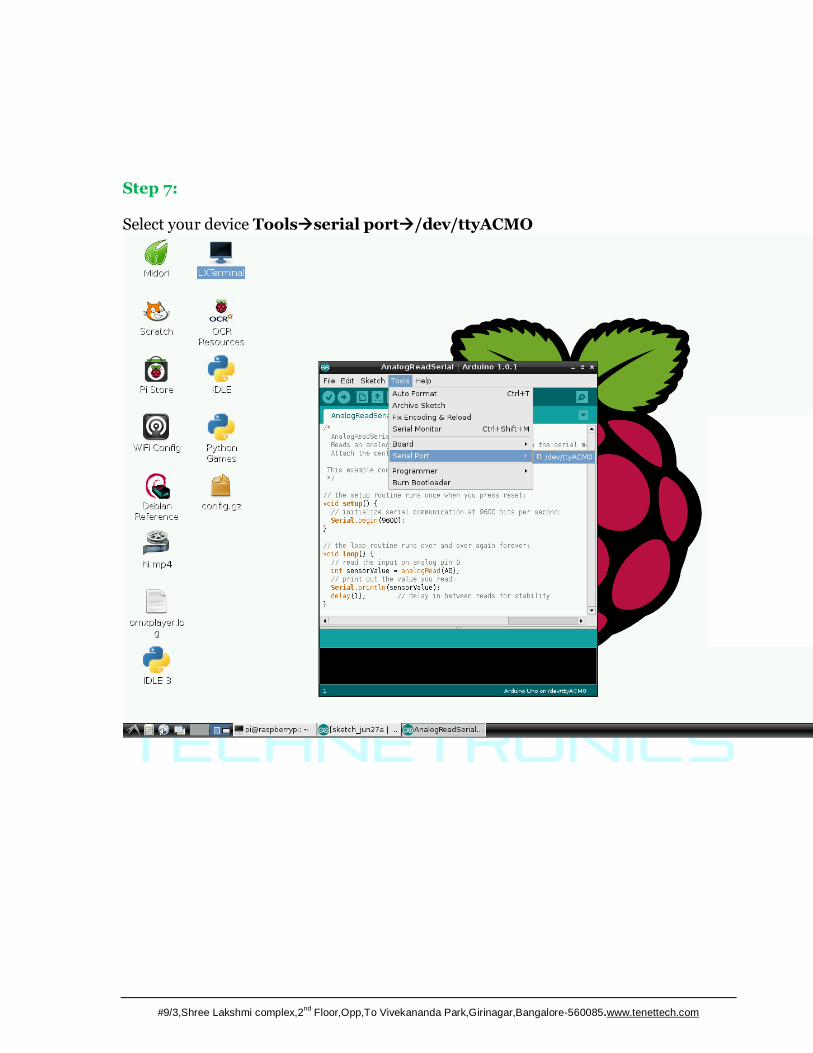
Step 7: Select your device Toolsserial port/dev/ttyACMO
#9/3,Shree Lakshmi complex,2nd
Floor,Opp,To Vivekananda Park,Girinagar,Bangalore-560085.www.tenettech.com
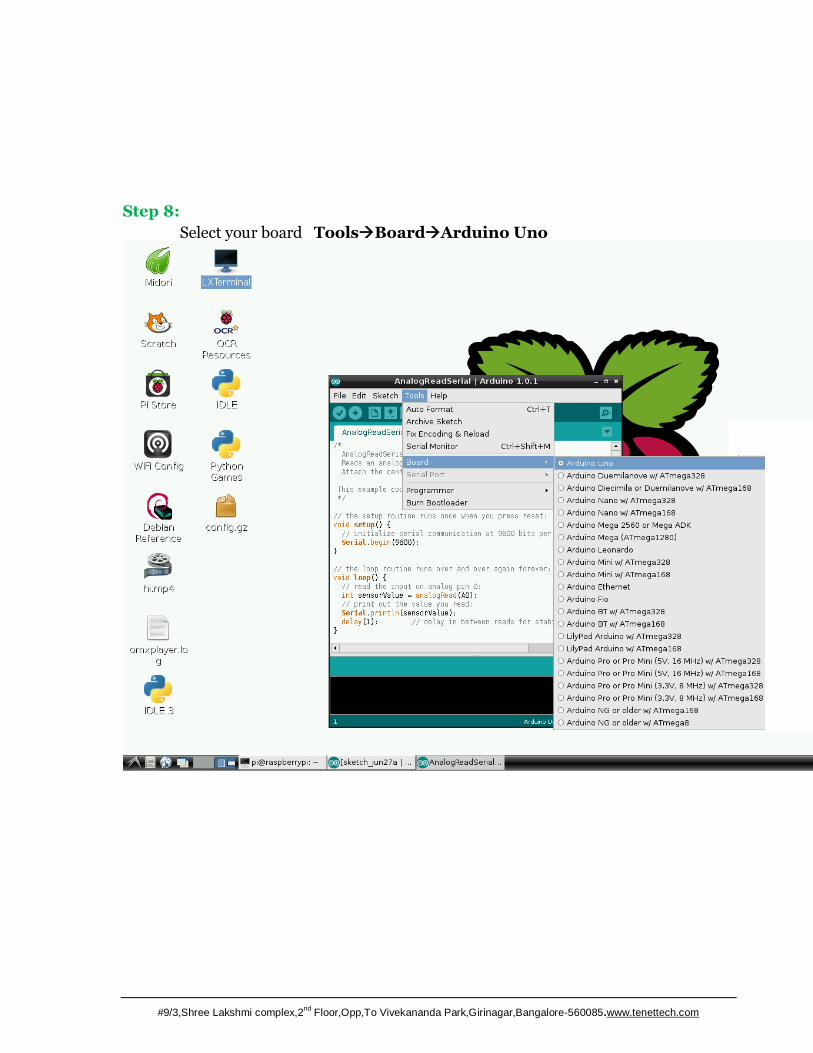
Step 8:
Select your board ToolsBoardArduino Uno

#9/3,Shree Lakshmi complex,2nd
Floor,Opp,To Vivekananda Park,Girinagar,Bangalore-560085.www.tenettech.com
Step 9:
Now you have to compile your sketch.

#9/3,Shree Lakshmi complex,2nd
Floor,Opp,To Vivekananda Park,Girinagar,Bangalore-560085.www.tenettech.com
Step 10:
Load your sketch to Arduino Uno board.

#9/3,Shree Lakshmi complex,2nd
Floor,Opp,To Vivekananda Park,Girinagar,Bangalore-560085.www.tenettech.com
Step 9:
Then finally open your serial monitor you will have your output.

#9/3,Shree Lakshmi complex,2nd
Floor,Opp,To Vivekananda Park,Girinagar,Bangalore-560085.www.tenettech.com
For queries:
For placing an order:
http://www.tenettech.com/product/2184/tenet-technetronicsraspberry-pi
Related Documents