Getting Started with the LabVIEW Real-Time Module This document provides exercises to teach you how to develop a real-time project and VIs, from setting up RT targets to building, debugging, and deploying real-time applications. This document provides references to the LabVIEW Help and other Real-Time Module documents for more information as you create the real-time application. Contents Installing and Configuring the Real-Time Module ................................. 1 Installing Real-Time Module Software ........................................... 1 Configuring an RT Target................................................................ 2 Installing RT Target Software ......................................................... 3 Installing Multiple-CPU Support.............................................. 3 Exploring the LabVIEW Documentation ............................................... 4 LabVIEW Help ................................................................................ 4 LabVIEW Real-Time Module Release and Upgrade Notes ............ 6 LabVIEW Real-Time Module Readme ........................................... 6 Creating a Real-Time Project and Application ....................................... 7 Creating a Project Using the Real-Time Project Wizard ................. 7 Selecting the RT Target and Host Computer Configuration for the Application ................................................................. 9 Adding an RT Target to the Project .......................................... 11 Exploring the Project and Application in the Project Explorer Window ............................................................. 12 Configuring RT Target Properties .......................................................... 15 Deploying and Running VIs on the RT Target ....................................... 16 Building a Stand-Alone Real-Time Application..................................... 17 Creating a Real-Time Build Specification ....................................... 17 Editing a Real-Time Build Specification ......................................... 18 Building and Running a Stand-Alone Real-Time Application ........ 19 Monitoring RT Target Resources and Errors .......................................... 20 Monitoring RT Target Resources .................................................... 20 Viewing RT Target Errors ............................................................... 21 Debugging RT Target VIs and Stand-Alone Applications ..................... 22 ™

Welcome message from author
This document is posted to help you gain knowledge. Please leave a comment to let me know what you think about it! Share it to your friends and learn new things together.
Transcript
Getting Started with the LabVIEW Real-Time Module
This document provides exercises to teach you how to develop a real-time project and VIs, from setting up RT targets to building, debugging, and deploying real-time applications. This document provides references to the LabVIEW Help and other Real-Time Module documents for more information as you create the real-time application.
ContentsInstalling and Configuring the Real-Time Module................................. 1
Installing Real-Time Module Software ........................................... 1Configuring an RT Target................................................................ 2Installing RT Target Software ......................................................... 3
Installing Multiple-CPU Support.............................................. 3Exploring the LabVIEW Documentation ............................................... 4
LabVIEW Help ................................................................................ 4LabVIEW Real-Time Module Release and Upgrade Notes ............ 6LabVIEW Real-Time Module Readme ........................................... 6
Creating a Real-Time Project and Application ....................................... 7Creating a Project Using the Real-Time Project Wizard ................. 7
Selecting the RT Target and Host Computer Configuration for the Application ................................................................. 9
Adding an RT Target to the Project.......................................... 11Exploring the Project and Application in the
Project Explorer Window ............................................................. 12Configuring RT Target Properties .......................................................... 15Deploying and Running VIs on the RT Target ....................................... 16Building a Stand-Alone Real-Time Application..................................... 17
Creating a Real-Time Build Specification....................................... 17Editing a Real-Time Build Specification......................................... 18Building and Running a Stand-Alone Real-Time Application ........ 19
Monitoring RT Target Resources and Errors.......................................... 20Monitoring RT Target Resources .................................................... 20Viewing RT Target Errors ............................................................... 21
Debugging RT Target VIs and Stand-Alone Applications ..................... 22
™
Getting Started with the LabVIEW Real-Time Module 2 ni.com
Debugging RT Target VIs ................................................................22Debugging Stand-Alone Real-Time Applications............................23Using the Real-Time Execution Trace Toolkit ................................23
Summary..................................................................................................24Installing the Real-Time Module and Configuring RT Targets .......24Using the Real-Time Project Wizard to Create
Real-Time Projects ........................................................................24Using the Project Explorer Window to Manage
and Configure Projects ..................................................................24Using the LabVIEW Application Builder to Create Stand-Alone
Real-Time Applications.................................................................25Using the Real-Time System Manager to Manage RT Target
Resources.......................................................................................25Using the RT Target Errors Dialog Box to View RT Target
Error Logs......................................................................................25Debugging RT Target VIs and Stand-Alone Applications...............26
Where to Go from Here ...........................................................................26Real-Time Module Concepts............................................................26Real-Time Module Examples...........................................................26
Installing and Configuring the Real-Time ModuleYou must install the Real-Time Module software on a development computer, or host computer, and configure and install software on the RT target.
NI Measurement & Automation Explorer (MAX) provides access to National Instruments devices and systems. MAX can communicate with networked RT targets, also known as remote systems, located on the same subnet as the computer on which it resides. You can install the Real-Time Module software on the host computer and then use MAX to configure the RT target and install the Real-Time Module software and drivers on the target.
Installing Real-Time Module SoftwareYou must install the LabVIEW development system on the host computer before attempting to install the Real-Time Module software and device drivers. Refer to the LabVIEW Release Notes for the LabVIEW installation instructions. Refer to the LabVIEW Real-Time Module Release and Upgrade Notes for the Real-Time Module and device driver installation instructions.

© National Instruments Corporation 3 Getting Started with the LabVIEW Real-Time Module
Configuring an RT TargetBefore you can install software or drivers on an RT target, you must use MAX to configure the basic settings of the target.
Note You must connect networked RT targets to the same subnet as the host computer from which you launch MAX to perform the initial configuration.
Figure 1 shows an RT Series PXI target, PXI-8106, configured to automatically obtain an IP address from a DHCP server, as shown in the IP Settings section of Figure 1.
Figure 1. Configuring RT Target Network Settings
Refer to the Remote Systems Help book in the Contents tab of the Measurement & Automation Explorer Help, available from MAX by selecting Help»MAX Help, for information about configuring networked RT targets. Refer to the Using Desktop PCs as RT Targets with the LabVIEW Real-Time Module document for information about configuring a desktop PC as a networked RT target.

Getting Started with the LabVIEW Real-Time Module 4 ni.com
Refer to the following additional resources for information about configuring RT targets.
• Real-Time (RT) Installation/Configuration Troubleshooter— Refer to the National Instruments Web site at ni.com/info and enter the info code rtconfig to access the Real-Time (RT) Installation/Configuration Troubleshooter page contains links to instructional resources to help you install and configure RT targets.
• LabVIEW Real-Time Target Configuration Tutorial—Refer to the LabVIEW Real-Time Target Configuration Tutorial topic in the Measurement & Automation Explorer Help for a step-by-step tutorial about configuring networked RT targets.
• Miscellaneous and Advanced Settings—Refer to the Configuring RT Target Settings topic of the LabVIEW Help for information about configuring additional settings for an RT target.
Installing RT Target SoftwareUse the LabVIEW Real-Time Software Wizard in MAX to install the software and drivers from the host computer on the RT target. In MAX, expand the target, right-click Software under the target, and select Add/Remove Software from the shortcut menu to launch the LabVIEW Real-Time Software Wizard.
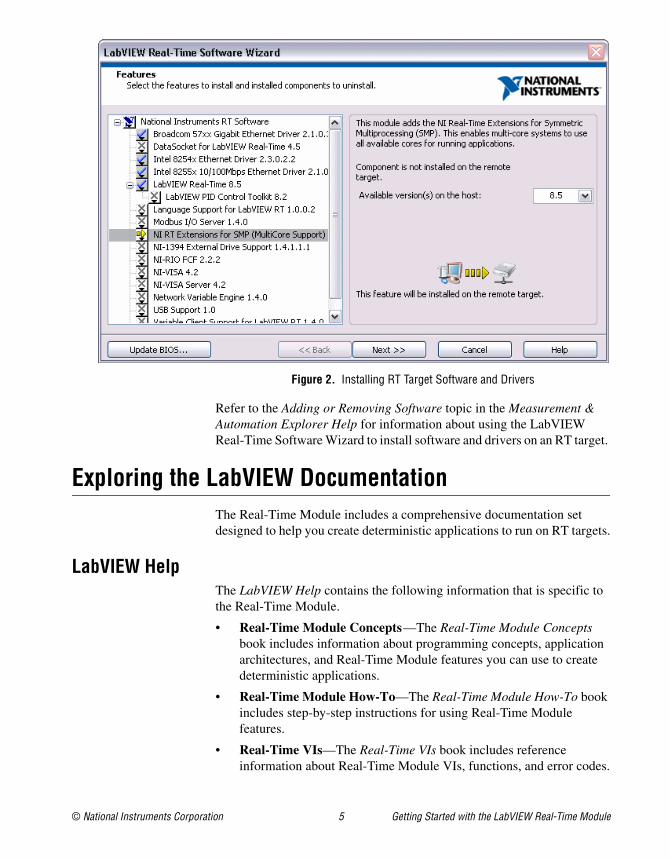
Figure 2 shows the LabVIEW Real-Time Software Wizard with the LabVIEW Real-Time 8.5 software selected for installation on an RT target. The LabVIEW Real-Time Software Wizard displays all the National Instruments software and drivers installed on the host computer that you can install on a selected RT target.
Installing Multiple-CPU SupportTo take advantage of parallel processing on a multiple-CPU system, use the LabVIEW Real-Time Software Wizard in MAX to install the NI RT Extensions for SMP, as shown in Figure 2. Refer to the Optimizing RT Applications for Multiple-CPU Systems book in the Contents tab of the LabVIEW Help for information about optimizing RT applications for multiple-CPU systems.
Note Single-CPU systems perform best without the NI RT Extensions for SMP. Also, some applications, such as those that consist mainly of single-point I/O, can achieve lower latency using a single CPU without the NI RT Extensions for SMP. Refer to the National Instruments Web site at ni.com/info and enter the info code rtsmp for further details about optimizing RT applications for systems with multiple CPUs.
© National Instruments Corporation 5 Getting Started with the LabVIEW Real-Time Module
Figure 2. Installing RT Target Software and Drivers
Refer to the Adding or Removing Software topic in the Measurement & Automation Explorer Help for information about using the LabVIEW Real-Time Software Wizard to install software and drivers on an RT target.
Exploring the LabVIEW DocumentationThe Real-Time Module includes a comprehensive documentation set designed to help you create deterministic applications to run on RT targets.
LabVIEW HelpThe LabVIEW Help contains the following information that is specific to the Real-Time Module.
• Real-Time Module Concepts—The Real-Time Module Concepts book includes information about programming concepts, application architectures, and Real-Time Module features you can use to create deterministic applications.
• Real-Time Module How-To—The Real-Time Module How-To book includes step-by-step instructions for using Real-Time Module features.
• Real-Time VIs—The Real-Time VIs book includes reference information about Real-Time Module VIs, functions, and error codes.

Getting Started with the LabVIEW Real-Time Module 6 ni.com
• Unsupported LabVIEW Features—The Unsupported LabVIEW Features book includes information about LabVIEW features that are not supported by the Real-Time Module.
Complete the following steps to access the Real-Time Module section of the LabVIEW Help.
1. Launch LabVIEW to display the Getting Started window shown in Figure 3.
You can use the Getting Started window to create new VIs and real-time projects, select among the most recently opened LabVIEW files, find examples, and launch the LabVIEW Help.
Figure 3. Getting Started Window
2. Select Help»Search the LabVIEW Help from the Getting Started window to launch the LabVIEW Help.
3. Expand the Real-Time Module book on the Contents tab of the LabVIEW Help.
Note You can search for a specific topic in the LabVIEW Help by clicking the Search tab and searching for the topic name enclosed in quotes.

© National Instruments Corporation 7 Getting Started with the LabVIEW Real-Time Module
LabVIEW Real-Time Module Release and Upgrade NotesThe LabVIEW Real-Time Module Release and Upgrade Notes contains information to help you install and configure the Real-Time Module 8.5 and a list of upgrade issues and new features.
Complete the following steps to access the LabVIEW Real-Time Module Release and Upgrade Notes.
1. Select Start»All Programs»National Instruments»LabVIEW 8.5»LabVIEW Manuals to open the labview\manuals directory.
The labview\manuals directory contains PDF versions of all the LabVIEW manuals installed on the computer. You can install the PDFs from the LabVIEW and LabVIEW Real-Time Module installation CDs.
Note You must have Adobe Reader with Search and Accessibility 5.0.5 or later installed to open the PDFs.
2. Double-click RT_Release_Upgrade_Notes.pdf to open the LabVIEW Real-Time Module Release and Upgrade Notes.
3. Browse the Installing the Real-Time Module 8.5 section, which includes instructions for installing the Real-Time Module.
4. Browse the New Real-Time Module 8.5 Features section, which includes a list of new features available with version 8.5 of the Real-Time Module.
LabVIEW Real-Time Module ReadmeThe readme_RT.html file contains a list of known issues with version 8.5 of the Real-Time Module.
Complete the following steps to access the LabVIEW Real-Time Module Readme.
1. Select Start»All Programs»National Instruments»LabVIEW 8.5»Readme to open the labview\readme directory.
The labview\readme directory contains the HTML readme files for LabVIEW and the LabVIEW modules and add-ons installed on the host computer.
2. Double-click readme_RT.html to open the LabVIEW Real-Time Module Readme.
3. Browse the LabVIEW Real-Time Module Readme for a list of known issues.

Getting Started with the LabVIEW Real-Time Module 8 ni.com
Creating a Real-Time Project and ApplicationWith the Real-Time Module, you must use a LabVIEW project to build real-time applications and to work with RT targets. Use projects to group LabVIEW files and non-LabVIEW files, create real-time build specifications, and deploy files to an RT target. When you save a project, LabVIEW creates a project file (.lvproj), which includes references to files in the project, configuration information, build information, and deployment information.
For this tutorial, you will use the Real-Time Project Wizard to create a deterministic application that simulates data acquisition, logs data to disk on the RT target, and then displays the data in a chart on the host computer. The application consists of two VIs—an RT target VI that runs on the target and simulates the deterministic data acquisition and logging and a host VI that runs on the host computer to provide the user interface.
You can complete the exercises in this section in approximately 35 minutes.
Creating a Project Using the Real-Time Project WizardUse the Real-Time Project Wizard to create a new project that defines RT targets and includes VIs and other application files. You can create projects using one of three architectures with the Real-Time Project Wizard—continuous communication, state machine, or custom.
• Continuous communication architecture—Use a continuous communication architecture to create data acquisition applications that log data to disk and continuously communicate with a host computer or to create applications that perform continuous deterministic tasks.
• State machine architecture—Use a state machine architecture to implement complex decision-making algorithms represented by state diagrams or flow charts. The state machine architecture implements any algorithm described by a Moore machine. A Moore machine performs a specific action for each state in a state diagram.
• Custom project—Use a custom project architecture to add a blank VI or import existing VIs to run on the host computer or RT target.
Refer to the LabVIEW Help for more information about using the Real-Time Project Wizard and for more information about the available real-time architectures.

© National Instruments Corporation 9 Getting Started with the LabVIEW Real-Time Module
Complete the following steps to create a project using the Real-Time Project Wizard.
1. Click the Real-Time Project link in the New section of the Getting Started window or select Tools»Real-Time Module»Project Wizard to launch the Real-Time Project Wizard.
2. Select Continuous communication architecture from the Project type pull-down menu.
The Real-Time Project Wizard displays a diagram in the right pane that represents the architecture you select, as shown in Figure 4.
Figure 4. Selecting a Project Type
3. Place a checkmark in the Application includes deterministic components checkbox. When you enable this option, the Real-Time Project Wizard restricts the configuration options of the project to ensure the application can run deterministically.
4. Enter RT Project in the Project name text box.
5. Specify the directory where you want to save the project files on the host computer in the Project folder text box or click the Browse button to browse to the directory in the file system.
6. Click the Next button to accept the settings and continue.

Getting Started with the LabVIEW Real-Time Module 10 ni.com
Selecting the RT Target and Host Computer Configuration for the ApplicationUse the Customize architecture options section of the Real-Time Project Wizard to specify the options for the VIs in the application. For the continuous communication architecture, the Real-Time Project Wizard creates a VI that runs on an RT target and contains LabVIEW Timed Loops and shared variables that control time-critical tasks, the user interface, and file I/O.
A Timed Loop executes a subdiagram each iteration of the loop at a period that you specify. Timed Loops use a timing source to control the timing and execution of the subdiagram. Refer to the LabVIEW Help for information about using the Timed Loop and other timed structures.
Shared variables are configured software items that can share data between locations in a VI that cannot be connected with wires, between VIs running on an RT target, and between VIs across a network running on different targets. After you create a shared variable, you can access the shared variable data from VIs using a Shared Variable node. A Shared Variable node is a block diagram object that references a shared variable. Use a Shared Variable node to read and write values to a shared variable.
The Real-Time Module adds real-time FIFO—first in, first out buffer—capability to the shared variable. If you enable the real-time FIFO of a shared variable, you can deterministically share live data without affecting the determinism of VIs on an RT target. Refer to the LabVIEW Help for more information about sharing data deterministically using shared variables.
With the continuous communication architecture, you can select an application configuration that uses one or two Timed Loops in the RT target VI.
• One loop—The RT target VI uses a Timed Loop to control the timing and execution of the application tasks.
• Two loops—The RT target VI uses two Timed Loops running at different priorities to control the timing and execution of the application tasks. The higher priority Timed Loop controls the time-critical tasks. The lower priority Timed Loop controls user interface communication and file I/O tasks.

© National Instruments Corporation 11 Getting Started with the LabVIEW Real-Time Module
The Real-Time Project Wizard can provide a user interface for the real-time application using a VI running on the host computer or using a LabVIEW remote panel to connect to the RT target VI.
• Host VI—Uses LabVIEW shared variables to send user interface data out of the RT target VI. A VI that runs on the host computer accesses the user interface data and displays the data on a front panel.
• Remote Panel—Uses a LabVIEW remote panel to view the front panel controls and indicators of the RT target VI. You cannot use remote panels with a single Timed Loop configuration if the application requires determinism.
Complete the following steps to configure the RT target VI with two Timed Loops and a host VI user interface using the Real-Time Project Wizard.
1. Select Two loops, as shown in Figure 5, to create an RT target VI with two Timed Loops.
The Real-Time Project Wizard adds shared variables to the RT target VI for sending data out of the higher priority Timed Loop that controls time-critical tasks.
Figure 5. Configuring the Architecture Options

Getting Started with the LabVIEW Real-Time Module 12 ni.com
2. Place a checkmark in the Include file I/O checkbox to log the data acquired in the time-critical loop of the RT target VI to a file on the RT target.
When you enable the Include file I/O option, the higher priority Timed Loop sends the acquired data to the lower priority Timed Loop using shared variables. The lower priority Timed Loop saves the data to a file on the RT target.
3. Place a checkmark in the Include user interface checkbox to configure the real-time application to send user interface data to the VI on the host computer.
4. Select Host VI to create a VI that runs on the host computer and displays a front panel for the real-time application.
5. Click the Next button to accept the settings and continue.
Adding an RT Target to the ProjectUse the Browse targets section of the Real-Time Project Wizard to add an RT target to the project. The RT targets you add to a project execute the RT target VIs in the project.
Complete the following steps to add an RT target to the project using the Real-Time Project Wizard.
Note Before adding a networked RT target to a project, you must first configure the RT target in MAX.
1. Click the Browse button to open the Add Targets and Devices dialog box. Use the Add Targets and Devices dialog box to select the previously configured RT target and click the OK button. The Selected target text box displays the name of the RT target you select.
2. Click the Next button to accept the settings and continue.
The Real-Time Project Wizard displays a preview of the project and the application that you configured. The preview displays the host computer, RT target, and VIs as they appear in a project. The next section of this tutorial explains the project layout and explores the application VIs.
You can place a checkmark in the Open VIs when finished checkbox to open all project VIs after the Real-Time Project Wizard creates the project, application, and support files.
3. Click the Finish button to exit the Real-Time Project Wizard and generate the new project, VIs, and support files for the real-time application. The Project Explorer window displays the new project that you create.

© National Instruments Corporation 13 Getting Started with the LabVIEW Real-Time Module
You can use the projects that you create with the Real-Time Project Wizard as a starting point for your application. You also can manually create projects and add RT targets and VIs to the project in LabVIEW. Refer to the Using LabVIEW Projects with the Real-Time Module topic in the LabVIEW Help for information about manually creating and editing projects for the Real-Time Module.
Exploring the Project and Application in the Project Explorer WindowThe Project Explorer window enables you to manage the RT targets, VIs, and other support files of a project from one location.
The Project Explorer window includes the following sections.
• Project root—Contains the host computer and the RT targets assigned to the current project.
– My Computer—Represents the host computer in the project.
– RT Target—Represents RT targets in the project. By default, the heading for an RT target is the target name that appears in MAX.
VIs and libraries that you add to an RT target appear under the target in the Project Explorer window. A VI appears under a target to indicate that you can run the VI on that target. Figure 6 shows the project, RT Project.lvproj, you created with the Real-Time Project Wizard.
Figure 6. Exploring the Real-Time Project and Applicationin the Project Explorer Window
Getting Started with the LabVIEW Real-Time Module 14 ni.com
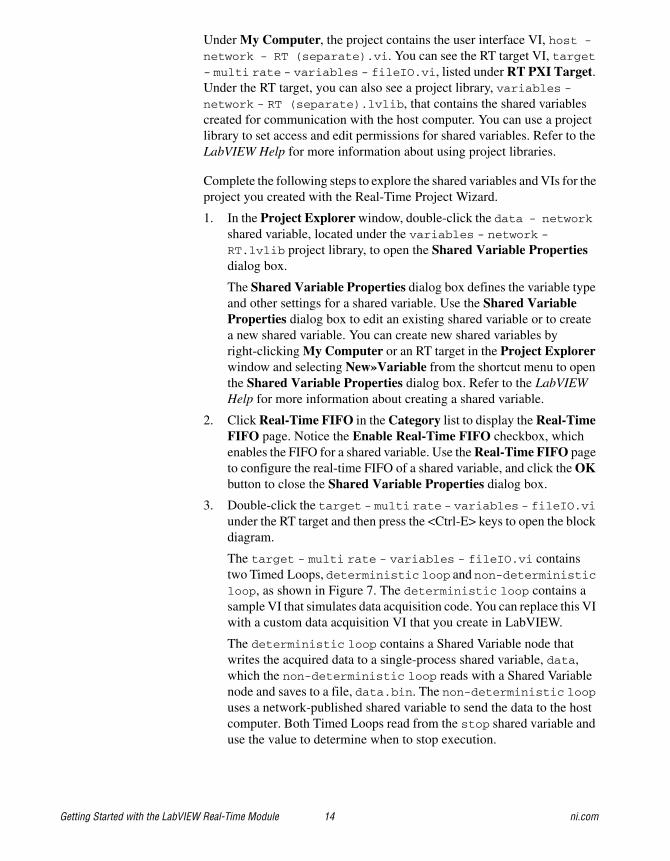
Under My Computer, the project contains the user interface VI, host - network - RT (separate).vi. You can see the RT target VI, target - multi rate - variables - fileIO.vi, listed under RT PXI Target. Under the RT target, you can also see a project library, variables - network - RT (separate).lvlib, that contains the shared variables created for communication with the host computer. You can use a project library to set access and edit permissions for shared variables. Refer to the LabVIEW Help for more information about using project libraries.
Complete the following steps to explore the shared variables and VIs for the project you created with the Real-Time Project Wizard.
1. In the Project Explorer window, double-click the data - network shared variable, located under the variables - network - RT.lvlib project library, to open the Shared Variable Properties dialog box.
The Shared Variable Properties dialog box defines the variable type and other settings for a shared variable. Use the Shared Variable Properties dialog box to edit an existing shared variable or to create a new shared variable. You can create new shared variables by right-clicking My Computer or an RT target in the Project Explorer window and selecting New»Variable from the shortcut menu to open the Shared Variable Properties dialog box. Refer to the LabVIEW Help for more information about creating a shared variable.
2. Click Real-Time FIFO in the Category list to display the Real-Time FIFO page. Notice the Enable Real-Time FIFO checkbox, which enables the FIFO for a shared variable. Use the Real-Time FIFO page to configure the real-time FIFO of a shared variable, and click the OK button to close the Shared Variable Properties dialog box.
3. Double-click the target - multi rate - variables - fileIO.vi under the RT target and then press the <Ctrl-E> keys to open the block diagram.
The target - multi rate - variables - fileIO.vi contains two Timed Loops, deterministic loop and non-deterministic loop, as shown in Figure 7. The deterministic loop contains a sample VI that simulates data acquisition code. You can replace this VI with a custom data acquisition VI that you create in LabVIEW.
The deterministic loop contains a Shared Variable node that writes the acquired data to a single-process shared variable, data, which the non-deterministic loop reads with a Shared Variable node and saves to a file, data.bin. The non-deterministic loop uses a network-published shared variable to send the data to the host computer. Both Timed Loops read from the stop shared variable and use the value to determine when to stop execution.

© National Instruments Corporation 15 Getting Started with the LabVIEW Real-Time Module
Figure 7. RT Target VI with Two Timed Loops
4. Double-click the host - network - RT (separate).vi under My Computer and press the <Ctrl-E> keys to open the block diagram.
As shown in Figure 8, the host VI contains a While Loop that reads from the shared variable, data - network, and publishes the data to a waveform chart on the front panel. The host VI also contains a Shared Variable node that writes to the shared variable, stop, allowing you to control the RT target VI from the host computer.
Figure 8. Host VI for User Interface
5. Notice that the RT target in the Project Explorer window also includes Dependencies and Build Specifications.
Use Dependencies to view items or subVIs that VIs under the RT target require to execute. Refer to the LabVIEW Help for more information about viewing dependencies in a project.
Getting Started with the LabVIEW Real-Time Module 16 ni.com
Use Build Specifications to create and manage stand-alone real-time applications. Refer to the Building a Stand-Alone Real-Time Application section for more information about using Build Specifications to create stand-alone real-time applications.
Configuring RT Target PropertiesUse the RT target Properties dialog box to configure the project settings of an RT target. You can configure general, VI Server, Web Server, access, and miscellaneous target settings. For example, you can enable the VI Server on the RT target, as explained in this section.
You can complete the exercises in this section in approximately 10 minutes.
Complete the following steps to enable the VI Server on the RT target.
1. Right-click the RT target in the Project Explorer window and select Properties from the shortcut menu to open the RT target Properties dialog box.
2. Select VI Server: Configuration from the Category list to display the VI Server: Configuration page.
3. Ensure that the TCP/IP checkbox contains a checkmark to enable the VI Server on the RT target.
4. Ensure that all the options in the Accessible Server Resources section are enabled to allow VI and application calls on the RT target. Enabling VI and application calls on the RT target allows you to remotely launch VIs that are in memory on the target.
5. Click the OK button to accept the settings and close the RT target Properties dialog box.
6. Save the project, by selecting Project»Save Project from the Project Explorer window, to save the settings you selected for the RT target in the RT target Properties dialog box. You must deploy the RT target before the settings take effect. Deploying an RT target refers to applying settings defined in the project to a target.
Note Deploying an RT target overwrites the current target settings with the latest settings specified in the RT target Properties dialog box.
7. Right-click the RT target and select Deploy from the shortcut menu to deploy the settings to the target.
© National Instruments Corporation 17 Getting Started with the LabVIEW Real-Time Module
Deploying and Running VIs on the RT TargetIn addition to applying properties to an RT target, deployment also refers to downloading VIs and dependent files to memory on the RT target. You can deploy VIs, libraries, and shared variables to an RT target where you can run or reference the items.
Note Deploying does not save the VI to disk on the RT target, so the VI does not remain on the target after rebooting. Refer to the Building a Stand-Alone Real-Time Application section for information about building and running a stand-alone real-time application that remains on the RT target and runs when the target powers on.
You can complete the exercises in this section in approximately 10 minutes.
Complete the following steps to deploy and run the real-time application you previously created on the RT target and host computer.
1. Right-click the target - multi rate - variables - fileIO.vi under the RT target in the Project Explorer window and select Deploy from the shortcut menu to download the VI to the RT target.
LabVIEW deploys the VI to the RT target and opens the front panel to indicate that the VI is in memory on the RT target. Closing the front panel removes the VI from memory on the RT target.
2. Click the Run button on the front panel to run the VI on the target.
3. Right-click the RT target in the Project Explorer window and select Disconnect from the shortcut menu to close the front panel connection with the target while leaving the VI running.
4. Double-click the host - network - RT (separate).vi under My Computer in the Project Explorer window to open the VI and then click the Run button on the front panel to run the VI on the host computer.
The host - network - RT (separate).vi displays a waveform chart with the data received from the RT target.
5. Click the Stop button to stop the execution of the Timed Loops in the RT target VI, which stops the execution of the VI.

Getting Started with the LabVIEW Real-Time Module 18 ni.com
Building a Stand-Alone Real-Time ApplicationUse the LabVIEW Application Builder with the Real-Time Module to create stand-alone real-time applications. Stand-alone real-time applications do not require you to run them from within a LabVIEW environment. You can embed a stand-alone real-time application on an RT target and have the application launch automatically when you power on the target. Use the Application Builder to create a build specification that defines how you want to build a stand-alone real-time application.
You can complete the exercises in this section in approximately 20 minutes.
Creating a Real-Time Build SpecificationA build specification defines the VIs, support files, and settings for stand-alone real-time applications. You must first create a build specification and then use the build specification to build the stand-alone real-time application.
Complete the following steps to create a build specification.
1. Right-click Build Specifications under the RT target in the Project Explorer window and select New»Real-Time Application from the shortcut menu to open the Real-Time Application Properties dialog box.
2. Enter Real-Time Application in the Build specification name text box. The build specification name appears under Build Specifications for the RT target.
3. Enter rtapp.rtexe in the Executable filename text box to set the file name for the stand-alone real-time application executable on the RT target. By default, the Executable filename text box contains startup.rtexe.
4. Click Source Files from the Category list to display the Source Files page.
5. From the Project Files tree, select the target - multi rate - variables - fileIO.vi, located under the RT target, and click the right arrow button next to the Startup VIs listbox to move the VI into the Startup VIs listbox. VIs in the Startup VIs listbox execute when you launch the stand-alone real-time application.
6. Click the OK button to accept the settings and close the Real-Time Application Properties dialog box. The build specification name appears in the Project Explorer window under Build Specifications for the RT target, as shown in Figure 9.

© National Instruments Corporation 19 Getting Started with the LabVIEW Real-Time Module
Figure 9. Creating a Build Specification
7. Select Project»Save Project from the Project Explorer window to save the project and the build specification settings.
Editing a Real-Time Build SpecificationYou can edit the settings of a build specification using the Real-Time Application Properties dialog box. If you change a build specification, you must save the project to save the build specification changes.
Complete the following steps to edit the build specification you created in the previous section.
1. From the Project Explorer window, right-click the real-time build specification under Build Specifications for the RT target and select Properties from the shortcut menu to display the Real-Time Application Properties dialog box.
2. Click Advanced in the Category list to display the Advanced page.
3. Place a checkmark in the Enable debugging checkbox. The Enable debugging option allows you to remotely debug the stand-alone real-time application generated with the build specification.
4. Click the OK button to accept the settings and close the Real-Time Application Properties dialog box.
5. Select Project»Save Project from the Project Explorer window to save the build specification settings to the project.

Getting Started with the LabVIEW Real-Time Module 20 ni.com
Building and Running a Stand-Alone Real-Time ApplicationAfter creating a build specification, you can build and run a stand-alone real-time application on an RT target. You also can set the stand-alone real-time application to launch when you power on the RT target.
Complete the following steps to build and run a stand-alone real-time application on an RT target.
1. Right-click the build specification and select Build from the shortcut menu to build the stand-alone real-time application. The Application Builder builds the stand-alone real-time application configured with the settings you defined in the build specification. When the build completes, click the Done button to close the Build Status dialog box.
2. Right-click the build specification and select Run as startup from the shortcut menu. The Run as startup shortcut menu item sets the application as the startup application, deploys the application to the target, and prompts you to reboot the RT target.
Note When you set a build specification as the startup application, LabVIEW displays the build specification with a green border around the specification icon in the Project Explorer window. Setting a build specification as startup enables the application generated from the build specification to launch automatically when you power on the RT target.
3. Right-click the project library in the Project Explorer window that contains the shared variables for the project and disable Autodeploy variables. If Autodeploy variables is enabled when you run the host VI, LabVIEW closes the stand-alone application running on the target and redeploys shared variable settings.
Note You only need to disable Autodeploy variables if you plan to monitor the built real-time application using a host VI.
4. From the Project Explorer window, open and run the host.vi under My Computer to display a chart with the data acquired and sent from the stand-alone real-time application.
Note If you plan to continue editing the real-time VI, you might not want the stand-alone real-time application to run every time you power on the RT target. To unset the application as startup, right-click the build specification and select Unset as startup and then Deploy from the shortcut menu. You also can re-enable automatic variable deployment by right-clicking the project library and selecting Autodeploy variables from the shortcut menu.
© National Instruments Corporation 21 Getting Started with the LabVIEW Real-Time Module
Monitoring RT Target Resources and ErrorsThe Real-Time Module provides utilities to monitor RT target resources and view target errors.
You can complete the exercises in this section in approximately 10 minutes.
Monitoring RT Target ResourcesThe Real-Time System Manager displays details about VIs running on an RT target and provides a dynamic display of the target resources, such as memory availability and CPU utilization. You also can use the Real-Time System Manager to stop and start VIs that are in memory on the RT target and log alerts when the use of a resource exceeds a level you specify.
Note You must enable the VI Server on a target to monitor the target with the Real-Time System Manager. Refer to the Configuring RT Target Properties section for information about enabling the VI Server on an RT target.
Complete the following steps to open the Real-Time System Manager and view the RT target resources.
1. Deploy and run the RT target VI you previously created, target - multi rate - variables - fileIO.vi, on the target.
2. From the Project Explorer window, select Tools»Real-Time Module»System Manager to launch the Real-Time System Manager.
3. Select the RT target from the Machine Name/IP Address pull-down menu.
4. Click the Start Monitoring button to connect to the selected RT target.
5. Click the Resources, VIs, and Alerts tabs to monitor target resources, to display VIs in memory, and to set and view alerts for the RT target.

Getting Started with the LabVIEW Real-Time Module 22 ni.com
Figure 10 shows an RT target, RT PXI Target, using 14.1% of its CPU resources and 63,509.1 K of its memory resources.
Figure 10. Displaying Target Resources Using the Real-Time System Manager
6. Click the Close button to close the Real-Time System Manager.
7. Close the front panel to remove the VI from memory on the RT target.
Refer to the LabVIEW Help for more information about using the Real-Time System Manager to monitor RT targets.
Viewing RT Target ErrorsThe RT Target Errors dialog box displays the error logs saved for all sessions of an RT target. An RT session begins when you power on an RT target and ends when you power off or reboot the target. The RT Target Errors dialog box displays LabVIEW errors, real-time operating system errors, and crash logs for each session of an RT target. You also can create an error report and save the report to disk on the host computer using the RT Target Errors dialog box.
© National Instruments Corporation 23 Getting Started with the LabVIEW Real-Time Module
Complete the following steps to view the errors logs for a session of an RT target and create a report of the session.
1. Right-click the RT target in the Project Explorer window and select Utilities»View Error Log from the shortcut menu to open the RT Target Errors dialog box.
2. Select the current session in the LabVIEW RT sessions listbox to display the error log for the current session. You can use the logs to debug errors or crashes that occur when running a VI on an RT target.
3. Click the Create Report button and browse to the directory on the host computer where you want to save the report.
4. Enter a filename in the File name text box and click the OK button to save the report.
The RT Target Errors dialog box saves the report as a text file that contains the error log for the selected session.
5. Click the Done button to close the RT Target Errors dialog box.
Debugging RT Target VIs and Stand-Alone ApplicationsYou can use LabVIEW tools and utilities to debug RT target VIs and stand-alone real-time applications (.rtexe) that are in memory on an RT target.
You can complete the exercises in this section in approximately 15 minutes.
Debugging RT Target VIsYou can open a front panel connection with an RT target and use the LabVIEW debugging tools to debug the VIs running on the target.
Complete the following steps to open a front panel connection with VIs running on an RT target and to debug the VIs from the host computer.
1. Deploy and run the RT target VI you previously created, target - multi rate - variables - fileIO.vi, on the RT target.
2. Use the LabVIEW debugging tools, such as execution highlighting and single-stepping, while the host computer is connected to an RT target to step through LabVIEW code. Refer to the LabVIEW Help for information about using the LabVIEW debugging tools to debug VIs.
3. Close the front panel to remove the VI from memory on the RT target.
4. Right-click the RT target in the Project Explorer window and select Disconnect from the shortcut menu to close the front panel connection.

Getting Started with the LabVIEW Real-Time Module 24 ni.com
Debugging Stand-Alone Real-Time ApplicationsUse the Debug Application or Shared Library dialog box to debug stand-alone real-time applications running on an RT target.
Note You must enable debugging for the stand-alone real-time application to connect to the application using the Debug Application or Shared Library dialog box. Refer to the Editing a Real-Time Build Specification section for information about enabling debugging.
Complete the following steps to debug a stand-alone real-time application running on an RT target.
1. Right-click the stand-alone real-time application you previously created, Real-Time Application, and select Run as startup from the shortcut menu to run the application on the RT target.
2. From the Project Explorer window, select Operate»Debug Application or Shared Library to open the Debug Application or Shared Library dialog box.
3. Enter the IP address or name of the RT target in the Machine name or IP address text box and click the Refresh button to view the list of stand-alone real-time applications that are in memory on the RT target.
4. Select rtapp.rtexe from the Application or shared library pull-down menu and click the Connect button to connect to the stand-alone real-time application.
LabVIEW opens the block diagram of the startup VI for debugging. You can use probes, breakpoints, and other LabVIEW debugging techniques on the block diagram to identify errors in the application.
5. Close the block diagram of the startup VI and the Debug Application or Shared Library dialog box.
6. Disable the stand-alone real-time application to launch when you power on the RT target and then deploy the build specification to apply the changes to the startup property.
7. Reboot the RT target.
Using the Real-Time Execution Trace ToolkitThe LabVIEW Real-Time Module 8.5 includes a 30-day full-featured evaluation of the Real-Time Execution Trace Toolkit 2.0. You can use the Real-Time Execution Trace Toolkit to analyze the timing and execution of a real-time application. Use the Execution Trace Tool VIs to capture the timing and execution data of VI and thread events for applications running on an RT target. The Real-Time Execution Trace Tool displays the timing and event data, or trace session, on the host computer. In LabVIEW, select Tools»Real-Time Module»Execution Trace Toolkit to display the Real-Time Execution Trace Tool. Refer to the LabVIEW Help for more information about using the Real-Time Execution Trace Toolkit to analyze real-time applications.

© National Instruments Corporation 25 Getting Started with the LabVIEW Real-Time Module
SummaryThe following topics summarize the main concepts in this tutorial.
Installing the Real-Time Module and Configuring RT TargetsYou must complete three steps to set up a LabVIEW Real-Time Module system.
1. Install software on the host computer—Install LabVIEW, the Real-Time Module, and the National Instruments device drivers on a host computer. Refer to the LabVIEW Release Notes for the LabVIEW installation instructions. Refer to the LabVIEW Real-Time Module Release and Upgrade Notes for the Real-Time Module and device driver installation instructions.
2. Configure the RT target settings—Use MAX to configure the settings of an RT target.
3. Install software on the RT target—Use the LabVIEW Real-Time Software Wizard in MAX to install the Real-Time Module software and device drivers on an RT target.
Using the Real-Time Project Wizard to Create Real-Time ProjectsWith the Real-Time Module, you must use a LabVIEW project to build real-time applications and to work with RT targets. Use the Real-Time Project Wizard to create a real-time project that defines RT targets and includes VIs and other application files. Click the Real-Time Project link in the New section of the Getting Started window or select Tools»Real-Time Module»Project Wizard to launch the Real-Time Project Wizard.
You also can manually create projects and add RT targets and VIs to the project in LabVIEW. Refer to the Using LabVIEW Projects with the Real-Time Module topic in the LabVIEW Help for information about manually creating and editing projects for the Real-Time Module.
Using the Project Explorer Window to Manage and Configure ProjectsThe Project Explorer window enables you to manage the RT targets, VIs, and other support files of a project from one location.
• Configure RT Target Properties—Use the RT target Properties dialog box to configure the project settings of an RT target. Right-click the RT target in the Project Explorer window and select Properties from the shortcut menu to open the RT target Properties dialog box.

Getting Started with the LabVIEW Real-Time Module 26 ni.com
• Deploy and Run VIs—From the Project Explorer window, you can deploy VIs, libraries, and shared variables to an RT target where you can run or reference the items. Right-click the VI under the RT target and select Deploy from the shortcut menu to deploy the VI to the target. Click the Run button on the front panel to run the deployed VI on the RT target.
Using the LabVIEW Application Builder to Create Stand-Alone Real-Time Applications
Use the Application Builder to create a build specification that you can use to build a stand-alone real-time application. A build specification defines the VIs, support files, and settings for stand-alone real-time applications.
• Create a Build Specification—Right-click Build Specifications under the RT target in the Project Explorer window and select New»Real-Time Application from the shortcut menu to create a new build specification. You also can use the build specification to define the stand-alone real-time application to launch when you power on the RT target. Right-click the build specification in the Project Explorer window and select Set as startup from the shortcut menu to set the stand-alone real-time application to launch when you power on the RT target.
• Build and Run a Stand-Alone Real-Time Application—Right-click the build specification and select Build from the shortcut menu to build the stand-alone real-time application. You then can run the stand-alone real-time application on the RT target from the Project Explorer window by right-clicking the build specification and selecting Run as Startup from the shortcut menu.
Using the Real-Time System Manager to Manage RT Target ResourcesThe Real-Time System Manager displays details about VIs running on an RT target and provides a dynamic display of target resources, such as memory and CPU utilization. From the Project Explorer window, select Tools»Real-Time Module»System Manager to launch the Real-Time System Manager.
Using the RT Target Errors Dialog Box to View RT Target Error LogsThe RT Target Errors dialog box displays LabVIEW errors, real-time operating system errors, and crash logs for each session of an RT target. Right-click an RT target in the Project Explorer window and select Utilities»View Error Log from the shortcut menu to open the RT Target Errors dialog box.

© National Instruments Corporation 27 Getting Started with the LabVIEW Real-Time Module
Debugging RT Target VIs and Stand-Alone Applications• Debug RT Target VIs—You can open a front panel connection with
an RT target and use the LabVIEW debugging tools to debug the VIs running on the target. Right-click the RT target in the Project Explorer window and select Connect from the shortcut menu to open a front panel connection with the target. Right-click the RT target in the Project Explorer window and select Disconnect from the shortcut menu to close the front panel connection.
• Debug Stand-Alone Real-Time Applications—Use the Debug Application or Shared Library dialog box to debug stand-alone real-time applications running on an RT target. From the Project Explorer window, select Operate»Debug Application or Shared Library to open the Debug Application or Shared Library dialog box.
Where to Go from HereNow that you have completed this introductory tutorial, you can refer to the following resources for additional information about the LabVIEW Real-Time Module.
Real-Time Module ConceptsThe Real-Time Module Concepts book of the LabVIEW Help includes conceptual information about real-time programming techniques, application architectures, and Real-Time Module features you can use to create real-time applications. Refer to the Real-Time Module concepts before attempting to create a deterministic real-time application.
Real-Time Module ExamplesUse the NI Example Finder, available by selecting Help»Find Examples from LabVIEW, to browse or search for example VIs. You also can access the example VIs from the examples\Real-Time directory. The Real-Time Module includes examples of multithreaded communication, network communication, and shared memory access.

National Instruments, NI, ni.com, and LabVIEW are trademarks of National Instruments Corporation. Refer to the Terms of Use section on ni.com/legal for more information about National Instruments trademarks. Other product and company names mentioned herein are trademarks or trade names of their respective companies. For patents covering National Instruments products, refer to the appropriate location: Help»Patents in your software, the patents.txt file on your CD, or ni.com/patents.
© 2003–2007 National Instruments Corporation. All rights reserved. 371375B-01 Aug07
Related Documents


