A TECHNICAL GUIDE TO PROPER GAMELINES & LOGO APPLICATION

Applying Game Lines and Logos
Mar 10, 2016
This eBook shows the basic steps to painting on game lines and logos to a hardwood athletic floor.
Welcome message from author
This document is posted to help you gain knowledge. Please leave a comment to let me know what you think about it! Share it to your friends and learn new things together.
Transcript
A TECHNICAL GUIDE TO PROPER
GAMELINES & LOGO APPLICATION
Horner Flooring is the oldest and longest-standing member of the Maple Flooring Manufacturers Association (MFMA), with maple sports flooring roots dating back to 1891 – the same year the game of basketball was invented by Dr. James Naismith.
www.hornerflooring.com
@HornerFloor
http://www.facebook.com/HornerFlooring
FIND US ELSEWHERE
A TECHNICAL GUIDE TO PROPER GAMELINES & LOGO APPLICATION
4 First Step
5 Floor Renderings
7 Line Preparation
9 Center Circle & Logo
12 Questions
TABLE OF CONTENTS
A TECHNICAL GUIDE TO PROPER GAMELINES & LOGO APPLICATION
After the client consults with Horner Flooring and selects a floor system based on their needs, the next step is the design phase – deciding what gets painted on top of the hardwood floor.
CHAPTER 1: FIRST STEP
// PAGE 4
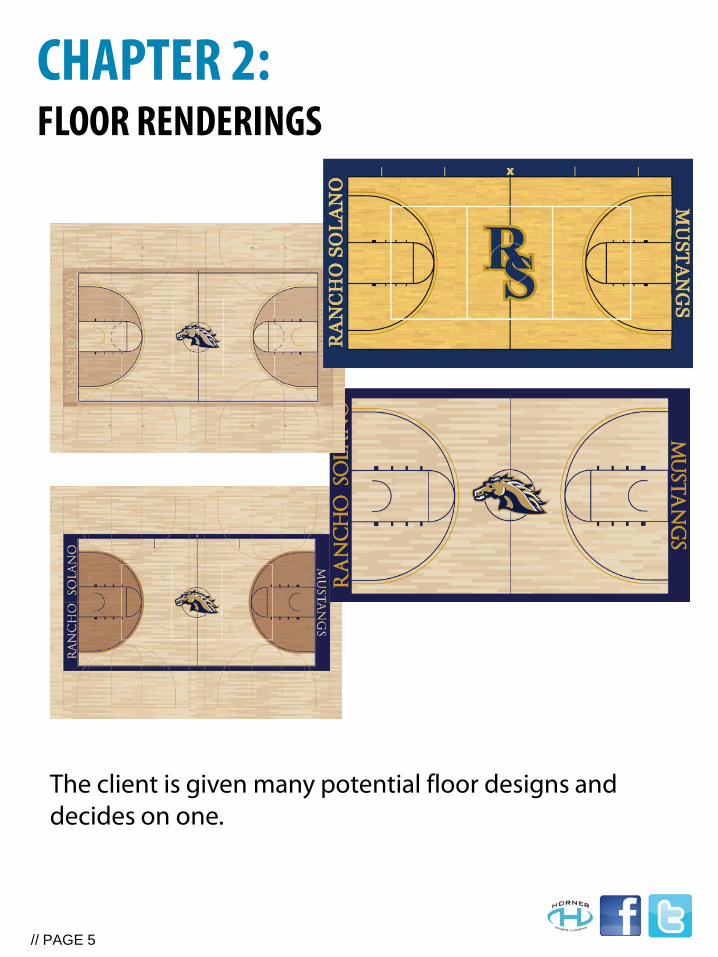
The client is given many potential floor designs and decides on one.
CHAPTER 2: FLOOR RENDERINGS
// PAGE 5
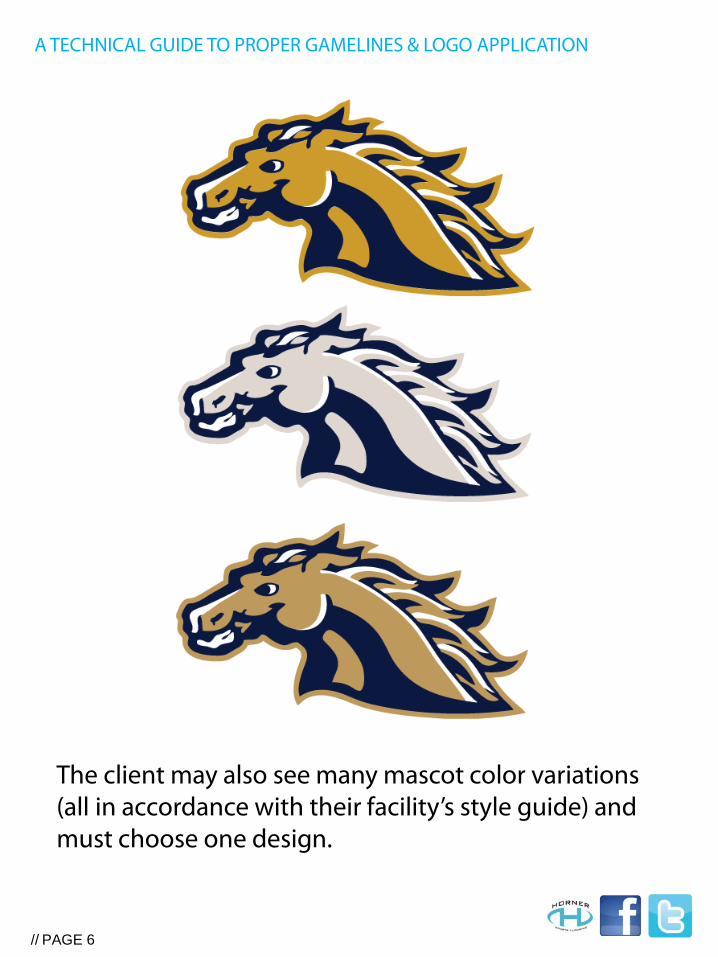
The client may also see many mascot color variations (all in accordance with their facility’s style guide) and must choose one design.
// PAGE 6
A TECHNICAL GUIDE TO PROPER GAMELINES & LOGO APPLICATION
CHAPTER 3: LINE PREPARATION
// PAGE 7
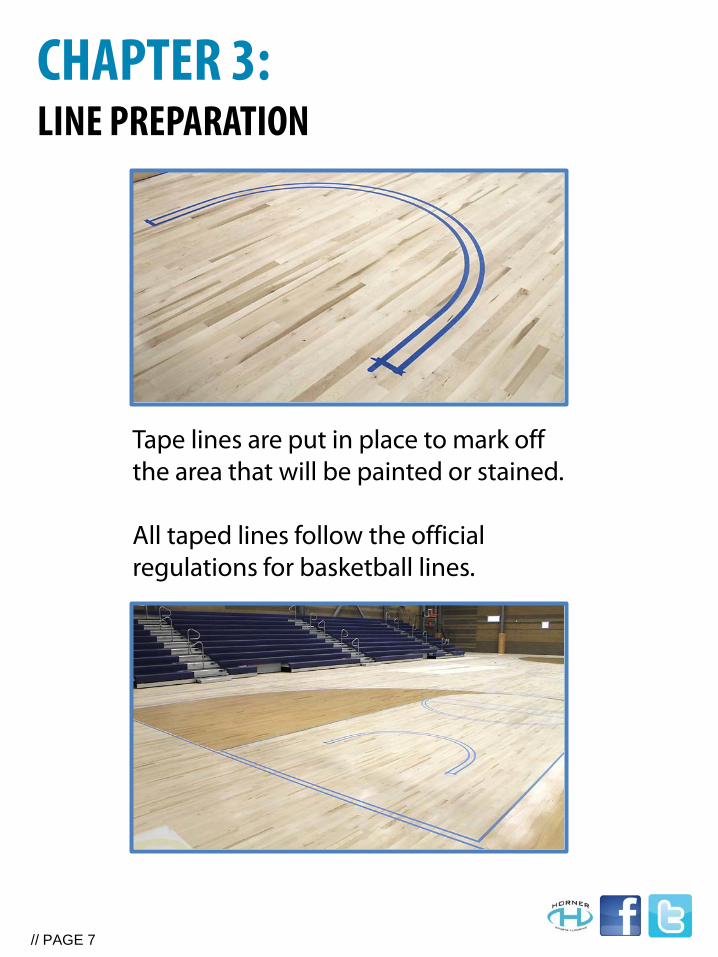
Tape lines are put in place to mark off the area that will be painted or stained. All taped lines follow the official regulations for basketball lines.
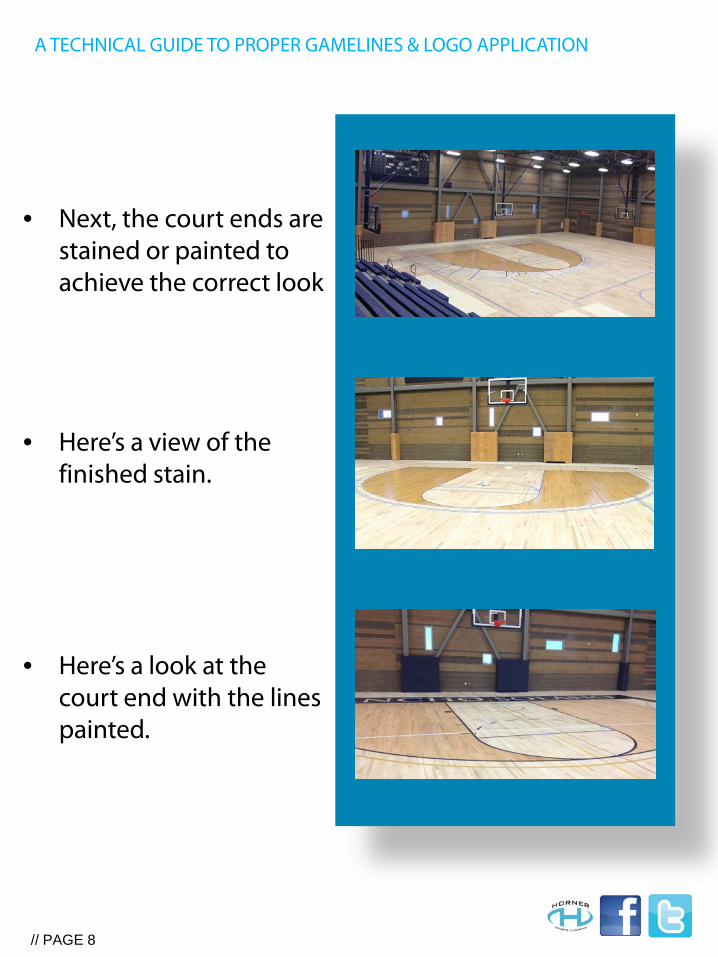
• Next, the court ends are stained or painted to achieve the correct look
• Here’s a view of the
finished stain.
• Here’s a look at the court end with the lines painted.
// PAGE 8
A TECHNICAL GUIDE TO PROPER GAMELINES & LOGO APPLICATION
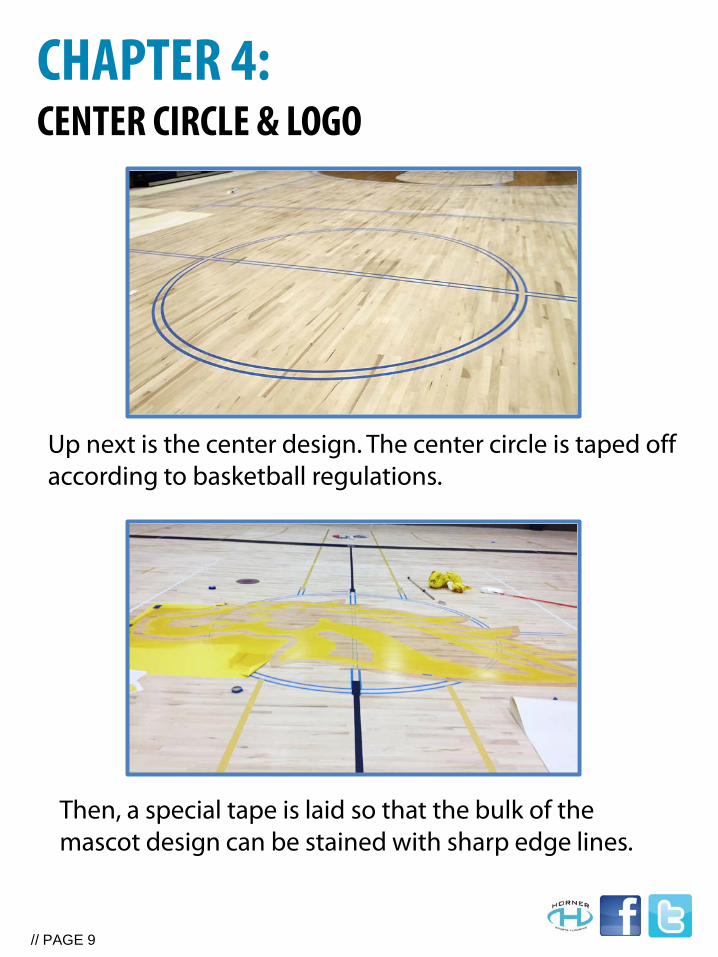
Up next is the center design. The center circle is taped off according to basketball regulations.
// PAGE 9
CHAPTER 4: CENTER CIRCLE & LOGO
Then, a special tape is laid so that the bulk of the mascot design can be stained with sharp edge lines.

• The yellow tape is removed to prepare for the next step
• The accent paint is carefully added
• The tape is carefully
removed after the final color is added
// PAGE 10
A TECHNICAL GUIDE TO PROPER GAMELINES & LOGO APPLICATION
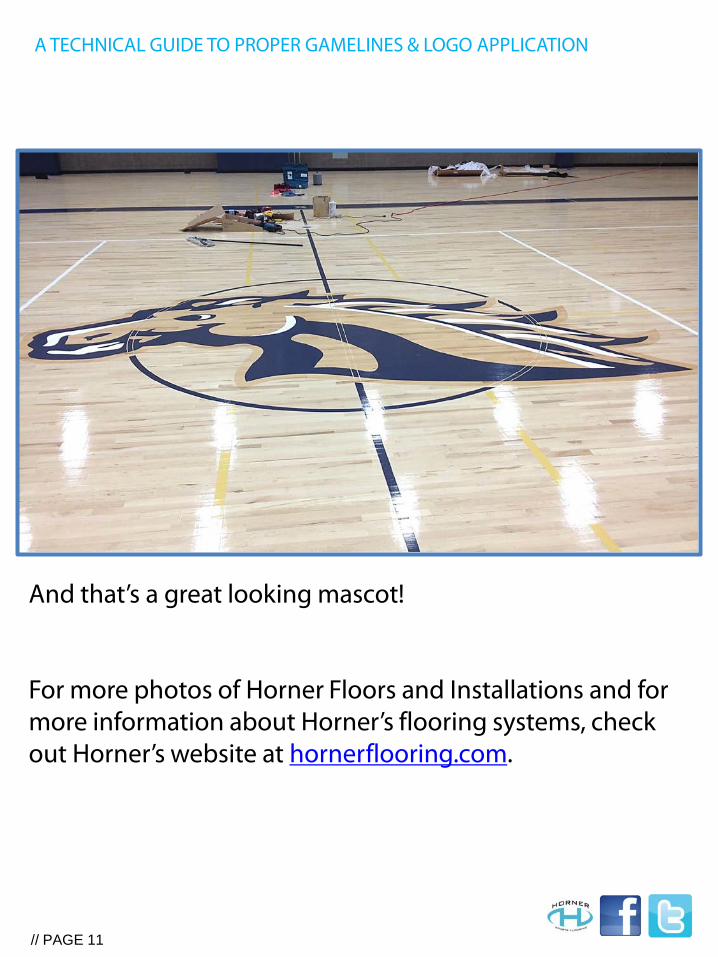
And that’s a great looking mascot! For more photos of Horner Floors and Installations and for more information about Horner’s flooring systems, check out Horner’s website at hornerflooring.com.
// PAGE 11
A TECHNICAL GUIDE TO PROPER GAMELINES & LOGO APPLICATION
// PAGE 12
Questions? Contact us!
Karl Borree - [email protected]
www.hornerflooring.com
@HornerFloor
http://www.facebook.com/HornerFlooring
A TECHNICAL GUIDE TO PROPER GAMELINES & LOGO APPLICATION
Related Documents