UI Smartphone Programming (CPE 490/590) Michael T. Shrove

Android and IOS UI Development (Android 5.0 and iOS 9.0)
Aug 17, 2015
Welcome message from author
This document is posted to help you gain knowledge. Please leave a comment to let me know what you think about it! Share it to your friends and learn new things together.
Transcript
UISmartphone Programming (CPE 490/590)
Michael T. Shrove

IOS
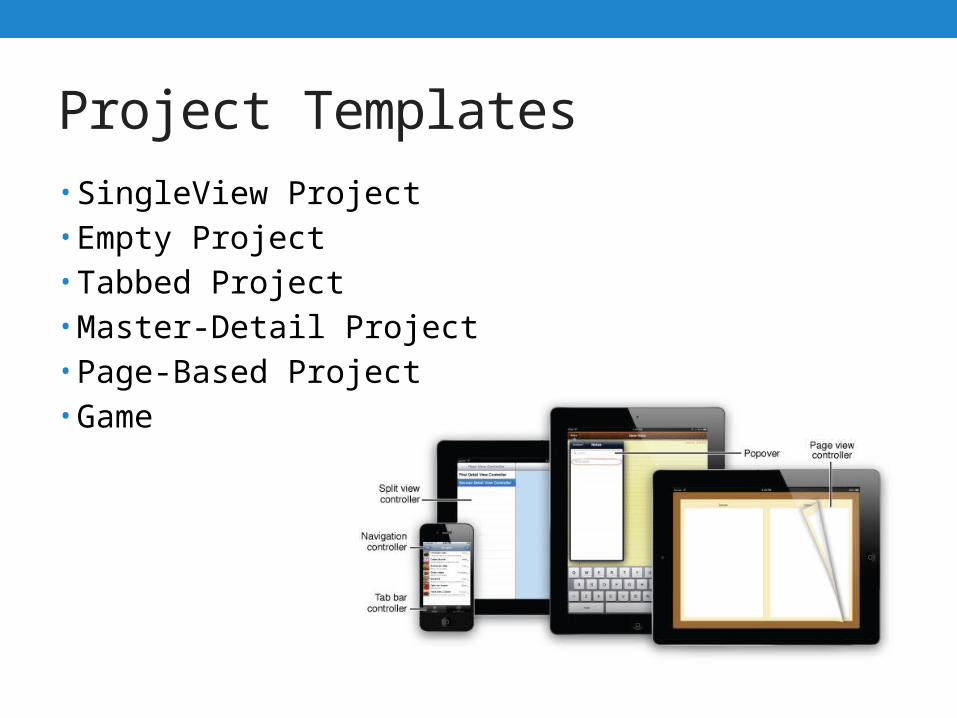
Project Templates• SingleView Project• Empty Project• Tabbed Project• Master-Detail Project• Page-Based Project• Game
Empty
•Do not use!!!!!!!• Does not come with anything pre-created.
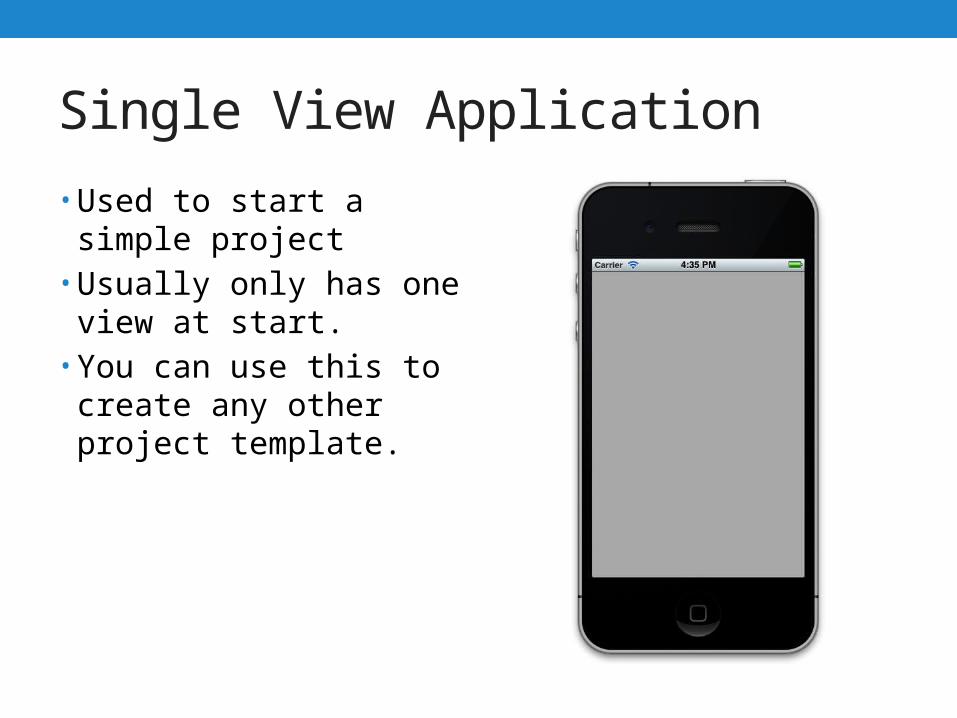
Single View Application
• Used to start a simple project
• Usually only has one view at start.
• You can use this to create any other project template.
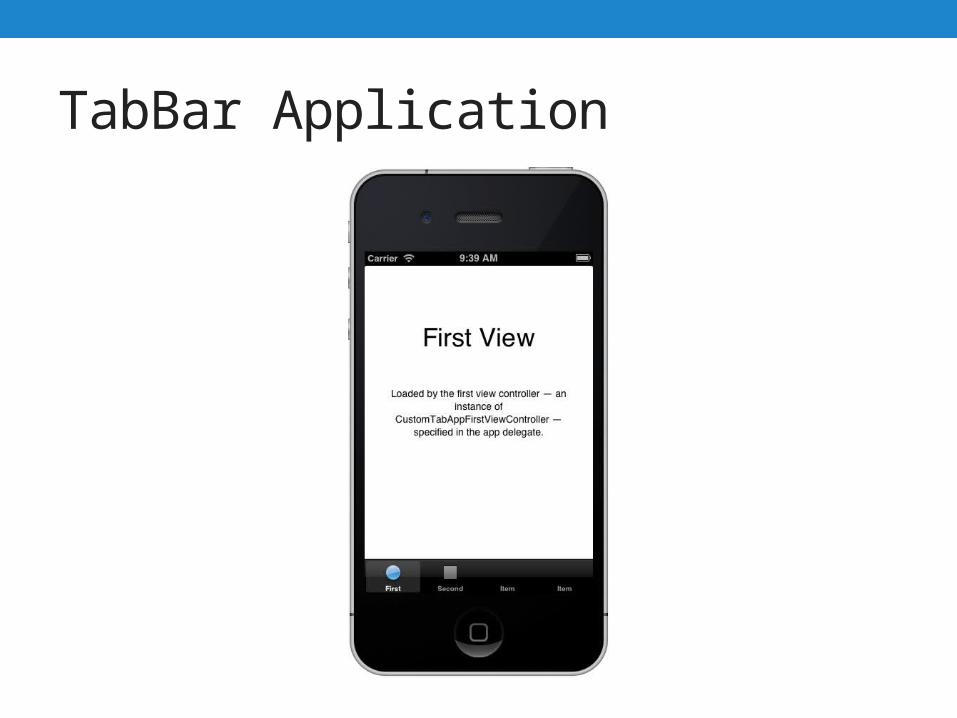
TabBar Application
TabBar Controller• You use tab bar controller to organize your app into one or
more distinct modes of operation. • The view hierarchy of a tab bar controller is self
contained. • It is composed of views that the tab bar controller
manages directly and views that are managed by content view controllers you provide.
• Each content view controller manages a distinct view hierarchy, and the tab bar controller coordinates the navigation between the view hierarchies.
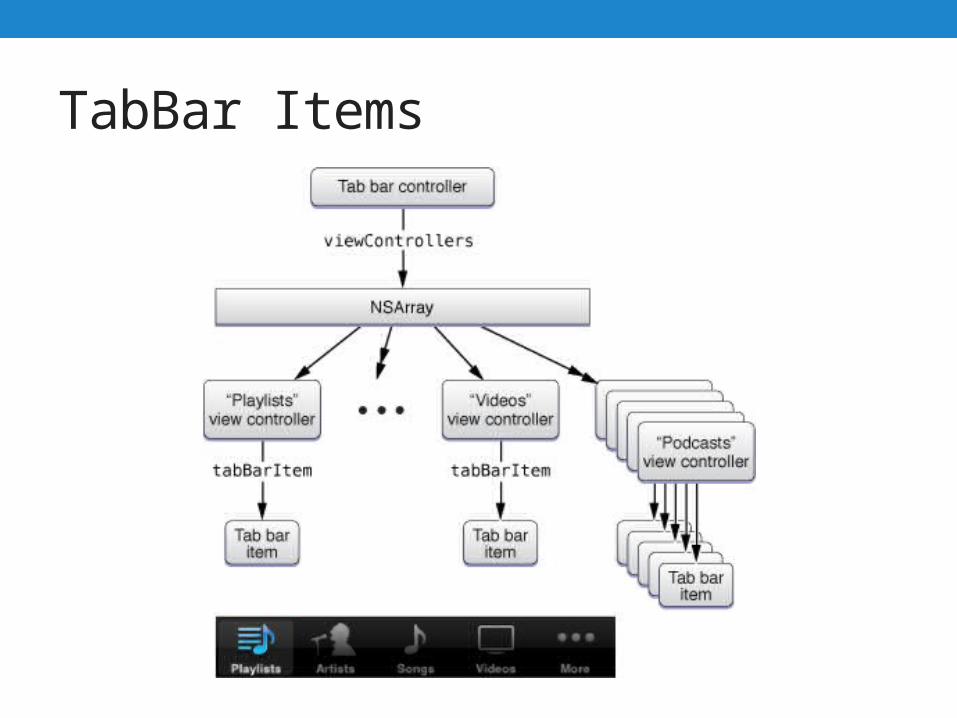
TabBar Items
Creating a Tab Bar Interface Using a Storyboard
• If you are creating a new Xcode project, the Tabbed Application template gives you a tab bar controller in the storyboard, set as the first scene.
• To create a tab bar controller in a storyboard, do the following:• Drag a tab bar controller from the library.• Interface Builder creates a tab bar controller and two view
controllers, and it creates relationships between them. These relationships identify each of the newly created view controllers as the view controller for one tab of the tab bar controller.
• Display it as the first view controller by selecting the option Is Initial View Controller in the Attributes inspector (or present the view controller in your user interface in another way.)
Example of Creating TabBar Controller
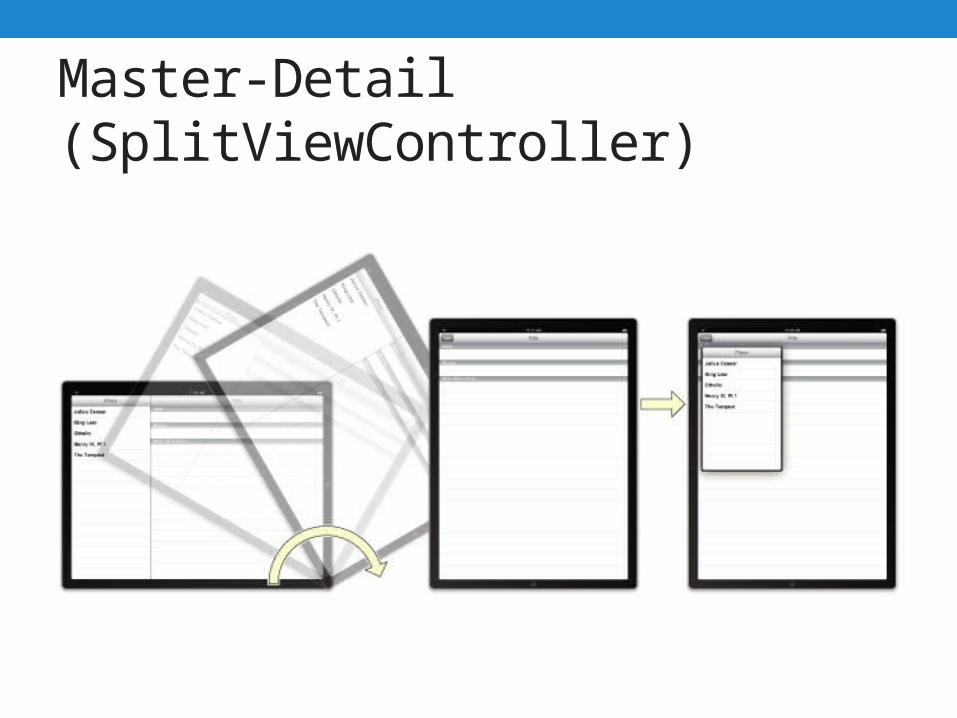
Master-Detail (SplitViewController)• The UISplitViewController class is a container view
controller that manages two panes of information. • The first pane has a fixed width of 320 points and a height
that matches the visible window height. • The second pane fills the remaining space.
Master-Detail (SplitViewController)
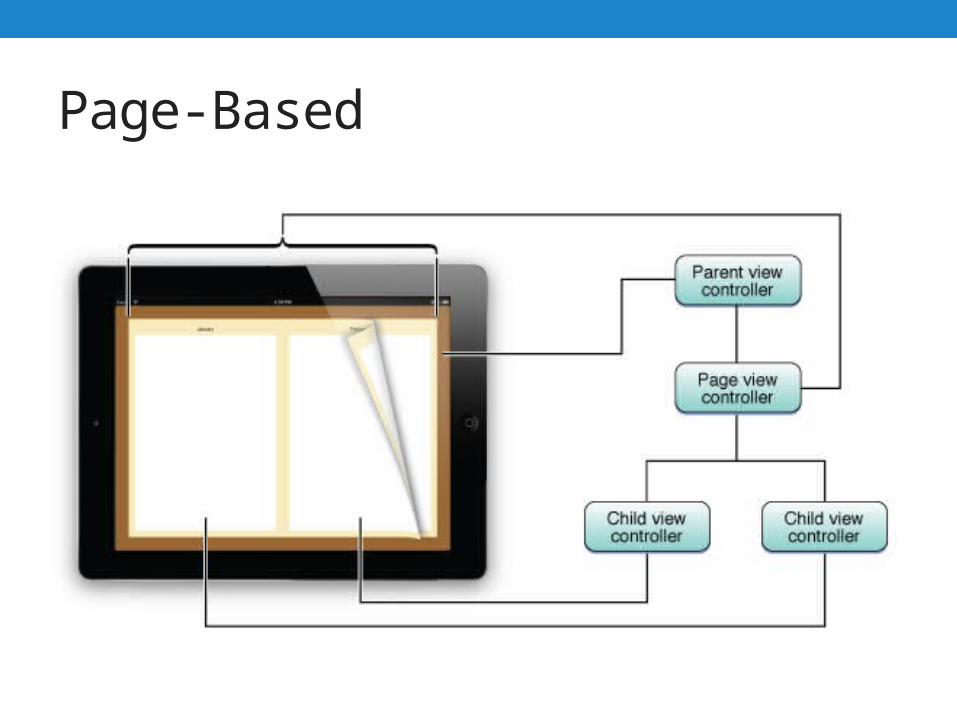
Page-Based• You use a page view controller to present content in a
page-by-page manner.• A page view controller manages a self-contained view
hierarchy. • The parent view of this hierarchy is managed by the page
view controller, and the child views are managed by the content view controllers that you provide.
Page-Based
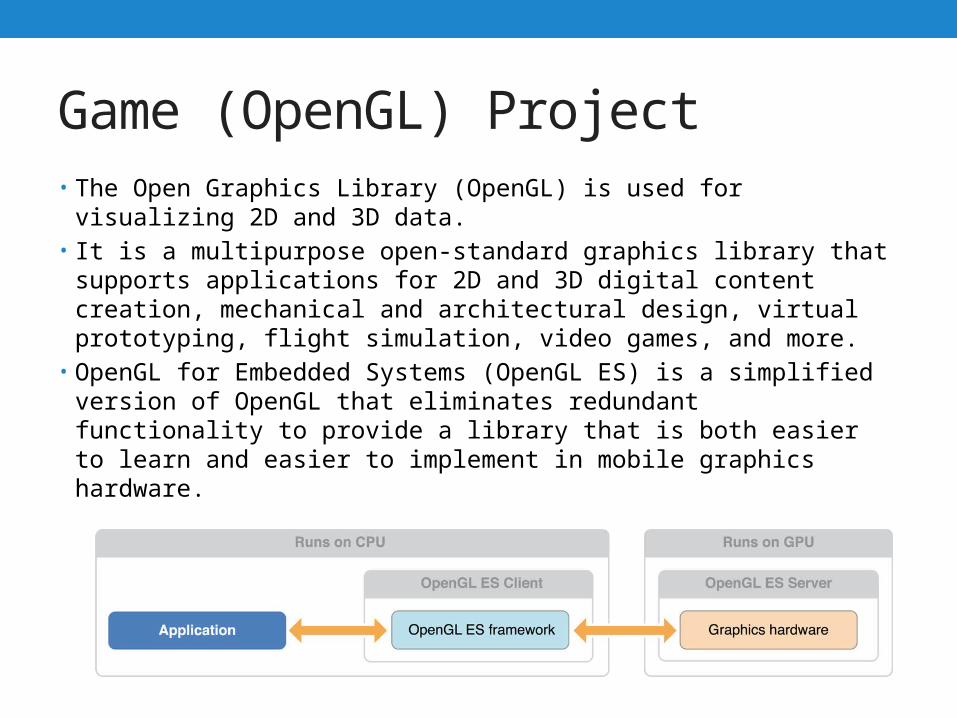
Game (OpenGL) Project• The Open Graphics Library (OpenGL) is used for visualizing 2D and
3D data. • It is a multipurpose open-standard graphics library that supports
applications for 2D and 3D digital content creation, mechanical and architectural design, virtual prototyping, flight simulation, video games, and more.
• OpenGL for Embedded Systems (OpenGL ES) is a simplified version of OpenGL that eliminates redundant functionality to provide a library that is both easier to learn and easier to implement in mobile graphics hardware.
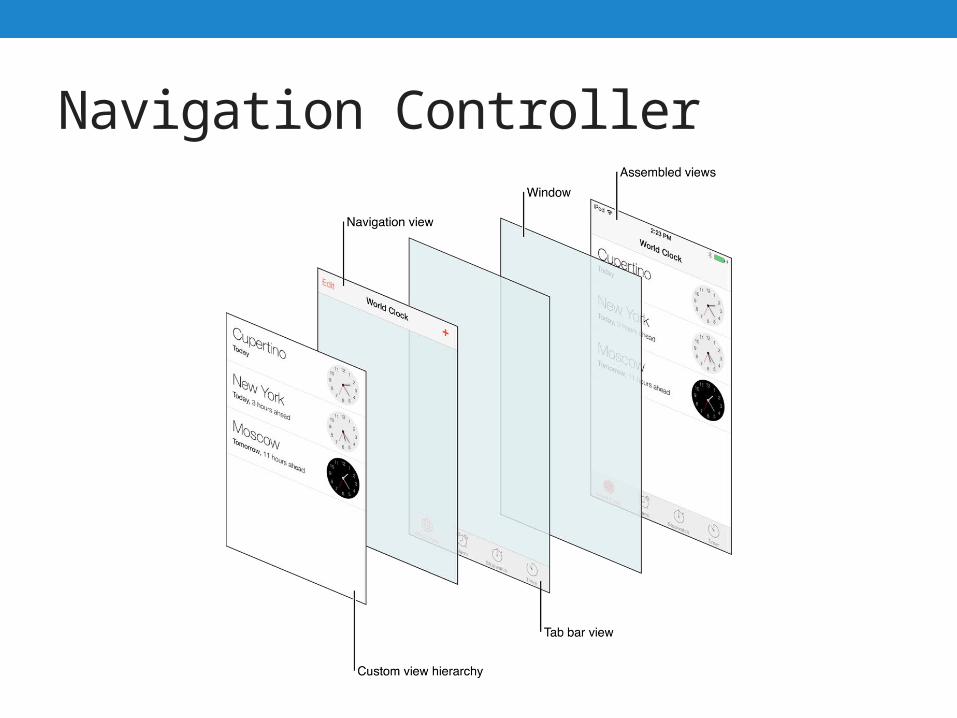
Navigation Controller• A navigation controller manages a stack of view
controllers to provide a drill-down interface for hierarchical content.
• The view hierarchy of a navigation controller is self contained.
• It is composed of views that the navigation controller manages directly and views that are managed by content view controllers you provide.
• Each content view controller manages a distinct view hierarchy, and the navigation controller coordinates the navigation between these view hierarchies.
Navigation Controller
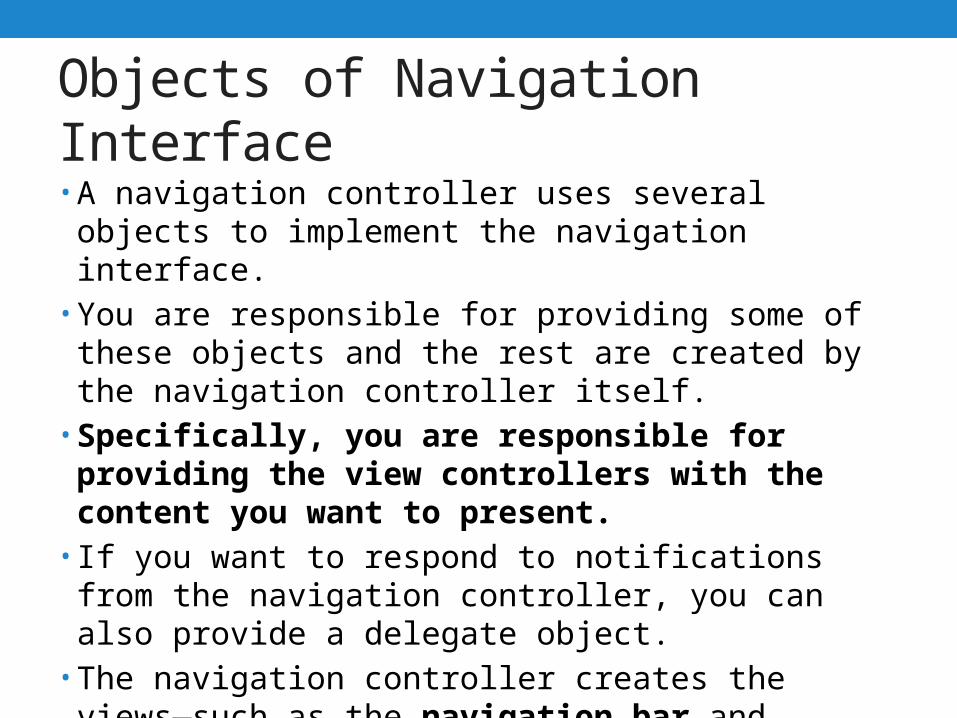
Objects of Navigation Interface• A navigation controller uses several objects to implement
the navigation interface. • You are responsible for providing some of these objects
and the rest are created by the navigation controller itself. • Specifically, you are responsible for providing the
view controllers with the content you want to present. • If you want to respond to notifications from the navigation
controller, you can also provide a delegate object. • The navigation controller creates the views—such as the
navigation bar and toolbar—that are used for the navigation interface, and it is responsible for managing those views.
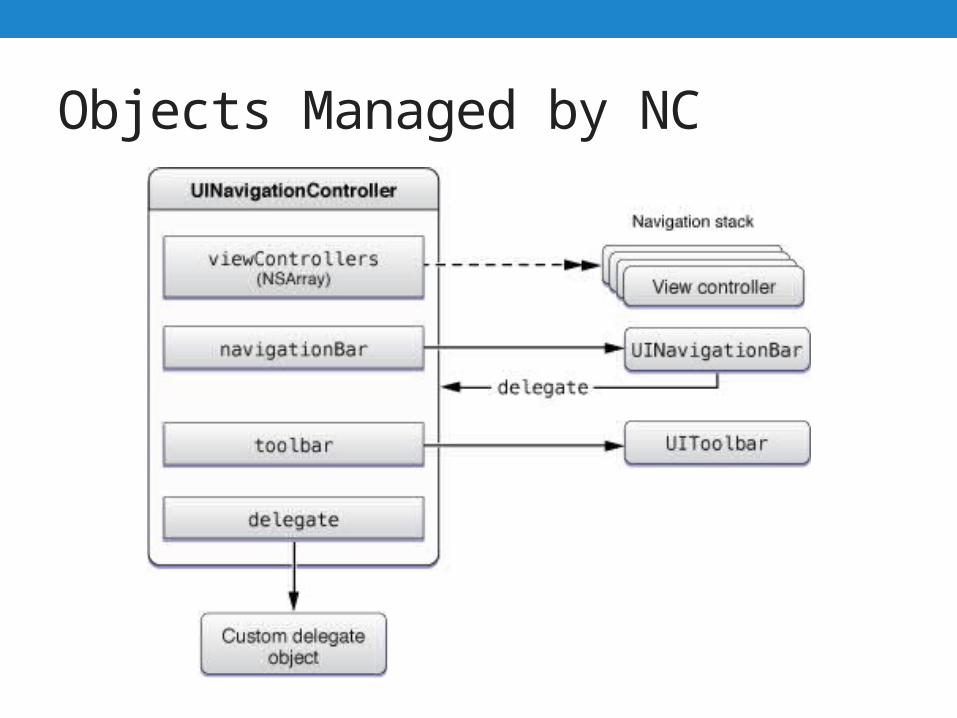
Objects Managed by NC
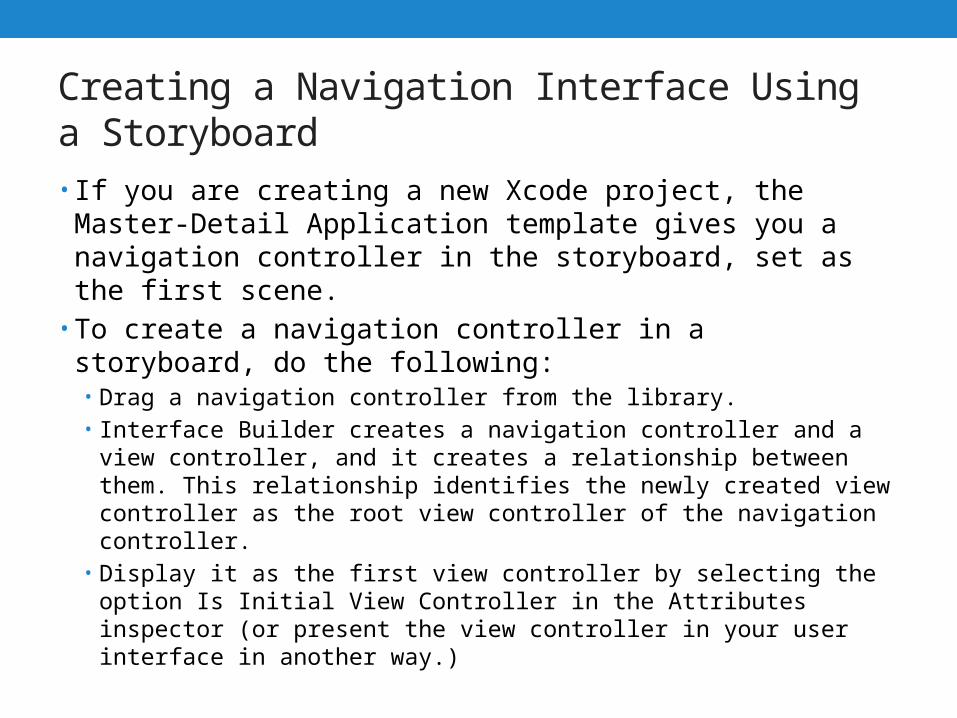
Creating a Navigation Interface Using a Storyboard• If you are creating a new Xcode project, the Master-Detail
Application template gives you a navigation controller in the storyboard, set as the first scene.
• To create a navigation controller in a storyboard, do the following:• Drag a navigation controller from the library.• Interface Builder creates a navigation controller and a view
controller, and it creates a relationship between them. This relationship identifies the newly created view controller as the root view controller of the navigation controller.
• Display it as the first view controller by selecting the option Is Initial View Controller in the Attributes inspector (or present the view controller in your user interface in another way.)
Modifying the Navigation Stack• You are responsible for creating the objects that reside on
the navigation stack. • When initializing a navigation controller object, you must
provide a content view controller to display the root content of your data hierarchy.
• You can add or remove view controllers programmatically or in response to user interactions.
• The navigation controller class provides several options for managing the contents of the navigation stack.
• These options cover the various scenarios you are likely to encounter in your app.
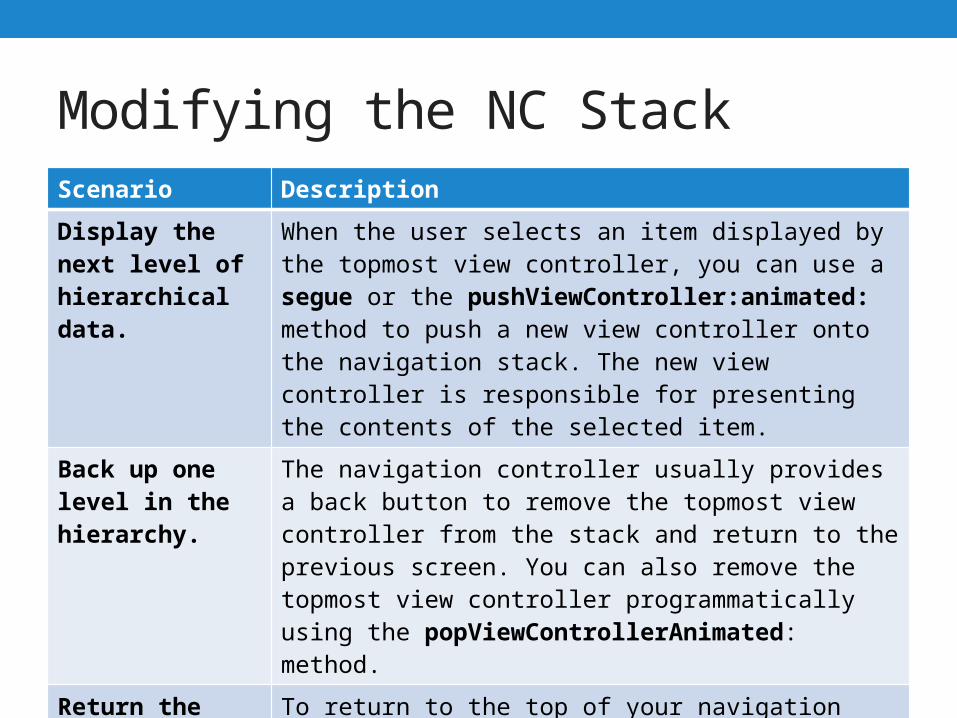
Modifying the NC StackScenario Description
Display the next level of hierarchical data.
When the user selects an item displayed by the topmost view controller, you can use a segue or the pushViewController:animated: method to push a new view controller onto the navigation stack. The new view controller is responsible for presenting the contents of the selected item.
Back up one level in the hierarchy.
The navigation controller usually provides a back button to remove the topmost view controller from the stack and return to the previous screen. You can also remove the topmost view controller programmatically using the popViewControllerAnimated: method.
Return the user to the root view controller.
To return to the top of your navigation interface, use the popToRootViewControllerAnimated: method. This method removes all but the root view controller from the navigation stack.
Navigation Bar• A navigation bar is a view that manages the controls in a
navigation interface, and it takes on a special role when managed by a navigation controller object.
• To ensure consistency, and to reduce the amount of work needed to build navigation interfaces, each navigation controller object creates its own navigation bar and takes on most of the responsibility for managing that bar’s content.
• As needed, the navigation controller interacts with other objects (like your content view controllers) to help in this process.
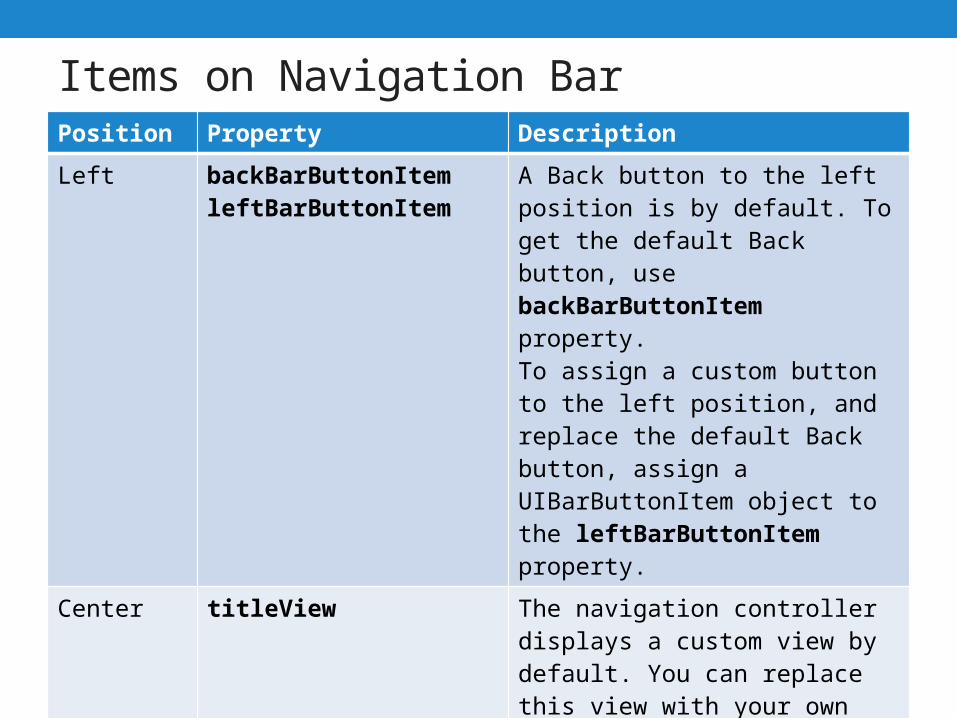
Items on Navigation BarPosition Property Description
Left backBarButtonItemleftBarButtonItem
A Back button to the left position is by default. To get the default Back button, use backBarButtonItem property.To assign a custom button to the left position, and replace the default Back button, assign a UIBarButtonItem object to the leftBarButtonItem property.
Center titleView The navigation controller displays a custom view by default. You can replace this view with your own custom view.
Right rightBarButtonItem This position is empty by default. It is used to place buttons for editing/modifying the current screen. You can place custom views here by using UIBarButtonItem object.
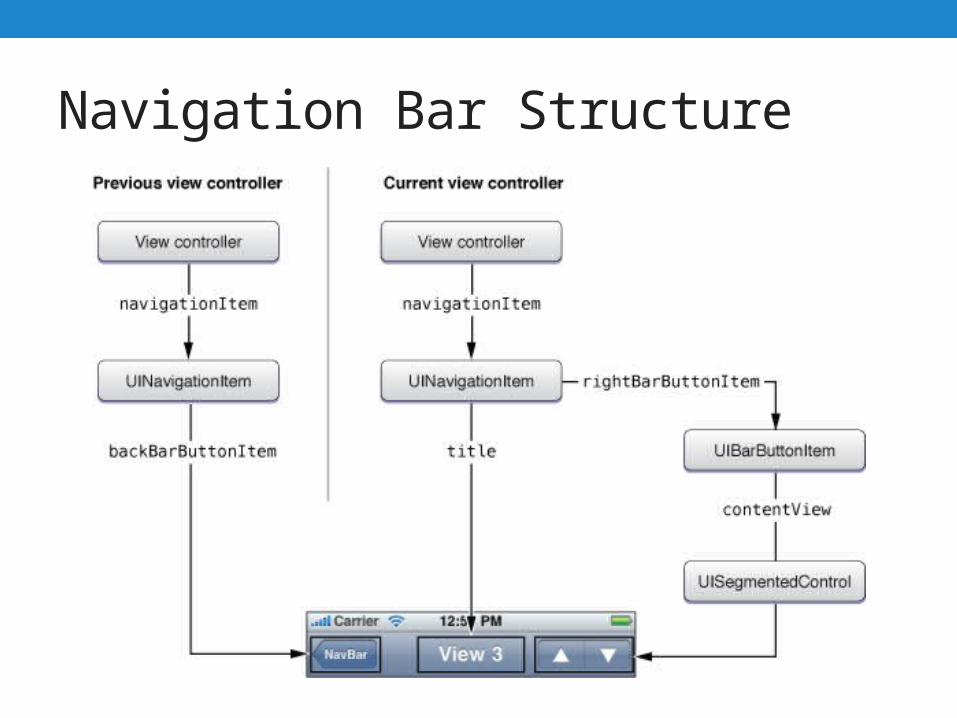
Navigation Bar Structure
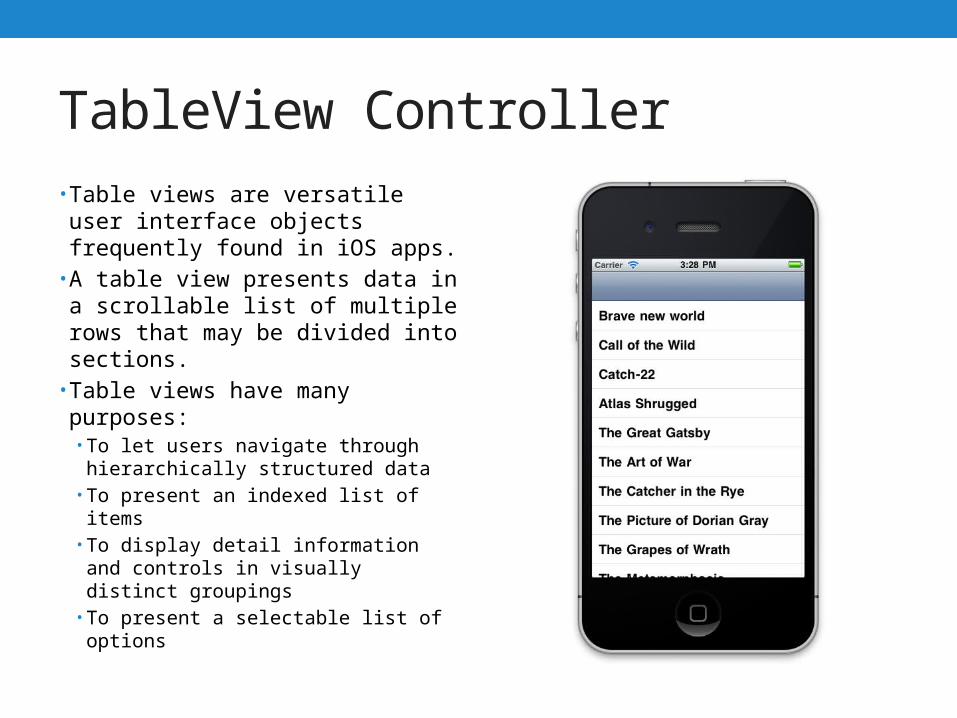
TableView Controller• Table views are versatile user
interface objects frequently found in iOS apps.
• A table view presents data in a scrollable list of multiple rows that may be divided into sections.
• Table views have many purposes:• To let users navigate through
hierarchically structured data• To present an indexed list of items• To display detail information and
controls in visually distinct groupings• To present a selectable list of options
TableViewController Information• A table view is an instance of the UITableView class in
one of two basic styles, plain or grouped.• A plain table view is an unbroken list; a grouped table
view has visually distinct sections. • A table view has a data source and might have a
delegate. • The data source object provides the data for populating
the sections and rows of the table view. • The delegate object customizes its appearance and
behavior.
TableView Cells• A table view draws its visible rows using cells—that is,
UITableViewCell objects. • Cells are views that can display text, images, or other kinds of
content.• Two Types of Cell Content:
1. Static cells: Use static cells to design a table with a fixed number of rows, each with its own layout. Use static cells when you know what the table looks like at design time, regardless of the specific information it displays.
2. Dynamic prototypes: Use dynamic prototypes to design one cell and then use it as the template for other cells in the table. Use a dynamic prototype when multiple cells in a table should use the same layout to display information. Dynamic prototype content is managed by the data source at runtime, with an arbitrary number of cells.
Populating a Dynamic TableView w/ Data
• Just after a table view object is created, it receives a reloadData message, which tells it to start querying the data source and delegate for the information it needs for the sections and rows it displays.
• The table view immediately asks the data source for its logical dimensions—that is, the number of sections and the number of rows in each section.
• It then repeatedly invokes the tableView:cellForRowAtIndexPath: method to get a cell object for each visible row.
• It uses this UITableViewCell object to draw the content of the row. (Scrolling a table view also causes an invocation of tableView:cellForRowAtIndexPath: for each newly visible row.)
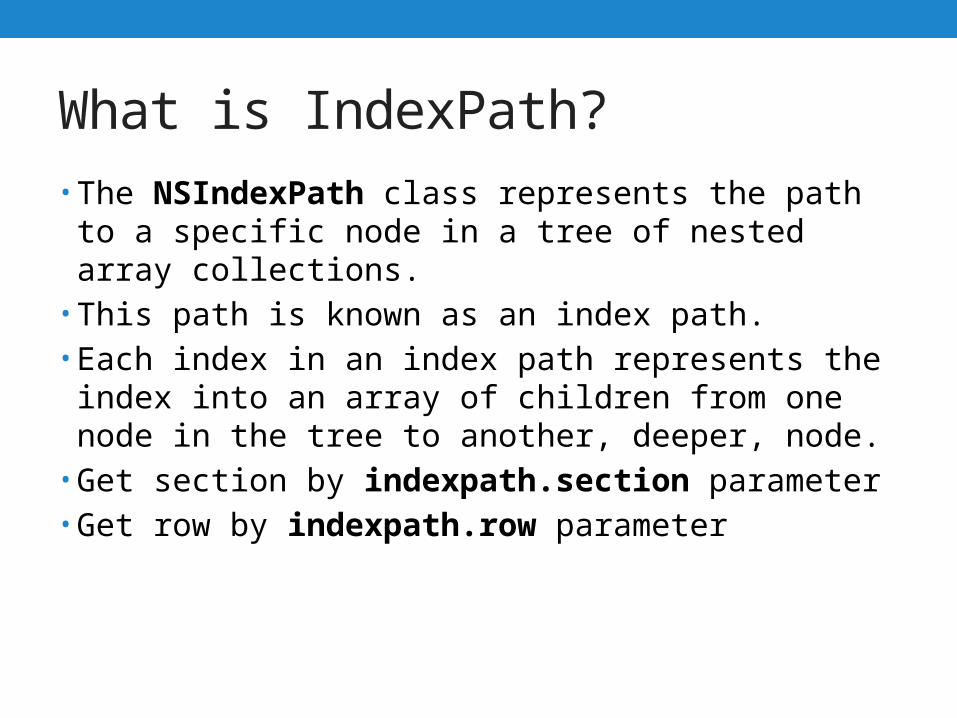
What is IndexPath?• The NSIndexPath class represents the path to a specific
node in a tree of nested array collections. • This path is known as an index path.• Each index in an index path represents the index into an
array of children from one node in the tree to another, deeper, node.
• Get section by indexpath.section parameter• Get row by indexpath.row parameter
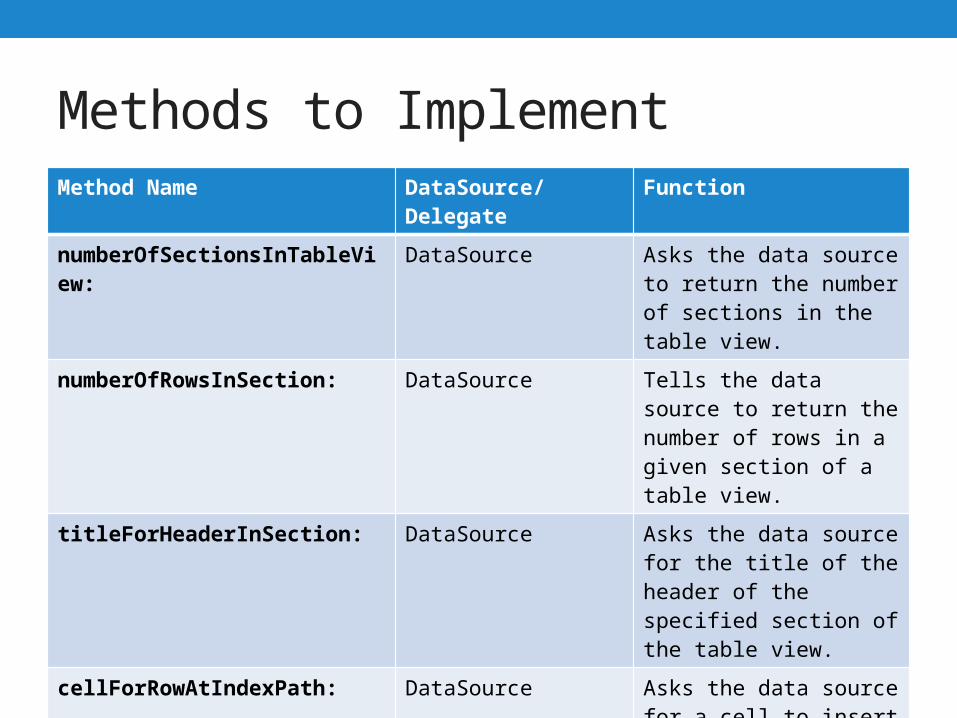
Methods to ImplementMethod Name DataSource/Delegate Function
numberOfSectionsInTableView: DataSource Asks the data source to return the number of sections in the table view.
numberOfRowsInSection: DataSource Tells the data source to return the number of rows in a given section of a table view.
titleForHeaderInSection: DataSource Asks the data source for the title of the header of the specified section of the table view.
cellForRowAtIndexPath: DataSource Asks the data source for a cell to insert in a particular location of the table view.
didSelectRowAtIndexPath: Delegate Tells the delegate that the specified row is now selected.
ANDROID
Checkbox
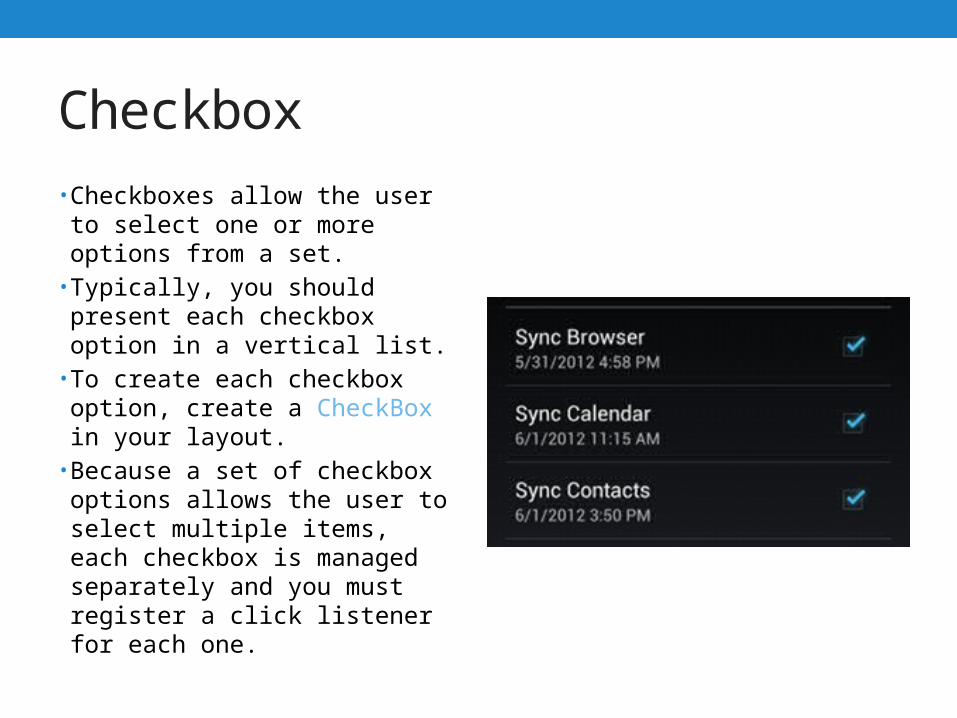
• Checkboxes allow the user to select one or more options from a set.
• Typically, you should present each checkbox option in a vertical list.
• To create each checkbox option, create a CheckBox in your layout.
• Because a set of checkbox options allows the user to select multiple items, each checkbox is managed separately and you must register a click listener for each one.
Checkbox Responding to Events• When the user selects a checkbox, the CheckBox object
receives an on-click event.• To define the click event handler for a checkbox, add the
android:onClick attribute to the <CheckBox> element in your XML layout.
• The value for this attribute must be the name of the method you want to call in response to a click event.
• The Activity hosting the layout must then implement the corresponding method.
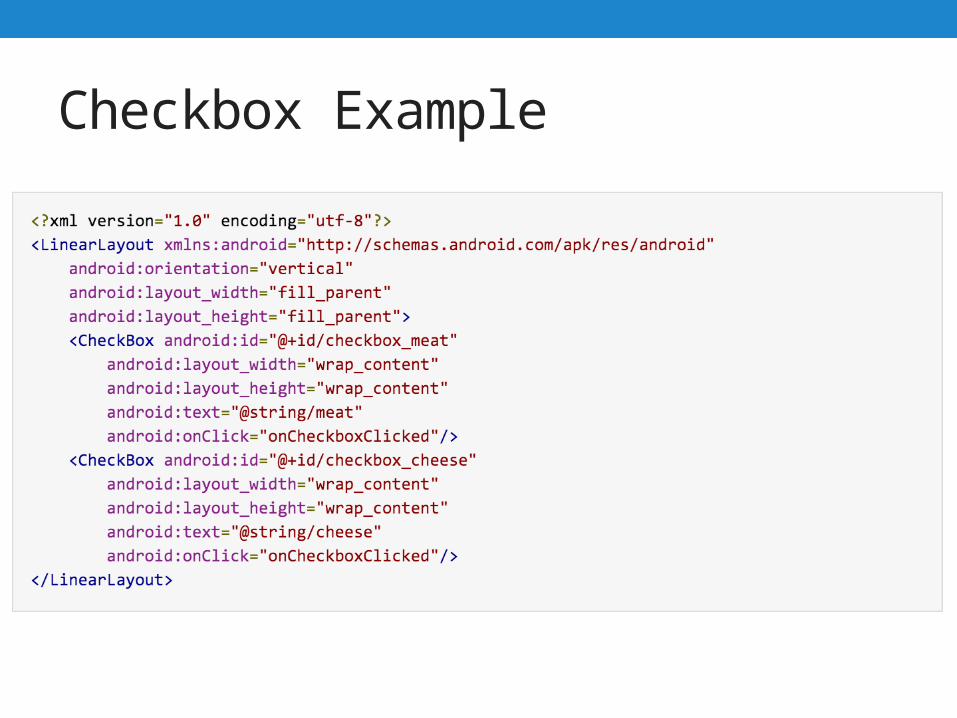
Checkbox Example
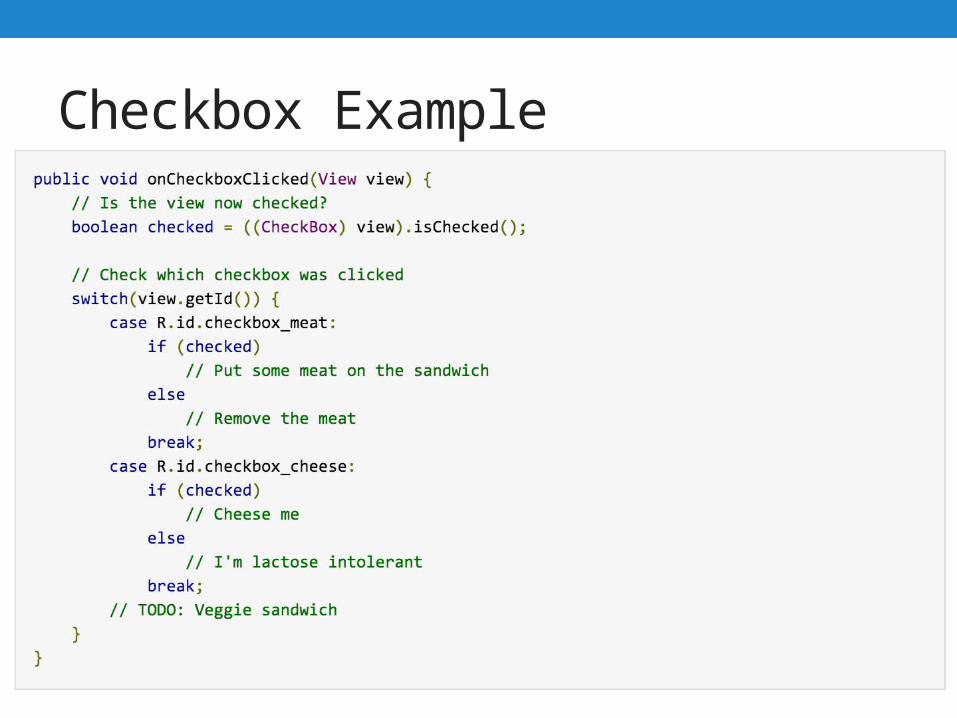
Checkbox Example
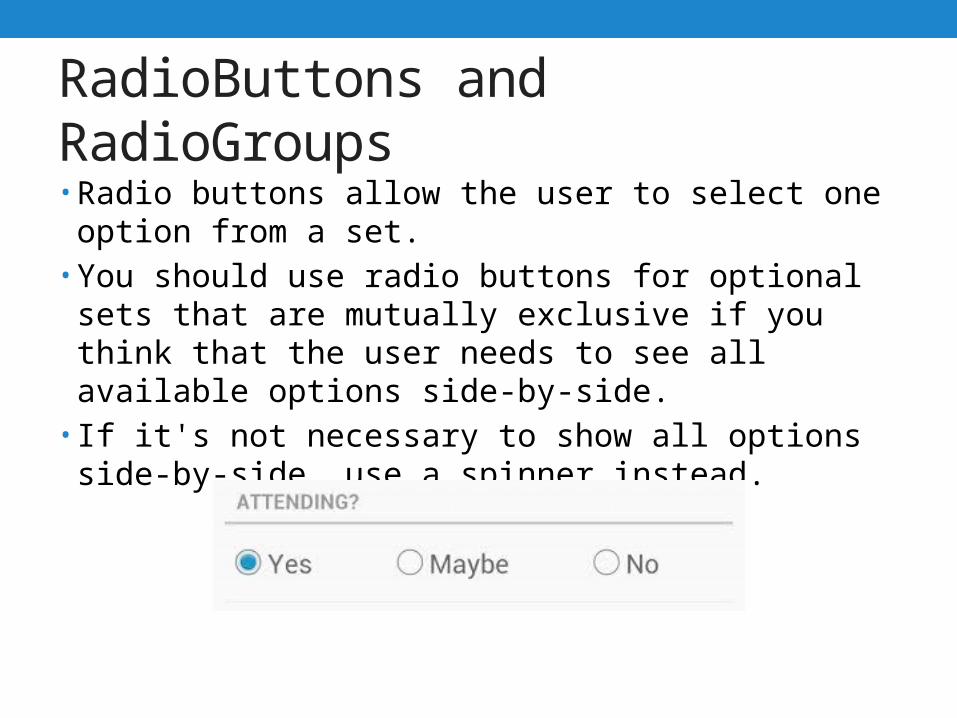
RadioButtons and RadioGroups• Radio buttons allow the user to select one option from a
set. • You should use radio buttons for optional sets that are
mutually exclusive if you think that the user needs to see all available options side-by-side.
• If it's not necessary to show all options side-by-side, use a spinner instead.
RadioButton Continued• To create each radio button option, create a RadioButton
in your layout. • However, because radio buttons are mutually exclusive,
you must group them together inside a RadioGroup.• By grouping them together, the system ensures that only
one radio button can be selected at a time.• When the user selects one of the radio buttons, the
corresponding RadioButton object receives an on-click event.
RadioButton Responding to Events• To define the click event handler for a button, add the
android:onClick attribute to the <RadioButton> element in your XML layout.
• The value for this attribute must be the name of the method you want to call in response to a click event.
• The Activity hosting the layout must then implement the corresponding method.
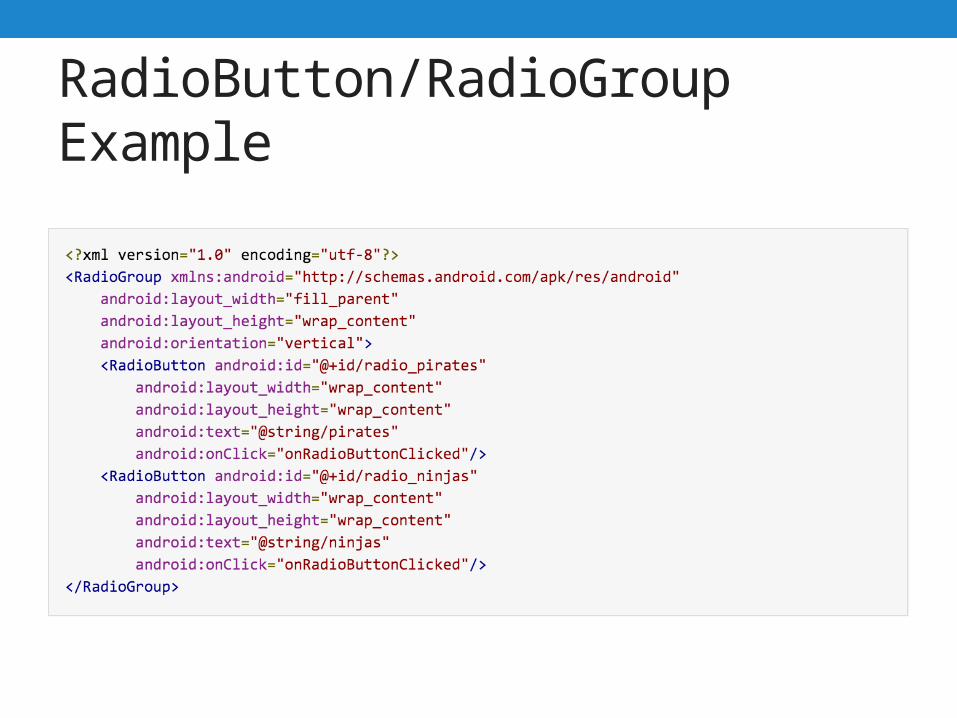
RadioButton/RadioGroup Example
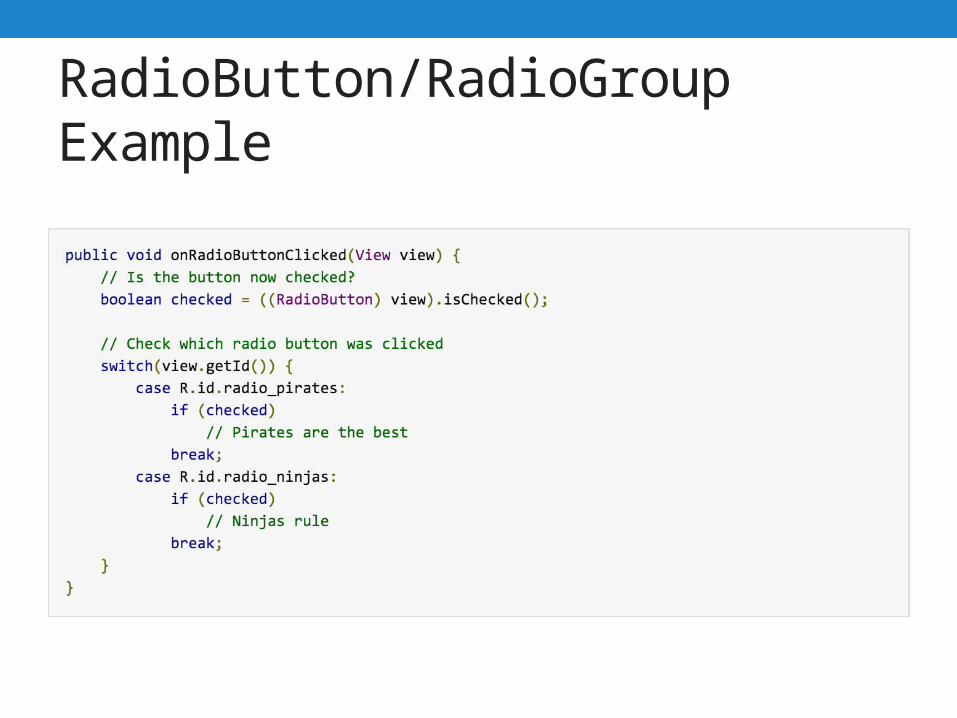
RadioButton/RadioGroup Example
Menus• Menus are a common user interface component in many
types of applications. • To provide a familiar and consistent user experience, you
should use the Menu APIs to present user actions and other options in your activities.
• Beginning with Android 3.0 (API level 11), Android-powered devices are no longer required to provide a dedicated Menu button.
• With this change, Android apps should migrate away from a dependence on the traditional 6-item menu panel and instead provide an action bar to present common user actions.
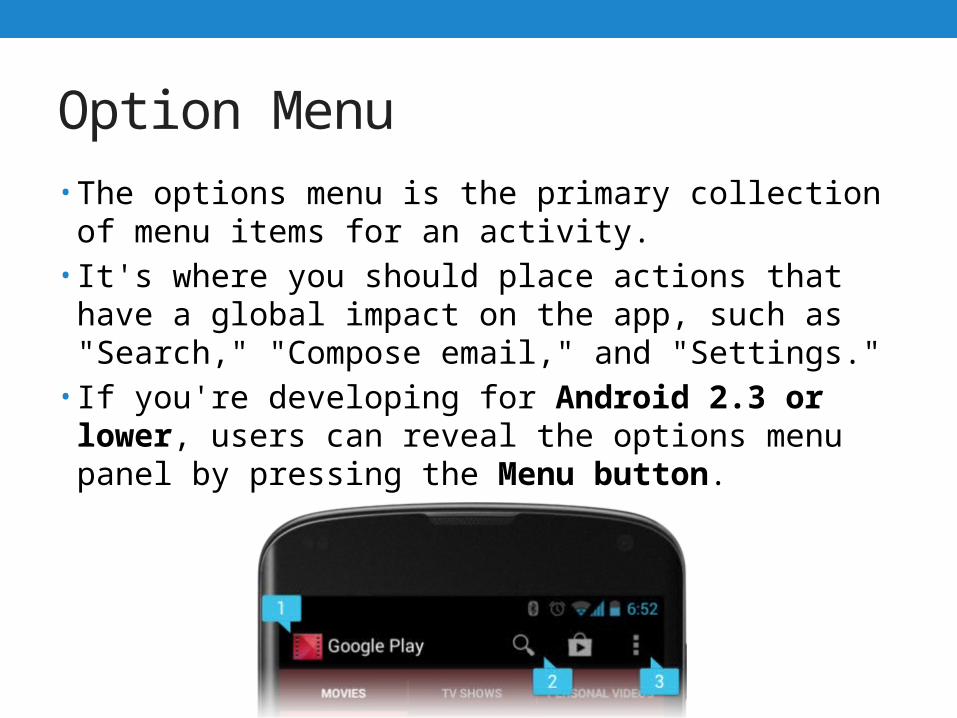
Option Menu• The options menu is the primary collection of menu items
for an activity. • It's where you should place actions that have a global
impact on the app, such as "Search," "Compose email," and "Settings."
• If you're developing for Android 2.3 or lower, users can reveal the options menu panel by pressing the Menu button.
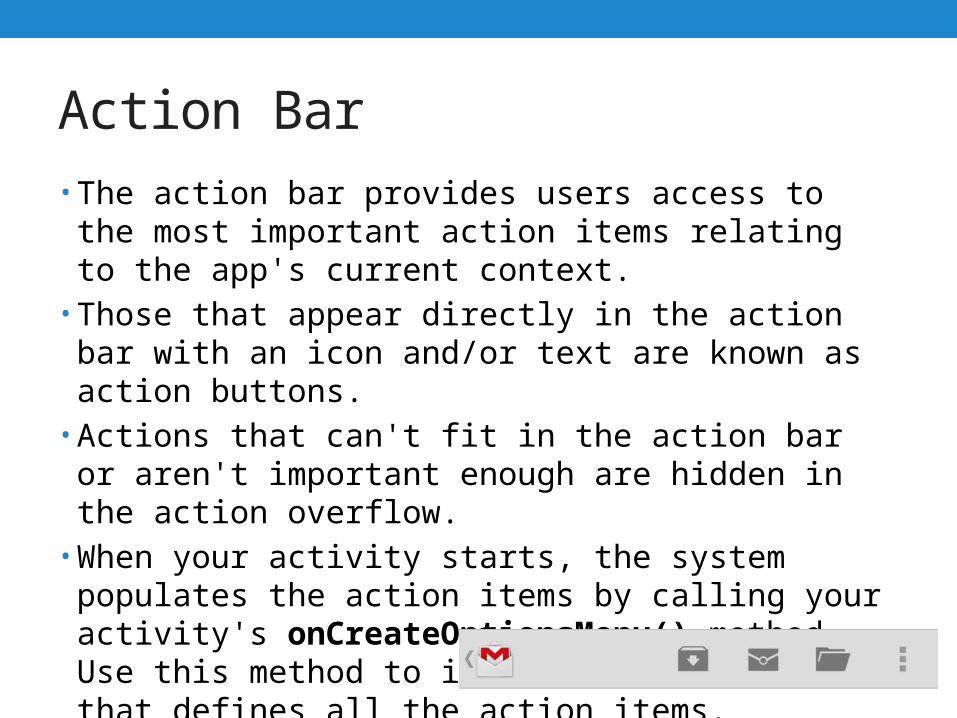
Action Bar• The action bar provides users access to the most
important action items relating to the app's current context.
• Those that appear directly in the action bar with an icon and/or text are known as action buttons.
• Actions that can't fit in the action bar or aren't important enough are hidden in the action overflow.
• When your activity starts, the system populates the action items by calling your activity's onCreateOptionsMenu() method. Use this method to inflate a menu resource that defines all the action items.
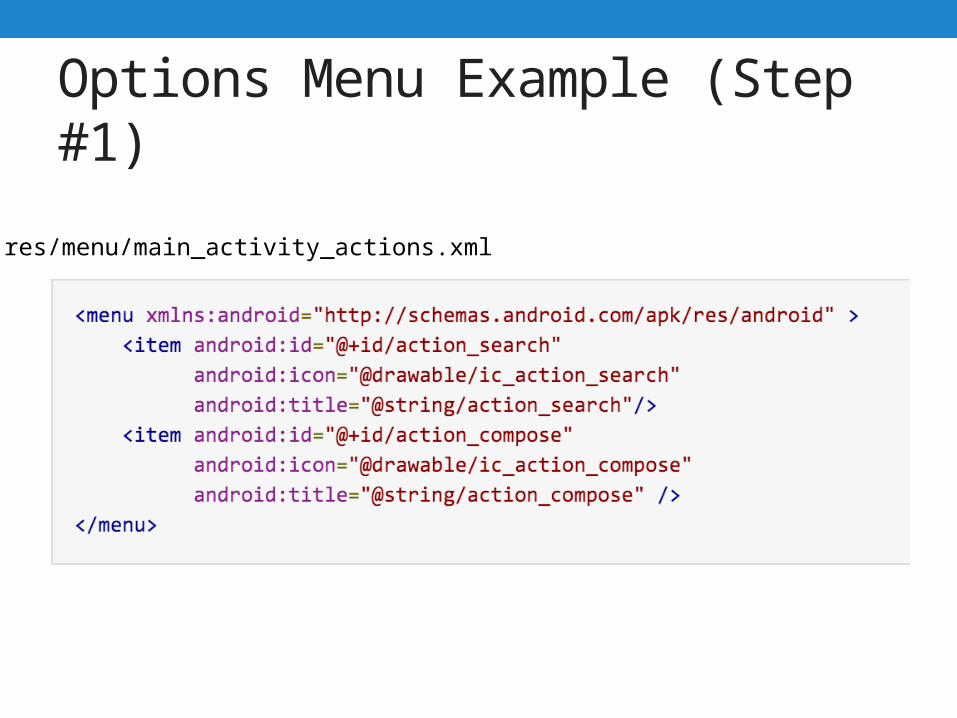
Options Menu Example (Step #1)
res/menu/main_activity_actions.xml
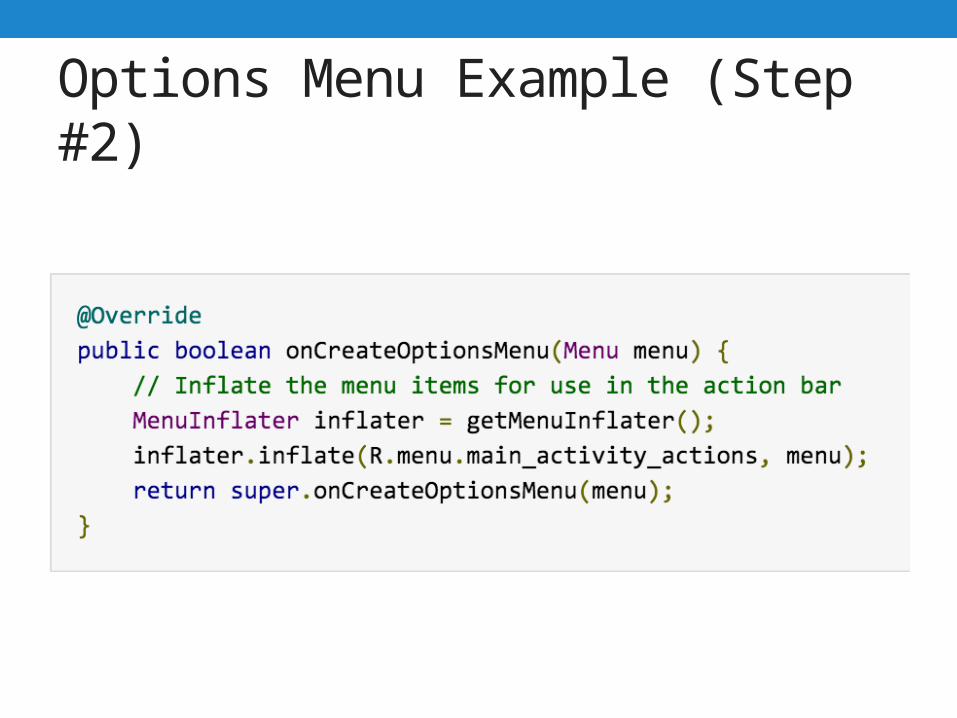
Options Menu Example (Step #2)
Option Menu Example (Step #3)• When the user presses an action, the system calls your
activity's onOptionsItemSelected() method. • Using the MenuItem passed to this method, you can
identify the action by calling getItemId(). • This returns the unique ID provided by the <item> tag's id
attribute so you can perform the appropriate action.
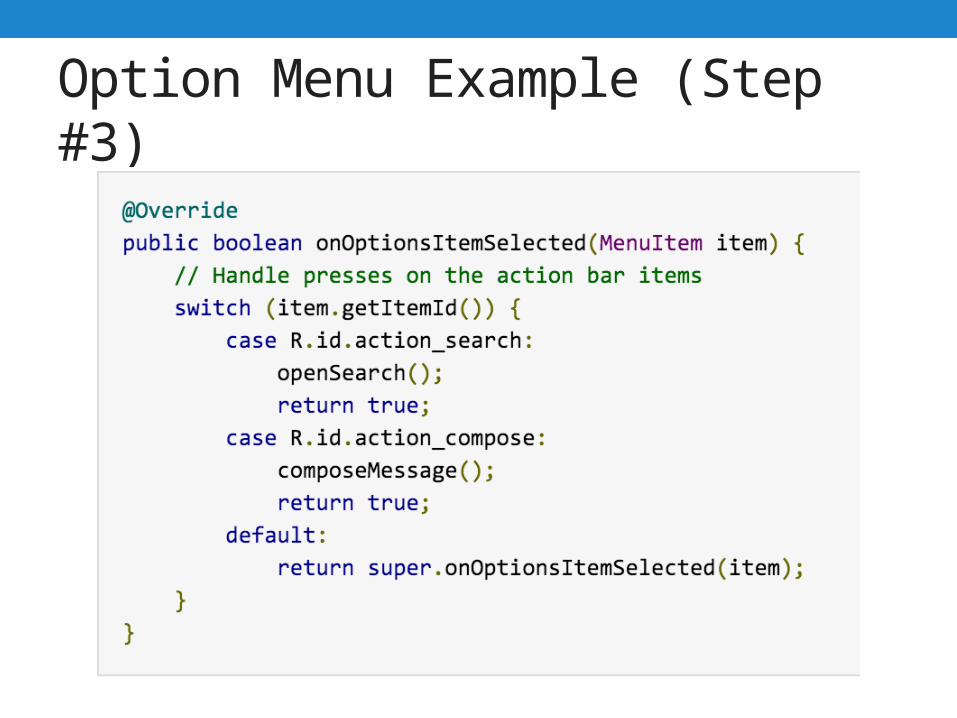
Option Menu Example (Step #3)
Context Menu• A context menu is a floating menu that appears when the
user performs a long-click on an element. • It provides actions that affect the selected content or
context frame.• When developing for Android 3.0 and higher, you should
instead use the contextual action mode to enable actions on selected content.
• This mode displays action items that affect the selected content in a bar at the top of the screen and allows the user to select multiple items.

Context Menu• A contextual menu offers actions that affect a specific item
or context frame in the UI. • You can provide a context menu for any view, but they are
most often used for items in a ListView, GridView, or other view collections in which the user can perform direct actions on each item.
• There are two ways to provide contextual actions:• Floating Context Menu• Contextual Action Mode
Creating Contextual Action Mode• If you want to invoke the contextual action mode only
when the user selects specific views, you should:• Implement the ActionMode.Callback interface. In its
callback methods, you can specify the actions for the contextual action bar, respond to click events on action items, and handle other lifecycle events for the action mode.
• Call startActionMode() when you want to show the bar (such as when the user long-clicks the view).
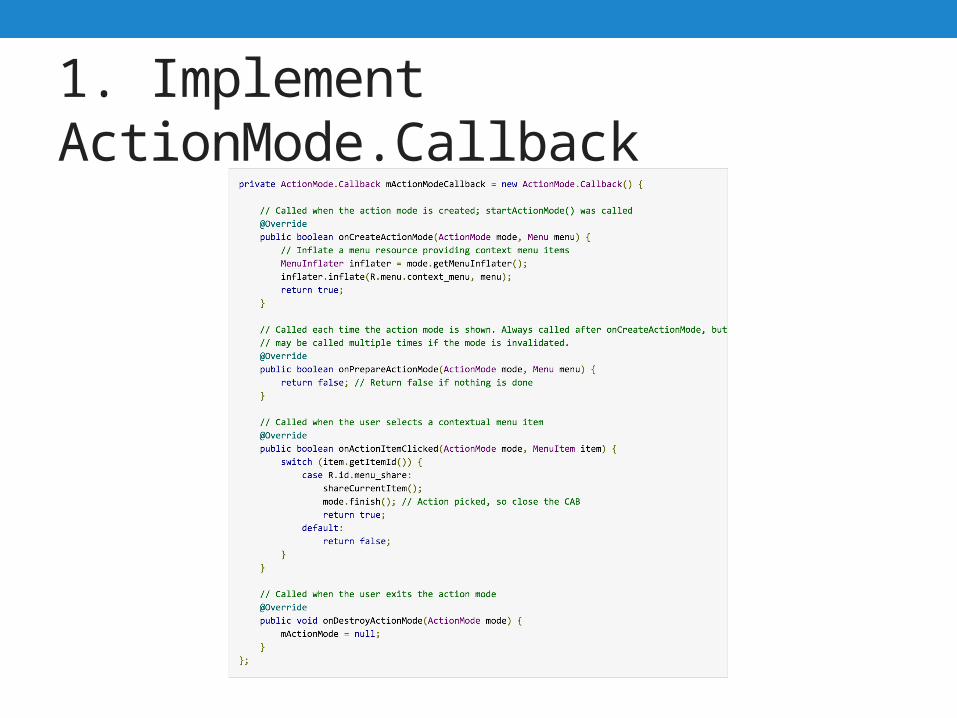
1. Implement ActionMode.Callback
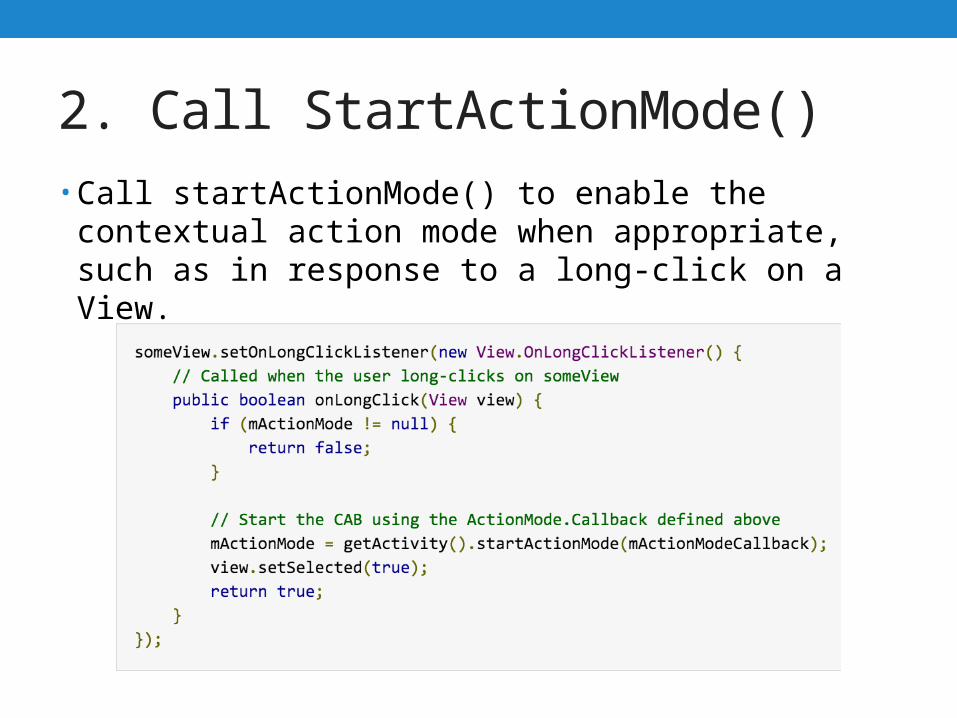
2. Call StartActionMode()• Call startActionMode() to enable the contextual action
mode when appropriate, such as in response to a long-click on a View.
Popup Menu• A popup menu displays a list of items in a vertical list
that's anchored to the view that invoked the menu.• It's good for providing an overflow of actions that relate to
specific content or to provide options for a second part of a command.
• Actions in a popup menu should not directly affect the corresponding content—that's what contextual actions are for.
• Rather, the popup menu is for extended actions that relate to regions of content in your activity.
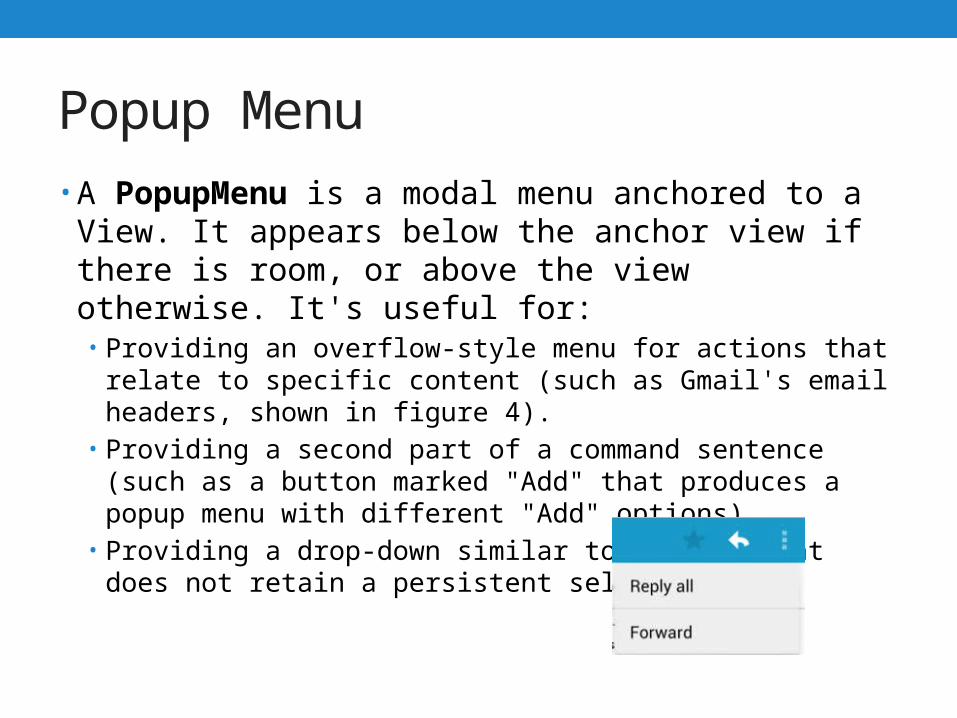
Popup Menu• A PopupMenu is a modal menu anchored to a View. It
appears below the anchor view if there is room, or above the view otherwise. It's useful for:• Providing an overflow-style menu for actions that relate to specific
content (such as Gmail's email headers, shown in figure 4).• Providing a second part of a command sentence (such as a button
marked "Add" that produces a popup menu with different "Add" options).
• Providing a drop-down similar to Spinner that does not retain a persistent selection.
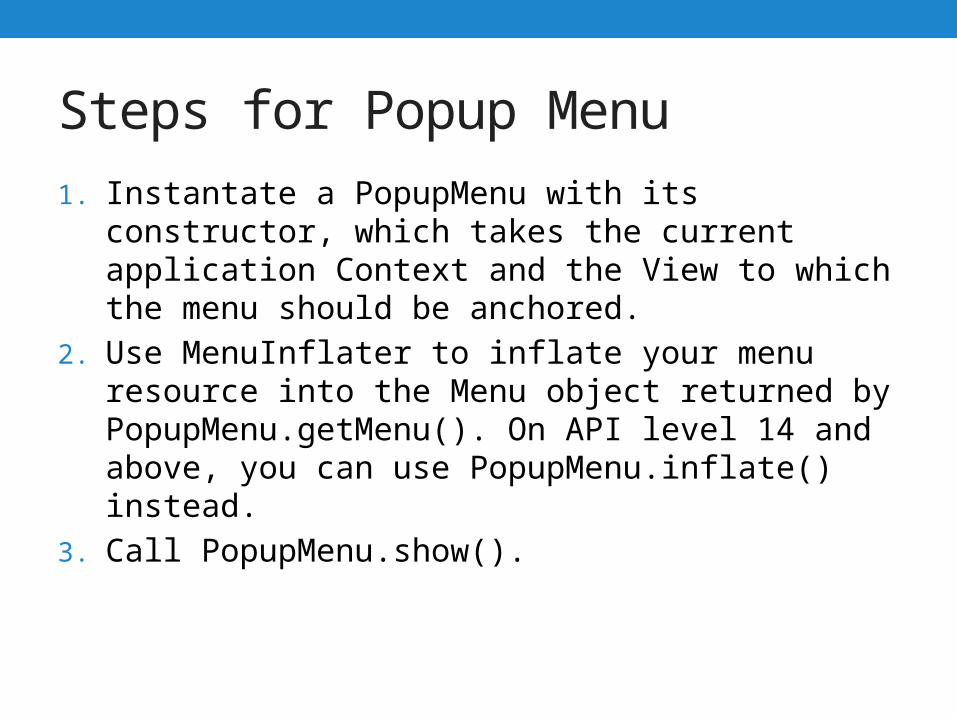
Steps for Popup Menu
1. Instantate a PopupMenu with its constructor, which takes the current application Context and the View to which the menu should be anchored.
2. Use MenuInflater to inflate your menu resource into the Menu object returned by PopupMenu.getMenu(). On API level 14 and above, you can use PopupMenu.inflate() instead.
3. Call PopupMenu.show().
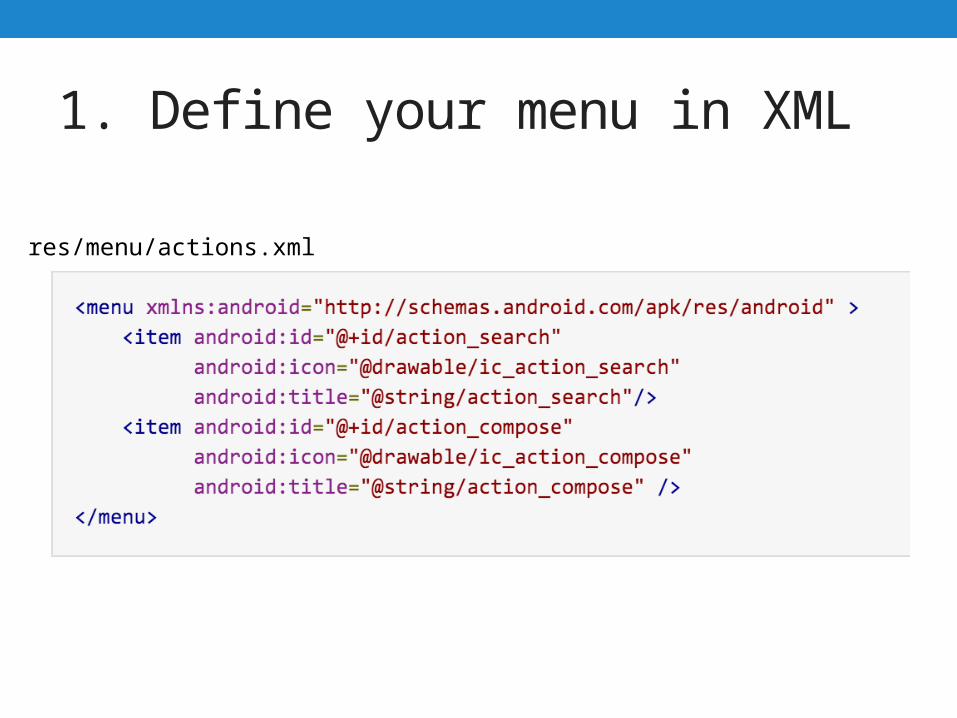
1. Define your menu in XML
res/menu/actions.xml
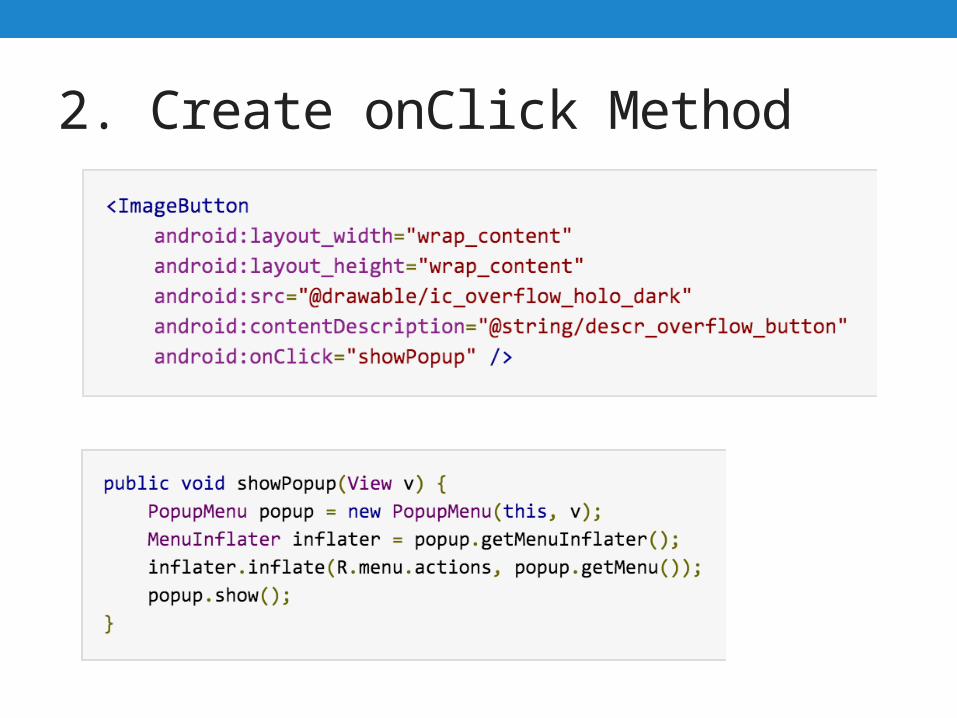
2. Create onClick Method
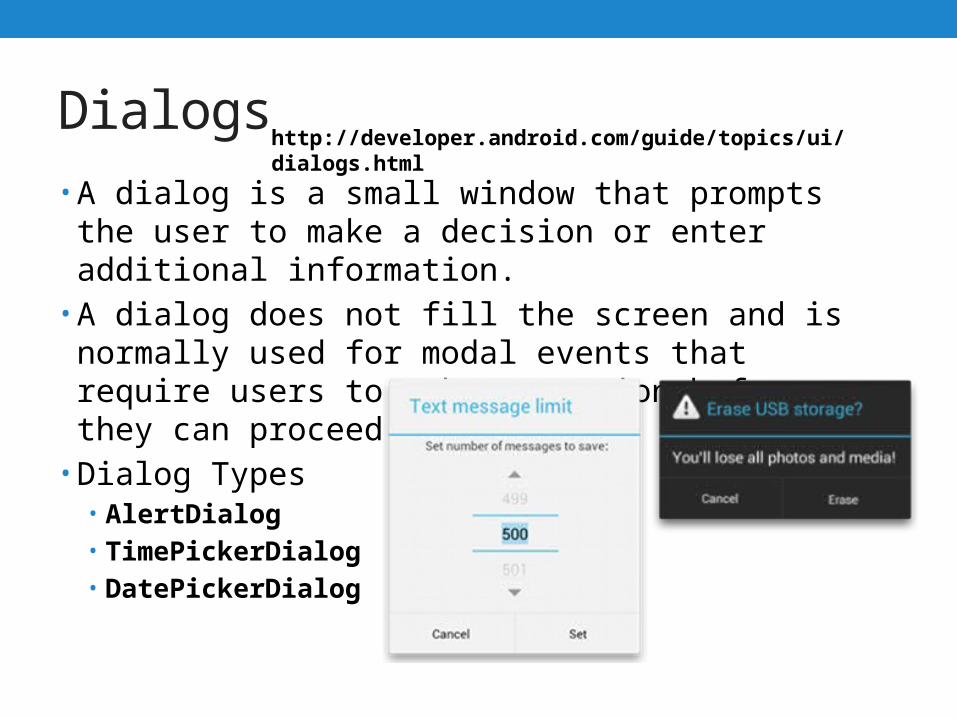
Dialogs• A dialog is a small window that prompts the user to make
a decision or enter additional information. • A dialog does not fill the screen and is normally used for
modal events that require users to take an action before they can proceed.
• Dialog Types• AlertDialog• TimePickerDialog• DatePickerDialog
http://developer.android.com/guide/topics/ui/dialogs.html
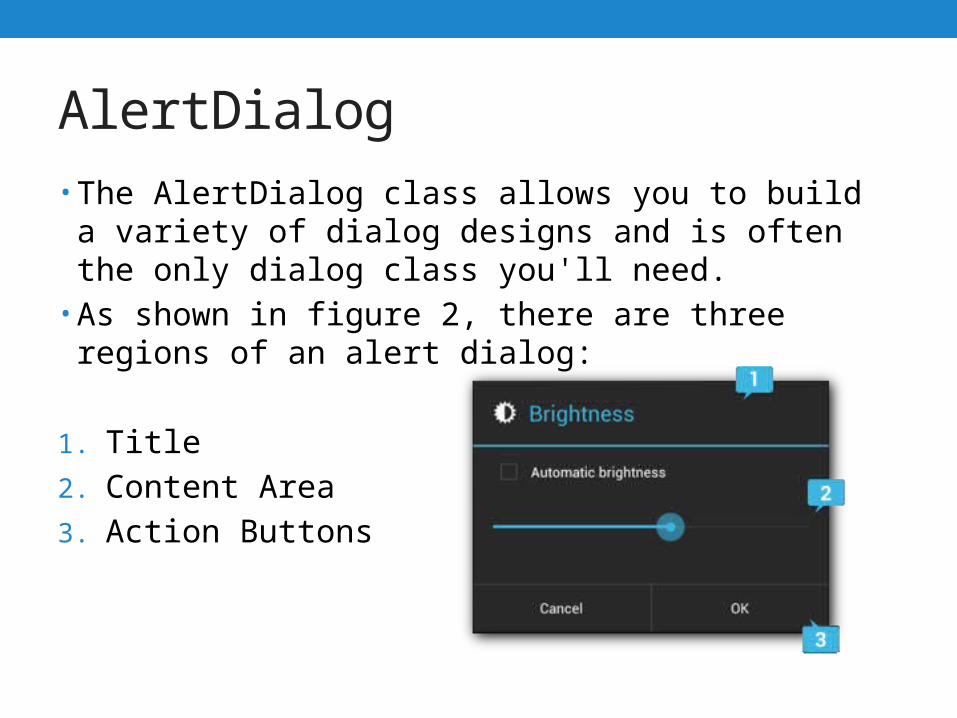
AlertDialog• The AlertDialog class allows you to build a variety of
dialog designs and is often the only dialog class you'll need.
• As shown in figure 2, there are three regions of an alert dialog:
1. Title
2. Content Area
3. Action Buttons
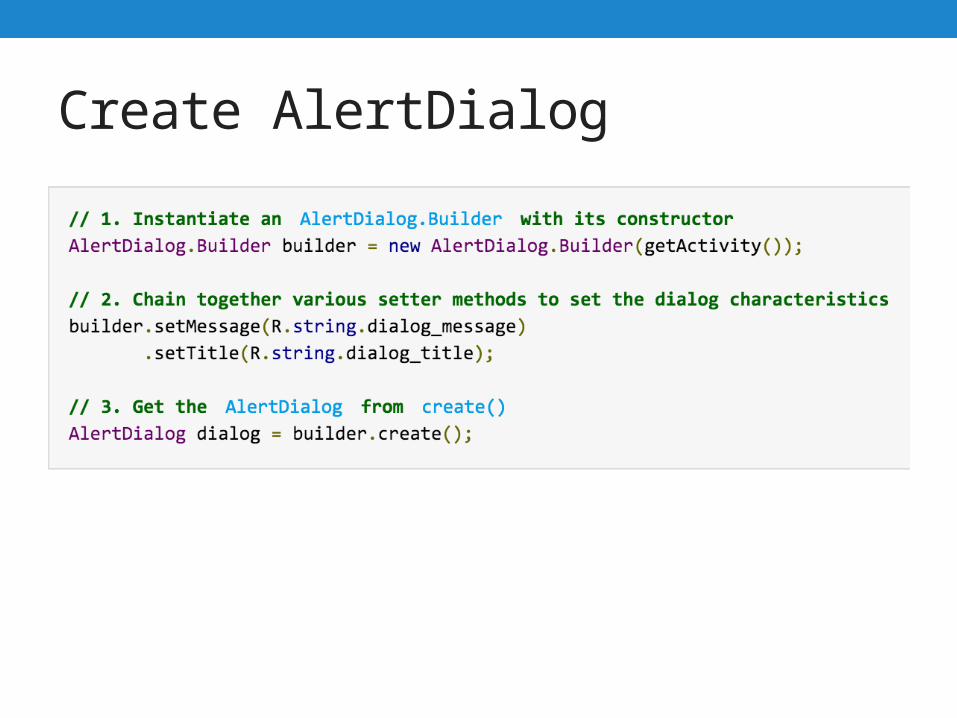
Create AlertDialog

Adding Buttons to AlertDialog

Notifications• A notification is a message you can display to the user
outside of your application's normal UI. • When you tell the system to issue a notification, it first
appears as an icon in the notification area. • To see the details of the notification, the user opens the
notification drawer. • Both the notification area and the notification drawer are
system-controlled areas that the user can view at any time.
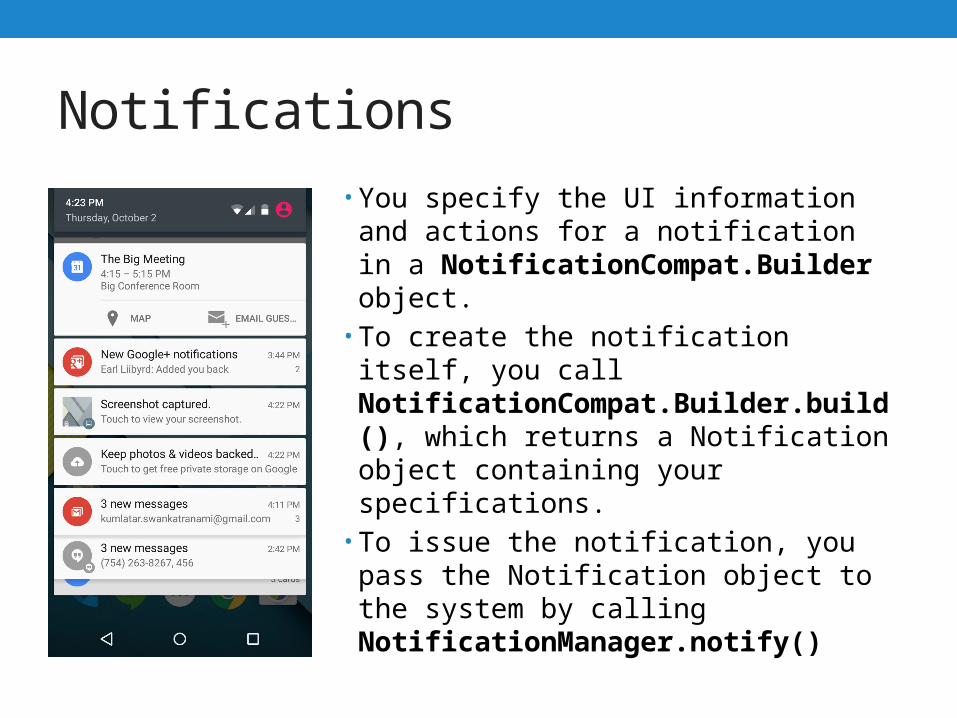
Notifications
• You specify the UI information and actions for a notification in a NotificationCompat.Builder object.
• To create the notification itself, you call NotificationCompat.Builder.build(), which returns a Notification object containing your specifications.
• To issue the notification, you pass the Notification object to the system by calling NotificationManager.notify()
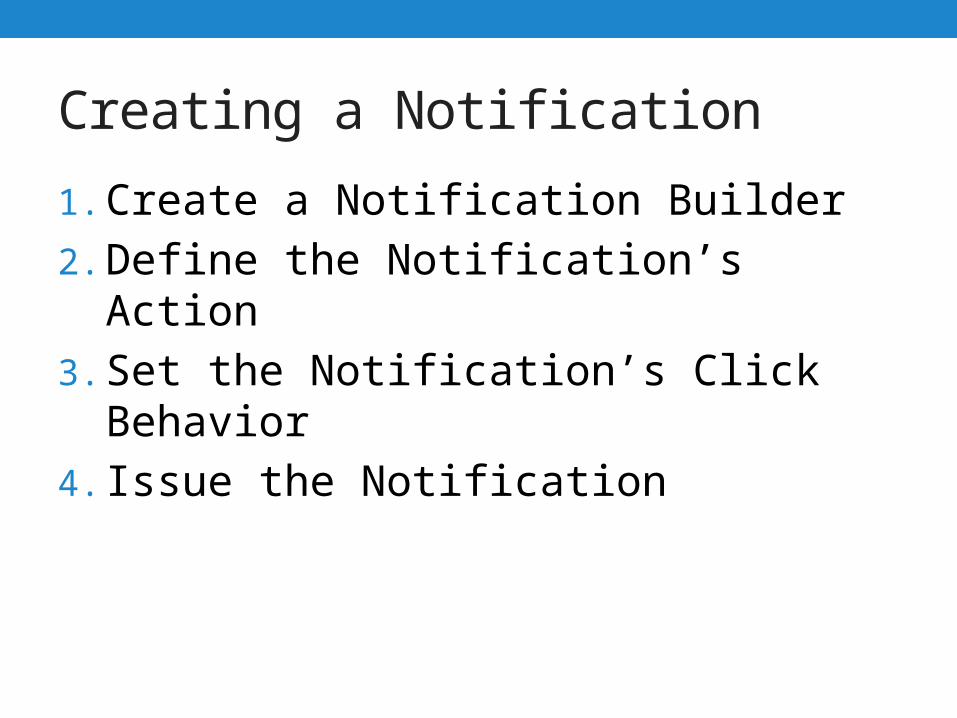
Creating a Notification
1. Create a Notification Builder
2. Define the Notification’s Action
3. Set the Notification’s Click Behavior
4. Issue the Notification
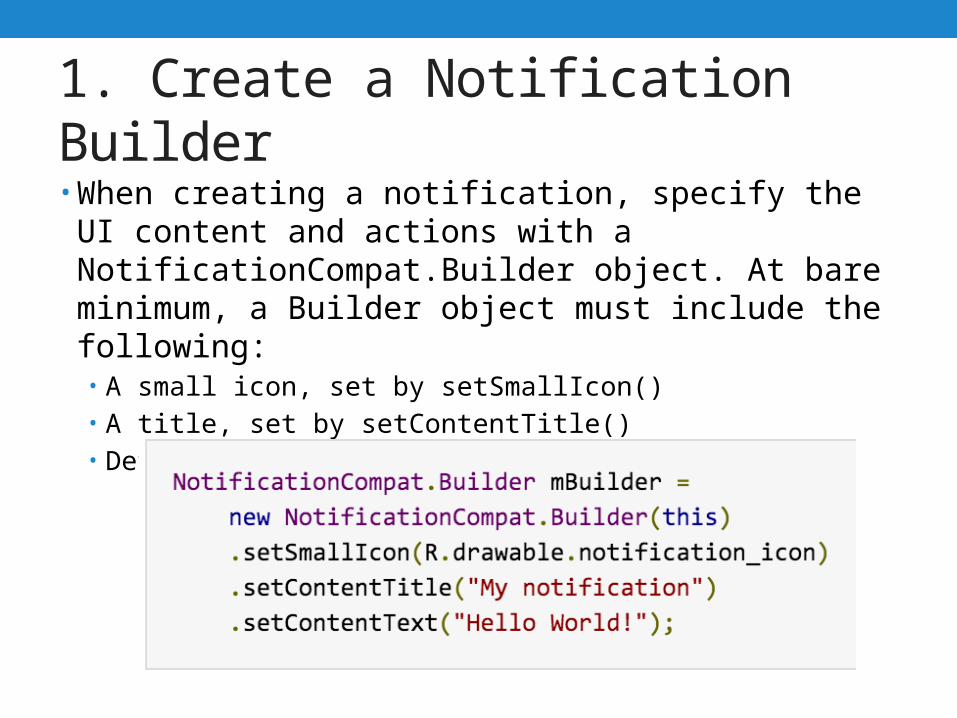
1. Create a Notification Builder• When creating a notification, specify the UI content and
actions with a NotificationCompat.Builder object. At bare minimum, a Builder object must include the following:• A small icon, set by setSmallIcon()• A title, set by setContentTitle()• Detail text, set by setContentText()

2. Define the Notification’s Action
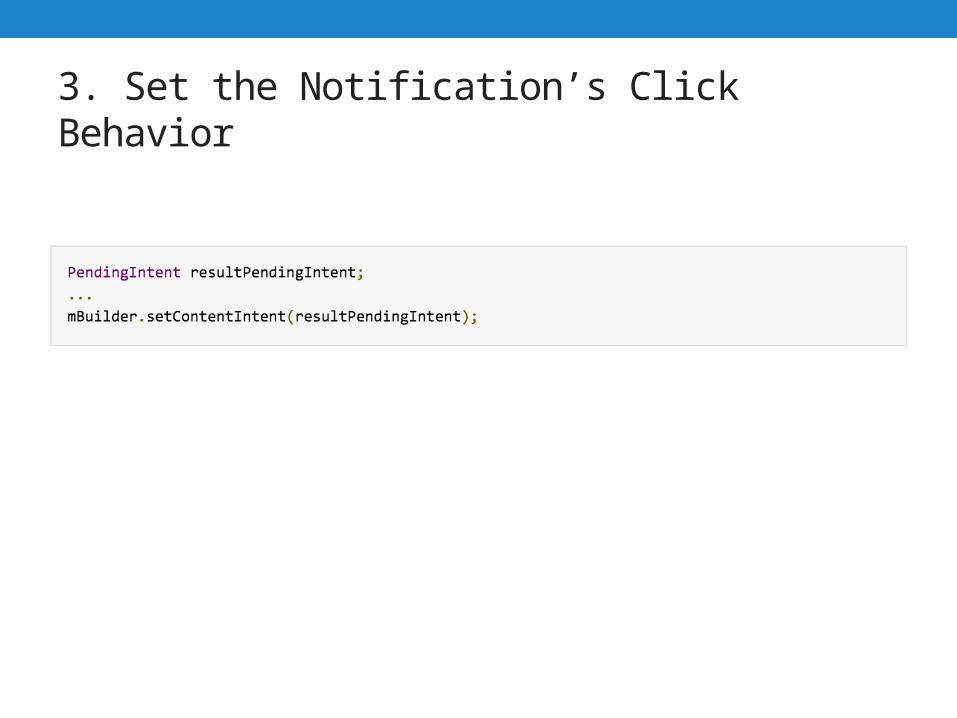
3. Set the Notification’s Click Behavior

Issue the notification• To issue the notification:
1. Get an instance of NotificationManager.
2. Use the notify() method to issue the notification. When you call notify(), specify a notification ID. You can use this ID to update the notification later on. This is described in more detail in Managing Notifications.
3. Call build(), which returns a Notification object containing your specifications.
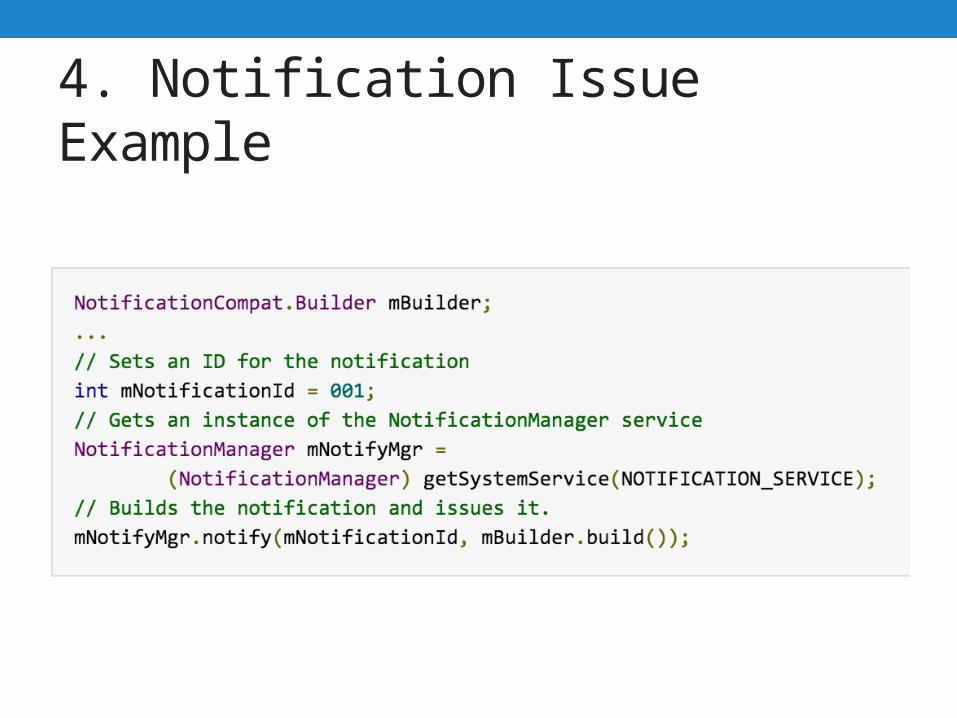
4. Notification Issue Example

ListView
• ListView is a view group that displays a list of scrollable items.
• The list items are automatically inserted to the list using an Adapter that pulls content from a source such as an array or database query and converts each item result into a view that's placed into the list.
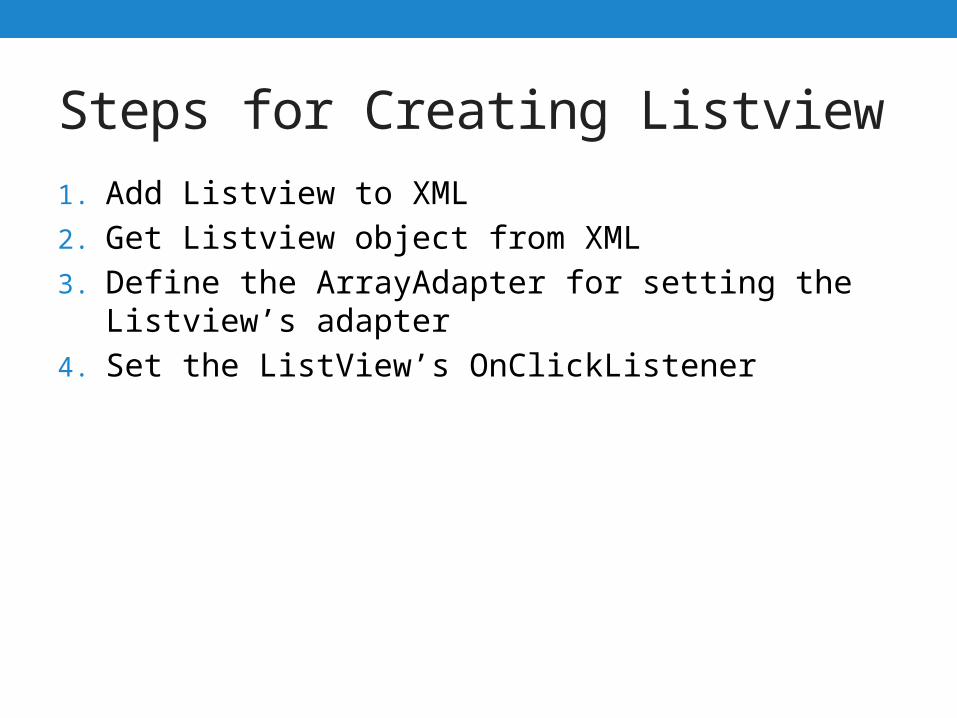
Steps for Creating Listview
1. Add Listview to XML
2. Get Listview object from XML
3. Define the ArrayAdapter for setting the Listview’s adapter
4. Set the ListView’s OnClickListener
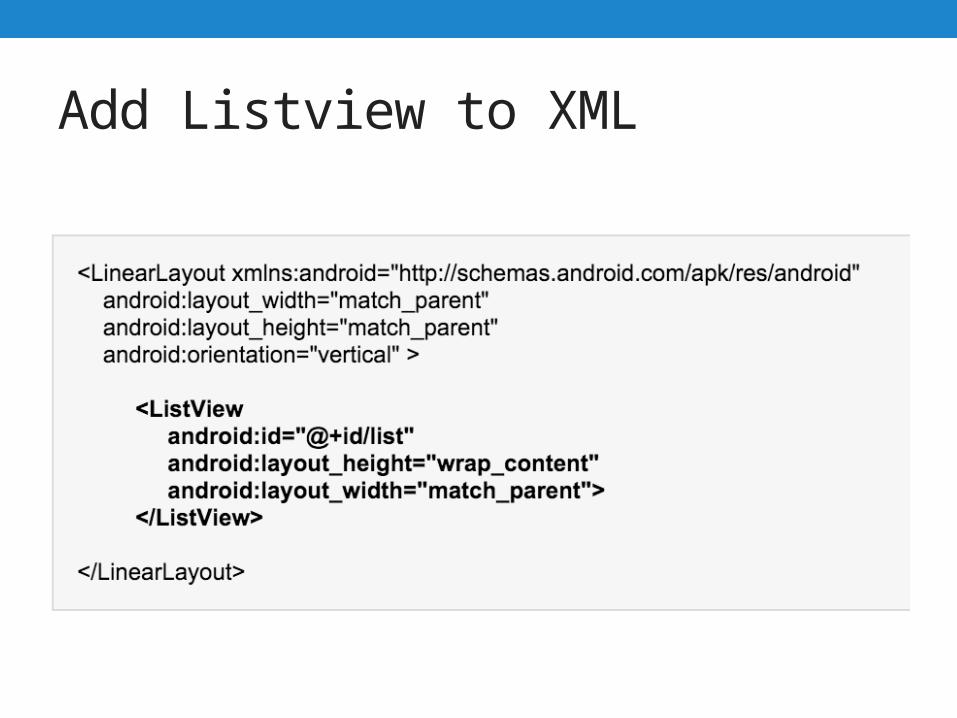
Add Listview to XML
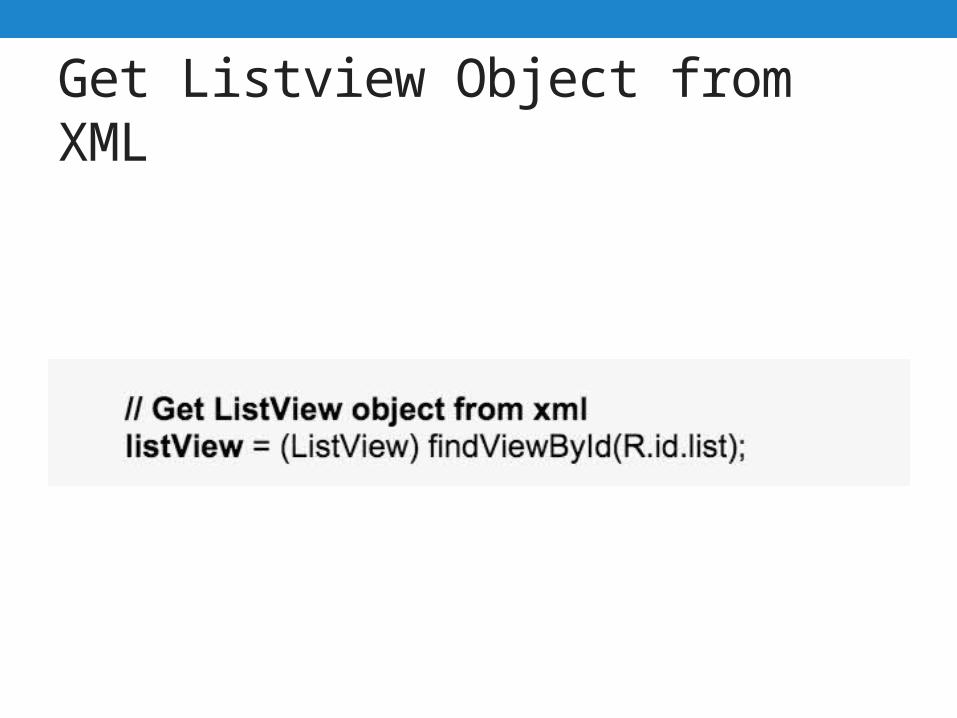
Get Listview Object from XML
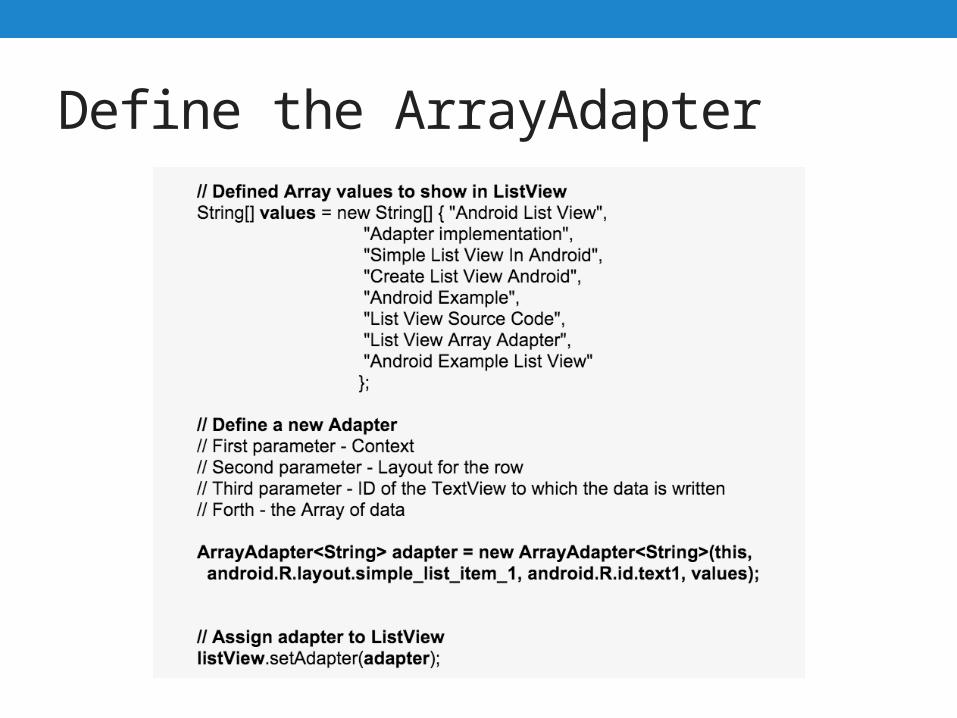
Define the ArrayAdapter
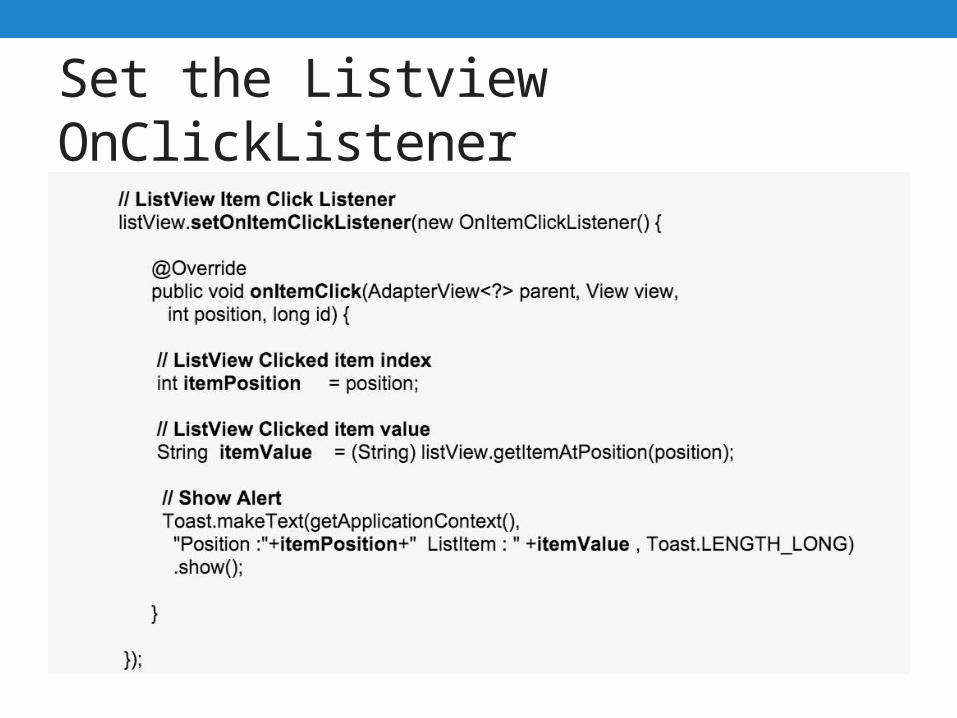
Set the Listview OnClickListener
References• http://androidexample.com/Create_A_Simple_Listview_-_
Android_Example/index.php?view=article_discription&aid=65&aaid=90
• http://developer.android.com/• https://developer.apple.com
Related Documents