An Introduction to InScribe 6

Welcome message from author
This document is posted to help you gain knowledge. Please leave a comment to let me know what you think about it! Share it to your friends and learn new things together.
Transcript
An Introduction to InScribe 6
Intro to InScribe Page 2 of 5
An Introduction
InScribe 6 includes all of the functionality you have come to know and love in InScribe 4, presented
in an organized ribbon menu layout for more intuitive navigation throughout the application with
enhanced application performance. AutoText and user dictionaries will be copied from InScribe 4
to make the transition as smooth as possible. Most shortcut keys have remained unchanged, but
with the introduction of a Jump feature, some navigational shortcuts are no longer available or have
changed.
Requirements
Operating Systems – Windows 7 or higher is recommended
Windows Vista
Windows 7
Windows 8
Web Browsers – Internet Explorer 10 or higher is recommended
Internet Explorer 9 or higher
Getting Started
InScribe 6 can be installed independently or concurrently with InScribe 4. The
desktop icon looks the same between both versions, but the labels are slightly
different. InScribe 4 is labeled as Emdat InScribe and InScribe 6 is labeled as
InScribe, by default. Though both versions can be installed and running at the
same time. We do not recommend logging into both versions at the same time
with the same username. Logging into InScribe 6 requires the same credentials used in prior
versions of InScribe.
Ribbon Menus
The most visual change in InScribe 6 is the new ribbon menu. All features and options have been
logically organized into six tabs within the ribbon menu to help you quickly find the commands you
need to complete the transcription.

Intro to InScribe Page 3 of 5
1.1. Home tab
The Home tab is the default tab that opens upon logging into InScribe. It includes the configurable
Function keys and the dictation playback controls and, typically, contains the most frequently-used
controls for transcribing or editing in InScribe.
1.2. Transcription tab
The Transcription tab includes all options related to a transcription document as a whole. This
includes creating new transcriptions, downloading new work from your pool, marking
transcriptions for QA or Review and completing transcriptions.
1.3. Data tab
The Data tab houses all options related to data attached to transcriptions. You can find document
and dictation templates, navigate/delete template fields, search for patients, appointments or prior
transcriptions, insert AutoText, and add/edit ShadowScribe sections.
1.4. Format tab
The Format tab includes all options related to editing and formatting transcription text. If you don’t
know or can’t remember the shortcut for a given formatting command, it can easily be found on this
tab.
Intro to InScribe Page 4 of 5
1.5. View tab
The View tab houses options to manipulate your view of InScribe and to open additional dialogs,
such as your transcription log, work pool and QA Feedback. You can also open the Shortcut
reference page and activate the Jump navigation feature.
1.6. File tab
The File tab includes options to save and preview transcriptions as well as open and back up your
personal files. The Options menu is accessed here as well.
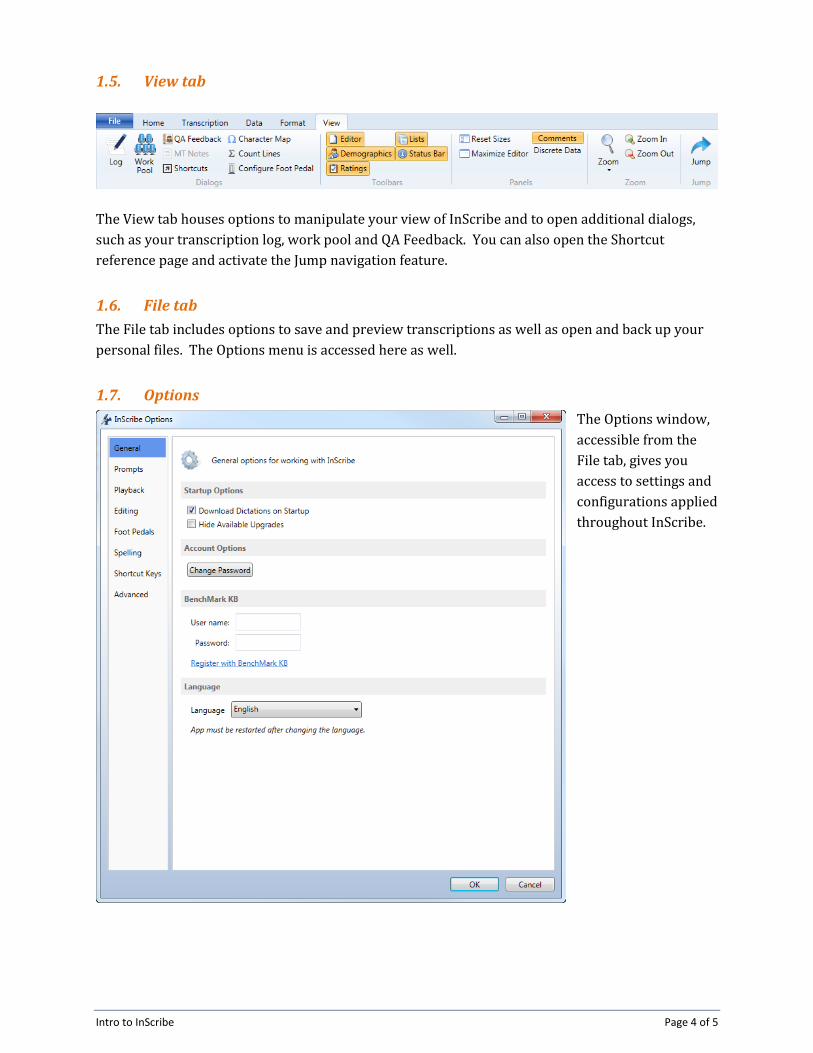
1.7. Options
The Options window,
accessible from the
File tab, gives you
access to settings and
configurations applied
throughout InScribe.

Intro to InScribe Page 5 of 5
1.8. Quick Access Features
We have added two quick access
buttons above the ribbon tabs to give
you easy access to the Save and Stop
Downloads features. Clicking on the Stop Downloads button will toggle downloads on and off.
We also added a new jump feature which allows you to quickly navigate to any part of the
application with only a couple of keyboard commands. Simply press the Alt+J keys to activate the
jump shortcuts. Helpful shortcut labels will appear, allowing you to navigate to any area of the
application without taking your hands off the keyboard. Type the corresponding letter or number
to select the desired menu or application area. Subsequent shortcut letters will appear until you’ve
selected the desired field or option in the application.
1.9. Creating a Help Desk Ticket
Should you come across any issues or concerns, we ask that you please create a help desk ticket.
The easiest way to do this is by selecting the Help menu drop down located in the upper right
corner of InScribe 6. Choose the Submit a Ticket option. Enter your contact information and details
about the issue you experienced in the Comments section. Pressing submit will create a ticket and
automatically attach required information, such as InScribe, IE and Windows versions as well as the
current TID.
Related Documents