lightweight safety flooring for the transportation industry Altro Transport Installation and maintenance guide Designed for possibilities. Made for people. V i r t u a l t r a i n i n g n o w a v a i l a b l e NEW Contact technical services [email protected] 800.382.0333 x3530

Welcome message from author
This document is posted to help you gain knowledge. Please leave a comment to let me know what you think about it! Share it to your friends and learn new things together.
Transcript

lightweight safety flooring for the transportation industry
Altro TransportInstallation and maintenance guide
Designed for possibilities.Made for people.
Virt
ual
tra
ining now available
NEWContact technical services
800.382.0333 x3530
1. Product overview 3
2. Storage and handling 3
3. Material inspection 3
4. Existing flooring removal 4
5. Subfloor preparation 4-5
6. Layout and cutting 5
7. Adhesives 5-6
8. Installation 6-8
9. Coving 8-9
10. Seam cutting method 9-10
11. Heat welding 10-12
12. HB welding 12
13. Step installation 13
14. Caulking and sealant 14
15. Step nosing 15
16. Additional installation techniques 16
17. Cleanup and protection 16
18. Cleaning overview 16
19. Routine cleaning instructions 17
20. Tools 18
Contents
Installation of Altro floor covering should follow the instructions detailed in this guide.
To obtain optimum performance from your Altro Transport flooring, careful consideration should be paid to the following:
• Preparation of the subfloor
• Correct installation
• Appropriate, regular cleaning routine
Important: failure to install Altro Transport products correctly will affect the product warranty.
2
1. Product OverviewAltro Transflor is a range of floor covering products especially engineered for the requirements and demands of transportation interiors.
Altro Transport flooring is a unique combination of vinyl, quartz aggregates, aluminum oxide, and silicon carbide, with a multi layered fiber reinforcement for controlled stability.
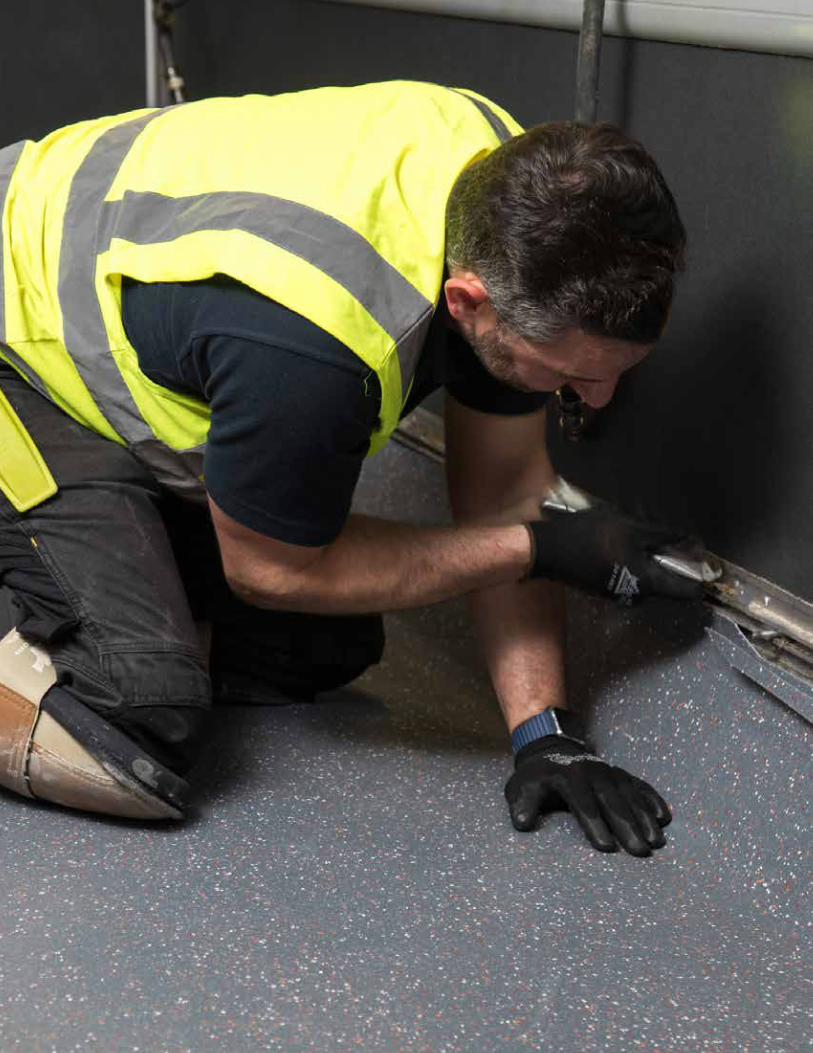
The underfoot safety of any floor is dependent on the coefficient of friction between the floor surface and the sole of the shoe. The performance of Altro safety flooring relies on the way in which the vinyl compresses under load, leaving the abrasive grain protruding above the surface to provide a reliable grip in both wet and dry conditions. This also means it remains easy to clean.
Altro Easyclean™ technology allows for a lifetime of easy to care for flooring systems.
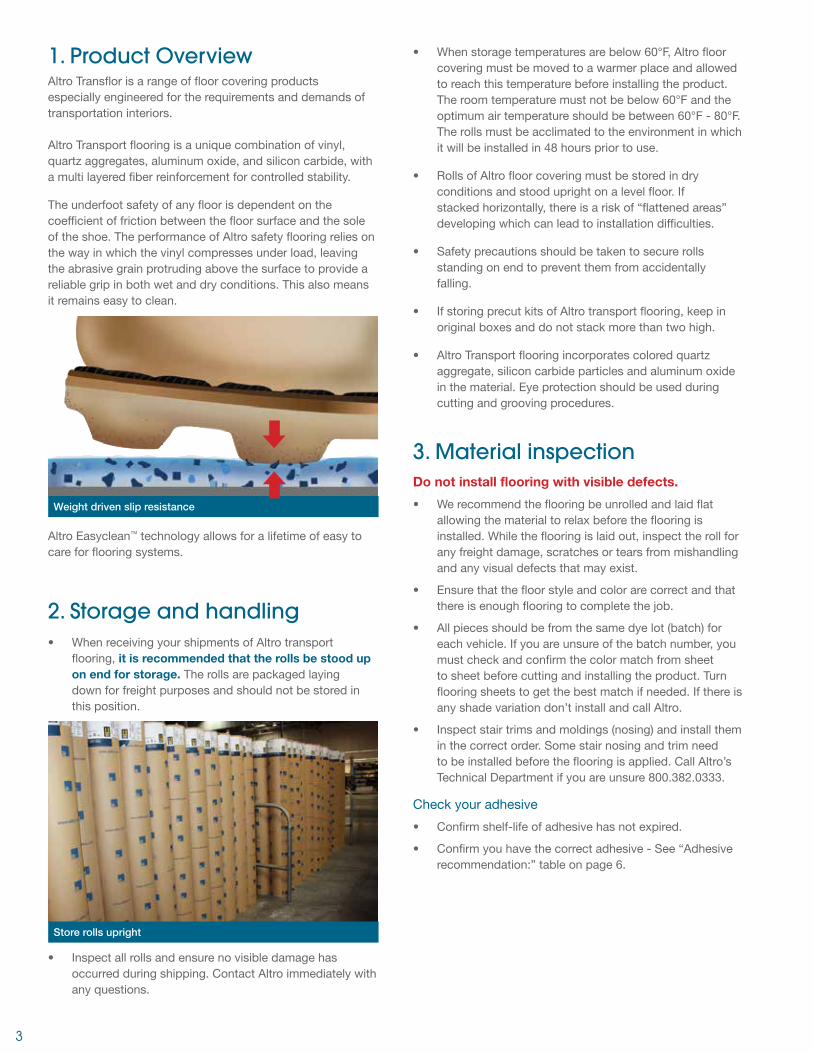
2. Storage and handling• When receiving your shipments of Altro transport
flooring, it is recommended that the rolls be stood up on end for storage. The rolls are packaged laying down for freight purposes and should not be stored in this position.
• Inspect all rolls and ensure no visible damage has occurred during shipping. Contact Altro immediately with any questions.
• When storage temperatures are below 60°F, Altro floor covering must be moved to a warmer place and allowed to reach this temperature before installing the product. The room temperature must not be below 60°F and the optimum air temperature should be between 60°F - 80°F. The rolls must be acclimated to the environment in which it will be installed in 48 hours prior to use.
• Rolls of Altro floor covering must be stored in dry conditions and stood upright on a level floor. If stacked horizontally, there is a risk of “flattened areas” developing which can lead to installation difficulties.
• Safety precautions should be taken to secure rolls standing on end to prevent them from accidentally falling.
• If storing precut kits of Altro transport flooring, keep in original boxes and do not stack more than two high.
• Altro Transport flooring incorporates colored quartz aggregate, silicon carbide particles and aluminum oxide in the material. Eye protection should be used during cutting and grooving procedures.
3. Material inspectionDo not install flooring with visible defects.
• We recommend the flooring be unrolled and laid flat allowing the material to relax before the flooring is installed. While the flooring is laid out, inspect the roll for any freight damage, scratches or tears from mishandling and any visual defects that may exist.
• Ensure that the floor style and color are correct and that there is enough flooring to complete the job.
• All pieces should be from the same dye lot (batch) for each vehicle. If you are unsure of the batch number, you must check and confirm the color match from sheet to sheet before cutting and installing the product. Turn flooring sheets to get the best match if needed. If there is any shade variation don’t install and call Altro.
• Inspect stair trims and moldings (nosing) and install them in the correct order. Some stair nosing and trim need to be installed before the flooring is applied. Call Altro’s Technical Department if you are unsure 800.382.0333.
Check your adhesive
• Confirm shelf-life of adhesive has not expired.
• Confirm you have the correct adhesive - See “Adhesive recommendation:” table on page 6.
Store rolls upright
Weight driven slip resistance
3
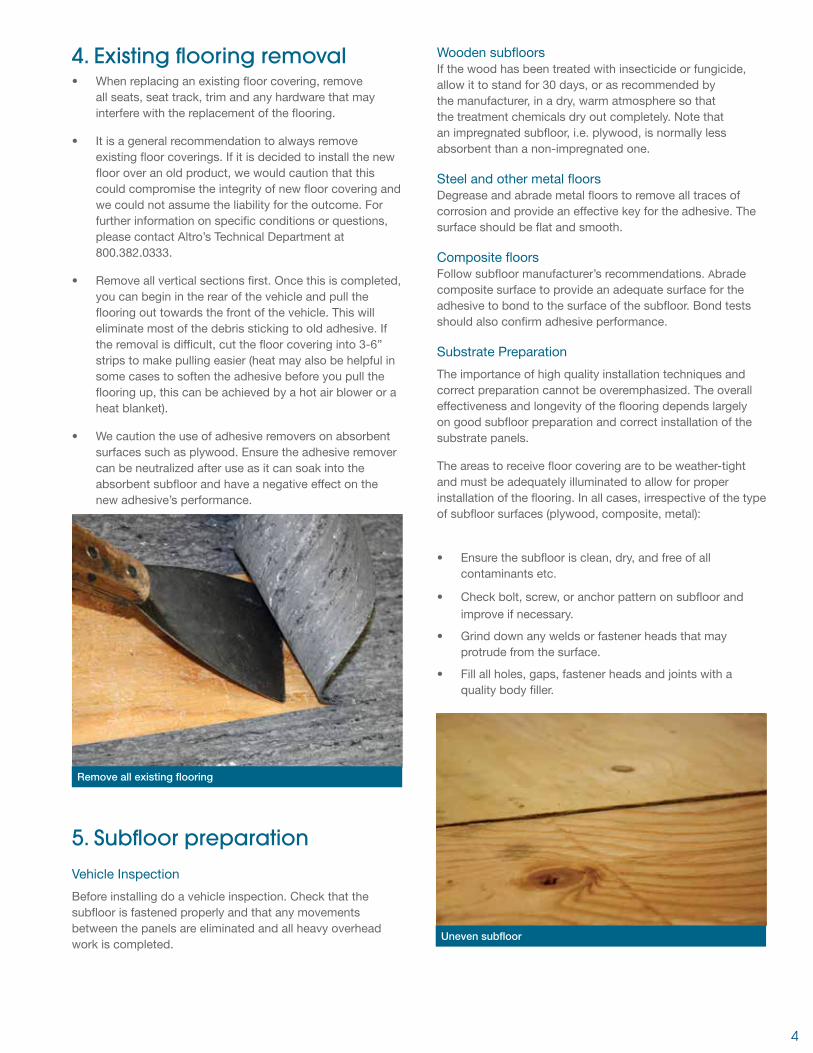
4. Existing flooring removal• When replacing an existing floor covering, remove
all seats, seat track, trim and any hardware that may interfere with the replacement of the flooring.
• It is a general recommendation to always remove existing floor coverings. If it is decided to install the new floor over an old product, we would caution that this could compromise the integrity of new floor covering and we could not assume the liability for the outcome. For further information on specific conditions or questions, please contact Altro’s Technical Department at 800.382.0333.
• Remove all vertical sections first. Once this is completed, you can begin in the rear of the vehicle and pull the flooring out towards the front of the vehicle. This will eliminate most of the debris sticking to old adhesive. If the removal is difficult, cut the floor covering into 3-6” strips to make pulling easier (heat may also be helpful in some cases to soften the adhesive before you pull the flooring up, this can be achieved by a hot air blower or a heat blanket).
• We caution the use of adhesive removers on absorbent surfaces such as plywood. Ensure the adhesive remover can be neutralized after use as it can soak into the absorbent subfloor and have a negative effect on the new adhesive’s performance.
5. Subfloor preparation
Vehicle Inspection
Before installing do a vehicle inspection. Check that the subfloor is fastened properly and that any movements between the panels are eliminated and all heavy overhead work is completed.
Wooden subfloors
If the wood has been treated with insecticide or fungicide, allow it to stand for 30 days, or as recommended by the manufacturer, in a dry, warm atmosphere so that the treatment chemicals dry out completely. Note that an impregnated subfloor, i.e. plywood, is normally less absorbent than a non-impregnated one.
Steel and other metal floors
Degrease and abrade metal floors to remove all traces of corrosion and provide an effective key for the adhesive. The surface should be flat and smooth.
Composite floors
Follow subfloor manufacturer’s recommendations. Abrade composite surface to provide an adequate surface for the adhesive to bond to the surface of the subfloor. Bond tests should also confirm adhesive performance.
Substrate Preparation
The importance of high quality installation techniques and correct preparation cannot be overemphasized. The overall effectiveness and longevity of the flooring depends largely on good subfloor preparation and correct installation of the substrate panels.
The areas to receive floor covering are to be weather-tight and must be adequately illuminated to allow for proper installation of the flooring. In all cases, irrespective of the type of subfloor surfaces (plywood, composite, metal):
• Ensure the subfloor is clean, dry, and free of all contaminants etc.
• Check bolt, screw, or anchor pattern on subfloor and improve if necessary.
• Grind down any welds or fastener heads that may protrude from the surface.
• Fill all holes, gaps, fastener heads and joints with a quality body filler.
Remove all existing flooring
4
Uneven subfloor
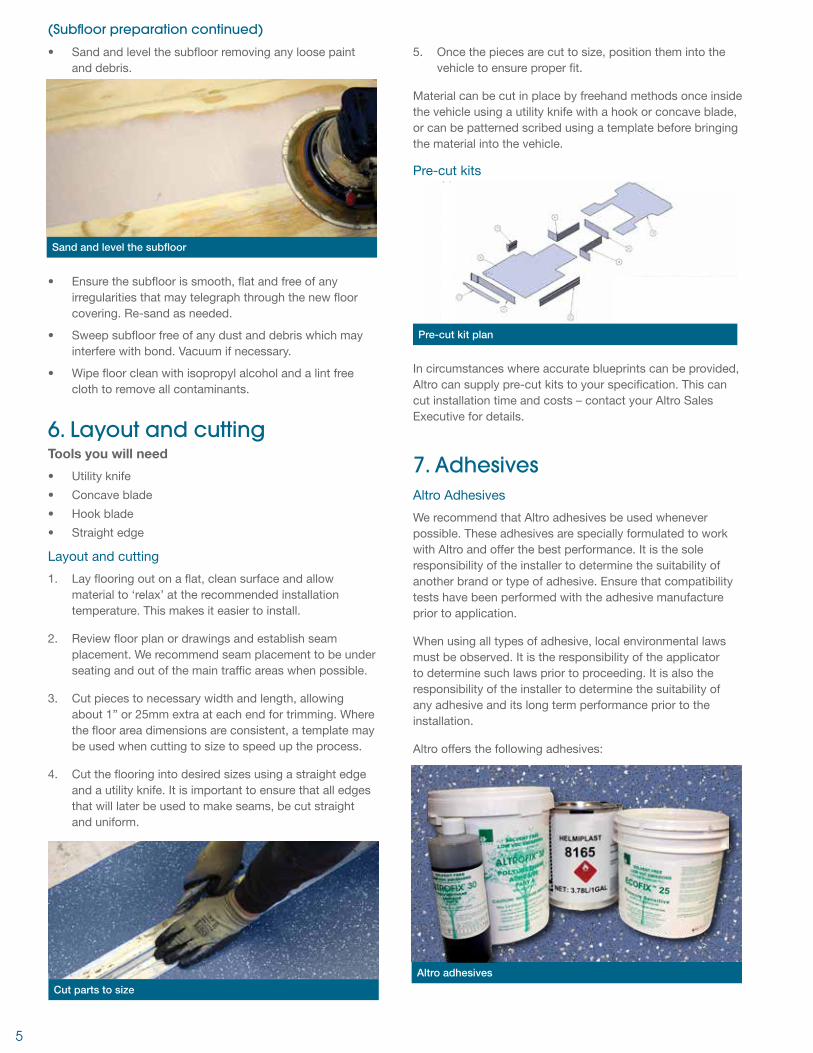
• Sand and level the subfloor removing any loose paint and debris.
• Ensure the subfloor is smooth, flat and free of any irregularities that may telegraph through the new floor covering. Re-sand as needed.
• Sweep subfloor free of any dust and debris which may interfere with bond. Vacuum if necessary.
• Wipe floor clean with isopropyl alcohol and a lint free cloth to remove all contaminants.
6. Layout and cutting Tools you will need
• Utility knife
• Concave blade
• Hook blade
• Straight edge
Layout and cutting
1. Lay flooring out on a flat, clean surface and allow material to ‘relax’ at the recommended installation temperature. This makes it easier to install.
2. Review floor plan or drawings and establish seam placement. We recommend seam placement to be under seating and out of the main traffic areas when possible.
3. Cut pieces to necessary width and length, allowing about 1” or 25mm extra at each end for trimming. Where the floor area dimensions are consistent, a template may be used when cutting to size to speed up the process.
4. Cut the flooring into desired sizes using a straight edge and a utility knife. It is important to ensure that all edges that will later be used to make seams, be cut straight and uniform.
5. Once the pieces are cut to size, position them into the vehicle to ensure proper fit.
Material can be cut in place by freehand methods once inside the vehicle using a utility knife with a hook or concave blade, or can be patterned scribed using a template before bringing the material into the vehicle.
Pre-cut kits
In circumstances where accurate blueprints can be provided, Altro can supply pre-cut kits to your specification. This can cut installation time and costs – contact your Altro Sales Executive for details.
7. AdhesivesAltro Adhesives
We recommend that Altro adhesives be used whenever possible. These adhesives are specially formulated to work with Altro and offer the best performance. It is the sole responsibility of the installer to determine the suitability of another brand or type of adhesive. Ensure that compatibility tests have been performed with the adhesive manufacture prior to application.
When using all types of adhesive, local environmental laws must be observed. It is the responsibility of the applicator to determine such laws prior to proceeding. It is also the responsibility of the installer to determine the suitability of any adhesive and its long term performance prior to the installation.
Altro offers the following adhesives:
Sand and level the subfloor
(Subfloor preparation continued)
Altro adhesives
5
Cut parts to size
Pre-cut kit plan
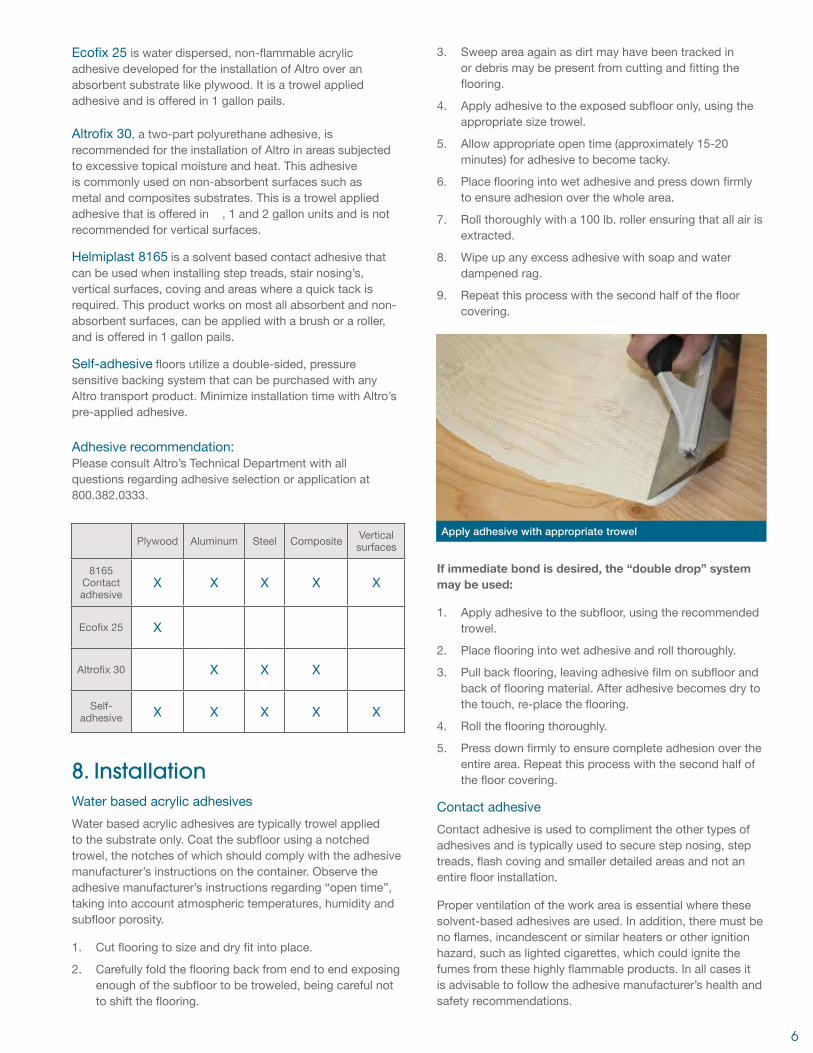
Ecofix 25 is water dispersed, non-flammable acrylic adhesive developed for the installation of Altro over an absorbent substrate like plywood. It is a trowel applied adhesive and is offered in 1 gallon pails.
Altrofix 30, a two-part polyurethane adhesive, is recommended for the installation of Altro in areas subjected to excessive topical moisture and heat. This adhesive is commonly used on non-absorbent surfaces such as metal and composites substrates. This is a trowel applied adhesive that is offered in ½, 1 and 2 gallon units and is not recommended for vertical surfaces.
Helmiplast 8165 is a solvent based contact adhesive that can be used when installing step treads, stair nosing’s, vertical surfaces, coving and areas where a quick tack is required. This product works on most all absorbent and non-absorbent surfaces, can be applied with a brush or a roller, and is offered in 1 gallon pails.
Self-adhesive floors utilize a double-sided, pressure sensitive backing system that can be purchased with any Altro transport product. Minimize installation time with Altro’s pre-applied adhesive.
Adhesive recommendation: Please consult Altro’s Technical Department with all questions regarding adhesive selection or application at 800.382.0333.
8. InstallationWater based acrylic adhesives
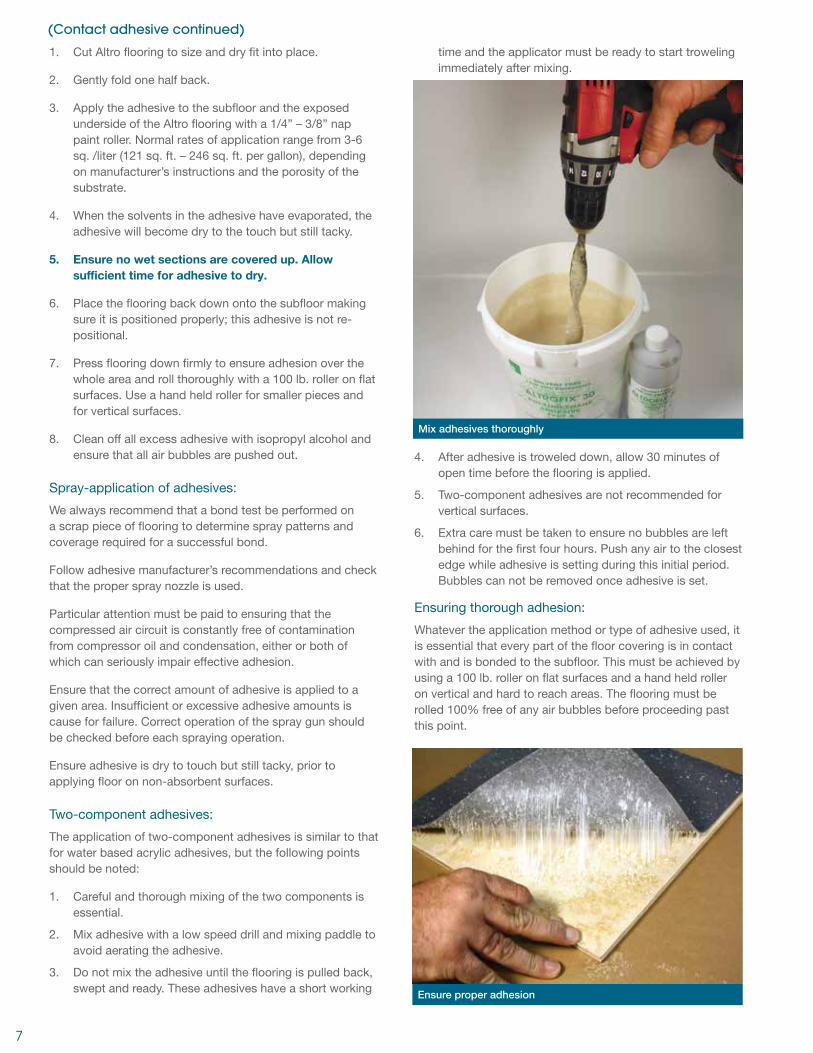
Water based acrylic adhesives are typically trowel applied to the substrate only. Coat the subfloor using a notched trowel, the notches of which should comply with the adhesive manufacturer’s instructions on the container. Observe the adhesive manufacturer’s instructions regarding “open time”, taking into account atmospheric temperatures, humidity and subfloor porosity.
1. Cut flooring to size and dry fit into place.
2. Carefully fold the flooring back from end to end exposing enough of the subfloor to be troweled, being careful not to shift the flooring.
3. Sweep area again as dirt may have been tracked in or debris may be present from cutting and fitting the flooring.
4. Apply adhesive to the exposed subfloor only, using the appropriate size trowel.
5. Allow appropriate open time (approximately 15-20 minutes) for adhesive to become tacky.
6. Place flooring into wet adhesive and press down firmly to ensure adhesion over the whole area.
7. Roll thoroughly with a 100 lb. roller ensuring that all air is extracted.
8. Wipe up any excess adhesive with soap and water dampened rag.
9. Repeat this process with the second half of the floor covering.
If immediate bond is desired, the “double drop” system may be used:
1. Apply adhesive to the subfloor, using the recommended trowel.
2. Place flooring into wet adhesive and roll thoroughly.
3. Pull back flooring, leaving adhesive film on subfloor and back of flooring material. After adhesive becomes dry to the touch, re-place the flooring.
4. Roll the flooring thoroughly.
5. Press down firmly to ensure complete adhesion over the entire area. Repeat this process with the second half of the floor covering.
Contact adhesive
Contact adhesive is used to compliment the other types of adhesives and is typically used to secure step nosing, step treads, flash coving and smaller detailed areas and not an entire floor installation.
Proper ventilation of the work area is essential where these solvent-based adhesives are used. In addition, there must be no flames, incandescent or similar heaters or other ignition hazard, such as lighted cigarettes, which could ignite the fumes from these highly flammable products. In all cases it is advisable to follow the adhesive manufacturer’s health and safety recommendations.
Apply adhesive with appropriate trowel
6
Plywood Aluminum Steel Composite Vertical surfaces
8165 Contact adhesive
X X X X X
Ecofix 25 X
Altrofix 30 X X X
Self- adhesive X X X X X
1. Cut Altro flooring to size and dry fit into place.
2. Gently fold one half back.
3. Apply the adhesive to the subfloor and the exposed underside of the Altro flooring with a 1/4” – 3/8” nap paint roller. Normal rates of application range from 3-6 sq. /liter (121 sq. ft. – 246 sq. ft. per gallon), depending on manufacturer’s instructions and the porosity of the substrate.
4. When the solvents in the adhesive have evaporated, the adhesive will become dry to the touch but still tacky.
5. Ensure no wet sections are covered up. Allow sufficient time for adhesive to dry.
6. Place the flooring back down onto the subfloor making sure it is positioned properly; this adhesive is not re-positional.
7. Press flooring down firmly to ensure adhesion over the whole area and roll thoroughly with a 100 lb. roller on flat surfaces. Use a hand held roller for smaller pieces and for vertical surfaces.
8. Clean off all excess adhesive with isopropyl alcohol and ensure that all air bubbles are pushed out.
Spray-application of adhesives:
We always recommend that a bond test be performed on a scrap piece of flooring to determine spray patterns and coverage required for a successful bond.
Follow adhesive manufacturer’s recommendations and check that the proper spray nozzle is used.
Particular attention must be paid to ensuring that the compressed air circuit is constantly free of contamination from compressor oil and condensation, either or both of which can seriously impair effective adhesion.
Ensure that the correct amount of adhesive is applied to a given area. Insufficient or excessive adhesive amounts is cause for failure. Correct operation of the spray gun should be checked before each spraying operation.
Ensure adhesive is dry to touch but still tacky, prior to applying floor on non-absorbent surfaces.
Two-component adhesives:
The application of two-component adhesives is similar to that for water based acrylic adhesives, but the following points should be noted:
1. Careful and thorough mixing of the two components is essential.
2. Mix adhesive with a low speed drill and mixing paddle to avoid aerating the adhesive.
3. Do not mix the adhesive until the flooring is pulled back, swept and ready. These adhesives have a short working
time and the applicator must be ready to start troweling immediately after mixing.
4. After adhesive is troweled down, allow 30 minutes of open time before the flooring is applied.
5. Two-component adhesives are not recommended for vertical surfaces.
6. Extra care must be taken to ensure no bubbles are left behind for the first four hours. Push any air to the closest edge while adhesive is setting during this initial period. Bubbles can not be removed once adhesive is set.
Ensuring thorough adhesion:
Whatever the application method or type of adhesive used, it is essential that every part of the floor covering is in contact with and is bonded to the subfloor. This must be achieved by using a 100 lb. roller on flat surfaces and a hand held roller on vertical and hard to reach areas. The flooring must be rolled 100% free of any air bubbles before proceeding past this point.
(Contact adhesive continued)
7
Ensure proper adhesion
Mix adhesives thoroughly
Installation of self-adhesive flooring
1. Cut Altro Transflor product to size.
2. Lay in place.
3. Trim to fit.
4. Carefully fold one half back.
5. Sweep floor one last time and wipe down with isopropyl alcohol.
6. Use a hook blade to cut the liner from the underside of the folded-back floor covering, taking care not to damage the floor covering.
7. Carefully remove the protective film liner from the exposed section and dispose of responsibly.
8. Position the floor covering into the final location ensuring all air is displaced to perimeter using a 100lb. roller and avoid walking onto floor until it has been rolled.
9. Repeat the above for the remaining floor covering.
Logos for setting into floor
1. Fit the Altro flooring sections to receive logos into the vehicle and trim into place.
2. Lay logo on top of the main flooring section according to flooring plans and measure placement.
3. Once logo location is confirmed, trace cut around the perimeter of the logo with a concave blade. Note: Masking tape can hold the position of the logo while cutting.
4. Lift the logo and set aside, then remove the portion cut from the main floor section.
5. Using a pencil, trace the inside perimeter of the logo onto the subfloor so the location is marked.
6. Pull the main section back and sweep the subfloor, you will see the logo location marked by the pencil line.
7. Adhesive application (refer to manufactures recommendations).
a. For pre-assembled (backed) Altro logos
i. Apply adhesive over the entire area.
ii. Lay flooring into the adhesive and roll with a 100lb roller.
iii. Apply logos into the cut locations.
b. Logos supplied without backing (loose pieces)
i. Must be installed with a waterproof adhesive such as Altrofix 30.
ii. Trowel waterproof adhesive in area that will take the logo, it will be marked with a pencil line.
iii. Apply the adhesive a minimum of 6” larger than the area to receive the logo.
iv. Apply the standard adhesive over the balance of the subfloor.
v. Lay flooring into the adhesive and roll with a 100lb roller.
vi. Apply logo’s into the cut locations.
8. Roll entire area with a 100 lb. roller.
9. Repeat adhesive application with other parts/sections of the vehicle.
10. Once the adhesive has set (in most cases overnight), the perimeter of the new logo is to be heat welded to ensure a water tight seal.
Please consult Altro’s Technical Department for further information at 800.382.0333.
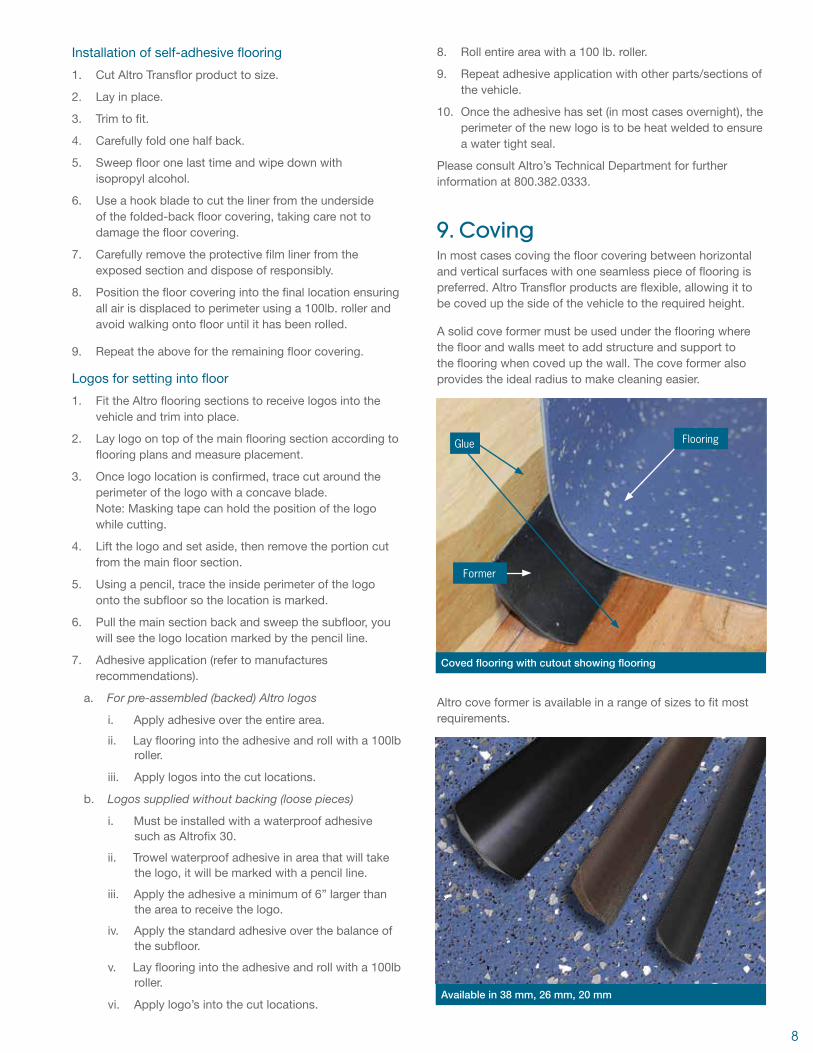
9. Coving In most cases coving the floor covering between horizontal and vertical surfaces with one seamless piece of flooring is preferred. Altro Transflor products are flexible, allowing it to be coved up the side of the vehicle to the required height.
A solid cove former must be used under the flooring where the floor and walls meet to add structure and support to the flooring when coved up the wall. The cove former also provides the ideal radius to make cleaning easier.
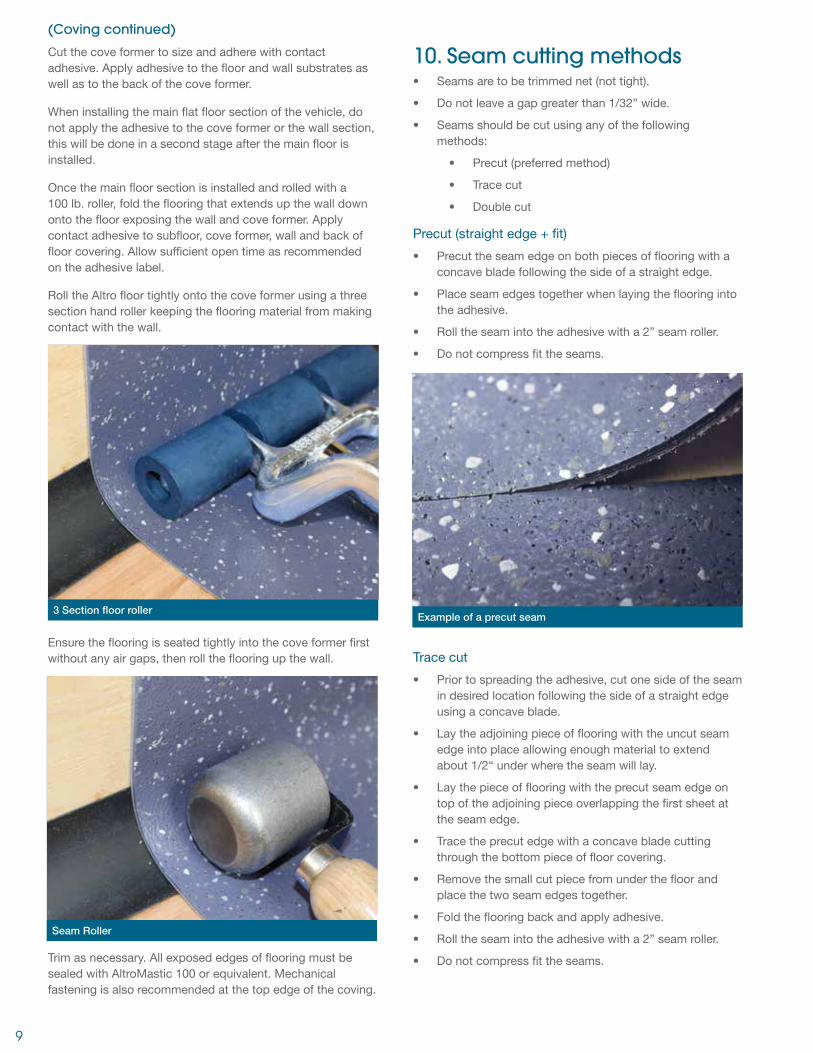
Altro cove former is available in a range of sizes to fit most requirements.
8
Available in 38 mm, 26 mm, 20 mm
Coved flooring with cutout showing flooring
Glue
Former
Flooring
Cut the cove former to size and adhere with contact adhesive. Apply adhesive to the floor and wall substrates as well as to the back of the cove former.
When installing the main flat floor section of the vehicle, do not apply the adhesive to the cove former or the wall section, this will be done in a second stage after the main floor is installed.
Once the main floor section is installed and rolled with a 100 lb. roller, fold the flooring that extends up the wall down onto the floor exposing the wall and cove former. Apply contact adhesive to subfloor, cove former, wall and back of floor covering. Allow sufficient open time as recommended on the adhesive label.
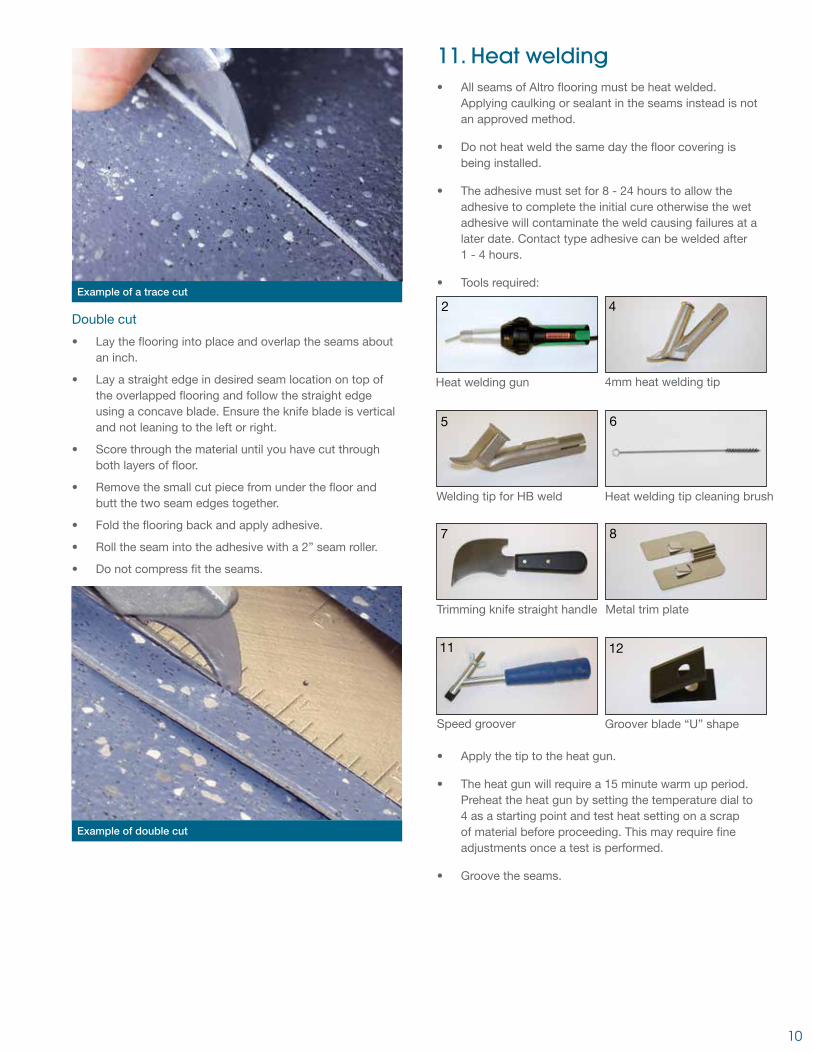
Roll the Altro floor tightly onto the cove former using a three section hand roller keeping the flooring material from making contact with the wall.
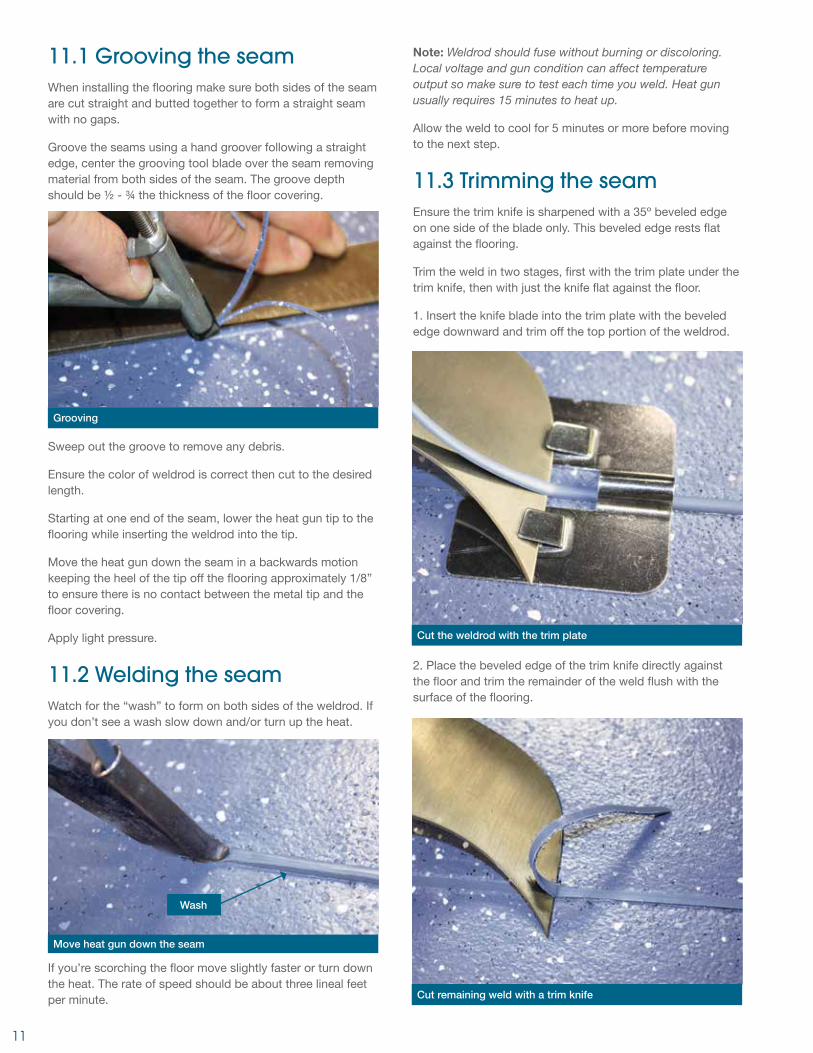
Ensure the flooring is seated tightly into the cove former first without any air gaps, then roll the flooring up the wall.
Trim as necessary. All exposed edges of flooring must be sealed with AltroMastic 100 or equivalent. Mechanical fastening is also recommended at the top edge of the coving.
10. Seam cutting methods• Seams are to be trimmed net (not tight).
• Do not leave a gap greater than 1/32” wide.
• Seams should be cut using any of the following methods:
• Precut (preferred method)
• Trace cut
• Double cut
Precut (straight edge + fit)
• Precut the seam edge on both pieces of flooring with a concave blade following the side of a straight edge.
• Place seam edges together when laying the flooring into the adhesive.
• Roll the seam into the adhesive with a 2” seam roller.
• Do not compress fit the seams.
Trace cut
• Prior to spreading the adhesive, cut one side of the seam in desired location following the side of a straight edge using a concave blade.
• Lay the adjoining piece of flooring with the uncut seam edge into place allowing enough material to extend about 1/2“ under where the seam will lay.
• Lay the piece of flooring with the precut seam edge on top of the adjoining piece overlapping the first sheet at the seam edge.
• Trace the precut edge with a concave blade cutting through the bottom piece of floor covering.
• Remove the small cut piece from under the floor and place the two seam edges together.
• Fold the flooring back and apply adhesive.
• Roll the seam into the adhesive with a 2” seam roller.
• Do not compress fit the seams.
9
Example of a precut seam3 Section floor roller
Seam Roller
(Coving continued)
Double cut
• Lay the flooring into place and overlap the seams about an inch.
• Lay a straight edge in desired seam location on top of the overlapped flooring and follow the straight edge using a concave blade. Ensure the knife blade is vertical and not leaning to the left or right.
• Score through the material until you have cut through both layers of floor.
• Remove the small cut piece from under the floor and butt the two seam edges together.
• Fold the flooring back and apply adhesive.
• Roll the seam into the adhesive with a 2” seam roller.
• Do not compress fit the seams.
11. Heat welding• All seams of Altro flooring must be heat welded.
Applying caulking or sealant in the seams instead is not an approved method.
• Do not heat weld the same day the floor covering is being installed.
• The adhesive must set for 8 - 24 hours to allow the adhesive to complete the initial cure otherwise the wet adhesive will contaminate the weld causing failures at a later date. Contact type adhesive can be welded after 1 - 4 hours.
• Tools required:
• Apply the tip to the heat gun.
• The heat gun will require a 15 minute warm up period. Preheat the heat gun by setting the temperature dial to 4 as a starting point and test heat setting on a scrap of material before proceeding. This may require fine adjustments once a test is performed.
• Groove the seams.
Heat welding gun
2
4mm heat welding tip
4
Welding tip for HB weld
5
Heat welding tip cleaning brush
6
Trimming knife straight handle
7
Metal trim plate
8
Speed groover
11
Groover blade “U” shape
12
10
Example of double cut
Example of a trace cut
11.1 Grooving the seamWhen installing the flooring make sure both sides of the seam are cut straight and butted together to form a straight seam with no gaps.
Groove the seams using a hand groover following a straight edge, center the grooving tool blade over the seam removing material from both sides of the seam. The groove depth should be ½ - ¾ the thickness of the floor covering.
Sweep out the groove to remove any debris.
Ensure the color of weldrod is correct then cut to the desired length.
Starting at one end of the seam, lower the heat gun tip to the flooring while inserting the weldrod into the tip.
Move the heat gun down the seam in a backwards motion keeping the heel of the tip off the flooring approximately 1/8” to ensure there is no contact between the metal tip and the floor covering.
Apply light pressure.
11.2 Welding the seamWatch for the “wash” to form on both sides of the weldrod. If you don’t see a wash slow down and/or turn up the heat.
If you’re scorching the floor move slightly faster or turn down the heat. The rate of speed should be about three lineal feet per minute.
Note: Weldrod should fuse without burning or discoloring. Local voltage and gun condition can affect temperature output so make sure to test each time you weld. Heat gun usually requires 15 minutes to heat up.
Allow the weld to cool for 5 minutes or more before moving to the next step.
11.3 Trimming the seamEnsure the trim knife is sharpened with a 35º beveled edge on one side of the blade only. This beveled edge rests flat against the flooring.
Trim the weld in two stages, first with the trim plate under the trim knife, then with just the knife flat against the floor.
1. Insert the knife blade into the trim plate with the beveled edge downward and trim off the top portion of the weldrod.
2. Place the beveled edge of the trim knife directly against the floor and trim the remainder of the weld flush with the surface of the flooring.
11
Move heat gun down the seam
Wash
Cut remaining weld with a trim knife
Cut the weldrod with the trim plate
Grooving
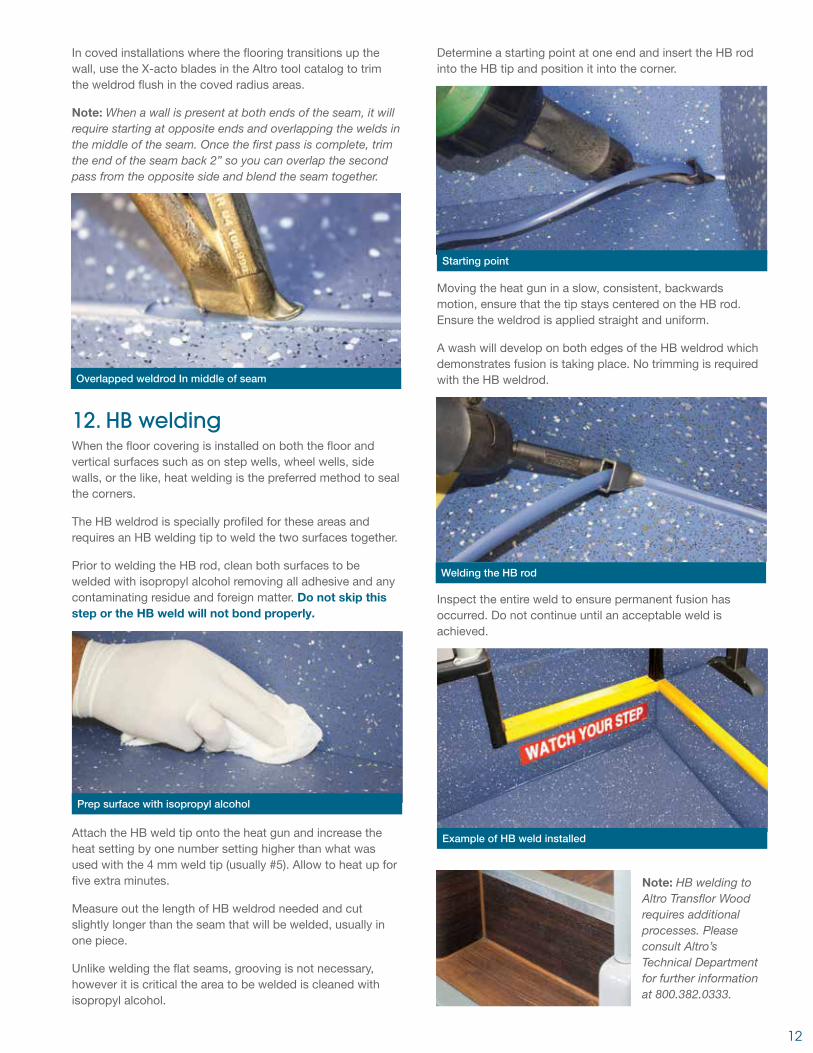
In coved installations where the flooring transitions up the wall, use the X-acto blades in the Altro tool catalog to trim the weldrod flush in the coved radius areas.
Note: When a wall is present at both ends of the seam, it will require starting at opposite ends and overlapping the welds in the middle of the seam. Once the first pass is complete, trim the end of the seam back 2” so you can overlap the second pass from the opposite side and blend the seam together.
12. HB weldingWhen the floor covering is installed on both the floor and vertical surfaces such as on step wells, wheel wells, side walls, or the like, heat welding is the preferred method to seal the corners.
The HB weldrod is specially profiled for these areas and requires an HB welding tip to weld the two surfaces together.
Prior to welding the HB rod, clean both surfaces to be welded with isopropyl alcohol removing all adhesive and any contaminating residue and foreign matter. Do not skip this step or the HB weld will not bond properly.
Attach the HB weld tip onto the heat gun and increase the heat setting by one number setting higher than what was used with the 4 mm weld tip (usually #5). Allow to heat up for five extra minutes.
Measure out the length of HB weldrod needed and cut slightly longer than the seam that will be welded, usually in one piece.
Unlike welding the flat seams, grooving is not necessary, however it is critical the area to be welded is cleaned with isopropyl alcohol.
Determine a starting point at one end and insert the HB rod into the HB tip and position it into the corner.
Moving the heat gun in a slow, consistent, backwards motion, ensure that the tip stays centered on the HB rod. Ensure the weldrod is applied straight and uniform.
A wash will develop on both edges of the HB weldrod which demonstrates fusion is taking place. No trimming is required with the HB weldrod.
Inspect the entire weld to ensure permanent fusion has occurred. Do not continue until an acceptable weld is achieved.
Note: HB welding to Altro Transflor Wood requires additional processes. Please consult Altro’s Technical Department for further information at 800.382.0333.
12
Starting point
Prep surface with isopropyl alcohol
Welding the HB rod
Example of HB weld installed
Overlapped weldrod In middle of seam

13. Step installationThe steps and risers can be installed in individual separate pieces or kept together in a step and riser combination with a cove former.
Determine the specified step molding/nosing to be used, as each style of molding will require cutting the flooring to a different size (see section “15. Step nosing”).
Two-Piece Step and Riser Install:
• Prep the step well as described in the subfloor preparation section.
• Measure and cut the flooring to fit the steps and risers.
• Use templates when possible to increase the accuracy and speed.
• Apply appropriate adhesive according to its specifications.
• Install the steps into the adhesive and roll with a three section hand roller.
• Install the risers with the bottom edge resting on top of the step.
• Cut and fit the flooring onto the step well sides leaving no gaps. Use templates when possible to increase the accuracy and speed.
• Install the parts after a proper fit is confirmed and roll with a hand roller.
• Install the specified step molding/nosing (see section “15. Step nosing”).
• Finish the step well with HB weld (preferred) or AltroMastic 100 to ensure a water tight seal around the edges.
One-Piece Step and Riser Install:
• Prep the step well as described in the subfloor preparation section.
• Cut and fit cove former to fit on top of the step and up against the riser.
• Install cove former with contact adhesive.
• Measure and cut the flooring to fit from the front of the step up the cove former to an inch above the top of the riser.
• Pieces should be cut to the correct width in the step well without any gaps. Use templates when possible to increase the accuracy and speed.
• Apply appropriate adhesive according to its specifications to the step, cove former, and riser.
• Lay step into place starting at the step’s edge and roll with a three section hand roller.
• Keep the flooring material from making contact with the riser and ensure the flooring is seated tightly into the cove former before rolling the floor up the riser.
• Cut the flooring even with the top of the riser/start of the next step.
• Continue with remaining steps.
• Install the specified step molding/nosing (see section “15. Step nosing”).
• Finish the step well with HB weld (preferred) or AltroMastic 100 to ensure a water tight seal around the edges.
13
Two-Piece Step and Riser Install
One-Piece Step and Riser Install
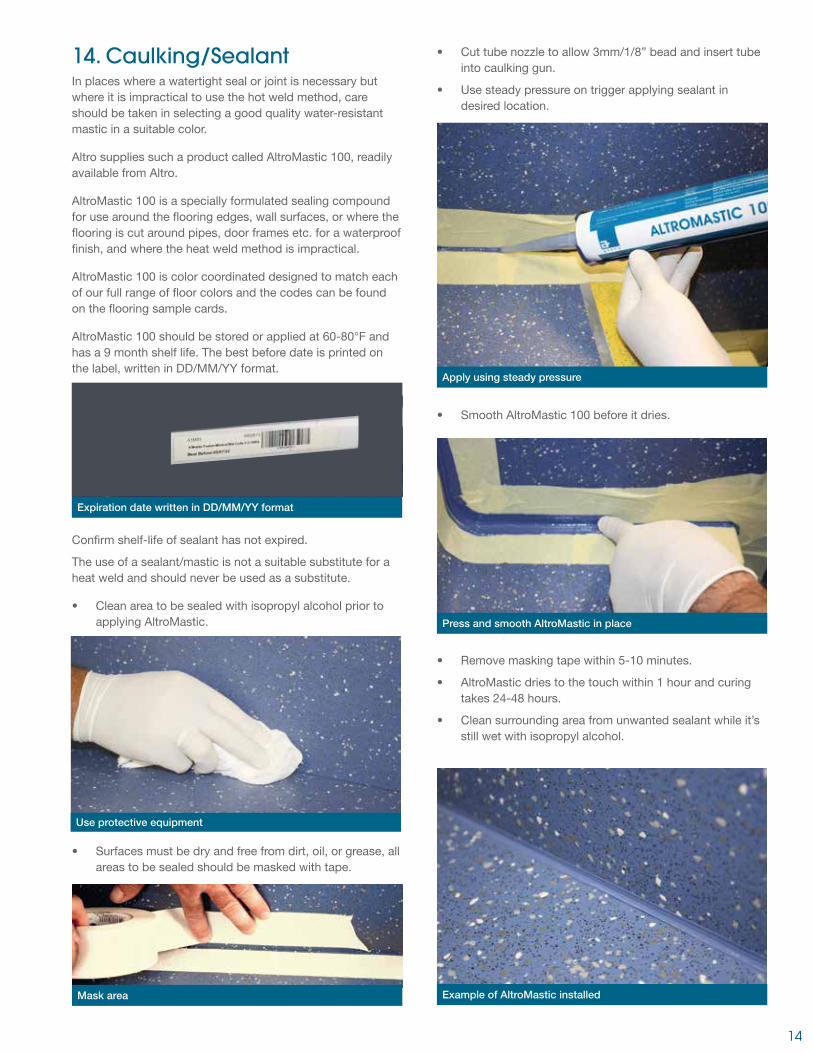
14. Caulking/SealantIn places where a watertight seal or joint is necessary but where it is impractical to use the hot weld method, care should be taken in selecting a good quality water-resistant mastic in a suitable color.
Altro supplies such a product called AltroMastic 100, readily available from Altro.
AltroMastic 100 is a specially formulated sealing compound for use around the flooring edges, wall surfaces, or where the flooring is cut around pipes, door frames etc. for a waterproof finish, and where the heat weld method is impractical.
AltroMastic 100 is color coordinated designed to match each of our full range of floor colors and the codes can be found on the flooring sample cards.
AltroMastic 100 should be stored or applied at 60-80°F and has a 9 month shelf life. The best before date is printed on the label, written in DD/MM/YY format.
Confirm shelf-life of sealant has not expired.
The use of a sealant/mastic is not a suitable substitute for a heat weld and should never be used as a substitute.
• Clean area to be sealed with isopropyl alcohol prior to applying AltroMastic.
• Surfaces must be dry and free from dirt, oil, or grease, all areas to be sealed should be masked with tape.
• Cut tube nozzle to allow 3mm/1/8” bead and insert tube into caulking gun.
• Use steady pressure on trigger applying sealant in desired location.
• Smooth AltroMastic 100 before it dries.
• Remove masking tape within 5-10 minutes.
• AltroMastic dries to the touch within 1 hour and curing takes 24-48 hours.
• Clean surrounding area from unwanted sealant while it’s still wet with isopropyl alcohol.
14
Mask area
Press and smooth AltroMastic in place
Use protective equipment
Example of AltroMastic installed
Expiration date written in DD/MM/YY format
Apply using steady pressure
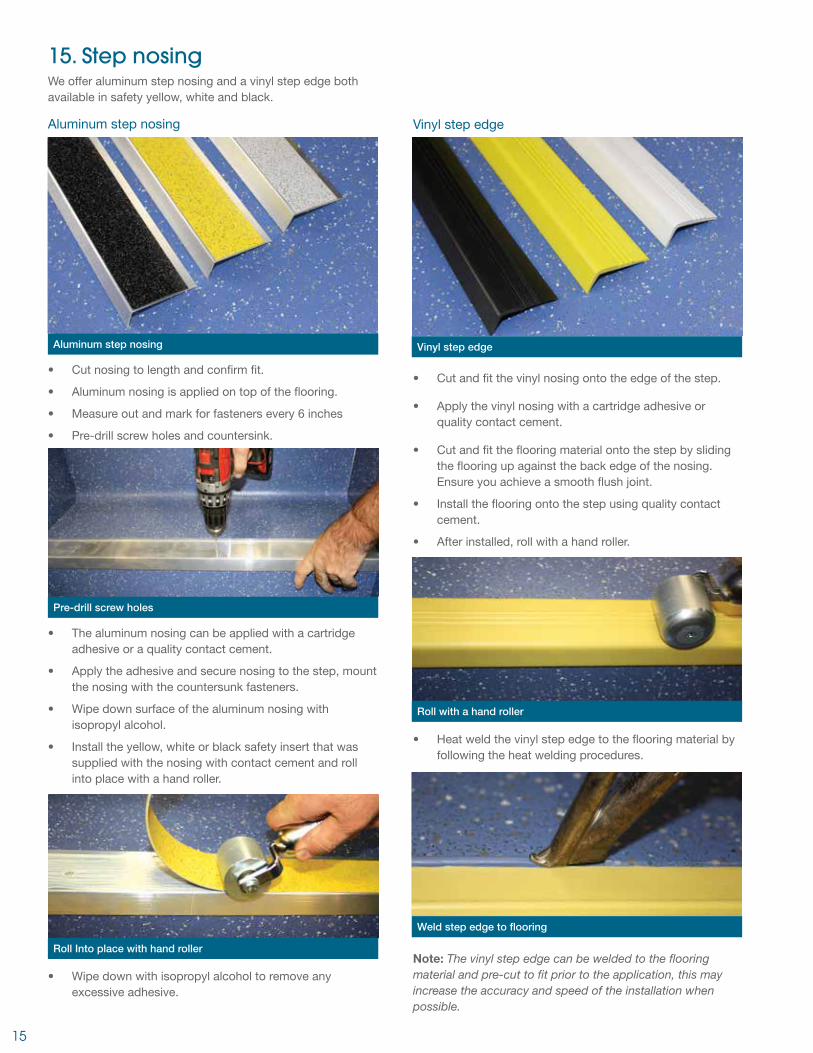
15. Step nosing We offer aluminum step nosing and a vinyl step edge both available in safety yellow, white and black.
Aluminum step nosing
• Cut nosing to length and confirm fit.
• Aluminum nosing is applied on top of the flooring.
• Measure out and mark for fasteners every 6 inches
• Pre-drill screw holes and countersink.
• The aluminum nosing can be applied with a cartridge adhesive or a quality contact cement.
• Apply the adhesive and secure nosing to the step, mount the nosing with the countersunk fasteners.
• Wipe down surface of the aluminum nosing with isopropyl alcohol.
• Install the yellow, white or black safety insert that was supplied with the nosing with contact cement and roll into place with a hand roller.
• Wipe down with isopropyl alcohol to remove any excessive adhesive.
Vinyl step edge
• Cut and fit the vinyl nosing onto the edge of the step.
• Apply the vinyl nosing with a cartridge adhesive or quality contact cement.
• Cut and fit the flooring material onto the step by sliding the flooring up against the back edge of the nosing. Ensure you achieve a smooth flush joint.
• Install the flooring onto the step using quality contact cement.
• After installed, roll with a hand roller.
• Heat weld the vinyl step edge to the flooring material by following the heat welding procedures.
Note: The vinyl step edge can be welded to the flooring material and pre-cut to fit prior to the application, this may increase the accuracy and speed of the installation when possible.
15
Pre-drill screw holes
Roll with a hand roller
Weld step edge to flooring
Roll Into place with hand roller
Vinyl step edgeAluminum step nosing

16. Additional installation techniquesWheel Well Installation
Each manufacturer has unique wheel wells and molding/trim with specific installation procedures. Most are covered in separate flooring pieces. We recommend HB welding all around the wheel wells and/or vertical areas where applicable. Seal with AltroMastic 100 when heat welding is impractical.
Seat Tracks
Where the Altro flooring is cut to the seat tracks either on the floor or on the walls, the edge of the flooring needs to be sealed with AltroMastic 100 to prevent water migration. It is recommended the sealant be applied to the edge of the track prior to fitting the floor to the track and again afterwards as well on the surface.
17. Post-installation cleanup and protectionCleanup
Remove any adhesive on top of the flooring with isopropyl alcohol. Do NOT use acetones, lacquer thinners or other chemicals that will damage the flooring surface. For dried adhesive, it may require several applications to soften the adhesive before it will lift off.
Always test cleaner on a scrap piece of flooring before use to confirm no damage can occur.
Note: Acetone is now being found in mineral spirits and denatured alcohol in some regions due to regulation changes. Please confirm before use as acetone will damage the floor.
Protection
Protect the flooring with a non-staining type protection to ensure other tradesmen do not damage the floor.
18. Consumer cleaning overviewRegular cleaning of Altro Transport products is essential. There are two cleaning cycles.
• Regular
• Deep (scrub) cleaning
An ideal schedule uses both.
1. Sweep and mop daily.
2. Wet clean and scrub floors weekly.
3. Major overall clean every three months including stain treatment.
4. If maintenance becomes sporadic, flooring can be restored using the deep (scrub) clean procedure and applying very concentrated solutions of cleaning agents.
Tools you will need:
• Maintenance guide
• AltroClean™ 44
• Microfiber mop head
• Deck brush
If in any doubt about any aspect of cleaning Altro Transport products, please contact your Altro Sales Executive. AltroClean 44 is approved for use on Altro Transport flooring, other manufacturers such as Taski and Johnson also provide suitable detergents, please contact your Altro Sales Executive for further information if you are unsure about which product to use. Altro also offers a Cleaning Kit containing a Flo-Pac brush, a mop head, cleaner, instructions and MSDS sheet.
Cleaning agentsThe composition of cleaning agents varies widely. They may be designed to remove specific soilings, or be formulated with respect to health, safety and environmental issues or the needs of the flooring itself. Alkaline cleaners are best suited to the cleaning of buses and coaches as they generally deal with the majority of soils.
Note: Use a twin compartment mop bucket or two buckets to keep clean and dirty water separate as good rinsing of residual dirt and cleaners is essential to prevent discoloring and reduction of slip resistance.
16
H20
1:10
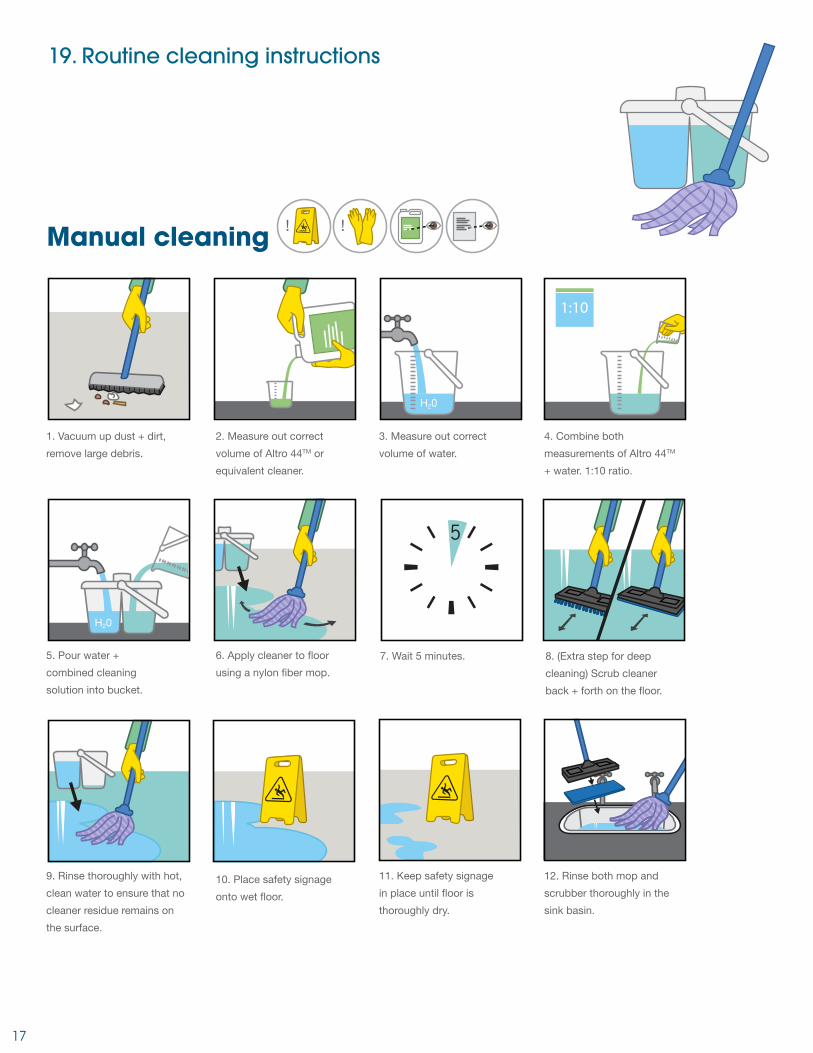
! !Manual cleaning
H20
H20
H20
H20
1:10
! !Manual cleaning
H20
H20
H20
H20
1:10
! !Manual cleaning
H20
H20
H20
H20
1:10
! !Manual cleaning
H20
H20
H20
1. Vacuum up dust + dirt,
remove large debris.
5. Pour water +
combined cleaning
solution into bucket.
9. Rinse thoroughly with hot,
clean water to ensure that no
cleaner residue remains on
the surface.
2. Measure out correct
volume of Altro 44TM or
equivalent cleaner.
6. Apply cleaner to floor
using a nylon fiber mop.
10. Place safety signage
onto wet floor.
3. Measure out correct
volume of water.
7. Wait 5 minutes.
11. Keep safety signage
in place until floor is
thoroughly dry.
4. Combine both
measurements of Altro 44TM
+ water. 1:10 ratio.
8. (Extra step for deep
cleaning) Scrub cleaner
back + forth on the floor.
12. Rinse both mop and
scrubber thoroughly in the
sink basin.
800 382 0333 USA / 800 565 4658 CANtransport@altrofl oors.com
www.altro.com
For technical support please call and speak with our Transport Technical Services department.
(non-porous substrates)
H20
1:10
! !Manual cleaning
H20
H20
H20
H20
1:10
! !Manual cleaning
H20
H20
H20
H20
1:10
! !Manual cleaning
H20
H20
H20
H20
1:10
! !Manual cleaning
H20
H20
H20
1. Vacuum up dust + dirt,
remove large debris.
5. Pour water +
combined cleaning
solution into bucket.
9. Rinse thoroughly with hot,
clean water to ensure that no
cleaner residue remains on
the surface.
2. Measure out correct
volume of Altro 44TM or
equivalent cleaner.
6. Apply cleaner to floor
using a nylon fiber mop.
10. Place safety signage
onto wet floor.
3. Measure out correct
volume of water.
7. Wait 5 minutes.
11. Keep safety signage
in place until floor is
thoroughly dry.
4. Combine both
measurements of Altro 44TM
+ water. 1:10 ratio.
8. (Extra step for deep
cleaning) Scrub cleaner
back + forth on the floor.
12. Rinse both mop and
scrubber thoroughly in the
sink basin.
800 382 0333 USA / 800 565 4658 CANtransport@altrofl oors.com
www.altro.com
For technical support please call and speak with our Transport Technical Services department.
8. (Extra step for deep
cleaning) Scrub cleaner
back + forth on the floor.
H20
1:10
! !Manual cleaning
H20
H20
H20
H20
1:10
! !Manual cleaning
H20
H20
H20
H20
1:10
! !Manual cleaning
H20
H20
H20
H20
1:10
! !Manual cleaning
H20
H20
H20
1. Vacuum up dust + dirt,
remove large debris.
5. Pour water +
combined cleaning
solution into bucket.
9. Rinse thoroughly with hot,
clean water to ensure that no
cleaner residue remains on
the surface.
2. Measure out correct
volume of Altro 44TM or
equivalent cleaner.
6. Apply cleaner to floor
using a nylon fiber mop.
10. Place safety signage
onto wet floor.
3. Measure out correct
volume of water.
7. Wait 5 minutes.
11. Keep safety signage
in place until floor is
thoroughly dry.
4. Combine both
measurements of Altro 44TM
+ water. 1:10 ratio.
8. (Extra step for deep
cleaning) Scrub cleaner
back + forth on the floor.
12. Rinse both mop and
scrubber thoroughly in the
sink basin.
800 382 0333 USA / 800 565 4658 CANtransport@altrofl oors.com
www.altro.com
For technical support please call and speak with our Transport Technical Services department.
17
19. Routine cleaning instructions

Heat welding kitHWKTF
Heat welding nozzleHWNTR
Grooving tool handleGH
Grooving tool bladeGTB
1
Heat welding gunHWGST
2 3
4mm heat welding tipHWT4MM
4
Welding tip for HB weldHWTHB
5
Heat welding tip cleaning brushHWCBB
6
Trimming knife straight handleTKSH
7
Metal trim plateTP
8
9 10
Speed grooverSPEED GROOVER
11
Xacto HandleXH
Xacto blades (8 pc)XARP
Straight blades (100 pc)HDB1
Hooked blades (100 pc)HDB2
Concave blades (100 pc)HDB3
2” seam rollerRSH
3 section floor rollerR3
Trowel blade 1/32 x 1/16 x 5/64 UTBWHA
Trowel blade 1/32 x 1/16 x 1/32 UTBFFA
Trowel handleTH
Electric grooverGE
Electric groover diamond bladeGEDB
Groover blade “U” shape (10 pc)GB
12
13 14 15 16
17 18 19 20
21 22 23 24
For non-porous substrates
For porous substrates
18
20. ToolsAltro offers a wide variety of tools for the installation of its products. Please consult with your local Altro supplier for an updated tool catalog.
Altro has been at the forefront of innovation for 100 years. Today, working closely with architects, end customers, engineers, designers and contractors around the world, our insight and expertise help them transform everyday spaces into environments that can improve the well-being of everyone that uses them.
And by consistently turning creative thinking into practical, real-world solutions – that maintain the highest standards of safety and durability – Altro has become synonymous with quality.
As a family-founded business, we have a strong sense of what we value and a way of thinking inspired by The Bauhaus – a balance of quality, form and design-led function – that puts people’s needs at the heart of everything we do. It’s a human-centered approach to designing for the demands of 21st century life.
It’s a history that means we value the bold, the brave and the new. From focusing on how the different sectors we serve need their spaces to perform, to the call for more environmentally sustainable materials, Altro is constantly challenging what is possible and seeking new ways of inspiring our customers and answering their biggest challenges.
With offices across Europe, the Americas, Asia Pacific and the Middle East, we remain committed to developing solutions that stand the test of time.
We combine the best in contemporary style with the functionality required to improve the way we all live and work, wherever in the world that may be.
We are Altro.
© Copyright Altro 2022
USA 800.382.0333
CANADA 800.565.4658
www.altro.com
Content correct at time of going to print. Altro reserves the right to change any detail. Please consult www.altro.com or your local Sales Representative for the latest product range information.
Follow us
TFL_Install 2022
Related Documents