Apsara Uni-manager Management Console User Guide/Legal disclaimer Document Version:20210130 1 Alibaba Cloud Apsara Stack Enterprise Apsara Uni-manager Management Console User Guide Product Version:2012, Internal: V3.13.0 Document Version:20210130

Welcome message from author
This document is posted to help you gain knowledge. Please leave a comment to let me know what you think about it! Share it to your friends and learn new things together.
Transcript

Apsara Uni-manager Management
Console User Guide/Legal
disclaimer
Document Version:20210130 1
Alibaba Cloud
Apsara Stack Enterprise
Apsara Uni-manager Management
Console User Guide
Product Version:2012, Internal: V3.13.0
Document Version:20210130

Apsara Uni-manager Management
Console User Guide/Legal
disclaimer
Document Version:20210130 2
Legal disclaimer
Alibaba Cloud reminds you to carefully read and fully understand the terms and conditions of
this legal disclaimer before you read or use this document. If you have read or used this
document, it shall be deemed as your total acceptance of this legal disclaimer.
You shall download and obtain this document from the Alibaba Cloud website or other
Alibaba Cloud-authorized channels, and use this document for your own legal business
activities only. The content of this document is considered confidential information of
Alibaba Cloud. You shall strictly abide by the confidentiality obligations. No part of this
document shall be disclosed or provided to any third party for use without the prior written
consent of Alibaba Cloud.
No part of this document shall be excerpted, translated, reproduced, transmitted, or
disseminated by any organization, company or individual in any form or by any means
without the prior written consent of Alibaba Cloud.
The content of this document may be changed because of product version upgrade,
adjustment, or other reasons. Alibaba Cloud reserves the right to modify the content of
this document without notice and an updated version of this document will be released
through Alibaba Cloud-authorized channels from time to time. You should pay attention
to the version changes of this document as they occur and download and obtain the most
up-to-date version of this document from Alibaba Cloud-authorized channels.
This document serves only as a reference guide for your use of Alibaba Cloud products
and services. Alibaba Cloud provides this document based on the "status quo", "being
defective", and "existing functions" of its products and services. Alibaba Cloud makes
every effort to provide relevant operational guidance based on existing technologies.
However, Alibaba Cloud hereby makes a clear statement that it in no way guarantees the
accuracy, integrity, applicability, and reliability of the content of this document, either
explicitly or implicitly. Alibaba Cloud shall not take legal responsibility for any errors or
lost profits incurred by any organization, company, or individual arising from download,
use, or trust in this document. Alibaba Cloud shall not, under any circumstances, take
responsibility for any indirect, consequential, punitive, contingent, special, or punitive
damages, including lost profits arising from the use or trust in this document (even if

Apsara Uni-manager Management
Console User Guide/Legal
disclaimer
Document Version:20210130 3
Alibaba Cloud has been notified of the possibility of such a loss).
By law, all the contents in Alibaba Cloud documents, including but not limited to pictures,
architecture design, page layout, and text description, are intellectual property of Alibaba
Cloud and/or its affiliates. This intellectual property includes, but is not limited to,
trademark rights, patent rights, copyrights, and trade secrets. No part of this document
shall be used, modified, reproduced, publicly transmitted, changed, disseminated,
distributed, or published without the prior written consent of Alibaba Cloud and/or its
affiliates. The names owned by Alibaba Cloud shall not be used, published, or reproduced
for marketing, advertising, promotion, or other purposes without the prior written consent
of Alibaba Cloud. The names owned by Alibaba Cloud include, but are not limited to,
"Alibaba Cloud", "Aliyun", "HiChina", and other brands of Alibaba Cloud and/or its
affiliates, which appear separately or in combination, as well as the auxiliary signs and
patterns of the preceding brands, or anything similar to the company names, trade names,
trademarks, product or service names, domain names, patterns, logos, marks, signs, or
special descriptions that third parties identify as Alibaba Cloud and/or its affiliates.
Please directly contact Alibaba Cloud for any errors of this document.

Apsara Uni-manager Management
Console User Guide/Document
conventions
Document Version:20210130 4
Document conventions

Apsara Uni-manager Management
Console User Guide/Table of
Contents
Document Version:20210130 5
Table of Contents
Legal disclaimer ......................................................................................................................... 2
Document conventions .............................................................................................................. 4
Table of Contents ..................................................................................................................... 5
1.What is the Apsara Uni-manager Management Console? ................................................ 16
2.User roles and permissions ................................................................................................ 18
3.Log on to the Apsara Uni-manager Management Console ............................................... 22
4.Web page introduction ........................................................................................................ 24
5.Initial configuration .............................................................................................................. 27
5.1. Configuration description ........................................................................................................ 27
5.2. Configuration process ............................................................................................................. 29
6.Monitoring ........................................................................................................................... 31
6.1. View the workbench ................................................................................................................ 31
6.2. CloudMonitor ........................................................................................................................... 33
6.2.1. Cloud Monitor overview .............................................................................................................................. 33
6.2.2. Metrics ........................................................................................................................................................... 33
6.2.3. View monitoring charts ............................................................................................................................... 68
6.3. Alerts ....................................................................................................................................... 69
6.3.1. View alarm overview ................................................................................................................................... 69
6.3.2. Enable or disable alert notification ............................................................................................................ 69

Apsara Uni-manager Management
Console User Guide/Table of
Contents
Document Version:20210130 6
6.3.3. View alert logs .............................................................................................................................................. 70
6.3.4. Alert rules ...................................................................................................................................................... 71
6.3.4.1. View alert rules .................................................................................................................................... 71
6.3.4.2. Create an alert rule.............................................................................................................................. 72
6.3.4.3. Disable an alarm rule .......................................................................................................................... 75
6.3.4.4. Enable an alarm rule ........................................................................................................................... 75
6.3.4.5. Delete an alarm rule ............................................................................................................................ 76
7.VMware Cloud on Alibaba Cloud ....................................................................................... 77
7.1. Log on to the VMware Cloud on Alibaba Cloud console ....................................................... 77
7.2. Bind a VMware Cloud on Alibaba Cloud region ..................................................................... 78
7.3. Instructions .............................................................................................................................. 78
7.3.1. Limits ............................................................................................................................................................. 79
7.3.2. Suggestions .................................................................................................................................................. 81
7.4. Instances ................................................................................................................................. 81
7.4.1. Create a VMware Cloud on Alibaba Cloud instance .............................................................................. 82
7.4.2. View instance information .......................................................................................................................... 90
7.4.3. Modify an instance ...................................................................................................................................... 91
7.4.4. Remotely connect to an instance .............................................................................................................. 91
7.4.5. Stop an instance .......................................................................................................................................... 93
7.4.6. Start an instance .......................................................................................................................................... 94
7.4.7. Restart an instance ..................................................................................................................................... 95

Apsara Uni-manager Management
Console User Guide/Table of
Contents
Document Version:20210130 7
7.4.8. Delete an instance ....................................................................................................................................... 96
7.5. Images .................................................................................................................................... 96
7.5.1. Create a custom image............................................................................................................................... 96
7.5.2. View images ................................................................................................................................................. 97
7.6. Snapshots ............................................................................................................................... 98
7.6.1. Create a snapshot ....................................................................................................................................... 98
7.6.2. Delete a snapshot ...................................................................................................................................... 100
7.6.3. View snapshots .......................................................................................................................................... 101
7.7. Disks ..................................................................................................................................... 102
7.7.1. Create a disk .............................................................................................................................................. 102
7.7.2. View disks ................................................................................................................................................... 104
7.7.3. Detach a data disk ..................................................................................................................................... 106
7.8. ENIs....................................................................................................................................... 106
7.8.1. Create an ENI ............................................................................................................................................ 106
7.8.2. View ENIs ................................................................................................................................................... 110
7.8.3. Delete an ENI ............................................................................................................................................. 111
8.Enterprise .......................................................................................................................... 112
8.1. Organizations ........................................................................................................................ 112
8.1.1. Create an organization ............................................................................................................................. 112
8.1.2. Query an organization ............................................................................................................................... 112
8.1.3. View organization information.................................................................................................................. 113

Apsara Uni-manager Management
Console User Guide/Table of
Contents
Document Version:20210130 8
8.1.4. Modify the name of an organization ........................................................................................................ 113
8.1.5. Change organization ownership .............................................................................................................. 114
8.1.6. Obtain the AccessKey pair of an organization ...................................................................................... 115
8.1.7. Delete an organization .............................................................................................................................. 116
8.2. Resource sets ....................................................................................................................... 116
8.2.1. Create a resource set ............................................................................................................................... 116
8.2.2. View the details of a resource set ........................................................................................................... 117
8.2.3. Modify the name of a resource set .......................................................................................................... 117
8.2.4. Add a member to a resource set ............................................................................................................. 118
8.2.5. Add or remove a user group of a resource set...................................................................................... 119
8.2.6. Delete a resource set ................................................................................................................................ 120
8.3. Roles ..................................................................................................................................... 121
8.3.1. Create a custom role ................................................................................................................................. 121
8.3.2. View the details of a role .......................................................................................................................... 124
8.3.3. Modify custom role information ................................................................................................................ 124
8.3.4. Copy a role ................................................................................................................................................. 126
8.3.5. Disable a role ............................................................................................................................................. 127
8.3.6. Enable a role .............................................................................................................................................. 127
8.3.7. Delete a custom role ................................................................................................................................. 128
8.4. Users ..................................................................................................................................... 128
8.4.1. System users .............................................................................................................................................. 128

Apsara Uni-manager Management
Console User Guide/Table of
Contents
Document Version:20210130 9
8.4.1.1. Create a user ..................................................................................................................................... 129
8.4.1.2. Query a user ....................................................................................................................................... 132
8.4.1.3. Modify user information .................................................................................................................... 133
8.4.1.4. Change user roles ............................................................................................................................. 133
8.4.1.5. Modify the information of a user group ........................................................................................... 135
8.4.1.6. Modify a user logon policy ................................................................................................................ 135
8.4.1.7. View the initial password of a user.................................................................................................. 136
8.4.1.8. Reset the password of a user .......................................................................................................... 137
8.4.1.9. Disable or enable a user account.................................................................................................... 138
8.4.1.10. Delete a user .................................................................................................................................... 139
8.4.2. Historical users .......................................................................................................................................... 140
8.4.2.1. Query historical users ....................................................................................................................... 140
8.4.2.2. Restore historical users .................................................................................................................... 140
8.5. Logon policies ....................................................................................................................... 141
8.5.1. Create a logon policy ................................................................................................................................ 141
8.5.2. Query a logon policy ................................................................................................................................. 145
8.5.3. Modify a logon policy................................................................................................................................. 146
8.5.4. Disable a logon policy ............................................................................................................................... 146
8.5.5. Enable a logon policy ................................................................................................................................ 147
8.5.6. Delete a logon policy ................................................................................................................................. 147
8.6. User groups .......................................................................................................................... 148

Apsara Uni-manager Management
Console User Guide/Table of
Contents
Document Version:20210130 10
8.6.1. Create a user group .................................................................................................................................. 148
8.6.2. Add users to a user group ........................................................................................................................ 150
8.6.3. Delete users from a user group ............................................................................................................... 150
8.6.4. Add a role ................................................................................................................................................... 151
8.6.5. Delete a role ............................................................................................................................................... 152
8.6.6. Modify the name of a user group ............................................................................................................ 152
8.6.7. Delete a user group ................................................................................................................................... 153
8.7. Resource pools ..................................................................................................................... 153
8.7.1. Update associations .................................................................................................................................. 154
8.8. Change the ownership of an instance .................................................................................. 154
8.9. Cloud instances .................................................................................................................... 155
8.9.1. Manage Apsara Stack cloud instances .................................................................................................. 155
8.9.1.1. Export data of the current cloud ...................................................................................................... 155
8.9.1.2. Add a secondary Apsara Stack node ............................................................................................. 156
8.9.1.3. View managed cloud instances ....................................................................................................... 159
8.9.1.4. Modify a cloud instance .................................................................................................................... 160
8.9.1.5. Manage cloud instances ................................................................................................................... 160
8.9.2. Manage VMware nodes ............................................................................................................................ 161
8.9.2.1. Add a VMware node .......................................................................................................................... 161
8.9.2.2. Modify a VMware node ..................................................................................................................... 163
8.9.2.3. Test VMware node connectivity ...................................................................................................... 164

Apsara Uni-manager Management
Console User Guide/Table of
Contents
Document Version:20210130 11
8.9.3. Manage public cloud resources ............................................................................................................... 164
8.9.3.1. Overview ............................................................................................................................................. 164
8.9.3.2. Management of public cloud accounts ........................................................................................... 165
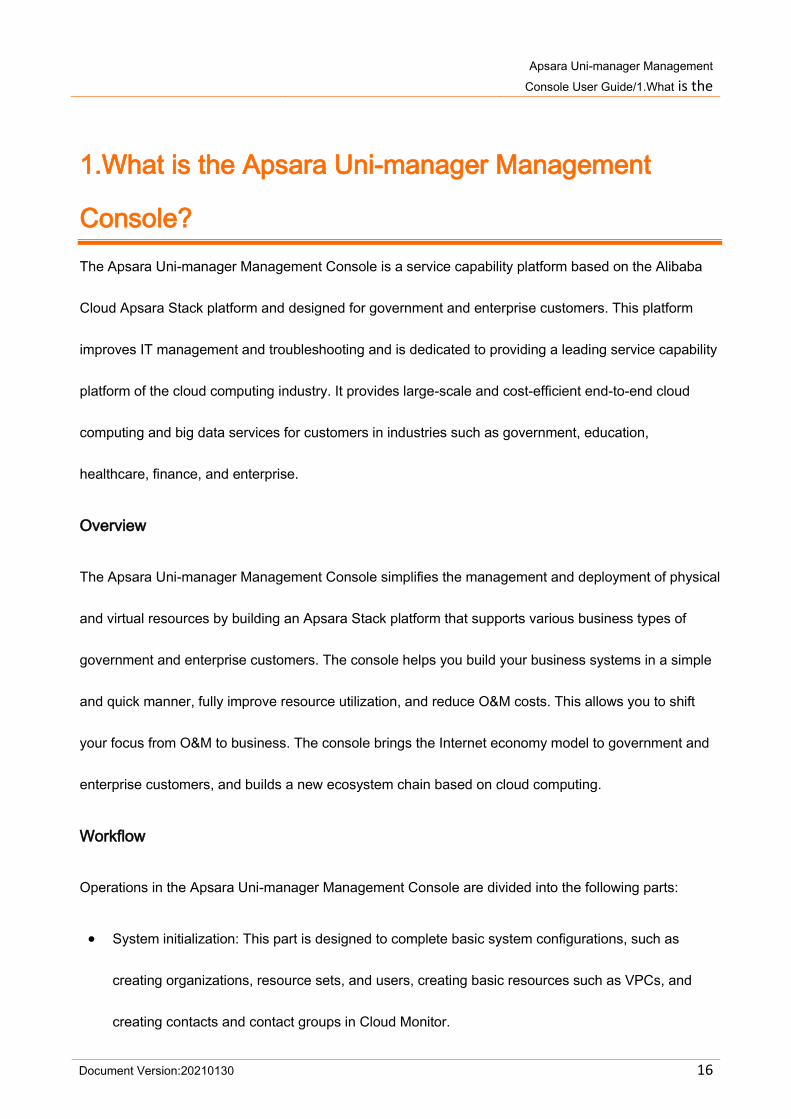
8.9.3.3. Management of ECS instances ....................................................................................................... 166
8.9.3.3.1 Create an ECS instance ............................................................................................................ 166
8.9.3.3.2 Manage an ECS instance.......................................................................................................... 167
8.9.3.3.3 Release an ECS instance ......................................................................................................... 168
8.9.3.4. Management of VPCs ....................................................................................................................... 169
8.9.3.4.1 Create a VPC .............................................................................................................................. 169
8.9.3.4.2 Manage a VPC ............................................................................................................................ 170
8.9.3.4.3 Release a VPC ........................................................................................................................... 170
8.3.9.5. Management of SLB instances ....................................................................................................... 171
8.9.3.5.1 Create an SLB instance ............................................................................................................. 171
8.9.3.5.2 Manage an SLB instance .......................................................................................................... 172
8.9.3.5.3 Release an SLB instance .......................................................................................................... 173
8.3.9.6. Management of OSS buckets .......................................................................................................... 173
8.9.3.6.1 Create an OSS bucket ............................................................................................................... 173
8.9.3.6.2 Manage an OSS bucket ............................................................................................................ 174
8.9.3.6.3 Release an OSS bucket ............................................................................................................ 175
8.3.9.7. Management of RDS instances ....................................................................................................... 176
8.9.3.7.1 Create an RDS instance ............................................................................................................ 176
8.9.3.7.2 Manage an RDS instance ......................................................................................................... 176

Apsara Uni-manager Management
Console User Guide/Table of
Contents
Document Version:20210130 12
8.9.3.7.3 Release an RDS instance ......................................................................................................... 177
8.10. Data permissions ................................................................................................................ 178
8.10.1. Overview ................................................................................................................................................... 178
8.10.2. Set the data permissions of resource instances ................................................................................. 178
8.10.3. Edit user permissions ............................................................................................................................. 179
8.10.4. View the permissions of a user ............................................................................................................. 180
9.Configurations ................................................................................................................... 182
9.1. Password policies ................................................................................................................. 182
9.2. Menus ................................................................................................................................... 182
9.2.1. Create a menu ........................................................................................................................................... 183
9.2.2. Modify a menu ............................................................................................................................................ 185
9.2.3. Delete a menu ............................................................................................................................................ 186
9.2.4. Display or hide menus .............................................................................................................................. 187
9.3. Specifications ........................................................................................................................ 187
9.3.1. Specification parameters .......................................................................................................................... 187
9.3.2. Create specifications ................................................................................................................................. 196
9.3.3. View specifications .................................................................................................................................... 197
9.3.4. Disable specifications ............................................................................................................................... 197
9.3.5. Export specifications ................................................................................................................................. 198
9.3.6. View specifications of each resource type in previous versions ......................................................... 198
9.4. Message center .................................................................................................................... 198

Apsara Uni-manager Management
Console User Guide/Table of
Contents
Document Version:20210130 13
9.4.1. View internal messages ............................................................................................................................ 199
9.4.2. Mark messages as read ........................................................................................................................... 199
9.4.3. Delete a message ...................................................................................................................................... 200
9.5. Resource pool management ................................................................................................ 200
10.Operations ....................................................................................................................... 202
10.1. Quotas ................................................................................................................................. 202
10.1.1. Quota parameters ................................................................................................................................... 202
10.1.2. Set quotas for a cloud service ............................................................................................................... 209
10.1.3. Modify quotas ........................................................................................................................................... 211
10.1.4. Reset quotas ............................................................................................................................................ 211
10.2. Usage statistics ................................................................................................................... 212
10.2.1. View the usage statistics of cloud resources ...................................................................................... 212
10.3. Statistical analysis .............................................................................................................. 214
10.3.1. View reports of current data ................................................................................................................... 214
10.3.2. Export reports of current data ................................................................................................................ 214
10.3.3. Download reports of historical data ...................................................................................................... 215
11.Security ........................................................................................................................... 218
11.1. View operations logs........................................................................................................... 218
12.RAM ................................................................................................................................ 220
12.1. RAM introduction ................................................................................................................ 220

Apsara Uni-manager Management
Console User Guide/Table of
Contents
Document Version:20210130 14
12.2. Permission policy structure and syntax .............................................................................. 221
12.3. RAM roles ........................................................................................................................... 225
12.3.1. View basic information about a RAM role ............................................................................................ 225
12.3.2. Create a RAM role................................................................................................................................... 226
12.3.3. Create a policy ......................................................................................................................................... 227
12.3.4. Modify the content of a RAM policy ...................................................................................................... 228
12.3.5. Modify the name of a RAM policy ......................................................................................................... 229
12.3.6. Add a RAM role to a user group ............................................................................................................ 229
12.3.7. Grant permissions to a RAM role .......................................................................................................... 230
12.3.8. Remove permissions from a RAM role ................................................................................................ 231
12.3.9. Modify a RAM role name ........................................................................................................................ 231
12.3.10. Delete a RAM role ................................................................................................................................. 232
12.4. RAM authorization policies ................................................................................................. 232
12.4.1. Create a RAM role................................................................................................................................... 233
12.4.2. View the details of a RAM role .............................................................................................................. 233
12.4.3. View RAM authorization policies ........................................................................................................... 234
13.Personal information management ................................................................................ 235
13.1. Modify personal information ............................................................................................... 235
13.2. Change your logon password ............................................................................................. 235
13.3. Switch the current role ........................................................................................................ 236

Apsara Uni-manager Management
Console User Guide/Table of
Contents
Document Version:20210130 15
13.4. View the AccessKey pair of your Apsara Stack tenant account ........................................ 237
Apsara Uni-manager Management
Console User Guide/1.What is the
Apsara Uni-manager Management Console?
Document Version:20210130 16
1.What is the Apsara Uni-manager Management
Console?
The Apsara Uni-manager Management Console is a service capability platform based on the Alibaba
Cloud Apsara Stack platform and designed for government and enterprise customers. This platform
improves IT management and troubleshooting and is dedicated to providing a leading service capability
platform of the cloud computing industry. It provides large-scale and cost-efficient end-to-end cloud
computing and big data services for customers in industries such as government, education,
healthcare, finance, and enterprise.
Overview
The Apsara Uni-manager Management Console simplifies the management and deployment of physical
and virtual resources by building an Apsara Stack platform that supports various business types of
government and enterprise customers. The console helps you build your business systems in a simple
and quick manner, fully improve resource utilization, and reduce O&M costs. This allows you to shift
your focus from O&M to business. The console brings the Internet economy model to government and
enterprise customers, and builds a new ecosystem chain based on cloud computing.
Workflow
Operations in the Apsara Uni-manager Management Console are divided into the following parts:
System initialization: This part is designed to complete basic system configurations, such as
creating organizations, resource sets, and users, creating basic resources such as VPCs, and
creating contacts and contact groups in Cloud Monitor.

Apsara Uni-manager Management
Console User Guide/1.What is the
Apsara Uni-manager Management Console?
Document Version:20210130 17
Cloud resource creation: This part is designed to create resources.
Cloud resource management: This part is designed to complete resource management
operations, such as starting, using, and releasing resources, and changing resource
configurations and resource quotas.

Apsara Uni-manager Management
Console User Guide/2.User roles
and permissions
Document Version:20210130 18
2.User roles and permissions
This topic describes roles and their permissions.
Roles and permissions
Role Role permission
Resource user
This role has the permissions to view and modify
resources in a resource set and create alert rules.
Resource set administrator
This role has the permissions to create, modify, and
delete resources in a resource set and manage the users
of the resource set.

Apsara Uni-manager Management
Console User Guide/2.User roles
and permissions
Document Version:20210130 19
Organization administrator
This role has the permissions to manage an organization
and its subordinate organizations, create, modify, and
delete the resources of organizations, create and view
alert rules for resources, and export reports.
Operations administrator
This role has read and write permissions on all
resources.
Security auditor
This role performs security audit on the Apsara Uni-
manager Management Console and has the read-only
permissions on operation logs of the Apsara Uni-
manager Management Console.
Platform administrator
This role has the permissions to initialize the system and
create operations administrators.
Resource auditor
This role has the read-only permissions on all resources
in the Apsara Uni-manager Management Console.
Organization security administrator
This role manages the security of an organization,
including the security of hosts, applications, and
networks. This role has the read-only permissions on
operation logs of the Apsara Uni-manager Management

Apsara Uni-manager Management
Console User Guide/2.User roles
and permissions
Document Version:20210130 20
Console and read and write permissions on ApsaraDB
RDS, ECS, and Apsara Stack Security.
Security system configuration
administrator
This role configures system security features such as the
upgrade center and global configurations. This role has
read and write permissions on the upgrade, protection,
and configuration features of Apsara Stack Security.
Global organization security
administrator
This role manages the security of global tenants by using
Cloud Security Operation Center (SOC). This role has
read and write permissions on all features of Apsara
Stack Security.
Platform security administrator
This role manages the security of the Apsara Uni-
manager Management Console by using SOC.
Global organization security auditor
This role checks the security conditions of all
organizations by using SOC. This role has the read-only
permissions on operation logs of the Apsara Uni-
manager Management Console and all features of
Apsara Stack Security.

Apsara Uni-manager Management
Console User Guide/2.User roles
and permissions
Document Version:20210130 21
Platform security auditor
This role checks the security conditions of the Apsara
Uni-manager Management Console by using SOC. This
role has the read-only permissions on operation logs of
the Apsara Uni-manager Management Console, Server
Guard, Cloud Firewall, Sensitive Data Discovery and
Protection, SOC, system configurations, and Web
Application Firewall (WAF) configurations as well as read
and write permissions on Anti-DDoS, Threat Detection,
and Update Center of Apsara Stack Security.
Platform security configuration
administrator
This role configures and has read and write permissions
on security services in the Apsara Uni-manager
Management Console, such as Server Guard and WAF.
Organization resource auditor
This role has the read-only permissions on all resources
in an organization to which it belongs.

Apsara Uni-manager Management
Console User Guide/3.Log on to the
Apsara Uni-manager Management Console
Document Version:20210130 22
3.Log on to the Apsara Uni-manager Management
Console
This topic describes how to log on to the Apsara Uni-manager Management Console.
Prerequisites
The URL of the Apsara Uni-manager Management Console is obtained from the deployment
personnel before you log on to the Apsara Uni-manager Management Console.
A browser is available. We recommend that you use the Google Chrome browser.
Procedure
1. In the address bar, enter the URL of the Apsara Uni-manager Management Console. Press the
Enter key.
2. Enter your username and password.
Obtain the username and password that you can use to log on to the console from the
operations administrator.
Note When you log on to the Apsara Uni-manager Management Console for the first time, you
must change the password of your username. Your password must meet complexity
requirements. The password must be 8 to 20 characters in length and must contain at least two
of the following character types:
o Uppercase or lowercase letters
o Digits

Apsara Uni-manager Management
Console User Guide/3.Log on to the
Apsara Uni-manager Management Console
Document Version:20210130 23
o Special characters, which include ! @ # $ %
3. Click Login.

Apsara Uni-manager Management
Console User Guide/4.Web page
introduction
Document Version:20210130 24
4.Web page introduction
The web page of the Apsara Uni-manager Management Console consists of the search box, top
navigation bar, information section of the current logon user, and operation section.
Apsara Uni-manager Management Console page
Functional sections of the web page
Section Description
① Search box This section allows you to search for cloud services by resource ID.
②
Top
navigation
bar
This section includes the following modules:
Home: uses charts to display the usage and monitoring data of
system resources in each region.

Apsara Uni-manager Management
Console User Guide/4.Web page
introduction
Document Version:20210130 25
Products: manages all types of basic cloud services and
resources.
Enterprise: manages organizations, resource sets, roles, users,
logon policies, user groups, ownership, and resource pools.
Configurations: manages resource pools, password policies,
specifications, menus, and RAM roles.
Operations: manages the daily operations of cloud resources,
including usage statistics and quotas.
Security: provides operations logs and system logs.
③
Information
section of the
current logon
user
: allows you to switch between English, simplified
Chinese, and traditional Chinese.
: allows you to switch between day and night modes.
User Information: When you click the icon of the current
logon user, the User Information, View Version, and Exit menu
items are displayed.
o If you click User Information, you can perform the following
operations on the User Information page:
View basic information.
Modify personal information.

Apsara Uni-manager Management
Console User Guide/4.Web page
introduction
Document Version:20210130 26
Change the logon password.
View the AccessKey pair of your Apsara Stack tenant
account.
Switch the current role.
Enable or disable alert notification.
o If you click View Version, you can view the version,
authorization status, and build number of Apsara Stack in the
message that appears.
o If you click Exit, you can log off from the current account.
④ Operation
section
Operation section: shows the information and operations.

Apsara Uni-manager Management
Console User Guide/5.Initial
configuration
Document Version:20210130 27
5.Initial configuration
5.1. Configuration description
Before you use the Apsara Uni-manager Management Console, you must complete a series of basic
configuration operations as an administrator, such as creating organizations, resource sets, users, and
roles and initializing resources. This is the initial system configuration.
The Apsara Uni-manager Management Console manages the organizations, resource sets, users, and
roles of cloud data centers in a centralized and service-oriented manner to grant different resource
access permissions to different users.
Organization
After the Apsara Uni-manager Management Console is deployed, a root organization is
automatically generated. You can create other organizations under the root organization.
Organizations are displayed in a hierarchical structure. You can create subordinate organizations
under each organization level.
Resource Set
A resource set is a container used to store resources. Each resource must belong to a resource
set.
User
A user is a resource manager and user.
Role

Apsara Uni-manager Management
Console User Guide/5.Initial
configuration
Document Version:20210130 28
A role is a set of access permissions. You can assign different roles to different users to
implement system access control to meet a variety of different requirements.
The following table describes the relationships among organizations, resource sets, users, roles, and
cloud resources.
Relationship
between two
items
Relationship
type
Description
Organization and
resource set
One-to-many
An organization can have multiple resource sets, but
each resource set can belong to only a single
organization.
Organization and
user
One-to-many
An organization can have multiple users, but each user
can belong to only a single organization.
Resource set and
user
Many-to-many
A user can have multiple resource sets, and a resource
set can be assigned to multiple users under the same
level-1 organization.
User and role Many-to-many
A user can have multiple roles, and a role can be
assigned to multiple users.

Apsara Uni-manager Management
Console User Guide/5.Initial
configuration
Document Version:20210130 29
Resource set and
resource
One-to-many
A resource set can have multiple resources, but each
cloud resource can belong to only a single resource set.
5.2. Configuration process
This topic describes the initial configuration process.
Before you use the Apsara Uni-manager Management Console, you must complete the initial system
configurations as an administrator based on the process shown in the following figure.
1. Create an organization
Create an organization to store resource sets and their resources.
2. Create a user

Apsara Uni-manager Management
Console User Guide/5.Initial
configuration
Document Version:20210130 30
Create a user and assign the user different roles to meet different requirements for system
access control.
3. Create a resource set
Create a resource set before you apply for resources.
4. Add a member to a resource set
Add users to the resource set.
5. Create cloud resources
Create instances in each service console based on project requirements. For more information
about how to create cloud service instances, see the user guide of each cloud service.

Apsara Uni-manager Management
Console User Guide/6.Monitoring
Document Version:20210130 31
6.Monitoring
6.1. View the workbench
The Apsara Uni-manager Management Console uses charts to keep you up to date on the current
usage and monitoring information of resources.
Context
Note The resource types displayed may vary with region types. See your dashboard for available
resource types.
Procedure
1. Log on to the Apsara Uni-manager Management Console.By default, the workbench page
appears when you log on to the Apsara Uni-manager Management Console. To return to the
workbench page from other pages, click Home in the top navigation bar.
2. On the workbench page, you can view the instance summary information for all regions of the
Apsara Stack environment.

Apsara Uni-manager Management
Console User Guide/6.Monitoring
Document Version:20210130 32
You can click Manage Charts in the upper-right corner of the page to select all or individual
modules to view relevant information. You can also click Change Layout in the upper-right
corner of the page and drag a specific module to a location.
o Quota Overview
Shows the usage and quotas of Elastic Compute Service (ECS), ApsaraDB RDS, Object
Storage Service (OSS), and Server Load Balancer (SLB) resources.
o Instances
Shows the numbers of ECS instances, ApsaraDB RDS instances, OSS buckets, and SLB
instances in each region.
o Instance Trends
Shows the numbers of ECS instances, ApsaraDB RDS instances, OSS buckets, and SLB
instances for the last five days.
o Resource Load
Shows the top five ECS and ApsaraDB RDS instances in terms of disk usage, CPU
utilization, and memory usage.
o Alert Rules
Shows the number of alerts and details of the alerts.
o My Management
Shows the numbers of organizations, resource sets, and users.

Apsara Uni-manager Management
Console User Guide/6.Monitoring
Document Version:20210130 33
o Region Map
Shows the information of all primary and secondary nodes in Apsara Stack. The network
connection status and related alerts are displayed for each secondary node.
o Cloud Resource Count
Shows the cloud services and the number of instances in each secondary node.
6.2. CloudMonitor
6.2.1. Cloud Monitor overview
Cloud Monitor provides real-time monitoring, alerting, and notification services for resources to protect
your services and businesses.
Cloud Monitor can monitor metrics for a variety of services such as ECS, ApsaraDB RDS, SLB, OSS,
KVStore for Redis, VPN Gateway, AnalyticDB for PostgreSQL, ApsaraDB for MongoDB, EIP, and API
Gateway.
You can use the metrics of cloud services to configure alert rules and notification policies. This way,
you can stay up to date on the running status and performance of your service instances and scale
resources in a timely manner when resources are insufficient.
6.2.2. Metrics
This topic describes the metrics available for each service.

Apsara Uni-manager Management
Console User Guide/6.Monitoring
Document Version:20210130 34
Cloud Monitor checks the availability of services based on their metrics. You can configure alert rules
and notification policies for these metrics to stay up to date on the running status and performance of
monitored service instances.
Cloud Monitor can monitor resources of other services, including Elastic Compute Service (ECS),
ApsaraDB RDS, Server Load Balancer (SLB), Object Storage Service (OSS), KVStore for Redis, VPN
Gateway, AnalyticDB for PostgreSQL, ApsaraDB for MongoDB, Elastic IP Address (EIP), and API
Gateway. The following tables list the metrics for each service.
Operating system metrics for ECS
Metric Description Unit
Host.cpu.total
The total CPU utilization of
an ECS instance.
%
Host.mem.usedutilization
The memory usage of an
ECS instance.
%
Host.load1
The system loads over the
last 1 minute. This metric is
unavailable for Windows
operating systems.
N/A

Apsara Uni-manager Management
Console User Guide/6.Monitoring
Document Version:20210130 35
Host.load5
The system loads over the
last 5 minutes. This metric is
unavailable for Windows
operating systems.
N/A
Host.load15
The system loads over the
last 15 minutes. This metric
is unavailable for Windows
operating systems.
N/A
Host.disk.utilization
The disk usage of an ECS
instance.
%
Host.disk.readbytes
The number of bytes read
from the disk per second.
byte/s
Host.disk.writebytes
The number of bytes written
to the disk per second.
byte/s
Host.disk.readIops
The number of read requests
received by the disk per
second.
count/s

Apsara Uni-manager Management
Console User Guide/6.Monitoring
Document Version:20210130 36
Host.disk.writeIops
The number of write
requests received by the
disk per second.
count/s
Host.fs.inode The inode usage. %
Basic metrics for ECS
Metric Description Unit
CPU utilization
The CPU utilization of an ECS
instance.
%
Inbound bandwidth to the
Internet
The average rate of inbound
traffic to the Internet.
bit/s
Inbound bandwidth to the
internal network
The average rate of inbound
traffic to the internal network.
bit/s
Outbound bandwidth from the
Internet
The average rate of outbound
traffic from the Internet.
bit/s
Outbound bandwidth from the
internal network
The average rate of outbound
bandwidth from the internal
network.
bit/s

Apsara Uni-manager Management
Console User Guide/6.Monitoring
Document Version:20210130 37
System disk BPS
The number of bytes read from
and written to the system disk
per second.
byte/s
System disk IOPS
The number of reads from and
writes to the system disk per
second.
count/s
Advance CPU credits
The changes in advance CPU
credits. Advance CPU credits
can be used only when the
unlimited mode is enabled.
N/A
CPU credit consumption
The changes in CPU credit
consumption. Consumption
trends are consistent with CPU
utilization.
N/A
Overdrawn CPU credits
The changes in overdrawn
CPU credits. Overdrawn CPU
credits can be used only when
the unlimited mode is enabled.
N/A

Apsara Uni-manager Management
Console User Guide/6.Monitoring
Document Version:20210130 38
CPU credit balance
The changes in CPU credit
balance. The CPU credit
balance is used to maintain
CPU credit usage.
N/A
Note
For ECS instances, you must install a monitoring plug-in to collect metric data at the operating
system level.
Installation method: On the Cloud Monitor page, select the target instance from the ECS instance list
and click Batch Install in the lower part of the page.
Metric data is displayed in the monitoring chart within 5 to 10 minutes after the monitoring plug-in is
installed.
Metrics for ApsaraDB RDS for PostgreSQL
Metric Description
Apsara Stack
service
Calculation formula
CPU
utilization
The CPU utilization of an
ApsaraDB RDS for
PostgreSQL instance.
Unit: %.
ApsaraDB
RDS for
PostgreSQL
Used CPU cores of an
ApsaraDB RDS for
PostgreSQL instance/Total

Apsara Uni-manager Management
Console User Guide/6.Monitoring
Document Version:20210130 39
CPU cores of the ApsaraDB
RDS for PostgreSQL instance
Memory
usage
The memory usage of an
ApsaraDB RDS for
PostgreSQL instance.
Unit: %.
ApsaraDB
RDS for
PostgreSQL
Used memory of an
ApsaraDB RDS for
PostgreSQL instance/Total
memory of the ApsaraDB
RDS for PostgreSQL instance
Disk usage
The disk usage of an
ApsaraDB RDS for
PostgreSQL instance.
Unit: %.
ApsaraDB
RDS for
PostgreSQL
None
IOPS usage
The number of I/O requests
for an ApsaraDB RDS for
PostgreSQL instance per
second. Unit: %.
ApsaraDB
RDS for
PostgreSQL
Number of I/O requests for an
ApsaraDB RDS for
PostgreSQL
instance/Statistical period
Connection
usage
The number of connections
between an application and
an ApsaraDB RDS for
ApsaraDB
RDS for
PostgreSQL
Number of connections
between an application and
an ApsaraDB RDS for

Apsara Uni-manager Management
Console User Guide/6.Monitoring
Document Version:20210130 40
PostgreSQL instance per
second. Unit: %.
PostgreSQL
instance/Statistical period
Metrics for ApsaraDB RDS for MySQL
Metric Description
Apsara
Stack
service
Calculation formula
CPU
utilization
The CPU utilization of an
ApsaraDB RDS for MySQL
instance. Unit: %.
ApsaraDB
RDS for
MySQL
Used CPU cores of an
ApsaraDB RDS for MySQL
instance/Total CPU cores of
the ApsaraDB RDS for
MySQL instance
Memory
usage
The memory usage of an
ApsaraDB RDS for MySQL
instance. Unit: %.
ApsaraDB
RDS for
MySQL
Used memory of an ApsaraDB
RDS for MySQL
instance/Total memory of the
ApsaraDB RDS for MySQL
instance

Apsara Uni-manager Management
Console User Guide/6.Monitoring
Document Version:20210130 41
Disk usage
The disk usage of an
ApsaraDB RDS for MySQL
instance. Unit: %.
ApsaraDB
RDS for
MySQL
None
IOPS usage
The number of I/O requests
for an ApsaraDB RDS for
MySQL instance per second.
Unit: %.
ApsaraDB
RDS for
MySQL
Number of I/O requests for an
ApsaraDB RDS for MySQL
instance/Statistical period
Connection
usage
The number of connections
between an application and
an ApsaraDB RDS for MySQL
instance per second. Unit: %.
ApsaraDB
RDS for
MySQL
Number of connections
between an application and an
ApsaraDB RDS for MySQL
instance/Statistical period
Inbound
bandwidth to
ApsaraDB
RDS for
MySQL
The inbound traffic to an
ApsaraDB RDS for MySQL
instance per second.
ApsaraDB
RDS for
MySQL
None
Outbound
bandwidth
from
The outbound traffic from an
ApsaraDB RDS for MySQL
instance per second.
ApsaraDB
RDS for
MySQL
None

Apsara Uni-manager Management
Console User Guide/6.Monitoring
Document Version:20210130 42
ApsaraDB
RDS for
MySQL
Metrics for ApsaraDB RDS for SQL Server
Metric Description
Apsara
Stack
service
Calculation formula
CPU
utilization
The CPU utilization of an
ApsaraDB RDS for SQL
Server instance. Unit: %.
ApsaraDB
RDS for SQL
Server
Used CPU cores of an
ApsaraDB RDS for SQL
Server instance/Total CPU
cores of the ApsaraDB RDS
for SQL Server instance
Memory
usage
The memory usage of an
ApsaraDB RDS for SQL
Server instance. Unit: %.
ApsaraDB
RDS for SQL
Server
Used memory of an ApsaraDB
RDS for SQL Server
instance/Total memory of the
ApsaraDB RDS for SQL
Server instance

Apsara Uni-manager Management
Console User Guide/6.Monitoring
Document Version:20210130 43
Disk usage
The disk usage of an
ApsaraDB RDS for SQL
Server instance. Unit: %.
ApsaraDB
RDS for SQL
Server
None
IOPS usage
The number of I/O requests
for an ApsaraDB RDS for SQL
Server instance per second.
Unit: %.
ApsaraDB
RDS for SQL
Server
Number of I/O requests for an
ApsaraDB RDS for SQL
Server instance/Statistical
period
Connection
usage
The number of connections
between an application and
an ApsaraDB RDS for SQL
Server instance per second.
Unit: %.
ApsaraDB
RDS for SQL
Server
Number of connections
between an application and an
ApsaraDB RDS for SQL
Server instance/Statistical
period
Inbound
bandwidth to
ApsaraDB
RDS for SQL
Server
The inbound traffic to an
ApsaraDB RDS for SQL
Server instance per second.
ApsaraDB
RDS for SQL
Server
None

Apsara Uni-manager Management
Console User Guide/6.Monitoring
Document Version:20210130 44
Outbound
bandwidth
from
ApsaraDB
RDS for SQL
Server
The outbound traffic from an
ApsaraDB RDS for SQL
Server instance per second.
ApsaraDB
RDS for SQL
Server
None
Metrics for PolarDB
Metric Description
Apsara
Stack
service
Calculation formula
CPU
utilization
The CPU utilization of a
PolarDB instance. Unit: %.
PolarDB
Used CPU cores of a PolarDB
instance/Total CPU cores of
the PolarDB instance
Memory
usage
The memory usage of a
PolarDB instance. Unit: %.
PolarDB
Used memory of a PolarDB
instance/Total memory of the
PolarDB instance
Disk usage
The disk usage of a PolarDB
instance. Unit: %.
PolarDB None

Apsara Uni-manager Management
Console User Guide/6.Monitoring
Document Version:20210130 45
IOPS usage
The number of I/O requests for
a PolarDB instance per
second. Unit: %.
PolarDB
Number of I/O requests for a
PolarDB instance/Statistical
period
Connection
usage
The number of connections
between an application and a
PolarDB instance per second.
Unit: %.
PolarDB
Number of connections
between an application and a
PolarDB instance/Statistical
period
Metrics for SLB
Metric Description Unit
Inbound bandwidth on a port
The average rate of inbound
traffic on a port.
bit/s
Outbound bandwidth on a port
The average rate of outbound
traffic on a port.
bit/s
Number of new connections
on a port
The average number of new
TCP connections established
between clients and SLB
instances in a statistical period.
N/A

Apsara Uni-manager Management
Console User Guide/6.Monitoring
Document Version:20210130 46
Number of inbound packets
received on a port
The number of packets received
by an SLB instance per second.
count/s
Number of outbound packets
sent on a port
The number of packets sent by
an SLB instance per second.
count/s
Number of active connections
on a port
The number of TCP
connections in the
ESTABLISHED state. If
persistent connections are
used, a connection can transfer
multiple file requests at one
time.
N/A
Number of inactive
connections on a port
The number of TCP
connections that are not in the
ESTABLISHED state. You can
run the netstat -an command to
view the connections for both
Windows and Linux instances.
N/A
Number of concurrent
connections on a port
The number of established TCP
connections.
count/s

Apsara Uni-manager Management
Console User Guide/6.Monitoring
Document Version:20210130 47
Number of dropped
connections on a port
The number of connections
dropped per second.
count/s
Number of dropped inbound
packets on a port
The number of inbound packets
dropped per second.
count/s
Number of dropped outbound
packets on a port
The number of outbound
packets dropped per second.
count/s
Dropped inbound bandwidth
on a port
The amount of inbound traffic
dropped per second.
bit/s
Dropped outbound bandwidth
on a port
The amount of outbound traffic
dropped per second.
bit/s
Metrics for monitoring service overview of OSS
Metric Description Unit
Availability
The metric that describes the
system availability of OSS. You
can obtain the metric value
based on the following formula:
Metric value = 1 - Server error
%

Apsara Uni-manager Management
Console User Guide/6.Monitoring
Document Version:20210130 48
requests with the returned HTTP
status code 5xx/All requests.
Valid request percentage
The percentage of valid
requests out of all requests.
%
Total number of requests
The total number of requests
that are received and
processed by the OSS server.
N/A
Number of valid requests
The total number of requests
with HTTP status codes 2xx
and 3xx returned.
N/A
Outbound traffic from the
Internet
The amount of outbound traffic
from the Internet.
byte
Inbound traffic to the Internet
The amount of inbound traffic
to the Internet.
byte
Outbound traffic from the
internal network
The amount of outbound traffic
from the internal network.
byte
Inbound traffic to the internal
network
The amount of inbound traffic
to the internal network.
byte

Apsara Uni-manager Management
Console User Guide/6.Monitoring
Document Version:20210130 49
CDN outbound traffic
The amount of outbound traffic
sent over CDN after CDN is
activated. Such outbound
traffic over CDN is back-to-
origin traffic.
byte
CDN inbound traffic
The amount of inbound traffic
received over CDN after CDN
is activated.
byte
Outbound traffic of cross-
region replication
The amount of outbound traffic
generated during data
replication after cross-region
replication is enabled.
byte
Inbound traffic of cross-region
replication
The amount of inbound traffic
generated during data
replication after cross-region
replication is enabled.
byte
Storage size
The amount of total storage
occupied by the buckets of a
byte

Apsara Uni-manager Management
Console User Guide/6.Monitoring
Document Version:20210130 50
specified user before the
statistics collection deadline.
Number of PUT requests
The total number of PUT
requests made by the user
between 00:00:00 on the first
day of the current month and
the statistics collection
deadline.
N/A
Number of GET requests
The total number of GET
requests made by the user
between 00:00:00 on the first
day of the current month and
the statistics collection
deadline.
N/A
Metrics for request status details of OSS
Metric Description Unit

Apsara Uni-manager Management
Console User Guide/6.Monitoring
Document Version:20210130 51
Number of requests with
server-side errors
The total number of system-level
error requests with the returned
HTTP status code 5xx.
N/A
Percentage of requests with
server-side errors
The percentage of requests with
server-side errors out of all
requests.
%
Number of requests with
network errors
The total number of requests
with the returned HTTP status
code 499.
N/A
Percentage of requests with
network errors
The percentage of requests with
network errors out of all
requests.
%
Number of requests with client-
side authorization errors
The total number of requests
with the returned HTTP status
code 403.
N/A
Percentage of requests with
client-side authorization errors
The percentage of requests with
authorization errors out of all
requests.
%

Apsara Uni-manager Management
Console User Guide/6.Monitoring
Document Version:20210130 52
Number of requests with client-
side errors indicating
resources not found
The total number of requests
with the returned HTTP status
code 404.
N/A
Percentage of requests with
client-side errors indicating
resources not found
The percentage of requests with
errors indicating resources not
found out of all requests.
%
Number of requests with client-
side timeout errors
The total number of requests
with the returned HTTP status
code 408 or OSS error code
RequestTimeout.
N/A
Percentage of requests with
client-side timeout errors
The percentage of requests with
client-side timeout errors out of
all requests.
%
Number of requests with other
client-side errors
The total number of requests
other than the foregoing client-
side error requests with the
returned HTTP status code 4xx.
N/A

Apsara Uni-manager Management
Console User Guide/6.Monitoring
Document Version:20210130 53
Percentage of requests with
other client-side errors
The percentage of requests with
other client-side errors out of all
requests.
%
Number of successful requests
The total number of requests
with the returned HTTP status
code 2xx.
N/A
Percentage of successful
requests
The percentage of successful
requests out of all requests.
%
Number of redirected requests
The total number of requests
with the returned HTTP status
code 3xx.
N/A
Percentage of redirected
requests
The percentage of redirected
requests out of all requests.
%
Metrics for maximum latency of OSS
Metric Description Unit

Apsara Uni-manager Management
Console User Guide/6.Monitoring
Document Version:20210130 54
Maximum end-to-end latency of
GetObject requests
The maximum end-to-end
latency of successful GetObject
requests.
ms
Maximum server latency of
GetObject requests
The maximum server latency of
successful GetObject requests.
ms
Maximum end-to-end latency of
HeadObject requests
The maximum end-to-end
latency of successful
HeadObject requests.
ms
Maximum server latency of
HeadObject requests
The maximum server latency of
successful HeadObject
requests.
ms
Maximum end-to-end latency of
PutObject requests
The maximum end-to-end
latency of successful PutObject
requests.
ms
Maximum server latency of
PutObject requests
The maximum server latency of
successful PutObject requests.
ms

Apsara Uni-manager Management
Console User Guide/6.Monitoring
Document Version:20210130 55
Maximum end-to-end latency of
PostObject requests
The maximum end-to-end
latency of successful
PostObject requests.
ms
Maximum server latency of
PostObject requests
The maximum server latency of
successful PostObject requests.
ms
Maximum end-to-end latency of
AppendObject requests
The maximum end-to-end
latency of successful
AppendObject requests.
ms
Maximum server latency of
AppendObject requests
The maximum server latency of
successful AppendObject
requests.
ms
Maximum end-to-end latency of
UploadPart requests
The maximum end-to-end
latency of successful
UploadPart requests.
ms
Maximum server latency of
UploadPart requests
The maximum server latency of
successful UploadPart requests.
ms

Apsara Uni-manager Management
Console User Guide/6.Monitoring
Document Version:20210130 56
Maximum end-to-end latency of
UploadPartCopy requests
The maximum end-to-end
latency of successful
UploadPartCopy requests.
ms
Maximum server latency of
UploadPartCopy requests
The maximum server latency of
successful UploadPartCopy
requests.
ms
Metrics for successful request category of OSS
Metric Description Unit
Number of successful
GetObject requests
The number of successful
GetObject requests.
N/A
Number of successful
HeadObject requests
The number of successful
HeadObject requests.
N/A
Number of successful
PostObject requests
The number of successful
PostObject requests.
N/A
Number of successful
AppendObject requests
The number of successful
AppendObject requests.
N/A

Apsara Uni-manager Management
Console User Guide/6.Monitoring
Document Version:20210130 57
Number of successful
UploadPart requests
The number of successful
UploadPart requests.
N/A
Number of successful
UploadPartCopy requests
The number of successful
UploadPartCopy requests.
N/A
Number of successful
DeleteObject requests
The number of successful
DeleteObject requests.
N/A
Number of successful
DeleteObjects requests
The number of successful
DeleteObjects requests.
N/A
Metrics for KVStore for Redis
Metric Description Apsara Stack service Unit
CPU utilization
The CPU utilization of a
KVStore for Redis instance.
KVStore for Redis %
Memory usage
The percentage of memory that
is in use.
KVStore for Redis %
Used memory
The amount of memory that is in
use.
KVStore for Redis byte

Apsara Uni-manager Management
Console User Guide/6.Monitoring
Document Version:20210130 58
Number of used
connections
The total number of client
connections that are in use.
KVStore for Redis N/A
Percentage of used
connections
The percentage of connections
that are in use.
KVStore for Redis %
Write bandwidth The write traffic per second. KVStore for Redis byte/s
Read bandwidth The read traffic per second. KVStore for Redis byte/s
Number of failed
operations per second
The number of failed operations
on a KVStore for Redis instance
per second.
KVStore for Redis count/s
Write bandwidth usage
The percentage of total
bandwidth used by write
operations.
KVStore for Redis %
Read bandwidth usage
The percentage of total
bandwidth used by read
operations.
KVStore for Redis %
Used QPS
The number of queries per
second (QPS).
KVStore for Redis count/s

Apsara Uni-manager Management
Console User Guide/6.Monitoring
Document Version:20210130 59
QPS usage The QPS usage. KVStore for Redis %
Average response
time
The average response time. KVStore for Redis ms
Maximum response
time
The maximum response time. KVStore for Redis ms
Number of failed
commands
The number of failed
commands.
KVStore for Redis N/A
Hit Rate The current hit rate. KVStore for Redis %
Inbound traffic
The inbound traffic to a KVStore
for Redis instance.
KVStore for Redis byte
Inbound bandwidth
usage
The inbound bandwidth usage
of a KVStore for Redis instance.
KVStore for Redis %
Outbound traffic
The outbound traffic from a
KVStore for Redis instance.
KVStore for Redis byte
Outbound bandwidth
usage
The outbound bandwidth usage
of a KVStore for Redis instance.
KVStore for Redis %

Apsara Uni-manager Management
Console User Guide/6.Monitoring
Document Version:20210130 60
Metrics for VPN Gateway
Metric Dimension Monitoring period Unit
Number of inbound
packets in a
connection per second
User and instance 1 minute pps
Number of outbound
packets in a
connection per second
User and instance 1 minute pps
Inbound bandwidth of
a connection
User and instance 1 minute bit/s
Outbound bandwidth
of a connection
User and instance 1 minute bit/s
Number of
connections
User and instance 1 minute N/A
Metrics for AnalyticDB for PostgreSQL
Metric Description Unit

Apsara Uni-manager Management
Console User Guide/6.Monitoring
Document Version:20210130 61
Connection usage
The number of connections
between an application and an
AnalyticDB for PostgreSQL
instance per second.
%
CPU utilization
The CPU utilization of an
AnalyticDB for PostgreSQL
instance.
%
Disk usage
The disk usage of an
AnalyticDB for PostgreSQL
instance.
%
IOPS usage
The number of I/O requests for
an AnalyticDB for PostgreSQL
instance per second.
%
Memory usage
The memory usage of an
AnalyticDB for PostgreSQL
instance.
%
Metrics for ApsaraDB for MongoDB
Tab Metric Description Unit

Apsara Uni-manager Management
Console User Guide/6.Monitoring
Document Version:20210130 62
Basic metric
CPU utilization
The CPU utilization of
an ApsaraDB for
MongoDB instance.
%
Memory usage
The memory usage of
an ApsaraDB for
MongoDB instance.
%
Disk usage
The disk usage of an
ApsaraDB for
MongoDB instance.
%
IOPS usage
The percentage of the
IOPS used by an
ApsaraDB for
MongoDB instance out
of the maximum
available IOPS.
%
Connection usage
The number of
connections between
an application and an
ApsaraDB for
%

Apsara Uni-manager Management
Console User Guide/6.Monitoring
Document Version:20210130 63
MongoDB instance per
second.
QPS
The number of queries
per second.
N/A
Number of used
connections
The number of current
connections to an
ApsaraDB for
MongoDB instance.
N/A
Disk capacity
Disk space occupied
by an instance
The total used space. byte
Disk space occupied
by data
The disk space
occupied by data.
byte
Disk space occupied
by logs
The disk space
occupied by logs.
byte
Network request
Inbound traffic to the
internal network
The inbound traffic. byte

Apsara Uni-manager Management
Console User Guide/6.Monitoring
Document Version:20210130 64
Outbound traffic from
the internal network
The outbound traffic. byte
Number of requests
The number of
processed requests.
N/A
Number of operations
Number of Insert
operations
None N/A
Number of Query
operations
None N/A
Number of Update
operations
None N/A
Number of Delete
operations
None N/A
Number of Getmore
operations
None N/A
Number of Command
operations
None N/A
Metrics for EIP

Apsara Uni-manager Management
Console User Guide/6.Monitoring
Document Version:20210130 65
Metric Description Dimension
Monitoring
period
Unit
Inbound
bandwidth
The traffic that
passes through
EIP to ECS per
second.
Instance 1 minute bit/s
Outbound
bandwidth
The traffic that
passes through
EIP from ECS
per second.
Instance 1 minute bit/s
Number of
inbound packets
per second
The number of
packets that pass
through EIP to
ECS per second.
Instance 1 minute pps
Number of
outbound
packets per
second
The number of
packets that pass
through EIP from
ECS per second.
Instance 1 minute pps

Apsara Uni-manager Management
Console User Guide/6.Monitoring
Document Version:20210130 66
Packet loss rate
due to throttling
The packet loss
rate when the
actually used
bandwidth
exceeds the
configured upper
limit.
Instance 1 minute pps
Metrics for API Gateway
Metric Description Dimension Unit
Monitoring
period
Error distribution
The number of
2xx, 4xx, and 5xx
status codes
returned for an
API in the
monitoring
period.
User and API N/A 1 minute
Inbound traffic
The total traffic of
requests
User and API byte 1 minute

Apsara Uni-manager Management
Console User Guide/6.Monitoring
Document Version:20210130 67
received by an
API in the
monitoring
period.
Outbound traffic
The total traffic of
responses sent
by an API in the
monitoring
period.
User and API byte 1 minute
Response time
The latency
between the time
when API
Gateway calls
the backend
service of an API
and the time
when the result is
received from the
backend service
User and API s 1 minute

Apsara Uni-manager Management
Console User Guide/6.Monitoring
Document Version:20210130 68
in the monitoring
period.
Number of total
requests
The total number
of requests
received by an
API in the
monitoring
period.
User and API N/A 1 minute
6.2.3. View monitoring charts
You can view monitoring charts to obtain up-to-date information about each instance.
Procedure
1. Log on to the Apsara Uni-manager Management Console as an administrator.
2. In the top navigation bar, choose Products > Monitoring and O&M > CloudMonitor.
3. In the left-side navigation pane of the CloudMonitor page, click Cloud Service Monitoring.
4. Click a cloud service.
5. Click Monitoring Charts in the Actions column corresponding to an instance.On the Monitoring
Charts page that appears, you can select a date and time to view the monitoring data of each
metric.

Apsara Uni-manager Management
Console User Guide/6.Monitoring
Document Version:20210130 69
6.3. Alerts
6.3.1. View alarm overview
On the Overview page in CloudMonitor, you can view the alarm status statistics and alarm logs.
Procedure
1. Log on to the Apsara Uni-manager Management Console as an administrator.
2. In the top navigation bar, choose Products > Monitoring and O&M > CloudMonitor.
3. In the left-side navigation pane of the CloudMonitor page, click Overview.
4. On the Overview page, view the alarm status statistics and alarm logs generated in the last 24
hours.
6.3.2. Enable or disable alert notification
You can choose whether to enable alert notification by SMS, email, or DingTalk.
Prerequisites
Valid contact information is specified when you create a user. If your contact information is changed,
you must modify personal information. For more information, see Modify personal information.
Procedure
1. Log on to the Apsara Uni-manager Management Console.
2. In the upper-right corner of the homepage, move the pointer over the profile picture and click
User Information.
3. In the Notification By section, select SMS, Email, or DingTalk to enable alert notification.To
disable alert notification, you can clear the corresponding check box.

Apsara Uni-manager Management
Console User Guide/6.Monitoring
Document Version:20210130 70
6.3.3. View alert logs
You can view alert information to stay up to date on the running status of ECS, ApsaraDB RDS, SLB,
KVStore for Redis, VPN Gateway, AnalyticDB for PostgreSQL, ApsaraDB for MongoDB, EIP, API
Gateway, and OSS.
Context
Alert information contains information for all items that do not comply with your configured alert rules.
Note
The system can retain up to one million alert items generated within the last three months.
This topic describes how to view alert information for ECS. You can view the alert
information for other cloud resources in a similar manner.
Procedure
1. Log on to the Apsara Uni-manager Management Console as an administrator.
2. In the top navigation bar, choose Products > Monitoring and O&M > CloudMonitor.
3. In the left-side navigation pane of the CloudMonitor page, choose Alerts > Alert History.
4. On the Alert Rule History List page, filter alert information by rule ID, rule name, service, metric,
and date.The following table describes the fields in the query result.
Alert information fields
Field Description

Apsara Uni-manager Management
Console User Guide/6.Monitoring
Document Version:20210130 71
Product The service for which the alert was triggered.
Fault Instance The instance for which the alert was triggered.
Occurred At The time when the alert was triggered.
Rule Name The name of the alert rule.
Status The status of the alert rule.
Notification Contact The recipient of the alert notification.
6.3.4. Alert rules
6.3.4.1. View alert rules
After you create alert rules, you can view your alert rules on the Alert Rules page.
Context
The system provides alert rules for ECS, ApsaraDB RDS, SLB, OSS, KVStore for Redis, VPN
Gateway, AnalyticDB for PostgreSQL, ApsaraDB for MongoDB, EIP, and API Gateway.
Procedure
1. Log on to the Apsara Uni-manager Management Console as an administrator.
2. In the top navigation bar, choose Products > Monitoring and O&M > CloudMonitor.
3. In the left-side navigation pane of the CloudMonitor page, click Cloud Service Monitoring.

Apsara Uni-manager Management
Console User Guide/6.Monitoring
Document Version:20210130 72
4. Click a cloud service.
5. Click Alert Rules in the Actions column corresponding to an instance.On the Alert Rules page,
view the detailed information of alert rules.
6.3.4.2. Create an alert rule
You can create an alert rule to monitor an instance.
Prerequisites
For ECS instances, you must install a monitoring plug-in to collect metric data at the operating system
level.
The installation methods are as follows:
1. Log on to the Apsara Uni-manager Management Console as an administrator.
2. In the top navigation bar, choose Products > Monitoring and O&M > CloudMonitor.
3. In the left-side navigation pane, choose Cloud Service Monitoring > ECS.
4. In the ECS instance list, select the instances that you want to monitor, and click Batch Install.
Note
The monitoring chart displays monitoring data 5 to 10 minutes after the monitoring plug-in is installed.
Procedure
1. Log on to the Apsara Uni-manager Management Console as an administrator.
2. In the top navigation bar, choose Products > Monitoring and O&M > CloudMonitor.

Apsara Uni-manager Management
Console User Guide/6.Monitoring
Document Version:20210130 73
3. In the left-side navigation pane of the Cloud Monitor page, click Cloud Service Monitoring.
4. Click a cloud service.
5. Click Alert Rules in the Actions column corresponding to an instance.
Note You can also use the search function to query specific instances for which you want to
create alert rules.
6. On the Alert Rules page, click Create Alert Rule.
Parameters for creating an alert rule
Parameter Description
Product The monitored cloud product.
Resource Range The range of resources that is associated with the alert rule.
Rule Description The description of the alert rule.
Add Rule
Description
Click Add Rule Description to go to the rule configuration panel.
For more information, see Parameters for adding rule description.
Effective Time
Only a single alert is sent during each mute duration, even if the
metric value exceeds the alert rule threshold several times in a
row.

Apsara Uni-manager Management
Console User Guide/6.Monitoring
Document Version:20210130 74
Effective Period
An alert is sent only when the threshold is crossed during the
effective period.
HTTP CallBack The callback URL when the alert conditions are met.
Alert Contact
Group
The group to which alerts are sent.
Parameters for adding rule description
Parameter Description
Rule Name
The name of the alert rule. The name must be 1 to 64 characters
in length and can contain letters and digits.
Metric Name
Different products have different monitoring metrics. For more
information, see Metrics.
Comparison
The comparison between thresholds and observed values. The
comparison operators include >, >=, <, and <=. When the
comparison rule is satisfied, an alert rule is triggered.
Threshold And
Alert Level
Different metrics have different reference thresholds.

Apsara Uni-manager Management
Console User Guide/6.Monitoring
Document Version:20210130 75
7. Click OK.
6.3.4.3. Disable an alarm rule
You can disable one or more alarm rules as needed.
Procedure
1. Log on to the Apsara Uni-manager Management Console as an administrator.
2. In the top navigation bar, choose Products > Monitoring and O&M > CloudMonitor.
3. In the left-side navigation pane of the CloudMonitor page, click Cloud Service Monitoring.
4. Click a cloud service.
5. Click Alarm Rules in the Actions column corresponding to an instance to go to its Alarm Rules
page.
6. Select the alarm rule that you want to disable, and click Disable below the alarm rule list.
7. In the message that appears, click OK.
6.3.4.4. Enable an alarm rule
After an alarm rule is disabled, it can be re-enabled as needed.
Procedure
1. Log on to the Apsara Uni-manager Management Console as an administrator.
2. In the top navigation bar, choose Products > Monitoring and O&M > CloudMonitor.
3. In the left-side navigation pane of the CloudMonitor page, click Cloud Service Monitoring.
4. Click a cloud service.

Apsara Uni-manager Management
Console User Guide/6.Monitoring
Document Version:20210130 76
5. Click Alarm Rules in the Actions column corresponding to an instance to go to its Alarm Rules
page.
6. Select the alarm rule that you want to enable, and click Enable below the alarm rule list.
7. In the message that appears, click OK.
6.3.4.5. Delete an alarm rule
You can delete alarm rules that are no longer needed.
Procedure
1. Log on to the Apsara Uni-manager Management Console as an administrator.
2. In the top navigation bar, choose Products > Monitoring and O&M > CloudMonitor.
3. In the left-side navigation pane of the CloudMonitor page, click Cloud Service Monitoring.
4. Click a cloud service.
5. Click Alarm Rules in the Actions column corresponding to an instance to go to its Alarm Rules
page.
6. Select the alarm rule that you want to delete and click Delete in the Actions column.
7. In the message that appears, click OK.

Apsara Uni-manager Management
Console User Guide/7.VMware
Cloud on Alibaba Cloud
Document Version:20210130 77
7.VMware Cloud on Alibaba Cloud
7.1. Log on to the VMware Cloud on Alibaba Cloud console
This topic describes how to log on to the VMware Cloud on Alibaba Cloud console.
Prerequisites
Before you log on to the Apsara Uni-manager Management Console, you must obtain the
endpoint of the console from the deployment personnel.
A browser is available. We recommend that you use the Google Chrome browser.
Procedure
1. In the address bar, enter the URL of the Apsara Uni-manager Management Console. Press the
Enter key.
2. Enter your username and password.
Obtain the username and password that you can use to log on to the console from the
operations administrator.
Note When you log on to the Apsara Uni-manager Management Console for the first time, you
must change the password of your username. Your password must meet complexity
requirements. The password must be 8 to 20 characters in length and must contain at least two
of the following character types:
o Uppercase or lowercase letters

Apsara Uni-manager Management
Console User Guide/7.VMware
Cloud on Alibaba Cloud
Document Version:20210130 78
o Digits
o Special characters, which include ! @ # $ %
3. Click Login.
4. In the top navigation bar, choose Products > Elastic Computing > VMware Cloud on Alibaba
Cloud.
7.2. Bind a VMware Cloud on Alibaba Cloud region
Before you use VMware Cloud on Alibaba Cloud, you must bind a VMware Cloud on Alibaba Cloud
region to an organization.
Prerequisites
A VMware Cloud on Alibaba Cloud region is managed. For more information, see Add a VMware node.
Procedure
1. Log on to the Apsara Uni-manager Management Console.
2. In the top navigation bar, click Enterprise.
3. In the left-side navigation pane, click Resource Pools.
4. In the organization navigation tree, click an organization. In the Regions section, select the
region that you want to bind.
5. Click Update Association.
7.3. Instructions

Apsara Uni-manager Management
Console User Guide/7.VMware
Cloud on Alibaba Cloud
Document Version:20210130 79
7.3.1. Limits
Before you use VMware Cloud on Alibaba Cloud virtual machine (VM) templates, you must familiarize
yourself with the limits of instances.
General limits
You must select appropriate operating systems for VMware Cloud on Alibaba Cloud VM
templates.
The following operating systems are verified to be available in the Apsara Uni-manager
Management Console:
o CentOS8.2.2004
o CentOS7.2003
o CentOS6.10
o Ubuntu-20.04.1
o Ubuntu-18.04.5
o Ubuntu-16.04.7
o Windows Server 2016
o Windows Server 2019
The Apsara Uni-manager Management Console supports VMware vSphere 6.x. Other versions of
VMware vSphere, such as 5.x or 7.x, can in theory be supported. However, the specific support
depends on the compatibility of the VMware Cloud on Alibaba Cloud API and must be evaluated
by the R&D team of the Apsara Uni-manager Management Console.

Apsara Uni-manager Management
Console User Guide/7.VMware
Cloud on Alibaba Cloud
Document Version:20210130 80
You must install VMware Tools.
For more information, see the VMware documentation. Select Full Installation in the installation
process.
You must modify network interface controller configurations in the operating system of the VM.
When you create a VM in the Apsara Uni-manager Management Console, you can specify the IP
address of the operating system. This feature is supported by valid network interface controller
configurations.
Operating systems of VM templates must be in DHCP mode. Information such as the MAC
address and universally unique identifier (UUID) in the network interface controller configurations
must be removed. The following information can be retained.
Note
Some configurations are required for the following operating systems:

Apsara Uni-manager Management
Console User Guide/7.VMware
Cloud on Alibaba Cloud
Document Version:20210130 81
o CentOS 6: You must clear the content in the network interface controller configuration file
named 70-persistent-net.rules. The file is stored in the /etc/udev/rules.d/ directory.
o CentOS 7: The system generates the name for a network interface controller, such as
ifcfg-ens160. You must modify the name to ifcfg-eth0 to make the name take effect.
Ubuntu18.04, 20.04, and later: You must run the sudo rm /etc/netplan/*.yaml
command to remove the network interface controller configurations.
7.3.2. Suggestions
Consider the following operation suggestions to make more efficient use of VMware Cloud on Alibaba
Cloud virtual machine (VM) templates.
Select the latest version of VM hardware.
Select thin provision for VM disks.
Disk replication is required when you create VMs based on templates. Files of disks of the thin
provision type are small in size. This can help accelerate the creation of VMs.
Note
Large sizes of disk files in VM templates or slow storage write speeds may cause VM creation to time
out and fail. The maximum timeout period supported by the Apsara Uni-manager Management
Console is 10 minutes.
7.4. Instances

Apsara Uni-manager Management
Console User Guide/7.VMware
Cloud on Alibaba Cloud
Document Version:20210130 82
7.4.1. Create a VMware Cloud on Alibaba Cloud instance
A VMware Cloud on Alibaba Cloud instance is a virtual machine (VM) that contains the basic computing
components of a server, such as CPU, memory, operating system, network, and disks.
Prerequisites
The region where VMware Cloud on Alibaba Cloud is deployed is managed. For more information,
see Add a VMware node.
The region where VMware Cloud on Alibaba Cloud is deployed is bound to an organization. For
more information, see Bind a VMware Cloud on Alibaba Cloud region.
Procedure
1. Log on to the VMware Cloud on Alibaba Cloud console.
2. In the left-side navigation pane, click Instances.
3. In the top navigation bar, move the pointer over Region and select the region where VMware
Cloud on Alibaba Cloud is deployed.
4. Click Create Instance in the upper-right corner.
5. Configure parameters listed in the following table to create an instance.
Section Parameter Required Description
Basic
Settings
Organization Yes
The organization in which
to create the instance.

Apsara Uni-manager Management
Console User Guide/7.VMware
Cloud on Alibaba Cloud
Document Version:20210130 83
Resource Set Yes
The resource set in which
to create the instance.
Region
Region Yes
The region in which to
create the instance.
Zone Yes
The zone in which to
create the instance.
VPC Yes
The VPC in which to
create the instance.
vSwitch Yes
Select the vSwitch to
which the instance
belongs.
The vSwitch corresponds
to the port group of a
VMware ESXi host or a
distributed switch, and
maps to the VLAN of a
physical switch.

Apsara Uni-manager Management
Console User Guide/7.VMware
Cloud on Alibaba Cloud
Document Version:20210130 84
Private IP Address Yes
The private IPv4 address
of the instance.
The private IPv4 address
must be within the CIDR
block of the vSwitch.
Private Subnet Mask Yes
The private subnet mask.
Example: 255.255.255.0.
The specified subnet
mask must be within the
CIDR block of the
selected vSwitch.
Private IP Address of
Gateway
Yes
The private IP address of
the gateway. Example:
192.168.100.1. The IP
address must be within
the CIDR block of the
selected vSwitch.

Apsara Uni-manager Management
Console User Guide/7.VMware
Cloud on Alibaba Cloud
Document Version:20210130 85
Private IP Address of
DNS Server
No
The private IP address of
the DNS server. Example:
114.114.114.114. The IP
address must be within
the CIDR block of the
selected vSwitch.
Instance
Instance Family No
The instance family of the
instance. Valid values:
o Memory Optimized
o Compute Optimized
o General Purpose
Instance Type Yes
The instance type of the
instance. You can specify
the vCPUs and memory.
Image Image Type No
The type of the image.
Default value: Public
Image.

Apsara Uni-manager Management
Console User Guide/7.VMware
Cloud on Alibaba Cloud
Document Version:20210130 86
Public Image Yes
The public image of the
instance.
Storage System Disk (GB) No
The system disk to which
the operating system is
installed.
You can configure
different storage types for
the disk. Valid values:
o Shared Storage: All:
The system selects an
available shared
storage. We
recommend that you
select this type.
o Shared Storage:
storageA: The storage
named storageA of
the VMware Cloud on
Alibaba Cloud

Apsara Uni-manager Management
Console User Guide/7.VMware
Cloud on Alibaba Cloud
Document Version:20210130 87
instance is used.
Administrators must
make sure the storage
is appropriate. If the
storage capacity is
insufficient, the
instance fails to be
created.
Data Disk (GB) No
You can also add data
disks after the instance is
created.
You can configure
different storage types for
the disk. Valid values:
o Shared Storage: All:
The system selects an
available shared
storage. We
recommend that you
select this type.

Apsara Uni-manager Management
Console User Guide/7.VMware
Cloud on Alibaba Cloud
Document Version:20210130 88
o Shared Storage:
storageA: The storage
named storageA of
the VMware Cloud on
Alibaba Cloud
instance is used.
Administrators must
make sure the storage
is appropriate. If the
storage capacity is
insufficient, the
instance fails to be
created.
You must also specify the
provision type when you
create the instance. Valid
values:
o Thin Provision:
Storage space

Apsara Uni-manager Management
Console User Guide/7.VMware
Cloud on Alibaba Cloud
Document Version:20210130 89
increases with the use
of the disk.
o Thick Provision Lazy
Zeroed: Storage
space is equal to the
size of the disk and
does not increase.
The disk is formatted
when data is written.
o Thick Provision Eager
Zeroed: Storage
space is equal to the
size of the disk and
does not increase.
The storage of the
disk is immediately
formatted when the
disk is created.
Password Password Setting No Select Set after Purchase.

Apsara Uni-manager Management
Console User Guide/7.VMware
Cloud on Alibaba Cloud
Document Version:20210130 90
Instance
Name
Instance Name Yes
The name of the instance.
The name must be 2 to
128 characters in length
and can contain letters,
periods (.), underscores
(_), hyphens (-), and
colons (:). It must start
with a letter and cannot
start with http:// or https://.
6. Click Submit.
7.4.2. View instance information
You can view the list of created instances as well as details of individual instances, such as their basic
configurations, disks, and elastic network interfaces (ENIs).
Procedure
1. Log on to the VMware Cloud on Alibaba Cloud console.
2. In the left-side navigation pane, click Instances.
3. In the top navigation bar, move the pointer over Region and select the region where VMware
Cloud on Alibaba Cloud is deployed.

Apsara Uni-manager Management
Console User Guide/7.VMware
Cloud on Alibaba Cloud
Document Version:20210130 91
You can view the list of VMware Cloud on Alibaba Cloud instances that are deployed in the
current region.
4. Use one of the following methods to go to the details page of an instance:
o In the Instance ID/Name column, click the instance ID.
o Click Manage in the Actions column corresponding to the instance.
o Choose More > Show Details in the Actions column corresponding to the instance.
7.4.3. Modify an instance
You can modify the name and description of a created VMware Cloud on Alibaba Cloud instance.
Procedure
1. Log on to the VMware Cloud on Alibaba Cloud console.
2. In the left-side navigation pane, click Instances.
3. In the top navigation bar, move the pointer over Region and select the region where VMware
Cloud on Alibaba Cloud is deployed.
4. Find the instance that you want to modify and choose More > Modify in the Actions column.
5. Modify the name and description of the instance.
6. Click OK.
7.4.4. Remotely connect to an instance
You can remotely connect to and manage added VMware Cloud on Alibaba Cloud instances.
Procedure

Apsara Uni-manager Management
Console User Guide/7.VMware
Cloud on Alibaba Cloud
Document Version:20210130 92
1. Log on to the VMware Cloud on Alibaba Cloud console.
2. In the left-side navigation pane, click Instances.
3. In the top navigation bar, move the pointer over Region and select the region where VMware
Cloud on Alibaba Cloud is deployed.
4. Find the instance that you want to manage and click Remote Connection in the Actions column.
5. Enter the username and password.
o For a Linux instance, enter the username root and the logon password.
Note
When you log on to the Linux instance, the password is not displayed as you enter it.
Press the Enter key after you enter the password.
For a Windows instance, to use a key combination such as Ctrl+Alt+Delete, click the List icon
in the upper-right corner of the page and select the corresponding composite key from the
drop-down list.
Enter the username and password, and click the Log On
icon.

Apsara Uni-manager Management
Console User Guide/7.VMware
Cloud on Alibaba Cloud
Document Version:20210130 93
7.4.5. Stop an instance
You can stop VMware Cloud on Alibaba Cloud instances that are not in use. The stop operation
interrupts services that are running on the instances. Exercise caution when you perform this operation.
Prerequisites
The instance is in the Running state.
Procedure
1. Log on to the VMware Cloud on Alibaba Cloud console.
2. In the left-side navigation pane, click Instances.
3. In the top navigation bar, move the pointer over Region and select the region where VMware
Cloud on Alibaba Cloud is deployed.
4. Use one of the following methods to stop the instance:
o To stop a single instance, find the instance and choose More > Instance Status > Stop in the
Actions column.
o To stop one or more instances at a time, select the instances and click Stop in the lower part
of the Instances page.
5. Click OK.
Execution results
When the instance is being stopped, its status in the Status column changes from Running to Stopping.
After the instance is stopped, its status changes to Stopped.

Apsara Uni-manager Management
Console User Guide/7.VMware
Cloud on Alibaba Cloud
Document Version:20210130 94
7.4.6. Start an instance
You can start a stopped instance.
Prerequisites
The instance is in the Stopped state.
Procedure
1. Log on to the VMware Cloud on Alibaba Cloud console.
2. In the left-side navigation pane, click Instances.
3. In the top navigation bar, move the pointer over Region and select the region where VMware
Cloud on Alibaba Cloud is deployed.
4. Use one of the following methods to start the instance:
o To start a single instance, find the instance and choose More > Instance > Status > Start in
the Actions column.
o To start one or more instances at a time, select the instances and click Start in the lower part
of the Instances page.
5. Click OK.
Execution results
When the instance is being started, its status in the Status column changes from Stopped to Starting.
After the instance is started, its status changes to Running.

Apsara Uni-manager Management
Console User Guide/7.VMware
Cloud on Alibaba Cloud
Document Version:20210130 95
7.4.7. Restart an instance
After you change the logon password of an instance or install system updates, you must restart the
instance. The restart operation stops the instances for a period of time. This causes the services that
are running on the instances to be interrupted. Exercise caution when you perform this operation.
Prerequisites
The instance is in the Running state.
Procedure
1. Log on to the VMware Cloud on Alibaba Cloud console.
2. In the left-side navigation pane, click Instances.
3. In the top navigation bar, move the pointer over Region and select the region where VMware
Cloud on Alibaba Cloud is deployed.
4. Use one of the following methods to restart the instance:
o To restart a single instance, find the instance and choose More > Instance Status > Restart
in the Actions column.
o To restart one or more instances at a time, select the instances and click Restart in the lower
part of the Instances page.
5. In the Restart Instance dialog box, select a restart mode.
o Restart: restarts the instance normally.
o Force Restart: forces the instance to restart. This may result in loss of unsaved data.

Apsara Uni-manager Management
Console User Guide/7.VMware
Cloud on Alibaba Cloud
Document Version:20210130 96
6. Click OK.
7.4.8. Delete an instance
You can delete instances that are no longer needed to release their resources. Deleted instances
cannot be recovered. We recommend that you back up data before you delete an instance. If data disks
are released with the instances, the disk data cannot be recovered.
Prerequisites
The instance is in the Stopped state.
Procedure
1. Log on to the VMware Cloud on Alibaba Cloud console.
2. In the left-side navigation pane, click Instances.
3. In the top navigation bar, move the pointer over Region and select the region where VMware
Cloud on Alibaba Cloud is deployed.
4. Select the instance and click Delete in the lower part of the Instances page.
5. Click OK.
7.5. Images
7.5.1. Create a custom image
You can create a custom image and use it to create identical instances or replace the system disks of
existing instances. This way, you can configure many instances that have identical operating systems
and data environments.

Apsara Uni-manager Management
Console User Guide/7.VMware
Cloud on Alibaba Cloud
Document Version:20210130 97
Create a custom image from an instance
You can create a custom image from an instance to replicate the data of all system and data disks on
the instance.
Note
To avoid data security risks, we recommend that you delete sensitive data from an instance before
you use the instance to create a custom image.
1. Log on to the VMware Cloud on Alibaba Cloud console.
2. In the left-side navigation pane, click Instances.
3. In the top navigation bar, move the pointer over Region and select the region where VMware
Cloud on Alibaba Cloud is deployed.
4. Find the instance from which you want to create a custom image and choose More > Create
Custom Image in the Actions column.
5. Set the name, sharing scope, and description for the custom image, and click OK.
The name must be 2 to 128 characters in length and can contain letters, digits, periods (.),
underscores (_), hyphens (-), and colons (:). It cannot start with a special character or digit.
You can set the sharing scope to the permission scope of the image.
The description must be 2 to 256 characters in length and cannot start with http:// or https://.
7.5.2. View images
You can view the list of created images.

Apsara Uni-manager Management
Console User Guide/7.VMware
Cloud on Alibaba Cloud
Document Version:20210130 98
Procedure
1. Log on to the VMware Cloud on Alibaba Cloud console.
2. In the left-side navigation pane, choose Images > Images.
3. In the top navigation bar, move the pointer over Region and select the region where the image
is created.
4. Select a filter option, enter the corresponding information in the search box, and then click
Search.
You can select multiple filter options to narrow down search results.
Parameter Description
Image Name
The image name used to search for the
image.
Image ID
The image ID used to search for the
image.
7.6. Snapshots
7.6.1. Create a snapshot
You can manually create a snapshot for a disk to back up disk data.
Prerequisites

Apsara Uni-manager Management
Console User Guide/7.VMware
Cloud on Alibaba Cloud
Document Version:20210130 99
The instance to which the disk is attached is in the Running or Stopped state.
The disk is in the Running state.
Background information
A snapshot of a disk can be used to roll back data of the disk.
When you create a snapshot, take note of the following items:
For each disk, the first snapshot is a full snapshot and subsequent snapshots are incremental
snapshots. It takes an extended period of time to create the first snapshot. It takes a short period
of time to create an incremental snapshot. The amount of taken time depends on the volume of
data that has been changed since the latest snapshot. The more data that has been changed, the
more time it takes.
Avoid creating snapshots during peak hours.
Procedure
1. Log on to the VMware Cloud on Alibaba Cloud console.
2. In the left-side navigation pane, click Instances.
3. In the top navigation bar, move the pointer over Region and select the region where VMware
Cloud on Alibaba Cloud is deployed.
4. Find the instance from which you want to create a snapshot and click the Snapshots tab.
5. Click Create and Bind Snapshot.
6. Set the name, type, and description for the snapshot, and click Submit.

Apsara Uni-manager Management
Console User Guide/7.VMware
Cloud on Alibaba Cloud
Document Version:20210130 100
Parameter Description
Snapshot Name The name of the snapshot.
Snapshot Type
The type of the snapshot. Valid values:
o Disk Snapshot
o Memory Snapshot
Snapshot Description The description of the snapshot.
7.6.2. Delete a snapshot
You can delete a snapshot that is no longer needed. After the snapshot is deleted, it cannot be
recovered.
Procedure
1. Log on to the VMware Cloud on Alibaba Cloud console.
2. In the left-side navigation pane, click Instances.
3. In the top navigation bar, move the pointer over Region and select the region where VMware
Cloud on Alibaba Cloud is deployed.
4. Find the instance whose snapshot is to be deleted and click the Snapshots tab.
5. Use one of the following methods to delete the snapshot:

Apsara Uni-manager Management
Console User Guide/7.VMware
Cloud on Alibaba Cloud
Document Version:20210130 101
o To delete a single snapshot, find the snapshot and click Delete in the Actions column.
o To delete one or more snapshots at a time, select the snapshots and click Delete in the lower
part of the Snapshots tab.
6. Click OK.
7.6.3. View snapshots
You can view the list of created snapshots.
Procedure
1. Log on to the VMware Cloud on Alibaba Cloud console.
2. In the left-side navigation pane, click Instances.
3. In the top navigation bar, move the pointer over Region and select the region where VMware
Cloud on Alibaba Cloud is deployed.
4. Find the instance in which you want to view snapshots and click the Snapshots tab.
5. Select a filter option, enter the corresponding information in the search box, and then click
Search.
You can select multiple filter options to narrow down search results.
Parameter Description
Snapshot Name
The snapshot name used to search for
the snapshot.

Apsara Uni-manager Management
Console User Guide/7.VMware
Cloud on Alibaba Cloud
Document Version:20210130 102
Snapshot ID
The snapshot ID used to search for the
snapshot.
7.7. Disks
7.7.1. Create a disk
To increase the storage space of VMware Cloud on Alibaba Cloud instances, you can create
standalone data disks and then attach them to the instances. This topic describes how to create an
empty data disk. You cannot create standalone system disks.
Procedure
1. Log on to the VMware Cloud on Alibaba Cloud console.
2. In the left-side navigation pane, click Instances.
3. In the top navigation bar, move the pointer over Region and select the region where VMware
Cloud on Alibaba Cloud is deployed.
4. Find the instance for which you want to create a disk and click the Disks tab.
5. Click Create and Attach Disk.
6. Configure parameters listed in the following table to create a disk.
Section Parameter Required Description

Apsara Uni-manager Management
Console User Guide/7.VMware
Cloud on Alibaba Cloud
Document Version:20210130 103
Region Zone Yes
The zone in which to
create the disk.
Basic Settings
Specifications Yes
The disk category
and the disk size.
Provision Type Yes
The provision type.
Valid values:
o Thin Provision:
Storage space
increases with
the use of the
disk.
o Thick Provision
Lazy Zeroed:
Storage space is
equal to the size
of the disk and
does not
increase. The
disk is formatted

Apsara Uni-manager Management
Console User Guide/7.VMware
Cloud on Alibaba Cloud
Document Version:20210130 104
when data is
written.
o Thick Provision
Eager Zeroed:
Storage space is
equal to the size
of the disk and
does not
increase. The
storage of the
disk is
immediately
formatted when
the disk is
created.
7. Click Submit.
Execution results
The created disk is displayed in the disk list and in the Running state.
7.7.2. View disks
You can view the list of created disks and the details of individual disks.

Apsara Uni-manager Management
Console User Guide/7.VMware
Cloud on Alibaba Cloud
Document Version:20210130 105
Procedure
1. Log on to the VMware Cloud on Alibaba Cloud console.
2. In the left-side navigation pane, click Instances.
3. In the top navigation bar, move the pointer over Region and select the region where VMware
Cloud on Alibaba Cloud is deployed.
4. Find the instance for which you want to view disks and click the Disks tab.
5. Select a filter option from the drop-down list, enter the relevant information in the search box,
and then click Search.
You can select multiple filter options to narrow down search results.
Parameter Description
Disk Name
The disk name used to search for the
disk.
Disk ID The disk ID used to search for the disk.
Disk Properties
The disk type used to search for disks of
that type. Valid values:
o All
o System Disk

Apsara Uni-manager Management
Console User Guide/7.VMware
Cloud on Alibaba Cloud
Document Version:20210130 106
o Data Disk
7.7.3. Detach a data disk
You can detach data disks. System disks cannot be detached.
Procedure
Warning
Resources are released after disks are detached. Make sure that the data of a disk is backed up
before you detach it.
1. Log on to the VMware Cloud on Alibaba Cloud console.
2. In the left-side navigation pane, click Instances.
3. In the top navigation bar, move the pointer over Region and select the region where VMware
Cloud on Alibaba Cloud is deployed.
4. Find the instance from which you want to detach a data disk and click the Disks tab.
5. Find the data disk that you want to detach and choose More > Detach in the Actions column.
6. Click OK.
7.8. ENIs
7.8.1. Create an ENI
You can create and bind elastic network interfaces (ENIs) to VMware Cloud on Alibaba Cloud
instances.

Apsara Uni-manager Management
Console User Guide/7.VMware
Cloud on Alibaba Cloud
Document Version:20210130 107
Prerequisites
A virtual private cloud (VPC) and a vSwitch are created. For more information, see Create a VPC and
Create a vSwitch in Apsara Stack VPC User Guide.
Background information
ENIs are classified into primary and secondary ENIs.
A primary ENI is created by default when an instance is created in a VPC. This primary ENI has the
same lifecycle as the instance and cannot be unbound from the instance.
ENIs that are separately created are secondary ENIs. This topic describes how to create a secondary
ENI.
Procedure
1. Log on to the VMware Cloud on Alibaba Cloud console.
2. In the left-side navigation pane, click Instances.
3. In the top navigation bar, move the pointer over Region and select the region where VMware
Cloud on Alibaba Cloud is deployed.
4. Find the instance for which you want to create an ENI and click the ENIs tab.
5. Click Create and Bind ENI.
6. Configure parameters listed in the following table to create an ENI.
Section Parameter Required Description

Apsara Uni-manager Management
Console User Guide/7.VMware
Cloud on Alibaba Cloud
Document Version:20210130 108
Region
Organization Yes
The organization in which
to create the ENI.
Resource Set Yes
The resource set in which
to create the ENI.
Region Yes
The region in which to
create the ENI.
Zone Yes
The zone in which to create
the ENI.
Basic Settings VPC Yes
The VPC in which to create
the ENI. The secondary
ENI can be bound only to
an instance in the same
VPC.
Note
After the ENI is created,
you cannot change its VPC.

Apsara Uni-manager Management
Console User Guide/7.VMware
Cloud on Alibaba Cloud
Document Version:20210130 109
vSwitch Yes
The vSwitch to be
associated with the ENI.
The secondary ENI can be
bound only to an instance
in the same VPC. Select a
vSwitch that is deployed
within the same zone as the
instance to which the ENI is
bound. The vSwitch of the
ENI can be different from
that of the instance.
Note
After the ENI is created,
you cannot change its
vSwitch.
7. Click Submit.
Execution results
The created ENI is displayed on the ENIs page and is in the Bound state.

Apsara Uni-manager Management
Console User Guide/7.VMware
Cloud on Alibaba Cloud
Document Version:20210130 110
7.8.2. View ENIs
You can view the list of created elastic network interfaces (ENIs).
Procedure
1. Log on to the VMware Cloud on Alibaba Cloud console.
2. In the left-side navigation pane, click Instances.
3. In the top navigation bar, move the pointer over Region and select the region where VMware
Cloud on Alibaba Cloud is deployed.
4. Find the instance for which you want to view ENIs and click the ENIs tab.
5. Select a filter option from the drop-down list, enter the relevant information in the search box,
and then click Search.
You can select multiple filter options to narrow down search results.
Parameter Description
ENI Name The ENI name used to search for the ENI.
ENI ID The ENI ID used to search for the ENI.
VSwitch ID
The vSwitch ID used to search for the
ENIs that are associated with the vSwitch.

Apsara Uni-manager Management
Console User Guide/7.VMware
Cloud on Alibaba Cloud
Document Version:20210130 111
7.8.3. Delete an ENI
You can delete secondary elastic network interfaces (ENIs) that are no longer needed.
Background information
Only secondary ENIs can be deleted. Primary ENIs share the same lifecycle as instances and cannot
be deleted.
Procedure
1. Log on to the VMware Cloud on Alibaba Cloud console.
2. In the left-side navigation pane, click Instances.
3. In the top navigation bar, move the pointer over Region and select the region where VMware
Cloud on Alibaba Cloud is deployed.
4. Find the instance whose secondary ENI is to be deleted and click the ENIs tab.
5. Find the secondary ENI and click Delete in the Actions column.
6. Click OK.

Apsara Uni-manager Management
Console User Guide/8.Enterprise
Document Version:20210130 112
8.Enterprise
8.1. Organizations
8.1.1. Create an organization
You can create organizations to store resource sets and their resources.
Procedure
1. Log on to the Apsara Uni-manager Management Console as an administrator.
2. In the top navigation bar, click Enterprise.
3. In the left-side navigation pane of the Enterprise page, click Organizations.
4. In the organization navigation tree, click a parent organization. In the Current Organization
section, click Add Organization.
5. In the Create Organization dialog box, enter an organization name and click OK.
8.1.2. Query an organization
You can query an organization by name to view its resource sets, users, and user groups.
Procedure
1. Log on to the Apsara Uni-manager Management Console as an administrator.
2. In the top navigation bar, click Enterprise.
3. In the left-side navigation pane of the Enterprise page, click Organizations.

Apsara Uni-manager Management
Console User Guide/8.Enterprise
Document Version:20210130 113
4. In the search box below Organizations, enter an organization nameto query information about
the corresponding organization.
8.1.3. View organization information
You can view information about an organization on the Organizations page.
Procedure
1. Log on to the Apsara Uni-manager Management Console as an administrator.
2. In the top navigation bar, click Enterprise.
3. In the left-side navigation pane of the Enterprise page, click Organizations.
4. On the Organizations page, click an organization in the organization list.
5. On the right side of the page, view the organization information.
o In the Resource Sets section, you can view information such as the name, creation time, and
creator of each resource set in the organization. Click the name of a resource set to view its
details.
o In the Users section, you can view information such as the name, status, and role of each
user in the organization. Click a username to view the user details.
o In the User Groups section, you can view the name, organization, role, users, and creation
time of each user group in the organization.
8.1.4. Modify the name of an organization
Users that have operation permissions on an organization can modify the name of the organization.
Procedure

Apsara Uni-manager Management
Console User Guide/8.Enterprise
Document Version:20210130 114
1. Log on to the Apsara Uni-manager Management Console.
2. In the top navigation bar, click Enterprise.
3. In the left-side navigation pane of the Enterprise page, click Organizations.
4. In the organization navigation tree, click an organization name.
5. In the Current Organization section, click Edit Organization.
6. In the Edit Organization dialog box, modify the organization name.
7. Click OK.
8.1.5. Change organization ownership
Users that have operation permissions on organizations can change the ownership of organizations.
Prerequisites
Make sure that each organization under the target organization has a unique name.
The ownership of an organization cannot be changed cross level-1 organizations.
Context
Users can change the ownership of an organization cross parent organizations. This way, the
ownership of subordinate organizations, users, and resources are also changed in a cascading manner.
Procedure
1. Log on to the Apsara Uni-manager Management Console as an administrator.
2. In the top navigation bar, click Enterprise.
3. In the left-side navigation pane of the Enterprise page, click Change Ownership.

Apsara Uni-manager Management
Console User Guide/8.Enterprise
Document Version:20210130 115
4. On the Change Ownership page, select the target organization and click Change Ownership on
the right.
5. In the Change Organization dialog box, select the destination organization and click OK to
change the ownership of the target organization and resources sets and users under this
organization.
8.1.6. Obtain the AccessKey pair of an organization
An AccessKey pair consists of an AccessKey ID and an AccessKey secret. The AccessKey pair is used
to implement symmetric encryption to verify the identity of the requester. The AccessKey ID is used to
identify a user. The AccessKey secret is used to encrypt the signature string. This topic describes how
to obtain the AccessKey pair of an organization.
Prerequisites
Only operations administrators and level-1 organization administrators can obtain the AccessKey pair of
an organization.
Procedure
1. Log on to the Apsara Uni-manager Management Console.
2. In the top navigation bar, click Enterprise.
3. In the left-side navigation pane, click Organizations.
4. In the organization navigation tree, click an organization name.
5. In the Current Organization section, click Obtain AccessKey Pair.
6. In the AccessKey message, view the AccessKey pair of the organization.

Apsara Uni-manager Management
Console User Guide/8.Enterprise
Document Version:20210130 116
8.1.7. Delete an organization
Administrators can delete organizations that are no longer needed.
Prerequisites
Before you delete an organization, make sure that the organization does not contain users, resource
sets, or subordinate organizations. Otherwise, the organization cannot be deleted.
Procedure
1. Log on to the Apsara Uni-manager Management Console as an administrator.
2. In the top navigation bar, click Enterprise.
3. In the left-side navigation pane of the Enterprise page, click Organizations.
4. In the organization navigation tree, click an organization name. In the Current Organization
section, click Delete Organization.
5. In the Confirm message, click OK.
8.2. Resource sets
8.2.1. Create a resource set
You must create a resource set before you apply for resources.
Procedure
1. Log on to the Apsara Uni-manager Management Console as an administrator.
2. In the top navigation bar, click Enterprise.
3. In the left-side navigation pane of the Enterprise page, click Resource Sets.

Apsara Uni-manager Management
Console User Guide/8.Enterprise
Document Version:20210130 117
4. In the upper-left corner of the Resource Sets page, click Create Resource Set.
5. In the Create Resource Set dialog box, set Name and Organization.
6. Click OK.
8.2.2. View the details of a resource set
When you want to use a cloud resource in your organization, you can view the details of the resource
set that contains the resource, including all resource instances and users of the resource set.
Procedure
1. Log on to the Apsara Uni-manager Management Console as an administrator.
2. In the top navigation bar, click Enterprise.
3. In the left-side navigation pane of the Enterprise page, click Resource Sets.
4. Select an organization from the drop-down list, or enter a resource set name in the search bar,
and then click Search.
5. Click the name of the target resource set.
6. On the Resource Set Details page, click the Resources and Members tabs to view information
about all resource instances and users of the resource set.
7. On the Resources tab, click the number of a service to go to the instance list page of the
service. The list is automatically filtered and displayed based on the organization and resource
set.
8.2.3. Modify the name of a resource set
An administrator can modify the name of a resource set to keep it up-to-date.

Apsara Uni-manager Management
Console User Guide/8.Enterprise
Document Version:20210130 118
Procedure
1. Log on to the Apsara Uni-manager Management Console as an administrator.
2. In the top navigation bar, click Enterprise.
3. In the left-side navigation pane of the Enterprise page, click Resource Sets.
4. Click More in the Actions column corresponding to a resource set, and choose Edit Name from
the shortcut menu.
5. In the dialog box that appears, enter the new name.
6. Click OK.
8.2.4. Add a member to a resource set
You can add a member to a resource set so that the member can use the resources in the resource
set.
Prerequisites
Before adding a member, make sure that the following prerequisites are met:
A resource set is created. For more information, see Create a resource set.
A user is created. For more information, see Create a user.
Context
Members of a resource set have the permissions to use resources in the resource set.
Deleting resources from a resource set does not affect the members of the resource set. Similarly,
deleting members from a resource set does not affect the resources in the resource set.

Apsara Uni-manager Management
Console User Guide/8.Enterprise
Document Version:20210130 119
You can delete a member that is no longer in use in a resource set. After the member is deleted, it will
no longer be able to access the resource set.
Procedure
1. Log on to the Apsara Uni-manager Management Console as an administrator.
2. In the top navigation bar, click Enterprise.
3. In the left-side navigation pane of the Enterprise page, click Resource Sets.
4. Click More in the Actions column corresponding to a resource set, and choose Add Member
from the shortcut menu.
5. In the dialog box that appears, select a username.
6. Click OK.
8.2.5. Add or remove a user group of a resource set
You can add or remove a user group of a resource set to manage user group access to resources in
the resource set.
Prerequisites
A resource set is created. For more information, see Create a resource set.
A user group is created. For more information, see Create a user group.
Context
User groups in a resource set have the permissions to use resources in the resource set.

Apsara Uni-manager Management
Console User Guide/8.Enterprise
Document Version:20210130 120
Deleting resources from a resource set does not affect user groups of the resource set. Similarly,
deleting user groups from a resource set does not affect the resources in the resource set.
You can delete a user group that is no longer in use in a resource set. After the user group is deleted, it
will no longer be able to access the resource set.
Procedure
1. Log on to the Apsara Uni-manager Management Console as an administrator.
2. In the top navigation bar, click Enterprise.
3. In the left-side navigation pane of the Enterprise page, click Resource Sets.
4. Click More in the Actions column corresponding to the target resource set.
5. Add or remove a user group.
o Select Add User Group. In the dialog box that appears, select a user group. Click OK to add
the user group.
o Select Delete User Group. In the dialog box that appears, select a user group. Click OK to
remove the user group.
8.2.6. Delete a resource set
You can delete resource sets that are not needed as an administrator.
Prerequisites
Ensure that the resource set to be deleted does not contain resources, users, or user groups.

Apsara Uni-manager Management
Console User Guide/8.Enterprise
Document Version:20210130 121
Notice A resource set cannot be deleted if it contains resources, users, or user groups.
Procedure
1. Log on to the Apsara Uni-manager Management Console as an administrator.
2. In the top navigation bar, click Enterprise.
3. In the left-side navigation pane of the Enterprise page, click Resource Sets.
4. Click More in the Actions column corresponding to the target resource set, and select Delete.
5. In the message that appears, click OK.
8.3. Roles
8.3.1. Create a custom role
You can create custom roles in the Apsara Uni-manager Management Console to more efficiently grant
permissions to users so that different personnel can work with different features.
Context
A role is a set of access permissions. Each role has a range of permissions. A user can have multiple
roles, which means that the user is granted all of the permissions defined for each role. A role can be
used to grant the same set of permissions to a group of users.
The total number of custom and default roles cannot exceed 20.
Procedure
1. Log on to the Apsara Uni-manager Management Console as an administrator.
2. In the top navigation bar, click Enterprise.

Apsara Uni-manager Management
Console User Guide/8.Enterprise
Document Version:20210130 122
3. In the left-side navigation pane of the Enterprise page, click Roles.
4. In the upper-right corner of the page, click Create Custom Role.
5. On the Roles page, set the role name and management permissions.
The following table describes the role parameters.
Role parameters
Parameter Description
Role Name
The name of the RAM role. The name can be up to 15 characters in
length and can contain only letters and digits.
Description
Optional. The description of the role. The description can be up to 100
characters in length and can contain letters, digits, commas (,),
semicolons (;), and underscores (_).
Sharing
Scope
o Global

Apsara Uni-manager Management
Console User Guide/8.Enterprise
Document Version:20210130 123
The role is visible and valid to all organizations involved. The default
value is Global.
o Current Organization
The role is visible and valid to the organization to which the user
belongs.
o Subordinate Organization
The role is visible and valid to the organization to which the user
belongs and its subordinate organizations.
Scope
o All Organizations
The permissions apply to all organizations involved.
o Specified Organization and Subordinate Organizations
The permissions apply to the organization to which the user belongs
and its subordinate organizations.
o Resource Sets
The permissions apply to the resource sets that are assigned to the
user.
6. Select the operation permissions that this role has and click Next.

Apsara Uni-manager Management
Console User Guide/8.Enterprise
Document Version:20210130 124
7. In the Application Permissions step, select the operation permissions that this role has on the
cloud services, and click Next.
8. In the Menu Permissions step, select the operation permissions that this role has on the menus
and the homepage template corresponding to the role, and click Create Role.
9. In the Associated Users step, select the users associated with the role from the drop-down list.
The associated users are granted the permissions of the role.
8.3.2. View the details of a role
If you are uncertain about the specific permissions of a role, you can go to the Roles page to view the
role permissions.
Procedure
1. Log on to the Apsara Uni-manager Management Console as an administrator.
2. In the top navigation bar, click Enterprise.
3. In the left-side navigation pane of the Enterprise page, click Roles.
4. Click the name of the role that you want to view. On the Roles page, view the information of the
role.
8.3.3. Modify custom role information
You can modify the name and permissions of a custom role as an administrator.
Context
Information about preset roles cannot be modified.

Apsara Uni-manager Management
Console User Guide/8.Enterprise
Document Version:20210130 125
Procedure
1. Log on to the Apsara Uni-manager Management Console as an administrator.
2. In the top navigation bar, click Enterprise.
3. In the left-side navigation pane of the Enterprise page, click Roles.
4. In the role name list, click More in the Actions column corresponding to the target custom role,
and select Modify.
5. On the Roles page, modify the custom role name, permissions, and associated users or user
groups.
o Modify role name: Enter a new role name in the Role Name field.
o Modify permissions: Click the Management Permissions, Application Permissions, or Menu
Permissions tab, select or clear related permissions from the corresponding tab, and then
click Update.
o Bind a user to a role: Click the Associated Users tab and select a user from the Select one or
more users drop-down list to add the user. To unbind the user from the role, click Remove in
the Actions column.
o Manage user groups: Click the User Groups tab, click Add User Group, select a user group
from the drop-down list, and then click OK to bind the user group. To unbind the user group
from the role, click Remove in the Actions column.

Apsara Uni-manager Management
Console User Guide/8.Enterprise
Document Version:20210130 126
8.3.4. Copy a role
You can copy a preset role or a custom role to create a role that has the same permissions.
Context
Operations on the Roles page are the same as those for creating a custom role. You can add, modify,
and remove the role permissions in the copied role. By default, if you do not modify the role
permissions, the sharing scope, management permissions, application permissions, menu permissions,
and associated users of the copied role are all the same as those of the source role.
Procedure
1. Log on to the Apsara Uni-manager Management Console as an administrator.
2. In the top navigation bar, click Enterprise.
3. In the left-side navigation pane of the Enterprise page, click Roles.
4. In the role list, choose More > Copy in the Actions column corresponding to a role.
5. On the Roles page, set the new role name, sharing scope, and management permissions.
Note The role name must be unique.
6. Select the operation permissions that this role has and click Next.

Apsara Uni-manager Management
Console User Guide/8.Enterprise
Document Version:20210130 127
7. In the Application Permissions step, select the operation permissions that this role has on the
cloud services and click Next.
8. In the Menu Permissions step, select the operation permissions that this role has on the menus
and click Create Role.
9. In the Associated Users step, select the users that are associated with the role from the drop-
down list.
The associated users are granted the permissions of the role.
8.3.5. Disable a role
When you disable a role, the permissions of the role are disabled.
Procedure
1. Log on to the Apsara Uni-manager Management Console as an administrator.
2. In the top navigation bar, click Enterprise.
3. In the left-side navigation pane of the Enterprise page, click Roles.
4. In the role list, click More in the Actions column corresponding to a role and choose Disable
from the shortcut menu.
8.3.6. Enable a role
When you enable a disabled role, the permissions of the role are restored.
Procedure
1. Log on to the Apsara Uni-manager Management Console as an administrator.

Apsara Uni-manager Management
Console User Guide/8.Enterprise
Document Version:20210130 128
2. In the top navigation bar, click Enterprise.
3. In the left-side navigation pane of the Enterprise page, click Roles.
4. In the role list, click More in the Actions column corresponding to a disabled role and choose
Enable from the shortcut menu.
8.3.7. Delete a custom role
You can delete a custom role that is no longer needed.
Prerequisites
Default or preset roles cannot be deleted.
To delete a role, you must unbind all user groups from the role.
Procedure
1. Log on to the Apsara Uni-manager Management Console as an administrator.
2. In the top navigation bar, click Enterprise.
3. In the left-side navigation pane of the Enterprise page, click Roles.
4. Choose More > Delete in the Actions column corresponding to a role.
5. In the Confirm message, click OK.
8.4. Users
8.4.1. System users

Apsara Uni-manager Management
Console User Guide/8.Enterprise
Document Version:20210130 129
8.4.1.1. Create a user
You can create a user and assign the user different roles as an administrator to meet different
requirements for system access control.
Procedure
1. Log on to the Apsara Uni-manager Management Console as an administrator.
2. In the top navigation bar, click Enterprise.
3. Use one of the following methods to open the Create User window:
o In the left-side navigation pane of the Enterprise page, click Organizations. In the Users
section of the Organizations page, click Create User.
o In the left-side navigation pane of the Enterprise page, click Users. On the System Users tab
of the Users page, click Create.
4. In the Create User dialog box, configure the parameters.
Parameter Description
Username
The Apsara Stack account name of the user. The name must
be 3 to 30 characters in length, and can contain letters, digits,
hyphens (-), underscores (_), periods (.), and at signs (@). It
must start with a letter or digit.

Apsara Uni-manager Management
Console User Guide/8.Enterprise
Document Version:20210130 130
Display Name
The display name of the user. The name must be 2 to 30
characters in length, and can contain letters, digits, hyphens
(-), underscores (_), periods (.), and at signs (@).
Roles The role to be assigned to the user.
Organization The organization to which the user belongs.
Logon Policy
The logon policy that restricts the logon time and IP
addresses of the user. The default policy is automatically
bound to new users.
Note The default policy does not restrict the time period and
IP addresses for users to log on. To restrict the logon time
and IP addresses of a user, you can modify the logon policy
of the user or create a logon policy for the user. For more
information, see Create a logon policy.
Mobile Number
The mobile number of the user. The mobile number is used
by the system to notify users of resource application and
usage. Make sure that the entered mobile number is correct.
Note If the mobile number is changed, update it on the
system in a timely manner.

Apsara Uni-manager Management
Console User Guide/8.Enterprise
Document Version:20210130 131
Landline Number
Optional. The landline number of the user. The landline
number must be 4 to 20 characters in length, and can contain
only digits and hyphens (-).
The email address of the user. Emails about the usage and
requests for resources will be sent to the email address.
Make sure that the specified email address is correct.
Note If the email address is changed, update it on the system
in a timely manner.
DingTalk Key
The key of the chatbot for the DingTalk group where the user
is a member.
Notify User by SMS
After this option is selected, the Apsara Uni-manager
Management Console informs the user configured as the
alert contact by SMS whenever an alert is generated.
Note You must configure an SMS server to receive an SMS
message each time an alert is triggered. For more
information, contact on-site O&M engineers.

Apsara Uni-manager Management
Console User Guide/8.Enterprise
Document Version:20210130 132
Notify User by Email
After this option is selected, the Apsara Uni-manager
Management Console informs the user configured as the
alert contact by email whenever an alert is generated.
Note You must configure an email server to receive an email
each time an alert is triggered. For more information, contact
on-site O&M engineers.
Notify User by
DingTalk
After this option is selected, the Apsara Uni-manager
Management Console informs the user configured as the
alert contact by DingTalk whenever an alert is generated.
5. Click OK.
8.4.1.2. Query a user
You can view user information such as name, organization, mobile number, email address, role, logon
time, and initial password.
Procedure
1. Log on to the Apsara Uni-manager Management Console as an administrator.
2. In the top navigation bar, click Enterprise.
3. In the left-side navigation pane of the Enterprise page, click Users.
4. Click the System Users tab.

Apsara Uni-manager Management
Console User Guide/8.Enterprise
Document Version:20210130 133
5. Set Username, Organization, or Role, and then click Search.
6. Click More in the Actions column corresponding to a user, and choose User Information from
the shortcut menu to view basic information about the user.
8.4.1.3. Modify user information
You can modify user information such as display name, mobile number, and email address to keep it up
to date.
Procedure
1. Log on to the Apsara Uni-manager Management Console as an administrator.
2. In the top navigation bar, click Enterprise.
3. In the left-side navigation pane of the Enterprise page, click Users.
4. Click the System Users tab.
5. Find the user that you want to modify and choose More > Edit in the Actions column.
6. In the Modify User Information dialog box, enter the relevant information and click OK.
8.4.1.4. Change user roles
You can add, change, and delete roles for a user.
Change user roles by using user management
1. Log on to the Apsara Uni-manager Management Console as an administrator.
2. In the top navigation bar, click Enterprise.
3. In the left-side navigation pane of the Enterprise page, click Users.

Apsara Uni-manager Management
Console User Guide/8.Enterprise
Document Version:20210130 134
4. Click the System Users tab.
5. Choose More > Authorize in the Actions column corresponding to a user.
6. In the Role field, add, delete, or change user roles.
7. Click OK.
Change user roles by changing ownership
1. Log on to the Apsara Uni-manager Management Console as an administrator.
2. In the top navigation bar, click Enterprise.
3. In the left-side navigation pane of the Enterprise page, click Change Ownership.
4. Click the icon to the left of an organization and click Users.
5. In the Users section on the right, set Logon Policy and Role or Username, and click Search to
query a user.
6. Find the user and click Change in the Actions column.
7. In the Organization to Change dialog box, select the destination or original organization and
select the role to be added or removed from the Assigned Roles drop-down list.
Note
o If you change only roles without changing the organization, select the original
organization.
o Blue role names are the roles that are selected, and black role names are the roles that
are not selected.

Apsara Uni-manager Management
Console User Guide/8.Enterprise
Document Version:20210130 135
8. Click OK.
8.4.1.5. Modify the information of a user group
On the Users page, you can view the user group information and modify the ownership of users in user
groups.
Procedure
1. Log on to the Apsara Uni-manager Management Console as an administrator.
2. In the top navigation bar, click Enterprise.
3. In the left-side navigation pane, click Users.
4. Click the System Users tab, select a target user, and then click More in the Actions column.
o Select Add to User Group. In the dialog box that appears, select the target user group and
click OK to add the user to the user group.
o Select Remove from User Group. In the dialog box that appears, select the target user group
and click OK to remove the user from the user group.
8.4.1.6. Modify a user logon policy
An administrator can modify a user's logon policy to restrict the permitted logon time and IP addresses
of the user.
Prerequisites
A new logon policy is created. For more information about how to create a logon policy, see Create a
logon policy.

Apsara Uni-manager Management
Console User Guide/8.Enterprise
Document Version:20210130 136
Modify a user logon policy
1. Log on to the Apsara Uni-manager Management Console as an administrator.
2. In the top navigation bar, click Enterprise.
3. In the left-side navigation pane of the Enterprise page, click Users.
4. Click the System Users tab.
5. Click More in the Actions column corresponding to a user, and choose Logon Policy from the
shortcut menu.
6. In the Assign Logon Policy dialog box, select a logon policy and click OK.
Modify multiple user logon policies at a time
1. Log on to the Apsara Uni-manager Management Console as an administrator.
2. In the top navigation bar, click Enterprise.
3. In the left-side navigation pane of the Enterprise page, click Users.
4. Click the System Users tab.
5. Select multiple users.
6. In the upper-right corner of the page, click Logon Policy.
7. In the Assign Logon Policies dialog box, select a logon policy and click OK.
8.4.1.7. View the initial password of a user
After a user is created, the system generates an initial password for the user.
Context

Apsara Uni-manager Management
Console User Guide/8.Enterprise
Document Version:20210130 137
Organization administrators can view the initial passwords of all users in the organizations they
manage.
Procedure
1. Log on to the Apsara Uni-manager Management Console as an administrator.
2. In the top navigation bar, click Enterprise.
3. Use one of the following methods to view the initial password of a user on the Enterprise page:
o In the left-side navigation pane, click Users. On the System Users tab of the Users page,
select a username.
Click View Initial Password in the upper-right corner of the Users page to view the initial
password.
Choose More > User Information in the Actions column corresponding to the user. On the
user information page, click View Password to view the initial password.
o In the left-side navigation pane, click Organizations. In the organization navigation tree on
the Organizations page, click an organization name. In the Users section, click a username.
On the user information page, click View Password to view the initial password.
8.4.1.8. Reset the password of a user
If users forget their logon passwords, the system administrator can reset the logon passwords for them.
Prerequisites
Only organization administrators can reset the password of a user.

Apsara Uni-manager Management
Console User Guide/8.Enterprise
Document Version:20210130 138
Procedure
1. Log on to the Apsara Uni-manager Management Console as an administrator.
2. In the top navigation bar, click Enterprise.
3. Use one of the following methods to go to the User Information page:
o In the left-side navigation pane of the Enterprise page, click Users. On the System Users tab
of the Users page, click a username.
o In the left-side navigation pane of the Enterprise page, click Organizations. On the
Organizations page, click a username in the Users section.
4. Click Reset Password.After the password is reset, a message is displayed, which indicates that
the password has been reset. If you want to view the initial password after password reset, click
View Password.
8.4.1.9. Disable or enable a user account
You can disable a user account to prevent the user account from logging on to the Apsara Uni-manager
Management Console. User accounts that are disabled must be re-enabled before they can be used to
log on to the Apsara Uni-manager Management Console again.
Context
By default, user accounts are enabled when they are created.
Procedure
1. Log on to the Apsara Uni-manager Management Console as an administrator.

Apsara Uni-manager Management
Console User Guide/8.Enterprise
Document Version:20210130 139
2. In the top navigation bar, click Enterprise.
3. In the left-side navigation pane of the Enterprise page, click Users.
4. Click the System Users tab.
5. Perform the following operations on the current tab:
o Select a user account whose Status is Enabled, choose More > Disable in the Actions
column to disable the user account.
o Select a user whose Status is Disabled, choose More > Enable in the Actions column to
enable the user account.
8.4.1.10. Delete a user
You can delete a specific user as an administrator.
Procedure
1. Log on to the Apsara Uni-manager Management Console as an administrator.
2. In the top navigation bar, click Enterprise.
3. On the Enterprise page, use one of the following methods to delete a user:
o In the left-side navigation pane of the Enterprise page, click Users. On the page that
appears, click the System Users tab. Click More in the Actions column corresponding to the
target user, and select Delete.

Apsara Uni-manager Management
Console User Guide/8.Enterprise
Document Version:20210130 140
o In the left-side navigation pane of the Enterprise page, click Organizations. On the page that
appears, find the Users section. Find the target user, click More in the Actions column, and
then select Delete.
4. Click OK.
8.4.2. Historical users
8.4.2.1. Query historical users
You can check whether a user has been deleted and restore a user that has been deleted.
Procedure
1. Log on to the Apsara Uni-manager Management Console as an administrator.
2. In the top navigation bar, click Enterprise.
3. In the left-side navigation pane of the Enterprise page, click Users.
4. Click the Historical Users tab.
5. Enter the username that you want to query in the Username search box.
Note You can search for usernames by fuzzy match.
6. Click Search.
8.4.2.2. Restore historical users
An administrator can restore a deleted user account from the Historical Users tab.
Context

Apsara Uni-manager Management
Console User Guide/8.Enterprise
Document Version:20210130 141
The basic information such as logon password of a restored user is the same as it was before the user
was deleted, except for the organization and role.
Procedure
1. Log on to the Apsara Uni-manager Management Console as an administrator.
2. In the top navigation bar, click Enterprise.
3. In the left-side navigation pane of the Enterprise page, click Users.
4. Click the Historical Users tab.
5. Find the user that you want to restore and click Restore in the Actions column.
6. In the Restore User dialog box, select an organization and a role.
7. Click OK.
8.5. Logon policies
8.5.1. Create a logon policy
To improve the security of the Apsara Uni-manager Management Console, you can create a logon
policy as an administrator to control logon access based on the logon time and user IP address.
Context
Logon policies are used to control the time period and IP addresses for users to log on. After a user is
bound to a logon policy, user logons are restricted based on the logon time and IP addresses specified
in the policy.

Apsara Uni-manager Management
Console User Guide/8.Enterprise
Document Version:20210130 142
A default policy without limits on logon time and IP addresses is automatically generated in the Apsara
Uni-manager Management Console. The default policy cannot be deleted.
Procedure
1. Log on to the Apsara Uni-manager Management Console as an administrator.
2. In the top navigation bar, click Enterprise.
3. In the left-side navigation pane of the Enterprise page, click Logon Policies.
4. In the upper-right corner of the page, click Create.
5. In the Create Logon Policy dialog box, set Name, Sharing Scope, Policy Properties, Time
Period, and IP Address.

Apsara Uni-manager Management
Console User Guide/8.Enterprise
Document Version:20210130 143
Parameters for creating a logon policy
Parameter Description
Name
The name of the logon policy. The name must be 2 to 50
characters in length and can contain only letters and digits. The
name must be unique in the system.
Description The description of the logon policy.

Apsara Uni-manager Management
Console User Guide/8.Enterprise
Document Version:20210130 144
Sharing Scope
The scope in which the role is visible.
o Global: The role is globally visible. The default value is
Global.
o Current Organization: The role is visible only in the current
organization and is invisible in subordinate organizations.
o Subordinate Organization: The role is visible in the current
organization and all its subordinate organizations.
Policy Properties
The authentication method of the logon policy.
o Whitelist: Logon is allowed if the parameter settings are
met.
o Blacklist: Logon is denied if the parameter settings are met.
Time Period
The permitted logon time period. When this policy is configured,
users can log on to the Apsara Uni-manager Management
Console only during the configured period. Specify the time in
minutes in a 24-hour clock. Example: 16:32.
Note When the Policy Properties parameter is set to Whitelist,
you can select No Time Limit.
IP Address The permitted CIDR block.

Apsara Uni-manager Management
Console User Guide/8.Enterprise
Document Version:20210130 145
o If the Policy Properties parameter is set to Whitelist, IP
addresses within this CIDR block are allowed to log on to
the Apsara Uni-manager Management Console.
o If the Policy Properties parameter is set to Blacklist, IP
addresses within this CIDR block are not allowed to log on
to the Apsara Uni-manager Management Console.
Note When the Policy Properties parameter is set to Whitelist,
you can select No CIDR Block Limit.
8.5.2. Query a logon policy
You can query the detailed information of a logon policy in the Apsara Uni-manager Management
Console.
Context
When the Apsara Uni-manager Management Console provides services, it automatically generates a
default policy without limits on the logon time and IP addresses.
Procedure
1. Log on to the Apsara Uni-manager Management Console as an administrator.
2. In the top navigation bar, click Enterprise.
3. In the left-side navigation pane of the Enterprise page, click Logon Policies.

Apsara Uni-manager Management
Console User Guide/8.Enterprise
Document Version:20210130 146
4. Enter the name of the policy that you want to view and click Search.
5. View the logon policy, including the permitted logon time and IP addresses.
8.5.3. Modify a logon policy
You can modify the policy name, policy properties, permitted logon time period, and IP addresses of a
logon policy.
Procedure
1. Log on to the Apsara Uni-manager Management Console as an administrator.
2. In the top navigation bar, click Enterprise.
3. In the left-side navigation pane of the Enterprise page, click Logon Policies.
4. Find the logon policy that you want to modify and choose More > Modify in the Actions column.
5. In the Modify Logon Policy dialog box, modify the logon policy information.
6. Click OK.
8.5.4. Disable a logon policy
You can disable logon policies that are no longer needed.
Procedure
1. Log on to the Apsara Uni-manager Management Console.
2. In the top navigation bar, click Enterprise.
3. In the left-side navigation pane of the Enterprise page, click Logon Policies.

Apsara Uni-manager Management
Console User Guide/8.Enterprise
Document Version:20210130 147
4. Find the logon policy that you want to disable and choose More > Disable in the Actions
column.
8.5.5. Enable a logon policy
You can re-enable disabled logon policies.
Procedure
1. Log on to the Apsara Uni-manager Management Console.
2. In the top navigation bar, click Enterprise.
3. In the left-side navigation pane of the Enterprise page, click Logon Policies.
4. Click More in the Actions column corresponding to a policy, and choose Enable from the
shortcut menu.
8.5.6. Delete a logon policy
You can delete logon policies that are no longer needed.
Prerequisites
The logon policy to be deleted is not bound to any users. If a logon policy is bound to a user, the logon
policy cannot be deleted.
Context
Note The default policy cannot be deleted.
Procedure
1. Log on to the Apsara Uni-manager Management Console as an administrator.

Apsara Uni-manager Management
Console User Guide/8.Enterprise
Document Version:20210130 148
2. In the top navigation bar, click Enterprise.
3. In the left-side navigation pane of the Enterprise page, click Logon Policies.
4. Click More in the Actions column corresponding to a policy, and choose Delete from the
shortcut menu.
5. In the message that appears, click OK.
8.6. User groups
8.6.1. Create a user group
You can create a user group in a selected organization and grant batch authorizations to users in the
group.
Prerequisites
Before creating a user group, you must create an organization. For more information, see Create an
organization.
Context
Relationship between user groups and users:
A user group can contain zero or more users.
You can add users to user groups as needed.
You can add a user to multiple user groups.
Relationship between user groups and organizations:
A user group can only belong to a single organization.

Apsara Uni-manager Management
Console User Guide/8.Enterprise
Document Version:20210130 149
You can create multiple user groups in an organization.
Relationship between user groups and roles:
A user group can only be bound to a single role.
A role can be associated with multiple user groups.
When a role is associated with a user group, the role permissions are automatically granted to
users in the user group.
Relationship between user groups and resource sets:
You can add zero or more user groups to a resource set.
A user group can be added to multiple resource sets.
Procedure
1. Log on to the Apsara Uni-manager Management Console as an administrator.
2. In the top navigation bar, click Enterprise.
3. In the left-side navigation pane of the Enterprise page, click User Groups.
4. In the upper-right corner of the page, click Create User Group.
5. In the dialog box that appears, set User Group Name and Organization.

Apsara Uni-manager Management
Console User Guide/8.Enterprise
Document Version:20210130 150
6. Click OK.
8.6.2. Add users to a user group
You can add users to a user group.
Procedure
1. Log on to the Apsara Uni-manager Management Console as an administrator.
2. In the top navigation bar, click Enterprise.
3. In the left-side navigation pane of the Enterprise page, click User Groups.
4. Click Add User in the Actions column corresponding to a user group.
5. Select the names of users to be added from the left list, and click the right arrow to move them
to the right list.
6. Click OK.
8.6.3. Delete users from a user group
You can delete users from a user group.

Apsara Uni-manager Management
Console User Guide/8.Enterprise
Document Version:20210130 151
Procedure
1. Log on to the Apsara Uni-manager Management Console as an administrator.
2. In the top navigation bar, click Enterprise.
3. In the left-side navigation pane of the Enterprise page, click User Groups.
4. Click Delete User in the Actions column corresponding to a user group.
5. Select the names of users to be deleted from the Users Under Specified User Group list, and
click the right arrow to move them to the Users to Be Deleted list.
6. Click OK.
8.6.4. Add a role
You can add a role to a user group and assign the role to all users in the group.
Context
Note You can add only one role to a user group.
Procedure

Apsara Uni-manager Management
Console User Guide/8.Enterprise
Document Version:20210130 152
1. Log on to the Apsara Uni-manager Management Console as an administrator.
2. In the top navigation bar, click Enterprise.
3. In the left-side navigation pane of the Enterprise page, click User Groups.
4. Click Add Role in the Actions column corresponding to a user group.
5. In the dialog box that appears, select a role.
6. Click OK.
8.6.5. Delete a role
You can delete existing roles.
Procedure
1. Log on to the Apsara Uni-manager Management Console as an administrator.
2. In the top navigation bar, click Enterprise.
3. In the left-side navigation pane of the Enterprise page, click User Groups.
4. Find the user group from which you want to delete a role and click Delete Role in the Actions
column.
5. In the Confirm message, click OK.
8.6.6. Modify the name of a user group
You can modify the names of user groups.
Procedure
1. Log on to the Apsara Uni-manager Management Console as an administrator.

Apsara Uni-manager Management
Console User Guide/8.Enterprise
Document Version:20210130 153
2. In the top navigation bar, click Enterprise.
3. In the left-side navigation pane of the Enterprise page, click User Groups.
4. Click Edit User Group in the Actions column corresponding to a user group.
5. In the dialog box that appears, enter the new name.
6. Click OK.
8.6.7. Delete a user group
You can delete user groups that are no longer needed.
Prerequisites
The user group to be deleted is unbound from all roles. If a user group is bound to a role, the user
group cannot be deleted.
Procedure
1. Log on to the Apsara Uni-manager Management Console as an administrator.
2. In the top navigation bar, click Enterprise.
3. In the left-side navigation pane of the Enterprise page, click User Groups.
4. Find the user group that you want to delete and click Delete User Group in the Actions column.
5. In the Confirm message, click OK.
8.7. Resource pools

Apsara Uni-manager Management
Console User Guide/8.Enterprise
Document Version:20210130 154
8.7.1. Update associations
You can deploy the Apsara Uni-manager Management Console in multiple regions. You can update the
associations between organizations and regions.
Procedure
1. Log on to the Apsara Uni-manager Management Console as an administrator.
2. In the top navigation bar, click Enterprise.
3. In the left-side navigation pane of the Enterprise page, click Resource Pools.
4. In the left-side organization navigation tree, click the name of the organization that you want to
update.
5. In the corresponding region list, select the names of regions to be associated.
6. Click Update Association.
8.8. Change the ownership of an instance
You can change the ownership of an instance from one resource set to another.
Change the ownership of an instance
1. Log on to the Apsara Uni-manager Management Console as an administrator.
2. In the top navigation bar, click Enterprise.
3. In the left-side navigation pane of the Enterprise page, click Change Ownership.
4. Click the icon to the left of an organization and click a resource set.

Apsara Uni-manager Management
Console User Guide/8.Enterprise
Document Version:20210130 155
5. In the resource list on the right side of the page, set a service type and a resource type, enter
an instance ID, and then click Search to query the instance.
6. Click Change ownership in the Actions column corresponding to the instance to change the
ownership of the instance to another resource set.
7. Click Change sharing scope in the Actions column corresponding to the instance to change the
sharing scope of the instance.
o Current Organization and Subordinate Organizations: The instance can be shared by the
organization that contains the resource set to which the instance belongs and by subordinate
organizations.
o Current Resource Set: The instance can be shared by the resource set to which the instance
belongs.
o Current Organization: The instance can be shared by the organization that contains the
resource set to which the instance belongs.
8. In the Change Resource Set dialog box, select a resource set and click OK.
8.9. Cloud instances
8.9.1. Manage Apsara Stack cloud instances
8.9.1.1. Export data of the current cloud
You can export the data of secondary Apsara Stack nodes to a configuration file. This can be used by
the primary node to manage nodes in a centralized manner.

Apsara Uni-manager Management
Console User Guide/8.Enterprise
Document Version:20210130 156
Procedure
1. Log on to the Apsara Uni-manager Management Console.
2. In the top navigation bar, click Enterprise. In the left-side navigation pane of the Enterprise
page, click Cloud Instances.
3. Click the Apsara Stack Management tab.
4. Click Collect Data of Current Cloud to collect the deployment information of the current cloud.
5. Click Export to export the information in the JSON format.
8.9.1.2. Add a secondary Apsara Stack node
You can add the configuration information of secondary Apsara Stack nodes to the multi-cloud
configuration of the primary Apsara Stack node for centralized management.
Procedure
1. Log on to the Apsara Uni-manager Management Console.
2. In the top navigation bar, click Enterprise. In the left-side navigation pane of the Enterprise
page, click Cloud Instances.
3. Click the Apsara Stack Management tab.
4. Click Import.
In the Create Apsara Stack Secondary Node dialog box, enter the configuration information of a
secondary node and click OK.

Apsara Uni-manager Management
Console User Guide/8.Enterprise
Document Version:20210130 157
Parameter Description
Cloud Instance Information
The configuration file of the secondary
node. For more information, see Export
data of the current cloud.

Apsara Uni-manager Management
Console User Guide/8.Enterprise
Document Version:20210130 158
Secondary Node Name The name of the secondary node.
Username
The username of the operations
administrator that manages the secondary
node.
Password
The password of the operations
administrator that manages the secondary
node.
Description The description of the secondary node.
AccessKey ID
The AccessKey ID of the operations
administrator that manages the secondary
node. For more information, see View the
AccessKey pair of your Apsara Stack
tenant.
AccessKey Secret
The AccessKey secret of the operations
administrator that manages the secondary
node. For more information, see View the

Apsara Uni-manager Management
Console User Guide/8.Enterprise
Document Version:20210130 159
AccessKey pair of your Apsara Stack
tenant.
Notice
You must create an operations administrator account in the secondary node. This account is
for dedicated use by the primary node and cannot be the default operations administrator
account.
8.9.1.3. View managed cloud instances
You can use the multi-cloud management feature to view the details of all managed cloud instances.
Procedure
1. Log on to the Apsara Uni-manager Management Console.
2. In the top navigation bar, click Enterprise. In the left-side navigation pane of the Enterprise
page, click Cloud Instances.
3. Click the Apsara Stack Management tab.
You can view the name, description, cloud type, cloud role, and address of all managed cloud
instances.
4. Enter a cloud instance name in the search box and click Search to search for the cloud
instance.
5. Click View Details in the Actions column corresponding to the cloud instance.

Apsara Uni-manager Management
Console User Guide/8.Enterprise
Document Version:20210130 160
In the Manage Cloud Instance message, you can view the version, ASAPI address, and region
of the cloud.
8.9.1.4. Modify a cloud instance
If you want to change the information of a cloud instance for more efficient management, you can
modify it in the Apsara Uni-manager Management Console.
Procedure
1. Log on to the Apsara Uni-manager Management Console.
2. In the top navigation bar, click Enterprise. In the left-side navigation pane of the Enterprise
page, click Cloud Instances.
3. Click the Apsara Stack Management tab.
4. Enter the name of a cloud instance that you want to modify in the search box and click Search
to search for the cloud instance.
5. Click Edit in the Actions column corresponding to the cloud instance.
6. In the Edit Cloud Instance dialog box, set Cloud Name, Username, Password, Description,
AccessKey ID, AccessKey Secret, Longitude, and Latitude, and click OK.
8.9.1.5. Manage cloud instances
You can manage Apsara Stack cloud instances to check whether they can be connected.
Procedure
1. Log on to the Apsara Uni-manager Management Console.

Apsara Uni-manager Management
Console User Guide/8.Enterprise
Document Version:20210130 161
2. In the top navigation bar, click Enterprise. In the left-side navigation pane of the Enterprise
page, click Cloud Instances.
3. Click the Apsara Stack Management tab.
4. Enter a cloud instance name in the search box and click Search to search for the cloud
instance.
5. Click Manage in the Actions column corresponding to the cloud instance.
6. In the Manage Cloud Instance dialog box, click Test Connectivity.
8.9.2. Manage VMware nodes
8.9.2.1. Add a VMware node
You can add the configuration information of VMware nodes to the Apsara Stack VMware management
configuration for centralized management.
Prerequisites
The configuration file of a VMware node is obtained from the deployment personnel.
The VMware node is configured.
Procedure
1. Log on to the Apsara Uni-manager Management Console.
2. In the top navigation bar, click Enterprise.
3. In the left-side navigation pane of the Enterprise page, click Cloud Instances.
4. Click the VMware Management tab.

Apsara Uni-manager Management
Console User Guide/8.Enterprise
Document Version:20210130 162
5. Click Create VMware Node.
In the Create VMware Node dialog box, enter the configuration information of a VMware node
and click OK.
Parameter Description
Cloud Instance Information
The configuration file of the VMware
node.

Apsara Uni-manager Management
Console User Guide/8.Enterprise
Document Version:20210130 163
Cloud Name The name of the VMware node.
Cloud Description The description of the VMware node.
AccessKey ID
The AccessKey ID in the configuration file
of the VMware node.
AccessKey Secret
The AccessKey secret in the configuration
file of the VMware node.
8.9.2.2. Modify a VMware node
If you want to change the information of a VMware node for more efficient management, you can
modify it in the Apsara Uni-manager Management Console.
Procedure
1. Log on to the Apsara Uni-manager Management Console.
2. In the top navigation bar, click Enterprise. In the left-side navigation pane of the Enterprise
page, click Cloud Instances.
3. Click the VMware Management tab.
4. Enter the name of a VMware node that you want to modify in the search box and click Search to
search for the VMware node.
5. Click Edit in the Actions column corresponding to the VMware node.

Apsara Uni-manager Management
Console User Guide/8.Enterprise
Document Version:20210130 164
6. In the Edit Cloud Instance dialog box, set Cloud Name, Cloud Description, AccessKey ID, and
AccessKey Secret, and click OK.
8.9.2.3. Test VMware node connectivity
You can manage VMware nodes to check whether they can be connected.
Procedure
1. Log on to the Apsara Uni-manager Management Console.
2. In the top navigation bar, click Enterprise. In the left-side navigation pane of the Enterprise
page, click Cloud Instances.
3. Click the VMware Management tab.
4. Enter a VMware node name in the search box and click Search to search for the VMware node.
5. Click Manage in the Actions column corresponding to the VMware node.
6. In the Manage Cloud Instance dialog box, click Test Connectivity.
8.9.3. Manage public cloud resources
8.9.3.1. Overview
Apsara Uni-manager is a platform for centralized management of both public cloud and private cloud
resources, as shown in the following figure. The platform provides end-to-end management capabilities
for public cloud resources.

Apsara Uni-manager Management
Console User Guide/8.Enterprise
Document Version:20210130 165
8.9.3.2. Management of public cloud accounts
Prerequisites
You have a public cloud account.
A browser is available. We recommend that you use Google Chrome.
Procedure
1. In the address bar, enter the URL of the Apsara Uni-manager Management Console. Press
the Enter key.
2. Enter the username and password of your account.
3. Obtain the username and password that are used to log on to the Apsara Uni-manager
Management Console from the operations administrator.
4. Log on to the Apsara Uni-manager Management Console.

Apsara Uni-manager Management
Console User Guide/8.Enterprise
Document Version:20210130 166
5. In the top navigation bar, click Settings. In the left-side navigation pane, click Cloud
Provider. In the upper-right corner of the page, click New.
6. In the panel that appears, specify the information of your account.
8.9.3.3. Management of ECS instances
8.9.3.3.1 Create an ECS instance
Prerequisites
A public cloud service provider is added.
A browser is available. We recommend that you use Google Chrome.
Procedure
1. Log on to the Apsara Uni-manager Management Console. In the top navigation bar, click
Resource.
2. In the upper-right corner of the Resource page, click New.
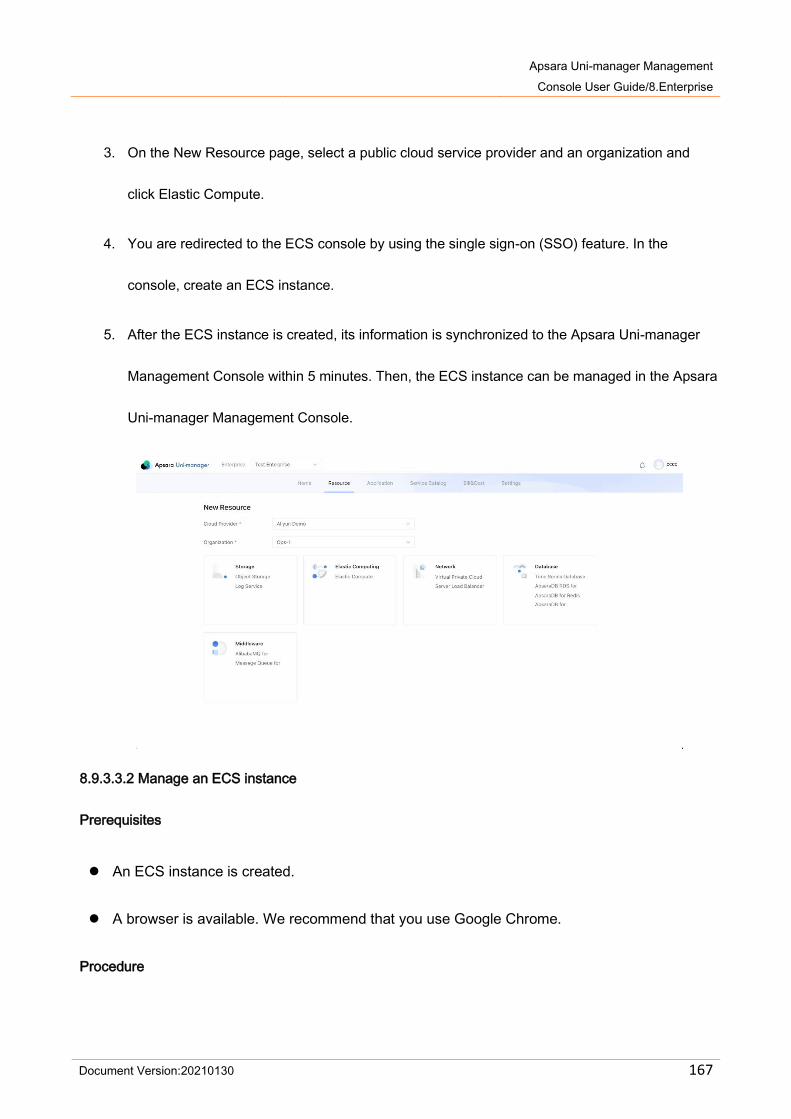
Apsara Uni-manager Management
Console User Guide/8.Enterprise
Document Version:20210130 167
3. On the New Resource page, select a public cloud service provider and an organization and
click Elastic Compute.
4. You are redirected to the ECS console by using the single sign-on (SSO) feature. In the
console, create an ECS instance.
5. After the ECS instance is created, its information is synchronized to the Apsara Uni-manager
Management Console within 5 minutes. Then, the ECS instance can be managed in the Apsara
Uni-manager Management Console.
8.9.3.3.2 Manage an ECS instance
Prerequisites
An ECS instance is created.
A browser is available. We recommend that you use Google Chrome.
Procedure

Apsara Uni-manager Management
Console User Guide/8.Enterprise
Document Version:20210130 168
1. Log on to the Apsara Uni-manager Management Console. In the top navigation bar, click
Resource.
2. On the Resource page, select a public cloud service provider and an organization and set Type
to ECS.
3. The corresponding ECS instances are displayed on the page. Find the ECS instance that you
want to manage and click Detail.
4. You are redirected to the ECS console by using the SSO feature. In the console, manage the
ECS instance.
8.9.3.3.3 Release an ECS instance
Prerequisites
An ECS instance is created.
A browser is available. We recommend that you use Google Chrome.
Procedure

Apsara Uni-manager Management
Console User Guide/8.Enterprise
Document Version:20210130 169
1. Log on to the Apsara Uni-manager Management Console. In the top navigation bar, click
Resource.
2. On the Resource page, select a public cloud service provider and an organization and set Type
to ECS.
3. The corresponding ECS instances are displayed on the page. Find the ECS instance that you
want to release and click Detail.
4. You are redirected to the ECS console by using the SSO feature. In the console, release the
ECS instance. After the ECS instance is released, it is removed from the Apsara Uni-manager
Management Console within 5 minutes.
8.9.3.4. Management of VPCs
8.9.3.4.1 Create a VPC
Prerequisites
A public cloud service provider is added.
A browser is available. We recommend that you use Google Chrome.
Procedure
1. Log on to the Apsara Uni-manager Management Console. In the top navigation bar, click
Resource.
2. In the upper-right corner of the Resource page, click New.
3. On the New Resource page, select a public cloud service provider and an organization and
click Virtual Private Cloud.

Apsara Uni-manager Management
Console User Guide/8.Enterprise
Document Version:20210130 170
4. You are redirected to the VPC console by using the SSO feature. In the console, create a VPC.
5. After the VPC is created, its information is synchronized to the Apsara Uni-manager
Management Console within 5 minutes. Then, the VPC can be managed in the Apsara Uni-
manager Management Console.
8.9.3.4.2 Manage a VPC
Prerequisites
A VPC is created.
A browser is available. We recommend that you use Google Chrome.
Procedure
1. Log on to the Apsara Uni-manager Management Console. In the top navigation bar, click
Resource.
2. On the Resource page, select a public cloud service provider and an organization and set Type
to VPC.
3. The corresponding VPCs are displayed on the page. Find the VPC that you want to manage
and click Detail.
4. You are redirected to the VPC console by using the SSO feature. In the console, manage the
VPC.
8.9.3.4.3 Release a VPC
Prerequisites

Apsara Uni-manager Management
Console User Guide/8.Enterprise
Document Version:20210130 171
A VPC is created.
A browser is available. We recommend that you use Google Chrome.
Procedure
1. Log on to the Apsara Uni-manager Management Console. In the top navigation bar, click
Resource.
2. On the Resource page, select a public cloud service provider and an organization and set Type
to VPC.
3. The corresponding VPCs are displayed on the page. Find the VPC that you want to release and
click Detail.
4. You are redirected to the VPC console by using the SSO feature. In the console, release the
VPC. After the VPC is released, it is removed from the Apsara Uni-manager Management
Console within 5 minutes.
8.3.9.5. Management of SLB instances
8.9.3.5.1 Create an SLB instance
Prerequisites
A public cloud service provider is added.
A browser is available. We recommend that you use Google Chrome.
Procedure
1. Log on to the Apsara Uni-manager Management Console. In the top navigation bar, click
Resource.

Apsara Uni-manager Management
Console User Guide/8.Enterprise
Document Version:20210130 172
2. In the upper-right corner of the Resource page, click New.
3. On the New Resource page, select a public cloud service provider and an organization and
click Server Load Balancer.
4. You are redirected to the SLB console by using the SSO feature. In the console, create an SLB
instance.
5. After the SLB instance is created, its information is synchronized to the Apsara Uni-manager
Management Console within 5 minutes. Then, the SLB instance can be managed in the Apsara
Uni-manager Management Console.
8.9.3.5.2 Manage an SLB instance
Prerequisites
An SLB instance is created.
A browser is available. We recommend that you use Google Chrome.
Procedure
1. Log on to the Apsara Uni-manager Management Console. In the top navigation bar, click
Resource.
2. On the Resource page, select a public cloud service provider and an organization and set Type
to SLB.
3. The corresponding SLB instances are displayed on the page. Find the SLB instance that you
want to manage and click Detail.

Apsara Uni-manager Management
Console User Guide/8.Enterprise
Document Version:20210130 173
4. You are redirected to the SLB console by using the SSO feature. In the console, manage the
SLB instance.
8.9.3.5.3 Release an SLB instance
Prerequisites
An SLB instance is created.
A browser is available. We recommend that you use Google Chrome.
Procedure
1. Log on to the Apsara Uni-manager Management Console. In the top navigation bar, click
Resource.
2. On the Resource page, select a public cloud service provider and an organization and set Type
to SLB.
3. The corresponding SLB instances are displayed on the page. Find the SLB instance that you
want to release and click Detail.
4. You are redirected to the SLB console by using the SSO feature. In the console, release the
SLB instance. After the SLB instance is released, it is removed from the Apsara Uni-manager
Management Console within 5 minutes.
8.3.9.6. Management of OSS buckets
8.9.3.6.1 Create an OSS bucket
Prerequisites
A public cloud service provider is added.

Apsara Uni-manager Management
Console User Guide/8.Enterprise
Document Version:20210130 174
A browser is available. We recommend that you use Google Chrome.
Procedure
1. Log on to the Apsara Uni-manager Management Console. In the top navigation bar, click
Resource.
2. In the upper-right corner of the Resource page, click New.
3. On the New Resource page, select a public cloud service provider and an organization and
click Object Storage.
4. You are redirected to the OSS console by using the SSO feature. In the console, create an
OSS bucket.
5. After the OSS bucket is created, its information is synchronized to the Apsara Uni-manager
Management Console within 5 minutes. Then, the OSS bucket can be managed in the Apsara
Uni-manager Management Console.
8.9.3.6.2 Manage an OSS bucket
Prerequisites
An OSS bucket is created.
A browser is available. We recommend that you use Google Chrome.
Procedure
1. Log on to the Apsara Uni-manager Management Console. In the top navigation bar, click
Resource.

Apsara Uni-manager Management
Console User Guide/8.Enterprise
Document Version:20210130 175
2. On the Resource page, select a public cloud service provider and an organization and set Type
to OSS.
3. The corresponding OSS buckets are displayed on the page. Find the OSS bucket that you want
to manage and click Detail.
4. You are redirected to the OSS console by using the SSO feature. In the console, manage the
OSS bucket.
8.9.3.6.3 Release an OSS bucket
Prerequisites
An OSS bucket is created.
A browser is available. We recommend that you use Google Chrome.
Procedure
1. Log on to the Apsara Uni-manager Management Console. In the top navigation bar, click
Resource.
2. On the Resource page, select a public cloud service provider and an organization and set Type
to OSS.
3. The corresponding OSS buckets are displayed on the page. Find the OSS bucket that you want
to release and click Detail.
4. You are redirected to the OSS console by using the SSO feature. In the console, release the
OSS bucket. After the OSS bucket is released, it is removed from the Apsara Uni-manager
Management Console within 5 minutes.

Apsara Uni-manager Management
Console User Guide/8.Enterprise
Document Version:20210130 176
8.3.9.7. Management of RDS instances
8.9.3.7.1 Create an RDS instance
Prerequisites
A public cloud service provider is added.
A browser is available. We recommend that you use Google Chrome.
Procedure
1. Log on to the Apsara Uni-manager Management Console. In the top navigation bar, click
Resource.
2. In the upper-right corner of the Resource page, click New.
3. On the New Resource page, select a public cloud service provider and an organization and
click ApsaraDB RDS.
4. You are redirected to the RDS console by using the SSO feature. In the console, create an
RDS instance.
5. After the RDS instance is created, its information is synchronized to the Apsara Uni-manager
Management Console within 5 minutes. Then, the RDS instance can be managed in the Apsara
Uni-manager Management Console.
8.9.3.7.2 Manage an RDS instance
Prerequisites
An RDS instance is created.
A browser is available. We recommend that you use Google Chrome.

Apsara Uni-manager Management
Console User Guide/8.Enterprise
Document Version:20210130 177
Procedure
1. Log on to the Apsara Uni-manager Management Console. In the top navigation bar, click
Resource.
2. On the Resource page, select a public cloud service provider and an organization and set Type
to RDS.
3. The corresponding RDS instances are displayed on the page. Find the RDS instance that you
want to manage and click Detail.
4. You are redirected to the RDS console by using the SSO feature. In the console, manage the
RDS instance.
8.9.3.7.3 Release an RDS instance
Prerequisites
An RDS instance is created.
A browser is available. We recommend that you use Google Chrome.
Procedure
1. Log on to the Apsara Uni-manager Management Console. In the top navigation bar, click
Resource.
2. On the Resource page, select a public cloud service provider and an organization and set Type
to RDS.
3. The corresponding RDS instances are displayed on the page. Find the RDS instance that you
want to release and click Detail.

Apsara Uni-manager Management
Console User Guide/8.Enterprise
Document Version:20210130 178
4. You are redirected to the RDS console by using the SSO feature. In the console, release the
RDS instance. After the RDS instance is released, it is removed from the Apsara Uni-manager
Management Console within 5 minutes.
8.10. Data permissions
8.10.1. Overview
Data permission management allows you to specify which users can access instances of a specific
service, grant data access permissions to the users, and view and modify the data permissions in all
the RAM policies attached to specified users.
Apsara Stack controls users and permissions by managing their visibility and operability in the Apsara
Uni-manager Management Console. Many Apsara Stack cloud services are directly used by calling
their API operations or SDKs instead of in the console. In this case, data access permissions must be
controlled by RAM permission verification provided by the cloud services.
RAM policies are configured for such cloud service instances for access control. Automatic judgment is
used when personnel are added to or removed from resource sets. However, this judgement method
can affect performance and has a high error rate in complex scenarios. To solve this problem, the
authorization of cloud services that require data access permissions is separately managed.
Organization administrators can configure the data permissions granted to related personnel on the
data authorization page.
8.10.2. Set the data permissions of resource instances
Organization administrators can set the data permissions of resource instances to allow or prohibit
access to and operations on cloud services in the Apsara Uni-manager Management Console.

Apsara Uni-manager Management
Console User Guide/8.Enterprise
Document Version:20210130 179
Prerequisites
The cloud services that support data authorization include Message Queue (MQ), Object Storage
Service (OSS), Log Service, DataHub, and Container Service.
Procedure
1. Log on to the Apsara Uni-manager Management Console.
2. In the top navigation bar, click Enterprise.
3. In the left-side navigation pane of the Enterprise page, click Data Permissions.
4. Click a resource set and click a product type on the right side of the page.
5. Click Authorize in the Actions column corresponding to the instance that you want to manage.
6. In the Data Authorization dialog box, select a user on the left side.
7. Turn on or off the data permission switches in the Actions column on the right side.
You can also turn on or off the Select All switch to manage permissions in batches.
8. Click OK.
8.10.3. Edit user permissions
You can use JSON statements to edit user permissions.

Apsara Uni-manager Management
Console User Guide/8.Enterprise
Document Version:20210130 180
Procedure
1. Log on to the Apsara Uni-manager Management Console.
2. In the top navigation bar, click Enterprise.
3. In the left-side navigation pane of the Enterprise page, click Data Permissions.
4. In the organization navigation tree, click the icon to the left of the organization that contains
the user you want to manage.
5. Click Users.
6. Enter the username in the search box and click Search.
7. Click Edit Permissions in the Actions column corresponding to the user.
8. In the Edit Permissions dialog box, select a data permission on the left side and click OK.
If no permissions are available, specify a policy in the text editor. For more information about
the syntax and structure of a policy, see Permission policy structure and syntax.
8.10.4. View the permissions of a user
You can view the existing policies of a user.
Procedure
1. Log on to the Apsara Uni-manager Management Console.
2. In the top navigation bar, click Enterprise.
3. In the left-side navigation pane of the Enterprise page, click Data Permissions.

Apsara Uni-manager Management
Console User Guide/8.Enterprise
Document Version:20210130 181
4. In the organization navigation tree, find the organization that contains the user you want to
manage and click the icon.
5. Click Users.
6. Enter the username in the search box and click Search.
7. Click View Permissions in the Actions column corresponding to the user.

Apsara Uni-manager Management
Console User Guide/9.Configurations
Document Version:20210130 182
9.Configurations
9.1. Password policies
You can configure password policies for user logons.
Procedure
1. Log on to the Apsara Uni-manager Management Console as a platform administrator.
2. In the top navigation bar, click Configurations.
3. In the left-side navigation pane of the Configurations page, click Security Policies.
4. On the Password Policy tab, set the password policy parameters.
To restore to the default password policy, click Reset.
9.2. Menus

Apsara Uni-manager Management
Console User Guide/9.Configurations
Document Version:20210130 183
9.2.1. Create a menu
You can create a menu and add its URL to the Apsara Uni-manager Management Console for quick
access.
Procedure
1. Log on to the Apsara Uni-manager Management Console as a platform administrator.
2. In the top navigation bar, click Configurations.
3. In the left-side navigation pane of the Configurations page, click Menu Settings.
4. On the Main Menu page, click Create in the upper-right corner.
5. In the Create dialog box, set the menu parameters.
Menu parameters

Apsara Uni-manager Management
Console User Guide/9.Configurations
Document Version:20210130 184
Parameter Description
Title The display name of the menu.
URL The URL of the menu.
Console Type
Different console types correspond to different domain names.
o oneconsole: You need only to enter the path in the URL
field. The domain name is automatically matched.
o asconsole: You need only to enter the path in the URL field.
The domain name is automatically matched.
o other: You must enter the domain name in the URL field.
Icon
The icon displayed in the left-side navigation pane. The icon
cannot be changed.
Identifier
The unique identifier of the menu in the system. This identifier
can be used to indicate whether the menu is selected in the
navigation bar. The identifier cannot be changed.
Order
The display order among the same-level menus. The larger the
value, the lower the display order. Leave the Order field empty.
Parent Level The displayed tree structure.

Apsara Uni-manager Management
Console User Guide/9.Configurations
Document Version:20210130 185
Open With
Specifies whether to open the menu in the current window or in
a new window.
Description The description of the menu.
9.2.2. Modify a menu
You can modify an existing menu, including the menu name, URL, icon, and menu order.
Prerequisites
Default menus cannot be modified.
Procedure
1. Log on to the Apsara Uni-manager Management Console as an administrator.
2. In the top navigation bar, click Configurations.
3. In the left-side navigation pane of the Configurations page, click Menu Settings.
4. Click Edit in the Actions column corresponding to a menu.
5. In the Edit dialog box, modify the relevant information of the menu.

Apsara Uni-manager Management
Console User Guide/9.Configurations
Document Version:20210130 186
9.2.3. Delete a menu
You can delete menus that are no longer needed.
Prerequisites
Default menus cannot be deleted.
Procedure
1. Log on to the Apsara Uni-manager Management Console as an administrator.
2. In the top navigation bar, click Configurations.
3. In the left-side navigation pane of the Configurations page, click Menu Settings.

Apsara Uni-manager Management
Console User Guide/9.Configurations
Document Version:20210130 187
4. Click Delete in the Actions column corresponding to a menu.
5. In the message that appears, click OK.
9.2.4. Display or hide menus
You can display or hide menus as follows:
Procedure
1. Log on to the Apsara Uni-manager Management Console as an administrator.
2. In the top navigation bar, click Configurations.
3. In the left-side navigation pane of the Configurations page, click Menu Settings.
4. Select or clear the check box in the Displayed column corresponding to a menu.
9.3. Specifications
9.3.1. Specification parameters
This topic describes the specification parameters of each resource type.
OSS
Parameter Description
Specifications
The specifications that can be configured for
Object Storage Service (OSS).
Specifications Description
The description of the specifications that can be
configured for OSS.

Apsara Uni-manager Management
Console User Guide/9.Configurations
Document Version:20210130 188
NAT Gateway
Parameter Description
Specifications
The specifications that can be configured for
NAT Gateway.
Specifications Description
The description of the specifications that can be
configured for NAT Gateway.
AnalyticDB for PostgreSQL
Parameter Description
Specifications
The specifications that can be configured for
AnalyticDB for PostgreSQL.
Specifications Name
The name of the specifications that can be
configured for AnalyticDB for PostgreSQL.
CPU
The total number of CPU cores that can be
configured for AnalyticDB for PostgreSQL.
Memory
The memory size that can be configured for
AnalyticDB for PostgreSQL.

Apsara Uni-manager Management
Console User Guide/9.Configurations
Document Version:20210130 189
Storage Space
The total storage size that can be configured for
AnalyticDB for PostgreSQL.
Version
The version number of AnalyticDB for
PostgreSQL.
Node
The number of nodes that can be configured for
AnalyticDB for PostgreSQL.
SLB
Parameter Description
Specifications
The specifications that can be configured for
Server Load Balancer (SLB).
Specifications Name
The name of the specifications that can be
configured for SLB.
Maximum Connections
The maximum number of connections that can
be configured for SLB.
New Connections
The number of new connections that can be
configured for SLB.

Apsara Uni-manager Management
Console User Guide/9.Configurations
Document Version:20210130 190
QPS
The queries per second (QPS) that can be
configured for SLB.
Description
The description of the specifications that can be
configured for SLB.
ApsaraDB RDS
Parameter Description
Engine Type
The engine type that can be configured for
ApsaraDB RDS.
Minimum Storage (GB)
The minimum amount of storage space that can
be configured for ApsaraDB RDS.
Maximum Storage (GB)
The maximum amount of storage space that
can be configured for ApsaraDB RDS.
Specifications Name
The name of the specifications that can be
configured for ApsaraDB RDS.
Version The version number of ApsaraDB RDS.

Apsara Uni-manager Management
Console User Guide/9.Configurations
Document Version:20210130 191
CPUs
The number of CPU cores that can be
configured for ApsaraDB RDS.
Maximum Connections
The maximum number of connections that can
be configured for ApsaraDB RDS.
Storage
The amount of storage space that can be
configured for ApsaraDB RDS.
Memory (GB)
The memory size that can be configured for
ApsaraDB RDS.
Share Type
The share type that can be configured for
ApsaraDB RDS.
PolarDB-X
Parameter Description
Instance Type
The instance type that can be configured for
PolarDB-X.
Instance Type Name
The name of the instance type that can be
configured for PolarDB-X.

Apsara Uni-manager Management
Console User Guide/9.Configurations
Document Version:20210130 192
Specifications
The specifications that can be configured for
PolarDB-X.
Specifications Name
The name of the specifications that can be
configured for PolarDB-X.
ECS
Parameter Description
Instance Family
The instance family that is divided into different
instance types based on the scenarios for
which they are suitable.
Specifications Level
The level of the specifications that can be
configured for Elastic Compute Service (ECS).
vCPUs
The maximum number of vCPUs that can be
configured for ECS.
Memory (GB)
The memory size that can be configured for
ECS.
Instance Specifications
The instance type that can be configured for
ECS.

Apsara Uni-manager Management
Console User Guide/9.Configurations
Document Version:20210130 193
GPU Type The GPU type that can be configured for ECS.
GPUs
The number of GPUs that can be configured for
ECS.
Supported ENIs
The number of Elastic Network Interfaces
(ENIs) that can be configured for ECS.
Number Of Private IP Addresses
The number of private IP addresses that can be
configured for ECS.
IPv6 Translation Service
Parameter Description
Specifications
The specifications that can be configured for
IPv6 Translation Service.
Specifications Name
The name of the specifications that can be
configured for IPv6 Translation Service.
KVStore for Redis
Parameter Description

Apsara Uni-manager Management
Console User Guide/9.Configurations
Document Version:20210130 194
Specifications Name
The name of the specifications that can be
configured for KVStore for Redis.
Instance Specifications
The instance type that can be configured for
KVStore for Redis.
Maximum Connections
The maximum number of connections that can
be configured for KVStore for Redis.
Maximum Bandwidth
The maximum bandwidth that can be
configured for KVStore for Redis.
CPUs
The number of CPU cores that can be
configured for KVStore for Redis.
Version The version number of KVStore for Redis.
Architecture The architecture of KVStore for Redis.
Node Type The node type of KVStore for Redis.
Service Plan
The service plan that can be configured for
KVStore for Redis.
ApsaraDB for MongoDB

Apsara Uni-manager Management
Console User Guide/9.Configurations
Document Version:20210130 195
Parameter Description
Specifications
The specifications that can be configured for
ApsaraDB for MongoDB.
Specifications Name
The name of the specifications that can be
configured for ApsaraDB for MongoDB.
Engine Type
The engine type that can be configured for
ApsaraDB for MongoDB.
Version
The version number of ApsaraDB for
MongoDB.
Serial Number The serial number of ApsaraDB for MongoDB.
Sequence Description
The description of the serial number of
ApsaraDB for MongoDB.
Maximum Connections
The maximum number of connections that can
be configured for ApsaraDB for MongoDB.
IOPS
The input/output operations per second (IOPS)
of ApsaraDB for MongoDB.

Apsara Uni-manager Management
Console User Guide/9.Configurations
Document Version:20210130 196
Storage Space
The amount of storage space that can be
configured for ApsaraDB for MongoDB.
Minimum Storage
The minimum amount of storage space that can
be configured for ApsaraDB for MongoDB.
Maximum Storage
The maximum amount of storage space that
can be configured for ApsaraDB for MongoDB.
9.3.2. Create specifications
You can customize specifications for each resource type.
Procedure
1. Log on to the Apsara Uni-manager Management Console as a platform administrator.
2. In the top navigation bar, click Configurations.
3. In the left-side navigation pane of the Configurations page, click Specifications.
4. Select the resource type for which you want to create specifications and click the Resource
Specifications tab.
5. On the Resource Specifications tab, click Create Specifications in the upper-right corner.
6. In the dialog box that appears, set the specifications parameters.For more information about
specification parameters, see Specification parameters.
7. Click OK.

Apsara Uni-manager Management
Console User Guide/9.Configurations
Document Version:20210130 197
9.3.3. View specifications
You can view the specifications of each resource type.
Procedure
1. Log on to the Apsara Uni-manager Management Console as an administrator.
2. In the top navigation bar, click Configurations.
3. In the left-side navigation pane of the Configurations page, click Specifications.
4. Click the resource type for which you want to view specifications.
5. On the Resource Specifications tab, set a region, column, and value. The corresponding
information is displayed in the specifications list.
6. Click the Existing Specifications tab and view the existing specifications and their quantity.
9.3.4. Disable specifications
By default, the status of newly created specifications is Enabled.
Procedure
1. Log on to the Apsara Uni-manager Management Console as an administrator.
2. In the top navigation bar, click Configurations.
3. In the left-side navigation pane of the Configurations page, click Specifications.
4. Select the resource type for which you want to disable specifications.
5. Click Disable in the Actions column corresponding to the target specifications.
6. In the message that appears, click OK.

Apsara Uni-manager Management
Console User Guide/9.Configurations
Document Version:20210130 198
9.3.5. Export specifications
You can export specifications that you want to view and share.
Procedure
1. Log on to the Apsara Uni-manager Management Console as a platform administrator.
2. In the top navigation bar, click Configurations.
3. In the left-side navigation pane of the Configurations page, click Specifications.
4. Click the resource type whose specifications are created.
5. In the upper-right corner of the page, click Export.
6. Save the specifications file to a path.
9.3.6. View specifications of each resource type in previous
versions
You can view specifications of each resource type in previous versions.
Procedure
1. Log on to the Apsara Uni-manager Management Console as an administrator.
2. In the top navigation bar, click Configurations.
3. In the left-side navigation pane of the Configurations page, click Specifications.
4. On the Specifications page, click the resource type for which you want to view specifications.
5. Click the Specifications History tab. View the detailed information in the specifications list.
9.4. Message center

Apsara Uni-manager Management
Console User Guide/9.Configurations
Document Version:20210130 199
9.4.1. View internal messages
You can view the IDs and creation time of all internal messages, including unread and read messages.
Context
When an instance is created in a resource, all users that have read and operation permissions on this
resource will receive the message that the instance is created.
Procedure
1. Log on to the Apsara Uni-manager Management Console as an administrator.
2. In the top navigation bar, move the pointer over the icon and click More.
3. In the left-side navigation pane of the Message Center page, click the target message scope.
o Choose Internal Messages > All Messages to view all messages, including unread and read
messages.
o Choose Internal Messages > Unread Messages to view unread messages.
o Choose Internal Messages > Read Messages to view read messages.
9.4.2. Mark messages as read
You can mark unread messages as read messages to facilitate message management.
Procedure
1. Log on to the Apsara Uni-manager Management Console as an administrator.
2. In the top navigation bar, move the pointer over the icon and click More.

Apsara Uni-manager Management
Console User Guide/9.Configurations
Document Version:20210130 200
3. In the left-side navigation pane of the Message Center page, choose Internal Messages >
Unread Messages.In the upper part of the Unread Messages page, click different message
types to filter messages.
4. On the Unread Messages page, find the message that you want to mark as read and click Mark
as Read in the Actions column.You can also select the check boxes to the left of messages and
click Batch Read in the lower-left corner of the page.
5. In the Mark as Read message, click OK.
9.4.3. Delete a message
You can delete messages that are no longer needed.
Procedure
1. Log on to the Apsara Uni-manager Management Console as an administrator.
2. In the top navigation bar, move the pointer over the icon and click More.
3. In the left-side navigation pane of the Message Center page, choose Internal Messages >
Unread Messages.
4. Find the message that you want to delete on the All Messages tab or other tabs and click
Delete.You can also select the check box to the left of the ID of the message that you want to
delete and click Batch Delete in the lower-left corner of the page.
9.5. Resource pool management
You can modify the maximum usage of each resource.
Prerequisites

Apsara Uni-manager Management
Console User Guide/9.Configurations
Document Version:20210130 201
If the physical inventory is unlimited, the logical inventory cannot be less than the used inventory.
If the physical inventory is limited, the logical inventory cannot be less than the used inventory or
greater than the physical inventory.
Procedure
1. Log on to the Apsara Uni-manager Management Console as an administrator.
2. In the top navigation bar, click Configurations.
3. In the left-side navigation pane of the Configurations page, click Resource Pool Management.
4. On the Resource Pools page, click the icon in the module that you want to modify and
modify the number of resources.
5. Click the icon to complete modification.

Apsara Uni-manager Management
Console User Guide/10.Operations
Document Version:20210130 202
10.Operations
10.1. Quotas
10.1.1. Quota parameters
This topic describes the quota parameters of each service.
An organization administrator can set resource quotas and create resources within the allowed quotas
for the organization. When the quotas for the organization are used up, the system does not allow the
organization administrator to create more resources for the organization. To create more resources,
you must first increase the quotas for the organization.
If no quotas are set, you can create an unlimited amount of resources.
ECS
Parameter Description
CPU Quota (Cores)
The total number of CPU cores that you can configure for
Elastic Compute Service (ECS) and the number of used
cores.
Memory Quota (GB) The total memory size that you can configure for ECS.
GPU Quota (Cores)
The total number of GPU cores that you can configure for
ECS.

Apsara Uni-manager Management
Console User Guide/10.Operations
Document Version:20210130 203
SSD Quota (GB) The total SSD capacity that you can configure for ECS.
Ultra Disk Quota (GB)
The total number of disks that you can configure for an
ECS instance.
VPC
Parameter Description
VPC Quota
The maximum number of virtual private clouds (VPCs)
that you can configure.
OSS
Parameter Description
OSS Quota (GB)
The maximum capacity that you can allocate for Object
Storage Service (OSS).
RDS-MySQL
Parameter Description

Apsara Uni-manager Management
Console User Guide/10.Operations
Document Version:20210130 204
CPU Quota (Cores)
The total number of CPU cores that you can configure for
ApsaraDB RDS for MySQL and the number of used
cores.
Memory Quota (GB)
The total memory size that you can configure for
ApsaraDB RDS for MySQL.
Disk Quota (GB)
The total storage size that you can configure for
ApsaraDB RDS for MySQL.
RDS-PolarDB
Parameter Description
CPU Quota (Cores)
The total number of CPU cores that you can configure for
PolarDB and the number of used cores.
Memory Quota (GB)
The total memory size that you can configure for
PolarDB.
Disk Quota (GB) The total storage size that you can configure for PolarDB.
RDS-SQLServer
Parameter Description

Apsara Uni-manager Management
Console User Guide/10.Operations
Document Version:20210130 205
CPU Quota (Cores)
The total number of CPU cores that you can configure for
ApsaraDB RDS for SQL Server and the number of used
cores.
Memory Quota (GB)
The total memory size that you can configure for
ApsaraDB RDS for SQL Server.
Disk Quota (GB)
The total storage size that you can configure for
ApsaraDB RDS for SQL Server.
RDS-PostgreSQL
Parameter Description
CPU Quota (Cores)
The total number of CPU cores that you can configure for
ApsaraDB RDS for PostgreSQL and the number of used
cores.
Memory Quota (GB)
The total memory size that you can configure for
ApsaraDB RDS for PostgreSQL.
Disk Quota (GB)
The total storage size that you can configure for
ApsaraDB RDS for PostgreSQL.
SLB

Apsara Uni-manager Management
Console User Guide/10.Operations
Document Version:20210130 206
Parameter Description
Virtual IP Quota (a)
The maximum number of internal IP addresses that you
can configure for Server Load Balancer (SLB).
Public Virtual IP Quota
The maximum number of public IP addresses that you
can configure for SLB.
EIP
Parameter Description
EIP Quota
The maximum number of elastic IP addresses (EIPs) that
you can configure.
MaxCompute
Parameter Description
CU Quota (a)
The total number of capacity units (CUs) that you can
configure for MaxCompute.
Disk Quota (GB)
The total storage size that you can configure for
MaxCompute.

Apsara Uni-manager Management
Console User Guide/10.Operations
Document Version:20210130 207
Redis
Parameter Description
Memory Quota (GB)
The total memory size that you can configure for KVStore
for Redis.
DRDS
Parameter Description
CPU Quota (Cores)
The total number of CPUs that you can configure for
PolarDB-X.
NAS
Parameter Description
Disk Quota (TB)
The total storage size that you can configure for Apsara
File Storage NAS.
GPDB
Parameter Description

Apsara Uni-manager Management
Console User Guide/10.Operations
Document Version:20210130 208
CPU Quota (Cores)
The total number of CPU cores that you can configure for
AnalyticDB for PostgreSQL and the number of used
cores.
Memory Quota (GB)
The total memory size that you can configure for
AnalyticDB for PostgreSQL.
Disk Quota (GB)
The total storage size that you can configure for
AnalyticDB for PostgreSQL.
ADB
Parameter Description
CPU Quota (Cores)
The total number of CPU cores that you can configure for
AnalyticDB for MySQL V3.0 and the number of used
cores.
Memory Quota (GB)
The total memory size that you can configure for
AnalyticDB for MySQL V3.0.
Disk Quota (GB)
The total storage size that you can configure for
AnalyticDB for MySQL V3.0.
MongoDB

Apsara Uni-manager Management
Console User Guide/10.Operations
Document Version:20210130 209
Parameter Description
CPU Quota (Cores)
The total number of CPU cores that you can configure for
ApsaraDB for MongoDB and the number of used cores.
Memory Quota (GB)
The total memory size that you can configure for
ApsaraDB for MongoDB.
Disk Quota (GB)
The total storage size that you can configure for
ApsaraDB for MongoDB.
AnalyticDB for MySQL V2.0
Parameter Description
CPU Quota (Cores)
The total number of CPU cores that you can configure for
AnalyticDB for MySQL V2.0 and the number of used
cores.
Memory Quota (GB)
The total memory size that you can configure for
AnalyticDB MySQL V2.0.
10.1.2. Set quotas for a cloud service
The Apsara Uni-manager Management Console allows you to set quotas to properly allocate resources
among organizations.

Apsara Uni-manager Management
Console User Guide/10.Operations
Document Version:20210130 210
Prerequisites
You must set quotas for a parent organization before you can set quotas for its subordinate
organizations.
Context
If the parent organization has quotas (except when the parent organization is a level-1 organization),
the available quotas for a subordinate organization are equal to the quotas for the parent organization
minus the quotas for other subordinate organizations.
This topic describes how to modify quotas for Elastic Compute Service (ECS). You can modify quotas
for other cloud resources in a similar manner.
Procedure
1. Log on to the Apsara Uni-manager Management Console as an administrator.
2. In the top navigation bar, click Operations.
3. In the left-side navigation pane of the Operations page, click Quotas.
4. In the left-side navigation tree, click the name of the organization for which you want to create
cloud resources.
5. Select the cloud service for which you want to set quotas. In this example, ECS is selected.
6. In the upper-right corner of the quota section, click Set.
7. Set the total quotas and click Save.
For more information about quota parameters, see Quota parameters.

Apsara Uni-manager Management
Console User Guide/10.Operations
Document Version:20210130 211
10.1.3. Modify quotas
Administrators can adjust quotas for cloud resources based on organizational requirements.
Context
This topic describes how to modify quotas for ECS. You can modify quotas for other cloud resources in
a similar manner.
Procedure
1. Log on to the Apsara Uni-manager Management Console as an administrator.
2. In the top navigation bar, click Operations.
3. In the left-side navigation pane of the Operations page, click Quotas.
4. In the left-side navigation tree, click the name of the organization for which you want to create
cloud resources.
5. Select the Apsara Stack service for which you want to modify quotas. For this example, ECS is
selected.
6. In the upper-right corner of the quota area, click Modify.
7. Set the total quotas and click Save.
For more information about quota parameters, see Quota parameters.
10.1.4. Reset quotas
Administrators can reset quotas as needed.

Apsara Uni-manager Management
Console User Guide/10.Operations
Document Version:20210130 212
Prerequisites
Before deleting a quota for an organization, make sure that no subordinate organizations have any
quotas.
Procedure
1. Log on to the Apsara Uni-manager Management Console as an administrator.
2. In the top navigation bar, click Operations.
3. In the left-side navigation pane of the Operations page, click Quotas.
4. In the left-side organization navigation tree, click the name of the target organization.
5. Select the cloud service for which you want to reset quotas. For this example, ECS is selected.
6. In the upper-right corner of the quota section, click Reset.
7. In the message that appears, click OK.
10.2. Usage statistics
10.2.1. View the usage statistics of cloud resources
The Apsara Uni-manager Management Console displays statistics about the number of resource
instances that run in the Apsara Stack environment by time, organization, resource set, or region. You
can also export statistical reports from the Apsara Uni-manager Management Console.
Context
The cloud resources that can be metered include Elastic Compute Service (ECS), Virtual Private Cloud
(VPC), Server Load Balancer (SLB), Object Storage Service (OSS), ApsaraDB RDS for MySQL, Elastic

Apsara Uni-manager Management
Console User Guide/10.Operations
Document Version:20210130 213
IP Address (EIP), Apsara File Storage NAS, Tablestore, PolarDB-X, KVStore for Redis, AnalyticDB for
MySQL, AnalyticDB for PostgreSQL, ApsaraDB for MongoDB, Message Queue (MQ), ApsaraDB RDS
for PostgreSQL, ApsaraDB RDS for SQL Server, Log Service, ECS disks, scaling group rules,
ApsaraDB for HBase, API gateways, Key Management Service (KMS), AnalyticDB for MySQL V2.0,
and Time Series Database (TSDB).
This topic describes how to modify quotas for ECS. You can set quotas for other cloud resources in a
similar manner.
Procedure
1. Log on to the Apsara Uni-manager Management Console.
2. In the top navigation bar, click Operations.
3. In the left-side navigation pane of the Operations page, click Usage Statistics.
4. In the Resource Type section, click Elastic Compute Service ECS.
5. In the Search Conditions section, set Time Period, Organization, Resource Set, Region, and
Instance ID to filter resources.You can view the statistics in the console or click Export in the
upper-right corner to export the statistics to your local computer in the XLS format.
Note In the console, you can view or export up to 1,000 statistical records to an Excel file. Use
the statistics query API to obtain more statistical data.
The exported file is named <Resource type name>.xls. Find the downloaded file from the
download path of the browser.

Apsara Uni-manager Management
Console User Guide/10.Operations
Document Version:20210130 214
10.3. Statistical analysis
10.3.1. View reports of current data
You can use reports to view the latest data of each service.
Procedure
1. Log on to the Apsara Uni-manager Management Console.
2. In the top navigation bar, click Operations.
3. In the left-side navigation pane of the Operations page, choose Statistical Analysis > Reports.
4. Click the tab that you want to view.
You can click the Resource Reports, Quota Reports, or Cloud Monitor Reports tab.
5. Set Organizations and Resource Sets and Region and click Search.
You can select the check box to the left of a resource and click Export Selected Reports in the
lower-left corner to export the report.
10.3.2. Export reports of current data
You can batch export data that you want to view by cloud service.
Procedure
1. Log on to the Apsara Uni-manager Management Console.
2. In the top navigation bar, click Operations.
3. In the left-side navigation pane of the Operations page, choose Statistical Analysis > Reports.
4. Click the tab that you want to view.

Apsara Uni-manager Management
Console User Guide/10.Operations
Document Version:20210130 215
You can click the Resource Reports, Quota Reports, or Cloud Monitor Reports tab.
5. Click Export Reports on the right side of the page.
6. In the Select Products to Export dialog box, select the check box to the left of a service and
click OK.
You can also select Select All in the lower-left corner and click OK.
10.3.3. Download reports of historical data
You can download data reports of cloud services within the specified period of time, resource set, and
region by creating download tasks.
Procedure
1. Log on to the Apsara Uni-manager Management Console.
2. In the top navigation bar, click Operations.
3. In the left-side navigation pane of the Operations page, choose Statistical Analysis > Download
Center.
4. In the upper-right corner of the page, click Create Download Task.
Enter the information of the download task.

Apsara Uni-manager Management
Console User Guide/10.Operations
Document Version:20210130 216
Parameter Description
Report Name The name of the report.
Report Type
The type of the report. Valid values:
o Resource Reports
o Cloud Monitor Reports
Product
The cloud service for which you want to download
reports. You can select multiple cloud services.

Apsara Uni-manager Management
Console User Guide/10.Operations
Document Version:20210130 217
Start Time The start time of the data.
End Time The end time of the data.
Organizations and Resource
Sets
The organization to which the data belongs. You can
select multiple organizations.
Region
The region of the data. You can select multiple
regions.
5. Click OK.
6. After the Created message appears, the Download Center page appears. Enter the information
of the created report in the search box and click Search to search for the created download
task.
7. After In Progress changes to Completed in the Status column, click Download Report in the
Actions column.

Apsara Uni-manager Management
Console User Guide/11.Security
Document Version:20210130 218
11.Security
11.1. View operations logs
You can view operations logs to obtain up-to-date information for various resources and functional
modules in the Apsara Uni-manager Management Console. You can also export operations logs to your
PC.
Procedure
1. Log on to the Apsara Uni-manager Management Console as a security administrator.
2. In the top navigation bar, click Security.
3. You can filter logs by username, object, level, source IP address, details, start time, and end
time.
The following table describes the fields in the query result.
Fields in the query result
Log field Description
Username The name of the operator.
Object
The Apsara Stack service on which operations are performed. The
operations include creating, modifying, deleting, querying, updating,
binding, unbinding, enabling and disabling service instances, applying

Apsara Uni-manager Management
Console User Guide/11.Security
Document Version:20210130 219
for and releasing service instances, and changing the ownership of
service instances.
Level The operation level. Valid values: INFO, DEBUG, and ERROR.
Source IP The IP address of the operator.
Details A brief introduction of the operation.
Start Time The time when the operation started.
End Time The time when the operation ended.
4. (Optional)Click Export to export the logs displayed on the current page to your PC in the XLS
format.
The exported log file is named log.xls and stored in the C:\Users\Username\Downloads
directory.

Apsara Uni-manager Management
Console User Guide/12.RAM
Document Version:20210130 220
12.RAM
12.1. RAM introduction
Resource Access Management (RAM) is a resource access control service provided by Apsara Stack.
You can use RAM to manage users and control which resources are accessible to employees,
systems, and applications.
RAM provides the following features:
RAM role
To authorize a cloud service in a level-1 organization to use other resources in the organization,
you must create a RAM role. This role specifies the operations that the cloud service can perform
on resources.
Only system administrators and level-1 organization administrators can create RAM roles.
User group
You can create multiple users within an organization and grant them different operation
permissions on cloud resources.
You can create RAM user groups to classify and authorize RAM users within your Apsara Stack
tenant account. This simplifies the management of RAM users and their permissions.
You can create RAM permission policies to grant different operation permissions to different user
groups.

Apsara Uni-manager Management
Console User Guide/12.RAM
Document Version:20210130 221
12.2. Permission policy structure and syntax
This topic describes the structure and syntax used to create or update permission policies in Resource
Access Management (RAM).
Policy characters and usage rules
Characters in a policy
o The following characters are JSON tokens and are included in policies: { } [ ] " , :.
o The following characters are special characters in the syntax and are not included in policies: =
< > ( ) |.
Use of characters
o If an element can have more than one value, you can perform the following operations:
Separate multiple values by using commas (,) as delimiters between each value and use an
ellipsis (...) to describe the remaining values. Example: [ <action_string>, <action_string>, ...].
Include only one value. Examples: "Action": [<action_string>] and "Action": <action_string>.
o A question mark (?) following an element indicates that the element is optional. Example:
<condition_block? >.
o A vertical bar (|) between elements indicates multiple options. Example: ("Allow" | "Deny").
o Elements that must be text strings are enclosed in double quotation marks (""). Example:
<version_block> = "Version" : ("1").
Policy structure
The policy structure includes the following components:

Apsara Uni-manager Management
Console User Guide/12.RAM
Document Version:20210130 222
The version number.
A list of statements. Each statement contains the following elements: Effect, Action, Resource,
and Condition. The Condition element is optional.
Policy syntax
policy = {
<version_block>,
<statement_block>
}
<version_block> = "Version" : ("1")
<statement_block> = "Statement" : [ <statement>, <statement>, ... ]
<statement> = {
<effect_block>,

Apsara Uni-manager Management
Console User Guide/12.RAM
Document Version:20210130 223
<action_block>,
<resource_block>,
<condition_block? >
}
<effect_block> = "Effect" : ("Allow" | "Deny")
<action_block> = ("Action" | "NotAction") :
("*" | [<action_string>, <action_string>, ...])
<resource_block> = ("Resource" | "NotResource") :
("*" | [<resource_string>, <resource_string>, ...])
<condition_block> = "Condition" : <condition_map>
<condition_map> = {
<condition_type_string> : {
<condition_key_string> : <condition_value_list>,
<condition_key_string> : <condition_value_list>,
...
},
<condition_type_string> : {
<condition_key_string> : <condition_value_list>,
<condition_key_string> : <condition_value_list>,
...
}, ...

Apsara Uni-manager Management
Console User Guide/12.RAM
Document Version:20210130 224
}
<condition_value_list> = [<condition_value>, <condition_value>, ...]
<condition_value> = ("String" | "Number" | "Boolean")
Description:
The current policy version is 1.
The policy can have multiple statements.
o The effect of each statement can be either Allow or Deny.
Note In a statement, both the Action and Resource elements can have multiple values.
o Each statement can have its own conditions.
Note A condition block can contain multiple conditions with different operators and logical
combinations of these conditions.
You can attach multiple policies to a RAM user. If policies that apply to a request include an Allow
statement and a Deny statement, the Deny statement overrides the Allow statement.
Element value:
o If an element value is a number or Boolean value, it must be enclosed in double quotation
marks ("") in the same way as strings.
o If an element value is a string, characters such as the asterisk (*) and question mark (?) can be
used for fuzzy matching.

Apsara Uni-manager Management
Console User Guide/12.RAM
Document Version:20210130 225
The asterisk (*) indicates any number (including zero) of allowed characters. For example,
ecs:Describe* indicates all ECS API operations that start with Describe.
The question mark (?) indicates an allowed character.
Policy format check
Policies are stored in RAM as JSON documents. When you create or update a policy, RAM first checks
whether the JSON format is valid.
For more information about JSON syntax standards, see RFC 7159.
We recommend that you use tools such as JSON validators and editors to check whether the
policies meet JSON syntax standards.
12.3. RAM roles
12.3.1. View basic information about a RAM role
You can view basic information about a RAM role, including its user groups and existing permission
policies.
Procedure
1. Log on to the Apsara Uni-manager Management Console as an administrator.
2. In the top navigation bar, click Enterprise.
3. In the left-side navigation pane of the Enterprise page, click Roles.
4. On the Roles page, click the name of the target RAM role.

Apsara Uni-manager Management
Console User Guide/12.RAM
Document Version:20210130 226
5. In the basic information section, click the User Groups and Permissions tabs to view relevant
information.
12.3.2. Create a RAM role
To authorize a cloud service in a level-1 organization to use other resources in the organization, you
must create a RAM role. This role contains the operations that the cloud service can perform on
resources.
Procedure
1. Log on to the Apsara Uni-manager Management Console as an administrator.
2. In the top navigation bar, click Enterprise.
3. In the left-side navigation pane of the Enterprise page, click Roles.
4. In the upper-right corner of the page, click Create RAM Role.
5. On the Roles - Create RAM Role page, set Role Name, Description, and Sharing Scope.Valid
values of the Sharing Scope parameter:
o Global
The role is visible and valid to all organizations involved. The default value is Global.
o Current Organization
The role is visible and valid to the organization to which the user belongs.
o Subordinate Organization

Apsara Uni-manager Management
Console User Guide/12.RAM
Document Version:20210130 227
The role is visible and valid to the organization to which the user belongs and its subordinate
organizations.
6. Click Create.
12.3.3. Create a policy
To use a cloud service to access other cloud resources, you must create a policy and attach it to a user
group.
Procedure
1. Log on to the Apsara Uni-manager Management Console as an administrator.
2. In the top navigation bar, click Enterprise.
3. In the left-side navigation pane of the Enterprise page, click Roles.
4. In the role name list, find the RAM role that you want to modify and choose More > Modify in the
Actions column to go to the Roles page.
5. Click the Permissions tab.
6. Click Add Permission Policy.
7. In the Add Permission Policy dialog box, enter information of the policy.

Apsara Uni-manager Management
Console User Guide/12.RAM
Document Version:20210130 228
For more information about how to enter the policy content, see Permission policy structure and
syntax.
12.3.4. Modify the content of a RAM policy
You can modify the content of a RAM policy.
Procedure
1. Log on to the Apsara Uni-manager Management Console as an administrator.
2. In the top navigation bar, click Enterprise.
3. In the left-side navigation pane of the Enterprise page, click Roles.
4. In the role list, find the RAM role that you want to modify and choose More > Modify in the
Actions column to go to the Roles page.

Apsara Uni-manager Management
Console User Guide/12.RAM
Document Version:20210130 229
5. Click the Permissions tab.
6. Click the name of a policy in the Permission Policy Name column.
7. In the Modify Permission Policy dialog box, modify the relevant information and click OK.For
more information about how to modify the policy content, see Permission policy structure and
syntax.
12.3.5. Modify the name of a RAM policy
You can modify the name of a RAM policy.
Procedure
1. Log on to the Apsara Uni-manager Management Console as an administrator.
2. In the top navigation bar, click Enterprise.
3. In the left-side navigation pane of the Enterprise page, click Roles.
4. In the role name list, find the RAM role that you want to modify and choose More > Modify in the
Actions column to go to the Roles page.
5. Click the Permissions tab. Click the name of that policy that you want to modify in the
Permission Policy Name column.
6. In the Modify Permission Policy dialog box, modify the policy name.
12.3.6. Add a RAM role to a user group
You can bind RAM roles to user groups.
Prerequisites
Apsara Uni-manager Management
Console User Guide/12.RAM
Document Version:20210130 230
You must create a user group before RAM roles can be added. For more information, see Add a role.
Procedure
1. Log on to the Apsara Uni-manager Management Console as an administrator.
2. In the top navigation bar, click Enterprise.
3. In the left-side navigation pane of the Enterprise page, click Roles.
4. In the role name list, find the RAM role that you want to modify and choose More > Modify in the
Actions column to go to the Roles page.
5. Click the User Groups tab.
6. Click Add User Group. In the Add User Group dialog box, select a user group.
7. Click OK.
12.3.7. Grant permissions to a RAM role
When you grant permissions to a RAM role, all users in the user groups that are assigned this role
share the granted permissions.
Procedure
1. Log on to the Apsara Uni-manager Management Console as an administrator.
2. In the top navigation bar, click Enterprise.
3. In the left-side navigation pane of the Enterprise page, click Roles.
4. In the role list, find the RAM role that you want to modify and choose More > Modify in the
Actions column to go to the Roles page.

Apsara Uni-manager Management
Console User Guide/12.RAM
Document Version:20210130 231
5. Click the Permissions tab.
6. Click Select Existing Permission Policy.
7. In the dialog box that appears, select a RAM policy and click OK.If no RAM policies are
available, see Add a permission policy.
12.3.8. Remove permissions from a RAM role
You can remove permissions that are no longer needed from RAM roles.
Procedure
1. Log on to the Apsara Uni-manager Management Console as an administrator.
2. In the top navigation bar, click Enterprise.
3. In the left-side navigation pane of the Enterprise page, click Roles.
4. In the role list, find the RAM role that you want to modify and choose More > Modify in the
Actions column to go to the Roles page.
5. Click the Permissions tab.
6. Find the policy that you want to remove and click Remove in the Actions column.
12.3.9. Modify a RAM role name
Administrators can modify the names of RAM roles.
Context
The name of a preset role cannot be modified.
Procedure

Apsara Uni-manager Management
Console User Guide/12.RAM
Document Version:20210130 232
1. Log on to the Apsara Uni-manager Management Console as an administrator.
2. In the top navigation bar, click Enterprise.
3. In the left-side navigation pane of the Enterprise page, click Roles.
4. In the role name list, find the RAM role that you want to modify and choose More > Modify in the
Actions column to go to the Roles page.
5. Move the pointer over the role name and click the icon to enter a new role name.
12.3.10. Delete a RAM role
This topic describes how to delete a RAM user.
Prerequisites
Before you delete a RAM role, make sure that no policies are attached to the RAM role.
Procedure
1. Log on to the Apsara Uni-manager Management Console as an administrator.
2. In the top navigation bar, click Enterprise.
3. In the left-side navigation pane of the Enterprise page, click Roles.
4. In the role name list, click More in the Actions column corresponding to a RAM role, and choose
Delete from the shortcut menu.
5. In the message that appears, click OK.
12.4. RAM authorization policies

Apsara Uni-manager Management
Console User Guide/12.RAM
Document Version:20210130 233
12.4.1. Create a RAM role
You can create authorization policies and grant them to organizations.
Procedure
1. Log on to the Apsara Uni-manager Management Console as a platform administrator.
2. In the top navigation bar, click Configurations.
3. In the left-side navigation pane of the Configurations page, click RAM Roles.
4. In the upper-right corner of the page, click Create RAM User.
5. On the Create RAM User page, set Organization and Service.
6. Click OK.
12.4.2. View the details of a RAM role
You can view the details of a RAM role, including its role name, creation time, description, and Alibaba
Cloud Resource Name (ARN).
Procedure
1. Log on to the Apsara Uni-manager Management Console as an administrator.
2. In the top navigation bar, click Configurations.
3. In the left-side navigation pane of the Configurations page, click RAM Roles.
4. On the RAM Users page, set Role Name, Service Name, or Organization Name, and click
Search in the upper-right corner.To perform another search, click Clear.
5. Find the target RAM role and click Details in the Actions column.

Apsara Uni-manager Management
Console User Guide/12.RAM
Document Version:20210130 234
12.4.3. View RAM authorization policies
You can view the details of a RAM authorization policy, including its policy name, policy type, default
version, description, association time, and policy content.
Prerequisites
A RAM authorization policy is created. For more information, see Create a RAM role.
Procedure
1. Log on to the Apsara Uni-manager Management Console as an administrator.
2. In the top navigation bar, click Configurations.
3. In the left-side navigation pane of the Configurations page, click RAM Service Linked Role.
4. On the RAM Roles page, set Role Name or Service Name and click Search in the upper-right
corner.To perform another search, click Clear.
5. Find the RAM role that you want to view and click Details in the Actions column.
6. Click the Role Policy tab to view the information of the role authorization policy. Click Details in
the Actions column to view the policy details.

Apsara Uni-manager Management
Console User Guide/13.Personal
information management
Document Version:20210130 235
13.Personal information management
13.1. Modify personal information
You can modify your personal information to keep it up to date.
Procedure
1. Log on to the Apsara Uni-manager Management Console as an administrator.
2. In the upper-right corner of the homepage, move the pointer over the profile picture and click
User Information.
3. Click the icon next to the item that you want to modify.
4. In the Modify User Information dialog box, modify the relevant information.
5. Click OK.
13.2. Change your logon password
To improve security, you must change your logon password in a timely manner.
Procedure
1. Log on to the Apsara Uni-manager Management Console as an administrator.
2. In the upper-right corner of the homepage, move the pointer over the user profile picture and
choose User Information from the shortcut menu.

Apsara Uni-manager Management
Console User Guide/13.Personal
information management
Document Version:20210130 236
3. Click Change Password. On the page that appears, set Current Password, New Password, and
Confirm Password.
4. Click Submit.
13.3. Switch the current role
You can switch the scope of your current role.
Procedure
1. Log on to the Apsara Uni-manager Management Console as an administrator.
2. In the upper-right corner of the homepage, move the pointer over the user profile picture and
choose User Information from the shortcut menu.

Apsara Uni-manager Management
Console User Guide/13.Personal
information management
Document Version:20210130 237
3. Click Switch Role.
4. In the Switch Role dialog box that appears, select the role that you want to switch to.
You can also switch back to the default role.
13.4. View the AccessKey pair of your Apsara Stack tenant account
To secure cloud resources, the system must verify the identity of visitors and ensure that they have the
relevant permissions. You must obtain the AccessKey ID and AccessKey secret of your personal
account to access cloud resources.
Procedure
1. Log on to the Apsara Uni-manager Management Console as an administrator.
2. In the upper-right corner of the homepage, move the pointer over the user profile picture and
choose User Information from the shortcut menu.
3. In the Apsara Stack AccessKey Pair section, view your AccessKey pair.

Apsara Uni-manager Management
Console User Guide/13.Personal
information management
Document Version:20210130 238
Note The AccessKey pair is made up of the AccessKey ID and AccessKey secret. These
credentials provide you full permissions on Apsara Stack resources. You must keep the
AccessKey pair confidential.
Related Documents