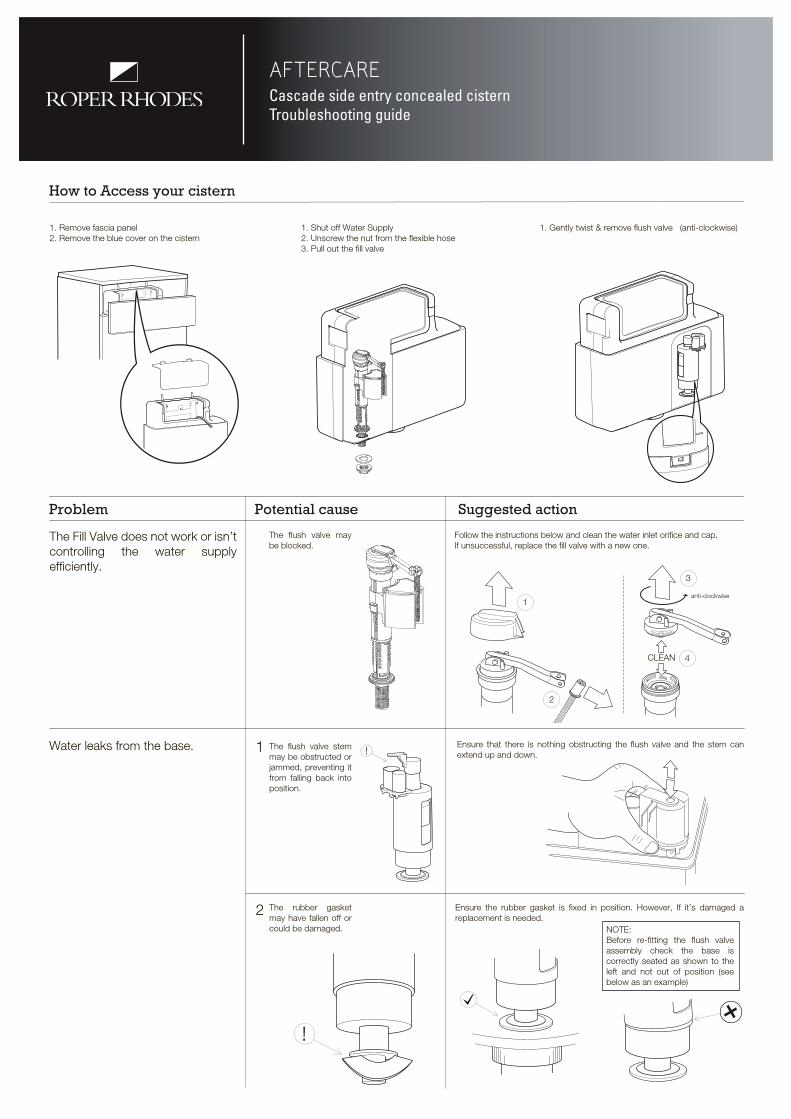
AFTERCARE Cascade side entry concealed cistern Troubleshooting guide

Welcome message from author
This document is posted to help you gain knowledge. Please leave a comment to let me know what you think about it! Share it to your friends and learn new things together.
Transcript
AFTERCARECascade side entry concealed cisternTroubleshooting guide

AFTERCARECascade side entry concealed cisternTroubleshooting guide

AFTERCARECascade side entry concealed cisternTroubleshooting guide - Jamming flush valve
1
Check the flush valve mechanism is fitted as shown here and does not touch / interfere with the cistern casing.
3
Check the rotation of the blue float component. The triangle should point towards the notches, not to the side of them.
2
Remove the flush valve assembly by gripping the body and rotationg anti-clockwise.
4
If the triangle isn’t aligned pointing at the notches the blue float component can catch on the adjustment measure as shown.
Continues on next page >

AFTERCARECascade side entry concealed cisternTroubleshooting guide - Jamming flush valve
5
Before re-fitting the flush valve assembly check the base is correctly seated as shown. Also check there are no damaged (e.g. snapped) comonents.
6
Once re-fitted lift the flush valve piston and release, it should drop back down without any jamming or friction. If the problem persists contact the Roper Rhodes sales office to obtain a replacement flush valve assembly (spare code: SP12166).
AFTERCARECascade side entry concealed cisternFlush volume adjustment
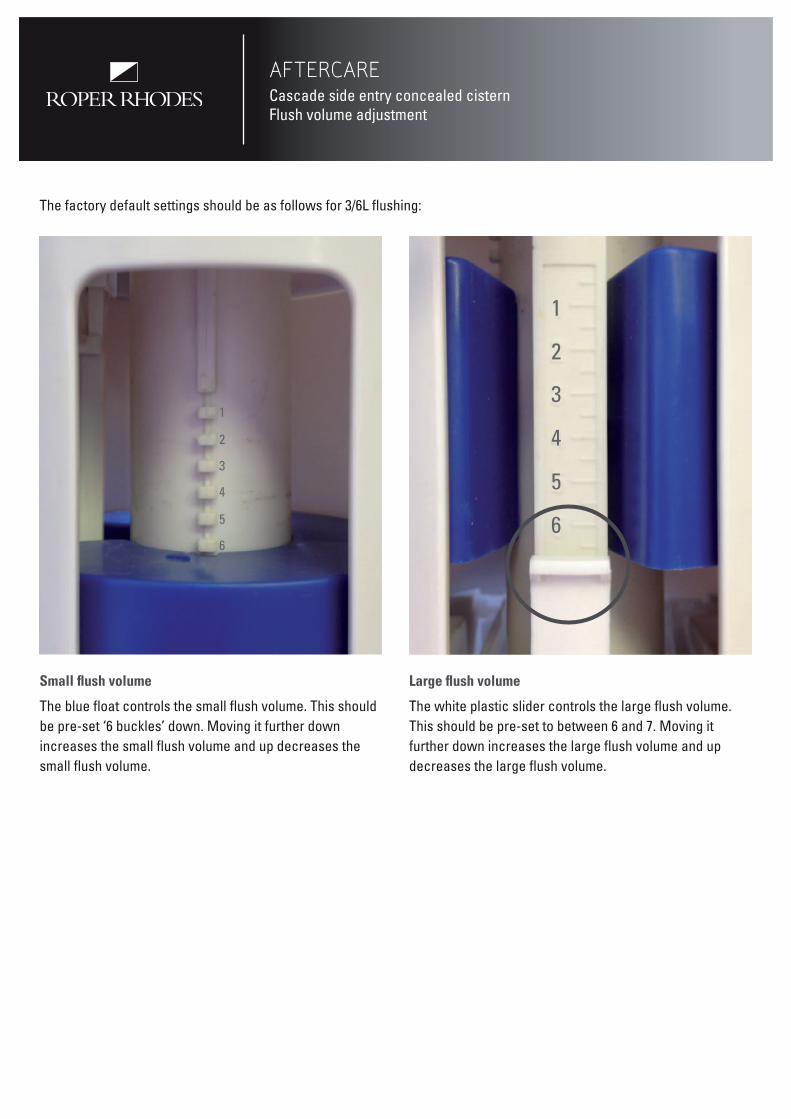
The factory default settings should be as follows for 3/6L flushing:
Small flush volume
The blue float controls the small flush volume. This should be pre-set ‘6 buckles’ down. Moving it further down increases the small flush volume and up decreases the small flush volume.
Large flush volume
The white plastic slider controls the large flush volume. This should be pre-set to between 6 and 7. Moving it further down increases the large flush volume and up decreases the large flush volume.
1
2
3
4
5
6
1
2
3
4
5
6
Related Documents