Welcome message from author
This document is posted to help you gain knowledge. Please leave a comment to let me know what you think about it! Share it to your friends and learn new things together.
Transcript

Advanced Android Mobile Application
2019
Dr. Babasaheb Ambedkar Open University

i
ii
Expert Committee
Prof. (Dr.) Nilesh ModiProfessor and Director, School of Computer Science, Dr. Babasaheb Ambedkar Open University, Ahmedabad
(Chairman)
Prof. (Dr.) Ajay Parikh Professor and Head, Department of Computer ScienceGujarat Vidyapith, Ahmedabad
(Member)
Prof. (Dr.) Satyen ParikhDean, School of Computer Science and ApplicationGanpat University, Kherva, Mahesana
(Member)
Prof. M. T. SavaliyaAssociate Professor and Head, Computer Eng. DepartmentVishwakarma Engineering College, Ahmedabad
(Member)
Dr. Himanshu PatelAssistant Professor, School of Computer Science, Dr. Babasaheb Ambedkar Open University, Ahmedabad
(Member Secretary)
Course Writer
Dr. Chetan GondaliyaAssistant Professor, Department of Computer Science, Ganpat University, KhervaDr. Hiral Patel, Assistant Professor, Department of Computer Science, Ganpat University, KhervaDr. Ashishkumar ParejiyaAssistant Professor, Institute of Information and Communication Technology, Indus University, Ahmedabad
Subject Reviewer
Mrs. Vishakha PatelManager, SWISS Infotech, Bhavnagar
Editors
Prof. (Dr.) Nilesh ModiProfessor and Director, School of Computer Science, Dr. Babasaheb Ambedkar Open University, AhmedabadDr. Himanshu PatelAssistant Professor, School of Computer Science, Dr. Babasaheb Ambedkar Open University, Ahmedabad
Acknowledgement: The content in this book is modifications based on work created and shared by the Android Open Source Project and used according to terms described in the
June 2019, © Dr. Babasaheb Ambedkar Open University
ISBN-978-81-940577-5-8
Printed and published by: Dr. Babasaheb Ambedkar Open University, Ahmedabad

iii

iv
Dr. Babasaheb Ambedkar Open University
PGDMAD-201
Advanced Android Mobile Application
Block-1: Common APIs
Unit-1 Using Content Providers 02
Unit-2 Handling Persisting Data 08
Unit-3 JSON Web Service 16
Block-2: Multimedia
Unit-1 Gallery 25
Unit-2 Drawing 2D and 3D Graphics and Multimedia 36
Unit-3 Drawing and Working with Animation 51
Block-3: Networking, Telephony and Location
Unit-1 Android Networking, Web and Telephony API 59
Unit-2 Search 76
Unit-3 Location and Mapping 117
Unit-4 Communication, Identity, Sync and Social Media 142
v
Block-4: Sensor and Hardware Programming
Unit-1 Sensors 162 Unit-2 NFC 184 Unit-3 Speech, Gestures and Accessibility 195 Unit-4 The Android Native Development Kit (NDK) 205 Block-5: Publishing Android Application
Unit-1 Deploying Android Application to The World 210 Unit-2 Selling Your Android Application 228

1
Block-1
Common APIs
2
Unit 1: Using Content Providers
Unit Structure 1.1 Learning Objectives
1.2 Introduction
1.3 Content Provider
1.4 Accessing Content Provider
1.5 Content URI
1.6 Methods
1.7 Let us sum up
1.8 Check your Progress
1.9 Check your Progress: Possible Answers
1.10 Further Reading
1.11 Assignments
1.12 Activities
1
3
1.1 LEARNING OBJECTIVE
After studying this unit student should be able to:
o Supply data from one application to others on request using Content Provider.
1.2 INTRODUCTION
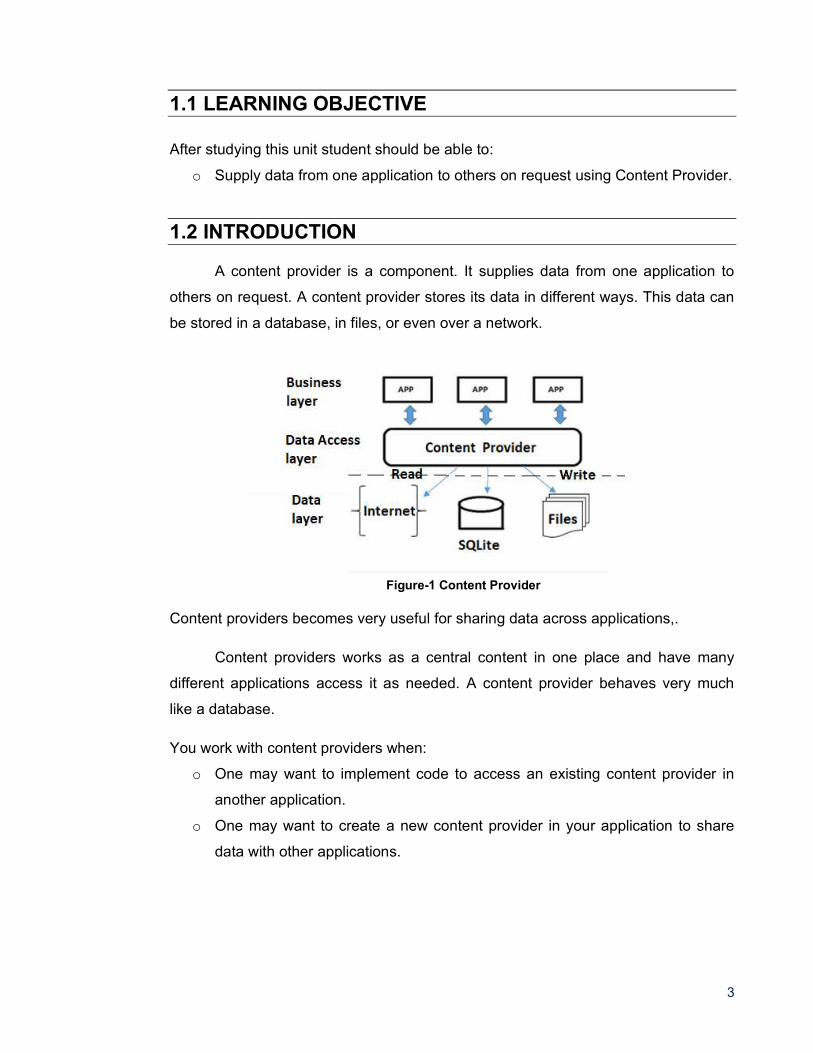
A content provider is a component. It supplies data from one application to
others on request. A content provider stores its data in different ways. This data can
be stored in a database, in files, or even over a network.
Figure-1 Content Provider
Content providers becomes very useful for sharing data across applications,.
Content providers works as a central content in one place and have many
different applications access it as needed. A content provider behaves very much
like a database.
You work with content providers when:
o One may want to implement code to access an existing content provider in
another application.
o One may want to create a new content provider in your application to share
data with other applications.
4
1.3 CONTENT PROVIDER
A content provider:
o Can share of access to your application data from any other applications
o Can send data to a widget or application.
o Can return custom search suggestions for your application through the search
framework using SearchRecentSuggestionsProvider.
o Can synchronize application data with your server using an implementation of
AbstractThreadedSyncAdapter.
o Can load data in your User Interface using a CursorLoader.
1.4 ACCESSING CONTENT PROVIDER
o If you want to access data using content provider, use
the ContentResolver to communicate with
the provider as a client.
o The ContentResolver object communicates with the provider object. This
object receives data requests from clients, performs the requested action, and
returns the results.
o The ContentResolver methods provide the basic "CRUD" (create, retrieve,
update, and delete) operations of a storage.
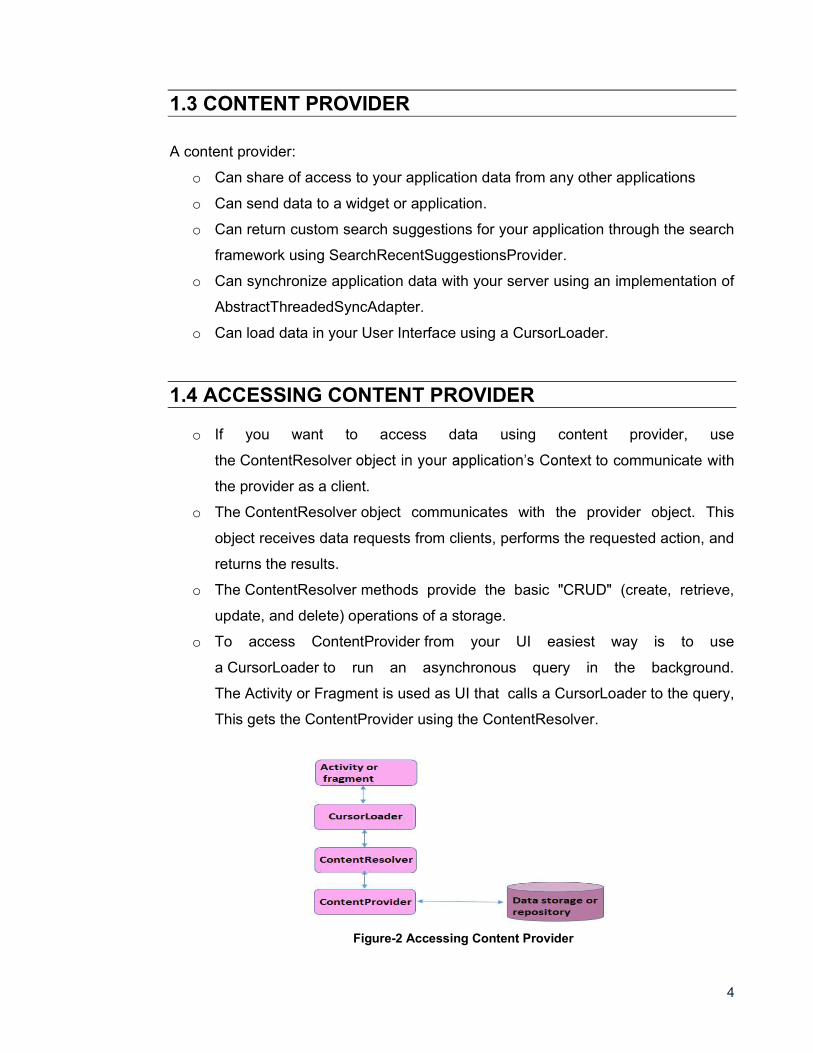
o To access ContentProvider from your UI easiest way is to use
a CursorLoader to run an asynchronous query in the background.
The Activity or Fragment is used as UI that calls a CursorLoader to the query,
This gets the ContentProvider using the ContentResolver.
Figure-2 Accessing Content Provider
5
A content provider is implemented as a subclass of ContentProvider class. public class My Application extends ContentProvider { {
1.5 CONTENT URI
To query a content provider, you specify the query string in the form of a URI which has following format
<prefix>://<authority>/<data_type>/<id>
Description of the URI parts
URI parts
Prefix
The string: // is always present, and identifies this as a content URI.
Authority
This specifies the name of the content provider, for
example contacts, browser etc.
data_type
This indicates the type of data that this particular provider provides.
Id
Many providers allow you to access a single row in a table by appending an ID
value to the end of the URI.
This specifies the specific record requested.
1.6 METHODS
Methods of ContentProvider:
o OnCreate() When the provider is started, this method is used.
o query() method is used to receive a request from a client. The result is
returned as a Cursor object.
6
o insert() method is used to insert a new record into the content provider.
o delete() method is used delete an existing record from the content provider.
o update() method is used to update an existing record from the content
provider.
o getType() method is used to return the MIME(Multipurpose Internet Mail
Extensions) type of the data at the given URI.
1.7 LET US SUM UP
Content Providers: Content provider is a component that supplies data from one
application to others on request.
For accessing Content Providers: Use ContentResolver and CursorLoader.
To query a content provider, use the query string in the form of a URI.
1.8 CHECK YOUR PROGRESS
1. The ContentResolver methods provide the _________ operations of storage
2. Explain the use of content provider in short?
3. Mention the Methods of content provider?
4. In how many ways the content provider stores the data?
1.9 CHECK YOUR PROGRESS: POSSIBLE ANSWERS
1. The ContentResolver methods provide the basic "CRUD" (create, retrieve,
update, and delete) operations of a storage.
2. A content provider is a component.It supplies data from one application to
others on request. Content providers works as a central content in one place
and have many different applications access it as needed. A content provider
behaves very much like a database.
3. Methods of ContentProvider
onCreate()
query()
insert()
7
delete()
update()
getType()
4. A content provider stores its data in different ways. This data can be stored in
a database, in files, or even over a network.
1.10 FURTHER READING Recommended links: http://developer.android.com/
Recommended Books: 1.
Ltd (2011) 2. Teach.Yourself.Android.Application.Development.in.24. Hours. 2nd.Edition. 3. Learning Android-Book by Marko Gargenta (2011)
1.11 ASSIGNMENTS 1. Create an Android app to add name and age and then retrieve the student
record by using content provider.
1.12 ACTIVITIES
1. Work of ContentResolver object?
2. What is use of CursorLoader?
3. Specify the query string in the form of a URI to query a content provider?
4. Mention URI parts of Content URI?
8
Unit 2: Handling Persisting Data Unit Structure 2.1 Learning Objectives
2.2 Introduction
2.3 Storage Options
2.4 Internal storage
2.5 External storage
2.6 SQLite database
2.7 Shared Preferences
2.8 Let us sum up
2.9 Check your Progress
2.10 Check your Progress: Possible Answers
2.11 Further Reading 2.12 Activities
2

9
2.1 LEARNING OBJECTIVE
Learn all the best practices in persisting your data at Android applications with
several options using Handling and persisting data.
learn these several data storage options in android
2.2 INTRODUCTION
Android gives many options for you to save your application data.The option
you choose depends on specific needs, such as storage your data needs, type of
data you need to store, and if you want the data to be private to your application or
accessible to other any other applications or users.
2.3 STORAGE OPTIONS
This different data storage options that are given by Android are:
Shared Preferences
It stores the primitive data that is private in key-value pairs.
Internal Storage
It stores private data on the device memory (which cannot accessed by other
users or applications)
External Storage
It stores public data on the shared external storage or any disk (which can be
shared by external users and applications)
SQLite Databases
It stores the structured data in a private database.
Network Connection
It stores data on the web with your own network server.
2.4 INTERNAL STORAGE
It is storage that is not accessible by the any outsider or user, except
developer. When app is uninstalled the system removes all your apps files. It is
10
mostly used when the developer wants no other user to access his/her application.
Internal storage is the storage of the private data only on the device memory. These
files by default are private an
get deleted, when he/she deletes your application.
2.5 EXTERNAL STORAGE
In built shared storage which is "accessible by any user by plugging in a USB
cable and mounting it as a drive on a host computer".
Example: Removable storage.
Example: SD Card.
file can be read by bufferreader class which has readline method.
2.6 SQLITE DATABASE SQLite is a opensource SQL database that stores data to a text file on a
device. Android comes in with built in SQLite database implementation.It is used to
perform database operations on android devices such as storing, manipulating or
retrieving persistent data from the database.SQLite supports all the relational
database features. In order to access this database, you don't need to establish any
kind of connections for it like JDBC,ODBC e.t.c
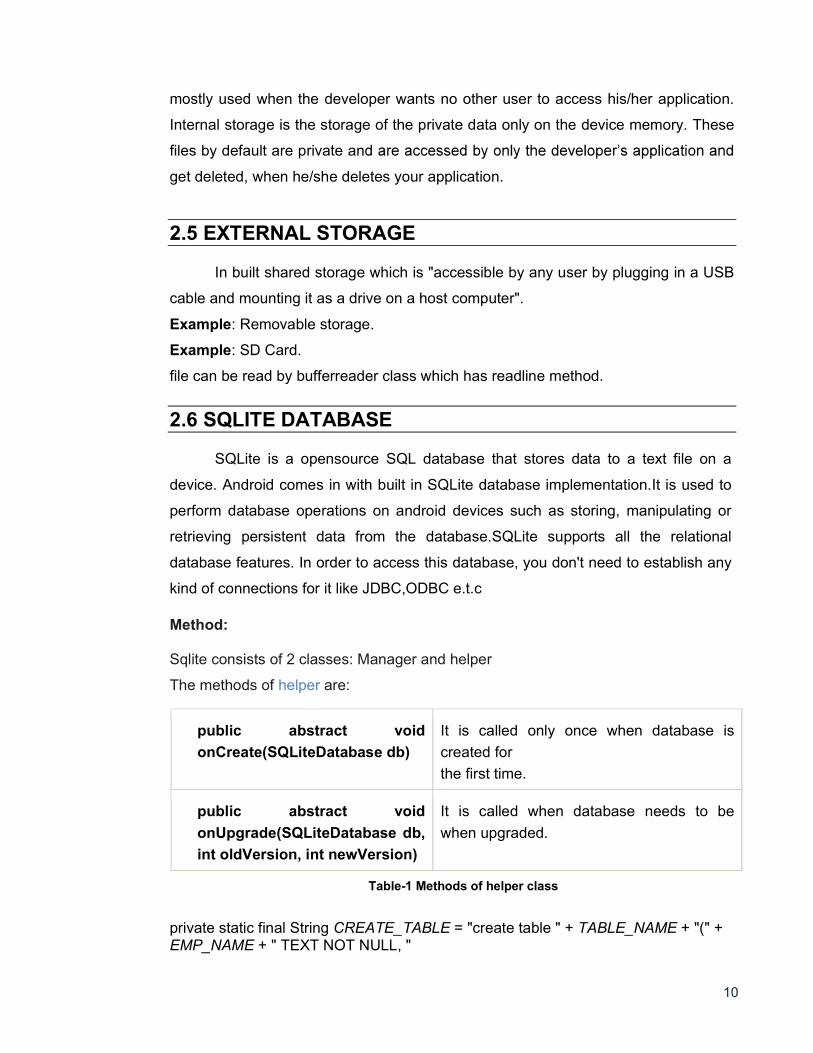
Method: Sqlite consists of 2 classes: Manager and helper
The methods of helper are:
Table-1 Methods of helper class
private static final String CREATE_TABLE = "create table " + TABLE_NAME + "(" + EMP_NAME + " TEXT NOT NULL, "
public abstract void
onCreate(SQLiteDatabase db)
It is called only once when database is
created for
the first time.
public abstract void
onUpgrade(SQLiteDatabase db,
int oldVersion, int newVersion)
It is called when database needs to be
when upgraded.
11
+ EMP_CITY + " TEXT);"; public Helper(Context context) { super(context, DB_NAME, null, DB_VERSION); } @Override public void onCreate(SQLiteDatabase db) { db.execSQL(CREATE_TABLE); } @Override public void onUpgrade(SQLiteDatabase db, int oldVersion, int newVersion) { db.execSQL("DROP TABLE IF EXISTS" + TABLE_NAME ); onCreate(db); }
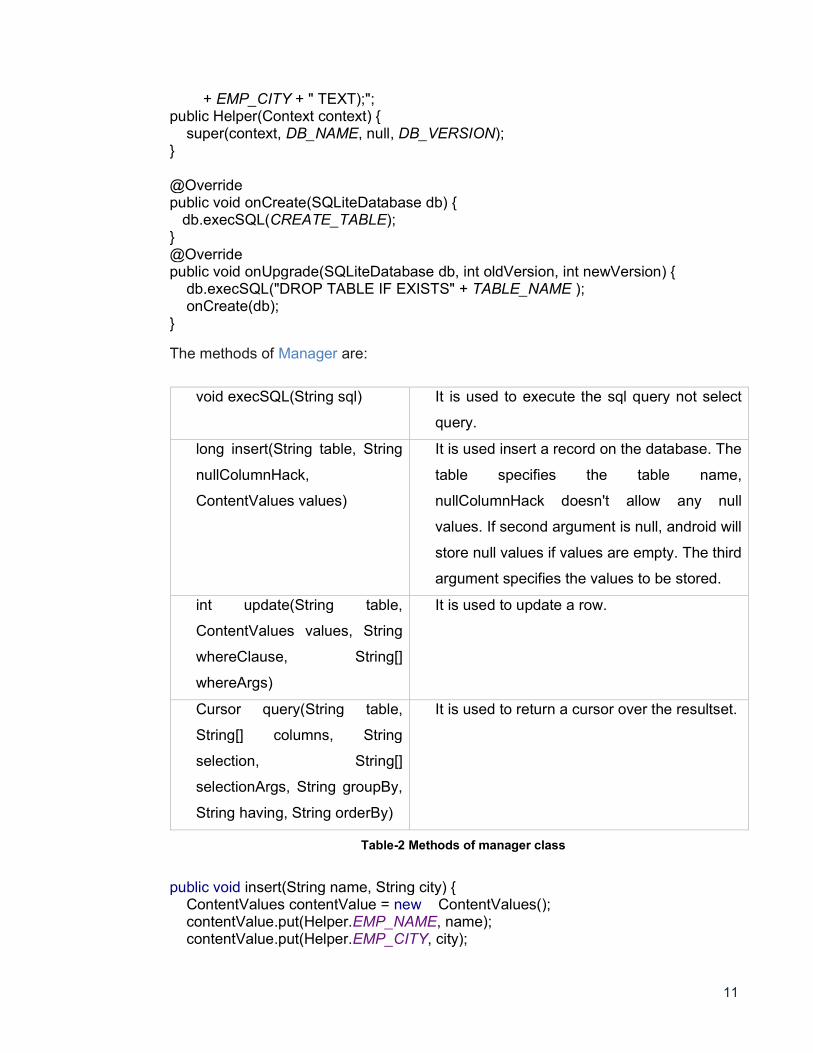
The methods of Manager are:
Table-2 Methods of manager class
public void insert(String name, String city) { ContentValues contentValue = new ContentValues(); contentValue.put(Helper.EMP_NAME, name); contentValue.put(Helper.EMP_CITY, city);
void execSQL(String sql) It is used to execute the sql query not select
query.
long insert(String table, String
nullColumnHack,
ContentValues values)
It is used insert a record on the database. The
table specifies the table name,
nullColumnHack doesn't allow any null
values. If second argument is null, android will
store null values if values are empty. The third
argument specifies the values to be stored.
int update(String table,
ContentValues values, String
whereClause, String[]
whereArgs)
It is used to update a row.
Cursor query(String table,
String[] columns, String
selection, String[]
selectionArgs, String groupBy,
String having, String orderBy)
It is used to return a cursor over the resultset.
12
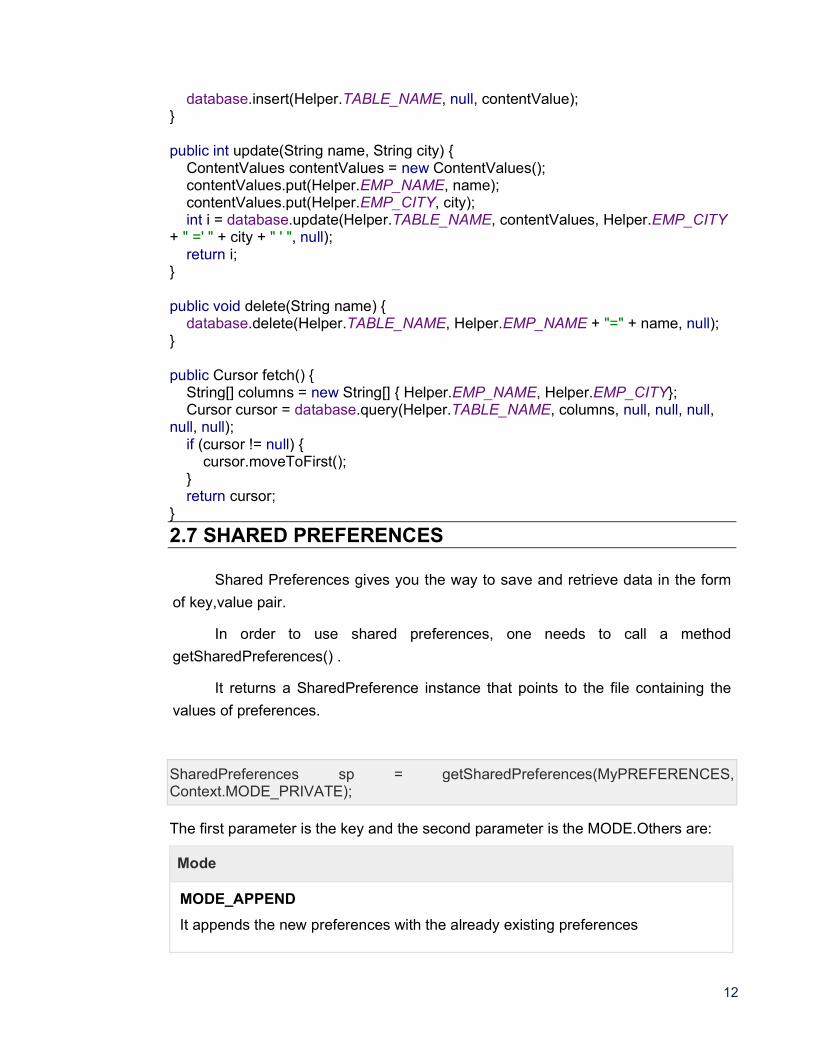
database.insert(Helper.TABLE_NAME, null, contentValue); } public int update(String name, String city) { ContentValues contentValues = new ContentValues(); contentValues.put(Helper.EMP_NAME, name); contentValues.put(Helper.EMP_CITY, city); int i = database.update(Helper.TABLE_NAME, contentValues, Helper.EMP_CITY + " =' " + city + " ' ", null); return i; } public void delete(String name) { database.delete(Helper.TABLE_NAME, Helper.EMP_NAME + "=" + name, null); } public Cursor fetch() { String[] columns = new String[] { Helper.EMP_NAME, Helper.EMP_CITY}; Cursor cursor = database.query(Helper.TABLE_NAME, columns, null, null, null, null, null); if (cursor != null) { cursor.moveToFirst(); } return cursor; }
2.7 SHARED PREFERENCES
Shared Preferences gives you the way to save and retrieve data in the form
of key,value pair.
In order to use shared preferences, one needs to call a method
getSharedPreferences() .
It returns a SharedPreference instance that points to the file containing the
values of preferences.
SharedPreferences sp = getSharedPreferences(MyPREFERENCES, Context.MODE_PRIVATE);
The first parameter is the key and the second parameter is the MODE.Others are:
Mode
MODE_APPEND
It appends the new preferences with the already existing preferences
13
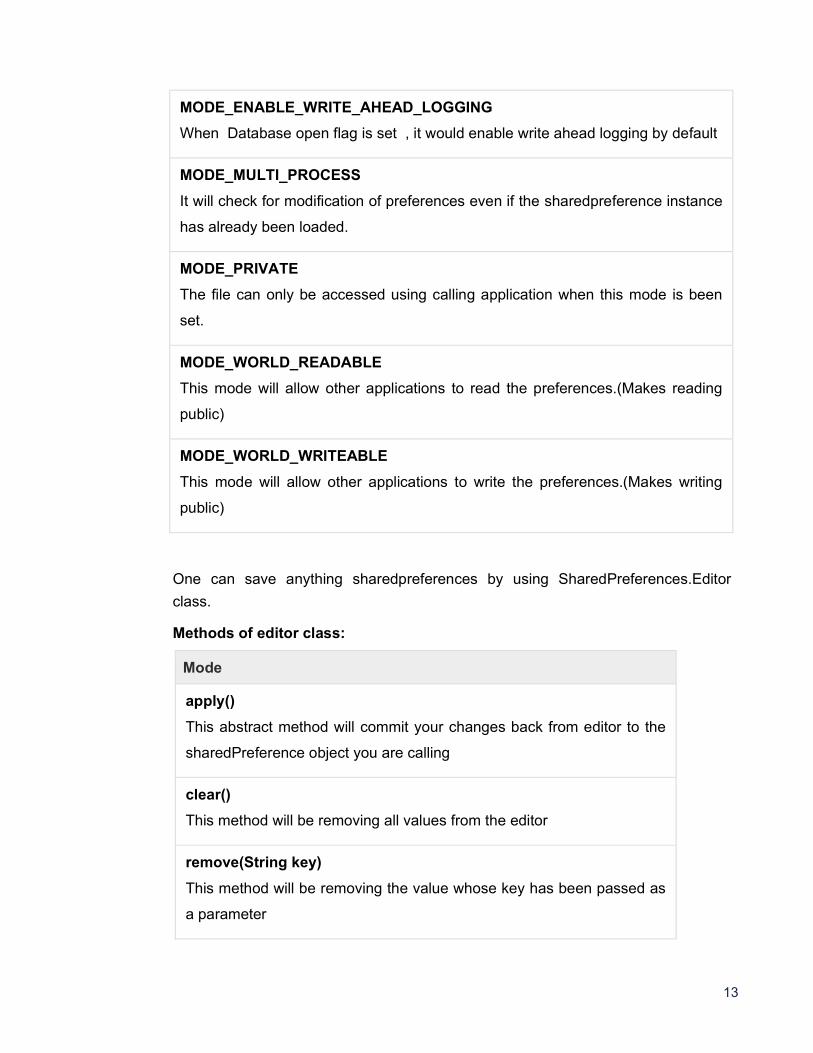
MODE_ENABLE_WRITE_AHEAD_LOGGING
When Database open flag is set , it would enable write ahead logging by default
MODE_MULTI_PROCESS
It will check for modification of preferences even if the sharedpreference instance
has already been loaded.
MODE_PRIVATE
The file can only be accessed using calling application when this mode is been
set.
MODE_WORLD_READABLE
This mode will allow other applications to read the preferences.(Makes reading
public)
MODE_WORLD_WRITEABLE
This mode will allow other applications to write the preferences.(Makes writing
public)
One can save anything sharedpreferences by using SharedPreferences.Editor
class.
Methods of editor class:
Mode
apply()
This abstract method will commit your changes back from editor to the
sharedPreference object you are calling
clear()
This method will be removing all values from the editor
remove(String key)
This method will be removing the value whose key has been passed as
a parameter
14
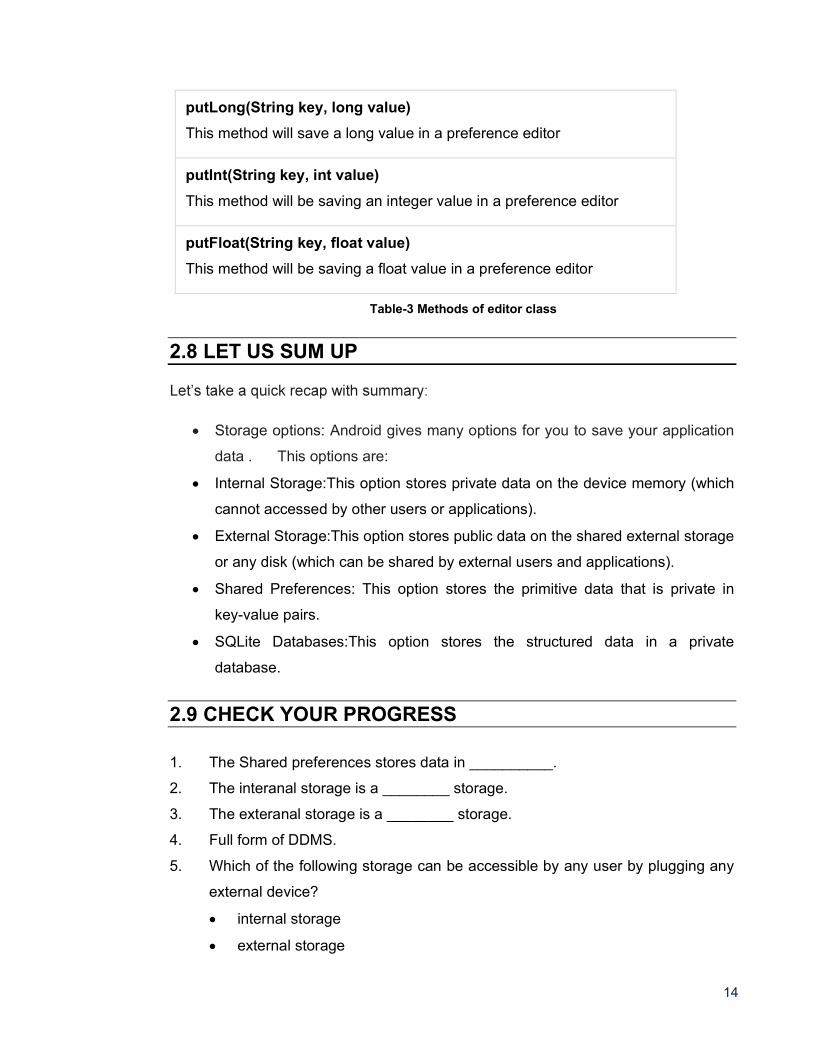
putLong(String key, long value)
This method will save a long value in a preference editor
putInt(String key, int value)
This method will be saving an integer value in a preference editor
putFloat(String key, float value)
This method will be saving a float value in a preference editor
Table-3 Methods of editor class
2.8 LET US SUM UP
Storage options: Android gives many options for you to save your application
data . This options are:
Internal Storage:This option stores private data on the device memory (which
cannot accessed by other users or applications).
External Storage:This option stores public data on the shared external storage
or any disk (which can be shared by external users and applications).
Shared Preferences: This option stores the primitive data that is private in
key-value pairs.
SQLite Databases:This option stores the structured data in a private
database.
2.9 CHECK YOUR PROGRESS
1. The Shared preferences stores data in __________.
2. The interanal storage is a ________ storage.
3. The exteranal storage is a ________ storage.
4. Full form of DDMS.
5. Which of the following storage can be accessible by any user by plugging any
external device?
internal storage
external storage
15
6. Which 2 classes does the sqlLite consists of?
2.10 CHECK YOUR PROGRESS: POSSIBLE ANSWERS 1. Shared preferences stores data in key-value pairs.
2. Internal Storage is private storage.
3. External Storage is public storage.
4. Dalvik Debug Monitor Server (DDMS).
5. External storage storage can be accessible by any user by plugging any
external device.
6. 2 classes of sqlLite connection is:
a) Helper
b) Manager
2.11 FURTHER READING Recommended links: http://developer.android.com/
Recommended Books: 1.
Ltd (2011) 2. Teach.Yourself.Android.Application.Development.in.24.Hours.2nd.Edition. 3. Learning Android-Book by Marko Gargenta(2011)
2.12 ACTIVITIES
1. Mention the data storage options in android.
2. Explain DDMS in short.
3. Mention the helper class methods.
4. Mention the Manager class methods.
5. Explain Content values in short.
6. Mention methods of Content values.
7. To use shared preferences, one needs to call a method______.
8. Mention the modes in shared preferences.
9. Explain the shared preferences in short.
16
Unit 3: JSON Web Service Unit Structure 3.1 Learning Objectives
3.2 Introduction
3.3 Web Service
3.4 Parser class
3.5 JSONArray 3.6 JSONObject
3.7 JSONString
3.8 Let us sum up
3.9 Check your Progress
3.10 Check your Progress: Possible Answers
3.11 Further Reading
3.12 Assignments
3.13 Activities
3
17
3.1 LEARNING OBJECTIVE After studying this unit student should be able to:
You learn about how data send through JSON services to android mobile
phone using Parser class and web services.
This chapter explains how to parse the URL and extract necessary
information from it.
3.2 INTRODUCTION
JSON stands for Java Script Object Notation. JSON is used to extract
information from the URL.
JSON is a programming language. It is a minimal, textual and a subset of
JavaScript. It is an alternative to XML.
Android provides support to parse the JSON object and JSON array, it
provides easy and flexible way to work with it.
3.3 WEB SERVICE
Before we get started with JSON, it is important to understand that what is a
web service and how it works.
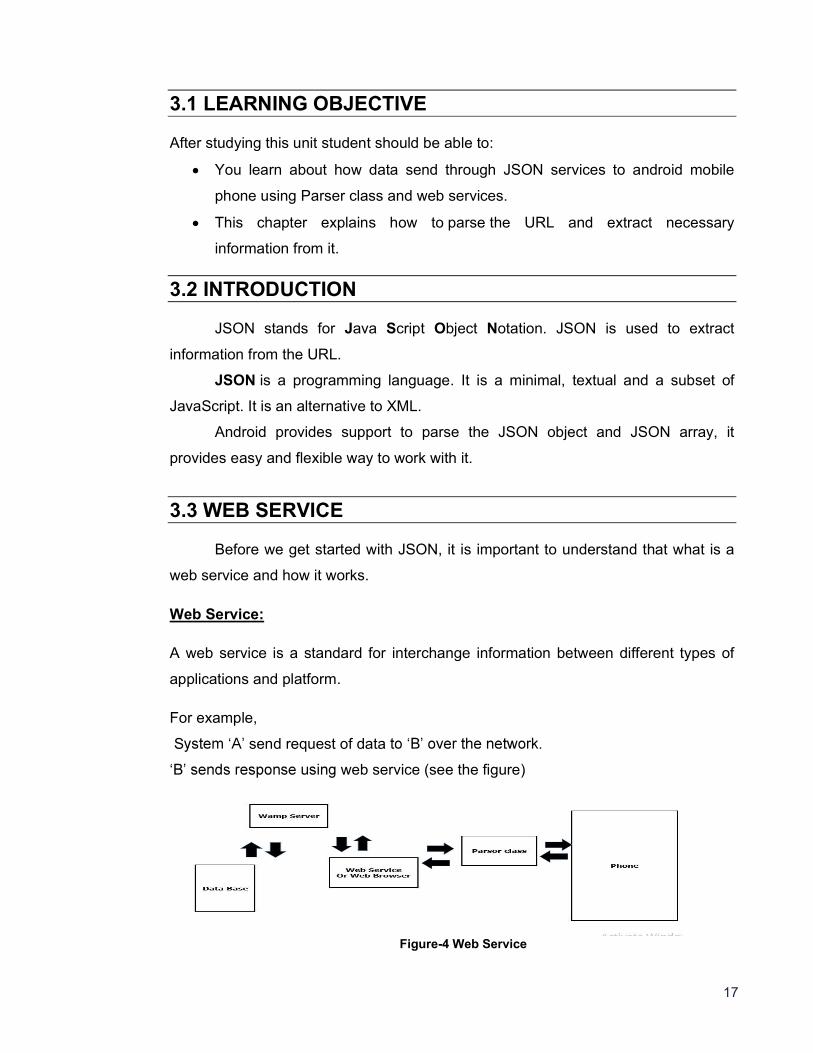
Web Service:
A web service is a standard for interchange information between different types of
applications and platform.
For example,
S send request of data
web service (see the figure)
Figure-4 Web Service
18
o There is data in the Database(DB) which the client service or browser sends
request to the server.
o The server sends the data necessary information to the DB.
o The response sends via database.
o The server sends it to the Client.
o And in the last stage, Parsor class is used to check the data in your phone.
3.4 PARSOR CLASS
After learning the classes, it is easy to create your own web service with easy
implementation.
Types of Parsor class:
1) JSON Array:
2) JSON String:
3) JSON Object:
The first step is to identify the fields in the JSON data in which you are interested in:
{
"employees"
[
{"firstName":"John","lastName":"Serin"},
{"firstName":"Cristen","lastName":"Smith"},
{"firstName":"Paul","lastName":"Walker"},
] }
3.5 JSON ARRAY JSON Array:
JSONArray class is used to create array with values.
Array ([ ]):
In a JSON, square bracket ([]) represents JSON array.
Example: ["January", "February", "March", "April", "May", "June", "July"]
19
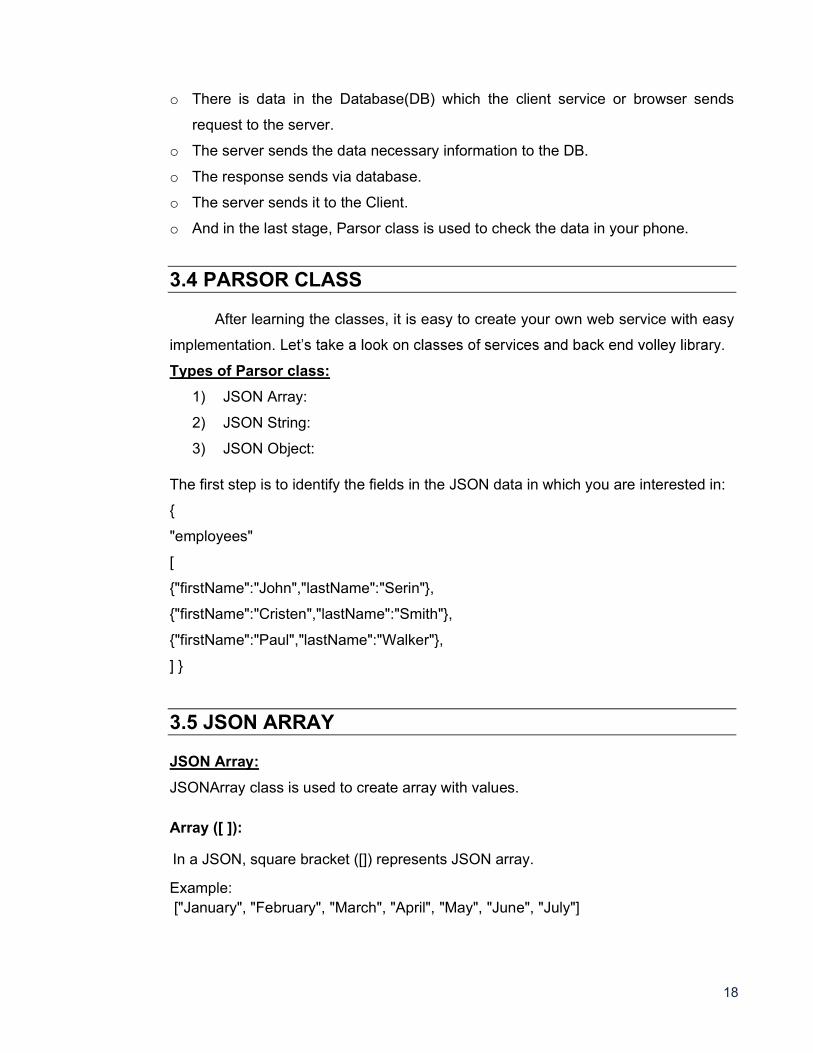
Constructor: Constructor Description
JSONArray() Creates a JSONArray with no values.
JSONArray(String json) Creates a new JSONArray with values
from the JSON string.
JSONArray(Object array) Creates a new JSONArray with values
from the given array.
Table-4 Constructors of JSON Array
Methods: onResponse
It will return a JSON array that contains the web service response.
onErrorResponse
It will be called when any error is generated and / or request is send.
3.6 JSON OBJECT
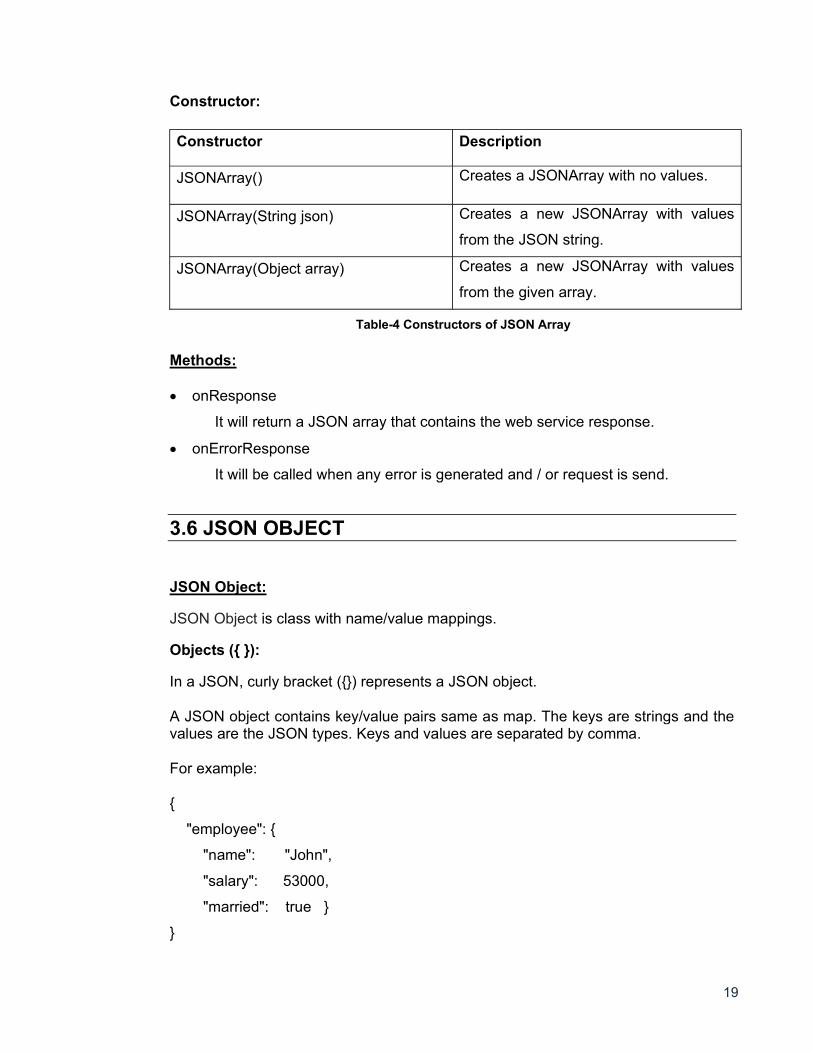
JSON Object:
JSON Object is class with name/value mappings.
Objects ({ }):
In a JSON, curly bracket ({}) represents a JSON object.
A JSON object contains key/value pairs same as map. The keys are strings and the values are the JSON types. Keys and values are separated by comma.
For example:
{
"employee": {
"name": "John",
"salary": 53000,
"married": true }
}
20
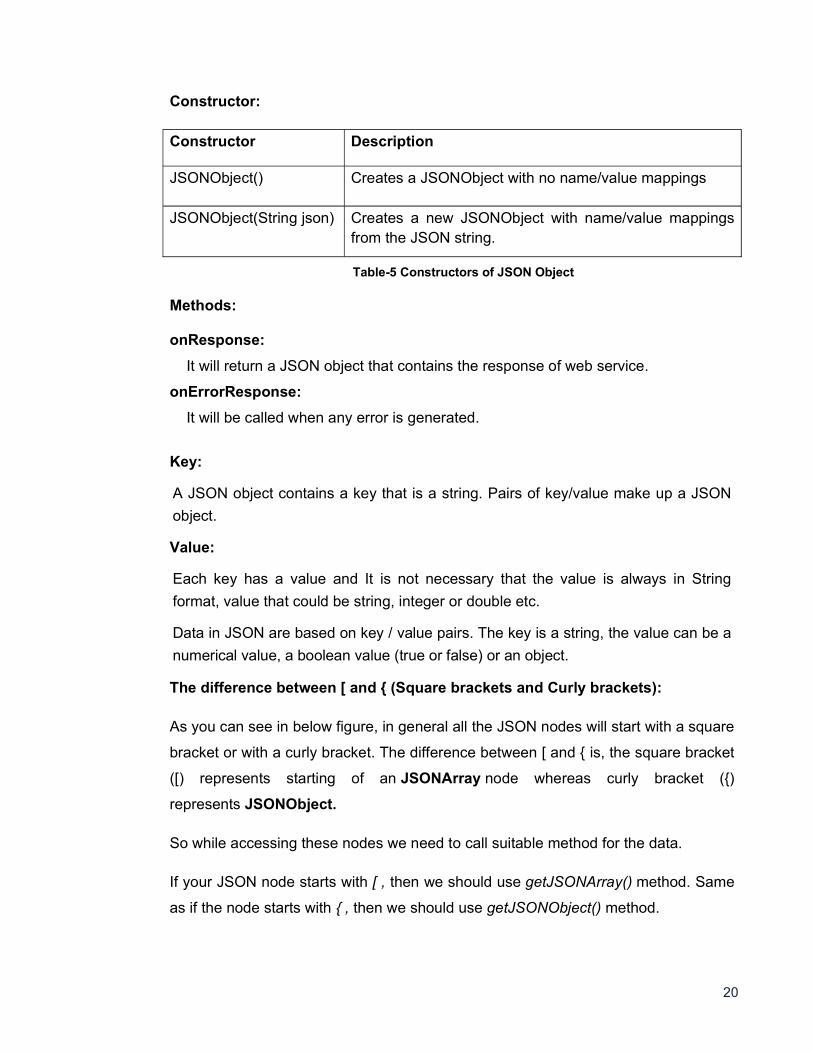
Constructor: Constructor Description
JSONObject()
Creates a JSONObject with no name/value mappings
JSONObject(String json)
Creates a new JSONObject with name/value mappings from the JSON string.
Table-5 Constructors of JSON Object Methods: onResponse:
It will return a JSON object that contains the response of web service.
onErrorResponse:
It will be called when any error is generated.
Key:
A JSON object contains a key that is a string. Pairs of key/value make up a JSON
object.
Value:
Each key has a value and It is not necessary that the value is always in String
format, value that could be string, integer or double etc.
Data in JSON are based on key / value pairs. The key is a string, the value can be a
numerical value, a boolean value (true or false) or an object.
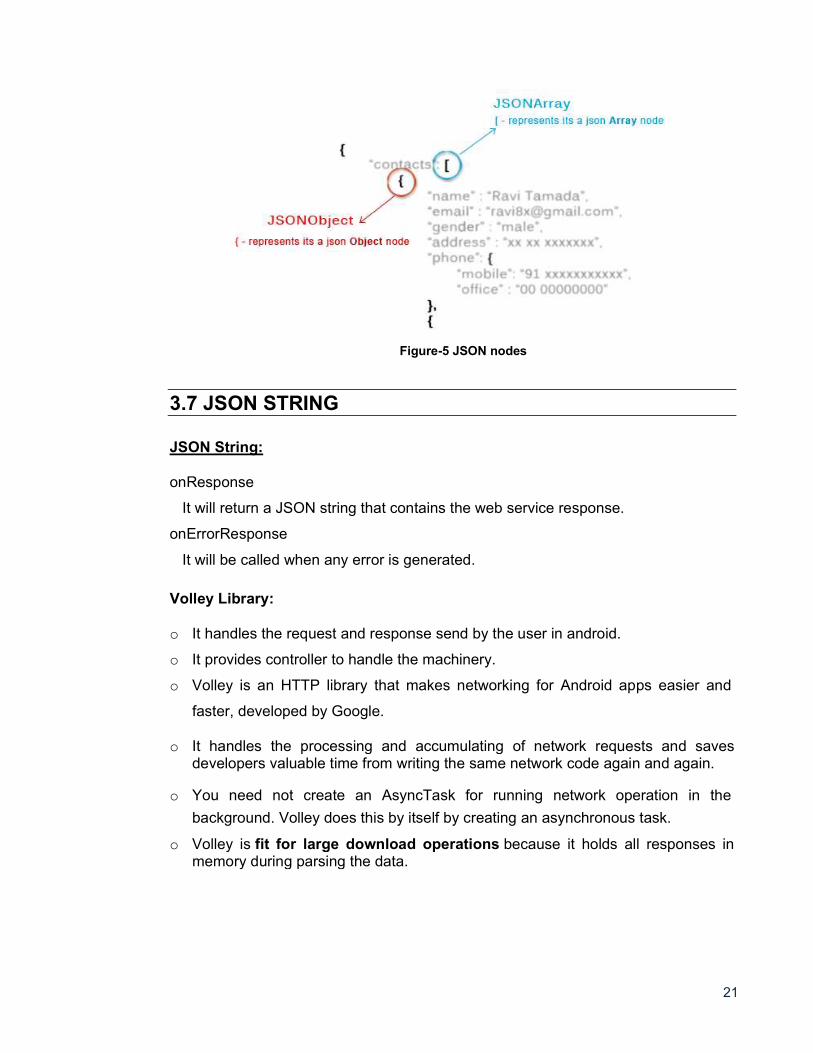
The difference between [ and { (Square brackets and Curly brackets):
As you can see in below figure, in general all the JSON nodes will start with a square
bracket or with a curly bracket. The difference between [ and { is, the square bracket
([) represents starting of an JSONArray node whereas curly bracket ({)
represents JSONObject.
So while accessing these nodes we need to call suitable method for the data.
If your JSON node starts with [ , then we should use getJSONArray() method. Same
as if the node starts with { , then we should use getJSONObject() method.
21
Figure-5 JSON nodes
3.7 JSON STRING
JSON String:
onResponse
It will return a JSON string that contains the web service response.
onErrorResponse
It will be called when any error is generated.
Volley Library:
o It handles the request and response send by the user in android.
o It provides controller to handle the machinery.
o Volley is an HTTP library that makes networking for Android apps easier and
faster, developed by Google.
o It handles the processing and accumulating of network requests and saves developers valuable time from writing the same network code again and again.
o You need not create an AsyncTask for running network operation in the
background. Volley does this by itself by creating an asynchronous task.
o Volley is fit for large download operations because it holds all responses in memory during parsing the data.
22
3.8 LET US SUM UP JSON (Java Script Object Notation) is easy extension of XML.
There parser class namely :JSONArray, JSONString and JSONObject.
Array ([ ]) In a JSON, square bracket ([) represents a JSON array.
Objects ({ }) In a JSON, curly bracket ({) represents a JSON object.
Key A JSON object contains a key that is string. Pairs of key/value make up a
JSON object.
Value Each value that could be string, integer or double.
Volley is an HTTP library that makes networking for Android apps easier
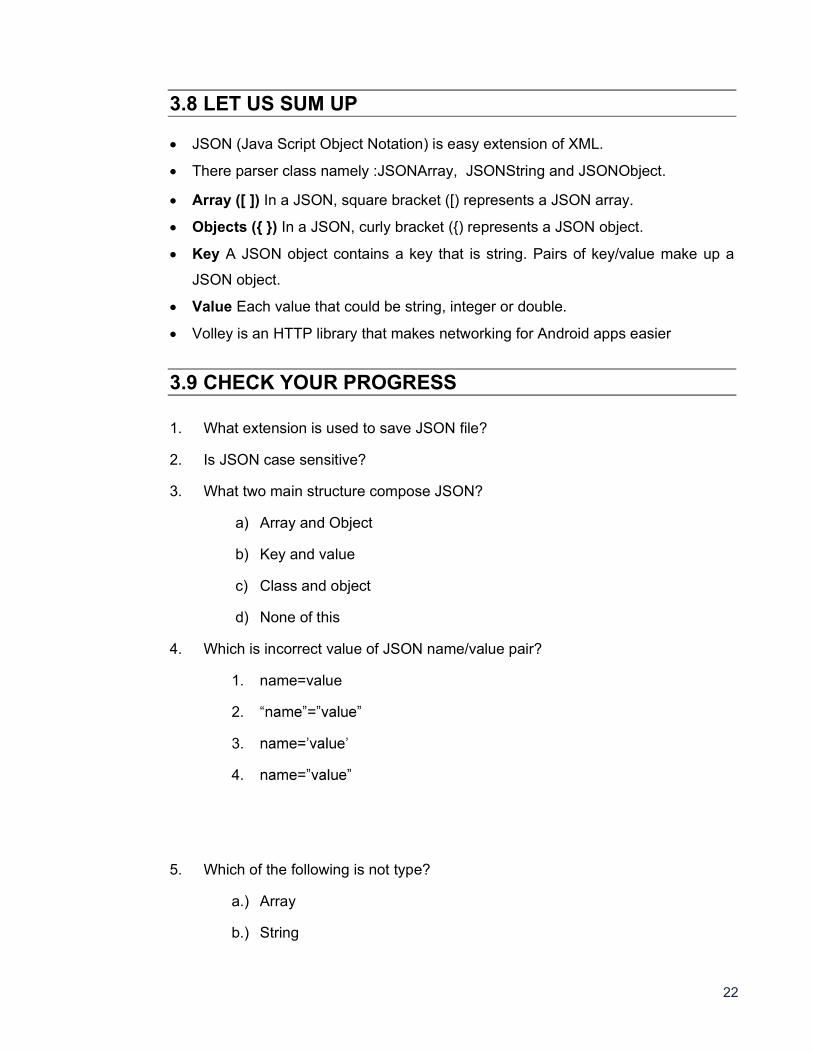
3.9 CHECK YOUR PROGRESS
1. What extension is used to save JSON file?
2. Is JSON case sensitive?
3. What two main structure compose JSON?
a) Array and Object
b) Key and value
c) Class and object
d) None of this
4. Which is incorrect value of JSON name/value pair?
1. name=value
2.
3.
4.
5. Which of the following is not type?
a.) Array
b.) String
23
c.) Object
d.) Date
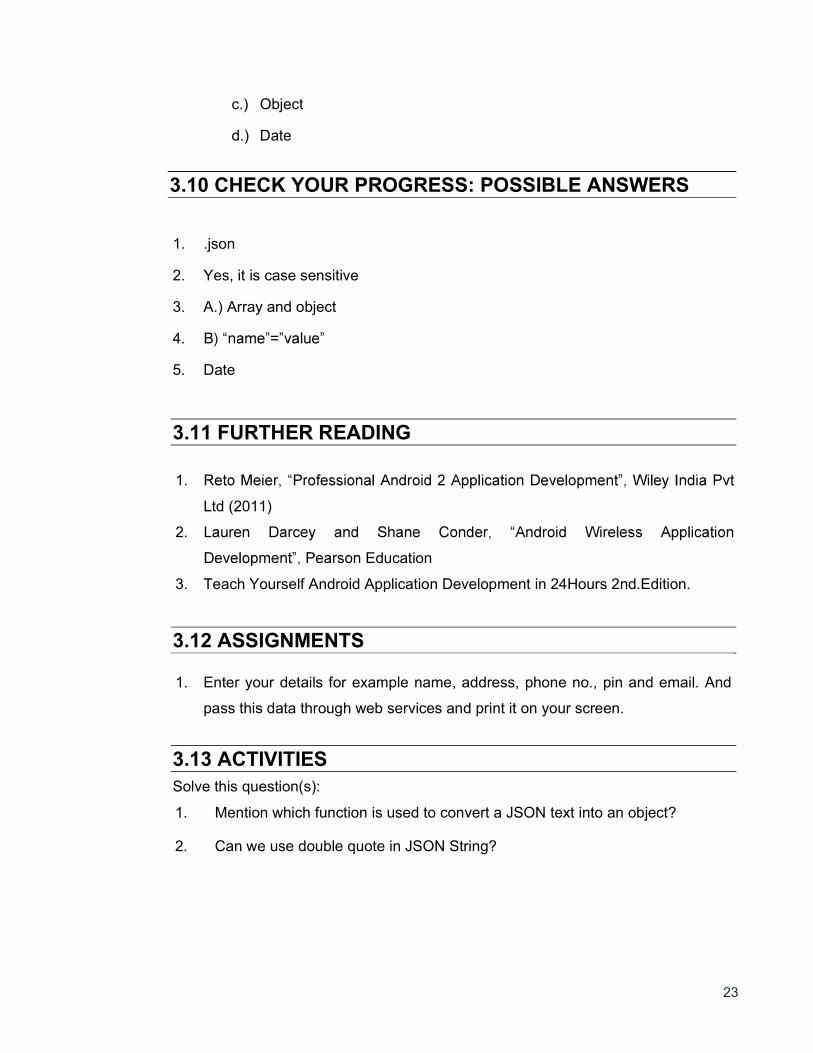
3.10 CHECK YOUR PROGRESS: POSSIBLE ANSWERS
1. .json
2. Yes, it is case sensitive
3. A.) Array and object
4.
5. Date
3.11 FURTHER READING
1.
Ltd (2011)
2.
Education
3. Teach Yourself Android Application Development in 24Hours 2nd.Edition.
3.12 ASSIGNMENTS
1. Enter your details for example name, address, phone no., pin and email. And
pass this data through web services and print it on your screen.
3.13 ACTIVITIES Solve this question(s):
1. Mention which function is used to convert a JSON text into an object?
2. Can we use double quote in JSON String?
24
Block-2
Multimedia
25
Unit 1: Gallery
Unit Structure 1.1. Learning Objectives 1.2. Introduction 1.3. Multimedia & Graphics in android 1.4. Image Components 1.5. Image gallery build and use 1.6. Let us sum up
1.7. Check Your Progress
1.8. Check your Progress: Possible Answers 1.9. Further Reading
1.10. Assignments 1.11. Activities
1
26
1.1 LEARNING OBJECTIVE After studying this unit student should be able to:
Students will understand about media content.
They will get more clarification about grid layout and custom.
How to pass media content to layout.
Call another activity based on gallery action.
1.2 INTRODUCTION
tasks
beyond simple voice calls. Multimedia capabilities, or the playing and recording of audio and
video, is one such significant task that many users find to be of great value. Take a quick
look around and you will find people using the phone as a means to enjoy a variety of
programs as well as share self-recorded media among friends. Android provides the APIs to
easily access this capability as well as embed multimedia and its manipulation directly within
an application.
Android provides a huge set of 2D-drawing APIs that allow you to create graphics.
Android has got visually appealing graphics and mind-blowing animations.
The Android framework provides a rich set of powerful APIS for applying animation to
UI elements and graphics as well as drawing custom 2D and 3D graphics.
1.3 MULTIMEDIA & GRAPHICS IN ANDROID In this unit, you will get a look at the fundamentals of Android UI design. You will understand
user input, views and layouts, as well as adapters and fragments.
We will cover some multimedia and graphic aspects in Android. The Android SDK provides
a set of APIs to handle multimedia files, such as audio, video and images. Moreover, the
SDK provides other API sets that help developers to implement interesting graphics effects,
like animations and so on.
The modern smart phones and tablets have an increasing storage capacity so that we can
27
store music files, video files, images etc. Not only the storage capacity is important, but also
the high definition camera makes it possible to take impressive photos. In this context, the
Multimedia API plays an important role.
Multimedia API
Android supports a wide list of audio, video and image formats. You can give a look here to
have an idea; just to name a few formats supported:
Audio
AAC LC/LTP *
HE-AACv1 (AAC+)
HE-AACv2 (enhanced AAC+)
AMR-NB *
AMR-WB *
MP3
FLAC (Android 3.1+)
MIDI
Ogg Vorbis
PCM/WAVE
Video
H.263 *
H.264 AVC * (encode Android 3.0+)
MPEG-4 SP
VP8 (Android 2.3.3+)
Images:
JPEG
GIF
PNG
Android, additionally, can handle local files, meaning files that are stored inside the smart
phone or tablet or remote file using data streaming. We can leverage these capabilities in
order to build very interesting apps.
All the classes provided by the Android SDK that we can use to add multimedia capabilities
to our apps are under the android.media package. In this package, the heart class is called
MediaPlayer. This class has several methods that we can use to play audio and video file
28
stored in our device or streamed from a remote server.
This class implements a state machine with well-defined states and we have to know them
before playing a file. Simplifying the state diagram, as shown in the official documentation,
we can define these macro-states:
There are 4 state of multimedia file play either video or music:
Idle state: When we create a new instance of the MediaPlayer class.
Initialization state: This state is triggered when we use setDataSource to set the
information source that MediaPlayer has to use.
Prepared state: In this state, the preparation work is completed. We can enter in this
state calling prepare method or prepareAsync. In the first case after the method returns
the state moves to Prepared. In the async way, we have to implement a listener to be
notified when the system is ready and the state moves to Prepared. We have to keep in
mind that when calling the prepare method, the entire app could hang before the method
returns because the method can take a long time before it completes its work, especially
when data is streamed from a remote server. We should avoid calling this method in the
main thread because it might cause a ANR (Application Not Responding) problem. Once
the MediaPlayer is in prepared state we can play our file, pause it or stop it.
Completed state: The end of the stream is reached.
1.4 IMAGE COMPONENTS
In Android, ImageView class is used to display an image file in application. Image file is easy
to use but hard to master in Android, because of the various screen sizes in Android
devices. An android is enriched with some of the best UI design widgets that allows us to
build good looking and attractive UI based application.
Important Note: ImageView comes with different configuration options to support different
scale types. Scale type options are used for scaling the bounds of an image to the bounds of
the imageview. Some of them scaleTypes configuration properties are center, center_crop,
fit_xy, fitStart etc. for more detail you can refer android developer documents :
https://developer.android.com/reference/android/widget/ImageView.ScaleType
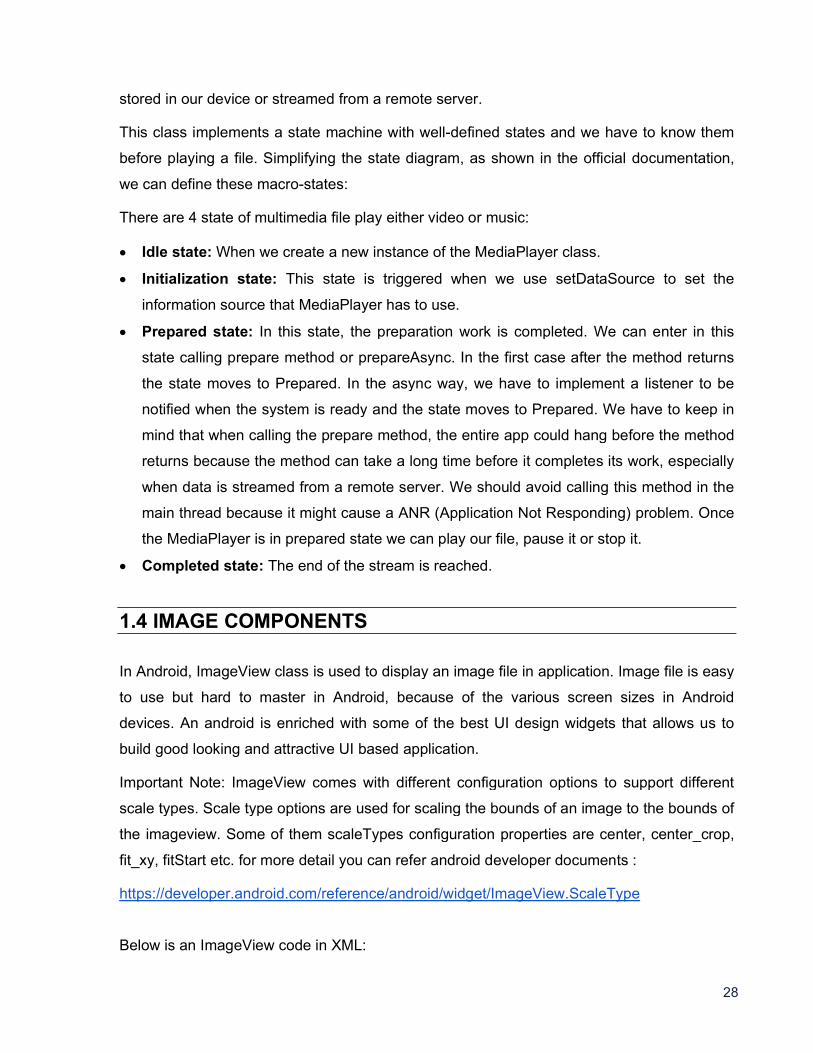
Below is an ImageView code in XML:
29
Make sure to save lion image in drawable folder
<ImageView
android:id="@+id/simpleImageView"
android:layout_width="fill_parent"
android:layout_height="wrap_content"
android:src="@drawable/lion" />
Attributes of ImageView:
your xml file.
Id: ID is an attribute used to uniquely identify an image view in android. Below is the
example code in which we set the id of an image view.
<ImageView
android:id="@+id/simpleImageView"
android:layout_width="fill_parent"
android:layout_height="wrap_content" />
src: src is an attribute used to set a source file or you can say image in your imageview
to make your layout attractive. Below is the example code in which we set the source of
a imageview lion which is saved in drawable folder.
<ImageView
android:id="@+id/simpleImageView"
android:layout_width="fill_parent"
android:layout_height="wrap_content"
android:src="@drawable/lion" /><!--set the source of an image view-->
In Java: We can also set the source image at run time programmatically in java class.
For that we use setImageResource() method as shown in below example code.
/*Add in Oncreate() function after setContentView()*/
ImageView simpleImageView=(ImageView) findViewById(R.id.simpleImageView);
simpleImageView.setImageResource(R.drawable.lion);
//set the source in java class
30
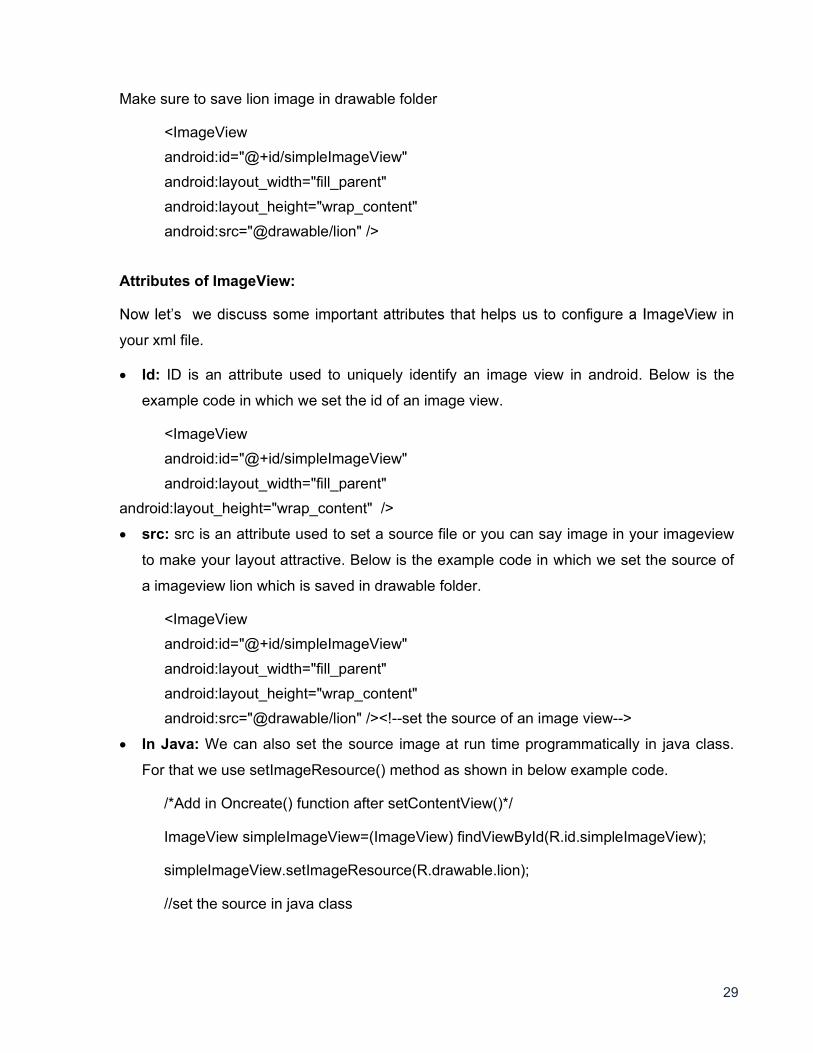
Figure-6 Output of Simple Image View (SRC as lion)
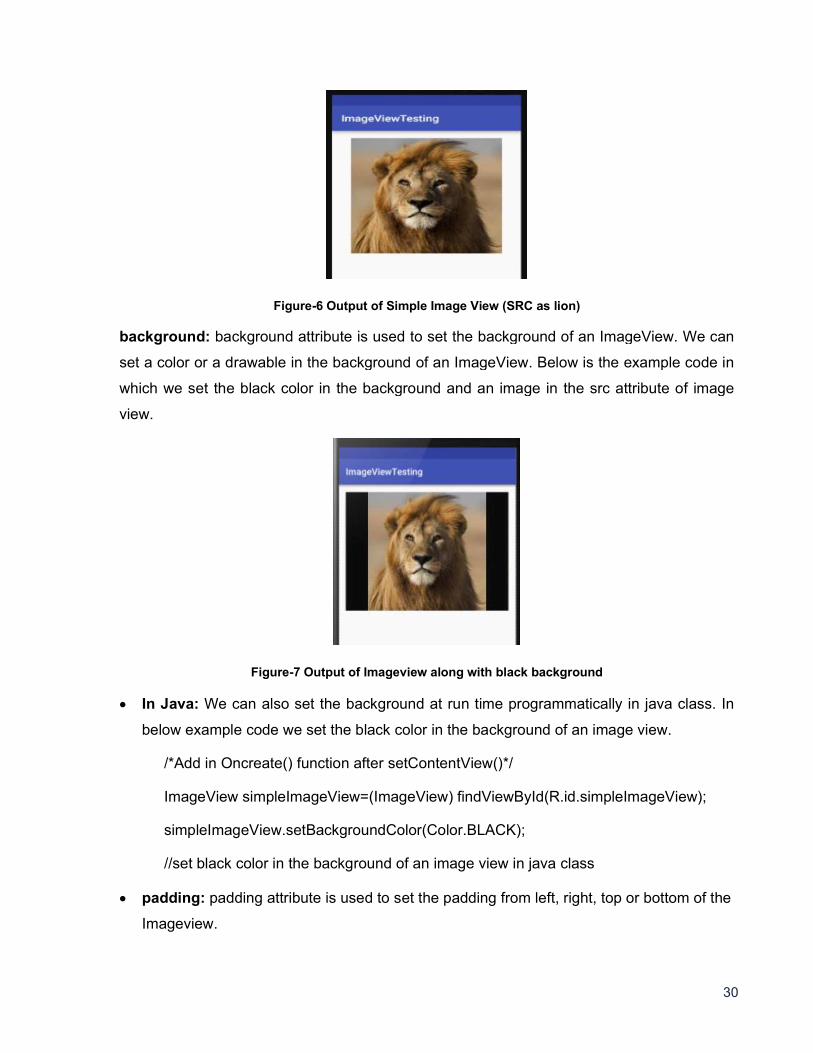
background: background attribute is used to set the background of an ImageView. We can
set a color or a drawable in the background of an ImageView. Below is the example code in
which we set the black color in the background and an image in the src attribute of image
view.
Figure-7 Output of Imageview along with black background
In Java: We can also set the background at run time programmatically in java class. In
below example code we set the black color in the background of an image view.
/*Add in Oncreate() function after setContentView()*/
ImageView simpleImageView=(ImageView) findViewById(R.id.simpleImageView);
simpleImageView.setBackgroundColor(Color.BLACK);
//set black color in the background of an image view in java class
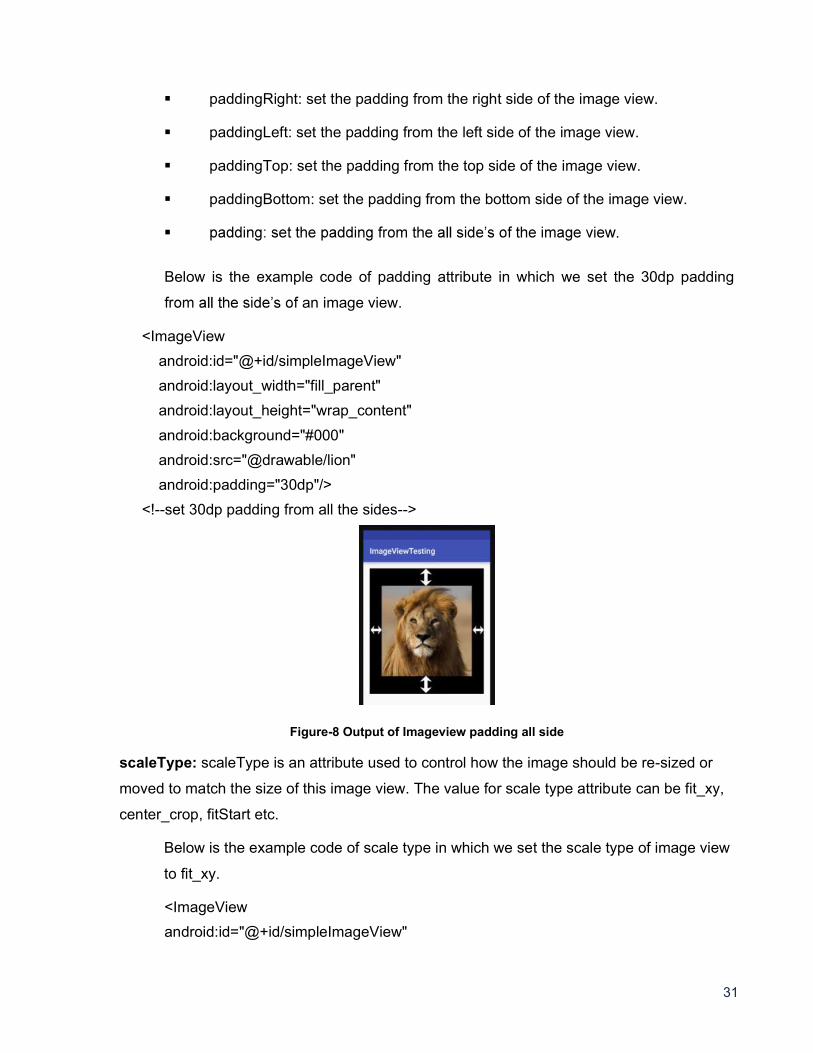
padding: padding attribute is used to set the padding from left, right, top or bottom of the
Imageview.
31
paddingRight: set the padding from the right side of the image view.
paddingLeft: set the padding from the left side of the image view.
paddingTop: set the padding from the top side of the image view.
paddingBottom: set the padding from the bottom side of the image view.
Below is the example code of padding attribute in which we set the 30dp padding
an image view.
<ImageView
android:id="@+id/simpleImageView"
android:layout_width="fill_parent"
android:layout_height="wrap_content"
android:background="#000"
android:src="@drawable/lion"
android:padding="30dp"/>
<!--set 30dp padding from all the sides-->
Figure-8 Output of Imageview padding all side
scaleType: scaleType is an attribute used to control how the image should be re-sized or
moved to match the size of this image view. The value for scale type attribute can be fit_xy,
center_crop, fitStart etc.
Below is the example code of scale type in which we set the scale type of image view
to fit_xy.
<ImageView
android:id="@+id/simpleImageView"
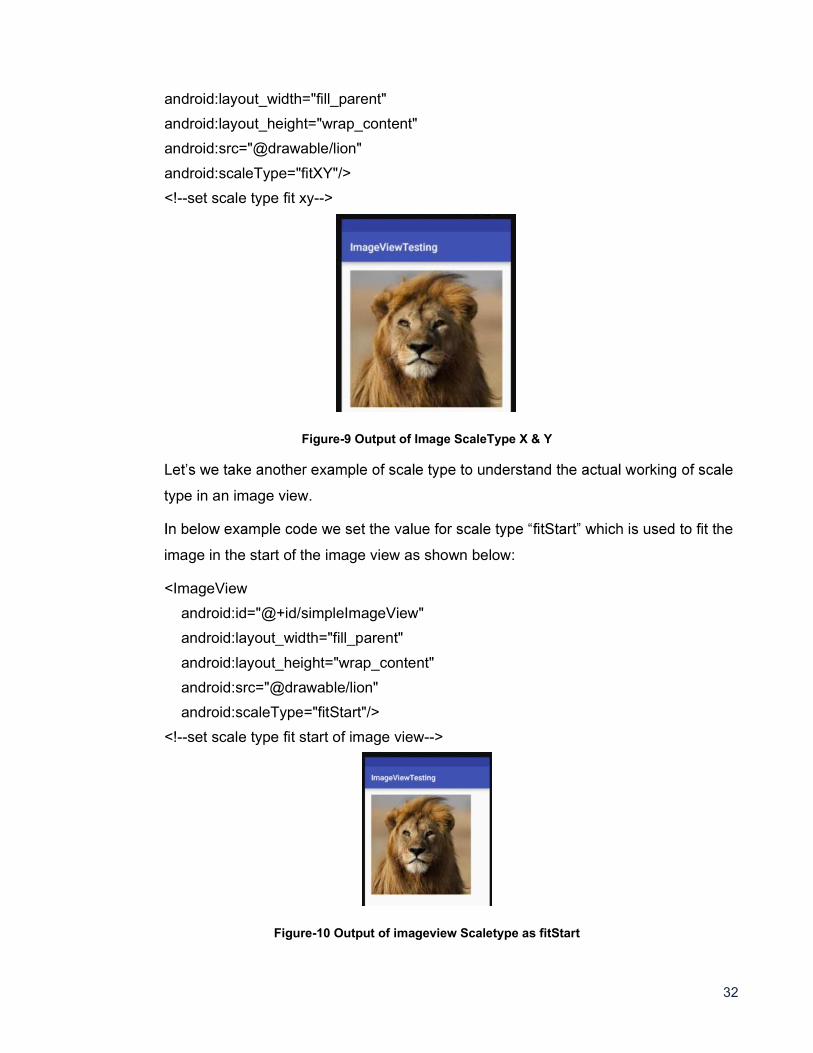
32
android:layout_width="fill_parent"
android:layout_height="wrap_content"
android:src="@drawable/lion"
android:scaleType="fitXY"/>
<!--set scale type fit xy-->
Figure-9 Output of Image ScaleType X & Y
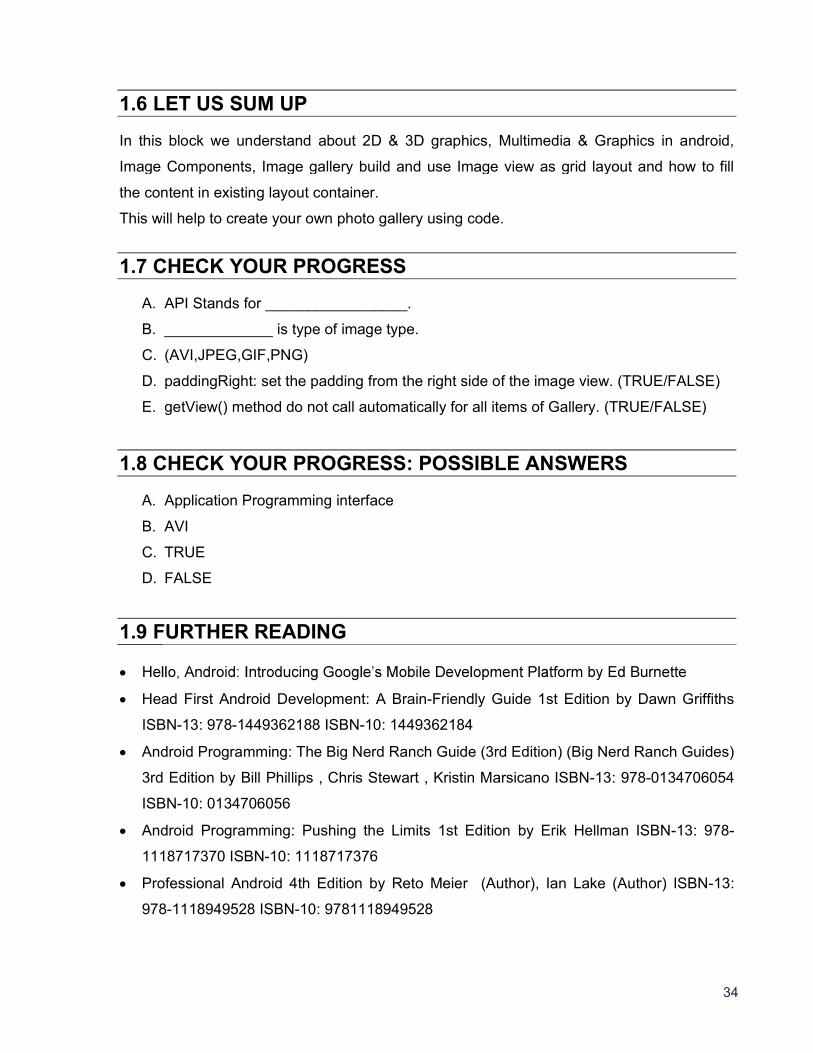
type in an image view.
image in the start of the image view as shown below:
<ImageView
android:id="@+id/simpleImageView"
android:layout_width="fill_parent"
android:layout_height="wrap_content"
android:src="@drawable/lion"
android:scaleType="fitStart"/>
<!--set scale type fit start of image view-->
Figure-10 Output of imageview Scaletype as fitStart

33
Below is the example of image view in which we display two animal images of Lion and
Monkey. And whenever user click on an image Animal name is displayed as toast on
screen. Below is the final output and code:
Figure-11 Full image Display as an ImageView
1.5 IMAGE GALLERY BUILD Android Gallery is a View commonly used to display items in a horizontally scrolling list that
images and when a user clicks an image, it will be displayed in the center of the screen.
Android Gallery View Overview
The items of Gallery are populated from an Adapter, similar to ListView, in which
ListView items were populated from an Adapter
We need to create an Adapter class which extends BaseAdapter class and override
getView() method
getView() method called automatically for all items of Gallery
The layout for the Gallery is defined as follows:
<Gallery
android:id="@+id/gallery1"
android:layout_width="fill_parent"
android:layout_height="wrap_content" />
It belongs to android.widget.Gallery class. However, this class is deprecated now.
34
1.6 LET US SUM UP
In this block we understand about 2D & 3D graphics, Multimedia & Graphics in android,
Image Components, Image gallery build and use Image view as grid layout and how to fill
the content in existing layout container.
This will help to create your own photo gallery using code.
1.7 CHECK YOUR PROGRESS
A. API Stands for _________________.
B. _____________ is type of image type.
C. (AVI,JPEG,GIF,PNG)
D. paddingRight: set the padding from the right side of the image view. (TRUE/FALSE)
E. getView() method do not call automatically for all items of Gallery. (TRUE/FALSE)
1.8 CHECK YOUR PROGRESS: POSSIBLE ANSWERS
A. Application Programming interface
B. AVI
C. TRUE
D. FALSE
1.9 FURTHER READING
Head First Android Development: A Brain-Friendly Guide 1st Edition by Dawn Griffiths
ISBN-13: 978-1449362188 ISBN-10: 1449362184
Android Programming: The Big Nerd Ranch Guide (3rd Edition) (Big Nerd Ranch Guides)
3rd Edition by Bill Phillips , Chris Stewart , Kristin Marsicano ISBN-13: 978-0134706054
ISBN-10: 0134706056
Android Programming: Pushing the Limits 1st Edition by Erik Hellman ISBN-13: 978-
1118717370 ISBN-10: 1118717376
Professional Android 4th Edition by Reto Meier (Author), Ian Lake (Author) ISBN-13:
978-1118949528 ISBN-10: 9781118949528
35
1.10 ASSIGNMENTS
1) Write sort note on 4 state of multimedia file play either video or music.
2) Explain Image Components in detail.
3) Write an application structure code for create Gallery
4) Explain how to build Image gallery using built in component.
5) Write a sort note on Image view as grid
1.11 ACTIVITIES
Create android application for Photo collage apps using different layout
36
Unit 2: Drawing 2D and 3D Graphics and Multimedia
Unit Structure 2.1 Learning Objectives
2.2 Introduction
2.3 Drawing 2D
2.4 3D Graphics
2.5 Multimedia
2.6 Let Us Sum Up
2.7 Check your Progress
2.8 Check your Progress: Possible Answers
2.9 Further Reading
2.10 Assignment
2.11 Activities
2
37
2.1 LEARNING OBJECTIVE After studying this unit student should be able to:
Understand about 2D & 3D graphics Animation
How to create graphics using Library
Understand about how to play multimedia file in multimedia players or other way
Will be able to create 2d or 3D graphics object component
2.2 INTRODUCTION
Android provides a huge set of 2D-drawing APIs that allow you to create graphics.
Android has got visually appealing graphics and mind-blowing animations.
The Android framework provides a rich set of powerful APIS for applying animation to UI
elements and graphics as well as drawing custom 2D and 3D graphics.
The android.graphics.Canvas can be used to draw graphics in android. It provides methods
to draw oval, rectangle, picture, text, line etc.
The android.graphics.Paint class is used with canvas to draw objects. It holds the
information of color and style.
Canvas
Android graphics provides low level graphics tools such as canvases, colour, filters, points
and rectangles which handle drawing to the screen directly.
The Android framework provides a set of 2D-DRAWING APIs which allows user to provide
own custom graphics onto a canvas or to modify existing views to customize their look and
feel.
There are two ways to draw 2D graphics,
1. Draw your animation into a View object from your layout.
2. Draw your animation directly to a Canvas.
38
Some of the important methods of Canvas Class are as follows
I. drawText()
II. drawRoundRect()
III. drawCircle()
IV. drawRect()
V. drawBitmap()
VI. drawARGB()
You can use these methods in onDraw() method to create your own custom user interface.
Drawing an animation with a View is the best option to draw simple graphics that do not
need to change dynamically and are not a part of a performance-intensive game. It is used
when user wants to display a static graphic or predefined animation.
Drawing an animation with a Canvas is better option when your application needs to re-draw
itself regularly. For example video games should be drawing to the Canvas on its own.
2.3 DRAWING 2D Android comes along with strong open-source API libraries which support customized 2D
and 3D graphics in addition to animations.
The Android framework APIs as well makes available a set of 2D-drawing APIs which gives
you room to customize graphics onto a canvas or to alter current Views to change their
appearance and feel.
When drawing 2D graphics, you will characteristically do that in two ways. API makes
available 2D drawing APIs for simple animation that does not have any need for key
alterations changes. These two ways of carrying this out using API are:
To draw to a View
To draw on a Canvas
DRAWING A CIRCLE TO VIEW : Drawing to view is a preferred option when your UI does
not require dynamic alterations in the application. The most suitable aspect of doing so is
that the Android framework will make available for you a pre-defined Canvas to which you
will put your drawing calls.
39
This can be fulfilled merely simply by extending the View category and define an onDraw()
callback technique.
canvas.drawCircle(x / 2, y / 2, radius, paint);). onDraw() is a callback technique called when
the view is at first drawn.
DRAWING TO A CANVAS: This is the preferred option when your application requires to
constantly re-draw itself. Applications like video games ought to be drawing to the Canvas
by itself. Although, there are other ways this could be achieved.
HOW TO DRAW 2D OBJECTS ON A CANVAS: To draw 2D graphics in a place in your
application that requires to constantly re draw itself, the best option for you is to draw on a
canvas. A Canvas functions for you as an interface, to the real surface on which your
graphics will be drawn.
If you are required to produce a fresh Canvas, then you ought to specify the bitmap on
which drawing will in reality be out. The Bitmap is at all times needed for a Canvas.
DRAWABLES: Android provides a customized 2D graphics files for drawing shapes and
images. The android.graphics.drawable file is the location where the regular categories used
for drawing in two-dimensions can be found.
We have provided here the fundamentals of making use of Drawable objects to draw
graphics and how to make use of a few subclasses of the Drawable category.
the Drawable category extends to define a lot of particular forms of drawable graphics,
which consists of BitmapDrawable, ShapeDrawable, PictureDrawable, LayerDrawable, and
many others. You can as well extend these to specify your own customized Drawable
objects that act in particular ways.
There are three ways to specify and initiate a Drawable: Through the utilization of an image
saved in your project resources; through the use of an XML file that specifies the Drawable
features; or the of standard category constructors.
GENERATING FROM RESOURCE IMAGES: An easy way to incorporate graphics to your
40
application is by referring to an image file from your project resources.
The file types that are supported are PNG (which is the most preferred option), JPG ( which
is an acceptable option) and GIF (which should not be used at all). This method would
clearly be preferred for application icons, logos, or other graphics like those made use of in a
game.
To make use of an image resource, you merely require to incorporate your file to the
res/drawable/ directory of your project.
You can the refer it from your code or your XML layout. Whichever one you choose it is
termed making use of a resource ID, which is the file name without the extension of the file
type extension like my_image.png is referenced as my_image.
In other scenarios, you may want to take care of your image resource as a Drawable object.
To be able to achieve this, build a Drawable from the resource such as:
Resources res = mContext.getResources();
Drawable myImage = res.getDrawable(R.drawable.my_image);
Every singular resource in your project can sustain just a unique state, irrespective of the
number of various objects you may initiate for it.
For instance, if you initiate two Drawable objects from an equivalent image resource, then
alter a property (like the alpha) for one of the Drawables, then it will as well affect the other.
Thus, anytime you are handling a lot of examples of an image resource, rather than
unswervingly changing the Drawable, you ought to carry out a tween animation.
Example XML
The XML code below illustrates how to add a resource Drawable to an ImageView in the
XML layout (with a few red tints merely to offer fun).
<ImageView
android:layout_width="wrap_content"
android:layout_height="wrap_content"
android:tint="#55ff0000"
android:src="@drawable/my_image"/>
41
CREATING FROM RESOURCE XML: You ought to have at this stage be able to create a
User Interface. Therefore, you should know the strength and flexibility intrinsic in specifying
objects in XML.
produce, which is not at first reliant on variables specified by your application code or user
interaction, then specifying the Drawable in XML is an excellent option.
application, you ought to take into consideration the specification of the object in XML, as
you can at all times alter properties immediately it is initiated.
res/drawable/directory of your project and after that retrieve and initiate the object by calling
Resources.getDrawable(), transferring to it the resource ID of your XML file.
Any Drawable subcategory that supports the inflate() technique can be specified in XML and
started by your application. Each Drawable that supports XML inflation makes use of
particular XML characteristics that assist you to define the object properties. See the
category documentation for every Drawable subcategory for information on how to specify it
in XML.
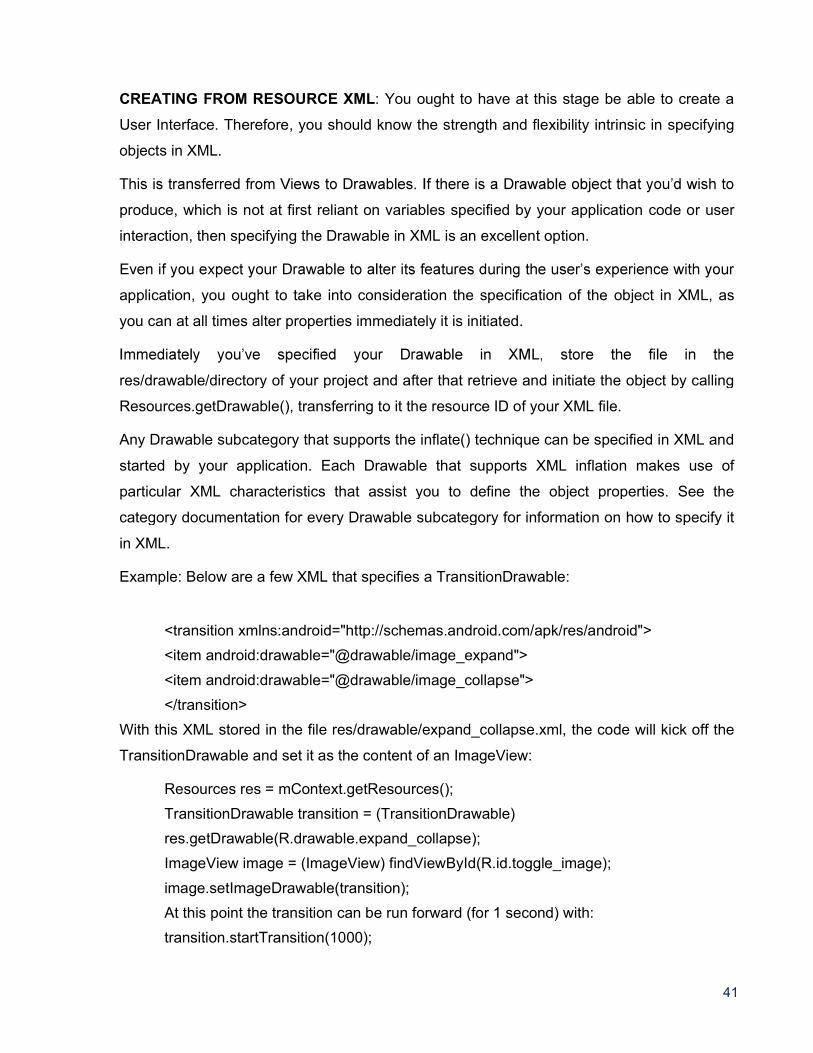
Example: Below are a few XML that specifies a TransitionDrawable:
<transition xmlns:android="http://schemas.android.com/apk/res/android">
<item android:drawable="@drawable/image_expand">
<item android:drawable="@drawable/image_collapse">
</transition>
With this XML stored in the file res/drawable/expand_collapse.xml, the code will kick off the
TransitionDrawable and set it as the content of an ImageView:
Resources res = mContext.getResources();
TransitionDrawable transition = (TransitionDrawable)
res.getDrawable(R.drawable.expand_collapse);
ImageView image = (ImageView) findViewById(R.id.toggle_image);
image.setImageDrawable(transition);
At this point the transition can be run forward (for 1 second) with:
transition.startTransition(1000);
42
SHAPE DRAWABLE:
Anytime you intend to draw a few 2D graphics dynamically, a ShapeDrawable object will
possibly be what you need to achieve this.
A ShapeDrawable, allows you c to draw as a program primeval shapes and design them in
any way you can think of.
A ShapeDrawable is an expansion of Drawable, that allows you to make use of it anywhere
a Drawable is should be used like for the background of a View, set with
setBackgroundDrawable().
Of course, you can as well draw your shape as its own customized View, to be incorporated
to your layout no matter the way it pleases you.
Due to the fact that ShapeDrawable possess its own draw() technique, you can produce a
subcategory of View that draws the ShapeDrawable during the View.onDraw() technique
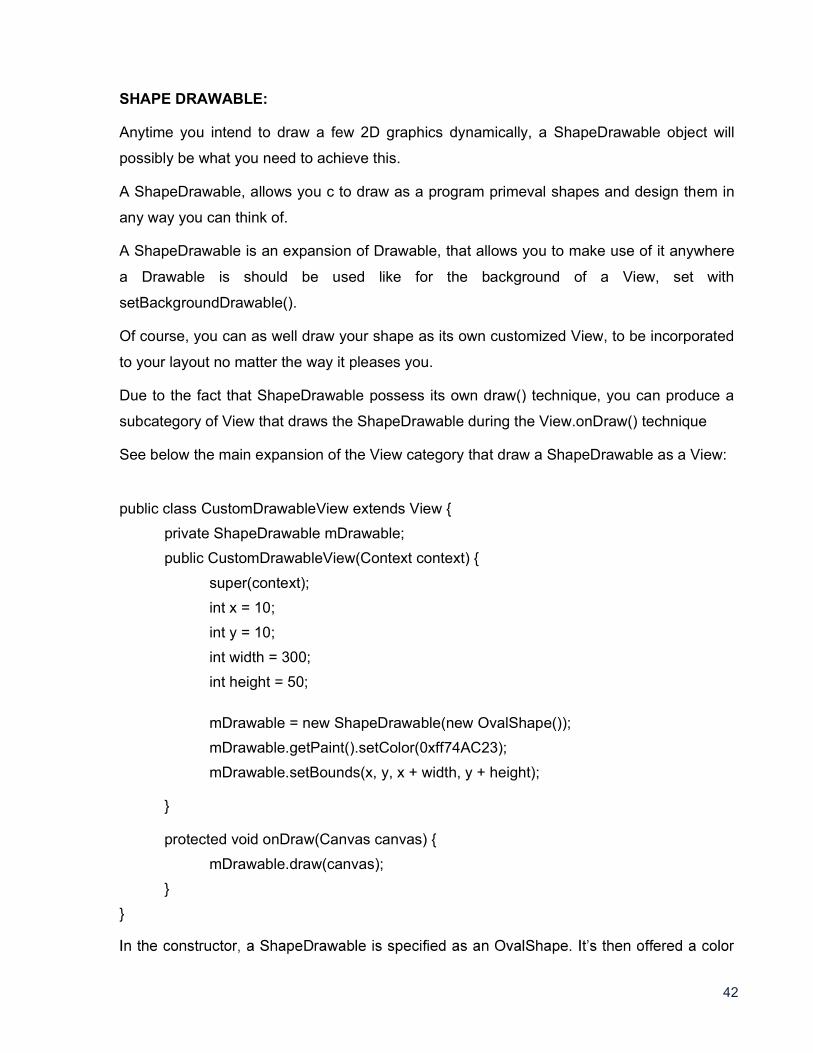
See below the main expansion of the View category that draw a ShapeDrawable as a View:
public class CustomDrawableView extends View {
private ShapeDrawable mDrawable;
public CustomDrawableView(Context context) {
super(context);
int x = 10;
int y = 10;
int width = 300;
int height = 50;
mDrawable = new ShapeDrawable(new OvalShape());
mDrawable.getPaint().setColor(0xff74AC23);
mDrawable.setBounds(x, y, x + width, y + height);
}
protected void onDraw(Canvas canvas) {
mDrawable.draw(canvas);
}
}
43
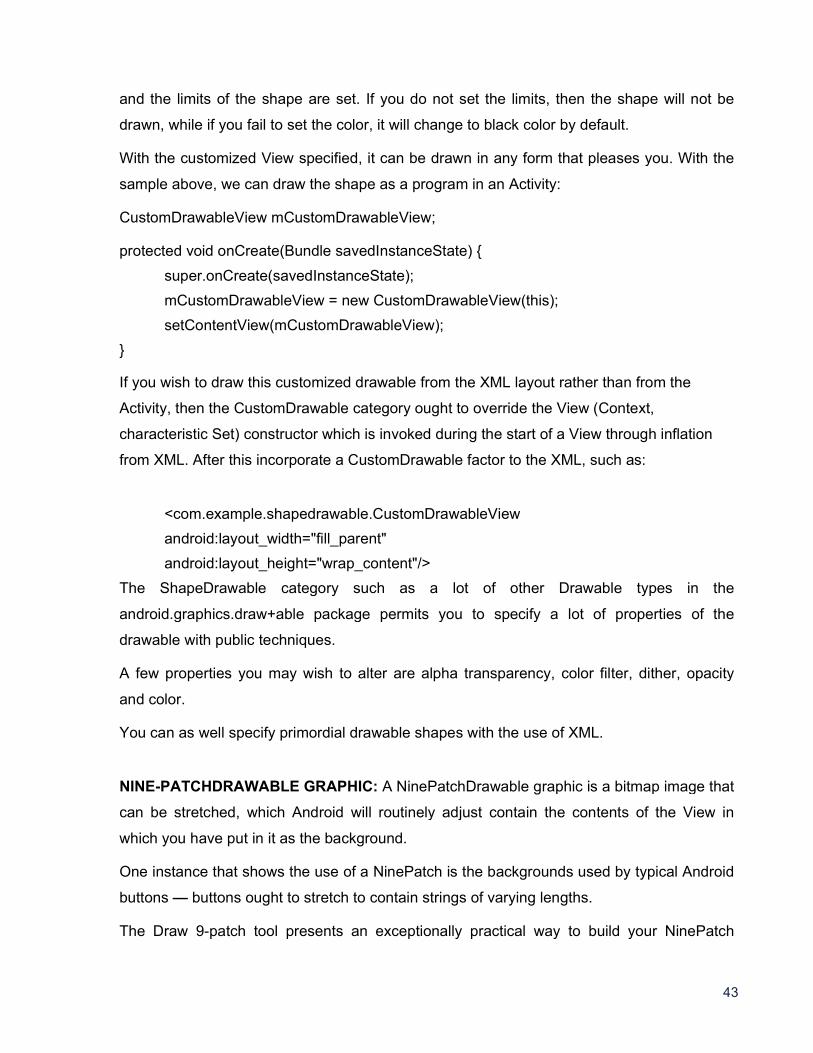
and the limits of the shape are set. If you do not set the limits, then the shape will not be
drawn, while if you fail to set the color, it will change to black color by default.
With the customized View specified, it can be drawn in any form that pleases you. With the
sample above, we can draw the shape as a program in an Activity:
CustomDrawableView mCustomDrawableView;
protected void onCreate(Bundle savedInstanceState) {
super.onCreate(savedInstanceState);
mCustomDrawableView = new CustomDrawableView(this);
setContentView(mCustomDrawableView);
}
If you wish to draw this customized drawable from the XML layout rather than from the
Activity, then the CustomDrawable category ought to override the View (Context,
characteristic Set) constructor which is invoked during the start of a View through inflation
from XML. After this incorporate a CustomDrawable factor to the XML, such as:
<com.example.shapedrawable.CustomDrawableView
android:layout_width="fill_parent"
android:layout_height="wrap_content"/>
The ShapeDrawable category such as a lot of other Drawable types in the
android.graphics.draw+able package permits you to specify a lot of properties of the
drawable with public techniques.
A few properties you may wish to alter are alpha transparency, color filter, dither, opacity
and color.
You can as well specify primordial drawable shapes with the use of XML.
NINE-PATCHDRAWABLE GRAPHIC: A NinePatchDrawable graphic is a bitmap image that
can be stretched, which Android will routinely adjust contain the contents of the View in
which you have put in it as the background.
One instance that shows the use of a NinePatch is the backgrounds used by typical Android
buttons buttons ought to stretch to contain strings of varying lengths.
The Draw 9-patch tool presents an exceptionally practical way to build your NinePatch
44
pictures, with the use of a WYSIWYG graphics editor. It even increases warnings if the area
pixel duplication.
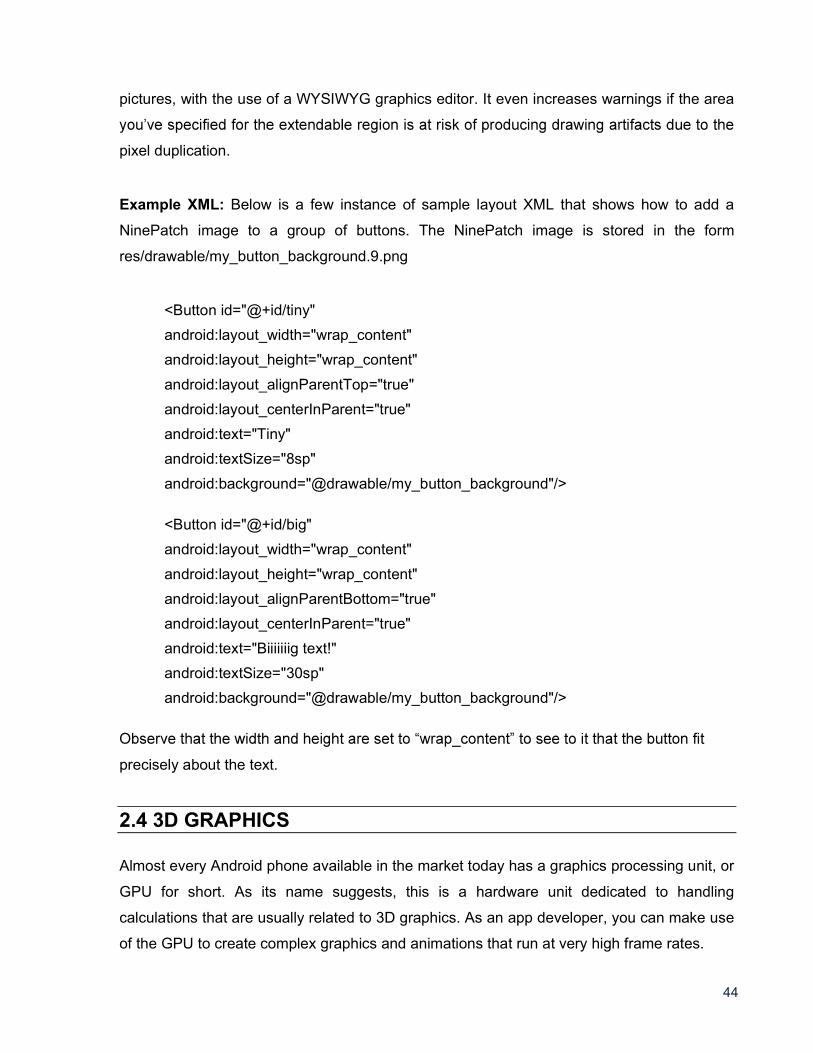
Example XML: Below is a few instance of sample layout XML that shows how to add a
NinePatch image to a group of buttons. The NinePatch image is stored in the form
res/drawable/my_button_background.9.png
<Button id="@+id/tiny"
android:layout_width="wrap_content"
android:layout_height="wrap_content"
android:layout_alignParentTop="true"
android:layout_centerInParent="true"
android:text="Tiny"
android:textSize="8sp"
android:background="@drawable/my_button_background"/>
<Button id="@+id/big"
android:layout_width="wrap_content"
android:layout_height="wrap_content"
android:layout_alignParentBottom="true"
android:layout_centerInParent="true"
android:text="Biiiiiiig text!"
android:textSize="30sp"
android:background="@drawable/my_button_background"/>
precisely about the text.
2.4 3D GRAPHICS
Almost every Android phone available in the market today has a graphics processing unit, or
GPU for short. As its name suggests, this is a hardware unit dedicated to handling
calculations that are usually related to 3D graphics. As an app developer, you can make use
of the GPU to create complex graphics and animations that run at very high frame rates.
45
There are currently two different APIs you can use to interact with an Android device's GPU:
Vulkan and OpenGL ES. While Vulkan is available only on devices running Android 7.0 or
higher, OpenGL ES is supported by all Android versions.
In this block, we will try to understand and started with using OpenGL ES 2.0 in Android
apps.
Prerequisites:
The latest version of Android Studio
an Android device that supports OpenGL ES 2.0 or higher
a recent version of Blender, or any other 3D modeling software
What Is OpenGL ES?
OpenGL, which is short for Open Graphics Library, is a platform-independent API that allows
you to create hardware-accelerated 3D graphics. OpenGL ES, short for OpenGL for
Embedded Systems, is a subset of the API.
OpenGL ES is a very low-level API. In other words, it doesn't offer any methods that allow
you to quickly create or manipulate 3D objects. Instead, while working with it, you are
expected to manually manage tasks such as creating the individual vertices and faces of 3D
objects, calculating various 3D transformations, and creating different types of shaders.
It is also worth mentioning that the Android SDK and NDK together allow you to write
OpenGL ES-related code in both Java and C.
In this Block, lets we understand, how to create 3D graphics using OpenGL in android.
Basic description of Underlying algorithm in step by step form:
1. Create a Project Graphics3d.
2. Put an image in res/drawable.
3. Create a custom view
46
2.5 MULTIMEDIA
MediaPlayer overview: The Android multimedia framework includes support for playing
variety of common media types, so that you can easily integrate audio, video and images
into your applications. You can play audio or video from media files stored in your
application's resources (raw resources), from standalone files in the filesystem, or from a
data stream arriving over a network connection, all using MediaPlayer APIs.
This document shows you how to write a media-playing application that interacts with the
user and the system in order to obtain good performance and a pleasant user experience.
In android, by using MediaPlayer class we can easily fetch, decode and play both audio and
video files with minimal setup.
The android media framework provides a built in support for playing a variety of common
media types, such as audio or video. We have a multiple ways to play audio or video but the
most important component of media framework is MediaPlayer class.
Android MediaPlayer Class: In android, by using MediaPlayer class we can access audio or
video files from application (raw) resources, standalone files in file system or from a data
stream arriving over a network connection and play audio or video files with the multiple
playback options such as play, pause, forward, backward, etc.
resource (res/raw) directory.
MediaPlayer mPlayer = MediaPlayer.create(this, R.raw.baitikochi_chuste);
mPlayer.start();
The second parameter in create() method is the name of the song that we want to play from
our application resource directory (res/raw). In case if raw folder not exists in your
application, create a new raw folder under res directory and add a properly encoded and
formatted media files in it.
In case, if we want to play an audio from a URI that is locally available in the system, we
need to write the code like as shown below.
Uri myUri = ....; // initialize Uri here
MediaPlayer mPlayer = new MediaPlayer();

47
mPlayer.setAudioStreamType(AudioManager.STREAM_MUSIC);
mPlayer.setDataSource(getApplicationContext(), myUri);
mPlayer.prepare();
mPlayer.start();
If we want to play an audio from a URL via HTTP streaming, we need to write the code like
as shown below.
String url = "http://........"; // your URL here
MediaPlayer mPlayer = new MediaPlayer();
mPlayer.setAudioStreamType(AudioManager.STREAM_MUSIC);
mPlayer.setDataSource(url);
mPlayer.prepare(); // might take long! (for buffering, etc)
mPlayer.start();
If you observe above code snippets, we create an instance of MediaPlayer class and added
required audio source, streaming type, audio file path, etc. to play an audio from our
application.
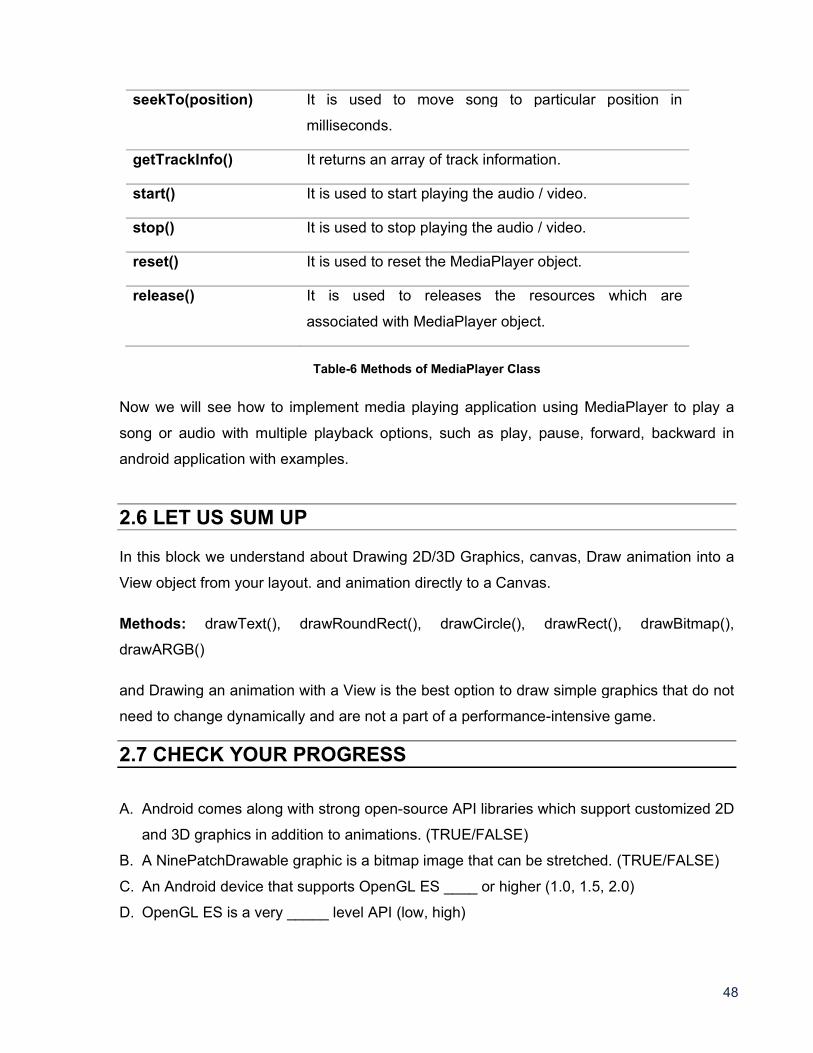
Apart from above methods, MediaPlayer class provides a different type of methods to
control audio and video files based on requirements.
Method Description
getCurrentPosition() It is used to get the current position of song in
milliseconds.
getDuration() It is used to get the total time duration of song in
milliseconds.
isPlaying() It returns true / false to indicate whether song playing or
not.
pause() It is used to pause the song playing.
setAudioStreamType() it is used to specify the audio streaming type.
setDataSource() It is used to specify the path of audio / video file to play.
setVolume() It is used to adjust media player volume either up /
down.
48
seekTo(position) It is used to move song to particular position in
milliseconds.
getTrackInfo() It returns an array of track information.
start() It is used to start playing the audio / video.
stop() It is used to stop playing the audio / video.
reset() It is used to reset the MediaPlayer object.
release() It is used to releases the resources which are
associated with MediaPlayer object.
Table-6 Methods of MediaPlayer Class
Now we will see how to implement media playing application using MediaPlayer to play a
song or audio with multiple playback options, such as play, pause, forward, backward in
android application with examples.
2.6 LET US SUM UP In this block we understand about Drawing 2D/3D Graphics, canvas, Draw animation into a
View object from your layout. and animation directly to a Canvas.
Methods: drawText(), drawRoundRect(), drawCircle(), drawRect(), drawBitmap(),
drawARGB()
and Drawing an animation with a View is the best option to draw simple graphics that do not
need to change dynamically and are not a part of a performance-intensive game.
2.7 CHECK YOUR PROGRESS
A. Android comes along with strong open-source API libraries which support customized 2D
and 3D graphics in addition to animations. (TRUE/FALSE)
B. A NinePatchDrawable graphic is a bitmap image that can be stretched. (TRUE/FALSE)
C. An Android device that supports OpenGL ES ____ or higher (1.0, 1.5, 2.0)
D. OpenGL ES is a very _____ level API (low, high)
49
2.8 CHECK YOUR PROGRESS: POSSIBLE ANSWERS
A. TRUE
B. TRUE
C. 2.0
D. low
2.9 FURTHER READING
Android Application Development for Dummies by Donn Felker
Professional Android 4th Edition by Reto Meier (Author), Ian Lake (Author) ISBN-13:
978-1118949528 ISBN-10: 9781118949528
Android Programming by Nicolas Gramlich.
Thinking in Java (4th Edition) 4th Edition by Bruce Eckel ISBN-13: 978-0131872486
ISBN-10: 0131872486 Android Programming for Beginners: Learn all the Java and
Android skills you need to start making powerful mobile applications ISBN-10:
1785883267 ISBN-13: 978-1785883262
Learning Java by Building Android Games: Explore Java Through Mobile Game
Development ISBN-10: 1784398853 ISBN-13: 978-1784398859
Beginning Android Application Development by Wei-Meng Lee
Java: A Beginner's Guide, Sixth Edition 6th Edition by Herbert Schildt ISBN-13: 978-
0071809252 ISBN-10: 0071809252
Android Programming: The Big Nerd Ranch Guide (3rd Edition) (Big Nerd Ranch
Guides) 3rd Edition by Bill Phillips , Chris Stewart , Kristin Marsicano ISBN-13: 978-
0134706054 ISBN-10: 0134706056
Android Programming: Pushing the Limits 1st Edition by Erik Hellman ISBN-13: 978-
1118717370 ISBN-10: 1118717376
Head First Android Development: A Brain-Friendly Guide 1st Edition by Dawn
Griffiths ISBN-13: 978-1449362188 ISBN-10: 1449362184
Pro Android by Sayed Y. Hashimi and Satya Komatineni, Springer, New York, 2009.
50
2.10 ASSIGNMENTS
A. Write sort note on 2D & 3D Graphics.
B. Explain code of HOW TO DRAW 2D OBJECTS ON A CANVAS.
C. Write sort note on NINE-PATCHDRAWABLE GRAPHIC.
D. What Is OpenGL ES?
E. List out graphics types and explain each in detail.
F.
2.11 ACTIVITIES
Create an android application using 2d or 3d animation-based game as per your
knowledge

51
Unit 3: Drawing and Working with Animation
Unit Structure 3.1. Learning Objectives 3.2. Introduction 3.3. Animation type 3.4. Animation Examples
3.5. Let us Sumup
3.6. Check your Progress 3.7. Check your Progress: Possible Answers 3.8. Further Reading 3.9. Assignment 3.10. Activities
3
52
3.1 LEARNING OBJECTIVE
After studying this unit student should be able to:
Understand the concept of drawing
Get basic knowledge about animation of android
Understand the type of animation using xml
Be able to create dynamic or hybrid animation using xml library
3.2 INTRODUCTION Android Drawing App are support to following things:
Draw Users will be able to draw on a blank canvas (whiteboard).
Erase Users will be able to erase what has been drawn.
Undo Users will be able to undo and redo drawing paths.
Color Users will be able to draw using a color of their choice from at least these colors:
black, dark gray, light gray, blue, red, and green, orange, yellow.
Share Users will be able to capture a screen shot and email it to a friend.
Paint applications are become famous thanks to Microsoft Paint, well known as simply Paint
or Paintbrush. It was a simple computer graphics application included with all versions of
Microsoft Windows. In this chapter, you are going to discover how to create a Paint
Application for Android which will let users to draw on the screen with their fingers.
Draw paths with fingers on the screen
Normal mode
Emboss mode
Blur mode
Clear option to remove all paths on the screen
Finger Path Object: The first step is to create a FingerPath Object to represent a path drawn
with the finger on the screen. Our FingerPath class will have several fields letting us to
53
define:
Colour of the path
Emboss mode or no
Blur mode or no
Stroke width of the path
Path object from the standard SDK representing the path drawn
In this unit we learnt drawing, 2d animation
3.3 ANIMATION AND TYPE
Android Animation is used to give the UI a rich look and feel. Animations in android apps
animations into our application.
Android Animation
Animation in android apps is the process of creating motion and shape change. The basic
ways of animation t
Fade In Animation
Fade Out Animation
Cross Fading Animation
Blink Animation
Zoom In Animation
Zoom Out Animation
Rotate Animation
Move Animation
Slide Up Animation
Slide Down Animation
54
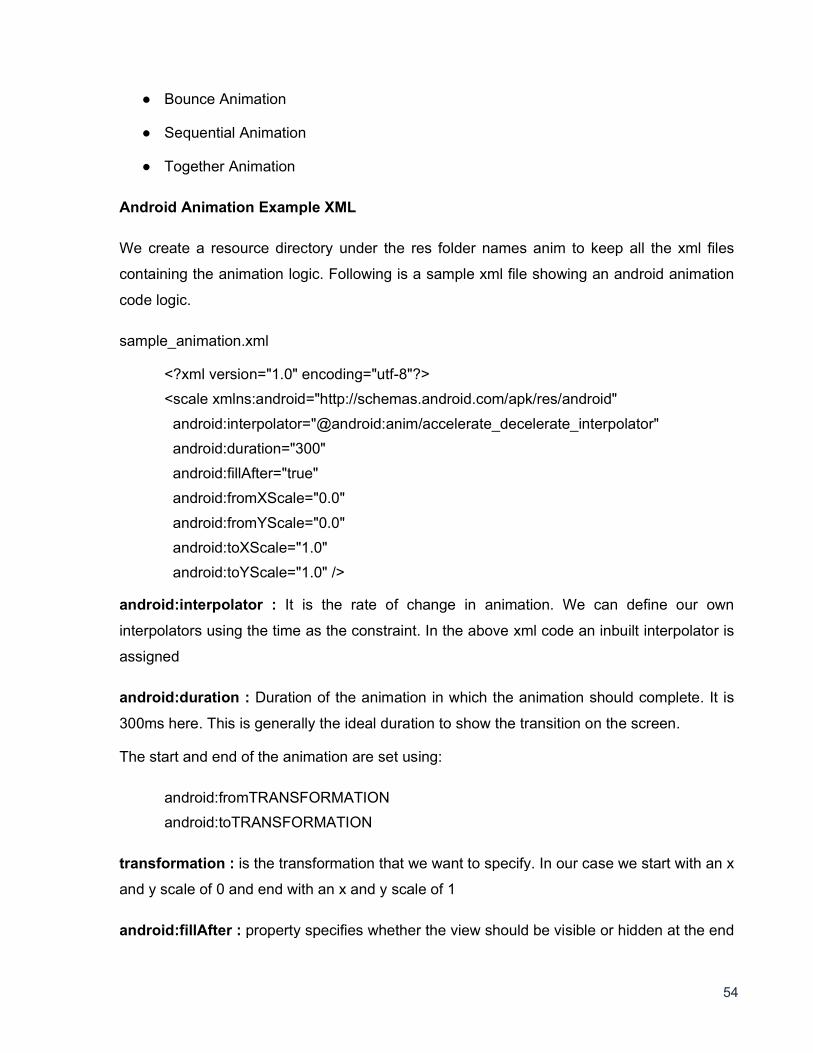
Bounce Animation
Sequential Animation
Together Animation
Android Animation Example XML
We create a resource directory under the res folder names anim to keep all the xml files
containing the animation logic. Following is a sample xml file showing an android animation
code logic.
sample_animation.xml
<?xml version="1.0" encoding="utf-8"?>
<scale xmlns:android="http://schemas.android.com/apk/res/android"
android:interpolator="@android:anim/accelerate_decelerate_interpolator"
android:duration="300"
android:fillAfter="true"
android:fromXScale="0.0"
android:fromYScale="0.0"
android:toXScale="1.0"
android:toYScale="1.0" />
android:interpolator : It is the rate of change in animation. We can define our own
interpolators using the time as the constraint. In the above xml code an inbuilt interpolator is
assigned
android:duration : Duration of the animation in which the animation should complete. It is
300ms here. This is generally the ideal duration to show the transition on the screen.
The start and end of the animation are set using:
android:fromTRANSFORMATION
android:toTRANSFORMATION
transformation : is the transformation that we want to specify. In our case we start with an x
and y scale of 0 and end with an x and y scale of 1
android:fillAfter : property specifies whether the view should be visible or hidden at the end
55
it visible in the above code. If it sets to false, the element
changes to its previous state after the animation
android:startOffset : It is the waiting time before an animation starts. This property is
mainly used to perform multiple animations in a sequential manner
android:repeatMode : This is useful when you want the animation to be repeat
android:repeatCount : This defines number of repetitions on animation. If we set this value
to infinite then animation will repeat infinite times
3.4 ANIMATION EXAMPLES
wizard with own credentials,
Loading Animation when UI widget is clicked: Our aim is to show an animation when any
widget(lets say TextView) is clicked. For that we need to use the Animation Class. The xml
file that contains the animation logic is loaded using AnimationUtils class by calling
the loadAnimation() function. The below snippet shows this implementation.
Animation animation;
animation = AnimationUtils.loadAnimation(getApplicationContext(),
R.anim.sample_animation);
To start the animation we need to call the startAnimation() function on the UI element as shown
in following : sampleTextView.startAnimation(animation);
Here we perform the animation on a textview component by passing the type of Animation
as the parameter.
Setting the Animation Listeners
This is only needed if we wish to listen to events like start, end or repeat. For this the activity
must implement AnimationListener and the following methods need to overridden.
onAnimationStart : This will be triggered once the animation started
onAnimationEnd : This will be triggered once the animation is over
onAnimationRepeat : This will be triggered if the animation repeats
56
3.5 LET US SUM UP
In this block learned about animation class and methods Android Drawing and animation
types : Draw, Erase, Undo, Colour, Share, Draw paths with fingers on the screen, Normal
mode, Emboss mode, Blur mode, Emboss mode or no, Blur mode or no, Stroke width of the
path.
3.6 CHECK YOUR PROGRESS
A. _____: Users will be able to erase what has been drawn. (Erase/Draw)
B. android:interpolator means It is the rate of change in animation. (TRUE/FALSE)
C. android:duration means Duration of the animation in which the animation should
complete. (TRUE/FALSE)
D. ____________: This is useful when you want the animation to be repeat
(repeatMode,repeatCount )
3.7 CHECK YOUR PROGRESS: POSSIBLE ANSWERS
A. Erase
B. TRUE
C. TRUE
D. RepeatMode
3.8 FURTHER READING
Learning Java by Building Android Games: Explore Java Through Mobile Game
Development ISBN-10: 1784398853 ISBN-13: 978-1784398859
Beginning Android Application Development by Wei-Meng Lee
Android Programming: The Big Nerd Ranch Guide (3rd Edition) (Big Nerd Ranch Guides)
3rd Edition by Bill Phillips , Chris Stewart , Kristin Marsicano ISBN-13: 978-0134706054
ISBN-10: 0134706056
Android Programming: Pushing the Limits 1st Edition by Erik Hellman ISBN-13: 978-
1118717370 ISBN-10: 1118717376
57
Pro Android by Sayed Y. Hashimi and Satya Komatineni, Springer, New York, 2009.
Head First Android Development: A Brain-Friendly Guide 1st Edition by Dawn Griffiths
ISBN-13: 978-1449362188 ISBN-10: 1449362184
Professional Android 4th Edition by Reto Meier (Author), Ian Lake (Author) ISBN-13:
978-1118949528 ISBN-10: 9781118949528
3.9 ASSIGNMENTS
A. What is the thing support by Android Drawing? explain each in detail.
B. Write as sort note on Create Custom View.
C. List out animation type and explain each in detail.
D. Explain fade animation xml code in detail.
3.10 ACTIVITIES
Create android application for all animation can apply on single or double object of
drawing or any image
58
Block-3
Networking, Telephony and Location
59
Unit 1: Android Networking, Web
and Telephony API
Unit Structure
1.1 Learning Objectives
1.2 Introduction
1.3 Checking Network Connection
1.4 Android NFC
1.5 Android WebView
1.6 Android - Wi-Fi
1.7 Overview of Android Telephony API
1.8 Let us sum up
1.9 Check your Progress
1.10 Check your Progress: Possible Answers
1.11 Further Reading
1.12 Assignment
1.13 Activities
1
60
1.1 LEARNING OBJECTIVE
After studying this unit student should be able to:
Get fimiler about Android networking terminology
Understand class method of android network states
To gain experience about WAP and WebView components for accessing local or
external webpages
Students will understand Android Telephony API and each methodology for
accessing it.
1.2 INTRODUCTION
Networking has played a critical role in Android apps since the very beginning of Android
retrieve data or perform other networking functions.
In the process, you will learn about the following:
How to check your network connection status.
How to perform network operations.
How to leverage open source libraries to perform network operations.
How to profile the network performance of your app.
Android lets your application connect to the internet or any other local network and allows
you to perform network operations.
A device can have various types of network connections. This chapter focuses on using
either a Wi-Fi or a mobile network connection.
Note: Update Note: This chapter is now up to date with the latest version of Android Studio
version 3.1.2, and uses Kotlin for app development.
Connected states are:
State
Connecting
Disconnected
Disconnecting
61
Suspended
Unknown
1.3 CHECKING NETWORK CONNECTION
Lets understand and perform any network operations, you must first check that are you
connected to that network or internet e.t.c. For this android provides ConnectivityManager
class. You need to instantiate an object of this class by calling getSystemService() method.
ConnectivityManager check = (ConnectivityManager)
this.context.getSystemService(Context.CONNECTIVITY_SERVICE);
Once you instantiate the object of ConnectivityManager class, you can use
getAllNetworkInfo method to get the information of all the networks. This method returns an
array of Network Info. So, you have to receive it like this.
NetworkInfo[] info = check.getAllNetworkInfo();
The last thing you need to do is to check Connected State of the network. Its syntax is given
for (int i = 0; i<info.length; i++){
if (info[i].getState() == NetworkInfo.State.CONNECTED){
Toast.makeText(context, "Internet is connected
Toast.LENGTH_SHORT).show();
}
}
Apart from these connected states, there are other states a network can achieve. They are
listed as in introduction section.
Performing Network Operations:
After checking that you are connected to the internet, you can perform any network
operation. Here we are fetching the html of a website from a url.
Android provides HttpURLConnection and URL class to handle these operations. You need
to instantiate an object of URL class by providing the link of website. Its syntax is as follows:
62
String link = "http://www.google.com";
URL url = new URL(link);
After that you need to call openConnection method of url class and receive it in a
HttpURLConnection object. After that you need to call the connect method of
HttpURLConnection class.
HttpURLConnection conn = (HttpURLConnection) url.openConnection();
conn.connect();
And the last thing you need to do is to fetch the HTML from the website. For this you will use
InputStream is = conn.getInputStream();
BufferedReader reader = new BufferedReader(new InputStreamReader(is,"UTF-8"));
String webPage = "",data="";
while ((data = reader.readLine()) != null){
webPage += data + "\n";
}
Apart from this connect method, there are other methods available in HttpURLConnection
class. They are listed below :
Method Description
disconnect() This method releases this connection so
that its resources may be either reused or
closed
getRequestMethod() This method returns the request method
which will be used to make the request to
the remote HTTP server
getResponseCode() This method returns response code
returned by the remote HTTP server
setRequestMethod(String method) This method Sets the request command
which will be sent to the remote HTTP
63
server
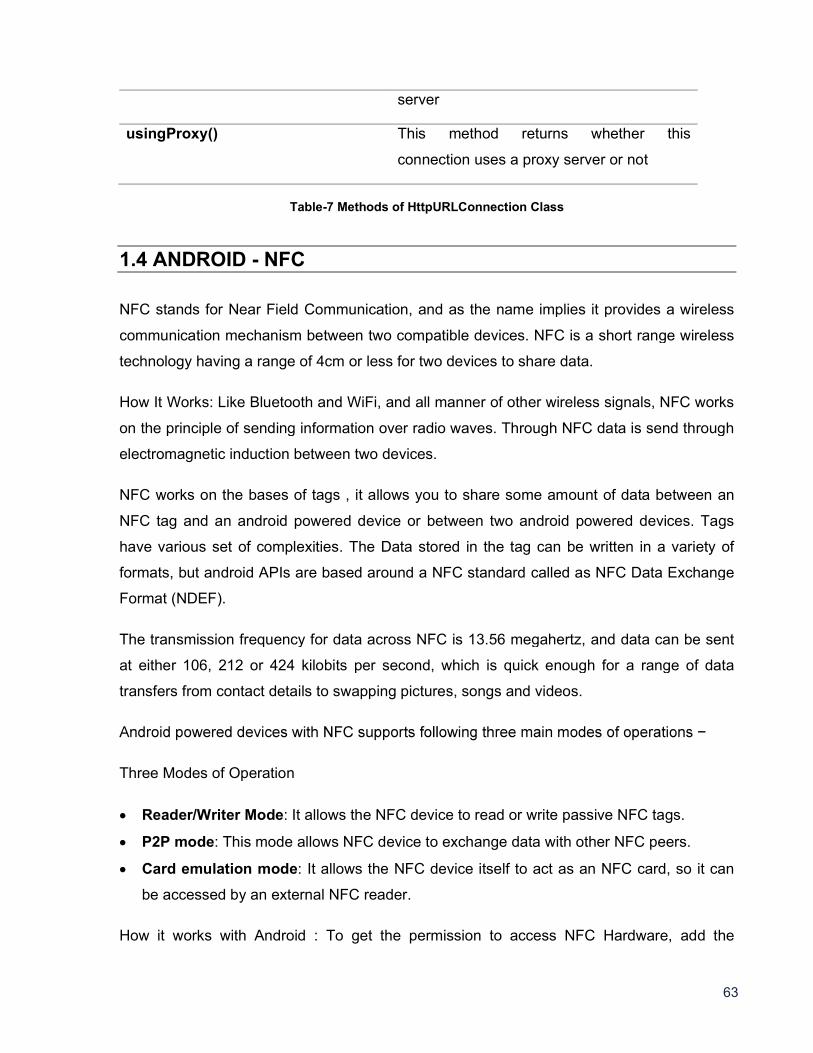
usingProxy() This method returns whether this
connection uses a proxy server or not
Table-7 Methods of HttpURLConnection Class
1.4 ANDROID - NFC
NFC stands for Near Field Communication, and as the name implies it provides a wireless
communication mechanism between two compatible devices. NFC is a short range wireless
technology having a range of 4cm or less for two devices to share data.
How It Works: Like Bluetooth and WiFi, and all manner of other wireless signals, NFC works
on the principle of sending information over radio waves. Through NFC data is send through
electromagnetic induction between two devices.
NFC works on the bases of tags , it allows you to share some amount of data between an
NFC tag and an android powered device or between two android powered devices. Tags
have various set of complexities. The Data stored in the tag can be written in a variety of
formats, but android APIs are based around a NFC standard called as NFC Data Exchange
Format (NDEF).
The transmission frequency for data across NFC is 13.56 megahertz, and data can be sent
at either 106, 212 or 424 kilobits per second, which is quick enough for a range of data
transfers from contact details to swapping pictures, songs and videos.
Three Modes of Operation
Reader/Writer Mode: It allows the NFC device to read or write passive NFC tags.
P2P mode: This mode allows NFC device to exchange data with other NFC peers.
Card emulation mode: It allows the NFC device itself to act as an NFC card, so it can
be accessed by an external NFC reader.
How it works with Android : To get the permission to access NFC Hardware, add the
64
following permission in your Android.Manifest file.
<uses-sdk android:minSdkVersion="10"/>
First thing to note is that not all android powered devices provide NFC technology. So to
make sure that your application shows up in google play for only those devices that have
NFC Hardware, add the following line in your Android.Manifest file.
<uses-feature android:name="android.hardware.nfc" android:required="true"/>
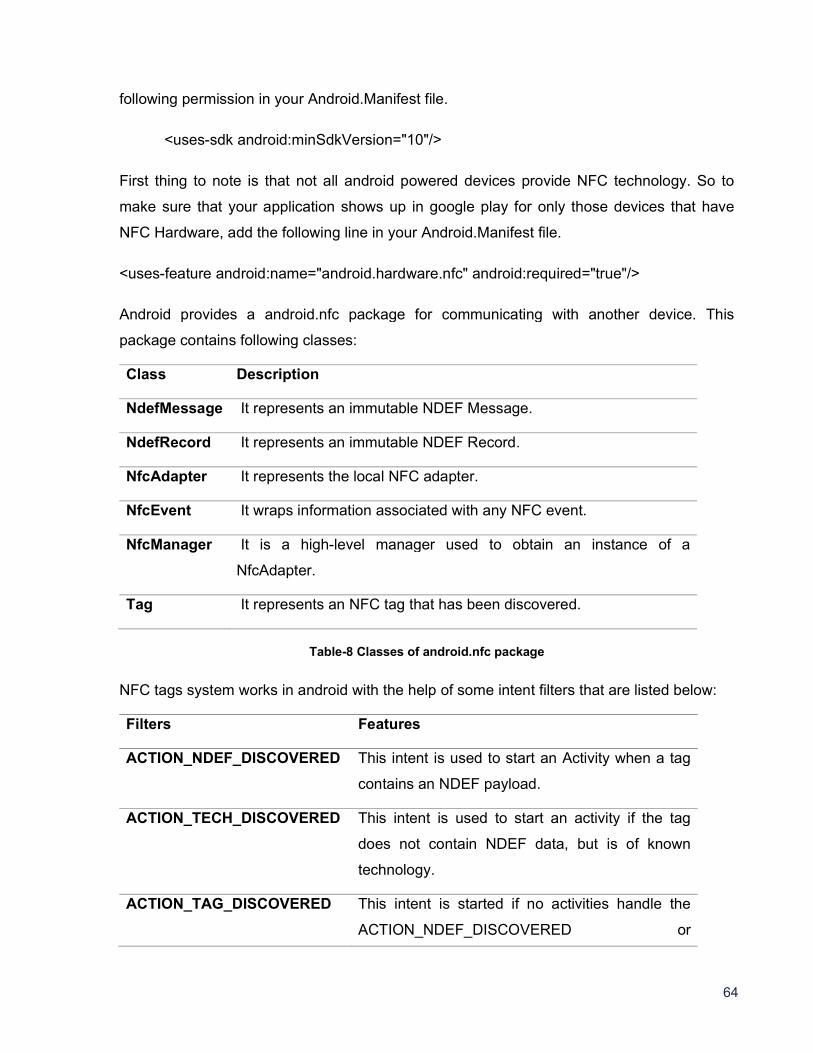
Android provides a android.nfc package for communicating with another device. This
package contains following classes:
Class Description
NdefMessage It represents an immutable NDEF Message.
NdefRecord It represents an immutable NDEF Record.
NfcAdapter It represents the local NFC adapter.
NfcEvent It wraps information associated with any NFC event.
NfcManager It is a high-level manager used to obtain an instance of a
NfcAdapter.
Tag It represents an NFC tag that has been discovered.
Table-8 Classes of android.nfc package
NFC tags system works in android with the help of some intent filters that are listed below:
Filters Features
ACTION_NDEF_DISCOVERED This intent is used to start an Activity when a tag
contains an NDEF payload.
ACTION_TECH_DISCOVERED This intent is used to start an activity if the tag
does not contain NDEF data, but is of known
technology.
ACTION_TAG_DISCOVERED This intent is started if no activities handle the
ACTION_NDEF_DISCOVERED or
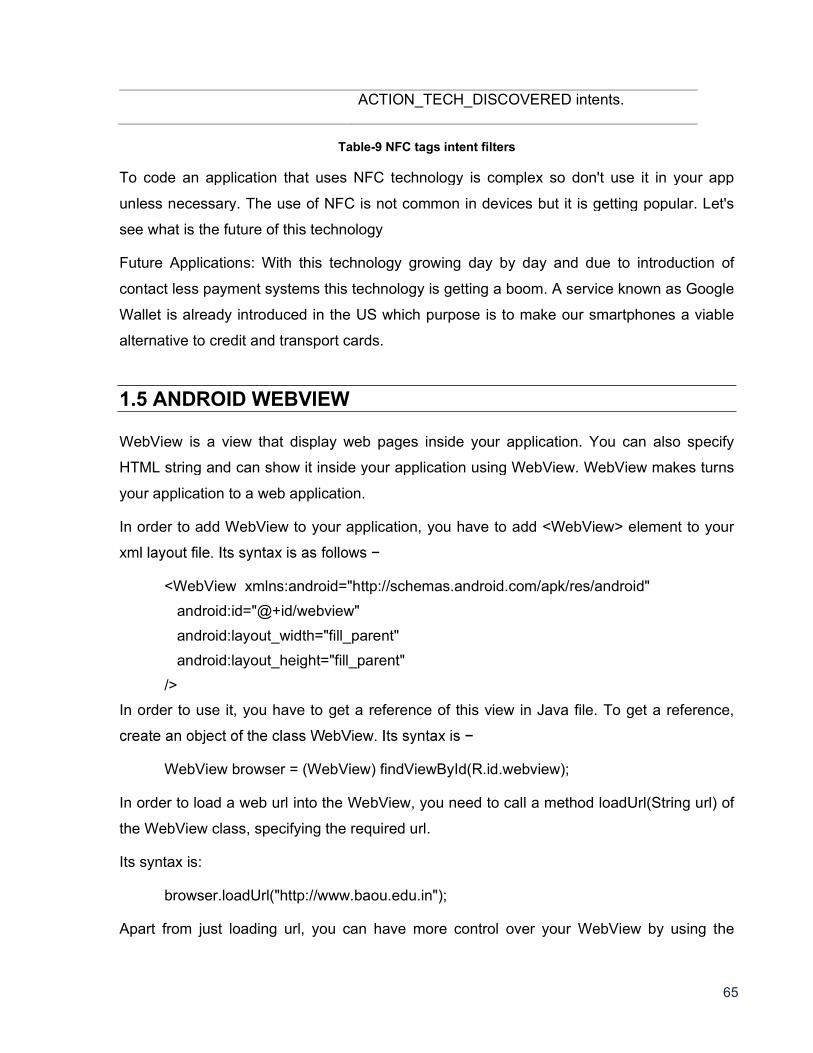
65
ACTION_TECH_DISCOVERED intents.
Table-9 NFC tags intent filters
To code an application that uses NFC technology is complex so don't use it in your app
unless necessary. The use of NFC is not common in devices but it is getting popular. Let's
see what is the future of this technology
Future Applications: With this technology growing day by day and due to introduction of
contact less payment systems this technology is getting a boom. A service known as Google
Wallet is already introduced in the US which purpose is to make our smartphones a viable
alternative to credit and transport cards.
1.5 ANDROID WEBVIEW
WebView is a view that display web pages inside your application. You can also specify
HTML string and can show it inside your application using WebView. WebView makes turns
your application to a web application.
In order to add WebView to your application, you have to add <WebView> element to your
<WebView xmlns:android="http://schemas.android.com/apk/res/android"
android:id="@+id/webview"
android:layout_width="fill_parent"
android:layout_height="fill_parent"
/>
In order to use it, you have to get a reference of this view in Java file. To get a reference,
WebView browser = (WebView) findViewById(R.id.webview);
In order to load a web url into the WebView, you need to call a method loadUrl(String url) of
the WebView class, specifying the required url.
Its syntax is:
browser.loadUrl("http://www.baou.edu.in");
Apart from just loading url, you can have more control over your WebView by using the
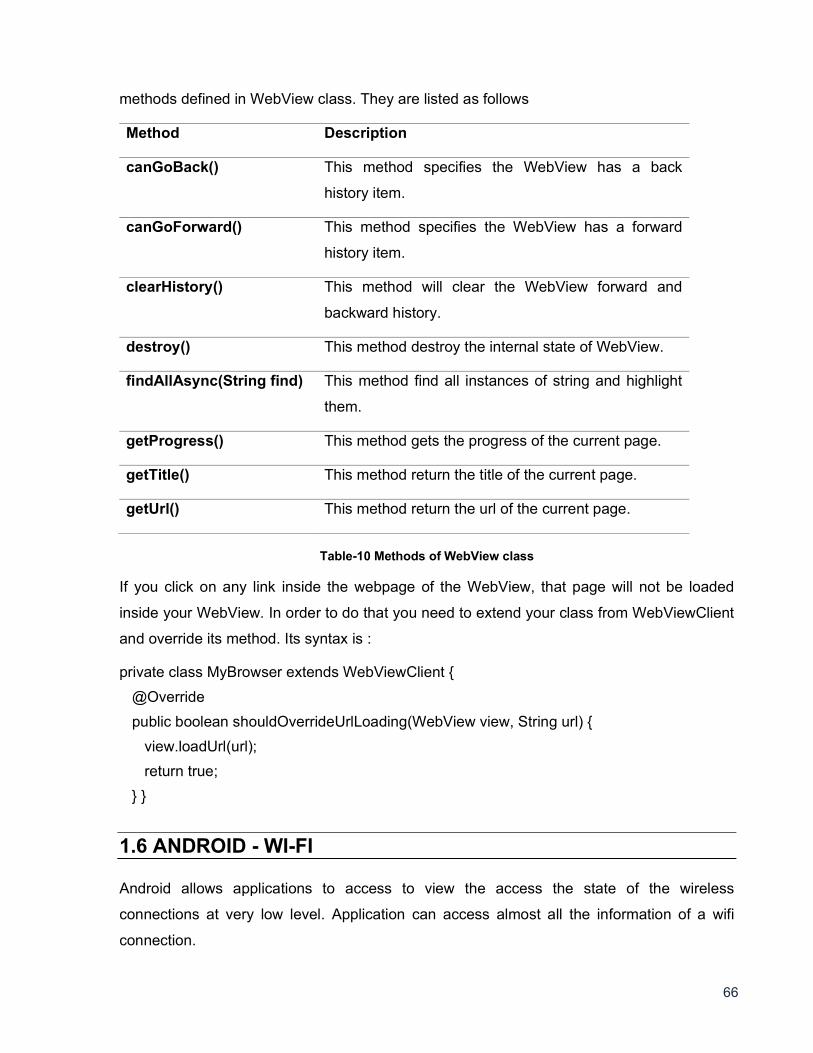
66
methods defined in WebView class. They are listed as follows
Method Description
canGoBack() This method specifies the WebView has a back
history item.
canGoForward() This method specifies the WebView has a forward
history item.
clearHistory() This method will clear the WebView forward and
backward history.
destroy() This method destroy the internal state of WebView.
findAllAsync(String find) This method find all instances of string and highlight
them.
getProgress() This method gets the progress of the current page.
getTitle() This method return the title of the current page.
getUrl() This method return the url of the current page.
Table-10 Methods of WebView class
If you click on any link inside the webpage of the WebView, that page will not be loaded
inside your WebView. In order to do that you need to extend your class from WebViewClient
and override its method. Its syntax is :
private class MyBrowser extends WebViewClient {
@Override
public boolean shouldOverrideUrlLoading(WebView view, String url) {
view.loadUrl(url);
return true;
} }
1.6 ANDROID - WI-FI
Android allows applications to access to view the access the state of the wireless
connections at very low level. Application can access almost all the information of a wifi
connection.
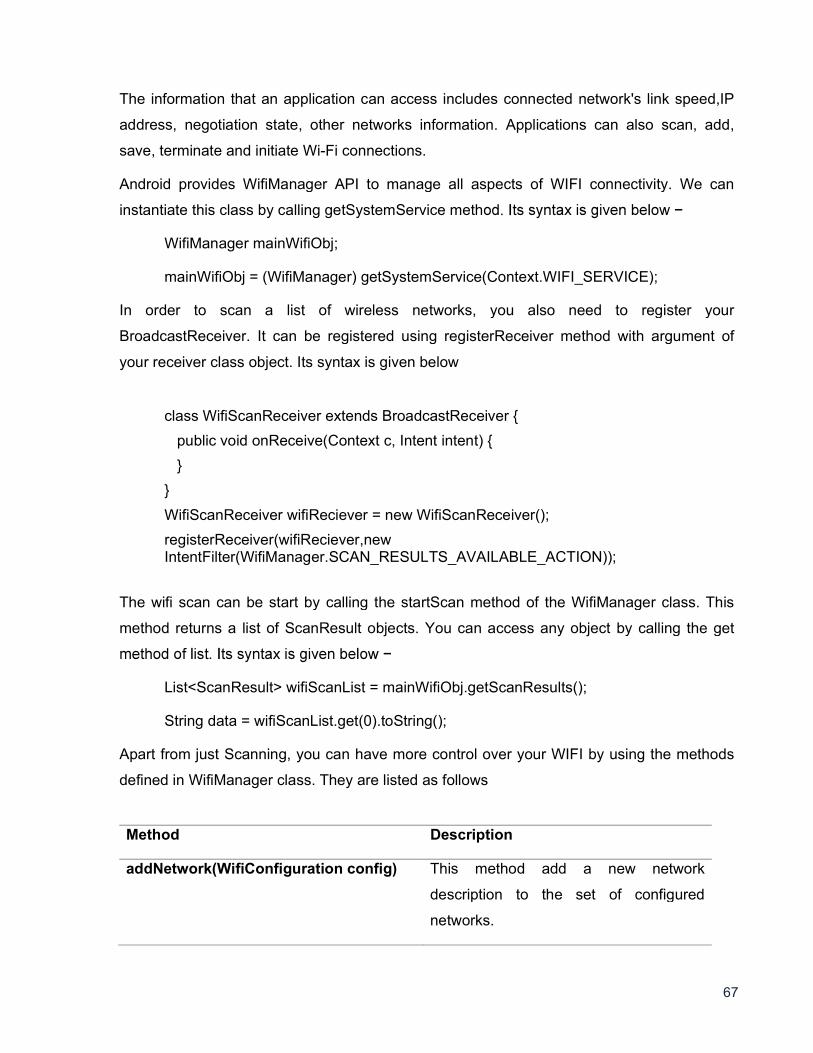
67
The information that an application can access includes connected network's link speed,IP
address, negotiation state, other networks information. Applications can also scan, add,
save, terminate and initiate Wi-Fi connections.
Android provides WifiManager API to manage all aspects of WIFI connectivity. We can
instantiate this class by calling getSystemService meth
WifiManager mainWifiObj;
mainWifiObj = (WifiManager) getSystemService(Context.WIFI_SERVICE);
In order to scan a list of wireless networks, you also need to register your
BroadcastReceiver. It can be registered using registerReceiver method with argument of
your receiver class object. Its syntax is given below
class WifiScanReceiver extends BroadcastReceiver {
public void onReceive(Context c, Intent intent) {
}
}
WifiScanReceiver wifiReciever = new WifiScanReceiver();
registerReceiver(wifiReciever,new IntentFilter(WifiManager.SCAN_RESULTS_AVAILABLE_ACTION));
The wifi scan can be start by calling the startScan method of the WifiManager class. This
method returns a list of ScanResult objects. You can access any object by calling the get
List<ScanResult> wifiScanList = mainWifiObj.getScanResults();
String data = wifiScanList.get(0).toString();
Apart from just Scanning, you can have more control over your WIFI by using the methods
defined in WifiManager class. They are listed as follows
Method Description
addNetwork(WifiConfiguration config) This method add a new network
description to the set of configured
networks.
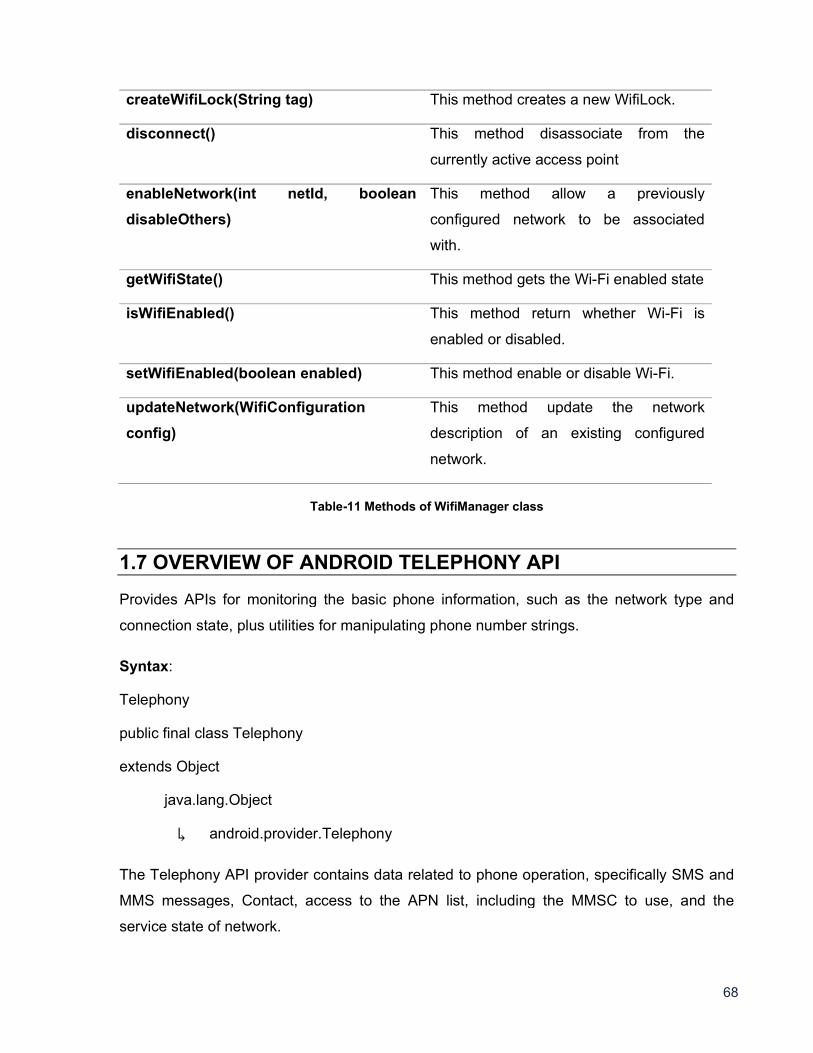
68
createWifiLock(String tag) This method creates a new WifiLock.
disconnect() This method disassociate from the
currently active access point
enableNetwork(int netId, boolean
disableOthers)
This method allow a previously
configured network to be associated
with.
getWifiState() This method gets the Wi-Fi enabled state
isWifiEnabled() This method return whether Wi-Fi is
enabled or disabled.
setWifiEnabled(boolean enabled) This method enable or disable Wi-Fi.
updateNetwork(WifiConfiguration
config)
This method update the network
description of an existing configured
network.
Table-11 Methods of WifiManager class
1.7 OVERVIEW OF ANDROID TELEPHONY API
Provides APIs for monitoring the basic phone information, such as the network type and
connection state, plus utilities for manipulating phone number strings.
Syntax:
Telephony
public final class Telephony
extends Object
java.lang.Object
android.provider.Telephony
The Telephony API provider contains data related to phone operation, specifically SMS and
MMS messages, Contact, access to the APN list, including the MMSC to use, and the
service state of network.
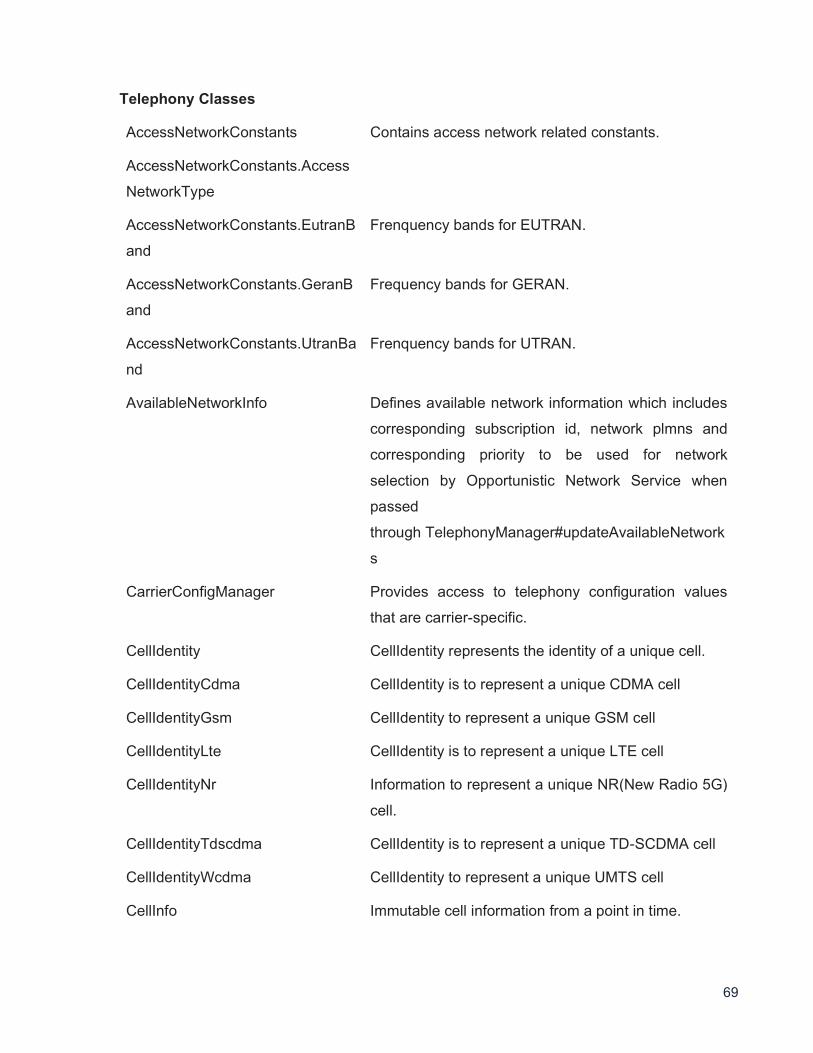
69
Telephony Classes
AccessNetworkConstants Contains access network related constants.
AccessNetworkConstants.Access
NetworkType
AccessNetworkConstants.EutranB
and
Frenquency bands for EUTRAN.
AccessNetworkConstants.GeranB
and
Frequency bands for GERAN.
AccessNetworkConstants.UtranBa
nd
Frenquency bands for UTRAN.
AvailableNetworkInfo Defines available network information which includes
corresponding subscription id, network plmns and
corresponding priority to be used for network
selection by Opportunistic Network Service when
passed
through TelephonyManager#updateAvailableNetwork
s
CarrierConfigManager Provides access to telephony configuration values
that are carrier-specific.
CellIdentity CellIdentity represents the identity of a unique cell.
CellIdentityCdma CellIdentity is to represent a unique CDMA cell
CellIdentityGsm CellIdentity to represent a unique GSM cell
CellIdentityLte CellIdentity is to represent a unique LTE cell
CellIdentityNr Information to represent a unique NR(New Radio 5G)
cell.
CellIdentityTdscdma CellIdentity is to represent a unique TD-SCDMA cell
CellIdentityWcdma CellIdentity to represent a unique UMTS cell
CellInfo Immutable cell information from a point in time.
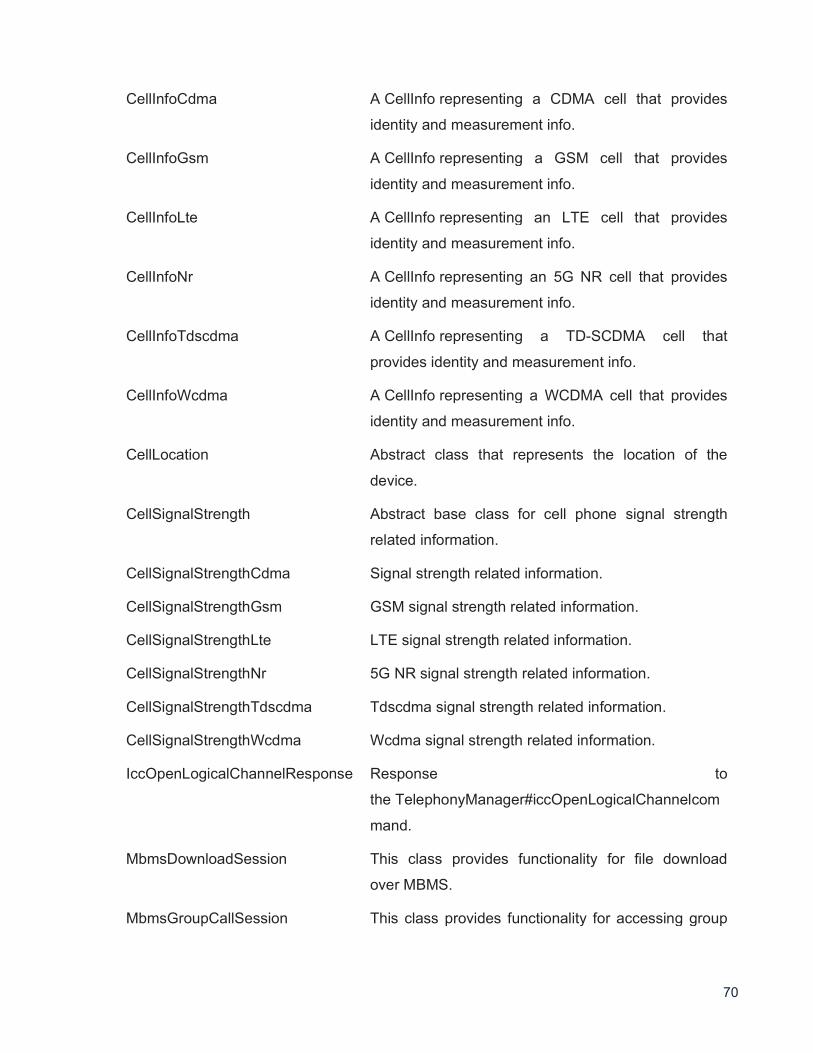
70
CellInfoCdma A CellInfo representing a CDMA cell that provides
identity and measurement info.
CellInfoGsm A CellInfo representing a GSM cell that provides
identity and measurement info.
CellInfoLte A CellInfo representing an LTE cell that provides
identity and measurement info.
CellInfoNr A CellInfo representing an 5G NR cell that provides
identity and measurement info.
CellInfoTdscdma A CellInfo representing a TD-SCDMA cell that
provides identity and measurement info.
CellInfoWcdma A CellInfo representing a WCDMA cell that provides
identity and measurement info.
CellLocation Abstract class that represents the location of the
device.
CellSignalStrength Abstract base class for cell phone signal strength
related information.
CellSignalStrengthCdma Signal strength related information.
CellSignalStrengthGsm GSM signal strength related information.
CellSignalStrengthLte LTE signal strength related information.
CellSignalStrengthNr 5G NR signal strength related information.
CellSignalStrengthTdscdma Tdscdma signal strength related information.
CellSignalStrengthWcdma Wcdma signal strength related information.
IccOpenLogicalChannelResponse Response to
the TelephonyManager#iccOpenLogicalChannelcom
mand.
MbmsDownloadSession This class provides functionality for file download
over MBMS.
MbmsGroupCallSession This class provides functionality for accessing group
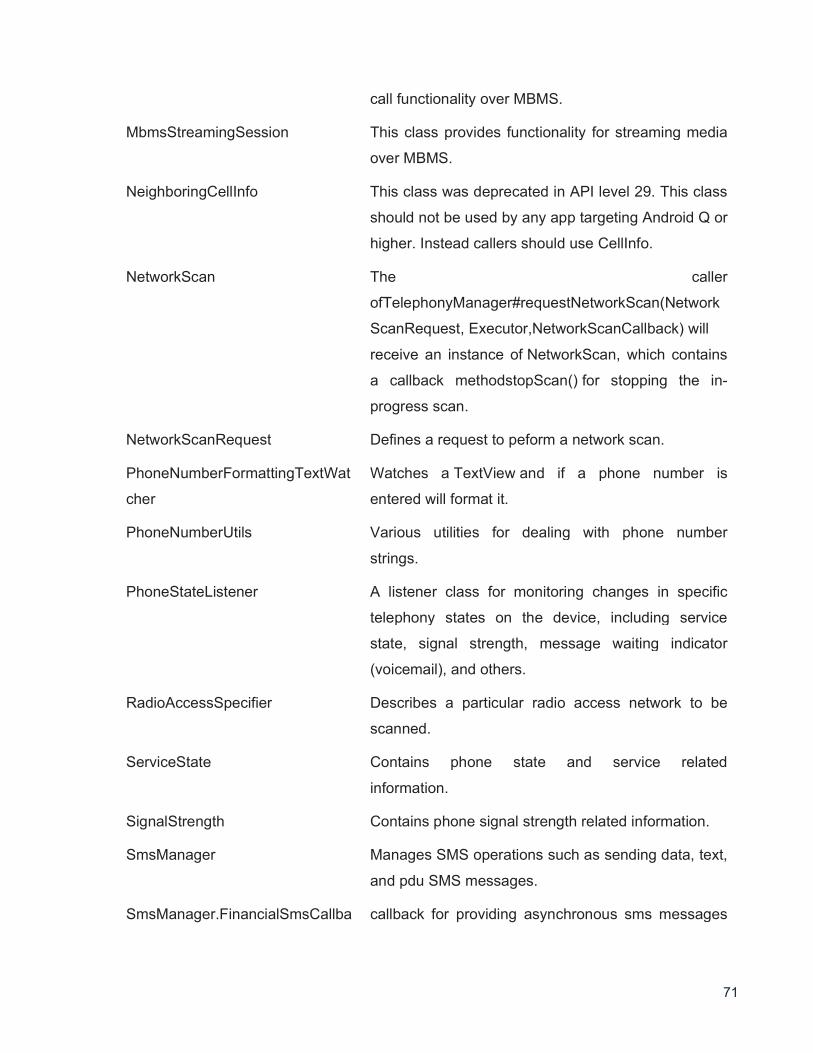
71
call functionality over MBMS.
MbmsStreamingSession This class provides functionality for streaming media
over MBMS.
NeighboringCellInfo This class was deprecated in API level 29. This class
should not be used by any app targeting Android Q or
higher. Instead callers should use CellInfo.
NetworkScan The caller
ofTelephonyManager#requestNetworkScan(Network
ScanRequest, Executor,NetworkScanCallback) will
receive an instance of NetworkScan, which contains
a callback methodstopScan() for stopping the in-
progress scan.
NetworkScanRequest Defines a request to peform a network scan.
PhoneNumberFormattingTextWat
cher
Watches a TextView and if a phone number is
entered will format it.
PhoneNumberUtils Various utilities for dealing with phone number
strings.
PhoneStateListener A listener class for monitoring changes in specific
telephony states on the device, including service
state, signal strength, message waiting indicator
(voicemail), and others.
RadioAccessSpecifier Describes a particular radio access network to be
scanned.
ServiceState Contains phone state and service related
information.
SignalStrength Contains phone signal strength related information.
SmsManager Manages SMS operations such as sending data, text,
and pdu SMS messages.
SmsManager.FinancialSmsCallba callback for providing asynchronous sms messages
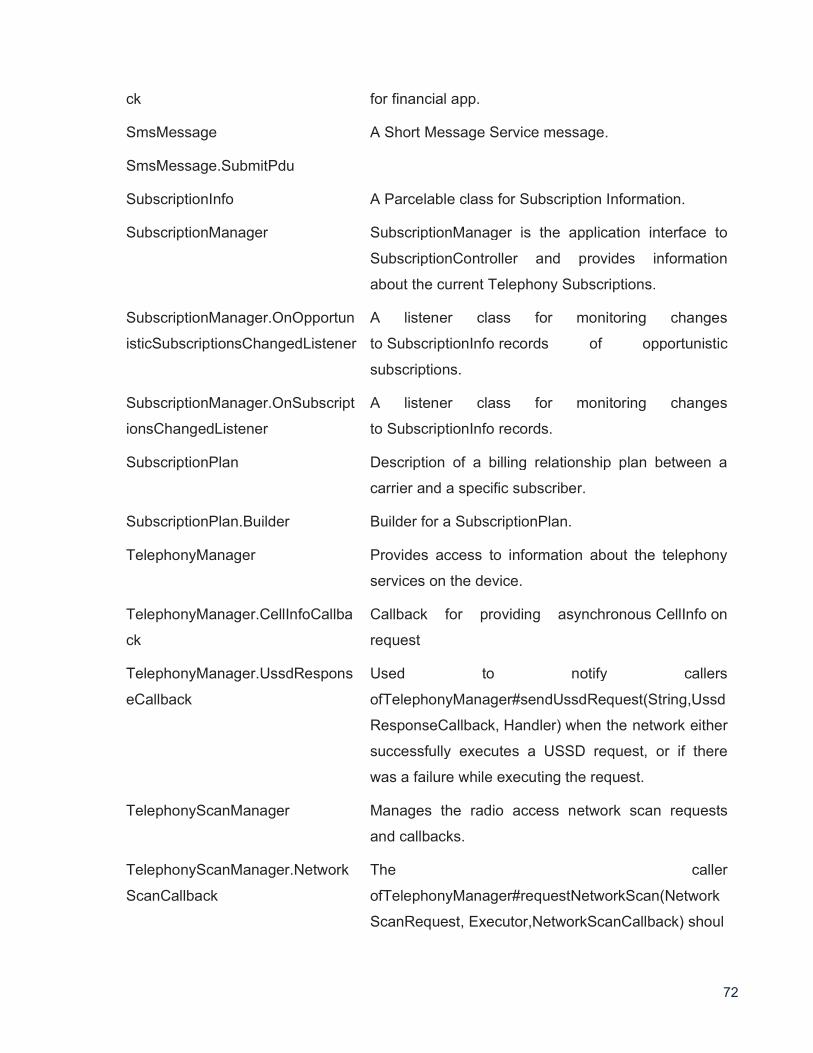
72
ck for financial app.
SmsMessage A Short Message Service message.
SmsMessage.SubmitPdu
SubscriptionInfo A Parcelable class for Subscription Information.
SubscriptionManager SubscriptionManager is the application interface to
SubscriptionController and provides information
about the current Telephony Subscriptions.
SubscriptionManager.OnOpportun
isticSubscriptionsChangedListener
A listener class for monitoring changes
to SubscriptionInfo records of opportunistic
subscriptions.
SubscriptionManager.OnSubscript
ionsChangedListener
A listener class for monitoring changes
to SubscriptionInfo records.
SubscriptionPlan Description of a billing relationship plan between a
carrier and a specific subscriber.
SubscriptionPlan.Builder Builder for a SubscriptionPlan.
TelephonyManager Provides access to information about the telephony
services on the device.
TelephonyManager.CellInfoCallba
ck
Callback for providing asynchronous CellInfo on
request
TelephonyManager.UssdRespons
eCallback
Used to notify callers
ofTelephonyManager#sendUssdRequest(String,Ussd
ResponseCallback, Handler) when the network either
successfully executes a USSD request, or if there
was a failure while executing the request.
TelephonyScanManager Manages the radio access network scan requests
and callbacks.
TelephonyScanManager.Network
ScanCallback
The caller
ofTelephonyManager#requestNetworkScan(Network
ScanRequest, Executor,NetworkScanCallback) shoul
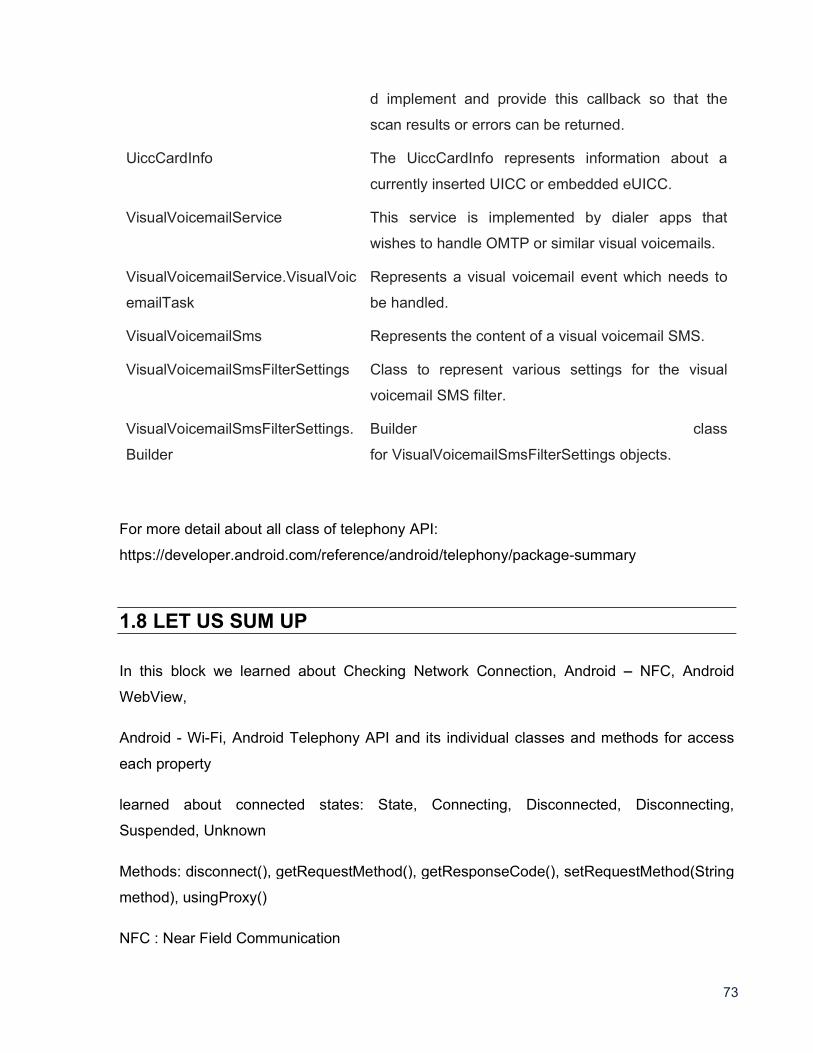
73
d implement and provide this callback so that the
scan results or errors can be returned.
UiccCardInfo The UiccCardInfo represents information about a
currently inserted UICC or embedded eUICC.
VisualVoicemailService This service is implemented by dialer apps that
wishes to handle OMTP or similar visual voicemails.
VisualVoicemailService.VisualVoic
emailTask
Represents a visual voicemail event which needs to
be handled.
VisualVoicemailSms Represents the content of a visual voicemail SMS.
VisualVoicemailSmsFilterSettings Class to represent various settings for the visual
voicemail SMS filter.
VisualVoicemailSmsFilterSettings.
Builder
Builder class
for VisualVoicemailSmsFilterSettings objects.
For more detail about all class of telephony API:
https://developer.android.com/reference/android/telephony/package-summary
1.8 LET US SUM UP
In this block we learned about Checking Network Connection, Android NFC, Android
WebView,
Android - Wi-Fi, Android Telephony API and its individual classes and methods for access
each property
learned about connected states: State, Connecting, Disconnected, Disconnecting,
Suspended, Unknown
Methods: disconnect(), getRequestMethod(), getResponseCode(), setRequestMethod(String
method), usingProxy()
NFC : Near Field Communication
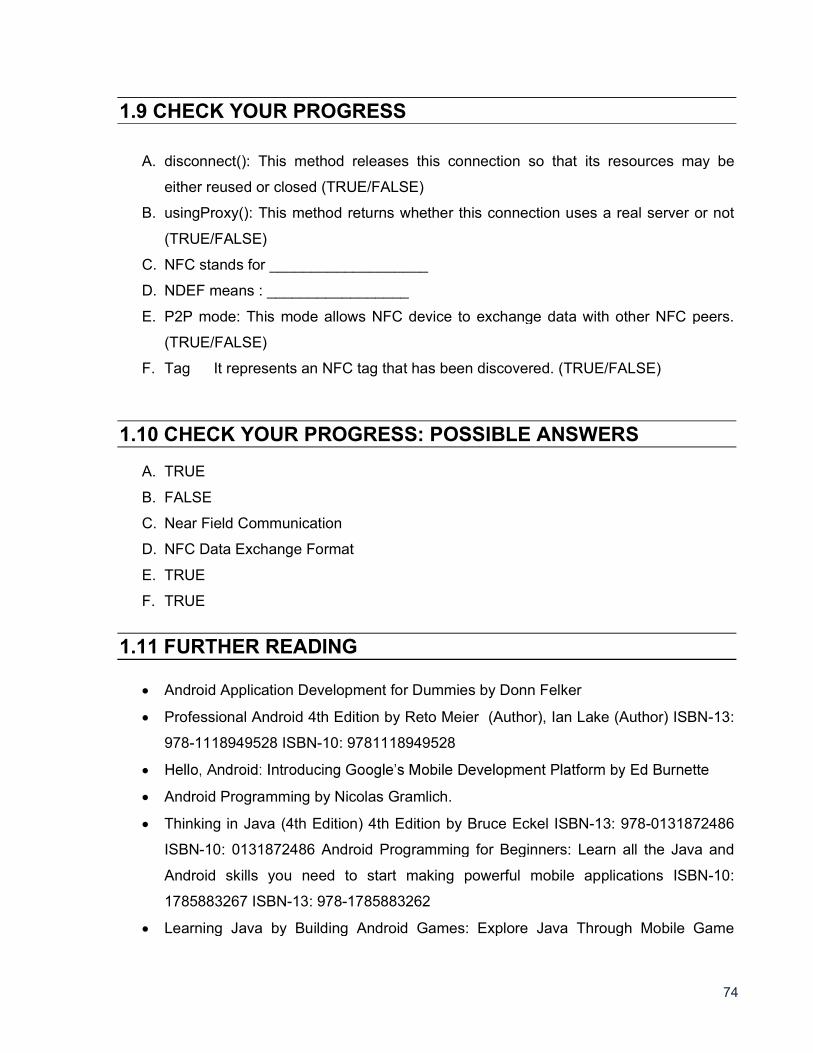
74
1.9 CHECK YOUR PROGRESS
A. disconnect(): This method releases this connection so that its resources may be
either reused or closed (TRUE/FALSE)
B. usingProxy(): This method returns whether this connection uses a real server or not
(TRUE/FALSE)
C. NFC stands for ___________________
D. NDEF means : _________________
E. P2P mode: This mode allows NFC device to exchange data with other NFC peers.
(TRUE/FALSE)
F. Tag It represents an NFC tag that has been discovered. (TRUE/FALSE)
1.10 CHECK YOUR PROGRESS: POSSIBLE ANSWERS
A. TRUE
B. FALSE
C. Near Field Communication
D. NFC Data Exchange Format
E. TRUE
F. TRUE
1.11 FURTHER READING
Android Application Development for Dummies by Donn Felker
Professional Android 4th Edition by Reto Meier (Author), Ian Lake (Author) ISBN-13:
978-1118949528 ISBN-10: 9781118949528
Android Programming by Nicolas Gramlich.
Thinking in Java (4th Edition) 4th Edition by Bruce Eckel ISBN-13: 978-0131872486
ISBN-10: 0131872486 Android Programming for Beginners: Learn all the Java and
Android skills you need to start making powerful mobile applications ISBN-10:
1785883267 ISBN-13: 978-1785883262
Learning Java by Building Android Games: Explore Java Through Mobile Game
75
Development ISBN-10: 1784398853 ISBN-13: 978-1784398859
Beginning Android Application Development by Wei-Meng Lee
Java: A Beginner's Guide, Sixth Edition 6th Edition by Herbert Schildt ISBN-13: 978-
0071809252 ISBN-10: 0071809252
Android Programming: The Big Nerd Ranch Guide (3rd Edition) (Big Nerd Ranch
Guides) 3rd Edition by Bill Phillips , Chris Stewart , Kristin Marsicano ISBN-13: 978-
0134706054 ISBN-10: 0134706056
Android Programming: Pushing the Limits 1st Edition by Erik Hellman ISBN-13: 978-
1118717370 ISBN-10: 1118717376
Head First Android Development: A Brain-Friendly Guide 1st Edition by Dawn
Griffiths ISBN-13: 978-1449362188 ISBN-10: 1449362184
Pro Android by Sayed Y. Hashimi and Satya Komatineni, Springer, New York, 2009.
1.12 ASSIGNMENTS
A. Explain Android WebView and each method.
B. Explain Android - Wi-Fi in detail and list out each method of its.
C. Describe Telephony Classes in detail.
D. Write sort note on Android - NFC.
E. Explain how to Checking Network Connection in android phone using coding.
1.13 ACTIVITIES
Create an android application for call/message functionality using telephony API
76
Unit 2: Search
Unit Structure 2.1 Learning Objectives
2.2 Introduction
2.3 Search Overview
2.4 Search View
2.5 Creating a Search Interface
2.6 Adding Recent Query Suggestions
2.7 Adding Custom Suggestions
2.8 Clear History From Apps & Chrome 2.9 Let us sum up
2.10 Further Reading
2.11 Assignment
2.12 Activities
2
77
2.1 LEARNING OBJECTIVE
After studying this unit student should be able to:
Understand the concept of searching method
Student will be able to implement method of different type of search from list or
container
To gain experience of implement search interface
Understand the configuration and wizard for privacy and removing/clear search
history for apps or web-browser
2.2 INTRODUCTION
Android's built-in search features offer apps an easy way to provide a consistent search
experience for all users. There are two ways to implement search in your app depending on
the version of Android that is running on the device. This class covers how to add search
with SearchView, which was introduced in Android 3.0, while maintaining backward
compatibility with older versions of Android by using the default search dialog provided by
the system.
2.3 SEARCH OVERVIEW
Search is a core user feature on Android. Users should be able to search any data that is
available to them, whether the content is located on the device or the Internet. To help
create a consistent search experience for users, Android provides a search framework that
helps you implement search for your application.
The search framework offers two modes of search input: a search dialog at the top of the
screen or a search widget (SearchView) that you can embed in your activity layout. In either
case, the Android system will assist your search implementation by delivering search
queries to a specific activity that performs searches. You can also enable either the search
dialog or widget to provide search suggestions as the user types. Figure 1 shows an
example of the search dialog with optional search suggestions.
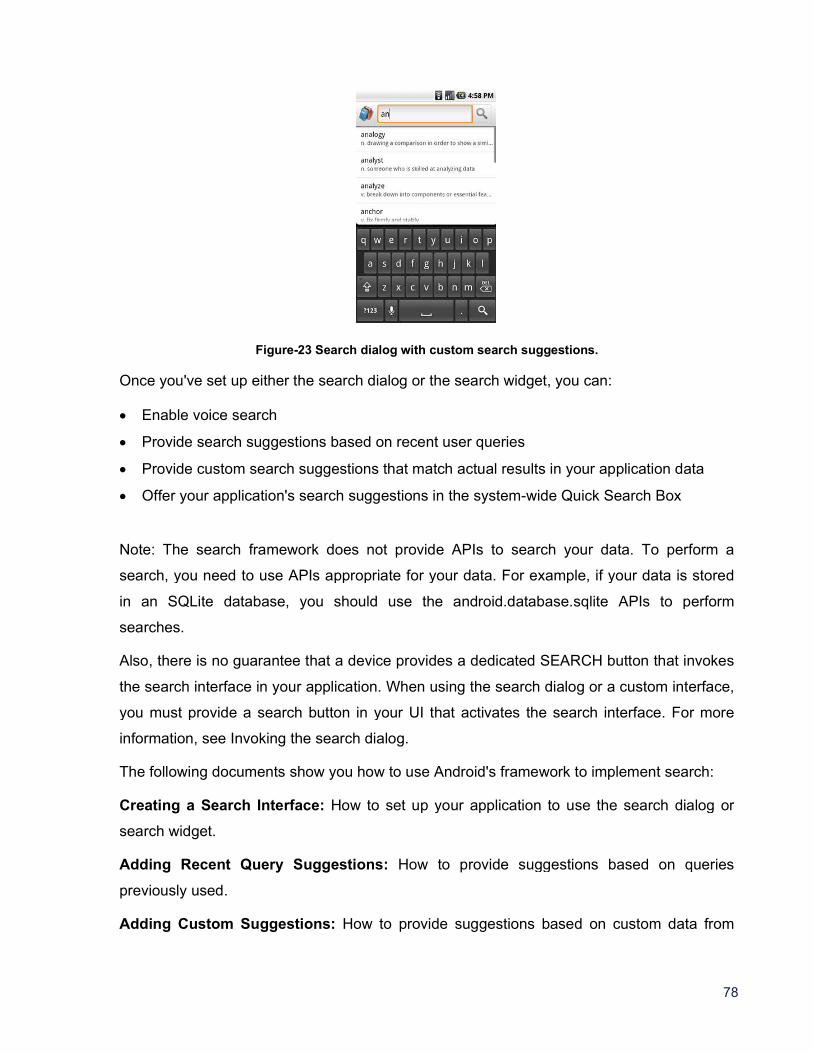
78
Figure-23 Search dialog with custom search suggestions.
Once you've set up either the search dialog or the search widget, you can:
Enable voice search
Provide search suggestions based on recent user queries
Provide custom search suggestions that match actual results in your application data
Offer your application's search suggestions in the system-wide Quick Search Box
Note: The search framework does not provide APIs to search your data. To perform a
search, you need to use APIs appropriate for your data. For example, if your data is stored
in an SQLite database, you should use the android.database.sqlite APIs to perform
searches.
Also, there is no guarantee that a device provides a dedicated SEARCH button that invokes
the search interface in your application. When using the search dialog or a custom interface,
you must provide a search button in your UI that activates the search interface. For more
information, see Invoking the search dialog.
The following documents show you how to use Android's framework to implement search:
Creating a Search Interface: How to set up your application to use the search dialog or
search widget.
Adding Recent Query Suggestions: How to provide suggestions based on queries
previously used.
Adding Custom Suggestions: How to provide suggestions based on custom data from
79
your application and also offer them in the system-wide Quick Search Box.
Searchable Configuration: A reference document for the searchable configuration file
(though the other documents also discuss the configuration file in terms of specific
behaviours).
2.4 SEARCH VIEW
Android SearchView provides user interface to search query submitted over search provider.
SearchView widget can be implemented over ToolBar/ActionBar or inside a layout.
SearchView is by default collapsible and set to be iconified using setIconifiedByDefault(true)
method of SearchView class. For making search field visible, SearchView uses
setIconifiedByDefault(false) method.
Methods of SearchView
public boolean onQueryTextSubmit(String query): It searches the query on the
submission of content over SearchView editor. It is case dependent.
public boolean onQueryTextChange(String newText): It searches the query at the
time of text change over SearchView editor.
2.5 CREATING A SEARCH INTERFACE
When you're ready to add search functionality to your application, Android helps you
implement the user interface with either a search dialog that appears at the top of the activity
window or a search widget that you can insert in your layout. Both the search dialog and the
widget can deliver the user's search query to a specific activity in your application. This way,
the user can initiate a search from any activity where the search dialog or widget is
available, and the system starts the appropriate activity to perform the search and present
results.
Other features available for the search dialog and widget include:
Voice search
Search suggestions based on recent queries
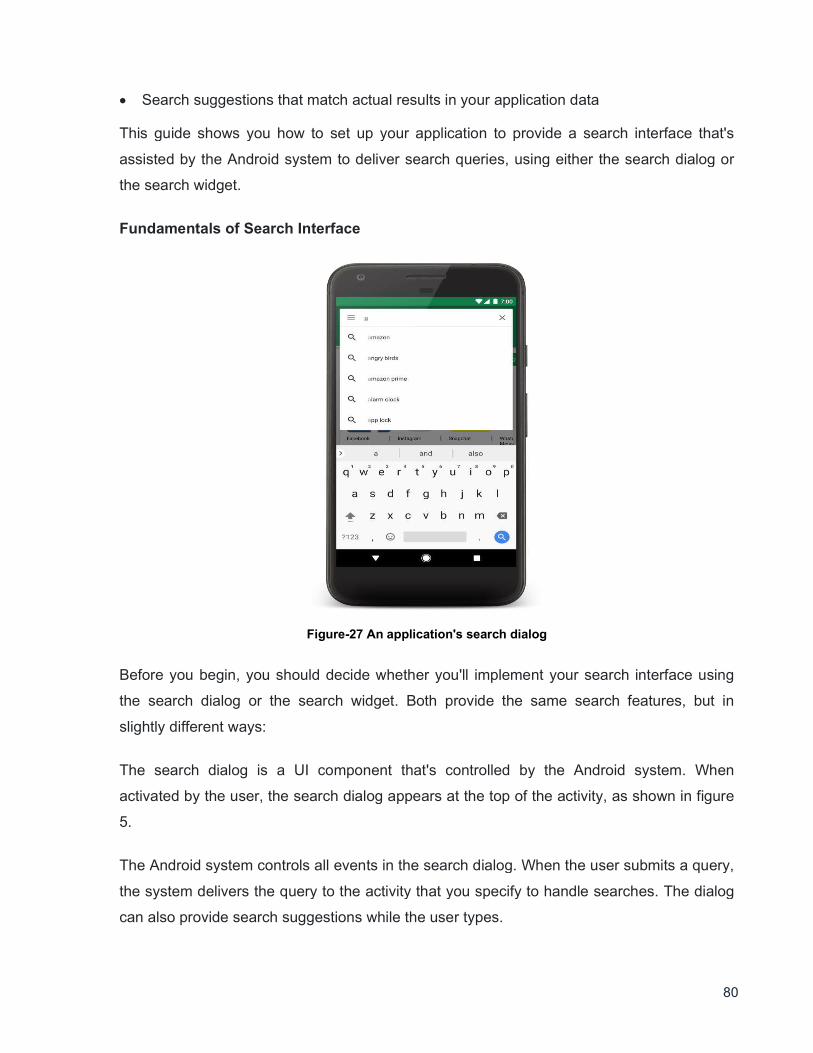
80
Search suggestions that match actual results in your application data
This guide shows you how to set up your application to provide a search interface that's
assisted by the Android system to deliver search queries, using either the search dialog or
the search widget.
Fundamentals of Search Interface
Figure-27 An application's search dialog
Before you begin, you should decide whether you'll implement your search interface using
the search dialog or the search widget. Both provide the same search features, but in
slightly different ways:
The search dialog is a UI component that's controlled by the Android system. When
activated by the user, the search dialog appears at the top of the activity, as shown in figure
5.
The Android system controls all events in the search dialog. When the user submits a query,
the system delivers the query to the activity that you specify to handle searches. The dialog
can also provide search suggestions while the user types.
81
The search widget is an instance of SearchView that you can place anywhere in your layout.
By default, the search widget behaves like a standard EditText widget and doesn't do
anything, but you can configure it so that the Android system handles all input events,
delivers queries to the appropriate activity, and provides search suggestions (just like the
search dialog).
When the user executes a search from the search dialog or a search widget, the system
creates an Intent and stores the user query in it. The system then starts the activity that
you've declared to handle searches (the "searchable activity") and delivers it the intent. To
set up your application for this kind of assisted search, you need the following:
A searchable configuration: An XML file that configures some settings for the search
dialog or widget. It includes settings for features such as voice search, search suggestion,
and hint text for the search box.
A searchable activity: The Activity that receives the search query, searches your data, and
displays the search results.
A search interface, provided by either:
The search dialog: By default, the search dialog is hidden, but appears at the top of the
screen when you call onSearchRequested() (when the user presses your Search button).
SearchView widget: Using the search widget allows you to put the search box anywhere
in your activity. Instead of putting it in your activity layout, you should usually use
SearchView as an action view in the app bar.
The rest of this document shows you how to create the searchable configuration, searchable
activity, and implement a search interface with either the search dialog or search widget.
Creating a Searchable Configuration
The first thing you need is an XML file called the searchable configuration. It configures
certain UI aspects of the search dialog or widget and defines how features such as
suggestions and voice search behave. This file is traditionally named searchable.xml and
must be saved in the res/xml/ project directory.
82
The searchable configuration file must include the <searchable> element as the root node
and specify one or more attributes.
For example:
<?xml version="1.0" encoding="utf-8"?>
<searchable xmlns:android="http://schemas.android.com/apk/res/android"
android:label="@string/app_label"
android:hint="@string/search_hint" >
</searchable>
The android:label attribute is the only required attribute. It points to a string resource, which
should be the application name. This label isn't actually visible to the user until you enable
search suggestions for Quick Search Box. At that point, this label is visible in the list of
Searchable items in the system Settings.
Though it's not required, we recommend that you always include the android:hint attribute,
which provides a hint string in the search box before users enter a query. The hint is
important because it provides important clues to users about what they can search.
The <searchable> element accepts several other attributes. However, you don't need most
attributes until you add features such as search suggestions and voice search. For detailed
information about the searchable configuration file, see the Searchable Configuration
reference document.
Creating a Searchable Activity
A searchable activity is the Activity in your application that performs searches based on a
query string and presents the search results.
When the user executes a search in the search dialog or widget, the system starts your
searchable activity and delivers it the search query in an Intent with the ACTION_SEARCH
action. Your searchable activity retrieves the query from the intent's QUERY extra, then
searches your data and presents the results.
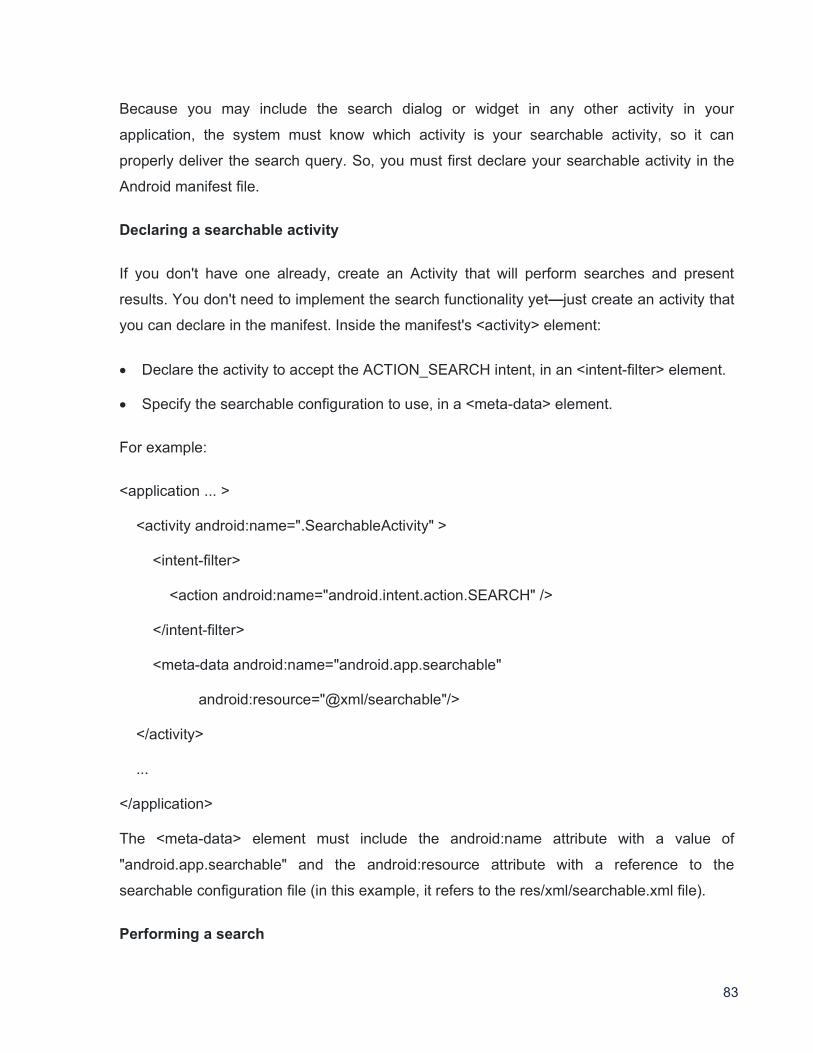
83
Because you may include the search dialog or widget in any other activity in your
application, the system must know which activity is your searchable activity, so it can
properly deliver the search query. So, you must first declare your searchable activity in the
Android manifest file.
Declaring a searchable activity
If you don't have one already, create an Activity that will perform searches and present
results. You don't need to implement the search functionality yet just create an activity that
you can declare in the manifest. Inside the manifest's <activity> element:
Declare the activity to accept the ACTION_SEARCH intent, in an <intent-filter> element.
Specify the searchable configuration to use, in a <meta-data> element.
For example:
<application ... >
<activity android:name=".SearchableActivity" >
<intent-filter>
<action android:name="android.intent.action.SEARCH" />
</intent-filter>
<meta-data android:name="android.app.searchable"
android:resource="@xml/searchable"/>
</activity>
...
</application>
The <meta-data> element must include the android:name attribute with a value of
"android.app.searchable" and the android:resource attribute with a reference to the
searchable configuration file (in this example, it refers to the res/xml/searchable.xml file).
Performing a search
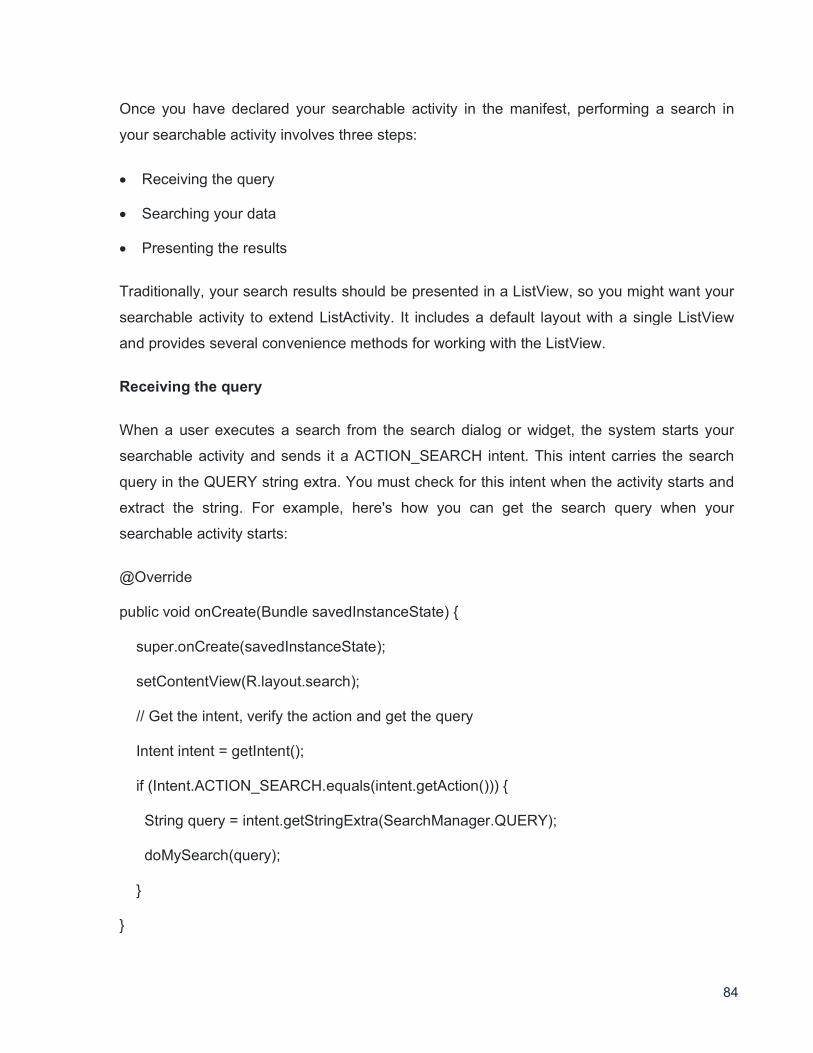
84
Once you have declared your searchable activity in the manifest, performing a search in
your searchable activity involves three steps:
Receiving the query
Searching your data
Presenting the results
Traditionally, your search results should be presented in a ListView, so you might want your
searchable activity to extend ListActivity. It includes a default layout with a single ListView
and provides several convenience methods for working with the ListView.
Receiving the query
When a user executes a search from the search dialog or widget, the system starts your
searchable activity and sends it a ACTION_SEARCH intent. This intent carries the search
query in the QUERY string extra. You must check for this intent when the activity starts and
extract the string. For example, here's how you can get the search query when your
searchable activity starts:
@Override
public void onCreate(Bundle savedInstanceState) {
super.onCreate(savedInstanceState);
setContentView(R.layout.search);
// Get the intent, verify the action and get the query
Intent intent = getIntent();
if (Intent.ACTION_SEARCH.equals(intent.getAction())) {
String query = intent.getStringExtra(SearchManager.QUERY);
doMySearch(query);
}
}
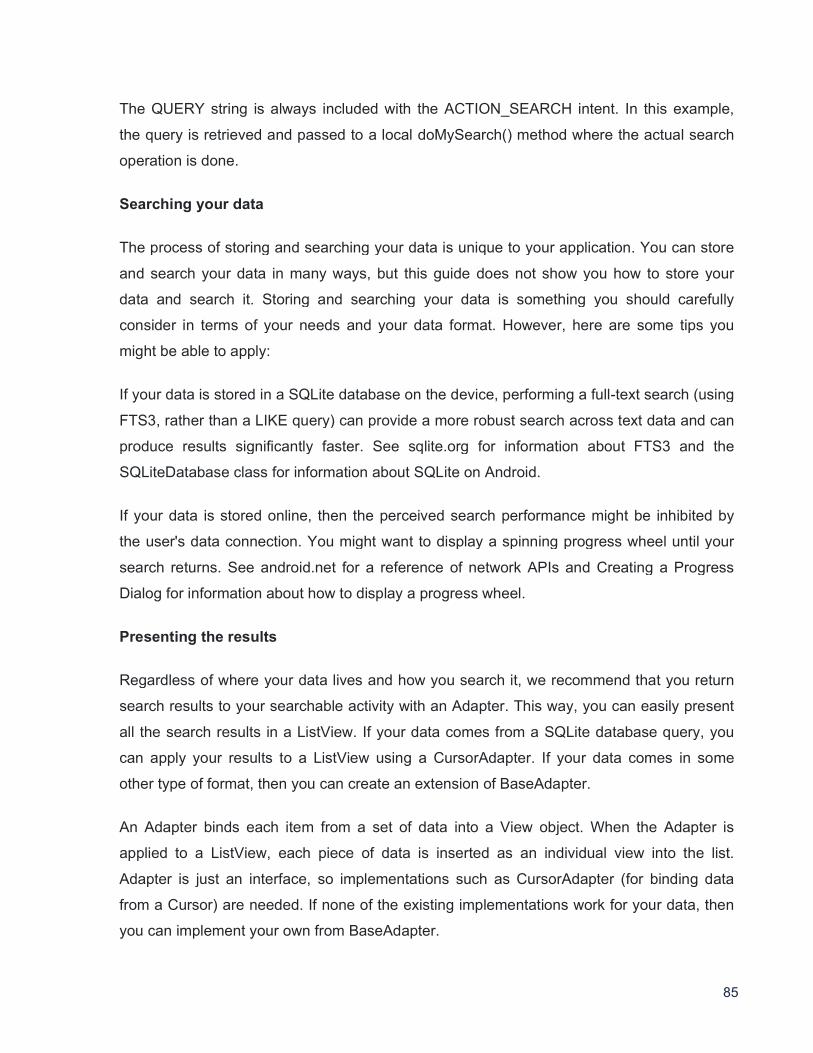
85
The QUERY string is always included with the ACTION_SEARCH intent. In this example,
the query is retrieved and passed to a local doMySearch() method where the actual search
operation is done.
Searching your data
The process of storing and searching your data is unique to your application. You can store
and search your data in many ways, but this guide does not show you how to store your
data and search it. Storing and searching your data is something you should carefully
consider in terms of your needs and your data format. However, here are some tips you
might be able to apply:
If your data is stored in a SQLite database on the device, performing a full-text search (using
FTS3, rather than a LIKE query) can provide a more robust search across text data and can
produce results significantly faster. See sqlite.org for information about FTS3 and the
SQLiteDatabase class for information about SQLite on Android.
If your data is stored online, then the perceived search performance might be inhibited by
the user's data connection. You might want to display a spinning progress wheel until your
search returns. See android.net for a reference of network APIs and Creating a Progress
Dialog for information about how to display a progress wheel.
Presenting the results
Regardless of where your data lives and how you search it, we recommend that you return
search results to your searchable activity with an Adapter. This way, you can easily present
all the search results in a ListView. If your data comes from a SQLite database query, you
can apply your results to a ListView using a CursorAdapter. If your data comes in some
other type of format, then you can create an extension of BaseAdapter.
An Adapter binds each item from a set of data into a View object. When the Adapter is
applied to a ListView, each piece of data is inserted as an individual view into the list.
Adapter is just an interface, so implementations such as CursorAdapter (for binding data
from a Cursor) are needed. If none of the existing implementations work for your data, then
you can implement your own from BaseAdapter.
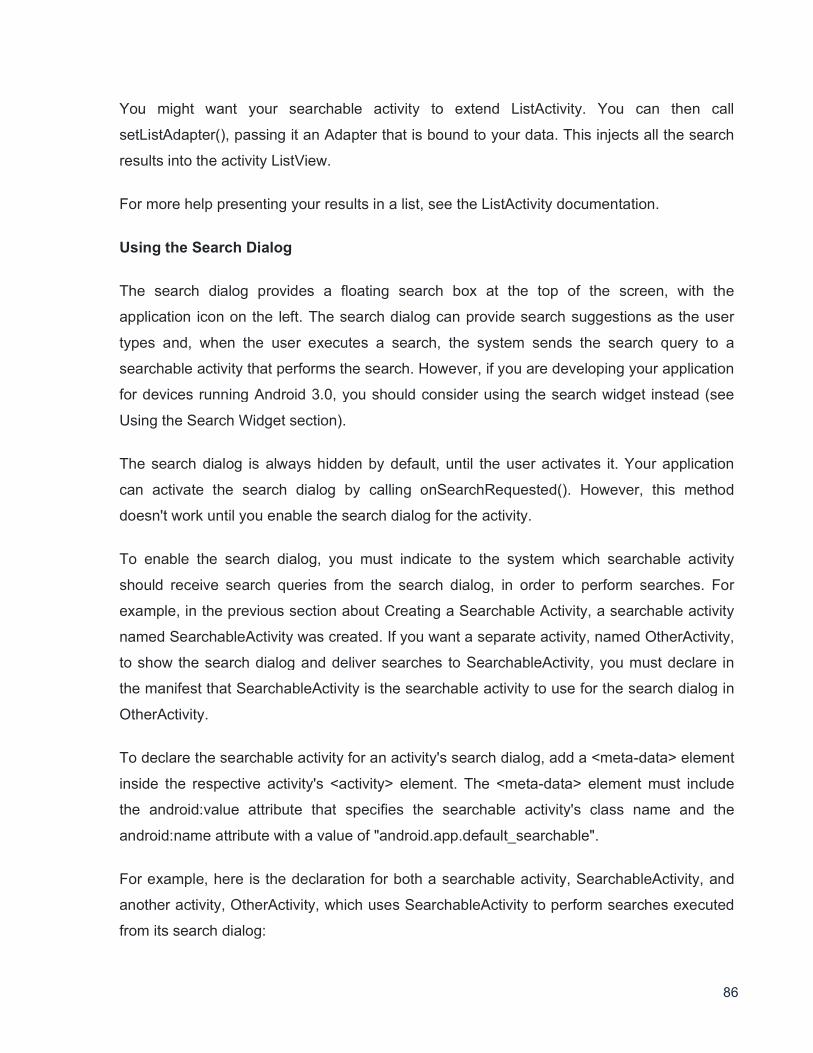
86
You might want your searchable activity to extend ListActivity. You can then call
setListAdapter(), passing it an Adapter that is bound to your data. This injects all the search
results into the activity ListView.
For more help presenting your results in a list, see the ListActivity documentation.
Using the Search Dialog
The search dialog provides a floating search box at the top of the screen, with the
application icon on the left. The search dialog can provide search suggestions as the user
types and, when the user executes a search, the system sends the search query to a
searchable activity that performs the search. However, if you are developing your application
for devices running Android 3.0, you should consider using the search widget instead (see
Using the Search Widget section).
The search dialog is always hidden by default, until the user activates it. Your application
can activate the search dialog by calling onSearchRequested(). However, this method
doesn't work until you enable the search dialog for the activity.
To enable the search dialog, you must indicate to the system which searchable activity
should receive search queries from the search dialog, in order to perform searches. For
example, in the previous section about Creating a Searchable Activity, a searchable activity
named SearchableActivity was created. If you want a separate activity, named OtherActivity,
to show the search dialog and deliver searches to SearchableActivity, you must declare in
the manifest that SearchableActivity is the searchable activity to use for the search dialog in
OtherActivity.
To declare the searchable activity for an activity's search dialog, add a <meta-data> element
inside the respective activity's <activity> element. The <meta-data> element must include
the android:value attribute that specifies the searchable activity's class name and the
android:name attribute with a value of "android.app.default_searchable".
For example, here is the declaration for both a searchable activity, SearchableActivity, and
another activity, OtherActivity, which uses SearchableActivity to perform searches executed
from its search dialog:
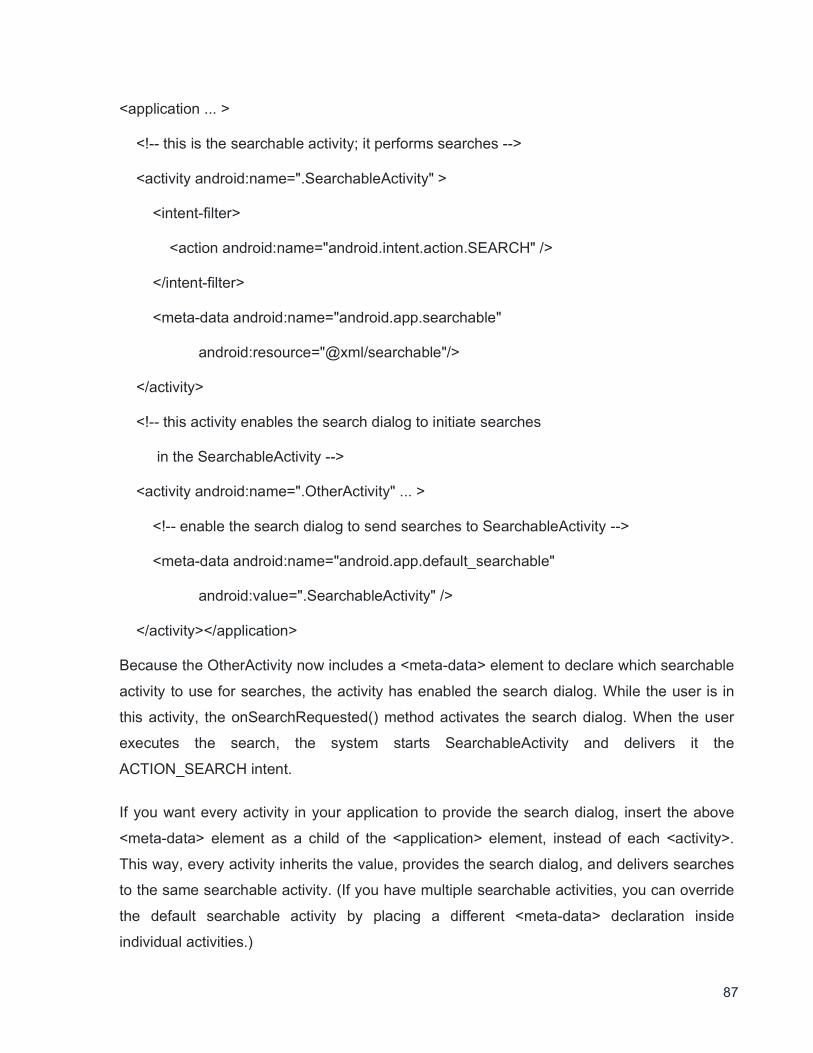
87
<application ... >
<!-- this is the searchable activity; it performs searches -->
<activity android:name=".SearchableActivity" >
<intent-filter>
<action android:name="android.intent.action.SEARCH" />
</intent-filter>
<meta-data android:name="android.app.searchable"
android:resource="@xml/searchable"/>
</activity>
<!-- this activity enables the search dialog to initiate searches
in the SearchableActivity -->
<activity android:name=".OtherActivity" ... >
<!-- enable the search dialog to send searches to SearchableActivity -->
<meta-data android:name="android.app.default_searchable"
android:value=".SearchableActivity" />
</activity></application>
Because the OtherActivity now includes a <meta-data> element to declare which searchable
activity to use for searches, the activity has enabled the search dialog. While the user is in
this activity, the onSearchRequested() method activates the search dialog. When the user
executes the search, the system starts SearchableActivity and delivers it the
ACTION_SEARCH intent.
If you want every activity in your application to provide the search dialog, insert the above
<meta-data> element as a child of the <application> element, instead of each <activity>.
This way, every activity inherits the value, provides the search dialog, and delivers searches
to the same searchable activity. (If you have multiple searchable activities, you can override
the default searchable activity by placing a different <meta-data> declaration inside
individual activities.)
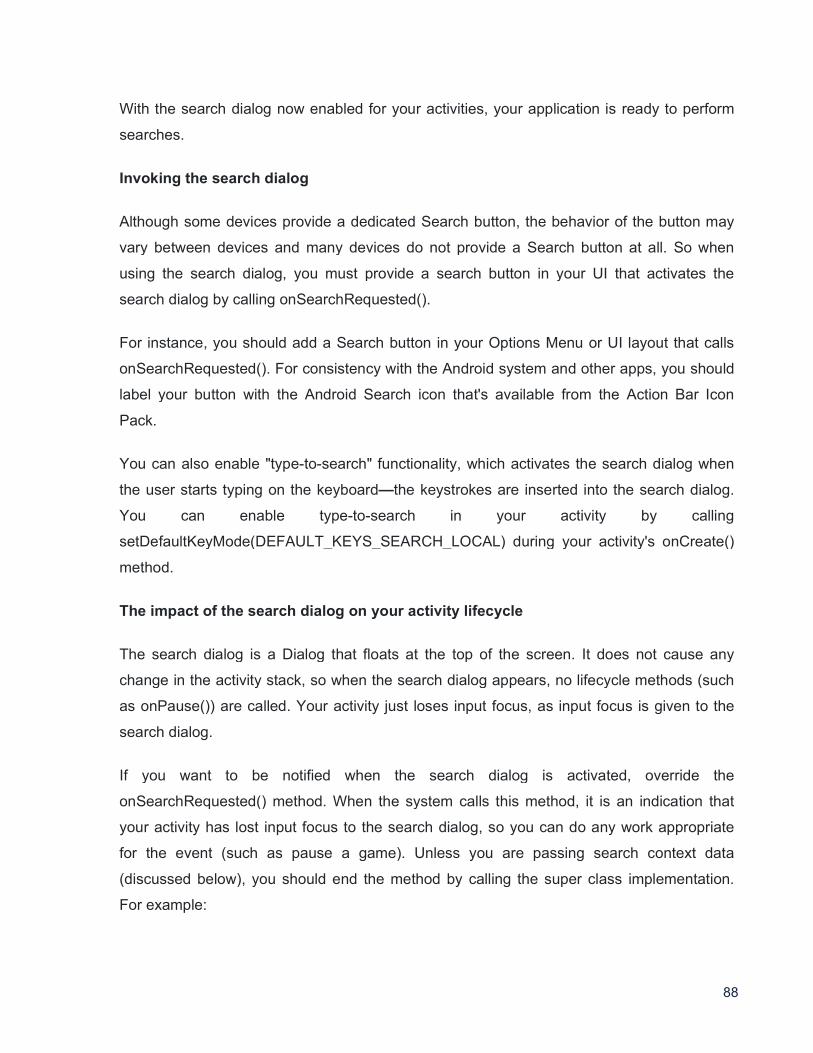
88
With the search dialog now enabled for your activities, your application is ready to perform
searches.
Invoking the search dialog
Although some devices provide a dedicated Search button, the behavior of the button may
vary between devices and many devices do not provide a Search button at all. So when
using the search dialog, you must provide a search button in your UI that activates the
search dialog by calling onSearchRequested().
For instance, you should add a Search button in your Options Menu or UI layout that calls
onSearchRequested(). For consistency with the Android system and other apps, you should
label your button with the Android Search icon that's available from the Action Bar Icon
Pack.
You can also enable "type-to-search" functionality, which activates the search dialog when
the user starts typing on the keyboard the keystrokes are inserted into the search dialog.
You can enable type-to-search in your activity by calling
setDefaultKeyMode(DEFAULT_KEYS_SEARCH_LOCAL) during your activity's onCreate()
method.
The impact of the search dialog on your activity lifecycle
The search dialog is a Dialog that floats at the top of the screen. It does not cause any
change in the activity stack, so when the search dialog appears, no lifecycle methods (such
as onPause()) are called. Your activity just loses input focus, as input focus is given to the
search dialog.
If you want to be notified when the search dialog is activated, override the
onSearchRequested() method. When the system calls this method, it is an indication that
your activity has lost input focus to the search dialog, so you can do any work appropriate
for the event (such as pause a game). Unless you are passing search context data
(discussed below), you should end the method by calling the super class implementation.
For example:
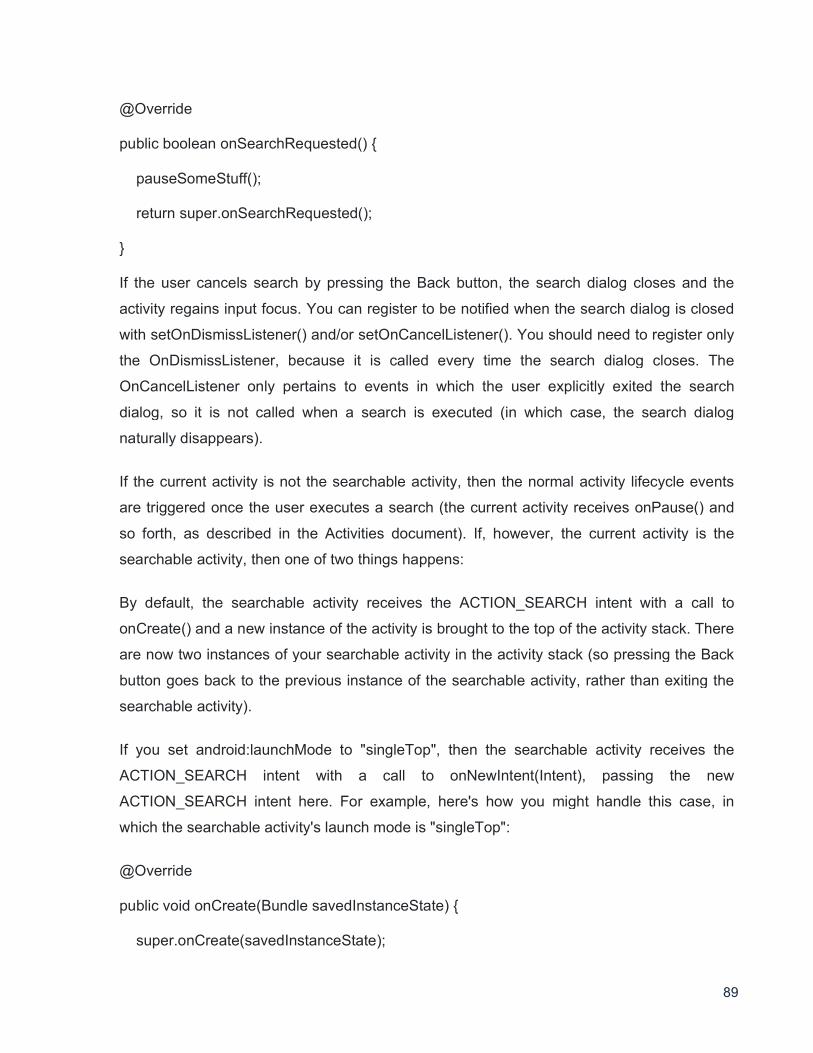
89
@Override
public boolean onSearchRequested() {
pauseSomeStuff();
return super.onSearchRequested();
}
If the user cancels search by pressing the Back button, the search dialog closes and the
activity regains input focus. You can register to be notified when the search dialog is closed
with setOnDismissListener() and/or setOnCancelListener(). You should need to register only
the OnDismissListener, because it is called every time the search dialog closes. The
OnCancelListener only pertains to events in which the user explicitly exited the search
dialog, so it is not called when a search is executed (in which case, the search dialog
naturally disappears).
If the current activity is not the searchable activity, then the normal activity lifecycle events
are triggered once the user executes a search (the current activity receives onPause() and
so forth, as described in the Activities document). If, however, the current activity is the
searchable activity, then one of two things happens:
By default, the searchable activity receives the ACTION_SEARCH intent with a call to
onCreate() and a new instance of the activity is brought to the top of the activity stack. There
are now two instances of your searchable activity in the activity stack (so pressing the Back
button goes back to the previous instance of the searchable activity, rather than exiting the
searchable activity).
If you set android:launchMode to "singleTop", then the searchable activity receives the
ACTION_SEARCH intent with a call to onNewIntent(Intent), passing the new
ACTION_SEARCH intent here. For example, here's how you might handle this case, in
which the searchable activity's launch mode is "singleTop":
@Override
public void onCreate(Bundle savedInstanceState) {
super.onCreate(savedInstanceState);
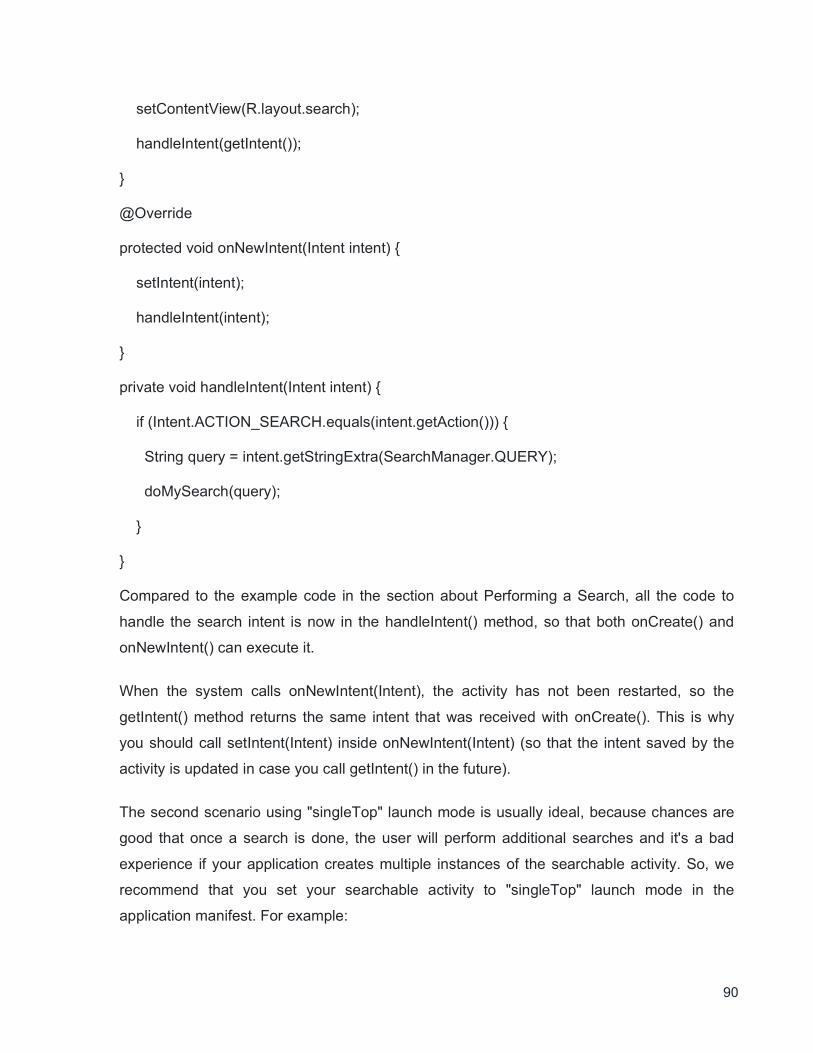
90
setContentView(R.layout.search);
handleIntent(getIntent());
}
@Override
protected void onNewIntent(Intent intent) {
setIntent(intent);
handleIntent(intent);
}
private void handleIntent(Intent intent) {
if (Intent.ACTION_SEARCH.equals(intent.getAction())) {
String query = intent.getStringExtra(SearchManager.QUERY);
doMySearch(query);
}
}
Compared to the example code in the section about Performing a Search, all the code to
handle the search intent is now in the handleIntent() method, so that both onCreate() and
onNewIntent() can execute it.
When the system calls onNewIntent(Intent), the activity has not been restarted, so the
getIntent() method returns the same intent that was received with onCreate(). This is why
you should call setIntent(Intent) inside onNewIntent(Intent) (so that the intent saved by the
activity is updated in case you call getIntent() in the future).
The second scenario using "singleTop" launch mode is usually ideal, because chances are
good that once a search is done, the user will perform additional searches and it's a bad
experience if your application creates multiple instances of the searchable activity. So, we
recommend that you set your searchable activity to "singleTop" launch mode in the
application manifest. For example:
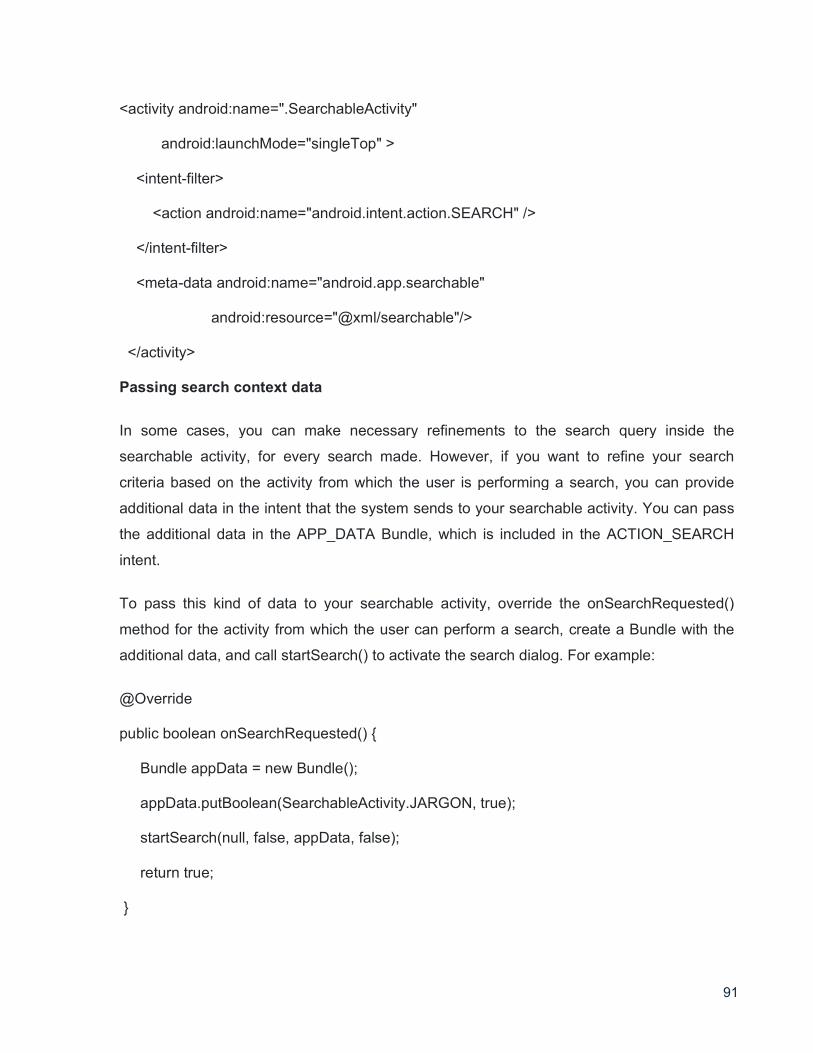
91
<activity android:name=".SearchableActivity"
android:launchMode="singleTop" >
<intent-filter>
<action android:name="android.intent.action.SEARCH" />
</intent-filter>
<meta-data android:name="android.app.searchable"
android:resource="@xml/searchable"/>
</activity>
Passing search context data
In some cases, you can make necessary refinements to the search query inside the
searchable activity, for every search made. However, if you want to refine your search
criteria based on the activity from which the user is performing a search, you can provide
additional data in the intent that the system sends to your searchable activity. You can pass
the additional data in the APP_DATA Bundle, which is included in the ACTION_SEARCH
intent.
To pass this kind of data to your searchable activity, override the onSearchRequested()
method for the activity from which the user can perform a search, create a Bundle with the
additional data, and call startSearch() to activate the search dialog. For example:
@Override
public boolean onSearchRequested() {
Bundle appData = new Bundle();
appData.putBoolean(SearchableActivity.JARGON, true);
startSearch(null, false, appData, false);
return true;
}
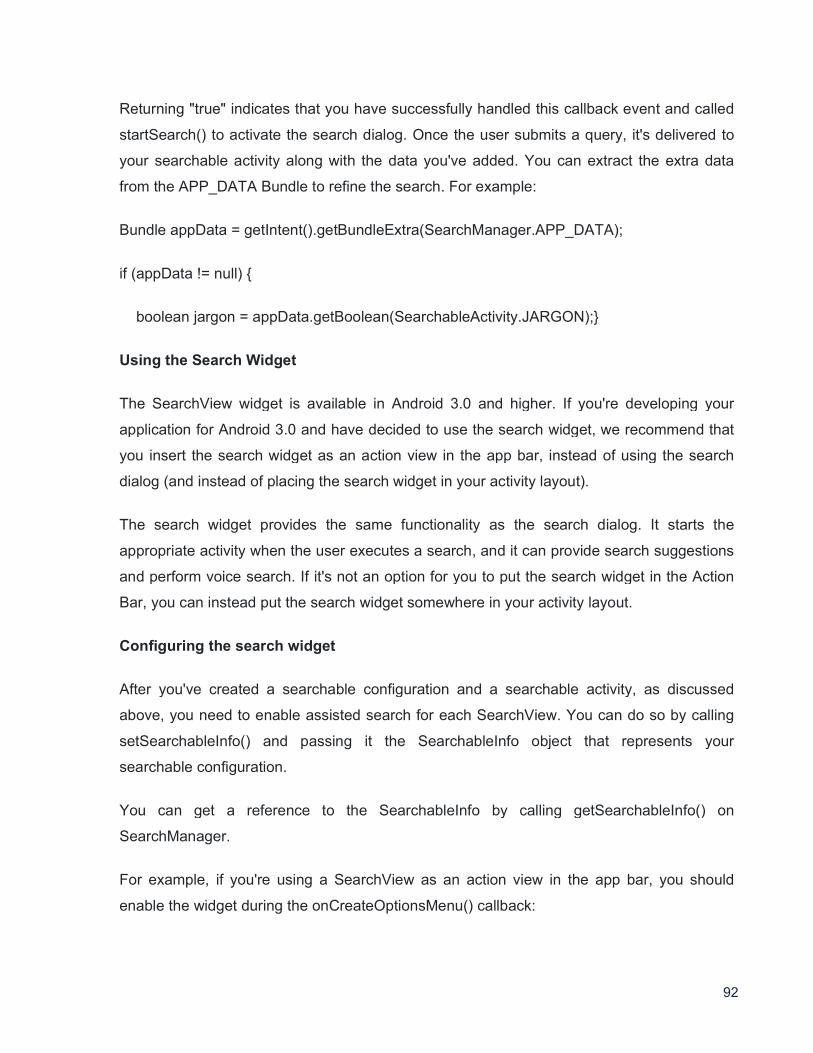
92
Returning "true" indicates that you have successfully handled this callback event and called
startSearch() to activate the search dialog. Once the user submits a query, it's delivered to
your searchable activity along with the data you've added. You can extract the extra data
from the APP_DATA Bundle to refine the search. For example:
Bundle appData = getIntent().getBundleExtra(SearchManager.APP_DATA);
if (appData != null) {
boolean jargon = appData.getBoolean(SearchableActivity.JARGON);}
Using the Search Widget
The SearchView widget is available in Android 3.0 and higher. If you're developing your
application for Android 3.0 and have decided to use the search widget, we recommend that
you insert the search widget as an action view in the app bar, instead of using the search
dialog (and instead of placing the search widget in your activity layout).
The search widget provides the same functionality as the search dialog. It starts the
appropriate activity when the user executes a search, and it can provide search suggestions
and perform voice search. If it's not an option for you to put the search widget in the Action
Bar, you can instead put the search widget somewhere in your activity layout.
Configuring the search widget
After you've created a searchable configuration and a searchable activity, as discussed
above, you need to enable assisted search for each SearchView. You can do so by calling
setSearchableInfo() and passing it the SearchableInfo object that represents your
searchable configuration.
You can get a reference to the SearchableInfo by calling getSearchableInfo() on
SearchManager.
For example, if you're using a SearchView as an action view in the app bar, you should
enable the widget during the onCreateOptionsMenu() callback:
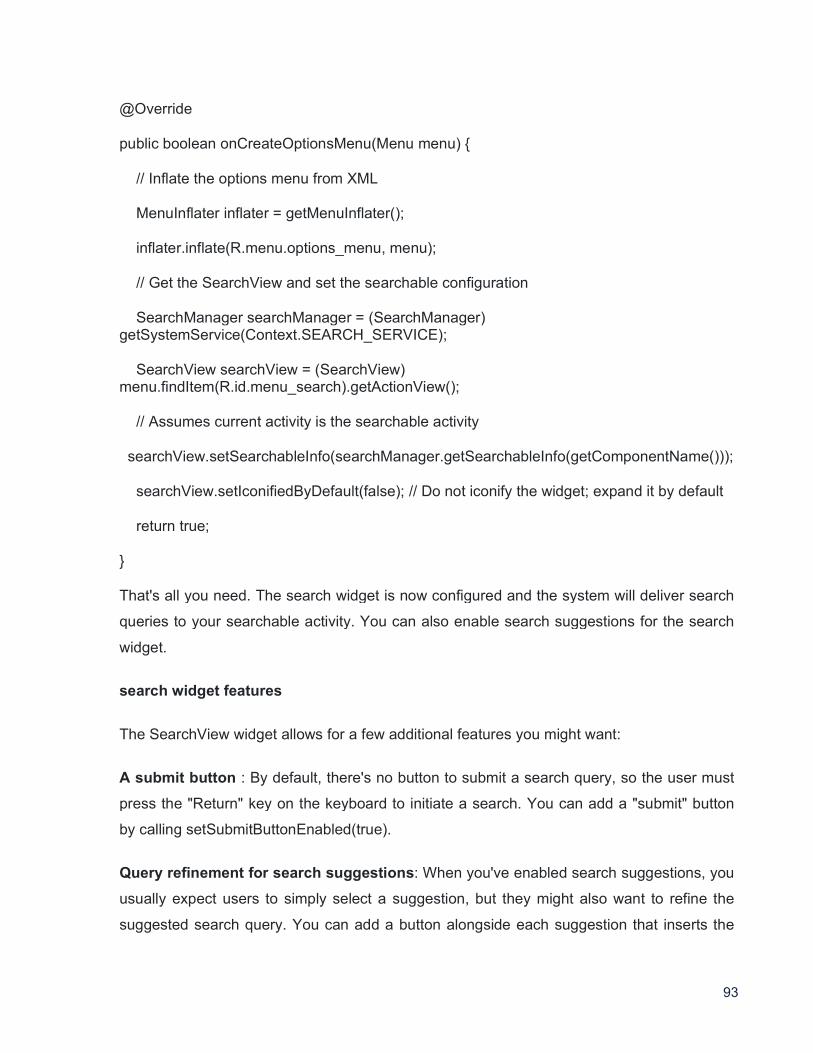
93
@Override
public boolean onCreateOptionsMenu(Menu menu) {
// Inflate the options menu from XML
MenuInflater inflater = getMenuInflater();
inflater.inflate(R.menu.options_menu, menu);
// Get the SearchView and set the searchable configuration
SearchManager searchManager = (SearchManager) getSystemService(Context.SEARCH_SERVICE);
SearchView searchView = (SearchView) menu.findItem(R.id.menu_search).getActionView();
// Assumes current activity is the searchable activity
searchView.setSearchableInfo(searchManager.getSearchableInfo(getComponentName()));
searchView.setIconifiedByDefault(false); // Do not iconify the widget; expand it by default
return true;
}
That's all you need. The search widget is now configured and the system will deliver search
queries to your searchable activity. You can also enable search suggestions for the search
widget.
search widget features
The SearchView widget allows for a few additional features you might want:
A submit button : By default, there's no button to submit a search query, so the user must
press the "Return" key on the keyboard to initiate a search. You can add a "submit" button
by calling setSubmitButtonEnabled(true).
Query refinement for search suggestions: When you've enabled search suggestions, you
usually expect users to simply select a suggestion, but they might also want to refine the
suggested search query. You can add a button alongside each suggestion that inserts the
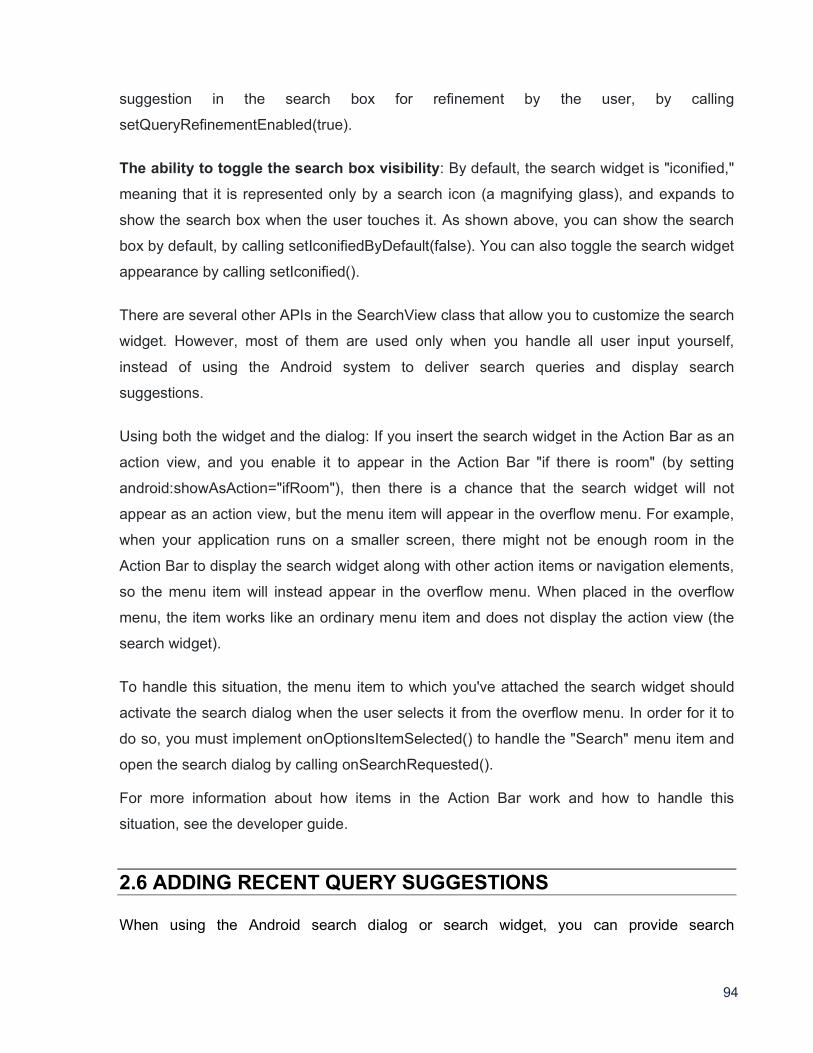
94
suggestion in the search box for refinement by the user, by calling
setQueryRefinementEnabled(true).
The ability to toggle the search box visibility: By default, the search widget is "iconified,"
meaning that it is represented only by a search icon (a magnifying glass), and expands to
show the search box when the user touches it. As shown above, you can show the search
box by default, by calling setIconifiedByDefault(false). You can also toggle the search widget
appearance by calling setIconified().
There are several other APIs in the SearchView class that allow you to customize the search
widget. However, most of them are used only when you handle all user input yourself,
instead of using the Android system to deliver search queries and display search
suggestions.
Using both the widget and the dialog: If you insert the search widget in the Action Bar as an
action view, and you enable it to appear in the Action Bar "if there is room" (by setting
android:showAsAction="ifRoom"), then there is a chance that the search widget will not
appear as an action view, but the menu item will appear in the overflow menu. For example,
when your application runs on a smaller screen, there might not be enough room in the
Action Bar to display the search widget along with other action items or navigation elements,
so the menu item will instead appear in the overflow menu. When placed in the overflow
menu, the item works like an ordinary menu item and does not display the action view (the
search widget).
To handle this situation, the menu item to which you've attached the search widget should
activate the search dialog when the user selects it from the overflow menu. In order for it to
do so, you must implement onOptionsItemSelected() to handle the "Search" menu item and
open the search dialog by calling onSearchRequested().
For more information about how items in the Action Bar work and how to handle this
situation, see the developer guide.
2.6 ADDING RECENT QUERY SUGGESTIONS
When using the Android search dialog or search widget, you can provide search
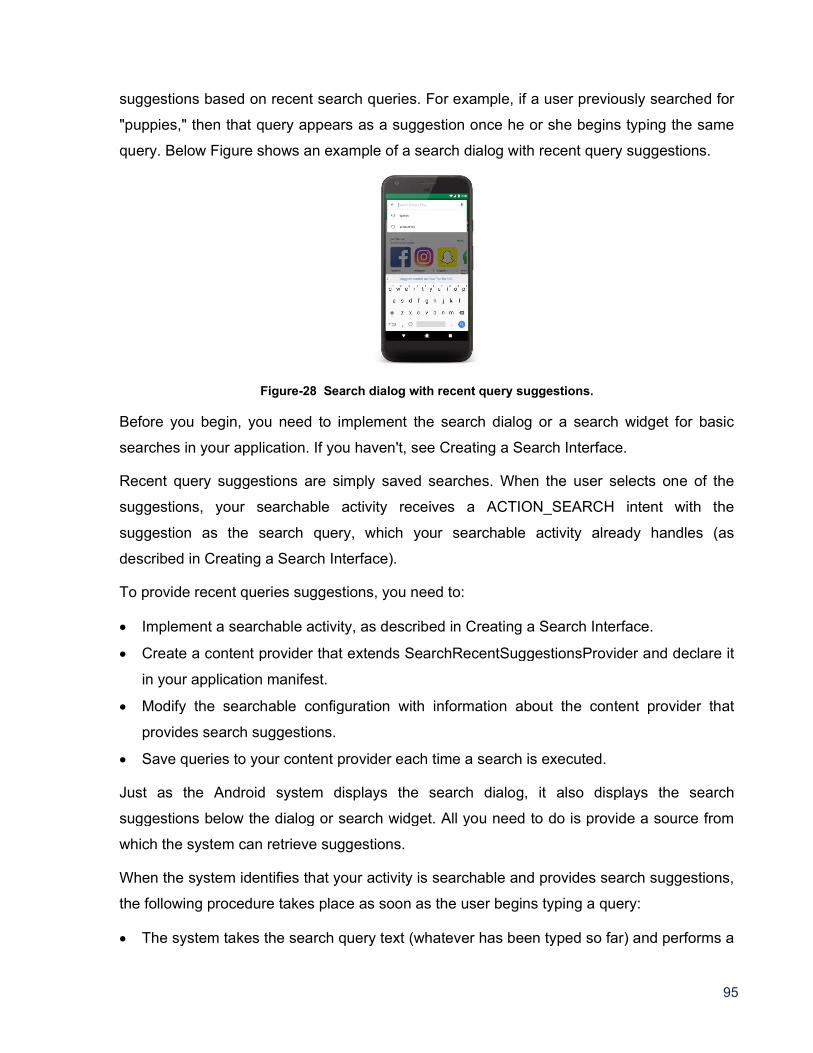
95
suggestions based on recent search queries. For example, if a user previously searched for
"puppies," then that query appears as a suggestion once he or she begins typing the same
query. Below Figure shows an example of a search dialog with recent query suggestions.
Figure-28 Search dialog with recent query suggestions.
Before you begin, you need to implement the search dialog or a search widget for basic
searches in your application. If you haven't, see Creating a Search Interface.
Recent query suggestions are simply saved searches. When the user selects one of the
suggestions, your searchable activity receives a ACTION_SEARCH intent with the
suggestion as the search query, which your searchable activity already handles (as
described in Creating a Search Interface).
To provide recent queries suggestions, you need to:
Implement a searchable activity, as described in Creating a Search Interface.
Create a content provider that extends SearchRecentSuggestionsProvider and declare it
in your application manifest.
Modify the searchable configuration with information about the content provider that
provides search suggestions.
Save queries to your content provider each time a search is executed.
Just as the Android system displays the search dialog, it also displays the search
suggestions below the dialog or search widget. All you need to do is provide a source from
which the system can retrieve suggestions.
When the system identifies that your activity is searchable and provides search suggestions,
the following procedure takes place as soon as the user begins typing a query:
The system takes the search query text (whatever has been typed so far) and performs a
96
query to the content provider that contains your suggestions.
Your content provider returns a Cursor that points to all suggestions that match the
search query text.
The system displays the list of suggestions provided by the Cursor.
Once the recent query suggestions are displayed, the following might happen:
If the user types another key, or changes the query in any way, the aforementioned steps
are repeated and the suggestion list is updated.
If the user executes the search, the suggestions are ignored and the search is delivered
to your searchable activity using the normal ACTION_SEARCH intent.
If the user selects a suggestion, an ACTION_SEARCH intent is delivered to your
searchable activity using the suggested text as the query.
The SearchRecentSuggestionsProvider class that you extend for your content provider
automatically does the work described above, so there's actually very little code to write.
Creating a Content Provider
The content provider that you need for recent query suggestions must be an implementation
of SearchRecentSuggestionsProvider. This class does practically everything for you. All you
have to do is write a class constructor that executes one line of code.
For example, here's a complete implementation of a content provider for recent query
suggestions:
public class MySuggestionProvider extends SearchRecentSuggestionsProvider {
public final static String AUTHORITY = "com.example.MySuggestionProvider";
public final static int MODE = DATABASE_MODE_QUERIES;
public MySuggestionProvider() {
setupSuggestions(AUTHORITY, MODE);
}
}
The call to setupSuggestions() passes the name of the search authority and a database
mode. The search authority can be any unique string, but the best practice is to use a fully
qualified name for your content provider (package name followed by the provider's class
97
name; for example, "com.example.MySuggestionProvider"). The database mode must
include DATABASE_MODE_QUERIES and can optionally include
DATABASE_MODE_2LINES, which adds another column to the suggestions table that
allows you to provide a second line of text with each suggestion. For example, if you want to
provide two lines in each suggestion:
public final static int MODE = DATABASE_MODE_QUERIES |
DATABASE_MODE_2LINES;
Now declare the content provider in your application manifest with the same authority string
used in your SearchRecentSuggestionsProvider class (and in the searchable configuration).
For example:
<application>
<provider android:name=".MySuggestionProvider"
android:authorities="com.example.MySuggestionProvider" />
...
</application>
Modifying the Searchable Configuration
To configure the system to use your suggestions provider, you need to add the
android:searchSuggestAuthority and android:searchSuggestSelection attributes to the
<searchable> element in your searchable configuration file. For example:
<?xml version="1.0" encoding="utf-8"?>
<searchable xmlns:android="http://schemas.android.com/apk/res/android"
android:label="@string/app_label"
android:hint="@string/search_hint"
android:searchSuggestAuthority="com.example.MySuggestionProvider"
android:searchSuggestSelection=" ?" >
</searchable>
The value for android:searchSuggestAuthority should be a fully qualified name for your
content provider that exactly matches the authority used in the content provider (the
98
AUTHORITY string in the above example).
The value for android:searchSuggestSelection must be a single question mark, preceded by
a space (" ?"), which is simply a placeholder for the SQLite selection argument (which is
automatically replaced by the query text entered by the user).
Saving Queries
To populate your collection of recent queries, add each query received by your searchable
activity to your SearchRecentSuggestionsProvider. To do this, create an instance of
SearchRecentSuggestions and call saveRecentQuery() each time your searchable activity
receives a query. For example, here's how you can save the query during your activity's
onCreate() method:
@Override
public void onCreate(Bundle savedInstanceState) {
super.onCreate(savedInstanceState);
setContentView(R.layout.main);
Intent intent = getIntent();
if (Intent.ACTION_SEARCH.equals(intent.getAction())) {
String query = intent.getStringExtra(SearchManager.QUERY);
SearchRecentSuggestions suggestions = new SearchRecentSuggestions(this,
MySuggestionProvider.AUTHORITY, MySuggestionProvider.MODE);
suggestions.saveRecentQuery(query, null);
}
}
The SearchRecentSuggestionsProvider constructor requires the same authority and
database mode declared by your content provider.
The saveRecentQuery() method takes the search query string as the first parameter and,
optionally, a second string to include as the second line of the suggestion (or null). The
second parameter is only used if you've enabled two-line mode for the search suggestions
with DATABASE_MODE_2LINES. If you have enabled two-line mode, then the query text is
also matched against this second line when the system looks for matching suggestions.
99
Clearing the Suggestion Data
To protect the user's privacy, you should always provide a way for the user to clear the
recent query suggestions. To clear the query history, call clearHistory(). For example:
SearchRecentSuggestions suggestions = new SearchRecentSuggestions(this,
HelloSuggestionProvider.AUTHORITY, HelloSuggestionProvider.MODE);
suggestions.clearHistory();
Execute this from your choice of a "Clear Search History" menu item, preference item, or
button. You should also provide a confirmation dialog to verify that the user wants to delete
their search history.
2.7 ADDING CUSTOM SUGGESTIONS
When using the Android search dialog or search widget, you can provide custom search
suggestions that are created from data in your application. For example, if your application is
a word dictionary, you can suggest words from the dictionary that match the text entered so
far. These are the most valuable suggestions, because you can effectively predict what the
user wants and provide instant access to it. Figure shows an example of a search dialog
with custom suggestions.
Once you provide custom suggestions, you can also make them available to the system-
wide Quick Search Box, providing access to your content from outside your application.
Before you begin with this guide to add custom suggestions, you need to have implemented
the Android search dialog or a search widget for searches in your application. If you haven't,
see Creating a Search Interface. You should also see the Content Providers documentation.
When the user selects a custom suggestion, the Android system sends an Intent to your
searchable activity. Whereas a normal search query sends an intent with the
ACTION_SEARCH action, you can instead define your custom suggestions to use
ACTION_VIEW (or any other intent action), and also include data that's relevant to the
selected suggestion. Continuing the dictionary example, when the user selects a suggestion,
your application can immediately open the definition for that word, instead of searching the

100
dictionary for matches.
To provide custom suggestions, do the following:
Implement a basic searchable activity, as described in Creating a Search Interface.
Modify the searchable configuration with information about the content provider that
provides custom suggestions.
Build a table (such as in an SQLiteDatabase) for your suggestions and format the table
with required columns.
Create a Content Provider that has access to your suggestions table and declare the
provider in your manifest.
Declare the type of Intent to be sent when the user selects a suggestion (including a
custom action and custom data).
Just as the Android system displays the search dialog, it also displays your search
suggestions. All you need is a content provider from which the system can retrieve your
suggestions. If you're not familiar with creating content providers, read the Content
Providers developer guide before you continue.
When the system identifies that your activity is searchable and provides search suggestions,
the following procedure takes place when the user types a query:
The system takes the search query text (whatever has been typed so far) and performs a
query to your content provider that manages your suggestions.
Your content provider returns a Cursor that points to all suggestions that are relevant to
the search query text.
The system displays the list of suggestions provided by the Cursor.
Once the custom suggestions are displayed, the following might happen:
If the user types another key, or changes the query in any way, the above steps are
repeated and the suggestion list is updated as appropriate.
If the user executes the search, the suggestions are ignored and the search is delivered
to your searchable activity using the normal ACTION_SEARCH intent.
If the user selects a suggestion, an intent is sent to your searchable activity, carrying a
custom action and custom data so that your application can open the suggested content.
101
Modifying the searchable configuration
To add support for custom suggestions, add the android:searchSuggestAuthority attribute to
the <searchable> element in your searchable configuration file. For example:
<?xml version="1.0" encoding="utf-8"?>
<searchable xmlns:android="http://schemas.android.com/apk/res/android"
android:label="@string/app_label"
android:hint="@string/search_hint"
android:searchSuggestAuthority="com.example.MyCustomSuggestionProvider">
</searchable>
You might need some additional attributes, depending on the type of intent you attach to
each suggestion and how you want to format queries to your content provider. The other
optional attributes are discussed in the following sections.
Creating a Content Provider
Creating a content provider for custom suggestions requires previous knowledge about
content providers that's covered in the Content Provider developer guide. For the most part,
a content provider for custom suggestions is the same as any other content provider.
However, for each suggestion you provide, the respective row in the Cursor must include
specific columns that the system understands and uses to format the suggestions.
When the user starts typing into the search dialog or search widget, the system queries your
content provider for suggestions by calling query() each time a letter is typed. In your
implementation of query(), your content provider must search your suggestion data and
return a Cursor that points to the rows you have determined to be good suggestions.
Details about creating a content provider for custom suggestions are discussed in the
following two sections:
Handling the suggestion query
How the system sends requests to your content provider and how to handle them
102
Building a suggestion table
How to define the columns that the system expects in the Cursor returned with each
query
Handling the suggestion query: When the system requests suggestions from your content
provider, it calls your content provider's query() method. You must implement this method to
search your suggestion data and return a Cursor pointing to the suggestions you deem
relevant.
Here's a summary of the parameters that the system passes to your query() method (listed
in order):
uri
Always a content Uri, formatted as:
content://your.authority/optional.suggest.path/SUGGEST_URI_PATH_QUERY
The default behavior is for system to pass this URI and append it with the query text. For
example:
content://your.authority/optional.suggest.path/SUGGEST_URI_PATH_QUERY/puppies
The query text on the end is encoded using URI encoding rules, so you might need to
decode it before performing a search.
The optional.suggest.path portion is only included in the URI if you have set such a path in
your searchable configuration file with the android:searchSuggestPath attribute. This is only
needed if you use the same content provider for multiple searchable activities, in which
case, you need to disambiguate the source of the suggestion query.
projection
Always null
selection
The value provided in the android:searchSuggestSelection attribute of your searchable
configuration file, or null if you have not declared the android:searchSuggestSelection
attribute. More about using this to get the query below.
selectionArgs: Contains the search query as the first (and only) element of the array if you
103
have declared the android:searchSuggestSelection attribute in your searchable
configuration. If you have not declared android:searchSuggestSelection, then this parameter
is null. More about using this to get the query below.
sortOrder: Always null
The system can send you the search query text in two ways. The default manner is for the
query text to be included as the last path of the content URI passed in the uri parameter.
However, if you include a selection value in your searchable configuration's
android:searchSuggestSelection attribute, then the query text is instead passed as the first
element of the selectionArgs string array. Both options are summarized next.
Get the query in the Uri
By default, the query is appended as the last segment of the uri parameter (a Uri object). To
retrieve the query text in this case, simply use getLastPathSegment(). For example:
String query = uri.getLastPathSegment().toLowerCase();
This returns the last segment of the Uri, which is the query text entered by the user.
Get the query in the selection arguments
Instead of using the URI, you might decide it makes more sense for your query() method to
receive everything it needs to perform the look-up and you want the selection and
selectionArgs parameters to carry the appropriate values. In such a case, add the
android:searchSuggestSelection attribute to your searchable configuration with your SQLite
selection string. In the selection string, include a question mark ("?") as a placeholder for the
actual search query. The system calls query() with the selection string as the selection
parameter and the search query as the first element in the selectionArgs array.
For example, here's how you might form the android:searchSuggestSelection attribute to
create a full-text search statement:
<?xml version="1.0" encoding="utf-8"?>
<searchable xmlns:android="http://schemas.android.com/apk/res/android"
android:label="@string/app_label"
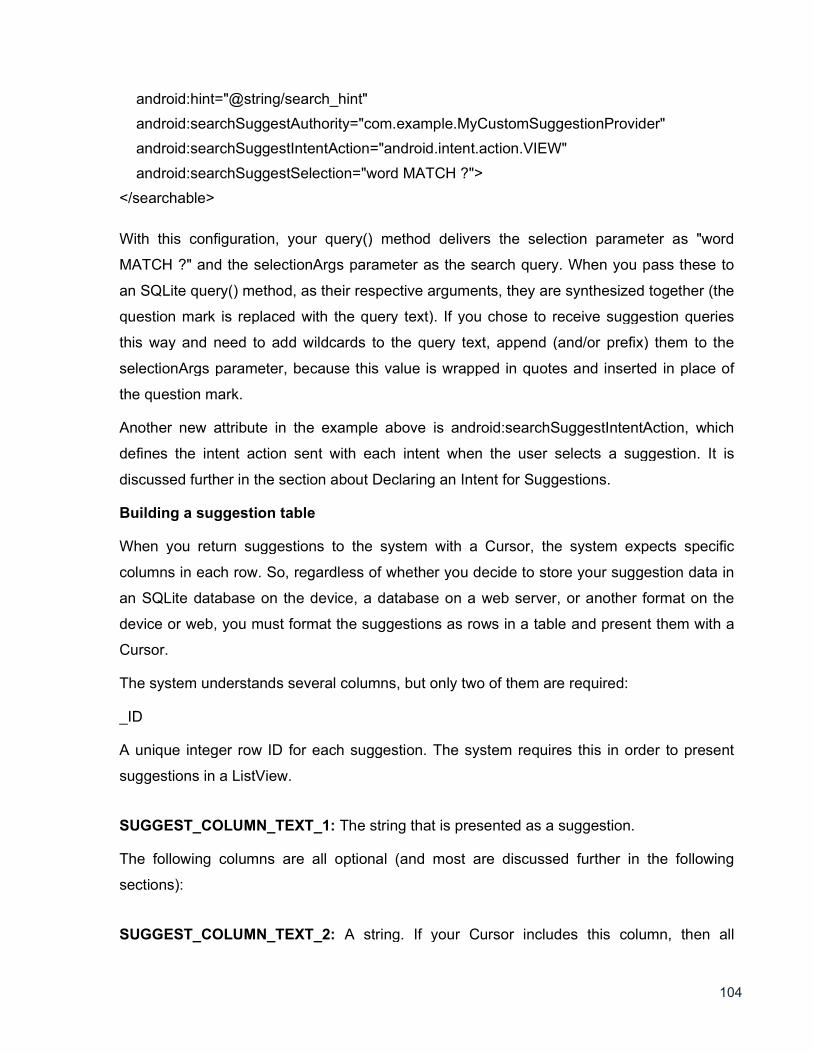
104
android:hint="@string/search_hint"
android:searchSuggestAuthority="com.example.MyCustomSuggestionProvider"
android:searchSuggestIntentAction="android.intent.action.VIEW"
android:searchSuggestSelection="word MATCH ?">
</searchable>
With this configuration, your query() method delivers the selection parameter as "word
MATCH ?" and the selectionArgs parameter as the search query. When you pass these to
an SQLite query() method, as their respective arguments, they are synthesized together (the
question mark is replaced with the query text). If you chose to receive suggestion queries
this way and need to add wildcards to the query text, append (and/or prefix) them to the
selectionArgs parameter, because this value is wrapped in quotes and inserted in place of
the question mark.
Another new attribute in the example above is android:searchSuggestIntentAction, which
defines the intent action sent with each intent when the user selects a suggestion. It is
discussed further in the section about Declaring an Intent for Suggestions.
Building a suggestion table
When you return suggestions to the system with a Cursor, the system expects specific
columns in each row. So, regardless of whether you decide to store your suggestion data in
an SQLite database on the device, a database on a web server, or another format on the
device or web, you must format the suggestions as rows in a table and present them with a
Cursor.
The system understands several columns, but only two of them are required:
_ID
A unique integer row ID for each suggestion. The system requires this in order to present
suggestions in a ListView.
SUGGEST_COLUMN_TEXT_1: The string that is presented as a suggestion.
The following columns are all optional (and most are discussed further in the following
sections):
SUGGEST_COLUMN_TEXT_2: A string. If your Cursor includes this column, then all
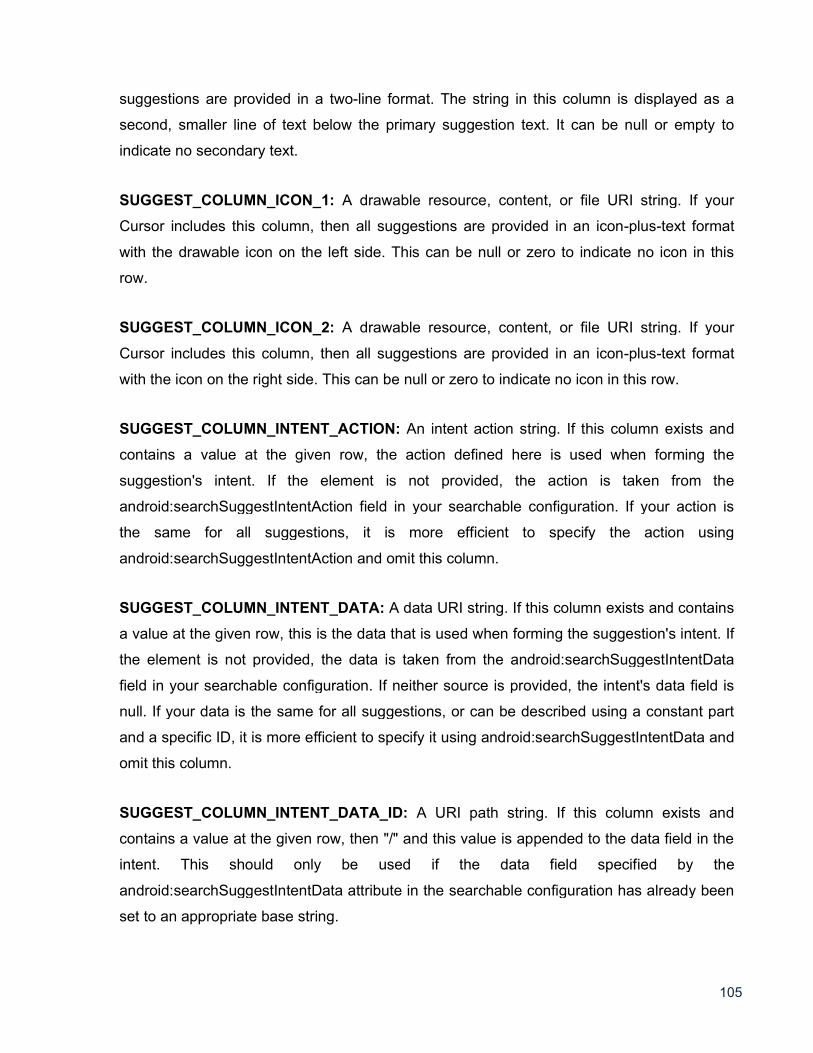
105
suggestions are provided in a two-line format. The string in this column is displayed as a
second, smaller line of text below the primary suggestion text. It can be null or empty to
indicate no secondary text.
SUGGEST_COLUMN_ICON_1: A drawable resource, content, or file URI string. If your
Cursor includes this column, then all suggestions are provided in an icon-plus-text format
with the drawable icon on the left side. This can be null or zero to indicate no icon in this
row.
SUGGEST_COLUMN_ICON_2: A drawable resource, content, or file URI string. If your
Cursor includes this column, then all suggestions are provided in an icon-plus-text format
with the icon on the right side. This can be null or zero to indicate no icon in this row.
SUGGEST_COLUMN_INTENT_ACTION: An intent action string. If this column exists and
contains a value at the given row, the action defined here is used when forming the
suggestion's intent. If the element is not provided, the action is taken from the
android:searchSuggestIntentAction field in your searchable configuration. If your action is
the same for all suggestions, it is more efficient to specify the action using
android:searchSuggestIntentAction and omit this column.
SUGGEST_COLUMN_INTENT_DATA: A data URI string. If this column exists and contains
a value at the given row, this is the data that is used when forming the suggestion's intent. If
the element is not provided, the data is taken from the android:searchSuggestIntentData
field in your searchable configuration. If neither source is provided, the intent's data field is
null. If your data is the same for all suggestions, or can be described using a constant part
and a specific ID, it is more efficient to specify it using android:searchSuggestIntentData and
omit this column.
SUGGEST_COLUMN_INTENT_DATA_ID: A URI path string. If this column exists and
contains a value at the given row, then "/" and this value is appended to the data field in the
intent. This should only be used if the data field specified by the
android:searchSuggestIntentData attribute in the searchable configuration has already been
set to an appropriate base string.

106
SUGGEST_COLUMN_INTENT_EXTRA_DATA: Arbitrary data. If this column exists and
contains a value at a given row, this is the extra data used when forming the suggestion's
intent. If not provided, the intent's extra data field is null. This column allows suggestions to
provide additional data that is included as an extra in the intent's EXTRA_DATA_KEY key.
SUGGEST_COLUMN_QUERY: If this column exists and this element exists at the given
row, this is the data that is used when forming the suggestion's query, included as an extra
in the intent's QUERY key. Required if suggestion's action is ACTION_SEARCH, optional
otherwise.
SUGGEST_COLUMN_SHORTCUT_ID: Only used when providing suggestions for Quick
Search Box. This column indicates whether a search suggestion should be stored as a
shortcut and whether it should be validated. Shortcuts are usually formed when the user
clicks a suggestion from Quick Search Box. If missing, the result is stored as a shortcut and
never refreshed. If set to SUGGEST_NEVER_MAKE_SHORTCUT, the result is not stored
as a shortcut. Otherwise, the shortcut ID is used to check back for an up to date suggestion
using SUGGEST_URI_PATH_SHORTCUT.
SUGGEST_COLUMN_SPINNER_WHILE_REFRESHING: only used when providing
suggestions for Quick Search Box. This column specifies that a spinner should be shown
instead of an icon from SUGGEST_COLUMN_ICON_2 while the shortcut of this suggestion
is being refreshed in Quick Search Box.
Some of these columns are discussed more in the following sections.
Declaring an Intent for Suggestions
When the user selects a suggestion from the list that appears below the search dialog or
widget, the system sends a custom Intent to your searchable activity. You must define the
action and data for the intent.
Declaring the intent action
The most common intent action for a custom suggestion is ACTION_VIEW, which is
appropriate when you want to open something, like the definition for a word, a person's
contact information, or a web page. However, the intent action can be any other action and
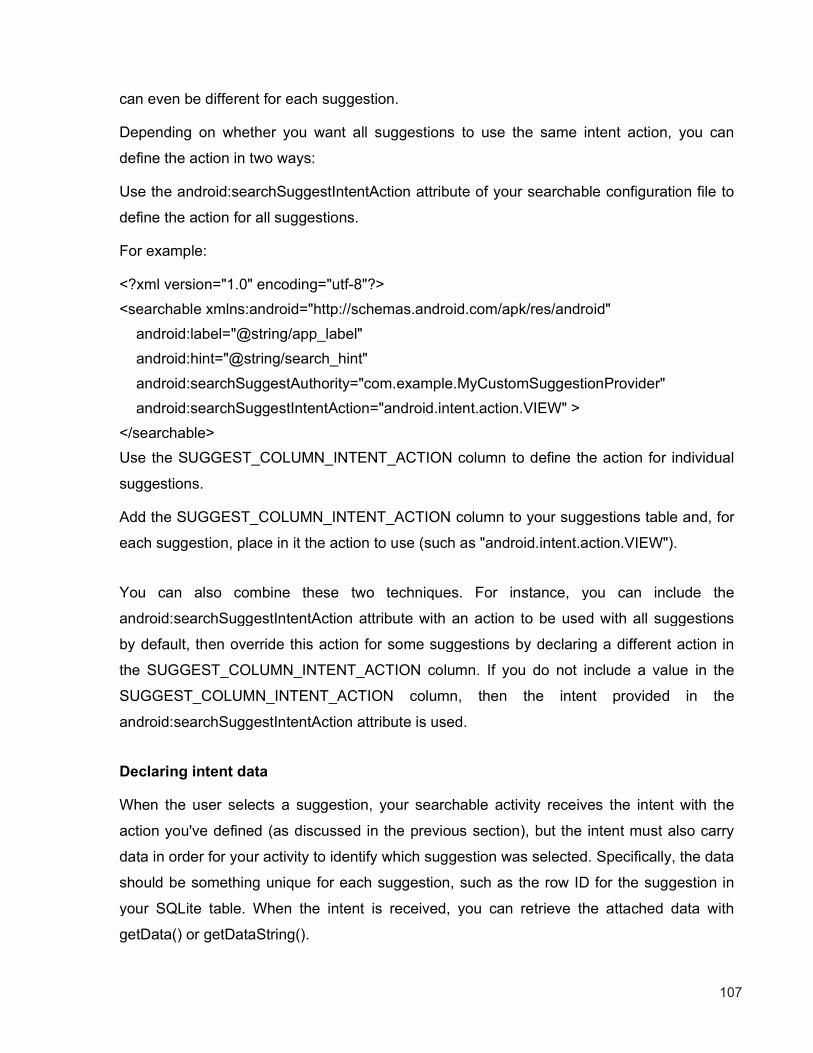
107
can even be different for each suggestion.
Depending on whether you want all suggestions to use the same intent action, you can
define the action in two ways:
Use the android:searchSuggestIntentAction attribute of your searchable configuration file to
define the action for all suggestions.
For example:
<?xml version="1.0" encoding="utf-8"?>
<searchable xmlns:android="http://schemas.android.com/apk/res/android"
android:label="@string/app_label"
android:hint="@string/search_hint"
android:searchSuggestAuthority="com.example.MyCustomSuggestionProvider"
android:searchSuggestIntentAction="android.intent.action.VIEW" >
</searchable>
Use the SUGGEST_COLUMN_INTENT_ACTION column to define the action for individual
suggestions.
Add the SUGGEST_COLUMN_INTENT_ACTION column to your suggestions table and, for
each suggestion, place in it the action to use (such as "android.intent.action.VIEW").
You can also combine these two techniques. For instance, you can include the
android:searchSuggestIntentAction attribute with an action to be used with all suggestions
by default, then override this action for some suggestions by declaring a different action in
the SUGGEST_COLUMN_INTENT_ACTION column. If you do not include a value in the
SUGGEST_COLUMN_INTENT_ACTION column, then the intent provided in the
android:searchSuggestIntentAction attribute is used.
Declaring intent data
When the user selects a suggestion, your searchable activity receives the intent with the
action you've defined (as discussed in the previous section), but the intent must also carry
data in order for your activity to identify which suggestion was selected. Specifically, the data
should be something unique for each suggestion, such as the row ID for the suggestion in
your SQLite table. When the intent is received, you can retrieve the attached data with
getData() or getDataString().
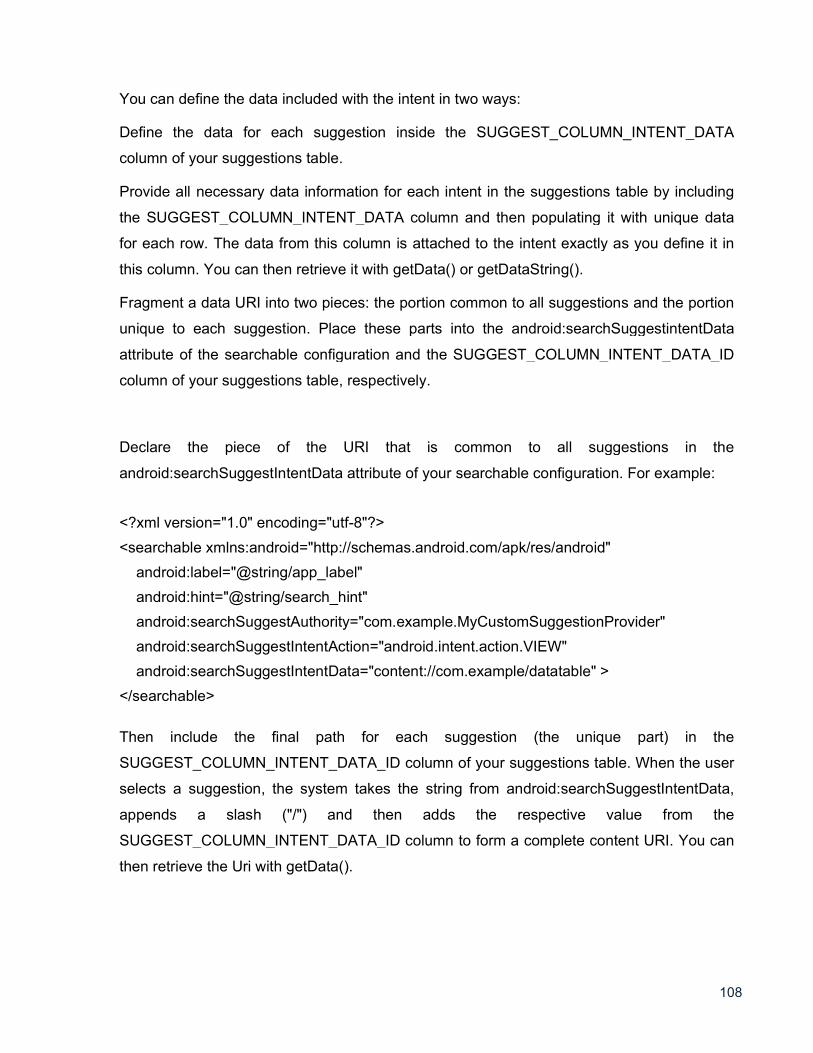
108
You can define the data included with the intent in two ways:
Define the data for each suggestion inside the SUGGEST_COLUMN_INTENT_DATA
column of your suggestions table.
Provide all necessary data information for each intent in the suggestions table by including
the SUGGEST_COLUMN_INTENT_DATA column and then populating it with unique data
for each row. The data from this column is attached to the intent exactly as you define it in
this column. You can then retrieve it with getData() or getDataString().
Fragment a data URI into two pieces: the portion common to all suggestions and the portion
unique to each suggestion. Place these parts into the android:searchSuggestintentData
attribute of the searchable configuration and the SUGGEST_COLUMN_INTENT_DATA_ID
column of your suggestions table, respectively.
Declare the piece of the URI that is common to all suggestions in the
android:searchSuggestIntentData attribute of your searchable configuration. For example:
<?xml version="1.0" encoding="utf-8"?>
<searchable xmlns:android="http://schemas.android.com/apk/res/android"
android:label="@string/app_label"
android:hint="@string/search_hint"
android:searchSuggestAuthority="com.example.MyCustomSuggestionProvider"
android:searchSuggestIntentAction="android.intent.action.VIEW"
android:searchSuggestIntentData="content://com.example/datatable" >
</searchable>
Then include the final path for each suggestion (the unique part) in the
SUGGEST_COLUMN_INTENT_DATA_ID column of your suggestions table. When the user
selects a suggestion, the system takes the string from android:searchSuggestIntentData,
appends a slash ("/") and then adds the respective value from the
SUGGEST_COLUMN_INTENT_DATA_ID column to form a complete content URI. You can
then retrieve the Uri with getData().

109
Add more data
If you need to express even more information with your intent, you can add another table
column, SUGGEST_COLUMN_INTENT_EXTRA_DATA, which can store additional
information about the suggestion. The data saved in this column is placed in
EXTRA_DATA_KEY of the intent's extra Bundle.
Handling the Intent
Now that you provide custom search suggestions with custom intents, you need your
searchable activity to handle these intents when the user selects a suggestion. This is in
addition to handling the ACTION_SEARCH intent, which your searchable activity already
does.
Here's an example of how you can handle the intents during your activity onCreate()
callback:
Intent intent = getIntent();
if (Intent.ACTION_SEARCH.equals(intent.getAction())) {
// Handle the normal search query case
String query = intent.getStringExtra(SearchManager.QUERY);
doSearch(query);
} else if (Intent.ACTION_VIEW.equals(intent.getAction())) {
// Handle a suggestions click (because the suggestions all use ACTION_VIEW)
Uri data = intent.getData();
showResult(data);
}
In this example, the intent action is ACTION_VIEW and the data carries a complete URI
pointing to the suggested item, as synthesized by the android:searchSuggestIntentData
string and SUGGEST_COLUMN_INTENT_DATA_ID column. The URI is then passed to the
local showResult() method that queries the content provider for the item specified by the
URI.
Rewriting the query text
If the user navigates through the suggestions list using the directional controls (such as with
a trackball or d-pad), the query text does not update, by default. However, you can
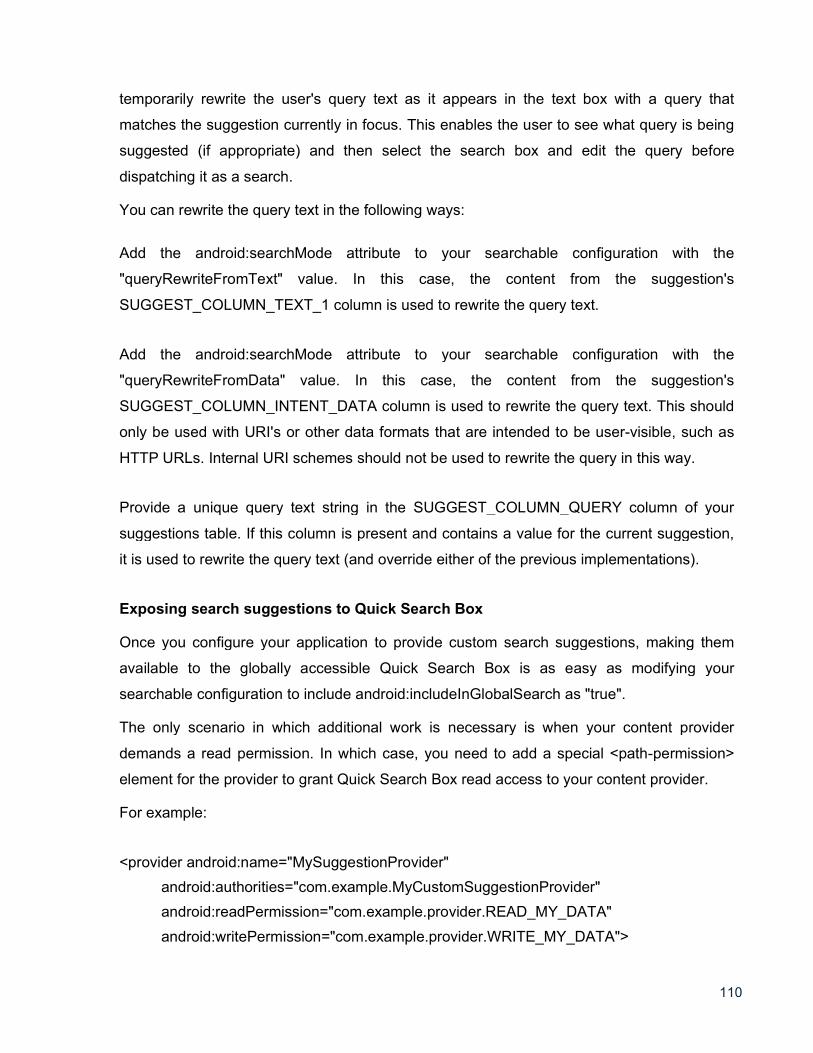
110
temporarily rewrite the user's query text as it appears in the text box with a query that
matches the suggestion currently in focus. This enables the user to see what query is being
suggested (if appropriate) and then select the search box and edit the query before
dispatching it as a search.
You can rewrite the query text in the following ways:
Add the android:searchMode attribute to your searchable configuration with the
"queryRewriteFromText" value. In this case, the content from the suggestion's
SUGGEST_COLUMN_TEXT_1 column is used to rewrite the query text.
Add the android:searchMode attribute to your searchable configuration with the
"queryRewriteFromData" value. In this case, the content from the suggestion's
SUGGEST_COLUMN_INTENT_DATA column is used to rewrite the query text. This should
only be used with URI's or other data formats that are intended to be user-visible, such as
HTTP URLs. Internal URI schemes should not be used to rewrite the query in this way.
Provide a unique query text string in the SUGGEST_COLUMN_QUERY column of your
suggestions table. If this column is present and contains a value for the current suggestion,
it is used to rewrite the query text (and override either of the previous implementations).
Exposing search suggestions to Quick Search Box
Once you configure your application to provide custom search suggestions, making them
available to the globally accessible Quick Search Box is as easy as modifying your
searchable configuration to include android:includeInGlobalSearch as "true".
The only scenario in which additional work is necessary is when your content provider
demands a read permission. In which case, you need to add a special <path-permission>
element for the provider to grant Quick Search Box read access to your content provider.
For example:
<provider android:name="MySuggestionProvider"
android:authorities="com.example.MyCustomSuggestionProvider"
android:readPermission="com.example.provider.READ_MY_DATA"
android:writePermission="com.example.provider.WRITE_MY_DATA">
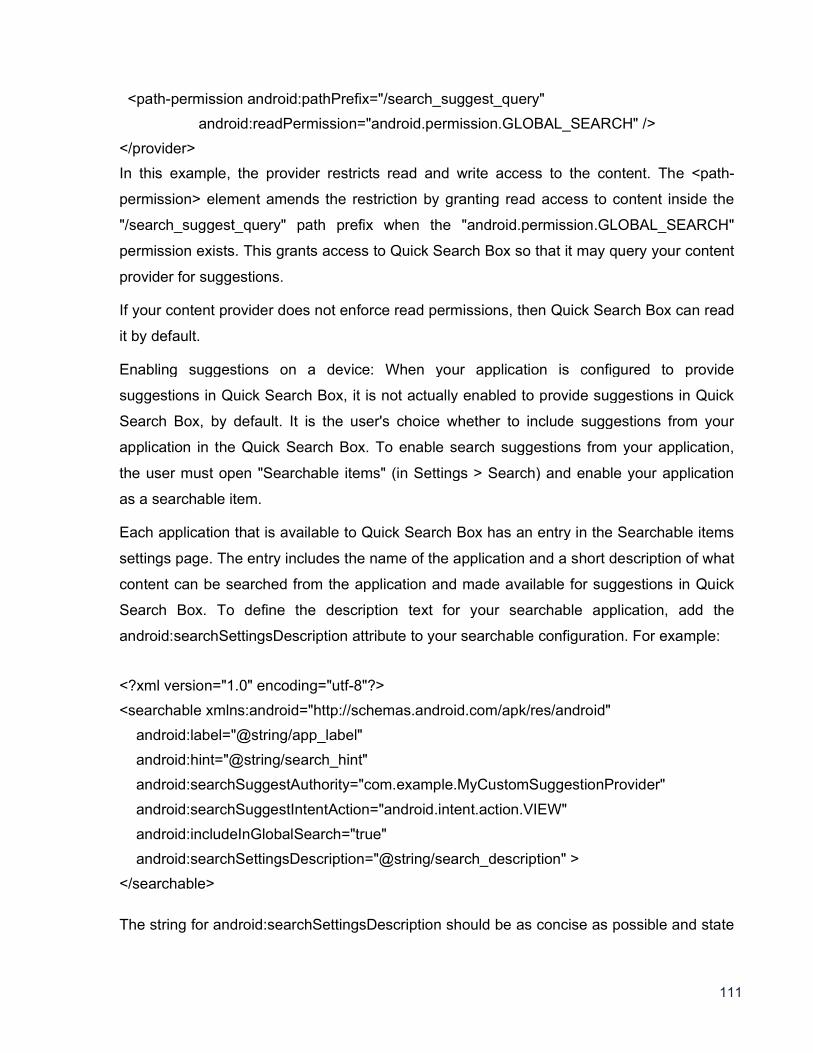
111
<path-permission android:pathPrefix="/search_suggest_query"
android:readPermission="android.permission.GLOBAL_SEARCH" />
</provider>
In this example, the provider restricts read and write access to the content. The <path-
permission> element amends the restriction by granting read access to content inside the
"/search_suggest_query" path prefix when the "android.permission.GLOBAL_SEARCH"
permission exists. This grants access to Quick Search Box so that it may query your content
provider for suggestions.
If your content provider does not enforce read permissions, then Quick Search Box can read
it by default.
Enabling suggestions on a device: When your application is configured to provide
suggestions in Quick Search Box, it is not actually enabled to provide suggestions in Quick
Search Box, by default. It is the user's choice whether to include suggestions from your
application in the Quick Search Box. To enable search suggestions from your application,
the user must open "Searchable items" (in Settings > Search) and enable your application
as a searchable item.
Each application that is available to Quick Search Box has an entry in the Searchable items
settings page. The entry includes the name of the application and a short description of what
content can be searched from the application and made available for suggestions in Quick
Search Box. To define the description text for your searchable application, add the
android:searchSettingsDescription attribute to your searchable configuration. For example:
<?xml version="1.0" encoding="utf-8"?>
<searchable xmlns:android="http://schemas.android.com/apk/res/android"
android:label="@string/app_label"
android:hint="@string/search_hint"
android:searchSuggestAuthority="com.example.MyCustomSuggestionProvider"
android:searchSuggestIntentAction="android.intent.action.VIEW"
android:includeInGlobalSearch="true"
android:searchSettingsDescription="@string/search_description" >
</searchable>
The string for android:searchSettingsDescription should be as concise as possible and state
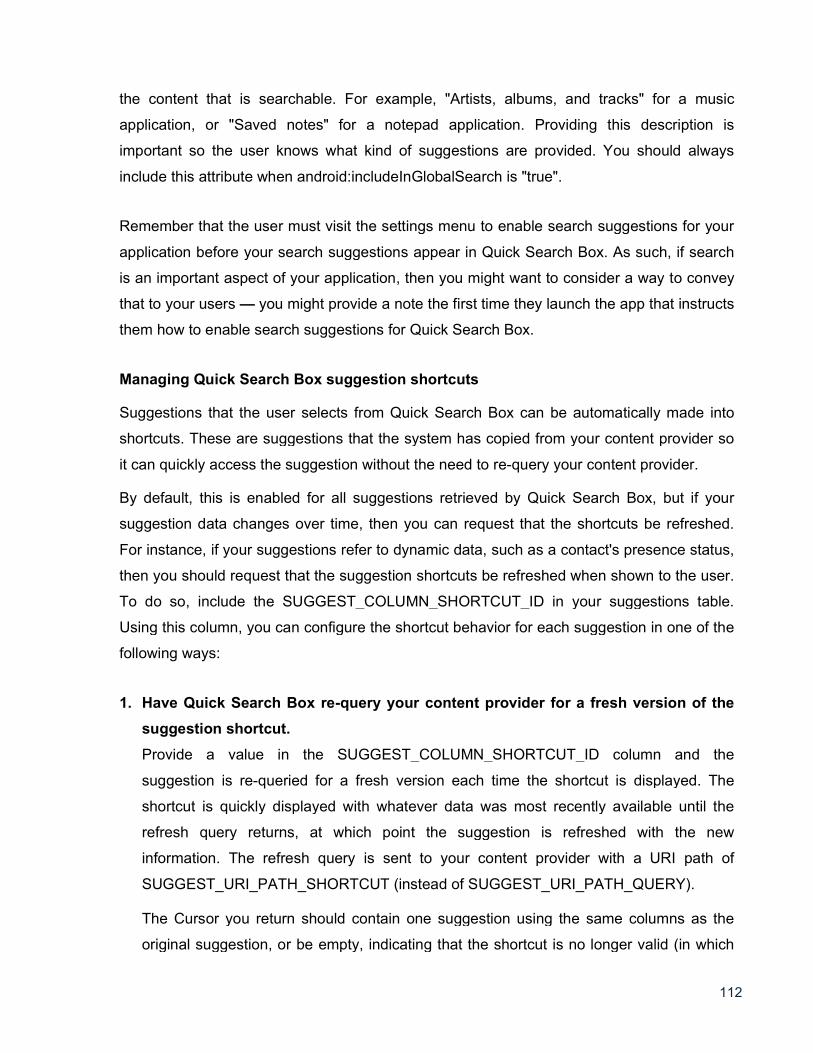
112
the content that is searchable. For example, "Artists, albums, and tracks" for a music
application, or "Saved notes" for a notepad application. Providing this description is
important so the user knows what kind of suggestions are provided. You should always
include this attribute when android:includeInGlobalSearch is "true".
Remember that the user must visit the settings menu to enable search suggestions for your
application before your search suggestions appear in Quick Search Box. As such, if search
is an important aspect of your application, then you might want to consider a way to convey
that to your users you might provide a note the first time they launch the app that instructs
them how to enable search suggestions for Quick Search Box.
Managing Quick Search Box suggestion shortcuts
Suggestions that the user selects from Quick Search Box can be automatically made into
shortcuts. These are suggestions that the system has copied from your content provider so
it can quickly access the suggestion without the need to re-query your content provider.
By default, this is enabled for all suggestions retrieved by Quick Search Box, but if your
suggestion data changes over time, then you can request that the shortcuts be refreshed.
For instance, if your suggestions refer to dynamic data, such as a contact's presence status,
then you should request that the suggestion shortcuts be refreshed when shown to the user.
To do so, include the SUGGEST_COLUMN_SHORTCUT_ID in your suggestions table.
Using this column, you can configure the shortcut behavior for each suggestion in one of the
following ways:
1. Have Quick Search Box re-query your content provider for a fresh version of the
suggestion shortcut.
Provide a value in the SUGGEST_COLUMN_SHORTCUT_ID column and the
suggestion is re-queried for a fresh version each time the shortcut is displayed. The
shortcut is quickly displayed with whatever data was most recently available until the
refresh query returns, at which point the suggestion is refreshed with the new
information. The refresh query is sent to your content provider with a URI path of
SUGGEST_URI_PATH_SHORTCUT (instead of SUGGEST_URI_PATH_QUERY).
The Cursor you return should contain one suggestion using the same columns as the
original suggestion, or be empty, indicating that the shortcut is no longer valid (in which
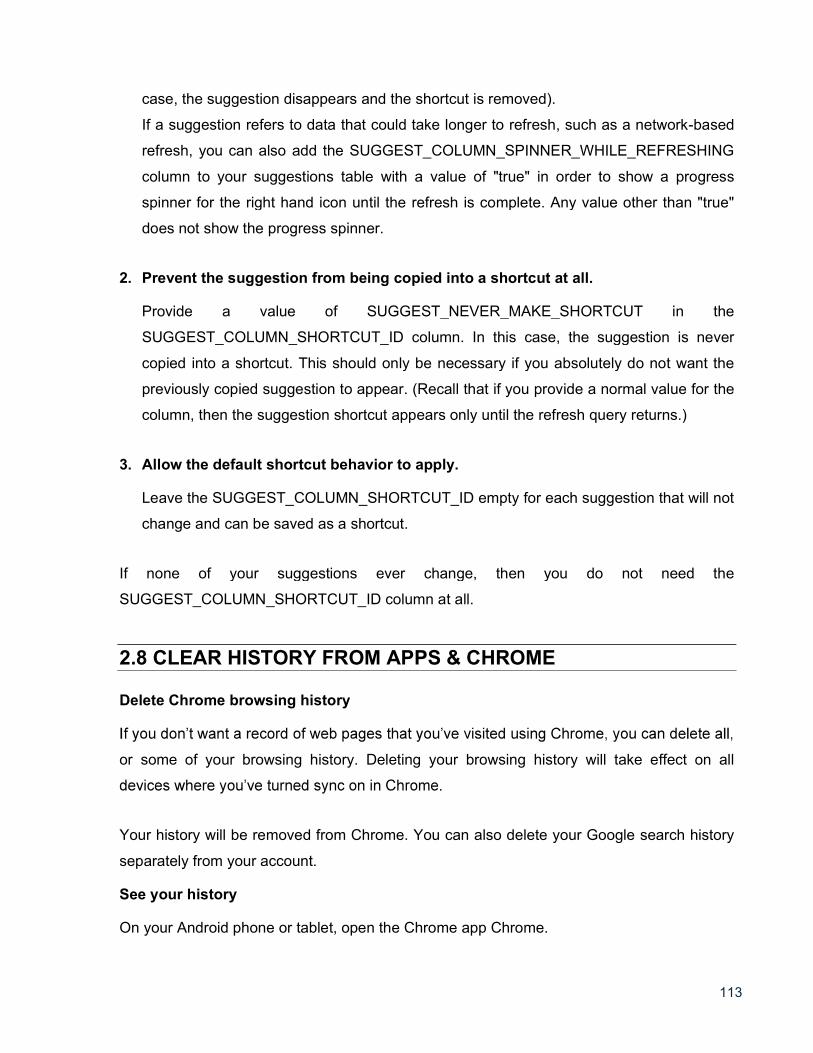
113
case, the suggestion disappears and the shortcut is removed).
If a suggestion refers to data that could take longer to refresh, such as a network-based
refresh, you can also add the SUGGEST_COLUMN_SPINNER_WHILE_REFRESHING
column to your suggestions table with a value of "true" in order to show a progress
spinner for the right hand icon until the refresh is complete. Any value other than "true"
does not show the progress spinner.
2. Prevent the suggestion from being copied into a shortcut at all.
Provide a value of SUGGEST_NEVER_MAKE_SHORTCUT in the
SUGGEST_COLUMN_SHORTCUT_ID column. In this case, the suggestion is never
copied into a shortcut. This should only be necessary if you absolutely do not want the
previously copied suggestion to appear. (Recall that if you provide a normal value for the
column, then the suggestion shortcut appears only until the refresh query returns.)
3. Allow the default shortcut behavior to apply.
Leave the SUGGEST_COLUMN_SHORTCUT_ID empty for each suggestion that will not
change and can be saved as a shortcut.
If none of your suggestions ever change, then you do not need the
SUGGEST_COLUMN_SHORTCUT_ID column at all.
2.8 CLEAR HISTORY FROM APPS & CHROME
Delete Chrome browsing history
or some of your browsing history. Deleting your browsing history will take effect on all
Your history will be removed from Chrome. You can also delete your Google search history
separately from your account.
See your history
On your Android phone or tablet, open the Chrome app Chrome.
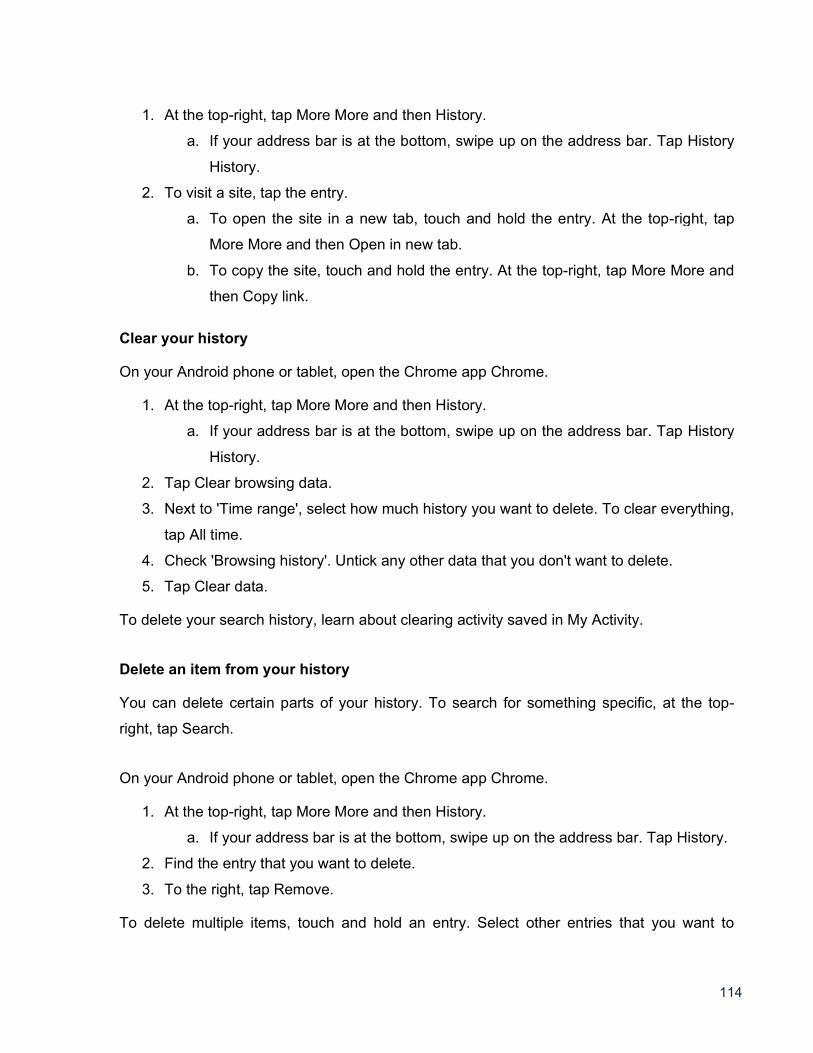
114
1. At the top-right, tap More More and then History.
a. If your address bar is at the bottom, swipe up on the address bar. Tap History
History.
2. To visit a site, tap the entry.
a. To open the site in a new tab, touch and hold the entry. At the top-right, tap
More More and then Open in new tab.
b. To copy the site, touch and hold the entry. At the top-right, tap More More and
then Copy link.
Clear your history
On your Android phone or tablet, open the Chrome app Chrome.
1. At the top-right, tap More More and then History.
a. If your address bar is at the bottom, swipe up on the address bar. Tap History
History.
2. Tap Clear browsing data.
3. Next to 'Time range', select how much history you want to delete. To clear everything,
tap All time.
4. Check 'Browsing history'. Untick any other data that you don't want to delete.
5. Tap Clear data.
To delete your search history, learn about clearing activity saved in My Activity.
Delete an item from your history
You can delete certain parts of your history. To search for something specific, at the top-
right, tap Search.
On your Android phone or tablet, open the Chrome app Chrome.
1. At the top-right, tap More More and then History.
a. If your address bar is at the bottom, swipe up on the address bar. Tap History.
2. Find the entry that you want to delete.
3. To the right, tap Remove.
To delete multiple items, touch and hold an entry. Select other entries that you want to
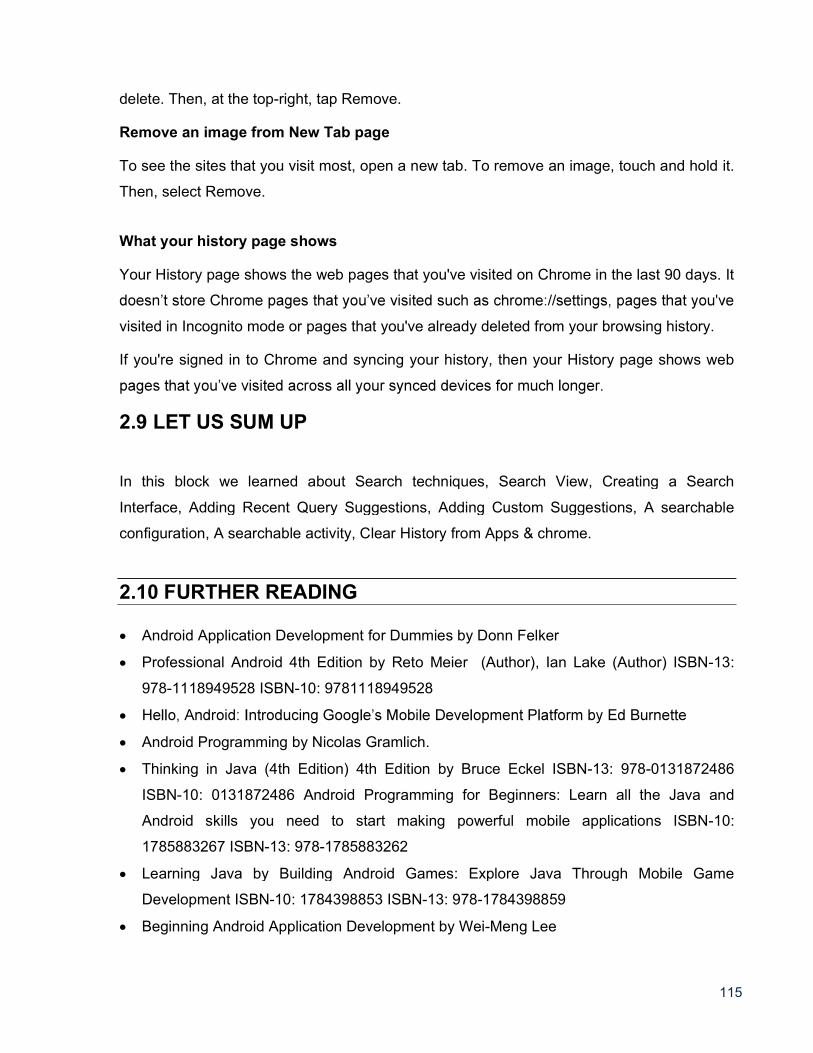
115
delete. Then, at the top-right, tap Remove.
Remove an image from New Tab page
To see the sites that you visit most, open a new tab. To remove an image, touch and hold it.
Then, select Remove.
What your history page shows
Your History page shows the web pages that you've visited on Chrome in the last 90 days. It
visited in Incognito mode or pages that you've already deleted from your browsing history.
If you're signed in to Chrome and syncing your history, then your History page shows web
2.9 LET US SUM UP
In this block we learned about Search techniques, Search View, Creating a Search
Interface, Adding Recent Query Suggestions, Adding Custom Suggestions, A searchable
configuration, A searchable activity, Clear History from Apps & chrome.
2.10 FURTHER READING
Android Application Development for Dummies by Donn Felker
Professional Android 4th Edition by Reto Meier (Author), Ian Lake (Author) ISBN-13:
978-1118949528 ISBN-10: 9781118949528
Android Programming by Nicolas Gramlich.
Thinking in Java (4th Edition) 4th Edition by Bruce Eckel ISBN-13: 978-0131872486
ISBN-10: 0131872486 Android Programming for Beginners: Learn all the Java and
Android skills you need to start making powerful mobile applications ISBN-10:
1785883267 ISBN-13: 978-1785883262
Learning Java by Building Android Games: Explore Java Through Mobile Game
Development ISBN-10: 1784398853 ISBN-13: 978-1784398859
Beginning Android Application Development by Wei-Meng Lee

116
Java: A Beginner's Guide, Sixth Edition 6th Edition by Herbert Schildt ISBN-13: 978-
0071809252 ISBN-10: 0071809252
Android Programming: The Big Nerd Ranch Guide (3rd Edition) (Big Nerd Ranch Guides)
3rd Edition by Bill Phillips , Chris Stewart , Kristin Marsicano ISBN-13: 978-0134706054
ISBN-10: 0134706056
Android Programming: Pushing the Limits 1st Edition by Erik Hellman ISBN-13: 978-
1118717370 ISBN-10: 1118717376
Head First Android Development: A Brain-Friendly Guide 1st Edition by Dawn Griffiths
ISBN-13: 978-1449362188 ISBN-10: 1449362184
Pro Android by Sayed Y. Hashimi and Satya Komatineni, Springer, New York, 2009.
2.11 ASSIGNMENTS
A. Write a sort note on Search View.
B. How to use the Search Widget.
C. How to Configuring the search widget.
D. Explain the search widget features.
E. Discuss about Adding Recent Query Suggestions.
F. How to Handling the suggestion query explain in detail.
G. How to see history in phone.
H. Explain the steps of Clear your history from phone.
2.12 ACTIVITIES
Create an android application for custom search from dynamic list
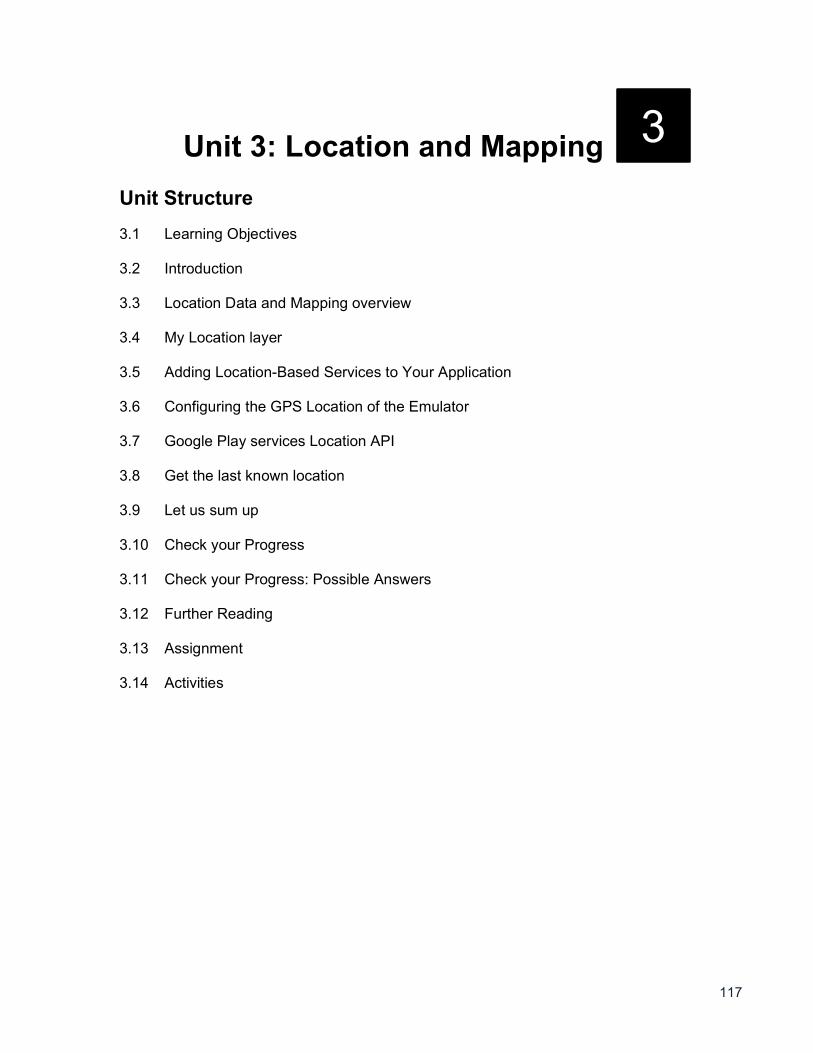
117
Unit 3: Location and Mapping
Unit Structure 3.1 Learning Objectives
3.2 Introduction
3.3 Location Data and Mapping overview 3.4 My Location layer
3.5 Adding Location-Based Services to Your Application
3.6 Configuring the GPS Location of the Emulator 3.7 Google Play services Location API
3.8 Get the last known location 3.9 Let us sum up
3.10 Check your Progress
3.11 Check your Progress: Possible Answers
3.12 Further Reading
3.13 Assignment
3.14 Activities
3
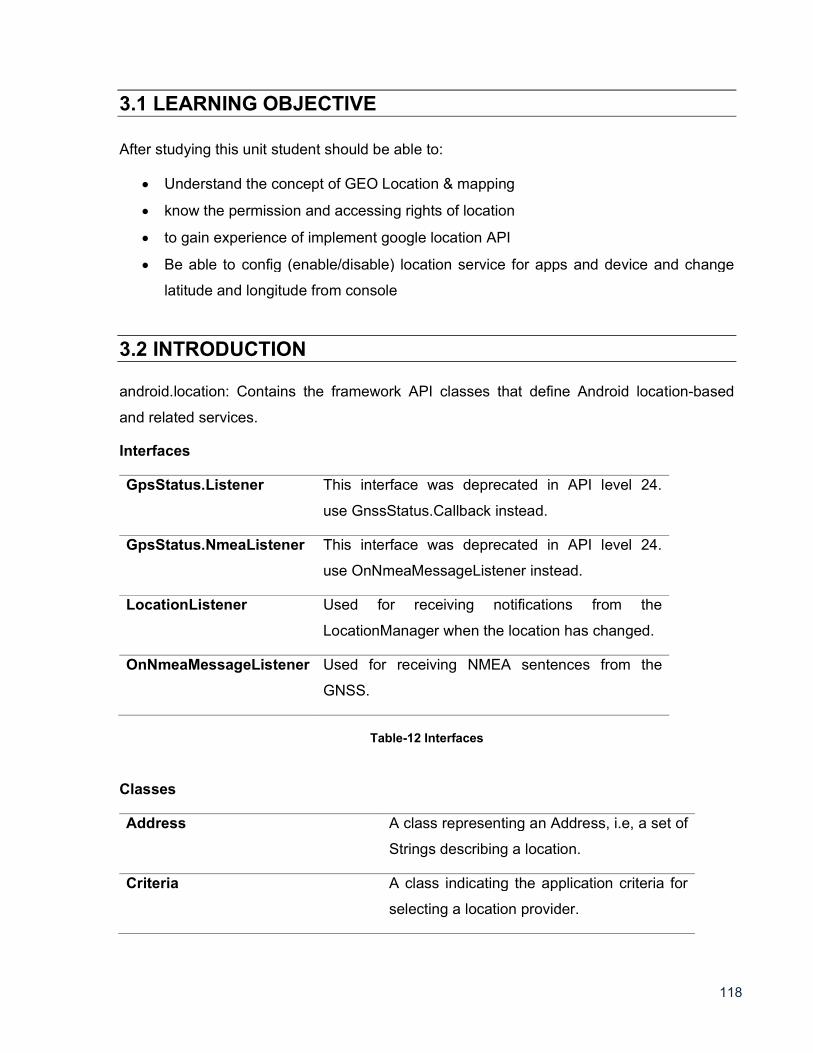
118
3.1 LEARNING OBJECTIVE
After studying this unit student should be able to:
Understand the concept of GEO Location & mapping
know the permission and accessing rights of location
to gain experience of implement google location API
Be able to config (enable/disable) location service for apps and device and change
latitude and longitude from console
3.2 INTRODUCTION
android.location: Contains the framework API classes that define Android location-based
and related services.
Interfaces
GpsStatus.Listener This interface was deprecated in API level 24.
use GnssStatus.Callback instead.
GpsStatus.NmeaListener This interface was deprecated in API level 24.
use OnNmeaMessageListener instead.
LocationListener Used for receiving notifications from the
LocationManager when the location has changed.
OnNmeaMessageListener Used for receiving NMEA sentences from the
GNSS.
Table-12 Interfaces
Classes
Address A class representing an Address, i.e, a set of
Strings describing a location.
Criteria A class indicating the application criteria for
selecting a location provider.
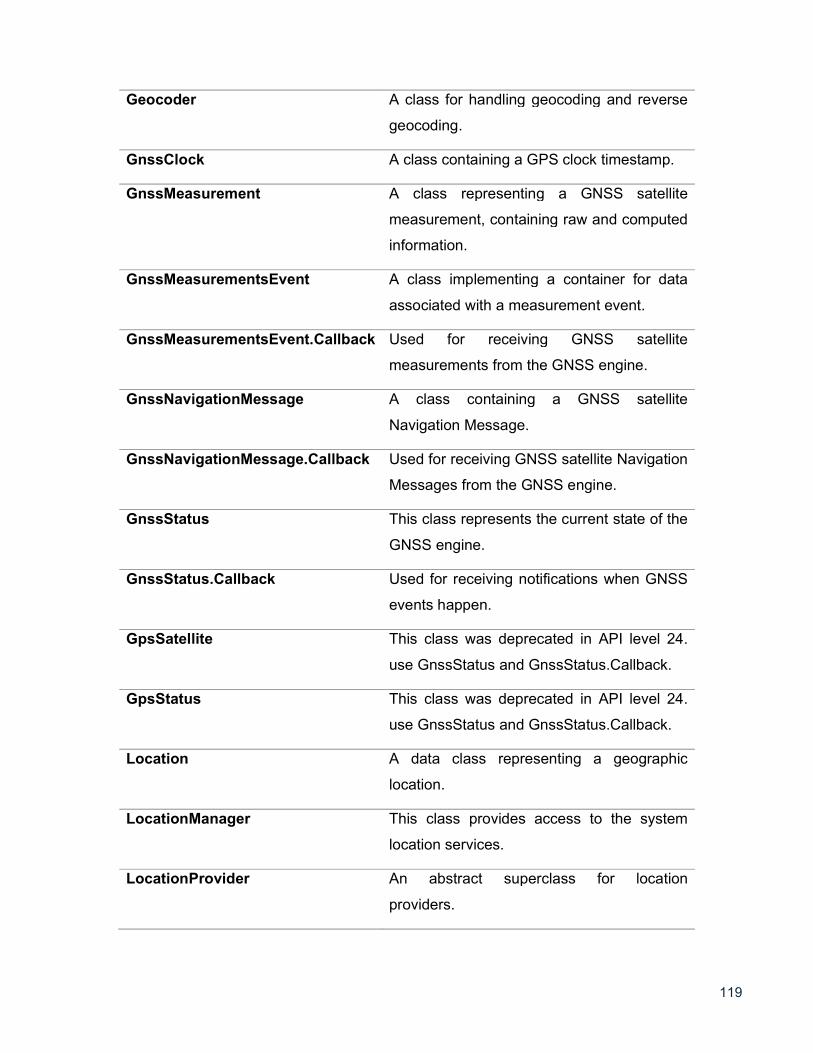
119
Geocoder A class for handling geocoding and reverse
geocoding.
GnssClock A class containing a GPS clock timestamp.
GnssMeasurement A class representing a GNSS satellite
measurement, containing raw and computed
information.
GnssMeasurementsEvent A class implementing a container for data
associated with a measurement event.
GnssMeasurementsEvent.Callback Used for receiving GNSS satellite
measurements from the GNSS engine.
GnssNavigationMessage A class containing a GNSS satellite
Navigation Message.
GnssNavigationMessage.Callback Used for receiving GNSS satellite Navigation
Messages from the GNSS engine.
GnssStatus This class represents the current state of the
GNSS engine.
GnssStatus.Callback Used for receiving notifications when GNSS
events happen.
GpsSatellite This class was deprecated in API level 24.
use GnssStatus and GnssStatus.Callback.
GpsStatus This class was deprecated in API level 24.
use GnssStatus and GnssStatus.Callback.
Location A data class representing a geographic
location.
LocationManager This class provides access to the system
location services.
LocationProvider An abstract superclass for location
providers.
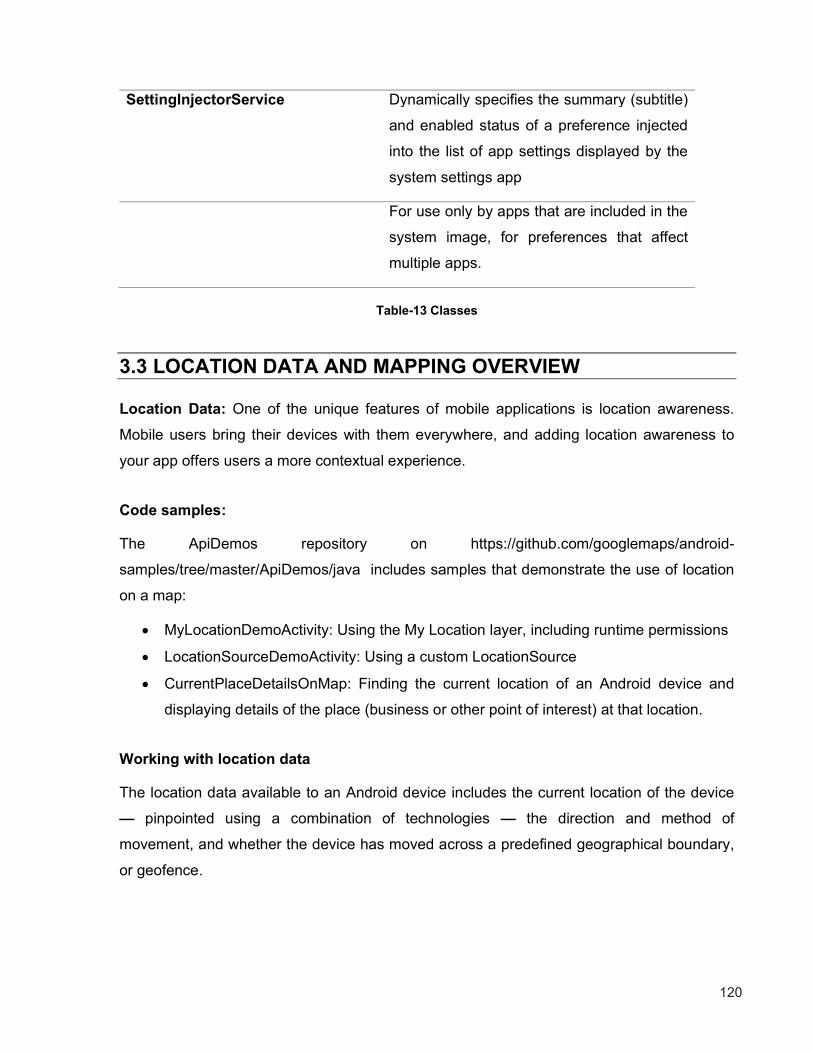
120
SettingInjectorService Dynamically specifies the summary (subtitle)
and enabled status of a preference injected
into the list of app settings displayed by the
system settings app
For use only by apps that are included in the
system image, for preferences that affect
multiple apps.
Table-13 Classes
3.3 LOCATION DATA AND MAPPING OVERVIEW
Location Data: One of the unique features of mobile applications is location awareness.
Mobile users bring their devices with them everywhere, and adding location awareness to
your app offers users a more contextual experience.
Code samples:
The ApiDemos repository on https://github.com/googlemaps/android-
samples/tree/master/ApiDemos/java includes samples that demonstrate the use of location
on a map:
MyLocationDemoActivity: Using the My Location layer, including runtime permissions
LocationSourceDemoActivity: Using a custom LocationSource
CurrentPlaceDetailsOnMap: Finding the current location of an Android device and
displaying details of the place (business or other point of interest) at that location.
Working with location data
The location data available to an Android device includes the current location of the device
pinpointed using a combination of technologies the direction and method of
movement, and whether the device has moved across a predefined geographical boundary,
or geofence.
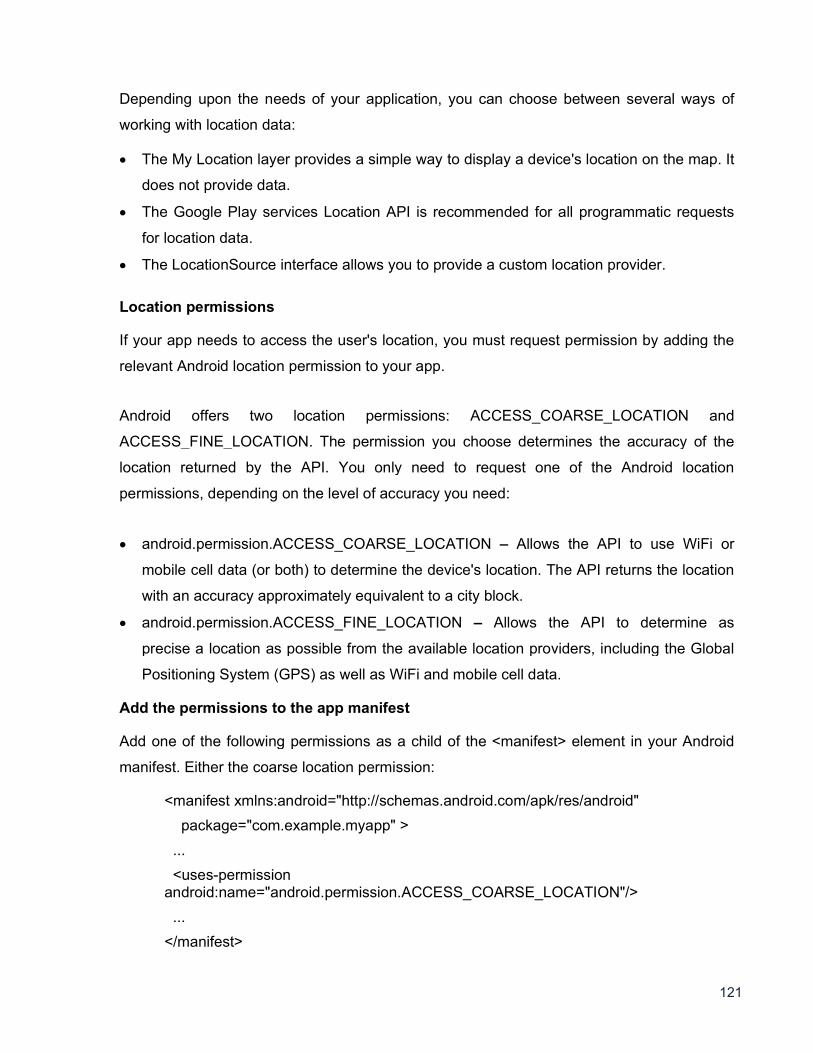
121
Depending upon the needs of your application, you can choose between several ways of
working with location data:
The My Location layer provides a simple way to display a device's location on the map. It
does not provide data.
The Google Play services Location API is recommended for all programmatic requests
for location data.
The LocationSource interface allows you to provide a custom location provider.
Location permissions
If your app needs to access the user's location, you must request permission by adding the
relevant Android location permission to your app.
Android offers two location permissions: ACCESS_COARSE_LOCATION and
ACCESS_FINE_LOCATION. The permission you choose determines the accuracy of the
location returned by the API. You only need to request one of the Android location
permissions, depending on the level of accuracy you need:
android.permission.ACCESS_COARSE_LOCATION Allows the API to use WiFi or
mobile cell data (or both) to determine the device's location. The API returns the location
with an accuracy approximately equivalent to a city block.
android.permission.ACCESS_FINE_LOCATION Allows the API to determine as
precise a location as possible from the available location providers, including the Global
Positioning System (GPS) as well as WiFi and mobile cell data.
Add the permissions to the app manifest
Add one of the following permissions as a child of the <manifest> element in your Android
manifest. Either the coarse location permission:
<manifest xmlns:android="http://schemas.android.com/apk/res/android"
package="com.example.myapp" >
...
<uses-permission android:name="android.permission.ACCESS_COARSE_LOCATION"/>
...
</manifest>
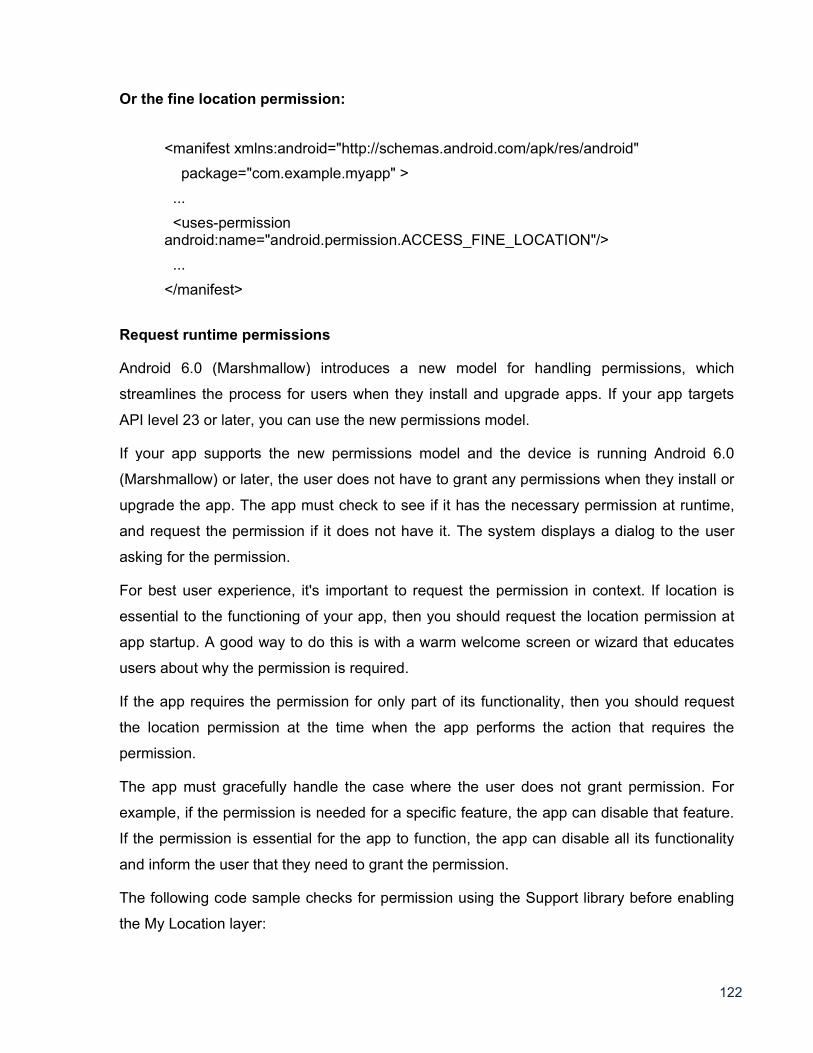
122
Or the fine location permission:
<manifest xmlns:android="http://schemas.android.com/apk/res/android"
package="com.example.myapp" >
...
<uses-permission android:name="android.permission.ACCESS_FINE_LOCATION"/>
...
</manifest>
Request runtime permissions
Android 6.0 (Marshmallow) introduces a new model for handling permissions, which
streamlines the process for users when they install and upgrade apps. If your app targets
API level 23 or later, you can use the new permissions model.
If your app supports the new permissions model and the device is running Android 6.0
(Marshmallow) or later, the user does not have to grant any permissions when they install or
upgrade the app. The app must check to see if it has the necessary permission at runtime,
and request the permission if it does not have it. The system displays a dialog to the user
asking for the permission.
For best user experience, it's important to request the permission in context. If location is
essential to the functioning of your app, then you should request the location permission at
app startup. A good way to do this is with a warm welcome screen or wizard that educates
users about why the permission is required.
If the app requires the permission for only part of its functionality, then you should request
the location permission at the time when the app performs the action that requires the
permission.
The app must gracefully handle the case where the user does not grant permission. For
example, if the permission is needed for a specific feature, the app can disable that feature.
If the permission is essential for the app to function, the app can disable all its functionality
and inform the user that they need to grant the permission.
The following code sample checks for permission using the Support library before enabling
the My Location layer:
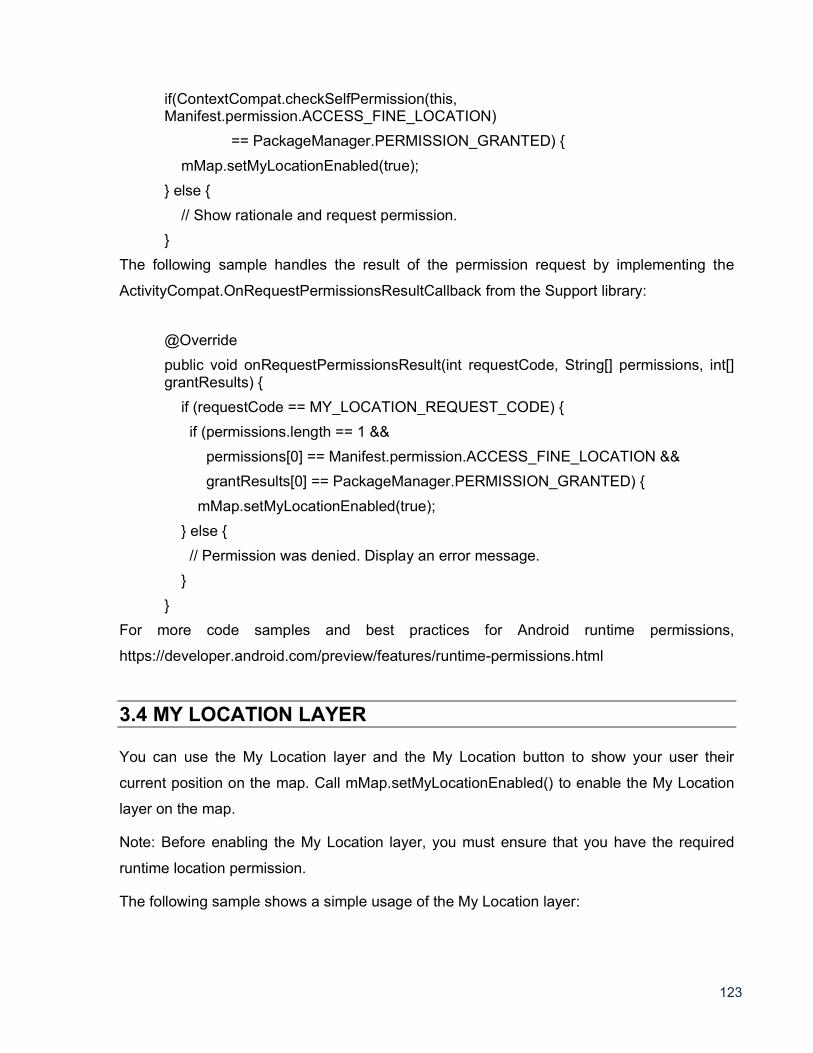
123
if(ContextCompat.checkSelfPermission(this, Manifest.permission.ACCESS_FINE_LOCATION)
== PackageManager.PERMISSION_GRANTED) {
mMap.setMyLocationEnabled(true);
} else {
// Show rationale and request permission.
}
The following sample handles the result of the permission request by implementing the
ActivityCompat.OnRequestPermissionsResultCallback from the Support library:
@Override
public void onRequestPermissionsResult(int requestCode, String[] permissions, int[] grantResults) {
if (requestCode == MY_LOCATION_REQUEST_CODE) {
if (permissions.length == 1 &&
permissions[0] == Manifest.permission.ACCESS_FINE_LOCATION &&
grantResults[0] == PackageManager.PERMISSION_GRANTED) {
mMap.setMyLocationEnabled(true);
} else {
// Permission was denied. Display an error message.
}
}
For more code samples and best practices for Android runtime permissions,
https://developer.android.com/preview/features/runtime-permissions.html
3.4 MY LOCATION LAYER
You can use the My Location layer and the My Location button to show your user their
current position on the map. Call mMap.setMyLocationEnabled() to enable the My Location
layer on the map.
Note: Before enabling the My Location layer, you must ensure that you have the required
runtime location permission.
The following sample shows a simple usage of the My Location layer:
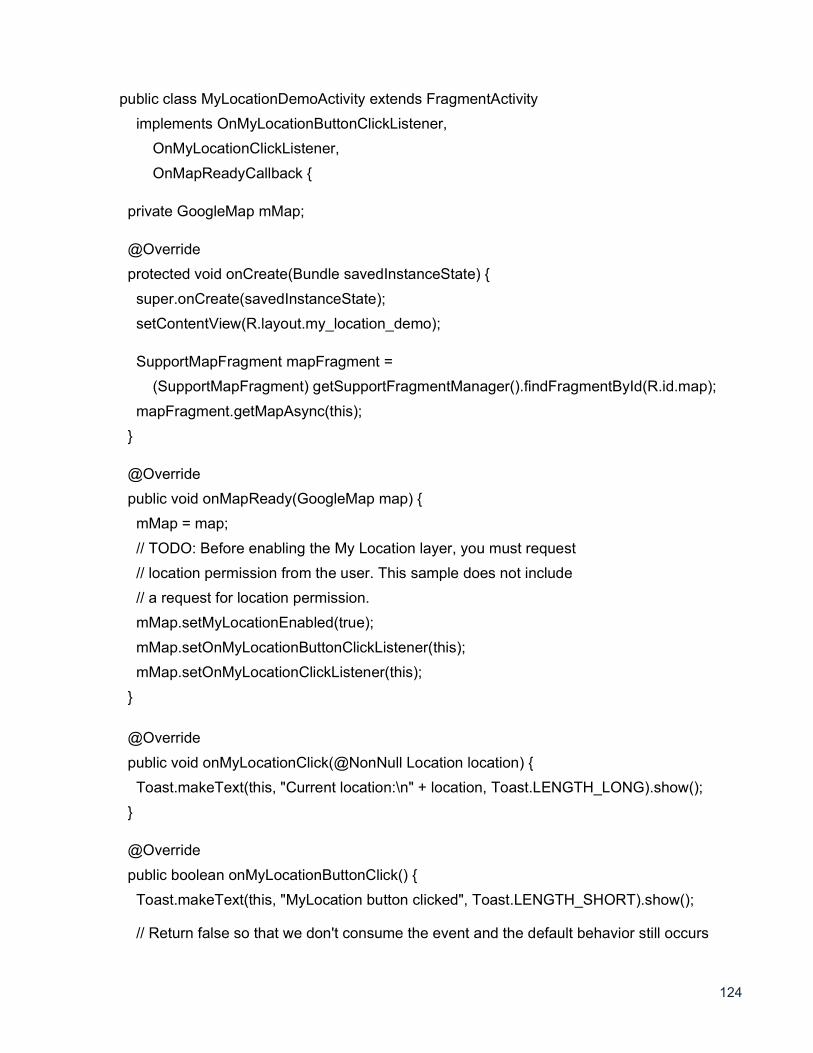
124
public class MyLocationDemoActivity extends FragmentActivity
implements OnMyLocationButtonClickListener,
OnMyLocationClickListener,
OnMapReadyCallback {
private GoogleMap mMap;
@Override
protected void onCreate(Bundle savedInstanceState) {
super.onCreate(savedInstanceState);
setContentView(R.layout.my_location_demo);
SupportMapFragment mapFragment =
(SupportMapFragment) getSupportFragmentManager().findFragmentById(R.id.map);
mapFragment.getMapAsync(this);
}
@Override
public void onMapReady(GoogleMap map) {
mMap = map;
// TODO: Before enabling the My Location layer, you must request
// location permission from the user. This sample does not include
// a request for location permission.
mMap.setMyLocationEnabled(true);
mMap.setOnMyLocationButtonClickListener(this);
mMap.setOnMyLocationClickListener(this);
}
@Override
public void onMyLocationClick(@NonNull Location location) {
Toast.makeText(this, "Current location:\n" + location, Toast.LENGTH_LONG).show();
}
@Override
public boolean onMyLocationButtonClick() {
Toast.makeText(this, "MyLocation button clicked", Toast.LENGTH_SHORT).show();
// Return false so that we don't consume the event and the default behavior still occurs
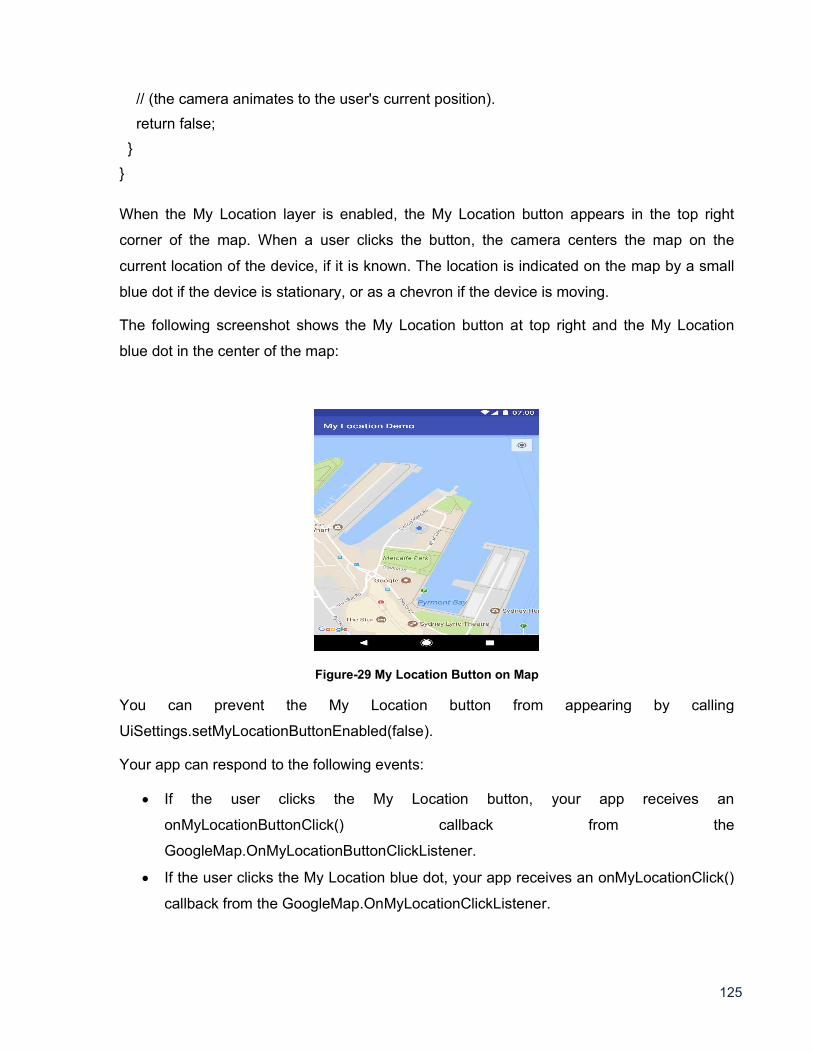
125
// (the camera animates to the user's current position).
return false;
}
}
When the My Location layer is enabled, the My Location button appears in the top right
corner of the map. When a user clicks the button, the camera centers the map on the
current location of the device, if it is known. The location is indicated on the map by a small
blue dot if the device is stationary, or as a chevron if the device is moving.
The following screenshot shows the My Location button at top right and the My Location
blue dot in the center of the map:
Figure-29 My Location Button on Map
You can prevent the My Location button from appearing by calling
UiSettings.setMyLocationButtonEnabled(false).
Your app can respond to the following events:
If the user clicks the My Location button, your app receives an
onMyLocationButtonClick() callback from the
GoogleMap.OnMyLocationButtonClickListener.
If the user clicks the My Location blue dot, your app receives an onMyLocationClick()
callback from the GoogleMap.OnMyLocationClickListener.
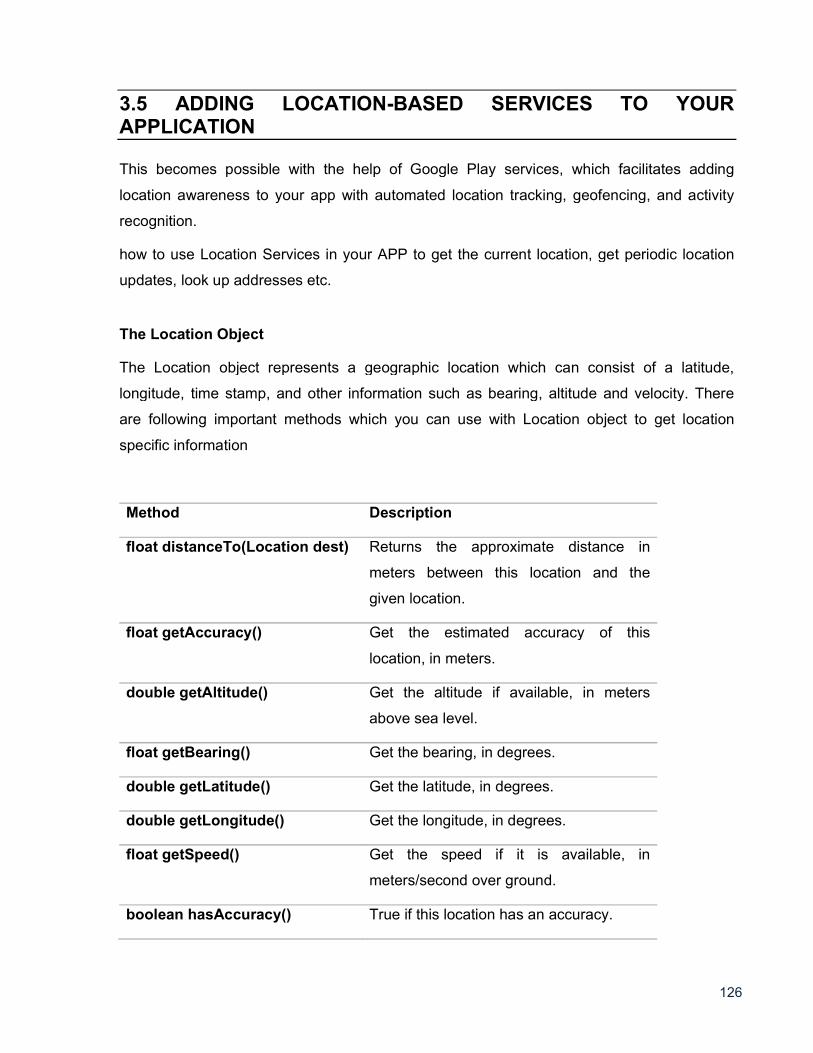
126
3.5 ADDING LOCATION-BASED SERVICES TO YOUR APPLICATION
This becomes possible with the help of Google Play services, which facilitates adding
location awareness to your app with automated location tracking, geofencing, and activity
recognition.
how to use Location Services in your APP to get the current location, get periodic location
updates, look up addresses etc.
The Location Object
The Location object represents a geographic location which can consist of a latitude,
longitude, time stamp, and other information such as bearing, altitude and velocity. There
are following important methods which you can use with Location object to get location
specific information
Method Description
float distanceTo(Location dest) Returns the approximate distance in
meters between this location and the
given location.
float getAccuracy() Get the estimated accuracy of this
location, in meters.
double getAltitude() Get the altitude if available, in meters
above sea level.
float getBearing() Get the bearing, in degrees.
double getLatitude() Get the latitude, in degrees.
double getLongitude() Get the longitude, in degrees.
float getSpeed() Get the speed if it is available, in
meters/second over ground.
boolean hasAccuracy() True if this location has an accuracy.
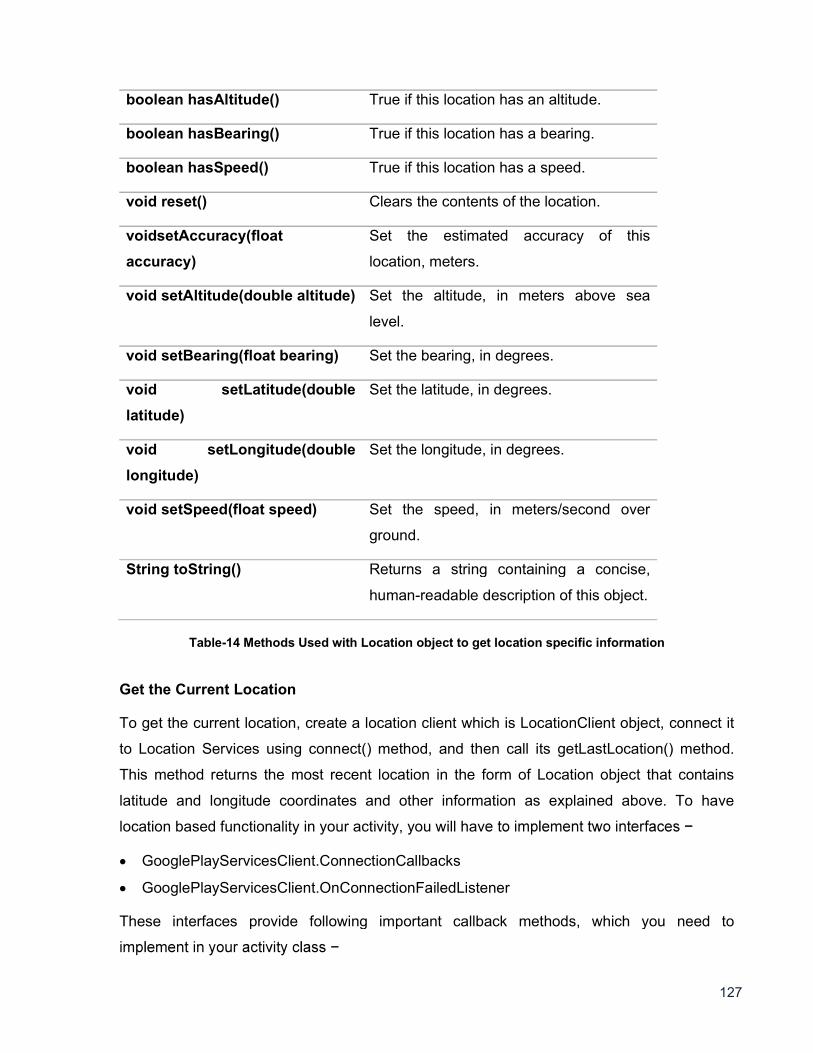
127
boolean hasAltitude() True if this location has an altitude.
boolean hasBearing() True if this location has a bearing.
boolean hasSpeed() True if this location has a speed.
void reset() Clears the contents of the location.
voidsetAccuracy(float
accuracy)
Set the estimated accuracy of this
location, meters.
void setAltitude(double altitude) Set the altitude, in meters above sea
level.
void setBearing(float bearing) Set the bearing, in degrees.
void setLatitude(double
latitude)
Set the latitude, in degrees.
void setLongitude(double
longitude)
Set the longitude, in degrees.
void setSpeed(float speed) Set the speed, in meters/second over
ground.
String toString() Returns a string containing a concise,
human-readable description of this object.
Table-14 Methods Used with Location object to get location specific information
Get the Current Location
To get the current location, create a location client which is LocationClient object, connect it
to Location Services using connect() method, and then call its getLastLocation() method.
This method returns the most recent location in the form of Location object that contains
latitude and longitude coordinates and other information as explained above. To have
location based functionality in your activity, you will hav
GooglePlayServicesClient.ConnectionCallbacks
GooglePlayServicesClient.OnConnectionFailedListener
These interfaces provide following important callback methods, which you need to
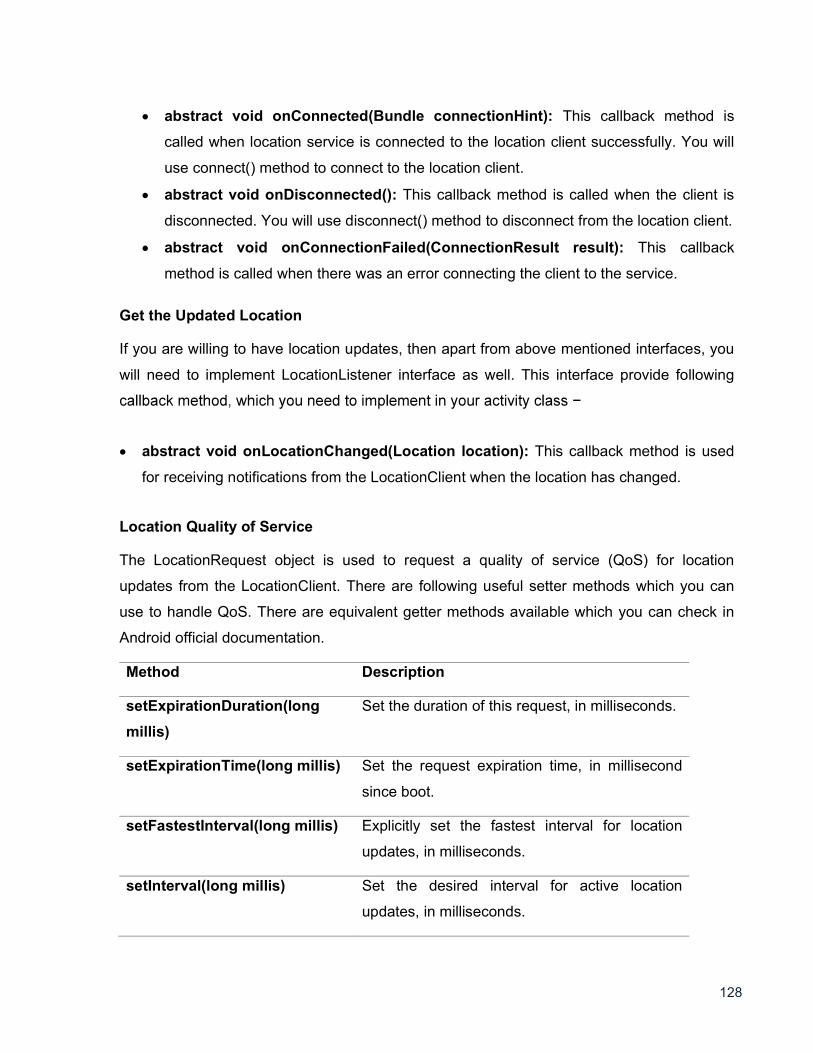
128
abstract void onConnected(Bundle connectionHint): This callback method is
called when location service is connected to the location client successfully. You will
use connect() method to connect to the location client.
abstract void onDisconnected(): This callback method is called when the client is
disconnected. You will use disconnect() method to disconnect from the location client.
abstract void onConnectionFailed(ConnectionResult result): This callback
method is called when there was an error connecting the client to the service.
Get the Updated Location
If you are willing to have location updates, then apart from above mentioned interfaces, you
will need to implement LocationListener interface as well. This interface provide following
abstract void onLocationChanged(Location location): This callback method is used
for receiving notifications from the LocationClient when the location has changed.
Location Quality of Service
The LocationRequest object is used to request a quality of service (QoS) for location
updates from the LocationClient. There are following useful setter methods which you can
use to handle QoS. There are equivalent getter methods available which you can check in
Android official documentation.
Method Description
setExpirationDuration(long
millis)
Set the duration of this request, in milliseconds.
setExpirationTime(long millis) Set the request expiration time, in millisecond
since boot.
setFastestInterval(long millis) Explicitly set the fastest interval for location
updates, in milliseconds.
setInterval(long millis) Set the desired interval for active location
updates, in milliseconds.
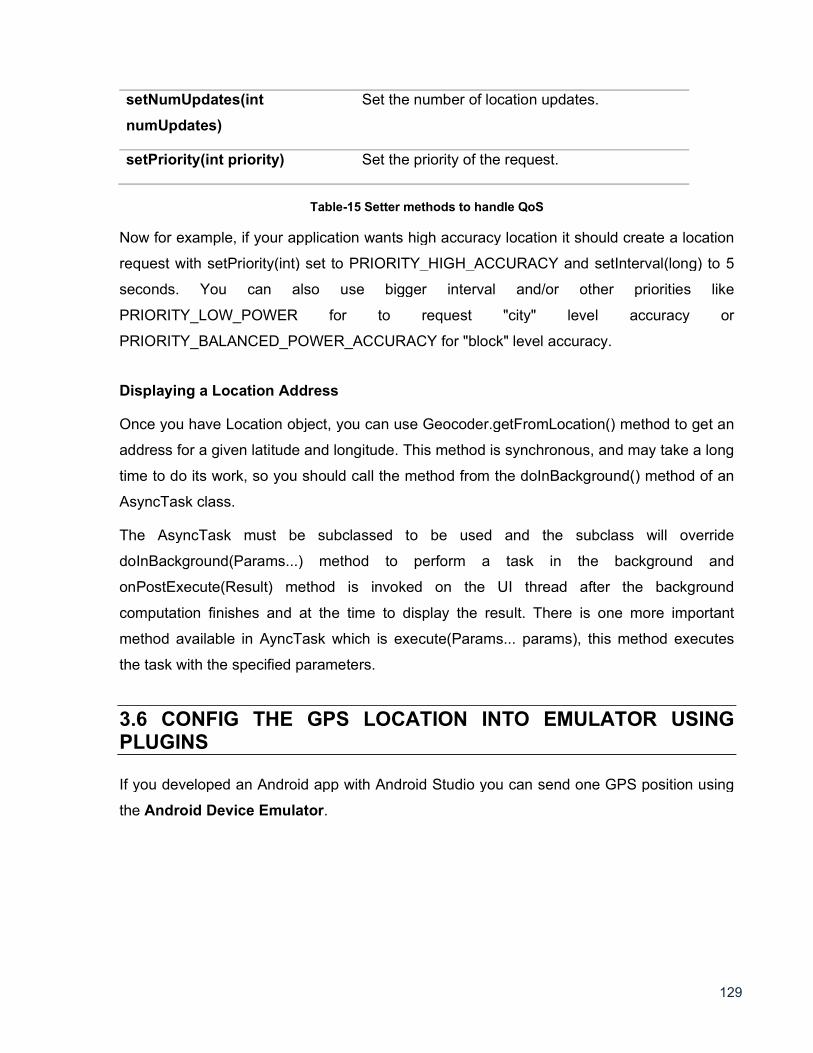
129
setNumUpdates(int
numUpdates)
Set the number of location updates.
setPriority(int priority) Set the priority of the request.
Table-15 Setter methods to handle QoS
Now for example, if your application wants high accuracy location it should create a location
request with setPriority(int) set to PRIORITY_HIGH_ACCURACY and setInterval(long) to 5
seconds. You can also use bigger interval and/or other priorities like
PRIORITY_LOW_POWER for to request "city" level accuracy or
PRIORITY_BALANCED_POWER_ACCURACY for "block" level accuracy.
Displaying a Location Address
Once you have Location object, you can use Geocoder.getFromLocation() method to get an
address for a given latitude and longitude. This method is synchronous, and may take a long
time to do its work, so you should call the method from the doInBackground() method of an
AsyncTask class.
The AsyncTask must be subclassed to be used and the subclass will override
doInBackground(Params...) method to perform a task in the background and
onPostExecute(Result) method is invoked on the UI thread after the background
computation finishes and at the time to display the result. There is one more important
method available in AyncTask which is execute(Params... params), this method executes
the task with the specified parameters.
3.6 CONFIG THE GPS LOCATION INTO EMULATOR USING PLUGINS
If you developed an Android app with Android Studio you can send one GPS position using
the Android Device Emulator.
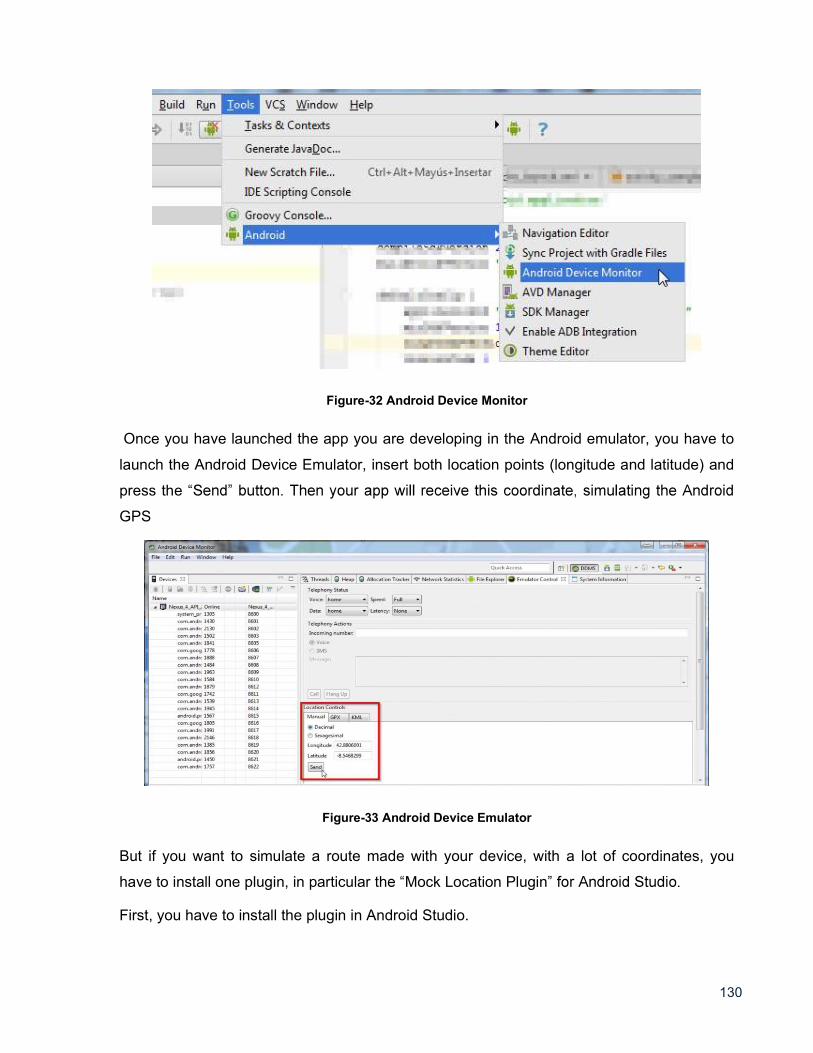
130
Figure-32 Android Device Monitor
Once you have launched the app you are developing in the Android emulator, you have to
launch the Android Device Emulator, insert both location points (longitude and latitude) and
press the
GPS
Figure-33 Android Device Emulator
But if you want to simulate a route made with your device, with a lot of coordinates, you
have to install one plugin, in particular th Mock Location Plugin
First, you have to install the plugin in Android Studio.
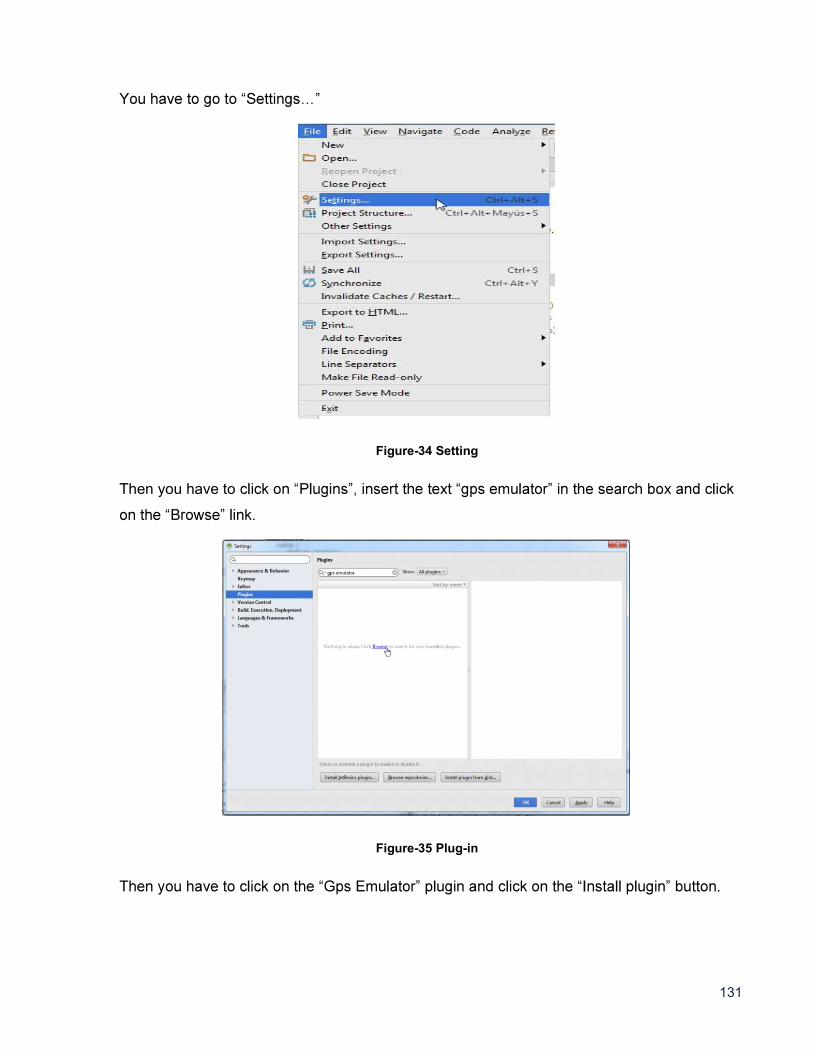
131
Figure-34 Setting
Then you have to
Figure-35 Plug-in
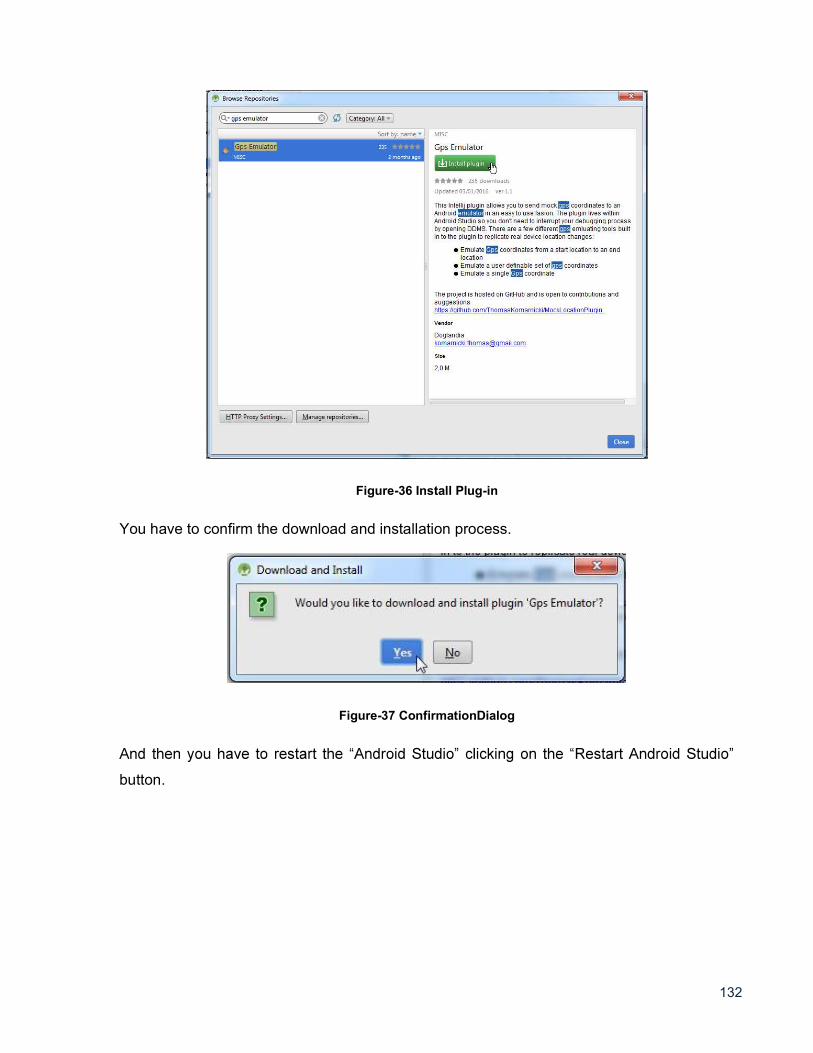
132
Figure-36 Install Plug-in
You have to confirm the download and installation process.
Figure-37 ConfirmationDialog
button.
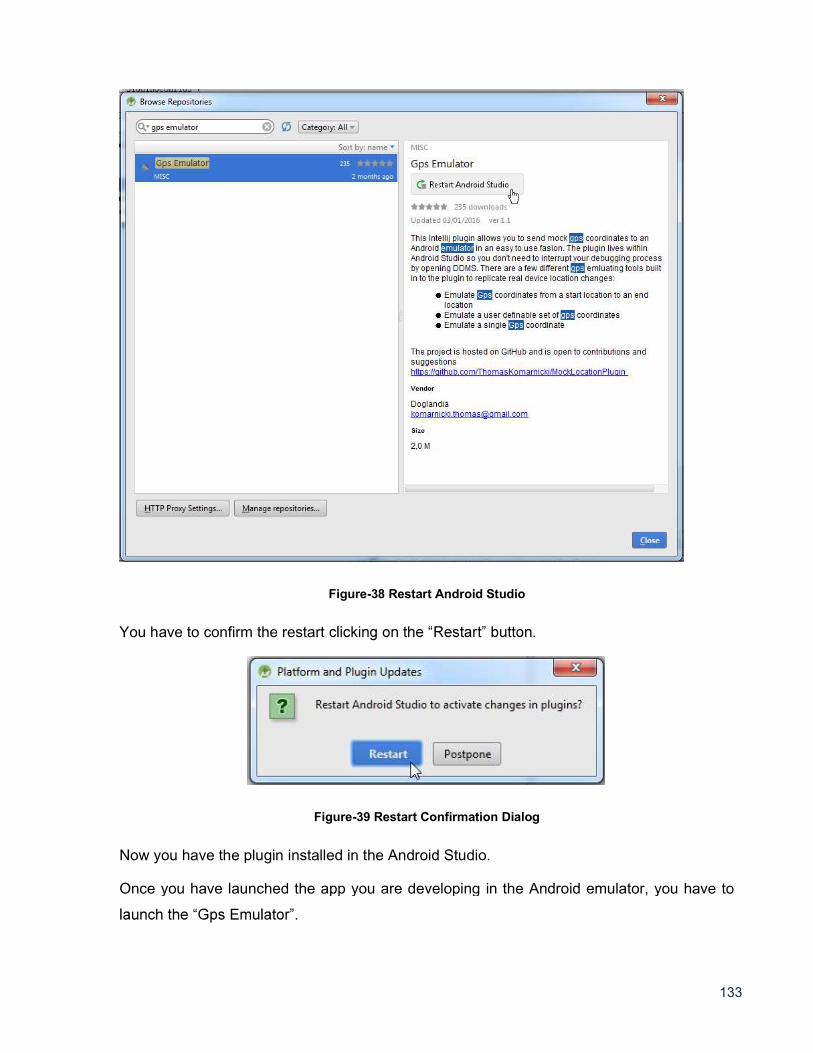
133
Figure-38 Restart Android Studio
You have to confirm the restart
Figure-39 Restart Confirmation Dialog
Now you have the plugin installed in the Android Studio.
Once you have launched the app you are developing in the Android emulator, you have to
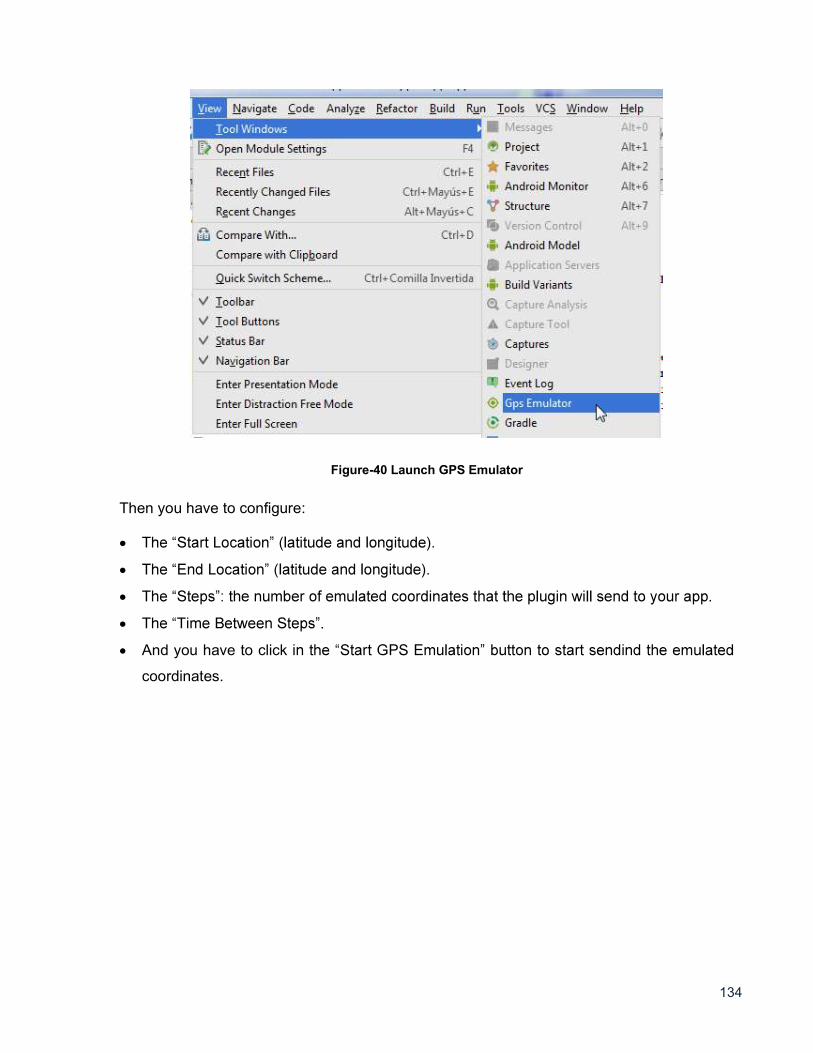
134
Figure-40 Launch GPS Emulator
Then you have to configure:
And you have to click
coordinates.
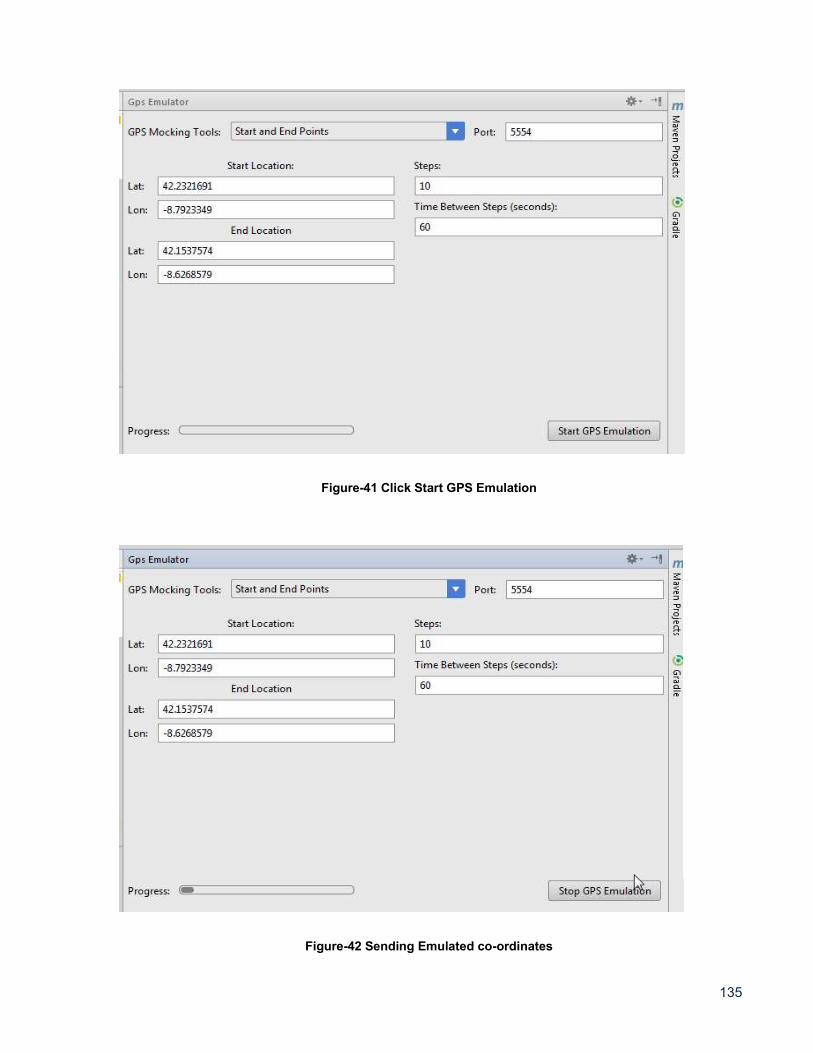
135
Figure-41 Click Start GPS Emulation
Figure-42 Sending Emulated co-ordinates
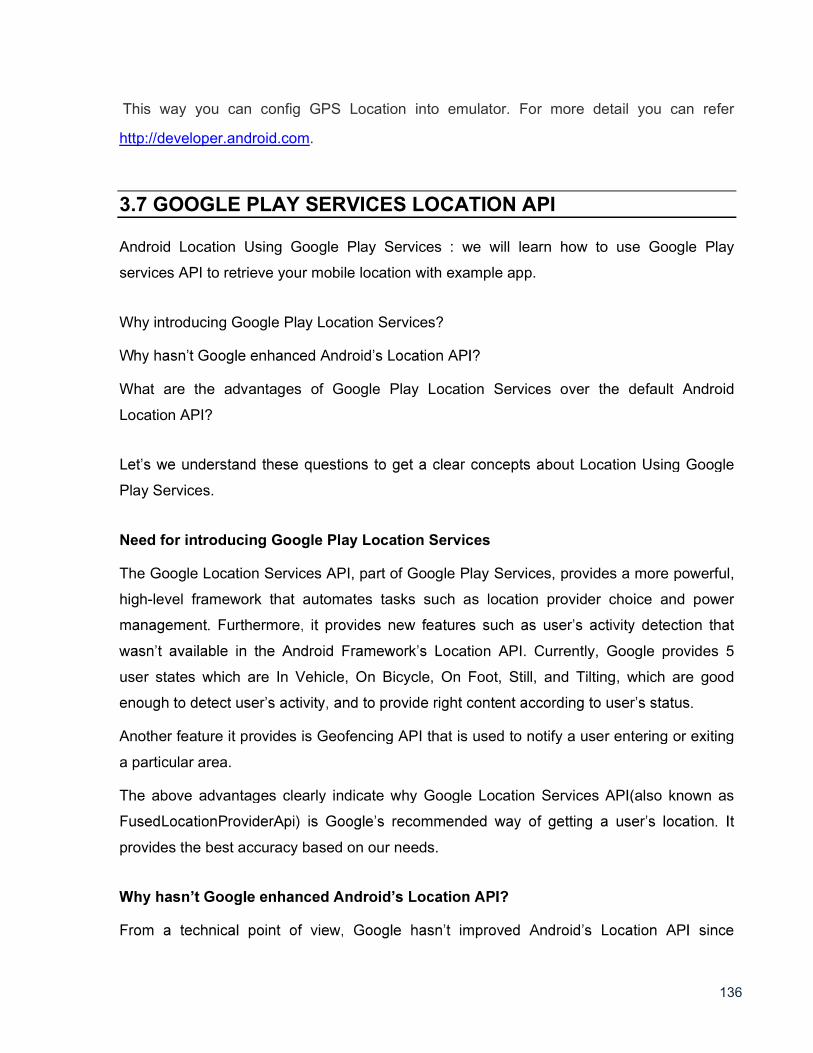
136
This way you can config GPS Location into emulator. For more detail you can refer
http://developer.android.com.
3.7 GOOGLE PLAY SERVICES LOCATION API
Android Location Using Google Play Services : we will learn how to use Google Play
services API to retrieve your mobile location with example app.
Why introducing Google Play Location Services?
What are the advantages of Google Play Location Services over the default Android
Location API?
out Location Using Google
Play Services.
Need for introducing Google Play Location Services
The Google Location Services API, part of Google Play Services, provides a more powerful,
high-level framework that automates tasks such as location provider choice and power
cation API. Currently, Google provides 5
user states which are In Vehicle, On Bicycle, On Foot, Still, and Tilting, which are good
Another feature it provides is Geofencing API that is used to notify a user entering or exiting
a particular area.
The above advantages clearly indicate why Google Location Services API(also known as
provides the best accuracy based on our needs.
137
Android has an independent update roll-out feature that lies in the hands of the smartphone
manufacturer. Google has less control over it and hence decided to shift to a new API
instead.
There are few important classes that are used to get the location:
LocationRequest : A data object that contains quality of service parameters for requests
to the FusedLocationProviderApi. LocationRequest objects are used to request a quality
of service for location updates from the FusedLocationProviderApi.
FusedLocationProviderApi : The main entry point for interacting with the fused location
provider. The methods must be used in conjunction with a GoogleApiClient client which
com.google.android.gms.location.LocationListener : The LocationListener interface is
used for receiving notifications from the FusedLocationProviderApi when the location has
changed. The method onLocationChanged is invoked if the LocationListener has been
registered with the location client using the requestLocationUpdates(GoogleApiClient,
LocationRequest, LocationListener) or requestLocationUpdates(GoogleApiClient,
LocationRequest, LocationListener, Looper) methods.
3.8 GET THE LAST KNOWN LOCATION
Using the Google Play services location APIs, your app can request the last known location
of the user's device. In most cases, you are interested in the user's current location, which is
usually equivalent to the last known location of the device.
Specifically, use the fused location provider to retrieve the device's last known location. The
fused location provider is one of the location APIs in Google Play services. It manages the
underlying location technology and provides a simple API so that you can specify
requirements at a high level, like high accuracy or low power. It also optimizes the device's
use of battery power.
This lesson shows you how to make a single request for the location of a device using the
getLastLocation() method in the fused location provider.
138
Set up Google Play services
To access the fused location provider, your app's development project must include Google
Play services. Download and install the Google Play services component via the SDK
Manager and add the library to your project. For details, see the guide to Setting Up Google
Play Services.
Specify app permissions
Apps that use location services must request location permissions. Android offers two
location permissions: ACCESS_COARSE_LOCATION and ACCESS_FINE_LOCATION.
The permission you choose determines the accuracy of the location returned by the API. If
you specify ACCESS_COARSE_LOCATION, the API returns a location with an accuracy
approximately equivalent to a city block.
This lesson requires only coarse location. Request this permission with the uses-permission
element in your app manifest, as the following code snippet shows:
<manifest xmlns:android="http://schemas.android.com/apk/res/android"
package="com.google.android.gms.location.sample.basiclocationsample" >
<uses-permission android:name="android.permission.ACCESS_COARSE_LOCATION"/>
</manifest>
Create location services client
In your activity's onCreate() method, create an instance of the Fused Location Provider
Client as the following code snippet shows.
private FusedLocationProviderClient fusedLocationClient;
// ..
@Override
protected void onCreate(Bundle savedInstanceState) {
// ...
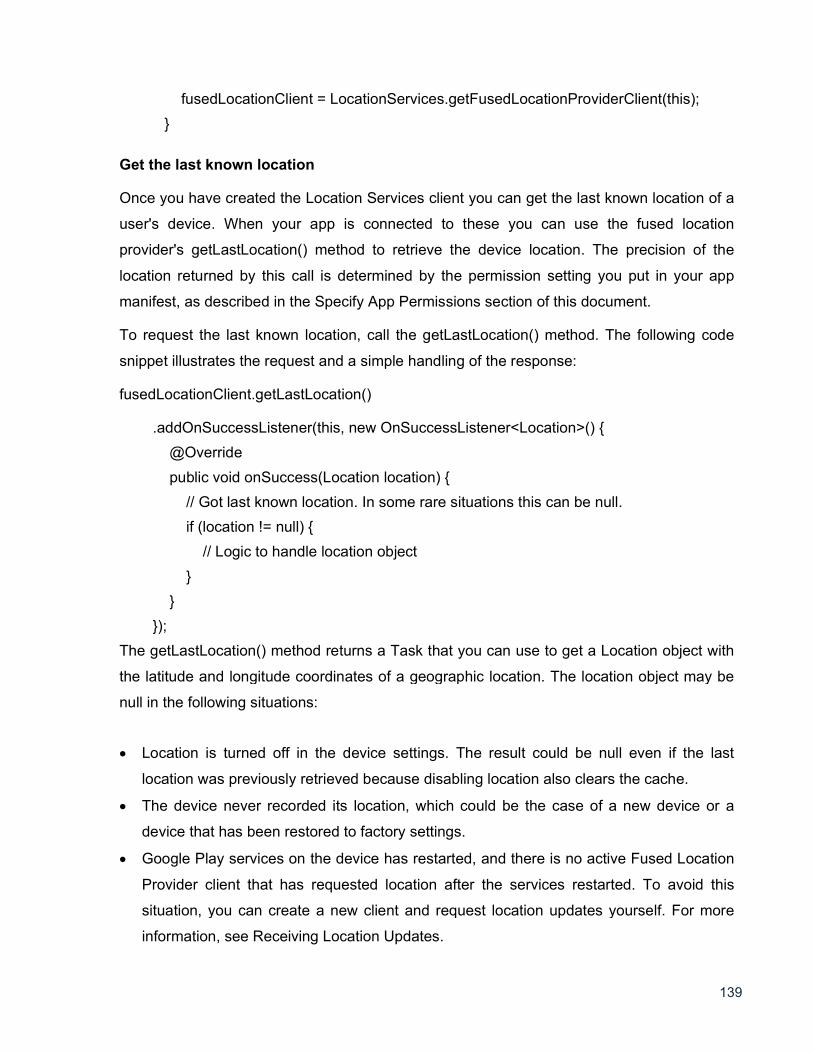
139
fusedLocationClient = LocationServices.getFusedLocationProviderClient(this);
}
Get the last known location
Once you have created the Location Services client you can get the last known location of a
user's device. When your app is connected to these you can use the fused location
provider's getLastLocation() method to retrieve the device location. The precision of the
location returned by this call is determined by the permission setting you put in your app
manifest, as described in the Specify App Permissions section of this document.
To request the last known location, call the getLastLocation() method. The following code
snippet illustrates the request and a simple handling of the response:
fusedLocationClient.getLastLocation()
.addOnSuccessListener(this, new OnSuccessListener<Location>() {
@Override
public void onSuccess(Location location) {
// Got last known location. In some rare situations this can be null.
if (location != null) {
// Logic to handle location object
}
}
});
The getLastLocation() method returns a Task that you can use to get a Location object with
the latitude and longitude coordinates of a geographic location. The location object may be
null in the following situations:
Location is turned off in the device settings. The result could be null even if the last
location was previously retrieved because disabling location also clears the cache.
The device never recorded its location, which could be the case of a new device or a
device that has been restored to factory settings.
Google Play services on the device has restarted, and there is no active Fused Location
Provider client that has requested location after the services restarted. To avoid this
situation, you can create a new client and request location updates yourself. For more
information, see Receiving Location Updates.
140
Using above code, you can retrieve your last location form google server, which Is you
visited recently also call as know about your last location .
3.9 LET US SUM UP
In this block we learned about Location Data and Mapping view in layout using components,
My Location layer, Adding and accessing Location-Based Services to user defined
Application, Configuring the GPS Location of the Emulator using command prompt or
external plugins, Google Play services Location API, Get the last known location from
application
3.10 CHECK YOUR PROGRESS
A. Criteria: A class indicating the application criteria for selecting a location provider.
(TRUE/FALSE)
B. GnssStatus.Callback Used for receiving notifications when data class representing a
geographic location. (TRUE/FALSE)
C. double getAltitude(): Get the altitude if available, in meters above sea level.
(TRUE/FALSE)
D. GooglePlayServicesClient.ConnectionCallbacks is ___________. (Interface, Class)
3.11 CHECK YOUR PROGRESS: POSSIBLE ANSWERS
A. TRUE
B. FALSE
C. TRUE
D. Interface
3.12 FURTHER READING
Android Application Development for Dummies by Donn Felker
Professional Android 4th Edition by Reto Meier (Author), Ian Lake (Author) ISBN-13:
978-1118949528 ISBN-10: 9781118949528
141
Android Programming by Nicolas Gramlich.
Thinking in Java (4th Edition) 4th Edition by Bruce Eckel ISBN-13: 978-0131872486
ISBN-10: 0131872486 Android Programming for Beginners: Learn all the Java and
Android skills you need to start making powerful mobile applications ISBN-10:
1785883267 ISBN-13: 978-1785883262
Learning Java by Building Android Games: Explore Java Through Mobile Game
Development ISBN-10: 1784398853 ISBN-13: 978-1784398859
Beginning Android Application Development by Wei-Meng Lee
Java: A Beginner's Guide, Sixth Edition 6th Edition by Herbert Schildt ISBN-13: 978-
0071809252 ISBN-10: 0071809252
Android Programming: The Big Nerd Ranch Guide (3rd Edition) (Big Nerd Ranch
Guides) 3rd Edition by Bill Phillips , Chris Stewart , Kristin Marsicano ISBN-13: 978-
0134706054 ISBN-10: 0134706056
Android Programming: Pushing the Limits 1st Edition by Erik Hellman ISBN-13: 978-
1118717370 ISBN-10: 1118717376
Head First Android Development: A Brain-Friendly Guide 1st Edition by Dawn
Griffiths ISBN-13: 978-1449362188 ISBN-10: 1449362184
Pro Android by Sayed Y. Hashimi and Satya Komatineni, Springer, New York, 2009.
3.13 ASSIGNMENTS
A. Write a sort note on Location Quality of Service.
B. Explain my Location layer in detail.
C. Describe Location Data in detail.
D. Write sort note on Location permissions.
E. Write a step of Config the GPS Location into Emulator using plugins.
3.14 ACTIVITIES
Create an android application for show your current location with 1 km radius are
circle on google location map
142
Unit 4: Communication, Identity, Sync and Social Media
Unit Structure 4.1 Learning Objectives
4.2 Introduction
4.3 Account Contacts
4.4 Authentication and Synchronization
4.5 The Bluetooth Communication Protocol Stack
4.6 Using Bluetooth in Android Applications
4.7 Social media integration with android apps 4.8 Let us sum up
4.9 Check your Progress
4.10 Check your Progress: Possible Answers
4.11 Further Reading
4.12 Assignment
4.13 Activities
4
143
4.1 LEARNING OBJECTIVE
After studying this unit student should be able to:
Understand the concept of context and account contact management
Will be able to perform Authentication and Synchronization with account
will know the concept of Bluetooth communication pattern
Will be able to integrate social media services and API
4.2 INTRODUCTION
About Contact for communication one of the primary data types that is stored and used (and
reused) in Android is contact data. This consists of the various pieces of information
associated with a contact name, phone number, email, and so on. In Android 3.2 (API
level 8), contact data was significantly expanded (allowing access to multiple accounts and
support for aggregation of similar contacts). In earlier chapters we covered the use of
content providers and Android database classes, so we will not cover that preliminary
material in this chapter. Instead, we will focus on the use of the Contacts content provider.
4.3 ACCOUNT CONTACTS
To access the account contacts the following permissions must be provided in the manifest:
<uses-permission android:name="android.permission.GET_ACCOUNTS" />
<uses-permission android:name="android.permission.READ_CONTACTS" />
<uses-permission android:name="android.permission.WRITE_CONTACTS" />
Within an Activity, we can use the managedQuery method to query the Contacts
Contract.Contacts data and return a Cursor for our use:
private Cursor getContacts() {
Uri uri = ContactsContract.Contacts.CONTENT_URI;
String[] projection = new String[] {
ContactsContract.Contacts._ID,
ContactsContract.Contacts.LOOKUP_KEY,
ContactsContract.Contacts.DISPLAY_NAME
};
144
String selection = null;
String[] selectionArgs = null;
String sortOrder = ContactsContract.Contacts.DISPLAY_NAME +
" COLLATE LOCALIZED ASC";
return managedQuery(uri, projection, selection, selectionArgs, sortOrder);
}
For complete information on the columns and constants available in the Contacts
Contract.Contacts class, refer to the developer documentation at
http://developer.android.com/reference/android/provider/ContactsContract.Contacts.html.
Constants for the contacts table, which contains a record per aggregate of raw contacts
representing the same person.
Operations
Insert:
A Contact cannot be created explicitly. When a raw contact is inserted, the provider will
first try to find a Contact representing the same person. If one is found, the raw contact's
RawContacts#CONTACT_ID column gets the _ID of the aggregate Contact. If no match
is found, the provider automatically inserts a new Contact and puts its _ID into the
RawContacts#CONTACT_ID column of the newly inserted raw contact.
Update:
Only certain columns of Contact are modifiable:
ContactsContract.ContactOptionsColumns.STARRED,
ContactsContract.ContactOptionsColumns.CUSTOM_RINGTONE,
ContactsContract.ContactOptionsColumns.SEND_TO_VOICEMAIL. Changing any of
these columns on the Contact also changes them on all constituent raw contacts.
Delete:
Be careful with deleting Contacts! Deleting an aggregate contact deletes all constituent
raw contacts. The corresponding sync adapters will notice the deletions of their
respective raw contacts and remove them from their back end storage.
Query:

145
If you need to read an individual contact, consider using CONTENT_LOOKUP_URI
instead of CONTENT_URI.
If you need to look up a contact by the phone number, use
PhoneLookup#CONTENT_FILTER_URI, which is optimized for this purpose.
If you need to look up a contact by partial name, e.g. to produce filter-as-you-type
suggestions, use the CONTENT_FILTER_URI URI.
If you need to look up a contact by some data element like email address, nickname, etc,
use a query against the ContactsContract.Data table. The result will contain contact ID,
name etc.
Once we have the Cursor, we can load it within a SimpleCursorAdapter and have it display
the specific data fields we
String[] fields = new String[] {
ContactsContract.Data.DISPLAY_NAME
};
SimpleCursorAdapter adapter = new SimpleCursorAdapter(this,
R.layout.contact,
cursor,
fields,
new int[] {R.id.name});
// get the listview
ListView contactlist = (ListView) findViewById(R.id.contactlist);
// set the adapter and let it render
contactlist.setAdapter(adapter);
Here is the layout that contains the ListView (referenced as R.id.contactlist):
<?xml version="1.0" encoding="utf-8"?>
<LinearLayout xmlns:android="http://schemas.android.com/apk/res/android"
android:orientation="vertical"
android:layout_width="fill_parent"
android:layout_height="fill_parent"
android:background="#fff"
>
<ListView android:id="@+id/contactlist"
146
android:layout_width="fill_parent"
android:layout_height="wrap_content"
/>
</LinearLayout>
Here is the contact layout (referenced as R.layout.contact) used for the SimpleCursor
Adapter:
<?xml version="1.0" encoding="utf-8"?>
<LinearLayout xmlns:android="http://schemas.android.com/apk/res/android"
android:layout_width="wrap_content"
android:layout_height="wrap_content"
android:background="#fff"
>
<TextView android:id="@+id/name"
android:layout_width="fill_parent"
android:layout_height="wrap_content"
android:textColor="#000"
android:textSize="25sp"
android:padding="5dp"
/>
</LinearLayout>
Here we delete a contact by providing the Cursor and the position within the Cursor to
delete:
private void deleteContact(Cursor cursor, int position) {
cursor.moveToPosition(position);
long id = cursor.getLong(0);
String lookupkey = cursor.getString(1);
Uri uri = ContactsContract.Contacts.getLookupUri(id, lookupkey);
String[] selectionArgs = null;
String where = null;
ContentResolver cr = getContentResolver();
cr.delete(uri, where, selectionArgs);
147
}
To add a contact in this example we construct a collection of ContentProvider Operations
and batch-apply them. Note that we first insert the new contact and then add the phone
information should it be available (as it is in this case). To do the inserts, we generate an
insert-specific ContentProviderOperation by creating a ContentProviderOperation.Builder
with the SimpleCursorContentProviderOperation .newInsert() method and then building with
the build() method:
String accountNameWeWant = "SpecialAccount";
String phone = "8885551234";
String name = "Bob";
String accountname = null;
String accounttype = null;
Account[] accounts = AccountManager.get(this).getAccounts();
// find the account we want. if we don't find it we use 'null' - the default
for(Account account : accounts) {
if(account.equals(accountNameWeWant)) {
accountname = account.name;
accounttype = account.type;
break;
}
}
ArrayList<ContentProviderOperation> ops =
new ArrayList<ContentProviderOperation>();
ops.add(ContentProviderOperation.newInsert
(ContactsContract.RawContacts.CONTENT_URI)
.withValue(ContactsContract.RawContacts.ACCOUNT_TYPE, accountname)
.withValue(ContactsContract.RawContacts.ACCOUNT_NAME, accounttype)
.build());
// create the new contact
ops.add(
ContentProviderOperation.newInsert(ContactsContract.Data.CONTENT_URI)
.withValueBackReference(ContactsContract.Data.RAW_CONTACT_ID, 0)
.withValue(ContactsContract.Data.MIMETYPE,
ContactsContract.CommonDataKinds.StructuredName.CONTENT_ITEM_TYPE)
148
.withValue(ContactsContract.CommonDataKinds.StructuredName.DISPLAY_NAME, name)
.build());
// if there is a phone num we add it
if(phone.getText() != null
&& phone.getText().toString().trim().length() > 0) {
ops.add(ContentProviderOperation.newInsert
(ContactsContract.Data.CONTENT_URI)
.withValueBackReference(ContactsContract.Data.RAW_CONTACT_ID, 0)
.withValue(ContactsContract.Data.MIMETYPE,
ContactsContract.CommonDataKinds.Phone.CONTENT_ITEM_TYPE)
.withValue(ContactsContract.CommonDataKinds.Phone.NUMBER,
phone)
.withValue(ContactsContract.CommonDataKinds.Phone.TYPE,
ContactsContract.CommonDataKinds.Phone.TYPE_HOME)
.build());
}
try {
getContentResolver().applyBatch(ContactsContract.AUTHORITY, ops);
} catch (Exception e) {
e.printStackTrace();
}
4.4 AUTHENTICATION AND SYNCHRONIZATION
Starting with Android 2.0 (API level 5), it is possible to write custom sync providers to
integrate with system contacts, calendars, and so forth. Synchronizing with a remote service
at this time is unfortunately a precarious endeavour, as any misstep at particular points can
literally cause the Android system to crash and reboot (with very little indication as to what
was done incorrectly). Hopefully, as Android evolves, synchronizing will become easier and
less tricky. For now, the process consists of two parts authentication (Account
Authenticator) and synchronization (Sync Provider). Before diving into the details of the two
parts, we would like to note that the examples we provide here have two components a
server side and the Android client side. The server side that we use is a basic web service
that accepts specific GET requests and responds back with a JSON-formatted response.
The relevant GET URI as well as the example response are provided within each section.

149
The source that comes with this book includes the full server-side source for completeness.
The other thing to note is that in the example we provide, we choose to sync up with the
account contacts. This is not the only thing with which you can sync up. You can sync up
with any content provider you have access to, or even to application-specific stored data.
4.4.1 AUTHENTICATION
To get the client to authenticate with a remote server using the Android Account
Authenticator system, three pieces must be put into place:
A service that is triggered by the android.accounts.AccountAuthenticator intent and that,
in its onBind method, returns a subclass of AbstractAccountAuthenticator
An activity that prompts the user to enter her credentials
An XML file describing how your account should look when displayed to the user
4.4.2 SYNCHRONIZATION
a service
that is registered to listen for an android.content.SyncAdapter intent and that returns an
AbstractThreadedSyncAdapter extended class on the onBind() method, an XML descriptor
describing the structure of the data that is to be viewed and synced, and a class extending
the AbstractThreadedSyncAdapter that handles the actual sync. For our example, we wish
to sync up with contact information for the account that we described in the preceding
section. Do note that contact information is not the only information with which you can sync
up. You can sync up with any content provider you have access to, or even to application-
specific stored data.
The following permissions are indicated in the manifest:
<uses-permission android:name="android.permission.GET_ACCOUNTS" />
<uses-permission android:name="android.permission.READ_CONTACTS" />
<uses-permission android:name="android.permission.WRITE_CONTACTS" />
<uses-permission android:name="android.permission.AUTHENTICATE_ACCOUNTS" />
<uses-permission android:name="android.permission.USE_CREDENTIALS" />
<uses-permission android:name="android.permission.MANAGE_ACCOUNTS" />
<uses-permission android:name="android.permission.INTERNET" />
<uses-permission android:name="android.permission.WRITE_SETTINGS" />
<uses-permission android:name="android.permission.WRITE_SECURE_SETTINGS" />
150
<uses-permission android:name="android.permission.READ_SYNC_STATS" />
<uses-permission android:name="android.permission.READ_SYNC_SETTINGS" />
<uses-permission android:name="android.permission.WRITE_SYNC_SETTINGS" />.
4.5 THE BLUETOOTH COMMUNICATION PROTOCOL STACK
Bluetooth: Bluetooth was the nickname for King Harald of Denmark. The following article on
a variety of information about Bluetooth, including the possibly apocryphal assertion that a
runic stone erected in honor of Harald states:
Harald Christianized the Danes
Harald controlled Denmark and Norway
Harald thinks notebooks and cellular phones should communicate seamlessly
Bluetooth classes in your applications, we will create a
utility for connecting to and transferring data to and from Bluetooth devices. This code is
based on the Bluetooth Chat example in the Android SDK. It has been generalized to cover
more applications of Bluetooth, and it has been modified to make it easier to adapt to your
purposes.
APIs, and how you can use the code for application-specific purposes, including as a
diagnostic tool for Bluetooth development.
First we will learn more about how Bluetooth works, and how it is implemented in Android.
The Bluetooth Protocol Stack
This section takes a look at the standards and protocols that make up the Bluetooth protocol
stack. These protocols and standards are what characterize Bluetooth: the kinds of data
Bluetooth is designed to move, how many devices can be connected at the same time,
latency, and so on.
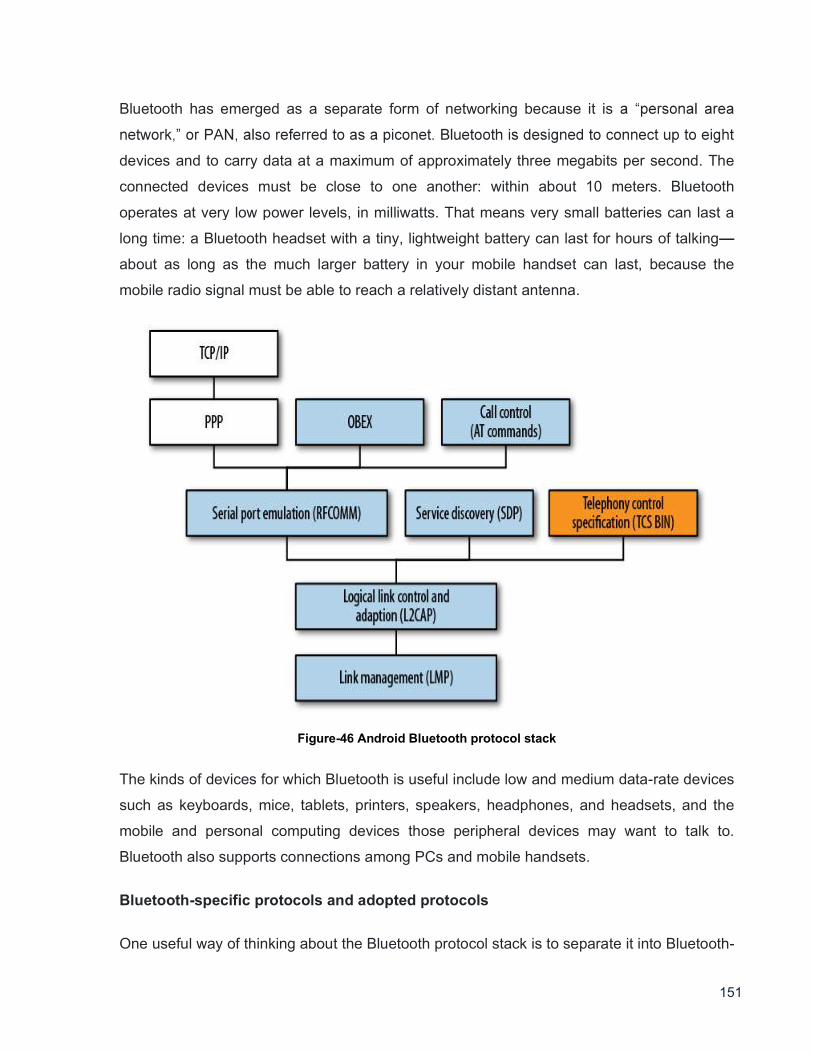
151
Bluetooth has emerged as a separate form of networking because it is
devices and to carry data at a maximum of approximately three megabits per second. The
connected devices must be close to one another: within about 10 meters. Bluetooth
operates at very low power levels, in milliwatts. That means very small batteries can last a
long time: a Bluetooth headset with a tiny, lightweight battery can last for hours of talking
about as long as the much larger battery in your mobile handset can last, because the
mobile radio signal must be able to reach a relatively distant antenna.
Figure-46 Android Bluetooth protocol stack
The kinds of devices for which Bluetooth is useful include low and medium data-rate devices
such as keyboards, mice, tablets, printers, speakers, headphones, and headsets, and the
mobile and personal computing devices those peripheral devices may want to talk to.
Bluetooth also supports connections among PCs and mobile handsets.
Bluetooth-specific protocols and adopted protocols
One useful way of thinking about the Bluetooth protocol stack is to separate it into Bluetooth-
152
protocols that run on top of Bluetooth. Taken together,
Bluetooth and the adopted protocols can be dauntingly complex, but if you temporarily set
aside the fact that large, complex protocols such as OBEX and TCP/IP run on top of
tandable. Therefore, we will start with the lower layers of
Bluetooth and emphasize how these layers shape how you can make use of Bluetooth.
Another useful mental model of Bluetooth is that it replaces serial ports. This means the
lower layers of Bluetooth emulate, and enable you to manage, a virtual set of serial cables
between peripherals. This is the type of Bluetooth protocol we will be using. This, in turn,
enables us to use the simple java.io classes InputStream and Output Stream to read and
write data.
4.6 USING BLUETOOTH IN ANDROID APPLICATIONS
Using Bluetooth in Android means using classes that were designed to encapsulate the way
Bluetooth works in the Android operating system: the BlueZ stack provides ways to
enumerate devices, listen for connections, and use connections; the java.io package
provides classes for reading and writing data; and the Handler and Message classes provide
a way to bridge between the threads that manage Bluetooth input and output and the user
look at the code and how these classes are used.
can do for applications that need to build simple connections to nearby devices.
The first step in trying out this Bluetooth application is to pair your handset with a PC. Then
you need a program that monitors what the PC has received via Bluetooth to see that what
Start the program under the debugger if you want to set some breakpoints and step through
it, especially the parts of the application that open and accept connections. You can create
the connection from your PC, using the Blueman applet in Linux, or from the app. Once the
connection is created, start hcidump in a terminal to see that what you typed into the app is
received by the PC. Use the following flags to show only the content of the Bluetooth
connection:
<<blutooth Connection Windows or linux>>
153
4.7 SOCIAL MEDIA INTEGRATION WITH ANDROID APPS
Social Network Integration with Android and in this section, we will Learn, how to users
authenticate into your app using
Twitter,
and see how to make posts to both social networks.
Many mobile apps require a user to create an account or to sign up for a service in order to
lways the best user experience.
So how can you overcome this when building your app? To give users a seamless
experience, you can give them the ability to sign in to your app with just a single tap of a
button, using one of their social networking accounts, e.g., Facebook or Twitter.
your Android app to allow them to log in and also share posts from your app into their social
networking account.
Next, open Android Studio 3.1.3 or later, and choose Open an existing Android Studio
project from the welcome screen or File > Open form the menu. Open the folder root folder
of the BAOUSocialMedia starter project.
update to Facebook or a tweet to Twitter.
screen for the app:
Connecting With Facebook
create an app to get a Facebook App ID.
Creating a Facebook App ID on Developers Portal & Setting Up
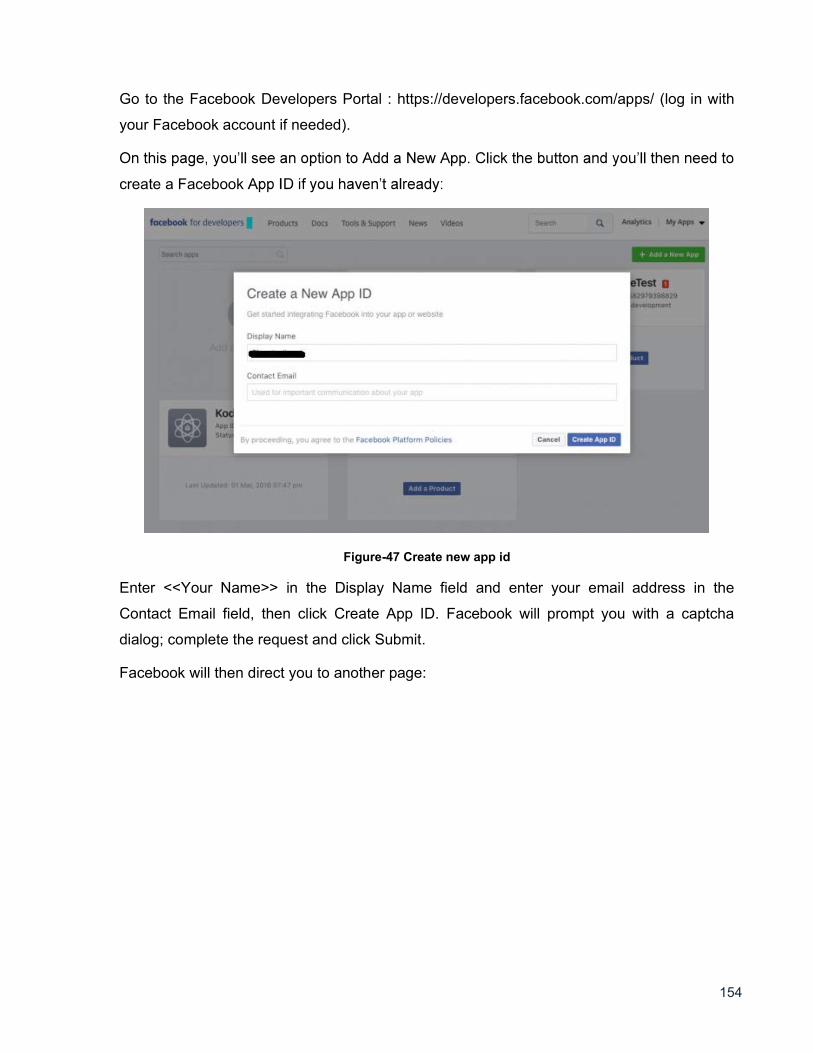
154
Go to the Facebook Developers Portal : https://developers.facebook.com/apps/ (log in with
your Facebook account if needed).
create a Facebook
Figure-47 Create new app id
Enter <<Your Name>> in the Display Name field and enter your email address in the
Contact Email field, then click Create App ID. Facebook will prompt you with a captcha
dialog; complete the request and click Submit.
Facebook will then direct you to another page:
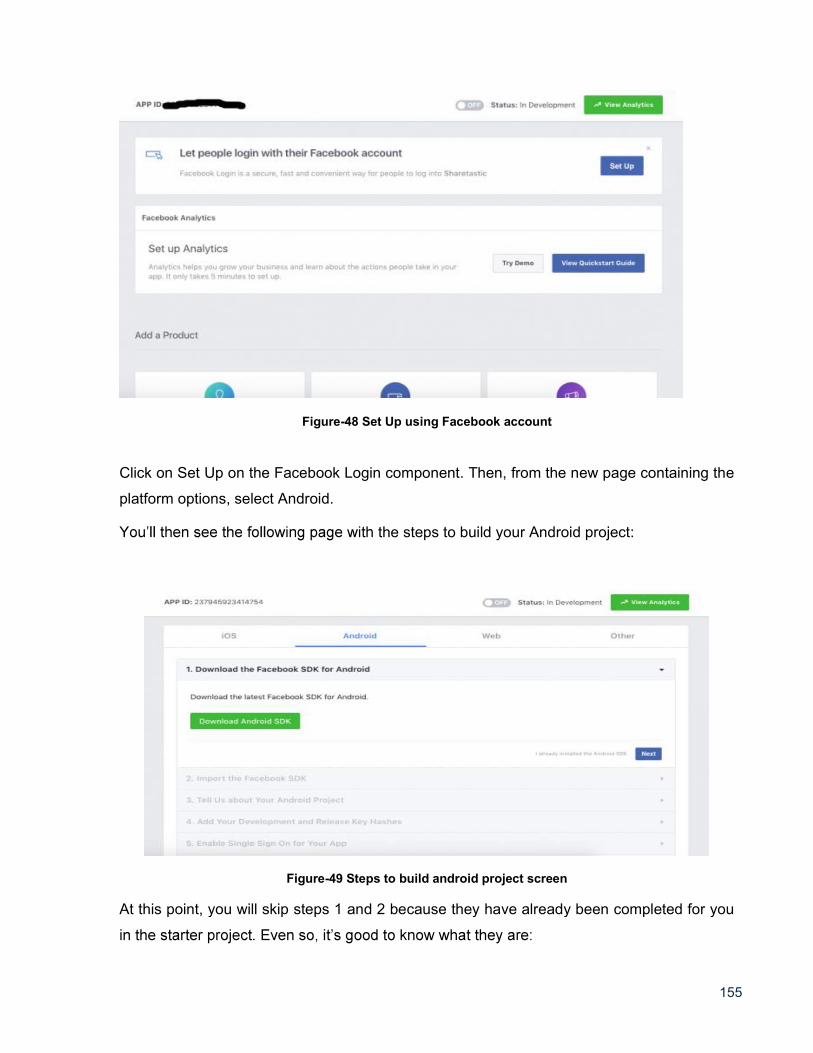
155
Figure-48 Set Up using Facebook account
Click on Set Up on the Facebook Login component. Then, from the new page containing the
platform options, select Android.
the steps to build your Android project:
Figure-49 Steps to build android project screen
At this point, you will skip steps 1 and 2 because they have already been completed for you
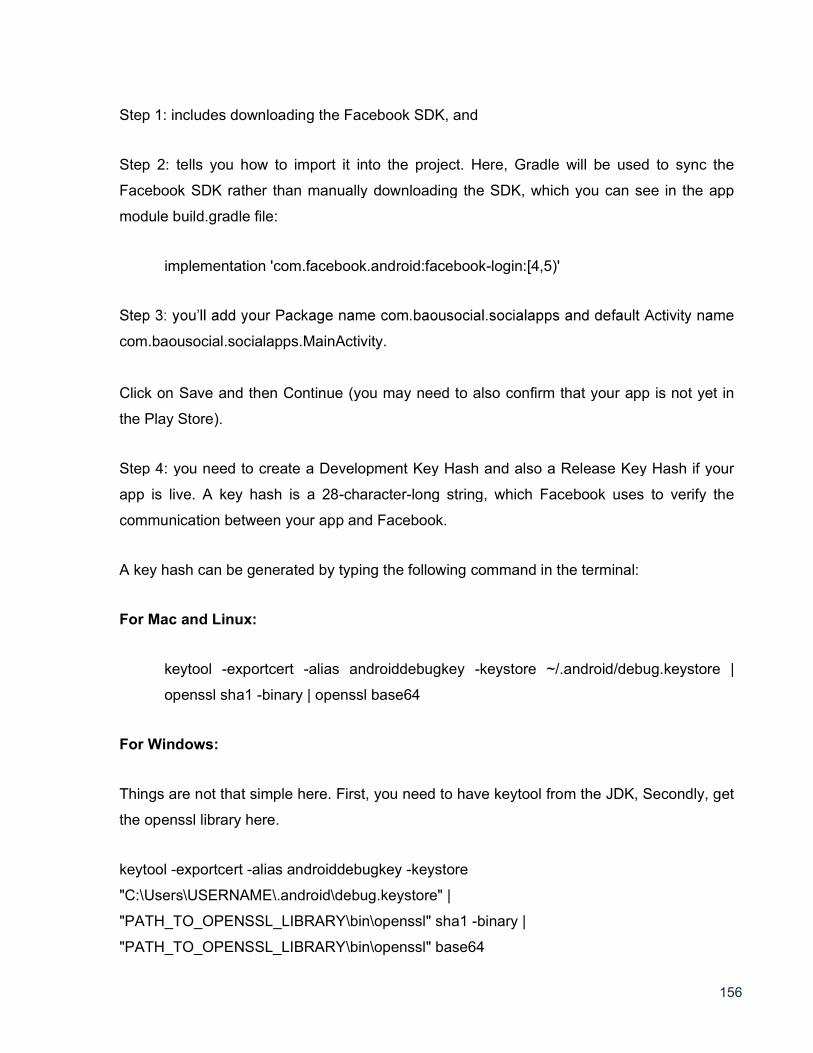
156
Step 1: includes downloading the Facebook SDK, and
Step 2: tells you how to import it into the project. Here, Gradle will be used to sync the
Facebook SDK rather than manually downloading the SDK, which you can see in the app
module build.gradle file:
implementation 'com.facebook.android:facebook-login:[4,5)'
com.baousocial.socialapps.MainActivity.
Click on Save and then Continue (you may need to also confirm that your app is not yet in
the Play Store).
Step 4: you need to create a Development Key Hash and also a Release Key Hash if your
app is live. A key hash is a 28-character-long string, which Facebook uses to verify the
communication between your app and Facebook.
A key hash can be generated by typing the following command in the terminal:
For Mac and Linux:
keytool -exportcert -alias androiddebugkey -keystore ~/.android/debug.keystore |
openssl sha1 -binary | openssl base64
For Windows:
Things are not that simple here. First, you need to have keytool from the JDK, Secondly, get
the openssl library here.
keytool -exportcert -alias androiddebugkey -keystore
"C:\Users\USERNAME\.android\debug.keystore" |
"PATH_TO_OPENSSL_LIBRARY\bin\openssl" sha1 -binary |
"PATH_TO_OPENSSL_LIBRARY\bin\openssl" base64
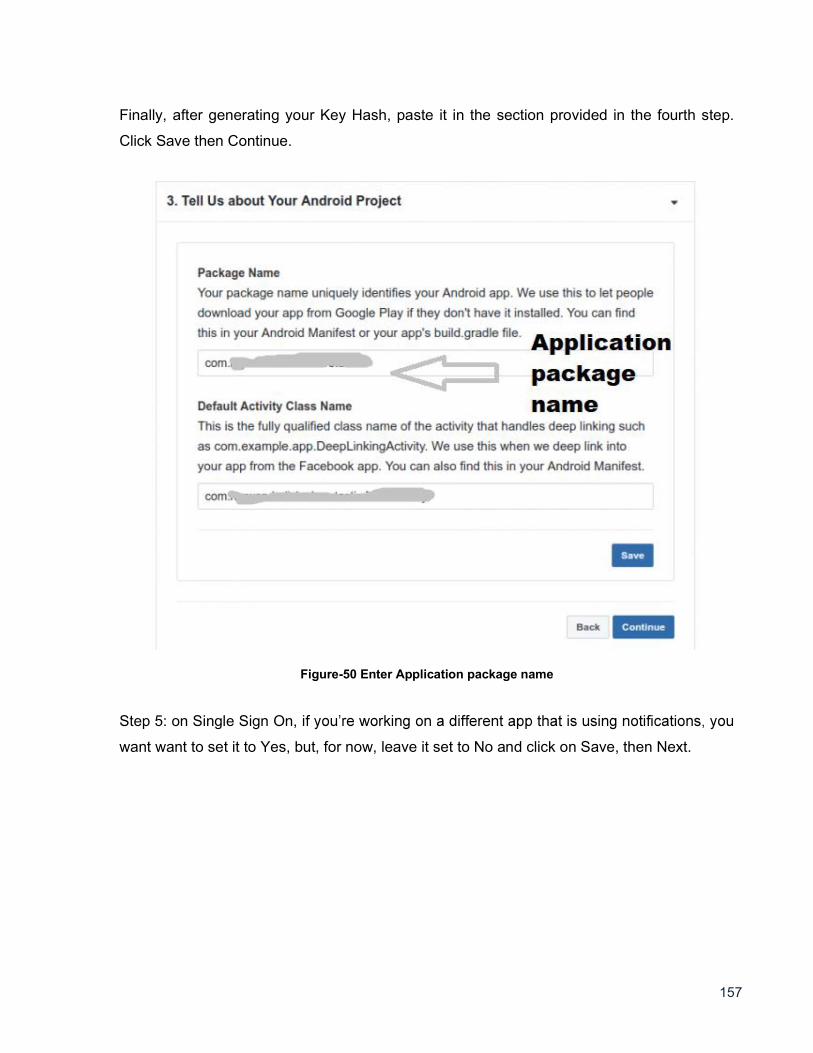
157
Finally, after generating your Key Hash, paste it in the section provided in the fourth step.
Click Save then Continue.
Figure-50 Enter Application package name
Step 5: on Single Sign On,
want want to set it to Yes, but, for now, leave it set to No and click on Save, then Next.
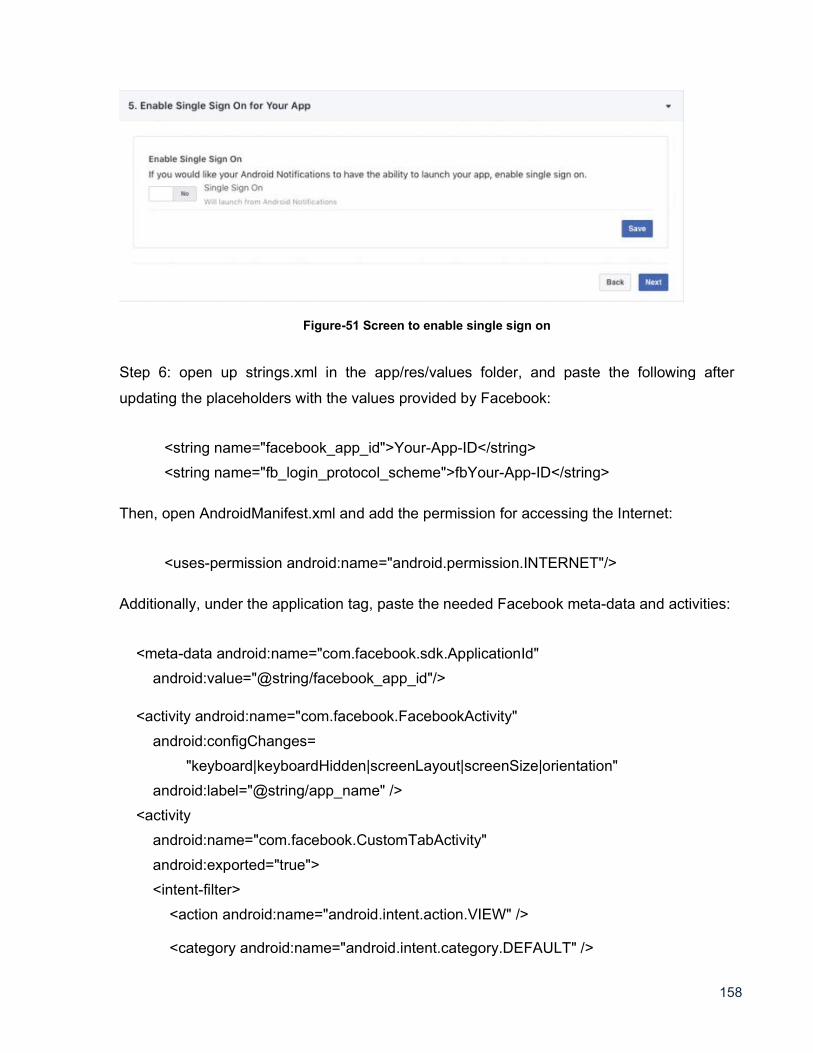
158
Figure-51 Screen to enable single sign on
Step 6: open up strings.xml in the app/res/values folder, and paste the following after
updating the placeholders with the values provided by Facebook:
<string name="facebook_app_id">Your-App-ID</string>
<string name="fb_login_protocol_scheme">fbYour-App-ID</string>
Then, open AndroidManifest.xml and add the permission for accessing the Internet:
<uses-permission android:name="android.permission.INTERNET"/>
Additionally, under the application tag, paste the needed Facebook meta-data and activities:
<meta-data android:name="com.facebook.sdk.ApplicationId"
android:value="@string/facebook_app_id"/>
<activity android:name="com.facebook.FacebookActivity"
android:configChanges=
"keyboard|keyboardHidden|screenLayout|screenSize|orientation"
android:label="@string/app_name" />
<activity
android:name="com.facebook.CustomTabActivity"
android:exported="true">
<intent-filter>
<action android:name="android.intent.action.VIEW" />
<category android:name="android.intent.category.DEFAULT" />
159
<category android:name="android.intent.category.BROWSABLE" />
<data android:scheme="@string/fb_login_protocol_scheme" />
</intent-filter>
</activity>
4.8 LET US SUM UP
In this block we learned about Account Contacts accessing, Authentication and
Synchronization, The Bluetooth Communication Protocol Stack, Using Bluetooth in Android
Applications, Android Bluetooth protocol stack, protocols, Social media Facebook and twitter
integration with android apps
4.9 CHECK YOUR PROGRESS
A. About Contact for communication one of the primary data types that is stored and used
(and reused) in Android is contact data. (TRUE/FALSE)
B. Authentication and Synchronization Starting with Android ____ and API level ___.
(2.0&5, 1.5&4)
C. Bluetooth: Bluetooth was the nickname for King Harald of Denmark. (TRUE/FALSE)
D. FULL form PAN:____________
E. Bluetooth connected devices must be close to one another: within about _____ meters
(5,10,15)
4.10 CHECK YOUR PROGRESS: POSSIBLE ANSWERS
A. TRUE
B. 2.0&5
C. TRUE
D. Personal Area Network
E. 10

160
4.11 FURTHER READING
Android Application Development for Dummies by Donn Felker
Professional Android 4th Edition by Reto Meier (Author), Ian Lake (Author) ISBN-13:
978-1118949528 ISBN-10: 9781118949528
Android Programming by Nicolas Gramlich.
1785883267 ISBN-13: 978-1785883262
Learning Java by Building Android Games: Explore Java Through Mobile Game
Development ISBN-10: 1784398853 ISBN-13: 978-1784398859
Beginning Android Application Development by Wei-Meng Lee
Android Programming: The Big Nerd Ranch Guide (3rd Edition) (Big Nerd Ranch Guides)
3rd Edition by Bill Phillips , Chris Stewart , Kristin Marsicano ISBN-13: 978-0134706054
ISBN-10: 0134706056
Android Programming: Pushing the Limits 1st Edition by Erik Hellman ISBN-13: 978-
1118717370 ISBN-10: 1118717376
Head First Android Development: A Brain-Friendly Guide 1st Edition by Dawn Griffiths
ISBN-13: 978-1449362188 ISBN-10: 1449362184
Pro Android by Sayed Y. Hashimi and Satya Komatineni, Springer, New York, 2009.
4.12 ASSIGNMENTS
A. Write a sort note on Account Contacts.
B. Write a step for Social media integration with android apps.
C. Explain the BtConsoleActivity class & The DeviceListActivity class in detail.
D. Discuss about Bluetooth and related I/O classes.
E. Describe Bluetooth-specific protocols and adopted protocols.
F. Explain the Bluetooth Protocol Stack in detail with diagram.
4.13 ACTIVITIES
Create an android application for established connection with Bluetooth device
Create an android application for share a post on Facebook or twitter using social
connectivity class
161
Block-4
Sensor And
Hardware Programming
162
Unit 1: Sensors
Unit Structure 1.1 Learning Objectives
1.2 Introduction
1.3 Identifying Sensors And Sensor Capabilities
1.4 Motion Sensor
1.5 Environmental Sensors
1.6 Position Sensors
1.7 Let us sum up
1.8 Check your Progress
1.9 Check your Progress: Possible Answers
1.10 Further Reading
1.11 Assignment
1.12 Activities
1
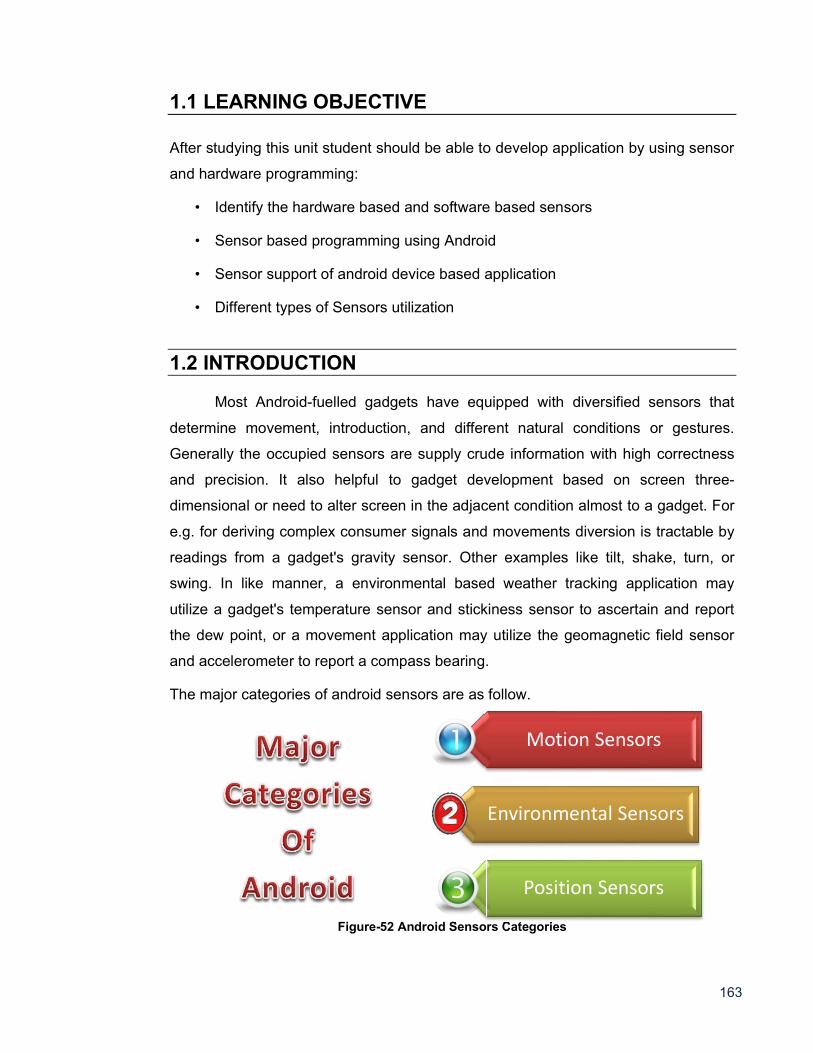
163
1.1 LEARNING OBJECTIVE
After studying this unit student should be able to develop application by using sensor
and hardware programming:
Identify the hardware based and software based sensors
Sensor based programming using Android
Sensor support of android device based application
Different types of Sensors utilization
1.2 INTRODUCTION
Most Android-fuelled gadgets have equipped with diversified sensors that
determine movement, introduction, and different natural conditions or gestures.
Generally the occupied sensors are supply crude information with high correctness
and precision. It also helpful to gadget development based on screen three-
dimensional or need to alter screen in the adjacent condition almost to a gadget. For
e.g. for deriving complex consumer signals and movements diversion is tractable by
readings from a gadget's gravity sensor. Other examples like tilt, shake, turn, or
swing. In like manner, a environmental based weather tracking application may
utilize a gadget's temperature sensor and stickiness sensor to ascertain and report
the dew point, or a movement application may utilize the geomagnetic field sensor
and accelerometer to report a compass bearing.
The major categories of android sensors are as follow.
Figure-52 Android Sensors Categories
Motion Sensors
Environmental Sensors
Position Sensors
164
The gadget sensor accessibility with gaining basic sensor related information
is utilized via the Android Sensor Framework (ASF) in android. The few of classes
and interfaces from ASF supports for play out a wide variety of sensor-related
undertakings. Some of the basic task which is utilizes the sensor system.
Identify the sensors availability on a device.
Confine the capability characteristics of each supported sensor like its most
extreme range, maker, control necessities, and goals.
Secure simple sensor information and characterize the base rate at which you
gain sensor information.
Register and unregister sensor event listener that screen sensor changes.
Motion sensors
o These sensors measure speeding up powers and rotational powers along three
axes. This classification incorporates accelerometers, gravity sensors, gyroscope
(from android 4.0), and rotational vector sensors.
Environmental sensors
o These sensors measure different natural parameters, for example, encompassing
air temperature and power, light, and moistness. This classification incorporates
indicators, photometers, and thermometers.
Position sensors
o These sensors measure the physical position of a gadget. This class preamble
sensors and magnetometers.
The ASF (Android Sensor Framework) enables the developer to use many
types of sensors which are of two types. Some of are hardware centric and some of
are software centric. The Hardware centric sensors are substantial components
generally resides in device. These sensors are gain the data by quantifying the
environmental properties such as acceleration, geomagnetic field strength, or
angular adjustment. The software centric sensors are mimic hardware based
sensors. It gains data some time from hardware based sensors and sometimes from
the virtual sensors or artificial sensors. Mostly the android devices have every type of
sensors. Almost have accelerometer and a magnetometer but some of have
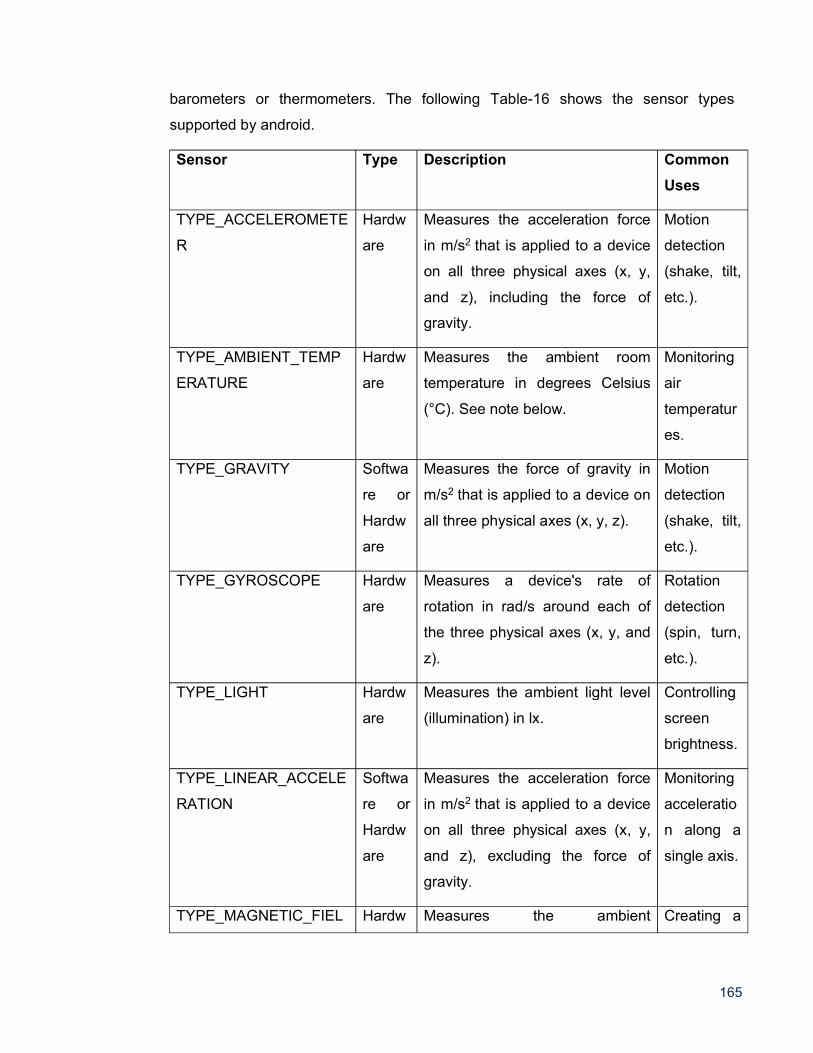
165
barometers or thermometers. The following Table-16 shows the sensor types
supported by android.
Sensor Type Description Common
Uses
TYPE_ACCELEROMETE
R
Hardw
are
Measures the acceleration force
in m/s2 that is applied to a device
on all three physical axes (x, y,
and z), including the force of
gravity.
Motion
detection
(shake, tilt,
etc.).
TYPE_AMBIENT_TEMP
ERATURE
Hardw
are
Measures the ambient room
temperature in degrees Celsius
(°C). See note below.
Monitoring
air
temperatur
es.
TYPE_GRAVITY Softwa
re or
Hardw
are
Measures the force of gravity in
m/s2 that is applied to a device on
all three physical axes (x, y, z).
Motion
detection
(shake, tilt,
etc.).
TYPE_GYROSCOPE Hardw
are
Measures a device's rate of
rotation in rad/s around each of
the three physical axes (x, y, and
z).
Rotation
detection
(spin, turn,
etc.).
TYPE_LIGHT Hardw
are
Measures the ambient light level
(illumination) in lx.
Controlling
screen
brightness.
TYPE_LINEAR_ACCELE
RATION
Softwa
re or
Hardw
are
Measures the acceleration force
in m/s2 that is applied to a device
on all three physical axes (x, y,
and z), excluding the force of
gravity.
Monitoring
acceleratio
n along a
single axis.
TYPE_MAGNETIC_FIEL Hardw Measures the ambient Creating a
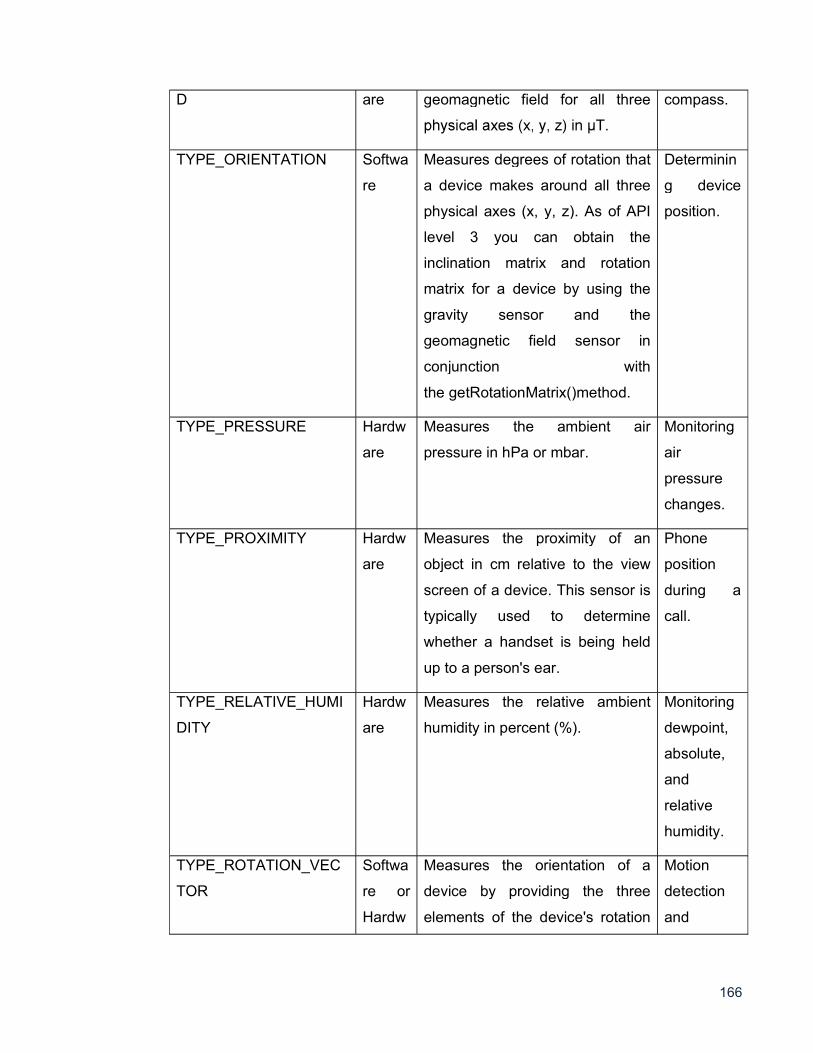
166
D are geomagnetic field for all three
compass.
TYPE_ORIENTATION Softwa
re
Measures degrees of rotation that
a device makes around all three
physical axes (x, y, z). As of API
level 3 you can obtain the
inclination matrix and rotation
matrix for a device by using the
gravity sensor and the
geomagnetic field sensor in
conjunction with
the getRotationMatrix()method.
Determinin
g device
position.
TYPE_PRESSURE Hardw
are
Measures the ambient air
pressure in hPa or mbar.
Monitoring
air
pressure
changes.
TYPE_PROXIMITY Hardw
are
Measures the proximity of an
object in cm relative to the view
screen of a device. This sensor is
typically used to determine
whether a handset is being held
up to a person's ear.
Phone
position
during a
call.
TYPE_RELATIVE_HUMI
DITY
Hardw
are
Measures the relative ambient
humidity in percent (%).
Monitoring
dewpoint,
absolute,
and
relative
humidity.
TYPE_ROTATION_VEC
TOR
Softwa
re or
Hardw
Measures the orientation of a
device by providing the three
elements of the device's rotation
Motion
detection
and
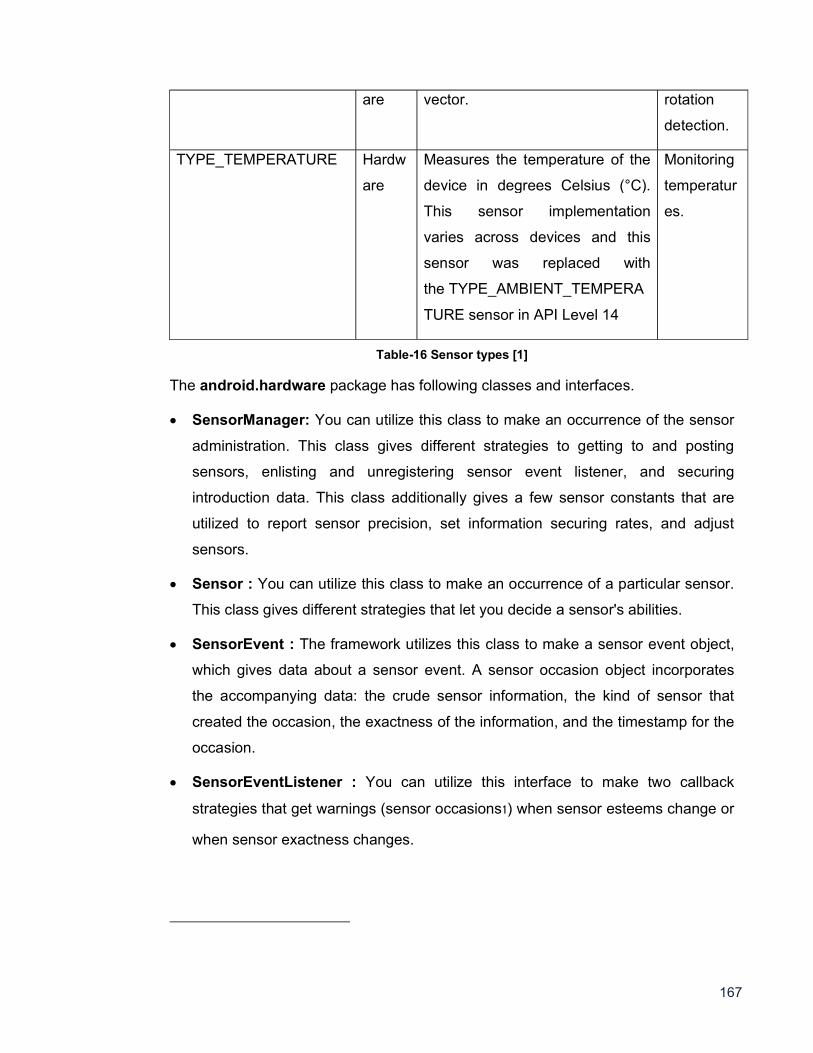
167
Table-16 Sensor types [1]
The android.hardware package has following classes and interfaces.
SensorManager: You can utilize this class to make an occurrence of the sensor
administration. This class gives different strategies to getting to and posting
sensors, enlisting and unregistering sensor event listener, and securing
introduction data. This class additionally gives a few sensor constants that are
utilized to report sensor precision, set information securing rates, and adjust
sensors.
Sensor : You can utilize this class to make an occurrence of a particular sensor.
This class gives different strategies that let you decide a sensor's abilities.
SensorEvent : The framework utilizes this class to make a sensor event object,
which gives data about a sensor event. A sensor occasion object incorporates
the accompanying data: the crude sensor information, the kind of sensor that
created the occasion, the exactness of the information, and the timestamp for the
occasion.
SensorEventListener : You can utilize this interface to make two callback
strategies that get warnings (sensor occasions1) when sensor esteems change or
when sensor exactness changes.
are vector. rotation
detection.
TYPE_TEMPERATURE Hardw
are
Measures the temperature of the
device in degrees Celsius (°C).
This sensor implementation
varies across devices and this
sensor was replaced with
the TYPE_AMBIENT_TEMPERA
TURE sensor in API Level 14
Monitoring
temperatur
es.
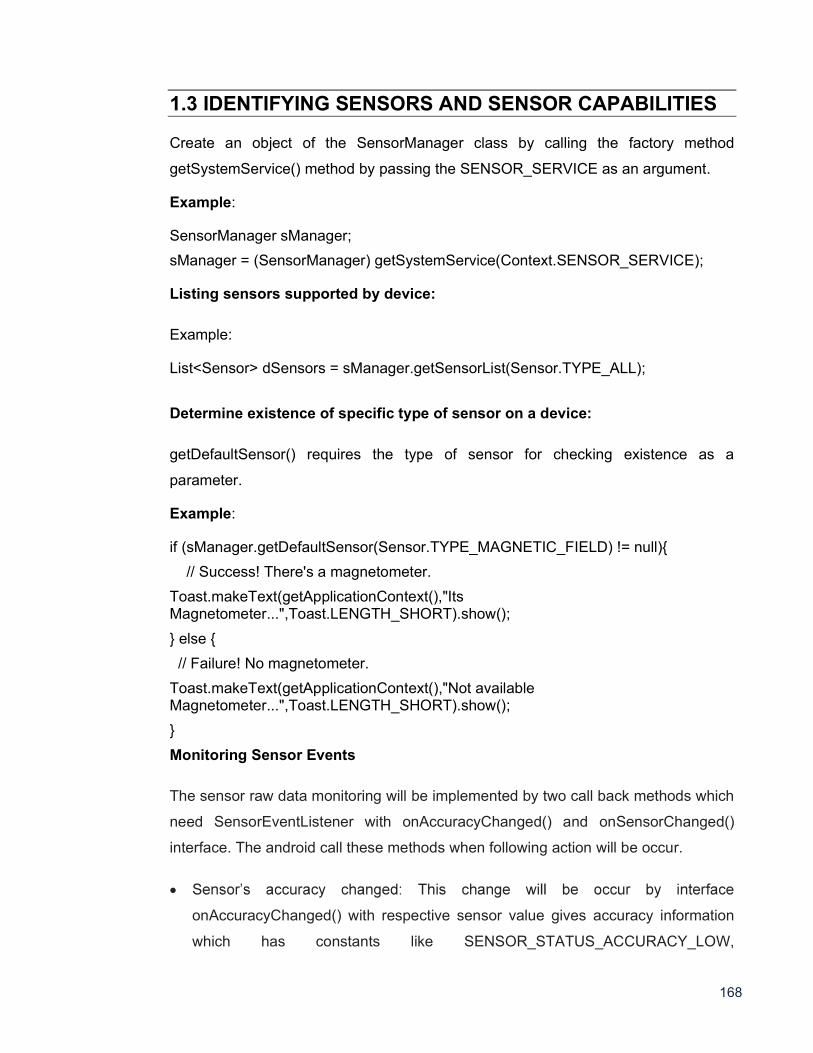
168
1.3 IDENTIFYING SENSORS AND SENSOR CAPABILITIES Create an object of the SensorManager class by calling the factory method
getSystemService() method by passing the SENSOR_SERVICE as an argument.
Example:
SensorManager sManager;
sManager = (SensorManager) getSystemService(Context.SENSOR_SERVICE);
Listing sensors supported by device:
Example:
List<Sensor> dSensors = sManager.getSensorList(Sensor.TYPE_ALL);
Determine existence of specific type of sensor on a device:
getDefaultSensor() requires the type of sensor for checking existence as a
parameter.
Example:
if (sManager.getDefaultSensor(Sensor.TYPE_MAGNETIC_FIELD) != null){
// Success! There's a magnetometer.
Toast.makeText(getApplicationContext(),"Its Magnetometer...",Toast.LENGTH_SHORT).show();
} else {
// Failure! No magnetometer.
Toast.makeText(getApplicationContext(),"Not available Magnetometer...",Toast.LENGTH_SHORT).show();
}
Monitoring Sensor Events
The sensor raw data monitoring will be implemented by two call back methods which
need SensorEventListener with onAccuracyChanged() and onSensorChanged()
interface. The android call these methods when following action will be occur.
onAccuracyChanged() with respective sensor value gives accuracy information
which has constants like SENSOR_STATUS_ACCURACY_LOW,
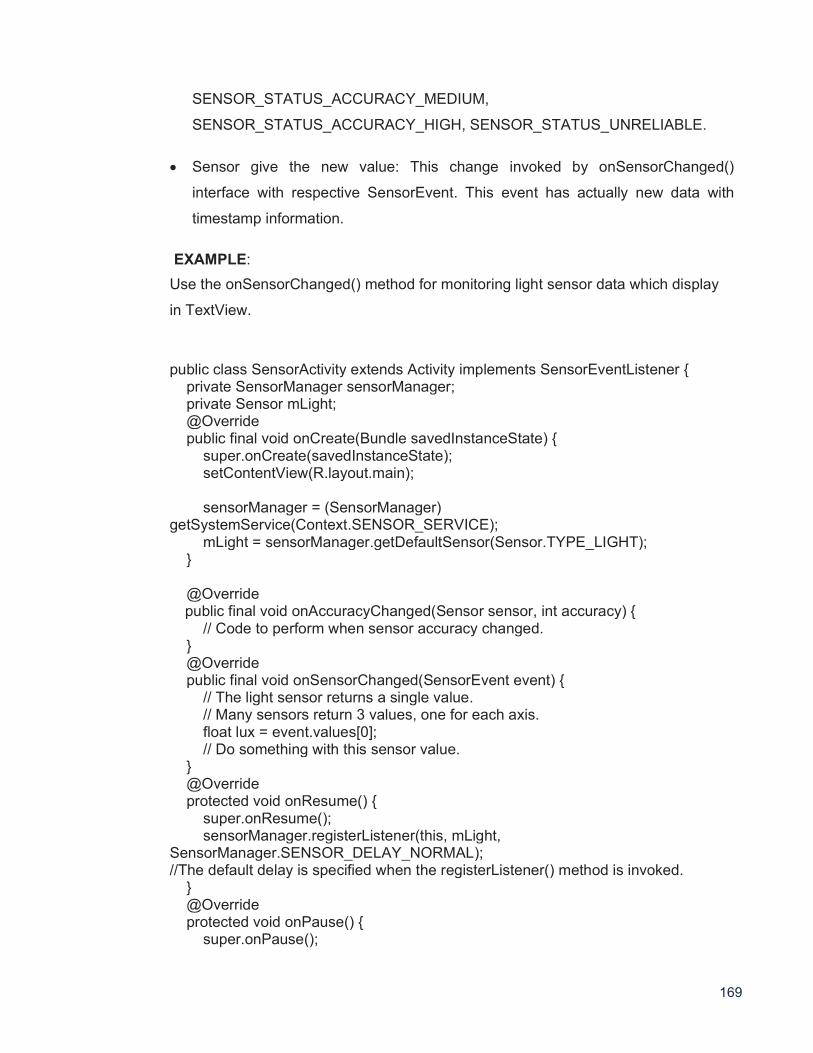
169
SENSOR_STATUS_ACCURACY_MEDIUM,
SENSOR_STATUS_ACCURACY_HIGH, SENSOR_STATUS_UNRELIABLE.
Sensor give the new value: This change invoked by onSensorChanged()
interface with respective SensorEvent. This event has actually new data with
timestamp information.
EXAMPLE:
Use the onSensorChanged() method for monitoring light sensor data which display
in TextView.
public class SensorActivity extends Activity implements SensorEventListener { private SensorManager sensorManager; private Sensor mLight; @Override public final void onCreate(Bundle savedInstanceState) { super.onCreate(savedInstanceState); setContentView(R.layout.main); sensorManager = (SensorManager) getSystemService(Context.SENSOR_SERVICE); mLight = sensorManager.getDefaultSensor(Sensor.TYPE_LIGHT); } @Override public final void onAccuracyChanged(Sensor sensor, int accuracy) { // Code to perform when sensor accuracy changed. } @Override public final void onSensorChanged(SensorEvent event) { // The light sensor returns a single value. // Many sensors return 3 values, one for each axis. float lux = event.values[0]; // Do something with this sensor value. } @Override protected void onResume() { super.onResume(); sensorManager.registerListener(this, mLight, SensorManager.SENSOR_DELAY_NORMAL); //The default delay is specified when the registerListener() method is invoked. } @Override protected void onPause() { super.onPause();
170
sensorManager.unregisterListener(this); } } Runtime Sensor Detection
The sensor specification required to check at runtime like which sensors are
activated and those values are also important for runtime than Sensor framework
provides the runtime sensor detection and disable or enabling features as
appropriately required.
EXAMPLE:
private SensorManager sensorManager;
sensorManager = (SensorManager) getSystemService(Context.SENSOR_SERVICE);
if (sensorManager.getDefaultSensor(Sensor.TYPE_PRESSURE) != null){
// Success! There's a pressure sensor.
} else {
// Failure! No pressure sensor.
}
Specific sensor configurations using Google Play filters
The Google Play Store targeted applications consume this feature. The <uses-
feature> elements in your manifest file to filter your application from devices that do
not have the appropriate sensor configuration for your application.
EXAMPLE:
<uses-feature android:name="android.hardware.sensor.accelerometer"
android:required="true" />
1.4 MOTION SENSORS The Motion sensors are useful for monitoring device movement, such as tilt, shake,
rotation, or swing. The sensors' possible architectures vary by sensor type:
The gravity, linear acceleration, rotation vector, significant motion, step counter,
and step detector sensors are either hardware-based or software-based.
The accelerometer and gyroscope sensors are always hardware-based.
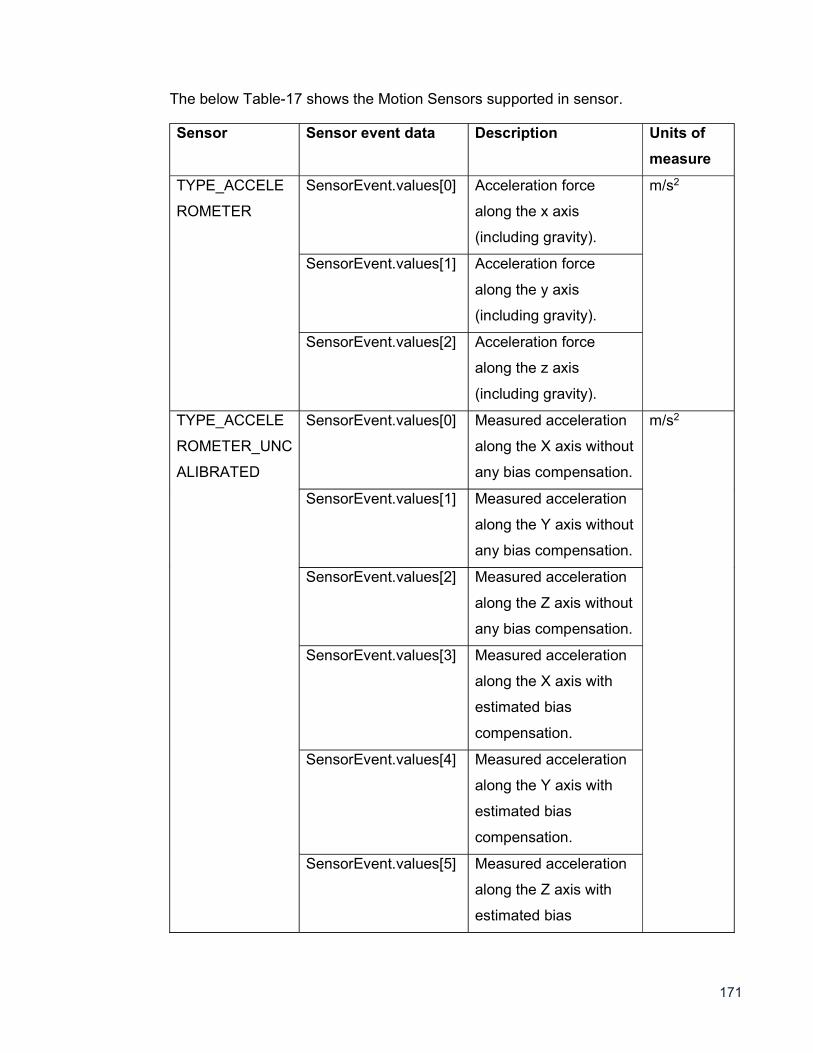
171
The below Table-17 shows the Motion Sensors supported in sensor.
Sensor Sensor event data Description Units of
measure
TYPE_ACCELE
ROMETER
SensorEvent.values[0] Acceleration force
along the x axis
(including gravity).
m/s2
SensorEvent.values[1] Acceleration force
along the y axis
(including gravity).
SensorEvent.values[2] Acceleration force
along the z axis
(including gravity).
TYPE_ACCELE
ROMETER_UNC
ALIBRATED
SensorEvent.values[0] Measured acceleration
along the X axis without
any bias compensation.
m/s2
SensorEvent.values[1] Measured acceleration
along the Y axis without
any bias compensation.
SensorEvent.values[2] Measured acceleration
along the Z axis without
any bias compensation.
SensorEvent.values[3] Measured acceleration
along the X axis with
estimated bias
compensation.
SensorEvent.values[4] Measured acceleration
along the Y axis with
estimated bias
compensation.
SensorEvent.values[5] Measured acceleration
along the Z axis with
estimated bias
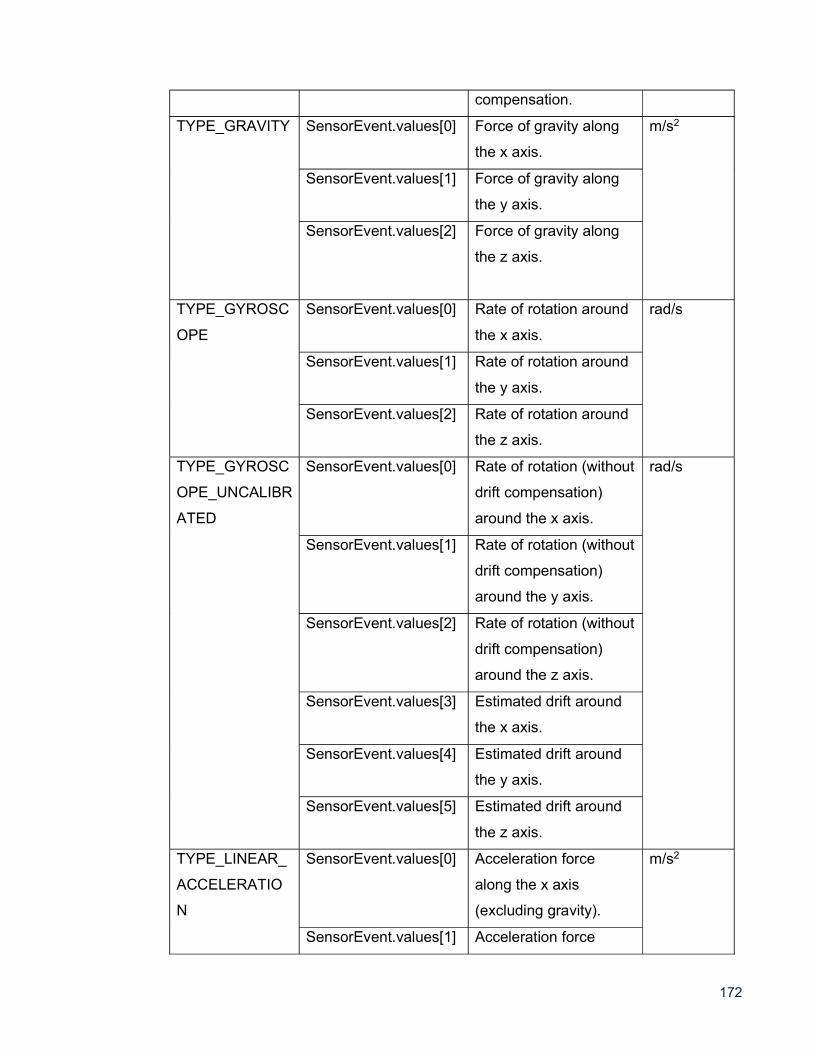
172
compensation.
TYPE_GRAVITY SensorEvent.values[0] Force of gravity along
the x axis.
m/s2
SensorEvent.values[1] Force of gravity along
the y axis.
SensorEvent.values[2] Force of gravity along
the z axis.
TYPE_GYROSC
OPE
SensorEvent.values[0] Rate of rotation around
the x axis.
rad/s
SensorEvent.values[1] Rate of rotation around
the y axis.
SensorEvent.values[2] Rate of rotation around
the z axis.
TYPE_GYROSC
OPE_UNCALIBR
ATED
SensorEvent.values[0] Rate of rotation (without
drift compensation)
around the x axis.
rad/s
SensorEvent.values[1] Rate of rotation (without
drift compensation)
around the y axis.
SensorEvent.values[2] Rate of rotation (without
drift compensation)
around the z axis.
SensorEvent.values[3] Estimated drift around
the x axis.
SensorEvent.values[4] Estimated drift around
the y axis.
SensorEvent.values[5] Estimated drift around
the z axis.
TYPE_LINEAR_
ACCELERATIO
N
SensorEvent.values[0] Acceleration force
along the x axis
(excluding gravity).
m/s2
SensorEvent.values[1] Acceleration force
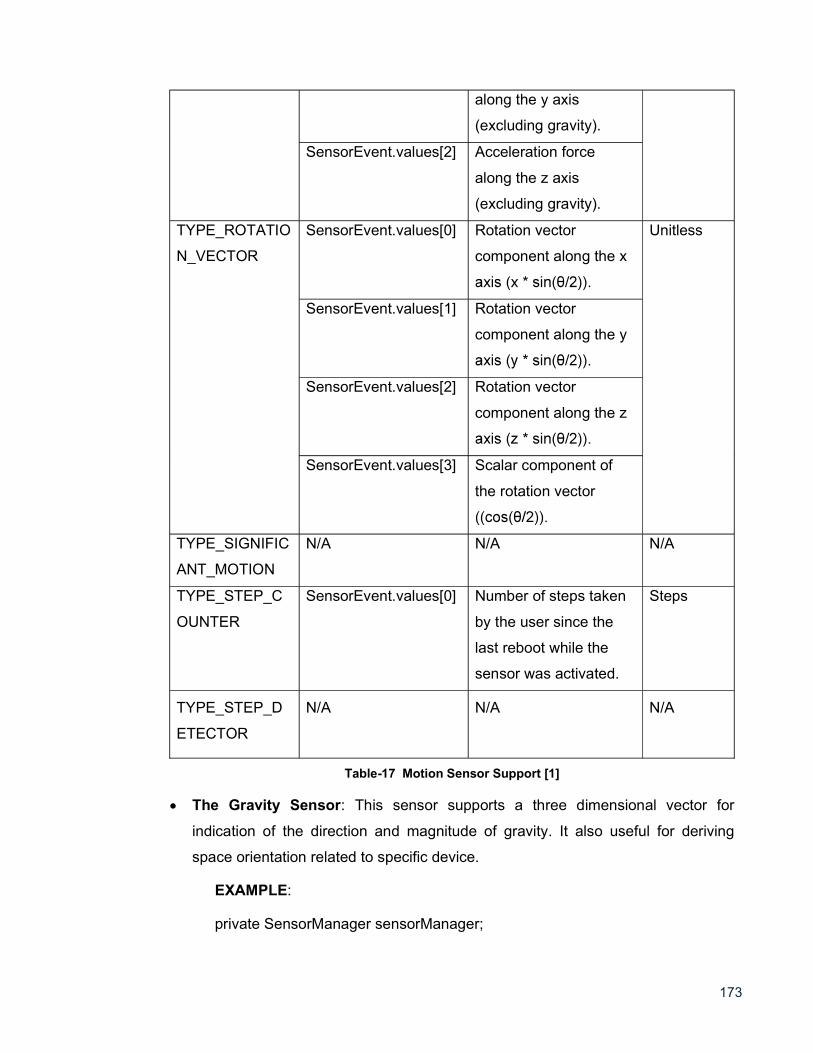
173
along the y axis
(excluding gravity).
SensorEvent.values[2] Acceleration force
along the z axis
(excluding gravity).
TYPE_ROTATIO
N_VECTOR
SensorEvent.values[0] Rotation vector
component along the x
Unitless
SensorEvent.values[1] Rotation vector
component along the y
SensorEvent.values[2] Rotation vector
component along the z
SensorEvent.values[3] Scalar component of
the rotation vector
TYPE_SIGNIFIC
ANT_MOTION
N/A N/A N/A
TYPE_STEP_C
OUNTER
SensorEvent.values[0] Number of steps taken
by the user since the
last reboot while the
sensor was activated.
Steps
TYPE_STEP_D
ETECTOR
N/A N/A N/A
Table-17 Motion Sensor Support [1]
The Gravity Sensor: This sensor supports a three dimensional vector for
indication of the direction and magnitude of gravity. It also useful for deriving
space orientation related to specific device.
EXAMPLE:
private SensorManager sensorManager;
174
private Sensor sensor;
sensorManager = (SensorManager) getSystemService(Context.SENSOR_SERVICE);
sensor = sensorManager.getDefaultSensor(Sensor.TYPE_GRAVITY);
The Linear Accelerometer: Generally this sensor used for gesture detection. It
provides three-dimensional vector with acceleration along each device axis,
excluding gravity.
EXAMPLE:
private SensorManager sensorManager; private Sensor sensor; sensorManager = (SensorManager) getSystemService(Context.SENSOR_SERVICE); sensor = sensorManager.getDefaultSensor(Sensor.TYPE_LINEAR_ACCELERATION);
The sensor provides acceleration data by calculating following.
linear acceleration = acceleration - acceleration due to gravity
The Rotation Vector Sensor: It characterizes the orientation of the device as a
combination of an angle and an axis, in which the device has rotated through an
angle around an axis (x, y, or z).
EXAMPLE:
private SensorManager sensorManager; private Sensor sensor; sensorManager = (SensorManager) getSystemService(Context.SENSOR_SERVICE); sensor = sensorManager.getDefaultSensor(Sensor.TYPE_ROTATION_VECTOR);
The Significant Motion Sensor: This sensor invoked and disable it by them self.
It invoked when significant motion is detected and then it disables itself. This
sensors are might be lead to change user location so its generally used for
walking, biking, or sitting in a moving car.
EXAMPLE:
private SensorManager sensorManager;
private Sensor sensor;
private TriggerEventListener triggerEventListener;
sensorManager = (SensorManager) getSystemService(Context.SENSOR_SERVICE);
175
sensor = sensorManager.getDefaultSensor(Sensor.TYPE_SIGNIFICANT_MOTION);
triggerEventListener = new TriggerEventListener() {
@Override
public void onTrigger(TriggerEvent event) {
// Do work
}
};
The Step Counter Sensor: It provides the number of steps taken by the user
since the last reboot while the sensor was activated. The step counter has more
latency (up to 10 seconds) but more accuracy than the step detector sensor.
EXAMPLE:
private SensorManager sensorManager;
private Sensor sensor;
sensorManager = (SensorManager) getSystemService(Context.SENSOR_SERVICE);
sensor = sensorManager.getDefaultSensor(Sensor.TYPE_STEP_COUNTER);
The Step Detector Sensor: This sensor fire an event each time the user takes a
step. The latency is expected to be below 2 seconds.
EXAMPLE:
private SensorManager sensorManager;
private Sensor sensor;
ssensorManager = (SensorManager) getSystemService(Context.SENSOR_SERVICE);
sensor = sensorManager.getDefaultSensor(Sensor.TYPE_STEP_DETECTOR);
1.5 POSITION SENSORS There are two type of sensors are available in android to get the position of the
device: the geomagnetic field sensor and the accelerometer. It also supports
proximity sensor which determine how close the face of a device is to an object and
give binary value like near or far. The geomagnetic field sensor and proximity sensor
are hardware based.
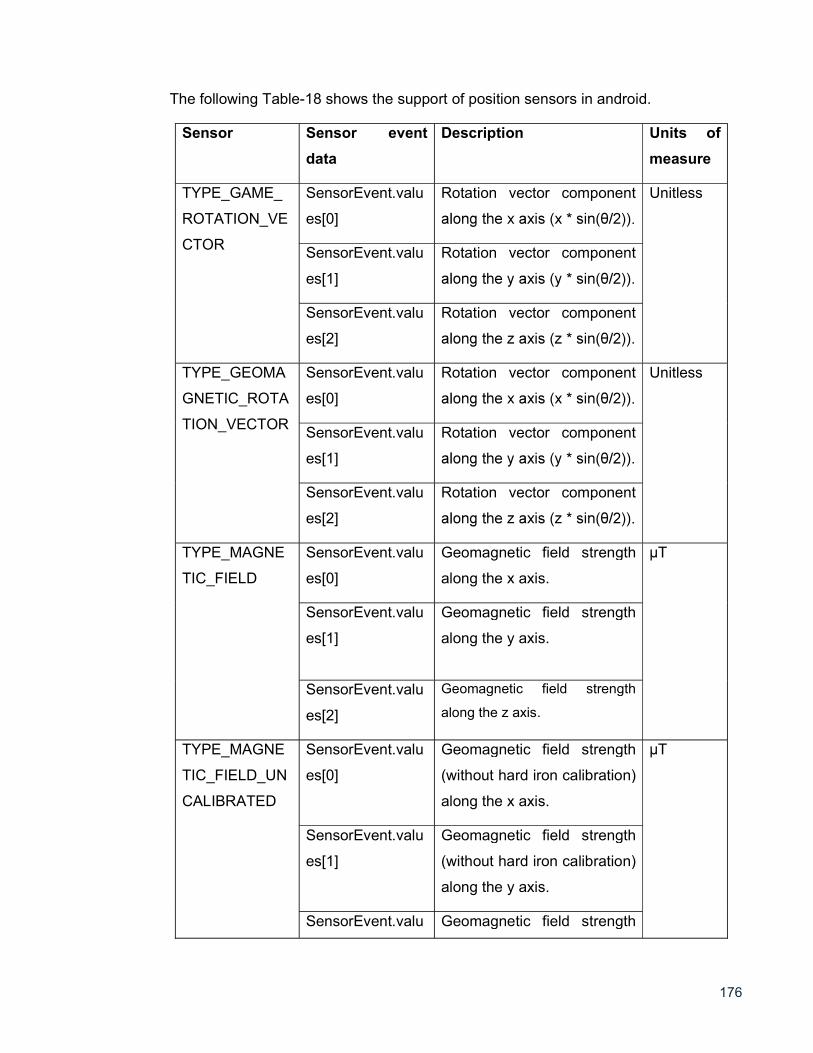
176
The following Table-18 shows the support of position sensors in android.
Sensor Sensor event
data
Description Units of
measure
TYPE_GAME_
ROTATION_VE
CTOR
SensorEvent.valu
es[0]
Rotation vector component
Unitless
SensorEvent.valu
es[1]
Rotation vector component
SensorEvent.valu
es[2]
Rotation vector component
TYPE_GEOMA
GNETIC_ROTA
TION_VECTOR
SensorEvent.valu
es[0]
Rotation vector component
Unitless
SensorEvent.valu
es[1]
Rotation vector component
SensorEvent.valu
es[2]
Rotation vector component
TYPE_MAGNE
TIC_FIELD
SensorEvent.valu
es[0]
Geomagnetic field strength
along the x axis.
SensorEvent.valu
es[1]
Geomagnetic field strength
along the y axis.
SensorEvent.valu
es[2]
Geomagnetic field strength
along the z axis.
TYPE_MAGNE
TIC_FIELD_UN
CALIBRATED
SensorEvent.valu
es[0]
Geomagnetic field strength
(without hard iron calibration)
along the x axis.
SensorEvent.valu
es[1]
Geomagnetic field strength
(without hard iron calibration)
along the y axis.
SensorEvent.valu Geomagnetic field strength
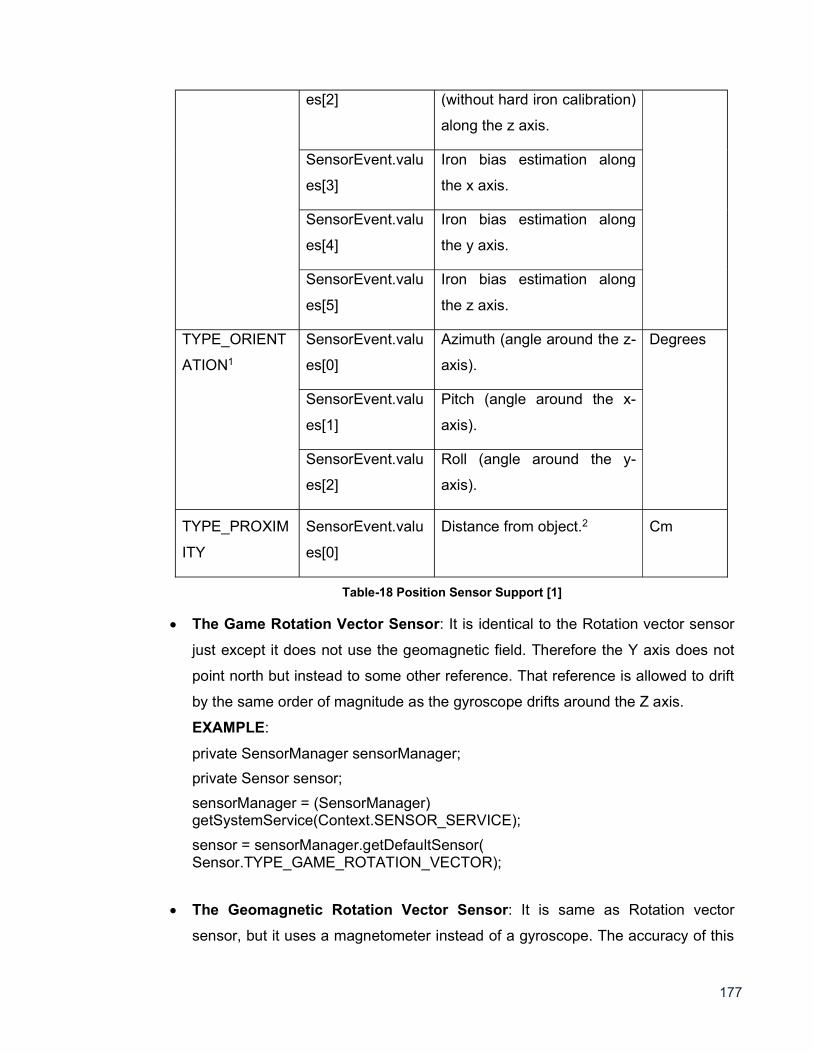
177
es[2] (without hard iron calibration)
along the z axis.
SensorEvent.valu
es[3]
Iron bias estimation along
the x axis.
SensorEvent.valu
es[4]
Iron bias estimation along
the y axis.
SensorEvent.valu
es[5]
Iron bias estimation along
the z axis.
TYPE_ORIENT
ATION1
SensorEvent.valu
es[0]
Azimuth (angle around the z-
axis).
Degrees
SensorEvent.valu
es[1]
Pitch (angle around the x-
axis).
SensorEvent.valu
es[2]
Roll (angle around the y-
axis).
TYPE_PROXIM
ITY
SensorEvent.valu
es[0]
Distance from object.2 Cm
Table-18 Position Sensor Support [1]
The Game Rotation Vector Sensor: It is identical to the Rotation vector sensor
just except it does not use the geomagnetic field. Therefore the Y axis does not
point north but instead to some other reference. That reference is allowed to drift
by the same order of magnitude as the gyroscope drifts around the Z axis.
EXAMPLE:
private SensorManager sensorManager;
private Sensor sensor;
sensorManager = (SensorManager) getSystemService(Context.SENSOR_SERVICE);
sensor = sensorManager.getDefaultSensor( Sensor.TYPE_GAME_ROTATION_VECTOR);
The Geomagnetic Rotation Vector Sensor: It is same as Rotation vector
sensor, but it uses a magnetometer instead of a gyroscope. The accuracy of this
178
sensor is lower than the normal rotation vector sensor, but the power
consumption is reduced. Only use this sensor if you want to collect some rotation
information in the background without draining too much battery. This sensor is
most useful when used in conjunction with batching.
EXAMPLE:
private SensorManager sensorManager;
private Sensor sensor;
sensorManager = (SensorManager) getSystemService(Context.SENSOR_SERVICE);
sensor = sensorManager.getDefaultSensor(Sensor.TYPE_GEOMAGNETIC_ROTATION_VECTOR);
The Geomagnetic Field Sensor: This sensor monitor changes in the earth's
magnetic field.
EXAMPLE:
private SensorManager sensorManager;
private Sensor sensor;
sensorManager = (SensorManager) getSystemService(Context.SENSOR_SERVICE);
sensor = sensorManager.getDefaultSensor(Sensor.TYPE_MAGNETIC_FIELD);
The Uncalibrated Magnetometer: It is same as the geomagnetic field sensor,
but it never apply the hard iron calibration to the magnetic field. Factory
calibration and temperature compensation are still applied to the magnetic field.
The uncalibrated magnetometer is useful to handle bad hard iron estimations.
EXAMPLE:
private SensorManager sensorManager;
private Sensor sensor;
sensorManager = (SensorManager) getSystemService(Context.SENSOR_SERVICE);
sensor = sensorManager.getDefaultSensor(Sensor.TYPE_MAGNETIC_FIELD_UNCALIBRATED);
179
The Proximity Sensor: The proximity sensor returns two value near or far the
object from device.
EXAMPLE:
private SensorManager sensorManager;
private Sensor sensor;
sensorManager = (SensorManager) getSystemService(Context.SENSOR_SERVICE);
sensor = sensorManager.getDefaultSensor(Sensor.TYPE_PROXIMITY);
Device Orientation Calculation
There are three types of orientation is available: Azimuth (degrees of rotation
about the -z axis), Pitch (degrees of rotation about the x axis) and Roll (degrees
of rotation about the y axis).
EXAMPLE:
private SensorManager sensorManager;
// Rotation matrix based on current readings from accelerometer and magnetometer.
final float[] rotationMatrix = new float[9];
SensorManager.getRotationMatrix(rotationMatrix, null,
accelerometerReading, magnetometerReading);
// Express the updated rotation matrix as three orientation angles.
final float[] orientationAngles = new float[3];
SensorManager.getOrientation(rotationMatrix, orientationAngles);
1.6 ENVIRONMENTAL SENSORS
The sensor framework of android supports four types of sensor that monitor
environmental properties like relative ambient humidity, illuminance, ambient
pressure, and ambient temperature. These all sensors are hardware-based. With the
exception of the light sensor, it use to control screen brightness, environment
sensors are not always available on devices. So it is important to verify before use it
in programming.
Sensor Sensor event
data
Units of
measure
Data description
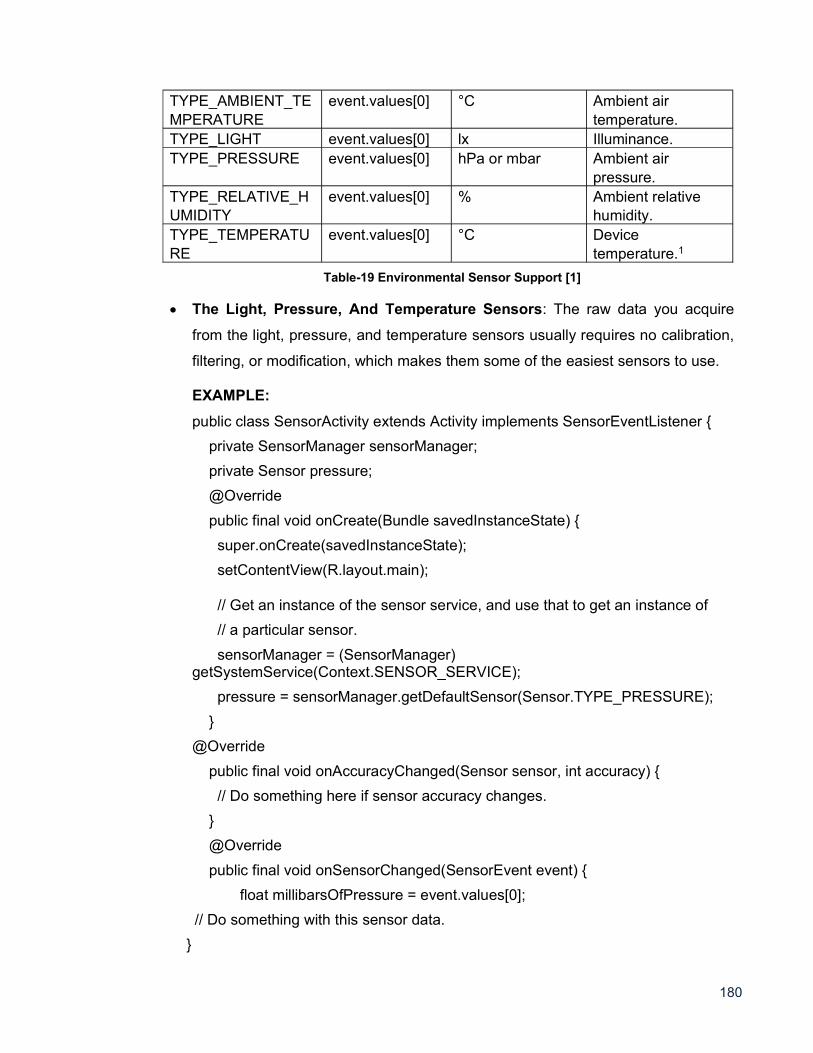
180
TYPE_AMBIENT_TEMPERATURE
event.values[0] °C Ambient air temperature.
TYPE_LIGHT event.values[0] lx Illuminance. TYPE_PRESSURE event.values[0] hPa or mbar Ambient air
pressure. TYPE_RELATIVE_HUMIDITY
event.values[0] % Ambient relative humidity.
TYPE_TEMPERATURE
event.values[0] °C Device temperature.1
Table-19 Environmental Sensor Support [1]
The Light, Pressure, And Temperature Sensors: The raw data you acquire
from the light, pressure, and temperature sensors usually requires no calibration,
filtering, or modification, which makes them some of the easiest sensors to use.
EXAMPLE:
public class SensorActivity extends Activity implements SensorEventListener {
private SensorManager sensorManager;
private Sensor pressure;
@Override
public final void onCreate(Bundle savedInstanceState) {
super.onCreate(savedInstanceState);
setContentView(R.layout.main);
// Get an instance of the sensor service, and use that to get an instance of
// a particular sensor.
sensorManager = (SensorManager) getSystemService(Context.SENSOR_SERVICE);
pressure = sensorManager.getDefaultSensor(Sensor.TYPE_PRESSURE);
}
@Override
public final void onAccuracyChanged(Sensor sensor, int accuracy) {
// Do something here if sensor accuracy changes.
}
@Override
public final void onSensorChanged(SensorEvent event) {
float millibarsOfPressure = event.values[0];
// Do something with this sensor data.
}
181
@Override
protected void onResume() {
// Register a listener for the sensor.
super.onResume();
sensorManager.registerListener(this, pressure, SensorManager.SENSOR_DELAY_NORMAL);
}
@Override
protected void onPause() {
// Be sure to unregister the sensor when the activity pauses.
super.onPause();
sensorManager.unregisterListener(this);
}
}
1.7 LET US SUM UP
This chapter focus on the different types of sensor support in android device. It also
helps to utilize the sensor capability through programming in android.
1.8 CHECK YOUR PROGRESS
Discuss in brief:
1. What is Sensor? Explain android.hardware package in detail.
2. How to identify the sensors and its services supported in android device?
3. Explain Motion Sensors in details.
4. What is Position Sensor? Explain in detail.
5. What is the use of Environmental Sensor? Discuss in detail.
Fill in the blanks.
1. ____________ is responsible for sensor administrations.
2. ____________ method is used to instantiate the SensorManager class.
3. ____________ method is used to get the information regarding sensor
information changed.
4. The _____________ and ____________ sensors are always hardware-
based.
182
5. ___________________ sensor supports a three dimensional vector for
indication of the direction and magnitude of gravity.
6. ___________________ sensor characterizes the orientation of the device as
a combination of an angle and an axis.
7. ___________________ sensor determine how close the face of a device is
to an object and give binary value like near or far.
8. ___________________ environment based sensor is not hardware based.
MCQ:
1. Gravity Sensor is Hardware based or software based?
A. Hardware
B. Software
C. Hardware or Software
D. None
2. The default data delay is suitable for monitoring typical screen orientation
changes and uses a delay of ------------- microseconds.
A. 200,000
B. 20000
C. 2000
D. none
1.9 CHECK YOUR PROGRESS: POSSIBLE ANSWERS
Discuss in brief:
1. Refer 1.2 in block 4.
2. Refer 1.3 in block 4.
3. Refer 1.4 in block 4.
4. Refer 1.6 in block 4.
5. Refer 1.5 in block 4.
Fill in the blanks.
1. SensorManager.
2. getSystemService().
183
3. onSensorChanged() OR onAcuracyChanged().
4. accelerometer , gyroscope.
5. gravity.
6. Rotation Vector.
7. Proximity.
8. Light.
MCQ:
1. C
2. A
1.10 FURTHER READING
The chapter provides the brief knowledge regarding sensor based application
development in android. For gaining detail view refer the Sensors Details(
https://developer.android.com/guide/topics/sensors).
1.11 ASSIGNMENT
Perform the following practice as programming point of view.
1. Create simple application for sensor identification of current device.
2. Create android application for giving the message if any raw information or
accuracy based changes on sensor.
1.12 ACTIVITIES
Study the sensors support in android in detail.

184
Unit 2: NFC
Unit Structure 2.1 Learning Objectives
2.2 Introduction
2.3 How NFC Work?
2.4 NFC VS Bluetooth
2.5 The Tag Dispatch System
2.6 Let us sum up
2.7 Check your Progress
2.8 Check your Progress: Possible Answers
2.9 Further Reading
2.10 Assignments
2.11 Activities
2
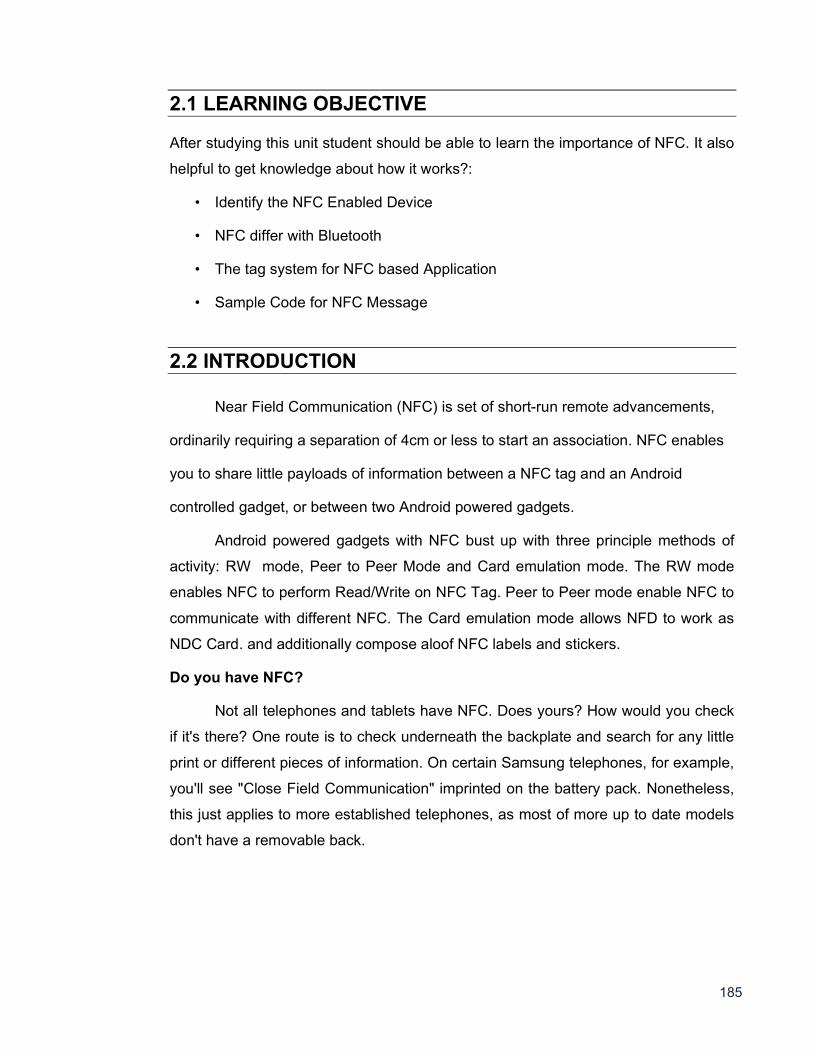
185
2.1 LEARNING OBJECTIVE After studying this unit student should be able to learn the importance of NFC. It also
helpful to get knowledge about how it works?:
Identify the NFC Enabled Device
NFC differ with Bluetooth
The tag system for NFC based Application
Sample Code for NFC Message
2.2 INTRODUCTION
Near Field Communication (NFC) is set of short-run remote advancements,
ordinarily requiring a separation of 4cm or less to start an association. NFC enables
you to share little payloads of information between a NFC tag and an Android
controlled gadget, or between two Android powered gadgets.
Android powered gadgets with NFC bust up with three principle methods of
activity: RW mode, Peer to Peer Mode and Card emulation mode. The RW mode
enables NFC to perform Read/Write on NFC Tag. Peer to Peer mode enable NFC to
communicate with different NFC. The Card emulation mode allows NFD to work as
NDC Card. and additionally compose aloof NFC labels and stickers.
Do you have NFC?
Not all telephones and tablets have NFC. Does yours? How would you check
if it's there? One route is to check underneath the backplate and search for any little
print or different pieces of information. On certain Samsung telephones, for example,
you'll see "Close Field Communication" imprinted on the battery pack. Nonetheless,
this just applies to more established telephones, as most of more up to date models
don't have a removable back.
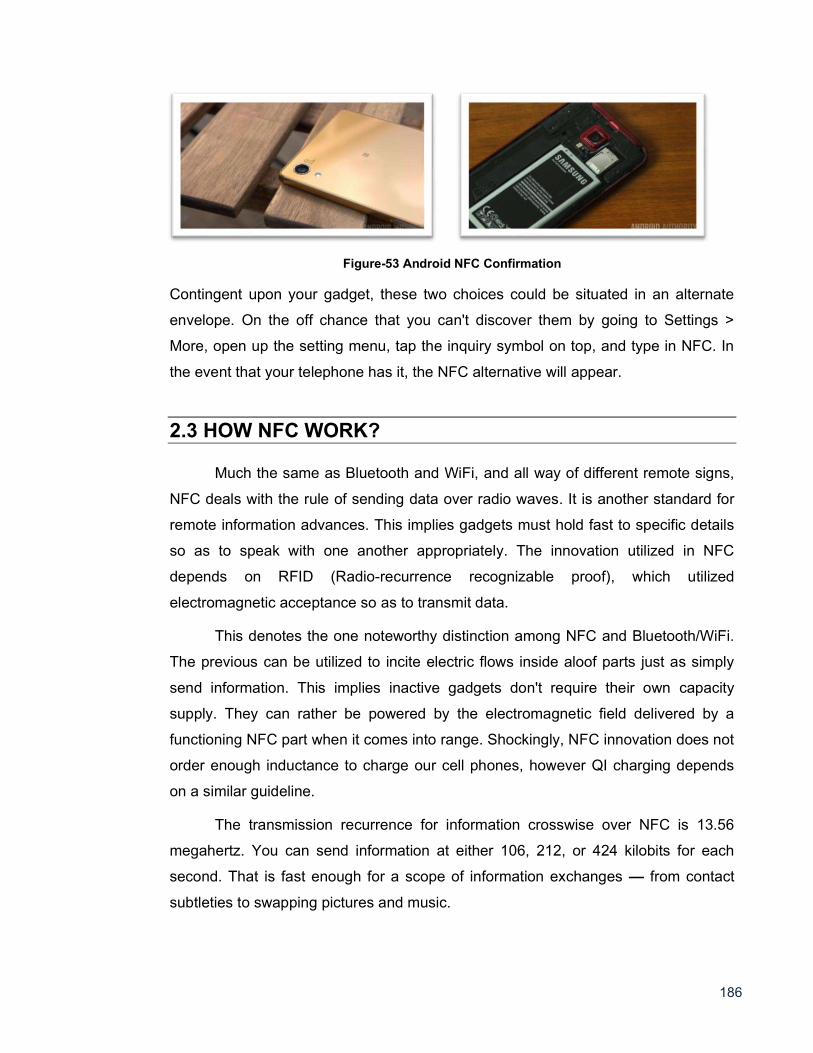
186
Figure-53 Android NFC Confirmation
Contingent upon your gadget, these two choices could be situated in an alternate
envelope. On the off chance that you can't discover them by going to Settings >
More, open up the setting menu, tap the inquiry symbol on top, and type in NFC. In
the event that your telephone has it, the NFC alternative will appear.
2.3 HOW NFC WORK?
Much the same as Bluetooth and WiFi, and all way of different remote signs,
NFC deals with the rule of sending data over radio waves. It is another standard for
remote information advances. This implies gadgets must hold fast to specific details
so as to speak with one another appropriately. The innovation utilized in NFC
depends on RFID (Radio-recurrence recognizable proof), which utilized
electromagnetic acceptance so as to transmit data.
This denotes the one noteworthy distinction among NFC and Bluetooth/WiFi.
The previous can be utilized to incite electric flows inside aloof parts just as simply
send information. This implies inactive gadgets don't require their own capacity
supply. They can rather be powered by the electromagnetic field delivered by a
functioning NFC part when it comes into range. Shockingly, NFC innovation does not
order enough inductance to charge our cell phones, however QI charging depends
on a similar guideline.
The transmission recurrence for information crosswise over NFC is 13.56
megahertz. You can send information at either 106, 212, or 424 kilobits for each
second. That is fast enough for a scope of information exchanges from contact
subtleties to swapping pictures and music.
187
To figure out what kind of data will be traded between gadgets, the NFC
standard right now has three particular methods of activity. Maybe the most widely
recognized use in cell phones is the distributed mode. This permits two NFC-
empowered gadgets to trade different snippets of data between one another. In this
mode the two gadgets switch between dynamic when sending information and
detached while accepting.
RW mode, then again, is a single direction information transmission. The
dynamic gadget, conceivably your cell phone, interfaces up with another gadget so
as to peruse data from it. NFC advert labels utilize this mode. The last method of
activity is card imitating. The NFC gadget can work as an intensive or contactless
entry permit which permit open data transmission with NFC tag using self protocol
stack.
2.4 NFC VS BLUETOOTH
Bluetooth and NFC share a few highlights, both being types of remote
communication between gadgets over short distance. NFC is constrained to a
distance of around 4CM while Bluetooth can reach more than 30FT. While it
might appear that Bluetooth is prevalent in such manner.
NFC innovation consumes little power when contrasted with Bluetooth.
The device which has Close proximity connected through NFC must be useful in
crowded locations to prevent interference caused when other devices are present
and trying to communicate. Bluetooth may have trouble dealing with interference
when trying to send signals between two devices, especially when several other
devices are in close proximity.
Another advantage of NFC innovation comes in its convenience. Bluetooth
expects clients to physically set up associations among cell phones and takes a
few seconds. NFC interfaces consequently in a small amount of a second, so
quick it appears to be prompt. In spite of the fact that the clients must be near
each other to utilize NFC innovation, it is quicker and simpler to set up than a
Bluetooth association.
Bluetooth does at present offer a more extended signals associating for
communication and exchanges. NFC innovation has exploited this and can
188
associate two gadgets immediately, at that point turn the signals over to
Bluetooth so the administrator can move further away without separating the
association.
The most recent advancement in Bluetooth innovation, Bluetooth Low Energy
(BLE), is focused at low power utilization and uses even less power than NFC. As
the innovation expands, Bluetooth and NFC innovation may keep on cooperating,
depending on one another to enable clients to meet their information
transmission needs.
The Android framework API supports these features so for more advances, including
a discussion of working with non-NDEF data have two major use cases when
working with NDEF data in Android:
Reading NDEF data from an NFC tag [Handled with handled with the tag
dispatch system]
Beaming NDEF messages from one device to another with Android Beam
2.5 THE TAG DISPATCH SYSTEM
Android provides a special tag dispatch system that analyzes scanned NFC tags,
parses them, and tries to locate applications that are interested in the scanned data.
It does this by:
Parsng the NFC tag and figuring out the MIME type or a URI that identifies the
data payload in the tag.
Encapsulating the MIME type or URI and the payload into intent.
Starts an activity based on the intent
NDEF message
3-bit TNF (Type Name Format): Indicates how to interpret the variable length type
field.
Type Name Format
(TNF)
Mapping
TNF_ABSOLUTE_URI URI based on the type field.
TNF_EMPTY Falls back to ACTION_TECH_DISCOVERED.
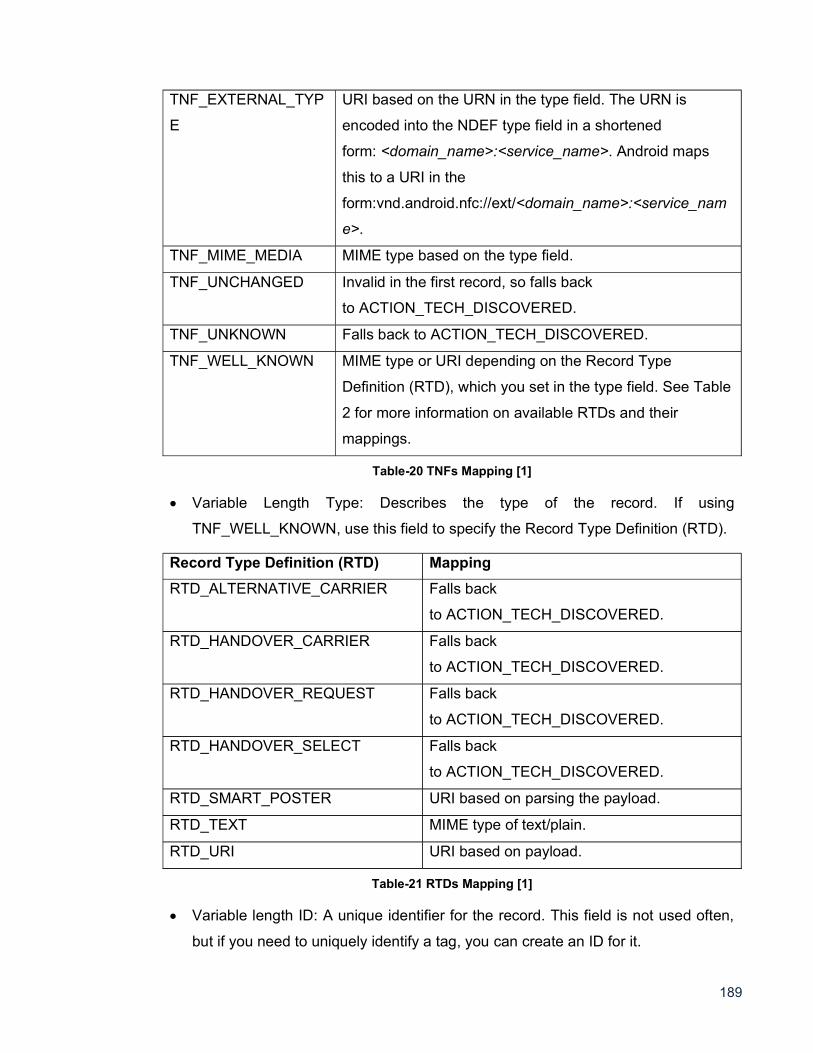
189
TNF_EXTERNAL_TYP
E
URI based on the URN in the type field. The URN is
encoded into the NDEF type field in a shortened
form: <domain_name>:<service_name>. Android maps
this to a URI in the
form:vnd.android.nfc://ext/<domain_name>:<service_nam
e>.
TNF_MIME_MEDIA MIME type based on the type field.
TNF_UNCHANGED Invalid in the first record, so falls back
to ACTION_TECH_DISCOVERED.
TNF_UNKNOWN Falls back to ACTION_TECH_DISCOVERED.
TNF_WELL_KNOWN MIME type or URI depending on the Record Type
Definition (RTD), which you set in the type field. See Table
2 for more information on available RTDs and their
mappings.
Table-20 TNFs Mapping [1]
Variable Length Type: Describes the type of the record. If using
TNF_WELL_KNOWN, use this field to specify the Record Type Definition (RTD).
Record Type Definition (RTD) Mapping
RTD_ALTERNATIVE_CARRIER Falls back
to ACTION_TECH_DISCOVERED.
RTD_HANDOVER_CARRIER Falls back
to ACTION_TECH_DISCOVERED.
RTD_HANDOVER_REQUEST Falls back
to ACTION_TECH_DISCOVERED.
RTD_HANDOVER_SELECT Falls back
to ACTION_TECH_DISCOVERED.
RTD_SMART_POSTER URI based on parsing the payload.
RTD_TEXT MIME type of text/plain.
RTD_URI URI based on payload.
Table-21 RTDs Mapping [1]
Variable length ID: A unique identifier for the record. This field is not used often,
but if you need to uniquely identify a tag, you can create an ID for it.
190
Variable length payload The actual data payload that you want to read or write.
An NDEF message can contain multiple NDEF records, so don't assume the full
payload is in the first NDEF record of the NDEF message.
NFC access in the Android manifest
<uses-permission android:name="android.permission.NFC" />
<uses-sdk android:minSdkVersion="10"/>
<uses-feature android:name="android.hardware.nfc" android:required="true" />
Filter for NFC intents
To begin your application when a NFC label that you need to deal with is examined,
your application can channel for one, two, or every one of the three of the NFC
intents. Be that as it may, you more often desire to channel for the
ACTION_NDEF_`DISCOVERED for the most control of when your application
begins. The ACTION_TECH_DISCOVERED intent is a fallback for
ACTION_NDEF_DISCOVERED when no applications channel for
ACTION_NDEF_DISCOVERED or for when the payload isn't NDEF. Filtering for
ACTION_TAG_DISCOVERED is typically excessively broad of a classification to
channel on. Numerous applications will channel for ACTION_NDEF_DISCOVERED
or ACTION_TECH_DISCOVERED before ACTION_TAG_DISCOVERED, so your
application has a low likelihood of beginning. ACTION_TAG_DISCOVERED is just
accessible if all else fails for applications to channel for in the situations where no
different applications are introduced to deal with the ACTION_NDEF_DISCOVERED
or ACTION_TECH_DISCOVERED goal.
ACTION_NDEF_DISCOVERED
<intent-filter>
<action android:name="android.nfc.action.NDEF_DISCOVERED"/>
<category android:name="android.intent.category.DEFAULT"/>
<data android:mimeType="text/plain" />
</intent-filter>
EXAMPLE:
191
The following example filters for a URI in the form of http://baou.edu.in/index.html.
<intent-filter>
<action android:name="android.nfc.action.NDEF_DISCOVERED"/>
<category android:name="android.intent.category.DEFAULT"/>
<data android:scheme="http"
android:host=" baou.edu.in "
android:pathPrefix="/index.html" />
</intent-filter>
ACTION_TECH_DISCOVERED
The following sample defines all of the technologies. You can remove the ones that
you do not need. Save this file (you can name it anything you wish) in the <project-
root>/res/xml folder.
<resources xmlns:xliff="urn:oasis:names:tc:xliff:document:1.2">
<tech-list>
<tech>android.nfc.tech.IsoDep</tech>
<tech>android.nfc.tech.NfcA</tech>
<tech>android.nfc.tech.NfcB</tech>
<tech>android.nfc.tech.NfcF</tech>
<tech>android.nfc.tech.NfcV</tech>
<tech>android.nfc.tech.Ndef</tech>
<tech>android.nfc.tech.NdefFormatable</tech>
<tech>android.nfc.tech.MifareClassic</tech>
<tech>android.nfc.tech.MifareUltralight</tech>
</tech-list>
</resources>
In AndroidManifest.xml file, specify the resource file that you just created in the
<meta-data> element inside the <activity> element like in the following example:
<activity>
...
<intent-filter>
<action android:name="android.nfc.action.TECH_DISCOVERED"/>
</intent-filter>
192
<meta-data android:name="android.nfc.action.TECH_DISCOVERED"
android:resource="@xml/nfc_tech_filter" />
...
</activity>
ACTION_TAG_DISCOVERED
To filter for ACTION_TAG_DISCOVERED use the following intent filter:
<intent-filter>
<action android:name="android.nfc.action.TAG_DISCOVERED"/>
</intent-filter>
Intents can contain the following extras depending on the tag that was scanned:
EXTRA_TAG (required): A Tag object representing the scanned tag.
EXTRA_NDEF_MESSAGES (optional): An array of NDEF messages parsed
from the tag. This extra is mandatory on ACTION_NDEF_DISCOVERED
intents.
EXTRA_ID (optional): The low-level ID of the tag.
2.6 LET US SUM UP
This chapter focus on NFC feature in detail. NFC is one of the advance technology
supported in devices. So this chapter gives information about the working
mechanism of NFC, identification of NFC enabled device and NDEF messaging
system. It also gives information regarding the features and advances in NFC than
Bluetooth.
2.7 CHECK YOUR PROGRESS
Discuss in brief:
1. Differentiate NFC VS Bluetooth.
2. Discuss NDEF message in detail.
3. Explain Tag Dispatch System.
193
Fill in the blanks.
1. NFC stands for _____________________________.
2. The transmission recurrence for information crosswise over NFC is _______
megahertz.
3. NFC is constrained to a distance of around ___ CM.
4. BLE stands for ____________________________.
5. ____________________ permission require for accessing NFC.
MCQ:
1. NDEF stands for:
A. NFC Data Exchange Format
B. NFC Data Exchange Field
C. Near Data Exchange Format
D. NFC Data Enable Format
2. Which mode of NFC allows Read or/and write to NFC tag?
A. RW mode
B. Peer to Peer Mode
C. Card Emulation Mode
D. All above
2.8 CHECK YOUR PROGRESS: POSSIBLE ANSWERS
Discuss in brief:
1. Refer 2.3 in block 4.
2. Refer 2.4 in block 4.
3. Refer 2.5 in block 4.
Fill in the blanks.
1. Near Field Communication.
2. 13.56 megahertz.
3. 4 CM.
4. Bluetooth Low Energy.
5. android.permission.NFC.
194
MCQ:
1. A
2. A
2.9 FURTHER READING
This chapter gives information and practically implementation of NDEF message. For
further more details refer NFC Detail
(https://developer.android.com/guide/topics/connectivity/nfc/).
2.10 ASSIGNMENT
1. Create android application to generate NDEF sample message.
2.11 ACTIVITIES
Study NDF in brief.
195
Unit 3: Speech, Gestures And Accessibility
Unit Structure 3.1 Learning Objectives
3.2 Introduction
3.3 Speech Recognizer
3.4 Gesture Recognizer
3.5 Accessibility
3.6 Let us sum up
3.7 Check your Progress
3.8 Check your Progress: Possible Answers
3.9 Further Reading
3.10 Assignments
3.11 Activities
3
196
3.1 LEARNING OBJECTIVES This chapter is focus on the mobility options. It also focuses on other device
specification oriented feature utilisation based application development. By this
chapter following should be understand easily.
Use of Speech Recognition and develop simple speech to text application
Learn common gestures, identification of gestures
Perform the task related to gestures.
Achieve the more usage of android application using accessibility feature
3.2 INTRODUCTION
The Speech to Text type applications and settings supports options for the
scalable app development, which TalkBack uses in recently Google app. The
Gesture Recognition is supported by android in different types of common gesture
recognition. Magnification gestures support the user to magnify portions of the
screen by tapping three times. Font and display-size settings can be used to enlarge
the default system text or all app elements. The Accessibility is also support the
versatile app development. It enables the usage of the application.
3.3 SPEECH RECOGNIZER
The android provides the facility to convert speech to text using
SpeechRecognizer class. The object of this class cannot be created directly instead
of it just call the method to create the object by following way.
SpeechRecognizer mSpeechRecognizer = SpeechRecognizer.createSpeechRecognizer(Context).
This API is not much useful for continuous speech stream recognition
because it consume a lot amount of battery and bandwidth. To use this feature
android require to get the permission in manifest file as stated below.
<uses-permission android:name="android.permission.RECORD_AUDIO" />
197
3.4 GESTURE RECOGNIZER
A "touch motion" happens when a client places at least one fingers on the
touch screen, and your application recognize that as touch as a specific gesture.
There are correspondingly two stages to motion identification:
Assemble information about touch events. Check the information for it meets
the criteria for any of the motions your application supports.
We know the listener for gesture recognition. the GestureDetectorCompat and
MotionEventCompat classes are in the Support Library. Support Library classes
where conceivable to give similarity gadgets running Android 1.6 and higher.
The onTouchEvent() on the View that got the touch listener. For each
arrangement of touch listener (position, size, estimate, expansion of another finger,
and so forth.) that is at last recognized as a signal, onTouchEvent() is terminated a
few times.The signal begins when the client first contacts the screen, proceeds as
the framework tracks the situation of the client's finger(s), and finishes by catching
the last call of the client's fingers leaving the screen.
All through this cooperation, the MotionEvent conveyed to onTouchEvent()
gives the subtleties of each communication. Your application can utilize the
information given by the MotionEvent to decide whether a motion it thinks about
occurred.
EXAMPLE:
Create touch event for Activity
For this override the onTouchEvent() Method with MotionEvent. Use the
getActionMasked() to extract the action which is user performed from the event
parameter.
public class MainActivity extends Activity {
...
// This example shows an Activity, but you would use the same approach if
// you were subclassing a View.
@Override
public boolean onTouchEvent(MotionEvent event){
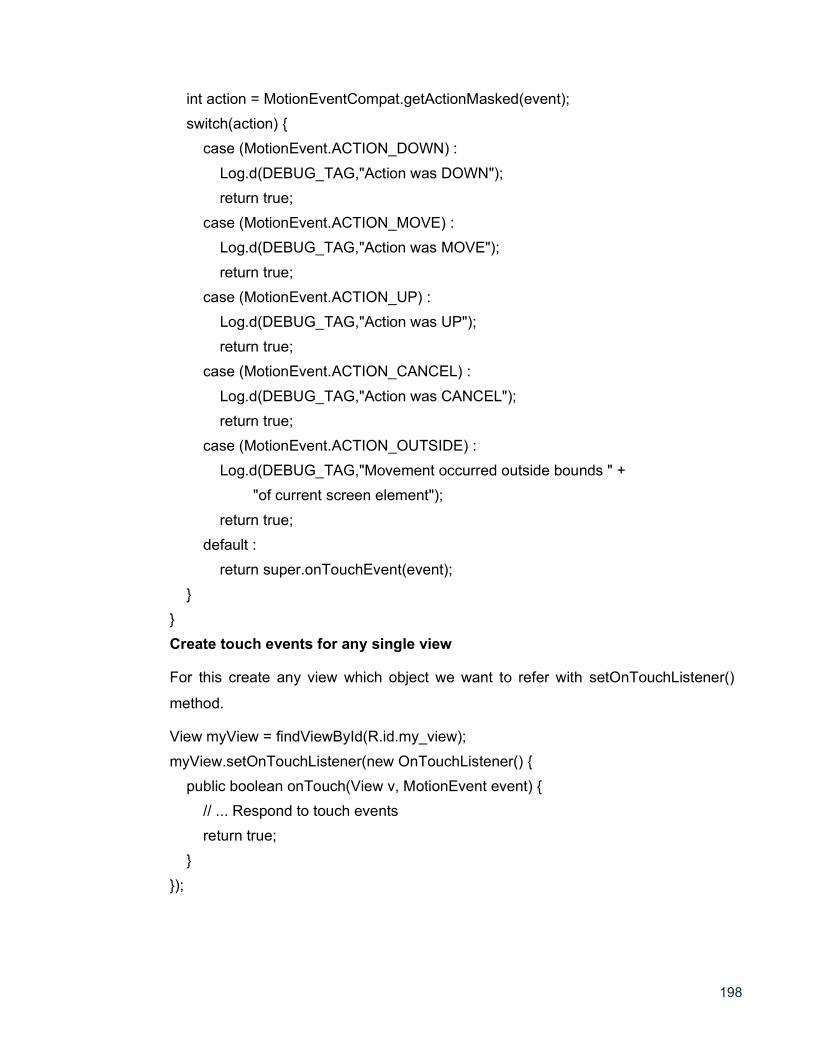
198
int action = MotionEventCompat.getActionMasked(event);
switch(action) {
case (MotionEvent.ACTION_DOWN) :
Log.d(DEBUG_TAG,"Action was DOWN");
return true;
case (MotionEvent.ACTION_MOVE) :
Log.d(DEBUG_TAG,"Action was MOVE");
return true;
case (MotionEvent.ACTION_UP) :
Log.d(DEBUG_TAG,"Action was UP");
return true;
case (MotionEvent.ACTION_CANCEL) :
Log.d(DEBUG_TAG,"Action was CANCEL");
return true;
case (MotionEvent.ACTION_OUTSIDE) :
Log.d(DEBUG_TAG,"Movement occurred outside bounds " +
"of current screen element");
return true;
default :
return super.onTouchEvent(event);
}
}
Create touch events for any single view
For this create any view which object we want to refer with setOnTouchListener()
method.
View myView = findViewById(R.id.my_view);
myView.setOnTouchListener(new OnTouchListener() {
public boolean onTouch(View v, MotionEvent event) {
// ... Respond to touch events
return true;
}
});
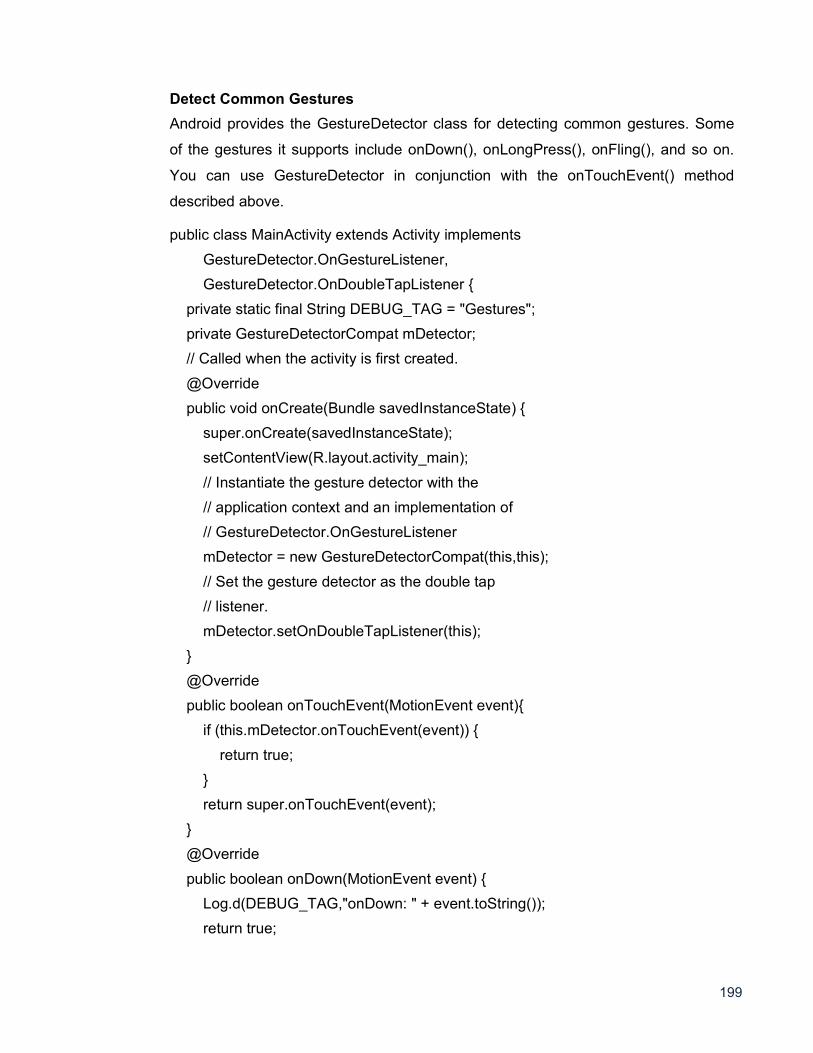
199
Detect Common Gestures
Android provides the GestureDetector class for detecting common gestures. Some
of the gestures it supports include onDown(), onLongPress(), onFling(), and so on.
You can use GestureDetector in conjunction with the onTouchEvent() method
described above.
public class MainActivity extends Activity implements
GestureDetector.OnGestureListener,
GestureDetector.OnDoubleTapListener {
private static final String DEBUG_TAG = "Gestures";
private GestureDetectorCompat mDetector;
// Called when the activity is first created.
@Override
public void onCreate(Bundle savedInstanceState) {
super.onCreate(savedInstanceState);
setContentView(R.layout.activity_main);
// Instantiate the gesture detector with the
// application context and an implementation of
// GestureDetector.OnGestureListener
mDetector = new GestureDetectorCompat(this,this);
// Set the gesture detector as the double tap
// listener.
mDetector.setOnDoubleTapListener(this);
}
@Override
public boolean onTouchEvent(MotionEvent event){
if (this.mDetector.onTouchEvent(event)) {
return true;
}
return super.onTouchEvent(event);
}
@Override
public boolean onDown(MotionEvent event) {
Log.d(DEBUG_TAG,"onDown: " + event.toString());
return true;
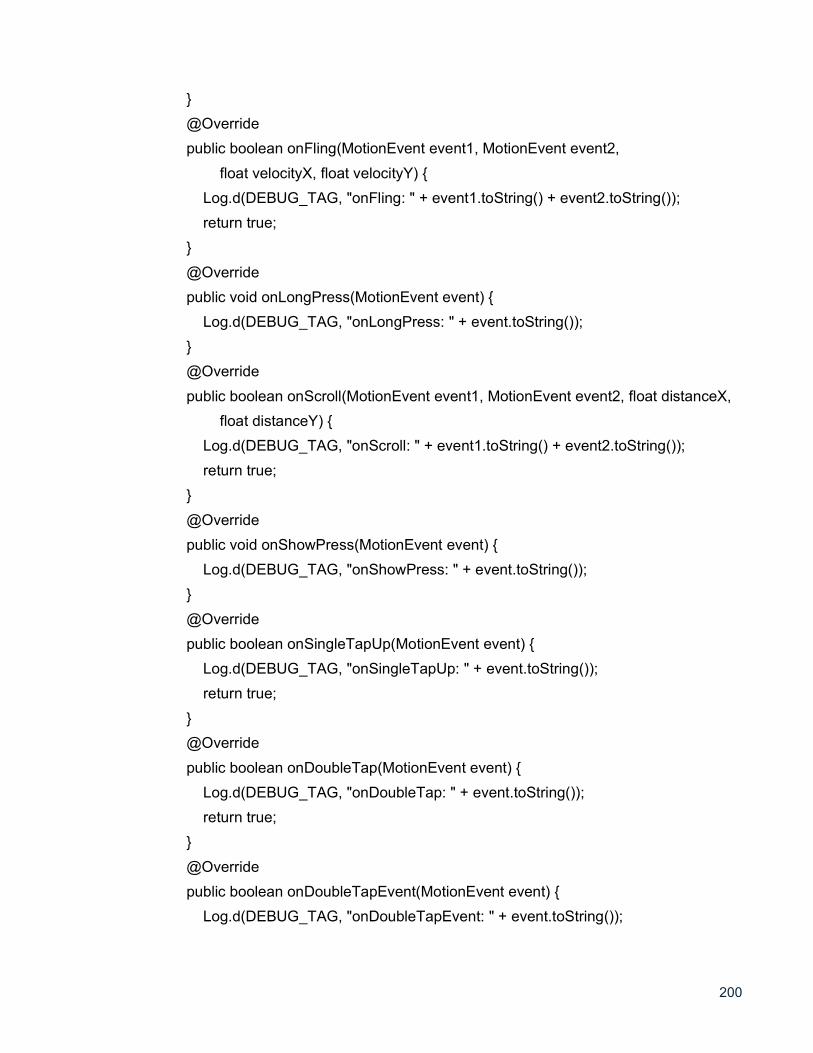
200
}
@Override
public boolean onFling(MotionEvent event1, MotionEvent event2,
float velocityX, float velocityY) {
Log.d(DEBUG_TAG, "onFling: " + event1.toString() + event2.toString());
return true;
}
@Override
public void onLongPress(MotionEvent event) {
Log.d(DEBUG_TAG, "onLongPress: " + event.toString());
}
@Override
public boolean onScroll(MotionEvent event1, MotionEvent event2, float distanceX,
float distanceY) {
Log.d(DEBUG_TAG, "onScroll: " + event1.toString() + event2.toString());
return true;
}
@Override
public void onShowPress(MotionEvent event) {
Log.d(DEBUG_TAG, "onShowPress: " + event.toString());
}
@Override
public boolean onSingleTapUp(MotionEvent event) {
Log.d(DEBUG_TAG, "onSingleTapUp: " + event.toString());
return true;
}
@Override
public boolean onDoubleTap(MotionEvent event) {
Log.d(DEBUG_TAG, "onDoubleTap: " + event.toString());
return true;
}
@Override
public boolean onDoubleTapEvent(MotionEvent event) {
Log.d(DEBUG_TAG, "onDoubleTapEvent: " + event.toString());

201
return true;
}
@Override
public boolean onSingleTapConfirmed(MotionEvent event) {
Log.d(DEBUG_TAG, "onSingleTapConfirmed: " + event.toString());
return true;
}
}
3.5 ACCESSIBILITY The accessibility features are supported in Android Studio 2.2 and higher. This features
generally used for device customization which improves applications usage and versatility.
The Android Accessibility Feature Set
Spoken analysis: The TalkBack work enables the client to collaborate with their
gadget utilizing contact and spoken input. The TalkBack monitor every client
activity and gives spoken alarms and warnings.
Select to speak Select as far as possible the verbally expressed input capacity to
just client chose things on the screen, perusing or portraying them so anyone
might hear.
Switch access For clients with constrained versatility, Switch Access gives an
option in contrast to the touchscreen. This empowers the client to rather utilize a
switch, console, or mouse.
Voice directions If utilizing a touchscreen is troublesome, the Voice Access
application enables clients to control their gadget utilizing spoken directions. This
component can be utilized to open applications, explore, and alter writings hands
free. Voice Access is at present just accessible as a beta discharge in English as
it were.
BrailleBack: The BrailleBack highlight enables individuals to interface a
refreshable braille show to an Android gadget through Bluetooth. BrailleBack can
likewise be coordinated with TalkBack for a consolidated discourse and braille
understanding.
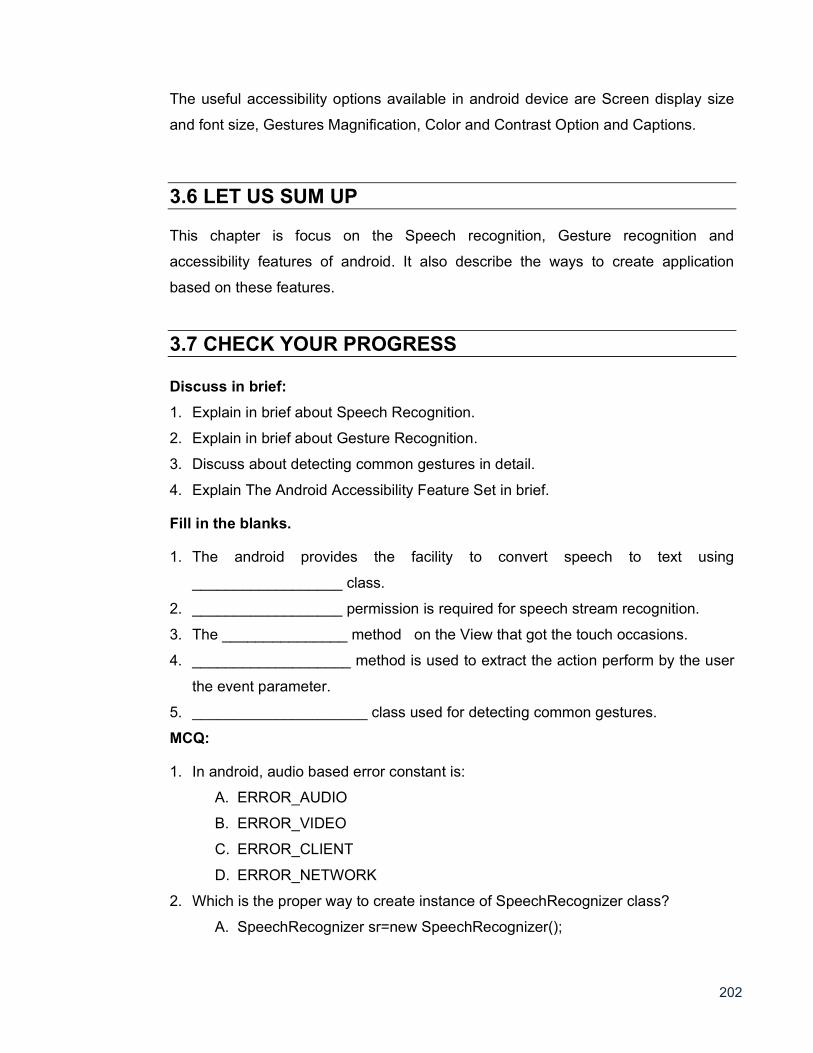
202
The useful accessibility options available in android device are Screen display size
and font size, Gestures Magnification, Color and Contrast Option and Captions.
3.6 LET US SUM UP
This chapter is focus on the Speech recognition, Gesture recognition and
accessibility features of android. It also describe the ways to create application
based on these features.
3.7 CHECK YOUR PROGRESS
Discuss in brief:
1. Explain in brief about Speech Recognition.
2. Explain in brief about Gesture Recognition.
3. Discuss about detecting common gestures in detail.
4. Explain The Android Accessibility Feature Set in brief.
Fill in the blanks.
1. The android provides the facility to convert speech to text using
__________________ class.
2. __________________ permission is required for speech stream recognition.
3. The _______________ method on the View that got the touch occasions.
4. ___________________ method is used to extract the action perform by the user
the event parameter.
5. _____________________ class used for detecting common gestures.
MCQ:
1. In android, audio based error constant is:
A. ERROR_AUDIO
B. ERROR_VIDEO
C. ERROR_CLIENT
D. ERROR_NETWORK
2. Which is the proper way to create instance of SpeechRecognizer class?
A. SpeechRecognizer sr=new SpeechRecognizer();
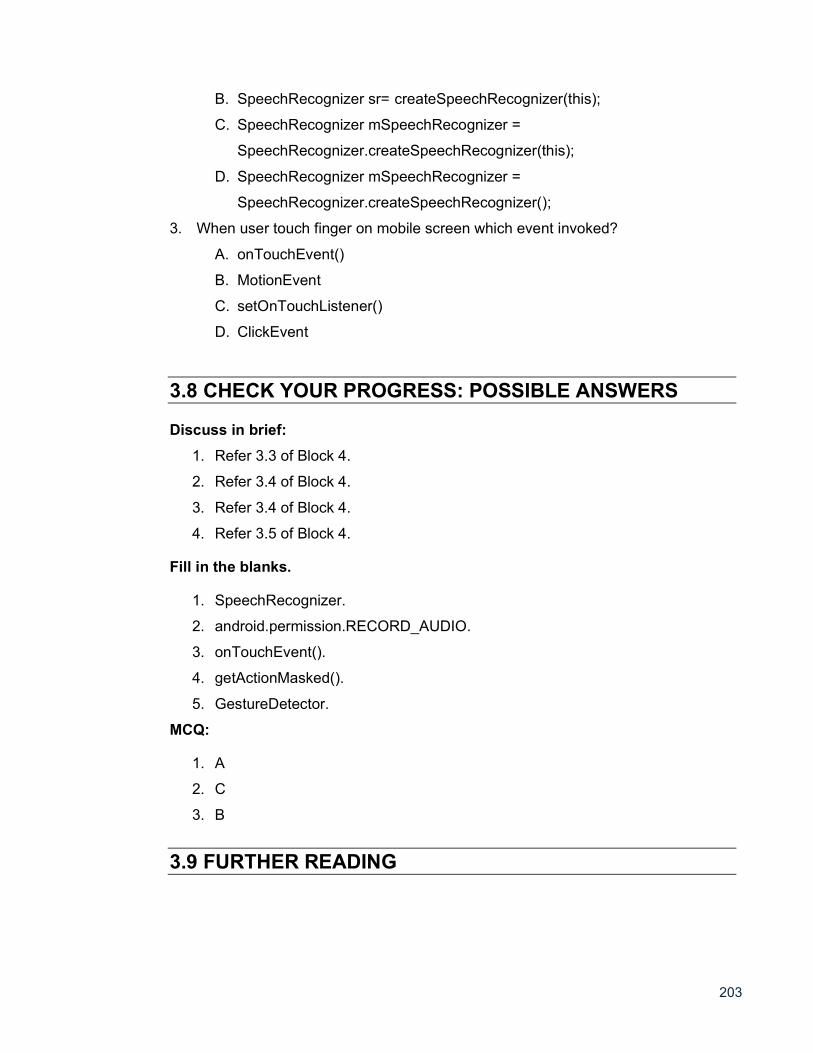
203
B. SpeechRecognizer sr= createSpeechRecognizer(this);
C. SpeechRecognizer mSpeechRecognizer =
SpeechRecognizer.createSpeechRecognizer(this);
D. SpeechRecognizer mSpeechRecognizer =
SpeechRecognizer.createSpeechRecognizer();
3. When user touch finger on mobile screen which event invoked?
A. onTouchEvent()
B. MotionEvent
C. setOnTouchListener()
D. ClickEvent
3.8 CHECK YOUR PROGRESS: POSSIBLE ANSWERS Discuss in brief:
1. Refer 3.3 of Block 4.
2. Refer 3.4 of Block 4.
3. Refer 3.4 of Block 4.
4. Refer 3.5 of Block 4.
Fill in the blanks.
1. SpeechRecognizer.
2. android.permission.RECORD_AUDIO.
3. onTouchEvent().
4. getActionMasked().
5. GestureDetector.
MCQ:
1. A
2. C
3. B
3.9 FURTHER READING
204
This chapter focus on different device based features utilization in application using
Speech, Gesture and accessibility. For detail study refer link
(https://developer.android.com/).
3.10 ASSIGNMENTS
1. Create android application for Speech to Text conversion. Take text using
speech input method and make it reverse.
2. Create android application to recognise common gesture perform by user.
3.11 ACTIVITIES
Study advance device based features in detail.
205
Unit 4: The Android Native Development Kit (NDK)
Unit Structure 4.1 Learning Objectives
4.2 Introduction
4.3 NDK Integration
4.4 Create android NDK Project
4.5 Summarization of NDK Project
4.6 Let us sum up
4.7 Check your Progress
4.8 Check your Progress: Possible Answers
4.9 Further Reading
4.10 Assignments
4.11 Activities
4
206
4.1 LEARNING OBJECTIVES This chapter is focus on NDK related application development using android. It
provides the learning of following feature:
NDK Integration
Common library support
Sample code for NDK project
4.2 INTRODUCTION
This chapter is focus on NDK related application development using android
by configuring NDK in android studio. It is really helpful to reuse native application
code in android application development.
4.3 THE ANDROID NATIVE DEVELOPMENT KIT (NDK)
Native Development Kit (NDK) is the set of tools which provides a way to use
C and C++ with android and access of physical components like sensors, touch
inputs... etc. NDK is most appropriately useful for extra performance achievement
with low latency and computationally more intensive application development. Its
major importance to reuse own developed libraries of C or C++ languages. Android
supports NDK builds for referring existing projects. For developing new NDK project
use CMake.
Steps for NDK Downloading and Configuration
Use following tools support: NDK, CMake & LLDB.
Click on SDK Tools -> Enable support of LLDB, CMake, and NDK. If not
installed than install it. Apply OK - > After Installation Click Finish
4.4 CREATE NEW NDK PROJECT Create new project creating any other Android Studio project
In the wizard, select the Native C++ project type
207
Than Clicking on Next focus on Customize C++ Support section of the
wizard, you can customize your project with the C++ Standard field. Use the
drop-down list to select which standardization of C++ you want to use.
Selecting Toolchain Default uses the default CMake setting.
Finish
Now in IDE select Android view. You can see the src/main/cpp/ directory which
include native-lib.cpp and CMakeLists.txt.
The is native-lib.cpp sample C++ source file.
Android Studio creates a CMake build script, CMakeLists.txt, and places it in your
4.5 SUMMARISATION OF WHEN RUN THE APPLICATION
Gradle calls upon your external build script, CMakeLists.txt.
CMake follows commands in the build script to compile a C++ source file,
native-lib.cpp, into a shared object library and names it libnative-lib.so, which
Gradle then packages into the APK.
During runtime, the app's MainActivity loads the native library using
available to the app.
MainActivity.onCreate() calls stringFromJNI(), which returns "Hello from C++",
and uses it to update the TextView.
4.6 LET US SUM UP This chapter focus on NDK Build feature which enable user to develop native API
based application.
4.7 CHECK YOUR PROGRESS
Discuss in brief:
1. Explain NDK integration in brief.
208
4.8 CHECK YOUR PROGRESS: POSSIBLE ANSWERS Discuss in brief:
1. Refer 4.3 of Block 4.
2. Refer 4.4 of Block 4.
4.9 FURTHER READING
This Material can be refer the following links:
1. Official Google Android Developer Help: developer.android.com
2. https://www.simplifiedcoding.net
3. Docand' Reference Series Android 4 Available Services: Andrew K-Fox ACM
BOOK Nov 2013 - API19 - Volume 4 ISBN:1494228262 9781494228262
4. http://www.andrious.com/
5. android.magicer.xyz
6. stackoverflow.com
7. www.android-doc.com
8. androidbox.me
9. https://codelabs.developers.google.com/codelabs/android-studio-cmake/#0
4.10 ASSIGNMENTS
1. Create android application to perform NDK based application to display Hello
Word!
4.11 ACTIVITIES
Study NDK in more detail.
2. Write the steps to create simple NDK project in android.
209
Block-5
Publishing Android Application
210
Unit 1: Deploying Android Application to the World
Unit Structure 1.1 Learning Objectives
1.2 Introduction
1.3 Deploying Android Application (Developer Console)
1.4 Published Manually
1.5 Self-Publishing Your Application 1.6 Let us sum up
1.7 Check your Progress
1.8 Check your Progress: Possible Answers
1.9 Further Reading
1.10 Assignments
1.11 Activities
1
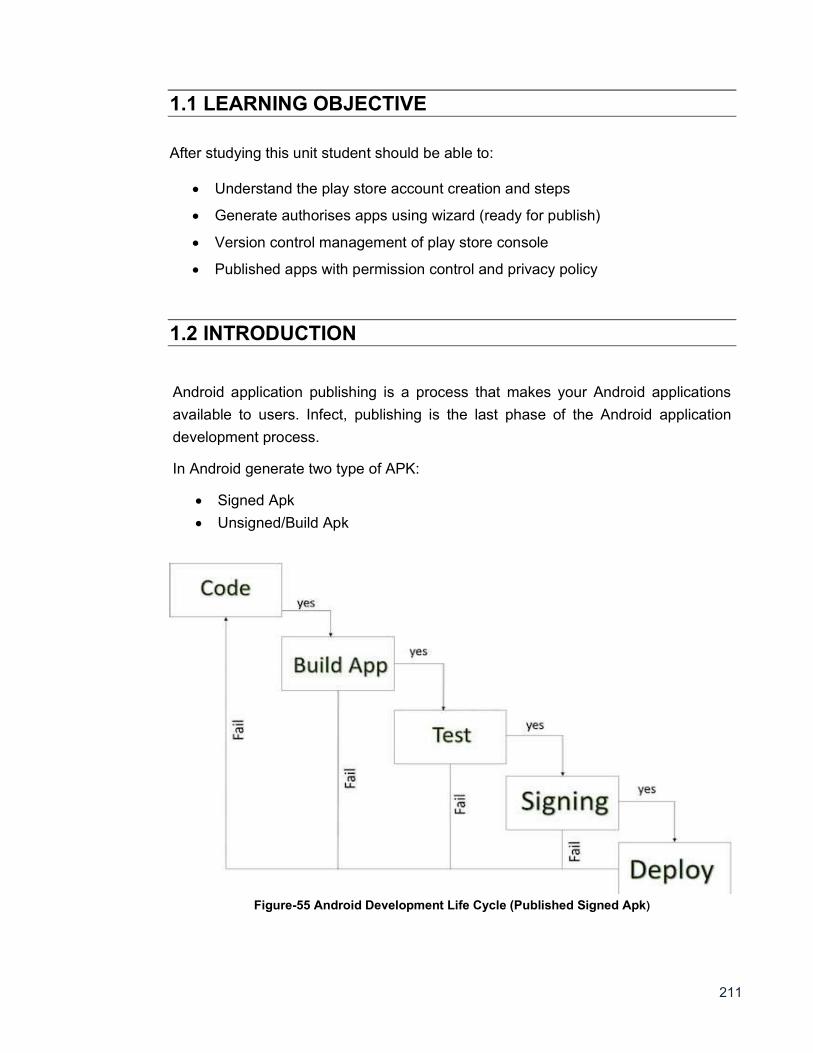
211
1.1 LEARNING OBJECTIVE
After studying this unit student should be able to:
Understand the play store account creation and steps
Generate authorises apps using wizard (ready for publish)
Version control management of play store console
Published apps with permission control and privacy policy
1.2 INTRODUCTION
Android application publishing is a process that makes your Android applications
available to users. Infect, publishing is the last phase of the Android application
development process.
In Android generate two type of APK:
Signed Apk
Unsigned/Build Apk
Figure-55 Android Development Life Cycle (Published Signed Apk)
212
Once you developed and fully tested your Android Application, you can start selling
or distributing free using Google Play (A famous Android marketplace). You can
also release your applications by sending them directly to users or by letting users
download them from your own website.
You can check a detailed publishing process at Android official website, but this
book chapter will take you through simple steps to launch your application on
Google Play.
1.3 DEPLOYING ANDROID APPLICATION (DEVELOPER CONSOLE)
Publish Android apps to google play store:
Have you seen new updates in Google Play Store for uploading your app? Nothing
to worry! This blog gives insight on changes in the uploading process and publishing
your Android app to the Play Store https://play.google.com/apps/publish/. I will be
driving through the detailed steps that you would need for uploading the latest
version of your app.
Generate a signed .apk file from Android Studio
using latest Android Studio 3.X & build gradle 3.X.X. I would recommend using
the latest version of Android Studio.
Step & Activity:
1. Regression Testing Before you publish your application, you need to make sure
that its meeting the basic quality expectations for all Android apps, on all of the
devices that you are targeting. So, perform all the required testing on different
devices including phone and tablets.
2. Application Rating When you will publish your application at Google Play, you will
have to specify a content rating for your app, which informs Google Play users of
its maturity level. Currently available ratings are (a) Everyone (b) Low maturity (c)
Medium maturity (d) High maturity.
3. Targeted Regions Google Play lets you control what countries and territories
where your application will be sold. Accordingly, you must take care of setting up
213
time zone, localization or any other specific requirement as per the targeted
region.
4. Application Size Currently, the maximum size for an APK published on Google
Play is 50 MB. If your app exceeds that size, or if you want to offer a secondary
download, you can use APK Expansion Files, which Google Play will host for free
on its server infrastructure and automatically handle the download to devices.
5. SDK and Screen Compatibility It is important to make sure that your app is
designed to run properly on the Android platform versions and device screen
sizes that you want to target.
6. Application Pricing Deciding whether you app will be free or paid is important
because, on Google Play, free app's must remain free. If you want to sell your
application then you will have to specify its price in different currencies.
7. Promotional Content It is a good marketing practice to supply a variety of high-
quality graphic assets to showcase your app or brand. After you publish, these
appear on your product details page, in store listings and search results, and
elsewhere.
8. Build and Upload release-ready APK. The release-ready APK is what you you will
upload to the Developer Console and distribute to users. You can check
complete detail on how to create a release-ready version of your app: Preparing
for Release.
9. Finalize Application Detail Google Play gives you a variety of ways to promote
your app and engage with users on your product details page, from colourful
graphics, screen shots, and videos to localized descriptions, release details, and
links to your other apps. So you can decorate your application page and provide
as much as clear crisp detail you can provide.
Export Android Application Process
Before exporting the apps, you must some of tools
Dx tools (Dalvik executable tools ): It going to convert .class file to .dex file.
it has useful for memory optimization and reduce the boot-up speed time
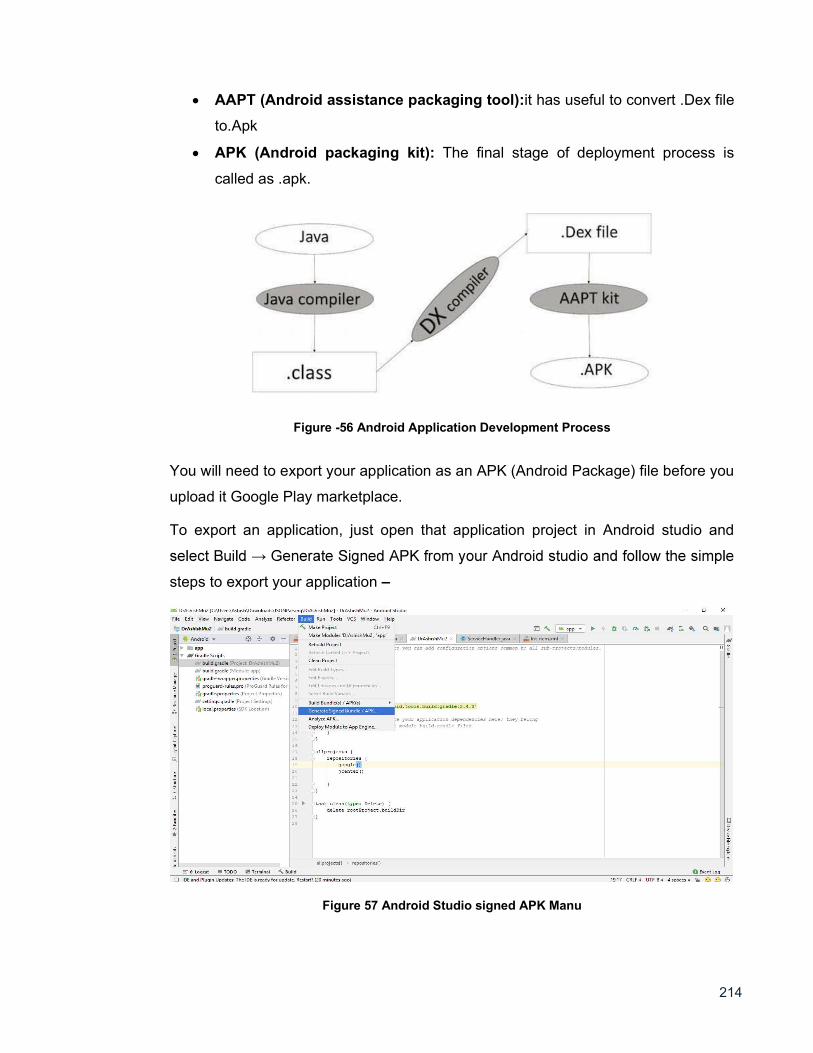
214
AAPT (Android assistance packaging tool):it has useful to convert .Dex file
to.Apk
APK (Android packaging kit): The final stage of deployment process is
called as .apk.
Figure -56 Android Application Development Process
You will need to export your application as an APK (Android Package) file before you
upload it Google Play marketplace.
To export an application, just open that application project in Android studio and
steps to export your application
Figure 57 Android Studio signed APK Manu
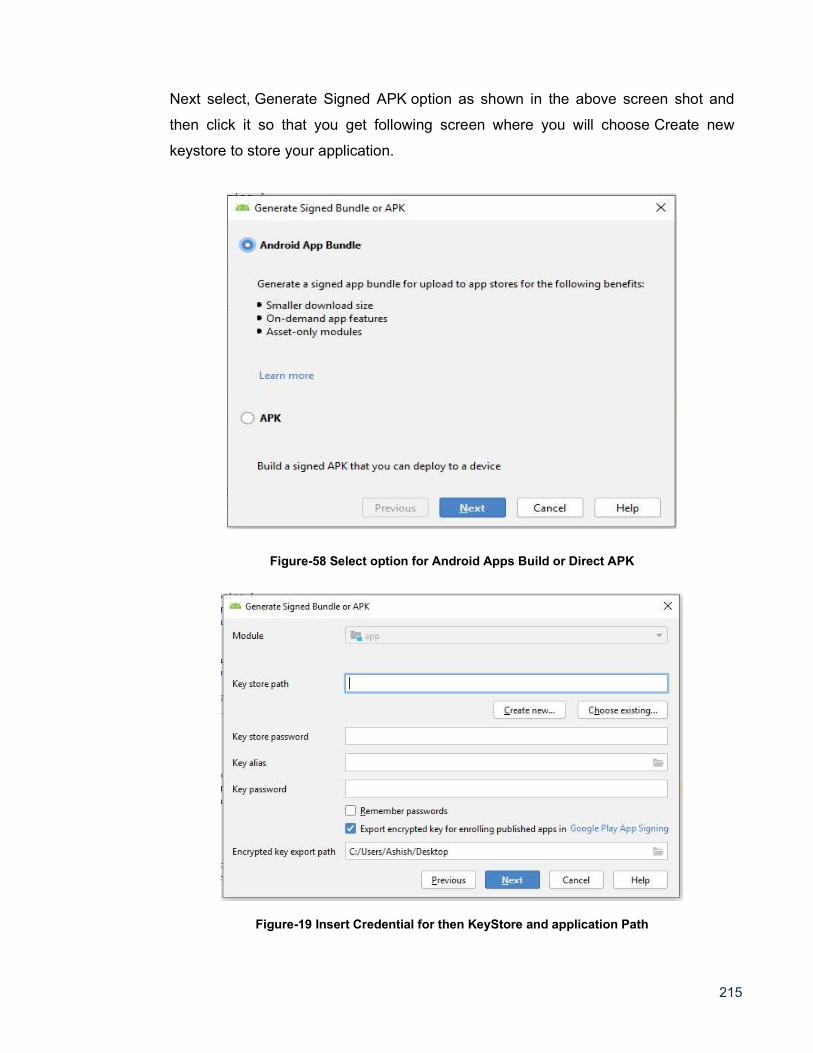
215
Next select, Generate Signed APK option as shown in the above screen shot and
then click it so that you get following screen where you will choose Create new
keystore to store your application.
Figure-58 Select option for Android Apps Build or Direct APK
Figure-19 Insert Credential for then KeyStore and application Path
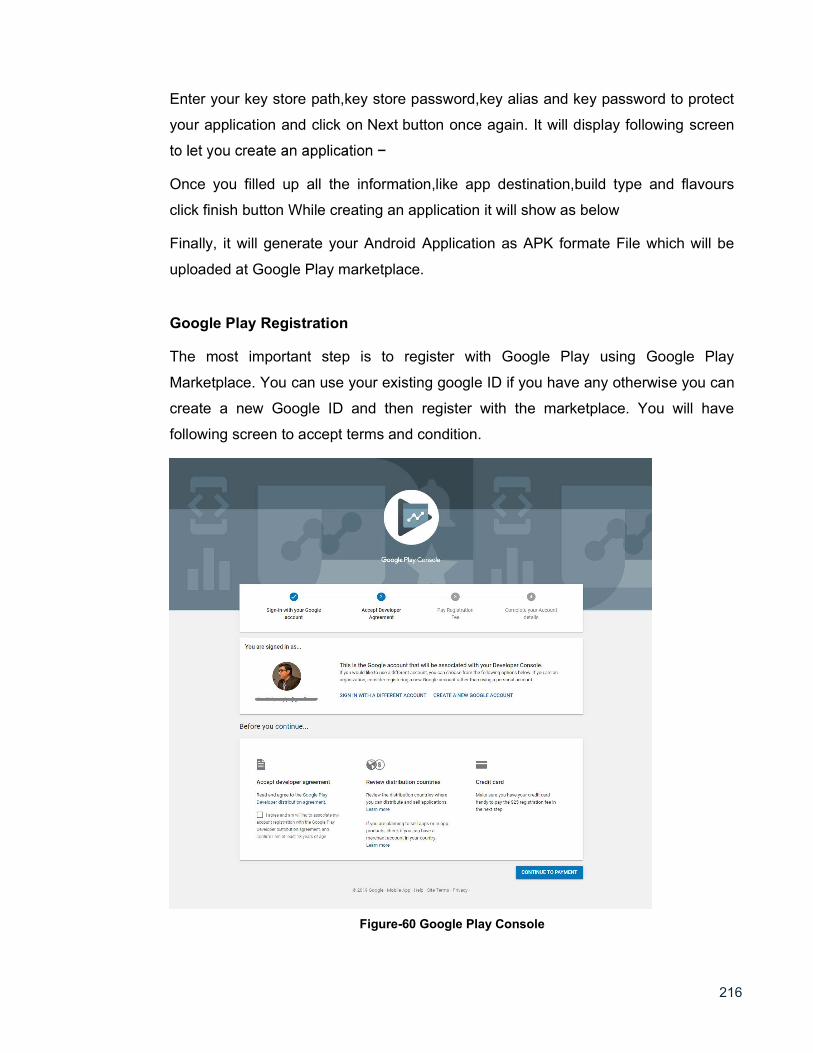
216
Enter your key store path,key store password,key alias and key password to protect
your application and click on Next button once again. It will display following screen
Once you filled up all the information,like app destination,build type and flavours
click finish button While creating an application it will show as below
Finally, it will generate your Android Application as APK formate File which will be
uploaded at Google Play marketplace.
Google Play Registration
The most important step is to register with Google Play using Google Play
Marketplace. You can use your existing google ID if you have any otherwise you can
create a new Google ID and then register with the marketplace. You will have
following screen to accept terms and condition.
Figure-60 Google Play Console
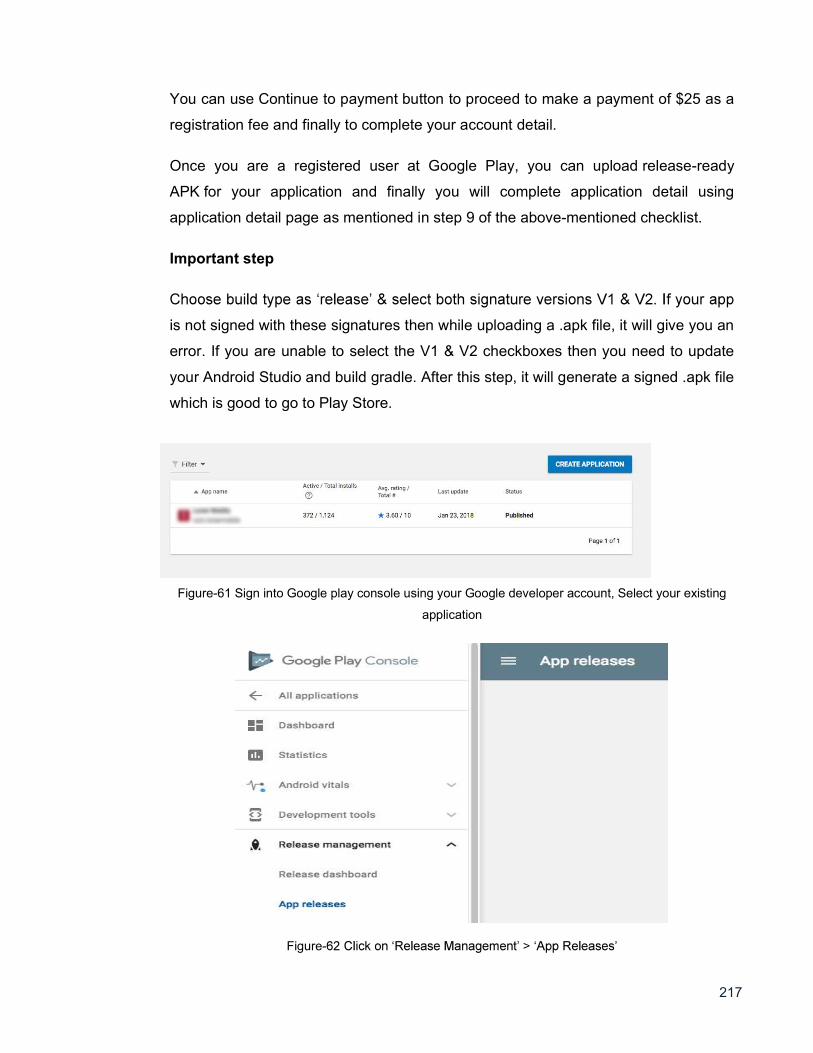
217
You can use Continue to payment button to proceed to make a payment of $25 as a
registration fee and finally to complete your account detail.
Once you are a registered user at Google Play, you can upload release-ready
APK for your application and finally you will complete application detail using
application detail page as mentioned in step 9 of the above-mentioned checklist.
Important step
is not signed with these signatures then while uploading a .apk file, it will give you an
error. If you are unable to select the V1 & V2 checkboxes then you need to update
your Android Studio and build gradle. After this step, it will generate a signed .apk file
which is good to go to Play Store.
Figure-61 Sign into Google play console using your Google developer account, Select your existing
application
Figure-
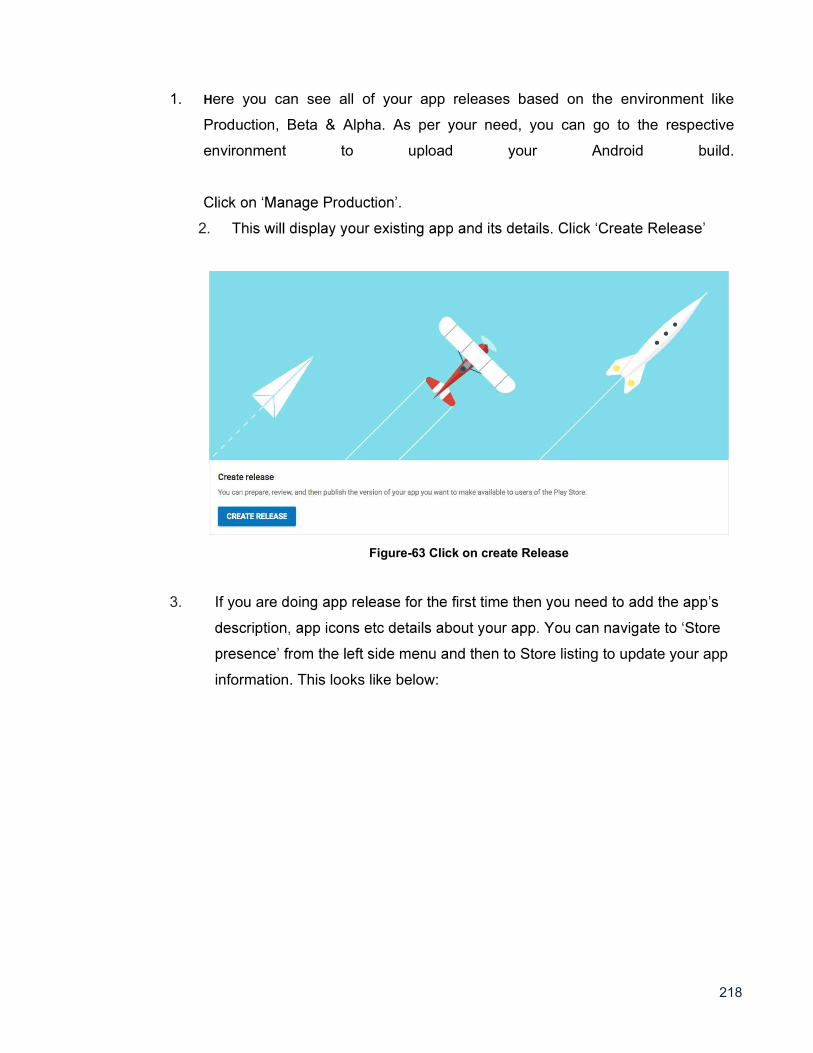
218
1. Here you can see all of your app releases based on the environment like
Production, Beta & Alpha. As per your need, you can go to the respective
environment to upload your Android build.
.
2.
Figure-63 Click on create Release
3. If you are
Store listing to update your app
information. This looks like below:

219
Figure-64 Store listing to update your app information
Figure-65 App information
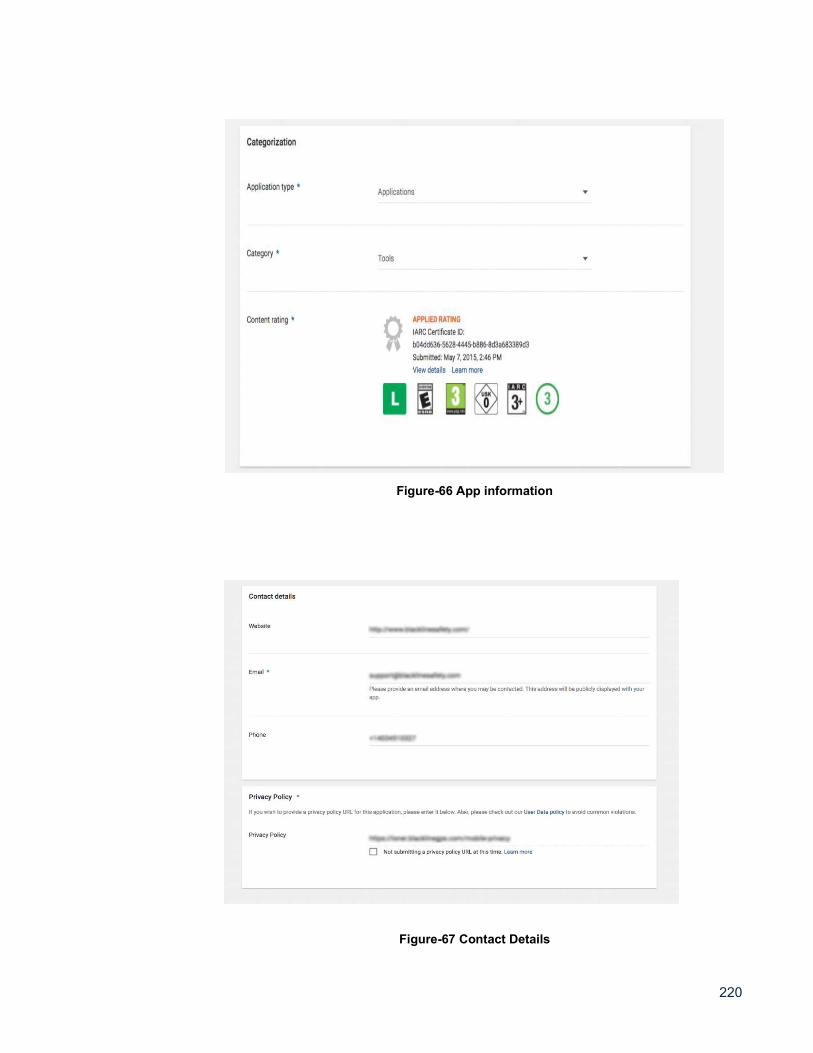
220
Figure-66 App information
Figure-67 Contact Details
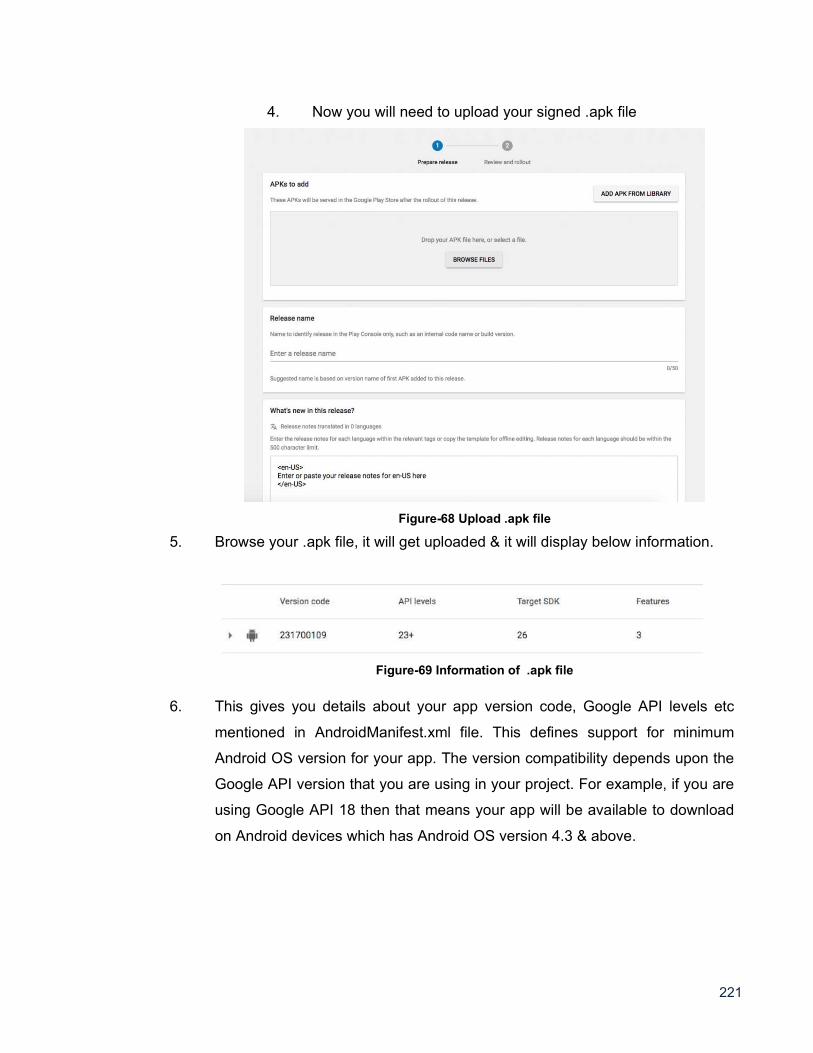
221
4. Now you will need to upload your signed .apk file
Figure-68 Upload .apk file
5. Browse your .apk file, it will get uploaded & it will display below information.
Figure-69 Information of .apk file
6. This gives you details about your app version code, Google API levels etc
mentioned in AndroidManifest.xml file. This defines support for minimum
Android OS version for your app. The version compatibility depends upon the
Google API version that you are using in your project. For example, if you are
using Google API 18 then that means your app will be available to download
on Android devices which has Android OS version 4.3 & above.
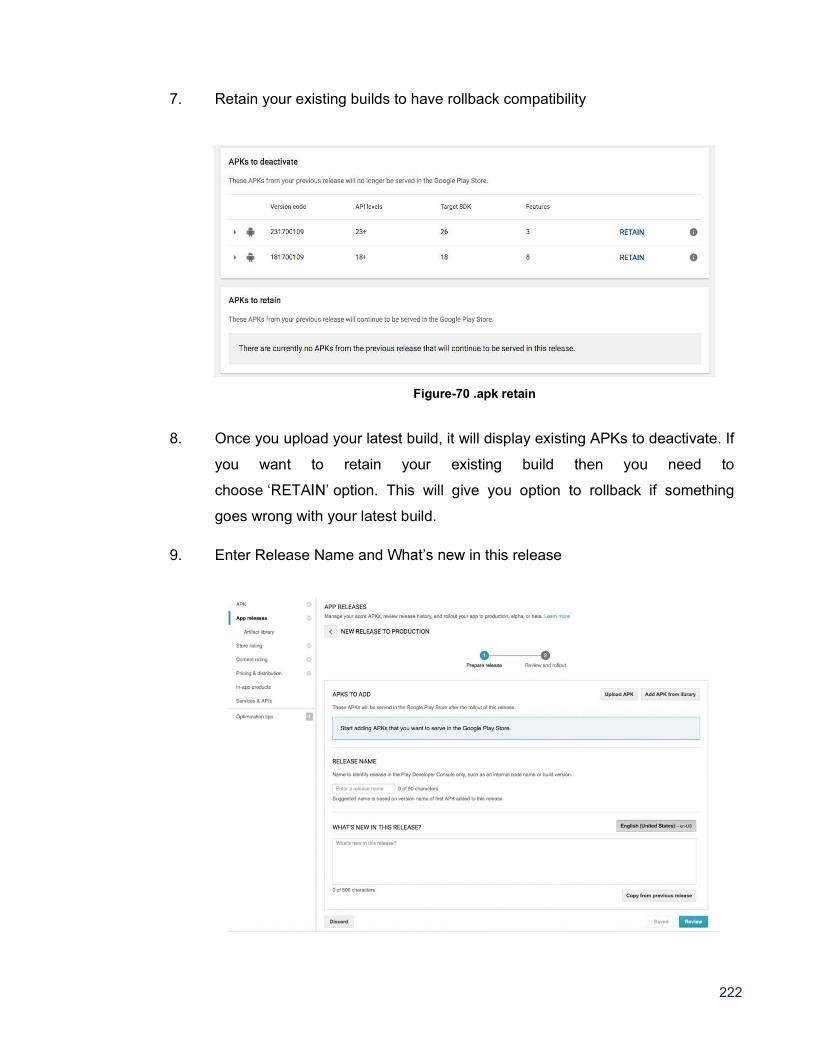
222
7. Retain your existing builds to have rollback compatibility
Figure-70 .apk retain
8. Once you upload your latest build, it will display existing APKs to deactivate. If
you want to retain your existing build then you need to
choose option. This will give you option to rollback if something
goes wrong with your latest build.
9. Enter Release Name and in this release
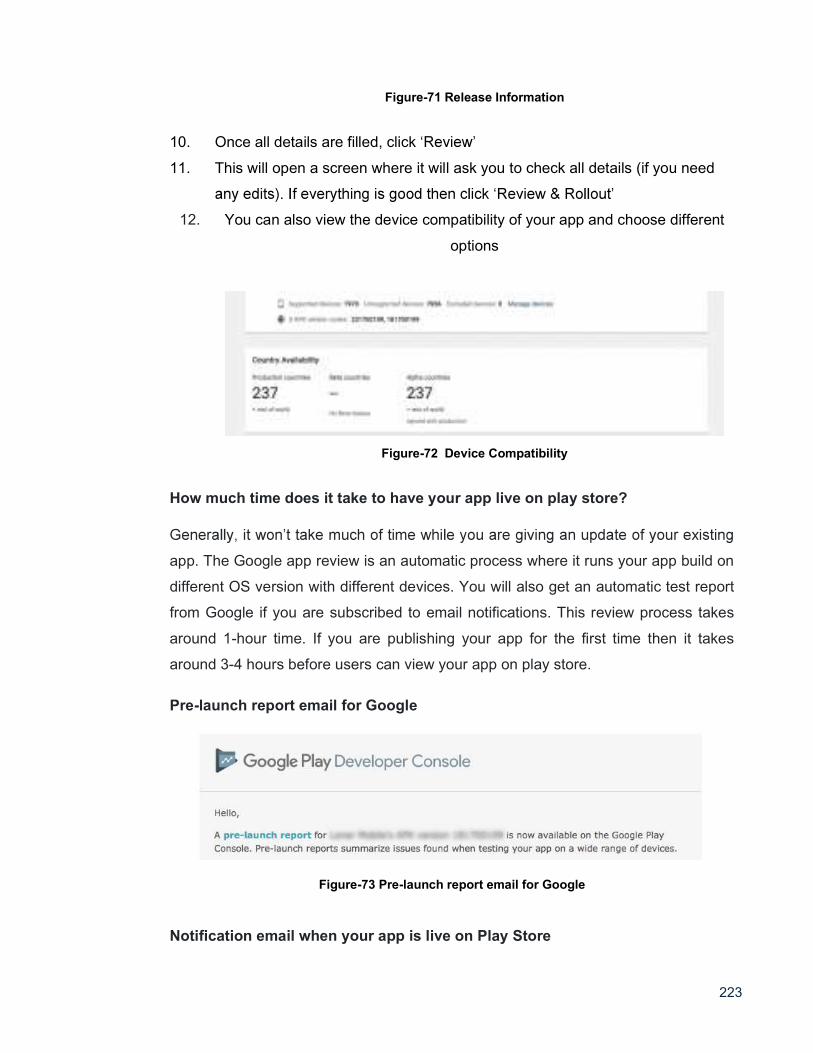
223
Figure-71 Release Information
10. Once all details are filled, click
11. This will open a screen where it will ask you to check all details (if you need
12. You can also view the device compatibility of your app and choose different
options
Figure-72 Device Compatibility
How much time does it take to have your app live on play store?
app. The Google app review is an automatic process where it runs your app build on
different OS version with different devices. You will also get an automatic test report
from Google if you are subscribed to email notifications. This review process takes
around 1-hour time. If you are publishing your app for the first time then it takes
around 3-4 hours before users can view your app on play store.
Pre-launch report email for Google
Figure-73 Pre-launch report email for Google
Notification email when your app is live on Play Store
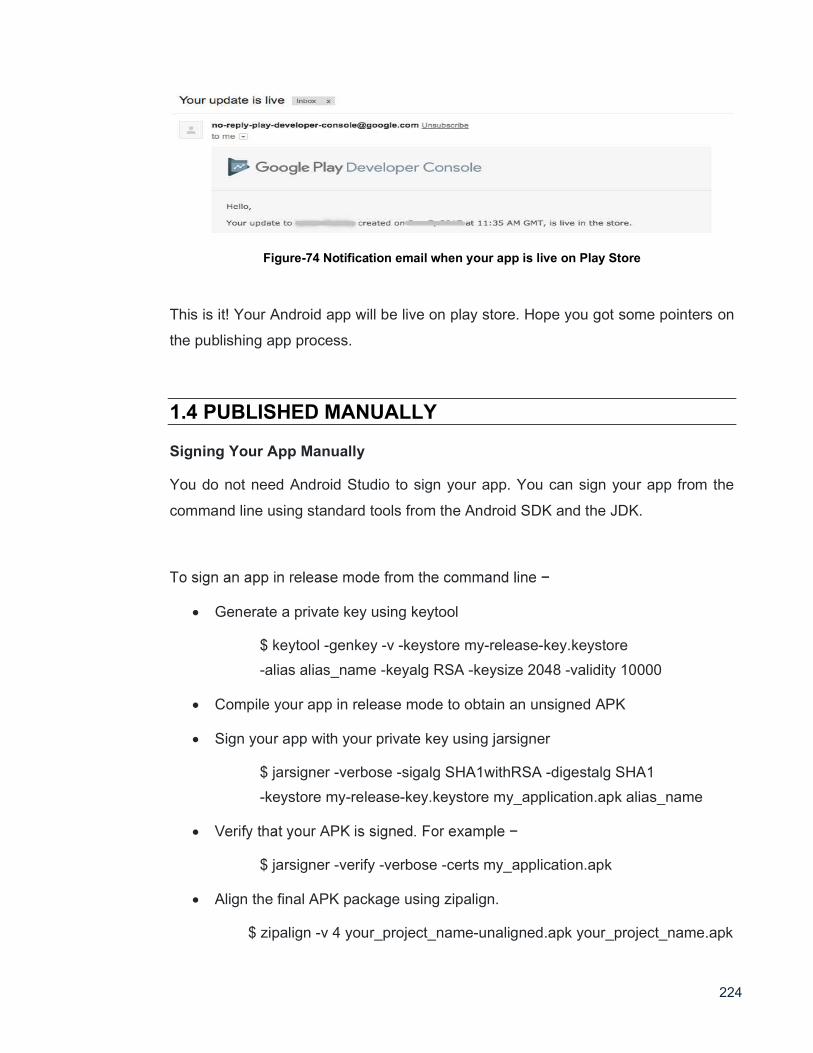
224
Figure-74 Notification email when your app is live on Play Store
This is it! Your Android app will be live on play store. Hope you got some pointers on
the publishing app process.
1.4 PUBLISHED MANUALLY Signing Your App Manually
You do not need Android Studio to sign your app. You can sign your app from the
command line using standard tools from the Android SDK and the JDK.
Generate a private key using keytool
$ keytool -genkey -v -keystore my-release-key.keystore
-alias alias_name -keyalg RSA -keysize 2048 -validity 10000
Compile your app in release mode to obtain an unsigned APK
Sign your app with your private key using jarsigner
$ jarsigner -verbose -sigalg SHA1withRSA -digestalg SHA1
-keystore my-release-key.keystore my_application.apk alias_name
$ jarsigner -verify -verbose -certs my_application.apk
Align the final APK package using zipalign.
$ zipalign -v 4 your_project_name-unaligned.apk your_project_name.apk
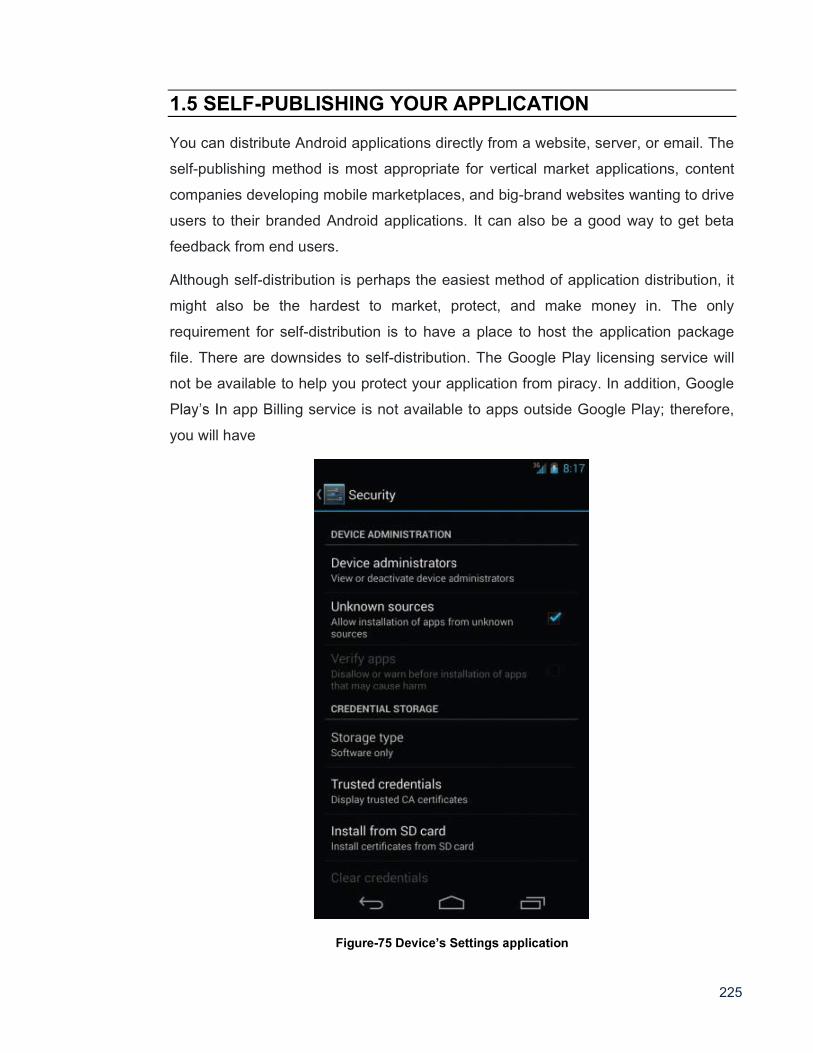
225
1.5 SELF-PUBLISHING YOUR APPLICATION You can distribute Android applications directly from a website, server, or email. The
self-publishing method is most appropriate for vertical market applications, content
companies developing mobile marketplaces, and big-brand websites wanting to drive
users to their branded Android applications. It can also be a good way to get beta
feedback from end users.
Although self-distribution is perhaps the easiest method of application distribution, it
might also be the hardest to market, protect, and make money in. The only
requirement for self-distribution is to have a place to host the application package
file. There are downsides to self-distribution. The Google Play licensing service will
not be available to help you protect your application from piracy. In addition, Google
app Billing service is not available to apps outside Google Play; therefore,
you will have
Figure-75 D lication
226
to manage the billing aspects yourself. Furthermore, end users must configure their
devices to allow packages from unknown sources. This setting is found under the
above Figure. This
option is not available on all consumer devices in the market.
After that, the final step the user must take is to enter the URL of the application
package into the Web browser on the handset and download the file (or click a link to
it). When the file is downloaded, the standard Android install process occurs, asking
the user to confirm the permissions and, optionally, confirm an update or
replacement of an existing application if a version is already installed.
1.6 LET US SUM UP
In this block we learned about create play store account and Deploying Android
Application (Developer Console), Published Manually or using wizard, Self-
Publishing Your Application.
1.7 CHECK YOUR PROGRESS
A. Only _________ APK published on google play store (Signed/Unsigned/Build)
B. Application Rating When you will publish your application at Google account.
(TRUE/FALSE)
C. The maximum size for an APK published on Google Play is ____
MB(40,50,60)
D. APK STANDS FOR: _______________
E. Full form AAPT: _______________
1.8 CHECK YOUR PROGRESS: POSSIBLE ANSWERS
A. Signed
B. False
C. 50
D. Android packaging kit
E. Android assistance packaging tool
1.9 FURTHER READING
227
Android Application Development for Dummies by Donn Felker.
Professional Android 4th Edition by Reto Meier (Author), Ian Lake (Author)
ISBN-13: 978-1118949528 ISBN-10: 9781118949528.
Burnette.
Android Programming by Nicolas Gramlich.
Thinking in Java (4th Edition) 4th Edition by Bruce Eckel ISBN-13: 978-
0131872486 ISBN-10: 0131872486 Android Programming for Beginners:
Learn all the Java and Android skills you need to start making powerful mobile
applications ISBN-10: 1785883267 ISBN-13: 978-1785883262.
Beginning Android Application Development by Wei-Meng Lee.
Java: A Beginner's Guide, Sixth Edition 6th Edition by Herbert Schildt ISBN-
13: 978-0071809252 ISBN-10: 0071809252.
Android Programming: The Big Nerd Ranch Guide (3rd Edition) (Big Nerd
Ranch Guides) 3rd Edition by Bill Phillips , Chris Stewart , Kristin Marsicano
ISBN-13: 978-0134706054 ISBN-10: 0134706056.
Android Programming: Pushing the Limits 1st Edition by Erik Hellman ISBN-
13: 978-1118717370 ISBN-10: 1118717376.
Head First Android Development: A Brain-Friendly Guide 1st Edition by Dawn
Griffiths ISBN-13: 978-1449362188 ISBN-10: 1449362184.
Pro Android by Sayed Y. Hashimi and Satya Komatineni, Springer, New York,
2009.
1.10 ASSIGNMENTS
A. Write a step for how to register on google play console.
B. List out steps of export singed APK using android 3.X.X.
C. Explain how to published android apps manually.
1.11 ACTIVITIES
Try to published your innovative conceptual android application on google
play store
228
Unit 2: Selling your Android application
Unit Structure 2.1 Learning Objectives
2.2 Introduction
2.3 Selling your Android application 2.4 Publishing Platform
2.5 Let us sum up
2.6 Check your Progress 2.7 Check your Progress: Possible Answers
2.8 Further Reading
2.9 Assignments
2.10 Activities
2
229
2.1 LEARNING OBJECTIVE After studying this unit student should be able to:
Understand the concept of apps selling structure and e-commerce platform
able sell signed APK to multiple digital content selling website
understand revenue model of apps selling
explore the apps selling country wise
2.2 INTRODUCTION Where to Sell Your Android App
A lot of Android developers and users alike assume that Google's Android Market is
the only place to download free and paid apps for the platform. This is not the case;
there are dozens of app stores out there. Some markets have wider or narrower
coverage than others, but each has its place, along with benefits and drawbacks that
developers need to be aware of. So you've developed an Android app -- now let's
discuss what your options are for publishing it in today's market.
Sellers: Sell your mobile apps. Receive cash for transferring your app to the new
owner or selling your source code.
Buyers: Buy the rights to quality mobile applications. Contact sellers directly and
buy mobile apps and source code.
You can sell your app in 2 ways
Sell your app after making it live on play store
Sell the source code of your app
Option 1 - If you choose this option, you will have to follow these steps:
Buy a developer licence from Google ($25 onetime)
Upload your app to play store (this involves some sub steps as generating a
signed apk, creating a play store listing etc. Just Google for these)
230
Market your app and get at lease 26k active users(if you want a decent amount
for your app, please make sure you market it online like crazy for a couple of
months to reach at least 26k active devices mark)
There's a good site called as we purchase apps .Com Google it out. They buy your
apps directly and escrow you the amount) you will have to transfer them all the
assets of your app (like graphics, logos, source code, signing key etc)
Option 2- If your app does something really unique, you can sell the source code
itself. I personally am not aware of any online service which sells the source. So,
you'll have to research a bit online
2.3 SELLING YOUR ANDROID APPLICATION Google's Android Market Google's Android Market is still the most popular and well-supported app store for
Android apps. With a robust application catalogue of Android titles and millions of
downloads a day, this is where most developers sell their apps -- for good cause.
The Android Market has fairly light curation compared to other app stores and
platforms, and includes various compelling features for developers, including market
filters, easy bug tracking and smooth upgrade support. Currently, developers get 70
percent of the application revenue but they also have to have a paid developer
account with a reasonable one-time authentication fee of $25. Recently, a Web store
version of the Android Market went live, with many new and compelling features for
users and developers alike.
Note: In fact, the Android device operating system restricts the applications that can
be installed on an Android device, by default, to only those from this market. In order
to enable downloads from other sources, the user must adjust the settings at the
operating system level. Certain carriers, such as AT&T, have removed this feature,
thus providing the Android Market with exclusive access to their users.
Handango, GetJar and the Other App Superstores
There are a number of big app stores we like to call "app superstores." These one-
stop shops carry apps for multiple mobile platforms and normally sport an application
231
catalog containing tens or hundreds of thousands of app titles with downloads in the
hundreds of millions and billions. Amongst the most popular of these are GetJar and
Handango. Both have been around a long time, have several hundred thousand
apps, support many platforms, and have international reach.
The Amazon Appstore opened its virtual doors only a few months ago, but it did so
with great fanfare and a pretty amazing track record for digital media distribution with
a lot of loyal users. Right off the bat, they've featured exciting exclusive applications,
incentivized users to try their store through a popular Free Paid App of the Day
program, and made waves with their initial success. Unlike the Android Market, the
Amazon Appstore features curation, deals, and a higher level of organization.
Additionally, Amazon has a great feature that allows users to test apps before
downloading them using a browser-based emulator. Currently, developers get 70
percent of the application revenue, but they also have to have a paid developer
account with a fee of $99 a year.
2.4 PUBLISHING PLATFORM
Top Apps to Sell (and Buy) Stuff
For more detail you can refer each portal website.
232
2.5 LET US SUM UP
In this block we learned about Selling Android application methods and platforms,
Publishing Platforms and revenue model of each
2.6 CHECK YOUR PROGRESS
A. Google developer cosole fees is ________$ one time. (20,25,30)
2.7 CHECK YOUR PROGRESS: POSSIBLE ANSWERS
A. 25
2.8 FURTHER READING
Professional Android 4th Edition by Reto Meier (Author), Ian Lake (Author) ISBN-
13: 978-1118949528 ISBN-10: 9781118949528.
Android Programming: The Big Nerd Ranch Guide (3rd Edition) (Big Nerd Ranch
Guides) 3rd Edition by Bill Phillips, Chris Stewart, Kristin Marsicano ISBN-13:
978-0134706054 ISBN-10: 0134706056.
Android Programming: Pushing the Limits 1st Edition by Erik Hellman ISBN-13:
978-1118717370 ISBN-10: 1118717376.
Pro Android by Sayed Y. Hashimi and Satya Komatineni, Springer, New York,
2009.
2.9 ASSIGNMENTS
A. Where you can sell your android apps.
B. List out android apps selling platform.
C. Write a sort note on The Amazon Appstore.
D. How Google's Android Market functioning.
2.10 ACTIVITIES
Make comparative analysis table of each platform for sell android application.

Related Documents