Installing Active Directory in Windows Server 2008 Active Directory stores information about objects on the network and makes this information available to users and network administrators. AD uses domain controllers to give network users access to permitted resources anywhere on the network through a single logon process. 1 st step: Go to Start > Server Manager > Roles > Add Roles. Choose Active Directory Domain Services and click Next to go to the next process. Figure: Installation Active Directory using wizard. 2 nd step: Click Install to start the installation process.

Welcome message from author
This document is posted to help you gain knowledge. Please leave a comment to let me know what you think about it! Share it to your friends and learn new things together.
Transcript
Installing Active Directory in Windows Server 2008
Active Directory stores information about objects on the network
and makes this information available to users and network
administrators. AD uses domain controllers to give network users
access to permitted resources anywhere on the network through a
single logon process.
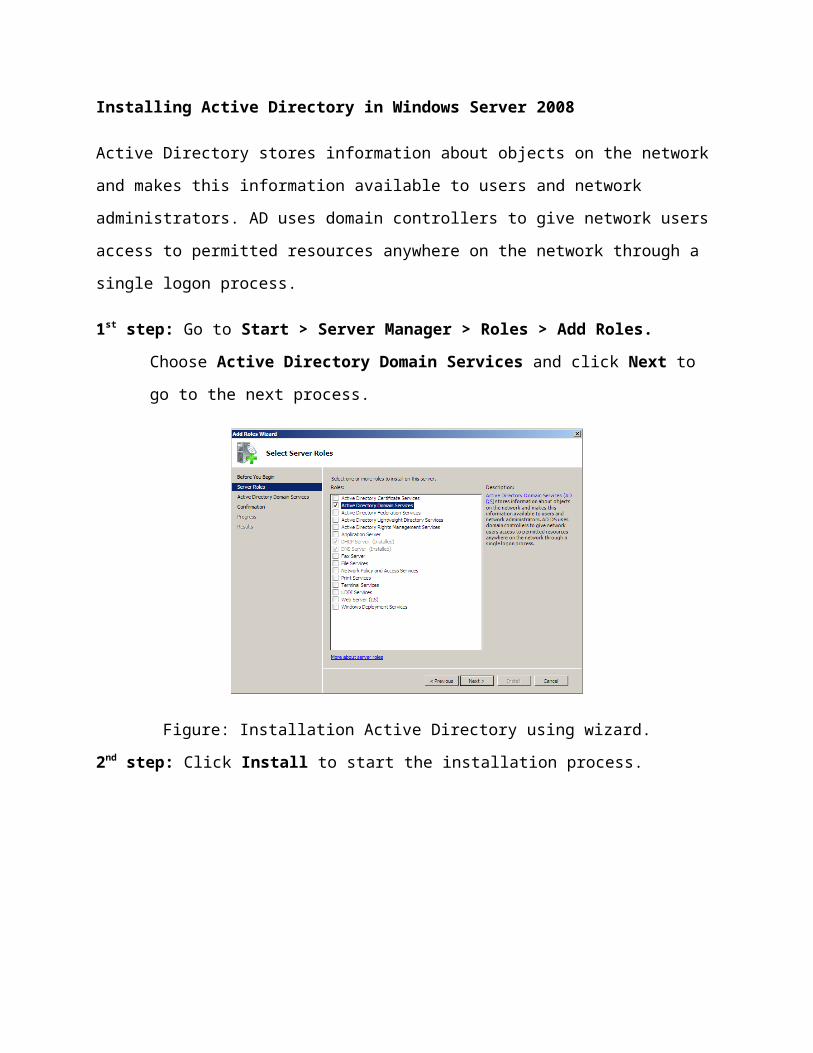
1st step: Go to Start > Server Manager > Roles > Add Roles.
Choose Active Directory Domain Services and click Next to
go to the next process.
Figure: Installation Active Directory using wizard.
2nd step: Click Install to start the installation process.
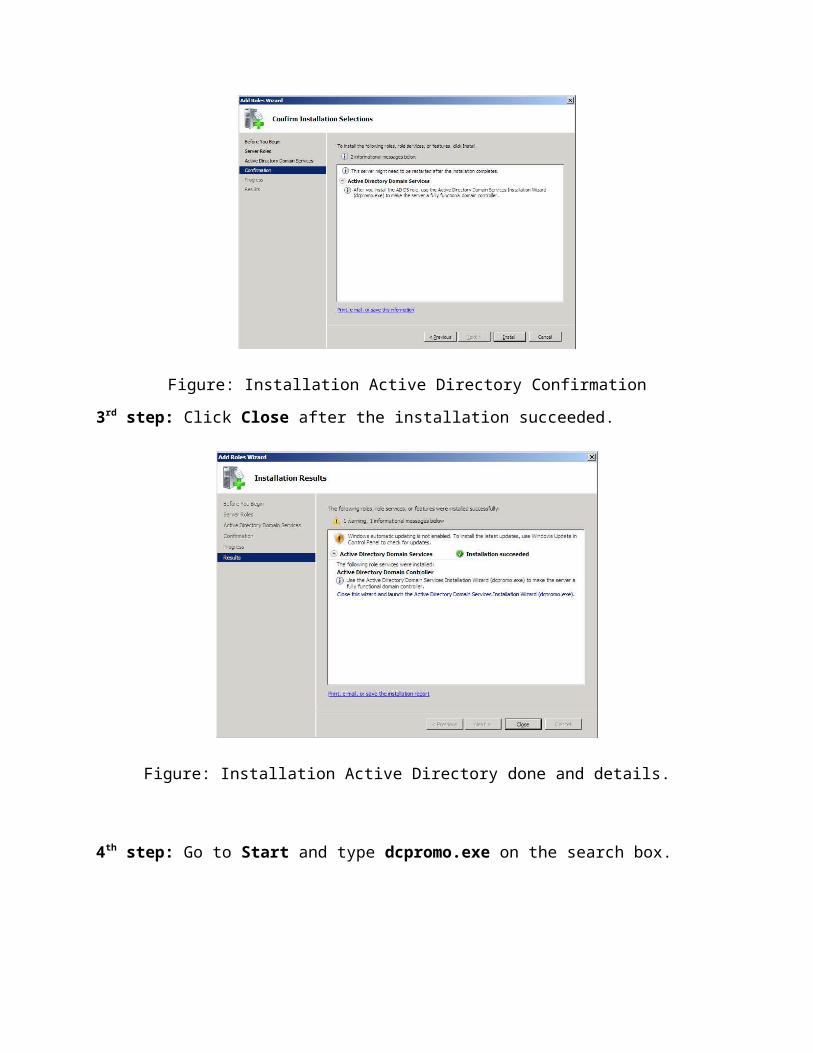
Figure: Installation Active Directory Confirmation
3rd step: Click Close after the installation succeeded.
Figure: Installation Active Directory done and details.
4th step: Go to Start and type dcpromo.exe on the search box.

Figure: Start Active Directory Installation.
5th step: Click Next to proceed to the next step.
Figure: Active Directory Configuration
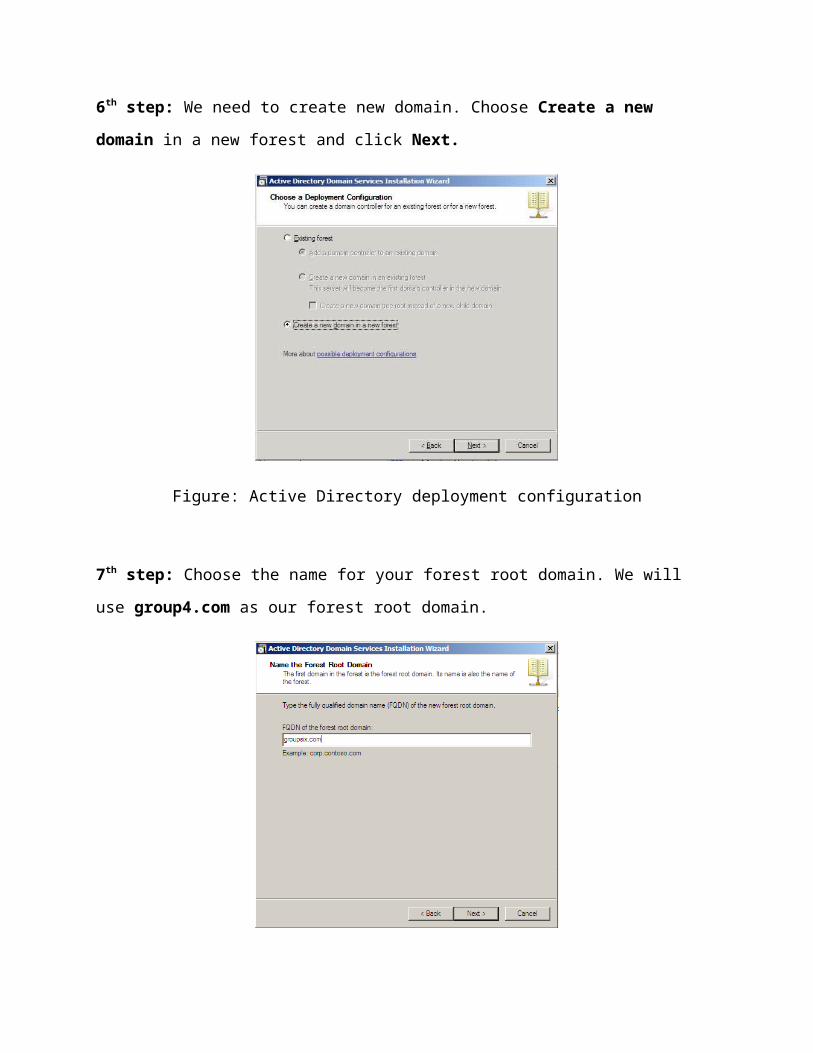
6th step: We need to create new domain. Choose Create a new
domain in a new forest and click Next.
Figure: Active Directory deployment configuration
7th step: Choose the name for your forest root domain. We will
use group4.com as our forest root domain.
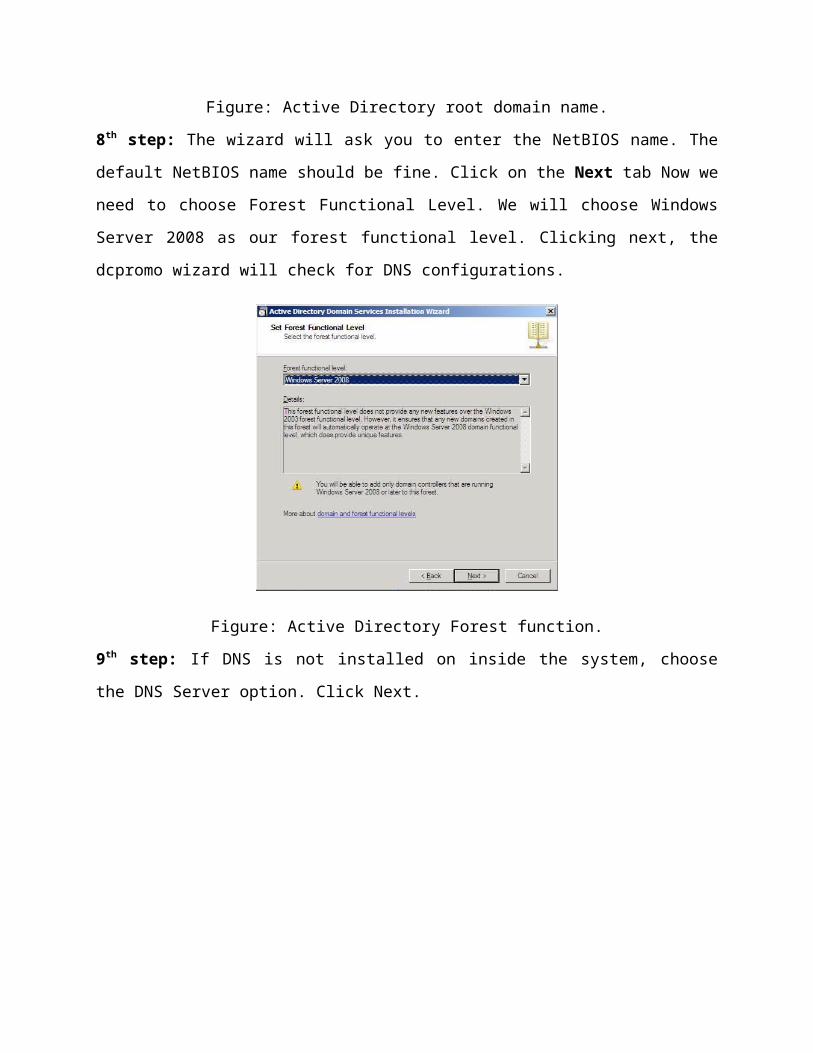
Figure: Active Directory root domain name.
8th step: The wizard will ask you to enter the NetBIOS name. The
default NetBIOS name should be fine. Click on the Next tab Now we
need to choose Forest Functional Level. We will choose Windows
Server 2008 as our forest functional level. Clicking next, the
dcpromo wizard will check for DNS configurations.
Figure: Active Directory Forest function.
9th step: If DNS is not installed on inside the system, choose
the DNS Server option. Click Next.
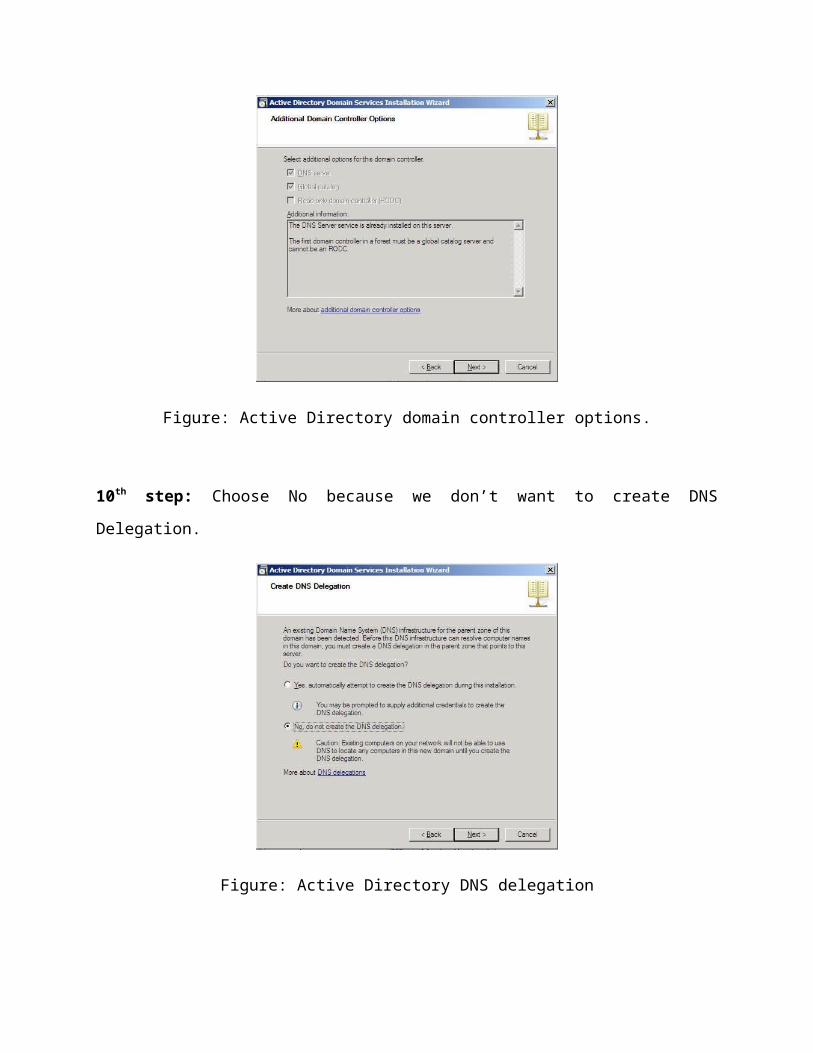
Figure: Active Directory domain controller options.
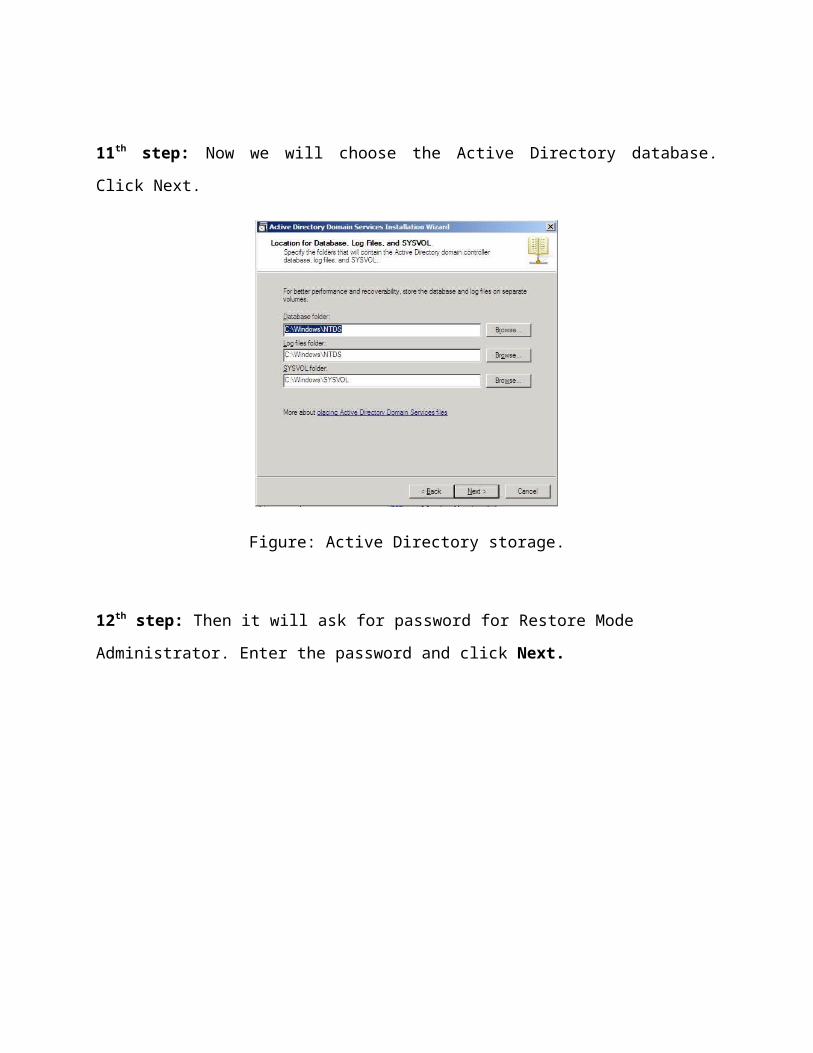
10th step: Choose No because we don’t want to create DNS
Delegation.
Figure: Active Directory DNS delegation
11th step: Now we will choose the Active Directory database.
Click Next.
Figure: Active Directory storage.
12th step: Then it will ask for password for Restore Mode
Administrator. Enter the password and click Next.
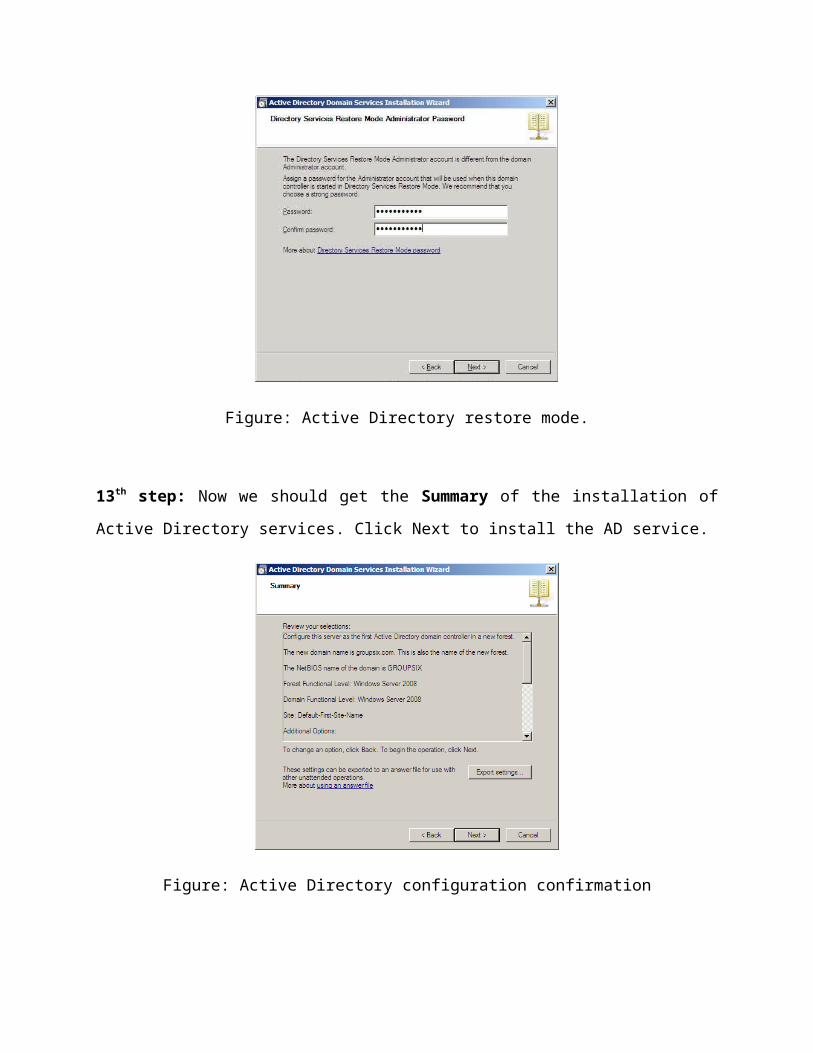
Figure: Active Directory restore mode.
13th step: Now we should get the Summary of the installation of
Active Directory services. Click Next to install the AD service.
Figure: Active Directory configuration confirmation
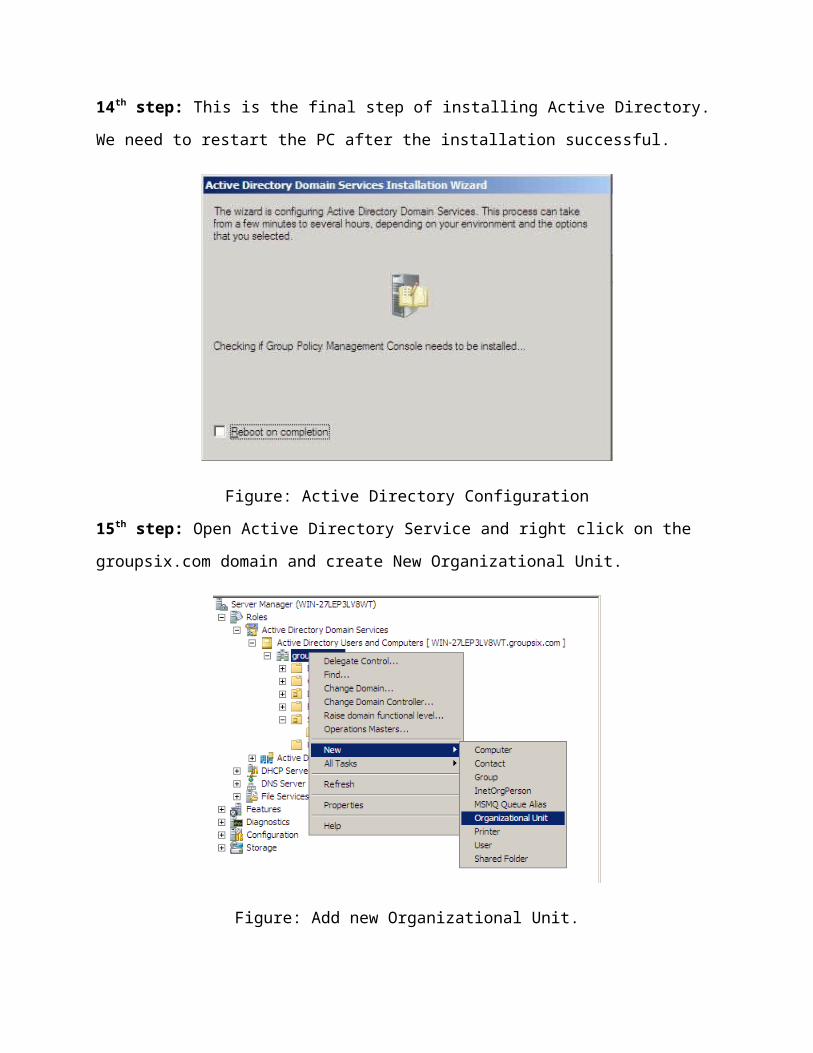
14th step: This is the final step of installing Active Directory.
We need to restart the PC after the installation successful.
Figure: Active Directory Configuration
15th step: Open Active Directory Service and right click on the
groupsix.com domain and create New Organizational Unit.
Figure: Add new Organizational Unit.
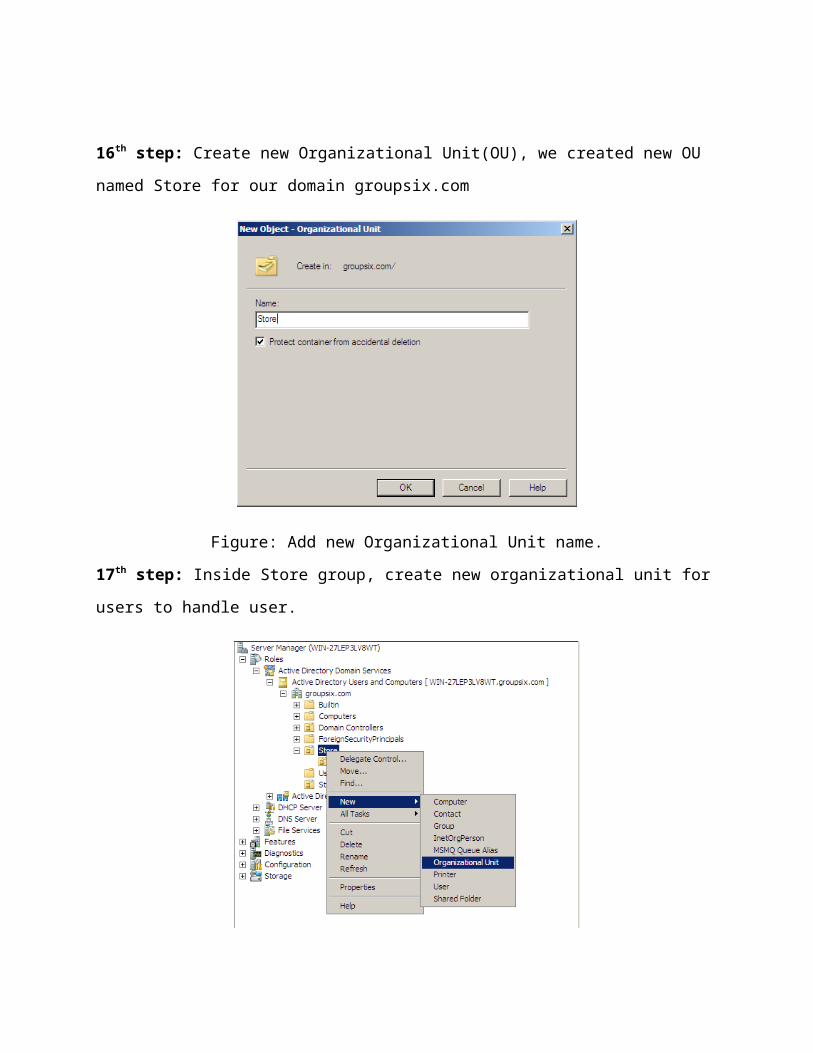
16th step: Create new Organizational Unit(OU), we created new OU
named Store for our domain groupsix.com
Figure: Add new Organizational Unit name.
17th step: Inside Store group, create new organizational unit for
users to handle user.
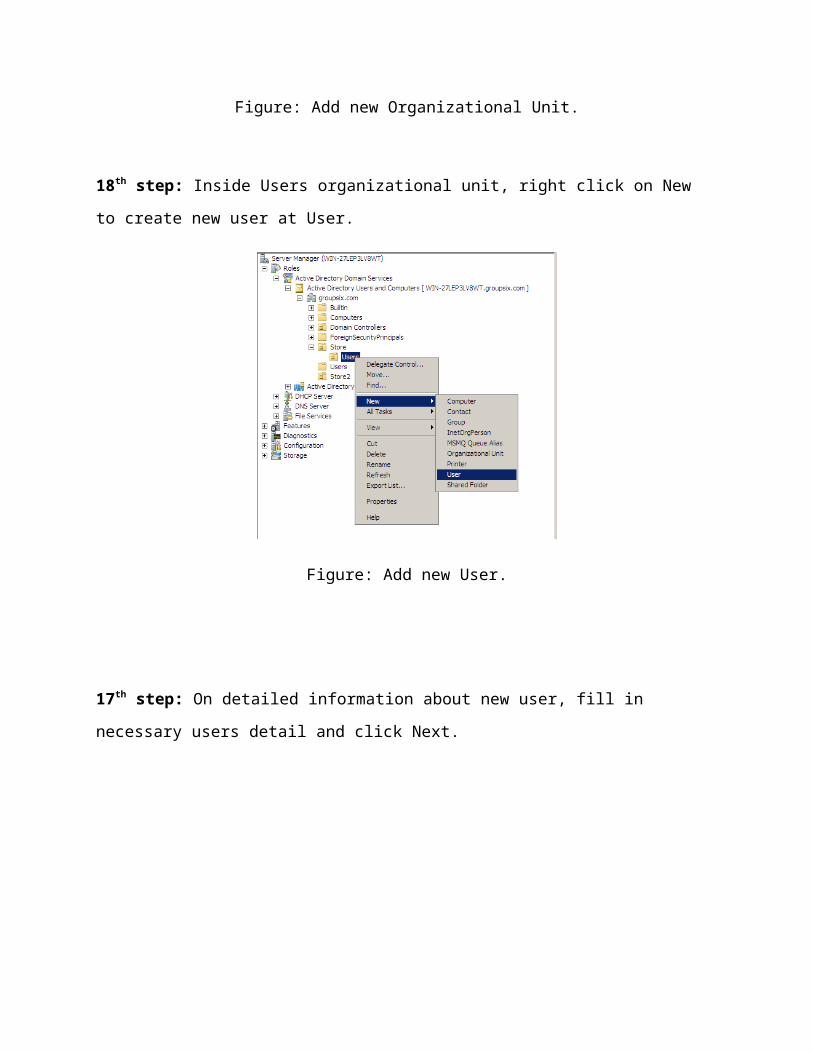
Figure: Add new Organizational Unit.
18th step: Inside Users organizational unit, right click on New
to create new user at User.
Figure: Add new User.
17th step: On detailed information about new user, fill in
necessary users detail and click Next.
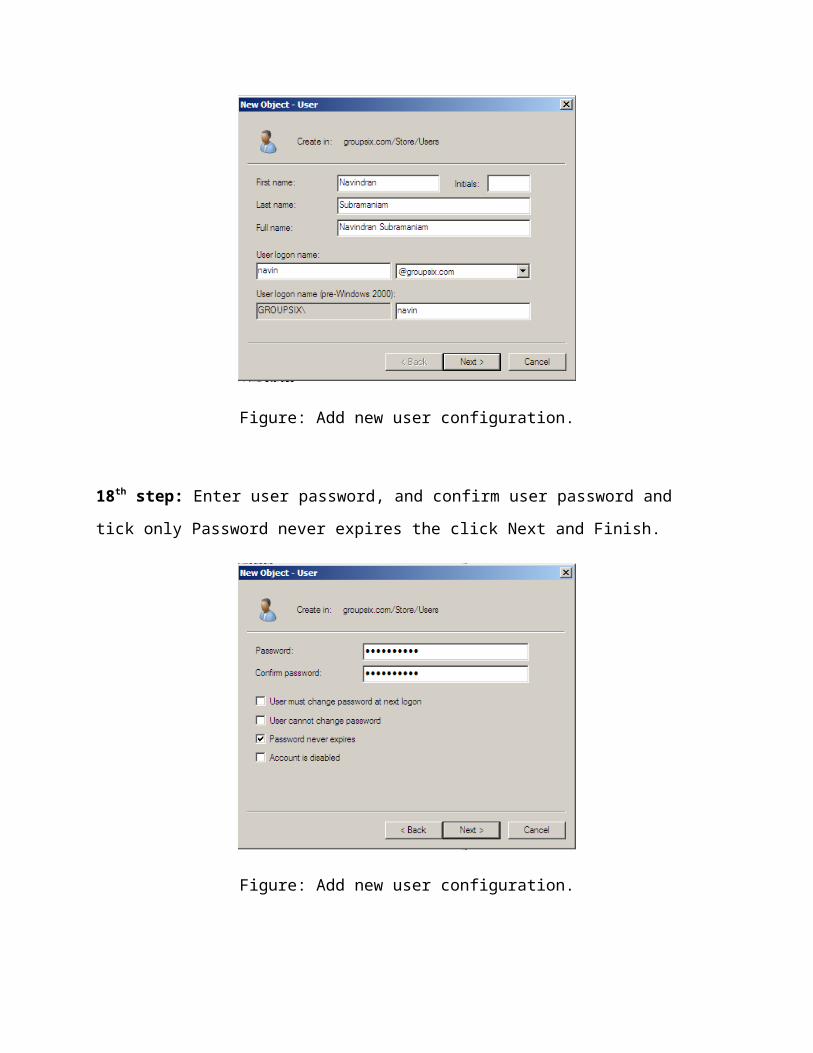
Figure: Add new user configuration.
18th step: Enter user password, and confirm user password and
tick only Password never expires the click Next and Finish.
Figure: Add new user configuration.
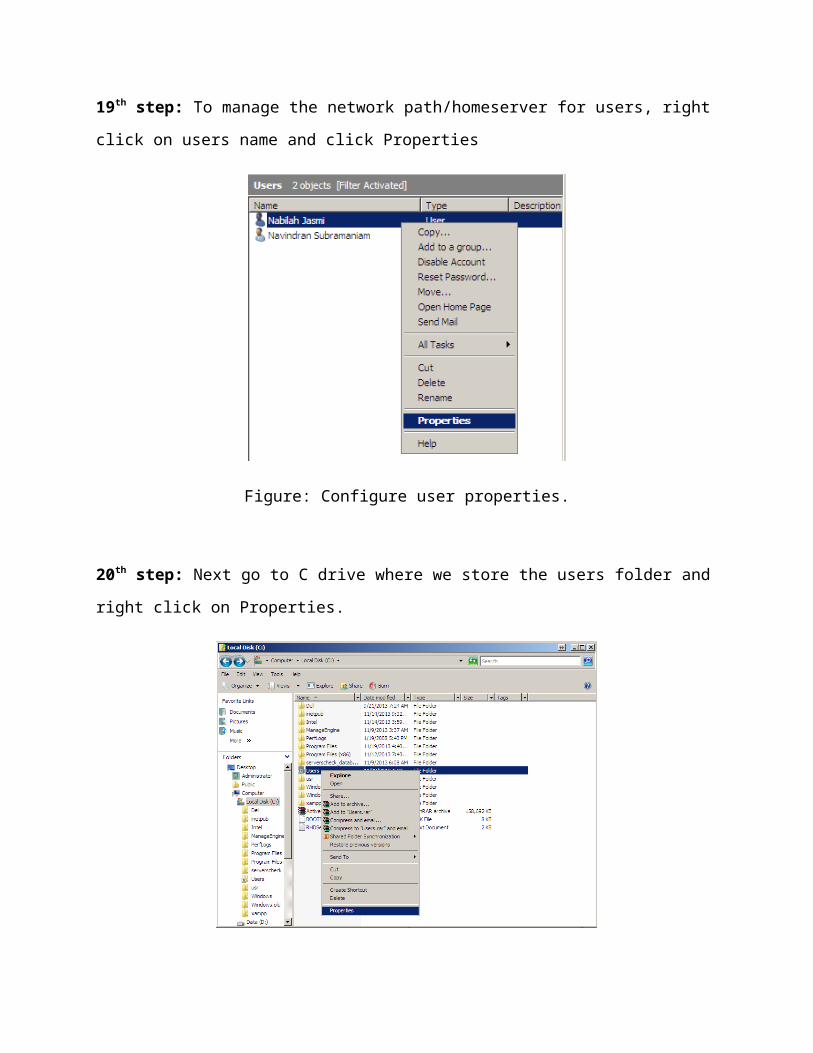
19th step: To manage the network path/homeserver for users, right
click on users name and click Properties
Figure: Configure user properties.
20th step: Next go to C drive where we store the users folder and
right click on Properties.
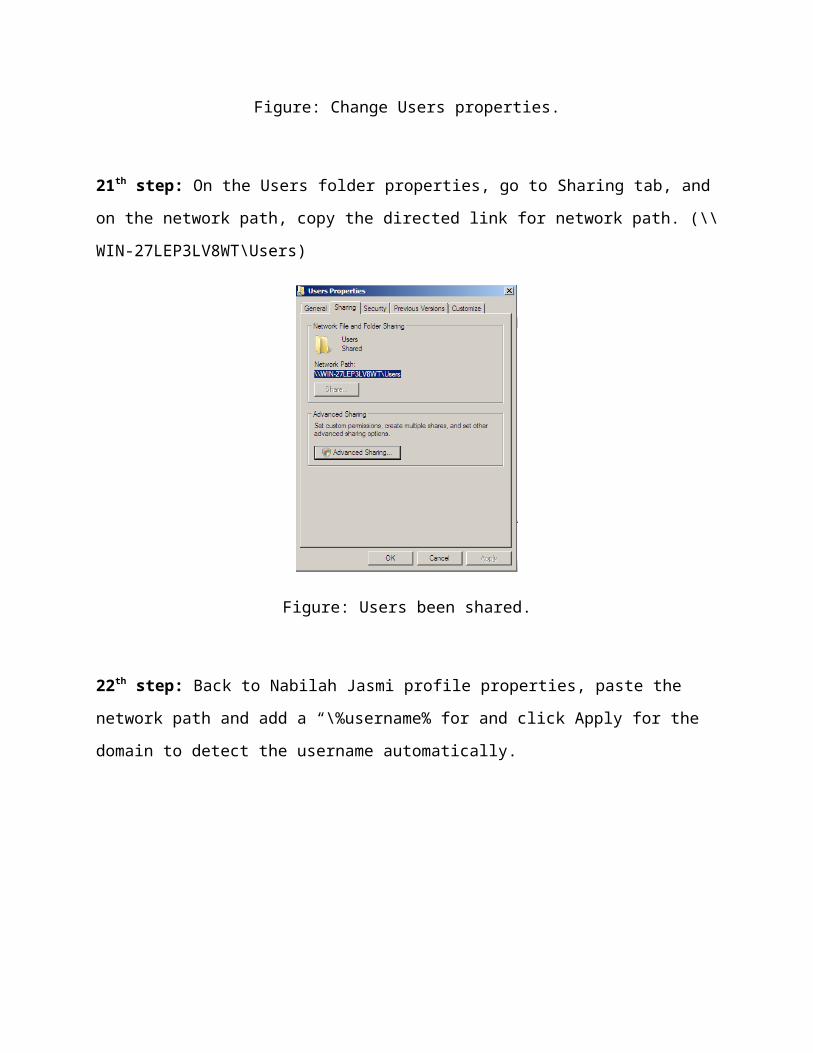
Figure: Change Users properties.
21th step: On the Users folder properties, go to Sharing tab, and
on the network path, copy the directed link for network path. (\\
WIN-27LEP3LV8WT\Users)
Figure: Users been shared.
22th step: Back to Nabilah Jasmi profile properties, paste the
network path and add a “\%username% for and click Apply for the
domain to detect the username automatically.
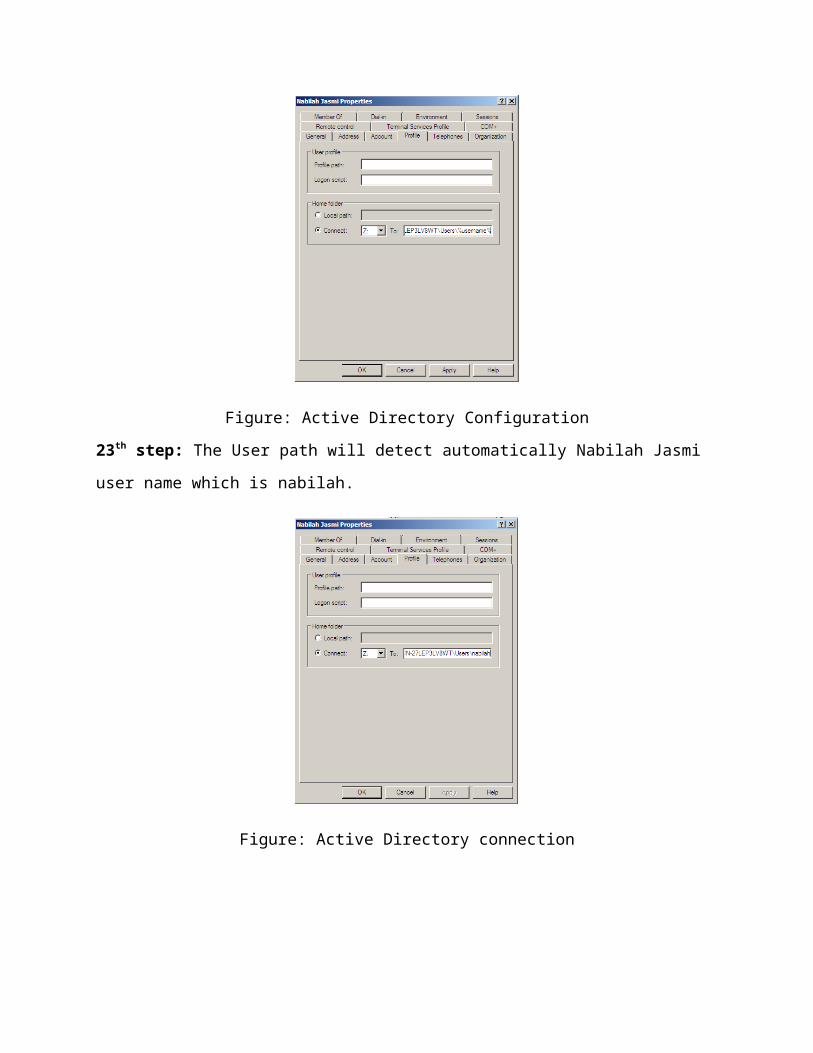
Figure: Active Directory Configuration
23th step: The User path will detect automatically Nabilah Jasmi
user name which is nabilah.
Figure: Active Directory connection
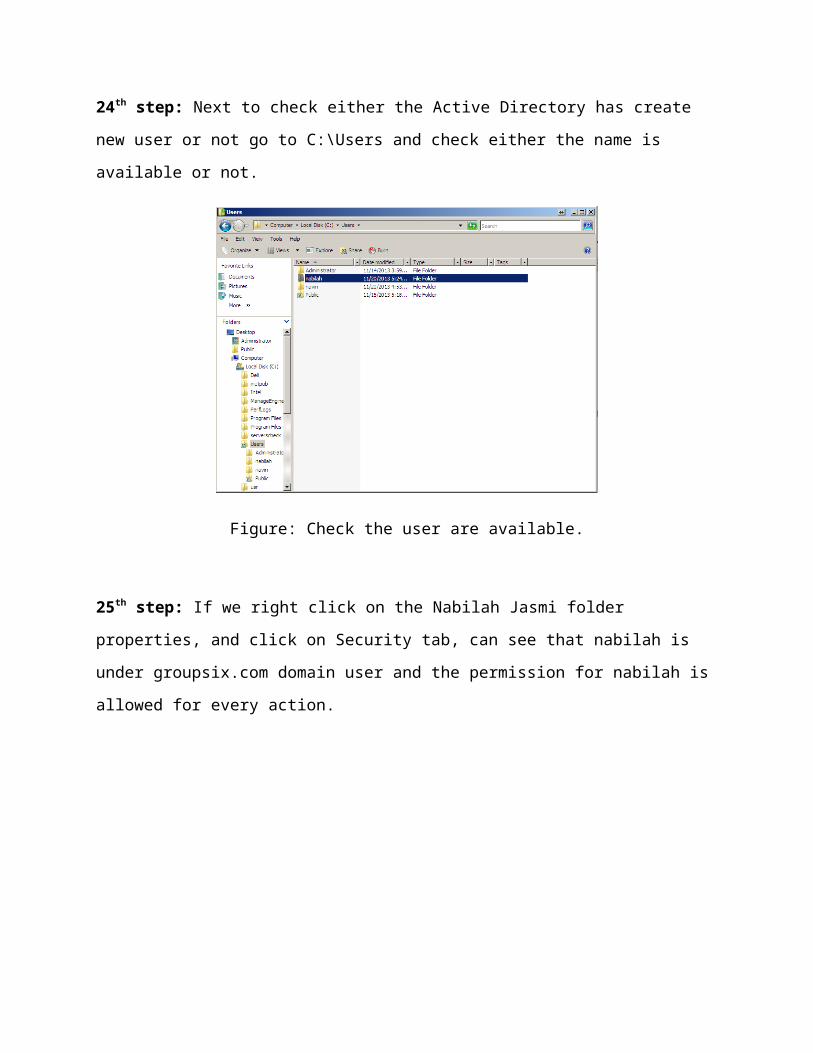
24th step: Next to check either the Active Directory has create
new user or not go to C:\Users and check either the name is
available or not.
Figure: Check the user are available.
25th step: If we right click on the Nabilah Jasmi folder
properties, and click on Security tab, can see that nabilah is
under groupsix.com domain user and the permission for nabilah is
allowed for every action.
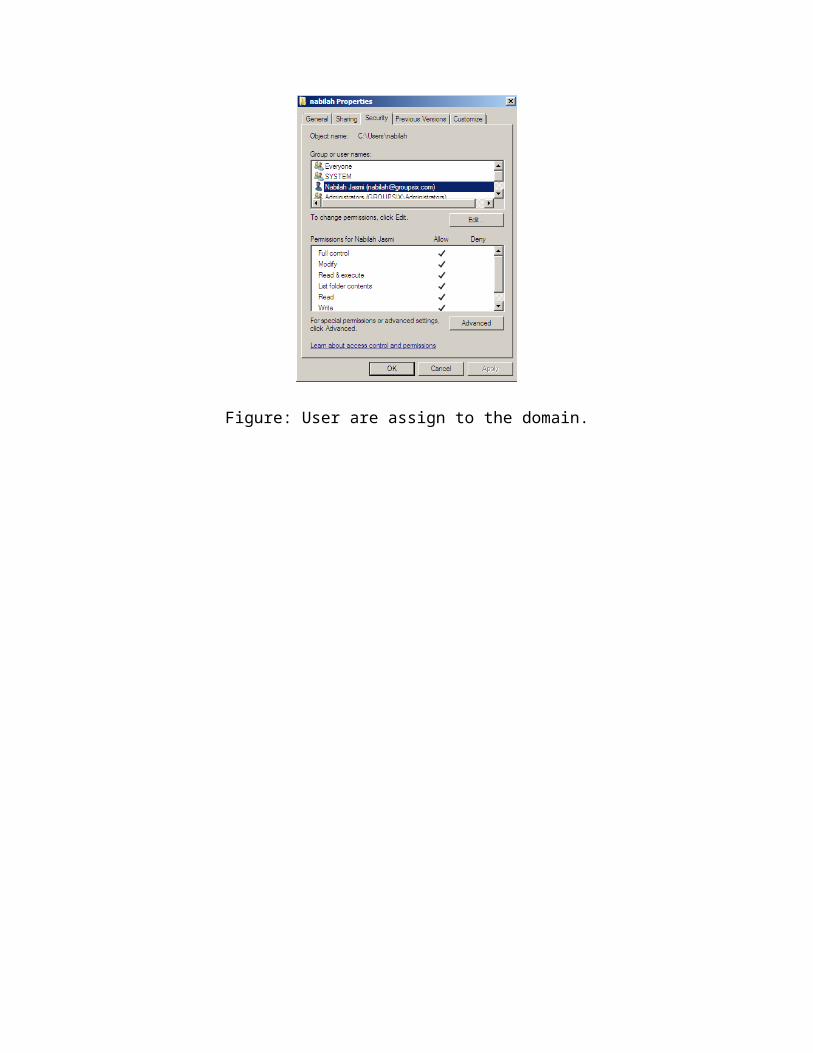
Figure: User are assign to the domain.
Related Documents