Welcome message from author
This document is posted to help you gain knowledge. Please leave a comment to let me know what you think about it! Share it to your friends and learn new things together.
Transcript


A guide in building container house
Since you are interested in container house, you might have thought of building one either for
you or for someone else. Container house has been increasing popularity today since its
inceptions. This guide will help you in the most comprehensive way possible to make your
projects comes to reality. Information were gathered through extensive research and then
illustrated. It provides necessary information from start to finish plus 25 sample container
house designs to choose.
The diagram below illustrates the design process of building a container house.
Design process flowchart
identify goals and
requirements
Research Conceptualize a house Design
Secure nesessary bulilding permit
purchase materials
implementation

Since Shipping Container also called ISO Container (International Standard
Organization) where built according to strict standard to make sure it can withstand harsh sea voyage environment.
Characteristics of an ISO shipping container Shipping Container
Specifications for the most common ISO Standard Shipping Containers:
Iso container length Width Height
External of a
stand
20' (6.1 m) 8' wide (2.44m) 8' 6". (2.6m.) high
40' (12.2 m) Same Same
Internal of a
stand
19' 4.25" (5.899 m) 7' 10" (2.353 m) 7' 8.625" (2.388 m)
39' 5.375" (12.024 m) Same Same
Characteristics and Components of a standard ISO shipping container:
1. Monocoque body
2. Corner Castings
3. Steel corrugated sheet sidewalls, roof, and back panel
4. All-welded-steel, continuously
5. Purin reinforced Plywood Floors
6. Forklift pockets
7. Grappler pockets
8. Gooseneck tunnel
Load capacity of steel shipping container:
1. Racking/Shear Load of the shipping container (corner posts) 16,000 lb
2. Side Wall Lateral Load of the shipping container 235 psf
3. End Wall Lateral Load of the shipping container 366psf
4. Racking/Shear Load of the shipping container 33,500 lb
5. Stacking/ Axil Load of the shipping container 210,000 lb
6. Roof Load of the shipping container 300psf
7. Floor Load of the shipping container 100 psf
Where to get shipping container
Table of information where to get shipping Container for sale 1. Newspaper classified ads
2. www.ebay.com 3. Yellow pages of your local telephone directory
4. Internet

The logical way to start your container building project is to come up with a
plan for your building on paper, deciding if you want to use 20 or 40 ft units.
The next step is to locate possible containers for purchase. Once you
have a source for purchasing your units, plan out and install your foundation
Then you can pay for the containers and arrange for delivery after concrete (
if using a concrete foundation) cures. This is also a good time to reserve a tr
uck mounted crane (if needed) to place units on the
foundation.
Pre-Purchase Inspection
Just like when you buy appliance product for example pre-purchase habit
should be in place. What I mean is that you have to check the product first
before you purchase.
Check the ID placards on any container you are interested in purchasing.
Buying long time used container is cheaper yet it’s life span service also
decreases. However, you can still revigorate it by cleaning it up and
removing the rust and dust then repaint it with anti-rust.

Moving the container
Many companies use specialized delivery trucks for 20' containers. These ar
e called side-loaders and drop the container on the passenger side
of the truck with miniature crane arms. These vehicles are usually able to re
ach a more backwoods locations than a semi towing a flat bed trailer.
In general, a 20' unit will get into more spots than the 40', but dealing with t
he driver, and perhaps coaxing him, is always a possibility when taking deliv
ery. Drivers do the best they can to get the container as close as possible to
the location you want. If no arrangements for a special delivery truck have b
een made, you will need to hire a crane or excavator capable of lifting the co
ntainer off the truck and onto your foundation, and have it waiting onsite at
delivery. The expense of hiring heavy equipment will be worthwhile, and still
bring your structure together for a low cost.Cranes for hire may prove rare

were you live, but large excavators are commonly available everywhere.
A large excavator is capable of lifting 20,000 lbs 30 ft high. A medium
sized back- hoe is adequate to lower a container from truck to foundation,
but a larger size wilbe needed to hoist containers into place for 2nd level des
igns. You can look in the phone book under 'excavating / back hoe' services f
or this. Hook up chains, hooks, cables, or lifting straps to the excavators sho
vel for lifting. An excavator or crane is required for 2 level container building
s. For anything higher than a 2 level building, a crane is required.

From http://www.zl6qh.com/000465.html
Consolidating the plan
Go back to diagram above in constructing your project container house. Planning is very
essential in our entire endeavor. Good planning increases our chances of getting success it is said that
90% of all architectural building constructed is attributed to good planning.
First, you to Establish planning and design goals. Define and evaluate space
requirements. Review benchmark standards, codes, and guidelines. Here is the checklist of this
to do:
o How many people will used the house
o What is the style/ overall feel of your house
o What is your minimum and maximum budget for the project
o What place is your building construction project located.
o What are the requirements for the building
o Review site and soil bearing capacity.
o Determine the binding code and review.
o Determine if required professional services.
o Prepare project budget.
o Detail all program requirements - number of bedrooms, baths, home office, etc
and determine rough square footage of each.
o Develop schematic design - including container massing configuration, floor
plans, and elevations.

o Locate local or regional shipping container re-sellers and shops capable of
performing modifications and interior fit-outs.
In Australia, Vitalmark constructions posted these building permit requirements on their site, Getting a Building Permit:
Why do I need a permit?
All major building work carried out in Australia requires a permit issued by the local Council.
Building without a permit can result in heavy fines.
Who gets the permit?
In most cases your builder will obtain all the proper permits required for your building to
commence. However you may wish to manage this part of the process yourself.
Whatever the choice, the owner is liable for all costs relating to the permit, and allocation of the
process should be clearly stipulated in the building contract.
The Permit Checklist
Getting your building permit is the first real step towards construction, but before you make that
step you'll need to take many little steps gathering together the following documentation.
The overall form:
A completed Application form
Payments
o Building Fee
o Lodgement Fee
o Crossing Deposit
o Inspection Fee
o Government Levy
Information relating to your property
Certificate of title for your property, a copy is available from the Titles Office
Proof of your ownership of the property OR
proof that you are purchasing the property under Section 9AA of the Sale of Land Act
1962
full details of services in any easement
45 degree Angle of Repose details

any approval issued by a relevant Authority (eg heritage body, VicCode) for works on the
property
final Town Planning agreement
Information relating to the building works
Housing Guarantee Fund registration (form 10)
3 sets of an allotment plan to a scale of 1:500 or more
3 sets of fully-dimensioned working drawings
3 sets of builders' specifications
AS1684,1992 compliant Timber frame and bracing design
3 sets of truss computations & layouts
3 sets of structural Engineers' computations
3 sets of Engineers' Report of existing conditions for Footing system & structural frame
elements
3 sets of Energy Rating Report
3 sets of Soil Report
details of any proposed work required for protection of persons & public property
III. Getting to work
Here we will talk about how to set-up your own container house assuming that you have
completed the task in setting your objectives and the necessary permits to establish your own
container house.
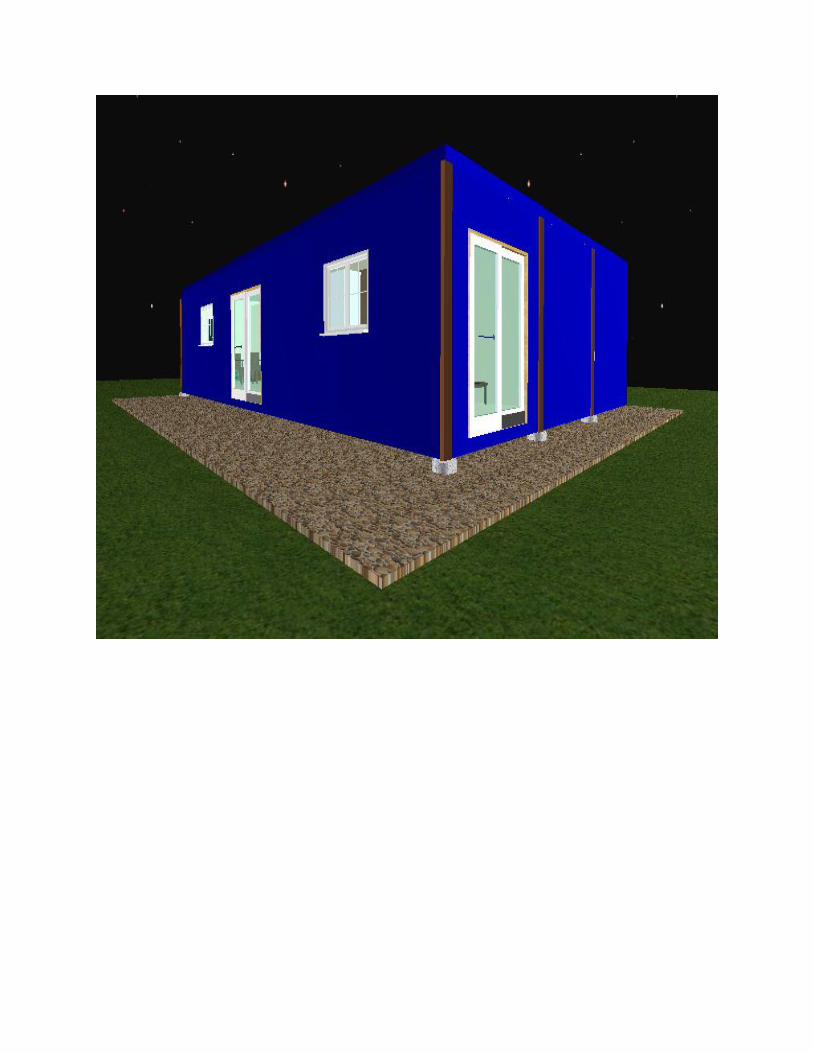
First,
We will take a design layout for your container house. The illustration below illustrated
the most common container house to consider. But, of course you can still make your own
design.
Note: Other countries vary on some degree of documents required in applying building permits.

On above layout we will take 2 40 footer ISO container. This will be enough to give us a
2 bedroom, 1 bathroom, a living and dining room.
You can used traditional way of lay outing foundation or through the aid of computer
aided design. If you consider using traditional method (pencil and paper) a sketch drawing will
do. Then when you have the initial layout out you can continue draw its initial floor plan design.
In this case it will be much easier if you will used Computer Assisted Design Software such as
3d homes Architect, Punch home design or sketch up.
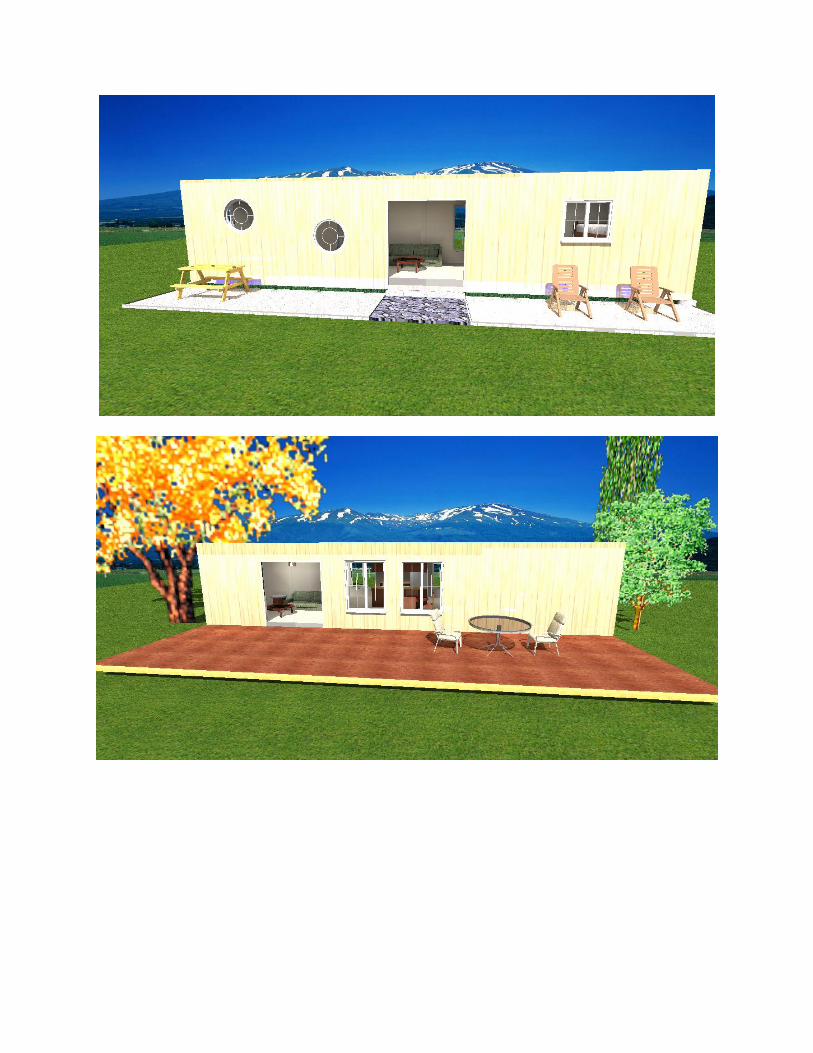
Container House Basic Elevation Layout
Container House Basic Plan Layout
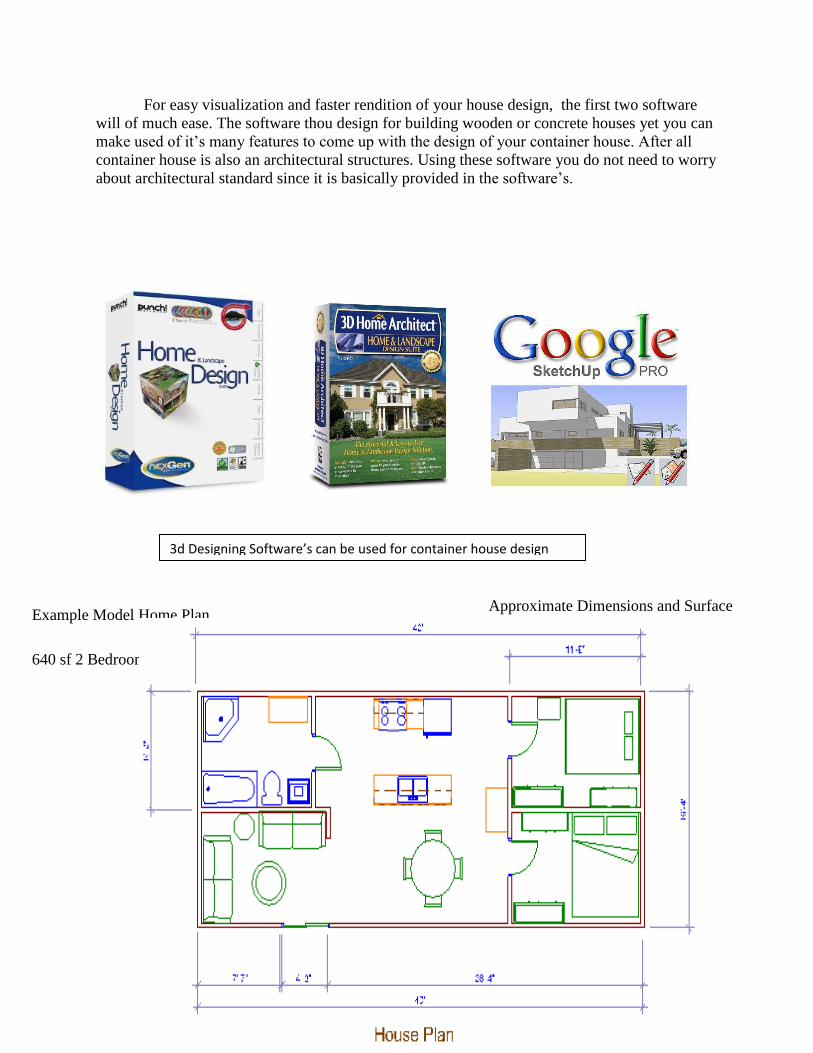
For easy visualization and faster rendition of your house design, the first two software
will of much ease. The software thou design for building wooden or concrete houses yet you can
make used of it’s many features to come up with the design of your container house. After all
container house is also an architectural structures. Using these software you do not need to worry
about architectural standard since it is basically provided in the software’s.
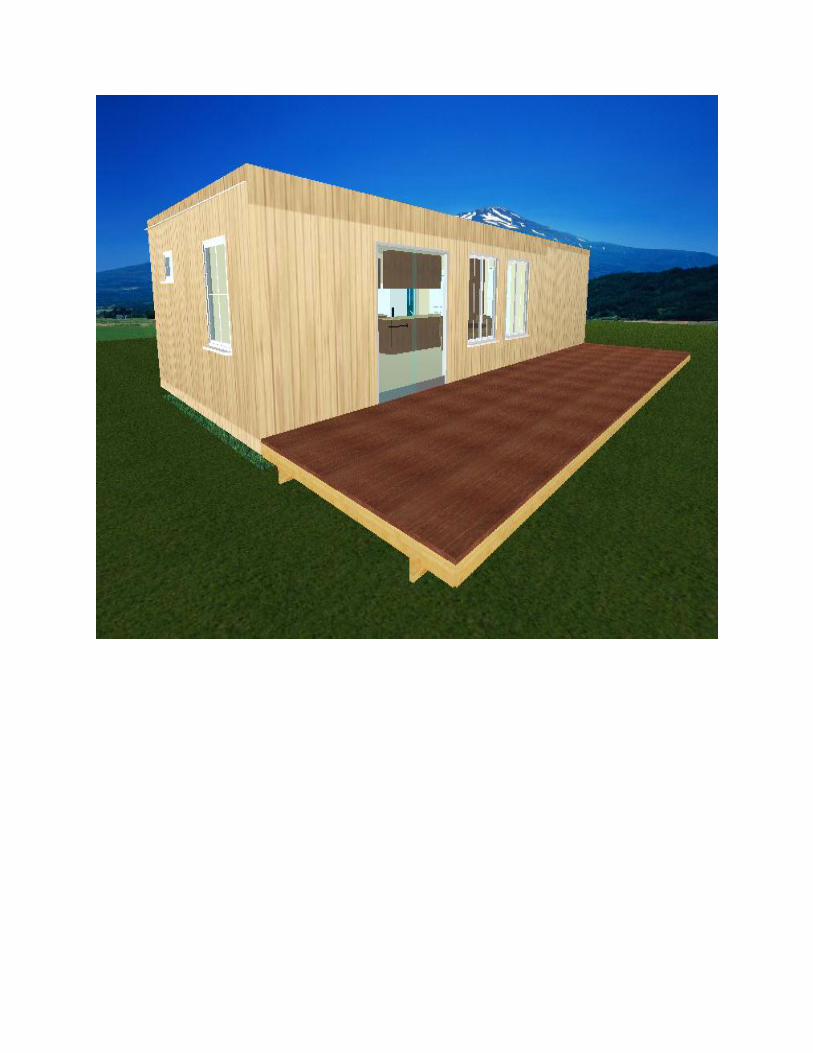
Example Model Home Plan
Approximate Dimensions and Surface
Areas
640 sf 2 Bedroom, 1 Bathroom
3d Designing Software’s can be used for container house design

Small residential house
Standard Container Units
Approximate Dimensions and Surface Areas
Container
Dimensions
Length
Width
Height
Floor
Area
Roof
Panel
Left.Side
Wall Panel
Right Side
Wall Panel
Back Wall
Panel
Front
Doors
20' High Cube 20ft 8ft 9.5ft 160 s.f. 160 s.f. 190 s.a. 190 s.a. 76 s.a. 76
s.a.
20' Standard
Cube 20ft 8ft 8.5ft 160 s.f. 160 s.f. 170 s.a. 170 s.a. 68 s.a.
68
s.a.
40' High Cube 40ft 8ft 9.5ft 320 s.f. 320 s.f. 380 s.a. 380 s.a. 76 s.a. 76
s.a.
40' Standard
Cube 40ft 8ft 8.5ft 320 s.f. 320 s.f. 340 s.a. 340 s.a. 68 s.a.
68
s.a.
The table above indicates the calculated space for ISO container. Those surfaced area will be useful in calculating space divisions for different areas
in the house. House Elevations
Door and window must be

Front Elevation
Site preparation:
Before you purchase you container, it is wise to prepare the site first. This includes cleaning the
site, flatten the area where you will place the containers. For flattening the area we can used the
pounding tool or you can just used flat board for flattening. Flattening activity is most useful when using
slab foundation but still looks well for just concrete footings. Anyways, after preparing the site we can
now proceed in laying the foundation.
For a 40-foot shipping container house:
To build the foundation for 40-foot container buildings may differ in style depending on its advantages.
What are most used are the Concrete blocks for shipping containers, but they have to be reinforced with
rebar. A pin foundation can also be used because it is more environment-friendly.
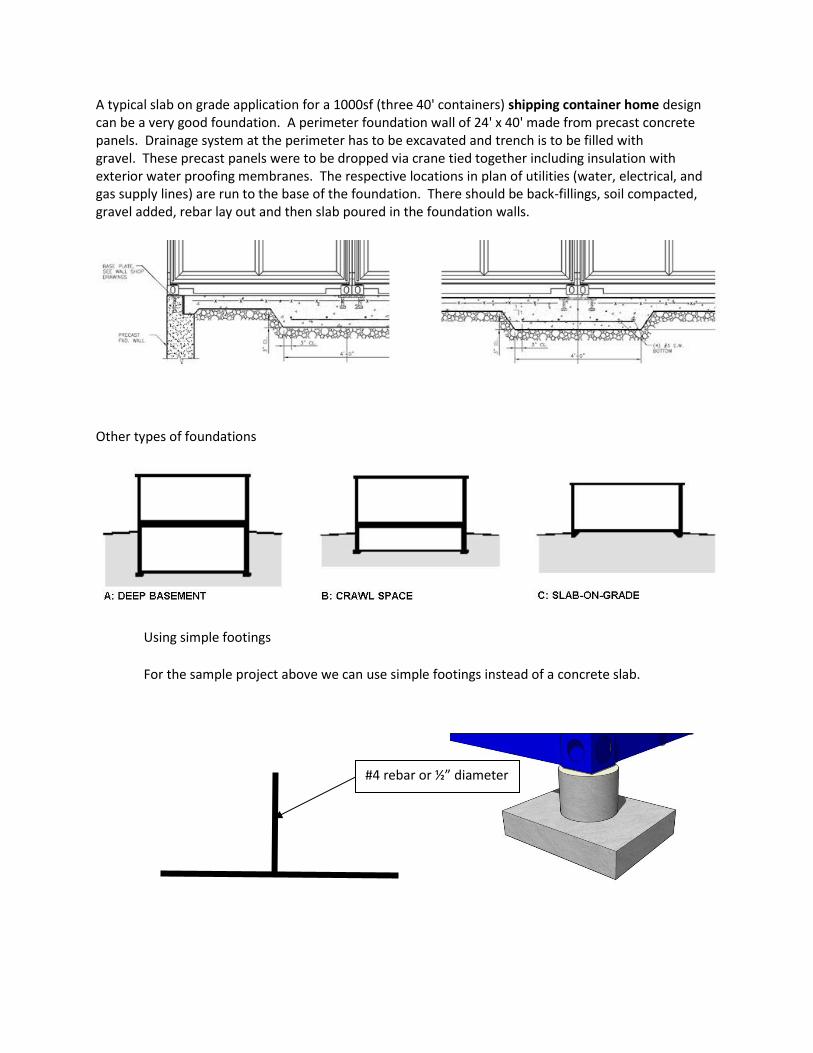
A typical slab on grade application for a 1000sf (three 40' containers) shipping container home design can be a very good foundation. A perimeter foundation wall of 24' x 40' made from precast concrete panels. Drainage system at the perimeter has to be excavated and trench is to be filled with gravel. These precast panels were to be dropped via crane tied together including insulation with exterior water proofing membranes. The respective locations in plan of utilities (water, electrical, and gas supply lines) are run to the base of the foundation. There should be back-fillings, soil compacted, gravel added, rebar lay out and then slab poured in the foundation walls.
Other types of foundations
Using simple footings
For the sample project above we can use simple footings instead of a concrete slab.
#4 rebar or ½” diameter
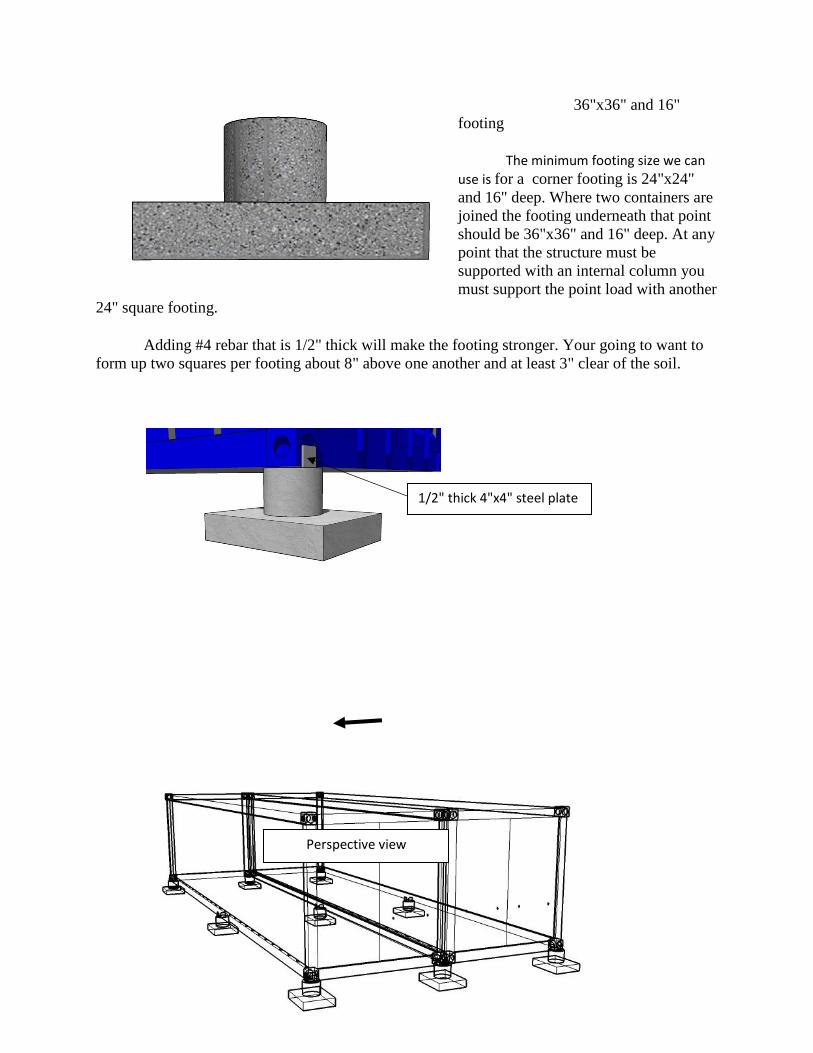
36"x36" and 16"
footing
The minimum footing size we can
use is for a corner footing is 24"x24"
and 16" deep. Where two containers are
joined the footing underneath that point
should be 36"x36" and 16" deep. At any
point that the structure must be
supported with an internal column you
must support the point load with another
24" square footing.
Adding #4 rebar that is 1/2" thick will make the footing stronger. Your going to want to
form up two squares per footing about 8" above one another and at least 3" clear of the soil.
36” x 36” and 16 “ footing isometric
1/2" thick 4"x4" steel plate
Perspective view
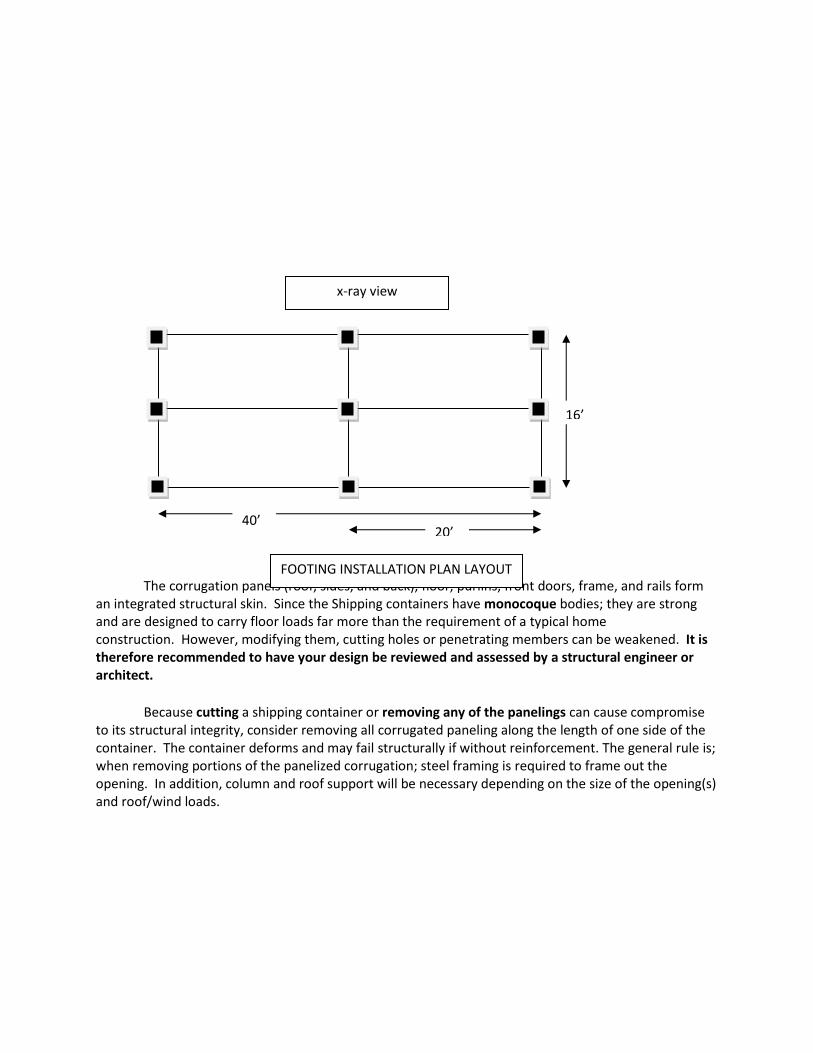
The corrugation panels (roof, sides, and back), floor, purlins, front doors, frame, and rails form an integrated structural skin. Since the Shipping containers have monocoque bodies; they are strong and are designed to carry floor loads far more than the requirement of a typical home construction. However, modifying them, cutting holes or penetrating members can be weakened. It is therefore recommended to have your design be reviewed and assessed by a structural engineer or architect.
Because cutting a shipping container or removing any of the panelings can cause compromise to its structural integrity, consider removing all corrugated paneling along the length of one side of the container. The container deforms and may fail structurally if without reinforcement. The general rule is; when removing portions of the panelized corrugation; steel framing is required to frame out the opening. In addition, column and roof support will be necessary depending on the size of the opening(s) and roof/wind loads.
FOOTING INSTALLATION PLAN LAYOUT
x-ray view
16’
16’
40’ 20’

In the designing and constructing of shipping containers into homes, larger part of that is Steel cutting, framing, and welding. In single family or smaller home designs, steel construction is not very popular because it is expensive. Cost of steel vs. wood/light gauge framing is substantial and the labor cost for steel vs. carpentry is also higher. To combat this, it is best to have as much of the welding and reinforcing done off-site before setting the containers on site and starting the interior fit-out. Most (if not all) container re-sellers have the facilities to make these modifications.
All corner blocks are welded to each other to secure the containers to them. And when the shipping containers arrive on site, they are crane-lifted one by one onto the foundation, hooked into place, and welded down to marry them completely to the foundation. These heavy-gauge steel containers are so strong—each is designed to carry 57,000 pounds—that they need only be fastened at the corners to hold fast, much as they would be on a ship. In the example above, the shipping container bottom corner blocks are welded to steel plates imbedded in the concrete slab to secure the house to the foundation.
Note:
If you don't have experience in metal work, or are not hiring a general contractor, you should plan on doing most of the container modification work off-site prior to delivery.

Understanding the ISO container
Figure 1 Primary Structural Components for a Typical 20' ISO Shipping Container. Note: On some ISO shelters, some of the primary structural components may be concealed
within the wall, roof, and floor panels. The areas where the adjacent panels join will be
thoroughly inspected. This inspection will meet the criteria for the Wall Beams and the Roof
Beams.
4.1.1 Corner Fitting. Internationally standard fitting (casting) located at the eight corners
of the container structure to provide means of handling, stacking and securing containers.
Specifications are defined in ISO 1161.
4.1.2 Corner Post. Vertical structural member located at the four corners of the container
and to which the corner fittings are joined.
4.1.3 Door Header. Lateral structural member situated over the door opening and joined
to the corner fittings in the door end frame.

4.1.4 Door Sill. Lateral structural member at the bottom of the door opening and joined
to the corner fittings in the door end frame.
4.1.5 Rear End Frame. The structural assembly at the rear (door end) of the container
consisting of the door sill and header joined at the rear corner fittings to the rear corner
posts to form the door opening.
4.1.6 Top End Rail. Lateral structural member situated at the top edge of the front end
(opposite the door end) of the container and joined to the corner fittings.
4.1.7 Bottom End Rail. Lateral structural member situated at the bottom edge of the
front end (opposite the door end) of the container and joined to the corner fittings.
4.1.8 Front End Frame. The structural assembly at the front end (opposite the door end)
of the container consisting of top and bottom end rails joined at the front corner fittings to
the front corner posts.
4.1.9 Top Side Rail. Longitudinal structural member situated at the top edge of each side
of the container and joined to the corner fittings of the end frames.
4.1.10 Bottom Side Rail. Longitudinal structural member situated at the bottom edge of
each side of the container and joined to the corner fittings to form a part of the
understructure.
4.1.11 Cross Member. Lateral structural member attached to the bottom side rails that
supports the
flooring.
4.1.12 Understructure. An assembly consisting of bottom side and end rails, door sill
(when applicable), cross members and forklift pockets.
4.1.13 Forklift Pocket. Reinforced tunnel (installed in pairs) situated transversely across
the understructure and providing openings in the bottom side rails at ISO prescribed
positions to enable either empty capacity or empty and loaded capacity container
handling by forklift equipment.
4.1.14 Forklift Pocket Strap. The plate welded to the bottom of each forklift pocket
opening or part of bottom siderail. The forklift pocket strap is a component of the forklift
pocket.
4.1.15 Gooseneck Tunnel. Recessed area in the forward portion of the understructure to
accommodate transport by a gooseneck chassis. This feature is more common in forty
foot and longer containers.

Figure 4.2 Exploded axonometric view of a Typical 20' ISO Shipping Container .
4.2 Walls, Roof, and Floor. Refer to Figure 4.2A
4.2.1 Fiberglass Reinforced Plywood (FRP). A material constructed of laminates of
fiberglass, polyester resins, and plywood, also known as sandwich panel.
4.2.2 Wall Panel. Corrugated or flat sheet steel, a riveted or bonded aluminum sheet and
wall post assembly, FRP, foam and beam, aluminum, or honeycomb material that forms
the side wall or end wall.
4.2.3 Wall Post. Interior or exterior intermediate vertical component to which sheet
aluminum or steel is riveted or welded to form a wall panel.
4.2.4 Wall Beam. Encapsulated vertical component to which sheet aluminum or steel is
bonded to form a wall panel.This is found in foam and beam panels.
4.2.5 Marking Panel. A side wall panel of a corrugated steel configured with a flat
portion used for the display of markings and placards. (4.2A)
4.2.6 Lining. Plywood or other like material attached to the interior side and end wall to
protect the walls and/or cargo and facilitate loading operations.
4.2.7 Lining Shield. A strip of thin metal installed at the bottom of the interior walls to
protect the lower portion of the lining from damage by materials handling equipment
during loading or unloading operations.
4.2.8 Kick Plate. A common name for a lining shield installed on the lower portion of
the interior front end wall.
4.2.9 Ventilator. Two or more devices permanently attached to the side or end wall panel
that provides openings for the exchange of air (but not water) between the outside and the
container interior. (4.2A)
4.2.10 Roof Panel. Corrugated or flat sheet steel, sheet aluminum, FRP, or foam and
beam and aluminum honeycomb panel that forms the top closure of the container. (4.2A,)
4.2.11 Roof Bow. Lateral non-structural member attached to the top side rails and
supporting the underside of the roof panel. Roof bows used with removable cover (tarp)
assembly are unattached. Not all container designs require roof bows.
4.2.12 Roof Beam. Encapsulated horizontal component to which sheet aluminum or steel
is bonded to form a roof panel.
4.2.13 Roof Reinforcement Plate. An additional metal plate on the interior or exterior of
the roof panel adjacent to the top corner fittings that provides protection of the roof panel
or top rail components from misaligned handling equipment.
4.2.14 Tarp. Jargon for "tarpaulin" which is a waterproof and flexible fabric used for
covering the top of an open-top container. This covering is referred to as a "Tilt" in some
countries.
4.2.15 TIR Cable. Plastic sheathed wire rope that is designed in accordance with TIR
customs convention (Refer to paragraph 4.5.6) and is threaded through the welded loops
on the sides, end panels and door panels of an open-top container to secure the tarp.
4.2.16 Flooring. Material that is supported by the cross members and bottom rails to
form a load bearing surface for the cargo. The flooring is usually constructed of
laminated wood planks, plywood sheets, or other composition material and is screwed or
bolted to the cross members. Some containers have welded steel or aluminum flooring,
sandwhich panels or a combination of metal and wood. (4.2A)
4.2.17 Joint Strip. A formed steel or aluminum strip (usually hat-shaped section)
installed between joints of the plywood sheet flooring or joints of the plywood sheet
lining to help integrate and support the edges of the plywood. (4.2A)
4.2.18 Threshold plate. Plate forward of the door sill to protect the entrance area of the
container floor. This plate is commonly referred to as a crash plate.
4.2.19 Steps. Folding steps are found on some ISO Shelters and are used to gain access to
the roof. They must be folded up prior to transporting shelter.
4.2.20 Sandwich Panel. A type of fixed or removable panel construction used in ISO
Shelters consisting of a thin inner and outer sheet aluminum skin, bonded or fastened to a
core constructed of either honeycomb or structural foam and aluminum beams.
4.2.21 Striker Plate. An additional metal plate on the exterior of the roof panel adjacent
to the top corner fittings that provides protection to the roof panel or top rail components
from misaligned handling equipment.

4.2.22 Sling Pad. An additional metal plate on the exterior of the roof panel located in
the center of the roof panel that provides protection to the panel from lowered handling
equipment.
Install windows, exterior doors, flashing, and any sky lights. Windows are set into openings that were measured and cut prior to delivery of the shipping containers or roughed out on site. All openings for windows and doors should be framed with a steel section. Hollow rectangle sections work the best, but an L section will work as well. Images below show openings for sliding door systems in the end and sidewall panels of a container.
Things For DO-IT yourself Construction
cordless drill-driver electric drill examples of bits and drills [1]
examples of bits and drills [2] hand drill brace
handsaw Compass saw Coping saw
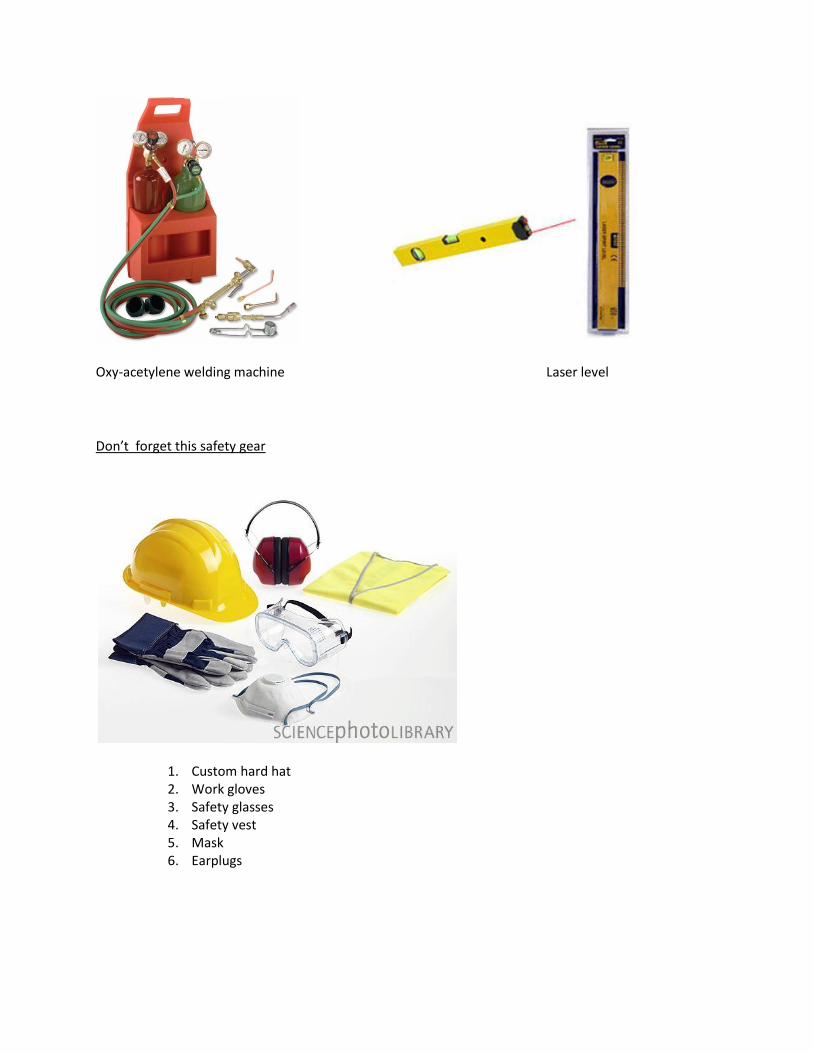
Oxy-acetylene welding machine Laser level
Don’t forget this safety gear
1. Custom hard hat 2. Work gloves 3. Safety glasses 4. Safety vest 5. Mask 6. Earplugs
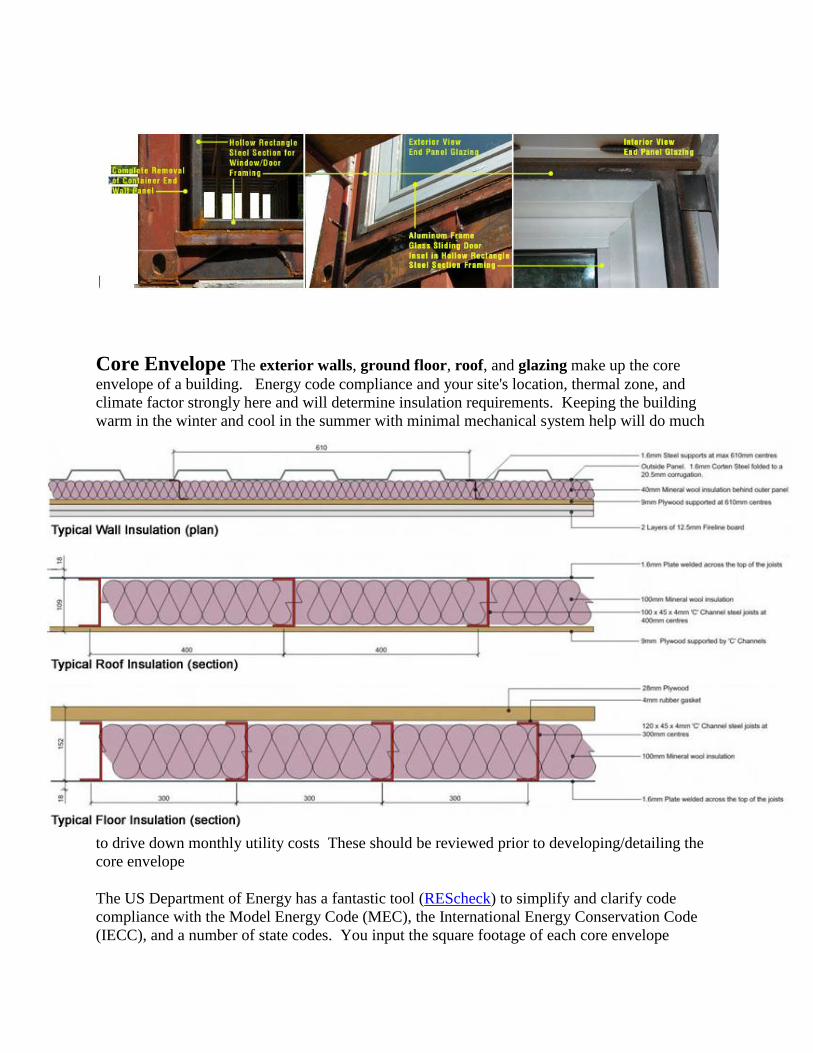
Core Envelope The exterior walls, ground floor, roof, and glazing make up the core
envelope of a building. Energy code compliance and your site's location, thermal zone, and
climate factor strongly here and will determine insulation requirements. Keeping the building
warm in the winter and cool in the summer with minimal mechanical system help will do much
to drive down monthly utility costs These should be reviewed prior to developing/detailing the
core envelope
The US Department of Energy has a fantastic tool (REScheck) to simplify and clarify code
compliance with the Model Energy Code (MEC), the International Energy Conservation Code
(IECC), and a number of state codes. You input the square footage of each core envelope
element (wall, roof, slab, etc.) and project location. This will determine the binding energy code
and allow you to play with different R values (insulation levels) until the envelope design is in
compliance and thereby setting the required R-values. Even if your project is small or not
subject to energy code compliance, the REScheck exercise is worth the time.
The R-Value Table in the Reference Documents and Details section has different assembly R-
values. Once you know the required R-values for the core envelope elements you can begin
detailing. For illustration, consider a cold climate that requires an R-30 value for exterior walls.
This could be achieve with batt (R 3.25 per inch ~ R30 would require 9-10"), foam panels (R 5
per inch ~ R30 would require 6"), and standard spray foam (R 6.75 per inch ~ R30 would require
4.5").
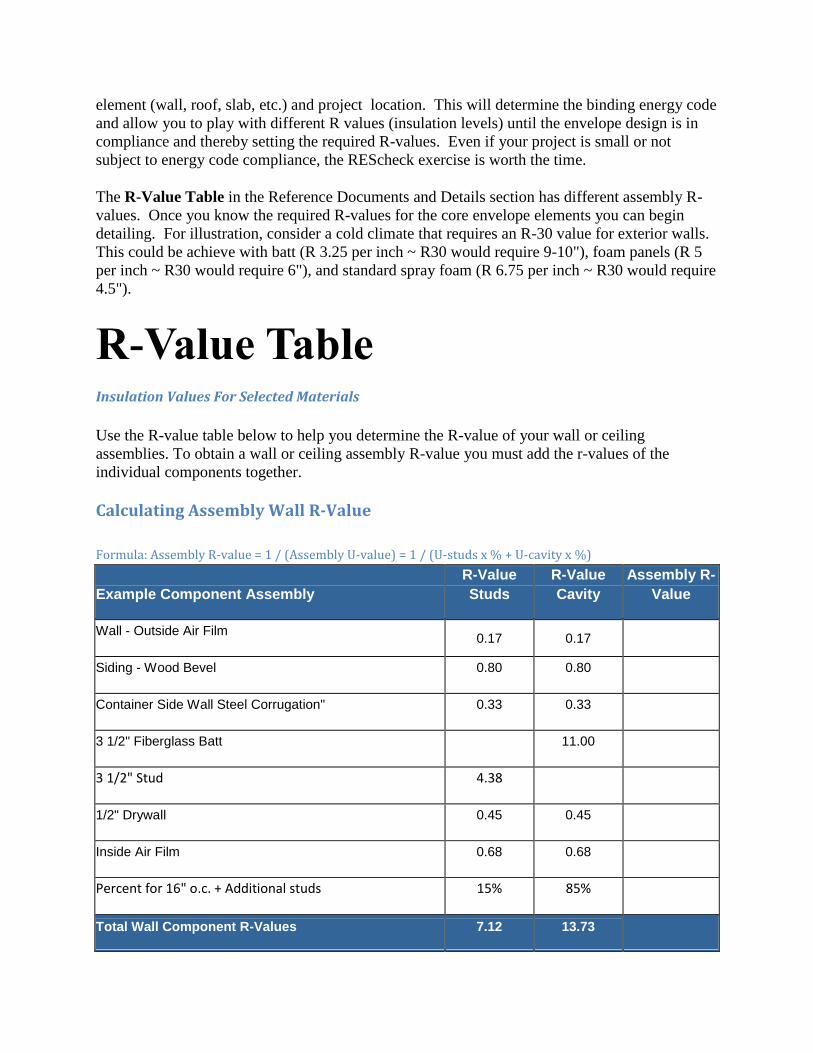
R-Value Table
Insulation Values For Selected Materials
Use the R-value table below to help you determine the R-value of your wall or ceiling
assemblies. To obtain a wall or ceiling assembly R-value you must add the r-values of the
individual components together.
Calculating Assembly Wall R-Value
Formula: Assembly R-value = 1 / (Assembly U-value) = 1 / (U-studs x % + U-cavity x %)
Example Component Assembly R-Value
Studs R-Value
Cavity Assembly R-
Value
Wall - Outside Air Film 0.17 0.17
Siding - Wood Bevel 0.80 0.80
Container Side Wall Steel Corrugation" 0.33 0.33
3 1/2" Fiberglass Batt 11.00
3 1/2" Stud 4.38
1/2" Drywall 0.45 0.45
Inside Air Film 0.68 0.68
Percent for 16" o.c. + Additional studs 15% 85%
Total Wall Component R-Values 7.12 13.73
Wall Component U-Values 0.1404 0.0728
Total Wall Assembly R-Value 12.05
* This example is just for wood frame construction. Steel studs are a more complicated calculation.
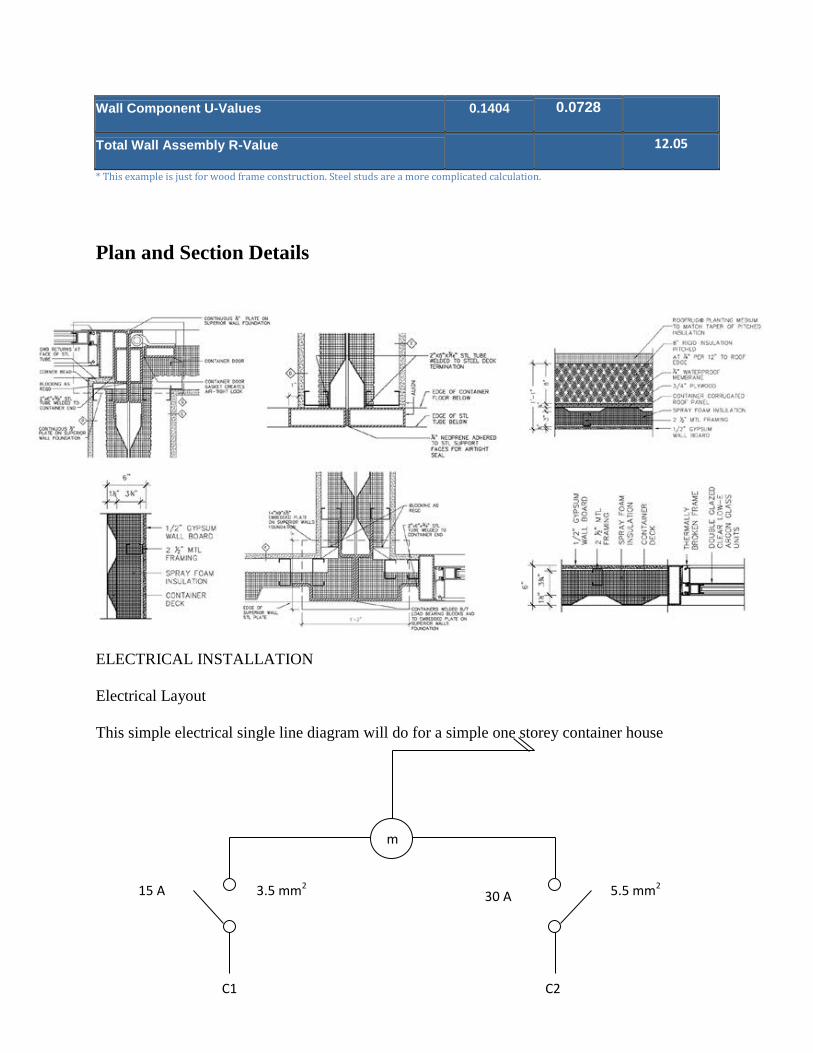
Plan and Section Details
ELECTRICAL INSTALLATION
Electrical Layout
This simple electrical single line diagram will do for a simple one storey container house
m
15 A 3.5 mm2 5.5 mm2
30 A
C1 C2
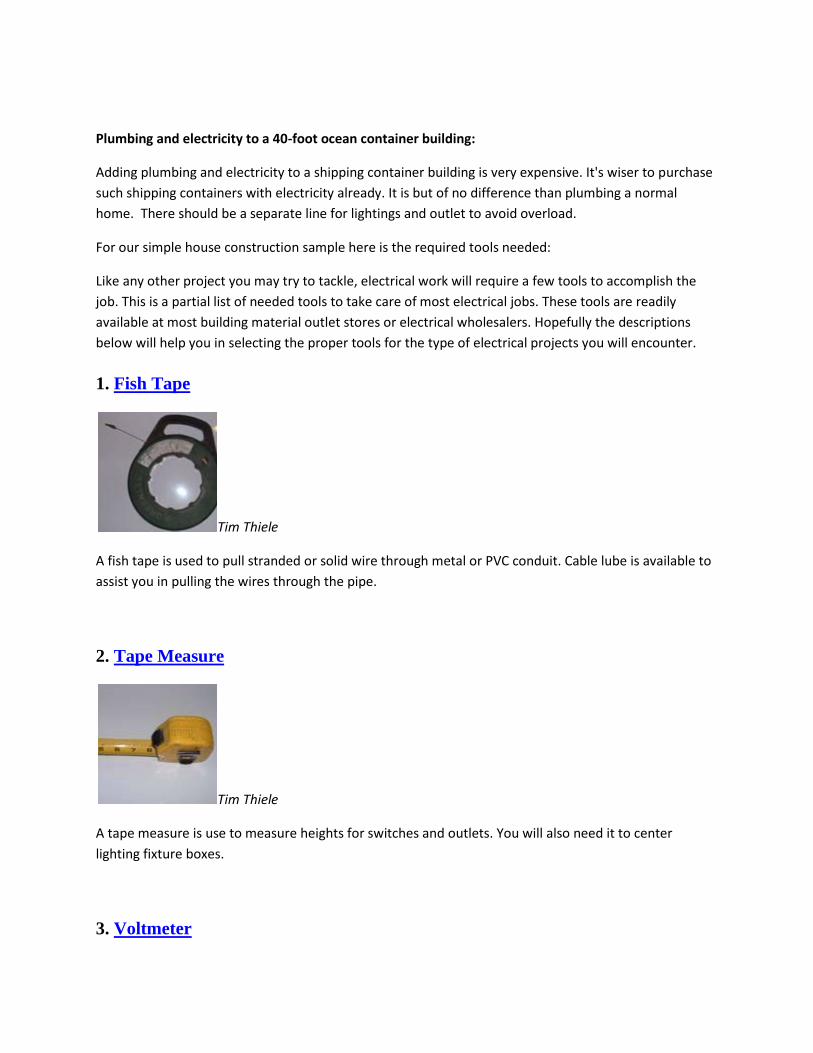
Plumbing and electricity to a 40-foot ocean container building:
Adding plumbing and electricity to a shipping container building is very expensive. It's wiser to purchase
such shipping containers with electricity already. It is but of no difference than plumbing a normal
home. There should be a separate line for lightings and outlet to avoid overload.
For our simple house construction sample here is the required tools needed:
Like any other project you may try to tackle, electrical work will require a few tools to accomplish the
job. This is a partial list of needed tools to take care of most electrical jobs. These tools are readily
available at most building material outlet stores or electrical wholesalers. Hopefully the descriptions
below will help you in selecting the proper tools for the type of electrical projects you will encounter.
1. Fish Tape
Tim Thiele
A fish tape is used to pull stranded or solid wire through metal or PVC conduit. Cable lube is available to
assist you in pulling the wires through the pipe.
2. Tape Measure
Tim Thiele
A tape measure is use to measure heights for switches and outlets. You will also need it to center
lighting fixture boxes.
3. Voltmeter
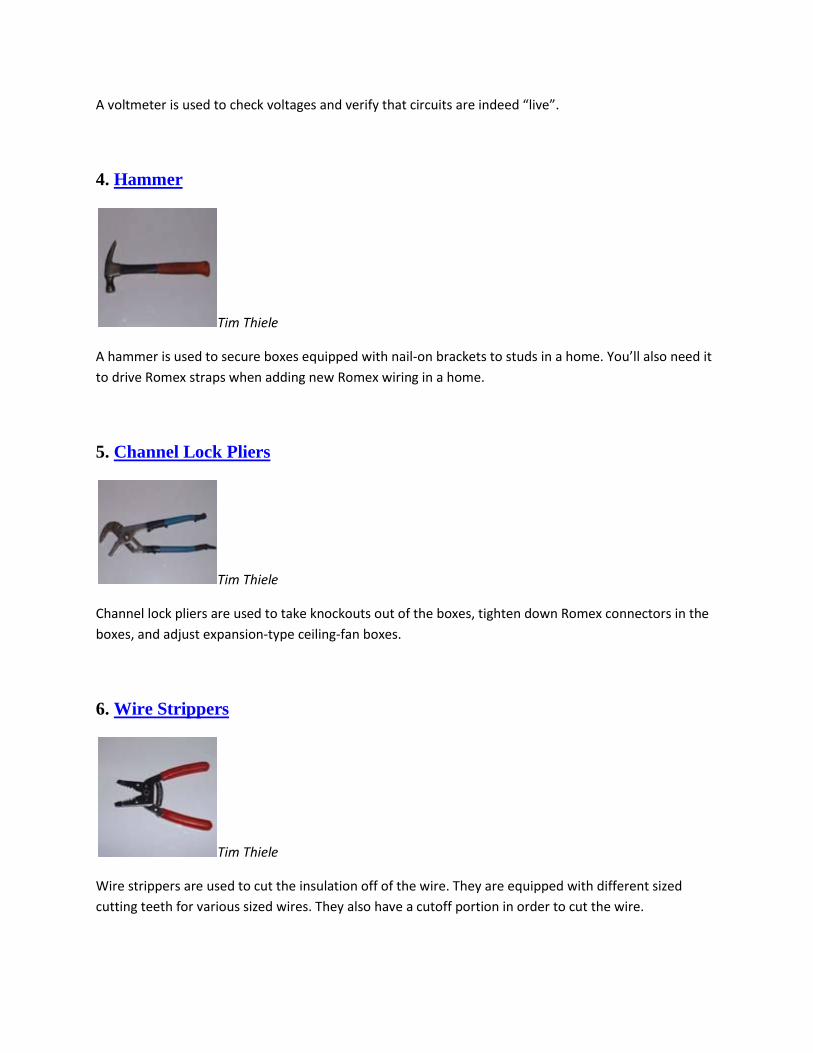
A voltmeter is used to check voltages and verify that circuits are indeed “live”.
4. Hammer
Tim Thiele
A hammer is used to secure boxes equipped with nail-on brackets to studs in a home. You’ll also need it
to drive Romex straps when adding new Romex wiring in a home.
5. Channel Lock Pliers
Tim Thiele
Channel lock pliers are used to take knockouts out of the boxes, tighten down Romex connectors in the
boxes, and adjust expansion-type ceiling-fan boxes.
6. Wire Strippers
Tim Thiele
Wire strippers are used to cut the insulation off of the wire. They are equipped with different sized
cutting teeth for various sized wires. They also have a cutoff portion in order to cut the wire.

7. Non-contact Voltage Detector
Tim Thiele
A voltage detector is used for a quick safety check to see if there is voltage or current flow present.
Some of these devices are automatic and some must be turned on via a switch. Simply place the end of
the tracer beside a wire, breaker or cord to see if it’s energized.
8. Side Cutter Diagonal Pliers
Tim Thiele
These cutting pliers, sometimes called side snips, are used to cut wire. They are specially designed with a
cutting edge that goes down to the tip of the pliers. The advantage being that you can get into tight
areas to trim wires. There are some that are equipped with live wire detection capabilities.
9. Linesman Pliers
Tim Thiele
These pliers are the do-it-all pliers. They cut, twist wires together, and grip wires for pulling. They have a
squared off end that is great for twisting wires together, a center cutting blade for cutting wire, and a
grip area between the handles to pull wire.

10. Torpedo Level
Tim Thiele
A level is used to make sure your work is level and plumb. A great installation starts with straight switch
and outlet covers.
Install interior framing, insulation, heating and cooling systems, plumbing, electrical, and rough out all fixtures. Supertherm insulative coating, is sprayed on both sides of the remaining container walls. Supertherm is a high-performance, four-part ceramic coating that carries an R value of R-19 and adheres to the steel surface of the shipping containers. A ½- inch plywood floor over the existing ¾- inch plywood sub-floor is installed. Metal hat channels for wiring are run along the walls and vertical support beams are secured. Metal studs and drywall are used for interior partition walls. Once insulated, the existing container walls are faced in drywall for finishing.
Installing Plumbing
40-foot cargo container building-maintenance:
A first-rate paint job must be applied to Steel buildings because we know they will rust. Others worry
about having a house that looks like a matchbox; all they have to do is to add stucco exteriors. By this, it
will not only lessen its appearance of being a box it also requires less effort of painting and repainting.
Plumbing tools needed
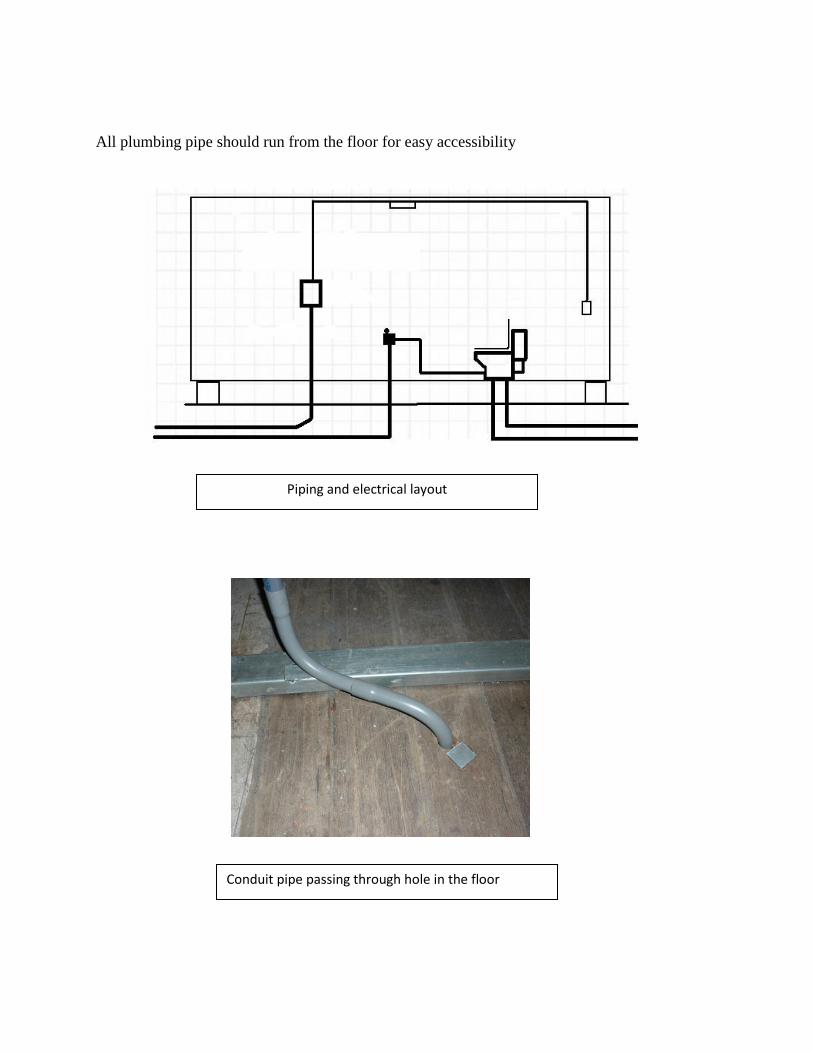
All plumbing pipe should run from the floor for easy accessibility
Conduit pipe passing through hole in the floor
Piping and electrical layout

Here is some PEX, the brass fittings, crimps, and the crimping tool:
Blue for cold, red for hot. Same stuff, just color coded for easier identification .
Here’s the toilet stub-up:
You can warm PEX with a torch, bend it, and it will keep its new shape. I welded two
pipe clamps to the side of the container. Later, this bathroom wall will get Plycem. That and the
concrete slab will hide the plumbing. The PEX, the PVC electrical conduit, and the PVC water
pipes can all be cut with this dandy pair of
shears made for the job:
Note:
Always observe safety
operating procedure like wearing
protective gloves, goggles, working
booths and etc.
Remember first precaution
is better than cure.

http://panamashippingcontainerhouse.com/%20/interior-walls-wiring-plumbing-projects-in-
progress
For Ceiling Installations:
For easy construction and convenience the use of suspended ceiling is quit popular now
days. For our simple container house plan we can use t-runner. Advantage of this is that ducts,
pipes and cables hidden above a dropped ceiling remain accessible for repair or modification. And
second, suspended ceilings are better sound barriers than drywall ceilings. In
http://www.popularmechanics.com the following are derived information on How To Install A
Suspended Ceiling:
1. We need at least 7 1/2-ft. ceiling height in new construction
2. Typical systems have an L-shaped perimeter bracket, or molding, to support the
suspended ceiling at the walls.
From this molding, long stringers, called main runners, are installed every 4 ft. and
run the length of the room. The ends of the main runners rest on the perimeter
moldings and everything in between is suspended with wires secured to the joists
above.
3. Cross tees are installed across these runners at intervals of 24 in. This grid is all
that's needed to support 2 x 4-ft. ceiling panels.
With 2 x 2-ft. panels, an additional set of connectors divides each 2 x 4-ft. area.

Installation of Septic Tank
New innovations in the use of new materials for septic tank are now increasingly used.
This type of septic tank is quit affordable and convenient to install than constructing a typical
septic tanks made of concrete. This is what we called plastic septic tanks.
According to www.damnseptictank.com these the advantages and disadvantages of plastic
septic tank
Plastic septic tanks are far less prone to cracking than other options on the market Plastic septic tanks weigh less than any other type of septic tank and so they are easily
maneuvered around a property and installed Plastic septic tanks are some of the most inexpensive on the market Since there are no metallic parts, plastic septic tanks do not rust Plastic septic tanks do not corrode and are complete water-tight
Plastic Septic Tank Disadvantages
Plastic septic tanks are so light that they will ‘float’ on the surface of the ground if they are not installed correctly
The effluent level is usually lower in a plastic septic tank, which you will only discover while having your septic tank pumped
Not all states allow the installation of plastic septic tanks (it is best to ask your City Hall) Damage to your plastic septic tank can occur during installation because it is so light-weight
Note: Check your local city hall if plastic septic tank is allowed in location
If plastic septic tank is not allowed you can still resort to the traditional use of concrete
septic tank or you can buy prefabricated concrete tank to lower by a backhoe.

Concrete Septic Tank Schematic
Lastly. Inspection and Sign-off
Staged inspections through the build with contractor and building official - foundation, plumbing
and electrical, architectural, and fire.
Put together final check/punch list for contractor
Review punch list with contractor
Final inspection with building official for certificate of occupancy

References:
Merle Henkenius. (July 1, 1996). Popular Mechanics. In How To Install A Suspended
Ceiling. Retrieved September 26, 2012, from
http://www.popularmechanics.com/home/improvement/interior/1276121-3.
Container Houses. Retrieved September 20,2012, from
http://conexhouse.blogspot.com/2008/09/foundations.html
Oxygen Acetylene Welding | How To Gas Weld.Retrieved September 27,2012, from
http://www.mechanicalengineeringblog.com/tag/oxy-acetylene-welding-equipment/
Visual Dictionary Online. Retrieved September 29,2012, from http://visual.merriam-
webster.com/house/do-it-yourself.php
Septictypes. In InspectApedia. Retrieved September 29,2012, from
http://inspectapedia.com/septic/SepticTypes.htm.
Paul Sawyers. (2004). Container for used as Steel Buildings.

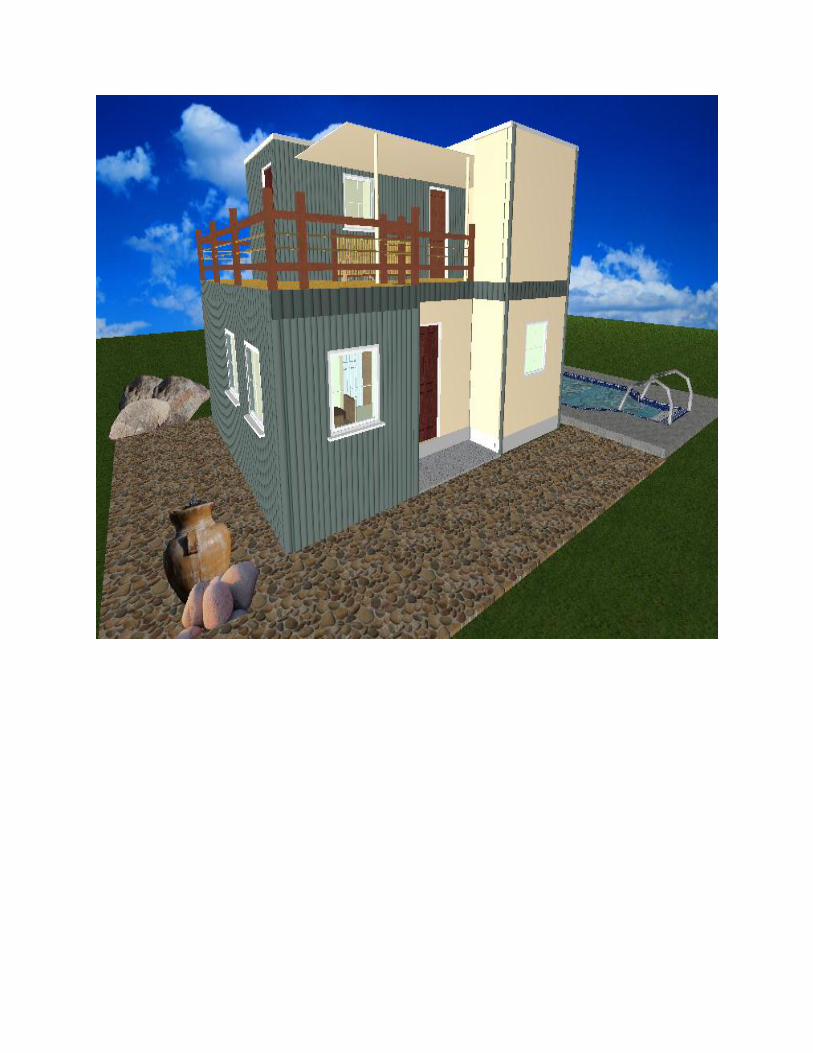
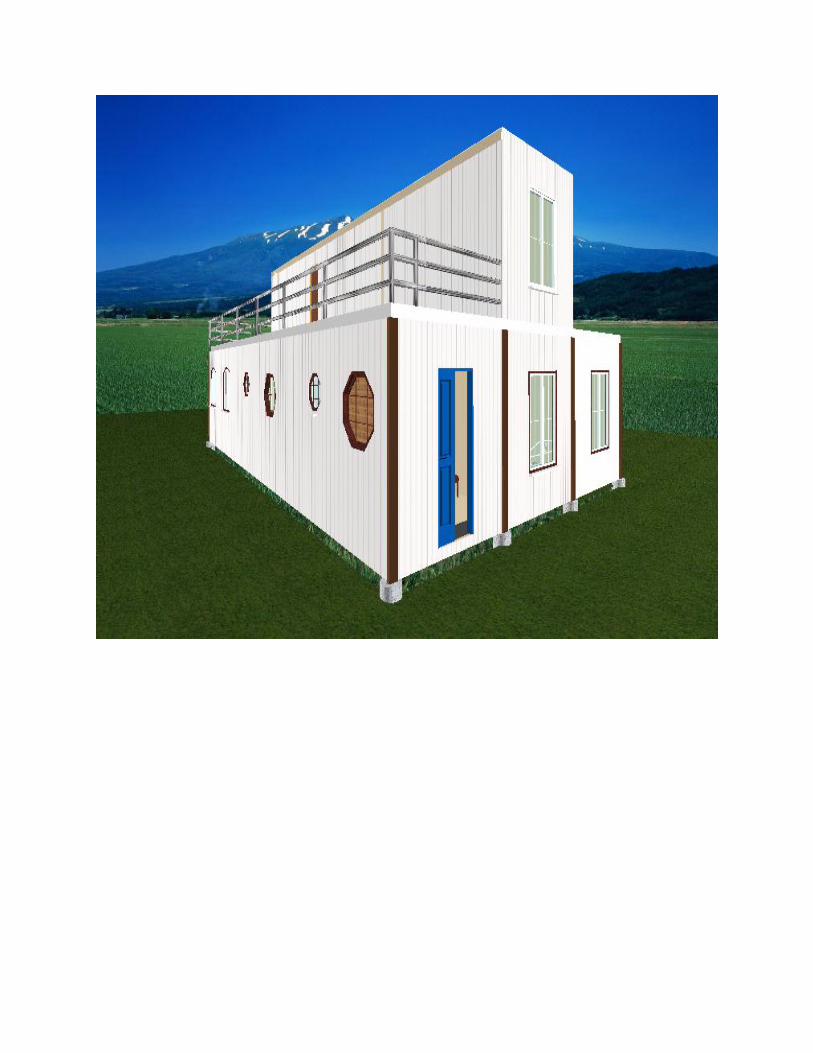
36 Container House Designs


END

Related Documents