825, 825Y, 825YD 825, 825Y, 825YD 21/2”-10” 21/2”-10”

825, 825Y, 825YD 21/2”-10”
Dec 31, 2015
825, 825Y, 825YD 21/2”-10”. Modification Overview. 825- (1975-1988) Cast iron body- Threaded in seats- Internal check parts are epoxy coated iron. Old style RV. 825D- (1988-1989) Ductile iron body- Bolted in seats- Internal check parts are stainless steel. Old style RV. - PowerPoint PPT Presentation
Welcome message from author
This document is posted to help you gain knowledge. Please leave a comment to let me know what you think about it! Share it to your friends and learn new things together.
Transcript

825, 825Y, 825YD825, 825Y, 825YD21/2”-10”21/2”-10”

Modification OverviewModification Overview 825- (1975-1988) Cast iron body- Threaded in 825- (1975-1988) Cast iron body- Threaded in
seats- Internal check parts are epoxy coated seats- Internal check parts are epoxy coated iron. Old style RV.iron. Old style RV.
825D- (1988-1989) Ductile iron body- Bolted in 825D- (1988-1989) Ductile iron body- Bolted in seats- Internal check parts are stainless steel. seats- Internal check parts are stainless steel. Old style RV.Old style RV.
825YD- (1989-present) Ductile iron body- bolted 825YD- (1989-present) Ductile iron body- bolted in seats- Internal check parts are stainless steel. in seats- Internal check parts are stainless steel. New style RV.New style RV.
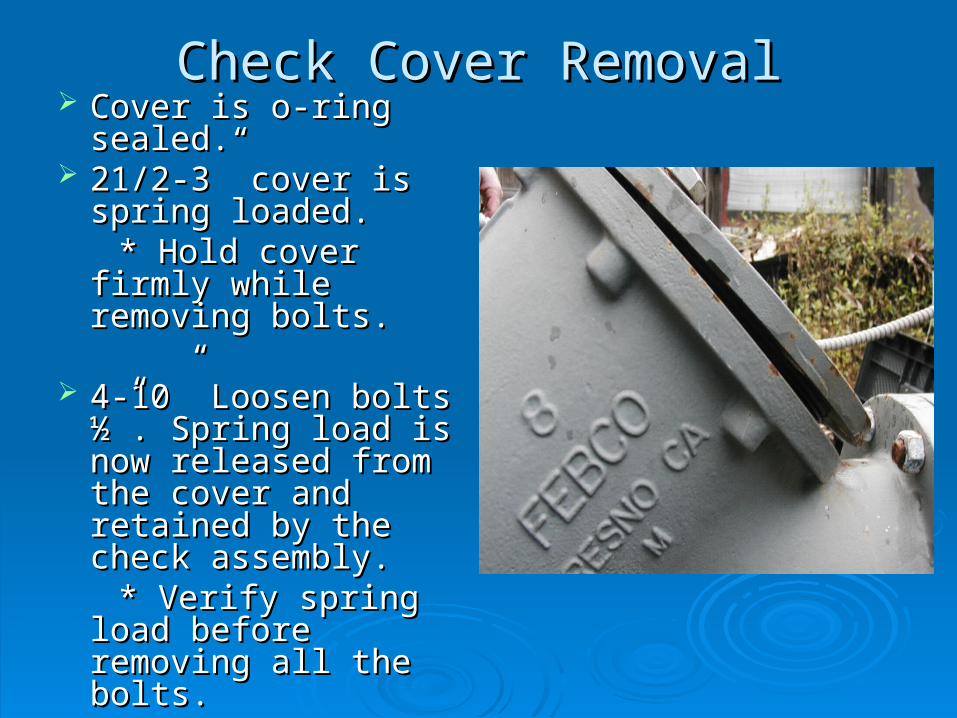
Check Cover RemovalCheck Cover Removal Cover is o-ring Cover is o-ring
sealed.sealed. 21/2-3” cover is 21/2-3” cover is
spring loaded.spring loaded. * Hold cover firmly * Hold cover firmly
while removing bolts.while removing bolts.
4-10” Loosen bolts 4-10” Loosen bolts ½”. Spring load is ½”. Spring load is now released from now released from the cover and the cover and retained by the check retained by the check assembly.assembly.
* Verify spring load * Verify spring load before removing all before removing all the bolts.the bolts.
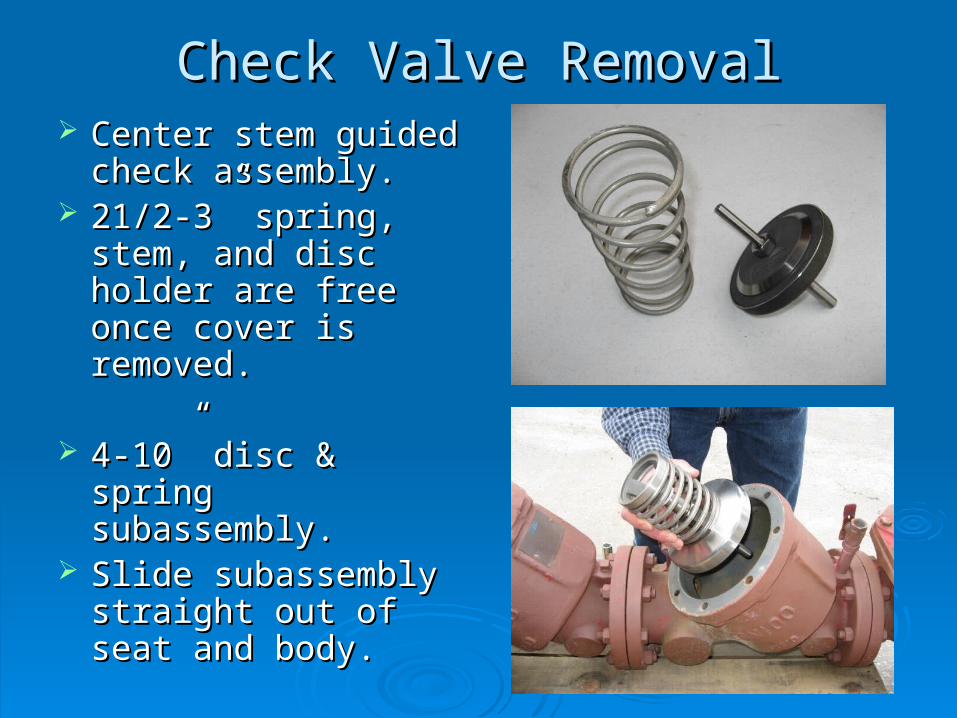
Check Valve RemovalCheck Valve Removal Center stem guided Center stem guided
check assembly.check assembly. 21/2-3” spring, stem, 21/2-3” spring, stem,
and disc holder are and disc holder are free once cover is free once cover is removed.removed.
4-10” disc & spring 4-10” disc & spring subassembly.subassembly.
Slide subassembly Slide subassembly straight out of seat straight out of seat and body.and body.

Check Seat RemovalCheck Seat Removal 825Y and YD series 825Y and YD series
seats are o-ring sealed seats are o-ring sealed and bolted into the body.and bolted into the body.
Remove bolts and pull Remove bolts and pull seat straight out of body.seat straight out of body.
Inspect the plastic guide Inspect the plastic guide bushing in center of seat.bushing in center of seat.
** (825) series seats are ** (825) series seats are threaded into the body.threaded into the body.
Check Disc ReplacementCheck Disc Replacement
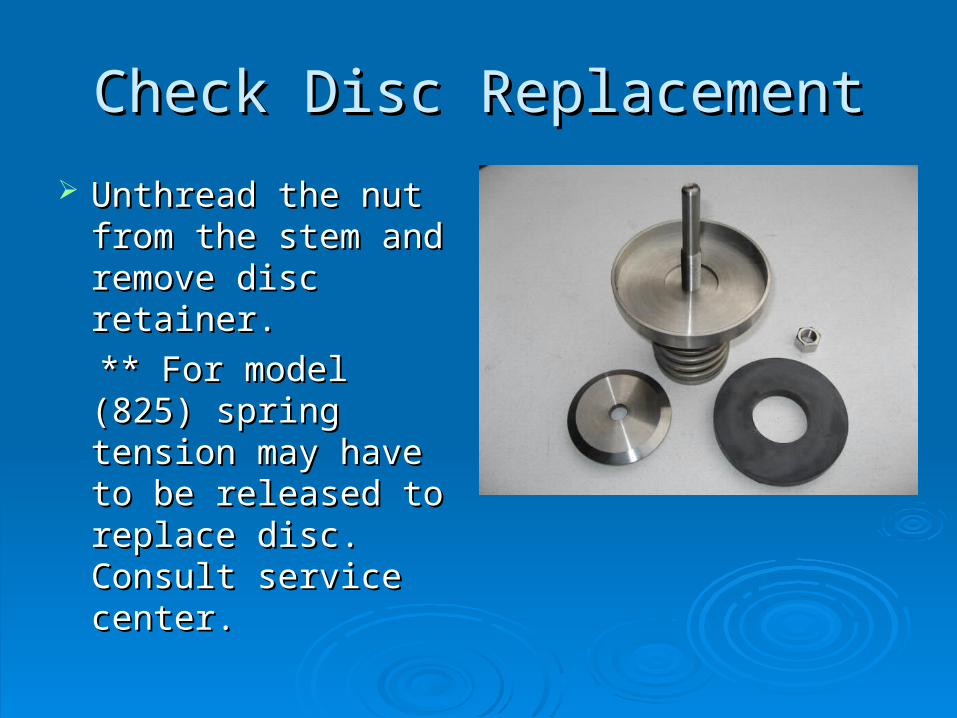
Unthread the nut from Unthread the nut from the stem and remove the stem and remove disc retainer.disc retainer.
** For model (825) ** For model (825) spring tension may spring tension may have to be released have to be released to replace disc. to replace disc. Consult service Consult service center.center.
Check Valve Reassembly NotesCheck Valve Reassembly Notes
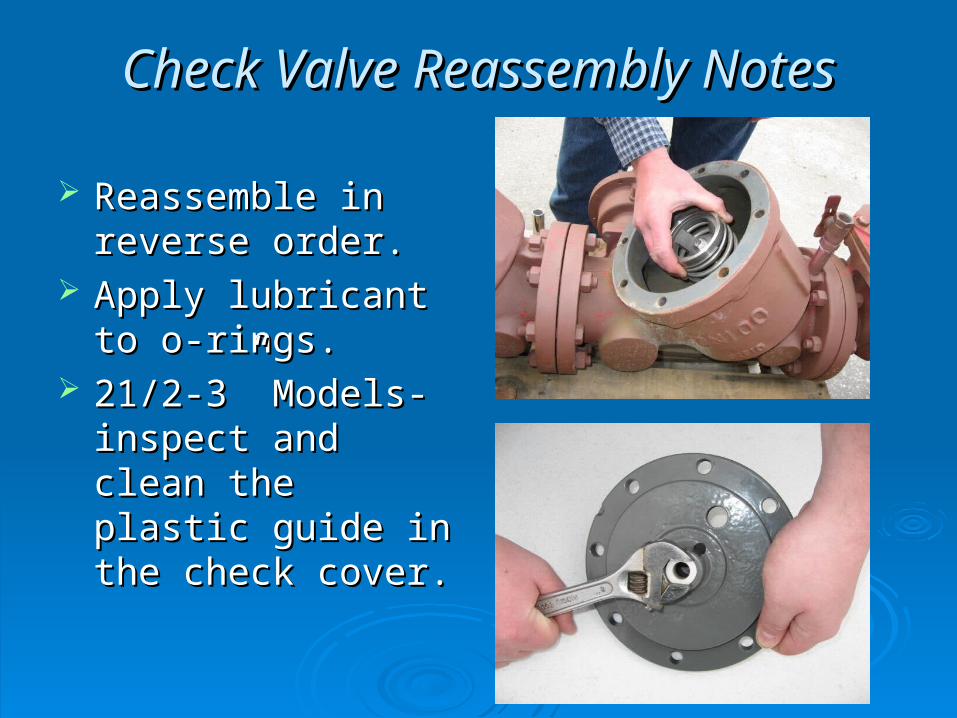
Reassemble in Reassemble in reverse order.reverse order.
Apply lubricant to o-Apply lubricant to o-rings.rings.
21/2-3” Models- 21/2-3” Models- inspect and clean the inspect and clean the plastic guide in the plastic guide in the check cover.check cover.
RV Cover Removal RV Cover Removal
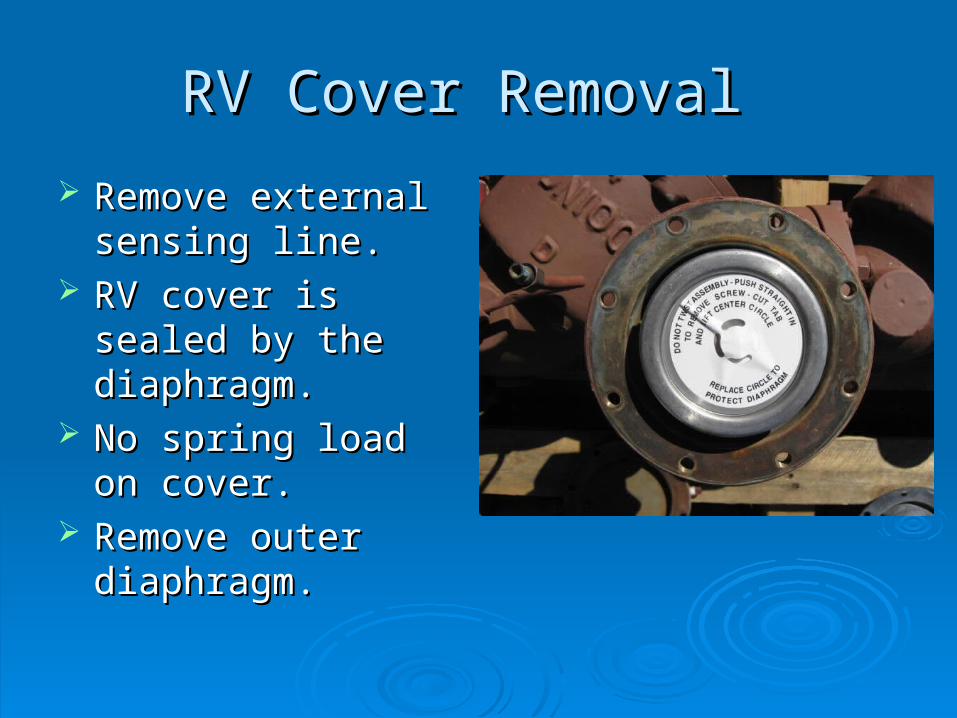
Remove external Remove external sensing line.sensing line.
RV cover is sealed by RV cover is sealed by the diaphragm.the diaphragm.
No spring load on No spring load on cover.cover.
Remove outer Remove outer diaphragm.diaphragm.

RV Module RemovalRV Module Removal
Module is o-ring Module is o-ring sealed.sealed.
Pull module straight Pull module straight out of body.out of body.
* Grasp the module * Grasp the module (button) with one (button) with one hand and insert hand and insert fingers (other hand) fingers (other hand) into RV port and into RV port and apply force to the seat apply force to the seat disc.disc.
* Do not twist module* Do not twist module..
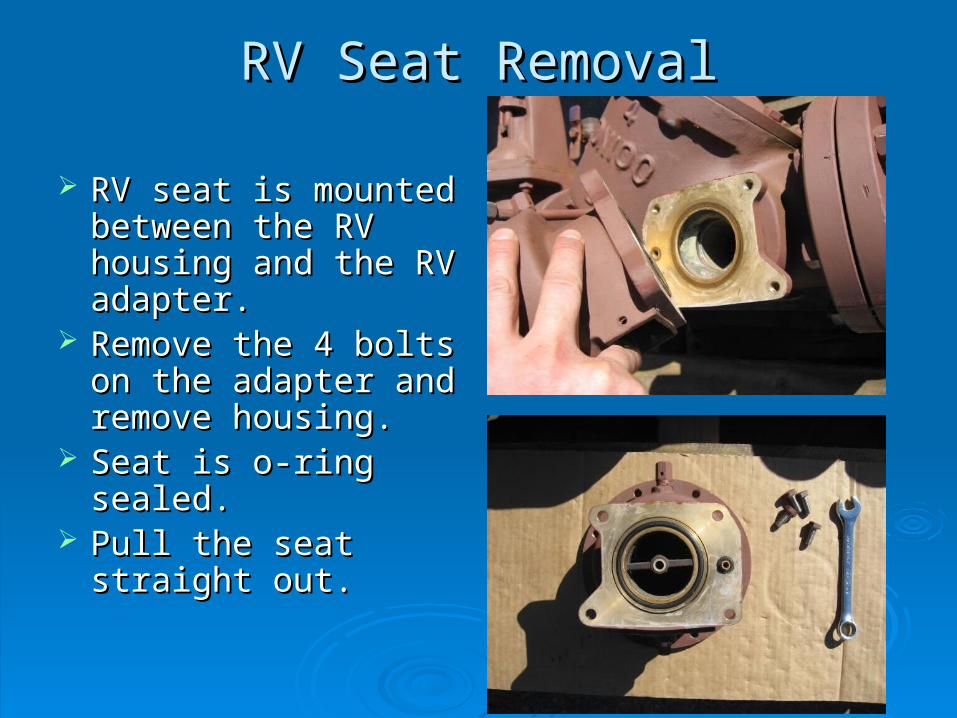
RV Seat RemovalRV Seat Removal
RV seat is mounted RV seat is mounted between the RV between the RV housing and the RV housing and the RV adapter.adapter.
Remove the 4 bolts Remove the 4 bolts on the adapter and on the adapter and remove housing.remove housing.
Seat is o-ring sealed. Seat is o-ring sealed. Pull the seat straight Pull the seat straight
out.out.

Disassemble RV ModuleDisassemble RV Module
Place the module on Place the module on a flat surface with a flat surface with lower guide facing up.lower guide facing up.
Hold the main stem Hold the main stem with one hand and with one hand and unscrew the lower unscrew the lower guide.guide.

Disassemble RV Module Disassemble RV Module
With lower guide With lower guide removed, place the removed, place the module upside down module upside down on a clean surface.on a clean surface.
Remove center of Remove center of protective sticker protective sticker (Save).(Save).
Hold the button firmly Hold the button firmly and loosen screw.and loosen screw.
* Button is spring * Button is spring loaded.loaded.

Disassemble RV ModuleDisassemble RV Module
Remove main stem Remove main stem and unthread the and unthread the retainer.retainer.
Remove slip ring and Remove slip ring and inner diaphragm.inner diaphragm.

Inner Diaphragm ReplacementInner Diaphragm Replacement
Position the bead of Position the bead of the inner diaphragm the inner diaphragm into the groove of the into the groove of the upper guide.upper guide.
Place slip ring over Place slip ring over the diaphragm.the diaphragm.
Thread retainer ring Thread retainer ring onto upper guide – onto upper guide – (hand tight).(hand tight).

Main Stem ReplacementMain Stem Replacement
Push the inner Push the inner diaphragm back diaphragm back through the upper through the upper guide assembly.guide assembly.
Insert main stem Insert main stem inside diaphragm.inside diaphragm.
The screw hole on The screw hole on diaphragm and main diaphragm and main stem should be lined stem should be lined up.up.

Spring / Button ReplacementSpring / Button Replacement
Place the spring over Place the spring over the upper guide the upper guide assembly.assembly.
Place button on Place button on spring and hold down spring and hold down firmly.firmly.
Replace button Replace button screw.screw.
Reposition center Reposition center label piece.label piece.
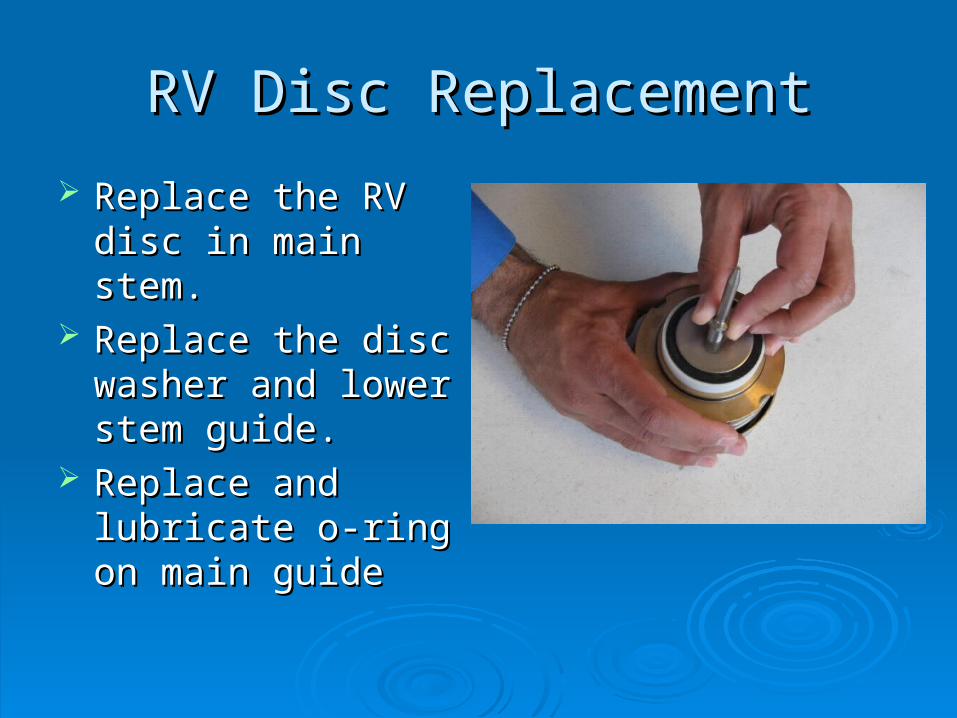
RV Disc ReplacementRV Disc Replacement
Replace the RV disc Replace the RV disc in main stem.in main stem.
Replace the disc Replace the disc washer and lower washer and lower stem guide.stem guide.
Replace and lubricate Replace and lubricate o-ring on main guideo-ring on main guide
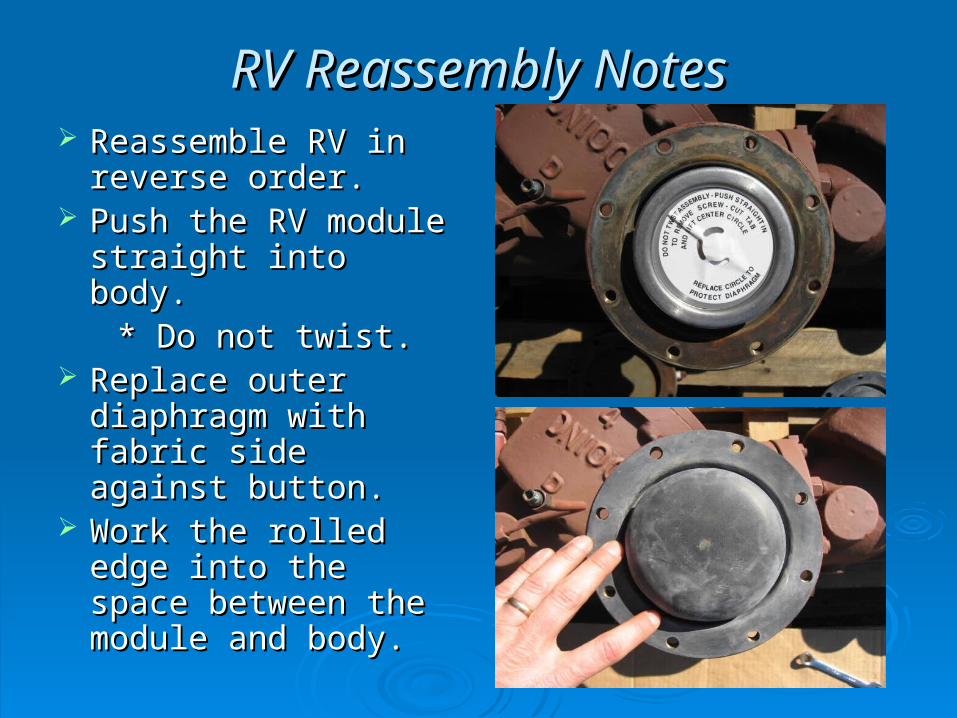
RV Reassembly NotesRV Reassembly Notes Reassemble RV in Reassemble RV in
reverse order.reverse order. Push the RV module Push the RV module
straight into body.straight into body. * Do not twist.* Do not twist. Replace outer Replace outer
diaphragm with fabric diaphragm with fabric side against button.side against button.
Work the rolled edge Work the rolled edge into the space into the space between the module between the module and body.and body.
Related Documents