E4W Level 14 Last Revision on Wednesday, February 09, 2005 5) Accounts Receivable BASIC TRAINING WORKSHOP & REFERENCE MANUAL

Welcome message from author
This document is posted to help you gain knowledge. Please leave a comment to let me know what you think about it! Share it to your friends and learn new things together.
Transcript

E4W Level 14 Last Revision on Wednesday, February 09, 2005
5) Accounts Receivable
BASIC TRAINING WORKSHOP & REFERENCE MANUAL

UNITY® Basic Training Classroom Workshop
5-2 Chapter 5: Accounts Receivable
TRAINING ASSISTANCE
Help is available to aid you in the operation of your UNITY system.
1. From the Eagle Browser, click on the Training link.2. From the Training Browser window, click on the "App Map" link.3. From the Application Map, click the topic called Accounts Receivable.4. From the Accounts Receivable Materials window, click on a link for:
Videos Quick Tips Application Training Job Aids Do It Yourself Training (Simulations) Quizzes Other Documentation

UNITY® Basic Training Classroom Workshop
Chapter 5: Accounts Receivable 5-3
ACCOUNTS RECEIVABLE
ADDING A CUSTOMER
Path: Eagle Browser / Accounts Receivable Menu / Customer Maintenance
Use Customer Maintenance to add or modify your Customer information and privileges.
1. From the Customer Maintenance window, click the Main Tab.2. Type in information into the fields for the customer you are adding.3. When finished, click the ADD button on the Tool Bar or press the F4 key.4. A Customer Added message displays at the bottom of the window.
Cash Customer Accounts
An asterisk (*) in front of a customer number indicates that this customer cannot charge. Specific cashaccounts can be created to track purchases for a customer, for an area code, for a zip code, etc.
For example: You may wish to track purchases by zip code. You would set up a cash account for yourcash customers who live in a specific Zip Code. This would aid you in your buying decisions to helpyou to better serve your cash customers who live in that specific Zip Code.
Note: Once you set up a customer as a "cash" account, you cannot changethe "cash" account into "charge" account. You would need to createa new charge account for that customer.
Creating a Default Customer
You can create a "DEFAULT" customer with some common fields already set up, like state, zip, areacodes, etc. To save time when adding accounts, call up the DEFAULT customer, then just change theappropriate fields to add the new customer.
1. In the Customer Maintenance window, on the Menu Bar, select the Tools drop down menu. 2. From the drop down menu, click on Options. The Customer Options window opens. 3. In the field for Default Customer for Add Mode, click on the down arrow. 4. Select the account that you wish to use as the basis for a default customer.

UNITY® Basic Training Classroom Workshop
5-4 Chapter 5: Accounts Receivable
ACCOUNTS RECEIVABLE TABS
1 Main Tab
The Main Tab shows general information about the customer.

UNITY® Basic Training Classroom Workshop
Chapter 5: Accounts Receivable 5-5
2 Credit Tab
The Credit Tab shows Balance History, Charge Options, and other collected informational data.

UNITY® Basic Training Classroom Workshop
5-6 Chapter 5: Accounts Receivable
3 Department Tab
The Department Tab shows sales history by department.

UNITY® Basic Training Classroom Workshop
Chapter 5: Accounts Receivable 5-7
4 Sales Tab
The Sales Tab shows Sales History as well as Finance Charge History about the customer.
UNITY® Basic Training Classroom Workshop
5-8 Chapter 5: Accounts Receivable
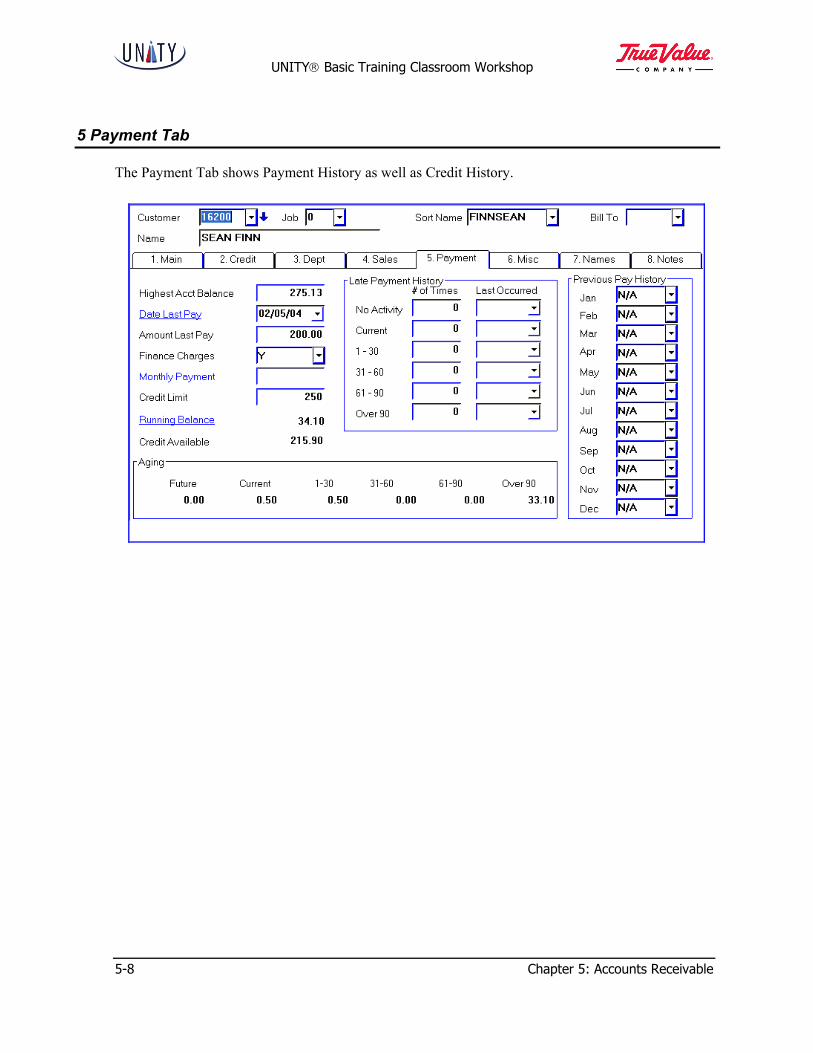
5 Payment Tab
The Payment Tab shows Payment History as well as Credit History.

UNITY® Basic Training Classroom Workshop
Chapter 5: Accounts Receivable 5-9
6 Miscellaneous Tab
The Miscellaneous Tab shows Cash Customer information, as well as information that will display atPoint of Sale.

UNITY® Basic Training Classroom Workshop
5-10 Chapter 5: Accounts Receivable
7 Names Tab
The Names Tab is used to attach the names of authorized persons to an account. You can also addimages of the authorized persons to the account.
Use the “Merge To” hotlink to add the authorized person to different job numbers.

UNITY® Basic Training Classroom Workshop
Chapter 5: Accounts Receivable 5-11
8 Notes Tab
The Notes Tab is used to display messages at the Point of Sale for an account.
You can also use it to alert the Cashier to a condition about the account

UNITY® Basic Training Classroom Workshop
5-12 Chapter 5: Accounts Receivable
SUPPORTING APPLICATIONS
GO TO MENU FOR ACCOUNTS RECEIVABLE
Path: Eagle Browser / Accounts Receivable Menu / Customer Maintenance / Go ToButton
1. On the Customer Maintenance Tool Bar, click the Go To button or press and hold the Controlkey while hitting the G key.
2. The Go To window opens.

UNITY® Basic Training Classroom Workshop
Chapter 5: Accounts Receivable 5-13
Change Customer Number/Job (CCN)
Path: Eagle Browser / Accounts Receivable Menu / Customer Maintenance / Go ToButton / Option 1
1. The Change Customer Number/Job window opens.2. In the Old Customer field, click the down arrow to bring up a list of customers. Select the
customer from the list, and click on it.3. The Customer Info area fills in.4. In the New Customer/Job field, type in the new information.5. Click the Change button.6. Results are displayed in the Results area.7. Click the Close button to exit.
Note: Depending upon your system, you may need to exit the currentwindow and re-open A/R Customer Maintenance for the change totake effect.

UNITY® Basic Training Classroom Workshop
5-14 Chapter 5: Accounts Receivable
Open Item Maintenance (MOI)
Path: Eagle Browser / Accounts Receivable Menu / Customer Maintenance / Go ToButton / Option 2
1. The Open Item Maintenance window opens.2. In the Document # field, type in the document number. Click the Display button on the Tool Bar
or press the F6 key. The window fills in with current information.3. In the Document Type field, click the down arrow to bring up a list of document types. Select the
document type from the list, and click on it. The window will change to reflect the new documenttype:
Invoice Credit Adjustment Finance Charge
4. Make changes as needed.5. To save your changes, click the Change button on the Tool Bar or press the F5 key.
Note: It is not recommended to use MOI to correct mistakes made in otherareas of the system. For example, if a mistake is made against anA/R account at POS, correct it at POS.

UNITY® Basic Training Classroom Workshop
Chapter 5: Accounts Receivable 5-15
Category Pricing Plans (CPP)
Path: Eagle Browser / Accounts Receivable Menu / Customer Maintenance / Go ToButton / Option 3
Use category pricing plans to sell items at point-of-sale (POS) with broader pricing flexibility. Acategory pricing plan is a customized price list that you set up for a specific account. The categorypricing plan is very flexible because it allows you to assign prices at more than just the SKU level.You can also link one plan to more than one customer.
The plan consists of pricing categories at levels you select (including SKU, product code, Fineline,class or department code, and vendor code). Each plan consists of one or more categories. Eachcategory within a plan has an expiration date, which can be different for each category.
Creating a Category Pricing Plan
1. The Category Pricing Plans window opens.2. In the Category Plan field, type in a Plan code or name. It can be up to 5 characters in length. This
field is required.3. The Description field is description of the Category Pricing Plan. If you leave this field blank
when adding a plan, it defaults to the Plan field. In the Description field, type in a Description. Itcan be up to 25 characters.
4. The Best Price field determines if the category price is the only price used at POS, or if it shouldbe considered along with the other available prices to determine the best price. In the Best Pricefield, select N for the system to consider the category plan price along with the other availableprices at POS to determine the best price.
UNITY® Basic Training Classroom Workshop
5-16 Chapter 5: Accounts Receivable
5. The Trade Discountable and Terms fields determine if this category pricing plan is eligible fortrade or terms discounts. Select N for Not eligible for trade or terms discounts.
6. The Include CPP < Non-Discount/Promotion Price field determines if SKU’s flagged in InventoryMaintenance, on the Codes Tab, as non-discountable or on promotion are eligible to receive alower category pricing plan price at POS. Select P so that SKU’s flagged as non-discountablenever allow a category pricing plan price that is lower than retail at POS. SKU’s flagged as onpromotion allow a category pricing plan price lower than the promotion price at POS.
7. Click the Add button or press the F4 key to add this plan's basic information to the system.
Adding to a Category Pricing Plan
1. To add records to a plan, make sure that the cursor is moved into the grid somewhere first.2. Click the Add button or press the F4 key. The New Category Record window opens.3. At the Type field, select the type of record that you wish to add to this plan: Department, Class,
Fineline, Product Code, SKU, Vendor, or Sub-Plan.4. At the Method field, select the pricing method that this record will follow. There are multiple
choices available, including: Cost, Markup from, Down from, Dollars off from, Price Matrix,Gross Margin percent, List, Retail
5. Click the OK button or press the Enter key when finished. 6. The New Category for Type window opens. The options and fields available to you depend upon
which Type of record you wanted to add to the pricing plan. Type in specific information asneeded.
7. If required, type in a Percent in the appropriate field. 8. The Expiration Date is optional. If you leave it blank, the category record in this plan will never
expire. Otherwise, it will expire on the date that you indicate here. 9. Click the OK button or press the Enter key when finished.10. This record will now be transferred into the grid of the plan. You may add other records to the
Category Pricing Plan as required.11. Once you have created Category Pricing Plans, assign the plan code, or name, to the appropriate
customer account(s) in the Category Plan field (on the Main Tab). 12. Click the Change button or press the F5 key to finalize the change.
UNITY® Basic Training Classroom Workshop
Chapter 5: Accounts Receivable 5-17
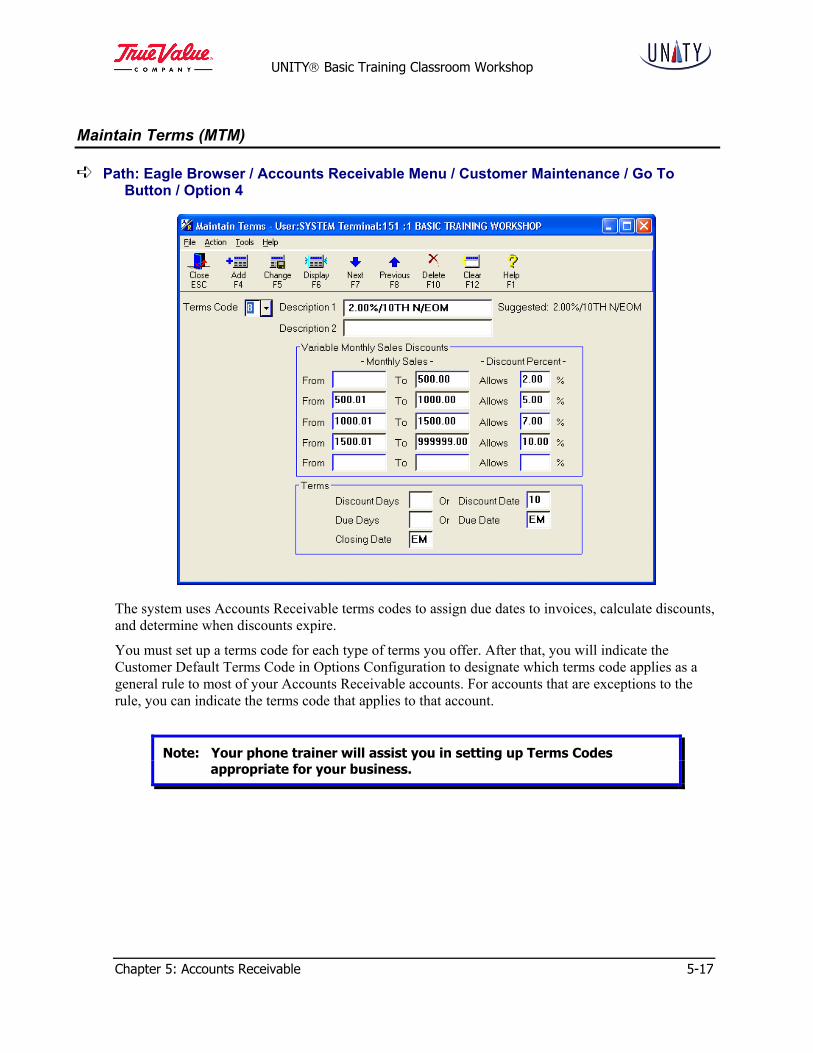
Maintain Terms (MTM)
Path: Eagle Browser / Accounts Receivable Menu / Customer Maintenance / Go ToButton / Option 4
The system uses Accounts Receivable terms codes to assign due dates to invoices, calculate discounts,and determine when discounts expire.
You must set up a terms code for each type of terms you offer. After that, you will indicate theCustomer Default Terms Code in Options Configuration to designate which terms code applies as ageneral rule to most of your Accounts Receivable accounts. For accounts that are exceptions to therule, you can indicate the terms code that applies to that account.
Note: Your phone trainer will assist you in setting up Terms Codesappropriate for your business.

UNITY® Basic Training Classroom Workshop
5-18 Chapter 5: Accounts Receivable
Maintain Tax Codes (MTX)
Path: Eagle Browser / Accounts Receivable Menu / Customer Maintenance / Go ToButton / Option 5
You must set up a tax code for each sales tax rate you charge. After that, you will indicate theCustomer Default Tax Code in Options Configuration to designate which tax code applies as a generalrule to most of your Accounts Receivable accounts. For accounts that are exceptions to the rule, youcan indicate the tax code that applies to that account.
Your Unity system automatically tracks the amount of sales tax you collect at POS, and accumulatesthe information in the Sales Tax File. You will use this information for your government tax reporting.
Even if you never collect any sales tax, you still must set up at least one tax code. If all your sales arereported as non-taxable, you can type in a code whose tax rate is 0%.
Note: Your phone trainer will assist you in setting up the Tax Codesappropriate for your business.

UNITY® Basic Training Classroom Workshop
Chapter 5: Accounts Receivable 5-19
Salesperson File Maintenance (MSL)
Path: Eagle Browser / Accounts Receivable Menu / Customer Maintenance / Go ToButton / Option 6
You can use your Unity system to track salesperson or clerk productivity:
You can credit each POS clerk with the sales he or she makes. You can credit the salesperson who is assigned to a particular customer account.
You can set up your system so that sales to some accounts are tracked using the first method, and salesto other accounts are tracked using the second method.
Tracking Sales by POS Clerk
If you want to credit each POS clerk with the sales he or she makes, you will:
Set up a salesperson record for each POS clerk. Cross-reference each POS clerk's salesperson record to his/her user record, using the Default
Salesperson field in the Add a User window in Security Maintenance (note: if you want to adda salesperson code to an existing user, click here for the procedure).
Leave the Salesperson field blank in Customer Maintenance.

UNITY® Basic Training Classroom Workshop
5-20 Chapter 5: Accounts Receivable
Tracking Sales by Salesperson
If you want to credit the salesperson who originally opened the customer account, you will:
Set up a salesperson record for each salesperson. Type the code of the salesperson who opened the account in the Salesperson field in Customer
Maintenance. Leave the "Customer Default - Salesperson" field in Options Configuration blank, or assign a
generic salesperson as the default.
How to Set Up Salesperson Records
Path: Eagle Browser / Accounts Receivable Menu / Customer Maintenance / Go ToButton / Option 6
1. The Salesperson File Maintenance window opens.2. Click the Add button on the Tool Bar or press the F4 key. An entry window for adding a new
salesperson opens.3. Fill in the fields in the window.4. Click the Add button on the Tool Bar or press the F4 key.5. Repeat this procedure for each salesperson you want to add.6. To link salesperson records to individual users, enter the salesperson code in the Default
Salesperson field in Options Configuration.7. To link salesperson records to in-store accounts, enter the salesperson code in the Salesperson
field for the appropriate account in Customer Maintenance.
UNITY® Basic Training Classroom Workshop
Chapter 5: Accounts Receivable 5-21
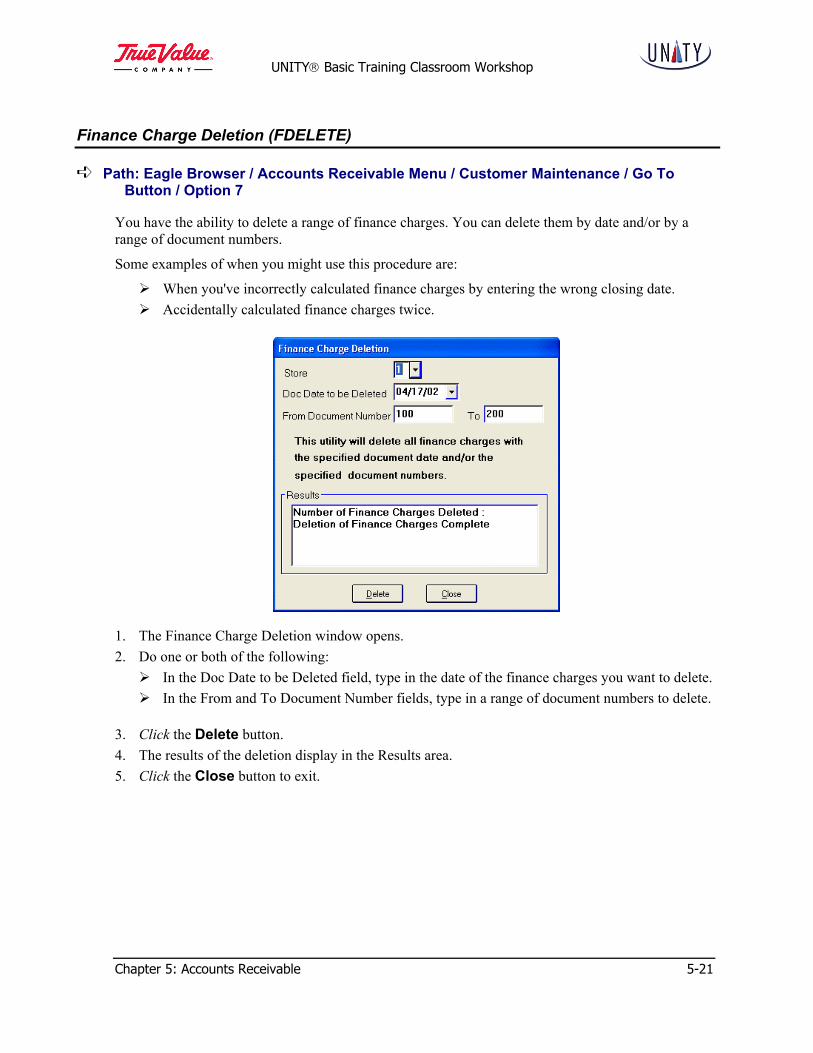
Finance Charge Deletion (FDELETE)
Path: Eagle Browser / Accounts Receivable Menu / Customer Maintenance / Go ToButton / Option 7
You have the ability to delete a range of finance charges. You can delete them by date and/or by arange of document numbers.
Some examples of when you might use this procedure are:
When you've incorrectly calculated finance charges by entering the wrong closing date. Accidentally calculated finance charges twice.
1. The Finance Charge Deletion window opens.2. Do one or both of the following:
In the Doc Date to be Deleted field, type in the date of the finance charges you want to delete. In the From and To Document Number fields, type in a range of document numbers to delete.
3. Click the Delete button. 4. The results of the deletion display in the Results area. 5. Click the Close button to exit.

UNITY® Basic Training Classroom Workshop
5-22 Chapter 5: Accounts Receivable
View Documents
Path: Eagle Browser / Accounts Receivable Menu / Customer Maintenance / Go ToButton / Option 8
You can view open orders, layaways, estimates, etc. This is a general purpose viewer.
1. To view all documents available on the system, click on the down arrow in the Type field. Selectfrom the drop down list the option for ALL.
2. Click the Refresh button on the Tool Bar or press the Plus key on the keypad. 3. The grid populates with all the documents available. 4. You can limit the items in the viewer by using the Cust # field, the Job # field, the Short ID field,
the SKU filed, etc.

UNITY® Basic Training Classroom Workshop
Chapter 5: Accounts Receivable 5-23
Customer Sales Summary from Quick Recall
Path: Eagle Browser / Accounts Receivable Menu / Customer Maintenance / Go ToButton / Option Q
You can view a sales summary for a particular customer by using the "Customer Sales Summary fromQuickRecall" viewer.
1. The Customer Sales Summary from Quick Recall window opens. In the Customer field, click thedown arrow. From the drop down list, locate and click on the desired Customer.
2. Click the Refresh button on the Tool Bar or press the Plus key on the keypad to populate thegrid with information from your QuickRecall archive files.
3. You can choose to view a sales summary by any of the following time periods:
Day Week Month Calendar year Calendar quarter Date table period Date table year Date Ranges
Many different columns of information display in the grid for each period, including:
Net Sales Cost Average Transaction amount Transaction Count Gross Profit Dollars (GP$) Gross Profit Percent (GP%)

UNITY® Basic Training Classroom Workshop
5-24 Chapter 5: Accounts Receivable
VIEWERS
CUSTOMER VIEWER
Path: Eagle Browser / Accounts Receivable Menu / Customer Maintenance / View CustButton
You can use the Customer Viewer to look up customer accounts.
1. Click the View Cust button on the Tool Bar or press the F9 key. The Viewer - CustomerNumber window opens.
2. Your customers are listed in the grid. To sort the grid by a column name, double-click on the named column. If you Right-Click on a column header, a menu of search options appears. You can also use the Customer field to look up Customers. Click on the down arrow for a list
of your customers.

UNITY® Basic Training Classroom Workshop
Chapter 5: Accounts Receivable 5-25
TRANSACTION VIEWER
Path: Eagle Browser / Accounts Receivable Menu / Customer Maintenance / View TrxButton
You can use the Transaction Viewer to get details about a customer’s account activity.
1. First, display a customer.2. Click the View Trx button on the Tool Bar or press the F11 key. This will display a list of
outstanding invoices for this customer. 3. You can use the Drill Down button or press the F3 key to display invoice specific information.4. While you are in the detailed information window, you can click the Lookup button or press the
F5 key to find unfinalized or unapplied documents as well as information from the Prior Journal(the last daily Journal report run with Option F).
5. You may need to click the Refresh button or the Plus key on the Keypad once you have selectedthe Lookup type.

UNITY® Basic Training Classroom Workshop
5-26 Chapter 5: Accounts Receivable
QUICK RECALL VIEWER
Path: Eagle Browser / Accounts Receivable Menu / Customer Maintenance / Q RecallButton
At the Quick Recall viewer, click the Refresh button on the Tool Bar or press the Minus key on thekeypad to populate the grid with all available documents in Quick Recall. You can limit the items inthe viewer by using the Cust # field, the Job # field, the Short ID field, the SKU filed, etc.

UNITY® Basic Training Classroom Workshop
Chapter 5: Accounts Receivable 5-27
RECEIVED ON ACCOUNT
Path: Eagle Browser / Accounts Receivable Menu / Received On Account / Menu Bar /Tools / Options / Received on Account Options window
Like other areas of the Unity software, Received on Account has its own set of options that controlhow the screen will act and appear when you are posting payments.
The window below represents some recommended settings. Click the OK button to save your changes.

UNITY® Basic Training Classroom Workshop
5-28 Chapter 5: Accounts Receivable
POSTING PAYMENTS
Path: Eagle Browser / Accounts Receivable Menu / Received On Account
Payment reconciliation allows you to quickly and easily verify that all checks have been posted andthat the correct check amount has been posted.
1. The Received on Account Options window opens. Click on the down arrow in the Customer field.2. Select the Customer from the drop down list. The window populates with the account information.
3. In the upper right hand corner is the Customer Type: Balance Forward Open Item Revolving Charge
4. Balance Forward and Revolving Charge accounts have two tabs of information: Customer information Payments and Credits
5. Open Item accounts have up to 4 tabs of information: Customer information Open Invoices Payments and Credits Unapplied Documents
6. For a new payment, click in the Check # field to type in the check number.7. Press the Tab key to advance to the Payment field.8. Type in the Payment amount, including decimal point.9. If this is an Open Item account, use the mouse to place a check mark in the box to the left of the
invoice(s) that this payment should be applied.10. Type in the Discount amount, if applicable, including decimal point.11. Type in the ABA#: (Optional) This field represents the American Banking Association number
identifying the bank where the check was drawn. The field is alphanumeric, up to 7 characters.12. Allowance is an 8 character numeric field that can go plus (+) or minus (-). You must include a
decimal point. If you type in a positive amount, the account's running balance decreases. If youtype in a negative amount, the account's running balance increases.
UNITY® Basic Training Classroom Workshop
Chapter 5: Accounts Receivable 5-29
13. Codes: (Optional) Use these fields for your own internal use, to identify certain transactions, forexample. If you decide to type in your own code, you must decide what each code means. Thesystem does not keep track of them. Therefore, you should keep a list for future reference.
14. Reference: (Optional) Use this field to make a special note about the payment. The informationyou type in the Reference field prints on statements. For Open Item accounts, this field applies toall payments made from a single check. The field is alphanumeric, up to 30 characters.
15. Press the Enter key to post the payment.
Note: If you find a customer who is past due, or has a related issue, thenclick the Misc. button or press the Minus key on the Keypad. Thisbrings up the Miscellaneous window. Clicking Menu Option 2 allowsyou to quickly change the Charge Allowed on a customer account.
If you get a "Session In Progress" warning message, click the Yesbutton to continue. This simply means that a user was in theprogram previously and chose to exit without reconciling the postedpayments.
DELETING A PAYMENT
Path: Eagle Browser / Accounts Receivable Menu / Received On Account
You can delete a payment that was previously entered. This procedure will come in handy if youposted a payment to the wrong account.
1. The Received on Account Options window opens. Click on the down arrow in the Customer field.2. Select the Customer from the drop down list. The window populates with the account information.3. Click the Payments and Credits Tab.4. Click the payment you want to delete. The payment information displays in the posting area at the
bottom of the screen.5. Click the Delete button or press the F10 key. 6. The Delete Payment window opens. Click the Yes button to delete the payment. The Delete
Confirmation window opens. Click the OK button.

UNITY® Basic Training Classroom Workshop
5-30 Chapter 5: Accounts Receivable
Payment Reconciliation
After all checks have been posted, you can complete payment reconciliation. Payment reconciliationallows you to quickly verify that all checks have been posted and that the correct check amount hasbeen posted. After completing payment reconciliation, you have the option to print a list of thepayments. This list of check numbers and check amounts could be attached to your bank deposit slip.
1. Post all payments in the Received on Account window.2. Click the Misc. button or press the Minus key on the keypad. The Miscellaneous window opens.3. From the Miscellaneous window, click on option 1 to Reconcile. The Payment Reconciliation
window opens. 4. A viewer grid displays the list of checks.
You can manually select or clear a check by clicking the check box in the grid. You can also type in the amount of the check in the Check Amount field.
5. In the Check Amount field, type the amount of one of the checks and press the Enter key. If the amount you entered matches one of payments in the Payment Reconciliation grid, a
check mark is automatically placed in the check box next to that check. If you type in a check amount that is not found in the grid, you will be prompted for the check
number. Type in the check number to locate the check in the grid. From there you candetermine if the check amount was incorrectly entered.
6. As you type in check amounts in the Check Amount box, the Selected amount will increase. TheSelected amount will continue to increase until the Selected amount equals the Total amount andthe Difference is zero.
7. Continue entering checks in the Check Amount box until all checks have been entered. 8. After entering all checks, if there is still a Difference amount, it could indicate that you missed
entering a check. Sort through your copies of the checks to see if there is one that matches theDifference amount.
9. After all the checks in the Payment Reconciliation grid have been checked off, a window opens.10. In the window, you can option to:
Click the button to print the reconciliation if you want a printed list of the checks. Click the button to purge the reconciliation. Click the Cancel button to cancel.
11. After reconciling all checks, click the Purge button. The ROA Reconciliation window opens.Click the Yes button.
12. To exit the Payment Reconciliation window, click the Continue Later button.

UNITY® Basic Training Classroom Workshop
Chapter 5: Accounts Receivable 5-31
ACCOUNTS RECEIVABLE MONTHLY STATEMENTS
NOTE: Steps 1 and 2 are part of the ARCLOSE queue, which will be set upand run automatically. You do not need to run these manually ifthey are in the ARCLOSE queue.
STEP 1) A/R AGING REPORT (RAG)
This report will set up the end-of-month balances and calculate the finance charges.
Path: Reports Menu / Accounts Receivable Reports / A/R Aging Report (RAG)
1. Print Setup Area Fill in the appropriate fields whether you wish to spool and/or print this report. Check store
policy.In the Copies field, do not change the number of Copies from thedefault of 01 or finance charges will calculate more than once!
2. Options Area If no option is selected here, the report will default to print by account number.
Select Options field: Click the checkbox next to: A to Include Active Zero Balance Accounts (optional) C to Include Credit balance Accounts (optional) Z to Include Zero Balance Accounts (optional)
Update Options field: Click the checkbox next to: B to Create Business Advisor Data (if using) C to Close (Prepare for Stmts) F to Finalize H to Update Credit History in MCR (should be run with Select Options 'A', 'C' or 'Z') X to Calculate Finance Charges
Print Options field: Click the checkbox next to: A to Print Alphabetically by Sort Name (optional)

UNITY® Basic Training Classroom Workshop
5-32 Chapter 5: Accounts Receivable
3. From / To Area
Start New Page field: Select N for Do not start a new page for each customer.
Closing Date field: The closing date is usually the end of the month, butshould correspond with the terms closing date (set up inMaintain Terms MTM).
Items to Include field: Select A for All Items.
From / To ranges: Leave blank unless you are running this report for aselect group of customers.
4. Code Selection Area Use this window only if you are running this report based on selected User Codes. You may
include or exclude based on pre-set codes.
5. Fax Setup Area Fax Setup in the left column is reserved for those stores who have purchased this software.
6. Press the Run button on the Tool Bar or click the F4 key to run this report.

UNITY® Basic Training Classroom Workshop
Chapter 5: Accounts Receivable 5-33
STEP 2) DAILY JOURNAL REPORT (RDJ)
This report will finalize and print a listing of the finance charges calculated on the A/R Aging Report.
Path: Eagle Browser / Reports Menu / Accounts Receivable Reports / Daily JournalReport (RDJ)
1. Print Setup Area Fill in the appropriate fields whether you wish to spool and/or print this report. Check store
policy.
2. Options Area
Options field: Click the checkbox next to: F to Finalize Transactions S for Finance Charges Only Z for Departmental Passoff
3. From/To Area
Store field: Leave the defaults.
From/To range fields Leave blank to print all. You can also select aspecific Customer or Job Number range.
4. Code Selection Area Use this window only if you are running this report based on selected User Codes. You may
include or exclude based on pre-set codes.
5. Fax Setup Area Fax Setup in the left column is reserved for those stores who have purchased this software.
6. Press the Run button on the Tool Bar or click the F4 key to run this report.
Note: This is where you will begin if Step 1 and 2 are in the automatedARCLOSE queue.
UNITY® Basic Training Classroom Workshop
5-34 Chapter 5: Accounts Receivable
STEP 3) EVALUATE FINANCE CHARGES
Evaluate the finance charges on the RDJ Daily Journal Report. If there are any that need to be deleted,follow these steps: This step is optional if no Finance Charge deletions are required.
Path: Eagle Browser / Accounts Receivable Menu / Customer Maintenance / Go ToMenu / Option 2 Open Item Maintenance
1. In the Customer Number field, display the correct customer account.2. In the Document Type field, select type F for Finance Charge.3. In the Document Number field, type in the finance charge document number.4. Click the Display button on the Tool Bar or press the F6 key.5. Verify that the information presented is correct.6. Click the Delete button or press the F10 key.7. The system will prompt,” Are you sure you want to delete?”8. Select Yes.
STEP 4) LOAD STATEMENT PAPER INTO THE PRINTER
Character Pitch should equal 10.
Print Quality should equal HSD.
UNITY® Basic Training Classroom Workshop
Chapter 5: Accounts Receivable 5-35
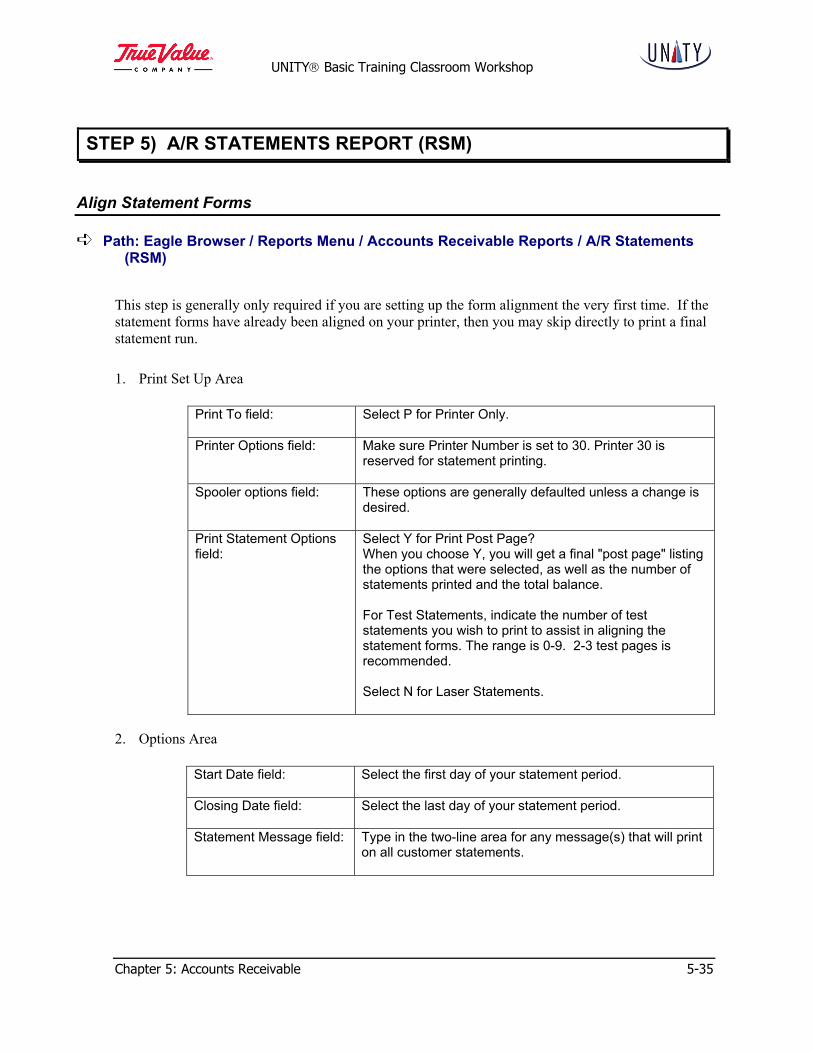
STEP 5) A/R STATEMENTS REPORT (RSM)
Align Statement Forms
Path: Eagle Browser / Reports Menu / Accounts Receivable Reports / A/R Statements(RSM)
This step is generally only required if you are setting up the form alignment the very first time. If thestatement forms have already been aligned on your printer, then you may skip directly to print a finalstatement run.
1. Print Set Up Area
Print To field: Select P for Printer Only.
Printer Options field: Make sure Printer Number is set to 30. Printer 30 isreserved for statement printing.
Spooler options field: These options are generally defaulted unless a change isdesired.
Print Statement Optionsfield:
Select Y for Print Post Page? When you choose Y, you will get a final "post page" listingthe options that were selected, as well as the number ofstatements printed and the total balance.
For Test Statements, indicate the number of teststatements you wish to print to assist in aligning thestatement forms. The range is 0-9. 2-3 test pages isrecommended.
Select N for Laser Statements.
2. Options Area
Start Date field: Select the first day of your statement period.
Closing Date field: Select the last day of your statement period.
Statement Message field: Type in the two-line area for any message(s) that will printon all customer statements.
UNITY® Basic Training Classroom Workshop
5-36 Chapter 5: Accounts Receivable
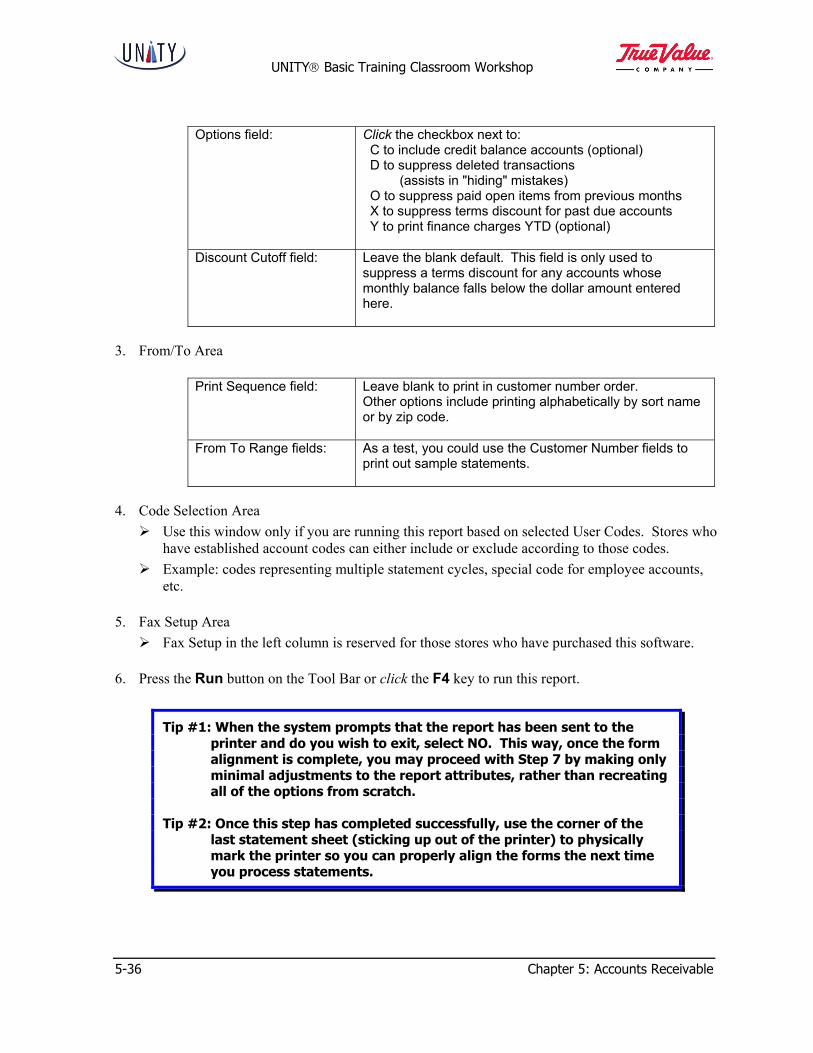
Options field: Click the checkbox next to: C to include credit balance accounts (optional) D to suppress deleted transactions (assists in "hiding" mistakes) O to suppress paid open items from previous months X to suppress terms discount for past due accounts Y to print finance charges YTD (optional)
Discount Cutoff field: Leave the blank default. This field is only used tosuppress a terms discount for any accounts whosemonthly balance falls below the dollar amount enteredhere.
3. From/To Area
Print Sequence field: Leave blank to print in customer number order. Other options include printing alphabetically by sort nameor by zip code.
From To Range fields: As a test, you could use the Customer Number fields toprint out sample statements.
4. Code Selection Area Use this window only if you are running this report based on selected User Codes. Stores who
have established account codes can either include or exclude according to those codes. Example: codes representing multiple statement cycles, special code for employee accounts,
etc.
5. Fax Setup Area Fax Setup in the left column is reserved for those stores who have purchased this software.
6. Press the Run button on the Tool Bar or click the F4 key to run this report.
Tip #1: When the system prompts that the report has been sent to theprinter and do you wish to exit, select NO. This way, once the formalignment is complete, you may proceed with Step 7 by making onlyminimal adjustments to the report attributes, rather than recreatingall of the options from scratch.
Tip #2: Once this step has completed successfully, use the corner of thelast statement sheet (sticking up out of the printer) to physicallymark the printer so you can properly align the forms the next timeyou process statements.

UNITY® Basic Training Classroom Workshop
Chapter 5: Accounts Receivable 5-37
Printing Final Statements
Path: Eagle Browser / Reports Menu / Accounts Receivable Reports / A/R Statements(RSM)
If the statement forms have already been aligned on your printer, then you can print a final statementrun.
1. Print Set Up Area
Print To field: Select P for Printer Only
Printer Options field: Make sure Printer Number is set to 30. Printer 30 isreserved for statement printing.
Spooler options field: These options are generally defaulted unless a change isdesired.
Print Statement Optionsfield:
Select Y for Print Post Page? When you choose Y, you will get a final "post page" listingthe options that were selected, as well as the number ofstatements printed and the total balance.
For Test Statements, select zero for the final run.
Select N for Laser Statements.
2. Options Area
Start Date field: Select the first day of your statement period.
Closing Date field: Select the last day of your statement period.
Statement Message field: Type in the two-line area for any message(s) that will printon all customer statements.
Options field: Click the checkbox next to:
C to include credit balance accounts (optional) D to suppress deleted transactions (assists in "hiding" mistakes) O to suppress paid open items from previous months X to suppress terms discount for past due accounts Y to print finance charges YTD (optional)

UNITY® Basic Training Classroom Workshop
5-38 Chapter 5: Accounts Receivable
Discount Cutoff field: Leave the blank default.
This field is only used to suppress a terms discount forany accounts whose monthly balance falls below thedollar amount entered here.
3. From/To Area
Print Sequence field: Leave blank to print in customer number order. Other options include printing alphabetically by sortname or by zip code.
From To Range fields: In the Customer Number field, leave blank or fill in theappropriate range.
4. Code Selection Area Use this window only if you are running this report based on selected User Codes. Stores who have established account codes can either include or exclude according to those
codes. Example: codes representing multiple statement cycles, special code for employeeaccounts, etc.
5. Fax Setup Area Fax Setup in the left column is reserved for those stores who have purchased this software.
6. Press the Run button on the Tool Bar or click the F4 key to process this report.

UNITY® Basic Training Classroom Workshop
Chapter 5: Accounts Receivable 5-39
Sample Statement Page

UNITY® Basic Training Classroom Workshop
5-40 Chapter 5: Accounts Receivable
Sample Post Page

UNITY® Basic Training Classroom Workshop
Chapter 5: Accounts Receivable 5-41
PURGING PAST DUE TRANSACTIONS
As part of each monthly close, you should purge the open item file of transaction detail, which is nolonger needed.
How does the system know how long to keep transaction detail? It checks the Past Due Periods KeptAfter Purge fields in MCT (A/R Control File Maintenance). Accounts using different balancemethods are all purged a little differently.
Open Item Accounts
The system purges any transaction (and its associated payments) which meets the followingconditions:
Has been fully paid. (Invoices and Finance charges) Is not marked as disputed. Meets the MCT Past Due Periods Kept After Purge requirement. Has a valid apply-to number assigned. (Adjustments, Credits, and Payments)
To keep the minimum detail, the newest payment document considered old enough to be purgedshould have a Document Date (receipt date) of the day before the Closing Date used on the report weare about to run.
You should also be aware that, for open item accounts, unapplied payments cannot be purged. Anypayment, which is applied to more than one invoice cannot be purged until even the most recentinvoice to which it was applied is eligible for purge.
Balance Forward Accounts
The system deletes all undisputed transactions that meet the MCT Past Due Periods Kept After Purgerequirement, keeping a running total of their sum. After that, any "purge" payment or credittransactions will have had a chance to reduce each month's balance. If there are any remaining dollars,a B type transaction is created for the remaining amount falling due in each month. This B transactionis added back to the account, or, if there was already B transactions for that month, it will show asbeing adjusted.
Revolving Charge Accounts
The system purges transactions similarly to the way Balance Forward accounts are handled. It isslightly different to allow accurate aged balances to print on the report we're about to print. That'swhy there is no control over the Past Due Periods Kept After Purge in MCT.

UNITY® Basic Training Classroom Workshop
5-42 Chapter 5: Accounts Receivable
For Disputed Items
Disputed items are always protected from purging. They can't be purged until you change theDisputed field in Open Item Maintenance (MOI) back to N.
When to Purge
You can't use a future Closing Date for your purge. If you ran your monthly close with a futureClosing Date, wait until that Closing Date arrives to do this procedure. Example: If you ran yourmonthly close on the 23rd, but you used a Closing Date of the 25th, wait until the 25th or later to runyour purge.

UNITY® Basic Training Classroom Workshop
Chapter 5: Accounts Receivable 5-43
PURGING PAST-DUE TRANSACTIONS USING A/R AGING REPORT
Path: Eagle Browser / Reports Menu / Accounts Receivable Reports / A/R Aging Report(RAG)
Purge past due transactions using the A/R Aging Report. (RAG)
1. Print Setup Area
In the Print To field, select S to Spool Only.
2. Options Area
If no option is selected here, the report will default to print by customer account number.
Select Options field: Click the checkbox next to option A to Include ActiveZero Balance Accounts (optional) C Include Creditbalance Accounts (optional) Z Include Zero BalanceAccounts (optional)
Update Options field: Click the checkbox next to option P to Purge
Print Options field: Click the checkbox next to option A to PrintAlphabetically by Sort Name (optional)
3. From / To Area
In the Start New Page field, select N for Do not start new page for each Customer.
The Closing Date field is an important date field. Use the appropriate date according to your needs, asoutlined below.
For Open Item Accounts:
To eliminate all paid detail, be sure that the Closing Date on this report is one day future to the A/RStatement Report (RSM) Closing Date for this period. Any transactions with a document date thesame as the Closing Date on this report will not purge.
For Revolving Charge Accounts:
If you want this aging to remain accurate, follow the rules for Balance Forward accounts. If you don'tcare if the aging remains accurate, follow the rules for Open Item Accounts.
UNITY® Basic Training Classroom Workshop
5-44 Chapter 5: Accounts Receivable
For Balance Forward Accounts:
The Closing Date depends on the type of terms codes used.
Date Terms Code: The Closing Date must match the due date specified in Terms Code Maintenance(MTM). Use the Due Date (calendar-wise) just prior to the closing date used inthe A/R Statement Report (RSM).
Days Terms Code: All transactions falling due on any date in a given month will be combined into a
single transaction that is due on the same day of the month as the date used on thisreport. This date should be as far away from the RAM Closing Date (calendar-wise) as possible. Example: If you normally close near the end of the month, usea purge closing date of the 10th or 15th. This will ensure that the B transactionwill still fall due in the correct aging periods, even if your Closing Date changes.
In the Items to Include field, select D for Doc Date before Closing Date
Leave the From / To ranges blank unless you are running this report for a select group of customers.
4. Code Selection Area
Use this window only if you are running this report based on selected User Codes.
Stores who have established account codes can either include or exclude according to those codes.
Example: codes representing multiple statement cycles, special code for employee accounts, etc.
5. Fax Setup Area
Fax Setup in the left column is reserved for those stores who have purchased this software.
6. Press the Run button on the Tool Bar or click the F4 key to process this report.
Related Documents