
Welcome message from author
This document is posted to help you gain knowledge. Please leave a comment to let me know what you think about it! Share it to your friends and learn new things together.
Transcript


DMA-03
2D Animation Block – II: Layout & designing
Odisha State Open University

2D Animation
This course has been developed with the support of the Commonwealth of Learning (COL). COL is an intergovernmental organisation created by Commonwealth Heads of Government to promote the development and sharing of open learning and distance education knowledge, resources and technologies. Odisha State Open University, Sambalpur (OSOU) is the first Open and Distance learning institution in the State of Odisha, where students can pursue their studies through Open and Distance Learning (ODL) methodologies. Degrees, Diplomas, or Certificates awarded by OSOU are treated as equivalent to the degrees, diplomas, or certificates awarded by other national universities in India by the University Grants Commission.
© 2018 by the Commonwealth of Learning and Odisha State Open University. Except where otherwise noted, 2D Animation is made available under Creative Commons Attribution-ShareAlike 4.0 International (CC BY-SA 4.0) License: https://creativecommons.org/licenses/by-sa/4.0/legalcode For the avoidance of doubt, by applying this license the Commonwealth of Learning does not waive any privileges or immunities from claims that it may be entitled to assert, nor does the Commonwealth of Learning submit itself to the jurisdiction, courts, legal processes or laws of any jurisdiction. The ideas and opinions expressed in this publication are those of the author/s; they are not necessarily those of Commonwealth of Learning and do not commit the organisation
Odisha State Open University Commonwealth of Learning
G.M. University Campus 4710 Kingsway, Suite 2500, Sambalpur Burnaby, V5H 4M2, British Odisha Columbia India Canada Fax: +91-0663-252 17 00 Fax: +1 604 775 8210 E-mail: [email protected] Email: [email protected] Website: www.osou.ac.in Website: www.col.org

Acknowledgements The Odisha State Open University and COL, Canada wishes to thank those Resource Persons below for their contribution to this DMA-03:
Concept / Advisor
Dr. Srikant Mohapatra Vice- Chancellor Odisha State Open University, Sambalpur
Course Writer
Bhagabat Kar Animation Director, News 7, Bhubaneswar
Course Editor Dr.Chitta Ranjan Mishra Associate Professor, English, BJB(Auto)College, Bhubaneswar
Prateek Das Centre Head, Om Animations and Graphics Institute, Cuttack
Olive Ashish Munda Teaches 3D Animation, Om Animations and Graphics Institute, Cuttack
Video Production
R. Mohana Sundaram Creative Director Jai Ram Institute of Visual Academy, Khurda, Odisha Guest Faculty, National Institute of Fashion Technology (NIFT), Bhubaneswar
Biranchi Prasad Sahoo Freelance Graphic Designer
Prateek Das Centre Head, Om Animations and Graphics Institute, Cuttack
Olive Ashish Munda Teaches 3D Animation, Om Animations and Graphics Institute, Cuttack
Published by :
Dr. Jayanta Kar Sharma Registrar on behalf of Odisha State Open University, Sambalpur
Contribution of following staff members of Odisha State Open University is acknowledged:
Jyoti Prakash Mohapatra
Sambit Mishra
Debidatta Behera
Prashansa Das
Radhakanta Suna
Abhinandan Tripathy
OSOU and COL acknowledge the support extended by Prof. Madhu Parhar, STRIDE, IGNOU, New Delhi in conducting several workshops in the process of preparation of course material for DMA.

2D Animation
Contents Contents
Course Overview 5
Welcome to Layout & Designing ..................................................................................... 5 Basic of Sketching ............................................................................................................ 5 Work in Different Media .................................................................................................. 5 Exploration of 2D elements .............................................................................................. 5
Pixel & Resolution ............................................................................................................ 6 Course outcomes ............................................................................................................... 6
Timeframe ......................................................................................................................... 7 Study skills ........................................................................................................................ 7 Need help? ........................................................................................................................ 7 Assignments ...................................................................................................................... 8
Assessments ...................................................................................................................... 8 Video Resources .............................................................................................................. 8
Getting around this course material 9
Margin icons ..................................................................................................................... 9
Unit-1 11
Basic of Sketching .......................................................................................................... 11 Introduction ........................................................................................................... 11 Outcomes ............................................................................................................... 11
Terminology .......................................................................................................... 12 The Pencil .............................................................................................................. 12
Types of Pencil ...................................................................................................... 13 Pencil holding techniques ...................................................................................... 16
Sketching ............................................................................................................... 20 Observation ........................................................................................................... 20 Still life drawing .................................................................................................... 21 Composition .......................................................................................................... 26 Element of Composition: ....................................................................................... 28
Summary ............................................................................................................... 30
Assignments .......................................................................................................... 30
Resources ............................................................................................................... 30
Unit 2 31
Work in Different Media ................................................................................................ 31 Introduction ........................................................................................................... 31
Outcomes ............................................................................................................... 31 Terminology .......................................................................................................... 31

ii Contents
A Brief History of Designing ................................................................................ 32
Drawing ................................................................................................................. 33 Types of Drawing Media ....................................................................................... 34 1.Dry Media ........................................................................................................... 34 2. Graphite ............................................................................................................. 35 3.Charcoal .............................................................................................................. 35
4.Pastels ................................................................................................................. 36 Wet media .............................................................................................................. 36 Painting .................................................................................................................. 37 1.Encaustic ............................................................................................................ 39 2.Tempera .............................................................................................................. 39
3.Fresco ................................................................................................................. 39 4.Oil ....................................................................................................................... 40
5.Acrylic Paint ....................................................................................................... 40 6. Watercolour ....................................................................................................... 41 Water Colour Techniques ...................................................................................... 42 Mixed Media Techniques for Collage ................................................................... 45
Unit Summary ....................................................................................................... 46
Assessment ............................................................................................................ 46
Resources ............................................................................................................... 46
Unit 3 47
Exploration of 2D elements ............................................................................................ 47 Introduction ........................................................................................................... 47 Outcomes ............................................................................................................... 47
Terminology .......................................................................................................... 48
Design Elements .................................................................................................... 48 2. Scale .................................................................................................................. 50 3. Color .................................................................................................................. 50
4. Contrast ............................................................................................................. 51 5. Texture ............................................................................................................... 52
6. Repetition .......................................................................................................... 53 7. Negative Space .................................................................................................. 53 8. Symmetry .......................................................................................................... 54
9. Transparency ..................................................................................................... 56 10.Balance ............................................................................................................. 57
11. Hierarchy ......................................................................................................... 57 12. Framing ........................................................................................................... 58 13. Grid .................................................................................................................. 60
14. Randomness ..................................................................................................... 61 15. Direction .......................................................................................................... 62 16. Rules ................................................................................................................ 63 17. Movement ........................................................................................................ 64
Unit Summary ....................................................................................................... 65
Assessment ............................................................................................................ 65
Resources ............................................................................................................... 66

2D Animation
Unit 4 67
Pixel & Resolution .......................................................................................................... 67 Introduction ........................................................................................................... 67 Outcomes ............................................................................................................... 67 Terminology .......................................................................................................... 67
Introduction ........................................................................................................... 68 Pixels and Resolution ............................................................................................ 68 Resolution .............................................................................................................. 70 Megapixels ............................................................................................................ 70 Aspect ratio ............................................................................................................ 70
True Color ............................................................................................................. 71 Raster(Bitmap) ...................................................................................................... 73 Vector (Lines/Calculated Points) .......................................................................... 74
Types of bitmap images ........................................................................................ 76 Characteristics of bitmap data ............................................................................... 77 How to convert bitmap data to vector data and back ............................................ 81
Unit summary ........................................................................................................ 84
Assignment ............................................................................................................ 84
Resources ............................................................................................................... 84

2D Animation
5
Course Overview
Welcome to Layout & Designing
This block focuses on layout and designing. Before setting your
hands into the practical aspects, a lesson on the theoretical study
of sketching is important. There are some common elements of a
successful 2D design. Exploration of 2D elements and
understanding of images, screens, pixels and resolution will help
you change the world of 2D animation.
Basic of Sketching
This course is intended for people who want to make a career in drawing and sketching. It helps you learn the techniques of using pencil in an organised way. Still life is the best subject in workmanship for learning and educating the aptitudes of drawing and painting. It shows you what is the look for items and see those like a craftsman - with a discerning attention to their framework, shape, extents, tone, shading, surface, frame and organization.
Work in Different Media
This course will assist the people who want to create a perfect 2D movie. Different types of artworks and drawing media will help you create a fantastic 2D output. The three forms of art such as painting, drawing and mixed media are the distinct method to describe your creativity.
Exploration of 2D elements
This course will prove beneficial for people intending to do 2D animation. Elements like Line, shape, form, space, color and texture are most important to design 2D. Furthermore, accumulations of different outline principles, balance, perspective, movement, design, rhythm and harmony are the elements that will help you change the field of 2D Animation.

Course Overview Basic of Sketching
6
Pixel & Resolution
This course is intended for people who want to become a graphic
designer. It includes a major portion of designing apart from two
distinct categories: vector-based and bitmap images.To make the
best design, the designer has to understand both the drawbacks
and benefits of types of images, screen, pixels and resolution.
This video will provide a brief overview of this course
Topic YouTube link QR
Code
Video 1 –2D sketching &
storyboardingfor animation https://youtu.be/AQpiyOW
CQ4Y
Video 2 – Image & graphics
Preparation
https://youtu.be/exL8Hwj
DNFc
Course outcomes
Upon completion of preproduction you will be able to:
Outcomes
Describe various types of pencil.
Describe various types of pencil
Examine various techniques of holding a pencil
Describe different type of drawing media
Explain the major theories influencing art
Describe various design elements
Division of elements
Know the resolution
Describe facts about vector and bitmap

2D Animation
7
Timeframe
How long?
This course will be completed within “4” classes.
This course is of “1” credit.
8 hours of study time is required for this unit.
Study skills
This is a combination of theory and practical.
Hence, you should have access to a personal computer or personal laptop for better understanding of this unit.
Each and every option is explained step by step in the course material.
Apart from this course material, the learner needs to adopt the tendency of learning from multiple sources i.e.;
Internet tutorials
Video tutorials on YouTube
Collaboration with people working in the industry etc.
Only classroom study will not make you a professional. You have to be active to grab the opportunity of learning wherever you get a chance.
Need help?
Help
In case you need any help, you can browse the internet sites such as youtube.com for video tutorials about the subject.

Course Overview Basic of Sketching
8
Assignments
Assignments
There will be some assignments at the end of each unit.
These assignments are mostly practical based and should be submitted in CDs or DVDs. Theoretical assignments are to be submitted written on A4-size sheets.
All assignments will be submitted to respective study centres of the Odisha State Open University or as directed by the co-ordinator.
All assignments should be unit wise on separate CD/DVDs clearly mentioning course title and unit on the top. Theoretical assignment will be neatly filed or spiral bind with cover mentioning necessary information of course, student detain on top.
Assessments
Assessments
There will be “1” assessment for each unit.
All practical assessments will be submitted to the OSOU.
Assessment will take place once at the end of each unit.
Learner will be allowed to complete the assessment within stipulated time frame given by the university.
Video Resources
This study material comes with additional online resources in the form of
videos. As videos puts in human element to e-learning at the same time
demonstrating the concepts visually also improves the overall learning
experience.
You can download any QR code reader from Google Play to view the
videos embedded in the course or type the URL on a web browser.
Reading

2D Animation
9
Getting around this course material
Margin icons
While working through this course material, you will notice the frequent use of margin icons. These icons serve to “signpost” a particular piece of text, a new task or change in activity; they have been included to help you find your way around this course material.
A complete icon set is shown below. We suggest that you familiarize yourself with the icons and their meaning before starting your study.
Activity Assessment Assignment Case study
Discussion Group activity Help Note it!
Outcomes Reading Reflection Study skills
Summary Terminology Time Tip

2D Animation
11
Unit-1
Basic of Sketching
Introduction
Drawings are methods for articulation of our perceptions, contemplations and emotions. Over the wide field of workmanship and outline, specialists and planners will utilize drawing as a particular tool for visual correspondence. In the meantime, it may also be utilized for a wide range of attracting strategies to express, create and showcase thoughts and work with the watcher for innumerable reasons. It is difficult to make a drawing unless the craftsman has a reasonable comprehension of what type of thought or scenario is to be presented and what visual dialect will be utilized in giving shape and expressing the flow of the drawing. This is frequently overlooked or misjudged by most educators of drawing.
In this unit, you will learn about basics of sketching, still life drawing and composition of basic elements.
Outcomes
Upon completion of this unit you will be able to:
Outcomes
Describe various types of pencil
Examine various techniques of holding a pencil
Explain the meaning of sketching
Practice still life drawing
Assess the components of composition

Unit-1 Basic of Sketching
12
Terminology
Terminology
Pencil: A bar of graphite encased in a delicate wood
for drawing and writing.
Balance: Balance is the feeling that the depiction "feels
right" and not heavier on one side.
Pattern: A customary reiteration of lines, shapes, hues, or
qualities in a composition.
The Pencil
A pencil is a bar of graphite encased in a delicate wood, for
example, cedar which is around six or seven inches in length and
uncovered toward one side. Unrefined types of graphite pencils
were first utilized as ahead of schedule as the 17th century. Prior
to this, poles of lead or silver (known as silver point) were utilized
as executables for making drawings. The cutting edge type of lead
or graphite pencil with its wooden encasement initially came into
utilization about the start of the 19th century.
The pencil essentially works by pushing or pulling the lead end
over the surface filaments of the paper, which gets grated getting
separated into little drops. Weight on the pencil pushes the pieces
of lead into the filaments of the paper to leave a stamp.
Graphite, a type of carbon, otherwise called mineral dark, is the
real constituent of the cutting edge pencil. The delicate quality or
hardness of a pencil fluctuates relying upon the measure of earth
blended with the carbon. Practically, no earth contains the mildest
assortments of pencil. Craftsmen and creators will have to utilize
the scope of pencils, for shifting their decisions as indicated by the
impact based on their attempts to accomplish.
As the graphite is worn away through utilization, it has to be
uncovered. This is finished by the activity of honing the pencil
utilizing a sharpener. Honing and uncovering the graphite ought to
be viewed as an imperative demonstration, since how it is done
changes the kind of stamp you make with it. There are numerous
methods for honing. A specific point creates a specific outcome.
2D Animation
13
The craftsman should test to find what is conceivable and how to
make each kind of pencil meet his specific needs at any given
point of time.
The pencil can be utilized for an assortment of purposes and, as
with any material which is utilized, you should be completely
aware of its possibilities and its impediments --diverse pencils and
sorts are intended for specific employments. In the resulting
section, some of these practices will be uncovered with specific
pertinence to the suitable pencil or graphite material.
The imprints that appear over the accompanying couple of pages
give some thought of the extensive variety of checks making
conceivable. When you are taking a look at them, see each of the
pencils thoroughly as to what marks you can make. Aside from
being extremely animating and finding methods for opening your
brain to new potential outcomes with your drawing, you will
discover how it expands your "vibe" for the pencil itself. As
specialists, what we feel through the materials we utilize affects
what we deliver. And understanding the nature of those materials
is indispensable for a decent result.
Types of Pencil
There are many types of pencils like hard pencil, soft pencil, peel-
back pencil, clutch pencil, standard thick dark pencil, triangular
craftsman's pencil, graphite pencil or stick and aqua drawing
pencil. But as a basic, we will discuss only about hard pencil and
soft pencil.
Hard pencil
Hard pencil marks have almost no variety in the scope of stamp
making. They just for the most part shift through a direct
movement. Tone is normally produced using a development of
crosshatch impacts. Hard pencils are meant by the letter H.
Similarly as with delicate pencils, they arrive in a range, involving
HB, H, 2H, 3H, 4H, 5H, 6H, 7H, 8H and 9H (the hardest).

Unit-1 Basic of Sketching
14
Title- Hard pencil marks Attribution- Peter Stanyer Source- The complete book of drawing techniques
These pencils are essentially for use by originators, planners and
individuals who create exact specialized diagrammatic drawings
for which a fine, precise line is fundamental (for example,
viewpoint or other projection drawings). Despite the fact that the
imprints made with hard pencil demonstrate almost no variety, it
can be utilized as a part of an expressive medium. Likewise, with
delicate pencil, tone can be constructed utilizing across-incubating
framework, despite significantly better and more formal outcome.
Hard pencils are generally proper for drawings requiring
exactness. As we have paid attention to already, such drawings are
typically done by engineers, mechanical fashioners, visual
originators and modellers. The last drawings which are created
must be proportional and exact with the goal of an individual, for
example skilled workers can choose in the directions to develop
and improve the instigated drawing or make the exact proposed
drawing. These drawings arrive in diverse point of views or parallel

2D Animation
15
projection frameworks, extending from level of orthographic
arrangement or rise drawings to 3D point of view delineations.
Soft pencil
The soft pencil has more flexibility for making tone and surfaces
than the hard pencil. Soft pencils are meant by the letter B. The
HB pencil is a blend of hard and soft and is the essential pencil
between the two extremes. The scope of soft pencils accessible
comprises of HB, B, 2B, 3B, 4B, 5B, 6B, 7B, 8B and 9B (the softest).
These pencils are intended for the fine craftsman to express
specific thoughts. For instance the working of tone, the making of
surface, cross-bring forth or even simply basic line. Range of
pencils having softest end can be utilized to create pieces of tone.
A graphite stick is by far the most suitable for this kind of work and
for creating bigger ranges of tone.
Mainly the soft pencil is reasonable for refined work requiring
extraordinary exactness - basically for the safeguard of the hard
pencil depends on the fine grip of the pencil.
Title- Soft pencil marks Attribution- Peter Stanyer Source- The complete book of drawing techniques Link-

Unit-1 Basic of Sketching
16
Pencil holding techniques
Holding Pencils
There are numerous approaches to hold the pencil yet the
watchword to recall while drawing is "unwind." Avoid holding the
pencil as though you were composing, in light of the fact that, for
the written work, the pencil has to be grasped fairly firm and tight.
The hold required for portraying is relatively loose and simpler.
Hold the pencil roughly, a few crawls from the tip of the lead. The
holding position ought to include the thumb and the initial two
fingers just, with the pencil lying easily within the tip of the third
finger. Utilize the second finger and the thumb to settle the pencil
and to keep it from slipping out.
The connection between the second finger and the thumb as a
rule directs the sort of lines and portraying style. At the point
when the tips of the two are moderately near one another, for
mooring of the pencil the whole hand by and large creases
internal; and in this manner the portability and reach of the pencil
for development is restricted by how far the fingers can extend.
This position is called Position A and is very similar to the written
work grasp. It is exceptionally helpful in portraying short strokes
and points of interest and it also gives the craftsman more control
of the instrument managing to be less inclined towards
committing errors

2D Animation
17
Position A

Unit-1 Basic of Sketching
18
Position B Title- Pencil holding techniques Attribution- Thomas c. wang Source- Pencil Sketching (2nd Edition) Link-
Position B is the point at which the tips of the second finger and
thumb are far separated. The second and third fingers are
normally straight as opposed to being twisted internally thereby
expanding the portability and reach of the pencil. By clearing here
and there with the broadened second and third fingers, the
strokes can be achieved up to six to seven inches. This is a perfect
position for shading in light of the fact that, the hold is free and
the fingers are substantially less demanding to move. This position
additionally enables the craftsman to hold the pencil sideways and
boosts the adequacy of the whole pencil tip. General terms are
one aftereffect of this hold. Basically broadening the fingers of the
whole hand having the palm down helps coasting the pencil over
the page. The edge of the pencil must be changed in accordance
with the individual craftsman's hand and level of adaptability. One
ought to have the capacity to change from Position A to Position B
in a nonstop development decisively or stoppage.
Position C Title- Pencil holding techniques Attribution- Thomas c. wang

2D Animation
19
Source- Pencil Sketching (2nd Edition)
The third (Position C) includes holding the pencil as though holding
a putty blade or little hand apparatus. The pencil is held between
the thumb and the second finger. This dispenses with any type of
finger or hand development and along with hand development
these lines are essentially suited for long and general terms. The
whole lower arm is utilized, giving the craftsman most extreme
reach. Contingent upon the extent of paper accessible and the
scope of the craftsman's arm, pencil strokes can reach more than
three feet. This position can likewise be utilized to make etch
strokes. Simply hold the pencil and strike it here and there utilizing
short and sudden strokes.
Pressure
Applying pressure (drive) to the pencil is the thing that gives
beauty and enthusiasm to a line. Without pressure, the strokes
and lines are plain and exhausting. A straight forward line
attracting pen and ink can be very excellent but if there is a
consistency in the lines, they can draw out the lucidity and
softness of theportray. A hard lead can give a line that is
moderately reliable when contrasted than a softer lead.
Considering this, the magnificence of pencil portraying lies in the
craftsman's capacity to apply pressure to the pencil keeping in
mind the end goal to change the nature of the lines. The striking,
lifting and turning, the incidental bumping and bending, and the
sudden change of the edge of the lead all add to a huge number of
impacts which are one of a kind to pencil portraying. What's
more?It is this uniqueness that makes pencil exceptional.
A pencil ought to and should be dealt like as an expansion of the
craftsman's hand arm and fingers. The creators of drawing not
only include the movement of a hand holding a pencil but also
manage the whole tactile transfer from eyes to cerebrum to that
of hand. We watch and inspect with our eyes; streamline with our
cerebrum and eyes; dissuade our mind about what ought to be
kept; record with our hand; assess with our eyes again to check
whether the picture takes a look at all like the one we saw before;
roll out moment improvements and reexamine everything again in
an unending cycle. This is the outlining procedure more or less.
Similarly, as drawing is without doubt a mental procedure that is

Unit-1 Basic of Sketching
20
extremely individual and cozy, so is the demonstration of applying
pressure to the pencil is based on individual and personal
experience. There is no logical standard for how much constrain
one ought to apply on a specific lead. It is fundamentally an
experimentation procedure which you gain from your trials and
errors. You do it more than once to accomplish a predictable
example and you attempt to keep it that way, however nobody
can show you how to do it.
Sketching
A definitive objective of sketching is to graphically decipher the picture effectively. In spite of the fact that the way of elucidation and introduction is an individual issue (and each craftsman has his or her methods for communicating it), the ultimate result of a draw is regularly represented by some pleasing benchmarks. The portrayal must have some level of authenticity and the subject of elucidation must be fairly conspicuous. For instance, on the oversimplified level, a portrayed tree should resemble a tree and not a man. On the more propelled level, an old tree ought not to resemble a youthful sapling. The storage compartment and the bark ought to some way or another uncover its age. If a house with a stone exterior is ought to be drawn, then the unobtrusive contrasts in the joints and mortar can be uncovered and highlighted.
Observation
With a specific end goal to effectively translate the picture that we
are endeavouring to portray, we should invest energy watching it
painstakingly. Cautious perception is a critical initial phase really
taking shape of a decent outline. Perception must be sharp.
Rehashed perception and recording are required to comprehend
the subject. Once in a while estimations are taken just to ensure
that the best possible relationship is accurately depicted. Scene
sketching (and especially the sketching of trees) gives one of the
best vehicles to exhibit the significance of perception and
recording. Estimations and recordings have an astonishing
advantage for originators in light of the fact that these right and
appropriately proportioned pictures can turn into the visual
information bank from which they can later infer motivation and
thoughts for future work.

2D Animation
21
Steps to sketch:
See
Identify
Isolate
Simplify
Translate into sketching
Still life drawing
Still life is the best subject in workmanship for learning and
educating the aptitudes of drawing and painting. It shows you
what is the look for items and see those like a craftsman -- with a
discerning attention to their framework, shape, extents, tone,
shading, surface, frame and organization.
Well ordered, still life lesson will show you the attracting
strategies used to create the still life, which was finished with a 2B
pencil on cartridge paper.
Steps 1 to 4: It exhibits how to draw the shapes and
extents of the still life objects utilizing line.
Steps 5 to 8: It represents how to render the three
dimensional type of the still life utilizing tone.
For this still life lesson you will require:
2B pencil
Eraser
A3 sheet
Step 1: Beginning the still life drawing
Title- Beginning the Still Life Drawing Link-http://www.artyfactory.com/still-life/still_life_pencil.html

Unit-1 Basic of Sketching
22
In any still life, you should begin to draw the items, as though they
are straightforward wire outline frames with noticeable lines of
development. This procedure causes you to be completely mindful
of the state of every individual frame and its position in
connection to alternate structures. It is critical to outline the items
softly as this commits it simpler to change any errors and delete
any lines of development.
NOTE: This transparent drawing strategy utilizes vertical and even
lines of development to help you to attract persuading circles and
to adjust the symmetry of round and hollow structures.
Step 2: Making a fascinating synthesis
Title- Making a fascinating synthesis
Link-http://www.artyfactory.com/still-life/still_life_pencil.html
While forming a still life, attempt to present the qualities that
make a fascinating plan. You should know about the conceptual
structure of your course of action: its rhythms and complexities of
line, shape, tone, shading, example, surface and frame.
NOTE: A straightforward wire outline way to deal with sketching
the still life encourages you to sort out the organization of the
gathering. It makes it less demanding to see the shape, position
and extents of each protest in connection to its neighbours.

2D Animation
23
Step 3: Eradicating the lines of development
Title- Eradicating the line of development
Link-http://www.artyfactory.com/still-life/still_life_pencil.html
When you are content with the shape, extent and structure of the
still life, you can delete the lines of straightforward development.
This will abandon you with a precise noticeable layout of each
shape and the certainty that everything of the articles is situated
accurately. You are currently prepared to take a shot at the points
of interest of each protest.
Step 4:Including the points of interest in line
Title- Including the points of interest in line
Link-http://www.artyfactory.com/still-life/still_life_pencil.html

Unit-1 Basic of Sketching
24
Presently softly portray in the states of any shadows or reflections
onto each question.
NOTE: The more care you assume control over the precision of
these imprints, the less demanding you will locate the following
phase of the drawing - the Application of Tone.
Step 5: Shading Method: 1
Title- Shading method step-1
Link-http://www.artyfactory.com/still-life/still_life_pencil.html
The tone of our still life is developed in four phases sketched out
in steps 5-8. In this progression, some essential tones are softly
connected to each protest help develop its three dimensional
shape.
Step 6: Shading Method:
Title- Shading method step-2
Link-http://www.artyfactory.com/still-life/still_life_pencil.html

2D Animation
25
The second stage in working up the tone concentrates on the
spaces between and around the articles.
NOTE: The drawing of the light and shade between the items must
be regarded with as much significance as the drawing of the
articles themselves. The shadows cast underneath and around the
articles add as much to the meaning of their shapes as does the
shading on their surfaces. Notice how the counter-change of tones
between the items and the spaces assumes control from the
utilization of line to characterize the types of the still life.
Step 7: Shading Method: 3
Title- Shading method step-3
Link-http://www.artyfactory.com/still-life/still_life_pencil.html
In the third phase of working up the tone, you concentrate back
on the items. This time you extend their tone, expanding the
complexity between the territories of dim and light. This will
improve the type of the articles and increment the effect of the
picture.
NOTE: The most concerning issue at this stage is keeping up an
adjustment of tones over the entire still life with the goal that no
protest shows up excessively dim or too light. You are hunting
down solidarity of tone and shape.

Unit-1 Basic of Sketching
26
Step 8: Shading Method: 4
Title- Shading method step-3
Link-http://www.artyfactory.com/still-life/still_life_pencil.html
At last, you concentrate again on the spaces between the articles,
developing their tones and expanding their complexity.
NOTE: You should be cautious in adjusting the tonal estimations of
the articles and the spaces between them to guarantee that you
make a bound together picture.
The finished still life should chip away at two levels: as a practical
portrayal of the gathering of items and as a dynamic creation of
visual components, orchestrating and differentiating the
utilization of line, shape and tone.
Composition
The demonstration of perception is the most critical part in
sketching. A decent draw starts with watchful perception and
innovative seeing. Inventive seeing needs to go with figuring out
how to disengage things. Earnest Watson said in his book The Art
of Pencil Sketching that “in pencil drawing, one always avoids any
leaning toward photographic simulation.” How genuine that is.
Sketching is tied in with catching the quintessence of the genuine
article. An outline speaks to another dialect particularly like

2D Animation
27
shorthand that records the genuine article with shortened images
of lines and surfaces. Imaginative seeing is tied in with finding the
conspicuous element, exhibiting it, and disposing of the rest. It is
tied in with catching the skeletal structure and the soul that rises
above it. Clearly, the genuine article can be scattered wreckage;
however, a decent draw comprehends what to dispose of.
Arrangement is a piece of the whole inventive seeing procedure. It
includes visual determination, visual positioning and visual core
interest. Maybe we know what to dispose of;however what do we
do with the things that we keep? How would we rank them in the
request that we need to accentuate them in an outline? For
instance, should the attention be on the entryway or the
windows? How would we disengage the purpose of intrigue and
utilize differentiation to highlight the significance? How would we
adjust tone and esteem and how would we outline the draw
keeping in mind the end goal to outwardly lead the watchers into
the photo? By tending to these inquiries effectively, a great
structure has the uncommon capacity to join the craftsman and
watcher both outwardly and inwardly.
Piece is the term used to depict the course of action of the visual
components in an artistic creation or other fine art. It is the
manner by which the Elements of Art and Design - line, shape,
shading, esteem, surface, frame, and space -- are sorted out or
formed by the Principles of Art and Design - adjust, differentiate,
accentuation, development, design, mood, solidarity/assortment -
and different Elements of Composition, to give the canvas
structure and pass on the aim of the craftsman.
Arrangement is not the same as the topic of a work of art. Each
depiction, whether theoretical or illustrative, paying little mind to
topic, has an organization. Great organization is basic to the
achievement of an artistic creation. Done effectively, great
organization attracts the watcher and afterward moves the
watcher's eye over the entire painting with the goal that
everything is taken in and at last, settling on the primary subject of
the depiction

Unit-1 Basic of Sketching
28
Element of Composition:
The Elements of Composition in craftsmanship are utilized to
orchestrate or arrange the visual parts in a way that is satisfying to
the craftsman and one’s expectations, the watcher. They enable to
provide structure for the format of the artistic creation and the
way the subject is introduced. They can likewise energize or lead
the watcher's eye to meander around the entire painting, taking in
everything and eventually returning to lie on the point of
convergence.
Components of composition are by and large thought to be:
•Unity: Does every one of the parts of the composition feel as
though they have a place together, or accomplishes something
feel stuck on, fumblingly strange?
•Balance: Balance is the feeling that the depiction "feels right"
and not heavier on one side. Having a symmetrical course of
action includes a feeling of quiet, though an awry game plan
makes a more powerful feeling. An artistic creation that is not
adjusted makes a feeling of unease.
•Movement: There are numerous approaches to give a feeling of
development in a work of art, for example, the plan of items, the
position of figures, the stream of a waterway. You can utilize
driving lines (a photography term appropriate to painting) to
coordinate the watcher's eye into and around the canvas. Driving
lines can be real lines, for example, the lines of a fence or railroad,
or they can be suggested lines, for example, a column of trees or
bend of stones or circles.
•Rhythm: Similarly music does, a bit of craftsmanship can have a
musicality or fundamental beat that leads your eye to see the fine
art at a specific pace. Search for the substantial basic shapes
(squares, triangles, and so forth) and rehashed shading.
•Focus (or Emphasis): The viewer's eye at last needs to lay on the
"most vital" thing or point of convergence in the artwork,
generally the eye feels lost, meandering around in space.
•Contrast: Paintings with high differentiation -- solid contrasts
amongst light and dim, for instance -- have an unexpected vibe in
comparison to artistic creations with insignificant complexity in

2D Animation
29
light and dim. Notwithstanding light and dim, complexity can be
contrasts fit as a fiddle, shading, estimate, surface, kind of line,
and so forth.
•Pattern: A customary reiteration of lines, shapes, hues or
qualities in a composition.
•Proportion: How things fit together and identify with each other
regarding size and scale; regardless of whether enormous or little,
adjacent or inaccessible

Unit-1 Basic of Sketching
30
Summary
Summary
In this unit, we described the basics of sketching and elements of
composition. You got general information of sketching. You will
know how to utilize pencil, you must have realized what materials
are best used for and you will know how to approach your
sketching. More importantly, in any case, you will have an
unmistakable understanding that sketching is about how to impart
your perceptions, your imaginations, and your thoughts in the
light of nature and our general surroundings.
Assignments
Assignments
1. List the different types of pencils
2. Describe hard pencil
3. Describe soft pencil
4. Write the ways of holding pencil for sketching
5. What is sketching and what are the steps
6. Describe still life drawing with step by step techniques
7. Explain what composition is
8. List the elements of composition
9. Describe the elements of composition
Resources
Reading
https://en.wikipedia.org/
https://www.google.co.in/ https://www.rmit.edu.au/

2D Animation
31
Unit 2
Work in Different Media
Introduction
Any work structure can be a good thing; but in regards to art,
innovation is the key to finding out how far you can take a painting
and how sincerely you’re prepared to express your visualization. A
few artists want to take in any particular sole medium, and
essentially they wants to use individual preferences for that picked
medium. And of course, there are those of us who are curious to
see how different mediums will work together; you can build up a
totally unique style of art while using variety methods of different
drawing media.
In this unit, you will learn about different kinds of artworks listed.
The unit will give a diagram with a few illustrations that may help
make you think about how our function in encaustic can be
integrated into the more extensive universe of art. You will learn
that each of the three fields that is focussed on painting, drawing
and mixed media/collage has a distinct method for describing
what the work is made of - a material vocabulary all its own..
Outcomes
Upon completion of this unit you will be able to:
Outcomes
Describe different type of drawing media
Explain the major theories influencing art
Assess how to use materials
Formal elements and safe working practices
Differentiate between various water colour techniques.
Terminology

Unit 2 Work in Different Media
32
Terminology
Canvas: The fabric that is extended on a wooden
casing in which oil paintings and acrylic
paintings are finished.
Crafts: Art frames used for creating attractive art
pieces that are both excellent and helpful.
Crafts include weaving, texture outline,
pottery, and gems making.
Crayons: Pigments held together with wax and formed
into sticks.
Fresco: A procedure of painting on a layer of wet
mortar. The mortar ingests the shades and
the painting turns out to be a piece of the
divider.
Mosaic: Small pieces of tile which is creatively placed
together to make a design on a wall or floor.
Palette: A wood, metal, or plastic surface used by an
artist to blend paint.
Solvent: A fluid material that is utilized to thin the
binder in paint.
A Brief History of Designing
Exploring Different Art
Art has implied different things to different individuals at
distinctive circumstances through our mankind's history. In the
content Art Fundamentals, the authors* discuss the term "art" we
utilize it today is likely to be gotten from the renaissance words
arti and arte. “Arti was the designation for the craft guilds of the
14th, 15th and 16th centuries to which the artists were closely
tied by the traditions of their calling. The word for craftsmanship is
art, implied knowledge of the materials utilized by the artist as
well as the surface on which they would execute their work. Art or
craftsmanship also implied the skilful handling of those materials
2D Animation
33
in the sense of producing images more or less like those of nature,
but certainly not in the sense of imitating the exact appearance of
nature.”
This unit investigates conventional and non-customary medium
related with Two Dimensional artworks including:
1. Drawing
2. Painting
3. Collage
Two-dimensional media are gathered into general classifications.
We should take a look at each gathering to comprehend their
specific qualities and how craftsmen utilize them.
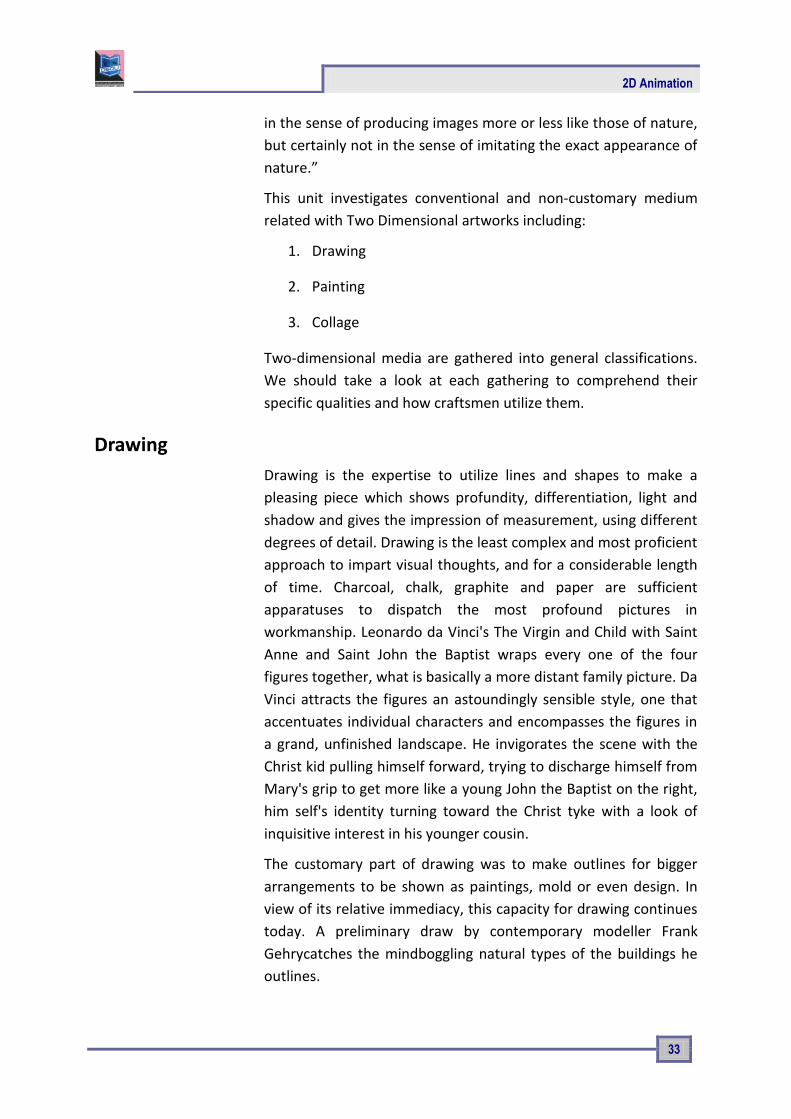
Drawing
Drawing is the expertise to utilize lines and shapes to make a
pleasing piece which shows profundity, differentiation, light and
shadow and gives the impression of measurement, using different
degrees of detail. Drawing is the least complex and most proficient
approach to impart visual thoughts, and for a considerable length
of time. Charcoal, chalk, graphite and paper are sufficient
apparatuses to dispatch the most profound pictures in
workmanship. Leonardo da Vinci's The Virgin and Child with Saint
Anne and Saint John the Baptist wraps every one of the four
figures together, what is basically a more distant family picture. Da
Vinci attracts the figures an astoundingly sensible style, one that
accentuates individual characters and encompasses the figures in
a grand, unfinished landscape. He invigorates the scene with the
Christ kid pulling himself forward, trying to discharge himself from
Mary's grip to get more like a young John the Baptist on the right,
him self's identity turning toward the Christ tyke with a look of
inquisitive interest in his younger cousin.
The customary part of drawing was to make outlines for bigger
arrangements to be shown as paintings, mold or even design. In
view of its relative immediacy, this capacity for drawing continues
today. A preliminary draw by contemporary modeller Frank
Gehrycatches the mindboggling natural types of the buildings he
outlines.

Unit 2 Work in Different Media
34
Types of Drawing Media
1.Dry Media
Dry Media includes charcoal, graphite, chalks and pastels. Each of
these mediums gives the craftsman an extensive variety of stamp
making abilities and impacts, from thin lines to expansive ranges
of shading and tone. The craftsman can control a drawing to
accomplish wanted impacts in numerous ways, including exerting
different weights on the medium against the drawing's surface, or
by eradication, blotting or rubbing.
This procedure of drawing can instantly exchange the feeling of
character to a picture. From vivacious to inconspicuous, these
qualities are clear in the most straightforward works: the
immediate and unalloyed soul of the craftsman's thought. You can
see this in the self-pictures of two German craftsmen; Kathe
Kollwitz and Ernst Ludwig Kirchner. Injured during the main world
war, his Self-Portrait under the Influence of Morphine from
around 1916 presents us with a nightmarish vision of him wrapped
in the mist of sedative medications. His empty eyes and the
realistic brokenness of his imprints verify the energy of his
drawing.
Title- Portraits Attribution- Sandrine Pelissier Source- pinterest.com
Link-https://www.moma.org/s/ge/collection_ge/artist/artist_id-3115_role-
1_sov_page-71.html

2D Animation
35
Ernst Ludwig Kirchner, Self Portrait under the Influence of Morphine
2. Graphite
Graphite is the most widely recognized drawing medium. Graphite
usually comes in the type of pencils, powder or packed sticks and
is the thing that a large portion of us basically allude to as "pencil".
Each one makes a scope of qualities depending on the hardness or
softness inherent in the material. Hard graphite tones territory
from light to dark dim, while softer graphite enables a range from
light dim to almost dark. In this manner a great deal of graphite
drawings are basically called pencil drawings, despite the fact that
calling them graphite drawings would be more exact.
Graphite drawing procedures are for all intents and purposes
interminable. At any rate that you apply graphite to a surface will
deliver some kind of results. French stone carver Gaston Lachaise's
Standing Nude with Drapery is a pencil drawing that fixes the
vitality and feeling of development of the figure to the paper in
only a couple of strokes. And Steven Talasnik's contemporary huge
scale drawings in graphite, with their swirling, natural structures
and design structures are demonstration of the energy of pencil
(and eraser) on paper.
3.Charcoal
Charcoal is scorched natural material. Typically the material is
wood. There are a couple of sorts of charcoal utilized by craftsmen
to make a drawing. These sorts of charcoal include "vine" and
"packed". Vine charcoal is more often used that does not comprise
of consumed willow wood. Vine charcoal is effectively spread on a
surface and is anything but difficult to eradicate. As an outcome it
is for the most part makes a lighter stamp when you draw than
packed charcoal and it is effectively smirches. Compacted charcoal
is held together by a gum binder and is darker than vine charcoal.
Thus, it is harder to eradicate, harder to smirch, yet makes a
darker stamp. Compacted charcoal may come as a round stick, a
square stick, or in a pencil. (Vine charcoal is quite often a round
stick.) But it's harder to control once they are connected to paper.

Unit 2 Work in Different Media
36
4.Pastels
Significantly more prominent color refinement is conceivable with
pastel colored pencils, produced using powdered shades blended
with a base measure of non-oily cover. At the point when the
colors are connected to paper, they perpetually look new and
bright, in spite of the fact that they should be safeguarded from
scattering by been kept under glass. Pastel colors can be
connected in straight method straightforwardly with the pastels,
or to a region of the paper specifically with the fingers. Pastels
originated in the north of Italy amid the 16th century, and were
utilized by Jacopo Bassano (1515-92) and Federico Barocci (1526-
1612). Pastel drawings were known to the Accademia degli
Incamminati no later than the 17th century, in spite of the fact
that as a work of art it didn't achieve its apogee until the
eighteenth century, eminently in France (with Jean Marc Nattier,
Maurice Quentin de La Tour, Jean-Baptiste Perronneau and Jean
Chardin) and in Venice (with Rosalba Carriera)
Title-Pastels Source- pixabay.com Link-https://www.pexels.com/photo/art-artistic-bright-close-up-268435/
Wet media
Ink: Wet drawing media generally eludes to ink, however, truly
includes any substance that can be put into arrangement and
connected to a drawing's surface. Since wet media is controlled
much like paint – through thinning and the utilization of a brush –
it obscures the line amongst drawing and painting. Ink can be
connected with a stick for linear impacts and by brush to cover
huge zones with tone. It can likewise be weakened with water to
make estimations of dim.
Felt tip pens are viewed as a type of wet media. The ink is
immersed into felt strips inside the pen at that point discharged

2D Animation
37
onto the paper or other help through the tip. The ink rapidly dries,
leaving a lasting imprint. The hued marker drawings of
DonnabelleCasis have a flowing, natural character to them. The
conceptual nature of the topic infers body parts and viscera.
Different fluids can be added to drawing media to improve
impacts – or make new ones. Craftsman Jim Dine has sprinkled
soda onto charcoal drawings to make the surface rise with
bubbling. The outcome is a visual surface dissimilar to anything he
could make with charcoal alone, in spite of the fact that his work is
known for its solid control. Dine's drawings often utilize both dry
and fluid media. His topic includes creatures, plants, figures and
apparatuses, ordinarily packed together in thick, darkly
sentimental pictures.
Conventional Chinese painting utilizes water-based inks and
colors. Truth be told, it is one of the most seasoned continuous
imaginative conventions on the planet. Painted on backings of
paper or silk, the topic includes landscapes, creatures, figures and
calligraphy, a fine art that utilizations letters and script in liquid,
expressive motions.
Painting
Painting is the act of applying paint, shade, shading or other
medium to a strong surface (bolster base). The medium is
normally connected to the base with a brush, however different
actualizes, for example, blades, wipes, and enhances with
Photoshop, can be utilized.
Painting is a method of inventive articulation, and the structures
are various. Drawing, signal (as in gestural painting), piece,
portrayal (as in story craftsmanship), or reflection (as in dynamic
workmanship), among other stylish modes, may serve to show the
expressive and theoretical intention of the professional. Paintings
can be naturalistic and illustrative (as in a still life or landscape
painting), photographic, conceptual, story, symbolist (as in
Symbolist craftsmanship), emotive (as in Expressionism), or
political in nature (as in Artivism).
Unit 2 Work in Different Media
38
Painting mediums are to massively flexible, in light of the fact that
they can be connected to a wide range of surfaces (called bolsters)
including paper, wood, canvas, mortar, earth, veneer and cement.
Since paint is normally connected in a fluid or semi-fluid state it
can douse into permeable help material, which can, after some
time, debilitate and damage it. To keep the help material, it is
typically first secured on a solid land with a blend of binder and
chalk, when dries makes a non-permeable layer between the help
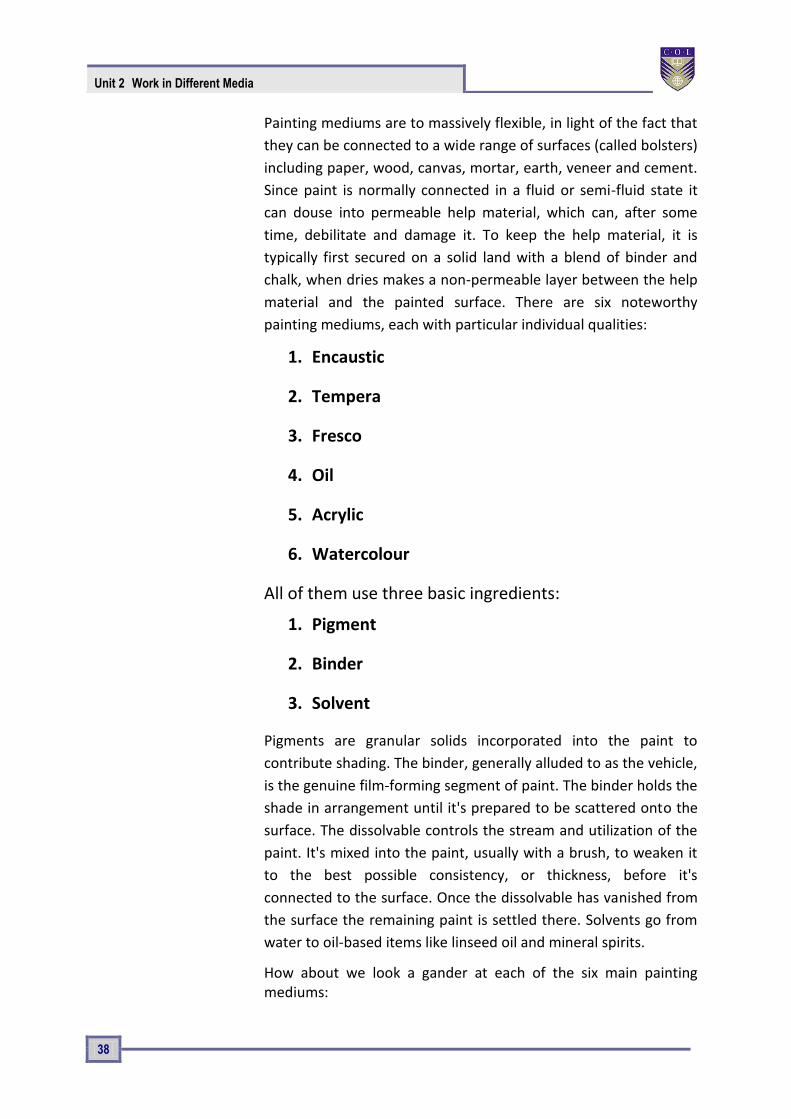
material and the painted surface. There are six noteworthy
painting mediums, each with particular individual qualities:
1. Encaustic
2. Tempera
3. Fresco
4. Oil
5. Acrylic
6. Watercolour
All of them use three basic ingredients:
1. Pigment
2. Binder
3. Solvent
Pigments are granular solids incorporated into the paint to
contribute shading. The binder, generally alluded to as the vehicle,
is the genuine film-forming segment of paint. The binder holds the
shade in arrangement until it's prepared to be scattered onto the
surface. The dissolvable controls the stream and utilization of the
paint. It's mixed into the paint, usually with a brush, to weaken it
to the best possible consistency, or thickness, before it's
connected to the surface. Once the dissolvable has vanished from
the surface the remaining paint is settled there. Solvents go from
water to oil-based items like linseed oil and mineral spirits.
How about we look a gander at each of the six main painting mediums:

2D Animation
39
1.Encaustic
Encaustic is a wax based paint (made out of beeswax, resin and
color), which is kept liquid on a warmed palette. It is connected to
a retentive surface and then warmed so as to meld the paint.
"Encaustic" originates from the Greek word enkaiein, meaning to
consume in, referring to the way toward fusing the paint. Though
they originate from a similar root word, "encaustic" ought not to
be mistaken for "acidic," which alludes to a destructive synthetic
response. There is no such risk with encaustic.
2.Tempera
Tempera, otherwise called egg tempera, is a changeless, quick
drying painting medium consisting of hued pigments mixed with a
water-solvent binder medium (typically a glutinous material, for
example, egg yolk or some other size). Tempera additionally
alludes to the paintings done in this medium. Tempera paintings
are durable and customarily connected in progressive thin layers,
called coats, painstakingly developed using systems of cross
brought forth lines.
3.Fresco
Fresco painting is utilized only on mortar dividers and ceilings. The
medium of fresco has been utilized for thousands of years, yet is
most connected with its utilization in Christian pictures during the
Renaissance time frame in Europe.
There are two types of fresco: Buon or "wet", and secco, meaning
"dry".
Buon fresco method comprises of painting in color mixed with
water on a thin layer of wet, crisp lime mortar or mortar. The color
is connected to and consumed by the wet mortar; following
various hours, the mortar dries and responds with the air: it is this
substance response that fixes the shade particles in the mortar. As
a result of the compound cosmetics of the mortar, a binder is not
required. Buon fresco is steadier on the grounds, that the shade
turns out to be a piece of the divider itself.
Buon Fresco alludes to the hues and subtle elements are
safeguarded in the dried mortar divider.

Unit 2 Work in Different Media
40
Secco fresco alludes to painting a picture on the surface of a dry
mortar divider. This medium requires a binder since the shade is
not mixed into the wet mortar. Egg tempera is the most widely
recognized binder utilized for this reason. It was basic to utilize
secco fresco over buon fresco paintings with a specific end goal to
repair damage or roll out improvements to the original. Then the
colours and details are preserved in the dried plaster wall.
4.Oil
Oil paint is the most flexible of all the painting mediums. It utilizes
color mixed with a binder of linseed oil. Linseed oil can likewise be
utilized as the mixing fluid, alongside mineral spirits or turpentine.
Oil painting was thought to have created in Europe during the
15th century, however, late research on wall paintings found in
Afghanistan hollows show oil based paints were utilized there as
right on time as the 7thcentury.
A portion of the characteristics of oil paint includes an extensive
variety of color decisions, its capacity to be thinned down and
connected in practically straightforward coatings and in addition
utilized straight from the tube (without the utilization of a
vehicle), developed in thick layers called impasto (you can see this
in many works by Vincent van Gogh). One disadvantage to the
utilization of impasto is that after some time the body of the paint
can part, leaving systems of breaks along the thickest parts of the
painting. Since oil paint dries slower than different mediums, it
can be mixed on the help surface with careful detail. This
expanded working time additionally takes into account alterations
and changes to be made without having to rub off segments of
dried paint.
5.Acrylic Paint
Acrylic paint was created in the 1950s and turned into another
option to oils. Shade is suspended in an acrylic polymer emulsion
binder and utilizations water as the mixing fluid. The acrylic
polymer has attributes like elastic or plastic. Acrylic paints offer
the body, shading reverberation and toughness of oils without the
expense, wreckage and danger issues of using overwhelming
solvents to blend them. One noteworthy contrast is the generally
quick drying time of acrylics. They are water dissolvable, yet once

2D Animation
41
dry wind up noticeably impenetrable to water or different
solvents. Additionally, acrylic paints cling to a wide range of
surfaces and are to a great degree solid. Acrylic impastos will not
split or yellow after some time.
6. Watercolour
Watercolour is the touchiest of the painting mediums. It responds
to the lightest touch of the craftsman and can turn into an
overworked mess in a minute. There are two kinds of watercolour
media: straightforward and obscure. Straightforward watercolour
works in a switch relationship to the next painting mediums. It is
generally connected to a paper bolster, and depends on the
whiteness of the paper to reflect light back through the connected
shading (see underneath), while hazy paints (including murky
watercolours) reflect light off the skin of the paint itself.
Watercolour comprises of shade and a binder of gum Arabic, a
water-solvent compound produced using the sap of the acacia
tree. It breaks up effectively in water.
The conventional and most basic help-material to which the paint
is connected for watercolour paintings is paper. Different backings
include papyrus, bark papers, plastics, vellum, or calfskin, texture,
wood, and canvas. Watercolour paper is often made completely or
somewhat with cotton, which gives a decent surface and
minimizes contortion when wet. Watercolours are generally
translucent, and seem luminous, in light of the fact that the
pigments are set down in an unadulterated shape with couple of
fillers obscuring the shade hues. Watercolours can likewise be
made hazy by adding Chinese white.
In East Asia, watercolour painting with inks is alluded to as brush
painting or parchment painting. In Chinese, Korean, and Japanese
painting it has been the dominant medium, often in monochrome
dark or tans. India, Ethiopia and different nations have long
watercolour painting conventions also. Finger-painting with
watercolour paints originated in mainland China.

Unit 2 Work in Different Media
42
Water Colour Techniques
Watercolour painting has the notoriety of being very demanding;
it is more exact to state that watercolour methods are remarkable
to water colour. Not at all like oil or acrylic painting, where the
paints basically stay where they are put and dry pretty much in the
frame they are connected, water is a dynamic and complex
accomplice in the water colour painting process, changing both
the sponginess and state of the paper when it is wet and the
outlines and appearance of the paint as it dries. The trouble in
water colour painting is totally in learning how to envision and use
the conduct of water, instead of attempting to control or
dominate it.
Washes and Glazes
In water colours, a wash is the use of weakened paint in a manner
that masks or destroys individual brush strokes to deliver a bound
together region of shading. For example, this may be a light blue
wash for the sky.
A coating is the use of one paint shading over a past paint layer,
with the new paint layer at a weakening adequate to enable the
main shading to show through. Coatings are utilized to blend at
least two hues, to alter a shading (darken it or change its tone or
chroma), or to deliver to a great degree homogenous, smooth
shading surface or a controlled yet sensitive shading move (light to
dark, or one tint to another). The last strategy requires the
principal layer to be an exceptionally weakened consistency of
paint; this paint layer disintegrates the surface sizing of the paper
and slackens the cellulose tufts in the mash. Painters who utilize
this method may apply 100 coatings or more to make a single
painting. This technique is as of now exceptionally mainstream for
painting high difference, intricate subjects, and specifically brilliant
blooms in precious stone vases splendidly illuminated by
coordinate daylight. The glazing technique likewise works
extraordinarily well in water colour picture, allowing the craftsman
to delineate the complex tissue tones successfully.
Wet in wet
Wet in wet includes any utilization of paint or water to a region of
the painting that is as of now wet with either paint or water. As a

2D Animation
43
rule, wet in wet is a standout amongst the most distinctive
elements of watercolour painting and the method that delivers a
striking painterly impact. The fundamental thought is to wet the
whole sheet of paper, laid level, until the point when the surface
no longer wicks up water yet gives it a chance to sit at first glance,
at that point to dive in with an expansive brush immersed with
paint. This is typically done to define the extensive zones of the
painting with unpredictably defined shading, which is then honed
and refined with more controlled painting as the paper dries.
Dry brush
Dry brush is the watercolour painting system for accuracy and
control, especially exemplified in numerous herbal paintings and
in the dry brush watercolours of Andrew Wyeth. Crude (undiluted)
paint is gotten with a pre-moistened, little brush and then
connected to the paper with little hatching or crisscrossing
brushstrokes. The brush tip must be wetted however not cheated
with paint, and the paint must be sufficiently liquid to exchange to
the paper with slight weight and without dissolving the paint layer
underneath. The objective is to develop or blend the paint hues
with short exact touches that mix to stay away from the presence
of pointillism. The aggregate impact is objective, textural, and
profoundly controlled, with the most grounded conceivable
esteem differentiates in the medium. Often it is difficult to
distinguish a decent drybrush watercolour from a shading photo
or oil painting, and numerous drybrush watercolours are
varnished or lacquered after they are finished to upgrade this
likeness.
Diluting and Mixing
Tube paints are regularly utilized with a level palette that gives
compartmentalized paint wells (for holding separate paint hues)
and an extensive mixing zone for mixing or diluting paints; skillet
paints are exhibited in enamelled metal paint boxes that give
shallow mixing zones in the folding spread or in a crease out
faceted plate. With tube paints, the abundance paint remaining in
the palette paint wells ought to be use or wash out just in case if
the paint moves toward other well dirtying another paint;
generally the paints ought to be permitted to dry out quickly and
totally, as this keeps shape from forming. Regardless of the regular

Unit 2 Work in Different Media
44
misguided judgment, there is no visual contrast between the
gooey paint bundled in tubes and the dried paints in skillet. Tube
paints left to dry in paint wells are utilized as a part of the very
same path as skillet paints—the painter essentially dribbles or
showers water over the paint a couple of minutes before starting
work. The main remarkable contrast is that some tube paints, for
example, viridian or cerulean blue, create a coarse, uneven paint
blend when left to dry and then rewetted.
Minimal Palettes
Palette is likewise the term for a particular choice of paints. A natural decision is the "primary" palette consisting of a fuchsia (generally yet inaccurately distinguished as "red"), yellow and cyan (customarily "blue") paint, each representing subtractive primary shading. This palette can blend every conceivable tint, however the purple, orange, and green blends are distinctively rather dull or dark, and most shading blends require utilization of each of the three paints. The primary palette is in this manner helpful to exhibit that smallness additionally influences accommodation (the trouble involved in mixing any normal shading) and shading immersion (by and large, the paint blend range or aggregate number of exceptional hues it is conceivable to blend with a palette). Leonardo, in his note pads, referred to red, yellow, green and blue (alongside white and dark) as the "painter's primaries". However, he might not have had a particular palette in mind; but rather replacing the cyan paint with a dark blue paint, (for example, ultramarine blue), and adding a green paint, incredibly enhances the immersion of both purple and green blends in a smaller four-paint determination, and enables a dark impartial or dark to be mixed specifically, using just red and green.
In the 19th century six paint "split primary" palette was introduced and is still upheld today as an answer for the mixing restrictions of the three paint "primary" palette. It depends on the three conventional subtractive primary hues (red, yellow, and blue), each in a "warm" and "cool" adaptation.
Collage
A collage is any work of art that is created by gluing or otherwise
attaching objects to a base. The base can be canvas, wood,
stone, paper or anything the artist wants to use. In collage the
medium attached to the base is usually paper or fabric.

2D Animation
45
History of Collage
Collage turned out to be all the more completely created during
the coming of innovation, when Cubist pioneers Pablo Picasso and
Georges Braque explored different avenues regarding combining
parts of different materials to make a radical new synthesis. These
craftsmen mixed high culture (present day workmanship) with
components of everyday life (bits of materials, daily papers,
magazines, colour paper, and so forth.). Dada craftsmen
introduced the use of existing photos in their compositions, which
often remarked on the province of German culture in the disorder
of World War I. The craft of arrangement continued to fill in as
inspiration in the 1950s and 1960s, when array and Pop craftsmen
utilized discovered questions and pictures from mass created
commercials in their works. While numerous craftsmen today
continue with original strategies for arrangement, many introduce
more updated computerized mediums to rejuvenate the
customary craftsmanship.
Mixed Media Techniques for Collage
Rice paper and gel medium present an excellent opportunity to
preserve many different objects while creating a beautiful piece of
art. Leaves, flowers, feathers, pieces of paper and bits of fabric can
all be used in this simple technique. When the gel medium dries,
the rice paper becomes transparent and encases the items you
used to create the collage.
Consider thinking outside the box on the selection of a base for
your collage. Stone or ceramic tiles that are commonly used in
kitchens or bathrooms can make interesting bases. The “wrong”
side of a travertine tile makes a lovely natural base for alcohol
inks, acrylic paints, glass powders and other interesting bits. Try
using stamps that you already have or make your own. Small
found objects can be glued on to add interest or tell a story.
Collage is an excellent technique for people that love to scrapbook
as well. You can add pieces of paper such as concert or movie
tickets. Pieces of fabric from special dresses, such as a wedding
dress or prom dress could be added to a collage that is part of a
scrapbook project. This is a good way to transform memories to
art and make them last for generations to come.

Unit 2 Work in Different Media
46
Unit Summary
Assessment
Assessment
1. Describe formal elements of art. 2. Classify different types of art. 3. Explain the term media in art. 4. Define pigment in art. 5. List the characteristics of abstract art. 6. Explain the meaning of texture in art. 7. Define creative arts. 8. State what is acrylic? 9. How is a Pegasus drawn? 10. Write the way to erase crayon from paper. 11. Define washes. 12. Describe perspective in painting. 13. State what is ink? 14. Describe "Fresco". 15. What is collage?
Resources
https://www.google.co.in/ https://www.rmit.edu.au/
https://www.wikipedia.org/
Summary
In this unit you have learned the different types of drawing media and its use in 2D animation. Besides that you have learnt the exploration of different medium and materials for producing a 2D art. You learn extra strategies and aptitudes to utilize them to express your own innovative thoughts.
Reading

2D Animation
47
Unit 3
Exploration of 2D elements
Introduction
All of us visit several websites in a day. Some websites grab our
sights all the more effectively, while others don't. Why? Once in a
while we need to comment our feeling about preferences or
abhorrence of web sites, and it is anything but difficult to state
just "I like this thing, or I don't care for that thin " But in the event
that we are asked to answer the inquiry for what good reason, it is
extremely troublesome for us to discover the fundamental driver.
Which factors do impact on somebody to have a specific
disposition towards a web page? There is a probability of many
reasons associated with it, yet I think the "plan" of the webpage is
extremely basic one of them.
This unit portrays the components and standards of plan and
eloquent the sub-variables of outline. Color, values, structures and
shapes, space lines and surfaces are known as the components of
outline. These components are known as the basics for all gems.
Without these components, craftsmanship couldn't be made.
These components exist in our general surroundings in nature and
in the situations we make for ourselves.
In this unit, you will learn the relationship between elements and
principles.
Outcomes
Upon completion of this unit you will be able to:
Outcomes
Describe various design elements
Division of elements
Elaborate, design elements
Define a line
Differentiate between 'outline randomness' and different forms of randomness
Discuss various grid systems

Unit 3 Exploration of 2D elements
48
Terminology
Terminology
Line: A line is a shape with width and length.
Scale: Scale is a huge piece of outline.
Color: It explains the particular state of mind.
Texture: Texture alludes to the surface quality.
The plan components and standards portrayed here can be an
investigating outline for webpage plan. It illuminates us where to
start, what to test and how to examine. For instance, the creator
who knows the outline components and standards can break
down the page in terms of lines, colors, developments,
adjustments, amicability, etc., while others simply imagine
whether it is suitable for them or not. This data can likewise give a
communicating instrument to the web planner. An author can
express his/her idea utilizing dialect. A webpage originator
likewise communicates their idea or a specific aim with
components of outline and does it viably alongside the plan
standards. When a planner needs to state something through the
webpage, he should utilize the components (line, color, and so
forth) as a specialized device. So it is essential to know such sort of
implications of the outline components and standards.
Note: Although colorstands out amongst the most vital outline
components, I barred the detail depiction of it, since color-related
subject has just grabbed creator’s interests and numerous
architects, I think, definitely they know about it in particular.
Design Elements
The components will be segments or parts which can be
disconnected and characterized in any visual outline or
masterpiece. They are the structure of the work and can convey a
wide assortment of messages. The points of interest might be
differently selected by scientists, however, I included “line”,
“scale, “color”, “repetition”, “negative space”, "symmetry", "
transparency ", "texture", "balance ","hierarchy ", "contrast",

2D Animation
49
"framing", "grid", "randomness","direction", "rules"and
"movement” 'in this unit
Title-Line drawing Attribution- Source- prawny Link-https://pixabay.com/en/vintage-sketch-doodle-line-drawing-1778234/
A line is a shape with width and length, yet no profundity. Artists
utilize lines to make edges and the outlines of articles. A line is
made by the movement of the craftsman's pen.
The direction of a line can pass on disposition. Flat lines are quiet
and tranquil, vertical lines proposes mostly the potential for
movement, while corner to corner lines emphatically recommend
movement, which gives a greater degree of sentiment
essentialness to a photo.
Lines can be characterized as any linear imprints. In this way,
when you consider it, lines make up pretty much everything.
Indeed, even these words and letters you're pursuing comprises
thousands of bended, calculated and straight lines.
Lines can channel certain thoughts as well. Straight ones can bring
out request and tidiness, wavy lines can make movement and
crisscrossed lines can infer pressure or fervour.
A strategy to improve photography to a considerable measure is
by the utilization of 'driving lines' which does exactly what they
guarantee i.e. they lead the eye. Finding and underscoring solid
driving lines in your piece can enable you to coordinate the eye
through the whole piece or to certain central focuses.
Let’s take a look at a case of driving lines in web outline. This
webpage has a cool askew grid with extremely solid driving lines
that brings down the page from area to segment in a quick

Unit 3 Exploration of 2D elements
50
crisscross shape. A solid utilization of line is an incredible approach
to stylise your representations.
Lines are adaptable, basic and viable realistic components that you
surely ought not to underestimate! Let’s explore different avenues
regarding them and find out what cool things they can add to your
plan.
2. Scale
Scale is a huge piece of outline, once in a while actually. In an
extremely fundamental definition, scale is the presence of mind
measuring the individual components.
Scale can enable us to comprehend plans and pictures. Consider if
you somehow happened to attract a mouse alongside an
elephant, you'd likely draw the mouse substantially littler than the
elephant, which would help watchers easily comprehend your
drawing.
Along these lines, scale encourages us to comprehend different
things. In any case, scale doesn't generally need to be found on
authenticity. You can estimate your components drastically
expansive or little to make staggering impacts and to flag which
parts of your outline are more vital and which are less.
While this scale is not in fact in light of authenticity as individuals'
countenances for the most part are of similar size. All things
considered (Ryan Gosling is not a mammoth as far as anyone is
concerned)are the sensational scaling all over. The confront
causes watchers to get a fast handle on each character's level of
significance in the film.
This scaling of components to flag significance is frequently called
"Progressive System", which we'll discuss later. For the interim,
let’s take a look at a case that utilizes scale to connote
significance.
3. Color
Color is vital factor. It explains particular states of mind, channels
feelings and as well as each shade has certain particular

2D Animation
51
undertones related to it. To put it simply, color can represent the
deciding moment your outline.
Color consists of three properties. The first is tone, which is the
name of the colors. The essential tones are yellow, red and blue.
Auxiliary colors are made by blending two primaries. Middle colors
are the blends of an essential and adjoining auxiliary color.
The second property of color is esteem, which alludes to the
softness or murkiness of shade. The third property of color is
power, which alludes to the virtue of the shade (likewise called
"chroma").
Color isn't a rule essentially restricted to marking
components.However, color ventures into everything, even
photos. Channels and picture adjustors have given us the
boundless capacity to change our photo’s coloring and tones.
It is safe to say that if you are planning a smooth and advanced
publication, then why not a sharp, noir-propelled monochromatic
channel run over your picture, similar to Canvas "Road" channel.
On the other hand, if you're going for an offbeat look, then
consider dropping the contrast of your picture a little to quiet your
picture’scolors a bit, making it milder and more quiet.
4. Contrast
Contrast is regularly the magical key fixing to make your plans
'pop', which is a (sometimes disappointing) demand from many
outline clients.
In an exceptionally basic definition, contrast is the level of
difference between two elements of your outline.
Some common forms of contrast are dull versus light, thick versus
thin, vast versus small, etc.
Contrast greatly affects meaningfulness and neatness also, it's a
major motivation behind why you see books and many different
publications imprinting in black content on a white background.
Imagine that they printed utilizing light dim on a white
background. The contrast would be low and the sort of hard to
peruse. In this way, in case you're utilizing sort, make beyond any
doubt you bump up that contrast.

Unit 3 Exploration of 2D elements
52
Contrast isn't only a stylistic element or a decipherability
enhancer; it can likewise act to attract the eye to certain elements
of your plan. This technique is utilized as a considerable measure
in website plan.
5. Texture
Texture alludes to the surface quality, both simulated and actual
pattern of craftsmanship. Techniques used as a part of painting
serves to indicate texture, i.e. the dry brush technique produces a
harsh simulated quality and substantial application of pigment
with brush or other implementation that produces an unpleasant
actual quality.
Clean, sharp and smooth graphic plans can be superb, however
sometimes; roughing it up a little with some texture can be far
superior. Texture can include tactility, profundity, and can add
some entirely fascinating effects to your outline.
Be that as it may, as with many things, make sure to use this
technique in moderation, as a lot of texture can quickly
overwhelm your plan. Remember: there's a barely recognizable
difference between shabby-chic and out and out old shabby.
The more textures connected, the harder sort and different
elements are created without a stroke effect around each letter.
Of course, in case you're going for the muddier look stylistically, at
that point layering textures might look good for you. However, if
you're searching for an approach to incorporate texture in a less
imposing manner, follow the example below
Title-texture Attribution- Source-monicore Link-https://pixabay.com/en/vintage-sketch-doodle-line-drawing-1778234/

2D Animation
53
How about we observe an example that utilizes texture in a way
that enhances the piece. Notice that the utilization of the
unpleasant texture isn't distracting, rather giving it a more
handcrafted, authentically-vintage feel.
6. Repetition
Title-repetition Source-kaatjem Link-https://pixabay.com/en/row-of-trees-repetition-sunrise-2168579/
Imagine about any big brand name such as Pepsi, Adidas, Audi,
Motorola and Apple, this is certain that you would all be able to
think about their logo, their manner of speaking and their general
color plans utilized. Why are these things so significant without a
moment's notice? That is correct, you got it – repetition.
Repetition is a critical component with regards to marking outline,
both as far as keeping your marking predictable and as far as
entwining your things.
7. Negative Space
To put it gruffly, negative space is the 'space inbetween', the range
between or around different elements that form its own particular
shape.
Take example of broadly respected ruler and counterfeiter of
negative space craftsman M.C. Escher, whose work I'm certain you

Unit 3 Exploration of 2D elements
54
have seen and would have been sometimes astounded. Escher did
a number of decorations that focussed on one shape driving into
the following, by means of negative and positive space.
Title-Negative space Attribution-Maurits Cornelis Escher Source- Link- https://www.flickr.com/photos/pedrosimoes7/38798263524
Perceive how the space in the middle of the black kangaroos is
utilized to display the state of white kangaroos. This is negative
space at work – considering everything around and in the middle
of your physical outline and manipulating that space to form
something new.
Negative space when utilized strategically can help create really
staggering and clever plans. Observe these simple animal icons to
render clear depictions of each animal.
8. Symmetry
Title-Symmetry Source-bogitw Link-https://pixabay.com/en/architecture-stairs-steel-abstract-1313678/

2D Animation
55
As species, human creatures are scientifically ended up being
attracted to symmetry. We find symmetrical faces, examples and
outlines, by and large more attractive, effective and lovely.
Symmetry is utilized as a considerable measure in logos so as to
create a harmonious and balanced plan. Some examples of
extensive brands with symmetrical logos are Target, McDonald's,
channel, Starbucks, etc.
Screenshot
Screenshot

Unit 3 Exploration of 2D elements
56
Of course, symmetry is not generally a possibility for each plan and
nor should it be. There's an almost negligible difference between
an outline looking balanced and symmetrical in appearance as
though one side was copied, flipped or stuck to one side. So as
opposed to attempting to achieve perfect symmetry, rather
attempt are made to introduce inconspicuous elements of
symmetry into your outline.
Symmetry isn't generally as evident, either sometimes it is
inconspicuous or sometimes you may not even notice it. A prime
example of imperceptible symmetry can be found in article plan
and more specific message boxes. Open up any magazine you
came across , the chances are more in a extended article where
you'll notice that the body copy that has been part up into
columns of content and they are frequently symmetrically
measured to keep things readable, flawless and additionally
outwardly engaging.
By utilizing a touch of symmetry in your format, you can create a
feeling of balance and request. In this way, next time you're
planning a publication outline or a plan with a considerable
measure of sort, focus on how much (or how little) symmetry
you're utilizing. On the off chance that your outline doesn't look
very right, have a run at toying with your symmetry, regardless of
whether this be increasing it or decreasing it.
9. Transparency
Likewise occasionally known as 'opacity', transparency alludes to
how 'transparent' an element is. The lower your opacity, the
lighter and less noticeable your element is, and the higher it is, the
more strongly noticeable the element is.
Transparency is additionally an incredible technique for producing
a feeling of movement in static images. For example, check out
this blurb, layers different images with various levels of
transparency to create an immersing effect and feeling of
movement.
Transparency isn't quite recently limited to advanced graphics
either. Check out how this welcome card for the New York
Museum of Glass has apropos which has been imprinted onto

2D Animation
57
straightforward glass, giving the plan a special and drawing in
effect. Consider on what mediums your outlines will be imprinted
on, what will be the opacity and what completion they will have
while designing or showcasing your creativity.
10.Balance
Balance is a really important thing in most of life and it's
equivalently important in the realm of outline.
One approach to master balance is to think about each of your
elements as having a "weight" behind it. From content boxes to
images, to that of blocks of color, consider each of their sizes,
shapes and what "weight" they have in connection to different
elements on the page.
A decent technique is to imagine if your outline were to be printed
out as a 3D model. Would it stand, or would it tip to the other
side?
One kind of balance is 'asymmetrical balance', which is less about
mirroring left and right/top and bottom and more about
conveying, measuring and adjusting elements so their "weights"
are in occasion.
11. Hierarchy
Hierarchy in configuration is a great deal like that in culture, as
both are based on fundamentally the same thought. At the highest
point of a hierarchical scale, we have the most important things,
the lords. These elements are to be "dressed" the most
indulgently and command the most consideration.
In the following level of hierarchy, we have the noblemen i.e. the
elements that are important.However they don't command much
consideration as the lords. These are things like subheadings, pull
cites and extra information. Make beyond any doubt to keep these
eye-catching and noticeable, however not at anyplace close as
noticeable as your headings.

Unit 3 Exploration of 2D elements
58
What's more?On the last rung of the hierarchical scale are the
labourers, the humble elements of your plan that are given
minimal amount of visual spirit, as a rule things like body copy,
less important information, joins, etc.
Observe this blurb. You can without much of a stretch bring up the
title, the subheading/date, and down the bottom, the smallest
sort of extra information that isn't as crucial to the
communication.
Of course, hierarchy isn't recently limited to sort. Images likewise
have hierarchy. The bigger, more colorful or more central
elements of your image will have a higher hierarchy than those
smaller, blunter and less point by point elements.
12. Framing
Much the same as you do with your photos and pieces of
workmanship, framing your plans correctly is an important aspect.
We as a rule consider framing in terms of photography – what you
include and what you don't. Be that as it may, framing is similarly
as important in plan.
Physical frames such as box outlines or graphic elements can
enhance or attract regard for specific elements of your plan.
For example, we should check out this menu plan that chooses to
frame one of the specials and the business mission statement to
attract consideration regarding these two elements that the eye
may have generally disregarded. Such a simple method for
highlighting certain elements of your outline can have a major
impact.

2D Animation
59
Title-Framing Attribution-Paleocookbook Link-https://commons.wikimedia.org/wiki/File:Paleo_diet_book.jpg

Unit 3 Exploration of 2D elements
60
Frames don't need to be graphic either. In case you're working
with photographic elements, consider utilizing them to frame your
plans. Check out how this notice uses random objects to create a
frame for the superimposed sort. Along these lines, you attract
consideration regarding the piece by the frame and direct the eye
to the truly important bits.
13. Grid
Think about an outline grid like the establishment to a house – it's
a crucial initial phase in taking into consideration for you to
construct a functional and wonderful final product. It signs to the
developer/planner where certain elements ought to be placed,
what ought to line up with what and it also gives a general outline
for construction.
Grids are important, normally imperceptible elements to pretty
much any outline. They are comprised of a certain number of lines
and columns that you can adjust your elements against. Grids can
keep your content all together, perfectand neat and great looking.
Here are some examples of various grid systems.
Title-Grid Attribution- William Caslon Link-https://commons.wikimedia.org/wiki/File:A_Specimen_by_William_Caslon.jpg
This example demonstrates a four-column grid at work. Note how
some elements are contained to one column, while others stretch

2D Animation
61
more than two, sometimes three columns. But the outline all in all
seems perfect, clean and very much adjusted.
For more adaptability, consider including some more columns,
similar to this example beneath.
In any case, this example has a clear and identifiable grid system
to which each element has been adjusted, making for a striking,
perfect and attractive outline.
Grids are adaptable, versatile and endlessly helpful.So consider
utilizing one for your next outline and see what it can accomplish
for you.
14. Randomness
As of not long ago we've been preaching about alignment and
request. Be that as it may, shouldn't something be said about the
more organic, unpleasant and random outlines? Randomness has
an extensive impact on outline.However, it is a specific sort of
randomness that we should call 'plan randomness'.
The difference between 'outline randomness' and different forms
of randomness is the reason and execution. With outline, your
main objective ought to be communication – what does this piece
need to state to consumers? Is it saying it plainly? How might I
make the communication more grounded?
This piece layers the hand-sort and positions. It is in an
exceptionally random manner that some individuals would state
obstruction to the intelligibility. But the idea behind this is to
speak to a scrambled and distorted psyche.
In this lies the difference amongst "randomness" and 'plan
randomness'. If this outline were connected to a blurb for a
children's movie about cheerful talking animals, it would seem
random and wouldn't communicate the best thing by any stretch
of the imagination. However, in this case, the random outline
communicates the movie's themes perfectly.
Likewise, observe this plan by Laura Berglund that uses a level of
randomness to create an organic-looking, collage-like effect. While
this piece seems as though it was slapped down onto a page and
in a flash looked beautifully harsh and rumpled. Have somewhat a

Unit 3 Exploration of 2D elements
62
glance at it and note what number of outline conventions it
actually uses.
Title-Collage Attribution- Source- Link-https://pxhere.com/en/photo/992512
Take a look at how each element has actually been strategically situated. Driving lines have been implemented to manage the eye around the piece and there has been a selective balance between color level, texture and photography.
This plan seems random; however, if you dissect its elements,
you'll notice that certain parts of the outline have been adjusted.
The design enables the eye to stream across the page and there
are even some indications of a grid at work.
The fact of the matter being – things don't need to be flawless and
efficient to be classed as plan. Speaking to "randomness" and
playing with a couple of vanguard outlines can be effective and
super fun.
15. Direction
Title-Direction Source- Pixabay Link- https://pixabay.com/en/direction-road-sign-note-arrow-95475/

2D Animation
63
An important aspect of many plans is the means by which the eye moves over the page and the direction it takes – this is likewise sometimes alluded to as 'stream'. How does your eye move across the page? Do your peruses know exactly where to look next? Is the direction that their eye takes is logical?
Studies have dissected the exact idea of our eye movement propensities and the examples our eyes trace over, when seeing specific things. By and large, the general thought is that the eye normally goes from the upper-left corner to the bottom-right corner, in a "clearing" motion. This hypothesis is best clarified top to bottom. Instead of planning 100% by these examples, however, attempt to adjust your outline’s' stream and direction on a case-by-case premise. Simply remember that the eye inclines toward the upper left of a page and winds its way down from there.
16. Rules
This without question begins a lot of verbal showdown and to parcel any room of makers – half announcing that there are no tenets in layout, the other testing that there are numerous. Additionally, in fact, they're both right.
Similarly as with any ability, there are things you need to learn and this comes with general rules. Things like: make your sort neat beyond any doubt, figure out how to kern, don't utilize pixelated images, etc. These are the establishments of plan, the things that assist you to make a basic outline.
In any case, once you've learnt these rules, it's certainly time to break them.
Thus, while the clarity is a little compromised, the communication
certainly is definitely not.
Following the rules and breaking them, each have their own places
in the realm of outline. Bring everything with a grain of salt and
learn as much as you can so that you can break and twist the rules
in the correct way and make a memorable sprinkle.

Unit 3 Exploration of 2D elements
64
17. Movement
Have you at any point heard or seen somebody describe an artistic
creation or piece of craftsmanship as having "a considerable
measure of movement to it"? You might have first been
bewildered by that clarification – all things considered, how does a
static painting move? In any case, movement is a major piece of
the visual expressions, including graphic plan.
Prior we discussed the direction and stream of your plan, these
factors have a major influence in the movement of your outline.
On the off chance that your last piece has a decent spill out of
through and through, left to right, corner A to corner B, etc., your
piece will "move" smoothly.
Yet, shouldn't something be said about the cases where you need
to give an element an exact feeling of movement? Maybe you
paint the town that you need to appear in motion, or a car that
you need to depict zooming down a roadway.
Movement can likewise be captured through motion lines. These
are common in comics representations, when a character is
fleeing or moving quickly. Along these lines, channel your internal
comic book artist and make the most of motion lines.

2D Animation
65
Unit Summary
Summary
Elements of configuration described here are point, line, shape,
form, space, color, and texture. Furthermore, I accumulated
information about different outline principles, similar to the
balance, extent, perspective, emphasis, movement, design,
repetition, rhythm, assortment, harmony, and solidarity. These
elements and principles can be the basic information and
analytical frame work for an architect. I attached the examples of
the elements and principles in supplement. I hope the perusers
would find it useful.
Configuration is a complicated business loaded with principles,
tricks, and techniques, some of which you can gain from others
and some you need to learn by yourself.
Take each "govern" you read about with a grain of salt and apply it
where it feels proper and relinquish the rules at whatever point
you feel they aren't. Configuration is a constantly developing and
changing field and each circumstance is distinctive -- one of a kind
and exciting.
Assessment
Assessment
1. Elements are divided into categories
2. Describe the various design elements
3. Elaborate how line helps us in design elements
4. The difference between 'outline randomness' and different
forms of randomness
5. What can keep your content all together, perfect, neat and
looking great
6. Discuss the various grid systems

Unit 3 Exploration of 2D elements
66
Resources
Reading
http://mexicounexplained.com
https://google.com
http://minyos.its.rmit.edu.au
http://wikipedia.com
https://encrypted-tbn3.gstatic.com
http://3.bp.blogspot.com
https://cdn0.iconfinder.com
https://thumbs.dreamstime.com
https://cdn.shopify.com
https://cms-assets.tutsplus.com
http://www.woot-design.co.uk
http://www.magazinedesigning.com
https://www.smashingmagazine.com
https://i.ytimg.com
http://montrealblackfilm.com
http://thecontextofthings.com
http://www.rockdesign.com
https://market.envato.com
http://subdimensionstudios.com

2D Animation
67
Unit 4
Pixel & Resolution
Introduction
In this unit, you will be introduced to pixel and resolution with vector-based and bitmapped graphics. In order to understand each graphic format, you will also have to know the benefits and the drawbacks of both types of images on a multimedia screen, calculation of Pixels and its color and intensity depth.
Outcomes
Upon completion of this unit you will be able to:
Terminology
Terminology
Pixels : Picture elements in digital images.
Image
Resolution:
Number of pixels in a digital image.
Digital Image: Which resolution always yields better quality,
generally Higher Resolution is chose.
Bitmap: A representation for the graphic /image data
in the same manner as they are stored in
video memory
Bits/Pixel: It contributes to the quality of the image
Outcomes
Know the resolution
Describe facts about vector and bitmap
Elaborate the depth of pixel color and intensity
Choose the right format
Convert bitmap to vector

Unit 4 Pixel & Resolution
68
Introduction
Digital images are basically divided into two distinct categories.
They are either bitmap files or vector graphics. You need a good
understanding of the advantages and disadvantages of both types
of data. In this unit you learn the differences.
Title-Photorealistic vector art Source-OpenClipart Link-https://pixabay.com/en/apple-red-fruit-nature-food-146453/
Pixels and Resolution
The image that is displayed on the screen is composed of
thousands (or millions) of small dots which are called pixels. The
word “Pixel” is a contraction of the phrase "Picture Element". A
pixel represents the smallest piece of the screen that can be
controlled individually. Each one can be set to a different color
and intensity (brightness). The number of pixels that can be
displayed on the screen is referred to as the resolution of the
image.This is normally displayed as a pair of numbers, such as
640x480. The first is the number of pixels that can be displayed
horizontally on the screen and the second represents how many
can be displayed vertically. The higher the resolution, the more
pixels that would be displayed and, therefore, more content can
be shown on the monitor at once. However, pixels are smaller at
high resolution and detail can be hard to make out on smaller
screens. Resolutions generally fall into predefined standard sets,
only a few different resolutions are used by most PCs.

2D Animation
69
The aspect ratio of the image is the ratio of the number of X pixels
to the number of Y pixels. The standard aspect ratio for PCs is 4:3,
but some resolutions use a ratio of 5:4. Monitors are calibrated to
this standard so that you can draw a circle and have it appear to
be a circle and not an ellipse. Displaying an image that uses an
aspect ratio of 5:4 will cause the image to appear somewhat
distorted. The only mainstream resolution that currently uses 5:4
is the high-resolution 1280x1024. There is some confusion
regarding the use of the term "resolution", since it can technically
mean different things. First, the resolution of the image you see is
a function of what the video card outputs and what the monitor is
capable of displaying. To see a high resolution image such as
1280x1024 requires both a video card capable of producing an
image this large and a monitor capable of displaying it. Secondly,
since each pixel is displayed on the monitor as a set of three
individual dots (red, green and blue), some people use the term
"resolution" to refer to the resolution of the monitor.The term
"Pixel Addressability" is referred to the number of discrete
elements that the video card produces. In practical terms, most
people use resolution to refer to the video image as it is done in
this unit. The table below lists the most common resolutions used
on PCs and the number of pixels each uses:
Resolution Number of Pixels
Aspect Ratio
320x200
640x480
800x600
1024x768
1280x1024
1600x1200
64,000
307,200
480,000
786,432
1,310,720
1,920,000
8:5
4:3
4:3
4:3
5:4
4:3

Unit 4 Pixel & Resolution
70
Resolution
The resolution can be defined in many ways such as pixel
resolution, spatial resolution, temporal resolution, spectral
resolution. We are going to discuss pixel resolution.
You have probably seen that in your own computer settings, there
are different monitor resolutions such as 800 x 600, 640 x 480
e.t.c. in the options for selecting pixel resolution. The term
resolution refers to the total number of count of pixels in an digital
image. For example,if an image has M rows and N columns, then
its resolution can be defined as M X N.
If we define resolution as the total number of pixels, then pixel
resolution can be defined with set of two numbers. The first
number is the width of the picture or the pixels across columns
and the second number is height of the picture or the pixels across
its width. We can say that the higher is the pixel resolution, higher
will be the quality of the image.
We can define pixel resolution of an image as 4500 X 5500.
Megapixels
We can calculate mega pixels of a camera using pixel resolution.
Column pixels (width ) X row pixels ( height ) / 1 Million.
The size of an image can be defined by its pixel resolution.
Size = pixel resolution X bpp ( bits per pixel ).
Calculating the mega pixels of the camera
Lets say we have an image of dimension: 2500 X 3192.
Its pixel resolution = 2500 * 3192 = 7982350 bytes.
Dividing it by 1 million = 7.9 = 8 mega pixel (approximately).
Aspect ratio
Another important concept with the pixel resolution is aspect
ratio. Aspect ratio is the ratio between width of an image and the
height of an image. It is commonly explained as two numbers
separated by a colon (8:9). This ratio differs in different images,
and in different screens. The common aspect ratios are:1.33:1,

2D Animation
71
1.37:1, 1.43:1, 1.50:1, 1.56:1, 1.66:1, 1.75:1, 1.78:1, 1.85:1, 2.00:1,
e.t.c .
Advantage
Aspect ratio maintains a balance between the appearance of an
image on the screen, means it maintains a ratio between
horizontal and vertical pixels. It does not let the image to get
distorted when aspect ratio is increased.
Pixel Color, Intensity, Depth of Color and the Color Palette
Each pixel of the screen image is displayed on a monitor using a
combination of three different color signals: red, green and blue.
This is similar (but by no means identical) to how images are
displayed on a television set. Each pixel's appearance is controlled
by the intensity of these three beams of light. When all are set to
the highest level, the resultant color is white; when all are set to
zero the pixel color is black, etc.
The amount of information that is stored about a pixel,
determines its color depth, which controls how precisely the
pixel's color can be specified. This is also sometimes called the Bit
Depth, because the precision of color depth is specified in bits. The
more bits that are used per pixel, the finer the color detail of the
image. However, increased color depths also require significantly
more memory for storage of the image, and also more data for the
video card to process, which reduces the possible maximum
refresh rate.
This table shows the color depths used in PCs:
True Color
True color is named as such because three bytes of information
are used, one for each color such as red, blue and green signals
that make up each pixel. A byte has 256 different values, which

Unit 4 Pixel & Resolution
72
means each color can have 256 different intensities, allowing over
16 million different color possibilities. This allows for a very
realistic representation of the color in images, with no
compromises necessary and no restrictions on the number of
colors an image can contain. In fact, 16 million colors is more than
the human eye can discern. True color is a necessity for those
doing high-quality photo editing, graphical design, etc.
High color uses two bytes of information to store the intensity
values for the three colors. This is done by breaking the 16 bits
into 5 bits for blue, 5 bits for red and 6 bits for green. This means
32 different intensities for blue, 32 for red and 64 for green. The
reduced color precision results in a slight loss of visible image
quality, but it is actually very slight -- as many people cannot see
the difference between the true color and high color images,
unless they are looking for them decisively. For this reason, high
color are often used instead of true color- as it requires 33% (or
50% in some cases) less video memory and it is also faster for the
same reason.
In 256-color mode the PC has only 8 bits to use; this would mean
something like 2 bits for blue and 3 for each of green and red.
Choosing between only 4 or 8 different values for each color
would result in rather hideously blocky color, so a different
approach is taken instead i.e. the use of a palette. A palette is
created containing 256 different colors. Each one is defined using
the standard 3-byte color definition that is used in true color: 256
possible intensities for each of red, blue and green. Then each
pixel is allowed to choose one from the 256 colors in the palette,
which can be considered as sort of "Color Numbers". So the full
range of color can be used in each image, but each image can only
use 256 of the available 16 million different colors. When each
pixel is displayed, the video card looks up the real red, green and
blue values in the palette based on the "color number" the pixel
has assigned.
The palette is an excellent compromise: it allows only 8 bits to be
used to specify each color in an image, but allows the creator of
the image to decide what the 256 colors in the image should be.
Since virtually no images contain an even distribution of colors,
this allows for more precision in an image by using more colors

2D Animation
73
than would be possible by assigning each pixel a 2-bit value for
blue and 3-bit values each for green and red. For example, an
image of the sky with clouds (like the Windows 95 standard
background) would have many different shades of blue, white and
gray and virtually no reds, greens, yellows would be choosed.
256-color is the standard for much of computing, mainly because
the higher-precision color modes require more resources
(especially video memory) and aren't supported by many PCs.
Despite the ability to “hand pick" the 256 colors, this mode
produces noticeably worse image quality than high color; most
people can tell the difference between high color and 256-color
mode.
Raster(Bitmap)
Screenshot
A raster image is defined by pixels. In raster images, the more
pixels an image contains, the higher will be its resolution. For
example, in a raster image a square is drawn as a grid of pixels
(dots) and each of those pixels will have a specific color value.The
amount of detail that can be seen in a picture depends on the
resolution of the image i.e. how many times per inch these
squares or pixels occur. 300 times per inch is what is needed for
good quality production of a commercial printing press and 72
pixels per inch is required for monitor display. A line is made up of
a row of pixels with each pixel having a color value and you work
with this line by working with the group of pixels that makes up
the line, not as a single object as you would find in a vector file.
Programs such as Photoshop, PaintShop, and PhotoPaint all work

Unit 4 Pixel & Resolution
74
with pixels (raster images). Raster images are the best choices for
creating subtle gradations of shades and color, such as in a
photograph.
A raster image is resolution-dependent because it contains a fixed
number of pixels that are used to create the image. Since there is
a fixed and limited number of pixels, a raster image will lose
quality if enlarged beyond that number of pixels as the computer
will have to 'make up' the missing information. This is usually the
cause of the image becoming ‘’fuzzy” or "steppy".
The other disadvantage with bitmaps is when an image is
enlarged, the individual coloured squares become visible and the
illusion of a smooth image is lost to the viewer. This 'pixelation'
makes the image look coarse.
Raster (Bitmap)
Pixel-based
Raster programs best for editing photos and creating
continuous tone images with soft color blends
Do not scale up optimally: Image must be created/scanned
at the desired usage size or larger
Large dimensions and detailed images equal large file size
It is more difficult to print raster images using a limited
amount of spot colors
Some processes cannot use raster formats
Depending on the complexity of the image, conversion to
vector may be time consuming
Raster images are the most common image format,
including: jpg, gif, png, tiff, bmp, psd, eps and pdfs
originating from raster programs
Common raster programs: photo editing / paint programs
such as Photoshop & Paint Shop, GIMP (free)
Vector (Lines/Calculated Points)
Screenshot

2D Animation
75
A vector image is defined by objects which are made of lines and
curves that are defined mathematically in the computer. Vectors
can have various attributes such as line thickness, length and
color. For example, in a vector image, a square is drawn as four
lines connected at the corners. Those lines can be set to different
thickness and colors. The square can be empty or filled. A line is
one object with attributes, and you work with this line as a single
object, not as a group of pixels as you would in a raster image. All
programs such as PowerPoint, Illustrator and Freehand work with
vectors. Vector graphics are resolution-independent because the
vector objects are drawn mathematically in the computer. They
can be made larger or smaller without any loss of quality to the
image. Vectors can be printed at any size, on any output device, at
any resolution, without losing detail and without altering the
resolution of the image. Vector images are the best choice of
typefaces, charts and graphs, drawings and other graphics that
must have sharp lines when scaled to various sizes.
Vector graphics, however, cannot reproduce 'continuous tone' photographic images like bitmaps.
Vector
Mathematical calculations that form shapes
Vector programs best for creating logos, drawings and illustrations, technical drawings. For images that will be applied to physical products
Can be scaled to any size without losing quality
Resolution-independent: Can be printed at any
size/resolution
A large dimension vector graphic maintains a small file size
Number of colors can be easily increased or reduced to
adjust printing budget
Vector art can be used for many processes and easily
rasterized to be used for all processes
Can be easily converted to raster
It is not the best format for continuous tone images with
blends of color or to edit photographs
Common vector programs: drawing programs such as
Illustrator, CorelDraw, Inkscape (free)

Unit 4 Pixel & Resolution
76
Types of bitmap images
Bitmap images can contain any number of colors, but there are
four main categories:
1. Line-art: These are images that only contain two colors,
usually black and white. Sometimes these images are
referred to as bitmaps because a computer has to use only
1 bit (on=black, off=white) to define each pixel.
Title-Line art
Source- pixabay.com
Link-https://pixabay.com/en/bicycle-meadow-flowers-grass-bike-
788733/
2. Grayscale images:These contain various shades of gray as
well as pure black and white.Typically 256 shades of gray
(8-bit) are used even though the human visual system
needs only 100 tints to perceive an image as life-like.
Title- Grey scale images
Source- pixabay.com
Link-https://pixabay.com/en/bicycle-meadow-flowers-grass-bike-
788733/

2D Animation
77
3. Multitones: Such images contain shades of two or more
colors. The most popular multitone images are duotones,
which usually consist of black and a second spot color
(often a Pantone color). The example below contains black
and Pantone Warm Red.
Title- Multitone images
Source- pixabay.com
Link-https://pixabay.com/en/bicycle-meadow-flowers-grass-bike-
788733/
4. Full-color images: The color information can be described
using a number of color spaces: RGB, CMYK or Lab for
instance.
Title- Full Color images
Source- pixabay.com
Link-https://pixabay.com/en/bicycle-meadow-flowers-grass-bike-
788733/
Characteristics of bitmap data
Bitmap data can take up a lot of room. A CMYK A4-size picture that is optimized for medium quality printing (150 lpi) takes up 40 MB. Compression can reduce the size of the file.

Unit 4 Pixel & Resolution
78
The image with the enlargement showed one of the main
disadvantages of bitmap images. Once they are enlarged too
much, they look unnatural and blocky. Reducing their sizes also
has an impact on image quality as images lose a bit of sharpness.
Bitmaps are fairly simple to output, as long as your RIP or printer
has sufficient memory.
File formats for Bitmap data
Bitmap data can be saved in a wide variety of file formats. Among
these are:
BMP: An outdated and limited file format that is not suitable for
use in prepress.
EPS: A flexible file format that can contain both bitmap and vector
data. It is gradually being replaced by PDF.
GIF: It is mainly used for internet graphics
JPEG: Rather the JFIF file format, which is mainly used for internet
graphics
PDF: A versatile file format that can contain just about any type of
data, including complete pages, it is not yet widely used to
exchange just images.
PICT: A file format that can contains both bitmap and vector data,
but that is mainly used on Macintosh computers and is not very
suitable for prepress.
PSD: The native file format of Adobe Photoshop (which can also
contain vector data such as clipping paths).
TIFF: A popular and versatile bitmap file format
Applications for Bitmap format data
Microsoft Paint
Adobe Photoshop
Corel Photo-Paint
Corel Paint Shop Pro
GIMP
All scanned images and digital camera images are bitmaps.

2D Animation
79
Converting between bitmap formats is generally as simple as
opening the image to be converted and using your software's
“Save As” command to save it in any other bitmap format
supported by your software.
Bitmap images, in general, do not inherently support
transparency. A couple of specific formats - namely GIF and PNG-
support transparency. In addition, most image editing programs
support transparency, but only when the image is saved in the
software program's native format. A common misconception is
the transparent areas in an image will remain transparent when
an image is saved to another format or copied and pasted into
another program. That just doesn't work, however, as there are
techniques for hiding or blocking out areas in a bitmap that you
intend to use in other software.
Key Points About Bitmap Images:
Pixels in a grid
Resolution dependent
Resizing to a larger size reduces quality
Easily converted
Restricted to rectangle
Minimal support for transparency
Vector graphics
Vector graphics are images that are completely described using
mathematical definitions. The image below shows the principle.
To the left, you see the image itself and to the right, you see the
actual lines that make up the drawing.
Screenshot
Example of a vector based image, drawn using bézier curves.

Unit 4 Pixel & Resolution
80
Each individual line is made up of either a vast collection of points
with lines interconnecting all of them or just a few control points
that are connected using so called Bézier Curves. It is this latter
method that generates the best results and is used by most
drawing programs.
Characteristics of vector drawings
Vector drawings are usually pretty small files because they only
contain data about the Bézier curves that form the drawing. The
EPS file format that is often used to store vector drawings includes
a bitmap preview image along the Bézier data. The file size of this
preview image is usually larger than the actual Bézier data
themselves.
Vector drawings can usually be scaled without any loss in quality.
This makes them ideal for company logos, maps or other objects
that have to be resized frequently. Please note that not all vector
drawings can be scaled as much as you like:
Drawings containing trapping information can only be
scaled up to 20 percent larger or smaller.
Thin lines may disappear if a vector drawing is reduced too
much.
Small errors in a drawing may become visible as soon as it
is enlarged too much.
It is fairly easy to create a vector-based drawing that is very
difficult to output. Especially the use of tiles (small objects that are
repeated dozens or hundreds of times) and Corel Draw lens
effects can lead to very complex files.
Applications for vector data
There are hundreds of applications on the market that can be used
to create or modify vector data.
Adobe Illustrator
CorelDRAW
Xara Xtreme
Serif DrawPlus
Inkscape

2D Animation
81
File formats for Vector data
Bitmap data can be saved in a wide variety of file formats. Oddly
enough the most relevant formats for the printing industry are
also capable of storing bitmap information:
EPS: The most popular file format to exchange vector drawings
even though PDF is quickly gaining ground.
PDF: A versatile file format that can contain just about any type of
data including complete pages.
PSD: The native file format of Adobe Photoshop.
AI: The native file format of Adobe Illustrator
AI: The native file format of Adobe Illustrator.
Note : By the way, PDF and EPS are technically compound file
formats, meaning that they can handle both vector and bitmap
artwork. However, for simplicity, they’re more commonly known
and categorized as vector file formats.
How to convert bitmap data to vector data and back
Visual Comparisons of Vector vs. Bitmap
300 dpi is generally considered the minimum resolution for
printing bitmap work, like photos or complex artwork. There can
be a marked difference between the way bitmaps and vectors are
printed.
Below are some close-up images from a chapter on file types in
‘The Print Handbook’. The book was printed using a Heidelberg
Speedmaster XL75 litho printer. Each image’s actual width is
roughly 15 mm (just over half an inch).
JPEG OR JPG(300 dpi/Quality: High):
Developed by the Joint photographic expert’s group, jpg became
an imaging standard in 1992, which is roughly about three years
before the web gained broad acceptance.
Jpg images support up to 24-bits of color in the RGB color space.
Though typically used for photos and scanned images, jpg is what
is called a lossy imaging format. By that, it means every time an
image undergoes jpg compression, color data is lost. The amount

Unit 4 Pixel & Resolution
82
of compression is determined at the time of creation through the
use of a quality slider or value. The default value is traditionally
80% or high quality, which kicks out a rather nice result. The issues
appear when you take that same image and recompress it.
Suddenly colors disappear and white dots or halos appear around
object. This means the color information has been wiped out in
those areas and can’t be recovered. It is replaced by what is called
a "Specular Color". Due to the relatively small file size, jpg has
become a de facto imaging standard on the web or for any
graphics displayed on a screen.
GIF
The grand daddy of web imaging formats, the Graphics Interchange Format , has been around since 1987 and was created by compuserve partly to provide 256 colors in the hexadecimal color space to otherwise black and white images.
The other objective behind its development was the image created which had to be small enough to be transferred over the slow dial-up modems that were common at the time. One case where the use of a GIF over a jpg image makes sense is a single-color logo or illustration being shown on a screen. Even thought the low quality GIF fell out of grace with the rise of faster bandwidth, its animated GIF counterpart is undergoing a bit of a nostalgic renaissance.
To learn more about the GIF, this article is a great overview of its history. A huge variety of some of the hilarious GIF and animated GIF files are available in the web for ready reference.
PNG
More commonly called “Ping” images, the Portable Network Graphic format actually rose to prominence thanks to competing GIF copyright claims between Compuserve and Unisys. The reason was due to the fact it was a non-patented alternative to GIF. Like its jpg counterpart, png images use the 24-bit RGB color space. What has spurred its popularity on the web and in mobile, is the fact PNG images can also support an 8-bit Alpha channel (RGBA) which means this is the only imaging format- other than GIF- which permits transparency.

2D Animation
83
TIF
The Tagged Image File Format (TIF or TIFF) is the preferred imaging format for the print industry. The reason is this is the only format that fully supports the CMYK color space and can supports very high resolutions of 300 dpi/ppi or more. At those resolutions the file size of a tiff image, compared to its jpg or png cousins, is relatively massive. Interestingly, this format is under the control of Adobe which explains why Photoshop is the software of choice when it comes to working with TIFF images.

Unit 4 Pixel & Resolution
84
Unit summary
Summary
In this unit, you’ve learned how image files can be divided into two
distinct categories: vector-based and bitmap images. These two
are different in the way that how to be processed by computers by
calculating the pixels and Pixel Color and Intensity Depth in order
to decide, which format will help you with your multimedia or web
project. You need to have a good understanding of both kinds of
images and know their advantages and disadvantages.
Assignment
Assignment
1. What is a pixel made of?
2. What does "dpi" stand for, and what is its relationship to a
digital file?
3. Describe mega-pixel
4. How the image is "pixelated"?
5. Differentiate between raster and vector graphics
6. What is a Bezier curve?
7. Describe the difference between screen resolution, print
resolution and image resolution.
8. Elaborate the difference between a halftone (or bitmap)
image and a greyscale image
9. Write down the advantages and disadvantages of the JPEG
and Tiff file formats
10. Explain the relevance of the term 72dpi
11. What is "ppi", and how is it different from "dpi"?
12. If an image is three inches by four inches at a resolution of
200ppi, how many pixels does it contain?
Resources
Reading
https://google.com
http://wikipedia.com
https://www.prepressure.com
Related Documents


![OASIS-D Handouts [Read-Only]€¦ · • Describe the major changes from OASIS-C2 to OASIS-D • Understand OASIS M-item coding instructions to accurately code new and revised OASIS](https://static.cupdf.com/doc/110x72/5ec3637ace40ce0748747c2e/oasis-d-handouts-read-only-a-describe-the-major-changes-from-oasis-c2-to-oasis-d.jpg)
