GPO Box 2343 Adelaide SA 5001 Tel (08) 8204 8773 Fax (08) 8204 8777 DX:467 [email protected] www.archives.sa.gov.au Records Management Disaster Planning Toolkit Guideline June 2007 Version 2.2

Welcome message from author
This document is posted to help you gain knowledge. Please leave a comment to let me know what you think about it! Share it to your friends and learn new things together.
Transcript

GPO Box 2343 Adelaide SA 5001 Tel (08) 8204 8773 Fax (08) 8204 8777 DX:467 [email protected] www.archives.sa.
gov.au
Records Management Disaster Planning Toolkit
Guideline June 2007 Version 2.2

Records Management Disaster Planning Toolkit Guideline
Table of Contents Acknowledgments .................................................................................. 5
Preface ..................................................................................................... 5
How to use this Toolkit ........................................................................... 6
Introduction ............................................................................................. 7 Template 1 - Progress Checklist ........................................................ 8
Records and Disasters ........................................................................... 9 Template 2 - Disaster Review Form ................................................. 10
Risk Management ................................................................................. 11 Template 3.1 - Hazard Checklist ...................................................... 12 Industrial Disasters .................................................................................................. 12 Natural Disasters ..................................................................................................... 12 Human (incl. Criminal) activity ................................................................................. 13 Accidents involving .................................................................................................. 13
Template 3.2 – Risk Assessment Template ..................................... 14 Template 3.3 – Action Plan to Reduce or Remove Risks Template . 15 Template 3.4 – Critical Needs Questionnaire Checklist ................... 16
Planning ................................................................................................. 18 Template 4.1 – Contents of Disaster Preparedness Plan Checklist . 19 Template 4.2 - Disaster Bins and Disaster Stores ........................... 22 ‘Wheelie’ Bins .......................................................................................................... 22 Storeroom ................................................................................................................ 23 Supplies ................................................................................................................... 23
Template 4.3 - Disaster Bins Checklist ............................................ 24 Template 4.4 - Disaster Store Checklist ........................................... 27 Template 4.5 – Storage and Handling Requirements Checklist ....... 30 The storage facility .................................................................................................. 30 Internal environment of storage facility ................................................................... 30 Official records containers ....................................................................................... 30 Shelving/cabinets/racking ....................................................................................... 30 Handling equipment ................................................................................................ 31 Security and confidentiality ..................................................................................... 31
Vital Records identification .................................................................. 32 Template 5.1 – Vital Records List (detailed list) ............................... 33 Template 5.2 – Vital Records List (by Record) ................................. 35
19 January 2012 Version 2.2 Page 2 of 58

Records Management Disaster Planning Toolkit Guideline
Template 5.3 – Vital Records List (by Location) ............................... 36
Response ............................................................................................... 37 Template 6.1 – Emergency Services List ......................................... 38 Template 6.2 - Telephone Tree ........................................................ 40 Template 6.4 – Safety Check Flowchart .......................................... 42 Template 6.5 – Assessing and Stabilising the Situation ................... 44
Recovery ................................................................................................ 45 Template 7.1 – In-house Disaster Response Team ......................... 46 Template 7.2 – Steps in Effective Disaster Recovery ...................... 47 Template 7.3 – Action Sheet Example ............................................. 48 Salvage Procedure for Air Drying - an example ...................................................... 48
Template 7.4 – Damaged records documentation list ...................... 49 Template 7.5 – Packing records in a recovery operation ................. 50 Volumes .................................................................................................................. 50 Documents, files and cards ..................................................................................... 50 Microfilm .................................................................................................................. 51 Maps and plans ....................................................................................................... 51
Template 7.6 - Stabilising and drying methods ................................ 52 Freezing .................................................................................................................. 52 Freeze drying .......................................................................................................... 53 Dry air purging or dehumidifying ............................................................................. 53 Air-drying ................................................................................................................. 53 Volumes .................................................................................................................. 53 Pamphlets ............................................................................................................... 54 Files ......................................................................................................................... 54 Maps and plans ....................................................................................................... 54 Card indexes ........................................................................................................... 54 Vellum and parchment ............................................................................................ 54 Photographic prints ................................................................................................. 54 Photographic negatives ........................................................................................... 55 Glass plate negatives .............................................................................................. 55 Fire .......................................................................................................................... 55
Template 7.7 – How to recover records ........................................... 56 Paper-based records ............................................................................................... 56 Magnetic media ....................................................................................................... 56 Floppy disks and diskettes ...................................................................................... 56 Magnetic tapes ........................................................................................................ 56 Wet tape .................................................................................................................. 57 Optical media .......................................................................................................... 57 Microforms ............................................................................................................... 57 Electronic Records .................................................................................................. 57
19 January 2012 Version 2.2 Page 3 of 58
Records Management Disaster Planning Toolkit Guideline
19 January 2012 Version 2.2 Page 4 of 58
© 2007 Government of South Australia
This Guideline may be copied for use by South Australian Government Agencies and Local Government Authorities and for reasonable study or research purposes. No part of this Guideline may be reproduced or distributed for profit or gain or for any other purpose without the written permission of the Manager [Director] of State Records of South Australia.
Records Management Disaster Planning Toolkit Guideline
Acknowledgments State Records would like to acknowledge that this guideline has been developed thanks to a significant contribution from the Heritage Collections Council, Commonwealth Department of Communications, Information Technology and the Arts and their publication Be Prepared: Guidelines for small museums for writing a disaster preparedness plan (2000) and also the State Records Authority of New South Wales and their publication Guidelines on Counter Disaster Strategies for Records and Recordkeeping Systems (2002).
Preface State Records has issued this Records Management Disaster Planning Toolkit in accordance with section 7(g) of the State Records Act 1997. Disaster planning is an important component of an adequate records management program. Planning for disasters is a benchmark for Outcome 7 of Adequate Records Management: Meeting the Standard (2002) and is also identified as part of a high quality recordkeeping system in the Australian Standard AS ISO 15489-2002: Records Management.
The purpose of this Records Management Disaster Planning Toolkit is to assist agencies within South Australia as defined in section 3 of the State Records Act 1997 which includes State Government agencies, Local Government authorities and Universities, in developing and maintaining a disaster plan for records and recordkeeping systems. It contains templates, flowcharts and checklists that can be completed by agencies in the course of developing their plans. Agencies are encouraged to use this Toolkit in conjunction with the Records Management Disaster Planning Guideline.
19 January 2012 Version 2.2 Page 5 of 58
Records Management Disaster Planning Toolkit Guideline
How to use this Toolkit This Toolkit has been developed in addition to the Records Management Disaster Planning Guideline. The Toolkit is consistent with the layout of the Guideline for ease of use, having 7 sections: • Introduction • Records and disasters • Risk management • Planning • Vital Records identification • Response • Recovery.
Each section has a series of templates, checklists and flowcharts that correlate with each of the sections within the guidelines (and for some templates, throughout other relevant sections). While the Toolkit contains a variety of templates, flowcharts and checklists, agencies should continue to develop and revise these tools to suit their own business needs and situation.
19 January 2012 Version 2.2 Page 6 of 58

Records Management Disaster Planning Toolkit Guideline
Introduction Records and recordkeeping systems are always potentially at risk of disaster. Due to the importance of records, their loss in a disaster can be crippling for the agency responsible. 1 The development of a Records Management Disaster Recovery Plan can provide many benefits for an agency’s records and recordkeeping systems.
This section of the Toolkit includes a Checklist for the progress of a Records Management Disaster Recovery Plan. It contains each of the broad steps that require completion to produce an effective plan. Sections can be worked through in order and can be used as a reference tool to view your progress. It can also be a useful tool in reporting to management where you are in developing your records management disaster recovery plan. Check the boxes as you complete each step.
Attached Templates:
Template 1 – Progress Checklist
1 State Records, New South Wales, Counter Disaster Strategies for Records and Recordkeeping Systems, 2002. p5
19 January 2012 Version 2.2 Page 7 of 58

Records Management Disaster Planning Toolkit Guideline
Template 1 - Progress Checklist
(Reference: Heritage Collections Council, Department of Communications, Information Technology and the Arts. Be Prepared: Guidelines for small museums for writing a disaster preparedness plan, p. 59)
COMPLETED / TO DO
STEP 1. Assess all risks and threats /
STEP 2. Reduce or remove those risks /
STEP 3. Prioritise collection /
STEP 4. Establish a Disaster Response Team /
STEP 5. Establish support networks /
STEP 6. Prepare the Disaster Response Plan /
STEP 7. Prepare the Disaster Recovery Plan /
STEP 8. Train all staff /
STEP 9. Review the plan /
19 January 2012 Version 2.2 Page 8 of 58

Records Management Disaster Planning Toolkit Guideline
Records and Disasters One of the most important elements in developing a records management disaster recovery plan is the identification of those disasters that may affect your agencies records and recordkeeping systems. A disaster can be defined as “any event that creates an inability on an organisation’s part to provide critical business functions for some predetermined period of time.”2 Disasters can be natural, structural, chemical, industrial, technological, criminal or accidental.
Agencies can prepare for disasters firstly by identifying which disasters may pose a risk to their records or recordkeeping systems before they strike. Agencies can do this by conducting a Disaster Review of their agency and perhaps include other agencies within close proximity to your organisation or those carrying out similar functions. This information can be obtained by speaking with members of staff internally, approaching other agency staff and consulting with emergency services personnel to obtain a history of previous disasters within your area. Consider a brainstorming session with staff in your agency or perhaps conduct a ‘walk-through’ of your agency and document any possible hazards or disasters on your premises.
Attached Templates:
Template 2 - Disaster Review form
2 State Records of SA, Recordkeeping Advice 006 - Adequate Records Management in Perspective – Disaster Management, 2004.
19 January 2012 Version 2.2 Page 9 of 58
Records Management Disaster Planning Toolkit Guideline
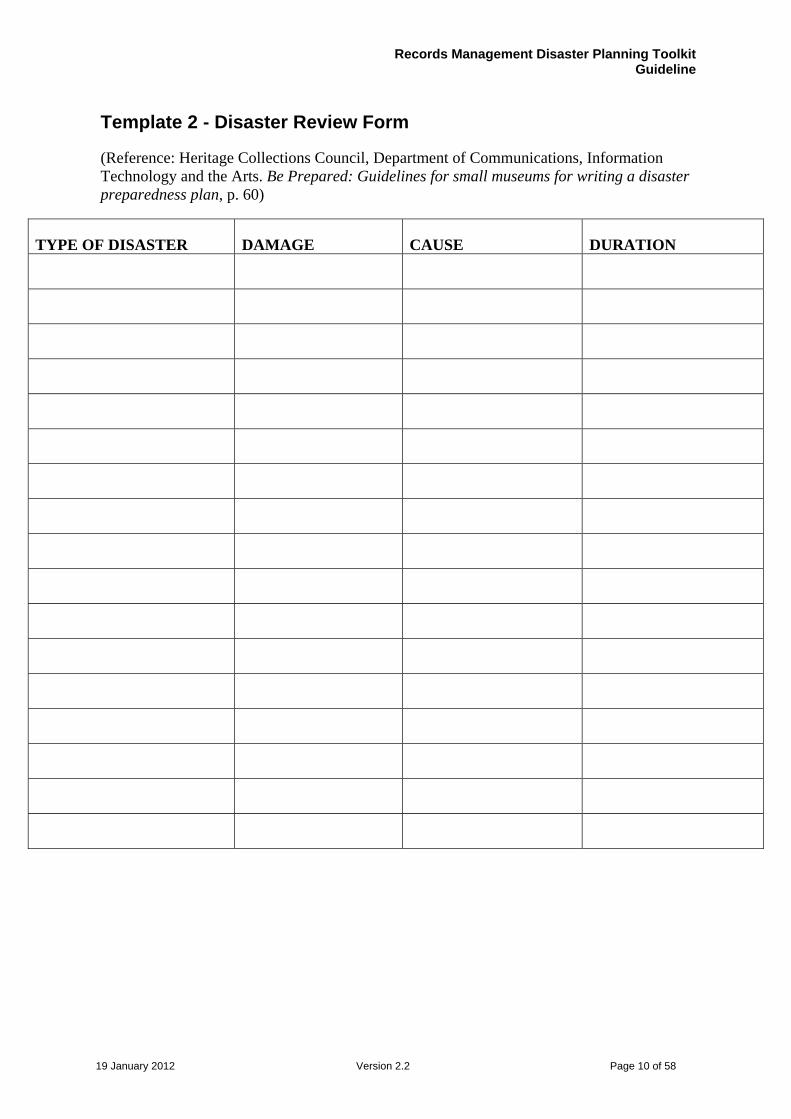
Template 2 - Disaster Review Form
(Reference: Heritage Collections Council, Department of Communications, Information Technology and the Arts. Be Prepared: Guidelines for small museums for writing a disaster preparedness plan, p. 60)
TYPE OF DISASTER DAMAGE CAUSE DURATION
19 January 2012 Version 2.2 Page 10 of 58

Records Management Disaster Planning Toolkit Guideline
Risk Management Risks affecting records and recordkeeping systems should be identified and assessed in order to manage disasters appropriately.3 This section provides some suggested methods for identifying hazards, assessing their likelihood and potential impact and developing an action plan to reduce or remove any associated risks. This section also contains some critical needs questions for agencies to identify their critical needs for information and equipment that are necessary to continue business operations if an agency were to experience a disaster or if this information or equipment became inaccessible.
Attached Templates:
Template 3.1 – Hazard Checklist
Template 3.2 – Risk Assessment Template
Template 3.3 – Action Plan to Reduce or Remove Risks Template
Template 3.4 – Critical Needs Questionnaire Checklist
3 State Records, New South Wales, Standard on Counter Disaster Strategies for Records and Recordkeeping, 2002, p2.
19 January 2012 Version 2.2 Page 11 of 58
Records Management Disaster Planning Toolkit Guideline
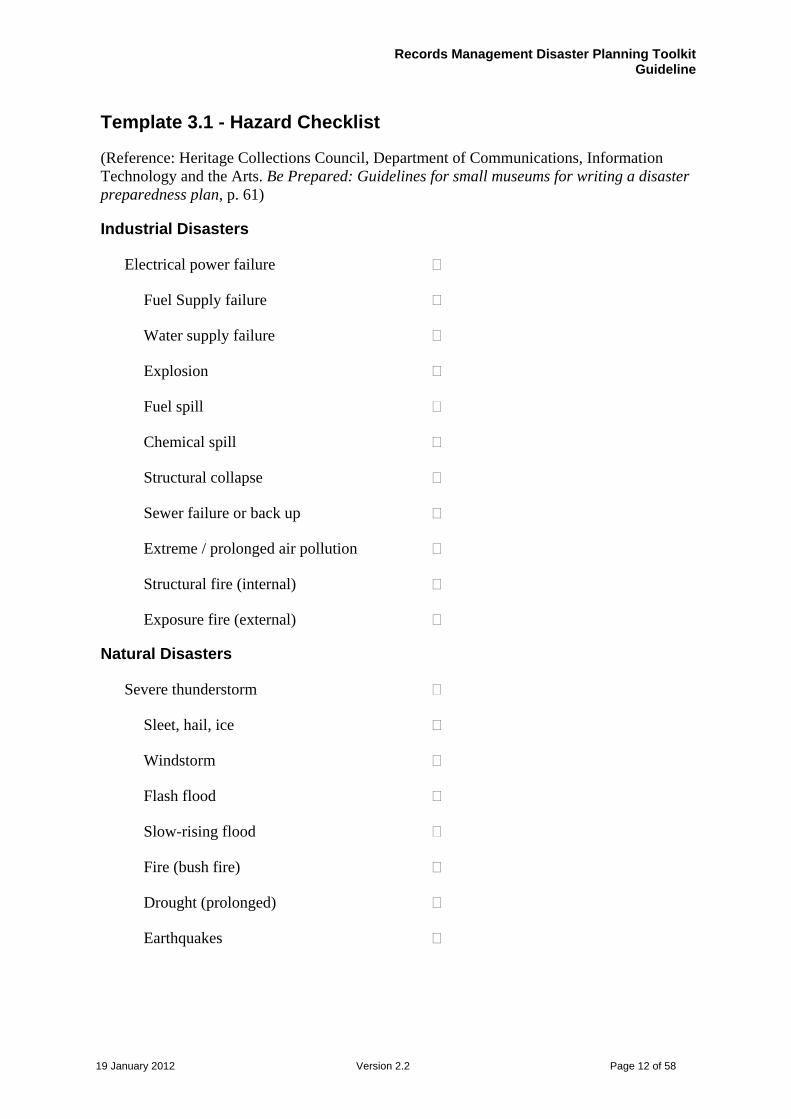
Template 3.1 - Hazard Checklist
(Reference: Heritage Collections Council, Department of Communications, Information Technology and the Arts. Be Prepared: Guidelines for small museums for writing a disaster preparedness plan, p. 61)
Industrial Disasters
Electrical power failure
Fuel Supply failure
Water supply failure
Explosion
Fuel spill
Chemical spill
Structural collapse
Sewer failure or back up
Extreme / prolonged air pollution
Structural fire (internal)
Exposure fire (external)
Natural Disasters
Severe thunderstorm
Sleet, hail, ice
Windstorm
Flash flood
Slow-rising flood
Fire (bush fire)
Drought (prolonged)
Earthquakes
19 January 2012 Version 2.2 Page 12 of 58
Records Management Disaster Planning Toolkit Guideline
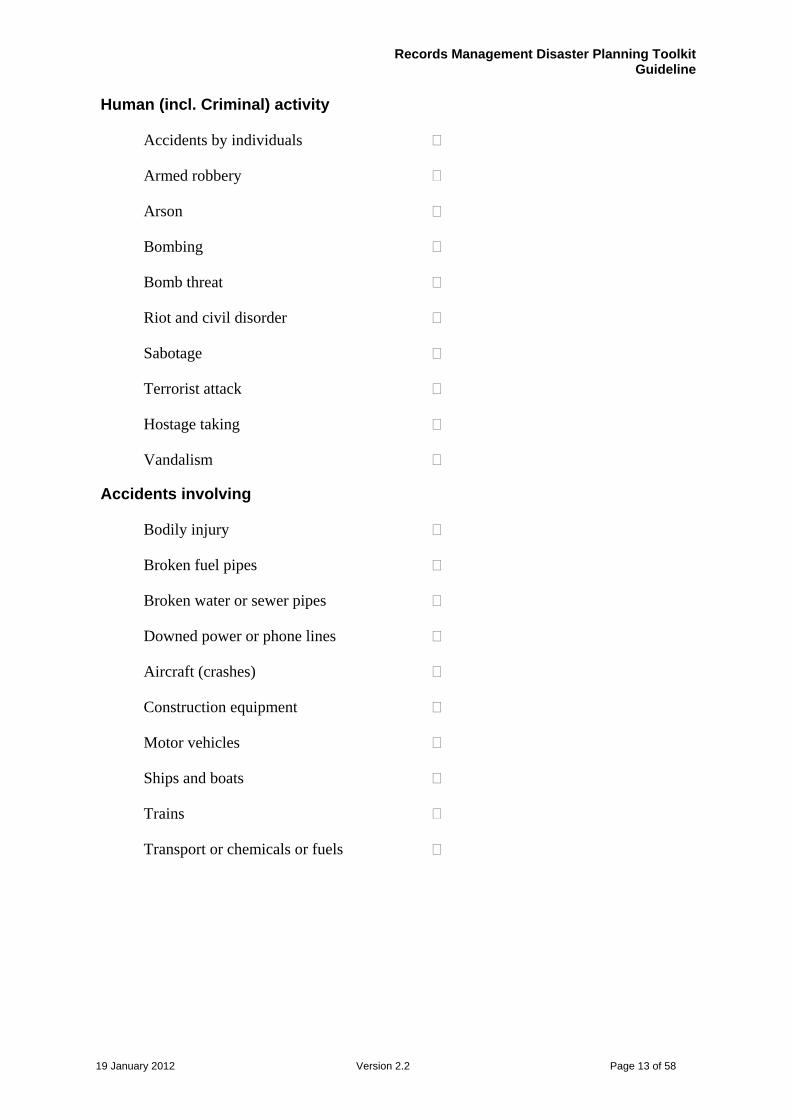
Human (incl. Criminal) activity
Accidents by individuals
Armed robbery
Arson
Bombing
Bomb threat
Riot and civil disorder
Sabotage
Terrorist attack
Hostage taking
Vandalism
Accidents involving
Bodily injury
Broken fuel pipes
Broken water or sewer pipes
Downed power or phone lines
Aircraft (crashes)
Construction equipment
Motor vehicles
Ships and boats
Trains
Transport or chemicals or fuels
19 January 2012 Version 2.2 Page 13 of 58
Records Management Disaster Planning Toolkit Guideline
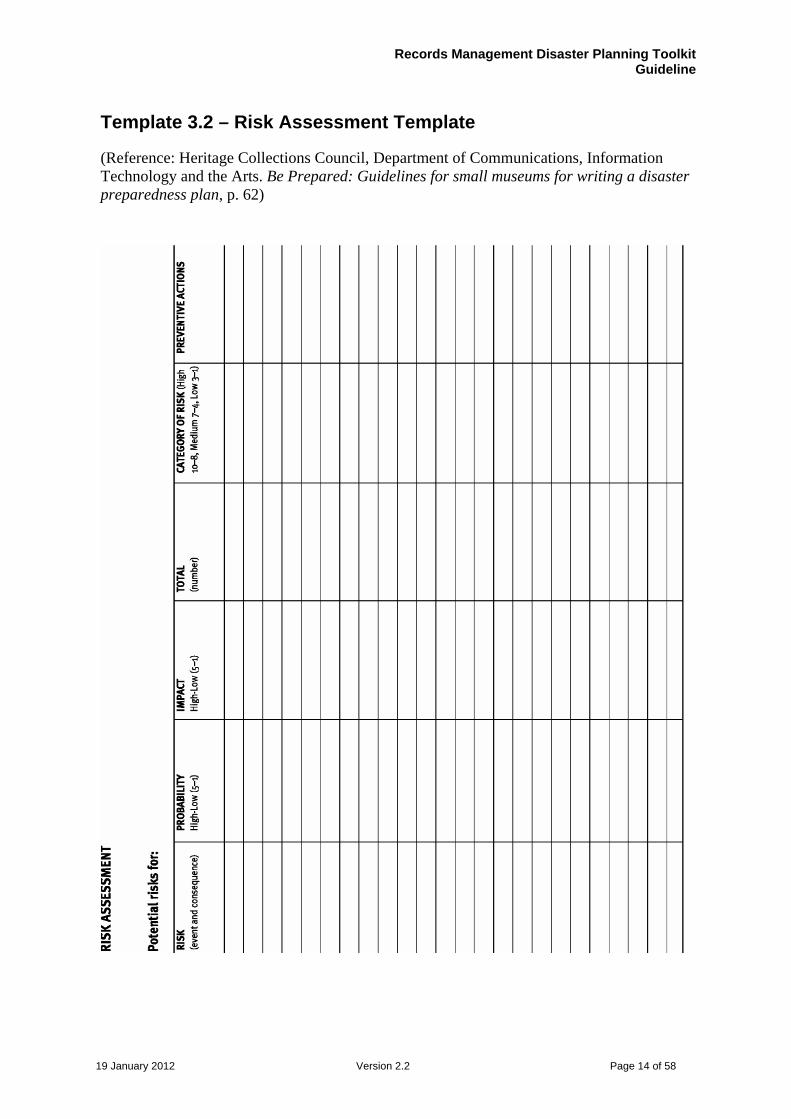
Template 3.2 – Risk Assessment Template
(Reference: Heritage Collections Council, Department of Communications, Information Technology and the Arts. Be Prepared: Guidelines for small museums for writing a disaster preparedness plan, p. 62)
19 January 2012 Version 2.2 Page 14 of 58
Records Management Disaster Planning Toolkit Guideline
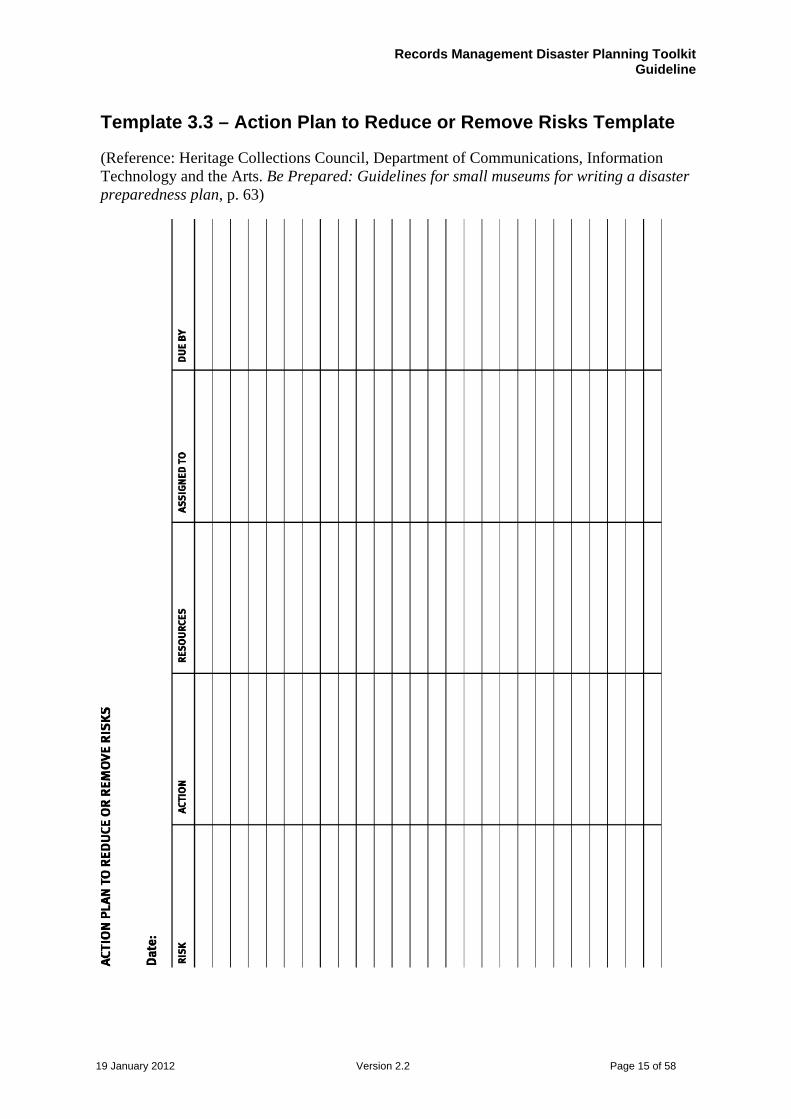
Template 3.3 – Action Plan to Reduce or Remove Risks Template
(Reference: Heritage Collections Council, Department of Communications, Information Technology and the Arts. Be Prepared: Guidelines for small museums for writing a disaster preparedness plan, p. 63)
19 January 2012 Version 2.2 Page 15 of 58

Records Management Disaster Planning Toolkit Guideline
Template 3.4 – Critical Needs Questionnaire Checklist
(Reference: State Records, New South Wales, Guidelines of Counter Disaster Strategies for Records and Recordkeeping Systems, 2002. p. 46-47)
Ask yourself these questions. Answers will help agency staff in the development of the disaster recovery plan or can provide a valuable source of information to a Consultant preparing your agency’s plan.
If a disaster occurred, how long could your agency function without the existing equipment and organisation?
What are the high priority tasks including critical manual functions and processes within your agency? How often are these tasks performed? Daily? Weekly? Monthly?
What staffing, equipment forms and supplies would be necessary to perform these high priority tasks?
How would the critical equipment, forms and supplies be replaced in a disaster situation?
Does any of the above information require long lead times for replacement?
What reference manuals and operating procedure manuals are used? How would these be replaced in the event of a disaster?
Should any forms, supplies, equipment, procedure manuals or reference manuals from your agency be stored in an off-site location?
Identify the storage and security of original documents. How would this information be replaced in the event of a disaster? Should this information be in a more protected location?
What are the current computer back-up procedures? Have the backups been restored? Should any critical backups be stored off-site?
What would the temporary operating procedures be in the event of a disaster?
How would other agencies be affected by a disaster in your agency?
What effect would a disaster at the main computer server have on your agency?
What external service/vendors are relied upon for normal operation?
Would a disaster in your agency jeopardize any legal requirements for reporting?
Are any of your agency staff trained in disaster procedures?
Have personnel been specifically trained in debriefing techniques?
19 January 2012 Version 2.2 Page 16 of 58

Records Management Disaster Planning Toolkit Guideline
Who would be the person responsible for maintaining your agency’s contingency
plan?
Is your agency moving to new or updated electronic systems and how would this be affected by a disaster in terms of “in-house” knowledge available?
How have any current projects to improve the accuracy and completeness of your organisation’s databases been factored in your disaster planning?
Do you know the development history of your databases; the uses of any locally defined codes, practices and requisite system capabilities?
How many users of your computer system need access to its applications to continue your business functions at emergency levels? Can this team be mustered in time and have the computer network recovery requirements been defined?
Do the agreements with external consultants developing or updating electronic systems cover disaster events? Has any form of incident management planning been undertaken?
Has there been any coordination or melding of the teams responsible for facility integrity and information security? Has your organisation moved away from separate plans to protect physical structures and information assets to a plan to protect your ability to operate? Can your organisation’s intellectual property, in confidence dealings, trade secrets, or proprietary information be protected during or after a disaster event?
Are there other concerns related to planning for the disaster recovery and have these concerns been addressed?
19 January 2012 Version 2.2 Page 17 of 58
Records Management Disaster Planning Toolkit Guideline
Planning Planning for disasters is a requirement for meeting Adequate Records Management practices, Outcome 7 in accordance with Adequate Records Management: Meeting the Standard (2002). This section includes a checklist for the contents of your agencies records management disaster recovery plan with brief information on what each section should include. This checklist can be checked off as each section is completed and will assist when reporting on progress to management in more detail than the Progress Checklist in Introduction. Also included is further information regarding Disaster Bins and Disaster Stores, and what to include in each (with corresponding checklists). The supplies and methods used for storing disaster recovery tools and equipment will depend on the requirements of the agency, its size, function and budgetary constraints. This will however serve as a good starting point for developing disaster recovery bins and stores.
Attached templates:
Template 4.1 – Contents of Disaster Preparedness Plan Checklist
Template 4.2 – Disaster Bins and Disaster Stores – Further Information
Template 4.3 - Disaster Bins Checklist
Template 4.4 – Disaster Store Checklist
Template 4.5 – Storage and Handling Requirements Checklist
19 January 2012 Version 2.2 Page 18 of 58
Records Management Disaster Planning Toolkit Guideline
Template 4.1 – Contents of Disaster Preparedness Plan Checklist
(Reference: State Records, New South Wales, Guidelines on Counter Disaster Strategies for Records and Recordkeeping Systems, 2002, p. 47– 51)
Check off the sections already completed as you go.
Background / Cover Page
Authorisation Page
This may be a letter or summary from the Chief Executive Officer (CEO) or Senior Management.
Distribution
Includes a spiel about the staff required to read the plan and the staff required to use the plan.
Confirmation Form
The person responsible for the plan signs this form. However, some organisations require staff to sign and date the form after reading the plan.
Policy Section
Includes the policy on confidentiality of counter disaster plans and information held by the organisation; aims and priorities of the organisation in terms of disaster and recovery management; overall goal of the plan; authority and responsibility designations; who changes policies and how policies are changed; and conditions for invoking the counter disaster plan.
Plan administration section
Includes who maintains the plan; how changes are made to the plans (including time limits for any review or evaluation of incidents); plan review and audit procedures; and exercise and training activities.
Risk Assessment section
Outlines how and when risks assessments should occur and identifies some potential risks and their impact on records and recordkeeping systems.
Pre-disaster section
This section deals with the organisational policy on disaster management. It should include the responsibilities of the organisation; individual or group or department responsibilities for health, safety and disaster reduction; risk reduction control; management procedures for dealing with non-organisational people on a site when a disaster occurs; and general instructions on information management.
19 January 2012 Version 2.2 Page 19 of 58

Records Management Disaster Planning Toolkit Guideline
Communication policy section
This section deals with information management in more detail. It includes who is to be informed; how information will be exchanged; media briefing instructions; instructions on dealing with inquiries from outside the organisation; instructions on dealing with stakeholders (including staff, customers, suppliers, creditors and insurers); and ministerial liaison.
Finance, legal and administration
Outlines how these activities will be conducted within the disaster management response (and recovery) to monitor and coordinate activities.
Warning and Alert Section
Outlines the types of warning and alert systems used in the organisation; designated officer(s) for alert/warning systems review; alert/warning systems maintenance; alert and warning messages (descriptions of sounds used, statements or any announcements); staff obligations when alerted; evacuation and security procedures; safety or evacuation sites; and contact telephone, pager, or email addresses and internal information procedures during and after a disaster.
Command and Co-ordination Section
Defines the lines of command and communication in terms of the disaster structure; the site and location of the disaster command centre (and alternatives); contact list of non-internal emergency service agencies (contacts and authority); and disaster manager contact and disaster team contact numbers (and alternatives).
Disaster Response Section
This is a large and often sub-sectioned set of outlines covering disaster response actions and activities. This should include identification and declaration of a disaster situation; procedures for handling elements of the disaster event; and procedures for handling elements of disaster impact. With each indicated group in disaster response, there will be an accompanying team leader and alternative contact list and a list of team member contacts.
Recovery management section
Includes activating the restoration or continuity plans; priority recovery of vital records and critical data (includes lists of vital records, location and control documentation); procedures an technical information for handling damaged materials; lists of resources, equipment and services required to deal with disaster situations; debriefing personnel involved in the disaster; advice to staff regarding the recovery operation; and assistance and counselling information.
19 January 2012 Version 2.2 Page 20 of 58

Records Management Disaster Planning Toolkit Guideline
Post recovery management section
Includes dealing with outside organisations such as insurers, professional disaster response organisations; review and evaluation of disaster situation; procedures for formal closure of a disaster; disaster response evaluation form for feedback on perceptions of warnings, impacts, a management and outcomes of the disaster situation; procedures for post disaster analysis, review and updating of the plan; and reporting requirements for disaster (e.g. to Board, Committees, etc).
19 January 2012 Version 2.2 Page 21 of 58
Records Management Disaster Planning Toolkit Guideline
Template 4.2 - Disaster Bins and Disaster Stores
Important to every disaster plan is a list of disaster recovery equipment and supplies. This list should highlight the available equipment and supplies that you have gathered and stored in preparation for a disaster and where they are located. The items may be stored in a variety of places e.g. a box, cupboard, storeroom or a ‘wheelie’ garbage bin. The system you choose for storing your disaster preparedness items will depend on the equipment and supplies you have and the size of your records collection.4
It is a good idea to list the equipment and stores that your agency may be required to purchase or rent, and where these items can be obtained from in the event of a disaster if they already are not in your disaster bin or store. It is also a good idea to document where the supplies you already have in your disaster bin and store have been purchased or obtained from, so that extra supplies can be ordered as needed. This list should be revised and updated to ensure the list of suppliers is current.
‘Wheelie’ Bins
‘Wheelie’ bins are good storage units for dealing with small disasters and the immediate response to a larger disaster. Being on wheels, they are easily moved to the disaster site and they keep the contents clean and dry. If you are using a wet and dry vacuum cleaner to pump out water, the bin (emptied of its contents) may be used to contain the water as it is being sucked up. Similarly, an empty bin can be used to catch water in a leak situation (depending on the location of the leak). The disadvantage of a large ‘wheelie’ bin is its size. It can be very difficult to reach materials at the bottom of the bin. There are smaller sizes of wheelie bins available.5
The bin should be clearly identified as a disaster bin and to be used for disaster response and recovery only. A list of the contents inside the bin should be attached to the bin also. The bin should be located in an easily accessible space that is not crowded or hindered by obstacles that could potentially slow down the response and/or recovery activities. The bin should also be located away from any public places within your office. This will remove the temptation of staff raiding the bin for a pair of scissors or a dustpan. It will also ensure that the bin is not mistakenly used as a rubbish bin by staff. Some agencies may decide to place a lock on the bin. It is important to remember that when using a lock to secure disaster supplies, make it clear where the key can be located.6
4 Heritage Collections Council, Commonwealth Department of Communications, Information Technology and the Arts, Be Prepared: Guidelines for small museums for writing a Disaster Preparedness Plan, 2000. pg 83.
5 Heritage Collections Council, Commonwealth Department of Communications, Information Technology and the Arts, Be Prepared: Guidelines for small museums for writing a Disaster Preparedness Plan, 2000. pg 83.
6 Heritage Collections Council, Commonwealth Department of Communications, Information Technology and the Arts, Be Prepared: Guidelines for small museums for writing a Disaster Preparedness Plan, 2000. pg 83.
19 January 2012 Version 2.2 Page 22 of 58
Records Management Disaster Planning Toolkit Guideline
Storeroom
Agencies may decide to store disaster recovery supplies in a storeroom that is separate to their own building. The advantage of this is that it allows ease of access during a large disaster. Imagine the frustration in having the disaster recovery team assembled to attend to the situation, only to find that the supplies are inaccessible or have been destroyed by fire or flood. Whilst this is an option worth considering, it may not be possible for some agencies given this option would be more costly than obtaining several disaster bins.
Supplies
All supplies need to be clearly marked as Disaster Bin or Disaster Store supplies, to be used in disaster response and recovery activities only. Disaster supplies can be locked away in a ‘wheelie’ bin, in a cupboard or in a storeroom. Where supplies are locked away, make it clear where the key can be found. There is no point having all your supplies if staff can’t access them in the event of a disaster. Perhaps leave a set of keys with members of the management team or team leaders of the disaster response teams. An alternative to using a lock and key to secure disaster supplies are the plastic snap lock fittings fitted through holes in the lid of the disaster bin. 7 These snap lock fittings allow easy access to supplies inside the disaster bins whilst preventing people from ‘borrowing’ items such as scissors or blotting paper from the bin.
7 Heritage Collections Council, Commonwealth Department of Communications, Information Technology and the Arts, Be Prepared: Guidelines for small museums for writing a Disaster Preparedness Plan, 2000. pg 83.
19 January 2012 Version 2.2 Page 23 of 58
Records Management Disaster Planning Toolkit Guideline
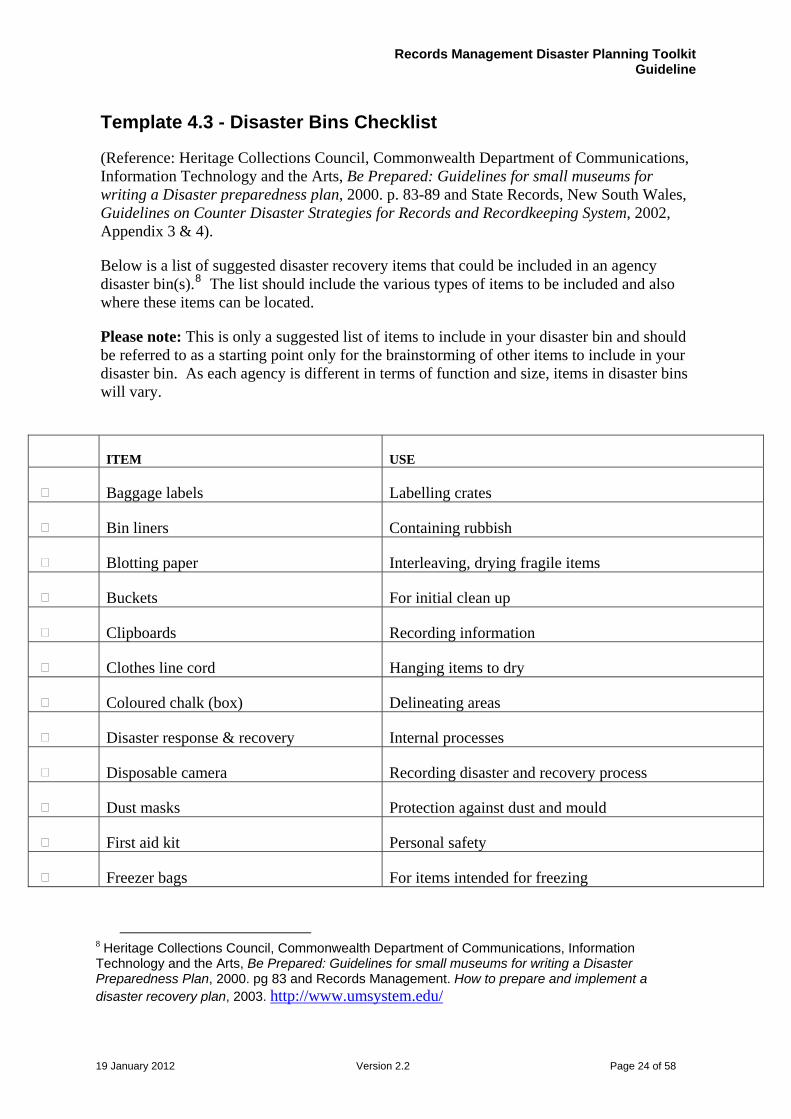
Template 4.3 - Disaster Bins Checklist
(Reference: Heritage Collections Council, Commonwealth Department of Communications, Information Technology and the Arts, Be Prepared: Guidelines for small museums for writing a Disaster preparedness plan, 2000. p. 83-89 and State Records, New South Wales, Guidelines on Counter Disaster Strategies for Records and Recordkeeping System, 2002, Appendix 3 & 4).
Below is a list of suggested disaster recovery items that could be included in an agency disaster bin(s).8 The list should include the various types of items to be included and also where these items can be located.
Please note: This is only a suggested list of items to include in your disaster bin and should be referred to as a starting point only for the brainstorming of other items to include in your disaster bin. As each agency is different in terms of function and size, items in disaster bins will vary.
ITEM USE
Baggage labels Labelling crates
Bin liners Containing rubbish
Blotting paper Interleaving, drying fragile items
Buckets For initial clean up
Clipboards Recording information
Clothes line cord Hanging items to dry
Coloured chalk (box) Delineating areas
Disaster response & recovery Internal processes
Disposable camera Recording disaster and recovery process
Dust masks Protection against dust and mould
First aid kit Personal safety
Freezer bags For items intended for freezing
8 Heritage Collections Council, Commonwealth Department of Communications, Information Technology and the Arts, Be Prepared: Guidelines for small museums for writing a Disaster Preparedness Plan, 2000. pg 83 and Records Management. How to prepare and implement a disaster recovery plan, 2003. http://www.umsystem.edu/
19 January 2012 Version 2.2 Page 24 of 58

Records Management Disaster Planning Toolkit Guideline
ITEM USE
Gauze bandage Protecting fragile items
Gloves, box of disposable Personal safety/protection of objects
Gloves, cotton Handling dry objects
Gloves, latex Personal safety
Goggles, safety Personal protection
Mop (squeeze style with handle) Initial clean up
Newsprint (butcher’s paper) Interleaving, table covers, etc
Nylon net Padding out 3 dimensional objects
Overalls, disposable Personal protection
Packaging tape Attaching plastic sheeting, securing lines, etc
Paintbrushes Cleaning mud/soot/dust
Paper towel perforated on a roll Interleaving
Pencils Documentation
Pens, waterproof Writing labels
Plastic containers with lids Containing small items
Plastic pegs Hanging items to dry
Polyethylene sheeting Channelling water, covering objects, covering tables
Protective aprons Personal protection
Salvage procedures action sheets Internal processes
Scissors Cutting cord, polyethylene sheeting, paper, etc
Sponges, large Mopping up spills
Stanley knife Cutting various materials
String Tying materials together, multipurpose
Torches (dolphin style with batteries) In case of diminished light
Whistles Calling everyone back together
19 January 2012 Version 2.2 Page 25 of 58

Records Management Disaster Planning Toolkit Guideline
ITEM USE
Writing pads Documentation
Zip lock bags (various sizes) Holding small items or broken pieces
Dust pan and broom Clean up
19 January 2012 Version 2.2 Page 26 of 58

Records Management Disaster Planning Toolkit Guideline
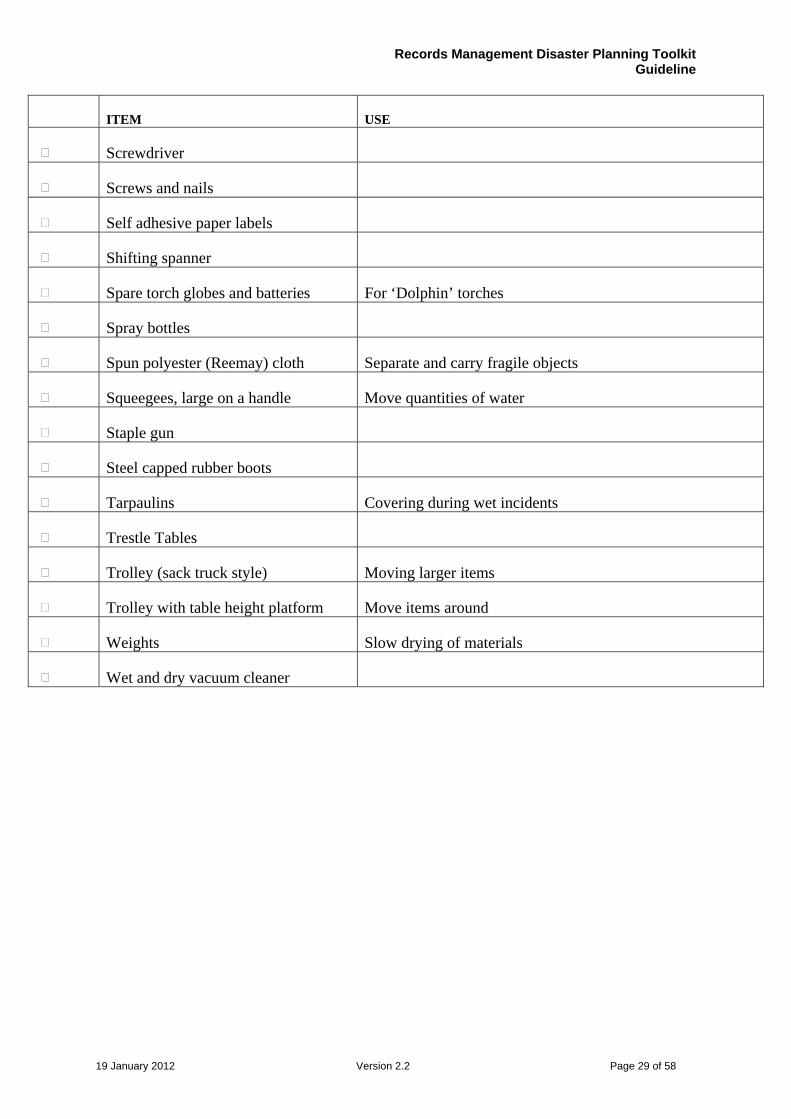
Template 4.4 - Disaster Store Checklist
(Reference: Heritage Collections Council, Commonwealth Department of Communications, Information Technology and the Arts, Be Prepared: Guidelines for small museums for writing a Disaster preparedness plan, 2000. p. 83-89 and State Records, New South Wales, Guidelines on Counter Disaster Strategies for Records and Recordkeeping System, 2002, Appendix 3 & 4)
Below is a list of suggested disaster recovery items that could be included in an agency disaster store, separate to the building or in a large cupboard.9 The list should include the various types of items to be included and also where these items can be located.
Please note: This is only a suggested list of items to include in your disaster store and should be referred to as a starting point only for the brainstorming of other items to include in your disaster store. As each agency is different in terms of function and size, items in disaster stores will vary. Some of these items are expensive and depending on your agency, it may be more cost effective to hire these as needed.
ITEM USE
Signage Warning signs for people eg slippery
Battery operated radio Communication
Bread trays Moving and air drying materials
Brooms, outdoor Move mud, dirt, dust, water
Clean rags/towels Mopping up, drying textile items, etc
Crates, plastic Transporting materials
Dehumidifiers Drying the building
Dining canopies Temporary work space
Disposable overalls Personal protection
Distilled water Supply of clean water
Electrical safety switches Turns power supply off if there is a power surge
Emergency tape Section off areas
9 Heritage Collections Council, Commonwealth Department of Communications, Information Technology and the Arts, Be Prepared: Guidelines for small museums for writing a Disaster Preparedness Plan, 2000. pg 86 and Records Management. How to prepare and implement a disaster recovery plan, 2003. http://www.umsystem.edu/
19 January 2012 Version 2.2 Page 27 of 58

Records Management Disaster Planning Toolkit Guideline
ITEM USE
Environmental monitoring equipment Ensure stability of environment
Extension leads with safety switches
Fire extinguishes For all fires
Fire blanket For fire management
Flashing hazard lights
Garden hose on a roll Clean out mud
Generator on trolley and petrol Emergency power supply
Gloves, leather Personal protection
Hammer
Hard hats with lights
Ladders Easy access to hard to reach places
Lights on stands
Lights to fit on a persons head
Methylated spirits Drying off metal items etc
Packing foam
Pedestal fans Dying off the building
Plastic rubbish bins
Plastic sheeting
Pliers
Poles and hooks Keep extension leads off the ground
Rain coats
Respirators Personal safety
Rope
Sandbags
Saw
19 January 2012 Version 2.2 Page 28 of 58
Records Management Disaster Planning Toolkit Guideline
ITEM USE
Screwdriver
Screws and nails
Self adhesive paper labels
Shifting spanner
Spare torch globes and batteries For ‘Dolphin’ torches
Spray bottles
Spun polyester (Reemay) cloth Separate and carry fragile objects
Squeegees, large on a handle Move quantities of water
Staple gun
Steel capped rubber boots
Tarpaulins Covering during wet incidents
Trestle Tables
Trolley (sack truck style) Moving larger items
Trolley with table height platform Move items around
Weights Slow drying of materials
Wet and dry vacuum cleaner
19 January 2012 Version 2.2 Page 29 of 58

Records Management Disaster Planning Toolkit Guideline
Template 4.5 – Storage and Handling Requirements Checklist
The storage facility
Is the facility of sturdy and intruder-resistant construction suitable for prevailing weather conditions?
Yes No
Is the floor capable of holding the weight of fully loaded shelving/racking/cabinets?
Yes No
Is the facility free of water leaks and dampness? Yes No
Internal environment of storage facility
Is the facility well ventilated? Yes No
Is the facility well lit with a minimum of natural light? Yes No
Does the facility have a stable temperature (preferably inside the range 15–27°C, with no more than 5°C variation in any 24 hour period) and humidity (preferably 30-60%RH, with no more than 5%RH variation in any 24 hour period)?
Yes No
Is the facility clean and free of dirt and dust? Yes No
Is the facility free of insects and rodents? Yes No
Official records containers
Are official records packaged into containers prior to receipt into a storage facility?
Yes No
Are containers clean and in good condition? Yes No
Are containers designed to fit the records? Yes No
Are the containers used strong enough to withstand handling, pressure and weight of the records?
Yes No
Are the containers of a quality and composition commensurate with the record’s format, media and use?
Yes No
Are the containers capable of being handled in a safe and easy manner?
Yes No
Shelving/cabinets/racking
Are shelving/cabinets/racking raised off the floor as a disaster precaution (preferably by 85–150 mm)?
Yes No
19 January 2012 Version 2.2 Page 30 of 58

Records Management Disaster Planning Toolkit Guideline
Do shelving/cabinets/racking not restrict good ventilation in the storage area?
Yes No
Do shelving/cabinets/racking enable ready and safe access to official records?
Yes No
Handling equipment
Does any handling equipment used comply with occupational health, safety and welfare codes of practice?
Yes No
Security and confidentiality
Are fire alarms installed and linked to a readily available emergency service?
Yes No
Is fire-extinguishing equipment installed and tested on an annual basis?
Yes No
Is there protection against unauthorised access to both the physical and information systems environment?
Yes No
Is there controlled access to storage areas? Yes No
Are there measures for protection of confidentiality of personal information contained in ’sensitive’ files (e.g. records of legal proceedings, medical records)?
Yes No
Are there measures for screening staff involved in providing services?
Yes No
Is there a current and adequate disaster response plan, reviewed annually?
Yes No
19 January 2012 Version 2.2 Page 31 of 58
Records Management Disaster Planning Toolkit Guideline
Vital Records identification A vital record is a record that contains information essential to the survival of an organisation. Vital records usually make up a small portion of the records created by an agency but should be the main priority for recovery and salvage efforts following a disaster.
This section provides templates to be used when identifying your agencies vital records. The templates provide for their documentation at three different levels: • in detail; • by record types; • by location.
You may choose to use each of the three levels of documentation, however, it may be more suitable for your agency to use just one of the following templates. Use the template that best suits your agency’s situation.
Attached Templates:
Template 5.1 – Vital Records List (detailed list)
Template 5.2 – Vital Records List (by Record)
Template 5.3 – Vital Records List (by Location)
19 January 2012 Version 2.2 Page 32 of 58

Records Management Disaster Planning Toolkit Guideline
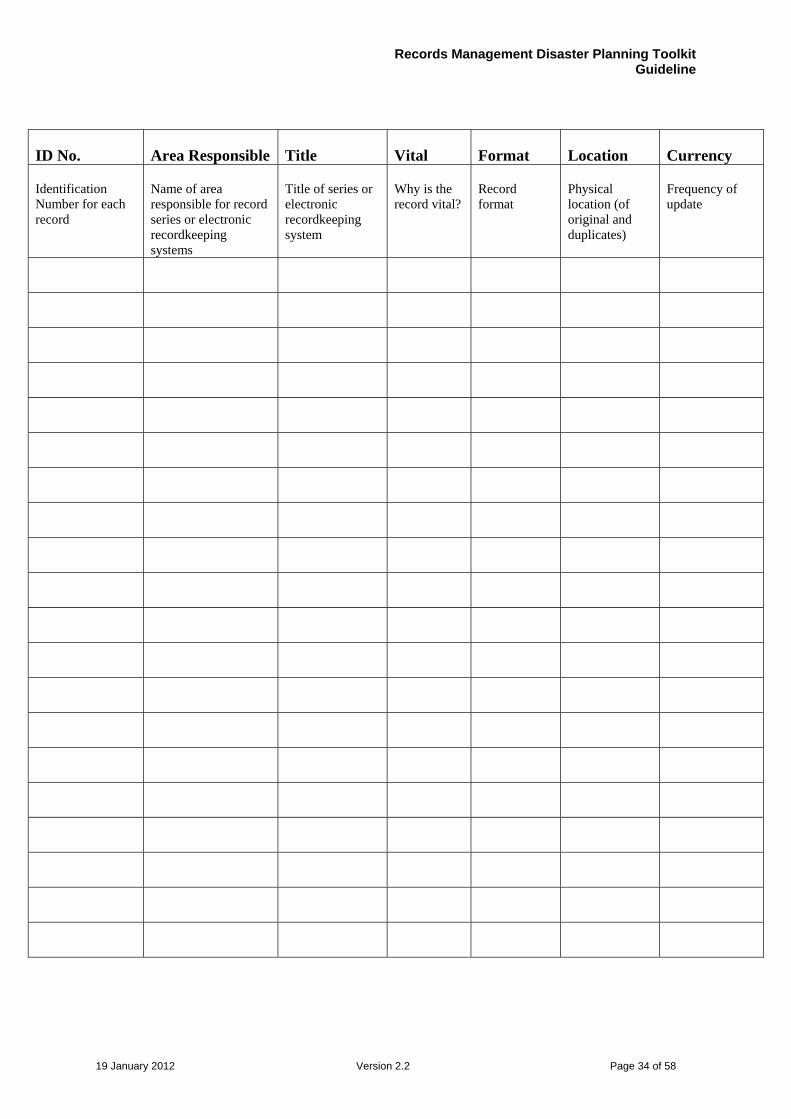
Template 5.1 – Vital Records List (detailed list)
(Reference: State Records, New South Wales Records, Guidelines on Counter Disaster Strategies for Records and Recordkeeping Systems, 2002, p. 32-33)
This list has been developed in line with the State Records Authority of New South Wales’ Counter Disaster Strategies for Records and Recordkeeping Systems guideline. The information on this list can be used to document in detail your agencies vital records and assist with the creation of Templates 5.2 and Template 5.3, if necessary. Agencies may decide to expand this table to include further information, including the amount of reference activity or frequency of use; existing records protection, such as the storage equipment used; the cost of records protection; the consequences of loss to the organisation; how vital records are transported; and when records are to be transferred to secondary storage or destroyed.10
Agencies may find it useful to develop a Priority Records List based on the Vital Records List that includes other important records within your organisation, rather than just the vital records. This list is just a starting point and agencies should adapt this list to the needs of their agency.
10 State Records, New South Wales, Guidelines on Counter Disaster Strategies for Records and Recordkeeping Systems, 2002. pg 32-33.
19 January 2012 Version 2.2 Page 33 of 58
Records Management Disaster Planning Toolkit Guideline
ID No. Area Responsible Title Vital Format Location Currency
Identification Number for each record
Name of area responsible for record series or electronic recordkeeping systems
Title of series or electronic recordkeeping system
Why is the record vital?
Record format
Physical location (of original and duplicates)
Frequency of update
19 January 2012 Version 2.2 Page 34 of 58

Records Management Disaster Planning Toolkit Guideline
Template 5.2 – Vital Records List (by Record)
(Reference: Heritage Collections Council, Department for Communications, Information Technology and the Arts, Be Prepared: Guideline for small museums for writing a disaster preparedness plan, 2000, p. 64).
RECORD LOCATION SECURITY
19 January 2012 Version 2.2 Page 35 of 58

Records Management Disaster Planning Toolkit Guideline
Template 5.3 – Vital Records List (by Location)
(Reference: Heritage Collections Council, Department for Communications, Information Technology and the Arts, Be Prepared: Guideline for small museums for writing a disaster preparedness plan, 2000, p. 65)
LOCATION RECORD SECURITY
19 January 2012 Version 2.2 Page 36 of 58
Records Management Disaster Planning Toolkit Guideline
Response How we respond to a disaster has a large impact on the damage that disaster will have on an agency’s records and recordkeeping system. Response involves putting the disaster recovery plan into action and gathering all the resources that your agency will need to protect and secure their assets from loss.
Located in this section is an Emergency Contact List that agencies will need to amend and develop to suit their own needs. This list is useful in contacting emergency personnel outside of your agency depending on the type and extent of the disaster. It is only a suggested list and each agency should obtain relevant contacts for services relevant to their operations. It is a good idea to make contact with those on your list to develop a rapport prior to the disaster occurring. In addition to the Emergency Contact list is the Telephone Tree. The Telephone Tree serves as a quick reference point indicating who to call within your own agency and whom they then need to call. Basically every person who receives a call then makes a call to another person and so on. The Telephone Tree charts who should be called and by whom.
Also included in this section is a Response and Recovery Flowchart, which briefly shows the steps taken during this process and should be used to trigger one’s memory in a time of stress. It is by no means a conclusive list but a next step guide to what you should think about next. This flowchart may need to be revised and amended by your agency to make it more specific to your needs. Also included is a Safety Check Flowchart. This flowchart will assist in determining whether there are any risks to your safety prior to entering the site. Safety should be your number one focus at all times.
Publications such as Be Prepared: A Guideline …contain examples of specific procedures to follow for specific disasters e.g. fire, flood, etc. You may decide to create similar procedures to follow when faced with a specific disaster. You will need to identify which disasters your agency is most likely to face when developing these, or have a procedure for all possible disasters.
Attached Templates:
Template 6.1 – Emergency Contact List
Template 6.2 - Disaster Response Telephone Tree
Template 6.3 – Response and Recovery Flowchart
Template 6.4 – Safety Check Flowchart
Template 6.5 – Assessing and Stabilising the Situation
19 January 2012 Version 2.2 Page 37 of 58
Records Management Disaster Planning Toolkit Guideline
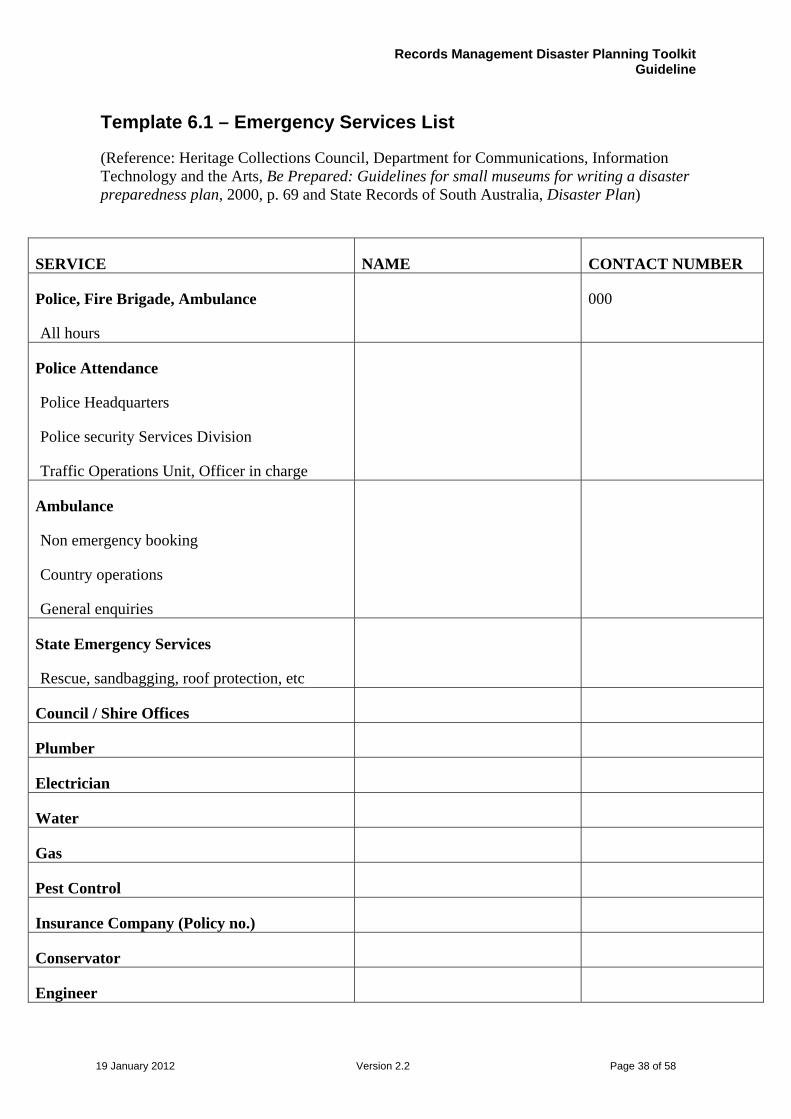
Template 6.1 – Emergency Services List
(Reference: Heritage Collections Council, Department for Communications, Information Technology and the Arts, Be Prepared: Guidelines for small museums for writing a disaster preparedness plan, 2000, p. 69 and State Records of South Australia, Disaster Plan)
SERVICE NAME CONTACT NUMBER
Police, Fire Brigade, Ambulance
All hours
000
Police Attendance
Police Headquarters
Police security Services Division
Traffic Operations Unit, Officer in charge
Ambulance
Non emergency booking
Country operations
General enquiries
State Emergency Services
Rescue, sandbagging, roof protection, etc
Council / Shire Offices
Plumber
Electrician
Water
Gas
Pest Control
Insurance Company (Policy no.)
Conservator
Engineer
19 January 2012 Version 2.2 Page 38 of 58

Records Management Disaster Planning Toolkit Guideline
SERVICE NAME CONTACT NUMBER
Lawyer
Locksmith
Freezer space (for freezing records)
Off-site space for recovery
Drying company (moisture control)
Emergency equipment rental
19 January 2012 Version 2.2 Page 39 of 58

Records Management Disaster Planning Toolkit Guideline
Template 6.2 - Telephone Tree
Disaster Coordinator or Team Leader
Recordkeeper/DocumentorVolunteer Coordinator
Disaster Response Team Members
Name:_________________Tel:___________________
Name:_________________Tel:___________________
Name:_________________Tel:___________________
Name:_________________Tel:___________________
Disaster Response Team Members
Name:_________________Tel:___________________
Name:_________________Tel:___________________
Name:_________________Tel:___________________
Name:_________________Tel:___________________
19 January 2012 Version 2.2 Page 40 of 58

Records Management Disaster Planning Toolkit Guideline
Template 6.3 – Response and Recovery Steps Flowchart
(Reference: Heritage Collections Council, Department for Communications, Information Technology and the Arts, Be Prepared: Guidelines for small museums for writing a disaster preparedness plan, 2000, pg 52 and State Records, New South Wales, Guidelines on Counter Disaster Strategies for Records and Recordkeeping Systems, 2002, p. 39-45)
START
Disaster has occurred
Locate disaster response and recovery plan
Contact Disaster Response Team
Leader
Complete a safety check
Assess and stabilise the situation
End of RESPONSE
Begin RESPONSE
Organise Salvage teams
Begin RECOVERY
Activate the plan
Contact all members of the Salvage
Team
Brief Disaster Response
team of roles & tasks
Ensure organisation is secure - monitor
security
Contact necessary emergency personnell
Assess and records
damage to records
Identify equipment and stores needed
Commence salvage
operations using
procedures
Begin with Vital / priority records
Formulate recovery plan
Collection salvaged
Restore procedures
Resume operations
Review disaster
response and recovery activities
Amend Disaster Plan as necessary
End RECOVERY
END
19 January 2012 Version 2.2 Page 41 of 58

Records Management Disaster Planning Toolkit Guideline
Template 6.4 – Safety Check Flowchart
(Reference: Heritage Collections Council, Department for Communications, Information Technology and the Arts, Be Prepared: Guidelines for small museums for writing a disaster preparedness plan, 2000, p.71)
19 January 2012 Version 2.2 Page 42 of 58

Records Management Disaster Planning Toolkit Guideline
START
Are there any electrical wires or power points in
contact with water?
Leave the area. DO NOT re-enter until
Emergency Services have deemed it safe
to do so.
Does the water extend beyond your
view? (Electrical contact may occur
where you can't see)
Is there more than 5cm of water on the
floor?
Are passageways blocked or obstructed
in any way?
Is there danger from falling material?
Do the walls / ceiling appear unstable?
Enter with caution - if in doubt wait for
Emergency Services to deem the site safe
END
19 January 2012 Version 2.2 Page 43 of 58

Records Management Disaster Planning Toolkit Guideline
Template 6.5 – Assessing and Stabilising the Situation
(Reference: Heritage Collections Council, Department for Communications, Information Technology and the Arts, Be Prepared: Guidelines for small museums for writing a disaster preparedness plan, 2000, p. 76)
Work through the following questions to develop an accurate picture of the situation you face.
QUESTIONS YES/NO
Is the cause of the disaster still ongoing?
What needs to be done to prevent further damage?
Is the site safe?
What extent of the collection has been damaged?
What is the main type of damage? (Water, fire, breakage)
Are there any object or areas in immediate danger?
Does the full Disaster Response Team need to be called? (See Telephone Tree)
Does the situation need to be documented?
Does outside help or expertise need to be called? (See Emergency Contact List)
Does the environment need to be further stabilised?
(eg water or smoke damage)
Have any of the priority items been damaged?
Does the Recovery Plan need to be activated?
What needs to be done to allow the recovery to begin?
Do we need to move to our off-site location?
19 January 2012 Version 2.2 Page 44 of 58

Records Management Disaster Planning Toolkit Guideline
Recovery Recovery is the final stage of managing a disaster to your organisation. It includes restoring business operations and the treatment and recovery of your records and recordkeeping systems. Included within this section are an In-house Disaster Response Team Listing which provides who is responsible for what roles; steps in effective disaster recovery; a damaged records documentation list which documents all the records damaged, their treatment and location; advice on how to pack records during a recovery operation; advice on how to stabilise records and drying methods and how to recover records following a disaster.
Attached Templates:
Template 7.1 – In-house Disaster Response Team
Template 7.2 – Steps in Effective Disaster Recovery
Template 7.3 – Action Sheet - Example
Template 7.4 – Damaged records documentation list
Template 7.5 – Packing records in recovery operation
Template 7.6 – Stabilising and drying methods
Template 7.7 – How to recover records
19 January 2012 Version 2.2 Page 45 of 58

Records Management Disaster Planning Toolkit Guideline
Template 7.1 – In-house Disaster Response Team
(Reference: State Records, New South Wales, Guidelines on Counter Disaster Strategies for Records and Recordkeeping Systems, 2002, p. 28 and State Records of South Australia, Disaster Plan)
ROLE NAME CONTACT DETAILS
Disaster Response Team Leader(s)
Liaison Officer
Supply Officer
Record Keeper(s)
(Documenter / Assessor)
Volunteer Coordinator
Finance Delegate
IT Adviser
Environmental Monitor
Building Maintenance Officer
First Aid Officer
Courier Service
Salvage Workers
19 January 2012 Version 2.2 Page 46 of 58

Records Management Disaster Planning Toolkit Guideline
Template 7.2 – Steps in Effective Disaster Recovery
(Used with permission from the Heritage Collections Council, DCITA publication Be Prepared: Guidelines for small museums for writing a disaster preparedness plan, 2002, p. 78)
(Once immediate response is complete and the building is declared safe) 1. Assemble Disaster Response Team and prepare to sketch out the Recovery Plan. 2. Review the situation and make sure you have all relevant information:
• Extent and type of damage • Priority list objects/items that were damaged • Condition of the environment of the building • General feeling about size of recovery operation (will outside help be required?)
3. Ensure all damage is documented and photographed. 4. Determine what you need for recovery – volunteers, material and equipment, outside expertise, space, freezer facilities. 5. Organise the team – some to focus on environment, others on salvage. 6. Modify (stabilize) the environment (remove wet material, open windows, fans) 7. Specify which salvage procedures will be used and decide on the Team Leaders for each procedure. 8. Use Action Sheets and salvage procedures to set up the areas for salvage. 9. Move into salvage operations – making sure all object/item movement and
treatment is documented.
10. Ensure adequate supplies are on hand and that you have all the help you need. 11. Ensure all formal notifications have occurred – council, insurance company, etc. 12. Ensure all workers are well looked after. Celebrate milestones and keep everyone informed.
19 January 2012 Version 2.2 Page 47 of 58
Records Management Disaster Planning Toolkit Guideline
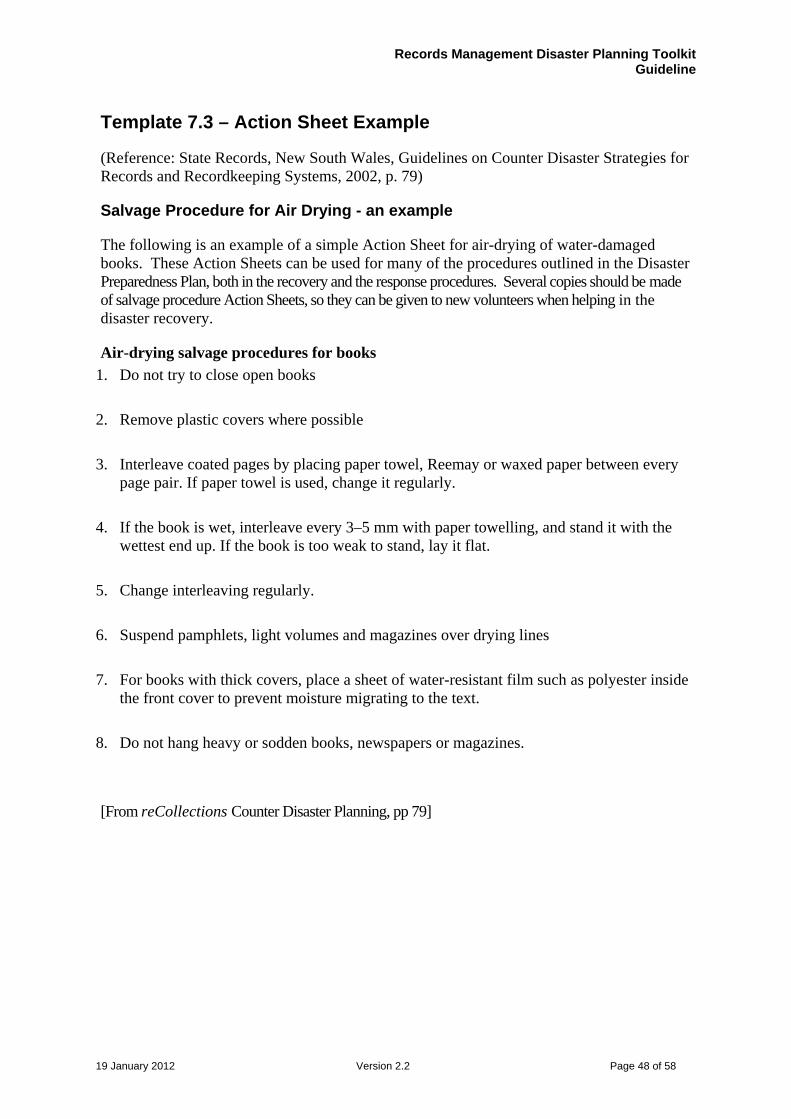
Template 7.3 – Action Sheet Example
(Reference: State Records, New South Wales, Guidelines on Counter Disaster Strategies for Records and Recordkeeping Systems, 2002, p. 79)
Salvage Procedure for Air Drying - an example
The following is an example of a simple Action Sheet for air-drying of water-damaged books. These Action Sheets can be used for many of the procedures outlined in the Disaster Preparedness Plan, both in the recovery and the response procedures. Several copies should be made of salvage procedure Action Sheets, so they can be given to new volunteers when helping in the disaster recovery.
Air-drying salvage procedures for books 1. Do not try to close open books
2. Remove plastic covers where possible
3. Interleave coated pages by placing paper towel, Reemay or waxed paper between every
page pair. If paper towel is used, change it regularly.
4. If the book is wet, interleave every 3–5 mm with paper towelling, and stand it with the wettest end up. If the book is too weak to stand, lay it flat.
5. Change interleaving regularly.
6. Suspend pamphlets, light volumes and magazines over drying lines
7. For books with thick covers, place a sheet of water-resistant film such as polyester inside the front cover to prevent moisture migrating to the text.
8. Do not hang heavy or sodden books, newspapers or magazines.
[From reCollections Counter Disaster Planning, pp 79]
19 January 2012 Version 2.2 Page 48 of 58

Records Management Disaster Planning Toolkit Guideline
Template 7.4 – Damaged records documentation list
(Reference: State Records, New South Wales, Guidelines on Counter Disaster Strategies for Records and Recordkeeping Systems, 2002, p. 80)
(To record damage, treatment and movement of records)
Record Number Damage Category (of salvage)
Treatment Location
19 January 2012 Version 2.2 Page 49 of 58
Records Management Disaster Planning Toolkit Guideline
Template 7.5 – Packing records in a recovery operation
(Reference: State Records, New South Wales, Guidelines on Counter Disaster Strategies for Records and Recordkeeping Systems, 2002, Appendix 5, p. 1-3)
There are two types of packing that may be needed in a recovery operation: • pre-evaluation packing where records need to be packed and taken to a different
treatment site, in other parts of the building or in a different building, and • post evaluation packing where records are packed for freezing.
Using either method, boxes should not exceed the weight recommended by Occupational Health and Safety Officers. All rare, intrinsically valuable and delicate material should be prepared for freezing separately from other materials and in separate categories so they can be located and identified for treatment by a conservator.
For pre-evaluation packing, paper records can be packed in plastic crates and taken by trolleys to the vehicle. Plastic crates are better for very wet records than cardboard boxes, which can sag and break with moisture and pressure. Volumes should not be flattened, simply packed as they are. They should be taken to the evaluation manager at the treatment site.
For post evaluation packing where there are small amounts of damaged materials, debris can be washed away under cold running water (if clean) by experienced people unless the material is fire damaged or contains soluble inks and dyes. Volumes, books or groups of papers should be held in two hands and dipped into containers of clean water or a hose should be gently applied providing the water is not contaminated. No materials should be scrubbed. In cases where there are vast amounts of material to pack, washing may not be viable.
The following packing rules should apply:
Volumes • Very wet volumes should be packed separately and vertically with their spines down.
Volumes of similar size should be packed together in a single layer and supported so that they do not bend. There should be a little space left in plastic crates to allow for their expansion when frozen.
• If it is likely that dyes from the covers of volumes will run, or if time allows, they should be individually wrapped or at least every other wrapped. Use wax or freezer paper, not plastic or plastic coated paper.
Documents, files and cards • Wet files should be wrapped in batches that are not more than 10cm deep. Large items
should be packed flat on the bottom so that they will not sag. If wet file covers are removed because of damage care should be taken to identify loose documents.
• Soaking wet bundles of wet paper that sustain damage should be packed into large plastic bags or packed on their side in boxes. Do not try and separate them, as it is labour intensive.
19 January 2012 Version 2.2 Page 50 of 58
Records Management Disaster Planning Toolkit Guideline
• Scattered sheets should be placed together in relation to their location and the
approximate location noted. • Files and cards should be left where possible in the original boxes, unless the contents
are dry and can be taken out and put in dry boxes without risk of damage. • Burnt, scorched or dirty records should be supported on single sheets of uncoloured
cardboard or heavy paper when transferring to crates.
Microfilm • Microfilm should be left in storage cartons and secured with rubber bands to retain
labels.
Maps and plans • Large format items such as maps should be interleaved with blotting paper and
polythene and placed on flat supports (may be several on each). Do not build up too much weight.
Remember when packing that you need to record information about the item and its location. If records are not in boxes or containers, or if the containers have no identification, label each box or bundle showing the location and identification if possible. Use a soft pencil and paper to write on labels that should be tied onto boxes or bundles. Do not use coloured paper, felt tipped or ballpoint pens or write on the records themselves. Crates should be numbered and the numbers added to documentation, and the removal and destination of boxes should be recorded.
Material should not be piled on top of each other or moved in large batches. It should not be left packed for more than a few hours. If the journey to the freezing facility is long, refrigerated vans are desirable.
19 January 2012 Version 2.2 Page 51 of 58

Records Management Disaster Planning Toolkit Guideline
Template 7.6 - Stabilising and drying methods
(Used with permission from State Records, NSW, publication Guidelines on Counter Disaster Strategies for Records and Recordkeeping Systems, 2002, Appendix 6)
There are a number of stabilising and drying methods that can be used in the recovery phase of disaster management. It is important to remember that different types of materials need different techniques, and that different types of damage may require different recovery options. Below are general tips on stabilising and drying water damaged paper-based materials. However, advice should be sought from a trained conservator before proceeding. Whichever method is chosen, dried materials should be monitored for potential mould growth.
Freezing
For stabilising and restoring large quantities of records, or records that are already starting to grow mould, freezing is the most effective method. If there are only small quantities of records then other methods, such as air drying, should be employed.
Freezing is a useful alternative for some records as: • it stops the growth of mould and mildew (while the object is still frozen) • it may stop bindings from warping, depending on the method of drying • it stabilises water soluble materials such as inks and dyes, and • it gives your organisation time to plan for recovery and restore buildings and equipment
ready for the material.
However, conservators do not advise the freezing of vellum, photographs, glass-plate negatives, electronic media such as diskettes, videos, cassettes or vinyl records.
As soon as the record quantities requiring freezing are decided, companies with appropriate freeze facilities (listed in the counter disaster plan) should be contacted and arrangements made for transport. You can: • Blast freeze - commercial blast freezers are ideal as they drop the temperature quickly
and have a large capacity. • Freeze in refrigerated chamber - this could be slow but there are benefits to reducing
temperature even before freezing point is reached. • Use a home freezer unit to freeze small quantities quickly - ensure that it reaches a
temperature of –10C and do not open until ready to remove the material (otherwise it will cause a freeze-thaw cycle).
Once the material is frozen and you have the time and resources to defrost and treat it, you need to look at drying options.
19 January 2012 Version 2.2 Page 52 of 58
Records Management Disaster Planning Toolkit Guideline
Freeze drying
The frozen items are placed in a vacuum chamber, which allows the water to evaporate without melting. This is of a huge advantage for water sensitive inks as it minimises the risk of them running further. Likewise it is also good for glossy papers as it prevents them from sticking together. But if these situations have begun freeze-drying will not reverse it.
Vacuum freeze-drying is not recommended for photographic materials unless there is no alternative, as their surfaces may be damaged. Leather and vellum may not survive. Volumes that are vacuum freeze dried should be acclimatised for at least one month before opening to avoid cracking the bindings, and monitored for mould.
It is important to have an agreement with a freeze-drying facility before a disaster so that costs, packing requirements and what items are suitable for the procedure are understood.
Dry air purging or dehumidifying
Dry air purging can be used if records are not soaking. A building or site is sealed in plastic sheeting and dry air, at least 26ºC and 15% relative humidity, is pumped in using desiccant or refrigeration equipment. The water vapour is then absorbed in the dry air. This method is rapid and has the advantage of being in situ, but is only useful when the whole site can be sealed off.
Air-drying
Air-drying can be attempted if it is within two days of the disaster and if material is not soaked. Otherwise, mould will start to grow, and items that are suitable should be frozen. Air-drying may result in some distortion of items and should not be used for items with soluble inks.
Air-drying requires a large space with good air circulation and temperatures below 21ºC. Circulation may be encouraged by positioning fans and opening windows. If available, dehumidifiers can be used in the drying process to reduce relative humidity (ideally to 25-35%). Screening material such as window screens can provide an excellent compact drying surface that allows for air circulation (although metal mesh will rust in contact with moisture).
Volumes
Closed volumes can be cleaned before drying, by washing off dirt or mud on covers and edges using clean running water and a sponge.
Books and volumes that can stand upright can be placed on paper towelling with their covers slightly open and their pages lightly fanned. A gentle breeze from a fan can assist the drying process. Do not use heat, as it will encourage mould.
Priority volumes can be dried by placing plastic sheeting on the floor, standing volumes upright with pages fanned (if their spines will support them), and then forming wind tunnels around them from cardboard or plastic sheeting. Cool air from fans can then be directed down the tunnels.
19 January 2012 Version 2.2 Page 53 of 58

Records Management Disaster Planning Toolkit Guideline
Interleaving can be used for wet volumes that cannot support their own weight. Loose sheets of paper towel or blotting paper can be placed at 1-centimetre intervals though the volumes. Do not allow interleaving materials to exceed a third of the thickness of the volume or the spine will be damaged (the exception is with coated papers where each page must be interleaved). Replace interleaving materials when wet.
If adhesives are sticking to the interleaving sheets, a release material such as nylon gauze should be used as a barrier between them.
Pamphlets
Pamphlets and loose pages can be hung on lines or improvised drying racks providing you have enough space and assistance.
Files
Files should be removed from boxes carefully and laid flat. Bundles can be interleaved and pressed under a light weight or pages turned regularly, ensuring that the original order is maintained for each bundle. Cool air can be directed to the pages, but ensure that it is directed upward rather than directly on the pages. Replace the interleaved sheets when they become wet. Glossy papers should be fully separated and interleaved or frozen.
For saturated files, metal binders should be replaced with plastic tubing or plastic coated wire and pages fanned with some interleaving.
Maps and plans
Maps and plans can be interleaved with blotting paper stacked up to 10 high and pressed dry under glass, Perspex or thick board and weighted evenly.
Card indexes
Card indexes should be removed from drawers, stack on sides loosely and supported at each end.
Vellum and parchment
Vellum and parchment items are very fragile and susceptible to damage when wet. They should be fully supported at all times when being moved. Consult a Conservator before proceeding with any treatments. If nobody can be contacted interleave and freeze.
Photographic prints
If treated rapidly, photographic prints may be air-dried. Photographs can be frozen if necessary but do not freeze dry as it may result in disfiguring marks on the surface of the photograph. To air dry: • remove photographs from mounts or separate from each other to prevent the emulsion
sticking • rinse with cool water if necessary. Do not touch or blot surfaces, and • place emulsion side up on blotters or lint free cloths or hang by placing clips on non-
image areas, ensuring there is no overlap.
19 January 2012 Version 2.2 Page 54 of 58
Records Management Disaster Planning Toolkit Guideline
If wet, immerse in clean cold water in polyethylene bags. Send to a processing laboratory within 2-3 days for reprocessing and drying (except historic ones).
Photographic negatives
To air dry: • remove negatives from envelopes • wash in clean running water, and • hang to dry or lay flat with emulsion side up.
Eastman colour film should only be handled by a processing lab. If there are large quantities of negatives they should be frozen and air-dried.
If wet, negatives should be sealed in polyethylene bags and placed in plastic garbage cans under cold, clean running water while the negatives are still wet. They should be transferred to a laboratory within three days.
Glass plate negatives
Glass plate negatives should NOT be immersed in water. They should never be frozen or freeze-dried. Air-dry them immediately by laying flat onto blotter with the emulsion side up (duller side) or upright in a dish rack.
Fire
While water damaged materials do cause problems, simple techniques such as those described above can be used. The recovery of burnt collections presents additional problems. The effects of fire include heat, soot, burnt edges, melted coverings such as plastics, and possible water damage. The costs of restoration should be weighed against other alternatives. Burnt materials can be frozen, but any restoration other than basic cleaning, rebinding and rehousing should be left to an experienced conservator.
19 January 2012 Version 2.2 Page 55 of 58
Records Management Disaster Planning Toolkit Guideline
Template 7.7 – How to recover records
(Used with permission from State Records, NSW, publication Guidelines on Counter Disaster Strategies for Records and Recordkeeping Systems, 2002, Appendix 7)
Records should be recovered in accordance with vital records schedules and priorities set for each functional area. These should be included in the counter disaster plan.
The following instructions are just a guide. For more detailed information on recovery please consult the bibliography. The State Library of New South Wales’ Counter Disaster Manual has a comprehensive recovery section detailing treatment for a variety of formats.
Paper-based records
See the section on Recovery in the Records Management Disaster Planning Guideline for information on how to proceed with the recovery of paper-based records. See Template 7.5 for methods of packing paper-based records for transport or freezing. See Template 7.6 for a description of the best methods of drying paper-based records.
If dealing with non-paper media, teams need to obtain assistance from professionals. Some general principles are explained below.
Magnetic media
If magnetic media (disks, audio, video) is damaged, teams should never try to make copies of it immediately because it might damage the hardware. If exposed to heat, an expert can advise of the chances of preserving the information.
Floppy disks and diskettes
If floppy disks are wet, they should be placed upright in cold distilled water until recovery is possible. Do not dry or attempt to freeze them. If full backup copies exist, then damaged media can be destroyed and replaced. If they need to be salvaged: • Remove from water immediately • Remove from jacket • Rinse off dirt with clean distilled water. Do not soak • Drip dry vertically in a disk drain or rack. • Clean with a soft lintless cloth. Move perpendicular to grooves, not in a circular motion.
Do not use hairdryers. • Place cleaned compact disk in clean jackets. • Replace if mould or condensation is present or if there are deep scratches. Check
playability and readability.
Magnetic tapes • DO NOT freeze, because the moisture in the tapes will cause permanent damage when
frozen. Do not use magnetised tools/scissors.
19 January 2012 Version 2.2 Page 56 of 58
Records Management Disaster Planning Toolkit Guideline
• DO NOT use hot or warm air to dry, as it will cause the tape to adhere.
Treatment of magnetic tapes will depend on the extent of water penetration. The casing usually keeps tapes clean and dry. If full backup copies exist, then damaged media can be destroyed and replaced.
Wet tape • Disassemble the case and remove the tape. • Rinse dirty tapes, still wound on reels in lukewarm water. • Support vertically on blotting paper to air dry. • Reassemble and copy.
Optical media
Compact disks
(If full backup copies exist, then damaged media can be destroyed and replaced.) • Remove from water immediately • Remove from jacket • Rinse off dirt with clean distilled water. Do not soak • Drip dry vertically in a disk drain or rack. • Clean with a soft lintless cloth. Move perpendicular to grooves, not in a circular motion.
Do not use hairdryers. • Place cleaned compact disk in clean jackets. • Replace if mould or condensation is present or if there are deep scratches. Check
playability and readability.
Microforms
(If backup copies exist, damaged media can be destroyed and replaced.)
Silver halide microfilm should be kept underwater and not allowed to dry out. It should be sent to a processing laboratory within 72 hours. Vesicular and diazo film should be separated and air-dried: • Extract water affected records and dry separately. • Peg aperture cards up for drying. • Unroll microfilms and air dry with the emulsion side up or send to film laboratory. • Rewind film and store in dry containers.
If microforms cannot be dried immediately, they should be immersed in clean, cold water for no more than 2 to 3 days and taken to a laboratory. Duplication is recommended where possible.
Electronic Records
All Electronic Document and Records Management Systems (EDRMS) and other business critical application systems should have had their records backed-up to an off-line medium at
19 January 2012 Version 2.2 Page 57 of 58
Records Management Disaster Planning Toolkit Guideline
19 January 2012 Version 2.2 Page 58 of 58
a minimum of every 24 hours. The Backup Media of data should have been stored “off-site” in a secure location. It should now be possible to reconstitute the Records Management System and the other business critical application systems from this backup media. However, depending on the damage to the primary computing facilities, this may be necessary at an alternative computing facility.
The risks associated with electronic records will have been highlighted when using the Critical Needs Questionnaire Checklist – Template 3.4. A separate section of the Disaster Response Plan should be available addressing all aspects of recovery of electronic records.
Related Documents