Web Design and Development – Tutorial 03 XHTML & CSS © 2006 Trevor Adams, Staffordshire University - 1 - Table of Contents Web Design & Development - Tutorial 03 ................................................................................... 2 Using and Applying CSS to XHTML...................................................................................... 2 Conventions ........................................................................................................................ 2 What you need for this tutorial ............................................................................................ 2 Common Terminology ................................................................................................................. 3 Parent / Child Elements ............................................................................................................ 3 Testing a Document ................................................................................................................. 3 CSS Inheritance ....................................................................................................................... 4 Exploring CSS.............................................................................................................................. 4 Selectors .................................................................................................................................. 4 Simple Selector .................................................................................................................... 5 Universal Selector ................................................................................................................ 5 Type Selector ...................................................................................................................... 5 Class Selector....................................................................................................................... 6 The ID Selector .................................................................................................................... 6 Exercise 1 – Using Selectors ................................................................................................. 7 Exercise 2 – Investigation ..................................................................................................... 8 The Box Model & Measurement.............................................................................................. 8 Exercise 3 – Box Model Demonstration ............................................................................... 8 Inline and Block-Level Elements .......................................................................................... 9 Exercise 4 – Altering Block-Level Elements ........................................................................ 10 Units of Measurement ....................................................................................................... 11 Absolute Units .................................................................................................................. 11 Relative Units and Percentages........................................................................................... 12 Exercise 5 – Using Measurements ...................................................................................... 12 The <div> and <span> Elements ........................................................................................... 12 A Word on CSS properties ................................................................................................ 13 Border Property ................................................................................................................ 13

Welcome message from author
This document is posted to help you gain knowledge. Please leave a comment to let me know what you think about it! Share it to your friends and learn new things together.
Transcript

Web Design and Development – Tutorial 03 XHTML & CSS
© 2006 Trevor Adams, Staffordshire University - 1 -
Table of Contents
Web Design & Development - Tutorial 03................................................................................... 2
Using and Applying CSS to XHTML...................................................................................... 2
Conventions ........................................................................................................................ 2
What you need for this tutorial ............................................................................................ 2
Common Terminology................................................................................................................. 3
Parent / Child Elements............................................................................................................ 3
Testing a Document................................................................................................................. 3
CSS Inheritance ....................................................................................................................... 4
Exploring CSS.............................................................................................................................. 4
Selectors .................................................................................................................................. 4
Simple Selector .................................................................................................................... 5
Universal Selector ................................................................................................................ 5
Type Selector ...................................................................................................................... 5
Class Selector....................................................................................................................... 6
The ID Selector.................................................................................................................... 6
Exercise 1 – Using Selectors ................................................................................................. 7
Exercise 2 – Investigation..................................................................................................... 8
The Box Model & Measurement.............................................................................................. 8
Exercise 3 – Box Model Demonstration ............................................................................... 8
Inline and Block-Level Elements .......................................................................................... 9
Exercise 4 – Altering Block-Level Elements........................................................................ 10
Units of Measurement ....................................................................................................... 11
Absolute Units .................................................................................................................. 11
Relative Units and Percentages........................................................................................... 12
Exercise 5 – Using Measurements ...................................................................................... 12
The <div> and <span> Elements ........................................................................................... 12
A Word on CSS properties ................................................................................................ 13
Border Property ................................................................................................................ 13
Web Design and Development – Tutorial 03 XHTML & CSS
© 2006 Trevor Adams, Staffordshire University - 2 -
Padding Property ............................................................................................................... 14
Margin Property ................................................................................................................ 14
Dimensions........................................................................................................................ 14
Exercise 6 – Styling using <div> and <span> ..................................................................... 15
Further Exercises ....................................................................................................................... 16
References ................................................................................................................................. 16
Acknowledgements.................................................................................................................... 16
Web Design & Development - Tutorial 03
Using and Applying CSS to XHTML
The purpose of this tutorial is to build upon the introduction to XHTML 1.0 Strict and CSS
provided in Tutorial 02. You shall explore various CSS concepts such as selector, class,
measurements and ‘box model’. You will also understand the differences between ‘inline’ and
‘block-level’ elements. Finally, the <div> and <span> elements will be explained and how you
can use them in your web sites. You should use the techniques shown in tutorial 02, such as
mark-up validation, throughout this tutorial.
Conventions
This type of print indicates an exercise. They are usually present at the end of a major section of information
This type of text indicates a code example / listing. You may wish to type this code out or copy & paste.
Italic Text indicates code elements inline with a sentence. E.g.
The <h1> element.
What you need for this tutorial
• Access to the Internet (validation engine)
Web Design and Development – Tutorial 03 XHTML & CSS
© 2006 Trevor Adams, Staffordshire University - 3 -
• A suitable web page / CSS editor such as Microsoft® Notepad® or Macromedia®
Dreamweaver® MX 2004 / 8 (Refer to week 1 tutorial notes for Macromedia®
Dreamweaver® assistance).
• A selection of web browsers for testing. E.g. Microsoft® Internet Explorer 6.x, Opera
7.54+, Mozilla Firefox 1.x or Safari
• A desire to use best practices and good professional techniques
Common Terminology
This section briefly covers some of the terms used in this tutorial that are potentially new to you
or have not been covered in any previous material.
Parent / Child Elements
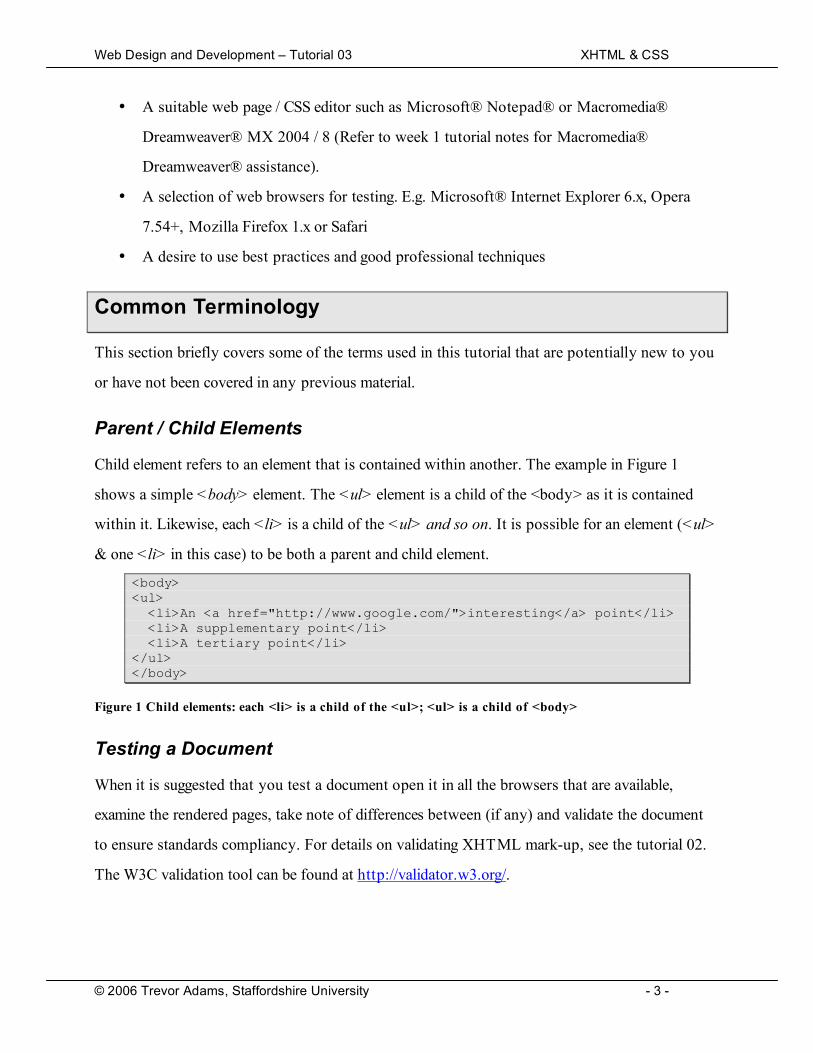
Child element refers to an element that is contained within another. The example in Figure 1
shows a simple <body> element. The <ul> element is a child of the <body> as it is contained
within it. Likewise, each <li> is a child of the <ul> and so on. It is possible for an element (<ul>
& one <li> in this case) to be both a parent and child element.
<body> <ul> <li>An <a href="http://www.google.com/">interesting</a> point</li> <li>A supplementary point</li> <li>A tertiary point</li> </ul> </body>
Figure 1 Child elements: each <li> is a child of the <ul>; <ul> is a child of <body>
Testing a Document
When it is suggested that you test a document open it in all the browsers that are available,
examine the rendered pages, take note of differences between (if any) and validate the document
to ensure standards compliancy. For details on validating XHTML mark-up, see the tutorial 02.
The W3C validation tool can be found at http://validator.w3.org/.

Web Design and Development – Tutorial 03 XHTML & CSS
© 2006 Trevor Adams, Staffordshire University - 4 -
CSS Inheritance
Many of the CSS properties inherit, which means that a child element will assume the same
properties as its parent elements (Duckett 2005). For example, if a <body> element has the
following CSS rule applied:
body {font-family:arial; color:Blue;}
All elements within the <body>, such as <h1> and/or <p>, will also have the font and colour of
the <body> element as they inherit those properties. This is one of the reasons that style sheets
are said to cascade. Browsers do not always implement inheritance consistently.
Inheritance can save you time by allowing you to make properties cascade down to the child
elements. Doing so enables you, the developer, to write fewer CSS rules to achieve the effects
you desire. It is important to know about inheritance and it works, particularly when you wish to
override the default inheritance behaviour.
Exploring CSS
This section will take you further into CSS, building on the techniques and knowledge already
obtained.
Selectors
CSS can be used, as you have already seen, to control the way that mark-up is rendered in a
browser. Rules need to be applied to parts of your mark-up and this can be done using selectors.
An example of a selector is shown in Figure 2.

Web Design and Development – Tutorial 03 XHTML & CSS
© 2006 Trevor Adams, Staffordshire University - 5 -
Figure 2 Components of a CSS rule
You have already learned how the selector shown in Figure 2 could be used to style <h1>
elements in mark-up. However, to begin to master CSS you need to be aware further methods of
stating selectors. This section will take you through the types of selectors available.
Simple Selector
A simple selector simply matches the name of an element in mark-up. The CSS rule given in
Figure 2 is a simple selector. This is the most basic and fundamental of the CSS selectors and has
also been used in the previous tutorial.
Universal Selector
The universal selector is implemented when you want a rule to apply to all elements. The
universal selector is an asterisk (*). An example might be:
* { color:Red; font-family:arial, verdana, sans-serif; }
The universal element is top-level, which means any other rule will be more specific, thus
overriding.
Type Selector
The type selector is similar to a simple selector. The only difference is that the rules apply to
multiple different elements or other selectors E.g.
p, h1, h2 { font-family:arial, verdana, sans-serif; color:Blue; font-weight:bold;

Web Design and Development – Tutorial 03 XHTML & CSS
© 2006 Trevor Adams, Staffordshire University - 6 -
}
This rule applies the declaration given to the <p>, <h1> and <h2> elements in a mark-up file.
Class Selector
The class selector is first of two elements that enable you to directly apply different rules to
elements with the same name. It is conceivable and common to define a style of paragraph that is
different to a regular paragraph. A class selector is defined using a period/full stop (.) character
E.g.
p.copyright { color:Black, font-family: "Times New Roman"; }
This CSS rule states that any <p> element that is of the class copyright will have black text and
use the Times New Roman font. To apply this CSS rule in mark-up, the class attribute must be
used. An example of which is given in Figure 3.
<p class="copyright">© 2006 Trevor Adams.</p>
Figure 3 using a class attribute
If you wished to define a class that was not limited to one type of element, it is possible to define
it without a named element E.g.
.copyright { color:Black, font-family: "Times New Roman"; }
This CSS rule could now be applied, using the class attribute, to any XHTML element that
supports the class attribute.
<h2 class="copyright">© 2006 Trevor Adams. </p>
The ID Selector
The ID selector works in much the same way as the class selector, except it matches an elements
id element instead of class. As XHTML specifies that each id attribute value must be unique per
document, it is a useful selector for applying style rules to unique elements. The selector is
implemented using the hash (#) character. The CSS snippet in fig will apply silver text and bold
font face to a <p> element with an id attribute of ‘copyright’.
p#copyright {color:Silver; font-weight:bold;}
Web Design and Development – Tutorial 03 XHTML & CSS
© 2006 Trevor Adams, Staffordshire University - 7 -
Just as the class selector allows you to be flexible in regards to elements, the id selector is too.
#copyright { color:Silver; font-weight:bold;}
The CSS snippet directly above allows you to apply the rule to any element that has an id
attribute with value ‘copyright’.
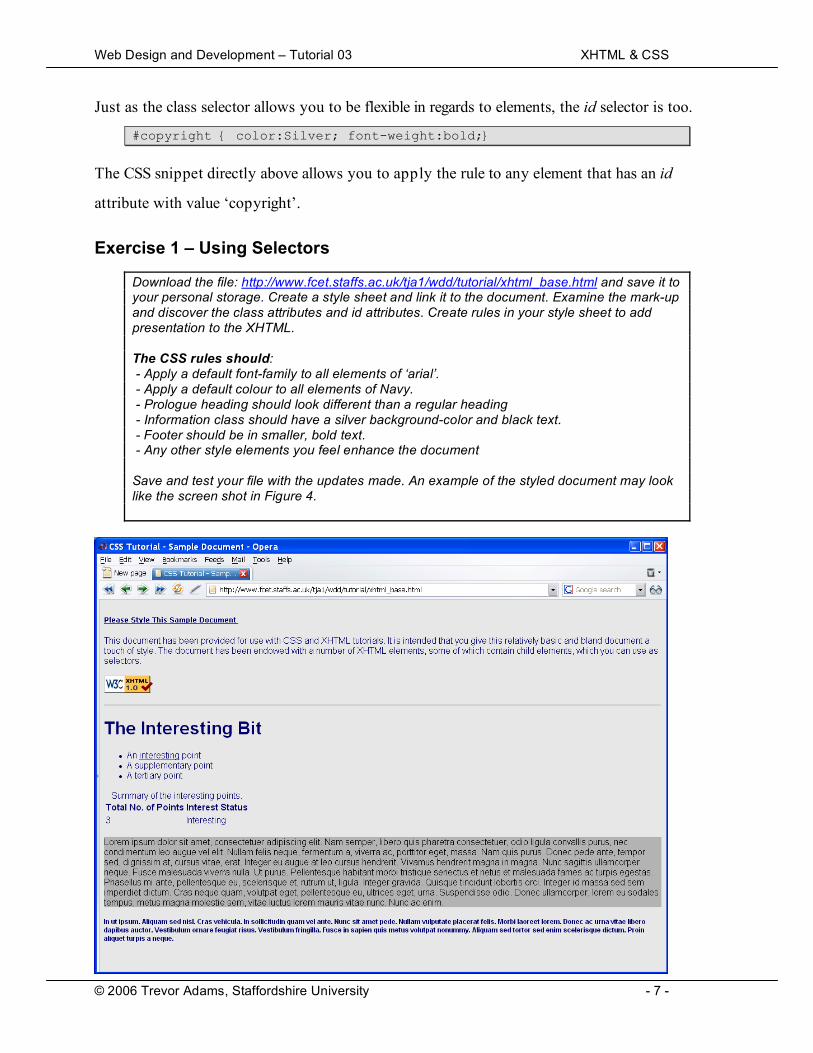
Exercise 1 – Using Selectors
Download the file: http://www.fcet.staffs.ac.uk/tja1/wdd/tutorial/xhtml_base.html and save it to your personal storage. Create a style sheet and link it to the document. Examine the mark-up and discover the class attributes and id attributes. Create rules in your style sheet to add presentation to the XHTML. The CSS rules should: - Apply a default font-family to all elements of ‘arial’. - Apply a default colour to all elements of Navy. - Prologue heading should look different than a regular heading - Information class should have a silver background-color and black text. - Footer should be in smaller, bold text. - Any other style elements you feel enhance the document Save and test your file with the updates made. An example of the styled document may look like the screen shot in Figure 4.

Web Design and Development – Tutorial 03 XHTML & CSS
© 2006 Trevor Adams, Staffordshire University - 8 -
Figure 4 Example styled document to exercise 1
Exercise 2 – Investigation
During your personal study time, use online resources and/or the books included in the references section to learn more about CSS properties that can alter the content of XHTML elements. Experiment with font-family, font-weight, text-decoration, text-transform and text-align properties. A good web site to start: http://www.w3schools.com/css/
The Box Model & Measurement
You now have a grasp of CSS and the properties used to affect the presentation of mark-up
elements. To extend your understanding of CSS, it is necessary to understand the ‘box model’.
Everything in CSS is treated like a box.
Each box has the following properties:
• Border – Separates the edge of one box from all others, exists even if made invisible
• Margin – the margin is the distance between the edge of a box and any box next to it
• Padding – padding the space between the border and what is inside the box
Figure 5 shows the following properties in diagram form.
This is a paragraph in mark-up. The solid black line that separates margin and
padding is known as ‘Border’. Padding is the space between border and content.
Margin is the space between the border and other mark-up elements.
Margin
PaddingBorder
Figure 5 Margin, padding and border - the box model
Exercise 3 – Box Model Demonstration
Download http://www.fcet.staffs.ac.uk/tja1/wdd/tutorial/xhtml_box.html and save it in your personal storage area. Create and link a style sheet for this document with the rules supplied in Figure 6 (Page 9).

Web Design and Development – Tutorial 03 XHTML & CSS
© 2006 Trevor Adams, Staffordshire University - 9 -
Look at the page (Example in Figure 7on page 9) and see if you can determine what elements are considered ‘block’ elements and which should be considered ‘inline’ elements.
h1, p { border:solid 2px Black; padding:5px; margin:4px; font-family:Verdana; } strong, em { border:solid 2px #999999; padding:2px; margin:23px; }
Figure 6 Box Model Demonstration CSS rules
Figure 7 Box Model Demonstration Example
Inline and Block-Level Elements
Elements in HTML are either block-level elements or inline elements. Both can be formatted in
the same way and both follow the box model. Their major difference is in their default behaviour
when rendered in a browser. Examine the document from Exercise 3. <h1> and <p> are block
level elements and they start on a new line and take up the entire of the page width. Inline
elements are those contained within the block level elements, such as <em> and <strong>. They
do not force a new line and flow with the content of a block-level element.

Web Design and Development – Tutorial 03 XHTML & CSS
© 2006 Trevor Adams, Staffordshire University - 10 -
According to XHTML 1.0 specifications, the <body> element can only contain block-level
elements. Block-level elements can contain inline elements and other block-level elements where
structure allows, such as the <ul> containing <li> elements, both of which are block-level.
You can alter the default display type by using the CSS property ‘display’. If you wished to
make hyperlinks display as block-level elements:
a { display: block; }
Likewise, if you wished for each <li> to display inline:
li { display: inline; }
Exercise 4 – Altering Block-Level Elements
Create an XHTML strict 1.0 page and include the code sample from Figure 8 in the <body> element of the page. Create and link a style sheet to alter the appearance of the unordered list to a horizontal ‘inline’ list of hyperlinks. This exercise should be completed without having to alter the XHTML mark-up. An example of the solution is shown in Figure 9.
<ul> <li><a href="http://www.google.com">Google</a></li> <li><a href="http://www.yahoo.co.uk">Yahoo!</a></li> <li><a href="http://www.excite.com">Excite</a></li> </ul>
Figure 8 Code sample inside <body> element - Exercise 4
Figure 9 Exercise 4 sample solution screen shots

Web Design and Development – Tutorial 03 XHTML & CSS
© 2006 Trevor Adams, Staffordshire University - 11 -
Units of Measurement
Many of the properties that CSS can implement require measurements. This can be anything
from the size of fonts, the thickness of a border to width of a heading. These values specify
height or width in most instances. These values can be measured in one of three ways in CSS:
• Absolute Units
• Relative Units
• Percentages
Absolute Units
Table shows a list of absolute units available to CSS. Table 1 Absolute units of measurement
Unit Full Name
pt Point
pc Pica
in Inch
cm Centimetre
mm Millimetre
Most of those units are self explanatory with the exception of points and picas. A point is 1/72 of
an inch which is the same as a pixel in many personal computer displays. Points are generally
used to measure font sizes and line spacing. A pica is 1/12 of an inch and is generally used to
determine line length.
Using absolute units of measurement in your CSS documents is simple, just append the unit type
to the end of the value. For example, to set <p> elements to have a font size of 10pt:
p { font-size: 10pt; }

Web Design and Development – Tutorial 03 XHTML & CSS
© 2006 Trevor Adams, Staffordshire University - 12 -
Relative Units and Percentages
According to Duckett (2005), relative units and percentages can be very useful, but they also
pose problems for two reasons:
• Their size can vary depending on the kind of media on which the document is shown
• Users can increase and decrease the size of fonts on a web browser, which can affect some
of the units of length
Relative units are pixel (px), em (em), ex (ex) and percentage (%). A pixel is the smallest basic unit
of measurement in computing displays. Many web designers use the pixel measurements for fine
grain control over the layout of a page on screen. An Em (em) refers to the reference element
(Duckett 2005) which is either the element itself or its parent. The em measurement is originally
thought to be derived from the width of a lowercase ‘m’ but it is now generally considered to be
the height of the font. An ex is similar to the em except it is derived from a lowercase ‘x’.
Percentages provide a value in relation to another value. The percentage is calculated by the
reference element, either the element itself or its container. For example, if the <body> element
was set to a font size of 1em and the paragraphs were set to 150%, the calculated size of the
paragraph would be 1.5em. Changing the <body> element base font size would increase the
paragraph.
Exercise 5 – Using Measurements
Create an XHTML of your own or use the sample file available at: http://www.fcet.staffs.ac.uk/tja1/wdd/tutorial/xhtml_measurement.html to experiment with applying measurement units with CSS rules. You are free to enhance the document however you see fit. Try to experiment with relative units and consider how inheritance in CSS affects the visual result. Discuss with your tutor any issue that does not make sense.
The <div> and <span> Elements
The <div> and <span> elements are arguably two of the most useful elements available to a web
developer for assisting with CSS formatting even though, by default, they do not actually ‘do’

Web Design and Development – Tutorial 03 XHTML & CSS
© 2006 Trevor Adams, Staffordshire University - 13 -
anything in terms of presentation. Their main purpose is the logical grouping of related elements
within mark-up.
The ability to group elements logically is a common task. It is conceivable that a logical document
block, a book chapter for example, would be made up of many XHTML elements. It would be a
long laborious task to define styles for each element, or indeed provide a class attribute for each
individual instance. Grouping an entire set of elements with a group element is much more
efficient as you only have to style the single element.
By default, <div> and <span> do not render as anything in the browser. Where a <ul> element
has a defined default form in a browser (bullet list), the <div> and <span> are completely void of
structure. However, they do exist in the mark-up and that means you can attach style. Put
simply, the major difference between <div> and <span>:
• <div> is a block-level grouping element
• <span> is an inline grouping element
A Word on CSS properties
The border, margin and padding properties have already been introduced in this handout.
However, the topics about box model and units of measurement needed to be covered before using
these properties could be understood properly.
Border Property
The border has three main components that browsers support; they are colour, style and width.
They can be set using the individual property names:
div.chapter { border-color:Black; border-width:1px; border-style:solid; }
Or in a short hand form (width, style, and colour), already used in this tutorial:
div.chapter {border: 1px solid Black;}

Web Design and Development – Tutorial 03 XHTML & CSS
© 2006 Trevor Adams, Staffordshire University - 14 -
The border colour can take any of the named web colours and any colour specified in hexadecimal
notation (preceding #). Red, green and blue values can be stated using the following notation:
div.chapter { border-color: rgb(0,0,0);} /* Black */
Border width can be set using any of the measurements covered in The Box Model &
Measurement, starting on page 8.
Border style can be any of the named style methods: dashed, dotted, double, groove, hidden,
inherit, inset, none, outset, ridge and solid.
Padding Property
The padding property enabled you to specify how much space should appear between the
content of an element and its border:
div.chapter {padding: 5px;}
The value should be a length, percentage or the keyword ‘inherit’. You can specify different
padding values for each side using padding-bottom, padding-right, padding-left and padding-top
properties. Use padding to create white space between the content of an element and any border
it has.
Margin Property
The margin property sets the gap between a box and any surrounding boxes; its value is a length,
a percentage or the keyword ‘inherit’.
div.chapter {margin: 10px;}
Individual settings for each side of a box can also be specified using margin-left, margin-top,
margin-right and margin-bottom properties.
Dimensions
As CSS treats all elements like a box, it is necessary to understand some of the properties related
to dimensions. Table 2 explains some of the common properties.

Web Design and Development – Tutorial 03 XHTML & CSS
© 2006 Trevor Adams, Staffordshire University - 15 -
Table 2 Box model dimension properties (Ducket 2005)
Property Description
Height Sets the height of a box
Width Sets the width of a box
Line-height Sets the height of a line of text (leading)
Max-height Sets a maximum height that a box can be
Min-height Sets a minimum height that a box can be
Max-width Sets the maximum width that a box can be
Min-width Sets the minimum width that a box can be
It should be noted that only height, width and line-height are currently supported in Microsoft®
Internet Explorer® 6.x.
Exercise 6 – Styling using <div> and <span>
Download the sample document: http://www.fcet.staffs.ac.uk/tja1/wdd/tutorial/xhtml_div.html and save it to your personal storage area. Examine the mark-up and locate the elements and make note of their classes. Style the XHTML document so that it looks like or similar to the screen shot shown in Figure 10.
Figure 10 Exercise 10 sample results
Web Design and Development – Tutorial 03 XHTML & CSS
© 2006 Trevor Adams, Staffordshire University - 16 -
Further Exercises
During your study time, you should attempt the following questions and exercises:
• Consider why grouping elements together in mark-up for styling purposes is considered
efficient, can you explain why?
• Build a five page web site using one or more style sheets to determine the look of the
pages. Create your page design first using paper and pen/pencil. Use the techniques in this
tutorial to make your CSS efficient
• Experiment with border, margins and padding. A margin will take a negative value but
padding will not, why is this so and why might it be useful?
• Investigate the z-order property and how it relates to the previous bullet point
References
Ducket, J. (2005) Accessible XHTML and CSS Web Sites: Problem-Design-Solution, Wrox Press
(J. Wiley Publishing, Inc.), Indianapolis, IN, USA
Schafer, S.M. (2005) Web Standards, Wrox Press (J. Wiley Publishing, Inc), Indianapolis, IN,
USA
Schmitt, C. et al. (2005) Professional CSS: Cascading Style Sheets for Web Design, Wrox Press (J.
Wiley Publishing, Inc), Indianapolis, IN, USA
Acknowledgements
Portions of the tutorial exercises were taken from Duckett (2005)
Related Documents
![XHTML-Print/CSS Print Profile Guidelines for PrintEnhanced:1 · 140 • XHTML-Print /CSS-Print Usage Guidelines 141 • Guidelines on how XHTML-Print[XHTML-PRINT] and CSS Print Profile](https://static.cupdf.com/doc/110x72/5f0eaedb7e708231d4406c47/xhtml-printcss-print-profile-guidelines-for-printenhanced1-140-a-xhtml-print.jpg)


