WWW.VIDYARTHIPLUS.COM Ex no: Date DEVELOPMENT OF WEB SERVICES IN J2EE AIM To develop a web service program which can persists the records of a student in the exam table. It makes use of SOAP Request and SOAP Response ALGORITHM CONNECTING DATABASE Step 1: Open the Netbeans Software Step 2: Navigate to the services tab. Step 3: Open JAVA DB Database Step 4: Start the Server Step 5: Select Sample database or you can create one Step 6: Right click and select connect. It will connect to the sample database. Step 7: Right click and select create table. Step 8: I t will open a dialog box in which the table name is given as stud Step 9: Now add the two columns – Roll with data type numeric and Name with data type char Step 10 : It creates a stud table a sample database. CREATING WEB SERVICE PROJECT Step 1: Create a new Web project Step 2: Give a name as jaxx2 Step 3: select the server as glassfish and click on the finish CREATE A WEB SERVICE Step 1: Right click on the project

Welcome message from author
This document is posted to help you gain knowledge. Please leave a comment to let me know what you think about it! Share it to your friends and learn new things together.
Transcript

WWW.VIDYARTHIPLUS.COM
Ex no:
Date
DEVELOPMENT OF WEB SERVICES IN J2EE
AIM
To develop a web service program which can persists the records of a student in the exam table. It
makes use of SOAP Request and SOAP Response
ALGORITHM
CONNECTING DATABASE
Step 1: Open the Netbeans Software
Step 2: Navigate to the services tab.
Step 3: Open JAVA DB Database
Step 4: Start the Server
Step 5: Select Sample database or you can create one
Step 6: Right click and select connect. It will connect to the sample database.
Step 7: Right click and select create table.
Step 8: I t will open a dialog box in which the table name is given as stud
Step 9: Now add the two columns – Roll with data type numeric and Name with data type char
Step 10 : It creates a stud table a sample database.
CREATING WEB SERVICE PROJECT
Step 1: Create a new Web project
Step 2: Give a name as jaxx2
Step 3: select the server as glassfish and click on the finish
CREATE A WEB SERVICE
Step 1: Right click on the project

WWW.VIDYARTHIPLUS.COM
Step 2: select new -> webservice
Step 3: Type name as stud
Step 4: Type package as pack1 and this will create a stud web service class.
ADDING OPERATION
Step 1: In the design view click on the add operation.
Step 2: In the generated add operation pop dialog box, give the operation name and parameters
. 2.1 Operation name exam.
2.2 Return type string
2.3 Parameters name roll and name.
Step 3: It creates a full web service class.
ADDING DATABASE CAPABILITIES
Step 1: Database and table created above is used in the web service
Step 2: Right click in the code of web serive and select the enterprise resources -> use database
Step 3: Add the data source reference and type reference name as data1
Step 4: Select jdbc/sample server data source and click on.
Step 5: This creates data source reference variable data1 at the top of the method.
RUNNING THE PROJECT
Step 1: Build the deploy the created project on the server
Step 2: Right click on the web service stud and select test web service . This opens web service in the
browser
Step 3: Enter the values in the text boxes which are actually arguments of web method and click on
exam button which is the method name of the web service.
Step 4: Right click on the stud table in derby database and select view data to show the inserted data in
the derby database
CLIENT WEB SERVICE
Step 1: Create a new web application project with type name jaxx2client.

WWW.VIDYARTHIPLUS.COM
Step2 : Right click on the project jax2clietn and new - >web service client
Step 3: It create a dialog box for WSDL and client location. Select either the project or give the wsdl url
and click on finish
CLIENT1.JSP
Step1: Right on jax2client and select new -> Jsp file
Step2: Give the name as client1.jsp
Step 3: Right click on the jsp code and select web service client resources and select the operation in the
client project( exam)
Step 4 : It gives the stud web service object, stud port and operation name code.
Step 5 : In two arguments name and roll initialize the values.
RUNNING THE CLIENT FILE
Step 1 : Deploy the jax2client project
Step 2: Right click in cleint1.jsp and select run
Step 3: It runs the file in the internet explorer and gives the status message record inserted
Step 4: Check the inserted value in the derby database as done above.
Code is give below
Stud.java
package pack1;
import java.sql.Connection;
import java.sql.PreparedStatement;
import javax.annotation.Resource;
import javax.jws.WebMethod;
import javax.jws.WebParam;
import javax.jws.WebService;
import javax.sql.DataSource;

WWW.VIDYARTHIPLUS.COM
/**
*
* @author admin
*/
@WebService()
public class stud {
@Resource(name = "data2")
private DataSource data2;
/**
* Web service operation
*/
@WebMethod(operationName = "exam")
public String exam(@WebParam(name = "roll")
int roll, @WebParam(name = "name")
String name) {
String status="inserted";
try
{
Connection con=data2.getConnection();
PreparedStatement ps=con.prepareStatement("insert into APP.STUD values(?,?)");
ps.setInt(1,roll);
ps.setString(2, name);
int i=ps.executeUpdate();

WWW.VIDYARTHIPLUS.COM
if(i!=0)
{
status="inserted";
}}catch(Exception e)
{
System.out.println("error data"+e);
}
return status;
}
}
Client1.jsp
<html>
<head>
<meta http-equiv="Content-Type" content="text/html; charset=UTF-8">
<title>JSP Page</title>
</head>
<body>
<h1>Hello World!</h1>

WWW.VIDYARTHIPLUS.COM
<%-- start web service invocation --%><hr/>
<%
try {
pack1.StudService service = new pack1.StudService();
pack1.Stud port = service.getStudPort();
// TODO initialize WS operation arguments here
int roll = 66;
java.lang.String name = "uuu";
// TODO process result here
java.lang.String result = port.exam(roll, name);
out.println("Result = "+result);
} catch (Exception ex) {
// TODO handle custom exceptions here
}
%>
<%-- end web service invocation --%><hr/>
</body>
</html>

WWW.VIDYARTHIPLUS.COM

WWW.VIDYARTHIPLUS.COM

WWW.VIDYARTHIPLUS.COM
EX NO:
DATE:
INVOKING EJB COMPONENTS AS WEB SERVICES
AIM:
To invoke EJB components as web services.
THEORY:
1.Either a EJB or web container can be used to deploy web services in J2EE.
2.To invoke EJB component as web service we have to use EJB container.
STEPS:
1.CHOOSING A CONTAINER:
1.File->New Project->JavaEE->EJBModule.
2.Project name:Calculator
3.Select server & click finish.
2.CREATING WEB SERVICE FROM JAVA CLASS:
1.Right click on project->New->Web services.
2 Web Services name:calculatorWS
3.Package name:org.me.Calculator
4.select create web service from scratch.
3.ADDING OPERATION TO WEB SERVICE:
1.Right click on Web service->add operation dialog box displayed->define method signature
and click OK
4.DEPLOYING AND TESTING WEB SERVICE:
1.Right click on project->deploy
2.Right click on calculatorWS->Test webservice.

WWW.VIDYARTHIPLUS.COM
SOAP REQUEST:
<?xml version=”1.0” encoding=”UTF-8”?>
<s:Envelope xmlns:S=”http://Schemas.xmlsoap.org/soap/envelope/”>
<s:Header/>
<s:Body>
<ns2:add xmlns:ns2=”http://calculator.me.org/”>
<a>5</a>
<b>5</b>
</ns2:add>
</s:Body>
</s:Envelope>
SOAP RESPONSE:
<?xml version =”1.0” encoding=”UTF-8”?>
<s:Envelope xmlns:s=”http://Schemas.xmlsoap.org/soap/envelope/”>
<s:Body>
<ns2:addResponse xmlns:ns2=”http://calculator.me.org/”>
<return>10</return>
</ns2:addResponse>
</s:Body>
</s:Envelope>
5.CONSUMING WEB SERVICE
1.File->New Project->Java->JavaApplication
2.Project name:calculator client
3.Right click project->New->webserviceclient->window displayed.
4.Browse project->click OK.

WWW.VIDYARTHIPLUS.COM
5.In calculator client unhook web service References till method Add.
6.Drag and drop Add method after main.
7.Within main declare var within try catch and catch add(a,b) method.
8.Add the following code after main
try
{
int a=8,b=4;
System.out.println(add(a,b));
}
catch(Exception e)
{
System.out.println(e);
}
9.Run the project.
OUTPUT:
RESULT:
Thus EJB components are invoked as web services.

WWW.VIDYARTHIPLUS.COM
EX.NO:
DATE:
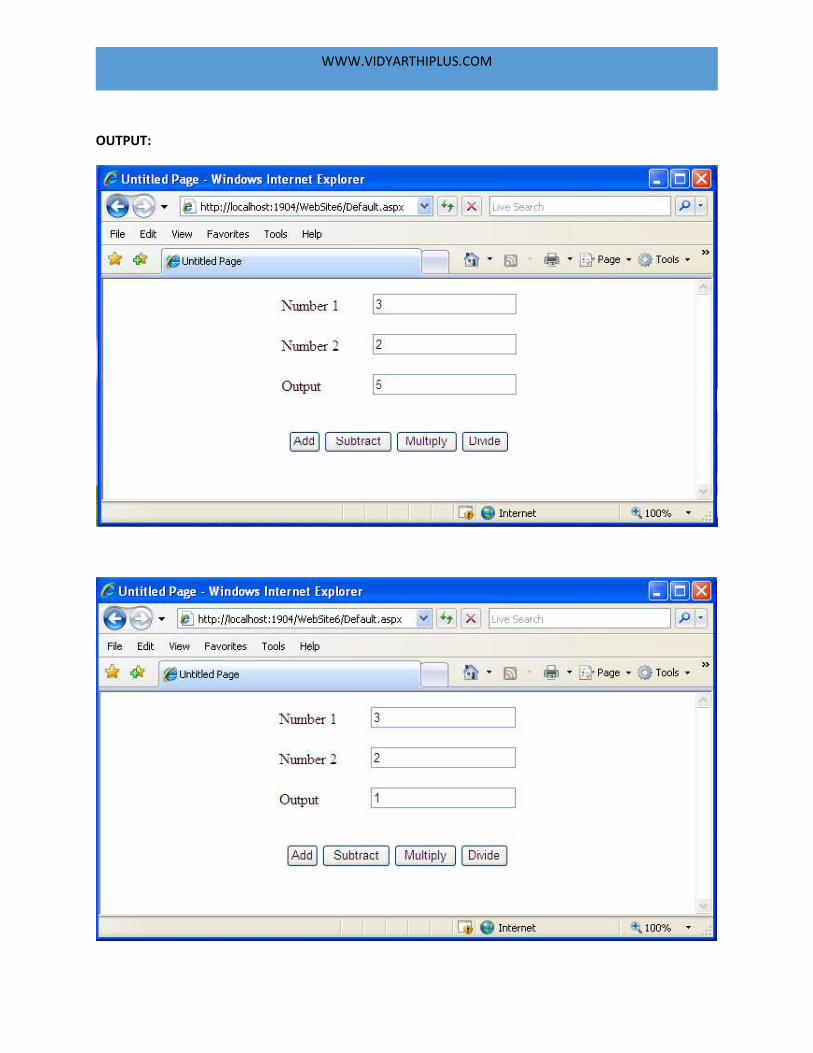
CREATING WEB SERVICES IN .NET
AIM:
To create a web services in .NET.
PROCEDURE:
STEP1: open visual studio
1.1:open visual studio 2005->c#settings.
1.2 Choosing a container
File->New->website->ASP.Net webService
Language:visual C#->ok
STEP 2: Creating a webservice
2.1 : In the right pane rename solution _website3 as solution calculator
2.2: open the service as file
2.3:Add a web method
Public string Helloworld() as
Public int add(int a,int b)
And return “Helloworld” as return a+b;
2.4: repeat the same for all the other operations like sub,mul,div.
Step 3: Build web service
3.1:From build menu->build solution.
Step 4: Test webservice
4.1:Debug->start without debugging
4.2:Service.asmx(right click)->view in browser

WWW.VIDYARTHIPLUS.COM
4.3:Test the function
4.4:Copy the end point
http://localhost:1032/website1/Service.asmx?
Step 5: Consuming the web services
The technology we use here is ASP.Net webform.This provides the presentation logic to
access the webform.
5.1:open another Microsoft Visual Studio 2005
5.2:File->New->Website->ASP.Net website
Langauge:Visual C# and click ok.
5.3:Right click on Default.aspx->View Designer
Step 6: Add Reference to ASP.Net web service
6.1:Right click on project(c:\...\website2\)website->Add web Reference
6.2:Paste the URL in the tab from step4[till asmx only]
6.3:Click go->Add Reference

WWW.VIDYARTHIPLUS.COM
Now APP_WebReferences file would have opened in the solution explorer in that service.disco
that is the discovery file,Service.WSDL is the WSDL file of the service which is the proxy object
to call the method in the web service.this is the interface of the Web service.
Step 7: To add proxy and code
7.1:Double click on ‘add’ button
Type the code:
Public partial class_Default:System.Web.UI.Page
{
Localhost.Service cal=new localhost.Service();
Protected void Button1_Click(Object sender,EventArgs e)
{
Int a=Int32.parse(TextBox1.Text);
Int b=Int32.parse(TextBox2.Text);
Int c=cal.add(a,b);
TextBox3.Text=c.ToString();
}
Repeat the same procedure for sub, mul and div.
Step8: Run the client application
8.1:Debug->Start without debugging.
WWW.VIDYARTHIPLUS.COM
OUTPUT:

WWW.VIDYARTHIPLUS.COM
RESULT:
Thus web services are created using .net

WWW.VIDYARTHIPLUS.COM
Exp No:
Date :
INVOKING J2EE WEB SERVICES FROM .NET CLIENTS
AIM:
To invoke j2ee web services from .net clients
STEPS:
Step1: Choosing a container
Open NetBeans IDE.
FileNew ProjectJava WebWeb Application (give the name)Finish.
Step2: Creating a Web Service.
Right click on projectNewWeb serviceGive name for web service and package.
Step3: Add operations to Web services
Right click on web service add operationdialogue box is displayed.
Give the Methods and Parameters.
( depending upon the application change the coding)
CONVERSION OF CELCIUS TO FARENHEIT
return (( c* 9 /5 )+32 ) ;
CONVERSION OF FARENHEIT TO CELCIUS
return (( f -32 )* 5/9 );
Step4: Deploying and Testing the Web Services
Right clickon projectdeploy.
Right clickon Web ServiceTest Web service.
Step5: Note the end point.

WWW.VIDYARTHIPLUS.COM
Step6: Consuming the Web Service .
Open the Microsoft Visual Studio 2005.
FilenewWeb siteaspx.net web site.
Public partial class_Default:System.web.UI
Language: c# visual click ok.
Step7: Go to the view Designer and include the Labels, Buttons, and the Text boxes needed.
Click on the each of the Labels and change their names.
Steps8: Include the coding in default.aspx..page
{
localhost.conversionservice con=new localhost .conversionservice();
protected void page_Load(Object sender,Event argse)
{ }
Protected void Button1_ click(Object sender,Event argse)
{
float c=float.Parse(TextBox1.Text);
float f=con.celciustofarenheit(c);
TextBox2.Text=f.ToString(); }
Protected void Button2_ click(Object sender,Event argse)
{
float f=float.Parse(TextBox1.Text);
float c=con.farenheittocelcius(f);
TextBox2.Text=c.ToString(); } }
Step9: Add web reference right click on C:\....\ Web site 4 \
A new window is opened for add web reference.
Type the end point in the URL space which is noted in the STEP 5 click Go .

WWW.VIDYARTHIPLUS.COM
click on the WSDL file link click on Add reference click Ok.
Step10:Debug Start without debugging.
OUTPUT : FARENHEIT TO CELCIUS:
RESULT :
Thus the J2EE services were invoked from the .Net client .

WWW.VIDYARTHIPLUS.COM
EX NO:
DATE:
CREATING COMPONENTS USING .NET CLIENT
AIM:
To create components using .NET client.
STEPS:
STEP 1: Creating components in .NET
STEP 1.1: Open Microsoft visual studio 2005
STEP 1.2: File-> New-> Project-> Visual Basic (Project types) -> Class Library-> Name->proj
STEP 1.3: Rename Class1.vb as Octdec.vb in the right pane.
STEP 1.4: After the following code in left pane,
Public Class Octdec
Type the following code
ReadOnly Property dtoO( ByVal a As Integer ) As Integer
Get
Dim n,c,I,x,t,g,m As Integer
i=0
g=0
m=0
n=a
While ( n>0 )
c=n Mod 8
m= (m+10) +c
n=n/8
i=i+1

WWW.VIDYARTHIPLUS.COM
End While
x=m
While(x>0)
t=x Mod 10
g= (g*10) +t
x=x/10
End While
Return g
End Get
End Property
ReadOnly Property Otod (Byval a As Integer) As Integer
Get
Dim n As Integer
n=a
Dim m,x,i As Integer
m=0
i=0
x=0
While(n>0)
x=m Mod 10
m=m+ (x* Math.Pow(8,i))
n=n/10
i=i+1
End While
Return m

WWW.VIDYARTHIPLUS.COM
End Get
End Property
End
STEP 2: Build the solution
Build-> Build solution
STEP 3: Creating .NET client
STEP 3.1: File-> New-> Project-> Visual C#-> Windows Application-> Name-> Client
STEP 3.2: Create a form having 2 text boxes, labels and buttons.
STEP 3.3: Right click on Client in the left pane-> Add Reference-> Select Browse tab-> using up
arrow select the project proj->proj->obj-> Debug-> proj.dll-> OK.
STEP 3.4: Double click on button1 in the form and type the following code
proj.Octdec d=new proj.Octdec();
int t= Int32.Parse(textbox1.Text);
int c=d.get_dtoO(t);
textbox2.Text=c.ToString();
Double click on button2 in the form and type the following code
proj.Octdec d1=new proj.Octdec();
int t1= Int32.Parse(textbox2.Text);
int c1=d.get_Otod(t1);
textbox1.Text=c1.ToString();
STEP 4: Run
Click the run button.

WWW.VIDYARTHIPLUS.COM
OUTPUT:
RESULT:
Thus the component using .NET client is created.

WWW.VIDYARTHIPLUS.COM
EX NO:
DATE:
ACCESSING .NET WEB SERVICES FROM J2EE CLIENT
AIM:
To access .net web services from J2EE client.
STEPS:
STEP 1: Creating web services in .net
STEP 1.1: Open a visual studio.
Start-> Microsoft visual studio 2005-> C# Settings.
STEP 1.2: Choosing a container
File-> New-> Website-> ASP.NET web services-> Language-> Visual C#->
Click OK.
STEP 1.3: Double click on Services.cs. The source code will be displayed in the left pane.
STEP 1.4: After the following code
usingSystem.Web.Services.Protocols;
Add the code,
publicstructlocaltime{
publicint day, month, year, hours, min, sec;
public string timezone;}
Modify the HelloWorld() method as,
publiclocaltimegetTime(){
localtimelt=new localtime();
DateTimedt=DateTime.Now;
lt.day= dt.Day;

WWW.VIDYARTHIPLUS.COM
lt.month= dt.Month;
lt.year= dt.Year;
lt.hours= dt.Hour;
lt.min= dt.Minute;
lt.sec= dt.Second;
returnlt;}
STEP 2: Build the Web Service
From Build menu-> Build solution.
STEP 3: Test the Web Service
Debug-> Start without debugging.
Note down the URL of the test page.
STEP 4: Consuming the Web Service from J2EE Client
STEP 4.1: File-> New Project-> Java-> Java Application
STEP 4.2: Project Name->LocalTime-> Finish.
STEP 4.3: Right click on Project-> New-> Web Service Client-> Web service client
window will be displayed.
STEP 4.4: Select WSDL URL-> type in the URL of the test page noted down before
-> edit it by adding ?wsdl at the end of the URL.
STEP 4.5: Give package name as org.me-> Finish.
STEP 4.6: Expand the WebServiceReference-> expand service-> expand Service->
expand ServiceSoap-> Drag getTime method and drop it after the main
method inside the Main class.
STEP 4.7: Inside the main function, add these codes
LocalTimelt=getTime();
String str1= lt.getDay()+”/”+lt.getMonth()+”/”+lt.getYear();
String str2= lt.getHours()+”:”+lt.getMin()+”:”+lt.getSec();

WWW.VIDYARTHIPLUS.COM
System.out.println(“Time: ”+str1+str2); }
OUTPUT:
RESULT:
Thus the .NET web service is accessed from a J2EE web client.

WWW.VIDYARTHIPLUS.COM
Ex.No Develop a Service Orchestration Engine (workflow) using WS-BPEL and implement service composition (Study Experiment)
To understand how business processes are described with BPEL, you will define an
oversimplified business process for employee travel arrangements: The client invokes the
business process, specifying the name of the employee, the destination, the departure date, and
the return date. The BPEL business process first checks the employee travel status, assuming that
a Web service exists through which such checks can be made. Then the BPEL process will check
the price for the flight ticket with two airlines: American Airlines and Delta Airlines. Again
assume that both airline companies provide a Web service through which such checks can be
made. Finally, the BPEL process will select the lower price and return the travel plan to the
client.
Then, we will build an asynchronous BPEL process. We will assume that the Web service for
checking the employee travel status is synchronous. This is reasonable because such data can be
obtained immediately and returned to the caller. To acquire the plane ticket prices we use
asynchronous invocations. Again, this is a reasonable approach, because it might take a little
longer to confirm the plane travel schedule. We assume that both airlines offer a Web service
and that both Web services are identical (i.e. provide equal port types and operations) to simplify
our example.
In real-world scenarios, you will usually not have the choice about the Web services but will
have to use whatever services are provided by your partners. If you have the luxury of designing
the Web services and BPEL process at the same time, you will want to consider which interface
is better. Usually you'll use asynchronous services for long-lasting operations and synchronous
services for operations that return a result in a relatively short time. If you use asynchronous
Web services, the BPEL process is usually asynchronous as well.
When you define a business process in BPEL, you essentially define a new Web service that is a
composite of existing services. The interface of the new BPEL composite Web service uses a set
of port types through which it provides operations like any other Web service. To invoke a
business process described in BPEL, you have to invoke the resulting composite Web service.
Figure 3 shows a schematic view of our process.

WWW.VIDYARTHIPLUS.COM
Figure 3: Example BPEL process for travel arrangements
In develop the sample BPEL process, you will go through the following steps:
Get familiar with the involved Web services
Define the WSDL for the BPEL process
Define partner link types
Develop the BPEL process:
o Define partner links
o Declare variables
o Write the process logic definition.
Step 1: Inventory the Involved Web Services
Before you can start writing the BPEL process definition, you have to become familiar with the
Web services invoked from our business process. These services are called partner Web services.
This example has the Employee Travel Status Web service and the American and Delta Airlines
Web service, which have identical WSDL descriptions. (Again, the Web services used in this
example are fictional.)
Employee Travel Status Web Service. The Employee Travel Status Web service provides the
EmployeeTravelStatusPT port type through which the employee travel status can be checked

WWW.VIDYARTHIPLUS.COM
with the EmployeeTravelStatus operation. The operation will return the travel class that an
employee can use, which can be economy, business, or first. (See Figure 4.)
Figure 4: The Employee Travel Status Web service
Airline Web Service. The Airline Web service is asynchronous; therefore, it specifies two port
types: The first, FlightAvailabilityPT, is used to check the flight availability using the
FlightAvailability operation. To return the result, the Web service specifies the second port type,
FlightCallbackPT. This port type specifies the FlightTicketCallback operation.
Although the Airline Web service defines two port types, it implements only the
FlightAvailabilityPT. FlightCallbackPT is implemented by the BPEL process, which is the client
of the Web service. The architecture of the Web service is schematically shown in Figure 5:
Figure 5: The Airline Web service
Step 2: Define WSDL for the BPEL Process
Next, we have to expose the business travel BPEL as a Web service. The second step is therefore
to define the WSDL for it. The process has to receive messages from its clients and return
results. It has to expose the TravelApprovalPT port type, which will specify an input message. It
also has to declare the ClientCallbackPT port type, used to return the result to the client
(asynchronously, using a callback). This process is illustrated in Figure 6.
Figure 6: The WSDL for the BPEL process

WWW.VIDYARTHIPLUS.COM
Step 3: Define Partner Link Types
The third step is to define the partner link types. Partner link types represent the interaction
between a BPEL process and the involved parties, which include the Web services the BPEL
process invokes and the client that invokes the BPEL process.
In our example, there are three different partners: the client, the employee travel status Web
service, and the airline Web service. Ideally, each Web service should define the corresponding
partner link types (in the WSDL). (In real-world scenarios, this may not be the case.) Then we
can wrap the partner Web service with a WSDL that imports the WSDL of the Web service and
defines the partner link types. Alternatively, we can define all partner links in the WSDL of the
BPEL process. However, this approach isn't recommended as it violates the principle of
encapsulation.
For our example, we define three partner link types, each in the corresponding WSDL of the
Web service:
travelLT: used to describe the interaction between the BPEL process client and the BPEL
process itself. This interaction is asynchronous. This partner link type is defined in the
WSDL of the BPEL process.
employeeLT: used to describe the interaction between the BPEL process and the
employee travel status Web service. This interaction is synchronous. This partner link
type is defined in the WSDL of the employee Web service.
flightLT: describes the interaction between the BPEL process and the airline Web
service. This interaction is asynchronous and the airline Web service invokes a callback
on the BPEL process. This partner link type is defined in the WSDL of the airline Web
service.
Each partner link type can have one or two roles and for each role we must specify the portType
it uses. For synchronous operations, there is a single role for each partner link type because the
operation is only invoked in a single direction. For example, the BPEL process invokes the
EmployeeTravelStatus operation on the employee travel status Web service. Because it is a
synchronous operation, the BPEL process waits for completion and gets a response only after the
operation is completed.
For asynchronous callback operations, you have to specify two roles. The first role describes the
invocation of the operation by the client. The second role describes the invocation of a callback
operation. In our example there is an asynchronous relation between the BPEL process and the
airline Web service.
As you already know, three partner link types are required: two specify two roles because they
are asynchronous, and one specifies a single role because it is synchronous.
Partner link types are defined in the WSDL within a special namespace:
http://schemas.xmlsoap.org/ws/2003/05/partner-link/. First let's define the travelLT link type in
the BPEL process WSDL used by clients to invoke the BPEL process. The first role required is

WWW.VIDYARTHIPLUS.COM
the role of the travel service (that is, our BPEL process). The client uses the TravelApprovalPT
port type to communicate with the BPEL service. The second role, travelServiceCustomer,
characterizes the client to which the BPEL process will perform a callback on the
ClientCallbackPT port type:
<plnk:partnerLinkType name="travelLT">
<plnk:role name="travelService">
<plnk:portType name="tns:TravelApprovalPT" />
</plnk:role>
<plnk:role name="travelServiceCustomer">
<plnk:portType name="tns:ClientCallbackPT" />
</plnk:role>
</plnk:partnerLinkType>
The second link type is employeeLT. It is used to describe the communication between the
BPEL process and the employee travel status Web service and is defined in the WSDL of the
employee Web service. The interaction is synchronous, so we need a single role, called
employeeTravelStatusService. The BPEL process uses the EmployeeTravelStatusPT on the
employee Web service:
<plnk:partnerLinkType name="employeeLT">
<plnk:role name="employeeTravelStatusService">
<plnk:portType name="tns:EmployeeTravelStatusPT" />
</plnk:role>
</plnk:partnerLinkType>
The last partner link type, flightLT, is used to describe the communication between the BPEL
process and the airline Web service. This communication is asynchronous. The BPEL process
invokes an asynchronous operation on the airline Web service. The Web service, after it has
completed the request, invokes a callback on the BPEL process. Therefore we need two roles.
The first role describes the participation of the airline Web service to the BPEL process, which is
the airline service ( airlineService). The BPEL process uses the FlightAvailabilityPT port type to
make the asynchronous invocation. The second role describes the participation of the BPEL
process to the airline Web services. For the airline Web service, the BPEL process is an airline
customer, hence the role name airlineCustomer. The airline Web service uses the
FlightCallbackPT port type to make the callback. This partner link type is defined in the WSDL
of the airline Web service:
<plnk:partnerLinkType name="flightLT">
<plnk:role name="airlineService">
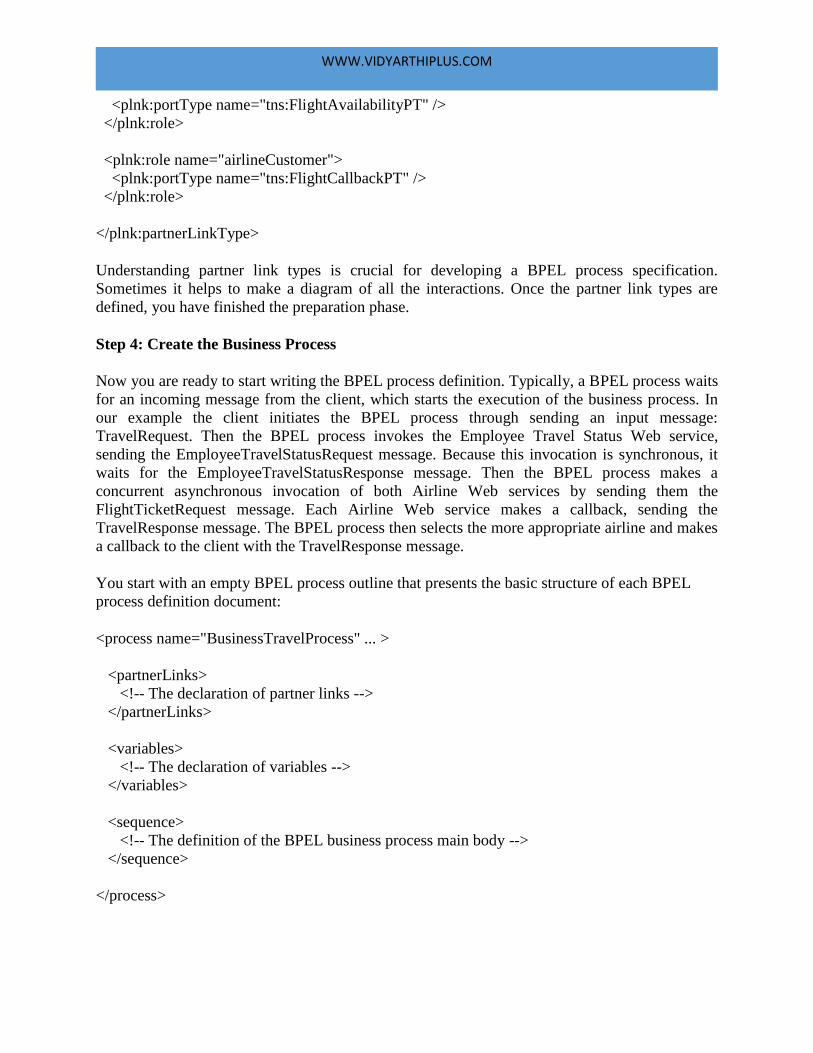
WWW.VIDYARTHIPLUS.COM
<plnk:portType name="tns:FlightAvailabilityPT" />
</plnk:role>
<plnk:role name="airlineCustomer">
<plnk:portType name="tns:FlightCallbackPT" />
</plnk:role>
</plnk:partnerLinkType>
Understanding partner link types is crucial for developing a BPEL process specification.
Sometimes it helps to make a diagram of all the interactions. Once the partner link types are
defined, you have finished the preparation phase.
Step 4: Create the Business Process
Now you are ready to start writing the BPEL process definition. Typically, a BPEL process waits
for an incoming message from the client, which starts the execution of the business process. In
our example the client initiates the BPEL process through sending an input message:
TravelRequest. Then the BPEL process invokes the Employee Travel Status Web service,
sending the EmployeeTravelStatusRequest message. Because this invocation is synchronous, it
waits for the EmployeeTravelStatusResponse message. Then the BPEL process makes a
concurrent asynchronous invocation of both Airline Web services by sending them the
FlightTicketRequest message. Each Airline Web service makes a callback, sending the
TravelResponse message. The BPEL process then selects the more appropriate airline and makes
a callback to the client with the TravelResponse message.
You start with an empty BPEL process outline that presents the basic structure of each BPEL
process definition document:
<process name="BusinessTravelProcess" ... >
<partnerLinks>
<!-- The declaration of partner links -->
</partnerLinks>
<variables>
<!-- The declaration of variables -->
</variables>
<sequence>
<!-- The definition of the BPEL business process main body -->
</sequence>
</process>

WWW.VIDYARTHIPLUS.COM
Let's first add the required namespaces. Here you have to define the target namespace and the
namespaces to access the Employee and Airline WSDLs and the BPEL process WSDL. You also
have to declare the namespace for all the BPEL activity tags (here the default namespace, so you
do not have to qualify each BPEL tag name). The BPEL activity namespace must be
http://schemas.xmlsoap.org/ws/2003/03/business-process/:
<process name="BusinessTravelProcess"
targetNamespace="http://packtpub.com/bpel/travel/"
xmlns="http://schemas.xmlsoap.org/ws/2003/03/business-process/"
xmlns:trv="http://packtpub.com/bpel/travel/"
xmlns:emp="http://packtpub.com/service/employee/"
xmlns:aln="http://packtpub.com/service/airline/" >
...
Partner Links. Next you have to define the partner links, which define different parties that
interact with the BPEL process. Each partner link is related to a specific partnerLinkType that
characterizes it. Each partner link also specifies one or two attributes:
myRole: Indicates the role of the business process itself.
partnerRole: Indicates the role of the partner.
The partner link can specify a single role, which is usually the case with synchronous
request/response operations. For asynchronous operations it specifies two roles. In our example,
you'll define four roles. The first partner link is called client and is characterized by the travelLT
partner link type. The client invokes the business process. You need to specify the myRole
attribute to describe the role of the BPEL process ( travelService). You have to specify the
second role: partnerRole. Here, this is travelServiceCustomer, which characterizes the BPEL
process client.
The second partner link is called employeeTravelStatus and is characterized by the employeeLT
partner link type. It is a synchronous request/response relation between the BPEL process and
the Web service; you again specify only one role. This time it is the partnerRole, because you
describe the role of the Web service, which is a partner to the BPEL process.
The last two partner links correspond to the airline Web services. Because they use the same type
of Web service, we specify two partner links based on a single partner link type, flightLT. Here
you have asynchronous callback communication, so you need two roles. The role of the BPEL
process ( myRole) to the airline Web service is airlineCustomer, whereas the role of the airline (
partnerRole) is airlineService:
<partnerLinks>
<partnerLink name="client"
partnerLinkType="trv:travelLT"
myRole="travelService"
partnerRole="travelServiceCustomer"/>

WWW.VIDYARTHIPLUS.COM
<partnerLink name="employeeTravelStatus"
partnerLinkType="emp:employeeLT"
partnerRole="employeeTravelStatusService"/>
<partnerLink name="AmericanAirlines"
partnerLinkType="aln:flightLT"
myRole="airlineCustomer"
partnerRole="airlineService"/>
<partnerLink name="DeltaAirlines"
partnerLinkType="aln:flightLT"
myRole="airlineCustomer"
partnerRole="airlineService"/>
</partnerLinks>
Variables. Variables in BPEL processes are used to store, reformat, and transform messages.
You usually need a variable for every message sent to the partners and received from them. In
this process you need seven variables. Let's call them TravelRequest,
EmployeeTravelStatusRequest, EmployeeTravelStatusResponse, FlightDetails,
FlightResponseAA, FlightResponseDA, and TravelResponse.
For each variable you have to specify the type. You can use a WSDL message type, an XML
Schema simple type, or an XML Schema element. In this example use WSDL message types for
all variables:
<variables>
<!-- input for this process -->
<variable name="TravelRequest"
messageType="trv:TravelRequestMessage"/>
<!-- input for the Employee Travel Status Web service -->
<variable name="EmployeeTravelStatusRequest"
messageType="emp:EmployeeTravelStatusRequestMessage"/>
<!-- output from the Employee Travel Status Web service -->
<variable name="EmployeeTravelStatusResponse"
messageType="emp:EmployeeTravelStatusResponseMessage"/>
<!-- input for American and Delta Web services -->
<variable name="FlightDetails"
messageType="aln:FlightTicketRequestMessage"/>
<!-- output from American Airlines -->
<variable name="FlightResponseAA"
messageType="aln:TravelResponseMessage"/>
<!-- output from Delta Airlines -->
<variable name="FlightResponseDA"
messageType="aln:TravelResponseMessage"/>
<!-- output from BPEL process -->
<variable name="TravelResponse"

WWW.VIDYARTHIPLUS.COM
messageType="aln:TravelResponseMessage"/>
</variables>
BPEL Process Main Body. The process main body specifies the order in which the partner Web
services are invoked. Usually it starts with a <sequence> that allows you to define several
activities that will be performed sequentially. Within the sequence, you first specify the input
message that starts the business process. You do that with the <receive> construct, which waits
for the matching message—in our case the TravelRequest message. Within the <receive>
construct, you do not specify the message directly. Rather we specify the partner link, the port
type, the operation name, and optionally the variable that holds the received message for
consequent operations.
We link the message reception with the client partner, and wait for the TravelApproval operation
to be invoked on port type TravelApprovalPT. We store the received message into the
TravelRequest variable:
<sequence>
<!-- Receive the initial request for business travel from client -->
<receive partnerLink="client"
portType="trv:TravelApprovalPT"
operation="TravelApproval"
variable="TravelRequest"
createInstance="yes" />
...
<receive> waits for the client to invoke the TravelApproval operation and stores the incoming
message and parameters about the business trip into the TravelRequest variable. Here, the
variable name is the same as the message name, but this is not necessary.
Next, you need to invoke the employee travel status Web service. Before that however we have
to prepare the input for this Web service. Looking at the WSDL, you'll see that you have to send
a message that consists of the employee part. You can construct such a message by copying the
employee part of the message that is sent the client. You would write the corresponding
assignment:
...
<!-- Prepare the input for the Employee Travel Status Web Service -->
<assign>
<copy>
<from variable="TravelRequest" part="employee"/>
<to variable="EmployeeTravelStatusRequest" part="employee"/>
</copy>
</assign>
...

WWW.VIDYARTHIPLUS.COM
Now you can invoke the Employee Travel Status Web service. You make a synchronous
invocation, for which we use the <invoke> activity. You use the employeeTravelStatus partner
link and invoke the EmployeeTravelStatus operation on the EmployeeTravelStatusPT port type.
You have prepared the input message in the EmployeeTravelStatusRequest variable. Because it
is a synchronous invocation, the call waits for the reply and stores it in the
EmployeeTravelStatusResponse variable:
...
<!-- Synchronously invoke the Employee Travel Status Web Service -->
<invoke partnerLink="employeeTravelStatus"
portType="emp:EmployeeTravelStatusPT"
operation="EmployeeTravelStatus"
inputVariable="EmployeeTravelStatusRequest"
outputVariable="EmployeeTravelStatusResponse" />
...
The next step is to invoke both airline Web services. Again first prepare the required input
message (which is identical for both Web services). The FlightTicketRequest message comprises
two parts:
flightData: This is retrieved from the client message ( TravelRequest).
travelClass: This is retrieved from the EmployeeTravelStatusResponse variable.
Therefore, write an assignment with two copy elements:
...
<!-- Prepare the input for AA and DA -->
<assign>
<copy>
<from variable="TravelRequest" part="flightData"/>
<to variable="FlightDetails" part="flightData"/>
</copy>
<copy>
<from variable="EmployeeTravelStatusResponse" part="travelClass"/>
<to variable="FlightDetails" part="travelClass"/>
</copy>
</assign>
...
The input data includes the data that needs to be passed to the airline Web services. Because it is
in the same format, you can pass it directly (using a simple copy). In the real world, you usually
need to perform a transformation. You could do that using XPath expressions with <assign>, use
a transformation service (such as XSLT engine), or use the transformation capabilities provided
by specific BPEL servers.

WWW.VIDYARTHIPLUS.COM
Now you are ready to invoke both airline Web services. Make concurrent asynchronous
invocations; to express concurrency, BPEL provides the <flow> activity. The invocation to each
Web service will comprise two steps:
The <invoke> activity is used for the asynchronous invocation.
The <receive> activity is used to wait for the callback.
Use <sequence> to group both activities. The two invocations differ only in the partner link
name: AmericanAirlines for one and DeltaAirlines for the other. Both invoke the
FlightAvailability operation on the FlightAvailabilityPT port type, sending the message from the
FlightDetails variable.
The callback is received using the <receive> activity. Again, you use both partner link names.
<receive> waits for the FlightTicketCallback operation to be invoked on the FlightCallbackPT
port type. Store the result message in the FlightResponseAA and the FlightResponseDA
variables respectively:
...
<!-- Make a concurrent invocation to AA in DA -->
<flow>
<sequence>
<!-- Async invoke of the AA Web service and wait for the callback-->
<invoke partnerLink="AmericanAirlines"
portType="aln:FlightAvailabilityPT"
operation="FlightAvailability"
inputVariable="FlightDetails" />
<receive partnerLink="AmericanAirlines"
portType="aln:FlightCallbackPT"
operation="FlightTicketCallback"
variable="FlightResponseAA" />
</sequence>
<sequence>
<!-- Async invoke of the DA Web service and wait for the callback-->
<invoke partnerLink="DeltaAirlines"
portType="aln:FlightAvailabilityPT"
operation="FlightAvailability"
inputVariable="FlightDetails" />
<receive partnerLink="DeltaAirlines"
portType="aln:FlightCallbackPT"

WWW.VIDYARTHIPLUS.COM
operation="FlightTicketCallback"
variable="FlightResponseDA" />
</sequence>
</flow>
...
In this stage of the process, you have two ticket offers. In the next step, you have to select one.
To do that, use the <switch> activity.
...
<!-- Select the best offer and construct the TravelResponse -->
<switch>
<case condition="bpws:getVariableData('FlightResponseAA',
'confirmationData','/confirmationData/Price')
<= bpws:getVariableData('FlightResponseDA',
'confirmationData','/confirmationData/Price')">
<!-- Select American Airlines -->
<assign>
<copy>
<from variable="FlightResponseAA" />
<to variable="TravelResponse" />
</copy>
</assign>
</case>
<otherwise>
<!-- Select Delta Airlines -->
<assign>
<copy>
<from variable="FlightResponseDA" />
<to variable="TravelResponse" />
</copy>
</assign>
</otherwise>
</switch>
...
In the <case> element, check whether the offer from American Airlines ( FlightResponseAA) is
equal to or better than the offer from Delta ( FlightResponseDA). Use the BPEL function
getVariableData and specify the variable name for this purpose. The price is inside the
confirmationData message part, which is the only message part, but you still have to specify it.

WWW.VIDYARTHIPLUS.COM
You also have to specify the query expression to locate the price element. Here, this is a simple
XPath 1.0 expression.
If the American Airlines offer is better Delta's, copy the FlightResponseAA variable to the
TravelResponse variable (which you finally return to the client). Otherwise copy the
FlightResponseDA variable.
You have come to the final step of the BPEL business process—returning a callback to the client
using the <invoke> activity. For the callback, we use the client partner link and invoke the
ClientCallback operation on the ClientCallbackPT port type. The variable that holds the reply
message is TravelResponse:
...
<!-- Make a callback to the client -->
<invoke partnerLink="client"
portType="trv:ClientCallbackPT"
operation="ClientCallback"
inputVariable="TravelResponse" />
</sequence>
</process>
With this, you have concluded our first business process specification in BPEL. You can see that
BPEL is not very complicated and allows a relatively easy and natural specification of business
processes.
Step 5: Deploy and Test
Each BPEL process you deploy to the Oracle BPEL Process Manager requires a process
descriptor. This process descriptor is not covered by the BPEL standard and is specific to the
BPEL server. The deployment process descriptor is the only part of the implementation of a
process on a given platform that must be re-written to run the process on a different BPEL
engine. The Oracle process descriptor is an XML file specifying the following details about the
BPEL process: BPEL source file name, BPEL process name (ID), WSDL locations of all partner
link Web services, and optional configuration properties. The default filename for the process
descriptor is bpel.xml, but you can use any other name:
<BPELSuitcase>
<BPELProcess src="Travel.bpel" id="TravelProcessCh4">
<partnerLinkBindings>
<partnerLinkBinding name="client">
<property name="wsdlLocation">
Travel.wsdl
</property>

WWW.VIDYARTHIPLUS.COM
</partnerLinkBinding>
<partnerLinkBinding name="employeeTravelStatus">
<property name="wsdlLocation">
http://localhost:9700/orabpel/default/Employee/Employee?wsdl
</property>
</partnerLinkBinding>
<partnerLinkBinding name="AmericanAirlines">
<property name="wsdlLocation">
http://localhost:9700/orabpel/default/AmericanAirline/AmericanAirline?wsdl
</property>
</partnerLinkBinding>
<partnerLinkBinding name="DeltaAirlines">
<property name="wsdlLocation">
http://localhost:9700/orabpel/default/DeltaAirline/DeltaAirline?wsdl
</property>
</partnerLinkBinding>
</partnerLinkBindings>
</BPELProcess>
</BPELSuitcase>
You are now ready to start the BPEL Process Manager. You can do this from the Start menu (if
using Windows) or by executing the startOraBPEL script, which can be found in the
c:\orabpel\bin directory (assuming Oracle BPEL Process Manager has been installed in
c:\orabpel). It is recommended that you include this directory in the path for easy access.
The Oracle BPEL Process Manager includes an Ant utility called obant, which you can use to
configure complex compilation and deployment scenarios. obant is just a wrapper around
standard Ant, which sets the environment and then invokes the standard Ant Java task. To use it
you have to prepare the corresponding project file, usually called build.xml. The project file for
our travel example process looks like this:
<?xml version="1.0"?>
<project name="TravelProcessCh4" default="main" basedir=".">
<property name="deploy" value="default"/>
<property name="rev" value="1.0"/>
<target name="main">
<bpelc home="${home}" rev="${rev}" deploy="${deploy}"/>
</target>
</project>

WWW.VIDYARTHIPLUS.COM
To compile and deploy our BPEL process you simply start obant from the command line.
Now that you have successfully deployed a BPEL process on the Oracle BPEL Server, it's time
to execute it. Oracle BPEL Process Manager provides a BPEL Console through which you can
execute, monitor, manage, and debug BPEL processes on a BPEL Server domain. The BPEL
Console is accessible at http://localhost:9700/BPELConsole/. You have to click the process
name, fill out the following form and click on the Post XML Message button:
Figure 7: BPEL Console
You now get a screen notifying you that the process instance is being processed asynchronously.
You can select the visual flow of the execution, instance auditing, or instance debugging. The
visual flow of the instance graphically shows the execution of a BPEL process instance. You can
monitor the execution of the process and its state (running, completed, canceled, or stale):

WWW.VIDYARTHIPLUS.COM
Figure 8: Graphical view of the instance's flow
Oracle BPEL Process Manager provides several options for auditing, managing, debugging, and
deploying of BPEL processes.
Related Documents