FOR THE LATEST DRIVERS, SUPPORTED VR TITLES, AND ACCESSORIES, VISIT:
vuzix.com
©Vuzix 2016. This user manual is subject to change.Please read the safety section before using this product.
All trademarks belong to the respective owners.
412PB0002-01- iWEAR USER MANUAL
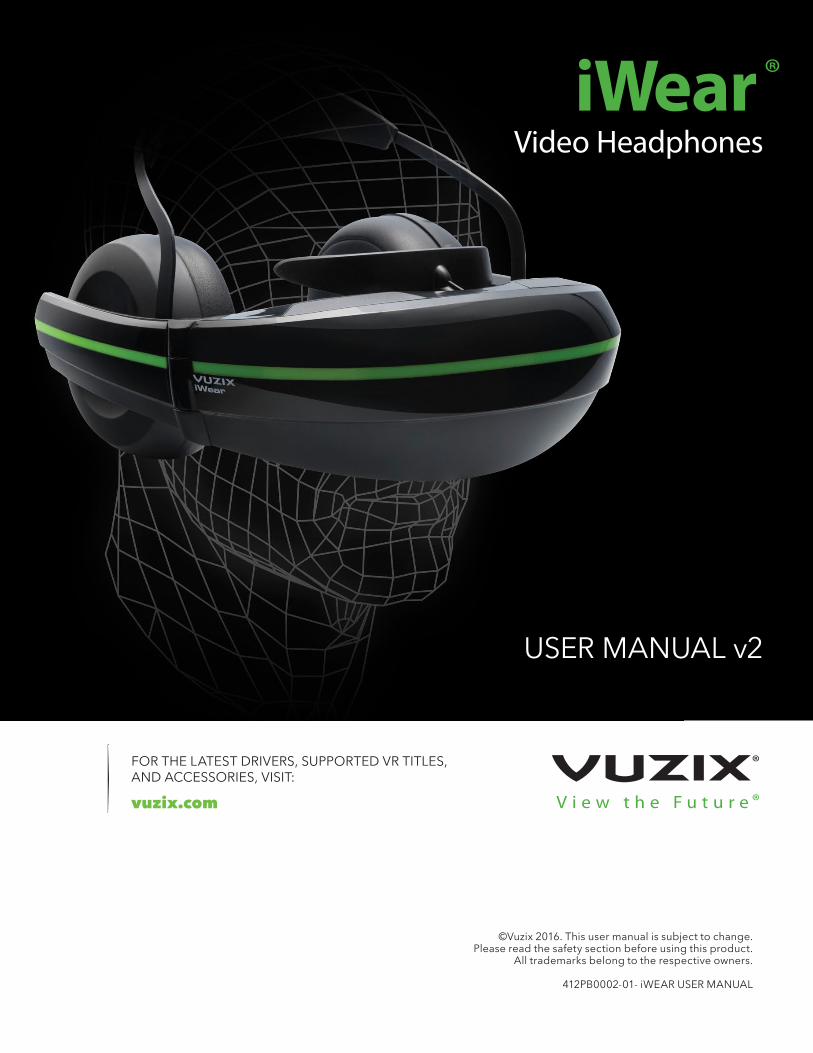
iWearVideo Headphones
USER MANUAL v2
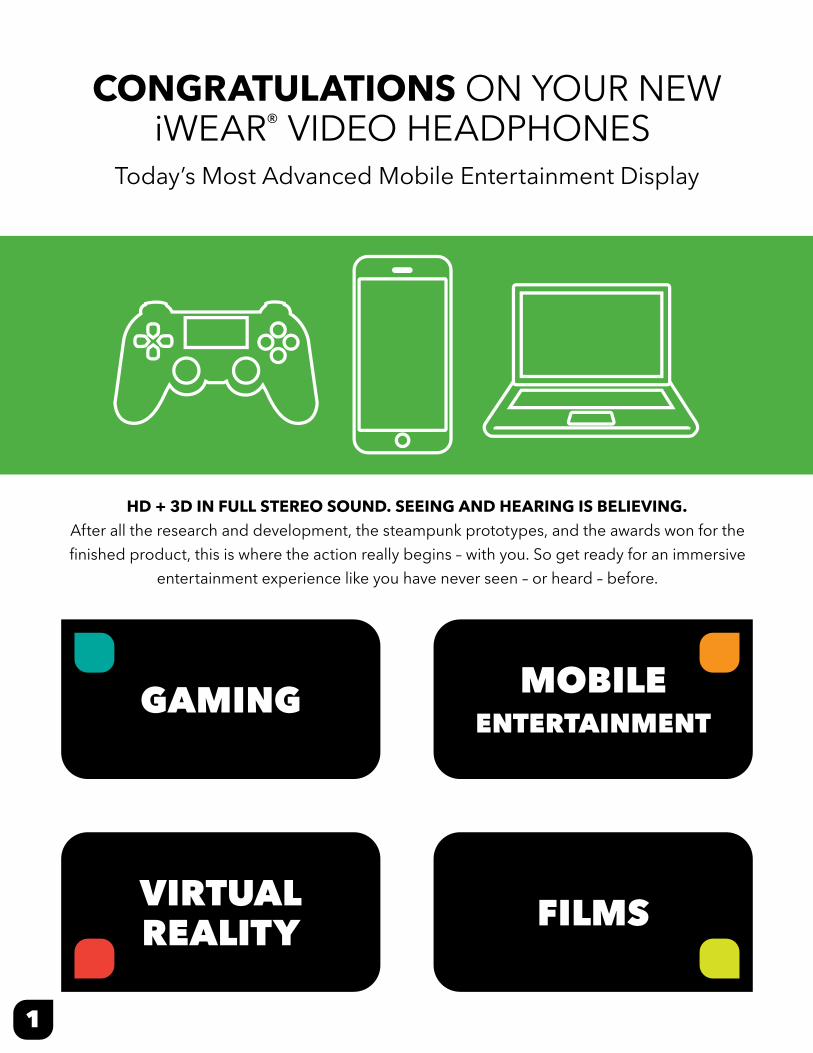
CONGRATULATIONS ON YOUR NEWiWEAR® VIDEO HEADPHONES
MOBILEENTERTAINMENT
GAMING
FILMS
1
VIRTUALREALITY
Today’s Most Advanced Mobile Entertainment Display
HD + 3D IN FULL STEREO SOUND. SEEING AND HEARING IS BELIEVING. After all the research and development, the steampunk prototypes, and the awards won for the finished product, this is where the action really begins – with you. So get ready for an immersive
entertainment experience like you have never seen – or heard – before.
Optional AR cameraadd-on
Optional pointcloud sensor
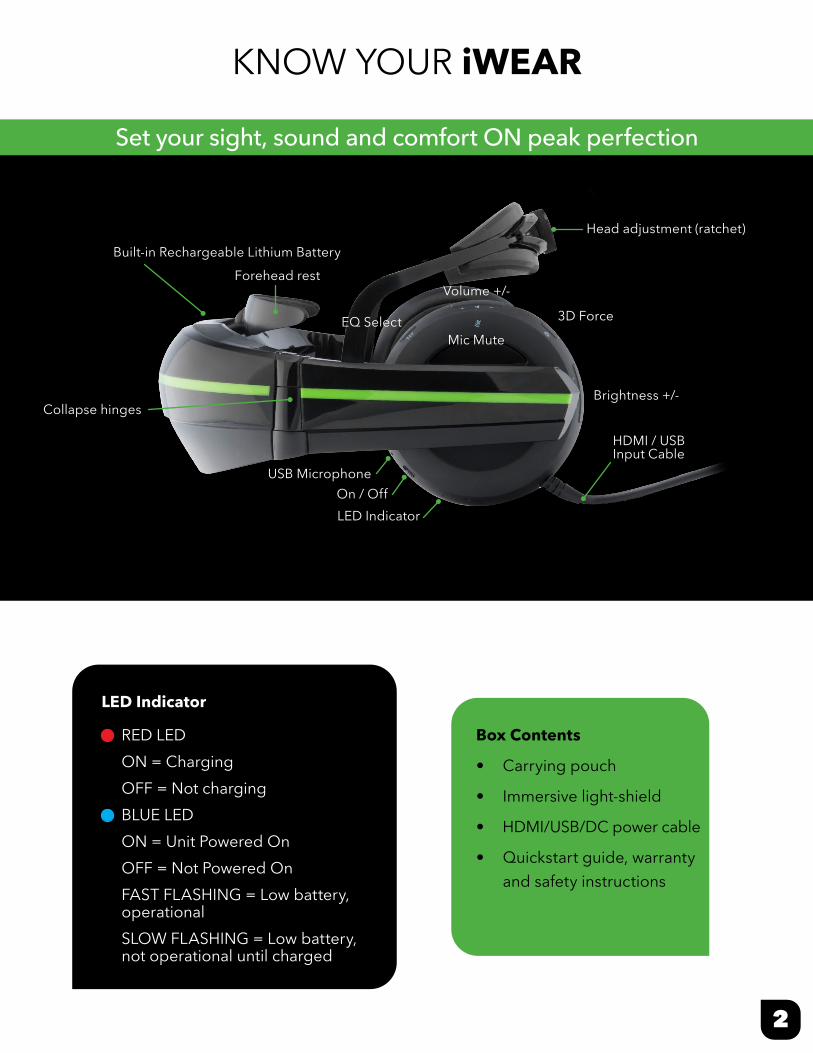
KNOW YOUR iWEAR
Set your sight, sound and comfort ON peak perfection
EQ Select
Built-in Rechargeable Lithium BatteryForehead rest
Mic Mute
On / OffLED Indicator
Collapse hinges
USB Microphone
HDMI / USB Input Cable
Brightness +/-
3D Force
Head adjustment (ratchet)
Volume +/-
LED Indicator
Box Contents
• Carrying pouch
• Immersive light-shield
• HDMI/USB/DC power cable
• Quickstart guide, warranty and safety instructions
BLUE LEDON = Unit Powered OnOFF = Not Powered OnFAST FLASHING = Low battery,operationalSLOW FLASHING = Low battery,not operational until charged
RED LEDON = ChargingOFF = Not charging
2
POWER
EQUALIZER
VOLUME
3D FORCE
BRIGH
TNESS
MIC MUTE
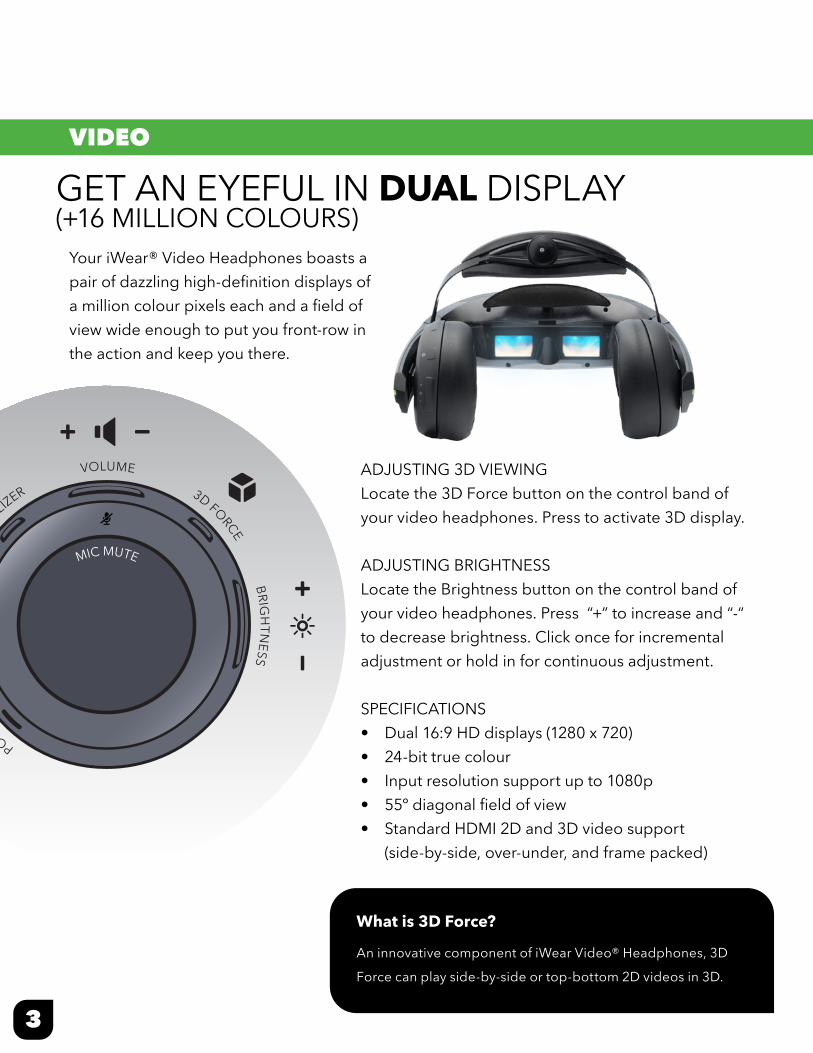
GET AN EYEFUL IN DUAL DISPLAY(+16 MILLION COLOURS)
3
VIDEO
What is 3D Force?
An innovative component of iWear Video® Headphones, 3D
Force can play side-by-side or top-bottom 2D videos in 3D.
Your iWear® Video Headphones boasts a pair of dazzling high-definition displays of a million colour pixels each and a field of view wide enough to put you front-row in the action and keep you there.
ADJUSTING 3D VIEWINGLocate the 3D Force button on the control band of your video headphones. Press to activate 3D display.
ADJUSTING BRIGHTNESSLocate the Brightness button on the control band of your video headphones. Press “+” to increase and “-“ to decrease brightness. Click once for incremental adjustment or hold in for continuous adjustment.
SPECIFICATIONS• Dual 16:9 HD displays (1280 x 720)• 24-bit true colour• Input resolution support up to 1080p • 55º diagonal field of view• Standard HDMI 2D and 3D video support (side-by-side, over-under, and frame packed)
4
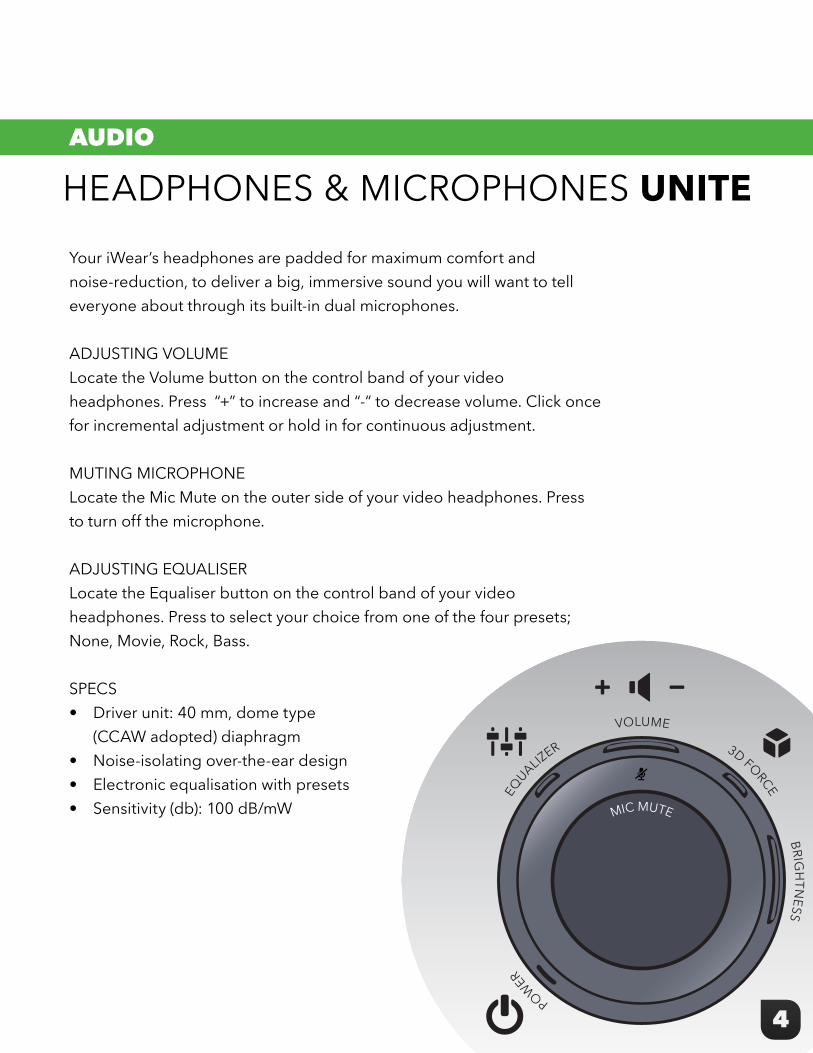
HEADPHONES & MICROPHONES UNITEAUDIO
POWER
EQUALIZER
VOLUME
3D FORCE
BRIGH
TNESS
MIC MUTE
Your iWear’s headphones are padded for maximum comfort and noise-reduction, to deliver a big, immersive sound you will want to tell everyone about through its built-in dual microphones.
ADJUSTING VOLUMELocate the Volume button on the control band of your video headphones. Press “+” to increase and “-“ to decrease volume. Click once for incremental adjustment or hold in for continuous adjustment.
MUTING MICROPHONELocate the Mic Mute on the outer side of your video headphones. Press to turn off the microphone. ADJUSTING EQUALISERLocate the Equaliser button on the control band of your video headphones. Press to select your choice from one of the four presets; None, Movie, Rock, Bass.
SPECS• Driver unit: 40 mm, dome type (CCAW adopted) diaphragm • Noise-isolating over-the-ear design • Electronic equalisation with presets • Sensitivity (db): 100 dB/mW

SEE WHERE YOU LOOK,THANKS TO 3 AXIS TECHNOLOGY
5
TRACKING
With its integrated tracking system, iWear® video headphones make sure that while your eyes are feasting on your favourite gaming or virtual world, any turn of your head is naturally matched in real-time—to increase the scope of your vision and the intensity of your viewing experience.
SPECS• 3 Axis Gyro, 3 Axis Accelerometer • 3 Axis Magnetic Sensor (compass) • Supports gaming engines like Unity 3D and OSVR alliance
VR tracks your head’s motion using VR
software. To get the latest drivers and to check for
compatibility, please visit: www.vuzix.com/downloads
What is 3-Axis Technology?Combining the movement of a gyroscope, the directional navigation of a compass, and a speed measure of an accelerometer, 3-axis technology essentially keeps track of optic motion to match the orientation of real movement with its mirror effect in virtual or augmented reality. Which is all just another way of saying “wow, that is pretty cool.”
An internal rechargeable battery along with a smart design for serious portability means your iWear® video headphones lets you step away from the settee and follow your entertainment
wherever your laptop or mobile device takes you.
6
BATTERY-POWEREDAND READY FOR THE ROAD
MOBILITY
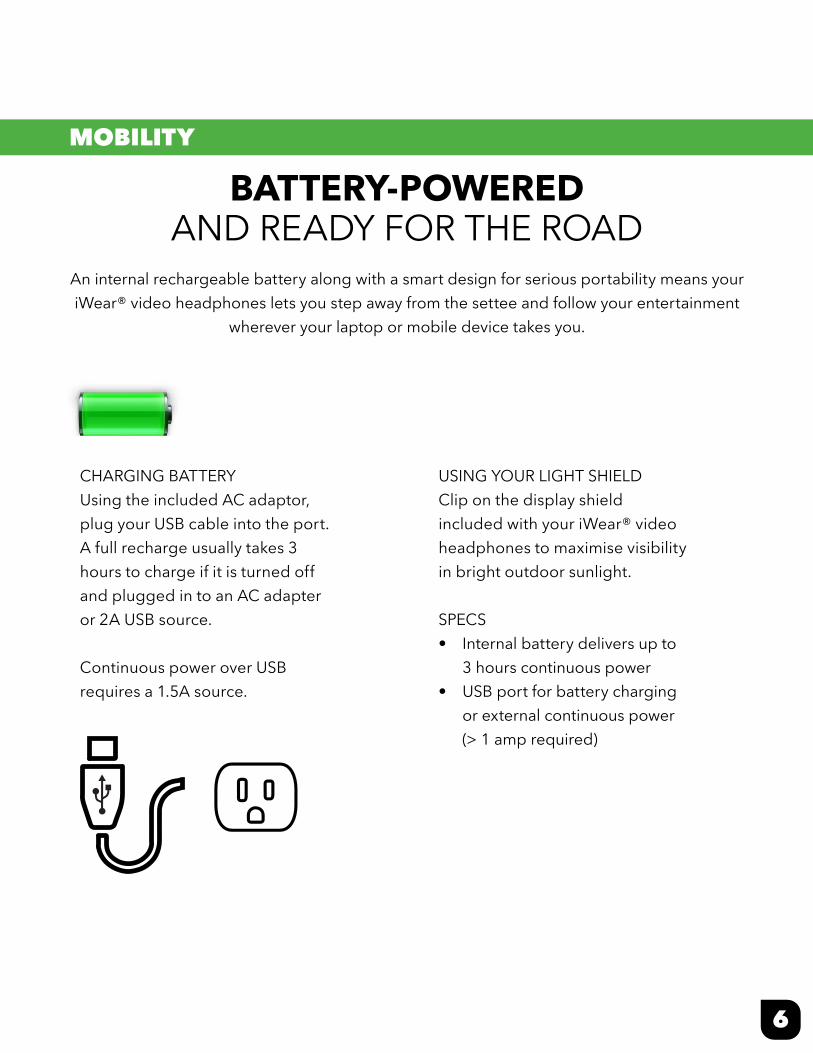
CHARGING BATTERYUsing the included AC adaptor, plug your USB cable into the port. A full recharge usually takes 3 hours to charge if it is turned off and plugged in to an AC adapter or 2A USB source.
Continuous power over USB requires a 1.5A source.
USING YOUR LIGHT SHIELDClip on the display shield included with your iWear® video headphones to maximise visibility in bright outdoor sunlight.
SPECS• Internal battery delivers up to 3 hours continuous power• USB port for battery charging or external continuous power (> 1 amp required)
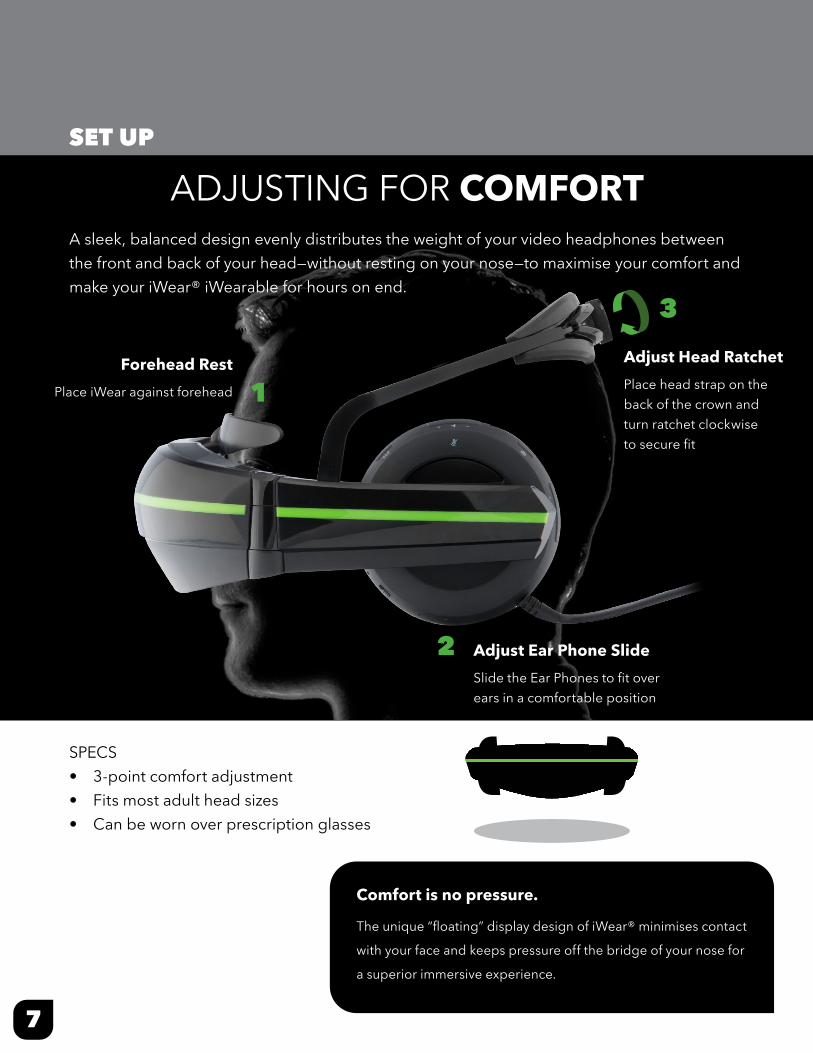
Comfort is no pressure.
The unique “floating” display design of iWear® minimises contact
with your face and keeps pressure off the bridge of your nose for
a superior immersive experience.
SPECS• 3-point comfort adjustment• Fits most adult head sizes• Can be worn over prescription glasses
ADJUSTING FOR COMFORT
7
SET UP
Forehead RestPlace iWear against forehead
Adjust Head RatchetPlace head strap on the back of the crown and turn ratchet clockwise to secure fit
Adjust Ear Phone SlideSlide the Ear Phones to fit overears in a comfortable position
1
2
3
A sleek, balanced design evenly distributes the weight of your video headphones between the front and back of your head—without resting on your nose—to maximise your comfort and make your iWear® iWearable for hours on end.
SET UP
8
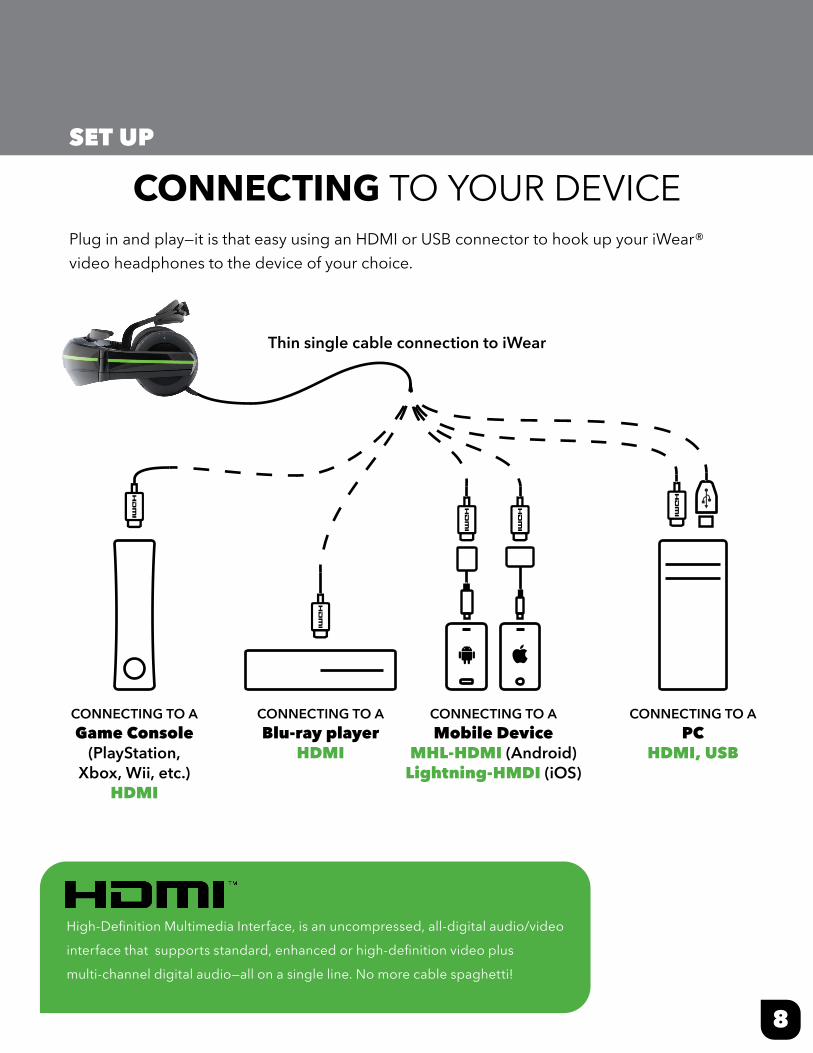
CONNECTING TO YOUR DEVICE
Thin single cable connection to iWear
CONNECTING TO APC
HDMI, USB
CONNECTING TO AGame Console
(PlayStation,Xbox, Wii, etc.)
HDMI
CONNECTING TO AMobile Device
MHL-HDMI (Android)Lightning-HMDI (iOS)
CONNECTING TO ABlu-ray player
HDMI
Plug in and play—it is that easy using an HDMI or USB connector to hook up your iWear® video headphones to the device of your choice.
High-Definition Multimedia Interface, is an uncompressed, all-digital audio/video
interface that supports standard, enhanced or high-definition video plus
multi-channel digital audio—all on a single line. No more cable spaghetti!
SET UP
CONNECTING TO YOUR PCUsing your iWear® video headphones with your PC opens up a world of movie viewing, gaming, and third-party application of 3-axis tracking technology.
GETTING STARTED• Connect the iWear® console to your PC with the included HDMI/USB cable.
If the internal battery needs charging, connect the included AC adaptor.• Press the Power button on the iWear® console until the LED indicator light turns on.
See page 2 of the User Manual LED indicator light chart.
INSTALLING DRIVERS• Make sure your PC is connected to the Internet.• Once you power up the iWear® console, your PC should automatically begin to
download the appropriate video and audio drivers from Vuzix, as indicated by the active green progress bar appearing at the bottom of your desktop. A pop-up notification in the system tray will indicate drivers are installed.
For 3D movie or secondary monitor viewing, your iWear video headphones are now ready for use with your PC. See page 7 of the User Manual for fitting adjustments. Enjoy the show!
(1 OF 4)9
SET UP
CONNECTING TO YOUR PCFor gaming and third-party application, follow these directions for configuring your PC to support virtual reality head tracking and stereoscopic 3D video:
(2 OF 4) 10
INSTALLING iWEAR SOFTWARE• Make sure your PC is connected to the Internet.• Open your Internet browser and go to the Vuzix.com download page at:
https://www.vuzix.com/support/Downloads_Drivers• Select “iWear Video Headphones” under “Browse Categories”.• Download Vuzix VR Manager.
VR Manager Set-up— Select the VR Manager set-up icon (on desktop or in download tray).— When prompted to allow elevated permissions while running the application,
select Accept to open Set-up Wizard.— Select Accept License Agreement and then Next to begin install. • If prompted to install Microsoft DirectX®, select Accept and then Next. • Follow the progress window to install/update DirectX®.
When installation is complete select Finish.— When VR Manager Set-up Wizard is complete, select Finish.iWear Firmware Update (only necessary when preloaded firmware is out of date).
— From the Vuzix.com iWear® Video Headphone page, download Firmware Update.— Select the Firmware Update icon (on desktop or in download tray).— When prompted to allow elevated permissions while running the application, select
Accept to install.
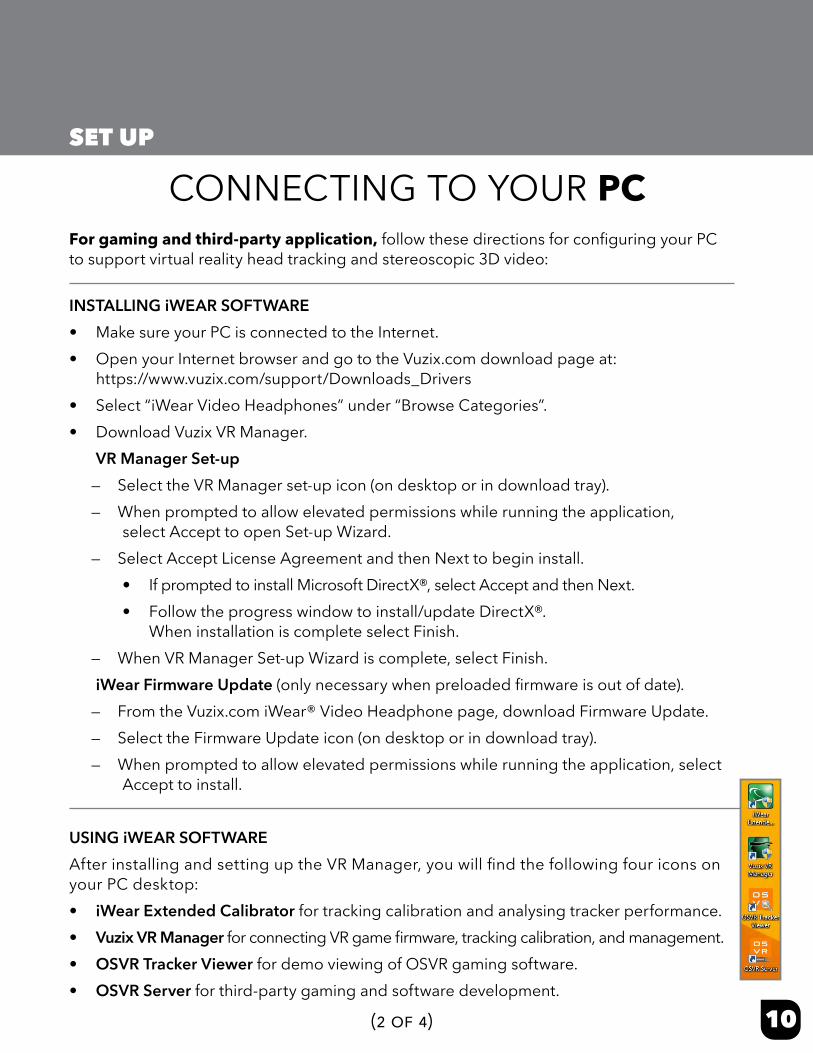
USING iWEAR SOFTWAREAfter installing and setting up the VR Manager, you will find the following four icons on your PC desktop:• iWear Extended Calibrator for tracking calibration and analysing tracker performance. • Vuzix VR Manager for connecting VR game firmware, tracking calibration, and management. • OSVR Tracker Viewer for demo viewing of OSVR gaming software.• OSVR Server for third-party gaming and software development.
SET UP
CONNECTING TO YOUR PCCALIBRATING HEAD TRACKINGBefore using your iWear® video headphones, you will need to calibrate the magnetometers for sensing the surrounding magnetic field and providing an absolute reference; and the gyroscopes for sensing rotational motion. Vuzix software provides you with two options for calibration.
OPTION 1iWear Extended Calibrator (recommended when calibrating your iWear Video Headphones only) – open iWear® Extended Calibrator and accept permissions to run. The control panel will appear on your screen.
STEP ONE: MAGNETIC CALIBRATION1. Make sure iWear® video headphones are fully
connected and powered.2. Extend the headband on your iWear® to pull the
earcups away from the dual viewing monitor. Keeping the earcups apart and separated from the viewing monitors during calibration helps optimise results, since magnetic tracking is influenced by ambient magnetic fields such as those from the magnets built into the earcups.
3. Find the Calibration-Magnetic controls on the control panel and select Begin.
4. While holding iWear®, slowly rotate the console a full 360°, along the three X, Y, and Z axes to ensure the maximum range of detection as the Magnetic-Calibration progress bars adjust to optimal measure.
5. When the three progress bars stop moving, usually at approximately the midway measure, stop rotating the unit and select End to complete calibrating magnometers.
STEP TWO: GYROSCOPE CALIBRATION1. Set iWear® on a flat, stable surface. Do not
move the console while calibrating gyroscopes.2. Find the Calibration-Gyro-Acc controls on the
control panel and select Begin.3. Run gyroscope calibration for at least five (5)
seconds. The coloured orientation markers indicating Yaw, Pitch, and Roll will revolve in their circles.
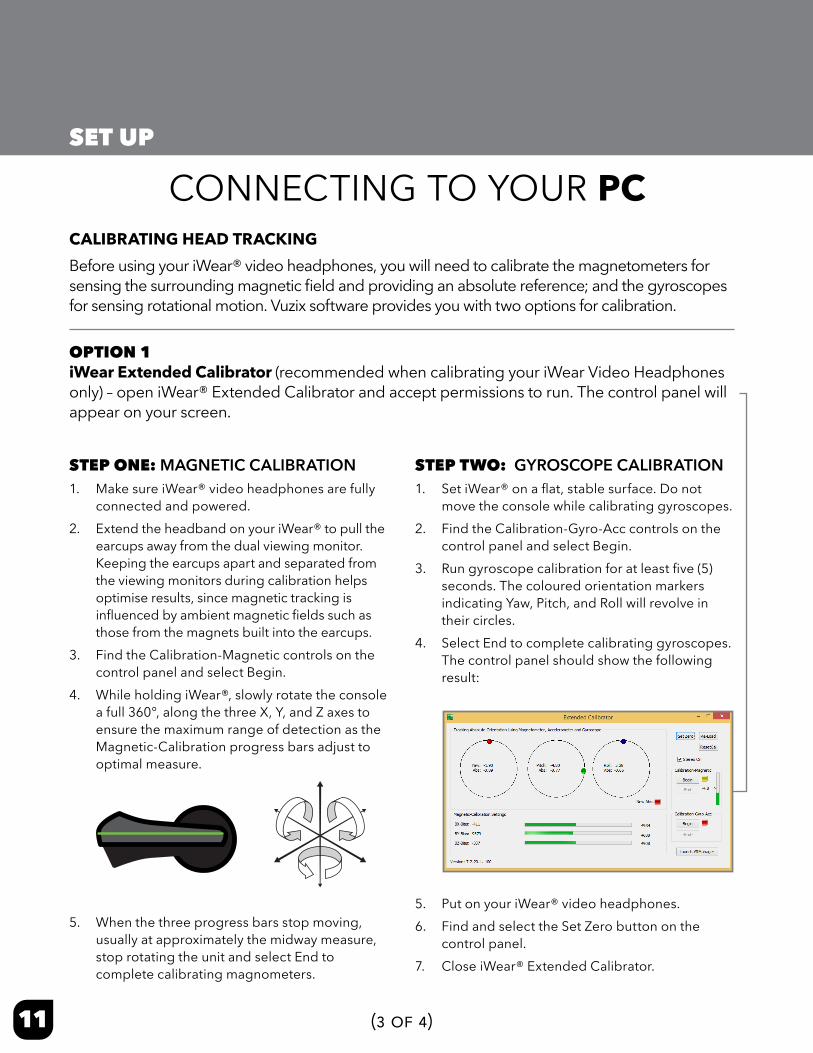
4. Select End to complete calibrating gyroscopes. The control panel should show the following result:
5. Put on your iWear® video headphones.6. Find and select the Set Zero button on the
control panel.7. Close iWear® Extended Calibrator.
(3 OF 4)11
SET UP
CONNECTING TO YOUR PC
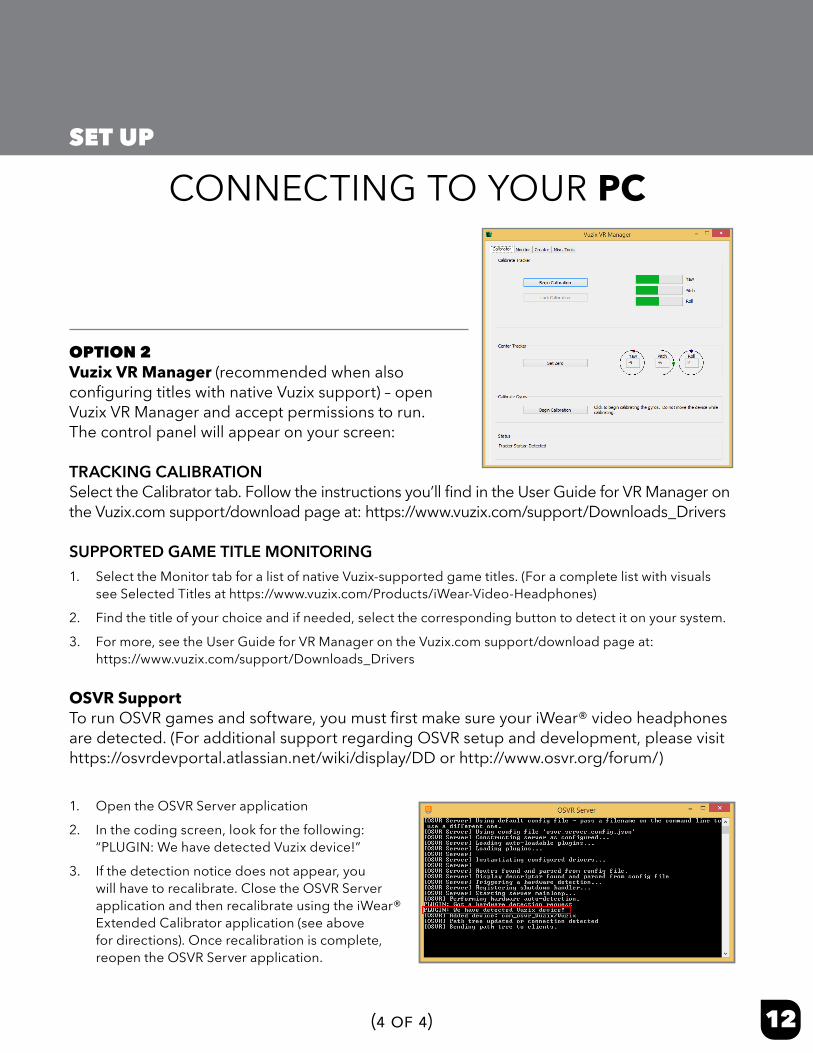
OPTION 2Vuzix VR Manager (recommended when alsoconfiguring titles with native Vuzix support) – open Vuzix VR Manager and accept permissions to run. The control panel will appear on your screen:
TRACKING CALIBRATIONSelect the Calibrator tab. Follow the instructions you’ll find in the User Guide for VR Manager on the Vuzix.com support/download page at: https://www.vuzix.com/support/Downloads_Drivers
SUPPORTED GAME TITLE MONITORING1. Select the Monitor tab for a list of native Vuzix-supported game titles. (For a complete list with visuals
see Selected Titles at https://www.vuzix.com/Products/iWear-Video-Headphones)
2. Find the title of your choice and if needed, select the corresponding button to detect it on your system.
3. For more, see the User Guide for VR Manager on the Vuzix.com support/download page at: https://www.vuzix.com/support/Downloads_Drivers
OSVR SupportTo run OSVR games and software, you must first make sure your iWear® video headphones are detected. (For additional support regarding OSVR setup and development, please visit https://osvrdevportal.atlassian.net/wiki/display/DD or http://www.osvr.org/forum/)
(4 OF 4) 12
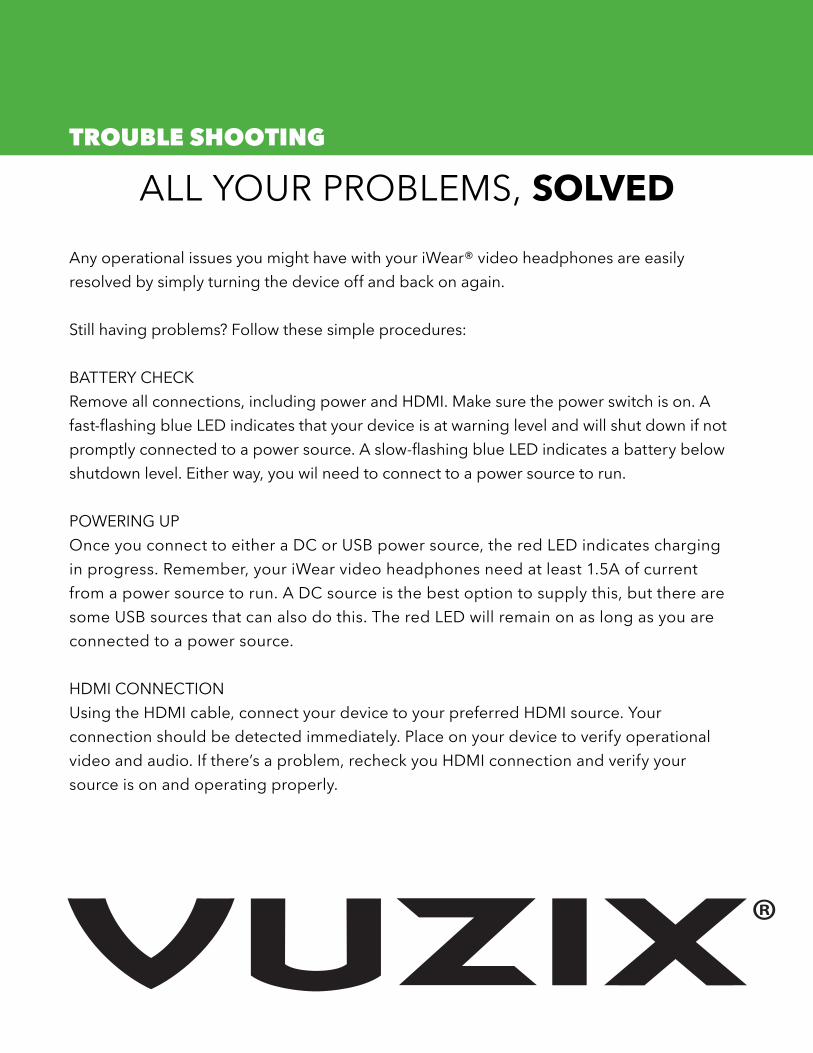
1. Open the OSVR Server application
2. In the coding screen, look for the following: “PLUGIN: We have detected Vuzix device!”
3. If the detection notice does not appear, you will have to recalibrate. Close the OSVR Server application and then recalibrate using the iWear® Extended Calibrator application (see above for directions). Once recalibration is complete, reopen the OSVR Server application.
TROUBLE SHOOTING
ALL YOUR PROBLEMS, SOLVEDAny operational issues you might have with your iWear® video headphones are easily resolved by simply turning the device off and back on again.
Still having problems? Follow these simple procedures:
BATTERY CHECKRemove all connections, including power and HDMI. Make sure the power switch is on. A fast-flashing blue LED indicates that your device is at warning level and will shut down if not promptly connected to a power source. A slow-flashing blue LED indicates a battery below shutdown level. Either way, you wil need to connect to a power source to run.
POWERING UPOnce you connect to either a DC or USB power source, the red LED indicates charging in progress. Remember, your iWear video headphones need at least 1.5A of current from a power source to run. A DC source is the best option to supply this, but there are some USB sources that can also do this. The red LED will remain on as long as you are connected to a power source.
HDMI CONNECTIONUsing the HDMI cable, connect your device to your preferred HDMI source. Your connection should be detected immediately. Place on your device to verify operational video and audio. If there’s a problem, recheck you HDMI connection and verify your source is on and operating properly.