TEACHER’S GUIDE PARTY BIG WASHINGTON

Welcome message from author
This document is posted to help you gain knowledge. Please leave a comment to let me know what you think about it! Share it to your friends and learn new things together.
Transcript
1
TEACHER’S GUIDE
PARTY BIG WASHINGTON
2
INTRODUCTIONNearly every teacher and student in the Puget Sound region receives a complimentary gate ticket to the Washington State Fair.
This year’s theme for the Fair is “Party Big Washington.” This guide explores the variety of activities at the Fair through discussion, projects and hands-on experiments. The activities are aimed at students in grades four through eight. These lessons are to be used with content that will appear in The Seattle Times on September 3, 10 and 17. The guide will appear in September on both The Seattle Times Newspapers In Education (NIE) website (www.seattletimes.com/nie) and the Washington State Fair’s website (www.thefair.com/education).
NOTE TO EDUCATORSActivities in this guide are built on knowledge and information provided in the e-Edition of The Seattle Times on September 3, 10 and 17. On each Thursday, you will find a full page of Washington State Fair exhibits, fun facts and thought-provoking questions in the newspaper. Have students take notes from the in-paper content each week to use in combination with this guide. Teachers are encouraged to modify the guide to fit their individual classroom needs.
THE SEATTLE TIMES NEWSPAPERS IN EDUCATION (NIE)To enroll in The Seattle Times NIE program and receive free access to the electronic version (e-Edition) of the newspaper, lesson plans and curriculum guides, as well as the in-paper content for this guide, please email [email protected] or call 206.652.6290.
WASHINGTON STATE SCIENCE STANDARDSThis guide addresses Washington State Science and Social Studies Standards for grades six through eight listed below. Please adapt the lessons to meet your classroom needs.
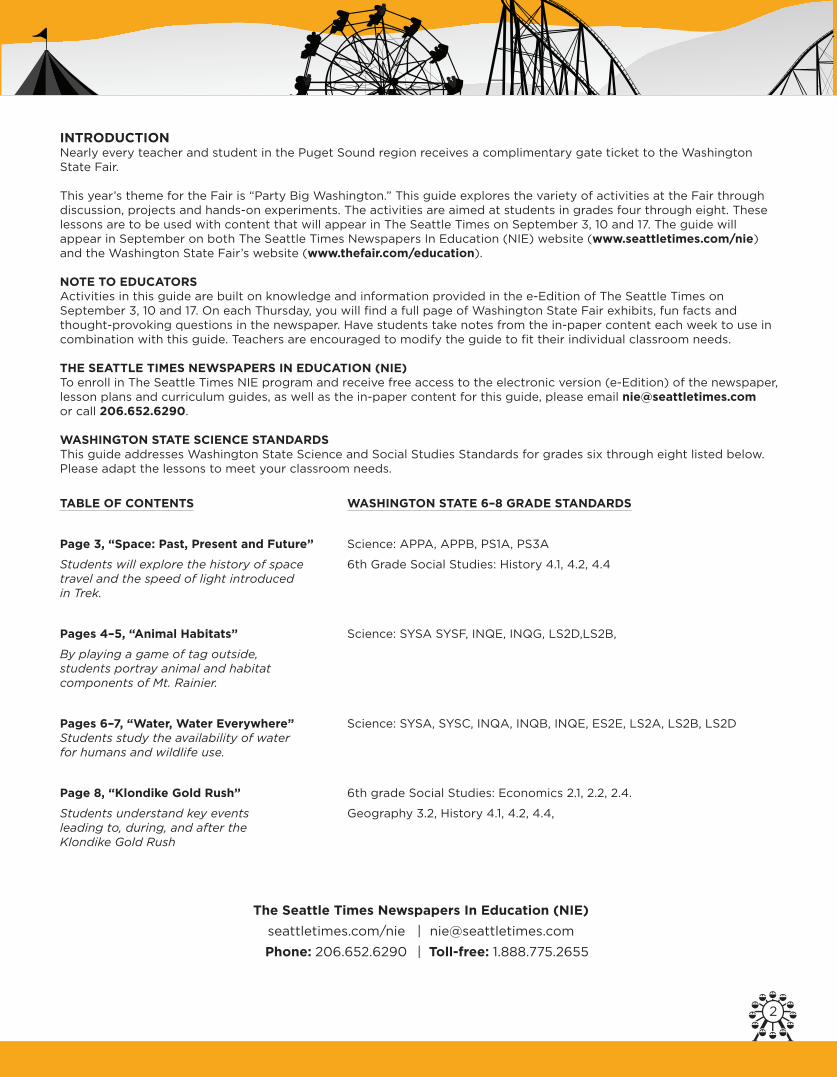
TABLE OF CONTENTS WASHINGTON STATE 6–8 GRADE STANDARDS
Page 3, “Space: Past, Present and Future” Science: APPA, APPB, PS1A, PS3A
Students will explore the history of space 6th Grade Social Studies: History 4.1, 4.2, 4.4 travel and the speed of light introduced in Trek.
Pages 4 –5, “Animal Habitats” Science: SYSA SYSF, INQE, INQG, LS2D,LS2B,
By playing a game of tag outside, students portray animal and habitat components of Mt. Rainier.
Pages 6–7, “Water, Water Everywhere” Science: SYSA, SYSC, INQA, INQB, INQE, ES2E, LS2A, LS2B, LS2D Students study the availability of water for humans and wildlife use.
Page 8, “Klondike Gold Rush” 6th grade Social Studies: Economics 2.1, 2.2, 2.4.
Students understand key events Geography 3.2, History 4.1, 4.2, 4.4, leading to, during, and after the Klondike Gold Rush
The Seattle Times Newspapers In Education (NIE)
seattletimes.com/nie | [email protected]
Phone: 206.652.6290 | Toll-free: 1.888.775.2655
3
SPACE: PAST, PRESENT AND FUTUREStar Trek is a fictional series but much of the science behind it is quite real. In this lesson students will explore the history of space travel and the speed of light introduced in Star Trek.
Space Travel: Research the following scientists and significant events in the history of space travel. Create a timeline in small groups or as a class to review why these people and events are significant. How are they relevant to the present and future of space travel?
Johannes Kepler
Isaac Newton
Konstantin Tsiolkovsky
Robert Goddard
Hermann Oberth
Wernher Von Braun
October 4, 1957
November 3, 1957
April 12, 1961
February 20, 1962
July 20, 1969
THE SPEED OF LIGHT Use your library or credible sources on the Internet to answer the following questions:
1. What is the definition of the “speed of light?”
2. How many miles per second does light travel?
3. How is a vacuum related to the speed of light?
4. How long does it take light to get from the earth to the moon?
5. How is the speed of light different from the speed of sound?
6. If the speed of light and the speed of sound are different, why is it that the sound and the image from your television appear to reach you at the same instant?
7. What famous mathematical equation is the speed of light related to?
8. Who discovered this equation? (Learn more about this discovery at http://www.pbs.org/wgbh/nova/physics/einstein-big-idea.html)
9. How is the speed of light related to a light year? What mathematical equations are relevant to this relationship?
10. What is “warp drive” and how is it related to the speed of light?
11. Research the following scientists who studied the speed of light. What did each scientist learn?
• Galileo
• Ole Roemer
• Hippolyte Fizeau
• Leon Foucault
• James Bradley
• Albert Michelson
4
ANIMAL HABITATSOriginally “Wild Wapati”
The balance between what animals need to live and the number of animals a habitat can support is known as “carrying capacity.” Carrying capacity affects the ability of wildlife species to successfully reproduce to maintain their populations over time. The most basic of life’s necessities for living organisms are food, water, shelter, and space in a suitable arrangement. If any of these components are out of balance, a species population in that habitat will be effected in one way or another.
Since all habitats have a finite amount of resources for life, carrying capacity limitations (limiting factors) can result in competition among those depending on that ecosystem for survival. Thus, populations can go through a natural growth or decline depending on seasons, migrations, etc. Usually the most fundamental and critical limiting factors are the main components of habitat: food, water, shelter, and space. With this game, students will understand:
• Good habitat is the key to wildlife survival
• A population will continue to increase in size until some limiting factors are imposed
• Limiting factors contribute to fluctuations in wildlife populations
• Nature is never in “balance,” but is always changing
• Everything in natural systems is interrelated
• Populations of animals are continually changing in a process of maintaining equilibrium
The Shawnee used the word wapiti to refer to elk, as it means “white rump.” They eat understory vegetation like vine maples and especially salmonberries. Elk herds have a social hierarchy, where the females will follow the most mature; and the largest bull (male elk) gets to tag along with the group. Other males will be driven off until this bull can’t defend himself anymore, which could be the next season since it’s hard work taking care of all the females in the herd.
WARM-UP 1. Ask students to make a list of what is needed to survive. Review the essential components of habitat (food, water, shelter, and space in a suitable arrangement). Set up outside, in a gym or large room.
ACTIVITY 2. The game is structured around food, water, and shelter, but it should be noted that space should not be forgotten and is very important for animal populations to reach maximum size. This, of course, is the goal of all animal species.
3. Divide students into four groups. Have each group go to a designated boundary of a field. Mark two parallel lines on the ground or floor ten to twenty yards apart. Have one group line up behind one line and the rest of the groups (put groups two, three, and four into one large group) line up on the other line facing the first group.
4. The first group is designated the wild wapiti (explain where the word came from as stated in the background). Since all elk need a suitable habitat to survive, assume that it has all the space it needs. The elk (group one) have to find all the components of habitat it needs to survive. Tell students which specific component the elk is looking for, he/she will use specific hand gestures illustrating either food, shelter, or water. To show that an elk is looking for food one should hold its “hooves” over its stomach. When an elk is looking for water, it should hold its “hooves” over his/her mouth. To show that an elk is looking for shelter, it holds its “hooves” together over its head. An elk chooses one habitat component each round, and cannot change until the next round (if it survives).
5. Each person in the larger second group chooses which habitat components they want to represent: food, water, or shelter. That student then makes the hand gesture that represents the component (i.e. hands on stomach for food, and so on).
5
6. The game begins when all players line up behind their respective line, backs to backs. With all students making their chosen sign, there should be some variety shown for food, water, and shelter. Later on in the game students might strategize and make only a certain sign, which is fine but don’t encourage it. If students switching their signs mid round could be a problem, then tokens, bandannas, or colored sheets of paper could be grabbed at the beginning of each round representing a different sign.
7. When the students are ready, say “Wild Wapiti!” Each student turns around to face the opposite group, continuing to hold their signs clearly.
8. When an elk sees the matching sign it is looking for (i.e. the elk has his/her hands covering their mouth then they would be looking for a person from the other group holding their hands over their mouth representing water), they should run to that person and “capture” the matching element. The sign has to be held until the elk reaches the matching person. Capturing a component is equal to an elk drinking water, eating food, or finding shelter. Thus the elk is able to reproduce, and would be encourage to make a bugle mating call (you could play a clip for an example found at http://www.junglewalk.com/sound/Moose-sounds.htm). If two elk go for the same component the elk who reaches that component first gets to “consume” it. If a habitat component is not consumed that person stays where they are holding up their sign and can change signs next round. The “consumed” component and elk head back to the elk line and the component then becomes an elk looking for another component next round.
9. Record the number of elk at the beginning and end of each round. Play for about fifteen rounds.
10. When the game is called off, discuss what happened during the activity. How did the herd of elk change through the game? How did the habitat components change as the elk population changed?
11. See if students have any hypothesizes about how the elk population fluctuated throughout the game (see if a student would volunteer drawing a general line showing their hypothesis on the board). Record the data from each round. Each round represents one year. Then have students graph the results.
WRAP-UP12. Possible discussion questions for students to summarize what they learned include:
• What do animals need to survive?
• How do these components influence carrying capacity?
• What are some of the different limiting factors that could effect a population of animals?
• How do these factors affect competition within a species, for example what would one animal have to do in order to make sure his/her “neighbor” didn’t get all the food?
• Is nature ever really in balance or are ecological systems constantly changing?
Activity adapted from Mount Rainer National Park: http://www.nps.gov/mora/learn/education/wild-wapati.htm. Mount Rainier National Park offers curriculum-based educational programs for school groups interested in a field trip experience in the park. For more information: contact Fawn Bauer at 360.569.6591 or http://www.nps.gov/mora/learn/education/index.htm
6
WATER, WATER, EVERYWHERE Review the background information and download the Teacher Reference Sheet available at: http://www.nwf.org/pdf/Schoolyard%20Habitats/WaterWaterEverywhere-NWF2011.pdf
LEARNING OBJECTIVES Students will be able to:
• Explain how much water is available for human and terrestrial wildlife use
• Discuss how humans use water
• Formulate strategies for conserving water
MATERIALS
• Water
• 2 large, clear plastic containers or an aquarium (4 gallons)
• 2 or 3 smaller buckets or other containers (1 gallon or less)
• 2 or 3 measuring cups or beakers and measuring spoons
• Calculators, water droppers, world map
ACTIVITY1. You will want to conduct most of this activity outside - it involves a lot of water! Introduce the activity by asking students, Where in the world is the greatest amount of water found? (the oceans) Where are other places water can be found? (Ice caps, ground water, inland lakes and seas, freshwater lakes, the atmosphere, in soil, rivers and streams.) Write, or have students write, the answers on a board or a large piece of paper. Have them brainstorm the order in which water on Earth exists, from greatest volume (oceans) to the least volume (rivers and streams).
2. Tell students that for the purposes of this activity, they will begin with 12 liters (about 3.2 gallons) of water, which will represent all of the water on Earth. The group should have the measuring beakers (or measuring cups) handy at the start of this activity. Piece by piece, they will remove different bodies of water that are effectively not available for human use or for use by wildlife that need freshwater. Each time they remove a “body of water,” they should place the water in a separate container. Ask students to first remove water that represents the ocean. The approximate amount of water they should remove is on the Teacher Reference Sheet. Or, instead of telling students how much water to remove in Part 1, give them the percentages represented by each category and have them calculate how much water to remove from the 12 L starting amount for each step. Have students sit or stand in a circle around the “world’s water” supply. They should decide with which measuring beaker or cup they will begin, and then should each take turns (and pass the beaker/cup to the next student) to do their part to remove the water. Count for them, or have them count along to make sure the right number of units is removed. Have them dump their full cups into another gallon or large container.
3. Next, they should remove the water stored in ice caps and glaciers, then inland seas, then (if it is possible at this point) a tiny bit for soil moisture and the atmosphere combined. As the water bodies become progressively smaller, allow students to decide to use different measuring beakers, cups, or water droppers to extract the water.
7
4. When all these are done, ask, What is left? Tell students that humans and wildlife together can use only about what they see left in the large container, less than 1% of the world’s water! Add to that the fact that most water used by humans is from rivers and streams, which comprise only 0.0001% of all the water on Earth, and this tiny amount must be shared with all non-ocean organisms! Challenge students to think about how they would have extracted 0.0001 % of the water they had in the large container. Ask students, How do humans get enough water? (Some examples: Dams contain water so that it can be easily extracted, pipelines and aqueducts move water to a particular place to be used, wells are drilled to extract groundwater.) How can wildlife get enough water?
5. After students have discussed the small amount of water available for humans and non-ocean wildlife to use, ask students, What do people do with the water we use? Have them create a list.
Examples Domestic uses: cooking, cleaning, teeth brushing, bathing, flushing toilet, watering lawn, etc.
Commercial uses: restaurants, car washes, public restrooms, etc.
Industrial uses: mining, for cooling large engines, etc.
Electricity: cools power generators, runs hydroelectric dams
Irrigation: agriculture, livestock
Where do people get this water? Have students brainstorm on this topic. Some potential answers: public supply (largely from river- or stream-fed reservoirs), well water (from ground water), cisterns or other raincatching devices (largely individuals; this practice is rare)
6. Wrap up the activity by asking students, How in the world can we do all these activities with so little of the earth’s water? What does this mean to us on a daily basis? If we have so little water, what do we do if it is polluted? What are some positive steps we can take to conserve water and prevent water pollution in our local community or in our schools and homes? Since this same water must be shared with all non-ocean wildlife, what does this mean for the way we use our water and how much of it we use?
WRAP UPAsk students to look at a world map. How is the earth’s freshwater distributed? Which areas have more water? Which areas have very little water? (For example, the Great Lakes in North America have a lot of freshwater, while deserts like the Mojave in the western states, and the Sahara in northern Africa are very dry). Ask, Where is the nearest freshwater source to you? Do you live in a dry or water-rich area? Ask students to explain their answers.
ASSESSMENT Have students develop posters depicting the amount of water available for humans and non-ocean wildlife, and suggesting ways their schoolmates and community members can conserve water in their everyday lives.
Part Two of the activity is available at http://www.nwf.org/pdf/Schoolyard%20Habitats/WaterWaterEverywhere-NWF2011.pdfAdapted from “Water, Water, Everywhere?” in Water NatureScope Kit (National Wildlife Federation, 2001). ©National Wildlife Federation® www.nwf.org/schoolyard email: [email protected]
8
KLONDIKE GOLD RUSH Learn about the History of the Klondike Gold Rush.http://www.proteacher.com/cgi-bin/outsidesite.cgi?id=11846&external=http://www.cr.nps.gov/nr/twhp/wwwlps/lessons/55klondike/55klondike.htm&original=http://www.proteacher.com/090091.shtml&title=Gold%20Fever%21%20%20Seattle%20Outfits%20the%20Klondike%20Gold%20Rush
Read the Reading 1 “The Rush for Gold” and answer the following questions:1. Where was the gold from?
2. Which Seattle neighborhood welcomed the miners?
3. Why were they called stampeders?
4. Why did stampeders have to buy non-perishable foods?
5. What businesses flourished as many newcomers arrived in Seattle?
6. What were the stampeders surprised to learn about their route to gold?
Read Reading 3 “The Legacy of the Klondike Gold Rush” and answer the following questions1. Why did the Klondike Gold Rush mark the end of an era?
2. Why was the purchase of Alaska called Seward’s Folly?
3. What changes took place in the Yukon as a result of the gold rush?
4. Why did some stampeders who went through Seattle never reach the gold fields?
5. Why was Seattle a desirable place to live at the time?
6. What Seattle businesses were born as a result of the gold rush?
7. How does this compare to Seattle’s appeal as a city now?
8. How did Seattle’s West Coast location improve its economy?
Study Map 1 “Routes from Seattle to the Klondike Gold Fields” and answer the following questions1. How was the Rich Man’s Route different from the Poor Man’s route?
2. Where were the gold fields concentrated?
3. How long do you think each route took?
4. Review travel websites. What routes by air or by sea are available now? How long do those trips take?
Study the Images 1, 2 and 3 and answer the following questions:1. Do you recognize this part of Seattle or any of the buildings? Where do you think these photographs were taken?
2. What historical information do you believe is conveyed in each photograph?
3. What type of businesses are these?
4. What do you think the piled sacks contain? Why are there so many of them?
5. When in the timeline of events regarding the Klondike Gold Rush do you think these photos were taken? Why?
Text, Map and Images from the above website. Questions developed by Newspapers In Education.
Related Documents