THE KING-MURPHY ELEMENTARY SCHOOL SCIENCE FAIR IS IN JANUARY! Do you want something fun to do during the school breaks? Why not consider a science project to enter into the King Murphy Science Fair? It’s not too early to begin working on that cool project you’ve been thinking about… The rules are the same as the Mountain Area Science Fair (MASF), which will be available to us in early December. The KMSF is scheduled for January 20, 2017 in the KM gym. Winners of the Division II and III categories will advance to the MASF scheduled for February 4, 2017 at Evergreen Country Day School. The divisions are: Division I – Kindergarten and 1 st grade Division II – 2 nd and 3 rd grades Division III – 4 th – 6 th grades The categories are (based on the Mountain Area Science Fair topic categories): Aerodynamics/Fluid Mechanics Botany Chemistry Earth/Environmental Electricity and Magnetism Human Body/Health Material Science Microbiology Physics Structures Zoology Computer Science/Engineering (Division III only) We need volunteers for the King Murphy Science Fair. If you would like to help with the KMSF, please contact Heidi Lupinacci or Carly Allen ([email protected] or [email protected]). Volunteers are needed to help with set-up of tables, organizing displays, assisting entrants and other volunteers, clean-up/take-down, and in particular, judging. If you have expertise in any of the categories, we would appreciate your willingness to volunteer as a judge!

Welcome message from author
This document is posted to help you gain knowledge. Please leave a comment to let me know what you think about it! Share it to your friends and learn new things together.
Transcript
THE KING-MURPHY ELEMENTARY
SCHOOL SCIENCE FAIR IS IN JANUARY!
Do you want something fun to do during
the school breaks? Why not consider a
science project to enter into the King
Murphy Science Fair? It’s not too early to
begin working on that cool project you’ve
been thinking about…
The rules are the same as the Mountain Area Science Fair (MASF),
which will be available to us in early December. The KMSF is scheduled
for January 20, 2017 in the KM gym. Winners of the Division II and III
categories will advance to the MASF scheduled for February 4, 2017 at
Evergreen Country Day School.
The divisions are:
Division I – Kindergarten and 1st grade
Division II – 2nd and 3rd grades
Division III – 4th – 6th grades
The categories are (based on the Mountain Area Science Fair topic categories):
Aerodynamics/Fluid Mechanics Botany
Chemistry Earth/Environmental
Electricity and Magnetism Human Body/Health
Material Science Microbiology
Physics Structures
Zoology Computer Science/Engineering (Division III only)
We need volunteers for the King Murphy Science Fair.
If you would like to help with the KMSF, please contact Heidi Lupinacci or Carly Allen
([email protected] or [email protected]). Volunteers are needed to
help with set-up of tables, organizing displays, assisting entrants and other volunteers,
clean-up/take-down, and in particular, judging.
If you have expertise in any of the categories, we would appreciate
your willingness to volunteer as a judge!

Page 0 of 17
KING-MURPHY ELEMENTARY SCHOOL SCIENCE FAIR
STUDENT AND VOLUNTEER PACKET For the 2016-2017 Academic Year
KING-MURPHY SCIENCE FAIR COMMITTEE
Page 1 of 17
The King Murphy Science Fair (KMSF) is an opportunity for students to enter a project of their choosing
in a specific topic category. The KMSF follows the same rules and judging as does the Mountain Area
Science Fair (MASF) with the exception that grades K-3rd have the option to enter a research project
which is a project that does not involve the testing of a hypothesis (please note that research projects
do not advance to the MASF). Division I (Kindergarten and 1st grade) winners do NOT advance to the
Mountain Area Science Fair, though they will be recognized at their school science fair as winners for
their respective topic category. For Division II and III, only the first place winners of a testable question
project in their respective category topic will be invited to advance to the MASF. The rules of the KMSF
are contained here. The rules of the MASF are available in the front office or electronically by request
to the chair or co-chair.
The Divisions are:
Division I = Kindergarten and 1st grade (research project or testable question projects)
Division II = 2nd and 3rd grades (research projects or testable question projects)
Division III = 4th, 5th, and 6th grades (testable question projects only)
The Topic Categories are:
Aerodynamics/Fluid Mechanics Botany
Chemistry Earth/Environmental
Electricity and Magnetism Human Body/Health
Material Science Microbiology
Physics Structures
Zoology Computer Science/Engineering (Division III only)
Table of Contents Entrant Form ..............................................................................................................................................................2
Volunteer Form ..........................................................................................................................................................3
King Murphy Science Fair Rules ..................................................................................................................................4
Science Fair Helpful Tips .............................................................................................................................................5
Testable Question Project Progression ......................................................................................................................6
Research Project Progression .....................................................................................................................................9
KMSF Judges Scoring Guide ..................................................................................................................................... 10
KMSF Judging Score Sheet for Testable Question Projects (non-CS&E, for K-6) ..................................................... 14
KMSF Judging Score Sheet for Testable Question Projects (For CS&E, for K-6) ...................................................... 15
KMSF Judging Score Sheet for Research Projects (For K-4 grades) ......................................................................... 16
Student/Adult Involvement Form ........................................................................................................................... 17
Page 2 of 17
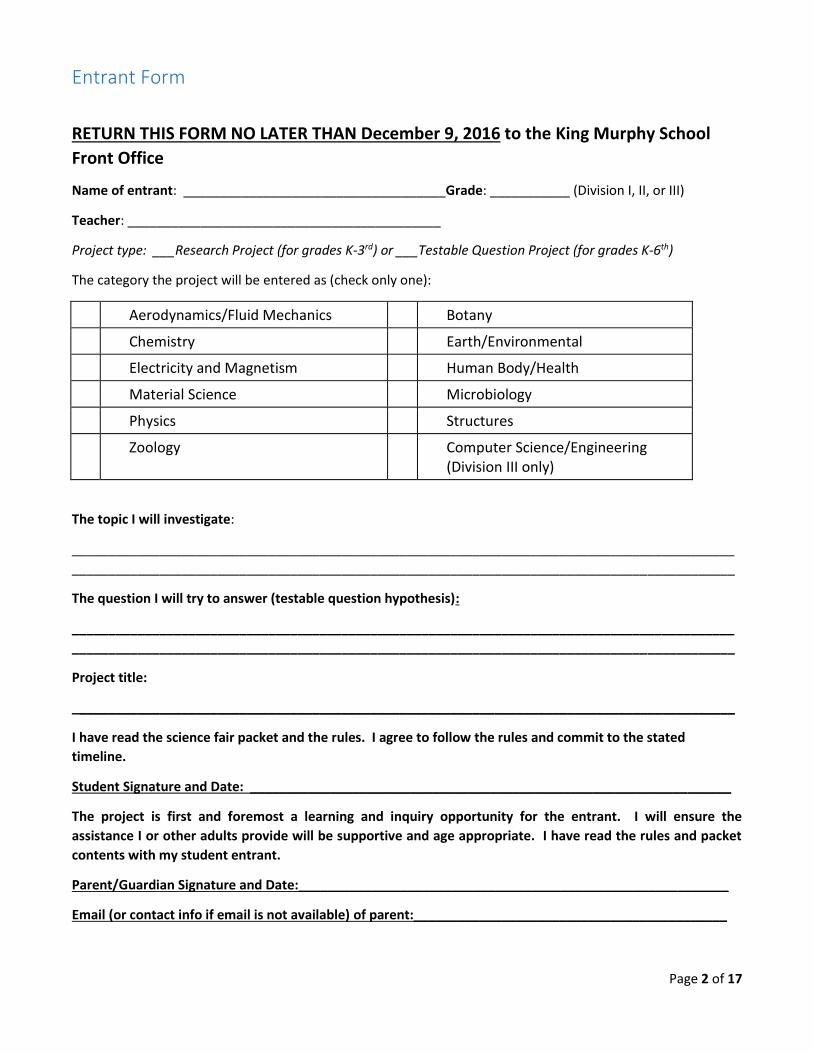
Entrant Form
RETURN THIS FORM NO LATER THAN December 9, 2016 to the King Murphy School
Front Office
Name of entrant: ____________________________________Grade: ___________ (Division I, II, or III)
Teacher: ___________________________________________
Project type: ___Research Project (for grades K-3rd) or ___Testable Question Project (for grades K-6th)
The category the project will be entered as (check only one):
Aerodynamics/Fluid Mechanics Botany
Chemistry Earth/Environmental
Electricity and Magnetism Human Body/Health
Material Science Microbiology
Physics Structures
Zoology Computer Science/Engineering (Division III only)
The topic I will investigate:
___________________________________________________________________________________________
___________________________________________________________________________________________
The question I will try to answer (testable question hypothesis):
___________________________________________________________________________________________
___________________________________________________________________________________________
Project title:
___________________________________________________________________________________________
I have read the science fair packet and the rules. I agree to follow the rules and commit to the stated
timeline.
Student Signature and Date: __________________________________________________________________
The project is first and foremost a learning and inquiry opportunity for the entrant. I will ensure the
assistance I or other adults provide will be supportive and age appropriate. I have read the rules and packet
contents with my student entrant.
Parent/Guardian Signature and Date:___________________________________________________________
Email (or contact info if email is not available) of parent:___________________________________________
Page 3 of 17
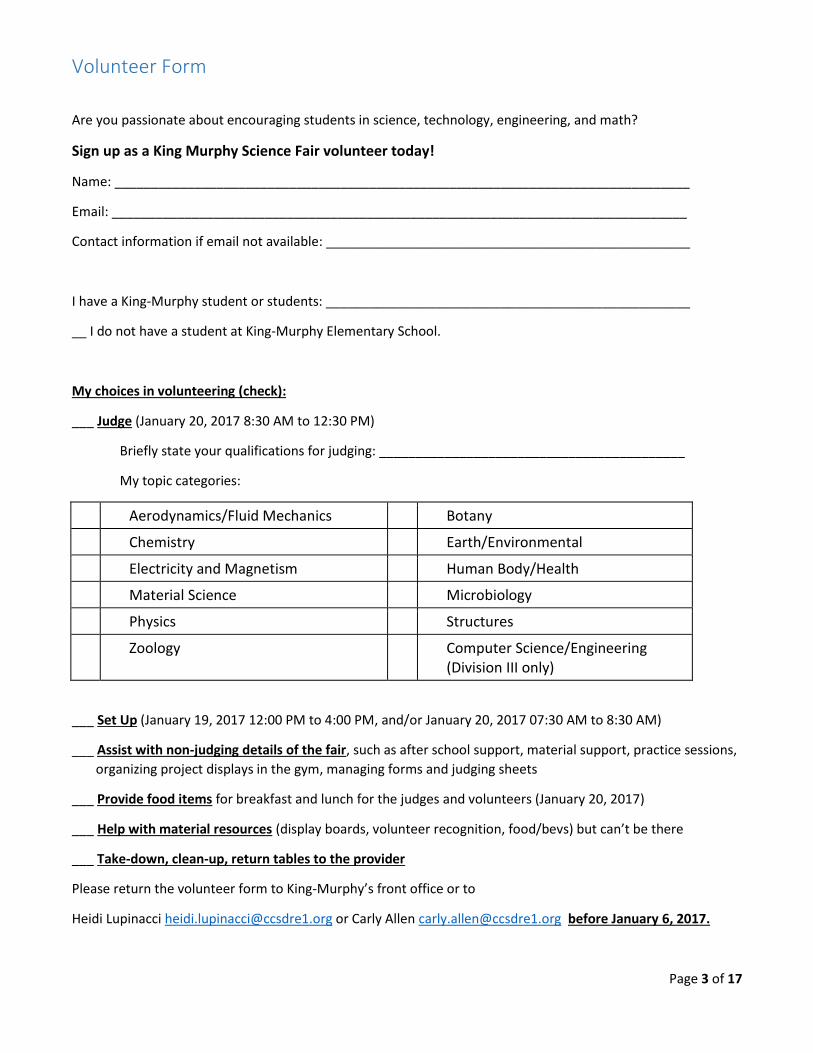
Volunteer Form
Are you passionate about encouraging students in science, technology, engineering, and math?
Sign up as a King Murphy Science Fair volunteer today!
Name: _______________________________________________________________________________
Email: _______________________________________________________________________________
Contact information if email not available: __________________________________________________
I have a King-Murphy student or students: __________________________________________________
__ I do not have a student at King-Murphy Elementary School.
My choices in volunteering (check):
___ Judge (January 20, 2017 8:30 AM to 12:30 PM)
Briefly state your qualifications for judging: __________________________________________
My topic categories:
Aerodynamics/Fluid Mechanics Botany
Chemistry Earth/Environmental
Electricity and Magnetism Human Body/Health
Material Science Microbiology
Physics Structures
Zoology Computer Science/Engineering (Division III only)
___ Set Up (January 19, 2017 12:00 PM to 4:00 PM, and/or January 20, 2017 07:30 AM to 8:30 AM)
___ Assist with non-judging details of the fair, such as after school support, material support, practice sessions,
organizing project displays in the gym, managing forms and judging sheets
___ Provide food items for breakfast and lunch for the judges and volunteers (January 20, 2017)
___ Help with material resources (display boards, volunteer recognition, food/bevs) but can’t be there
___ Take-down, clean-up, return tables to the provider
Please return the volunteer form to King-Murphy’s front office or to
Heidi Lupinacci [email protected] or Carly Allen [email protected] before January 6, 2017.

Page 4 of 17
King Murphy Science Fair Rules 1. The size of the project is limited to a base area of 3 feet deep X 4 feet wide X 4 feet high. It needs to sit
unsupported on a table or a floor. Parents, assistants, and teachers note: Some students will be
innovative and work within these stated dimensions in surprising ways. No points shall be deducted for
innovation and/or artwork.
2. One student must construct the display during this academic school year. Group projects are accepted
at the Division I level for the KMSF. For the MASF, no group projects are accepted. Only one science
fair project entry per student to KMSF and MASF are allowed. If you have several possible projects,
narrow it down to the one you feel will win your category topic in your division. It is important to note,
winners can only enter their winning school project in the MASF. Entrants are not allowed to switch
topic categories or projects for the MASF.
3. Adult assistance with your project is necessary and enables the entrant to embark on a journey of
inquiry, given the right resources. Entrants will need:
a. A display board – the display board meets the dimensions stated above and can be found in the
arts and crafts departments of retailers such as WalMart, Michael’s, Dollar Tree and major
grocers. Use the display board as an opportunity to convey enthusiasm and genuine interest in
the topic category.
b. A notebook – the notebook is the record of the project. Record everything about your project in
your notebook. Questions, hypothesis, methods, experiment details, results, conclusions, and
next steps should be recorded in your notebook.
c. Materials, time, and constructive feedback – your project may require obtaining materials in
order to test your hypothesis. Be resourceful. Thrift stores, family, and friends are a great place
to start for your materials. Spend enough time on your project to complete it with a sense of
pride. Engage your family and friends in discussion about your project to build your confidence
in speaking with the judges.
4. Hazards to the school, judges, and participants must be avoided. Bacterial cultures must be sealed.
Adequate measures must be taken to avoid risk of injury or worse to yourself and others. Use a tarp or
have spill control measures in place for messy displays. Consider the environment when generating
waste during your project. DO NOT include flames. ABSOLUTELY NO toxic, reactive, flammable,
corrosive, or radioactive materials in your project display. No electrical outlets are available. Safe and
prudent use of batteries are permitted.
5. Experiments involving the use of animals and human subjects must demonstrate and document
appropriate humane treatment.
6. Only qualified judges will judge the projects. Volunteer judges have dedicated their time to participate.
Entrants and judges must treat each other with respect and kindness at all times. Any problems and
questions that arise should be brought to the chair and co-chair for resolution.
7. You must include the following the day of the KMSF: An entrant index card given to you upon check
in, the project display, the notebook, the signed green adult/student involvement form
8. DO NOT INCLUDE your name, photo, teacher’s name, or other personally identifying marks on your
project display or notebook.
9. Project displays are entered at the entrants’ risk. Displays must be picked up no later than January 20,
2017. Entrants must secure their own transportation and entry to the MASF upon conclusion of the
KMSF.
Page 5 of 17
Science Fair Helpful Tips Review the King Murphy Science Fair packet materials. Consider volunteering to be an active participant
in the King Murphy Science Fair event. The entrants have taken the time and effort to complete a
project for entry and possible invitation to the Mountain Area Science Fair. Providing students with
materials, resources, assistance, and constructive feedback furthers their journeys into scientific inquiry.
Look at the Judges Scoring Guide. How would you judge your project or the projects of your peers?
Remember, a complex project is not necessarily as inspiring as a simple, yet very well done one. Think
of your audience – would you rather know which brand of ski wax is the best performer in low
temperatures or would you rather learn about counting the total number of neutrinos per square meter
in your basement?
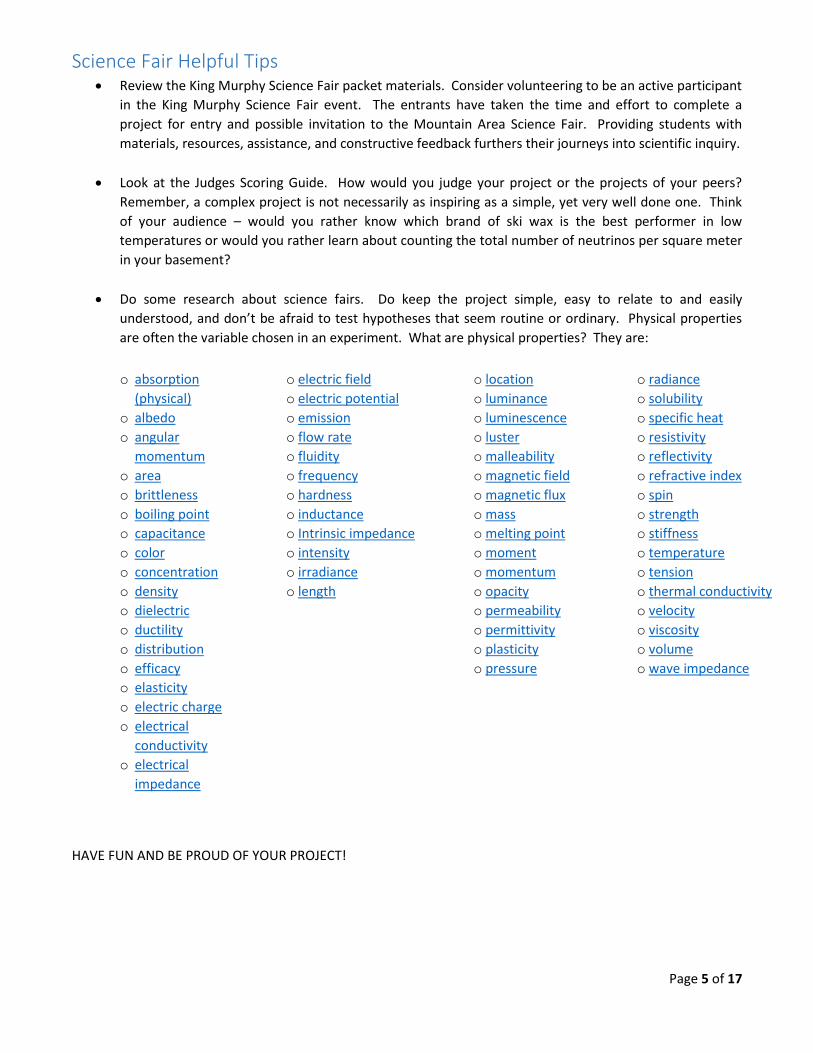
Do some research about science fairs. Do keep the project simple, easy to relate to and easily
understood, and don’t be afraid to test hypotheses that seem routine or ordinary. Physical properties
are often the variable chosen in an experiment. What are physical properties? They are:
o absorption
(physical)
o albedo
o angular
momentum
o area
o brittleness
o boiling point
o capacitance
o color
o concentration
o density
o dielectric
o ductility
o distribution
o efficacy
o elasticity
o electric charge
o electrical
conductivity
o electrical
impedance
o electric field
o electric potential
o emission
o flow rate
o fluidity
o frequency
o hardness
o inductance
o Intrinsic impedance
o intensity
o irradiance
o length
o location
o luminance
o luminescence
o luster
o malleability
o magnetic field
o magnetic flux
o mass
o melting point
o moment
o momentum
o opacity
o permeability
o permittivity
o plasticity
o pressure
o radiance
o solubility
o specific heat
o resistivity
o reflectivity
o refractive index
o spin
o strength
o stiffness
o temperature
o tension
o thermal conductivity
o velocity
o viscosity
o volume
o wave impedance
HAVE FUN AND BE PROUD OF YOUR PROJECT!
Page 6 of 17
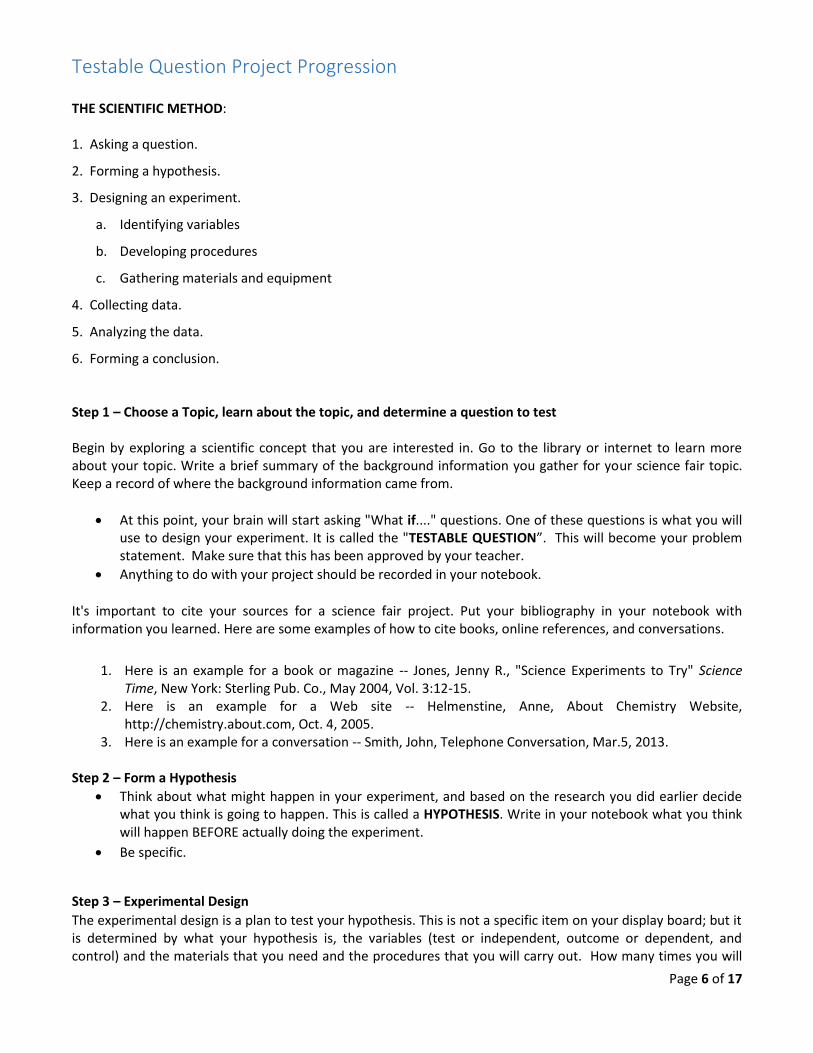
Testable Question Project Progression THE SCIENTIFIC METHOD: 1. Asking a question.
2. Forming a hypothesis.
3. Designing an experiment.
a. Identifying variables
b. Developing procedures
c. Gathering materials and equipment
4. Collecting data.
5. Analyzing the data.
6. Forming a conclusion.
Step 1 – Choose a Topic, learn about the topic, and determine a question to test Begin by exploring a scientific concept that you are interested in. Go to the library or internet to learn more about your topic. Write a brief summary of the background information you gather for your science fair topic. Keep a record of where the background information came from.
At this point, your brain will start asking "What if...." questions. One of these questions is what you will use to design your experiment. It is called the "TESTABLE QUESTION”. This will become your problem statement. Make sure that this has been approved by your teacher.
Anything to do with your project should be recorded in your notebook.
It's important to cite your sources for a science fair project. Put your bibliography in your notebook with information you learned. Here are some examples of how to cite books, online references, and conversations.
1. Here is an example for a book or magazine -- Jones, Jenny R., "Science Experiments to Try" Science Time, New York: Sterling Pub. Co., May 2004, Vol. 3:12-15.
2. Here is an example for a Web site -- Helmenstine, Anne, About Chemistry Website, http://chemistry.about.com, Oct. 4, 2005.
3. Here is an example for a conversation -- Smith, John, Telephone Conversation, Mar.5, 2013. Step 2 – Form a Hypothesis
Think about what might happen in your experiment, and based on the research you did earlier decide what you think is going to happen. This is called a HYPOTHESIS. Write in your notebook what you think will happen BEFORE actually doing the experiment.
Be specific.
Step 3 – Experimental Design
The experimental design is a plan to test your hypothesis. This is not a specific item on your display board; but it is determined by what your hypothesis is, the variables (test or independent, outcome or dependent, and control) and the materials that you need and the procedures that you will carry out. How many times you will
Page 7 of 17
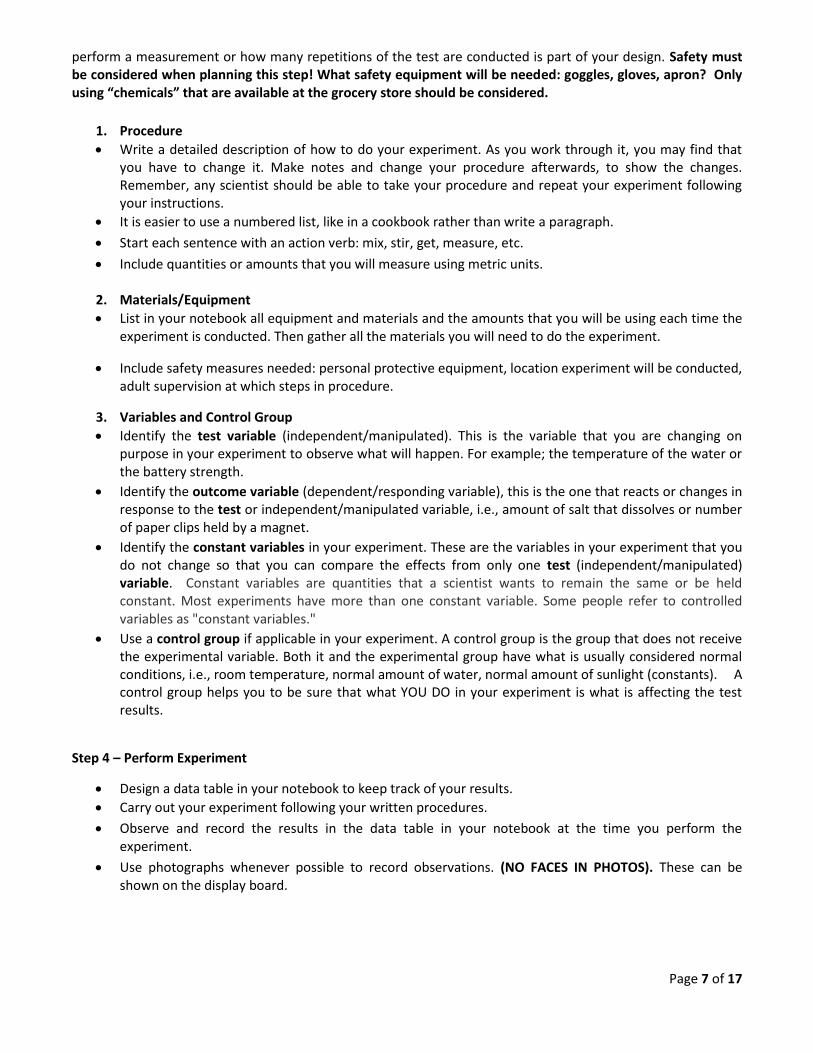
perform a measurement or how many repetitions of the test are conducted is part of your design. Safety must be considered when planning this step! What safety equipment will be needed: goggles, gloves, apron? Only using “chemicals” that are available at the grocery store should be considered.
1. Procedure
Write a detailed description of how to do your experiment. As you work through it, you may find that you have to change it. Make notes and change your procedure afterwards, to show the changes. Remember, any scientist should be able to take your procedure and repeat your experiment following your instructions.
It is easier to use a numbered list, like in a cookbook rather than write a paragraph.
Start each sentence with an action verb: mix, stir, get, measure, etc.
Include quantities or amounts that you will measure using metric units. 2. Materials/Equipment
List in your notebook all equipment and materials and the amounts that you will be using each time the experiment is conducted. Then gather all the materials you will need to do the experiment.
Include safety measures needed: personal protective equipment, location experiment will be conducted, adult supervision at which steps in procedure.
3. Variables and Control Group
Identify the test variable (independent/manipulated). This is the variable that you are changing on purpose in your experiment to observe what will happen. For example; the temperature of the water or the battery strength.
Identify the outcome variable (dependent/responding variable), this is the one that reacts or changes in response to the test or independent/manipulated variable, i.e., amount of salt that dissolves or number of paper clips held by a magnet.
Identify the constant variables in your experiment. These are the variables in your experiment that you do not change so that you can compare the effects from only one test (independent/manipulated) variable. Constant variables are quantities that a scientist wants to remain the same or be held constant. Most experiments have more than one constant variable. Some people refer to controlled variables as "constant variables."
Use a control group if applicable in your experiment. A control group is the group that does not receive the experimental variable. Both it and the experimental group have what is usually considered normal conditions, i.e., room temperature, normal amount of water, normal amount of sunlight (constants). A control group helps you to be sure that what YOU DO in your experiment is what is affecting the test results.
Step 4 – Perform Experiment
Design a data table in your notebook to keep track of your results.
Carry out your experiment following your written procedures.
Observe and record the results in the data table in your notebook at the time you perform the experiment.
Use photographs whenever possible to record observations. (NO FACES IN PHOTOS). These can be shown on the display board.
Page 8 of 17
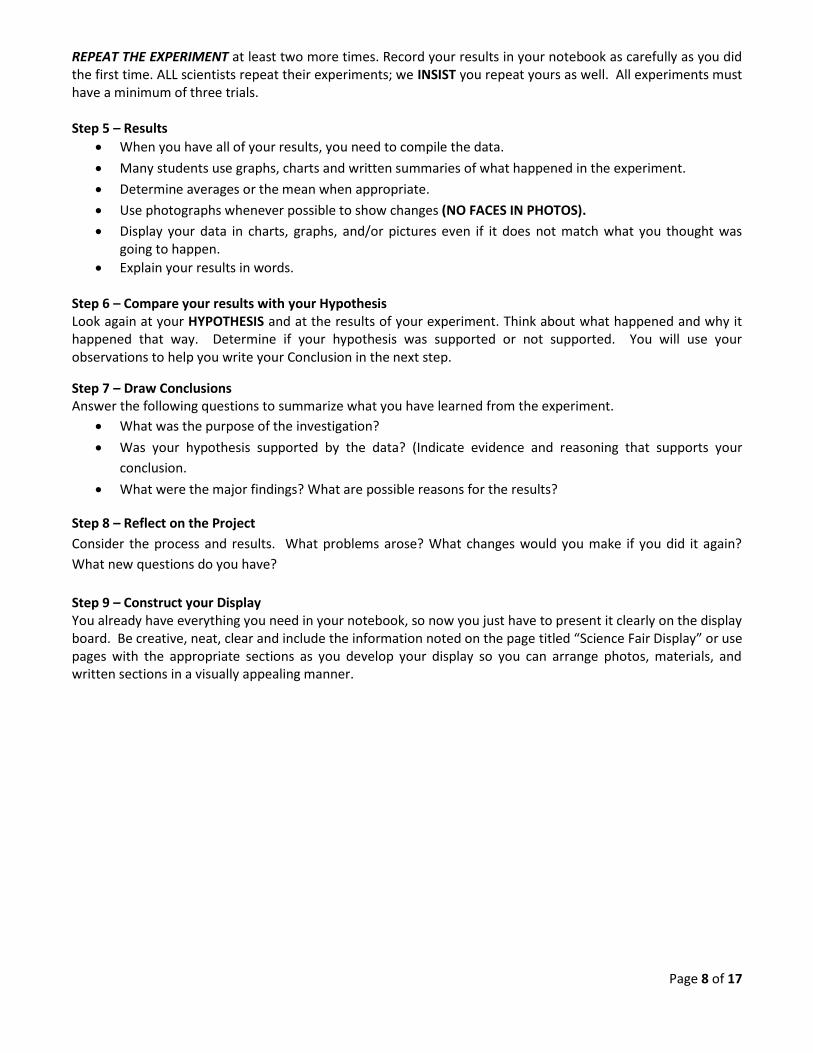
REPEAT THE EXPERIMENT at least two more times. Record your results in your notebook as carefully as you did the first time. ALL scientists repeat their experiments; we INSIST you repeat yours as well. All experiments must have a minimum of three trials. Step 5 – Results
When you have all of your results, you need to compile the data.
Many students use graphs, charts and written summaries of what happened in the experiment.
Determine averages or the mean when appropriate.
Use photographs whenever possible to show changes (NO FACES IN PHOTOS).
Display your data in charts, graphs, and/or pictures even if it does not match what you thought was going to happen.
Explain your results in words.
Step 6 – Compare your results with your Hypothesis Look again at your HYPOTHESIS and at the results of your experiment. Think about what happened and why it happened that way. Determine if your hypothesis was supported or not supported. You will use your observations to help you write your Conclusion in the next step.
Step 7 – Draw Conclusions Answer the following questions to summarize what you have learned from the experiment.
What was the purpose of the investigation?
Was your hypothesis supported by the data? (Indicate evidence and reasoning that supports your
conclusion.
What were the major findings? What are possible reasons for the results?
Step 8 – Reflect on the Project
Consider the process and results. What problems arose? What changes would you make if you did it again?
What new questions do you have?
Step 9 – Construct your Display You already have everything you need in your notebook, so now you just have to present it clearly on the display board. Be creative, neat, clear and include the information noted on the page titled “Science Fair Display” or use pages with the appropriate sections as you develop your display so you can arrange photos, materials, and written sections in a visually appealing manner.
Page 9 of 17
Research Project Progression (Reminder: Research projects do not progress to the MASF.)
Step 1 – Choose a Topic, something that interests you Step 2 - Learn about the topic Begin by exploring a scientific concept that you are interested in. Go to the library or internet to learn more about your topic. Write a brief summary of the background information you gather for your science fair topic. Keep a record of where the background information came from. Step 3 -Determine a specific question to research
As you learn about the topic you have chosen start asking “How is…? Why does…? What about…” questions.
Step 4 – Record the information gathered and the source of the information
In your lab notebook.
It's important to cite your sources for a science fair project. Put your bibliography in your notebook with information you learned. Here are some examples of how to cite books, online references, and conversations.
1. Here is an example for a book or magazine -- Jones, Jenny R., "Science Experiments to Try" Science Time, New York: Sterling Pub. Co., May 2004, Vol. 3:12-15.
2. Here is an example for a Web site -- Helmenstine, Anne, About Chemistry Website, http://chemistry.about.com, Oct. 4, 2005.
3. Here is an example for a conversation -- Smith, John, Telephone Conversation, Mar.5, 2013.
Step 5 – Reflect on the Project
Consider the process and results. What surprised you? What new questions do you have? What else about the
topic would you like to find out about?
Step 6 – Construct your Display You already have everything you need in your notebook, so now you just have to present it clearly on the display board. Be creative, neat, clear and include the information noted on the page titled “Science Fair Display”
Page 10 of 17
KMSF Judges Scoring Guide
Judging elementary student science fair projects is a big responsibility. Your scoring must be fair and within the
realm of your education and/or expertise. It is important to keep in mind that the expectations for the upper
division is greater than the lower divisions. The expectations vary from judge to judge, though this guide should
be referred to during the scoring process. Scoring sheets for the student projects will be available at the KMSF
during the date and time scheduled for judging.
Appearance: The display should be attractive. It should be evident the student considered the layout
and that the content clearly and accurately exhibits their work. Correct spelling, attention to contrast
and color-scheme, and workmanship are other appearance criteria to be considered. If appropriate for
the project, equipment and items used in the project can be included with the project display. Make
sure that the display conforms to the science fair rules.
Communication/Display Board: Generally expected sections present on the board are those in bold.
Researchers present their work in different ways so the section and subsection titles should reflect the
way the student felt the project should be presented. The Mountain Area Science Fair rules state “limit
the size of the project to a base area of 3 feet deep, 4 feet wide, and 4 feet high. It may sit on a table or
the floor. It should stand alone.” REMEMBER – these are dimensional specifications, and creative
participants may not always present their project in a way that is usually expected. As long as it meets
the rules, no points should be deducted simply because the display is not in the expected configuration.
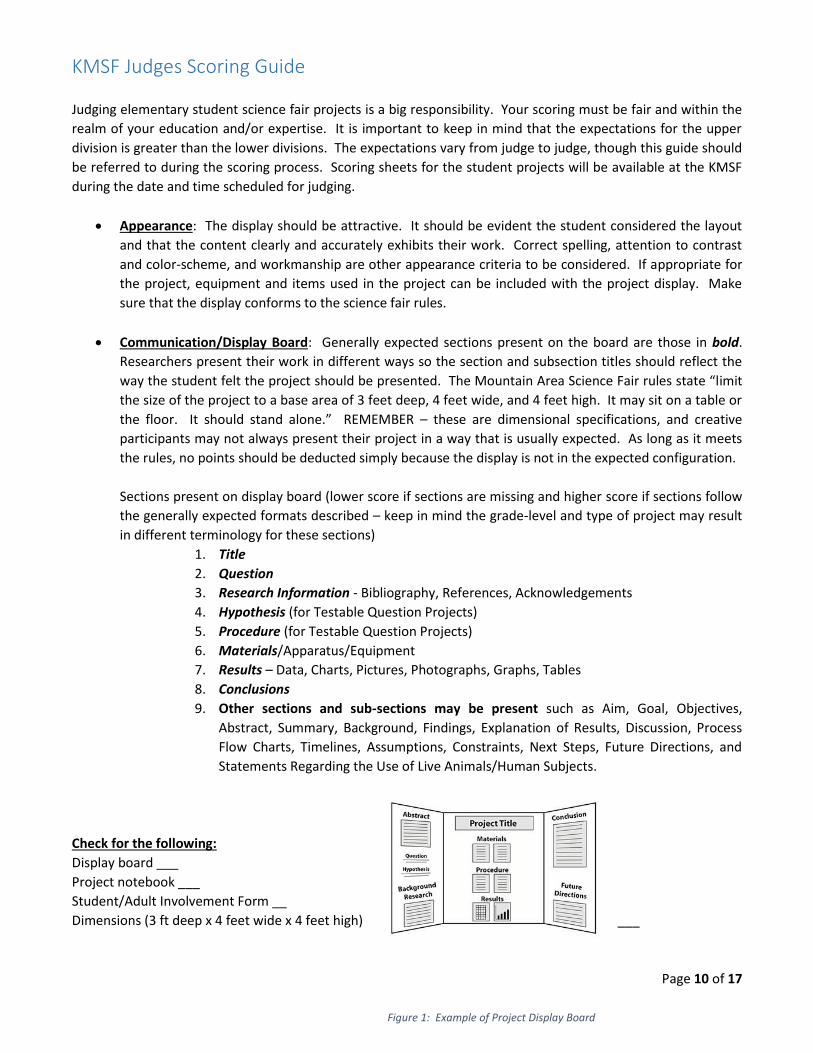
Sections present on display board (lower score if sections are missing and higher score if sections follow
the generally expected formats described – keep in mind the grade-level and type of project may result
in different terminology for these sections)
1. Title
2. Question
3. Research Information - Bibliography, References, Acknowledgements
4. Hypothesis (for Testable Question Projects)
5. Procedure (for Testable Question Projects)
6. Materials/Apparatus/Equipment
7. Results – Data, Charts, Pictures, Photographs, Graphs, Tables
8. Conclusions
9. Other sections and sub-sections may be present such as Aim, Goal, Objectives,
Abstract, Summary, Background, Findings, Explanation of Results, Discussion, Process
Flow Charts, Timelines, Assumptions, Constraints, Next Steps, Future Directions, and
Statements Regarding the Use of Live Animals/Human Subjects.
Check for the following:
Display board ___
Project notebook ___
Student/Adult Involvement Form __
Dimensions (3 ft deep x 4 feet wide x 4 feet high) ___
Figure 1: Example of Project Display Board

Page 11 of 17
Figure 2: Expected Elements of the Project Display
Student/Adult Involvement Form: The Student/Adult Involvement Form is a green form required for
the project and must be completed and included with the project display. If it is missing, a zero will be
scored. Judges will review these forms and score the degree of adult involvement according to the
generally expected level for the division level and complexity of the project.
Lab or Project Notebook: The notebook with the project title printed (or neatly written) on the front
cover must be present with the project display. The notebook is the key part of demonstrating the
project from start to finish. When a computer is used for word processing or data management, print
outs should be included in the notebook. When the data or code is too long to print out and include in
the notebook, the entrant MUST reference and include the electronic copy of such in a standard format
(DVDROM, USB thumbdrive, or accessible cloud drive storage.)
Sections that should be included in the notebook:
1. Title on the front of the notebook
2. Table of Contents (number the notebook pages accordingly and use tabs for section
division)
3. Question that the project is based on.
4. Research with the sources of information cited in a bibliography or references
5. Hypothesis (for Testable Question Projects)
6. Materials list (for Testable Questions Projects)
7. Procedure (for Testable Question Projects)
8. Data Collection/Results – measurements (for Testable Question Projects)
9. Conclusion/s
10. Reflection on the Project
Student/ Adult Involvement Form
Page 12 of 17
11. Glossary or Vocabulary list – helpful for new or technical terms involved – remember,
the judges are not the only attendees at the science fair.
12. Other sections and subsections may be present in the notebook, such as brainstorming
notes, maps/flowcharts, new ideas, and the sections/subsections detailed in the
Communications/Display Board criteria.
Background Research: The project display and notebook should demonstrate the student gathered and
reviewed relevant information for the project. Bibliographies, references, and works cited are common
ways the background research is documented. Interview notes, website addresses, literature, and
multi-media materials should be referenced appropriately. Higher scores should be awarded for
projects that follow a standard citation format for project background references (such as MLA or ACS
styles for citations and full URLs for Internet sources). Lower scores should be awarded for content that
is vaguely cited (for example, “data table obtained from the Internet” is not specific enough for
someone to locate the information).
Experimental Design: The experimental design should be scored on how well the student clearly stated
the project purpose or hypothesis as well as developed the overall experimental design to adequately
test the stated hypothesis. The student should ideally explain what they think will happen and why.
Higher scores should be awarded for projects that demonstrate the approach used to test the
hypothesis.
Creativity/Originality: The creativity and originality of the project can be indicated in several ways. The
project display board, the notebook, and other items can demonstrate creativity by showing the student
explored unique ways to state the purpose and hypothesis, design the experiment in a way that shows
an original approach, or sparks further inquiry of the attendees and judges. Projects that demonstrate
the student is enthusiastic about the topic and went through lengths to pursue original ideas should be
scored higher. Innovation, such as configuration of the display dimensions within the rules but not in
the way shown in the figures, should not be penalized.
Controls, Variables, and Repetition: The project should show the appropriate controls and variables
were chosen to test the hypothesis. The project should only have one variable and the outcomes
observed by changing this one variable (or if no outcomes observed, then a good explanation of why
that might be the case.) The project should include evidence the tests were repeated at least three
times. Higher scores should be awarded for explicit definitions of the controls and variable as well as
clear indications of tests that were repeated.
Data/Results: The project should demonstrate the level of effort made to manage the data generated
by the student. Data should be organized and easily understood. Items such as lists, charts, tables,
graphs, observation records, and calculations indicate the how the project data and results were
managed. For data and records handled with a computer, print-outs should be included in the project
notebook. For complex projects (such as computer science and engineering), access to data or code
that cannot be feasibly printed out can be made available (DVDROM, USB thumbdrive, or accessible
cloud drive storage.) Higher scores should be awarded for data recorded in metric or international
standard (SI) units.
Conclusion: The conclusion of the project should be clear and well-understood. It is important the
conclusion summarizes the question, hypothesis, and result of testing the hypothesis. The overall
Page 13 of 17
objective of the conclusion is to show how the student completed the project and the outcome of the
experiment/s performed in relation to the original hypothesis. When judging, remember the hypothesis
may not have been correct! This is perfectly acceptable if the student clearly understands whether the
hypothesis was supported by the results and adequately explains why in the conclusion. Higher scores
should be awarded for projects that have conclusions that follow the stated research question and
hypothesis and lower scores should be awarded for conclusions that do not relate to the stated research
question or hypothesis.
Next Step/Reflection/New Discoveries: The project should demonstrate the student has considered
the overall project effort and learned something meaningful from it. When judging this criteria,
consideration should be given to the notebook entries that indicate the student considered other
possible hypotheses, approaches, new ideas generated from their work, and alternative methods. In the
project display, this criteria is also supported by statements such as “next time I would…” or “now I
would like to test…” or “I want to design…”
Interview: The interview with the students gives the students the opportunity to present their project
and develop speaking skills. Students are understandably nervous when speaking, especially with judges
who are scoring their project! Try to put the student at ease. Sit or try to be at eye-level with the
student so they do not feel intimidated. Ask some general questions to assess how much effort the
student put forth completing the project. Sometimes there are concerns the student did not complete
as much of the project as indicated on the Student/Adult Involvement form. Avoid making judgments
on the level of student involvement until the student has had a chance to be interviewed!
Some example questions for judges: o How did you choose your category?
o Is your project something that personally interests you?
o What was the most exciting part about doing your project?
o Did you understand all of the things you had to do for the project?
o Was there anything you had trouble with? (Note: for younger students, trouble with data management is
often cited.)
o Did someone help you with parts of the project you had trouble with?
o Would you like to do another project?
Page 14 of 17
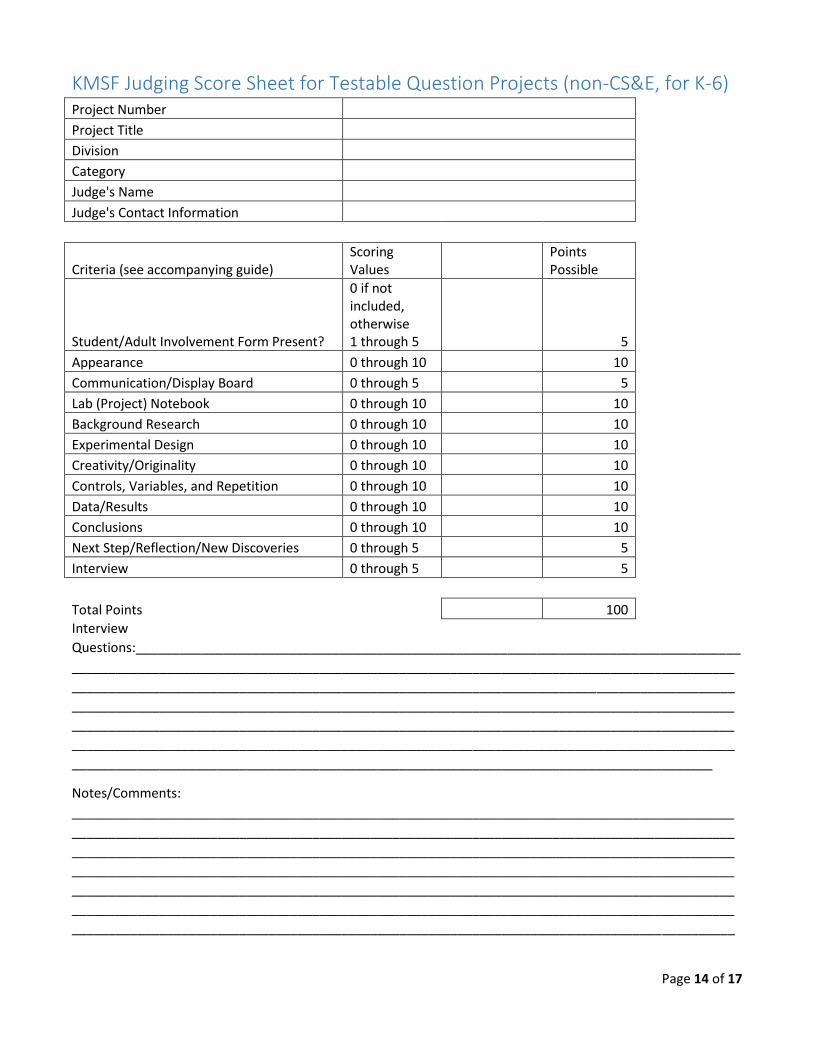
KMSF Judging Score Sheet for Testable Question Projects (non-CS&E, for K-6) Project Number
Project Title
Division
Category
Judge's Name
Judge's Contact Information
Criteria (see accompanying guide) Scoring Values
Points Possible
Student/Adult Involvement Form Present?
0 if not included, otherwise 1 through 5 5
Appearance 0 through 10 10
Communication/Display Board 0 through 5 5
Lab (Project) Notebook 0 through 10 10
Background Research 0 through 10 10
Experimental Design 0 through 10 10
Creativity/Originality 0 through 10 10
Controls, Variables, and Repetition 0 through 10 10
Data/Results 0 through 10 10
Conclusions 0 through 10 10
Next Step/Reflection/New Discoveries 0 through 5 5
Interview 0 through 5 5
Total Points
100
Interview
Questions:___________________________________________________________________________________
___________________________________________________________________________________________
___________________________________________________________________________________________
___________________________________________________________________________________________
___________________________________________________________________________________________
___________________________________________________________________________________________
________________________________________________________________________________________
Notes/Comments:
___________________________________________________________________________________________
___________________________________________________________________________________________
___________________________________________________________________________________________
___________________________________________________________________________________________
___________________________________________________________________________________________
___________________________________________________________________________________________
___________________________________________________________________________________________
Page 15 of 17
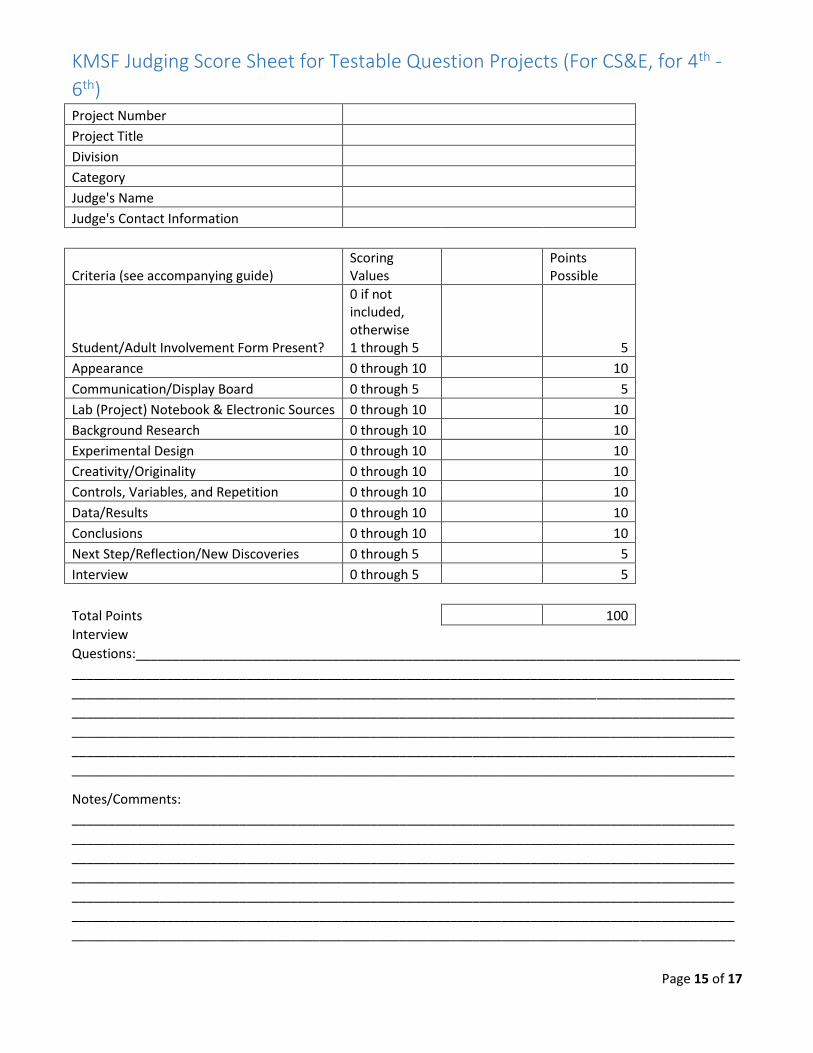
KMSF Judging Score Sheet for Testable Question Projects (For CS&E, for 4th -
6th) Project Number
Project Title
Division
Category
Judge's Name
Judge's Contact Information
Criteria (see accompanying guide) Scoring Values
Points Possible
Student/Adult Involvement Form Present?
0 if not included, otherwise 1 through 5 5
Appearance 0 through 10 10
Communication/Display Board 0 through 5 5
Lab (Project) Notebook & Electronic Sources 0 through 10 10
Background Research 0 through 10 10
Experimental Design 0 through 10 10
Creativity/Originality 0 through 10 10
Controls, Variables, and Repetition 0 through 10 10
Data/Results 0 through 10 10
Conclusions 0 through 10 10
Next Step/Reflection/New Discoveries 0 through 5 5
Interview 0 through 5 5
Total Points
100
Interview
Questions:___________________________________________________________________________________
___________________________________________________________________________________________
___________________________________________________________________________________________
___________________________________________________________________________________________
___________________________________________________________________________________________
___________________________________________________________________________________________
___________________________________________________________________________________________
Notes/Comments:
___________________________________________________________________________________________
___________________________________________________________________________________________
___________________________________________________________________________________________
___________________________________________________________________________________________
___________________________________________________________________________________________
___________________________________________________________________________________________
___________________________________________________________________________________________

Page 16 of 17
KMSF Judging Score Sheet for Research Projects (For K-3 grades) Project Number
Project Title
Division
Category
Judge's Name
Judge's Contact Information
Criteria (see accompanying guide) Scoring Values
Points Possible
Student/Adult Involvement Form Present?
0 if not included, otherwise 1 through 5 5
Appearance 0 through 20 20
Communication/Display Board 0 through 15 15
Project Notebook 0 through 10 10
Creativity/Originality 0 through 10 10
Background Research 0 through 10 10
Next Step/Reflection/New Discoveries 0 through 20 20
Interview 0 through 10 10
Total Points
100
Interview
Questions:___________________________________________________________________________________
___________________________________________________________________________________________
___________________________________________________________________________________________
___________________________________________________________________________________________
___________________________________________________________________________________________
___________________________________________________________________________________________
___________________________________________________________________________________________
Notes/Comments:
___________________________________________________________________________________________
___________________________________________________________________________________________
___________________________________________________________________________________________
___________________________________________________________________________________________
___________________________________________________________________________________________
___________________________________________________________________________________________
___________________________________________________________________________________________
Page 17 of 17
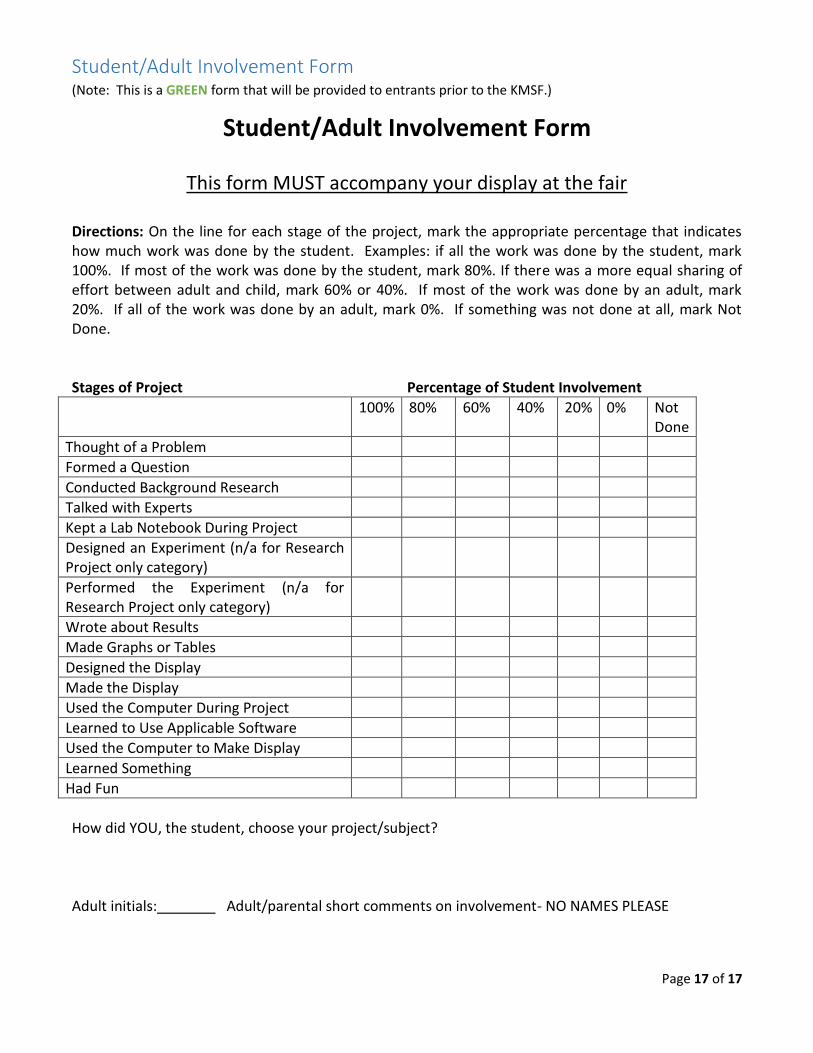
Student/Adult Involvement Form (Note: This is a GREEN form that will be provided to entrants prior to the KMSF.)
Student/Adult Involvement Form
This form MUST accompany your display at the fair Directions: On the line for each stage of the project, mark the appropriate percentage that indicates how much work was done by the student. Examples: if all the work was done by the student, mark 100%. If most of the work was done by the student, mark 80%. If there was a more equal sharing of effort between adult and child, mark 60% or 40%. If most of the work was done by an adult, mark 20%. If all of the work was done by an adult, mark 0%. If something was not done at all, mark Not Done. Stages of Project Percentage of Student Involvement
100% 80% 60% 40% 20% 0% Not Done
Thought of a Problem
Formed a Question
Conducted Background Research
Talked with Experts
Kept a Lab Notebook During Project
Designed an Experiment (n/a for Research Project only category)
Performed the Experiment (n/a for Research Project only category)
Wrote about Results
Made Graphs or Tables
Designed the Display
Made the Display
Used the Computer During Project
Learned to Use Applicable Software
Used the Computer to Make Display
Learned Something
Had Fun
How did YOU, the student, choose your project/subject? Adult initials: Adult/parental short comments on involvement- NO NAMES PLEASE
Related Documents