METRONIC DIGITAL DECODER INSTRUCTIONS MANUAL Digital Decoder 488200 Parental Lock 2 Scarts 2000 TV and radio channels Liberty

Welcome message from author
This document is posted to help you gain knowledge. Please leave a comment to let me know what you think about it! Share it to your friends and learn new things together.
Transcript

metronic digital decoderinStrUctionS manUal
Digital Decoder488200
Parental Lock2 Scarts
2000 TV and radio channels
Liberty
1
SAFETY INSTRUCTIONS
Please read the safety instructions carefully before using the receiver. Please follow all warnings and instructions on the equipment and in the manual.
! Basic safety instructions !
Electrical connection • Do not expose the receiver to rain or any kind of liquid to avoid risk of electric shock. • Never open the case. • Ensure that the total power consumption of the antenna does not exceed 300 mA “LNB IN”. • Pull the external power pack or the 12 V cable out of the mains socket if you do not intend to use the device for a long period of time. Only pull the external power cable or the head of the 12 V cable out, never the cable itself. • In case of a storm, pull the external power cable or the 12 V cable of the receiver out of the mains socket. • If foreign bodies or fluids enter the receiver, pull the external power cable or the 12 V cable out of the mains socket. Ask a qualified person to check the equipment before operating it again, as there is a risk of electric shock. • Do not bend or crimp any cable. • If a cable used for mains supply is damaged, the receiver must be repaired before reusing it. • Never allow children to play with the antenna unit unless supervised. • Always ask a qualified person to carry out maintenance jobs. Otherwise, you are putting yourself and others at risk. • Disconnect the receiver from the power source in case of operational disruptions. • Ensure that the power source is easily accessible.
Maintenance
• Place the receiver on a stable and even base. • Use the receiver only in normal climatic conditions. • Avoid proximity to:
Heat sources e.g. heaters / flames e.g. candles / Devices with strong magnetic fields e.g. loud-speakers. / You must never leave objects filled with liquid, such as vases, on top of the receiver.
• Avoid direct sunlight and areas with a high amount of dust. • Never cover the ventilation slits. Provide sufficient room for ventilation by maintaining a safety distance of 5 cm between the receiver and other objects. • Do not place any heavy objects on the receiver. • Humidity may settle in the receiver if it is brought into hot surroundings from a cold place. If this hap-pens, you should wait for about an hour before operating the equipment. • Hide all cables so they do not represent a danger to anyone. • The antenna unit is not suitable in case of high wind pressure. Do not expose it to strong wind.
Correct battery handling
• The remote requires 2 x AAA 1.5V batteries. Batteries may contain toxic agents. Ensure that batteries are not within the reach of children. • Discharged batteries may damage the remote control. If the receiver is not in use for a longperiod of time, remove the batteries from the remote control. • Batteries may contain toxic agents. Therefore, dispose of the batteries immediately in an ecological manner according to the prevailing statutory regulations. Never throw the batteries into normal hou-sehold waste. • Never expose the batteries to open fire or strong heat.• Always use the correct batteries as specified above.
Contents
1- Installation ............................................................................................................page 3
Installing a fixed antenna
Installing a Monobloc LNB
Connecting the receiver to an antenna (orientated towards a satellite)
Connecting the Dual Feed system (2 satellites) Astra 19,2 + HotBird already
Orientated
2- Remote description ..............................................................................................page 8
3- METRONIC receiver description ...........................................................................page 9
4- Daily Use ..............................................................................................................page 9
5- Adding channels ................................................................................................. page 10 Manual search: searching for a specific satellite channel
Automatic search: searching for all channels from one satellite
Adding / deleting / modifying a transponder
Searching for a specific channel
Adding a satellite
6- Modifying / organising your channels ................................................................. page 11
7- Additional adjustments ...................................................................................... page 13 Languages
TV Scart
Time
Program to be recorded
Changing the password and locking access to the menu
Re-setting the receiver
8- Using with a VCR ............................................................................................... page 14
9- In case of a problem .......................................................................................... page 14
Channels list ................................................................................................page 15
Warranty details ................................................................................................. page 17 Index ................................................................................................................... page 17
Liberty caravan kit contents ..........................................................................page 18
2
Programming the receiver is achieved through the various menus. In order to make this manual easier to understand, please follow the instructions below on how to access the menu as shown below :
Go to MENU / System Set Up / TV System.
This means :
- Press MENU key to access to the main menu.- Use the 34 keys to select System Set Up.- Use the 56 to select TV System. - Press OK to confirm.

3
INSTALLATION
MOUNTING THE ANTENNA
You should mount your antenna facing South and ensure there are no obstructions. The mounting must be stable and vertical.
In case of an obstruction, you should respect the rules of distance (see picture)Details on how to mount the antenna are to be found later in this manual. Mounting and assembling: cautiously swivel the anten-na as the edges are sharp.
NECESSARY ITEMS1- Antenna2- Fixing base3- Offset bracket4- Universal LNB5- Suction disk 6- METRONIC receiver7- PAL / SECAM TV8- Scart cable with 21 pins9- F connector10- Satellite cable
B
A
1
d > H x 1,5
H
d
SUD
1
23
4
510 9
9 68
7
Fig. 1
Fig. 2
4
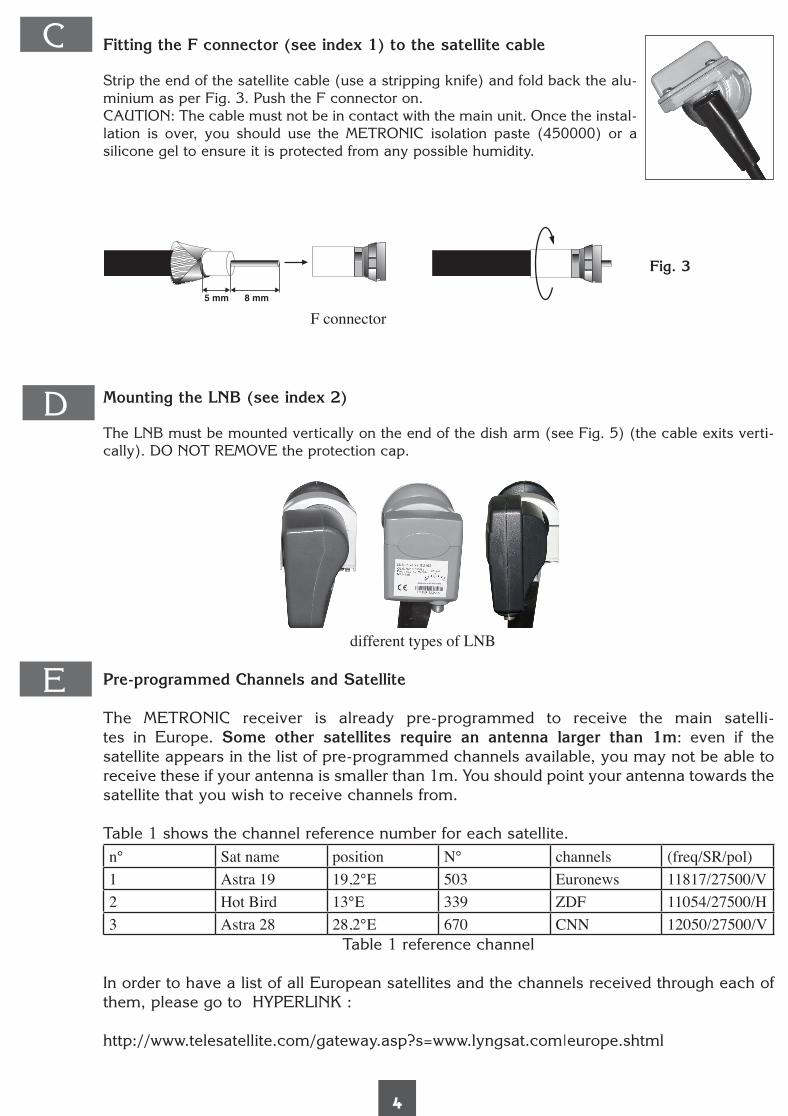
Fitting the F connector (see index 1) to the satellite cable
Strip the end of the satellite cable (use a stripping knife) and fold back the alu-minium as per Fig. 3. Push the F connector on.CAUTION: The cable must not be in contact with the main unit. Once the instal-lation is over, you should use the METRONIC isolation paste (450000) or a silicone gel to ensure it is protected from any possible humidity.
Mounting the LNB (see index 2)
The LNB must be mounted vertically on the end of the dish arm (see Fig. 5) (the cable exits verti-cally). DO NOT REMOVE the protection cap.
Pre-programmed Channels and Satellite
The METRONIC receiver is already pre-programmed to receive the main satelli-tes in Europe. Some other satellites require an antenna larger than 1m: even if the satellite appears in the list of pre-programmed channels available, you may not be able to receive these if your antenna is smaller than 1m. You should point your antenna towards the satellite that you wish to receive channels from.
Table 1 shows the channel reference number for each satellite.n° Sat name position N° channels (freq/SR/pol)1 Astra 19 19,2°E 503 Euronews 11817/27500/V2 Hot Bird 13°E 339 ZDF 11054/27500/H3 Astra 28 28,2°E 670 CNN 12050/27500/V
Table 1 reference channel
In order to have a list of all European satellites and the channels received through each of them, please go to HYPERLINK :
http://www.telesatellite.com/gateway.asp?s=www.lyngsat.com|europe.shtml
C
D
E
5 mm 8 mm
Fig. 3
F connector
different types of LNB
5
B
C
INSTALLING A FIXED ANTENNA FOR A SPECIFIC SATELLITE
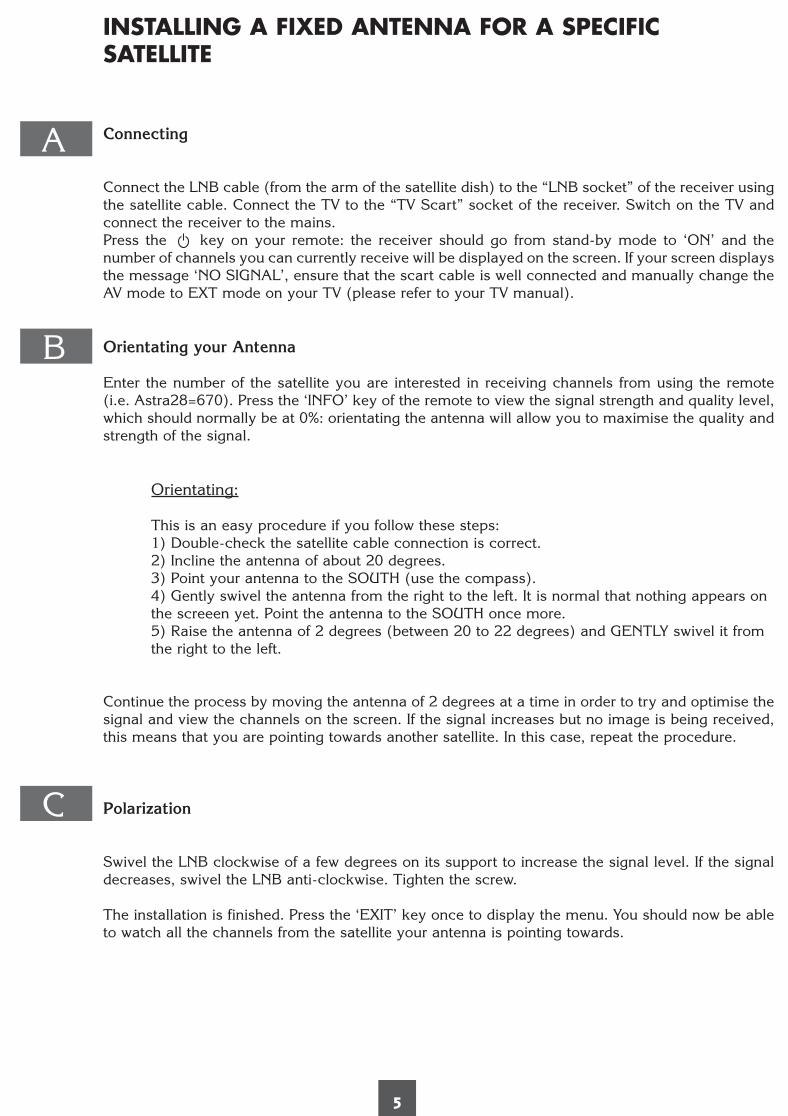
Connecting
Connect the LNB cable (from the arm of the satellite dish) to the “LNB socket” of the receiver using the satellite cable. Connect the TV to the “TV Scart” socket of the receiver. Switch on the TV and connect the receiver to the mains.Press the key on your remote: the receiver should go from stand-by mode to ‘ON’ and the number of channels you can currently receive will be displayed on the screen. If your screen displays the message ‘NO SIGNAL’, ensure that the scart cable is well connected and manually change the AV mode to EXT mode on your TV (please refer to your TV manual).
Orientating your Antenna
Enter the number of the satellite you are interested in receiving channels from using the remote (i.e. Astra28=670). Press the ‘INFO’ key of the remote to view the signal strength and quality level, which should normally be at 0%: orientating the antenna will allow you to maximise the quality and strength of the signal.
Orientating:
This is an easy procedure if you follow these steps: 1) Double-check the satellite cable connection is correct. 2) Incline the antenna of about 20 degrees. 3) Point your antenna to the SOUTH (use the compass). 4) Gently swivel the antenna from the right to the left. It is normal that nothing appears on the screeen yet. Point the antenna to the SOUTH once more. 5) Raise the antenna of 2 degrees (between 20 to 22 degrees) and GENTLY swivel it from the right to the left.
Continue the process by moving the antenna of 2 degrees at a time in order to try and optimise the signal and view the channels on the screen. If the signal increases but no image is being received, this means that you are pointing towards another satellite. In this case, repeat the procedure.
Polarization
Swivel the LNB clockwise of a few degrees on its support to increase the signal level. If the signal decreases, swivel the LNB anti-clockwise. Tighten the screw.
The installation is finished. Press the ‘EXIT’ key once to display the menu. You should now be able to watch all the channels from the satellite your antenna is pointing towards.
A
6
INSTALLING A MONOBLOC LNB FOR ASTRA/HOTBIRD (USING AN ANTENNA LARGER THAN 80CM)
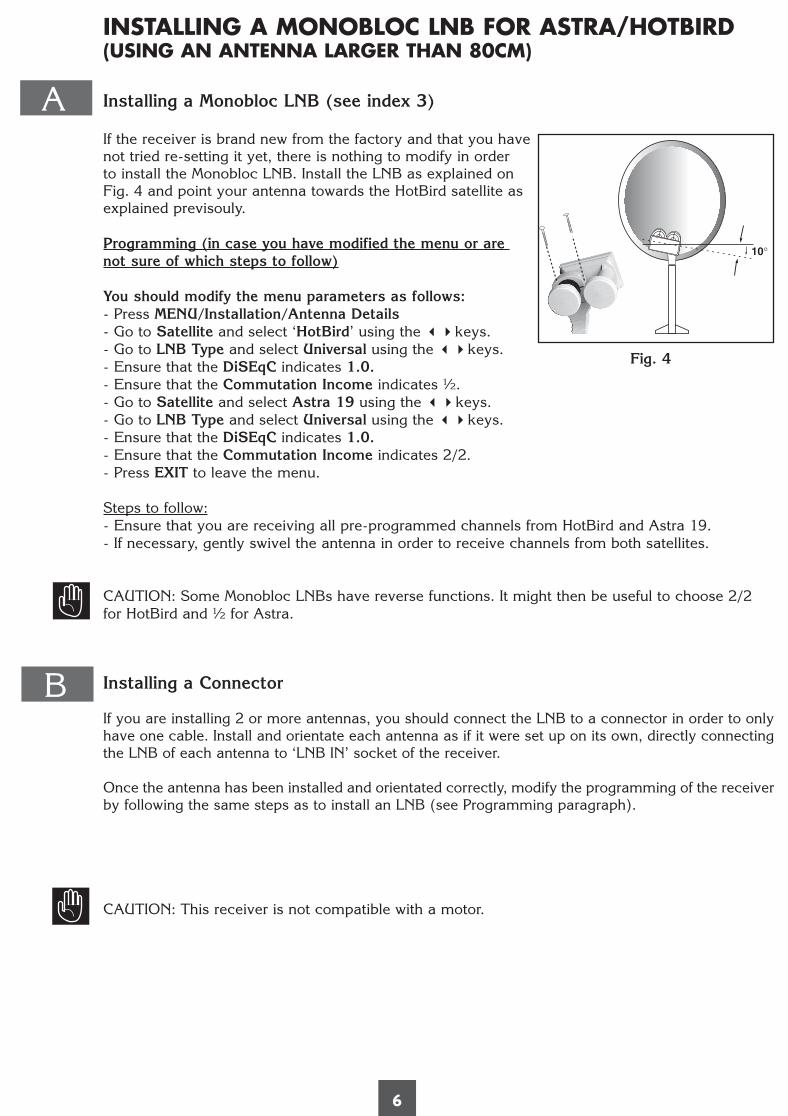
Installing a Monobloc LNB (see index 3)
If the receiver is brand new from the factory and that you have not tried re-setting it yet, there is nothing to modify in order to install the Monobloc LNB. Install the LNB as explained on Fig. 4 and point your antenna towards the HotBird satellite as explained previsouly.
Programming (in case you have modified the menu or are not sure of which steps to follow)
You should modify the menu parameters as follows:- Press MENU/Installation/Antenna Details- Go to Satellite and select ‘HotBird’ using the 34keys.- Go to LNB Type and select Universal using the 34keys.- Ensure that the DiSEqC indicates 1.0.- Ensure that the Commutation Income indicates ½.- Go to Satellite and select Astra 19 using the 34keys.- Go to LNB Type and select Universal using the 34keys.- Ensure that the DiSEqC indicates 1.0.- Ensure that the Commutation Income indicates 2/2.- Press EXIT to leave the menu.
Steps to follow:- Ensure that you are receiving all pre-programmed channels from HotBird and Astra 19.- If necessary, gently swivel the antenna in order to receive channels from both satellites.
CAUTION: Some Monobloc LNBs have reverse functions. It might then be useful to choose 2/2 for HotBird and ½ for Astra.
Installing a Connector
If you are installing 2 or more antennas, you should connect the LNB to a connector in order to only have one cable. Install and orientate each antenna as if it were set up on its own, directly connecting the LNB of each antenna to ‘LNB IN’ socket of the receiver.
Once the antenna has been installed and orientated correctly, modify the programming of the receiver by following the same steps as to install an LNB (see Programming paragraph).
CAUTION: This receiver is not compatible with a motor.
10°
A
B
Fig. 4
7
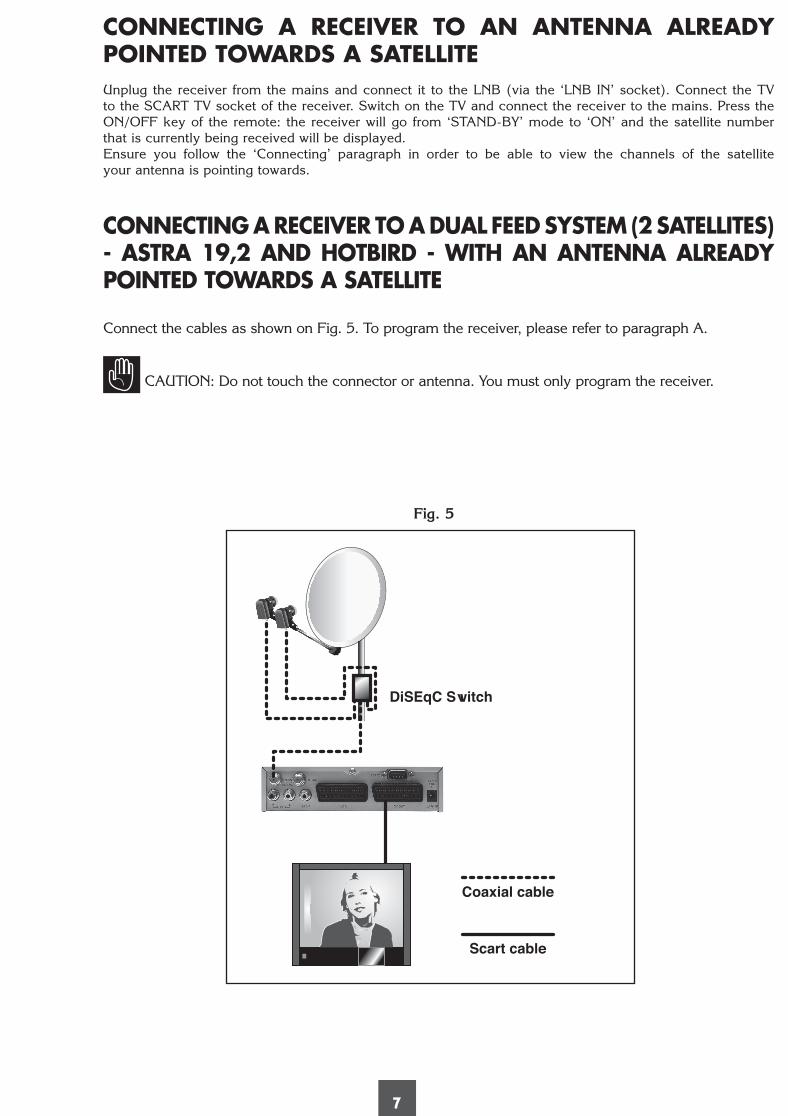
CONNECTING A RECEIVER TO AN ANTENNA ALREADY POINTED TOWARDS A SATELLITEUnplug the receiver from the mains and connect it to the LNB (via the ‘LNB IN’ socket). Connect the TV to the SCART TV socket of the receiver. Switch on the TV and connect the receiver to the mains. Press the ON/OFF key of the remote: the receiver will go from ‘STAND-BY’ mode to ‘ON’ and the satellite number that is currently being received will be displayed. Ensure you follow the ‘Connecting’ paragraph in order to be able to view the channels of the satellite your antenna is pointing towards.
CONNECTING A RECEIVER TO A DUAL FEED SYSTEM (2 SATELLITES) - ASTRA 19,2 AND HOTBIRD - WITH AN ANTENNA ALREADY POINTED TOWARDS A SATELLITE
Connect the cables as shown on Fig. 5. To program the receiver, please refer to paragraph A.
CAUTION: Do not touch the connector or antenna. You must only program the receiver.
Fig. 5
8
REMOTE DESCRIPTION
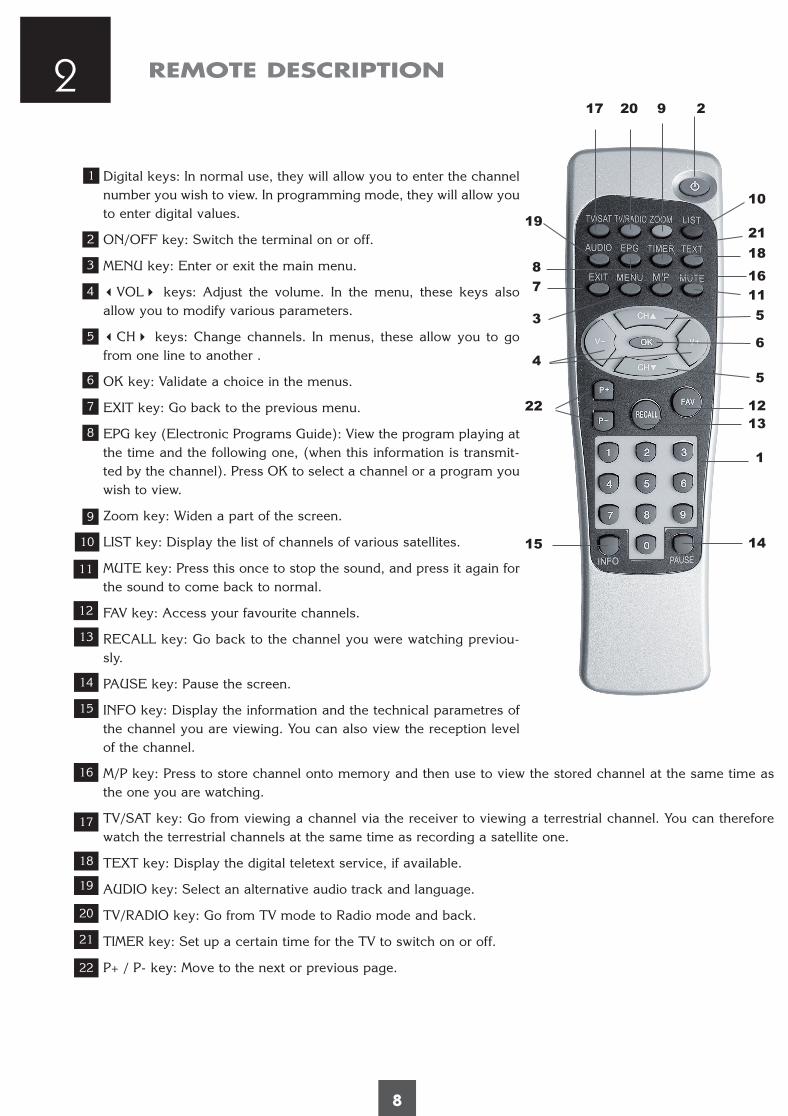
Digital keys: In normal use, they will allow you to enter the channel number you wish to view. In programming mode, they will allow you to enter digital values.
ON/OFF key: Switch the terminal on or off.
MENU key: Enter or exit the main menu.
3VOL4 keys: Adjust the volume. In the menu, these keys also allow you to modify various parameters.
3CH4 keys: Change channels. In menus, these allow you to go from one line to another .
OK key: Validate a choice in the menus.
EXIT key: Go back to the previous menu.
EPG key (Electronic Programs Guide): View the program playing at the time and the following one, (when this information is transmit-ted by the channel). Press OK to select a channel or a program you wish to view.
Zoom key: Widen a part of the screen.
LIST key: Display the list of channels of various satellites.
MUTE key: Press this once to stop the sound, and press it again for the sound to come back to normal.
FAV key: Access your favourite channels.
RECALL key: Go back to the channel you were watching previou-sly.
PAUSE key: Pause the screen.
INFO key: Display the information and the technical parametres of the channel you are viewing. You can also view the reception level of the channel.
M/P key: Press to store channel onto memory and then use to view the stored channel at the same time as the one you are watching.
TV/SAT key: Go from viewing a channel via the receiver to viewing a terrestrial channel. You can therefore watch the terrestrial channels at the same time as recording a satellite one.
TEXT key: Display the digital teletext service, if available.
AUDIO key: Select an alternative audio track and language.
TV/RADIO key: Go from TV mode to Radio mode and back.
TIMER key: Set up a certain time for the TV to switch on or off.
P+ / P- key: Move to the next or previous page.
2
1
2
3
4
5
6
7
8
9
10
11
12
13
14
15
16
17
18
19
20
21
22
2
1
3
45
5
6
7
8
9
10
18
11
1213
1415
16
17 20
19
22
21
9
3
4
METRONIC RECEIVER DESCRIPTION
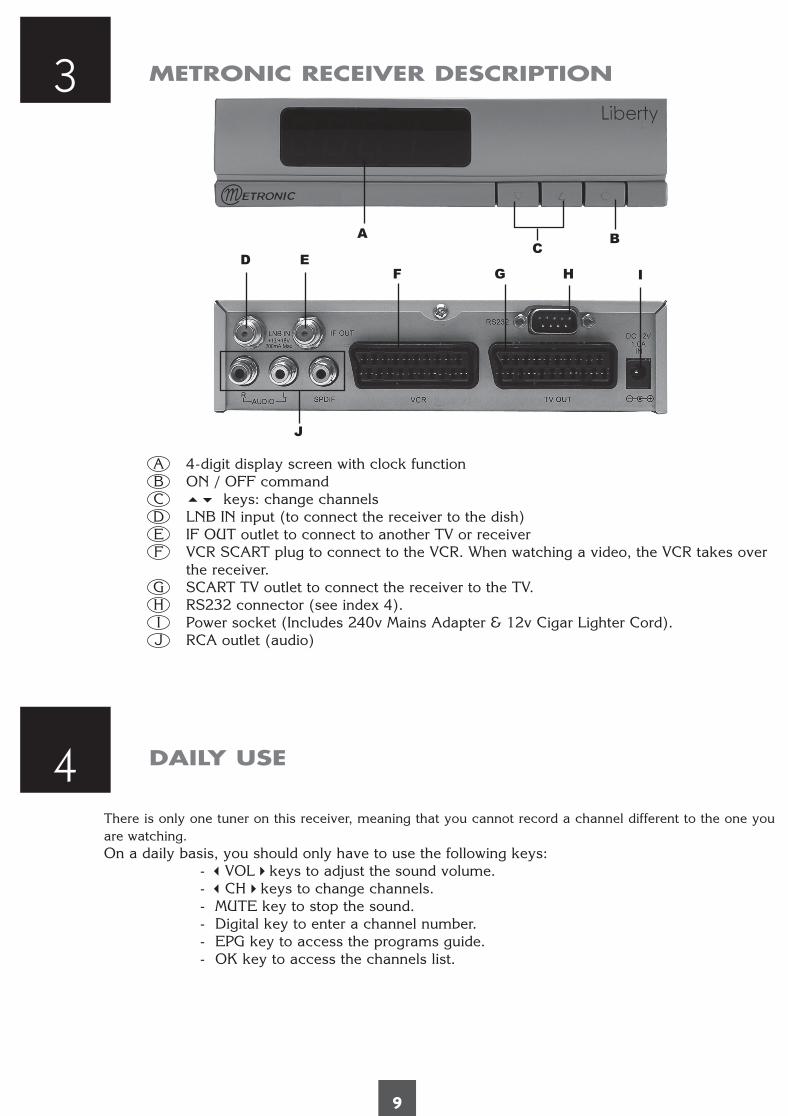
A 4-digit display screen with clock function B ON / OFF command C 56 keys: change channels D LNB IN input (to connect the receiver to the dish) E IF OUT outlet to connect to another TV or receiver F VCR SCART plug to connect to the VCR. When watching a video, the VCR takes over
the receiver. G SCART TV outlet to connect the receiver to the TV. H RS232 connector (see index 4). I Power socket (Includes 240v Mains Adapter & 12v Cigar Lighter Cord). J RCA outlet (audio)
DAILY USE
There is only one tuner on this receiver, meaning that you cannot record a channel different to the one you are watching. On a daily basis, you should only have to use the following keys: - 3VOL4keys to adjust the sound volume. - 3CH4keys to change channels. - MUTE key to stop the sound. - Digital key to enter a channel number. - EPG key to access the programs guide. - OK key to access the channels list.
AC
B
ED
J
F G H I

10
ADDING CHANNELS
Manual Search: searching for a specific satellite channel
- Press MENU / Installation / TP Scan.- Go to Satellite and press OK to display the list of satellites.- Using the 56 keys, select the satellite that emitts the channels you wish to view and press
OK to confirm.- Go to TP Index, press OK to view the list of the frequencies.- Using the 56 keys select the frequency of the channel you wish to view (if the desired fre-
quency is not diplayed, it will need to be added to the list, as explained in paragraph C).- The Symbol Rate and Polarity functions will be automatically modified (in case this does
not happen it is possible to enter the values manually).- Ensure that the quality and signal intensity levels are superior to 50% (grey bar = no signal:
this means that the frequency or LNB parametres are not correct or that the antenna is not pointing to the right satellite).
- Go to Scan mode and select FREE using the 34keys.- Use the 6 key to go to Search and press OK.- The TP Scan window is displayed along with the Find Channel. The screen goes back to
TP Scan. Press EXIT twice to leave the menu.
Automatic Channel Search: searching for all channels from one satellite
- Press MENU / Installation / Auto scan. - Go to Satellite and press OK to display the list of satellites. - Using the 56 , keys select the satellite that emitts the channels you wish to view to start an automatic search. Press OK to confirm. - Go to Scan mode and select FREE using the 34keys. - Use the 6 key to go to Search and press OK.The Auto Search window is displayed along with the Find Channel. The screen goes back to Auto Search. Press EXIT twice to leave the menu.
Adding / Cancelling / Modifying a transponder (see index 5)
Modifying a transponder: - Press MENU / Installation / TP Scan. - Select the satellite on the first line using the 56keys. - Go to TP List and select the transponder you wish to modify. - Change the value: frequency, rate symbol, polarity etc. - Press EXIT to save the data you have entered.
Cancelling a transponder- Press MENU / Installation / TP Scan.- Select the transponder you wish to cancel using the 56 keys and press the ‘2’ key
of your remote.- Press EXIT to save the data you have entered.
5A
B
C
11
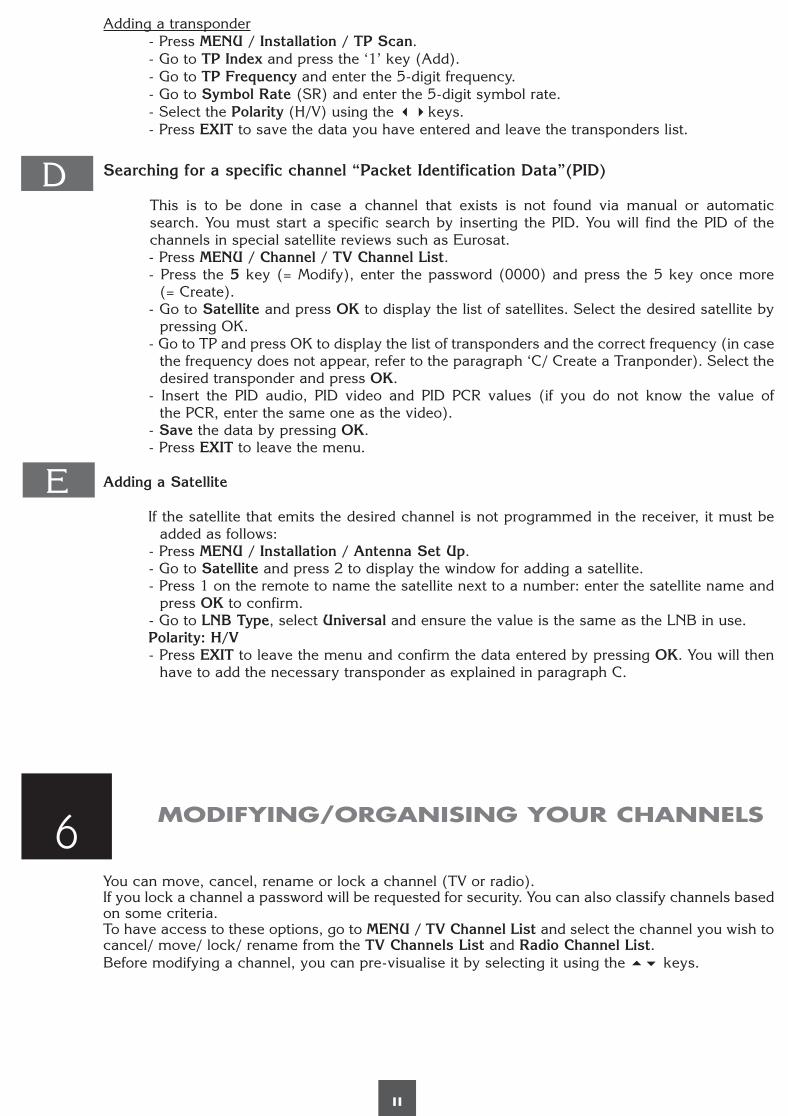
Adding a transponder- Press MENU / Installation / TP Scan.- Go to TP Index and press the ‘1’ key (Add).- Go to TP Frequency and enter the 5-digit frequency.- Go to Symbol Rate (SR) and enter the 5-digit symbol rate.- Select the Polarity (H/V) using the 34keys.- Press EXIT to save the data you have entered and leave the transponders list.
Searching for a specific channel “Packet Identification Data”(PID)
This is to be done in case a channel that exists is not found via manual or automatic search. You must start a specific search by inserting the PID. You will find the PID of the channels in special satellite reviews such as Eurosat.- Press MENU / Channel / TV Channel List.- Press the 5 key (= Modify), enter the password (0000) and press the 5 key once more
(= Create).- Go to Satellite and press OK to display the list of satellites. Select the desired satellite by
pressing OK. - Go to TP and press OK to display the list of transponders and the correct frequency (in case
the frequency does not appear, refer to the paragraph ‘C/ Create a Tranponder). Select the desired transponder and press OK.
- Insert the PID audio, PID video and PID PCR values (if you do not know the value of the PCR, enter the same one as the video).
- Save the data by pressing OK. - Press EXIT to leave the menu.
Adding a Satellite
If the satellite that emits the desired channel is not programmed in the receiver, it must be added as follows:
- Press MENU / Installation / Antenna Set Up.- Go to Satellite and press 2 to display the window for adding a satellite.- Press 1 on the remote to name the satellite next to a number: enter the satellite name and
press OK to confirm. - Go to LNB Type, select Universal and ensure the value is the same as the LNB in use. Polarity: H/V- Press EXIT to leave the menu and confirm the data entered by pressing OK. You will then
have to add the necessary transponder as explained in paragraph C.
MODIFYING/ORGANISING YOUR CHANNELS
You can move, cancel, rename or lock a channel (TV or radio).If you lock a channel a password will be requested for security. You can also classify channels based on some criteria. To have access to these options, go to MENU / TV Channel List and select the channel you wish to cancel/ move/ lock/ rename from the TV Channels List and Radio Channel List.Before modifying a channel, you can pre-visualise it by selecting it using the 56 keys.
D
E
6
12
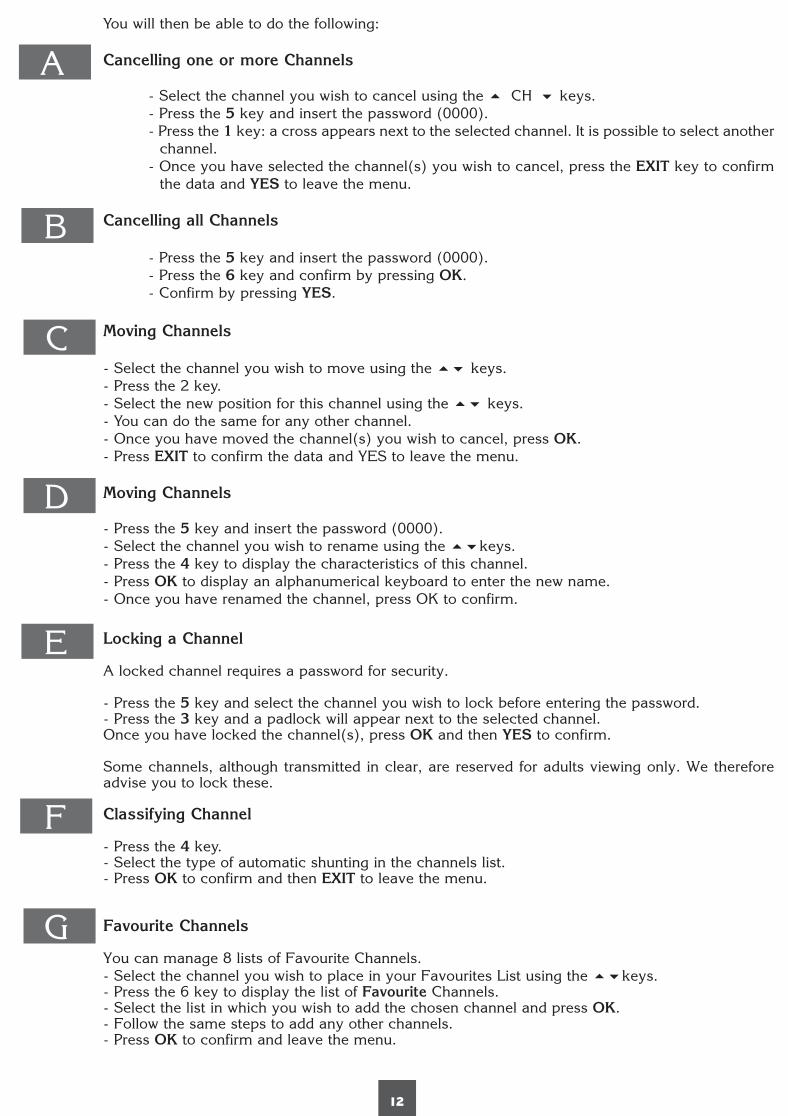
You will then be able to do the following:
Cancelling one or more Channels
- Select the channel you wish to cancel using the 5 CH 6 keys.- Press the 5 key and insert the password (0000).- Press the 1 key: a cross appears next to the selected channel. It is possible to select another
channel.- Once you have selected the channel(s) you wish to cancel, press the EXIT key to confirm
the data and YES to leave the menu.
Cancelling all Channels
- Press the 5 key and insert the password (0000).- Press the 6 key and confirm by pressing OK. - Confirm by pressing YES.
Moving Channels
- Select the channel you wish to move using the 56 keys.- Press the 2 key.- Select the new position for this channel using the 56 keys.- You can do the same for any other channel.- Once you have moved the channel(s) you wish to cancel, press OK.- Press EXIT to confirm the data and YES to leave the menu.
Moving Channels
- Press the 5 key and insert the password (0000).- Select the channel you wish to rename using the 56keys.- Press the 4 key to display the characteristics of this channel.- Press OK to display an alphanumerical keyboard to enter the new name. - Once you have renamed the channel, press OK to confirm.
Locking a Channel
A locked channel requires a password for security.
- Press the 5 key and select the channel you wish to lock before entering the password. - Press the 3 key and a padlock will appear next to the selected channel. Once you have locked the channel(s), press OK and then YES to confirm.
Some channels, although transmitted in clear, are reserved for adults viewing only. We therefore advise you to lock these.
Classifying Channel
- Press the 4 key.- Select the type of automatic shunting in the channels list. - Press OK to confirm and then EXIT to leave the menu.
Favourite Channels
You can manage 8 lists of Favourite Channels.- Select the channel you wish to place in your Favourites List using the 56keys.- Press the 6 key to display the list of Favourite Channels. - Select the list in which you wish to add the chosen channel and press OK. - Follow the same steps to add any other channels.- Press OK to confirm and leave the menu.
A
B
C
D
E
F
G
13
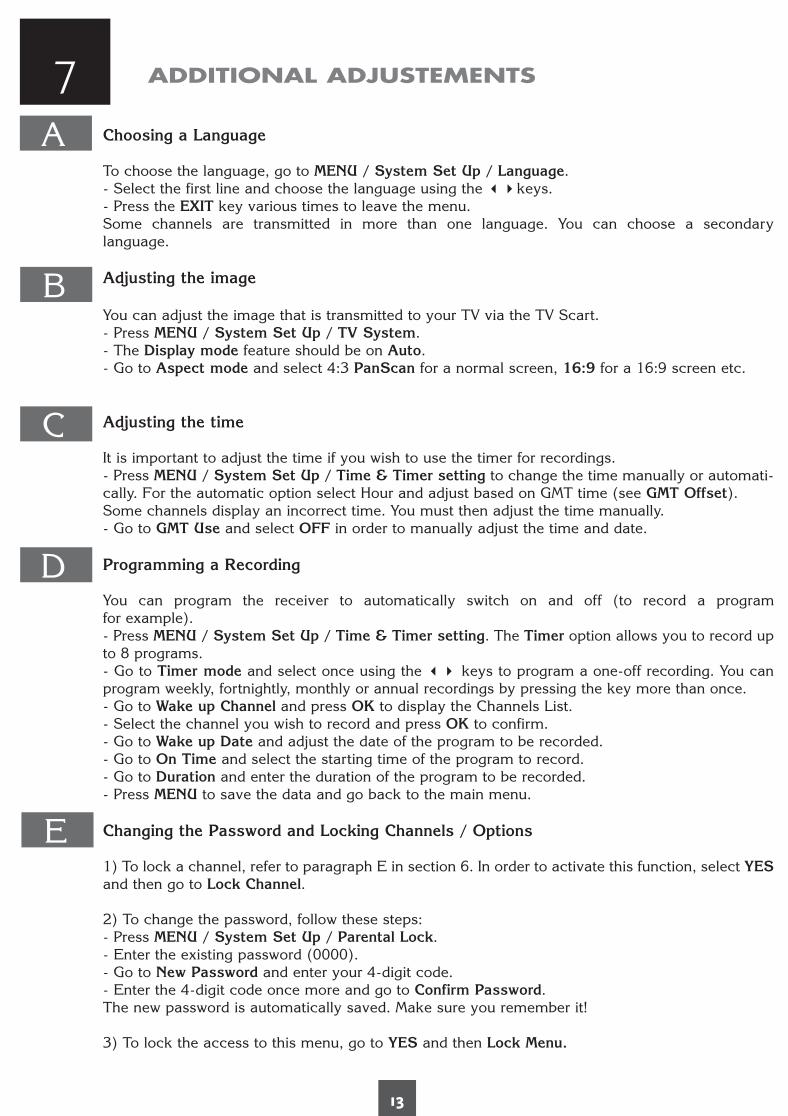
ADDITIONAL ADJUSTEMENTS
Choosing a Language
To choose the language, go to MENU / System Set Up / Language. - Select the first line and choose the language using the 34keys.- Press the EXIT key various times to leave the menu. Some channels are transmitted in more than one language. You can choose a secondary language.
Adjusting the image
You can adjust the image that is transmitted to your TV via the TV Scart.- Press MENU / System Set Up / TV System.- The Display mode feature should be on Auto. - Go to Aspect mode and select 4:3 PanScan for a normal screen, 16:9 for a 16:9 screen etc.
Adjusting the time
It is important to adjust the time if you wish to use the timer for recordings.- Press MENU / System Set Up / Time & Timer setting to change the time manually or automati-cally. For the automatic option select Hour and adjust based on GMT time (see GMT Offset).Some channels display an incorrect time. You must then adjust the time manually. - Go to GMT Use and select OFF in order to manually adjust the time and date.
Programming a Recording
You can program the receiver to automatically switch on and off (to record a program for example).- Press MENU / System Set Up / Time & Timer setting. The Timer option allows you to record up to 8 programs. - Go to Timer mode and select once using the 34 keys to program a one-off recording. You can program weekly, fortnightly, monthly or annual recordings by pressing the key more than once.- Go to Wake up Channel and press OK to display the Channels List. - Select the channel you wish to record and press OK to confirm. - Go to Wake up Date and adjust the date of the program to be recorded. - Go to On Time and select the starting time of the program to record. - Go to Duration and enter the duration of the program to be recorded. - Press MENU to save the data and go back to the main menu.
Changing the Password and Locking Channels / Options
1) To lock a channel, refer to paragraph E in section 6. In order to activate this function, select YES and then go to Lock Channel.
2) To change the password, follow these steps:- Press MENU / System Set Up / Parental Lock.- Enter the existing password (0000).- Go to New Password and enter your 4-digit code. - Enter the 4-digit code once more and go to Confirm Password. The new password is automatically saved. Make sure you remember it!
3) To lock the access to this menu, go to YES and then Lock Menu.
7A
B
C
D
E
14
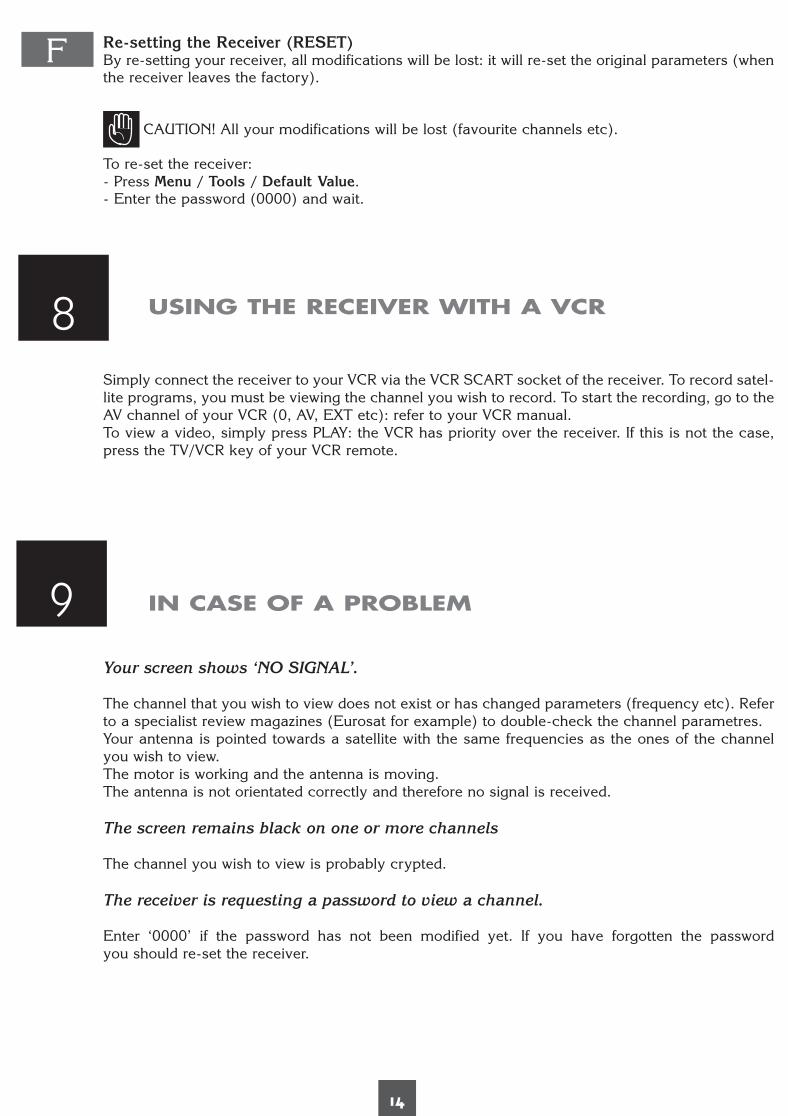
Re-setting the Receiver (RESET)By re-setting your receiver, all modifications will be lost: it will re-set the original parameters (when the receiver leaves the factory).
CAUTION! All your modifications will be lost (favourite channels etc).
To re-set the receiver:- Press Menu / Tools / Default Value.- Enter the password (0000) and wait.
USING THE RECEIVER WITH A VCR
Simply connect the receiver to your VCR via the VCR SCART socket of the receiver. To record satel-lite programs, you must be viewing the channel you wish to record. To start the recording, go to the AV channel of your VCR (0, AV, EXT etc): refer to your VCR manual.To view a video, simply press PLAY: the VCR has priority over the receiver. If this is not the case, press the TV/VCR key of your VCR remote.
IN CASE OF A PROBLEM
Your screen shows ‘NO SIGNAL’.
The channel that you wish to view does not exist or has changed parameters (frequency etc). Refer to a specialist review magazines (Eurosat for example) to double-check the channel parametres.Your antenna is pointed towards a satellite with the same frequencies as the ones of the channel you wish to view. The motor is working and the antenna is moving.The antenna is not orientated correctly and therefore no signal is received.
The screen remains black on one or more channels
The channel you wish to view is probably crypted.
The receiver is requesting a password to view a channel.
Enter ‘0000’ if the password has not been modified yet. If you have forgotten the password you should re-set the receiver.
F
9
8
15
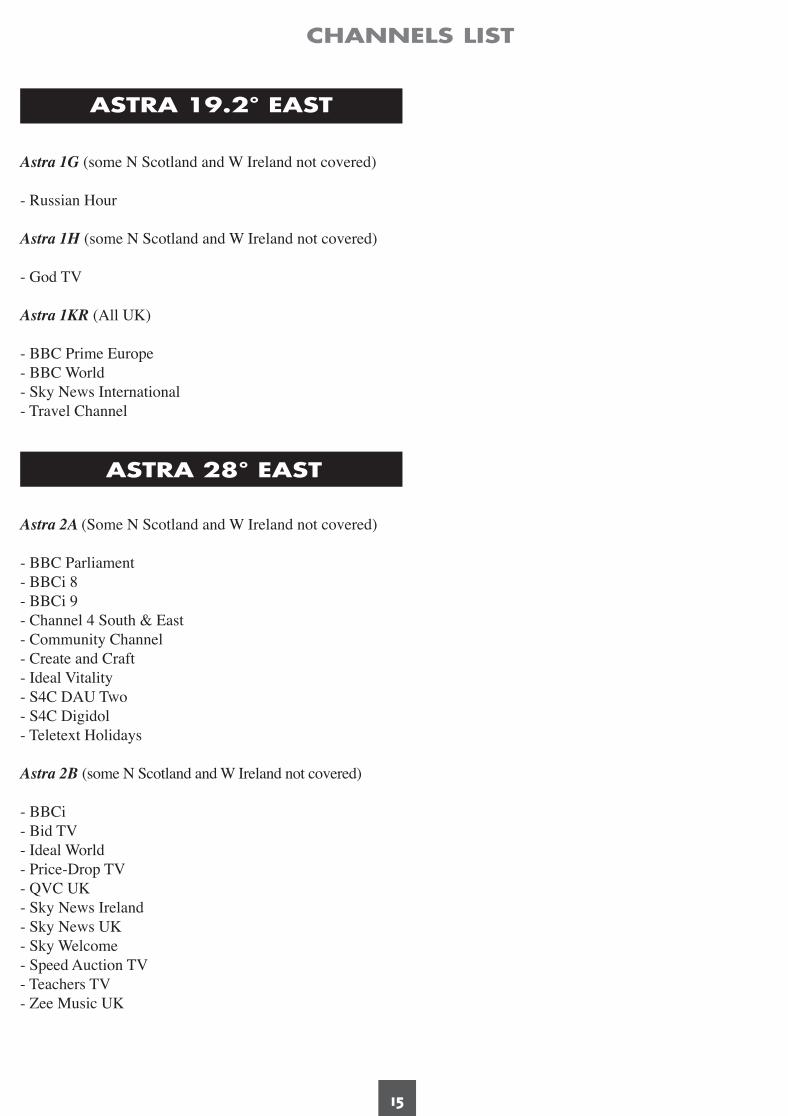
CHANNELS LIST
ASTRA 19.2° EAST
ASTRA 28° EAST
Astra 1G (some N Scotland and W Ireland not covered)
- Russian Hour
Astra 1H (some N Scotland and W Ireland not covered)
- God TV
Astra 1KR (All UK)
- BBC Prime Europe- BBC World- Sky News International- Travel Channel
Astra 2A (Some N Scotland and W Ireland not covered)
- BBC Parliament - BBCi 8 - BBCi 9 - Channel 4 South & East - Community Channel - Create and Craft - Ideal Vitality - S4C DAU Two - S4C Digidol - Teletext Holidays
Astra 2B (some N Scotland and W Ireland not covered)
- BBCi - Bid TV - Ideal World - Price-Drop TV - QVC UK - Sky News Ireland - Sky News UK - Sky Welcome - Speed Auction TV - Teachers TV - Zee Music UK

16
CHANNELS LIST
EUTELSAT W2 16° EAST
EUTELSAT W1 10° EAST
HOTBIRD 2/6/7A/8 13° EAST
Astra 2D (All UK)
- BBC Four - BBC News 24 - BBC One Cambridge - BBC One Channel Island - BBC One East England - BBC One Midlands - BBC One East Yorkshire & Lincolnshire - BBC One London - BBC One North East & Cumbria - BBC North West - BBC One Northern Ireland - BBC One Oxford- BBC One Scotland- BBC One South East - BBC One South England- BBC One South West- BBC One Wales- BBC West England- BBC one West Midlands- BBC One Yorkshire & North Midlands- BBC Three- BBC Two England- BBC Two Northern Ireland- BBC Two Scotland- BBC Two Wales- CBBC- Cbeebies- Channel TV- CITV- Film 4- Film 4 + 1- ITV 1 Anglia TV North- ITV 1 Anglia TV South- ITV 1 Anglia TV West- ITV 1 Border TV North England- ITV 1 Border TV South Scotland- ITV 1 Central East- ITV 1 Central TV South West- ITV 1 Central West- ITV 1 Granada TV- ITV 1 London- ITV 1 Meridian TV South- ITV 1 Meridian TV South East- ITV 1 Meridian TV Sussex- ITV 1 Thames Valley TV North- ITV 1 Thames Valley TV South- ITV 1 Tyne Tees TV North- ITV 1 Tyne Tees TV South- ITV 1 Wales
- ITV 1 West- ITV 1 Westcountry South- ITV 1 Yorkshire TV East- ITV 1 Yorkshire TV North- ITV 2- ITV2 + 1- ITV3- ITV3 + 1- ITV 4- Men & Motors- STV Grampian TV North- STV Scottish TV East- STV Scottish TV West - Ulster TV
- God TV
- Al Jazeera English
- Church Channel- Daystar TV
W Ireland not covered)
17
WARRANTY DETAILS
INDEX
This product has a 1-year warranty provided by Metronic Ltd.
For further information, please contact us at :
LINK
1 – F Connector : This connector goes at the end of your satellite cable to allow you to connect to the satellite receiver.2 – LNB: Low Noise Block: receives signal from the satellite and sends the signal down to your receiver.3 – Monobloc LNB: LNB purely for Astra and HotBird.4 – RS232: Generally used to connect to a PC / download software.5 – Transponder: channel frequency
18
6
4
5
11
5
3
1414
13
712
1
1
17
19
18
2
33
16
30mm
1
1
11
1
1
1
1
1
12
1
2
2
1918
1617
1314
121110
7
56
15
321
45
4
1
10
10
360° ROTATE360° ROTATE
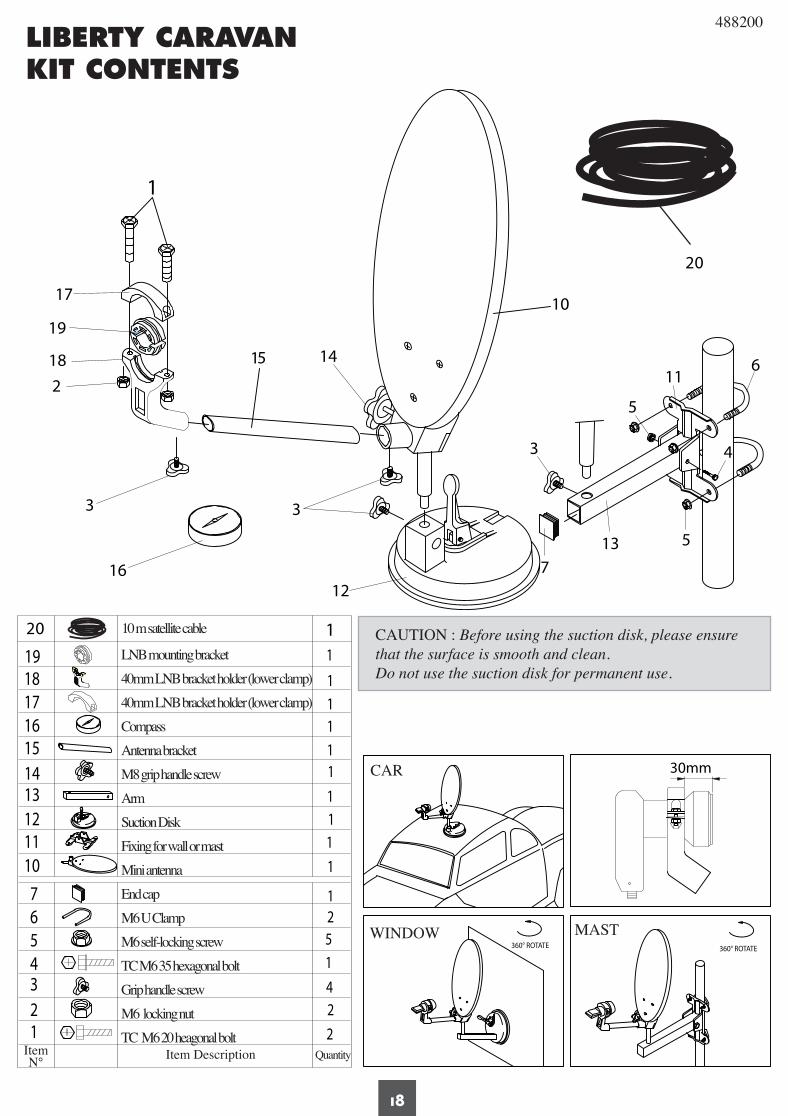
LIBERTY CARAVANKIT CONTENTS
488200
LNB mounting bracket 40mm LNB bracket holder (lower clamp) 40mm LNB bracket holder (lower clamp) Compass Antenna bracket M8 grip handle screw Arm Suction Disk Fixing for wall or mast Mini antenna End cap M6 U Clamp M6 self-locking screw TC M6 35 hexagonal bolt Grip handle screw M6 locking nut TC M6 20 heagonal bolt
Item N° Item Description Quantity
CAR
WINDOW MAST
CAUTION : Before using the suction disk, please ensure that the surface is smooth and clean.Do not use the suction disk for permanent use.
5
2
102 10 m satellite cable
Product made in Asia.
Metronic Ltd, Regus,Cardinal Point,
Park Road,
Rickmansworth WD3 1RE,UK.
www.metronic.com
GB - As per the EN 60065 norm requirements, please pay particular attention to the following safety guidelines. Do not obstruct the air vents with objects such as newspapers, table cloths, curtains etc. Allow at least 5 cm around the product to allow enough ventilation. Do not place the product on or near flamable objects such as lit candles. The device may not be exposed to dripping or splashing and no object filled with liquid, such as vases, must be put on the device. If the mains power supply is used as the on / off control, it must be easily accessible.Please respect the environment and the law : do not throw batteries with the household rubbish ; take them back to your retailer and dispose of them in the correct container.
GB -This symbol indicates that the product must not be treated as household waste. The harmfull substances possibly contained in the equipment may have negative consequences on the environment and / or the human health. At the end of its life, bring any electronic equipment back to your retailer or at the collection point that your city or town puts at your disposal.
Related Documents