Welcome To The Beagle Black Board (BBB)

Introduction To The Beagleboard
Aug 17, 2015
Welcome message from author
This document is posted to help you gain knowledge. Please leave a comment to let me know what you think about it! Share it to your friends and learn new things together.
Transcript

Welcome To The Beagle Black Board (BBB)

What is Beagle Bone Black..?
It is a low-cost, development platform for developers.
Boot Linux in under 10 seconds and get started on development in less than 5 minutes with just a single USB cable.

Nuts & Bolts

Beagle Board Means
• Bring your own peripherals
• Entry-level cost ($149/179)
• ARM Cortex-A8 (superscalar)
• Graphics and DSP accelerated
• Linux and open source community
• Environment for innovators
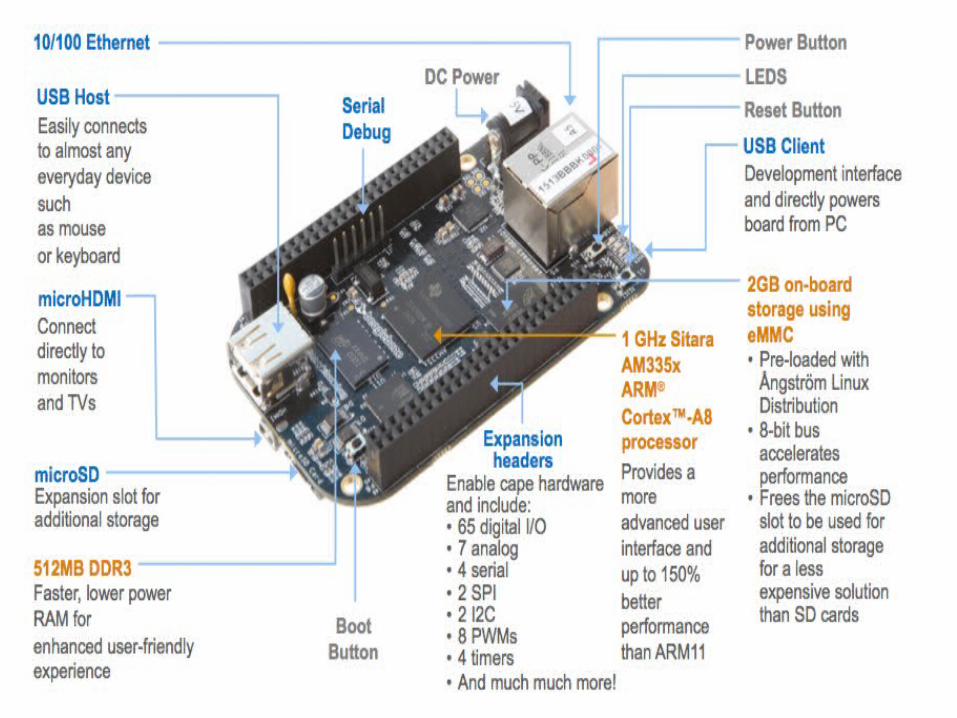
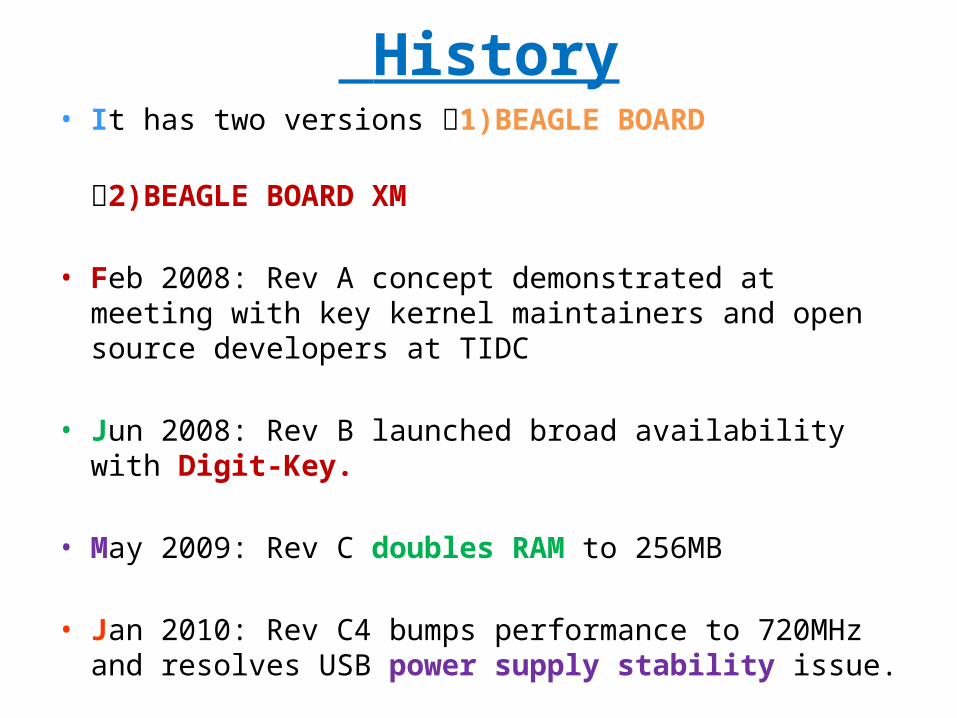
HardwareProcessor: AM335x 1GHz ARM® Cortex-A8• 512MB DD3 RAM• 2GB 8-bit eMMC on-board flash storage• 3D graphics accelerator
Connectivity• USB client for power and communications• USB host• Ethernet• HDMI• 2x46 pin headers
Software Compatibility• Angstrom Linux• Android• Cloud9 IDE on Node.js w/ Bone Script Library
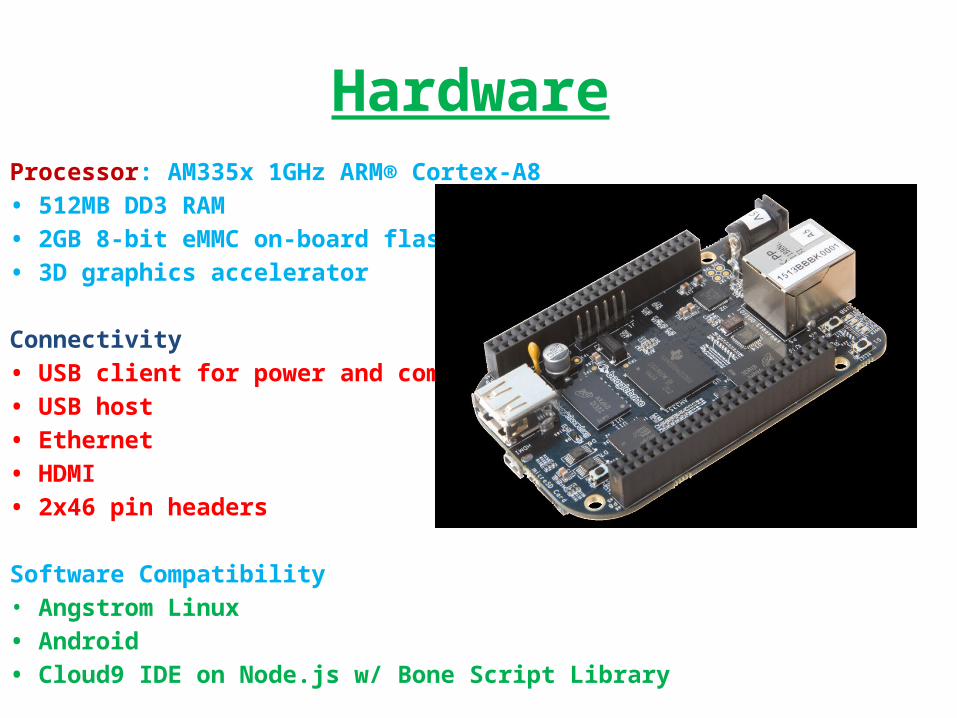
History• It has two versions 1)BEAGLE BOARD 2)BEAGLE BOARD XM
• Feb 2008: Rev A concept demonstrated at meeting with key kernel maintainers and open source developers at TIDC
• Jun 2008: Rev B launched broad availability with Digit-Key.
• May 2009: Rev C doubles RAM to 256MB
• Jan 2010: Rev C4 bumps performance to 720MHz and resolves USB power supply stability issue.

Beagle Board -XM• A modified version of the Beagle Board called the Beagle Board-XM started shipping on August 27, 2010.
• It measures in at 82.55 by 82.55 mm and has a faster CPU core (clocked at 1 GHz compared to the 720 MHz of the Beagle Board).
• RAM (512 MB compared to 256 MB), onboard Ethernet and 4 port USB hub.
• It has micro SD card.
• The addition of the Camera port to the -XM provides a simple way of importing videos.

Beagle Board -XM

Browsing Your Beagle Board
• Firstly, just test that the connection is active by trying to connect to the BBB with a browser.
• Connect to the URL http://192.168.7.2
• You should see a helpful introductory web page served by the Beagle Board itself

• On Linux or Mac simply open a terminal window and type the following command:
ssh 192.168.7.2 –l root

FeaturesBuilt-innetworking
Remote Access
Time Keeping
Linux SW
Multitasking
File system Size
USB
Community
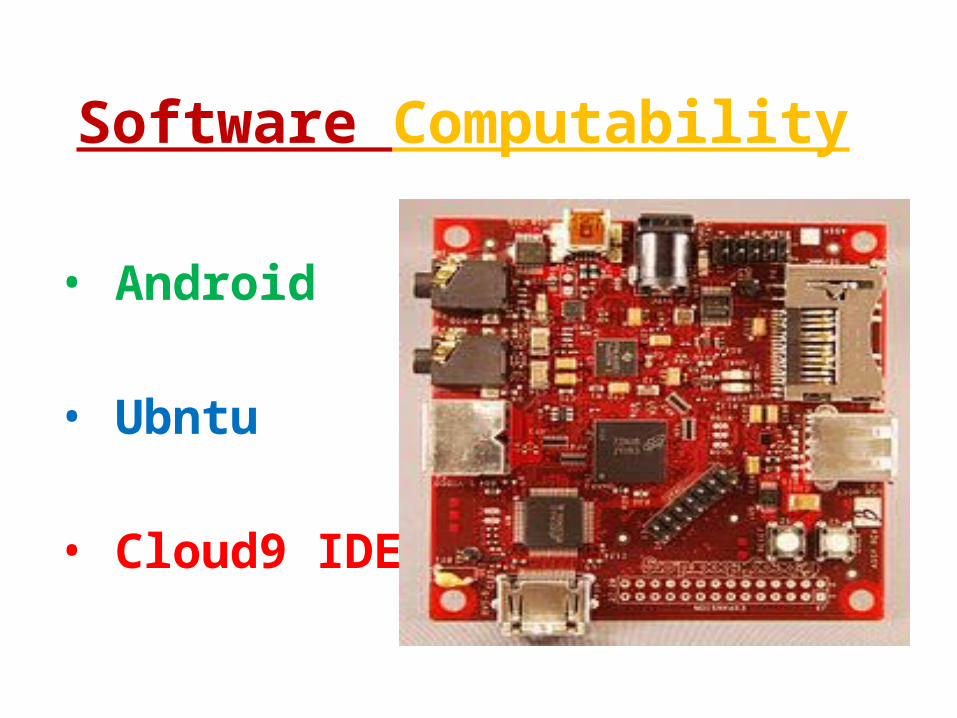
Software Computability
• Android
• Ubntu
• Cloud9 IDE

Beagle Board
Note: Beagle Board can be powered from the alternate jack (as shown) or via USB
Stereo in
SD
Power
DVI-D
USB
Stereo out

Why Beagle Board XM To Be Used
In beagle board there is no over voltage protection circuit.
It is having only one USB, no insertion of memory card, camera header, various expansions.
It is having only 256mb of memory as compare to the beagle board XM.

LED Blinking: Wiring +ve To Pin 10 & -ve To GND
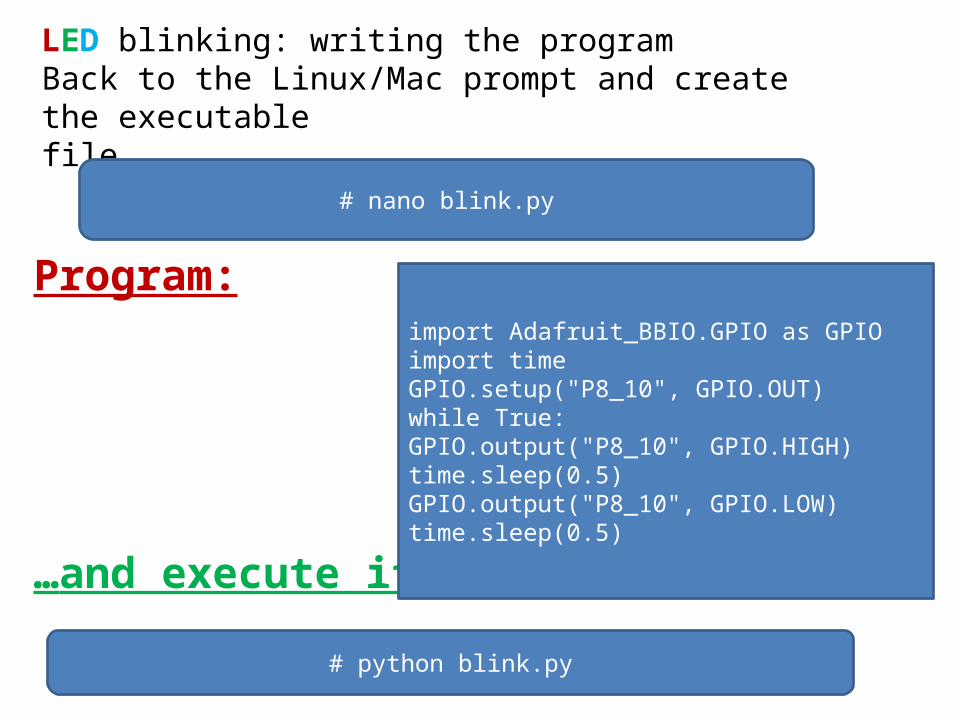
LED blinking: writing the programBack to the Linux/Mac prompt and create the executablefile
Program:
…and execute it
# nano blink.py
import Adafruit_BBIO.GPIO as GPIOimport timeGPIO.setup("P8_10", GPIO.OUT)while True:GPIO.output("P8_10", GPIO.HIGH)time.sleep(0.5)GPIO.output("P8_10", GPIO.LOW)time.sleep(0.5)
# python blink.py

Time Display

Measuring Temperature: Wiring

Displaying Temperature

Fade Effect With PWM: Wiring
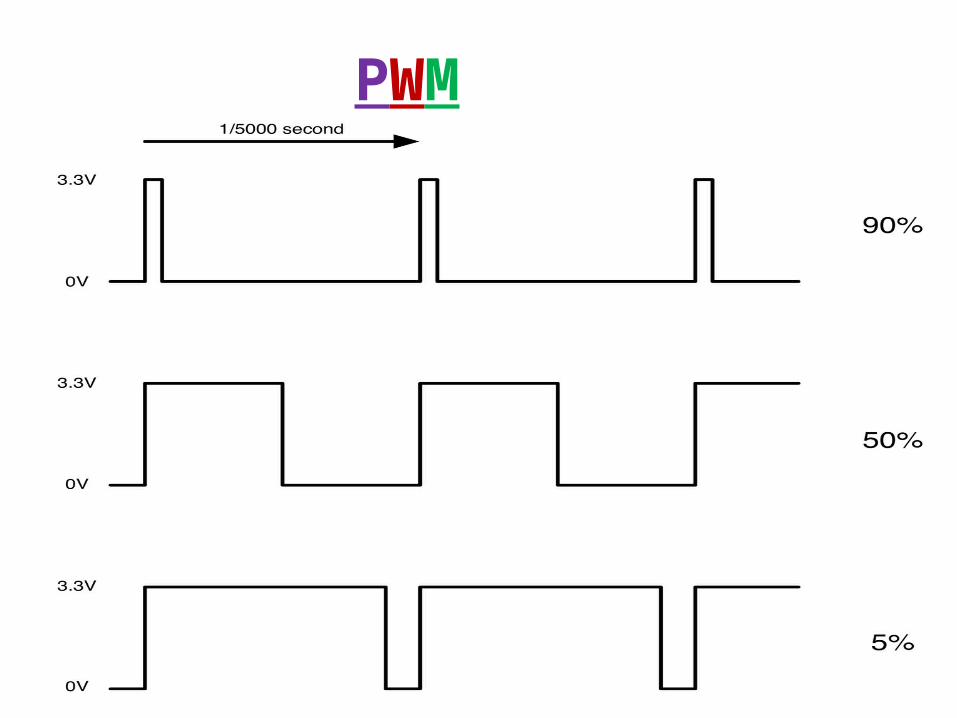
PWM

Differences

It is perfect for physical computing and smaller embedded applications.
It can be complemented with cape plug-in boards.
Capes are expansion boards which can be stacked onto the beagle bone board (up to four at one time).
Application

Capes are expansion boards which can be stacked onto the beagle bone board (up to four at one time).

Exiting Applications Interfacing to all of your robotics motor drivers.location or pressure sensors.
2D or 3D cameras.
Running Open CV, Open NI and other image collection.
Analysis software to recognize the objects around your robot and the gestures you might make to control it.


Recommended Readings
Getting Started with Beagle Bone Black Make
By Matt Richardson
Building Embedded Linux SystemO’Reilly
By Karim Yaghmour, Jon Masters, Gilad BenYassef, and Philippe Gerum

Embedded Linux System Design and Development
By P. Raghavan, A. Lad, S. Neelakandan,
Auerbach

Links
www.beagleboard.org
http://www.angstrom-distribution.org/
http://wiki.openembedded.net/index.php/Main_Page
http://focus.ti.com/docs/prod/folders/print/omap3530.html

Related Documents