DVD Slideshow Tutorial Requirements: 1. Apple iDVD 2. Apple iMovie 3. Adobe Photoshop 4. A computer with a DVD burner. 5. A blank DVD-R or DVD-RW. { A MICA AV Services Tutorial } http://www.mica.edu/tss/av/tutorials [email protected] Page 1

Welcome message from author
This document is posted to help you gain knowledge. Please leave a comment to let me know what you think about it! Share it to your friends and learn new things together.
Transcript

DVD Slideshow TutorialRequirements:
1. Apple iDVD2. Apple iMovie3. Adobe Photoshop4. A computer with a DVD burner.5. A blank DVD-R or DVD-RW.
{ A MICA AV Services Tutorial }
http://www.mica.edu/tss/av/[email protected]
Page 1
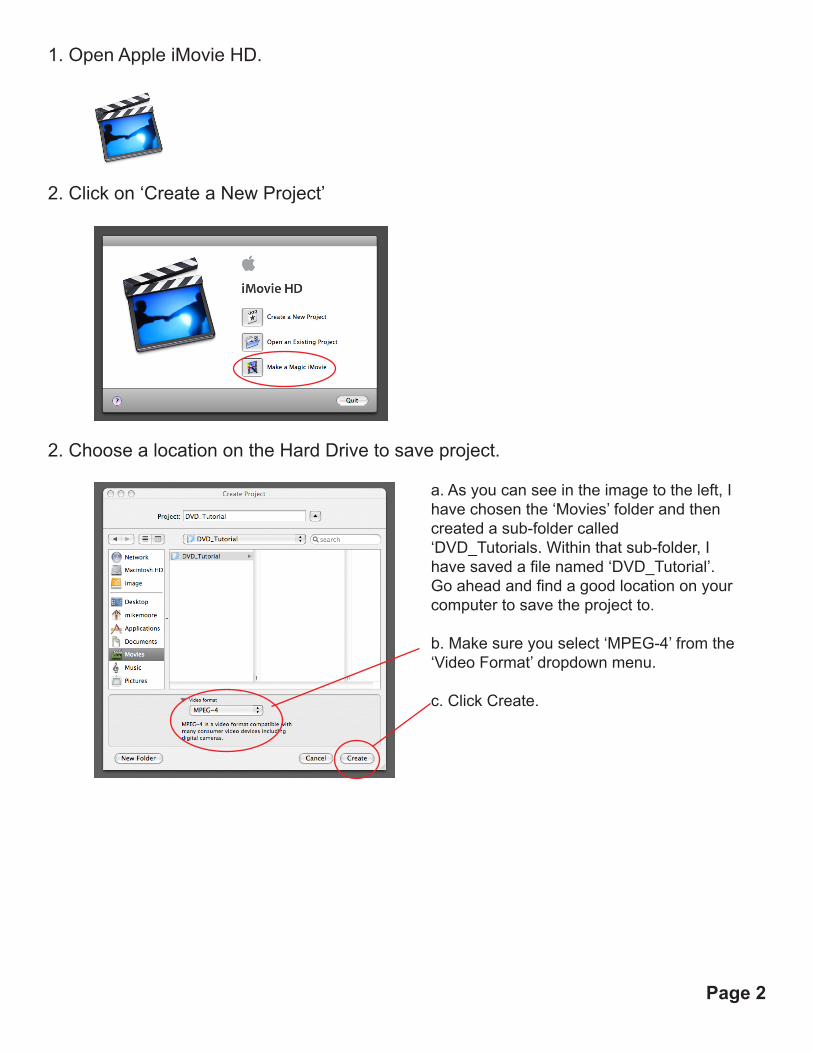
1. Open Apple iMovie HD.
2. Click on ‘Create a New Project’
2. Choose a location on the Hard Drive to save project.
a. As you can see in the image to the left, I have chosen the ‘Movies’ folder and then created a sub-folder called ‘DVD_Tutorials. Within that sub-folder, I have saved a file named ‘DVD_Tutorial’. Go ahead and find a good location on your computer to save the project to.
b. Make sure you select ‘MPEG-4’ from the ‘Video Format’ dropdown menu.
c. Click Create.
Page 2
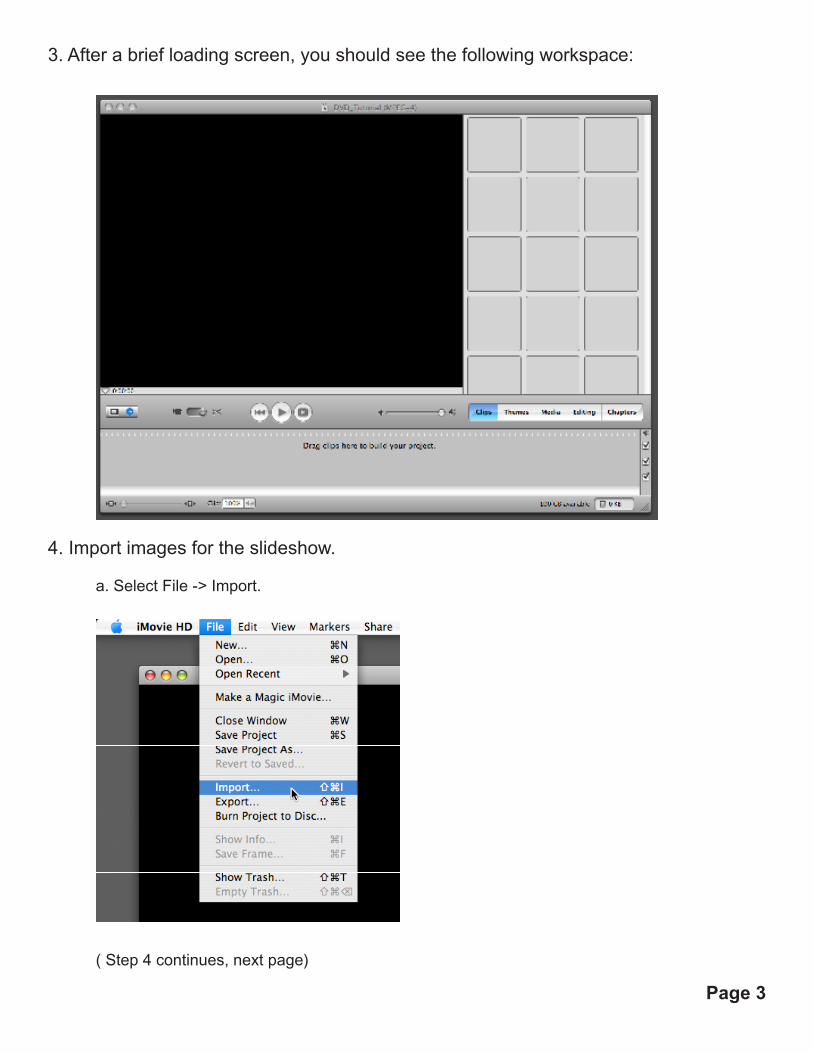
3. After a brief loading screen, you should see the following workspace:
4. Import images for the slideshow.
a. Select File -> Import.
( Step 4 continues, next page)
Page 3
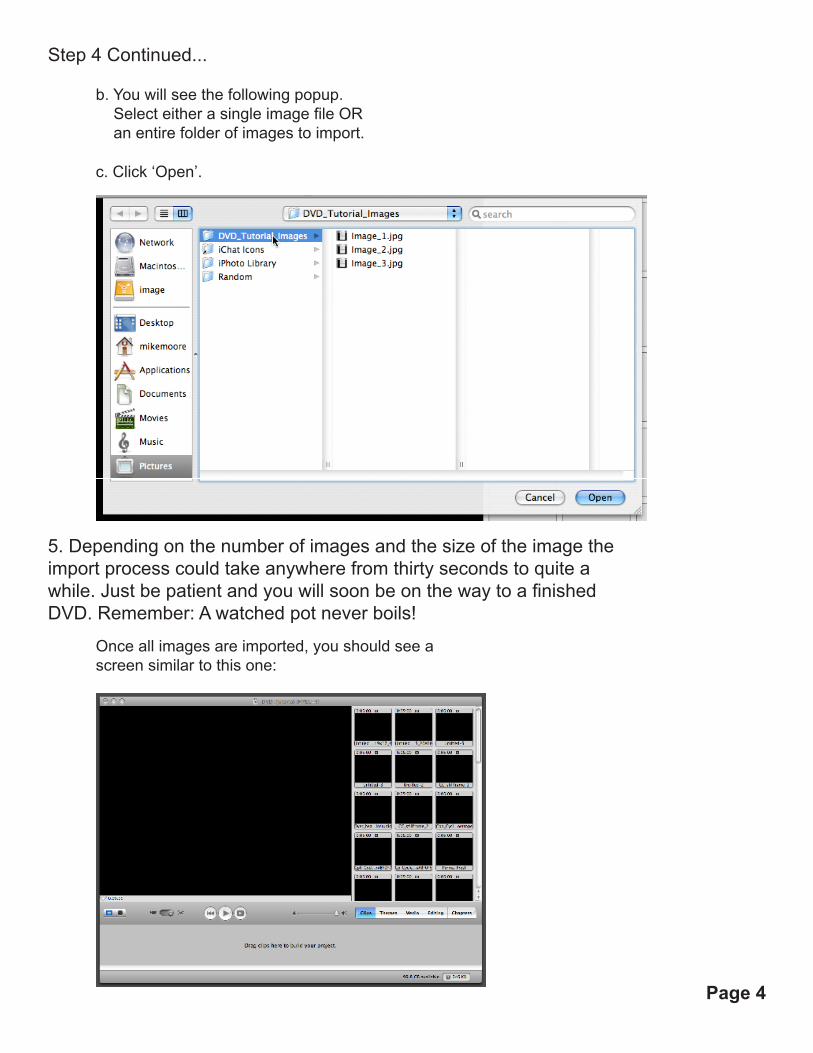
Step 4 Continued...
b. You will see the following popup. Select either a single image file OR an entire folder of images to import.
c. Click ‘Open’.
5. Depending on the number of images and the size of the image the import process could take anywhere from thirty seconds to quite a while. Just be patient and you will soon be on the way to a finished DVD. Remember: A watched pot never boils!
Once all images are imported, you should see a screen similar to this one:
Page 4
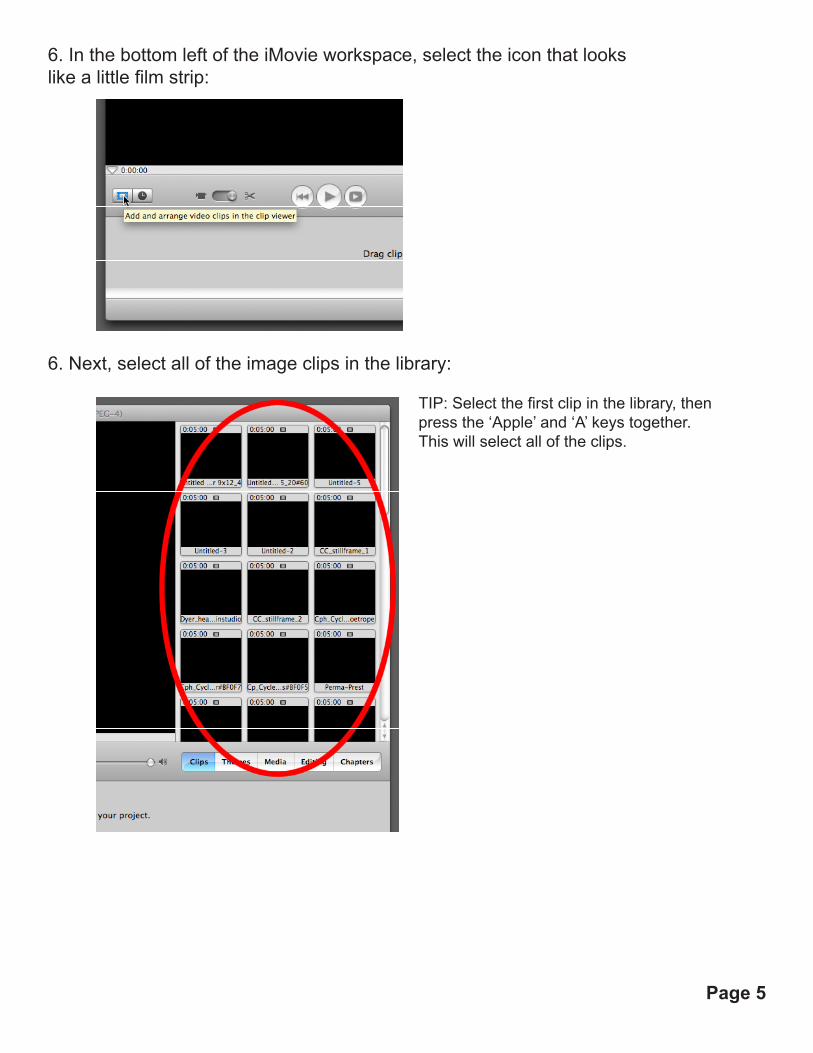
6. In the bottom left of the iMovie workspace, select the icon that looks like a little film strip:
6. Next, select all of the image clips in the library:
TIP: Select the first clip in the library, then press the ‘Apple’ and ‘A’ keys together. This will select all of the clips.
Page 5
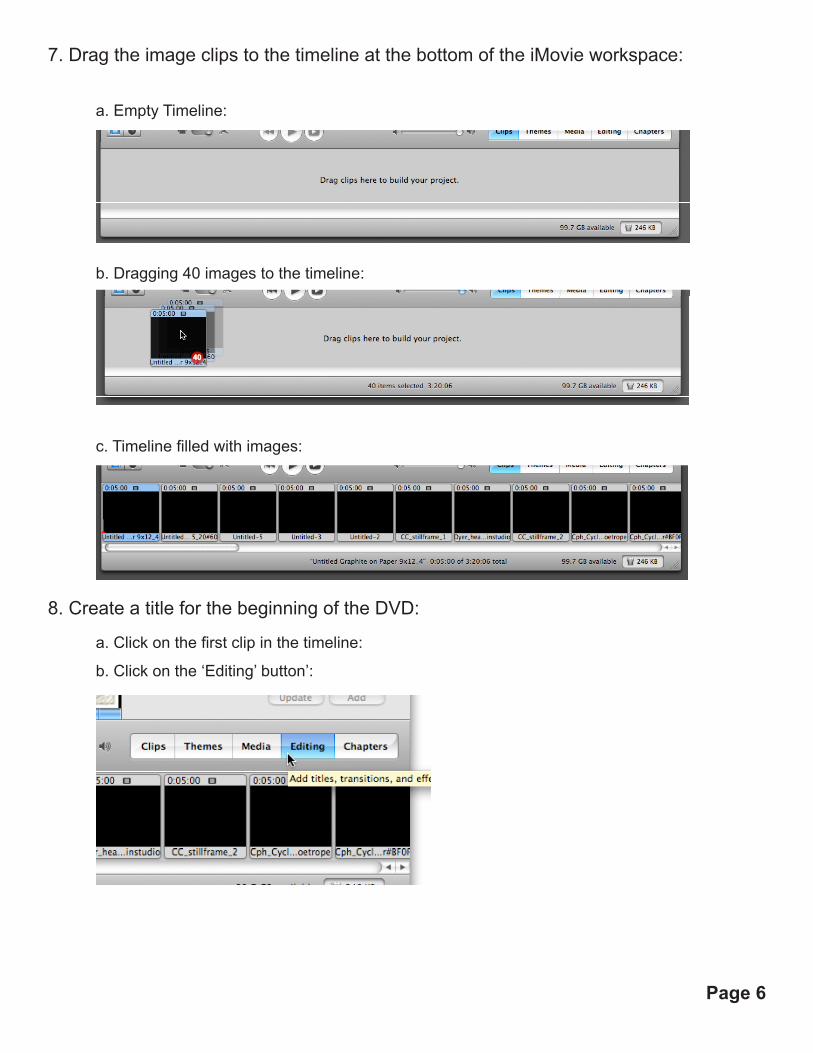
7. Drag the image clips to the timeline at the bottom of the iMovie workspace:
a. Empty Timeline:
b. Dragging 40 images to the timeline:
c. Timeline filled with images:
8. Create a title for the beginning of the DVD:
a. Click on the first clip in the timeline:
b. Click on the ‘Editing’ button’:
Page 6
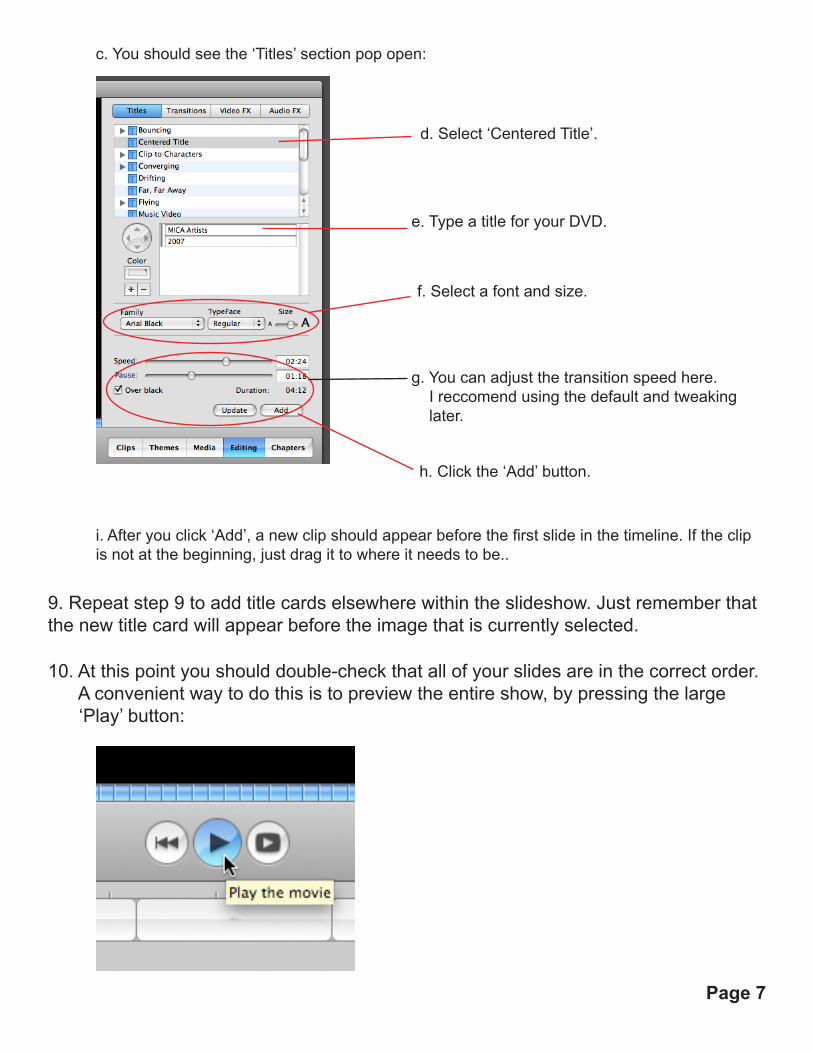
c. You should see the ‘Titles’ section pop open:
d. Select ‘Centered Title’.
e. Type a title for your DVD.
f. Select a font and size.
g. You can adjust the transition speed here. I reccomend using the default and tweaking later.
h. Click the ‘Add’ button.
i. After you click ‘Add’, a new clip should appear before the first slide in the timeline. If the clip is not at the beginning, just drag it to where it needs to be..
9. Repeat step 9 to add title cards elsewhere within the slideshow. Just remember that the new title card will appear before the image that is currently selected.
10. At this point you should double-check that all of your slides are in the correct order. A convenient way to do this is to preview the entire show, by pressing the large ‘Play’ button:
Page 7
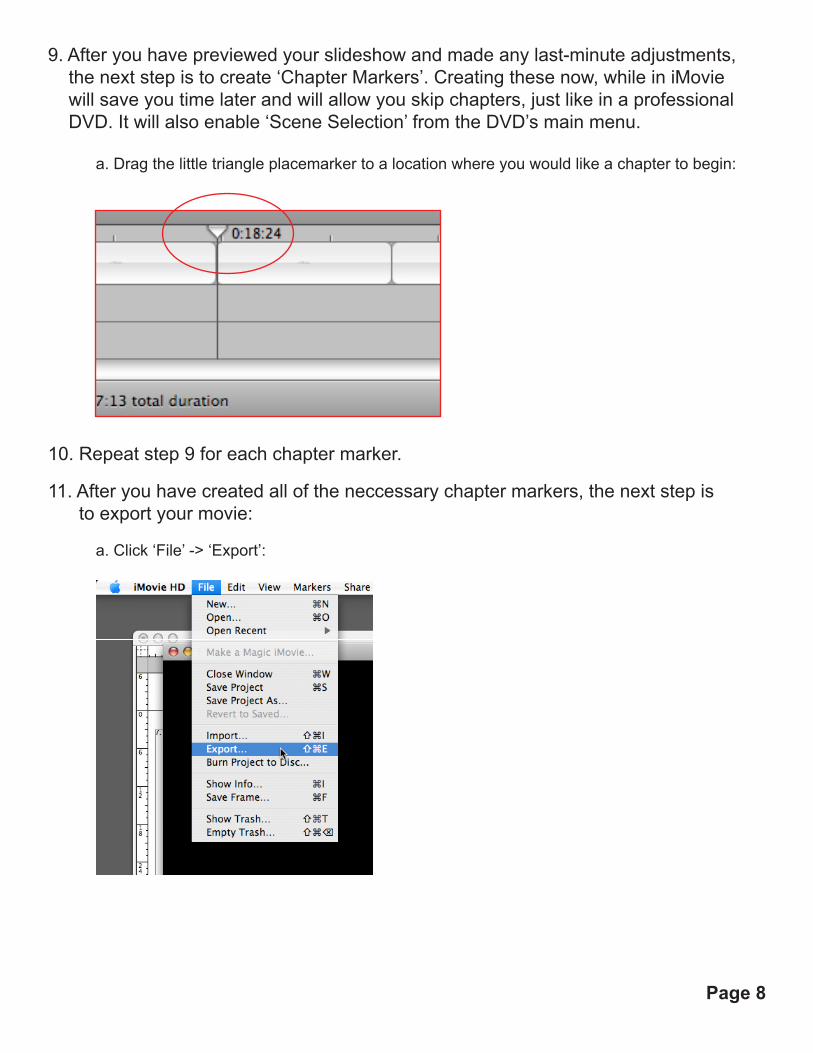
a. Click ‘File’ -> ‘Export’:
9. After you have previewed your slideshow and made any last-minute adjustments, the next step is to create ‘Chapter Markers’. Creating these now, while in iMovie will save you time later and will allow you skip chapters, just like in a professional DVD. It will also enable ‘Scene Selection’ from the DVD’s main menu.
a. Drag the little triangle placemarker to a location where you would like a chapter to begin:
10. Repeat step 9 for each chapter marker.
11. After you have created all of the neccessary chapter markers, the next step is to export your movie:
Page 8
Page 9
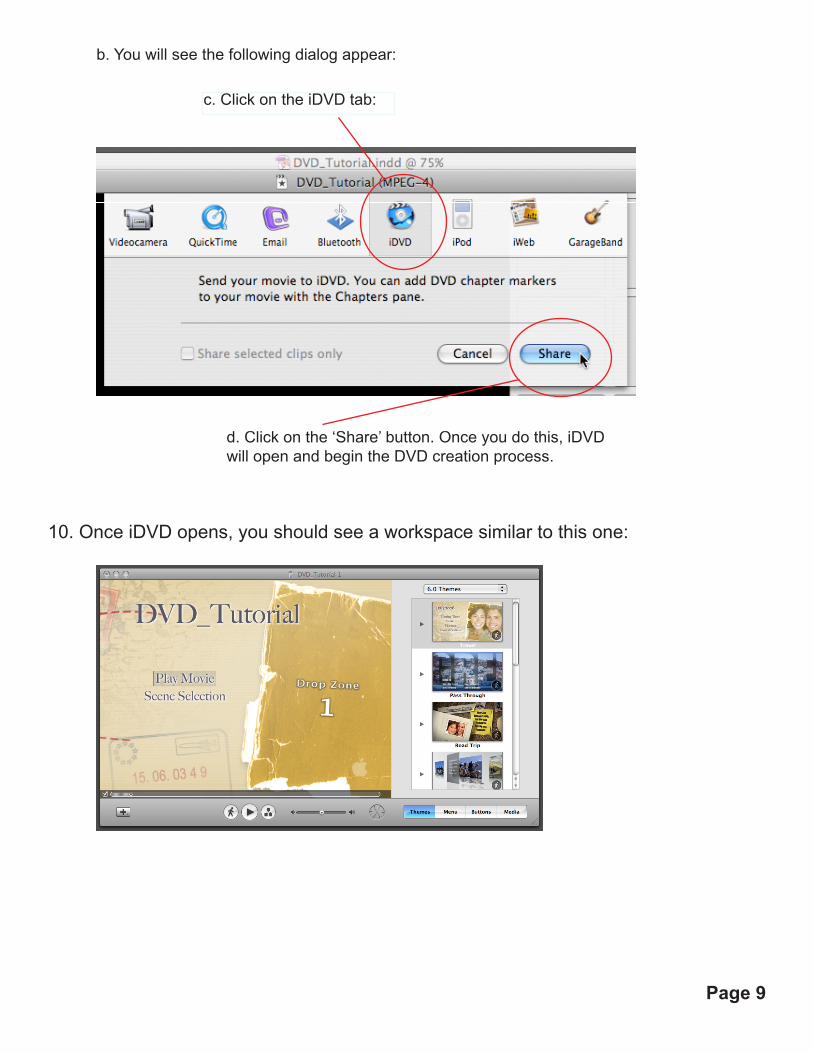
b. You will see the following dialog appear:
c. Click on the iDVD tab:
d. Click on the ‘Share’ button. Once you do this, iDVD will open and begin the DVD creation process.
10. Once iDVD opens, you should see a workspace similar to this one:
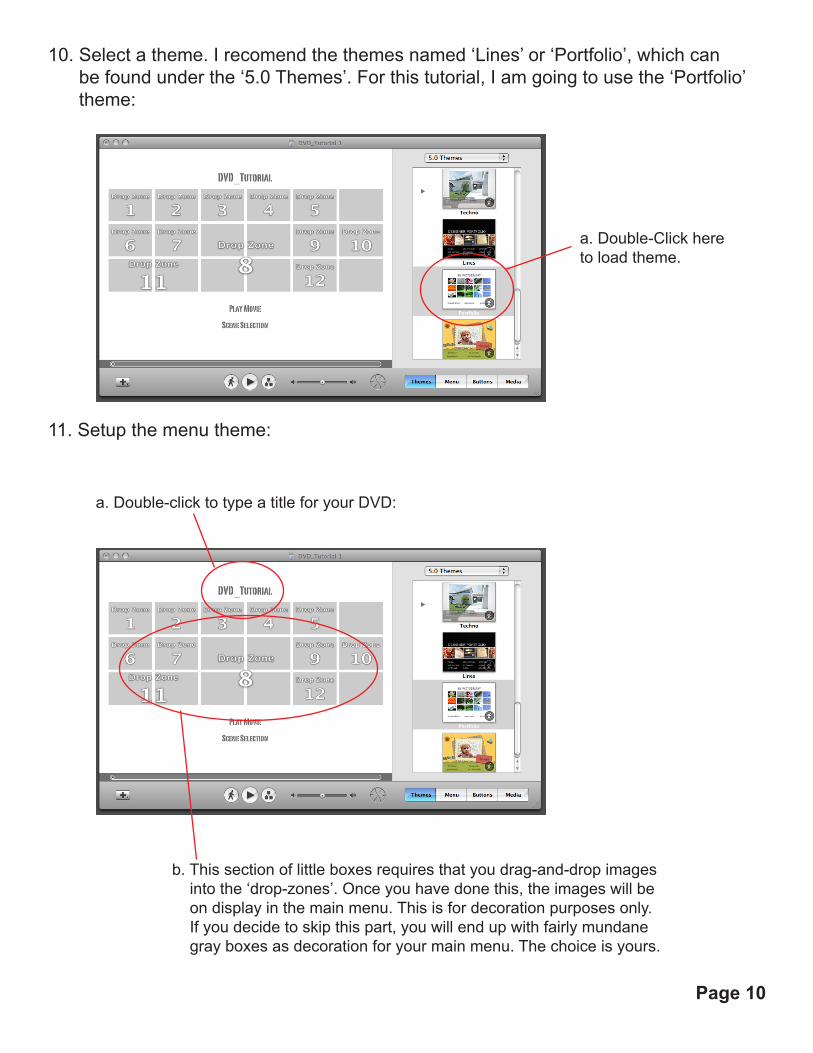
10. Select a theme. I recomend the themes named ‘Lines’ or ‘Portfolio’, which can be found under the ‘5.0 Themes’. For this tutorial, I am going to use the ‘Portfolio’ theme:
a. Double-Click here to load theme.
a. Double-click to type a title for your DVD:
b. This section of little boxes requires that you drag-and-drop images into the ‘drop-zones’. Once you have done this, the images will be on display in the main menu. This is for decoration purposes only. If you decide to skip this part, you will end up with fairly mundane gray boxes as decoration for your main menu. The choice is yours.
11. Setup the menu theme:
Page 10
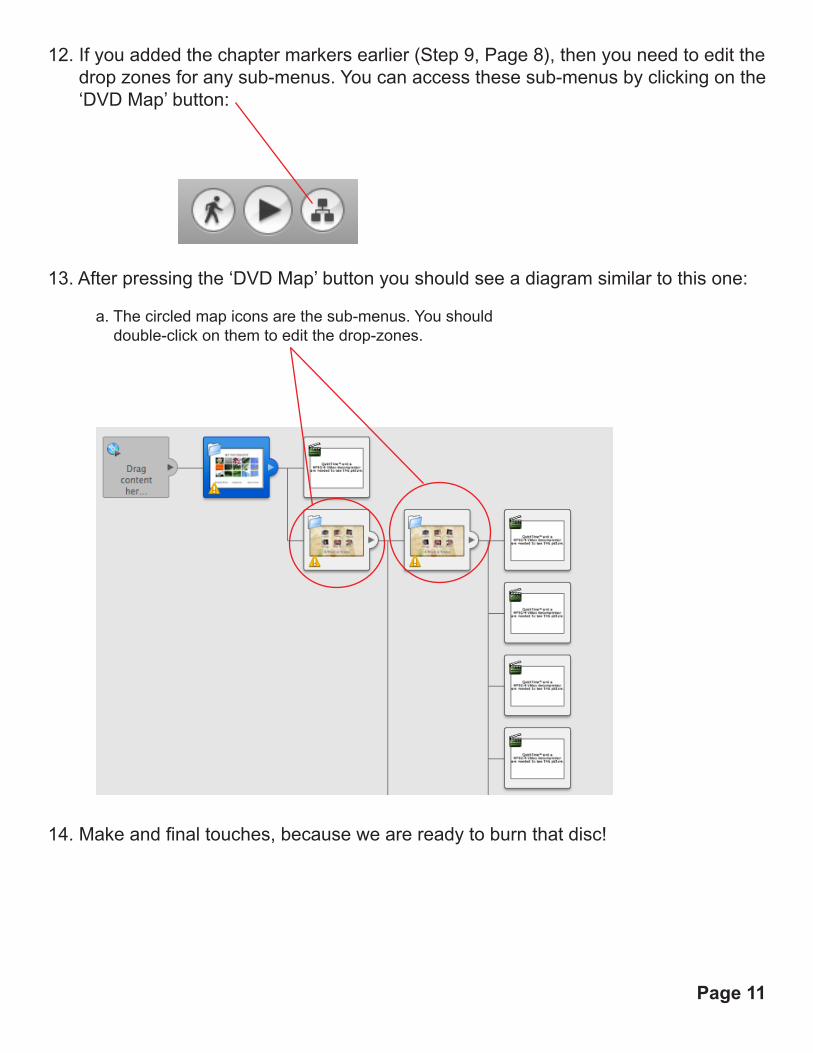
12. If you added the chapter markers earlier (Step 9, Page 8), then you need to edit the drop zones for any sub-menus. You can access these sub-menus by clicking on the ‘DVD Map’ button:
Page 11
13. After pressing the ‘DVD Map’ button you should see a diagram similar to this one:
a. The circled map icons are the sub-menus. You should double-click on them to edit the drop-zones.
14. Make and final touches, because we are ready to burn that disc!
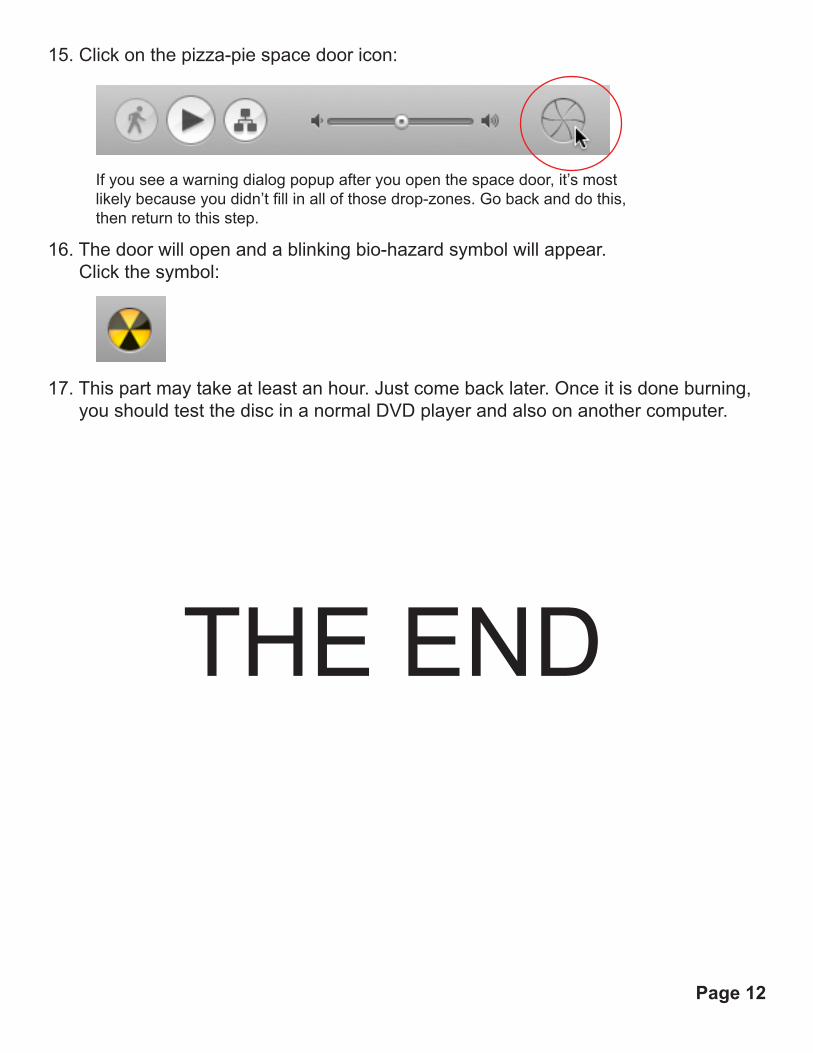
16. The door will open and a blinking bio-hazard symbol will appear. Click the symbol:
15. Click on the pizza-pie space door icon:
If you see a warning dialog popup after you open the space door, it’s most likely because you didn’t fill in all of those drop-zones. Go back and do this, then return to this step.
17. This part may take at least an hour. Just come back later. Once it is done burning, you should test the disc in a normal DVD player and also on another computer.
THE END
Page 12
Related Documents