the rv roofing experts dicor products A collection of Rudy’s helpful hints, tips, methods and recommendations. RUDY’S EXPERT RV ROOF CARE HANDBOOK

Welcome message from author
This document is posted to help you gain knowledge. Please leave a comment to let me know what you think about it! Share it to your friends and learn new things together.
Transcript
the rv roofing expertsdicor products
A collection of Rudy’s
helpful hints, tips,
methods and
recommendations.
RUDY’S EXPERT RV ROOF CARE HANDBOOK
Hello! I’m Rudy, your Dicor Products RV roof care expert. I’m here to help you take care of your roof in any way I can. My “expertise” comes from Dicor Products’ more than 25 years of experience as the leading supplier of RV roofing.
You can expect to see me on Dicor Products’ website (www.dicorproducts.com) and in periodic email bulletins. My job is not to sell you anything, but to simply be a resource for answering your RV roofing questions. And to be a friendly reminder of how important RV roof care is.
CO N T E N T S Roof Inspection ............................................................ 3
Roof Cleaning .............................................................. 4
Black Streaks ................................................................ 5
Protecting Your Roof .................................................. 6
Roof Coating ............................................................ 7-8
Simple Repairs ............................................................... 9
TPO Roofing ................................................................ 10
Safety On Your Roof ................................................... 11
As we like to say, there’s a lot riding under your RV roof. When you think of all the furnishings, appliances and structural elements of your RV — and whatever you bring along — there is A LOT that can be harmed by roof leaks, not to mention the cosmetic damage that can adversely affect your RV’s appearance and value. A leaky roof can become a very expensive roof when water damage is involved.
This booklet presents tips and information about common roof concerns. Look for more such information to come via our website and email. You can go to www.dicorproducts.com/resources/care to sign up for ongoing updates. Or scan the QR code.
We’ll be talkin’ to ya!
2
Take it insideYou can’t always see what’s wrong or right with the roof by looking on top. Leaks are often very elusive. You can’t always look at the sealant and tell if it’s sealing properly. So instead of looking outside for a place that’s leaking, go inside the coach and look for signs. You may need to open up some cabinets to spot a problem. I’ve often looked in cabinets or closets and literally found mush-rooms growing. This is a sure sign of water where it shouldn’t be. But don’t just look for mushrooms, check for mildew and mold, wet patches, pools of water (if it has rained recently) or water streaks.
ROOF INSPECTIONA L OT R I D E S U N D E R Y O U R R O O F
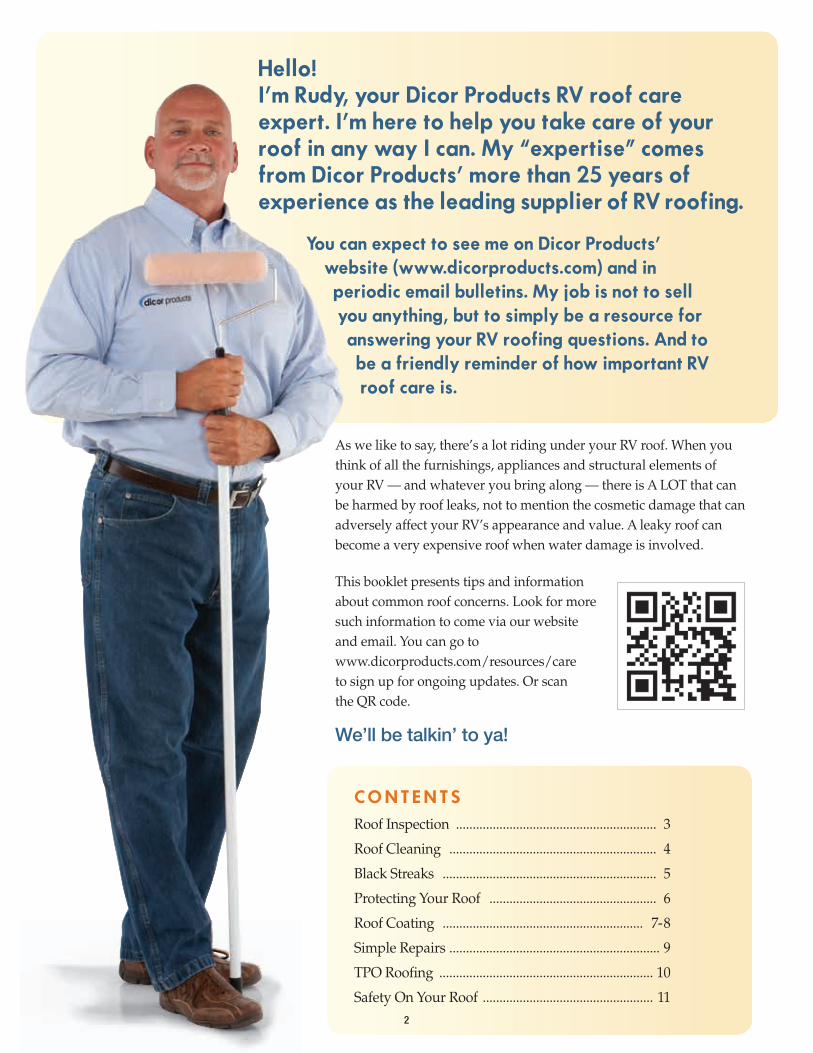
If you haven’t inspected your roof lately, or are buying a used RV, a roof inspection should be on your to-do list, even if it means taking the time to haul out the old ladder and poke around a bit. Remember, your investment is riding under this roof. It’s a good idea to make sure it has not been leaking, is not prone to leaks, and is likely to hold up a while.
Fixing leak damage is one of the most expensive repairs you can make on an RV, not to mention the potential damage to your contents. If water, for example, seeps into the studs and insulation inside your sidewalls, it can wreak havoc by spreading rot and mold. It pays big time to catch potential problems as soon as you can.
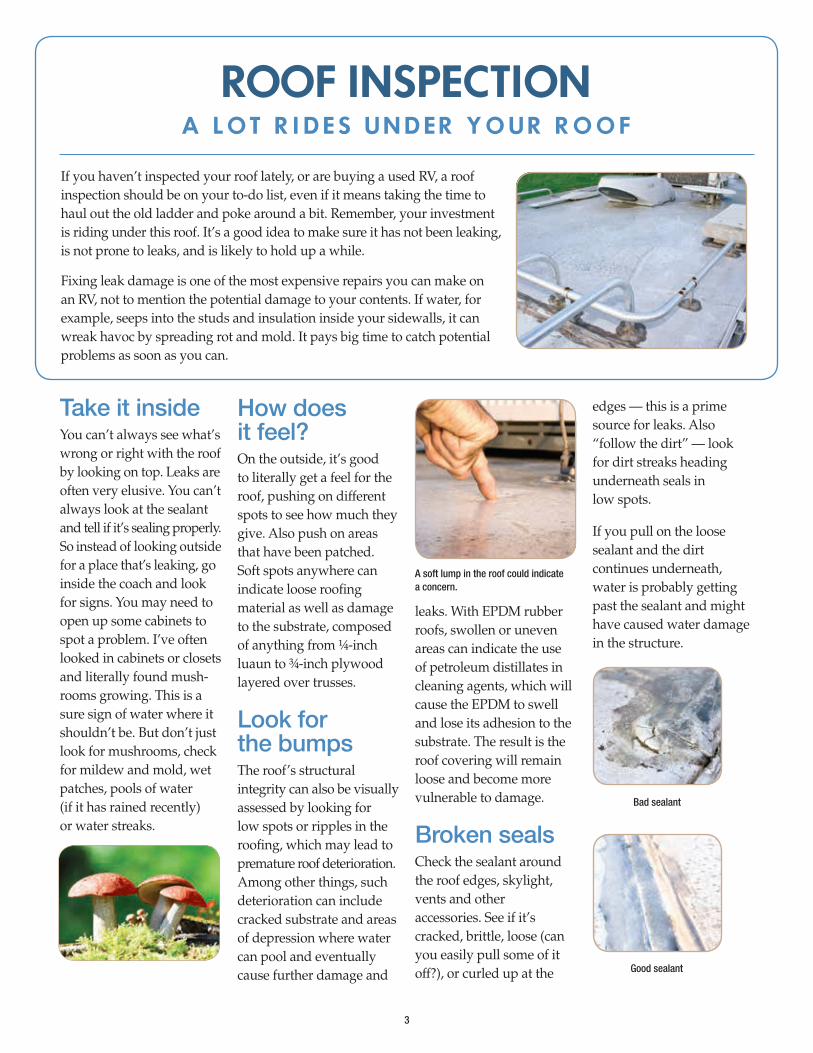
How does it feel?On the outside, it’s good to literally get a feel for the roof, pushing on different spots to see how much they give. Also push on areas that have been patched. Soft spots anywhere can indicate loose roofing material as well as damage to the substrate, composed of anything from ¼-inch luaun to ¾-inch plywood layered over trusses.
Look for the bumpsThe roof’s structural integrity can also be visually assessed by looking for low spots or ripples in the roofing, which may lead to premature roof deterioration. Among other things, such deterioration can include cracked substrate and areas of depression where water can pool and eventually cause further damage and
leaks. With EPDM rubber roofs, swollen or uneven areas can indicate the use of petroleum distillates in cleaning agents, which will cause the EPDM to swell and lose its adhesion to the substrate. The result is the roof covering will remain loose and become more vulnerable to damage.
Broken sealsCheck the sealant around the roof edges, skylight, vents and other accessories. See if it’s cracked, brittle, loose (can you easily pull some of it off?), or curled up at the
edges — this is a prime source for leaks. Also “follow the dirt” — look for dirt streaks heading underneath seals in low spots. If you pull on the loose sealant and the dirt continues underneath, water is probably getting past the sealant and might have caused water damage in the structure.
3
Bad sealant
Good sealant
A soft lump in the roof could indicate a concern.
CLEANING RV ROOFSR U D Y ’ S T I P S
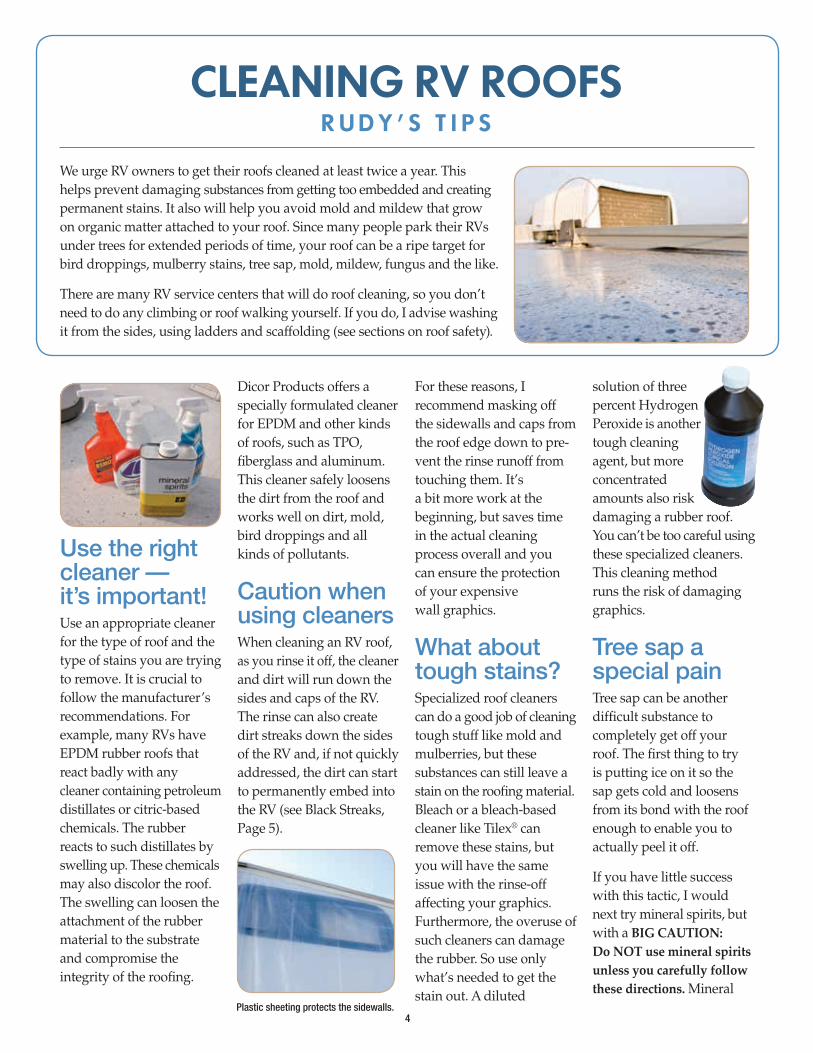
We urge RV owners to get their roofs cleaned at least twice a year. This helps prevent damaging substances from getting too embedded and creating permanent stains. It also will help you avoid mold and mildew that grow on organic matter attached to your roof. Since many people park their RVs under trees for extended periods of time, your roof can be a ripe target for bird droppings, mulberry stains, tree sap, mold, mildew, fungus and the like.
There are many RV service centers that will do roof cleaning, so you don’t need to do any climbing or roof walking yourself. If you do, I advise washing it from the sides, using ladders and scaffolding (see sections on roof safety).
Use the right cleaner — it’s important!Use an appropriate cleaner for the type of roof and the type of stains you are trying to remove. It is crucial to follow the manufacturer’s recommendations. For example, many RVs have EPDM rubber roofs that react badly with any cleaner containing petroleum distillates or citric-based chemicals. The rubber reacts to such distillates by swelling up. These chemicals may also discolor the roof. The swelling can loosen the attachment of the rubber material to the substrate and compromise the integrity of the roofing.
Dicor Products offers a specially formulated cleaner for EPDM and other kinds of roofs, such as TPO, fiberglass and aluminum. This cleaner safely loosens the dirt from the roof and works well on dirt, mold, bird droppings and all kinds of pollutants.
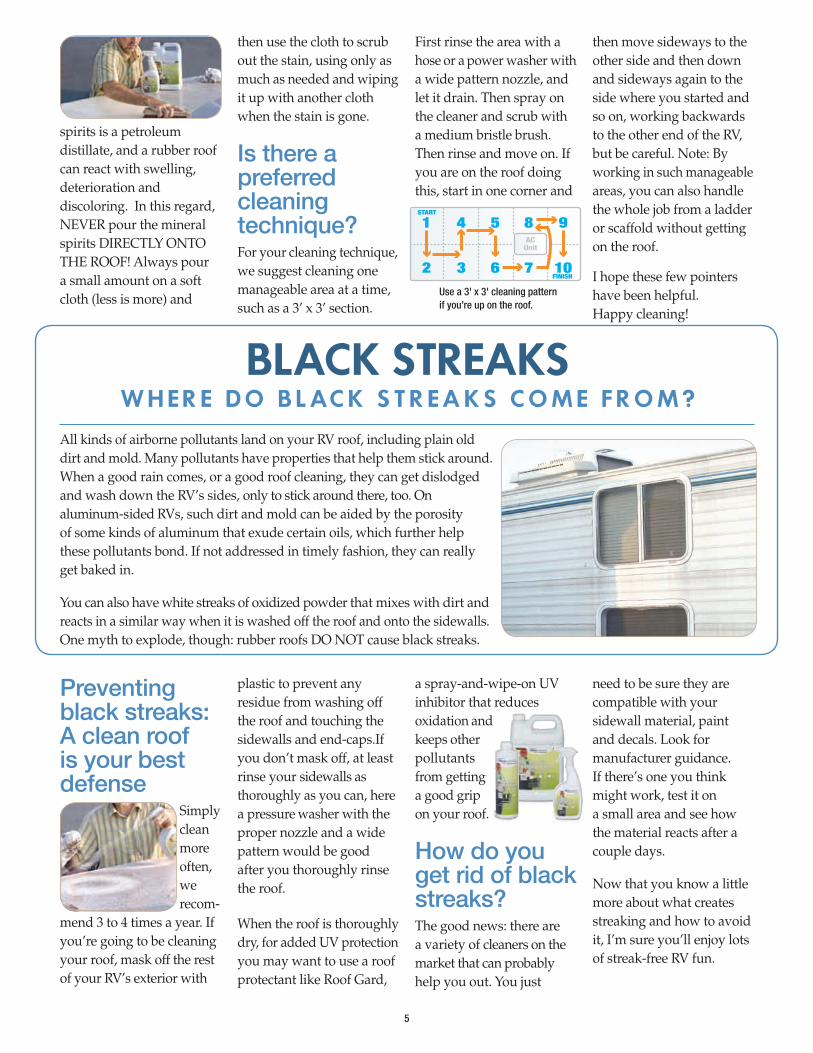
Caution when using cleanersWhen cleaning an RV roof, as you rinse it off, the cleaner and dirt will run down the sides and caps of the RV. The rinse can also create dirt streaks down the sides of the RV and, if not quickly addressed, the dirt can start to permanently embed into the RV (see Black Streaks, Page 5).
For these reasons, I recommend masking off the sidewalls and caps from the roof edge down to pre-vent the rinse runoff from touching them. It’s a bit more work at the beginning, but saves time in the actual cleaning process overall and you can ensure the protection of your expensive wall graphics.
What about tough stains?Specialized roof cleaners can do a good job of cleaning tough stuff like mold and mulberries, but these substances can still leave a stain on the roofing material. Bleach or a bleach-based cleaner like Tilex® can remove these stains, but you will have the same issue with the rinse-off affecting your graphics. Furthermore, the overuse of such cleaners can damage the rubber. So use only what’s needed to get the stain out. A diluted
solution of three percent Hydrogen Peroxide is another tough cleaning agent, but more concentrated amounts also risk damaging a rubber roof. You can’t be too careful using these specialized cleaners. This cleaning method runs the risk of damaging graphics.
Tree sap a special painTree sap can be another difficult substance to completely get off your roof. The first thing to try is putting ice on it so the sap gets cold and loosens from its bond with the roof enough to enable you to actually peel it off.
If you have little success with this tactic, I would next try mineral spirits, but with a BIG CAUTION: Do NOT use mineral spirits unless you carefully follow these directions. Mineral
4Plastic sheeting protects the sidewalls.
ACUnit
1 4 5 8 9
2 3 6 7 10FINISH
START
BLACK STREAKS W H E R E D O B L AC K S T R E A K S C O M E F R O M ?
spirits is a petroleum distillate, and a rubber roof can react with swelling, deterioration and discoloring. In this regard, NEVER pour the mineral spirits DIRECTLY ONTO THE ROOF! Always pour a small amount on a soft cloth (less is more) and
then use the cloth to scrub out the stain, using only as much as needed and wiping it up with another cloth when the stain is gone.
Is there a preferred cleaning technique?For your cleaning technique, we suggest cleaning one manageable area at a time, such as a 3’ x 3’ section.
First rinse the area with a hose or a power washer with a wide pattern nozzle, and let it drain. Then spray on the cleaner and scrub with a medium bristle brush. Then rinse and move on. If you are on the roof doing this, start in one corner and
then move sideways to the other side and then down and sideways again to the side where you started and so on, working backwards to the other end of the RV, but be careful. Note: By working in such manageable areas, you can also handle the whole job from a ladder or scaffold without getting on the roof.
I hope these few pointers have been helpful. Happy cleaning!
All kinds of airborne pollutants land on your RV roof, including plain old dirt and mold. Many pollutants have properties that help them stick around. When a good rain comes, or a good roof cleaning, they can get dislodged and wash down the RV’s sides, only to stick around there, too. On aluminum-sided RVs, such dirt and mold can be aided by the porosity of some kinds of aluminum that exude certain oils, which further help these pollutants bond. If not addressed in timely fashion, they can really get baked in.
You can also have white streaks of oxidized powder that mixes with dirt and reacts in a similar way when it is washed off the roof and onto the sidewalls. One myth to explode, though: rubber roofs DO NOT cause black streaks.
Preventing black streaks: A clean roof is your best defense Simply clean more often, we recom-mend 3 to 4 times a year. If you’re going to be cleaning your roof, mask off the rest of your RV’s exterior with
plastic to prevent any residue from washing off the roof and touching the sidewalls and end-caps.If you don’t mask off, at least rinse your sidewalls as thoroughly as you can, here a pressure washer with the proper nozzle and a wide pattern would be good after you thoroughly rinse the roof.
When the roof is thoroughly dry, for added UV protection you may want to use a roof protectant like Roof Gard,
a spray-and-wipe-on UV inhibitor that reduces oxidation and keeps other pollutants from getting a good grip on your roof.
How do you get rid of black streaks?The good news: there are a variety of cleaners on the market that can probably help you out. You just
need to be sure they are compatible with your sidewall material, paint and decals. Look for manufacturer guidance. If there’s one you think might work, test it on a small area and see how the material reacts after a couple days.
Now that you know a little more about what creates streaking and how to avoid it, I’m sure you’ll enjoy lots of streak-free RV fun.
5
Use a 3' x 3' cleaning pattern if you’re up on the roof.
Avoid petroleum distillatesStick to cleaners made for your particular roof. An EPDM rubber roof, for example, is made with petroleum products and tends to react negatively with many kinds of cleaners that use petroleum distillates or citric-based chemicals because they contain oils. The EPDM material tends to swell and sometimes discolor. If it swells too much, it can come loose from the substrate and eventually compromise the integrity of the roof structure. Always know what you’re putting on your roof.
Get some UV protectionMost RVers spend a lot of time in the sunny climates. The steady beat of the sun and its UV rays on your roof can cause oxidation
to occur. The chalk-like powder that’s the result of this oxidation is the equivalent of a sunburn that turns your skin brown to protect it from the sun’s rays.
If you feel the need to add extra UV protection, you need a protectant with a UV inhibitor like Dicor’s Roof Gard. A coating like this is also a great dirt inhibitor, as its chemical formulation makes it harder for dirt and other stuff to stick to your roof. Prior to application, we recommend thoroughly cleaning your roof (see Roof Cleaning, Page 4). Then, with your RV out of direct sunlight, simply spray it on and use a soft cloth or sponge mop
to evenly spread it around. Bingo, you’re done!
To maintain maximum results, we suggest reapplying Roof Gard every three to five weeks or after your next cleaning. If you have a regular cleaning schedule apply it each time you clean the roof.
The trouble with treesWhen looking for a place to park for a while, a nice, big shade tree or a row of majestic pines might look like a comfortable and scenic spot, not to mention a natural shelter from the sun and rain.
The problem is, a nice shady spot also becomes a good place to get deposited on — by birds, mulberries,
pine sap, and maybe even a branch or two. It’s a good place for dirt to collect, and trees are a handy way for critters that like to crawl and claw to get on your roof. So another aspect of roof preservation is simple awareness. Even driving around, watch out for low-hanging branches!
So, whether you park close to trees or not, I think you can have confidence that your well-maintained roof will provide excellent protection for your RV. Wherever you roam, take care and have fun out there!
6
Your RV roof is your shield. It protects you and your RV’s contents and structure. As a traveling roof, it can be exposed to extreme variations of climate, from snow and ice to broiling sun and soaking rain, from arid deserts to humid swamps. More extremes than most houses would see. Add man-made chemicals not made for your roof and other poor choices, and, over time, your shield can start to break down. Here are three things to be aware of when protecting your roof.
PROTECTING YOUR ROOFT H E D O ’s A N D D O N ’ Ts
Prepare to coat — one week before Just like painting, much of the work in coating an RV roof is in the preparation And I recommend doing any lap sealant touch-up or replacement at least one to two weeks before you apply the coating in order for the sealant to be well cured before the coating covers it. This ensures the coating and sealant will bond for maximum effectiveness. Peel and stick patches may be applied one or two days before coating.
A two-step process — cleaning comes firstThe key to making any coating stick well is having a very clean surface before you coat. First, sweep any loose dirt, debris, sticks, stones or leaves from the roof. Then use the appropriate Dicor Products cleaner/activator for your kind of roof and for the coating system you are using.
The type of roof you have will determine the type of coating system you will be applying to the roof surface. Each roofing material has it’s own individual
characteristics which require a certain type of coating system. Because of this, Dicor Products offers three coating systems, one for EPDM and TPO, a specially formulated roof coating system for fiberglass and a metal roof coating system.
Keep the RV exterior safe — mask it offFor the cleaning and coating procedure, I always mask off the sidewalls and caps of the RV. The cleaning/activator agent is designed to loosen dirt from the roof material. The chemicals in the cleaning and coating materials are made for the particular roof material they are acting on, not for your sidewalls and
end-caps. Masking off the sidewalls and front and rear end-caps takes a little more prep work, but then you don’t have to keep constantly rinsing the walls and end-caps (unless you like the exercise). This prevents the dirt, debris and cleaning agent from having an opportunity to affix themselves to the sidewalls and end-caps. It also prevents any accidental contact with the coating and these surfaces. It’s easier and safer all the way around.
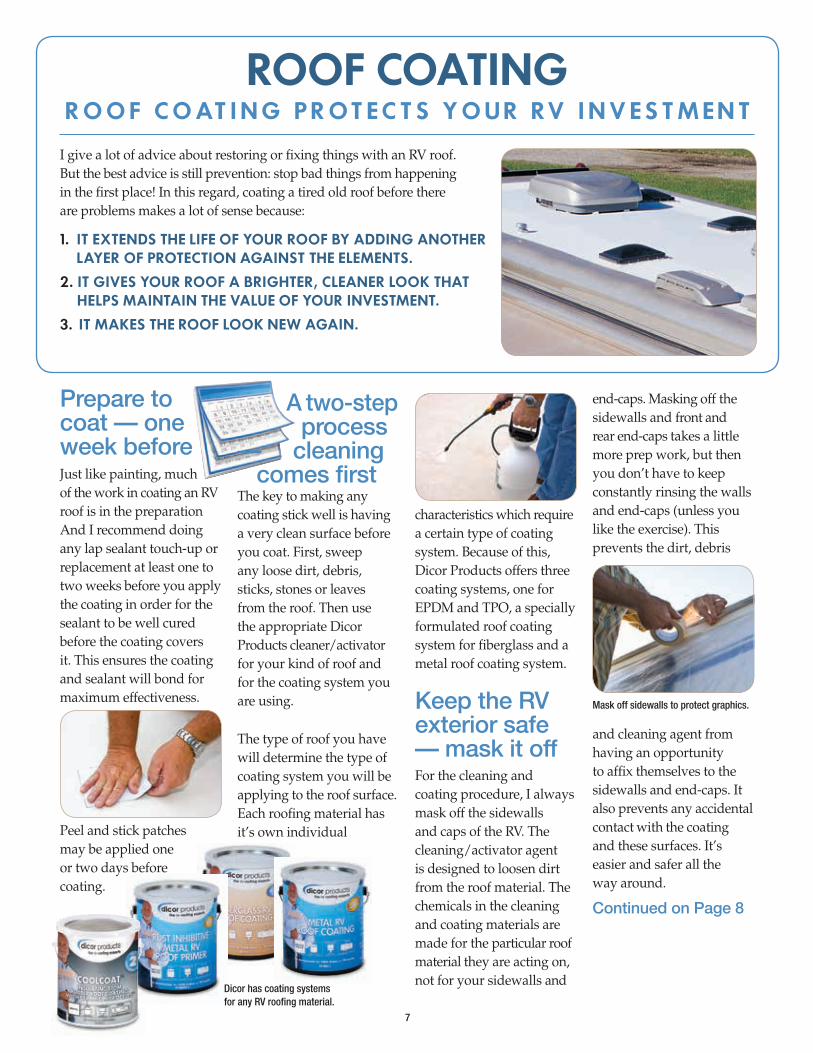
1. IT EXTENDS THE LIFE OF YOUR ROOF BY ADDING ANOTHER LAYER OF PROTECTION AGAINST THE ELEMENTS. 2. IT GIVES YOUR ROOF A BRIGHTER, CLEANER LOOK THAT HELPS MAINTAIN THE VALUE OF YOUR INVESTMENT. 3. IT MAKES THE ROOF LOOK NEW AGAIN.
7
ROOF COATINGR O O F C O AT I N G P R OT E C T S Y O U R RV I N V E S T M E N T
I give a lot of advice about restoring or fixing things with an RV roof. But the best advice is still prevention: stop bad things from happening in the first place! In this regard, coating a tired old roof before there are problems makes a lot of sense because:
Continued on Page 8
Dicor has coating systems for any RV roofing material.
Mask off sidewalls to protect graphics.
Do it all in one dayIn coating your RV, it is important that the whole cleaning and coating procedure be done in one day. For example, when coating EPDM roofing, the cleaner/activator not only cleans the roof surface, it also opens the pores in the EPDM membrane for about five to six hours. Once the cleaner/activator is rinsed off the roof, the roof needs to dry completely. The coating needs to be applied while the pores are open so that the two-coat application imbeds itself in the old roofing and bonds together for a solid, tight seal (we love bonding). Remember, before applying the second coat, be sure the first coat is dry.
Find a day when you can be sure it’s not going to rain. I recommend start-ing right after the morning dew has dissipated. Then do the step one cleaning procedure and let it dry completely. Then apply
two coats of the coating material (remember to let the first coat dry) then let it sit to dry and set up before the evening dew. I like to see three to four hours of sunlight on the finished job. Lastly, make sure you have covered every inch of the roof and not cut any corners.
Cure timeOnce applied, roof coatings take 24 to 48 hours to fully cure and strengthen its bond with the roof. Refrain from doing anything else with the RV during this time and avoid rain and other hazards as best you can. Factor these things into your planning as well.
Use the right tools and … read the instructions!Before starting anything (listen up, guys), read the instructions! Different cleaning and coating formulas are made for different roof materials. I have been mostly talking about EPDM and TPO roofing here, but there are materials, processes and products designed for fiberglass and metal roofing as well. Such instructions can help you make best use of your time and your product.
For coating roofs, I find a medium nap roller is the best way to apply the coating material.
A power washer with the correct nozzle (use a wider pattern, not a concentrated stream) and a long enough wand is a great tool for cleaning and rinsing your RV roof.
Remember, with planning and prevention, you can stop bad things happening, and enjoy your RV more.
8
ROOF COATING CONTIN U E D
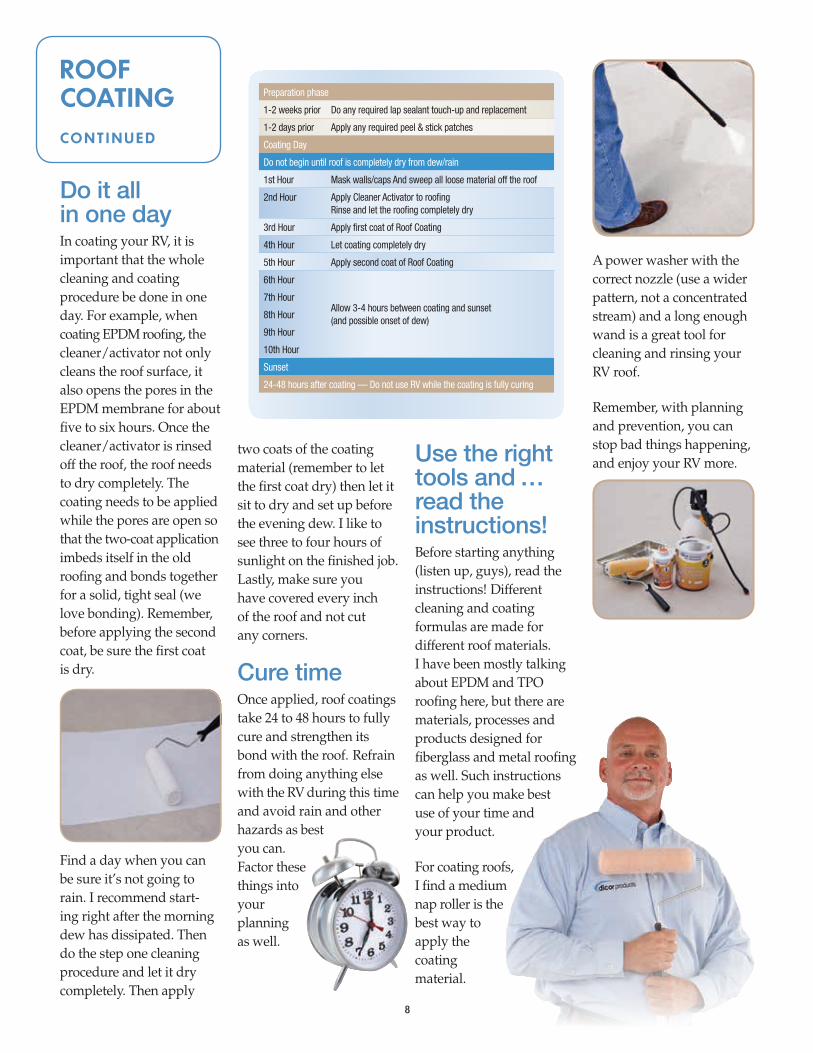
Preparation phase
1-2 weeks prior Do any required lap sealant touch-up and replacement
1-2 days prior Apply any required peel & stick patches
Coating Day
Do not begin until roof is completely dry from dew/rain
1st Hour Mask walls/caps And sweep all loose material off the roof
2nd Hour Apply Cleaner Activator to roofing Rinse and let the roofing completely dry
3rd Hour Apply first coat of Roof Coating
4th Hour Let coating completely dry
5th Hour Apply second coat of Roof Coating
6th Hour
Allow 3-4 hours between coating and sunset (and possible onset of dew)
7th Hour
8th Hour
9th Hour
10th Hour
Sunset
24-48 hours after coating — Do not use RV while the coating is fully curing

SIMPLE REPAIRSPATC H I T U P
With the adhesive backing still on, position the patch and mark the edges in pencil or chalk for a positioning guide. Cut the patch to size, peel off the adhesive backing and,
with great care (once it’s down, if you pull it up you need to replace the patch with a new one), press it onto the roof surface using a wallpaper seam roller,
and smooth it out from the center to the edges, mak-ing sure the entire patch is tightly bonded to the roof. Then apply a 5/16-inch bead of self-leveling lap
sealant to the edges. Give it a couple hours to set up before moving the vehicle. More detailed instructions can be found on the Dicor Products website.
• MAKE SURE THE ROOF IS STRUCTURALLY SOUND AND THAT THE DAMAGED AREA IS NOT PART OF A BIGGER PROBLEM.
• DON’T PATCH OVER A PREVIOUS PATCH.
• TRIM ANY LOOSE OR PROTRUDING MATERIAL FROM THE ROOF.
• DON’T REPAIR WITH MULTIPLE PATCHES.
• PATCH NEEDS TO EXTEND TWO INCHES BEYOND THE HOLE IN ALL DIRECTIONS.
• AS ALWAYS, CLEAN BEFORE YOU SEAL — REMOVING ALL DIRT, OILS AND DEBRIS FROM THE PATCH AREA WITH THE APPROPRIATE CLEANING AGENTS (SEE ROOF CLEANING).
Minor cracks in sealant may simply require cleaning and a new bead of sealant.
For small punctures, cracks or tears, a sealing tape designed for RV roofs can do a nice job. First, some things to note:
Replacing lap sealants — stay on top of it!If the sealant around your roof edges, skylights and the like is looking cracked, brittle, loose or turned up at the edges (see Roof Inspection, Page 3), some repair and replacement is in order. Staying on top of your sealant situation is one of the most vital
maintenance steps for preventing leaks. It will also keep your repairs, when they are needed, fairly simple. If the repair area simply needs a good cleaning and removal of some loose material, your work should go fairly rapidly depending on the size of the affected area. If the sealant is too far gone, there may be more work involved in getting some of the old sealant off before resealing.
9
To view our video on applying lap sealants visit the Lap Sealant page in the “Roof Products” area of the Dicor Products website www.dicorproducts.com/lap sealants.
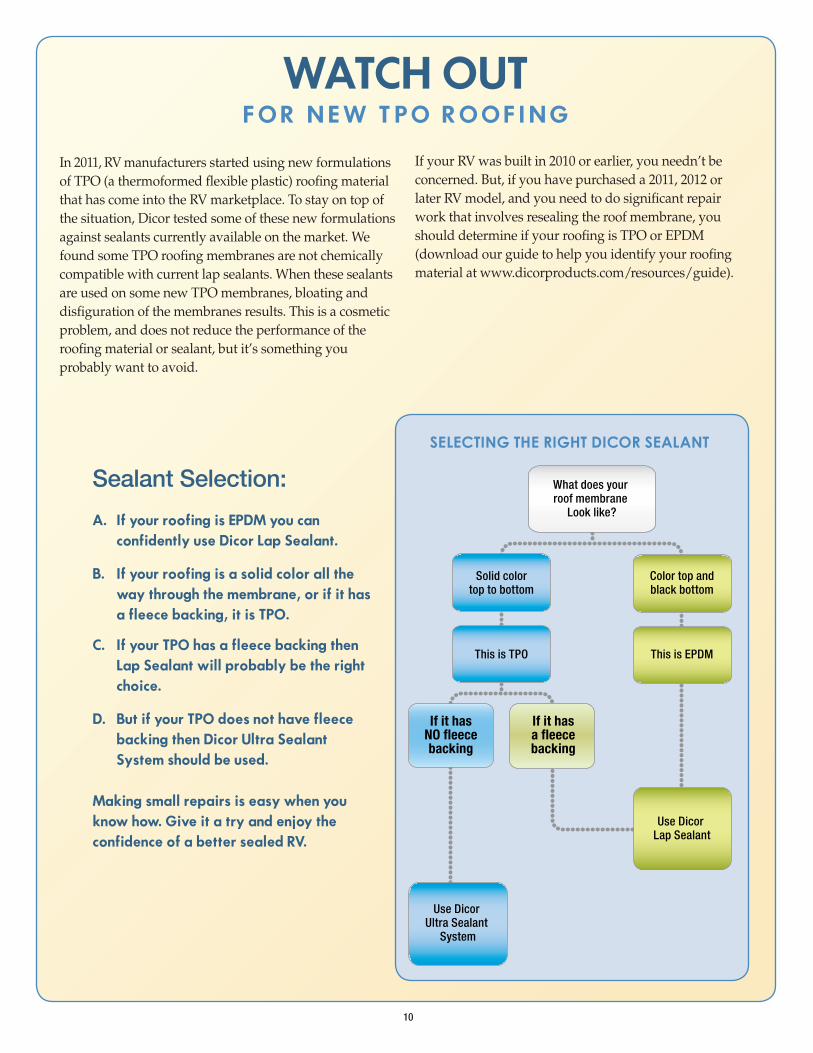
What does your roof membrane
Look like?
Solid colortop to bottom
Color top andblack bottom
This is TPO This is EPDM
If it hasNO fleecebacking
If it hasa fleecebacking
Use Dicor Ultra Sealant
System
Use Dicor Lap Sealant
SELECTING THE RIGHT DICOR SEALANT
What does your roof membrane
Look like?
Solid colortop to bottom
Color top andblack bottom
This is TPO This is EPDM
If it hasNO fleecebacking
If it hasa fleecebacking
Use Dicor Ultra Sealant
System
Use Dicor Lap Sealant
SELECTING THE RIGHT DICOR SEALANT
If your RV was built in 2010 or earlier, you needn’t be concerned. But, if you have purchased a 2011, 2012 or later RV model, and you need to do significant repair work that involves resealing the roof membrane, you should determine if your roofing is TPO or EPDM (download our guide to help you identify your roofing material at www.dicorproducts.com/resources/guide).
Sealant Selection:
A. If your roofing is EPDM you can confidently use Dicor Lap Sealant.
B. If your roofing is a solid color all the way through the membrane, or if it has a fleece backing, it is TPO.
C. If your TPO has a fleece backing then Lap Sealant will probably be the right choice.
D. But if your TPO does not have fleece backing then Dicor Ultra Sealant System should be used.
Making small repairs is easy when you know how. Give it a try and enjoy the confidence of a better sealed RV.
10
WATCH OUTF O R N E W T P O ROOF I N G
In 2011, RV manufacturers started using new formulations of TPO (a thermoformed flexible plastic) roofing material that has come into the RV marketplace. To stay on top of the situation, Dicor tested some of these new formulations against sealants currently available on the market. We found some TPO roofing membranes are not chemically compatible with current lap sealants. When these sealants are used on some new TPO membranes, bloating and disfiguration of the membranes results. This is a cosmetic problem, and does not reduce the performance of the roofing material or sealant, but it’s something you probably want to avoid.
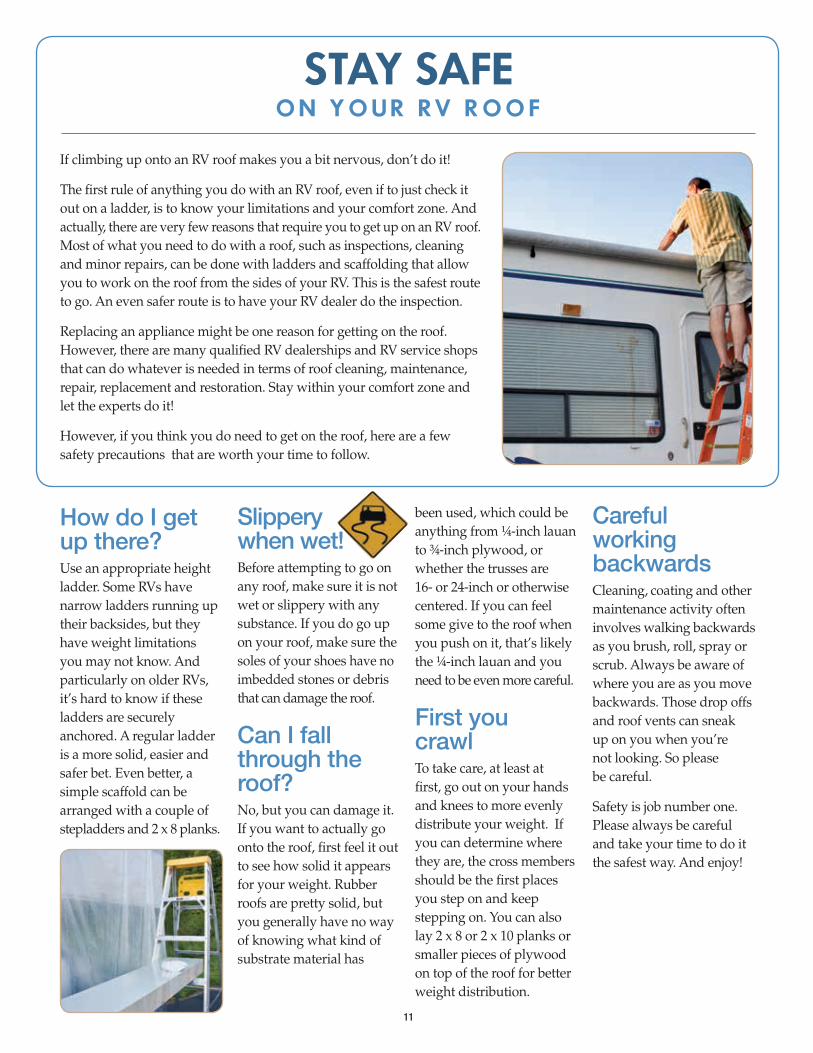
STAY SAFE O N Y O U R RV R O O F
How do I get up there?Use an appropriate height ladder. Some RVs have narrow ladders running up their backsides, but they have weight limitations you may not know. And particularly on older RVs, it’s hard to know if these ladders are securely anchored. A regular ladder is a more solid, easier and safer bet. Even better, a simple scaffold can be arranged with a couple of stepladders and 2 x 8 planks.
Slippery when wet! Before attempting to go on any roof, make sure it is not wet or slippery with any substance. If you do go up on your roof, make sure the soles of your shoes have no imbedded stones or debris that can damage the roof.
Can I fall through the roof?No, but you can damage it. If you want to actually go onto the roof, first feel it out to see how solid it appears for your weight. Rubber roofs are pretty solid, but you generally have no way of knowing what kind of substrate material has
been used, which could be anything from ¼-inch lauan to ¾-inch plywood, or whether the trusses are 16- or 24-inch or otherwise centered. If you can feel some give to the roof when you push on it, that’s likely the ¼-inch lauan and you need to be even more careful.
First you crawlTo take care, at least at first, go out on your hands and knees to more evenly distribute your weight. If you can determine where they are, the cross members should be the first places you step on and keep stepping on. You can also lay 2 x 8 or 2 x 10 planks or smaller pieces of plywood on top of the roof for better weight distribution.
Careful working backwards Cleaning, coating and other maintenance activity often involves walking backwards as you brush, roll, spray or scrub. Always be aware of where you are as you move backwards. Those drop offs and roof vents can sneak up on you when you’re not looking. So please be careful.
Safety is job number one. Please always be careful and take your time to do it the safest way. And enjoy!
If climbing up onto an RV roof makes you a bit nervous, don’t do it!
The first rule of anything you do with an RV roof, even if to just check it out on a ladder, is to know your limitations and your comfort zone. And actually, there are very few reasons that require you to get up on an RV roof. Most of what you need to do with a roof, such as inspections, cleaning and minor repairs, can be done with ladders and scaffolding that allow you to work on the roof from the sides of your RV. This is the safest route to go. An even safer route is to have your RV dealer do the inspection.
Replacing an appliance might be one reason for getting on the roof. However, there are many qualified RV dealerships and RV service shops that can do whatever is needed in terms of roof cleaning, maintenance, repair, replacement and restoration. Stay within your comfort zone and let the experts do it!
However, if you think you do need to get on the roof, here are a few safety precautions that are worth your time to follow.
11
Printed in U.S.A. ©2012 Dicor Corporation DC-294 TM/11-12
REPAIR EPDM RUBBER ROOF LAP SEALANTSHelps create a water-tight seal along a roof’s edges, air vents, vent pipes and screw heads.
ULTRA SEALANT SYSTEMFormulated for newer TPO RV roofing materials. This two part system creates a permanent water-tight seal at roof edges, screws, vents, and other rooftop appliances.
DiSEAL SEALING TAPE A flexible weather-resistant patch designed for sealing EPDM rubber, TPO, fiberglass, wood, plastic, steel or aluminum.
PATCHIT ROOF REPAIR KIT Easy repair of punctures, tears and breaks that can occur in RV roofs. It includes a 9” x 10” peel-and-stick EPDM rubber patch and a tube of lap sealant.
EPDM RUBBER ROOF REPAIR MEMBRANES Repairs punctures, tears and breaks in EPDM rubber, TPO, metal and fiberglass roofs. This heavy-duty, peel and stick material is made of self-adhering EPDM rubber.
CLEAN RUBBER ROOF CLEANER Formulated specifically for RV rubber roofing. This biodegradable, deep-cleaning formula lifts dirt and grime, yet is gentle on the surface.
PROTECT ROOF-GARD RUBBER ROOF PROTECTANT Helps prevent your EPDM rubber roof from fading, oxidizing, drying and cracking.
RESTORERUBBER ROOF COATING SYSTEM Two part, commercial grade system combines a cleaner/activator for proper preparation and an acrylic coating providing a protective barrier for extending life to the EPDM rubber membrane.
COOLCOAT™ RUBBER ROOF COATING SYSTEM Insulating Coating Ceramic MicroCells™ reduce heat transfer, known as heat flux, to the coach interior, reflects and dissipates solar heat with vacuum spheres for reduced A/C demand. Use with Dicor Rubber Roof Cleaner/Activator.
METAL COATING ROOF SYSTEM Dicor Products’ new three part solution to renewing old, rusty, metal RV roofs. It starts with a primer to reduce further rusting and finishes with a bright white acrylic coating.
FIBERGLASS COATING ROOF SYSTEM All new from Dicor Products, a two-part system specifically formulated to make fiberglass roofs look like new again.
EPDM ROOF RENEW KIT Includes 4 gallons of Dicor Products Acrylic Roof Coating, two quarts Cleaner/Activator, one 4” x 50’ roll Coating Ready Cover Tape, one Metal Pan, one 9” Paint Roller, two 9” Roller Covers and one roll 1” Masking Tape.
A FULL LINE OF CARE AND MAINTENANCE PRODUCTS FOR RV ROOFING
Dicor Products has helped manufacturers install rubber roofing on almost three million RVs over the last 20 years. Our experience and expertise in roofing materials enabled us to develop a full line of care and maintenance products for rubber and other roofing. It’s also why you will have total confidence that every one of these products will help safely and effectively repair and renew the RV roof’s appearance.
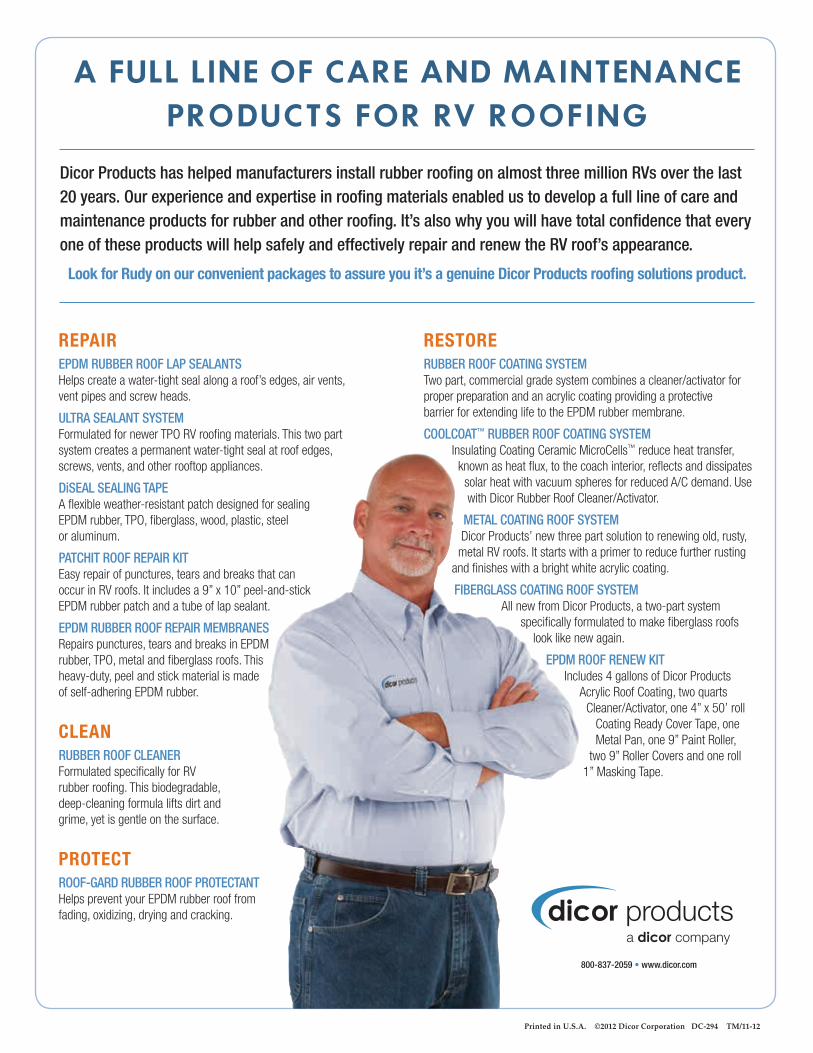
Look for Rudy on our convenient packages to assure you it’s a genuine Dicor Products roofing solutions product.
800-837-2059 • www.dicor.com
Related Documents