PicoAPRS Developed by Taner Schenker DB1NTO Instruction Manual (Antenna not included) www.wimo.com - 1- ©Taner Schenker

Welcome message from author
This document is posted to help you gain knowledge. Please leave a comment to let me know what you think about it! Share it to your friends and learn new things together.
Transcript
PicoAPRS
Developed by Taner SchenkerDB1NTO
Instruction Manual
(Antenna not included)
www.wimo.com - 1- ©Taner Schenker
Table of Contents1. PicoAPRS.................................................................................................................................... 4
1.1 Optional Accessories............................................................................................................ 51.2 Recommended Rubber Antennas..........................................................................................51.3 Safety Notes..........................................................................................................................6Safety Notes on battery disposal.................................................................................................6
2. Usage............................................................................................................................................72.1 General..................................................................................................................................7
Switching On.........................................................................................................................7Software updates................................................................................................................... 7
2.2 Mainscreen............................................................................................................................7Left Button............................................................................................................................ 7Right Button..........................................................................................................................7Automatic display of received APRS packets.......................................................................9- open.....................................................................................................................................9- Received staus message......................................................................................................9- Received message („SMS“)..............................................................................................10- Reply.................................................................................................................................10
2.3 Menu structure (overview)................................................................................................. 102.4 Menu details........................................................................................................................11
Power OFF.......................................................................................................................... 11Last Heard........................................................................................................................... 11Messages............................................................................................................................. 11Messages → RX Messages................................................................................................. 12Messages → TX Messages................................................................................................. 12Messages → Send Message → Destination........................................................................12Messages → Send Message → Text................................................................................... 12Messages → Send Message → Confirm.............................................................................13Send aprs.fi…......................................................................................................................13Send aprs.fi → To e-Mail....................................................................................................13Send aprs.fi → confirm....................................................................................................... 13APRS Symbol..................................................................................................................... 13GPS Status...........................................................................................................................14GPS Status → GPS data 1...................................................................................................14GPS Status → GPS data 2...................................................................................................14GPS Status → Speedometer................................................................................................14GPS Status → Compass...................................................................................................... 14GPS Status → Follow......................................................................................................... 15GPS Status → Home...........................................................................................................15USB Mode...........................................................................................................................15Save Home pos....................................................................................................................16TX Power............................................................................................................................ 16TX interval.......................................................................................................................... 16Timezone.............................................................................................................................16
www.wimo.com - 2- ©Taner Schenker

Beep (only from hardware version 2!)................................................................................17Morsecode (only from hardware version 2!)...................................................................... 17MyCall................................................................................................................................ 17MySSID.............................................................................................................................. 18Receiver.............................................................................................................................. 18Frequency............................................................................................................................18AutoPower.......................................................................................................................... 19Autoclose............................................................................................................................ 19Screensaver......................................................................................................................... 19GPS Powersave................................................................................................................... 20Contrast............................................................................................................................... 20Comment.............................................................................................................................20Info...................................................................................................................................... 21Units.................................................................................................................................... 21Firmwarecheck....................................................................................................................21Reboot................................................................................................................................. 21
3. Specifications............................................................................................................................ 224. Troubleshooting........................................................................................................................ 225. Manufacturer Information...................................................................................................... 236. EU Declaration of conformity................................................................................................. 24
www.wimo.com - 3- ©Taner Schenker
1. PicoAPRS
"The world's smallest APRS transceiver including TNC" with a wide range of applications. Size likematchbox, built-in GPS receiver.
The transceiver can be used not only as an APRS tracker and receiver for APRS data but also as a TNC (KISS protocol) for the computer.The graphic OLED display (128x64 pixel) displays incoming APRS packets such as position messages, APRS messages (similar to SMS), and status messages. For position messages, the distance and the direction of the sky are also displayed. The four stations, including the distance and the cardinal direction, as well as received messages, are stored and can be queried via the menu.
The own GPS coordinates can be displayed and the Pico-APRS can also be used as a GPS receiver, e.g. for geocaching.If desired, the GPS position can be stored permanently in the device. This is used when no GPS position can be determined. The stored position is then only used to display the distance and the cardinal direction of received stations. With the two control buttons and the versatile menu, the Pico APRS can be configured and used entirely without a PC. In the default state, the device is almost completely preconfigured. All you have to do is to enter the own call sign. The transmissionpower is about 1 Watt (switchable to approx. 0.5 Watt). The position data are compressed in the MIC-E format, in order to minimize the frequency as much as possible and to save the battery. Of course, both received packets with MIC-E compression as well as uncompressed APRS packets can be decoded and displayed.
With the built-in 850mAh LiIon battery, the device can be operated up to 10 hours depending on the configuration. Depending on how frequently the position data is to be sent, whether APRS packets are to be received, the GPS receiver should be switched off automatically when not in use, and how often the screen can be switched off.
The receiver can be deactivated to significantly extend the operating time so that the Pico APRS functions as a pure APRS tracker. In order to further extend the runtime, the built-in GPS receiver is cyclically switched off and the screen saver is used (configurable).
The built-in Micro-USB connector not only allows the built-in rechargeable battery to be charged and the firmware upgraded, the transceiver can also be used as a USB GPS mouse or TNC on a computer. This allows you to run your own APRS Digipeater or iGate!
The transmitter has a 7-pole harmonic filter for the suppression of unwanted sub-transmissions. The main processor used is an ATmega processor (ATmega1284p) which is popupar on Arduino. The current software occupies about half of the available memory space of the main processor. Thus, there is still a lot of memory space for possible future function extensions available!
With a size of only 33 mm x 58 mm x 24 mm, the PicoAPRS resembles a matchbox. It weighs just52 grams (without antenna).
Ideal to have the device always with you, e.g. Hiking, biking, motorcycling, skiing, on a boat or in the air.
APRS & Mic-Encoder are Trademarks of Bob Bruninga, WB4APR
www.wimo.com - 4- ©Taner Schenker
1.1 Optional Accessories
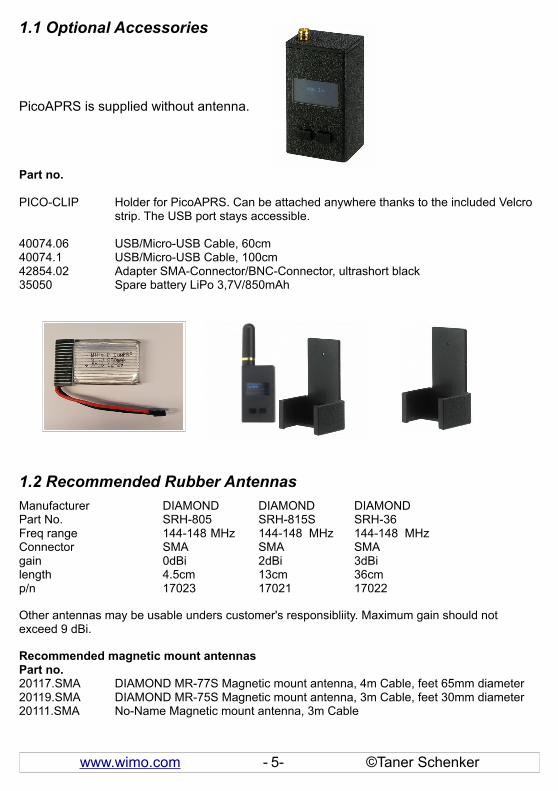
PicoAPRS is supplied without antenna.
Part no.
PICO-CLIP Holder for PicoAPRS. Can be attached anywhere thanks to the included Velcro strip. The USB port stays accessible.
40074.06 USB/Micro-USB Cable, 60cm40074.1 USB/Micro-USB Cable, 100cm42854.02 Adapter SMA-Connector/BNC-Connector, ultrashort black35050 Spare battery LiPo 3,7V/850mAh
1.2 Recommended Rubber Antennas
Manufacturer DIAMOND DIAMOND DIAMONDPart No. SRH-805 SRH-815S SRH-36Freq range 144-148 MHz 144-148 MHz 144-148 MHzConnector SMA SMA SMAgain 0dBi 2dBi 3dBilength 4.5cm 13cm 36cmp/n 17023 17021 17022
Other antennas may be usable unders customer's responsibliity. Maximum gain should not exceed 9 dBi.
Recommended magnetic mount antennasPart no.20117.SMA DIAMOND MR-77S Magnetic mount antenna, 4m Cable, feet 65mm diameter20119.SMA DIAMOND MR-75S Magnetic mount antenna, 3m Cable, feet 30mm diameter20111.SMA No-Name Magnetic mount antenna, 3m Cable
www.wimo.com - 5- ©Taner Schenker
1.3 Safety Notes
- The unit is not waterproof and is not protected against splash water. Please use it only in a dry environment.
- Do not expose the appliance to excessive heat (for example, a parked vehicle in high sunlight).
- Do not use any damaged components.
- WARNING RF EXPOSURE! This device emits Radio Frequency (RF) energy.Caution should be observed when operating this device. If you have any questions regarding RF exposure and safety standards, please refer to the FCC Office of Engineering and Technology’s report on Evaluating Compliance with FCC Guidelines for Human Radio Frequency Electromagnetic Fields (OET Bulletin 65).
- WARNING! Never hold the transceiver so that the antenna is very close to, or touching exposed parts of the body, especially the face or eyes, while transmitting. PicoAPRS will perform best if it is20 cm away from the body.
The used battery stores energy with a high density. Incorrect handling of the battery can lead to dangerous situations. Please observe the following precautions regarding the handling of the battery.
- Do not open or attempt to repair the battery- Do not short-circuit the connections- Do not expose the battery to high temperatures or burn it- Do not expose or dispose of the battery- Do not charge the battery when the battery is warmed or near sources of heat.- Do not use a defective or damaged battery- Do not charge the battery with other chargers- Do not place the unit on a flammable base
Safety Notes on battery disposal
In connection with the distribution of batteries or with the delivery of devices containing batteries, the supplier is obliged to inform the customer of the following:
The customer is legally obliged to return used batteries as end users. It can return old batteries, which the supplier has as a new battery in the assortment or led, free of charge at the dispatch warehouse (dispatch address) of the offerer. Batteries and accumulators must not be disposed of in household waste.
The symbol according to §17 paragraph 1 BattG (german laws) and the signs according to §17 paragraph 3 BattG have the following meaning:Pb = Battery contains more than 0.004% weight of leadCd = battery contains more than 0.002% cadmiumHg = battery contains more than 0.0005 mass% of mercury
www.wimo.com - 6- ©Taner Schenker
2. Usage
2.1 General
The transceiver has only two buttons due to the very small dimensions. With these two buttons, PicoAPRS can be fully operated and configured. The operation is very simple.
PicoAPRS can only be operated with the battery connected.
Switching On
To switch on, press one of the buttons for at least 2 seconds.
Software updates
As the software of the PicoAPRS is continually developed and improved, we recommend checking regularly for updates!You can download and install the latest firmware and operating instructions at www.db1nto.de/downloads.html. The update procedure is described on the website.
2.2 Mainscreen
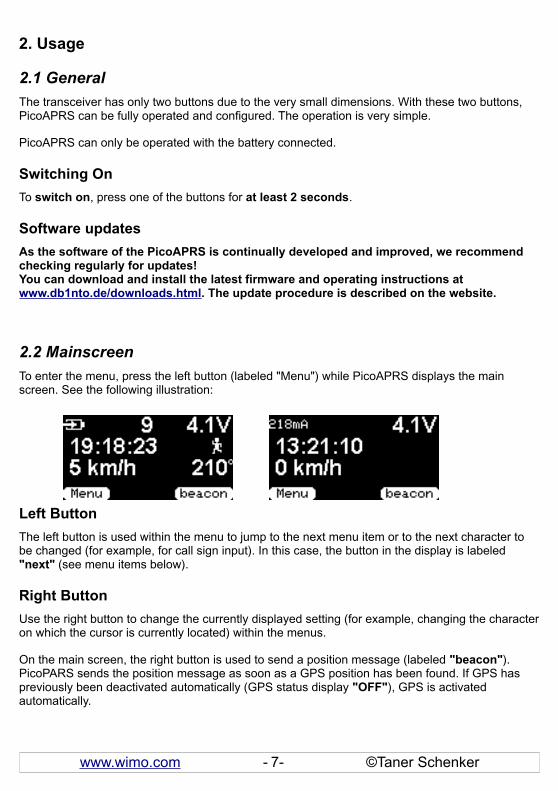
To enter the menu, press the left button (labeled "Menu") while PicoAPRS displays the main screen. See the following illustration:
Left Button
The left button is used within the menu to jump to the next menu item or to the next character to be changed (for example, for call sign input). In this case, the button in the display is labeled "next" (see menu items below).
Right Button
Use the right button to change the currently displayed setting (for example, changing the characteron which the cursor is currently located) within the menus.
On the main screen, the right button is used to send a position message (labeled "beacon"). PicoPARS sends the position message as soon as a GPS position has been found. If GPS has previously been deactivated automatically (GPS status display "OFF"), GPS is activated automatically.
www.wimo.com - 7- ©Taner Schenker
If mycalll has not been set to MyCall, "mycall" appears instead of "beacon". By pressing the "mycall" key, you are taken directly to the menu item for setting your call sign.
The following information is displayed on the main screen:
First line, from left to right: Battery icon, alternating with charging current in mA (only version V2!). When the device is in power-saving mode (receiver off, GPS Powersave ON), the battery symbol is replaced by "PS" for "Powersave", TX / RX status, GPS status, battery voltage.Second line: Time (time zone can be set via the menu) and your APRS symbolThird line: speed in km/h (updated only while GPS is active) and above 3km/h your course in degrees.4th line: Label for the left and right buttonsExample screen:
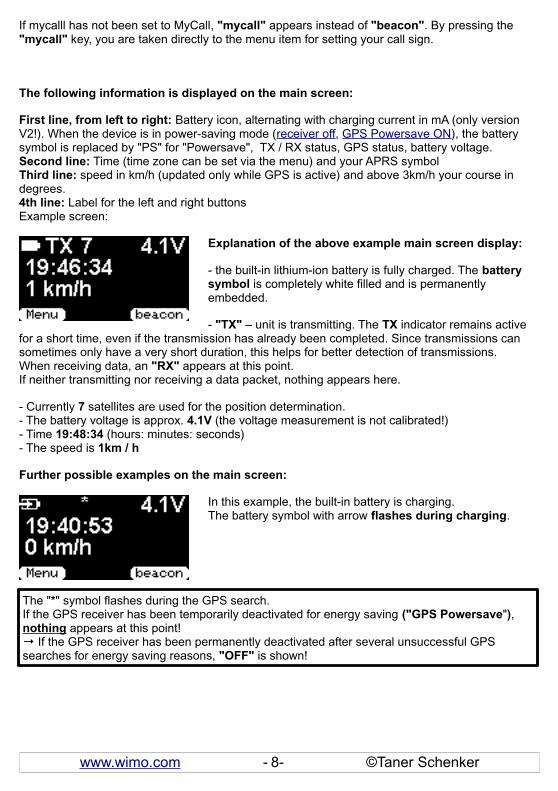
Explanation of the above example main screen display:
- the built-in lithium-ion battery is fully charged. The battery symbol is completely white filled and is permanently embedded.
- "TX" – unit is transmitting. The TX indicator remains active for a short time, even if the transmission has already been completed. Since transmissions can sometimes only have a very short duration, this helps for better detection of transmissions.When receiving data, an "RX" appears at this point.If neither transmitting nor receiving a data packet, nothing appears here.
- Currently 7 satellites are used for the position determination.- The battery voltage is approx. 4.1V (the voltage measurement is not calibrated!)- Time 19:48:34 (hours: minutes: seconds)- The speed is 1km / h
Further possible examples on the main screen:
In this example, the built-in battery is charging.The battery symbol with arrow flashes during charging.
www.wimo.com - 8- ©Taner Schenker
The "*" symbol flashes during the GPS search.If the GPS receiver has been temporarily deactivated for energy saving ("GPS Powersave"),nothing appears at this point!→ If the GPS receiver has been permanently deactivated after several unsuccessful GPSsearches for energy saving reasons, "OFF" is shown!

Automatic display of received APRS packets
When an APRS packet is received, the package is displayed automatically, unless you are within the menu.
- Received position message
First line: call sign, SSID and APRS Symbol of the received station
Second line: Distance in km as well as direction to indicated station in degrees. Unless a valid GPS position is known (for example inside buildings or when the GPS is deactivated dueto energy saving functions), a "~" appears in front of the
distance indication.
Third line: If a status text has been sent, this is displayed here as running text. The "close" button closes the message.
- open
"Open" opens a page with the three options "Follow", "Send Message" or "Close".
By selecting "follow" you will be shown the distance and direction IN RELATION to your own direction of travel. When you move directly to the station, the arrow points straight up. If new position data are received to the tracked station, this display is automatically updated. You can always open this view from the GPS data menu at any time. The last "tracked" station remains until a reset of the PicoAPRS.
With the "Send Message" option, you go directly to the menu for sending a message and just enter the message text. The destination call and SSID are taken from the displayed station. See "Send Message".
- Received staus message
If a pure status packet without position data is received, will display:Status from:Call signSSIDStatus text
www.wimo.com - 9- ©Taner Schenker
- Received message („SMS“)
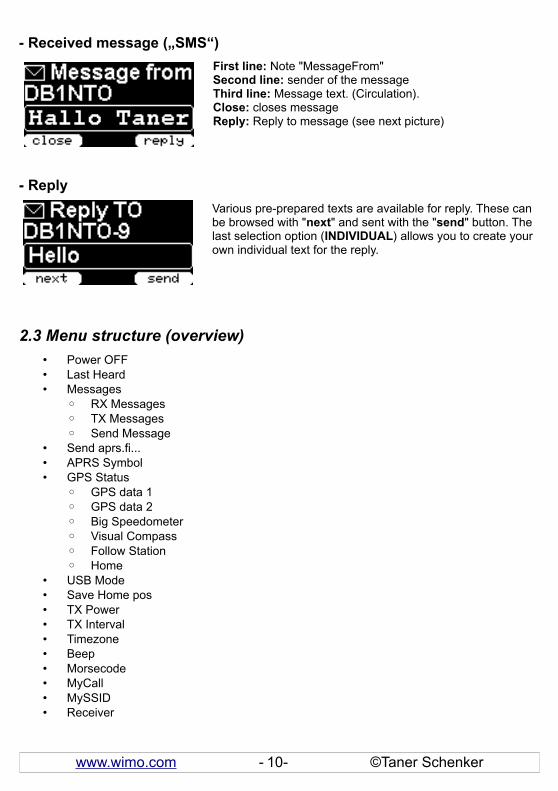
First line: Note "MessageFrom"Second line: sender of the messageThird line: Message text. (Circulation).Close: closes messageReply: Reply to message (see next picture)
- Reply
Various pre-prepared texts are available for reply. These can be browsed with "next" and sent with the "send" button. The last selection option (INDIVIDUAL) allows you to create your own individual text for the reply.
2.3 Menu structure (overview)
• Power OFF• Last Heard• Messages
◦ RX Messages◦ TX Messages◦ Send Message
• Send aprs.fi...• APRS Symbol• GPS Status
◦ GPS data 1◦ GPS data 2◦ Big Speedometer◦ Visual Compass◦ Follow Station◦ Home
• USB Mode• Save Home pos• TX Power• TX Interval• Timezone• Beep• Morsecode• MyCall• MySSID• Receiver
www.wimo.com - 10- ©Taner Schenker
• Frequency• Autopower• Autoclose• Screensaver• GPS Powersave• Contrast• Comment• Info• Units• Reboot
After the last menu point "Reboot" you get back to the main screen!
2.4 Menu details
Power OFF
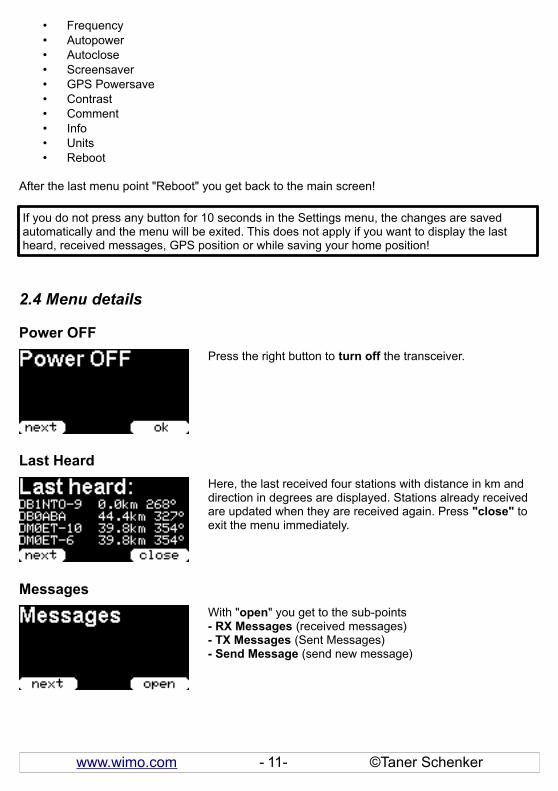
Press the right button to turn off the transceiver.
Last Heard
Here, the last received four stations with distance in km and direction in degrees are displayed. Stations already received are updated when they are received again. Press "close" to exit the menu immediately.
Messages
With "open" you get to the sub-points- RX Messages (received messages)- TX Messages (Sent Messages)- Send Message (send new message)
www.wimo.com - 11- ©Taner Schenker
If you do not press any button for 10 seconds in the Settings menu, the changes are savedautomatically and the menu will be exited. This does not apply if you want to display the lastheard, received messages, GPS position or while saving your home position!

Messages → RX Messages
Received messages. Order descending (latest on top). If the text is longer than the displayed width for the text area, the text is automatically scrolling.
Messages → TX Messages
Sent messages. Order descending (latest on top). If the text islonger than the displayed width for the text area, the text is automatically scrolling.
On the far right of the screen, you can see how many delivery attempts are still left (number 0-5), or a hyphen for the fact that no delivery report has been received or a "smiley" if a
delivery report has arrived from the recipient.
Messages → Send Message → Destination
You can use „SendMessage“ to send a text message.First enter the destination (call sign and SSID) for the message. The input works analog to the input of your own call sign (see "MyCall" menu).When you finish entering the call sign with the tick icon, a hyphen is displayed automatically and you can enter the receiver's SSID.
Messages → Send Message → Text
Enter the message text here. The available characters are limited to the most necessary for the simplification of the text input. Only lowercase letters, numbers 0-9 and a few special characters are available.The message text is limited. The remaining characters are shown below between the two labels on the buttons. The picture on the left has 45 characters left.
www.wimo.com - 12- ©Taner Schenker
HINT: You can also send an e-mail to any e-mail address via the APRS network! For thispurpose, please enter the destination EMAIL-2 as the recipient. The target e-mail address isthen entered first in the text field followed by a space and then by your message text.
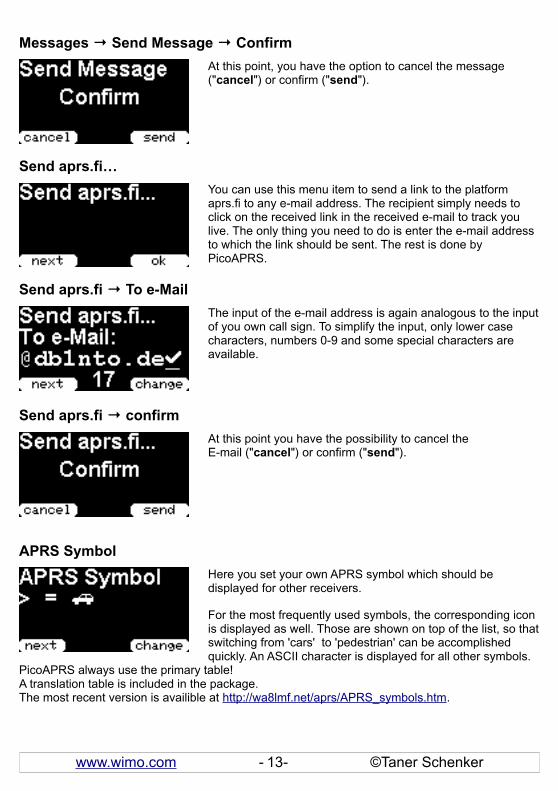
Messages → Send Message → Confirm
At this point, you have the option to cancel the message ("cancel") or confirm ("send").
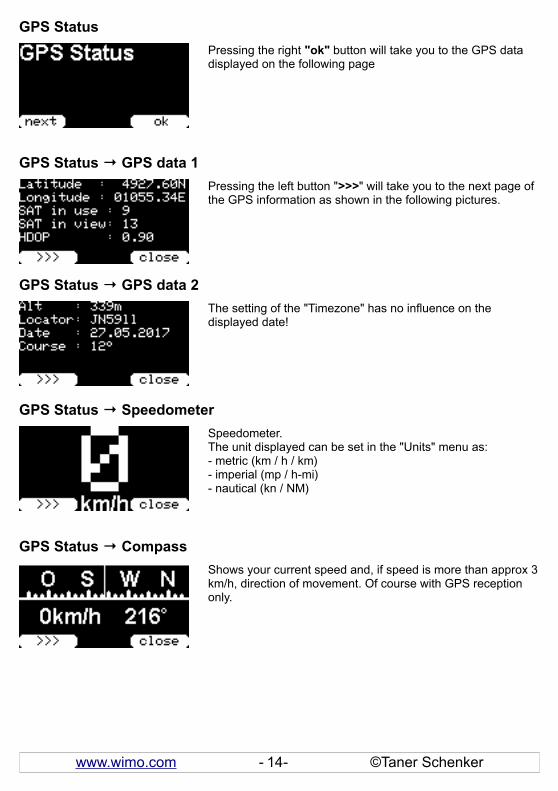
Send aprs.fi…
You can use this menu item to send a link to the platform aprs.fi to any e-mail address. The recipient simply needs to click on the received link in the received e-mail to track you live. The only thing you need to do is enter the e-mail address to which the link should be sent. The rest is done by PicoAPRS.
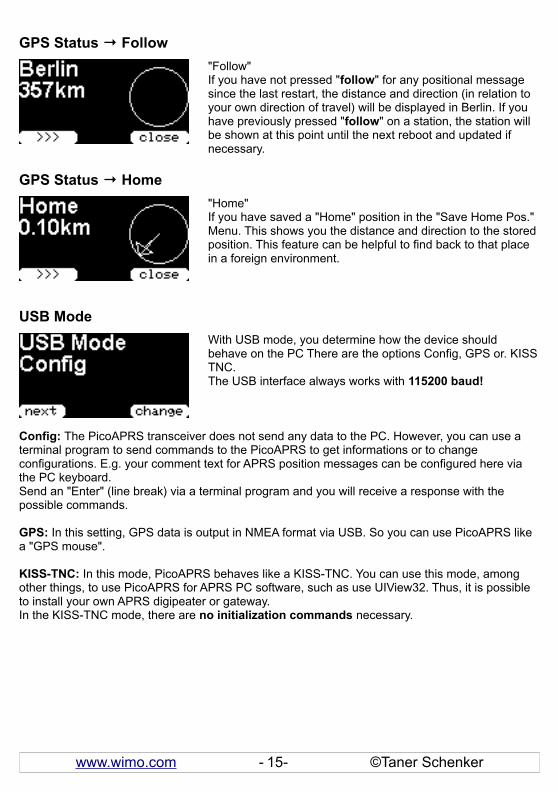
Send aprs.fi → To e-Mail
The input of the e-mail address is again analogous to the inputof you own call sign. To simplify the input, only lower case characters, numbers 0-9 and some special characters are available.
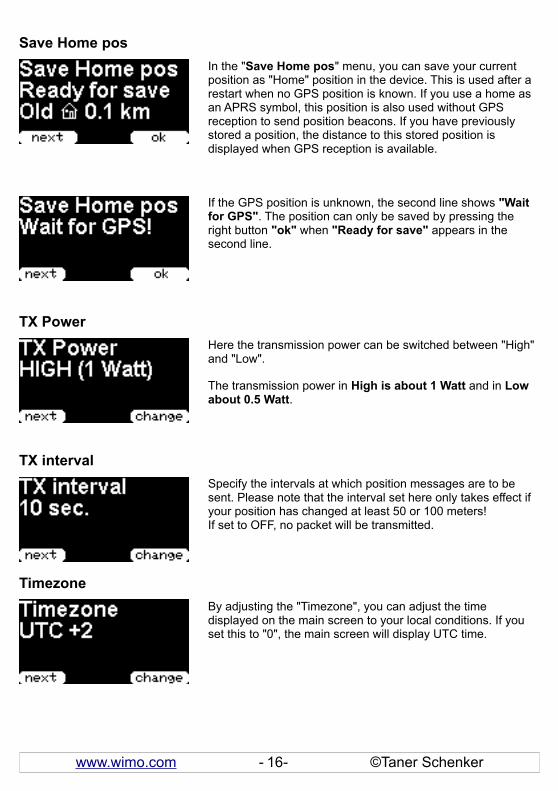
Send aprs.fi → confirm
At this point you have the possibility to cancel theE-mail ("cancel") or confirm ("send").
APRS Symbol
Here you set your own APRS symbol which should be displayed for other receivers.
For the most frequently used symbols, the corresponding icon is displayed as well. Those are shown on top of the list, so thatswitching from 'cars' to 'pedestrian' can be accomplished quickly. An ASCII character is displayed for all other symbols.
PicoAPRS always use the primary table!A translation table is included in the package.The most recent version is availible at http://wa8lmf.net/aprs/APRS_symbols.htm.
www.wimo.com - 13- ©Taner Schenker
GPS Status
Pressing the right "ok" button will take you to the GPS data displayed on the following page
GPS Status → GPS data 1
Pressing the left button ">>>" will take you to the next page of the GPS information as shown in the following pictures.
GPS Status → GPS data 2
The setting of the "Timezone" has no influence on the displayed date!
GPS Status → Speedometer
Speedometer.The unit displayed can be set in the "Units" menu as:- metric (km / h / km)- imperial (mp / h-mi)- nautical (kn / NM)
GPS Status → Compass
Shows your current speed and, if speed is more than approx 3km/h, direction of movement. Of course with GPS reception only.
www.wimo.com - 14- ©Taner Schenker
GPS Status → Follow
"Follow"If you have not pressed "follow" for any positional message since the last restart, the distance and direction (in relation to your own direction of travel) will be displayed in Berlin. If you have previously pressed "follow" on a station, the station will be shown at this point until the next reboot and updated if necessary.
GPS Status → Home
"Home"If you have saved a "Home" position in the "Save Home Pos." Menu. This shows you the distance and direction to the storedposition. This feature can be helpful to find back to that place in a foreign environment.
USB Mode
With USB mode, you determine how the device should behave on the PC There are the options Config, GPS or. KISSTNC.The USB interface always works with 115200 baud!
Config: The PicoAPRS transceiver does not send any data to the PC. However, you can use a terminal program to send commands to the PicoAPRS to get informations or to change configurations. E.g. your comment text for APRS position messages can be configured here via the PC keyboard.Send an "Enter" (line break) via a terminal program and you will receive a response with the possible commands.
GPS: In this setting, GPS data is output in NMEA format via USB. So you can use PicoAPRS like a "GPS mouse".
KISS-TNC: In this mode, PicoAPRS behaves like a KISS-TNC. You can use this mode, among other things, to use PicoAPRS for APRS PC software, such as use UIView32. Thus, it is possible to install your own APRS digipeater or gateway.In the KISS-TNC mode, there are no initialization commands necessary.
www.wimo.com - 15- ©Taner Schenker
Save Home pos
In the "Save Home pos" menu, you can save your current position as "Home" position in the device. This is used after a restart when no GPS position is known. If you use a home as an APRS symbol, this position is also used without GPS reception to send position beacons. If you have previously stored a position, the distance to this stored position is displayed when GPS reception is available.
If the GPS position is unknown, the second line shows "Wait for GPS". The position can only be saved by pressing the right button "ok" when "Ready for save" appears in the second line.
TX Power
Here the transmission power can be switched between "High" and "Low".
The transmission power in High is about 1 Watt and in Low about 0.5 Watt.
TX interval
Specify the intervals at which position messages are to be sent. Please note that the interval set here only takes effect if your position has changed at least 50 or 100 meters!If set to OFF, no packet will be transmitted.
Timezone
By adjusting the "Timezone", you can adjust the time displayed on the main screen to your local conditions. If you set this to "0", the main screen will display UTC time.
www.wimo.com - 16- ©Taner Schenker

Beep (only from hardware version 2!)
with Beep, you can set when PicoAPRS should beep:- OFF (Off, no beep)- Message (Only on received Message)- Message + Key (Keystroke and received Message)- All (Keystroke, Message and decoded Pkt.)
Morsecode (only from hardware version 2!)
In Morsecode, you can define what is to be output as Morse code for received messages ("SMS"). However, at least "Message" must be set under "Beep".- SMS (only 3 x SMS)- SMS + CALL (SMS and the callsign of sender)- SMS + CALL + TEXT (SMS, callsign and message text)
MyCall
Here you set your own callsign. This is the most important setting you need to make!It is used to send position messages and to receive personalmessages.The currently set call sign is displayed here.To change, press the right button ("change").
A "underscore" ("_") will appear at the position you are changing (see figure on left). Repeatedly press the change key to change the underlined position until the desired character appears. There are only LETTERS from A to Z and numbers from 0-9 available.
To complete your input, please use the "Check" as shown in the figure above and then press "save". Your setting will be saved.
www.wimo.com - 17- ©Taner Schenker
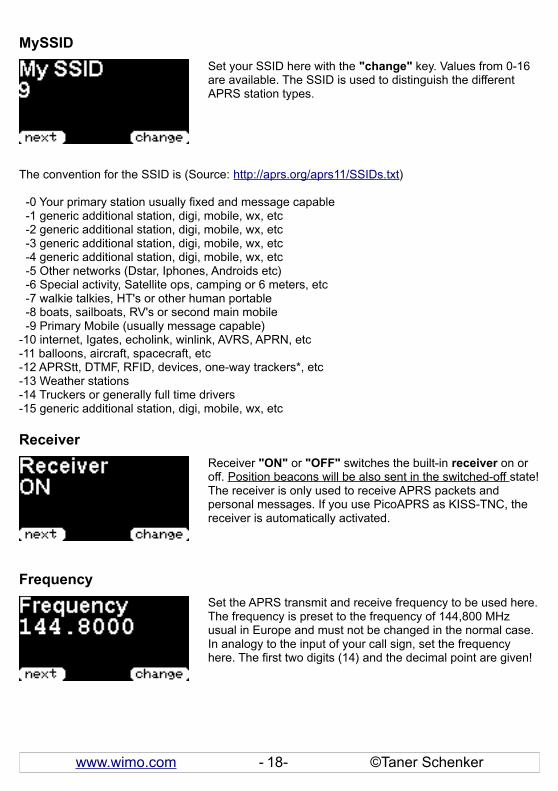
MySSID
Set your SSID here with the "change" key. Values from 0-16 are available. The SSID is used to distinguish the different APRS station types.
The convention for the SSID is (Source: http://aprs.org/aprs11/SSIDs.txt)
-0 Your primary station usually fixed and message capable -1 generic additional station, digi, mobile, wx, etc -2 generic additional station, digi, mobile, wx, etc -3 generic additional station, digi, mobile, wx, etc -4 generic additional station, digi, mobile, wx, etc -5 Other networks (Dstar, Iphones, Androids etc) -6 Special activity, Satellite ops, camping or 6 meters, etc -7 walkie talkies, HT's or other human portable -8 boats, sailboats, RV's or second main mobile -9 Primary Mobile (usually message capable)-10 internet, Igates, echolink, winlink, AVRS, APRN, etc-11 balloons, aircraft, spacecraft, etc-12 APRStt, DTMF, RFID, devices, one-way trackers*, etc-13 Weather stations-14 Truckers or generally full time drivers-15 generic additional station, digi, mobile, wx, etc
Receiver
Receiver "ON" or "OFF" switches the built-in receiver on or off. Position beacons will be also sent in the switched-off state!The receiver is only used to receive APRS packets and personal messages. If you use PicoAPRS as KISS-TNC, the receiver is automatically activated.
Frequency
Set the APRS transmit and receive frequency to be used here.The frequency is preset to the frequency of 144,800 MHz usual in Europe and must not be changed in the normal case.In analogy to the input of your call sign, set the frequency here. The first two digits (14) and the decimal point are given!
www.wimo.com - 18- ©Taner Schenker
The following frequencies are used in other parts of the world for 1200 baud FM APRS:
USA: 144.390 MHzJapan: 144.660 MHzEurope: 144.800 MHzAustralia: 145.175 MHzThailand: 145.525 MHzISS (Space Station): 145.825 MHzOSCAR44 (Uplink): 144.828 MHz
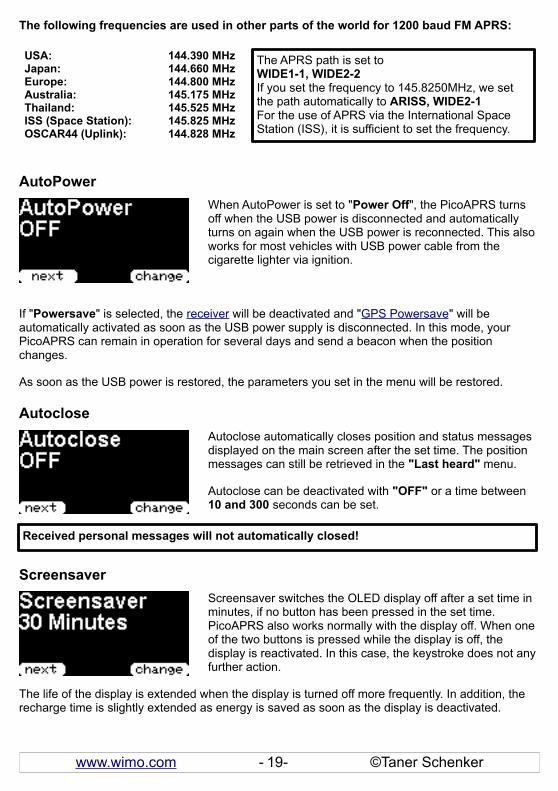
AutoPower
When AutoPower is set to "Power Off", the PicoAPRS turns off when the USB power is disconnected and automatically turns on again when the USB power is reconnected. This also works for most vehicles with USB power cable from the cigarette lighter via ignition.
If "Powersave" is selected, the receiver will be deactivated and "GPS Powersave" will be automatically activated as soon as the USB power supply is disconnected. In this mode, your PicoAPRS can remain in operation for several days and send a beacon when the position changes.
As soon as the USB power is restored, the parameters you set in the menu will be restored.
Autoclose
Autoclose automatically closes position and status messages displayed on the main screen after the set time. The position messages can still be retrieved in the "Last heard" menu.
Autoclose can be deactivated with "OFF" or a time between 10 and 300 seconds can be set.
Screensaver
Screensaver switches the OLED display off after a set time in minutes, if no button has been pressed in the set time. PicoAPRS also works normally with the display off. When one of the two buttons is pressed while the display is off, the display is reactivated. In this case, the keystroke does not anyfurther action.
The life of the display is extended when the display is turned off more frequently. In addition, the recharge time is slightly extended as energy is saved as soon as the display is deactivated.
www.wimo.com - 19- ©Taner Schenker
The APRS path is set toWIDE1-1, WIDE2-2If you set the frequency to 145.8250MHz, we setthe path automatically to ARISS, WIDE2-1For the use of APRS via the International SpaceStation (ISS), it is sufficient to set the frequency.
Received personal messages will not automatically closed!
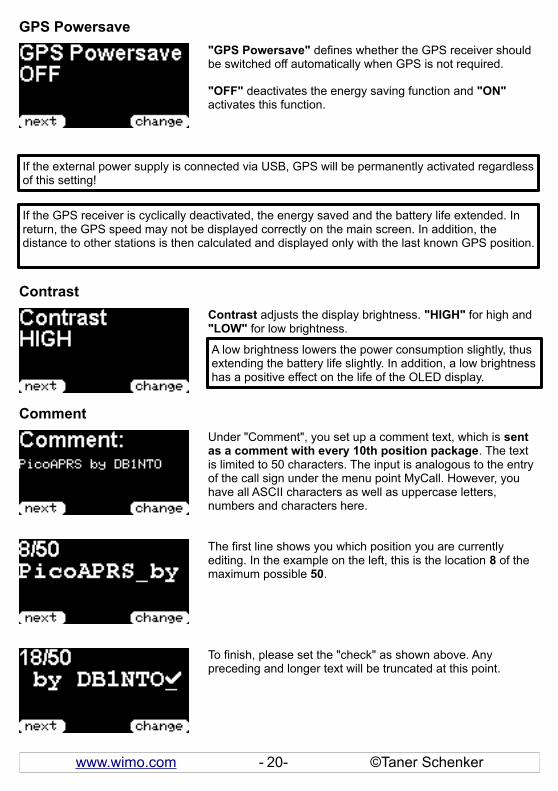
GPS Powersave
"GPS Powersave" defines whether the GPS receiver should be switched off automatically when GPS is not required.
"OFF" deactivates the energy saving function and "ON" activates this function.
Contrast
Contrast adjusts the display brightness. "HIGH" for high and "LOW" for low brightness.
Comment
Under "Comment", you set up a comment text, which is sent as a comment with every 10th position package. The text is limited to 50 characters. The input is analogous to the entry of the call sign under the menu point MyCall. However, you have all ASCII characters as well as uppercase letters, numbers and characters here.
The first line shows you which position you are currently editing. In the example on the left, this is the location 8 of the maximum possible 50.
To finish, please set the "check" as shown above. Any preceding and longer text will be truncated at this point.
www.wimo.com - 20- ©Taner Schenker
If the external power supply is connected via USB, GPS will be permanently activated regardlessof this setting!
If the GPS receiver is cyclically deactivated, the energy saved and the battery life extended. Inreturn, the GPS speed may not be displayed correctly on the main screen. In addition, thedistance to other stations is then calculated and displayed only with the last known GPS position.
A low brightness lowers the power consumption slightly, thusextending the battery life slightly. In addition, a low brightnesshas a positive effect on the life of the OLED display.
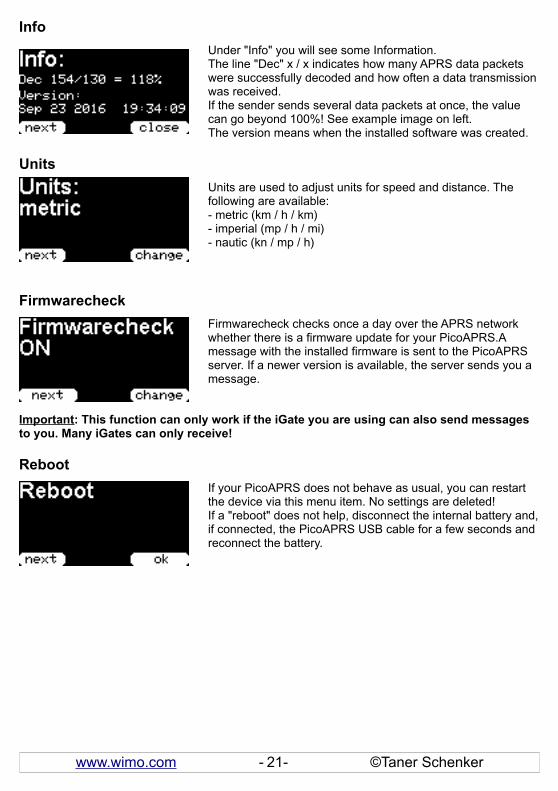
Info
Under "Info" you will see some Information.The line "Dec" x / x indicates how many APRS data packets were successfully decoded and how often a data transmissionwas received.If the sender sends several data packets at once, the value can go beyond 100%! See example image on left.The version means when the installed software was created.
Units
Units are used to adjust units for speed and distance. The following are available:- metric (km / h / km)- imperial (mp / h / mi)- nautic (kn / mp / h)
Firmwarecheck
Firmwarecheck checks once a day over the APRS network whether there is a firmware update for your PicoAPRS.A message with the installed firmware is sent to the PicoAPRS server. If a newer version is available, the server sends you a message.
Important: This function can only work if the iGate you are using can also send messages to you. Many iGates can only receive!
Reboot
If your PicoAPRS does not behave as usual, you can restart the device via this menu item. No settings are deleted!If a "reboot" does not help, disconnect the internal battery and,if connected, the PicoAPRS USB cable for a few seconds and reconnect the battery.
www.wimo.com - 21- ©Taner Schenker
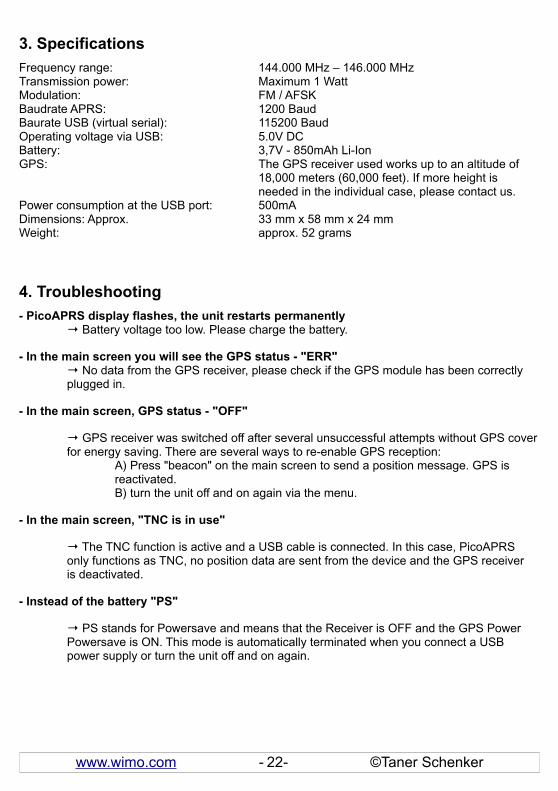
3. Specifications
Frequency range: 144.000 MHz – 146.000 MHzTransmission power: Maximum 1 WattModulation: FM / AFSKBaudrate APRS: 1200 BaudBaurate USB (virtual serial): 115200 BaudOperating voltage via USB: 5.0V DCBattery: 3,7V - 850mAh Li-IonGPS: The GPS receiver used works up to an altitude of
18,000 meters (60,000 feet). If more height is needed in the individual case, please contact us.
Power consumption at the USB port: 500mADimensions: Approx. 33 mm x 58 mm x 24 mmWeight: approx. 52 grams
4. Troubleshooting
- PicoAPRS display flashes, the unit restarts permanently→ Battery voltage too low. Please charge the battery.
- In the main screen you will see the GPS status - "ERR"→ No data from the GPS receiver, please check if the GPS module has been correctly plugged in.
- In the main screen, GPS status - "OFF"
→ GPS receiver was switched off after several unsuccessful attempts without GPS coverfor energy saving. There are several ways to re-enable GPS reception:
A) Press "beacon" on the main screen to send a position message. GPS is reactivated.B) turn the unit off and on again via the menu.
- In the main screen, "TNC is in use"
→ The TNC function is active and a USB cable is connected. In this case, PicoAPRS only functions as TNC, no position data are sent from the device and the GPS receiveris deactivated.
- Instead of the battery "PS"
→ PS stands for Powersave and means that the Receiver is OFF and the GPS Power Powersave is ON. This mode is automatically terminated when you connect a USB power supply or turn the unit off and on again.
www.wimo.com - 22- ©Taner Schenker
5. Manufacturer Information
WiMo Antennen und Elektronik GmbH
Am Gäxwald 1476863 Herxheim
Germany
Tel. +49 (0) 7276 9668-0FAX +49 (0) 7276 9668-11
http://www.wimo.com
e-mail: [email protected]
www.wimo.com - 23- ©Taner Schenker
6. EU Declaration of conformity
In accordance with EU Directives and RegulationsWiMo Antennen und Elektronik GmbH
Am Gäxwald 14, 76863 Herxheim, Germany
as the manufacturer, hereby declares under our sole responsibility that
product: APRS Data TransceiverModel name: PICO-APRS is in conformity with the essential requirements of the RE Directive 2014/53/EU:
Radio EN 301 783 V2.2.1 (2016-01)
Article 3.2 EN 300 440 V2.1.1 (2017-03)EMC EN 301 489-1 V2.2.0 (2017-03);
Article 3.1(b) EN 301 489-3 V2.1.1 (2017-03);
Safety EN 60950-1: 2006+A11:2009+A1:2010+A12:2011+A2:2013 Health EN 62311:2008
The notified body Bay Area Compliance Labs Corp.(BACL) (EU Identification Number: 1313) performed a conformity assessment according to Annex III, Module B.
Signed on behalf of WiMo Antennen und Elektronik GmbH
Name: Volkmar Junge SignatureTitle: Certification SupervisorTel: +49 7276 96680 (V. Junge)Mail: [email protected]
Date: aug 7, 2017
www.wimo.com - 24- ©Taner Schenker
Related Documents