Engineering Materials Module 9: Magnetic Particles Test PREPARED BY IAT Curriculum Unit August 2010 © Institute of Applied Technology, 2010

Welcome message from author
This document is posted to help you gain knowledge. Please leave a comment to let me know what you think about it! Share it to your friends and learn new things together.
Transcript
Engineering Materials
Module 9: Magnetic Particles Test
PREPARED BY
IAT Curriculum Unit
August 2010
© Institute of Applied Technology, 2010

ATM 1112 – Engineering Materials
Module 9: Magnetic Particles Test 2
Module 9: Magnetic Particles Test
Module Objectives
After the completion of this module, the student will be able to:
Explain the basic principles of the magnetic particles test.
Describe the main parts of the magnetic particles Kit used to perform the magnetic particles test.
Differentiate between wet magnetic and dry magnetic particles.
Carry out a magnetic test for different speciemen using a certain procedure.
Record and report the defects using standard NDT report.
Module Contents Topic Page No.
1 Basic principles of the magnetic test 3
2 Magnetic field orientation and flaw detect ability 5
3 The magnetic particles testing kit 6
4 The magnetic particles test procedure 9
5 Magnetic particles versus dye penetrant test 10
6 Supplementary Resources 11
7 References 11
ATM 1112 – Engineering Materials
Module 9: Magnetic Particles Test 3
Introduction
Magnetic Test (MT) or Magnetic Particle
Inspection (MPI) is a nondestructive
testing method used for defect detection
on ferromagnetic materials.
MT uses magnetic fields and small
magnetic particles (i.e. iron filings) to
detect surface and subsurface (1-2mm
below the surface) flaws in components
which must be made of a ferromagnetic
material such as iron, nickel, cobalt, or
some of their alloys. The MT method is
used to inspect a variety of product
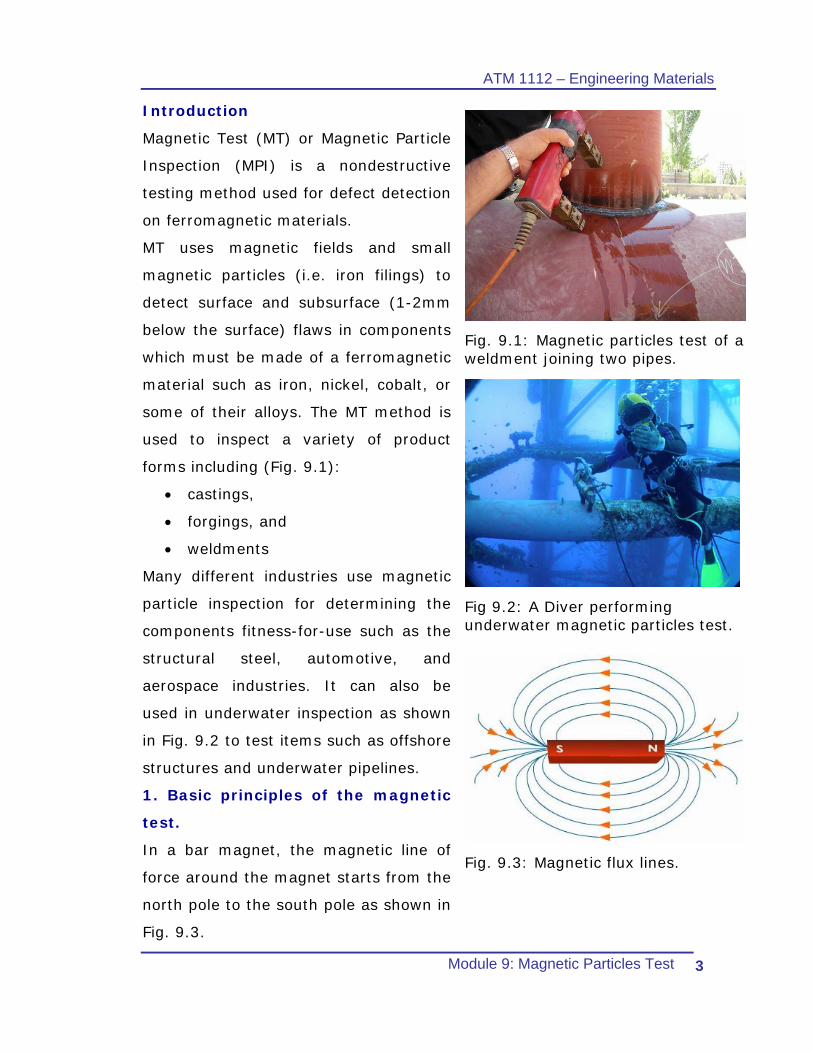
forms including (Fig. 9.1):
• castings,
• forgings, and
• weldments
Many different industries use magnetic
particle inspection for determining the
components fitness-for-use such as the
structural steel, automotive, and
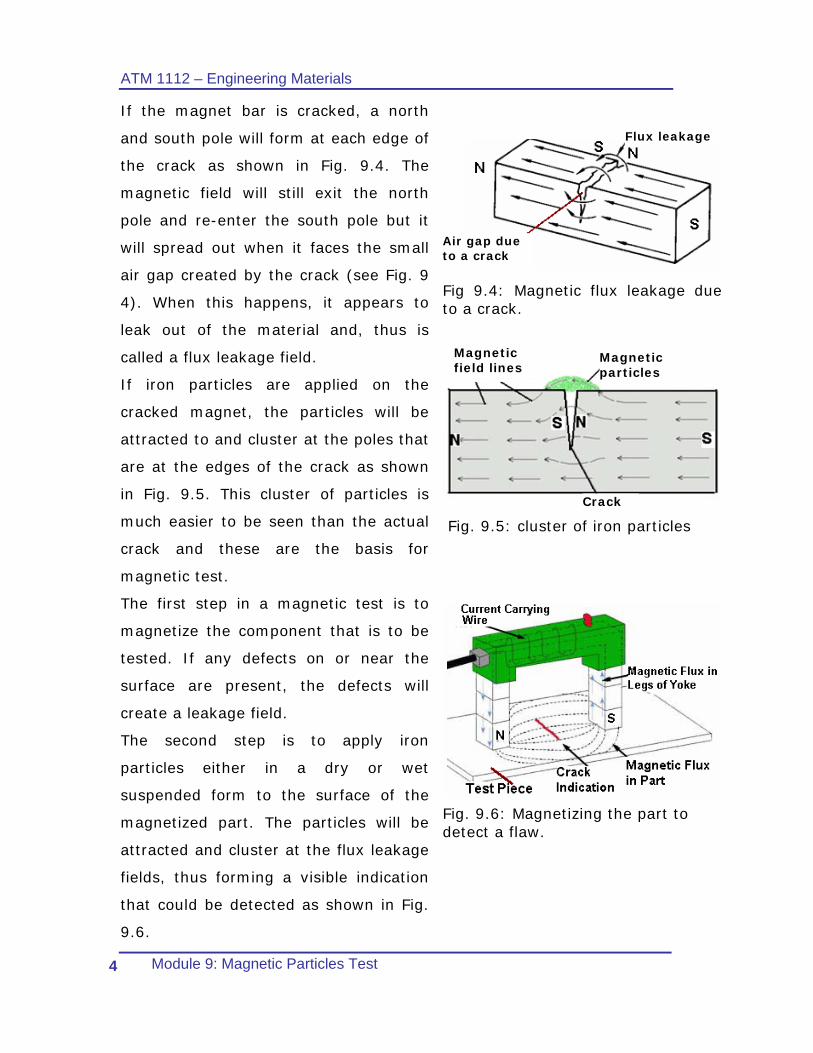
aerospace industries. It can also be
used in underwater inspection as shown
in Fig. 9.2 to test items such as offshore
structures and underwater pipelines.
1. Basic principles of the magnetic
test.
In a bar magnet, the magnetic line of
force around the magnet starts from the
north pole to the south pole as shown in
Fig. 9.3.
Fig. 9.1: Magnetic particles test of a weldment joining two pipes.
Fig 9.2: A Diver performing underwater magnetic particles test.
Fig. 9.3: Magnetic flux lines.
ATM 1112 – Engineering Materials
Module 9: Magnetic Particles Test 4
If the magnet bar is cracked, a north
and south pole will form at each edge of
the crack as shown in Fig. 9.4. The
magnetic field will still exit the north
pole and re-enter the south pole but it
will spread out when it faces the small
air gap created by the crack (see Fig. 9
4). When this happens, it appears to
leak out of the material and, thus is
called a flux leakage field.
If iron particles are applied on the
cracked magnet, the particles will be
attracted to and cluster at the poles that
are at the edges of the crack as shown
in Fig. 9.5. This cluster of particles is
much easier to be seen than the actual
crack and these are the basis for
magnetic test.
Flux leakage
Air gap due to a crack
Fig 9.4: Magnetic flux leakage due to a crack.
Magnetic particles
Magnetic field lines
Crack
Fig. 9.5: cluster of iron particles
The first step in a magnetic test is to
magnetize the component that is to be
tested. If any defects on or near the
surface are present, the defects will
create a leakage field.
The second step is to apply iron
particles either in a dry or wet
suspended form to the surface of the
magnetized part. The particles will be
attracted and cluster at the flux leakage
fields, thus forming a visible indication
that could be detected as shown in Fig.
9.6.
Fig. 9.6: Magnetizing the part to detect a flaw.
ATM 1112 – Engineering Materials
Module 9: Magnetic Particles Test 5
2. Magnetic field orientation and
flaw detect ability
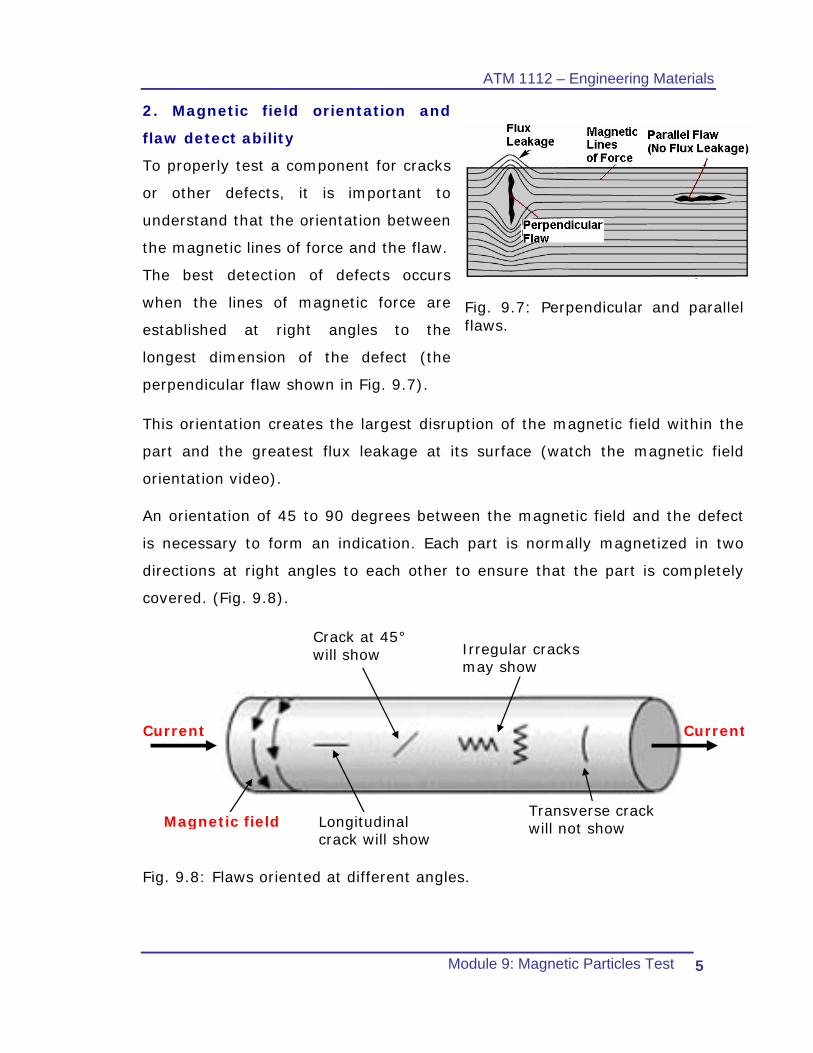
To properly test a component for cracks
or other defects, it is important to
understand that the orientation between
the magnetic lines of force and the flaw.
The best detection of defects occurs
when the lines of magnetic force are
established at right angles to the
longest dimension of the defect (the
perpendicular flaw shown in Fig. 9.7).
Fig. 9.7: Perpendicular and parallel flaws.
This orientation creates the largest disruption of the magnetic field within the
part and the greatest flux leakage at its surface (watch the magnetic field
orientation video).
An orientation of 45 to 90 degrees between the magnetic field and the defect
is necessary to form an indication. Each part is normally magnetized in two
directions at right angles to each other to ensure that the part is completely
covered. (Fig. 9.8).
Crack at 45° will show Irregular cracks
may show
CurrentCurrent
Magnetic field Transverse crack will not show Longitudinal
crack will show
Fig. 9.8: Flaws oriented at different angles.
ATM 1112 – Engineering Materials
Module 9: Magnetic Particles Test 6
3. The magnetic test kit
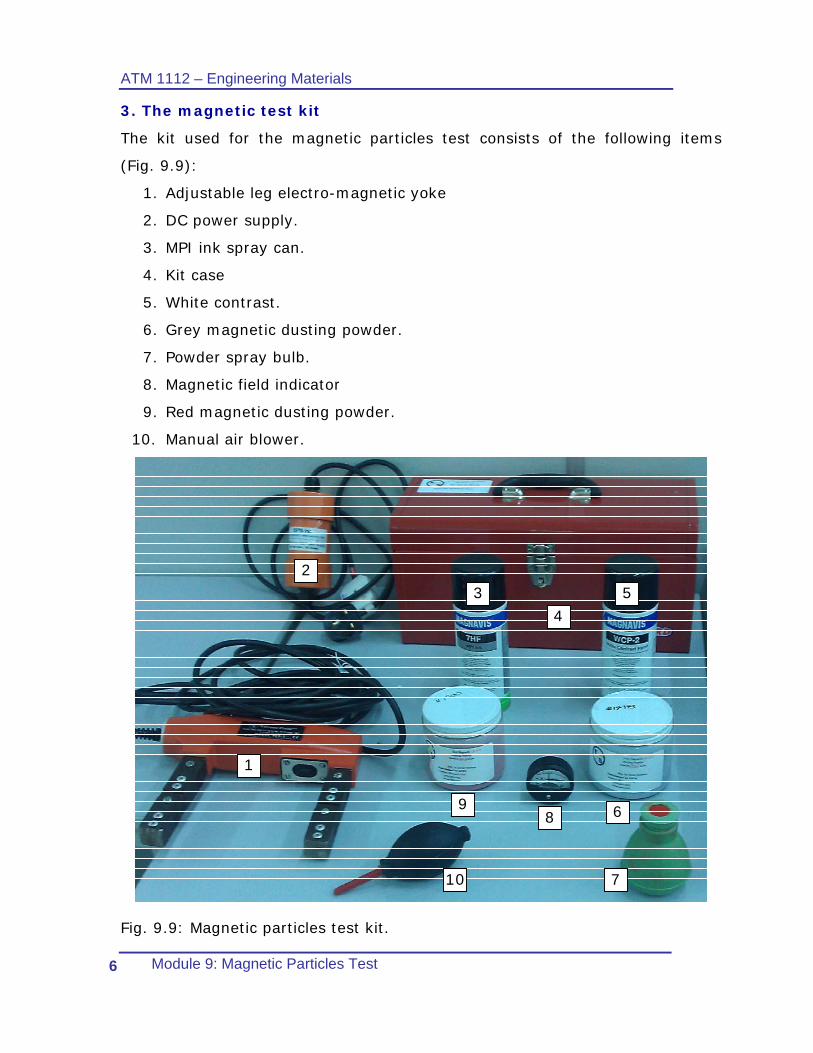
The kit used for the magnetic particles test consists of the following items
(Fig. 9.9):
1. Adjustable leg electro-magnetic yoke
2. DC power supply.
3. MPI ink spray can.
4. Kit case
5. White contrast.
6. Grey magnetic dusting powder.
7. Powder spray bulb.
8. Magnetic field indicator
9. Red magnetic dusting powder.
10. Manual air blower.
10
8 6 9
3 5 4
7
1
2
Fig. 9.9: Magnetic particles test kit.
ATM 1112 – Engineering Materials
Module 9: Magnetic Particles Test 7
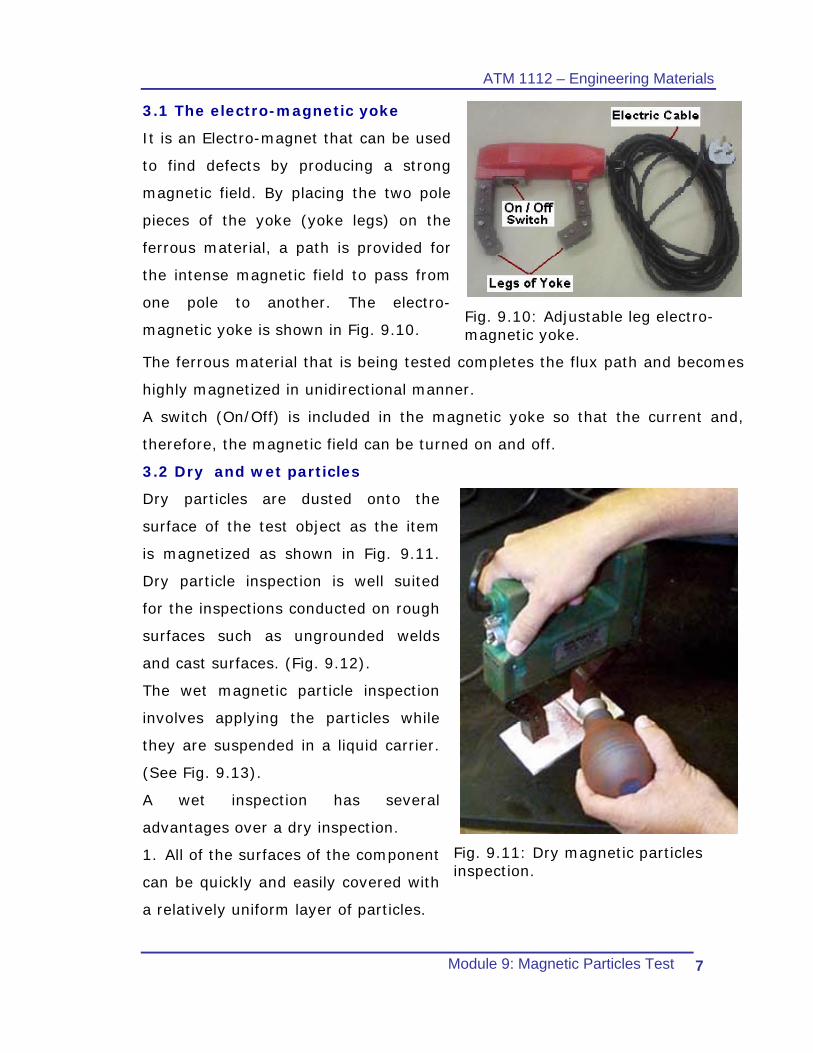
3.1 The electro-magnetic yoke
It is an Electro-magnet that can be used
to find defects by producing a strong
magnetic field. By placing the two pole
pieces of the yoke (yoke legs) on the
ferrous material, a path is provided for
the intense magnetic field to pass from
one pole to another. The electro-
magnetic yoke is shown in Fig. 9.10.
Fig. 9.10: Adjustable leg electro-magnetic yoke.
The ferrous material that is being tested completes the flux path and becomes
highly magnetized in unidirectional manner.
A switch (On/Off) is included in the magnetic yoke so that the current and,
therefore, the magnetic field can be turned on and off.
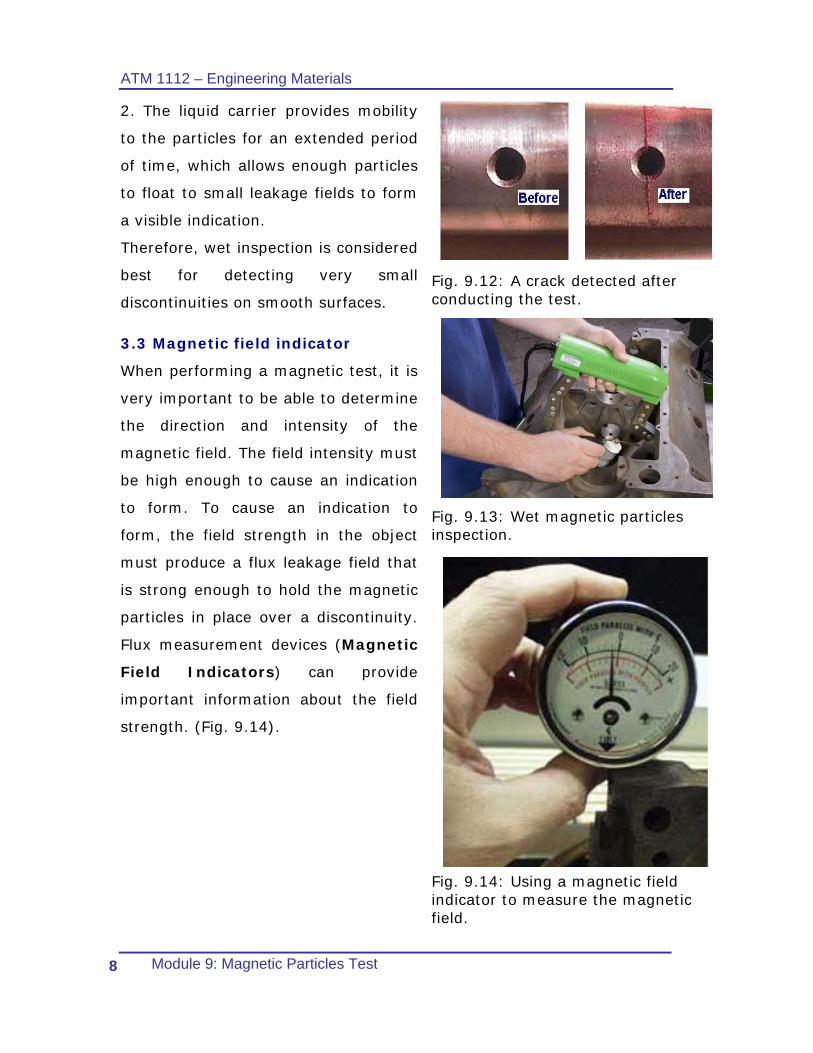
3.2 Dry and wet particles
Dry particles are dusted onto the
surface of the test object as the item
is magnetized as shown in Fig. 9.11.
Dry particle inspection is well suited
for the inspections conducted on rough
surfaces such as ungrounded welds
and cast surfaces. (Fig. 9.12).
The wet magnetic particle inspection
involves applying the particles while
they are suspended in a liquid carrier.
(See Fig. 9.13).
A wet inspection has several
advantages over a dry inspection.
1. All of the surfaces of the component
can be quickly and easily covered with
a relatively uniform layer of particles.
Fig. 9.11: Dry magnetic particles inspection.
ATM 1112 – Engineering Materials
Module 9: Magnetic Particles Test 8
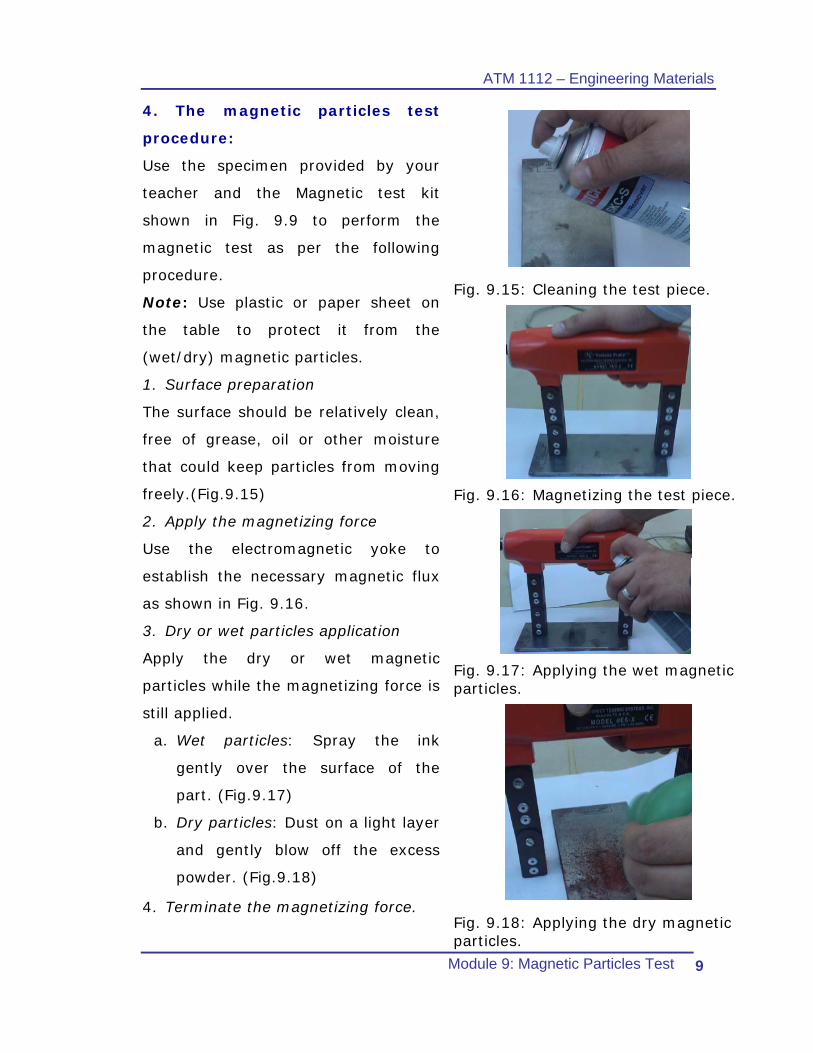
2. The liquid carrier provides mobility
to the particles for an extended period
of time, which allows enough particles
to float to small leakage fields to form
a visible indication.
Therefore, wet inspection is considered
best for detecting very small
discontinuities on smooth surfaces.
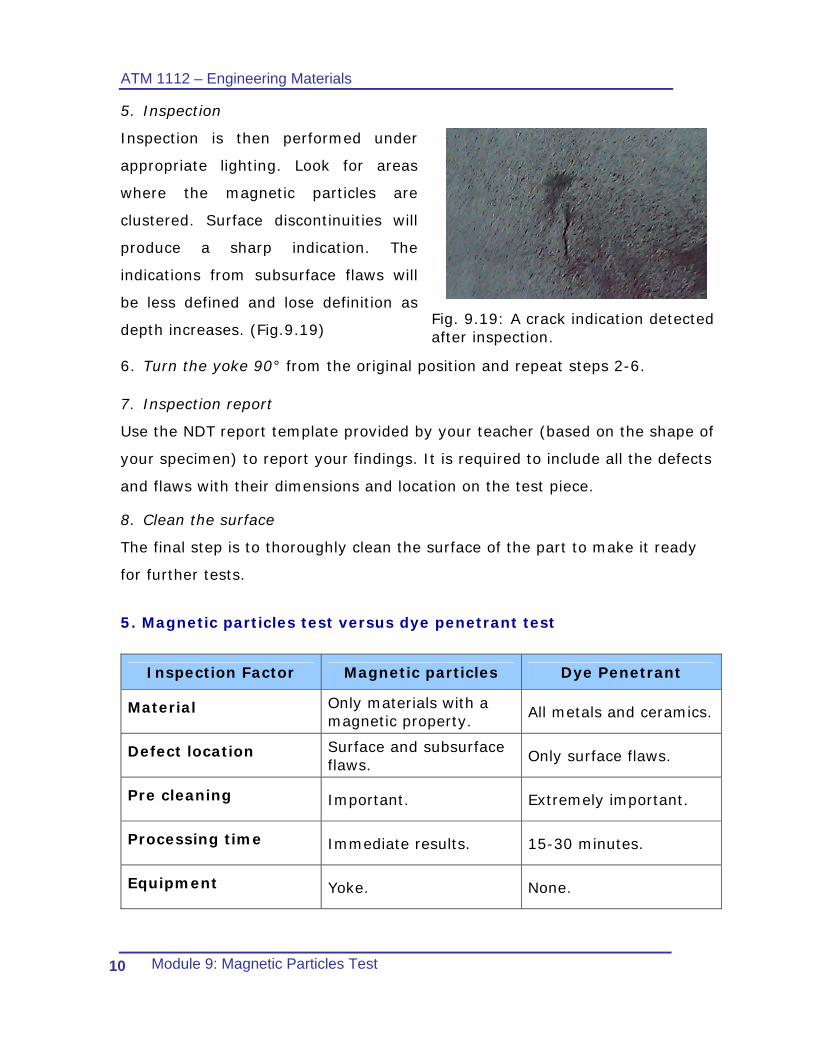
3.3 Magnetic field indicator
When performing a magnetic test, it is
very important to be able to determine
the direction and intensity of the
magnetic field. The field intensity must
be high enough to cause an indication
to form. To cause an indication to
form, the field strength in the object
must produce a flux leakage field that
is strong enough to hold the magnetic
particles in place over a discontinuity.
Flux measurement devices (Magnetic
Field Indicators) can provide
important information about the field
strength. (Fig. 9.14).
Fig. 9.12: A crack detected after conducting the test.
Fig. 9.13: Wet magnetic particles inspection.
Fig. 9.14: Using a magnetic field indicator to measure the magnetic field.
ATM 1112 – Engineering Materials
Module 9: Magnetic Particles Test 9
4. The magnetic particles test
procedure:
Use the specimen provided by your
teacher and the Magnetic test kit
shown in Fig. 9.9 to perform the
magnetic test as per the following
procedure.
Note: Use plastic or paper sheet on
the table to protect it from the
(wet/dry) magnetic particles.
1. Surface preparation
The surface should be relatively clean,
free of grease, oil or other moisture
that could keep particles from moving
freely.(Fig.9.15)
2. Apply the magnetizing force
Use the electromagnetic yoke to
establish the necessary magnetic flux
as shown in Fig. 9.16.
3. Dry or wet particles application
Apply the dry or wet magnetic
particles while the magnetizing force is
still applied.
a. Wet particles: Spray the ink
gently over the surface of the
part. (Fig.9.17)
b. Dry particles: Dust on a light layer
and gently blow off the excess
powder. (Fig.9.18)
4. Terminate the magnetizing force.
Fig. 9.15: Cleaning the test piece.
Fig. 9.16: Magnetizing the test piece.
Fig. 9.17: Applying the wet magnetic particles.
Fig. 9.18: Applying the dry magnetic particles.
ATM 1112 – Engineering Materials
Module 9: Magnetic Particles Test 10
5. Inspection
Inspection is then performed under
appropriate lighting. Look for areas
where the magnetic particles are
clustered. Surface discontinuities will
produce a sharp indication. The
indications from subsurface flaws will
be less defined and lose definition as
depth increases. (Fig.9.19)
Fig. 9.19: A crack indication detected after inspection.
6. Turn the yoke 90° from the original position and repeat steps 2-6.
7. Inspection report
Use the NDT report template provided by your teacher (based on the shape of
your specimen) to report your findings. It is required to include all the defects
and flaws with their dimensions and location on the test piece.
8. Clean the surface
The final step is to thoroughly clean the surface of the part to make it ready
for further tests.
5. Magnetic particles test versus dye penetrant test
Inspection Factor Magnetic particles Dye Penetrant
Material Only materials with a magnetic property. All metals and ceramics.
Defect location Surface and subsurface flaws.
Only surface flaws.
Pre cleaning Important. Extremely important.
Processing time Immediate results. 15-30 minutes.
Equipment Yoke. None.
ATM 1112 – Engineering Materials
Module 9: Magnetic Particles Test 11
6. Supplementary recourses
1. Mechanical and non-destructive testing video.
2. Magnetic field orientation video.
3. Magnetic test_1 video.
4. Magnetic test_2 video.
7. References
1. The magnetic particles test Kit instruction manual.
2. http://www.ndt-ed.org/EducationResources/CommunityCollege/MagParticle/cc_mpi_index.htm
3. Other internet websites
ATM 1112 – Engineering Materials
Module 9: Magnetic Particles Test 12
Student’s notes
............................................................................................................
............................................................................................................
............................................................................................................
............................................................................................................
............................................................................................................
............................................................................................................
............................................................................................................
............................................................................................................
............................................................................................................
............................................................................................................
............................................................................................................
............................................................................................................
............................................................................................................
............................................................................................................
............................................................................................................
............................................................................................................
............................................................................................................
............................................................................................................
............................................................................................................
............................................................................................................
............................................................................................................
Related Documents