Welcome message from author
This document is posted to help you gain knowledge. Please leave a comment to let me know what you think about it! Share it to your friends and learn new things together.
Transcript
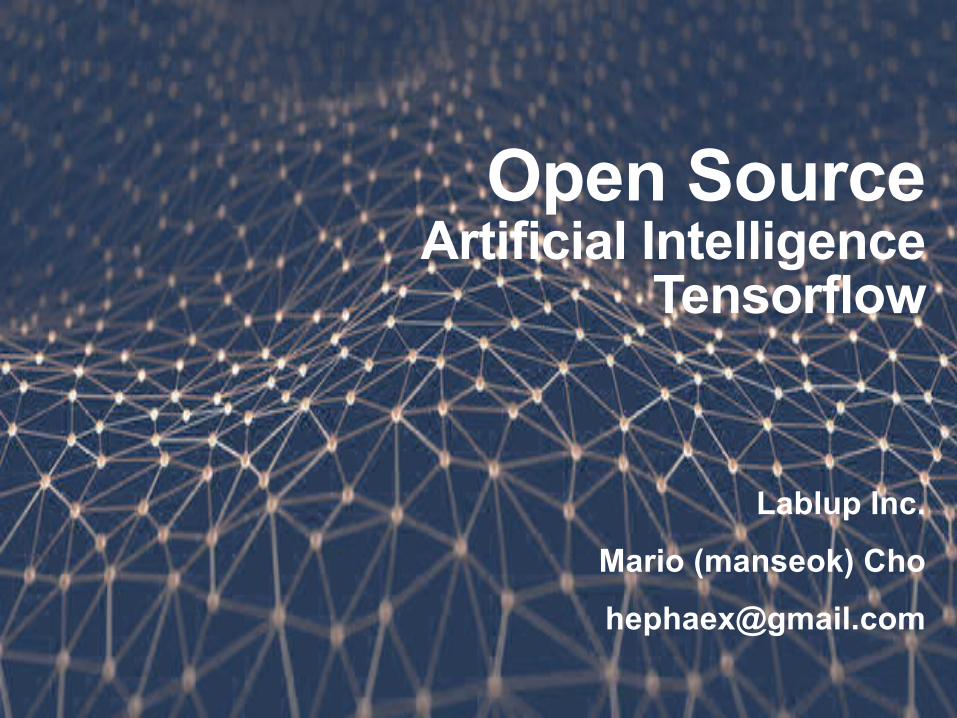
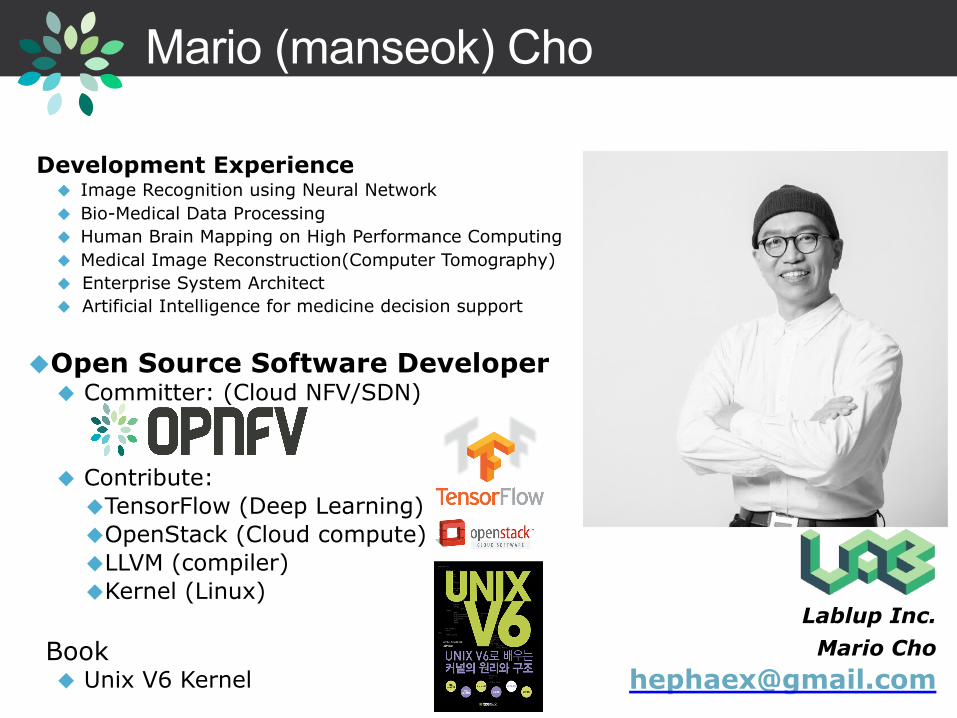
Mario (manseok) Cho
Development Experience◆ Image Recognition using Neural Network◆ Bio-Medical Data Processing◆ Human Brain Mapping on High Performance Computing◆ Medical Image Reconstruction(Computer Tomography) ◆ Enterprise System Architect ◆ Artificial Intelligence for medicine decision support
◆Open Source Software Developer◆ Committer: (Cloud NFV/SDN)
◆ Contribute: ◆TensorFlow (Deep Learning)◆OpenStack (Cloud compute)◆LLVM (compiler)◆Kernel (Linux)
Book◆ Unix V6 Kernel
Lablup Inc.Mario Cho

I. Setup Virtual Environment
•Virtual Box 5.1 Download & install.•https://www.virtualbox.org
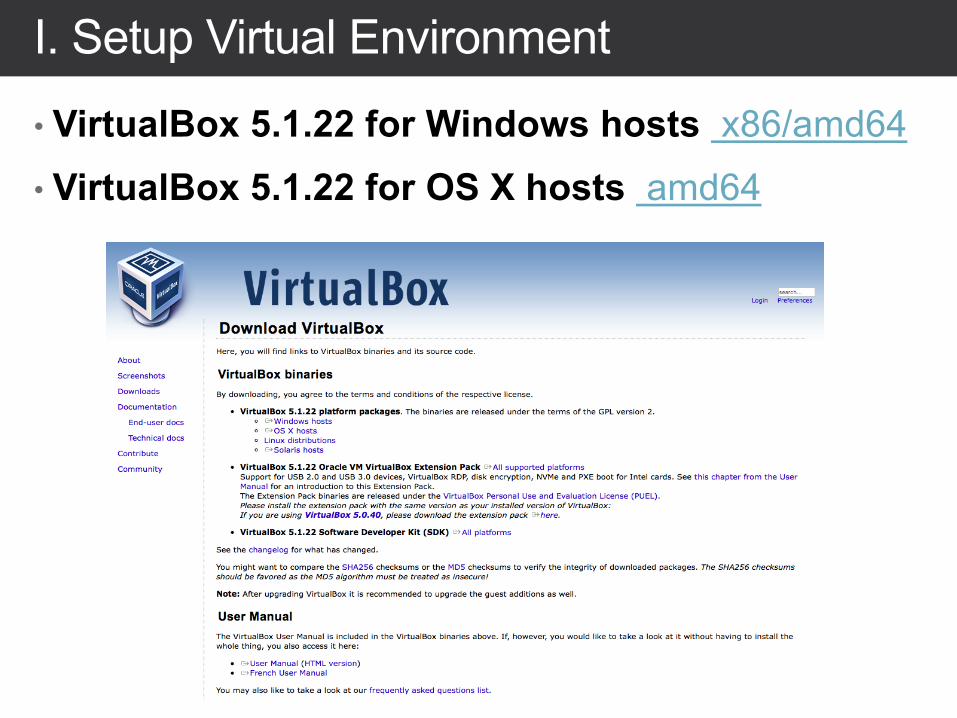
I. Setup Virtual Environment
• VirtualBox 5.1.22 for Windows hosts x86/amd64• VirtualBox 5.1.22 for OS X hosts amd64
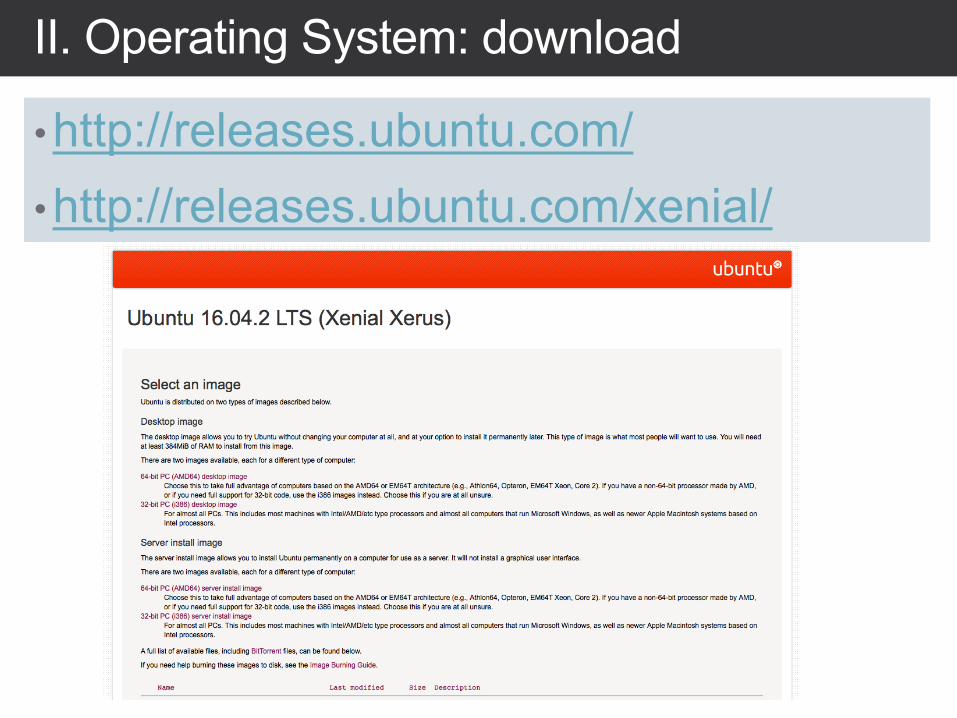
II. Operating System: download
•http://releases.ubuntu.com/•http://releases.ubuntu.com/xenial/
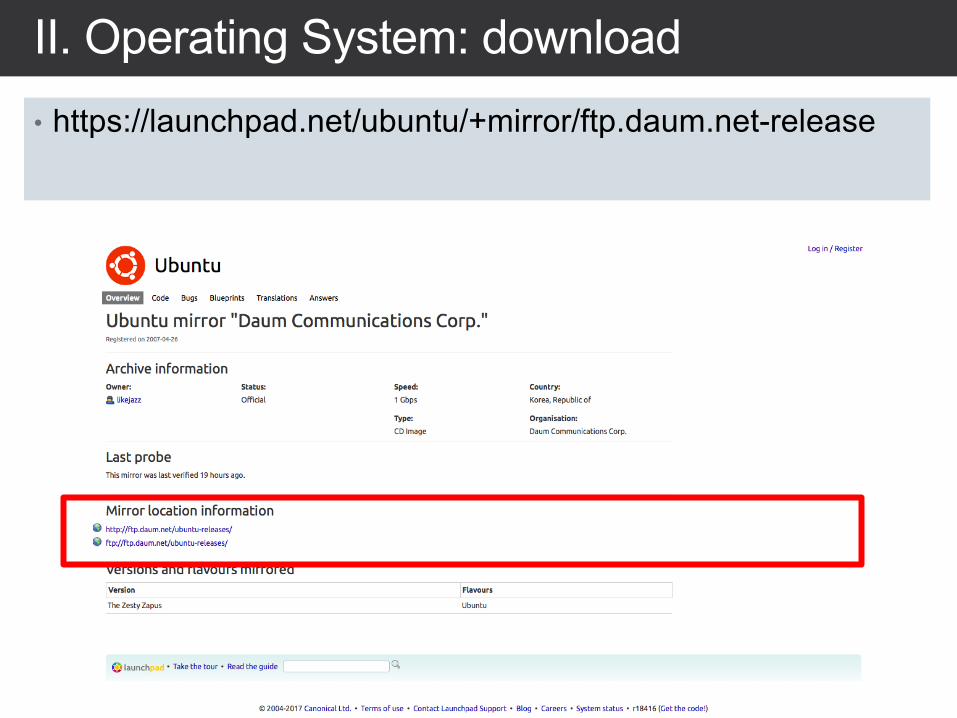
II. Operating System: download• https://launchpad.net/ubuntu/+mirror/ftp.daum.net-release
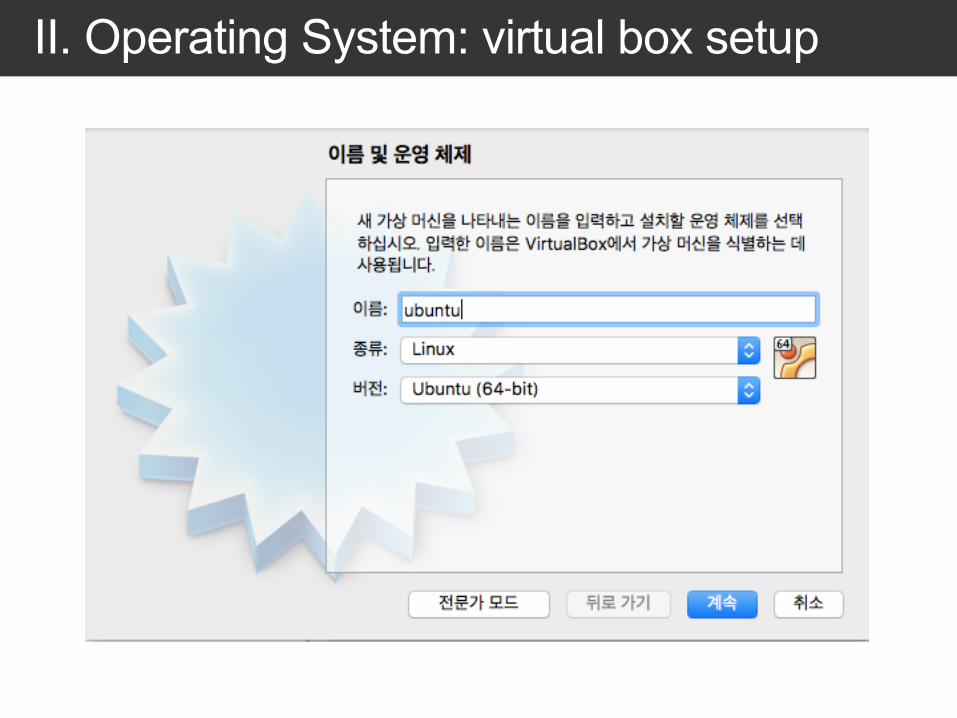
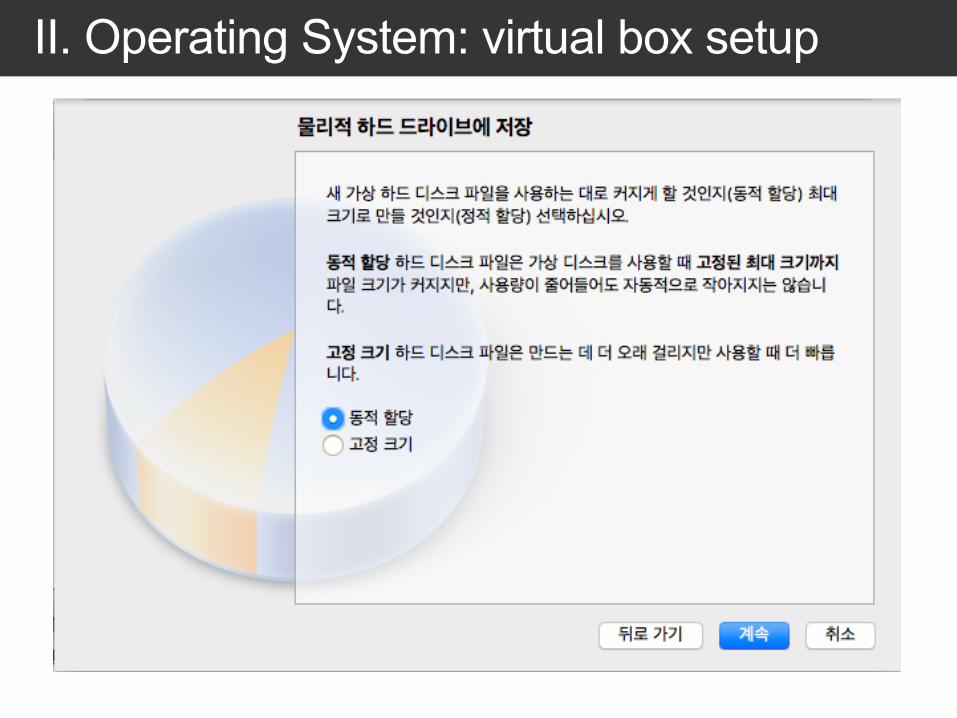
II. Operating System: virtual box setup
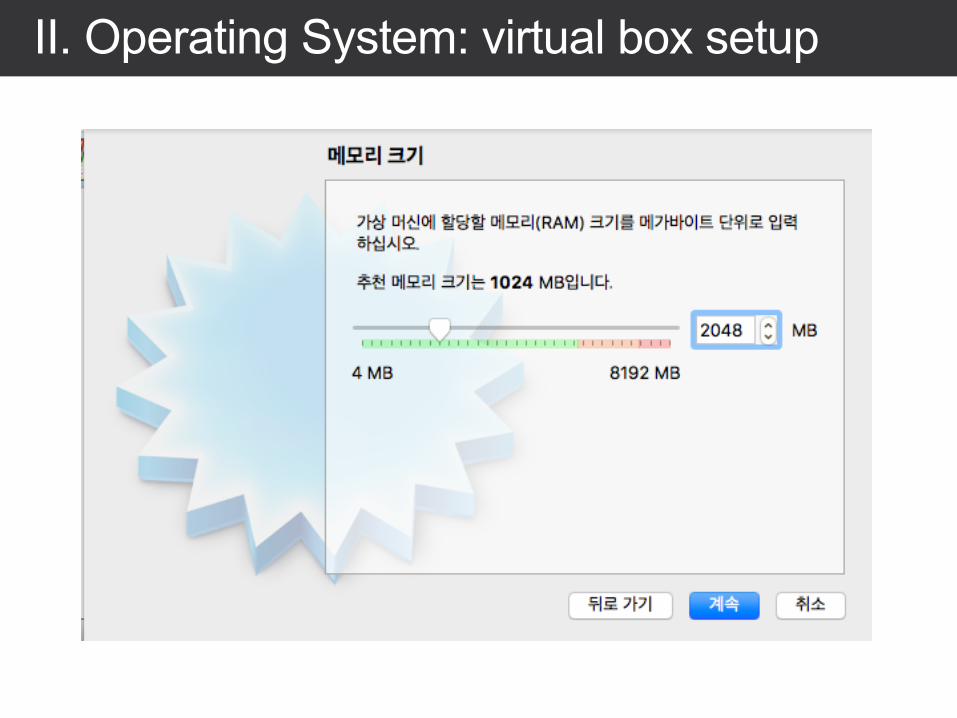
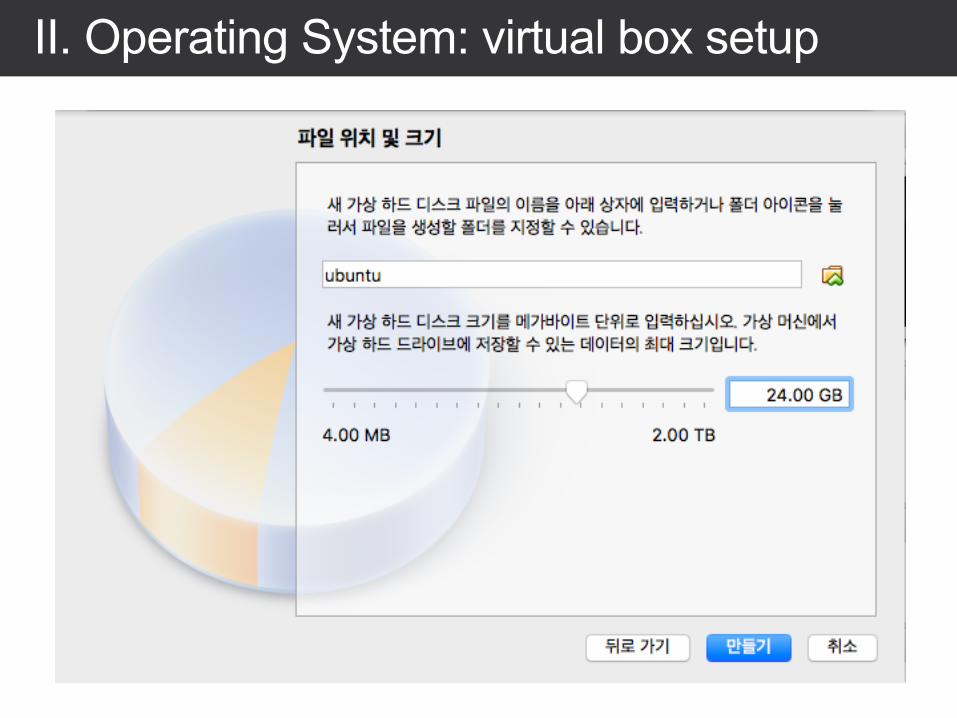
II. Operating System: virtual box setup
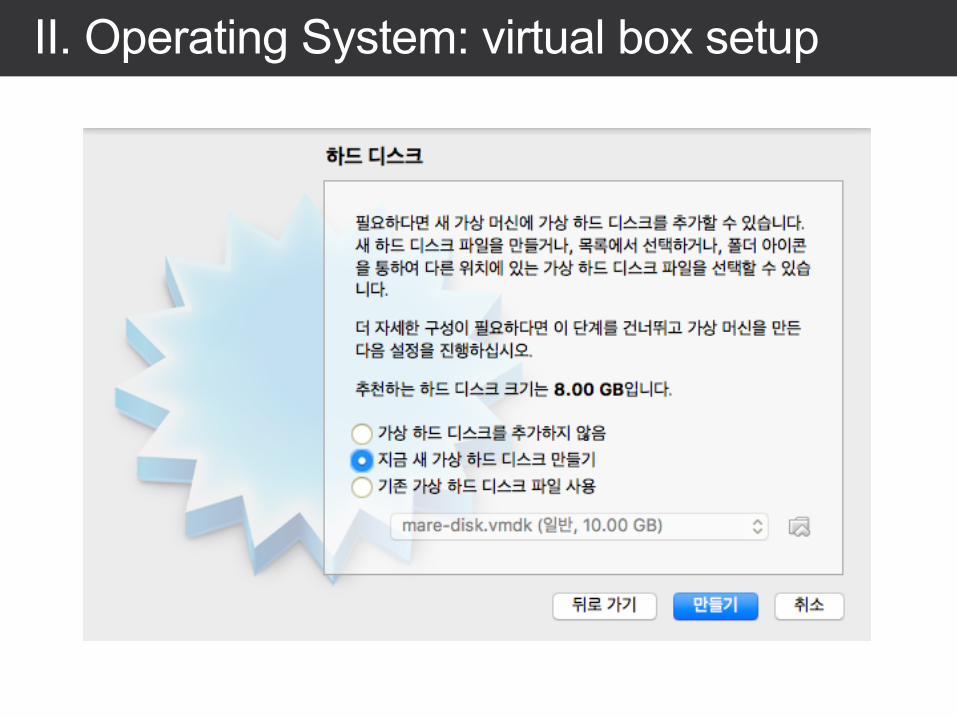
II. Operating System: virtual box setup
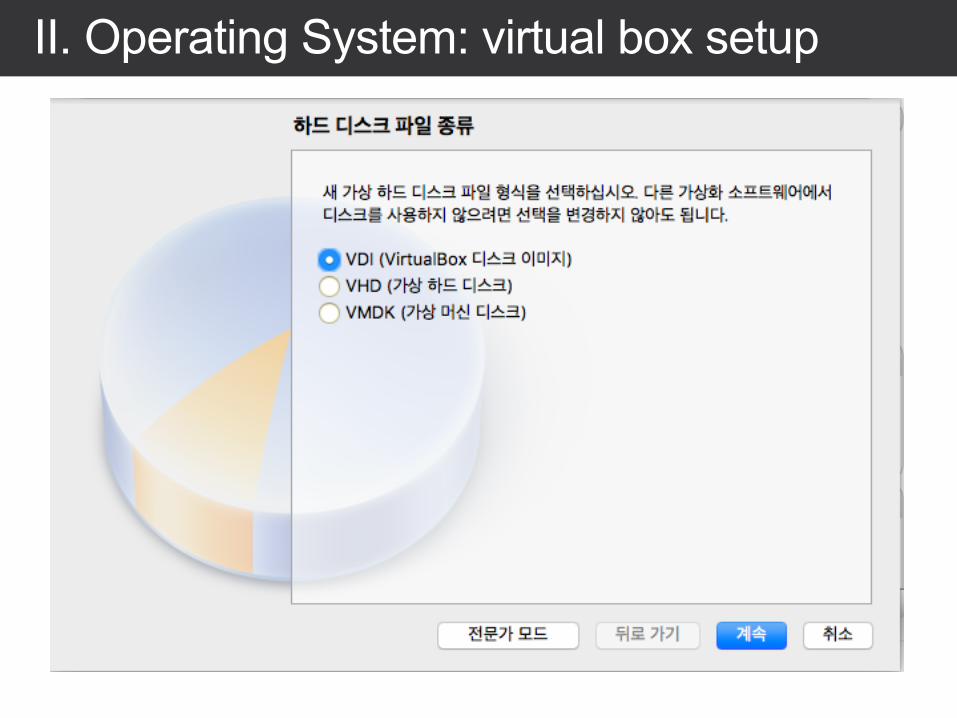
II. Operating System: virtual box setup
II. Operating System: virtual box setup
II. Operating System: virtual box setup
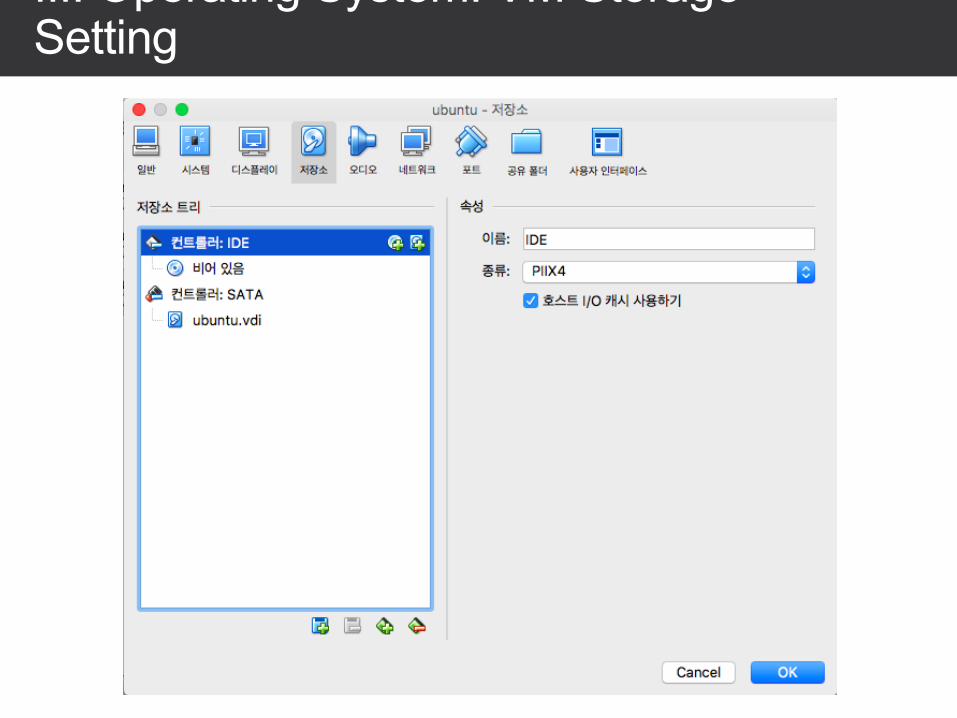
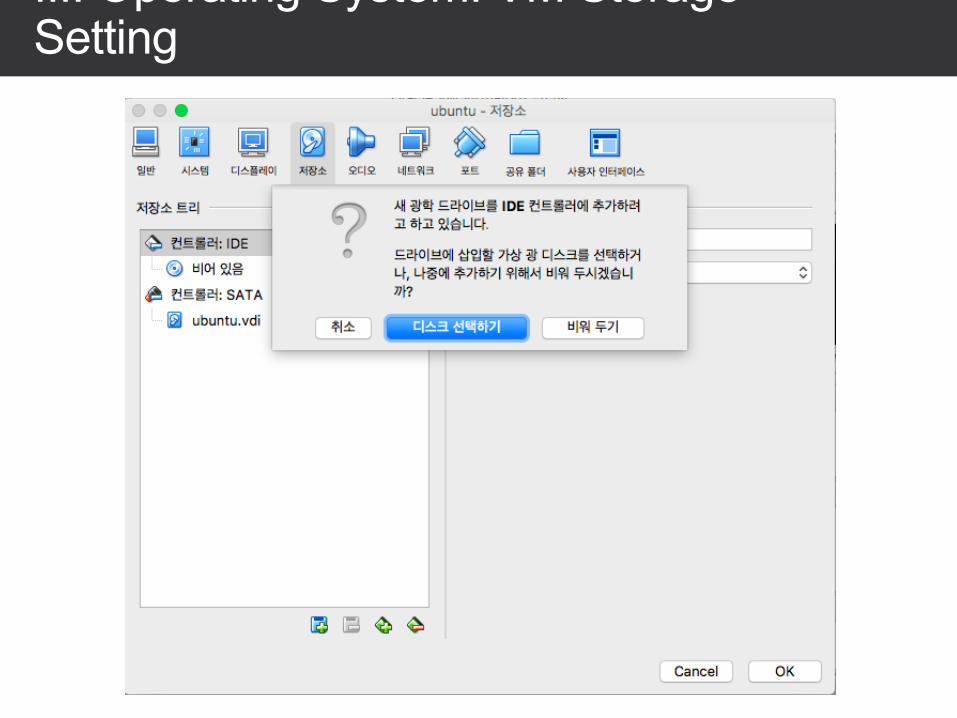
III. Operating System: VM Storage Setting
III. Operating System: VM Storage Setting
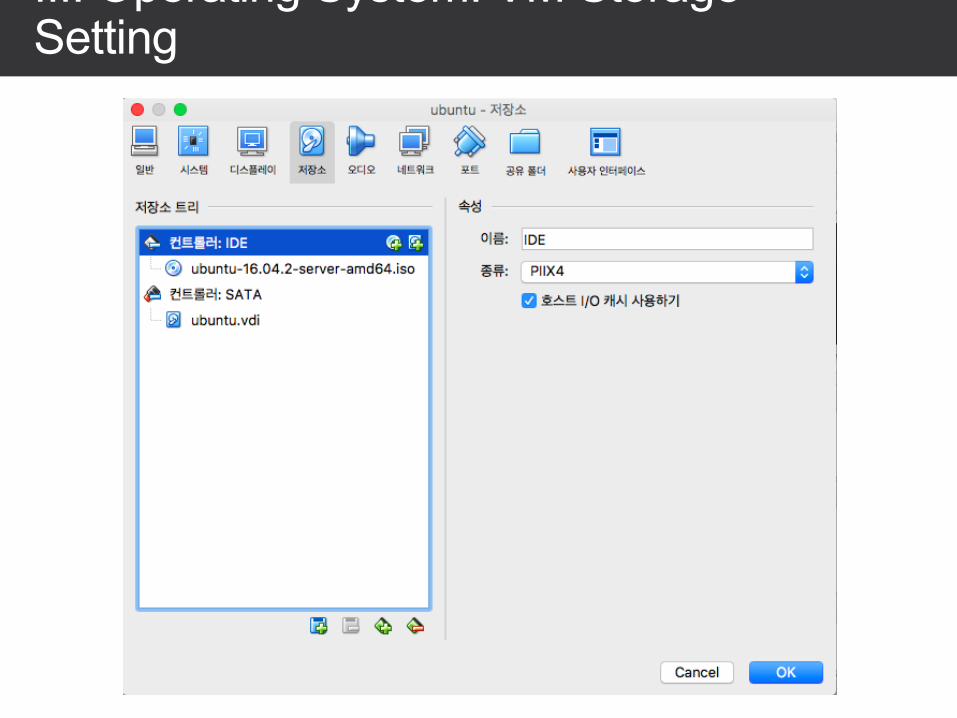
III. Operating System: VM Storage Setting
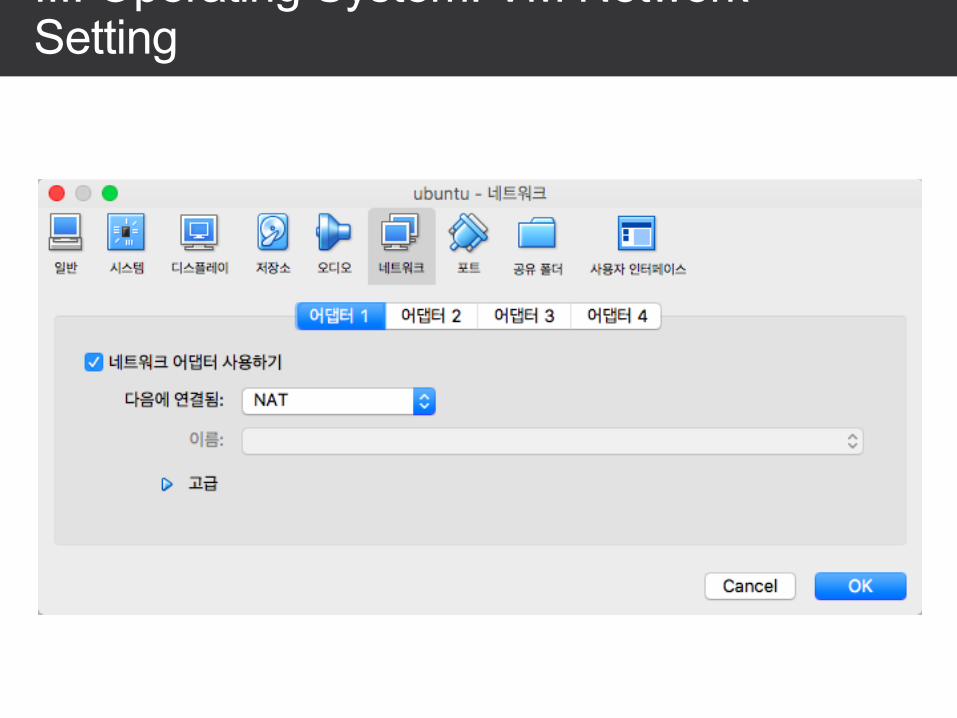
III. Operating System: VM Network Setting
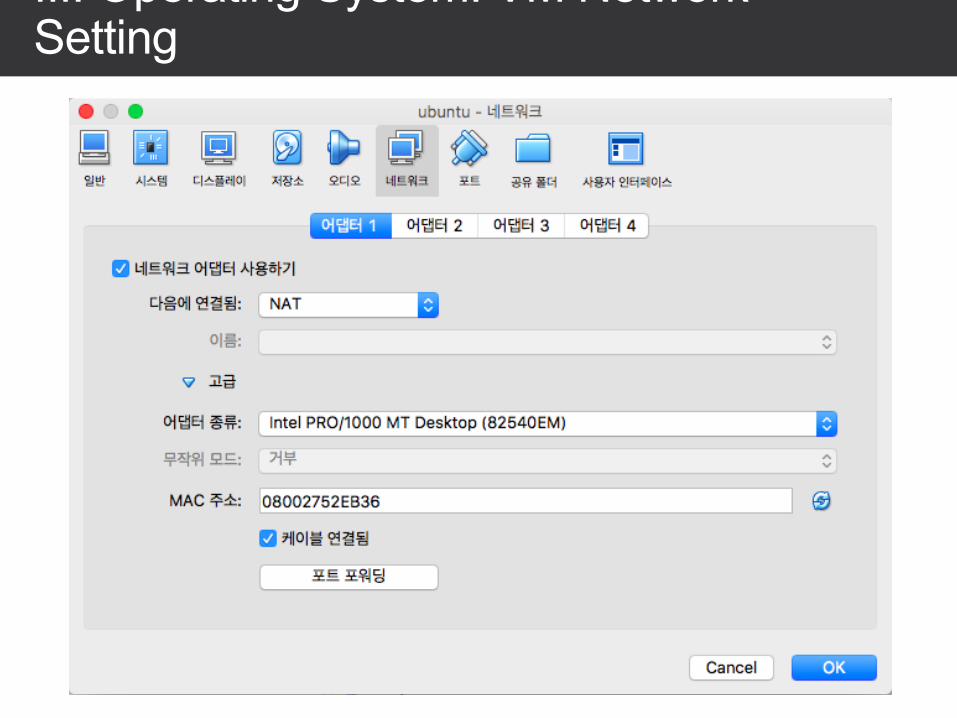
III. Operating System: VM Network Setting
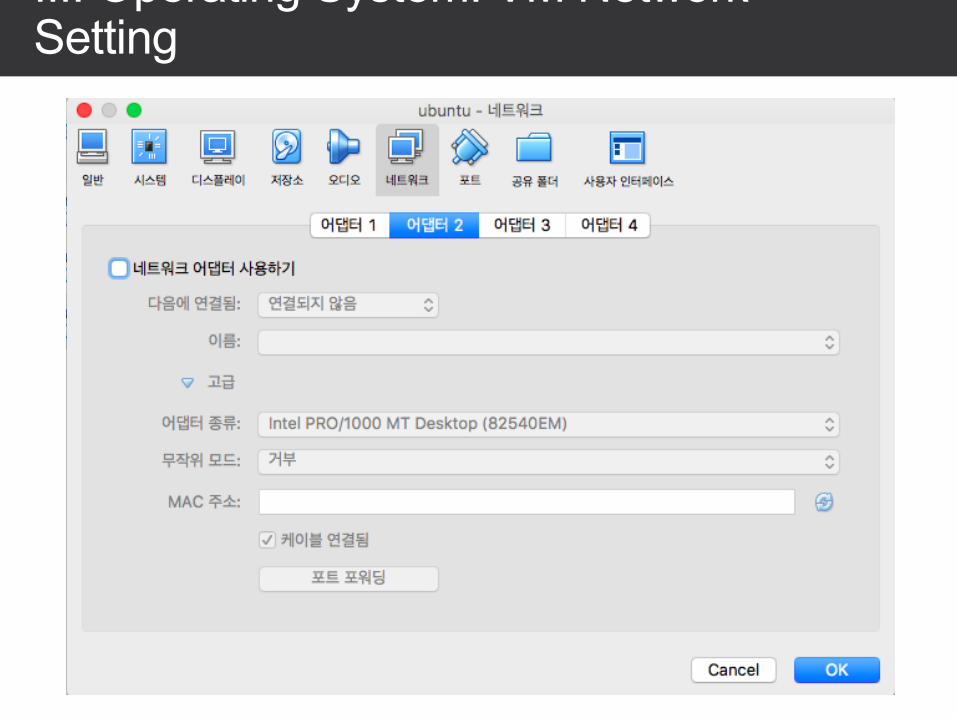
III. Operating System: VM Network Setting
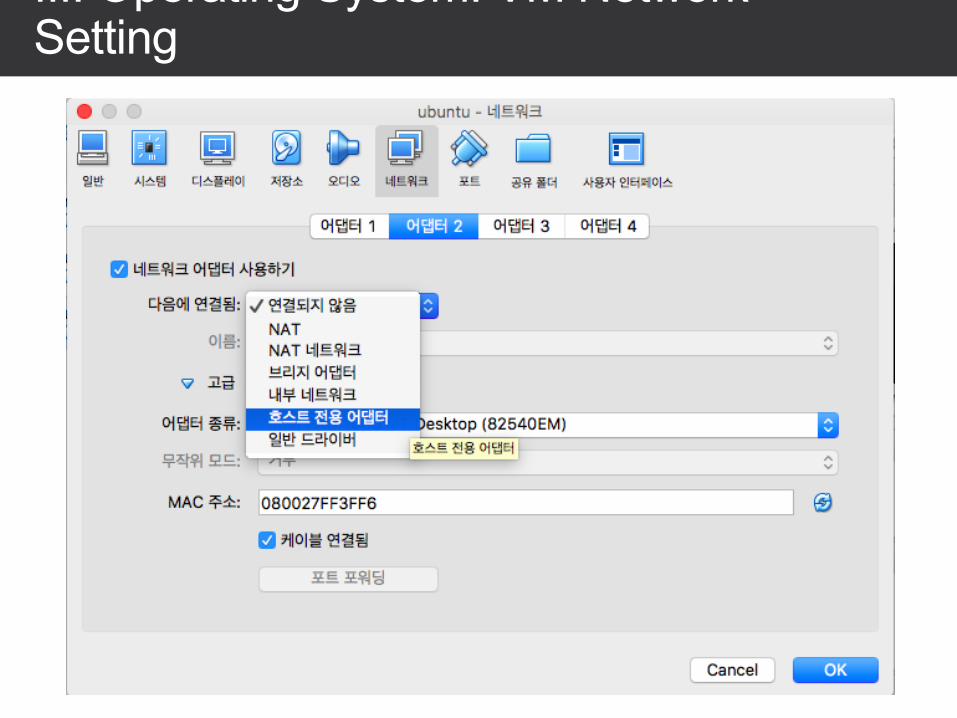
III. Operating System: VM Network Setting
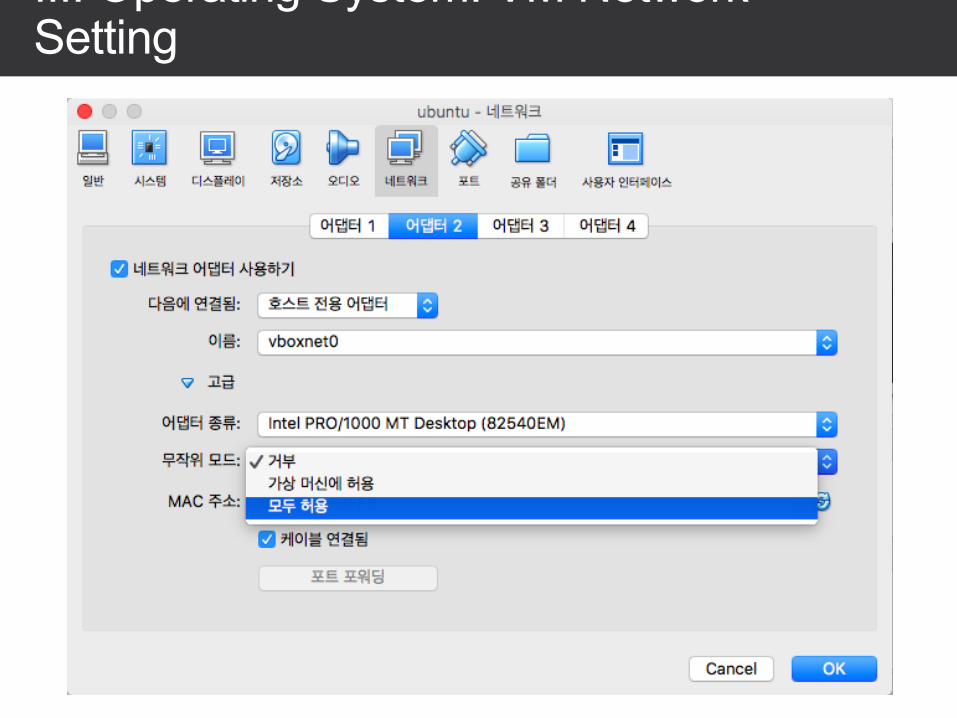
III. Operating System: VM Network Setting

III. Operating System: VM Network Setting
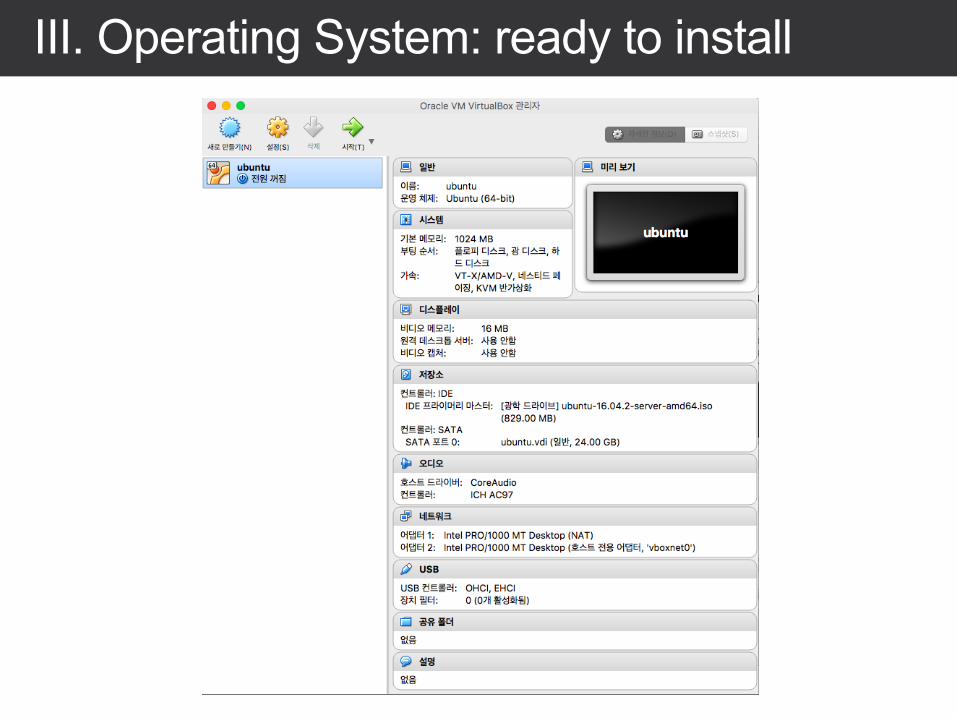
III. Operating System: ready to install
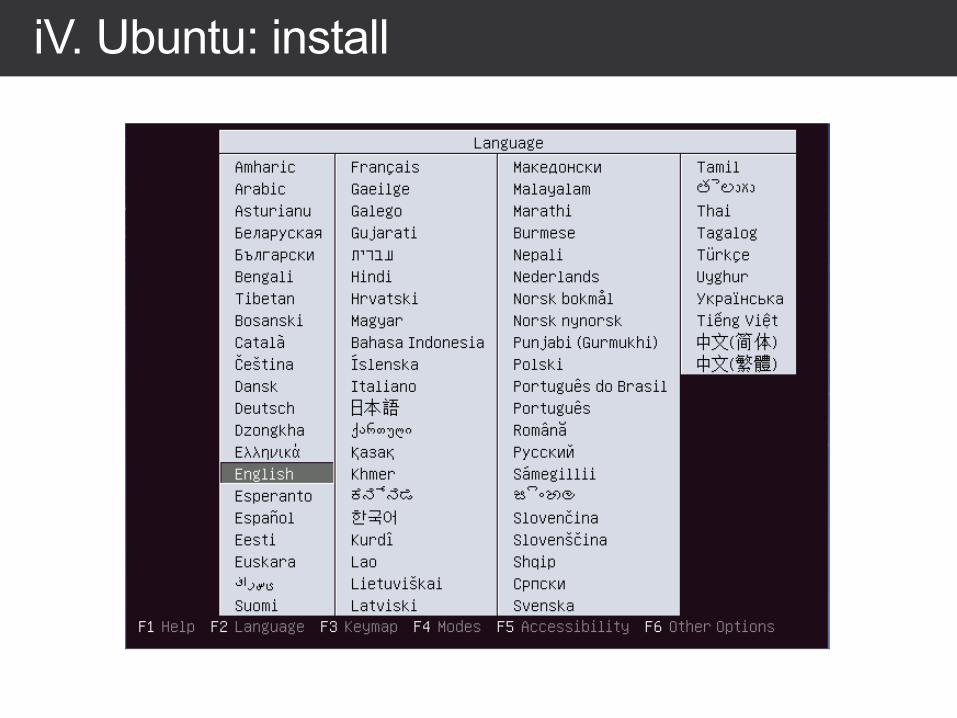
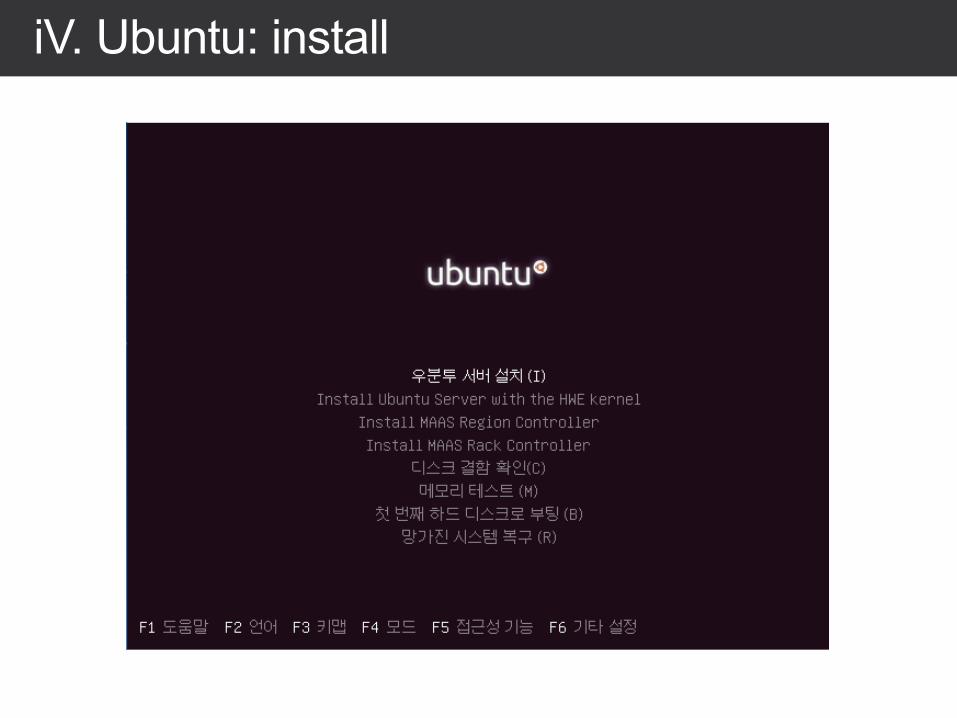
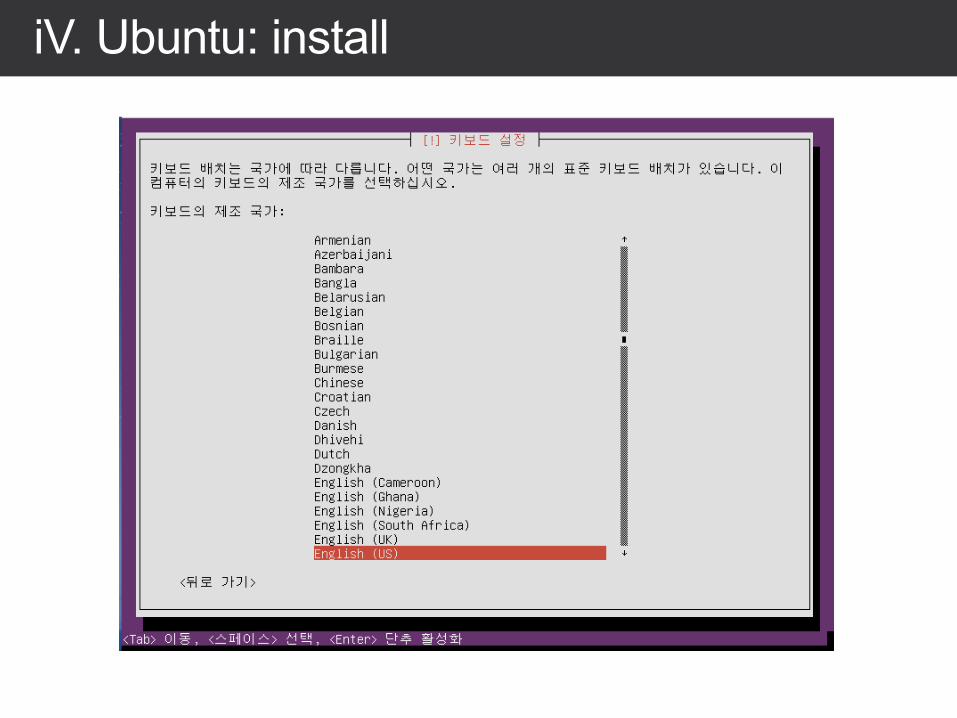
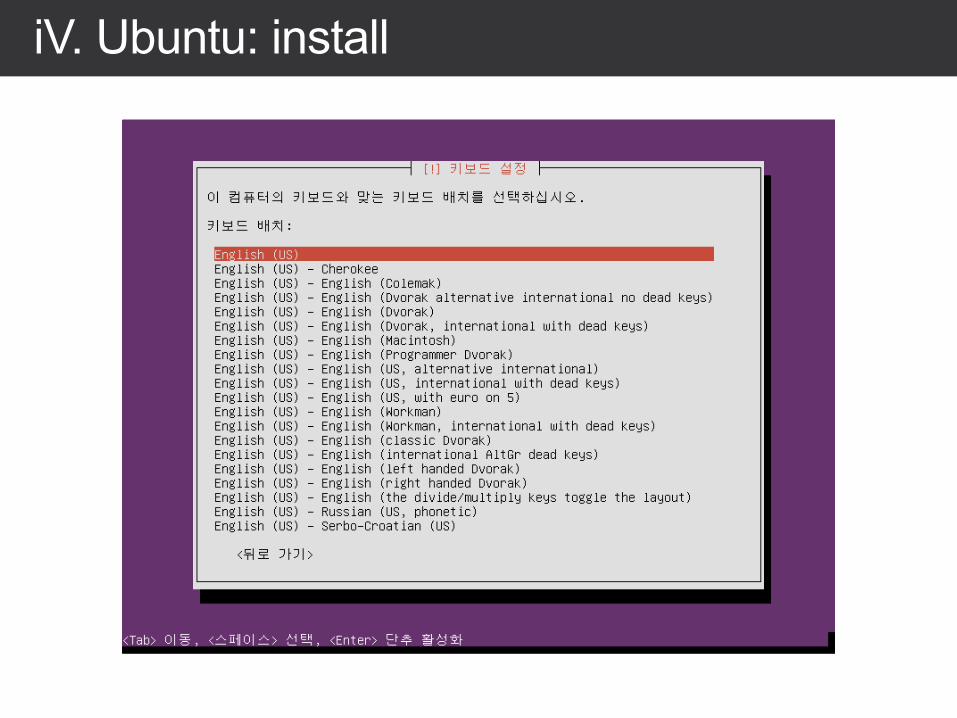
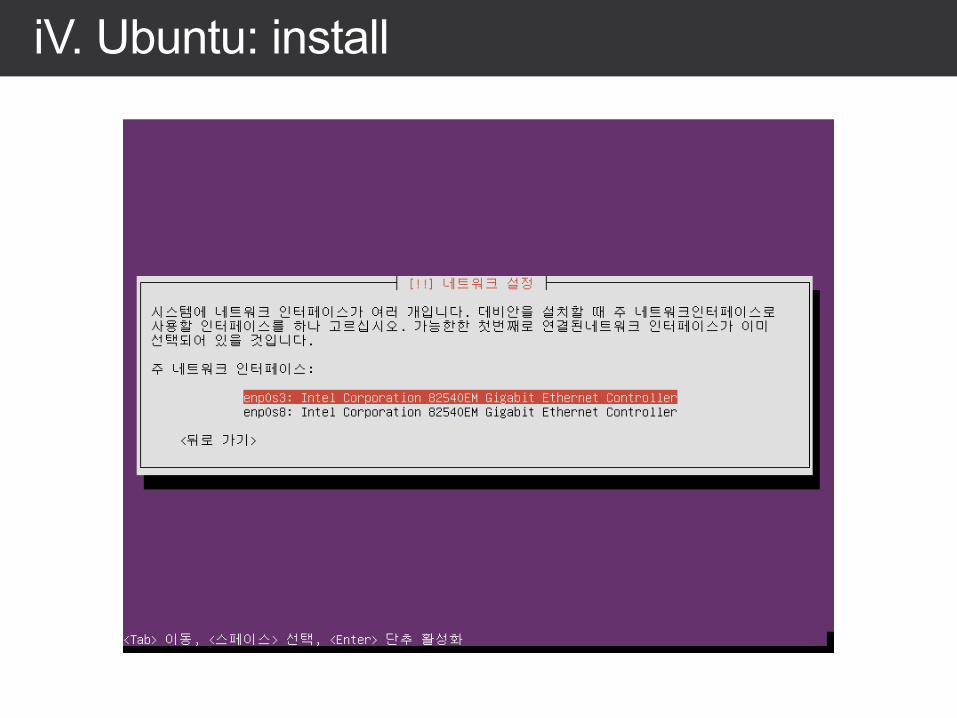
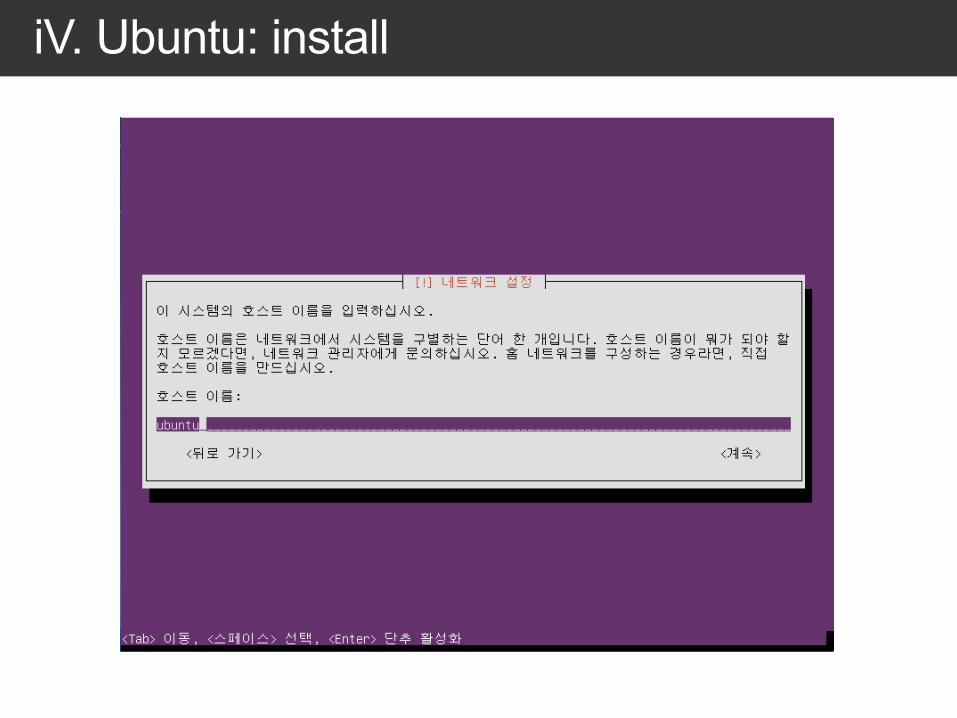
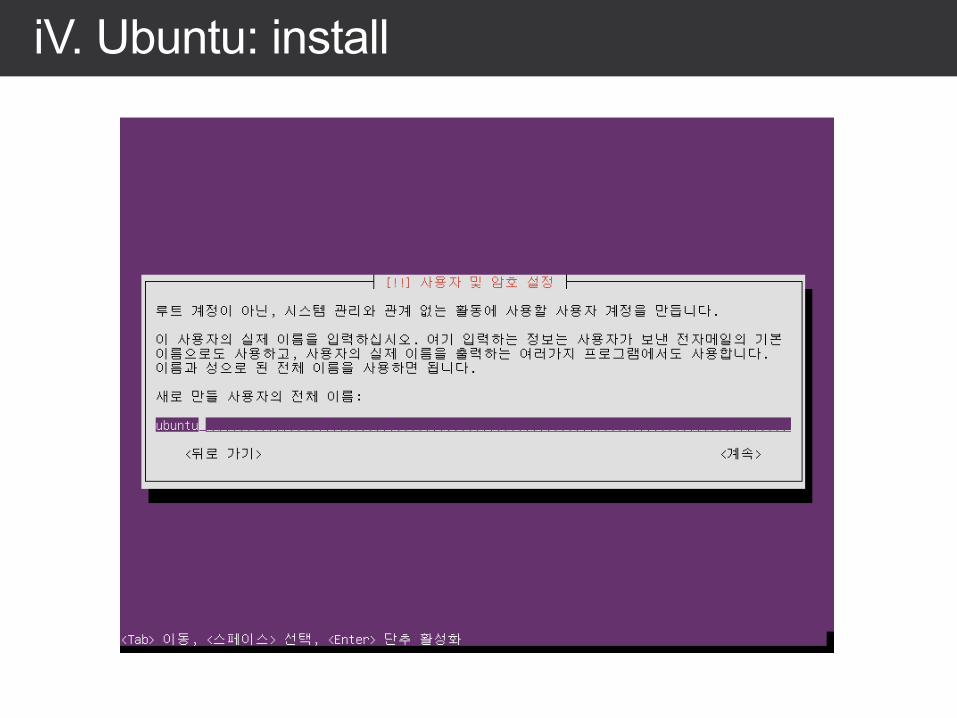
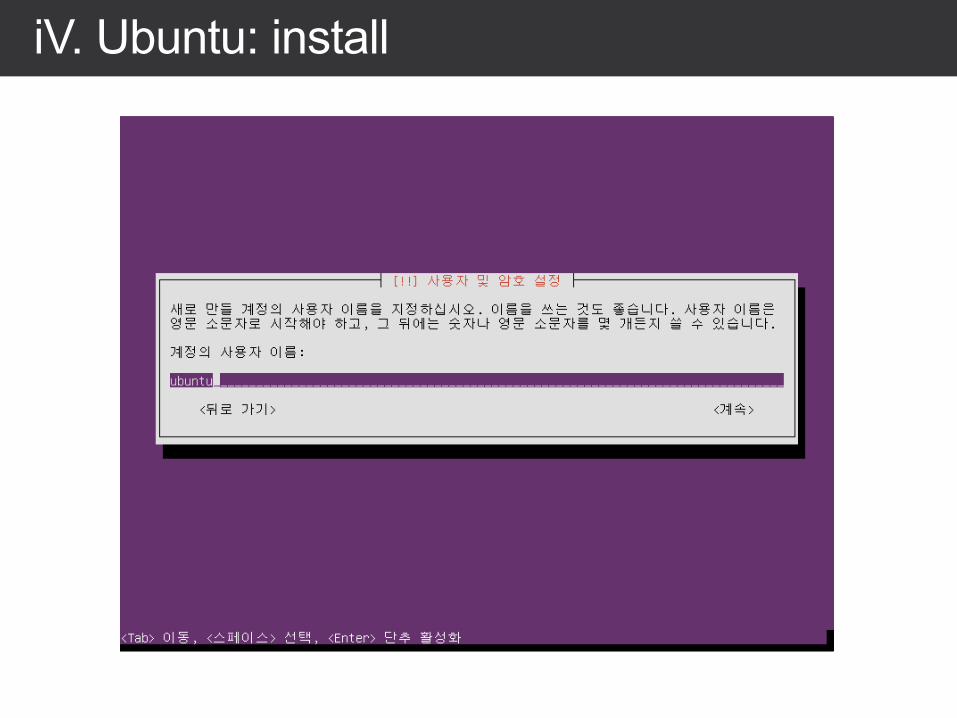
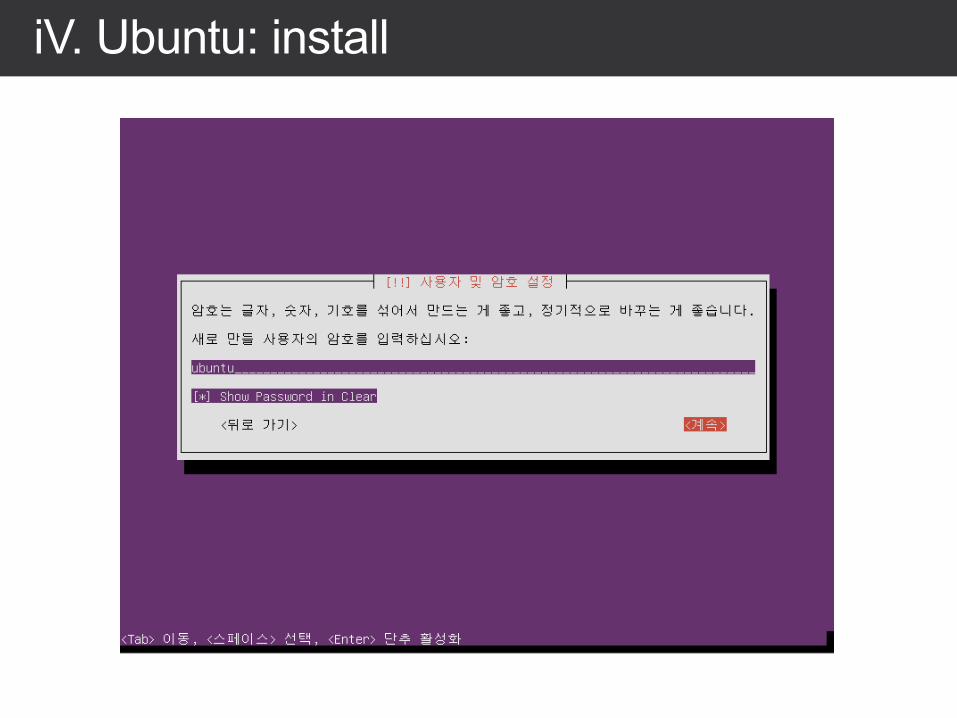
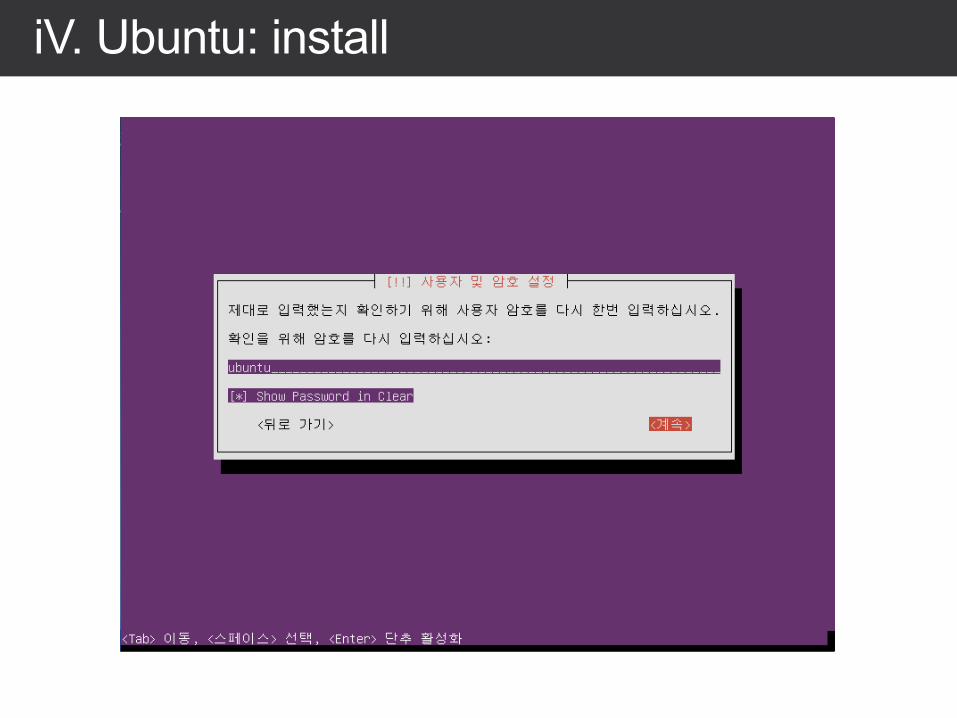
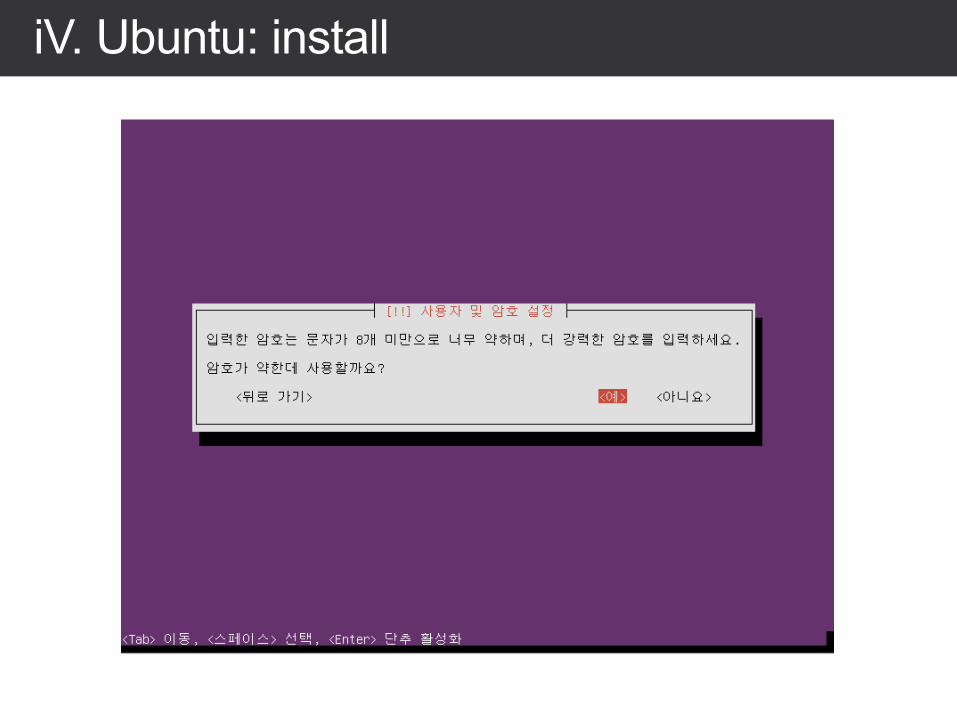
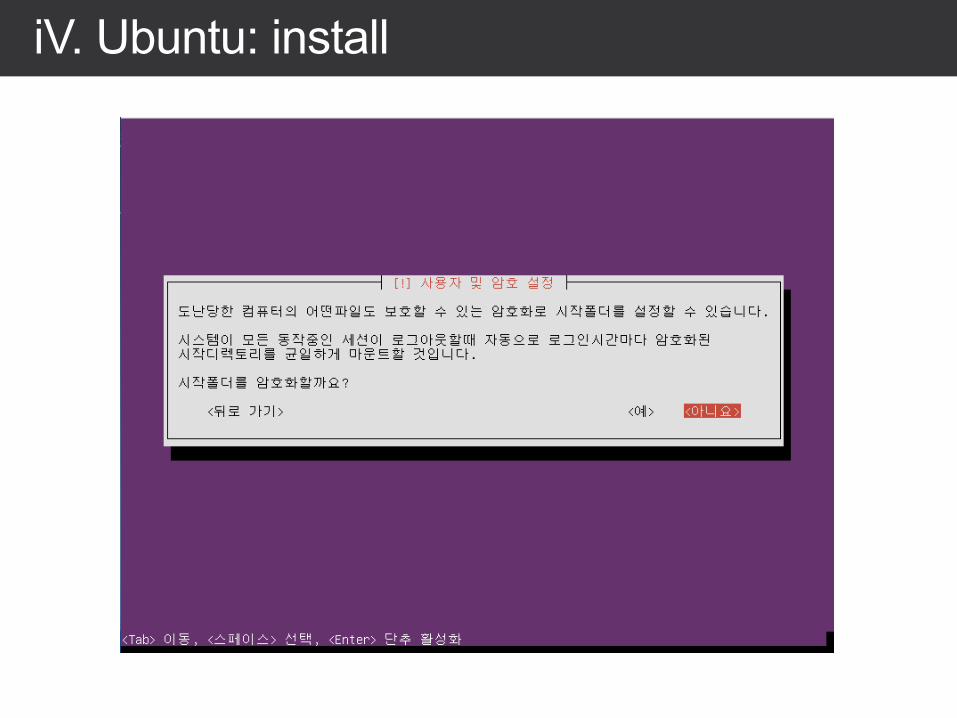
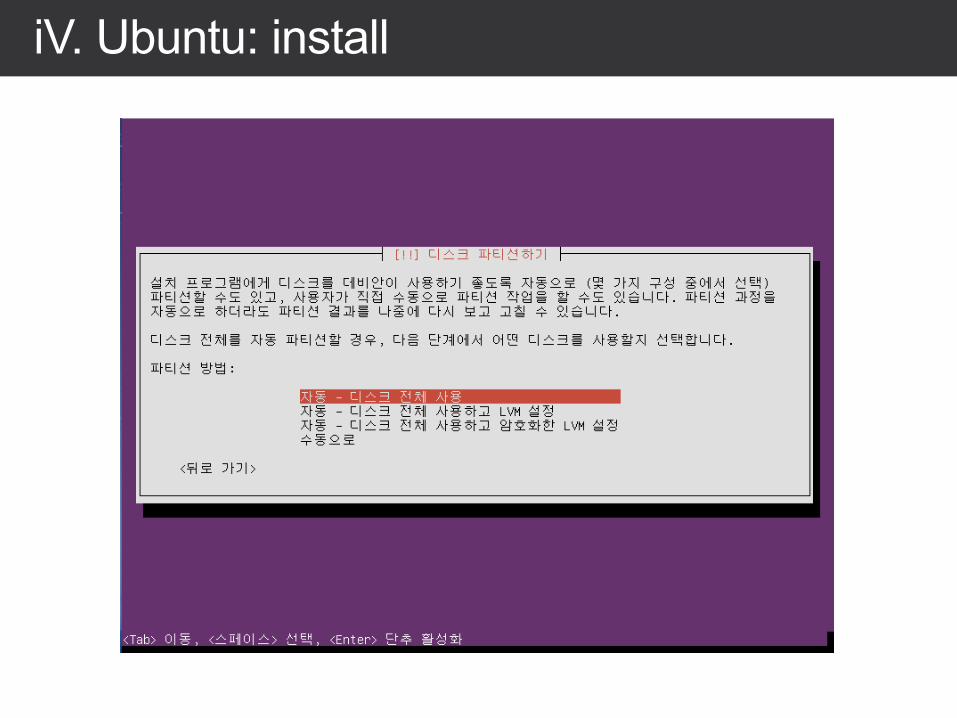
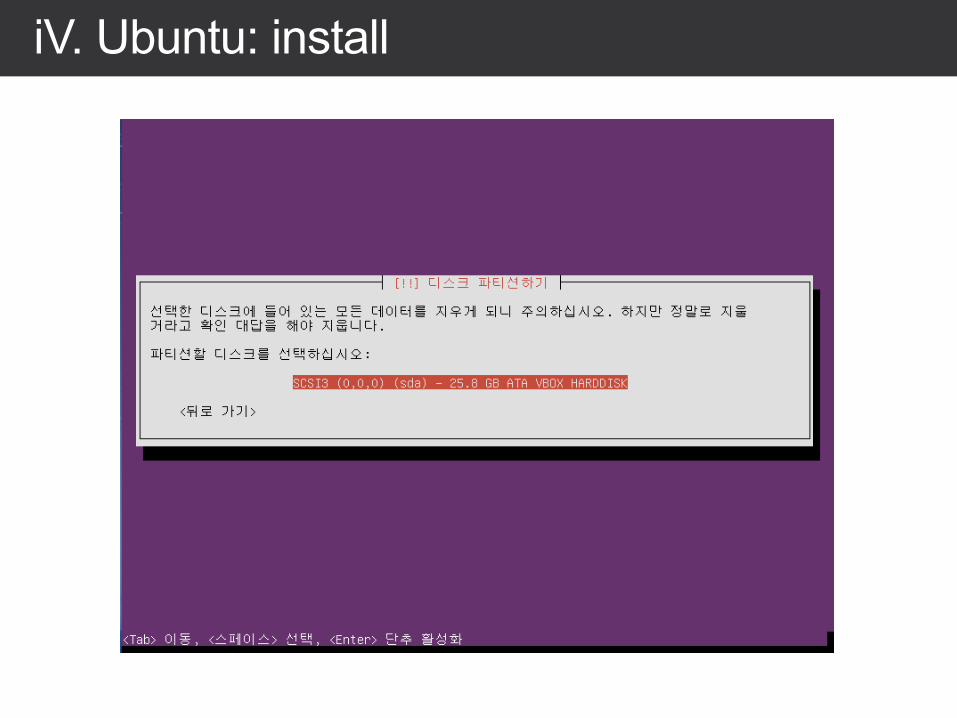
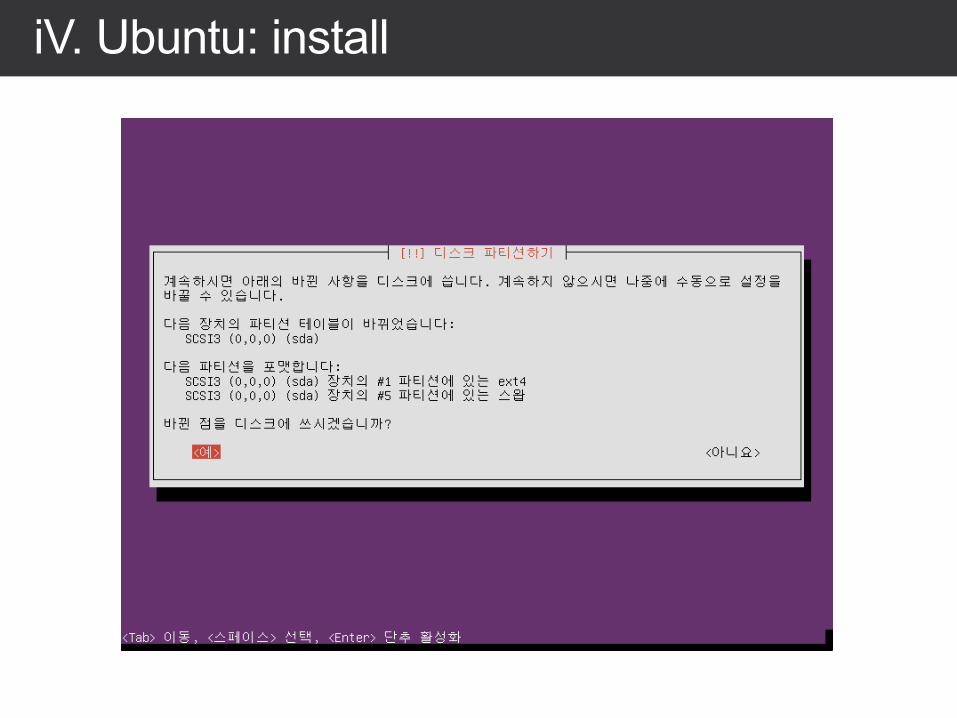
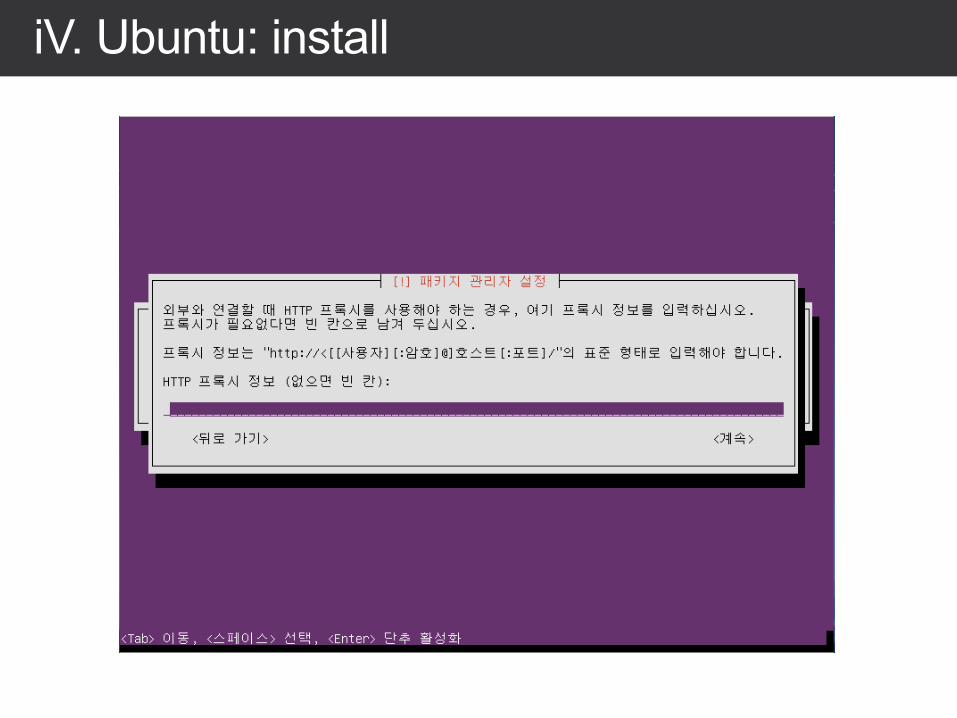
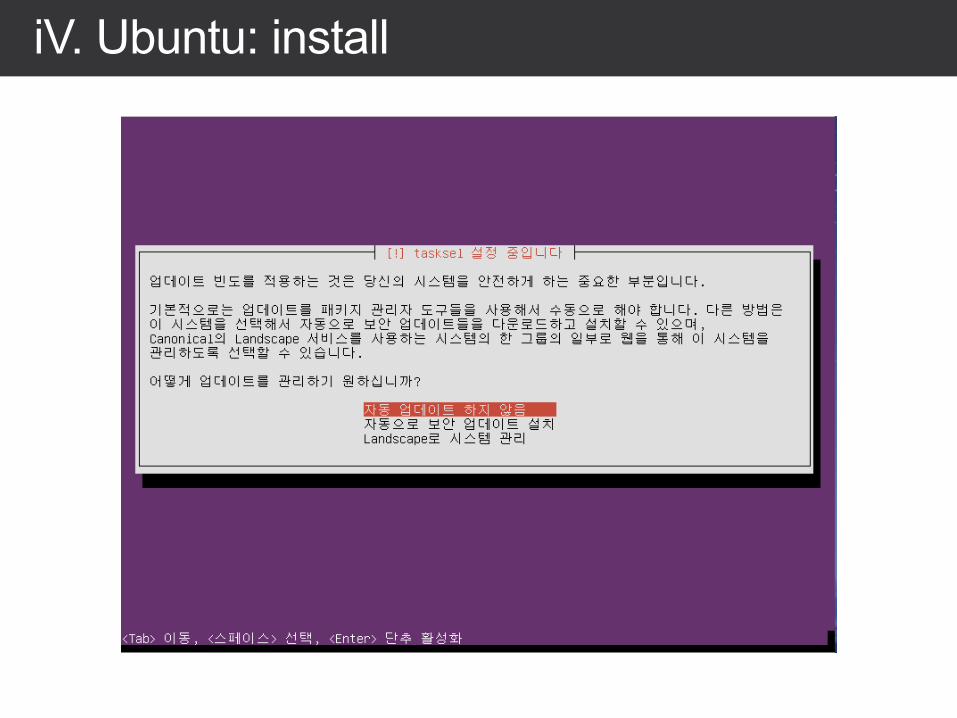
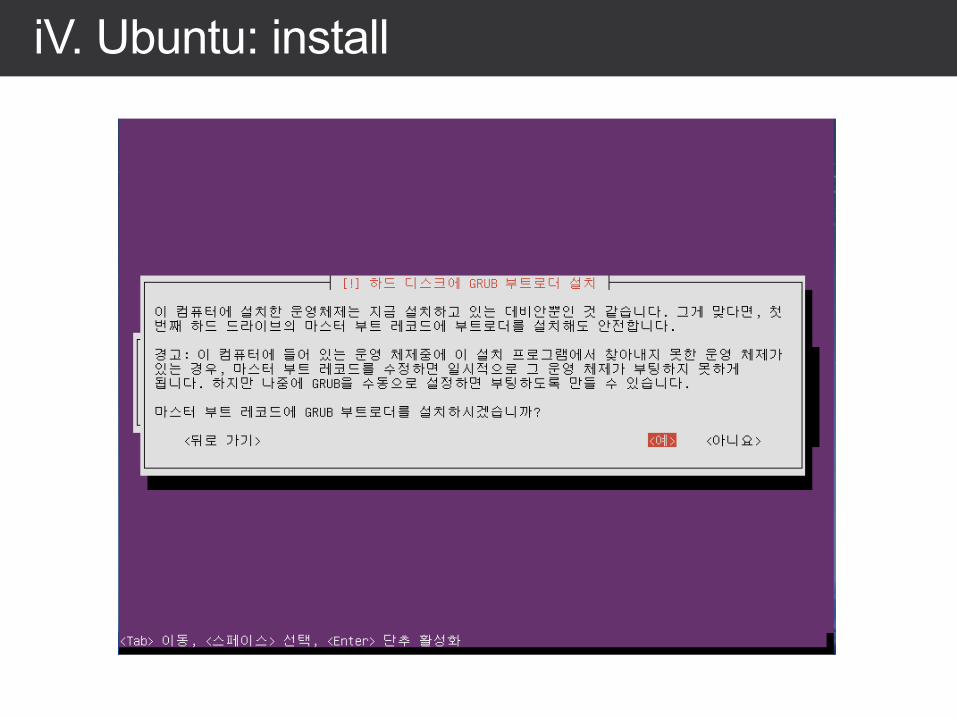
iV. Ubuntu: install
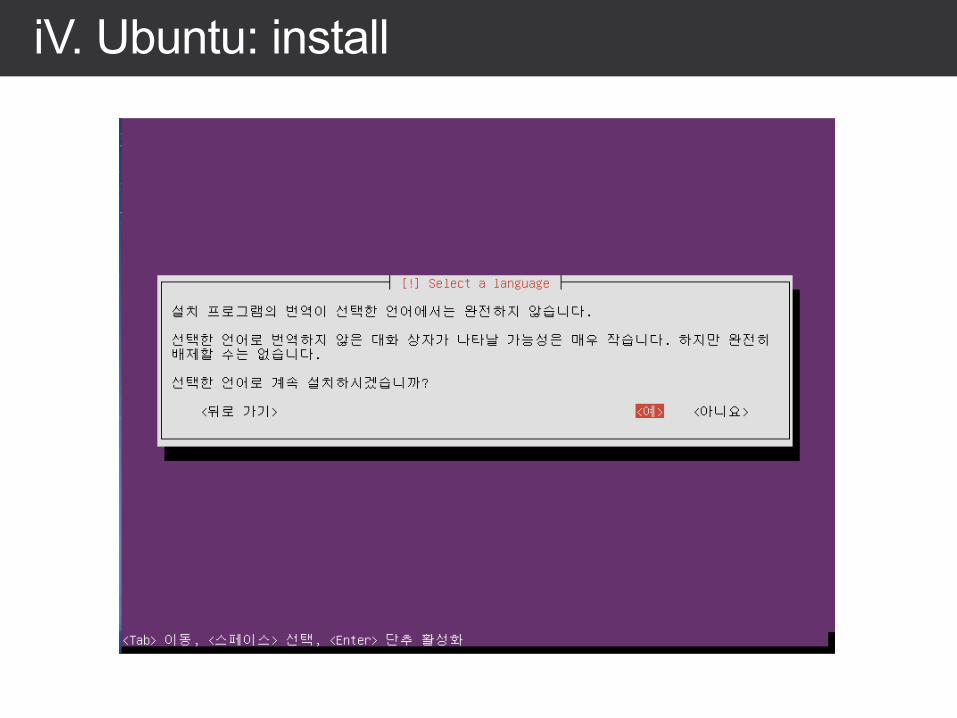
iV. Ubuntu: install
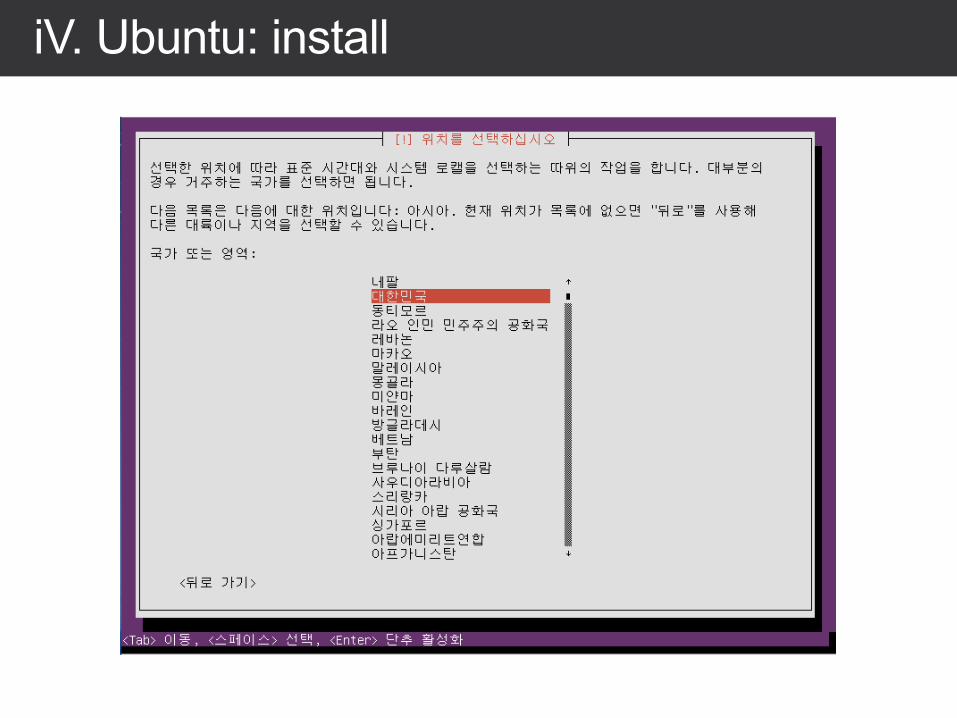
iV. Ubuntu: install
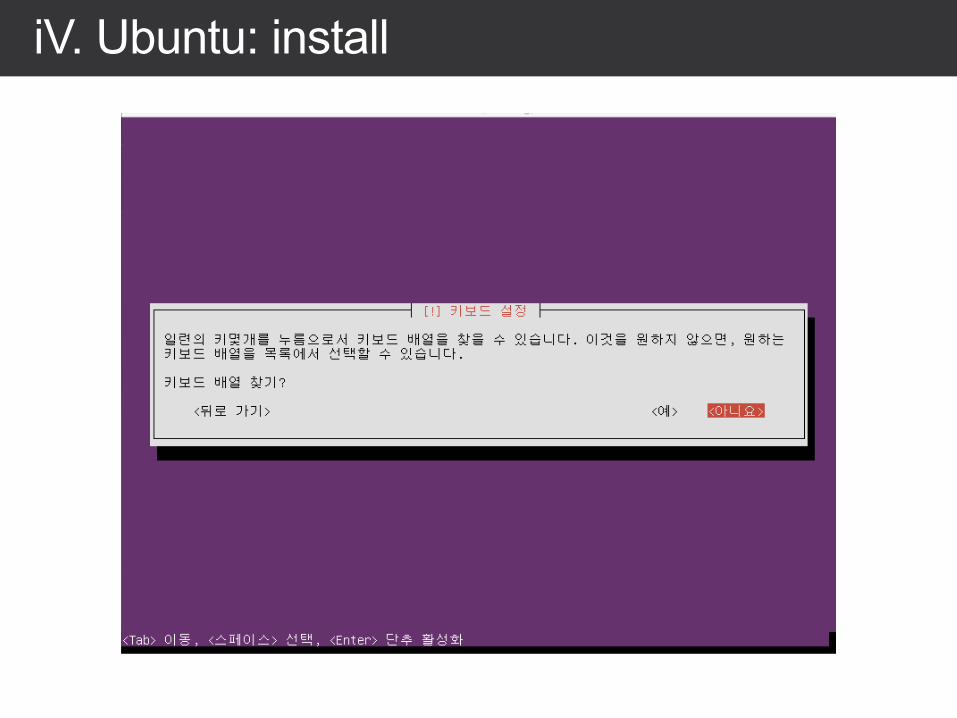
iV. Ubuntu: install
iV. Ubuntu: install
iV. Ubuntu: install
iV. Ubuntu: install
iV. Ubuntu: install
iV. Ubuntu: install
iV. Ubuntu: install
iV. Ubuntu: install
iV. Ubuntu: install
iV. Ubuntu: install
iV. Ubuntu: install
iV. Ubuntu: install

iV. Ubuntu: install
iV. Ubuntu: install
iV. Ubuntu: install
iV. Ubuntu: install
iV. Ubuntu: install
iV. Ubuntu: install

iV. Ubuntu: install
iV. Ubuntu: install
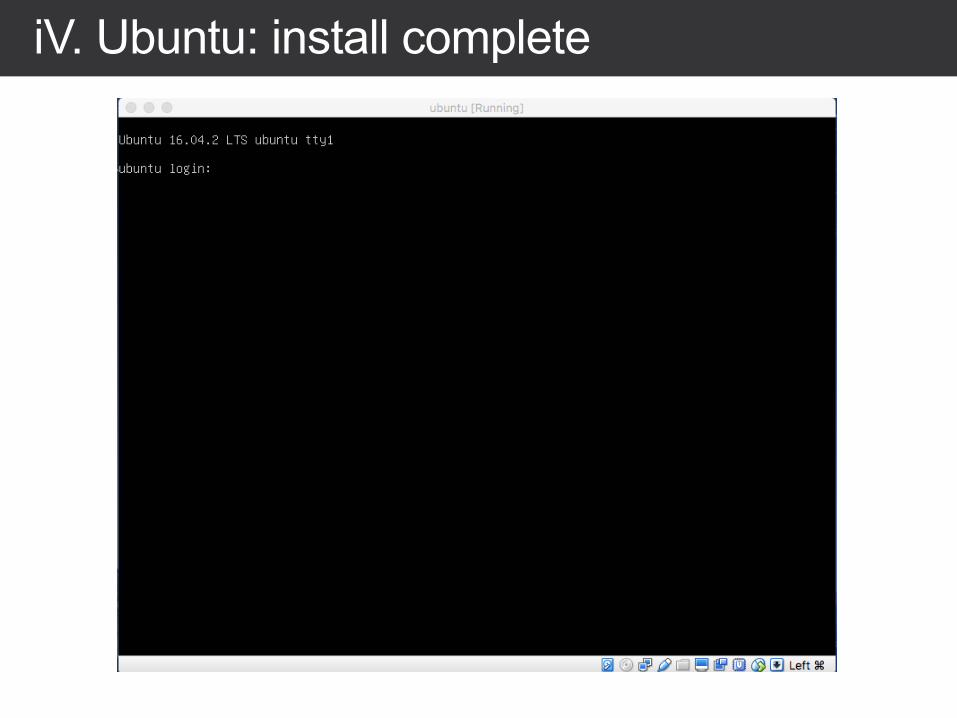
iV. Ubuntu: install complete
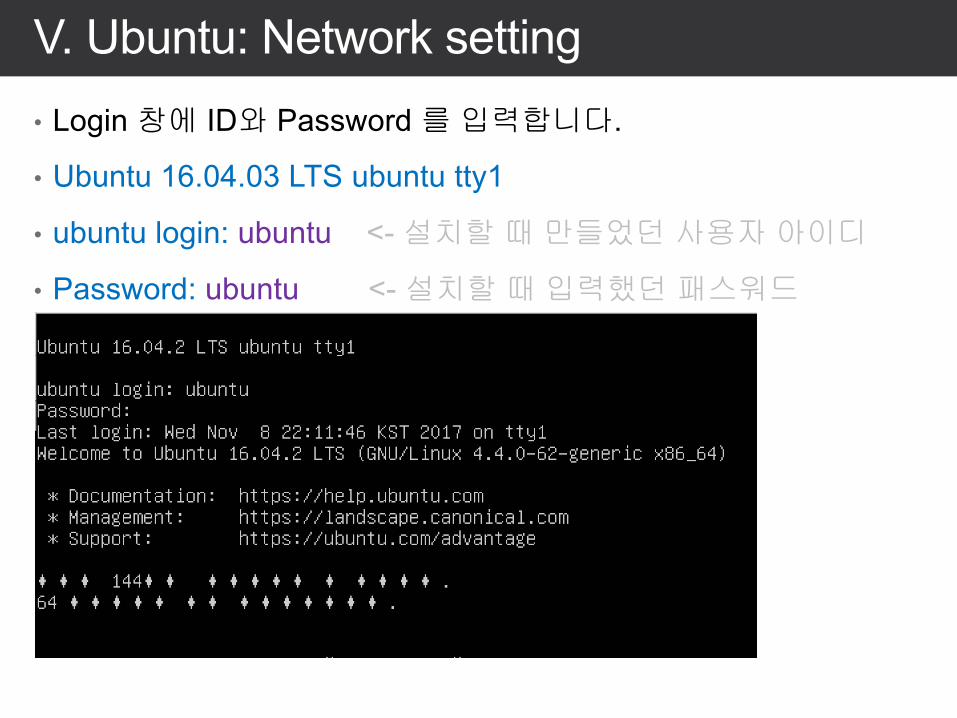
V. Ubuntu: Network setting• Login 창에 ID와 Password 를입력합니다.
• Ubuntu 16.04.03 LTS ubuntu tty1
• ubuntu login: ubuntu <-설치할때만들었던사용자아이디
• Password: ubuntu <-설치할때입력했던패스워드
• Pa
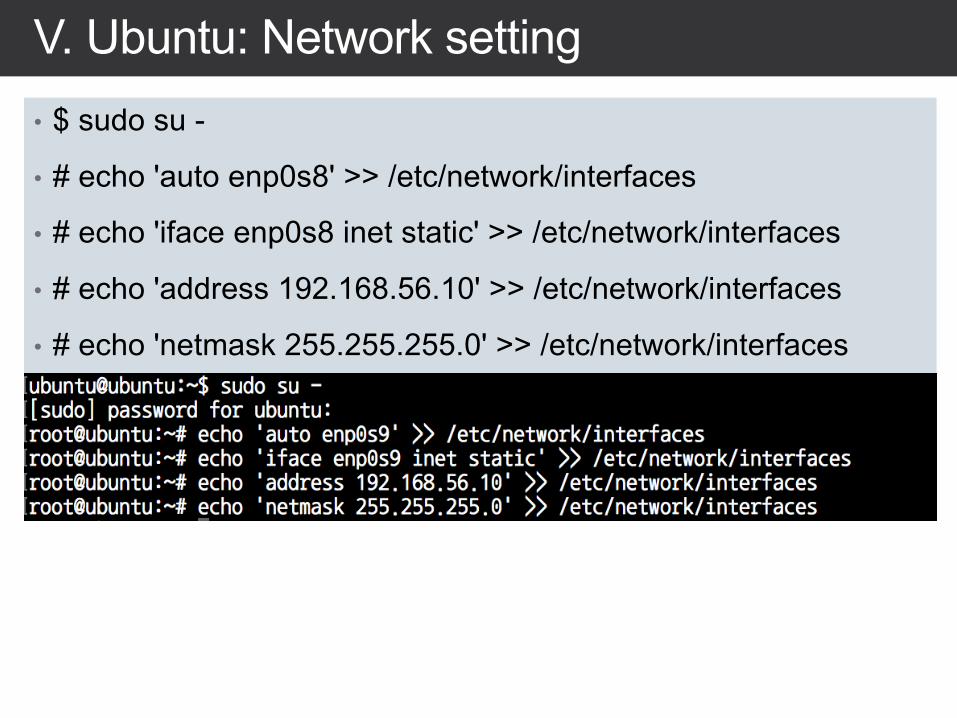
V. Ubuntu: Network setting• $ sudo su -
• # echo 'auto enp0s8' >> /etc/network/interfaces
• # echo 'iface enp0s8 inet static' >> /etc/network/interfaces
• # echo 'address 192.168.56.10' >> /etc/network/interfaces
• # echo 'netmask 255.255.255.0' >> /etc/network/interfaces

V. Ubuntu: Network setting• 설치를안했을경우새로설치
• $ sudo apt-get install openssh-server
• 검증 verify
• $ sudo service ssh status
V. Ubuntu: reboot• $ sudo reboot
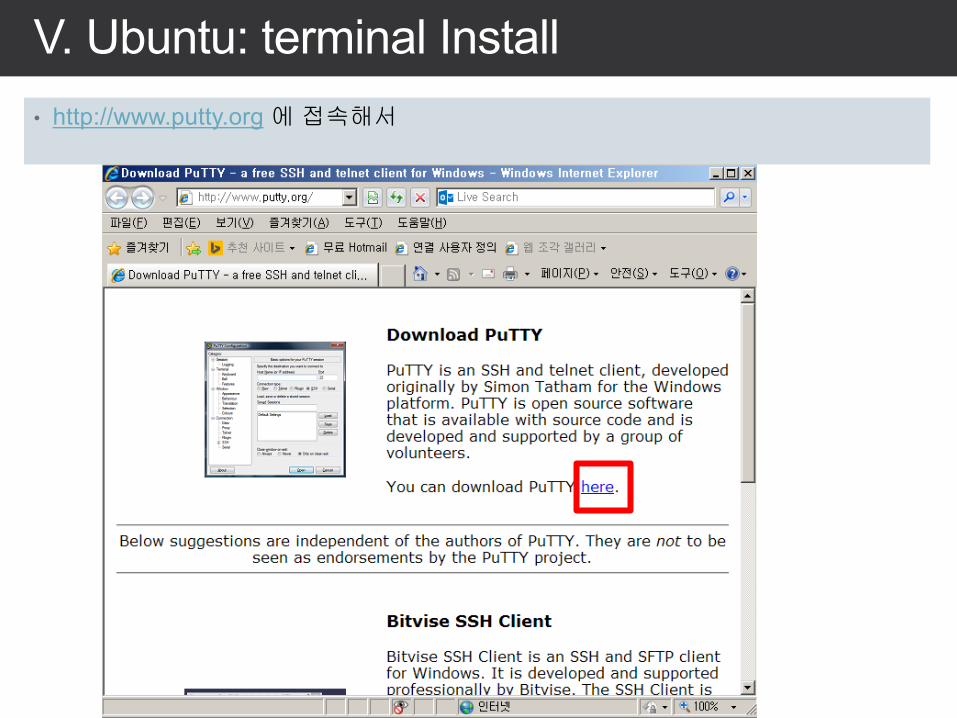
V. Ubuntu: terminal Install• http://www.putty.org에접속해서
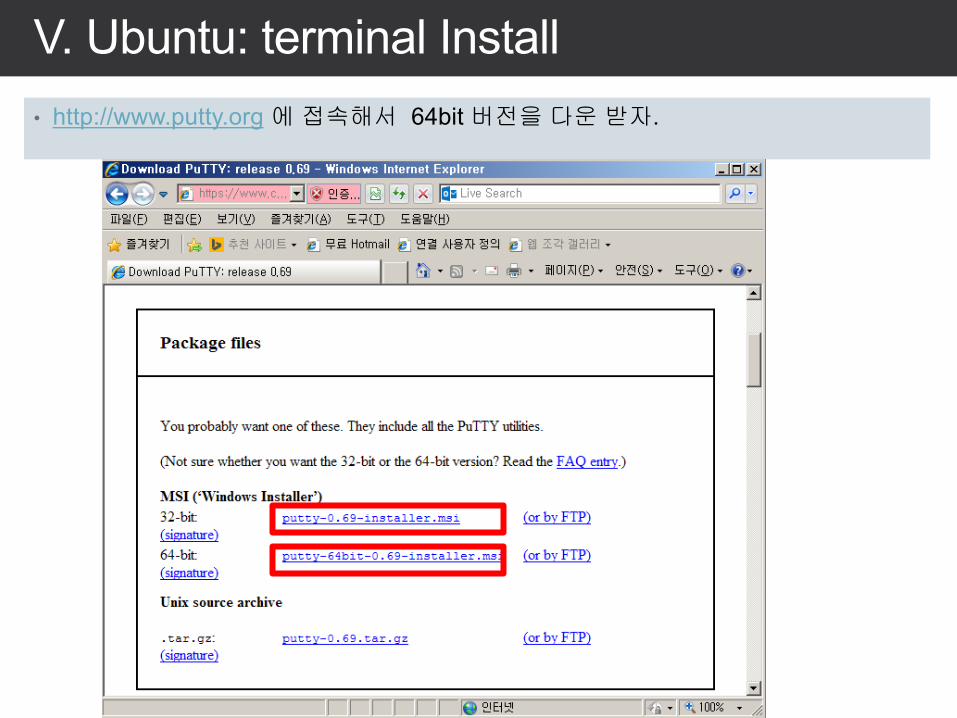
V. Ubuntu: terminal Install• http://www.putty.org에접속해서 64bit 버전을다운받자.
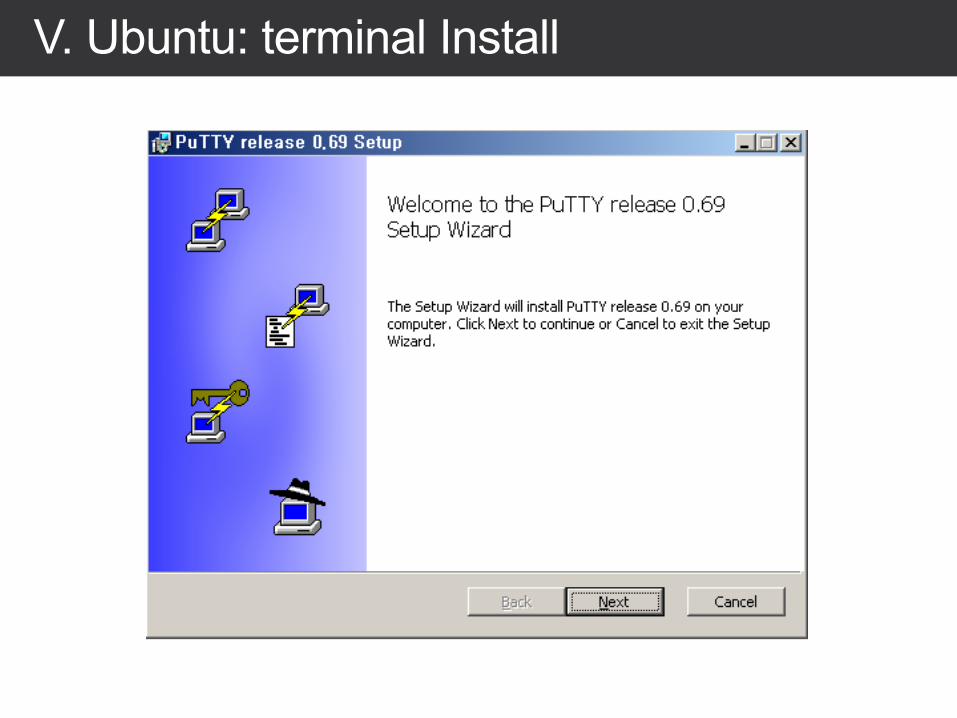
V. Ubuntu: terminal Install
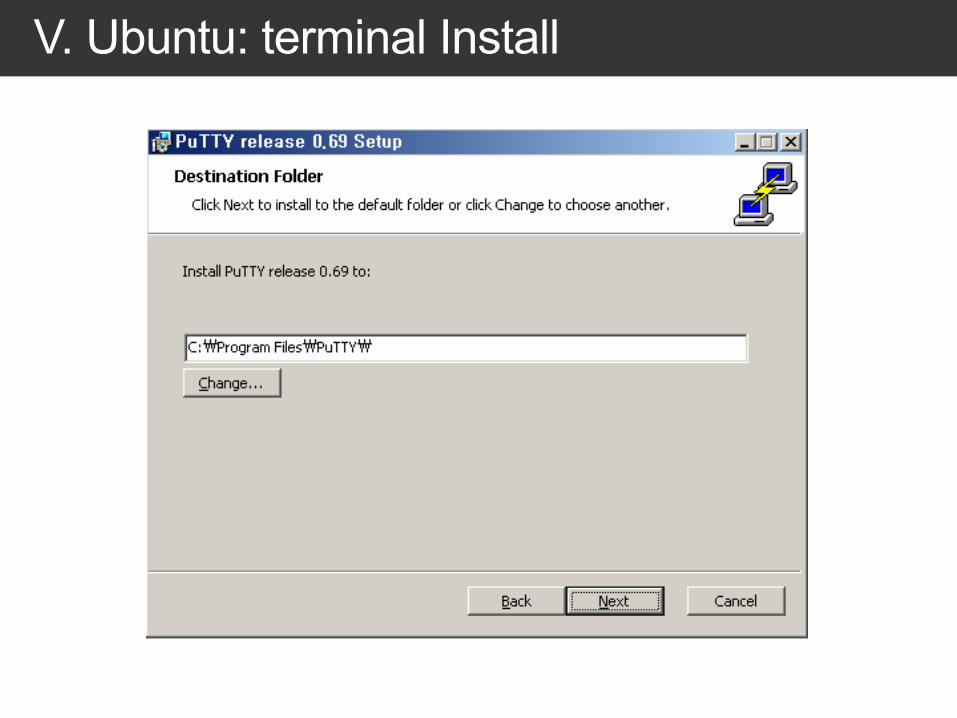
V. Ubuntu: terminal Install
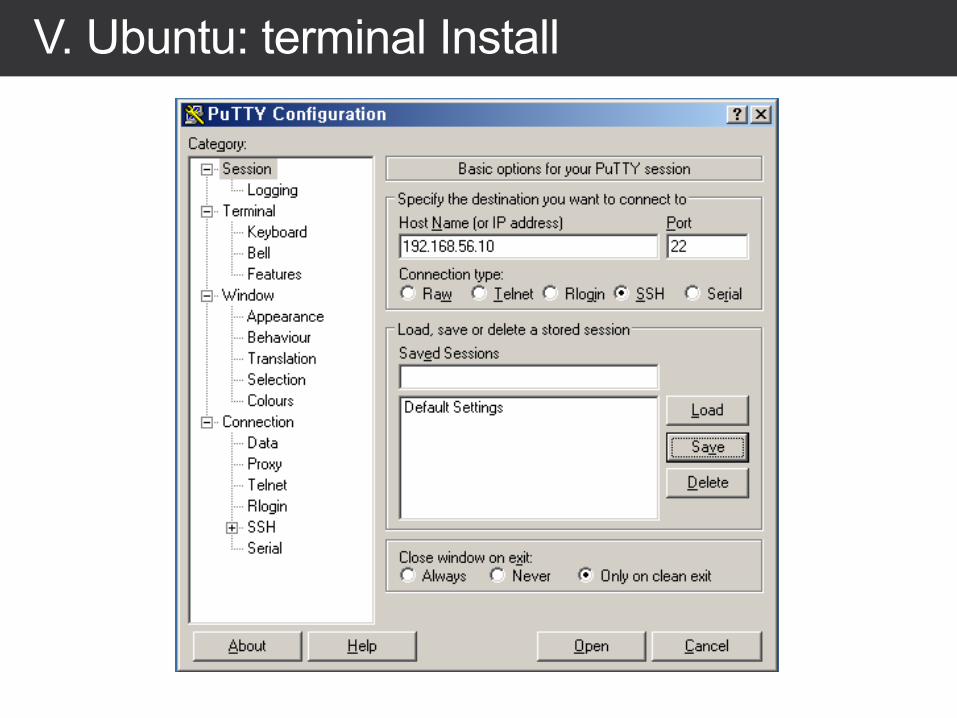
V. Ubuntu: terminal Install
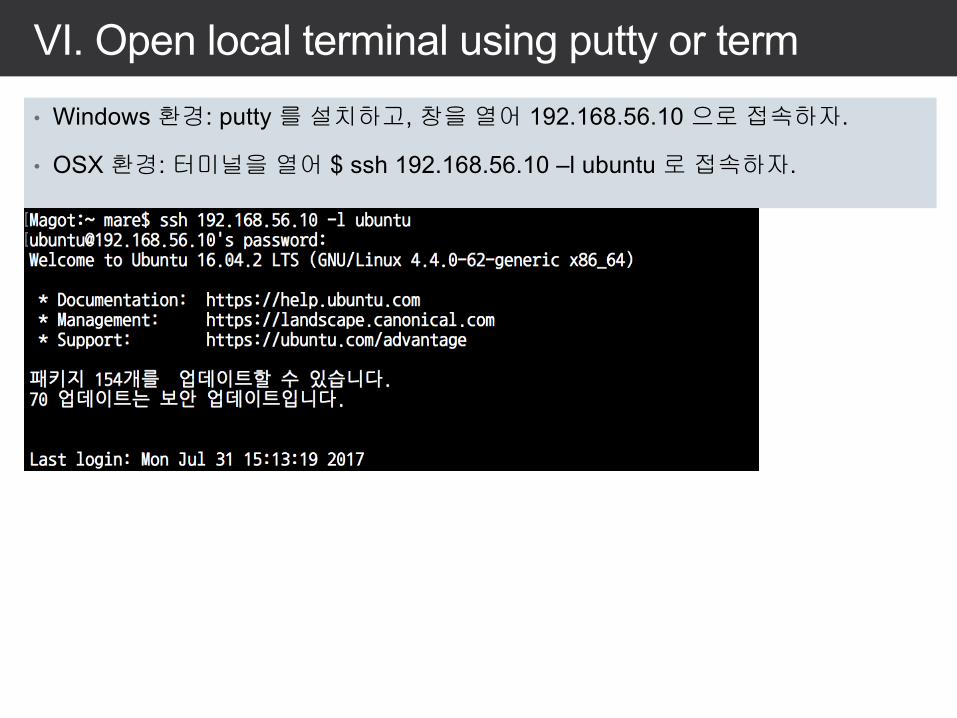
VI. Open local terminal using putty or term• Windows 환경: putty 를설치하고,창을열어 192.168.56.10 으로접속하자.
• OSX 환경:터미널을열어 $ ssh 192.168.56.10 –l ubuntu로접속하자.
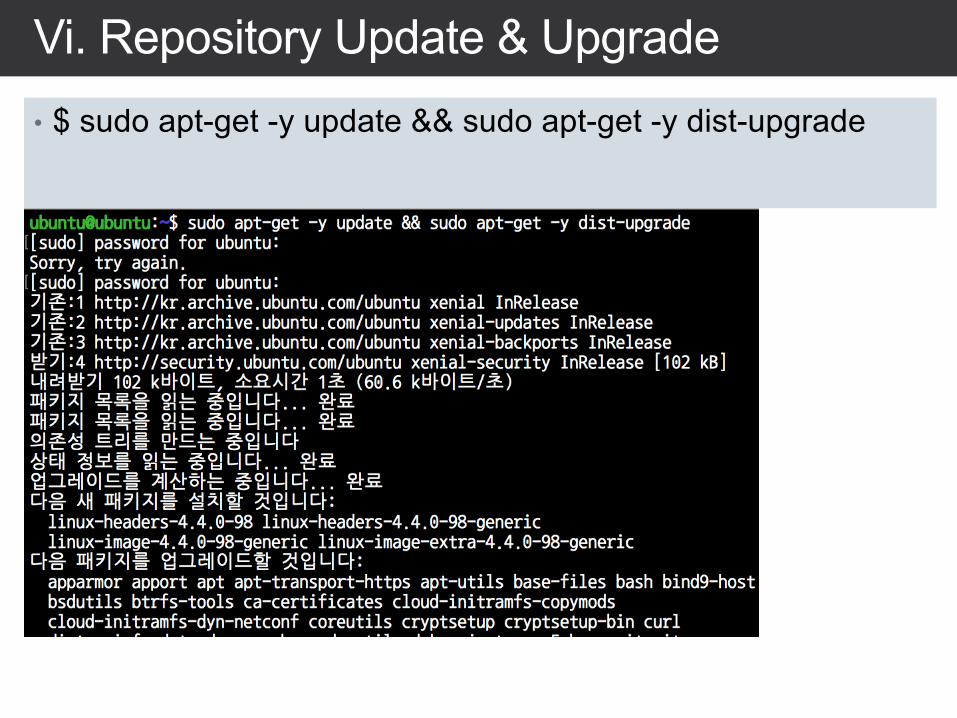
Vi. Repository Update & Upgrade• $ sudo apt-get -y update && sudo apt-get -y dist-upgrade
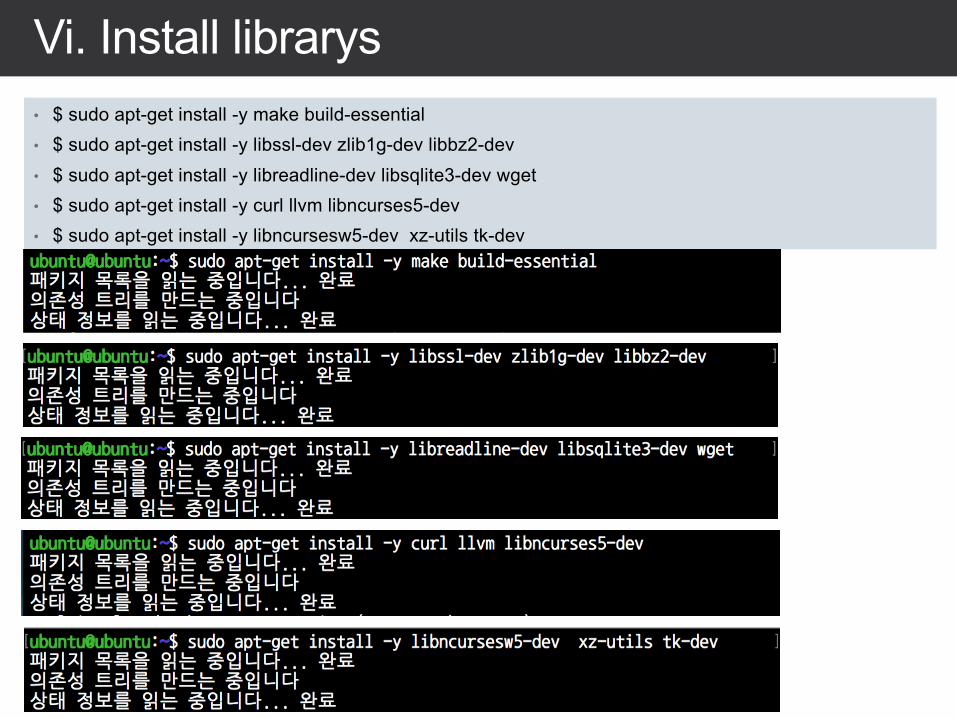
Vi. Install librarys• $ sudo apt-get install -y make build-essential• $ sudo apt-get install -y libssl-dev zlib1g-dev libbz2-dev• $ sudo apt-get install -y libreadline-dev libsqlite3-dev wget• $ sudo apt-get install -y curl llvm libncurses5-dev• $ sudo apt-get install -y libncursesw5-dev xz-utils tk-dev
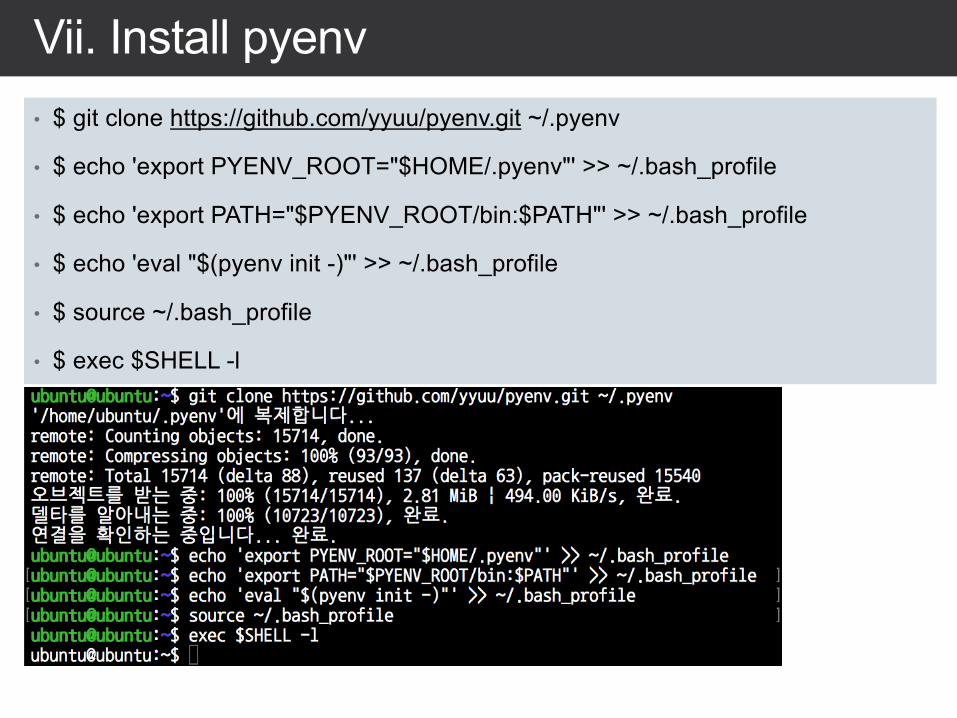
Vii. Install pyenv• $ git clone https://github.com/yyuu/pyenv.git ~/.pyenv
• $ echo 'export PYENV_ROOT="$HOME/.pyenv"' >> ~/.bash_profile
• $ echo 'export PATH="$PYENV_ROOT/bin:$PATH"' >> ~/.bash_profile
• $ echo 'eval "$(pyenv init -)"' >> ~/.bash_profile
• $ source ~/.bash_profile
• $ exec $SHELL -l
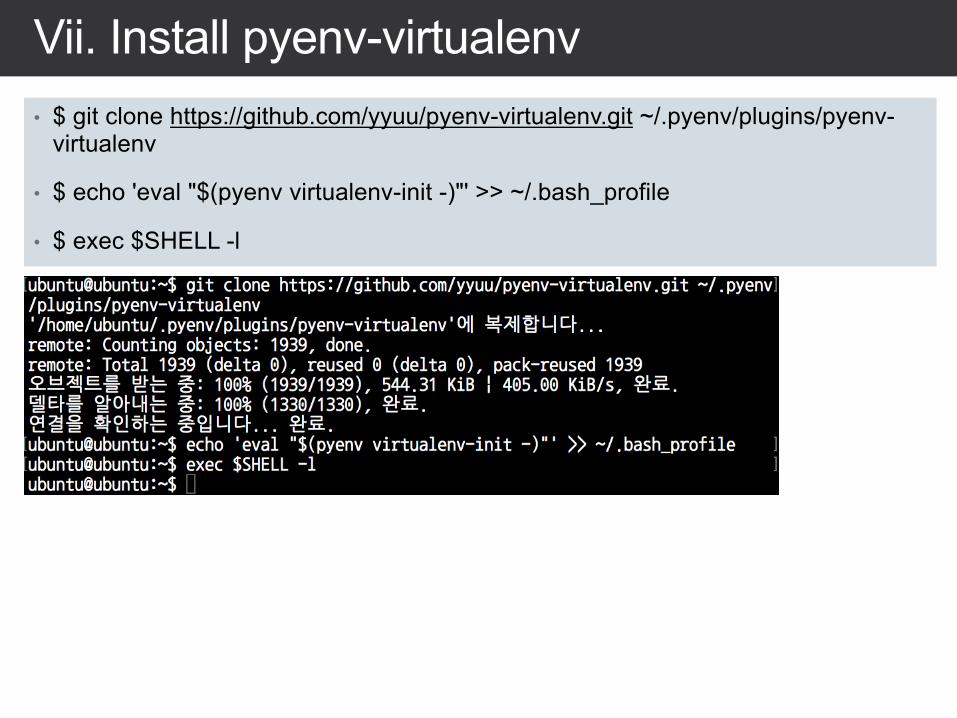
Vii. Install pyenv-virtualenv• $ git clone https://github.com/yyuu/pyenv-virtualenv.git ~/.pyenv/plugins/pyenv-
virtualenv
• $ echo 'eval "$(pyenv virtualenv-init -)"' >> ~/.bash_profile
• $ exec $SHELL -l
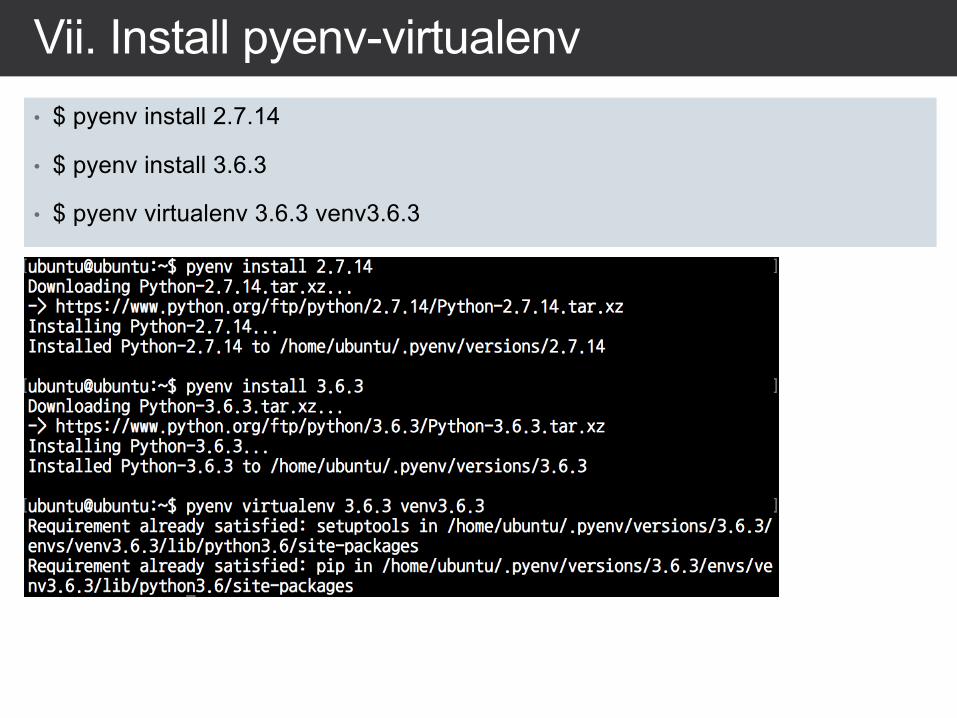
Vii. Install pyenv-virtualenv• $ pyenv install 2.7.14
• $ pyenv install 3.6.3
• $ pyenv virtualenv 3.6.3 venv3.6.3
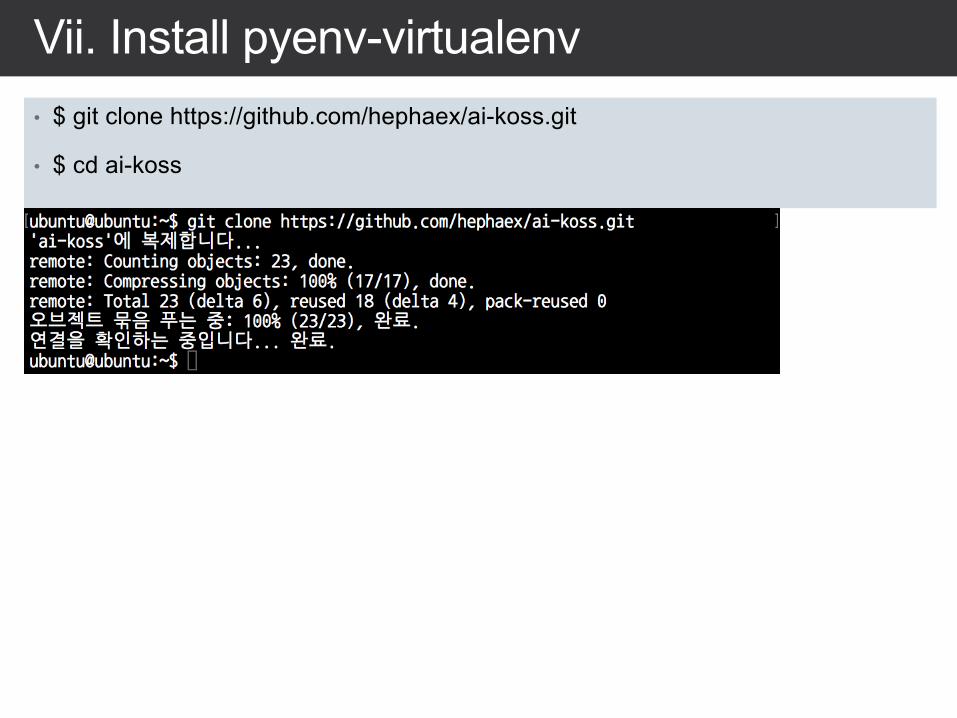
Vii. Install pyenv-virtualenv• $ git clone https://github.com/hephaex/ai-koss.git
• $ cd ai-koss
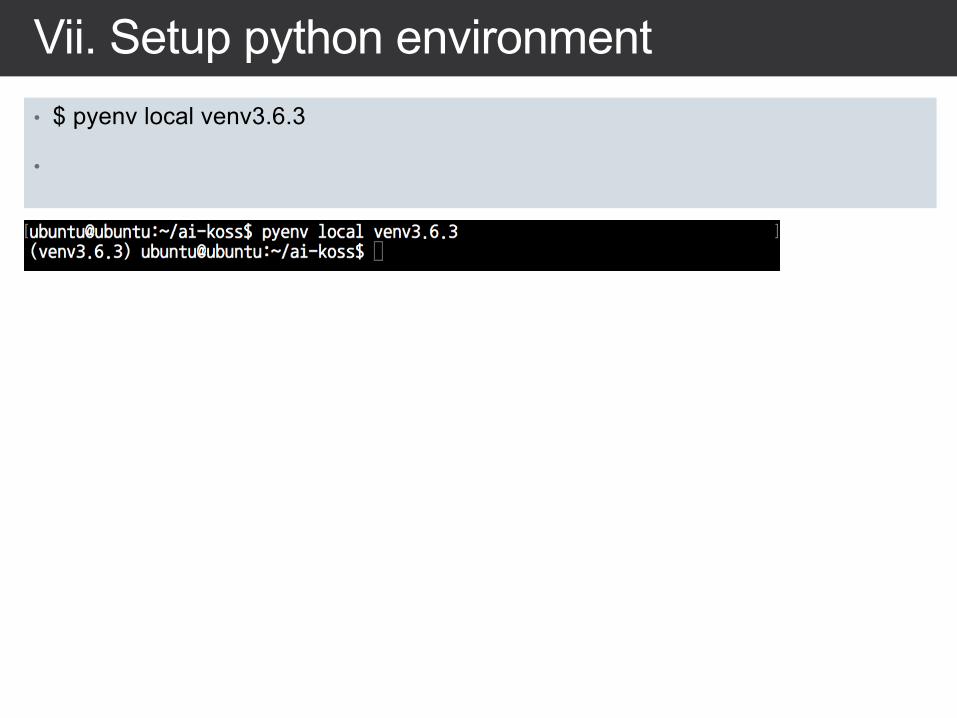
Vii. Setup python environment• $ pyenv local venv3.6.3
•
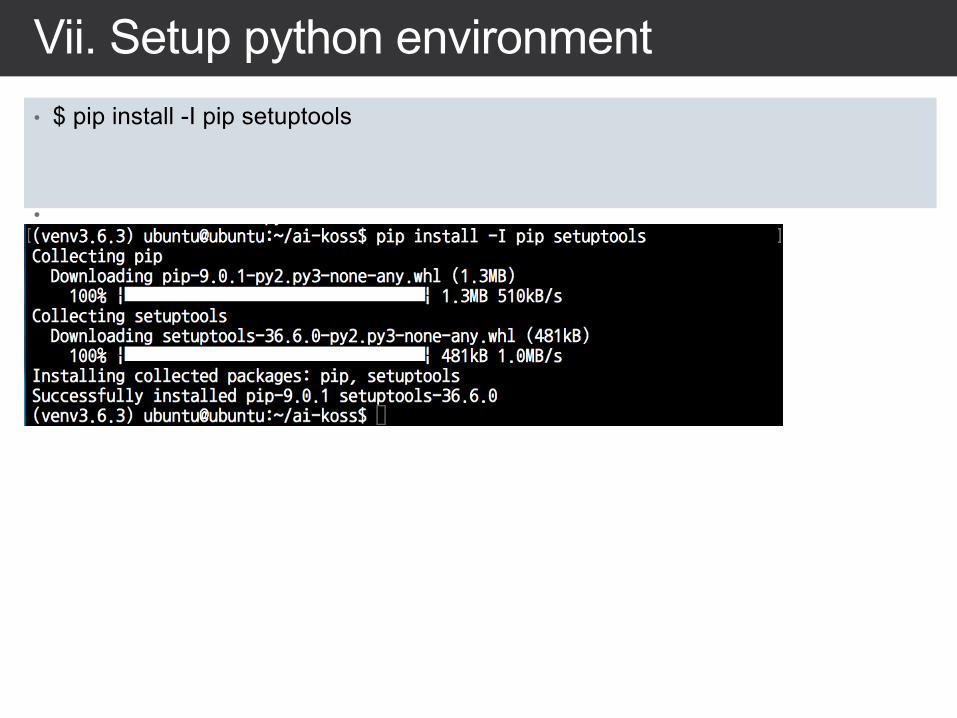
Vii. Setup python environment• $ pip install -I pip setuptools
•
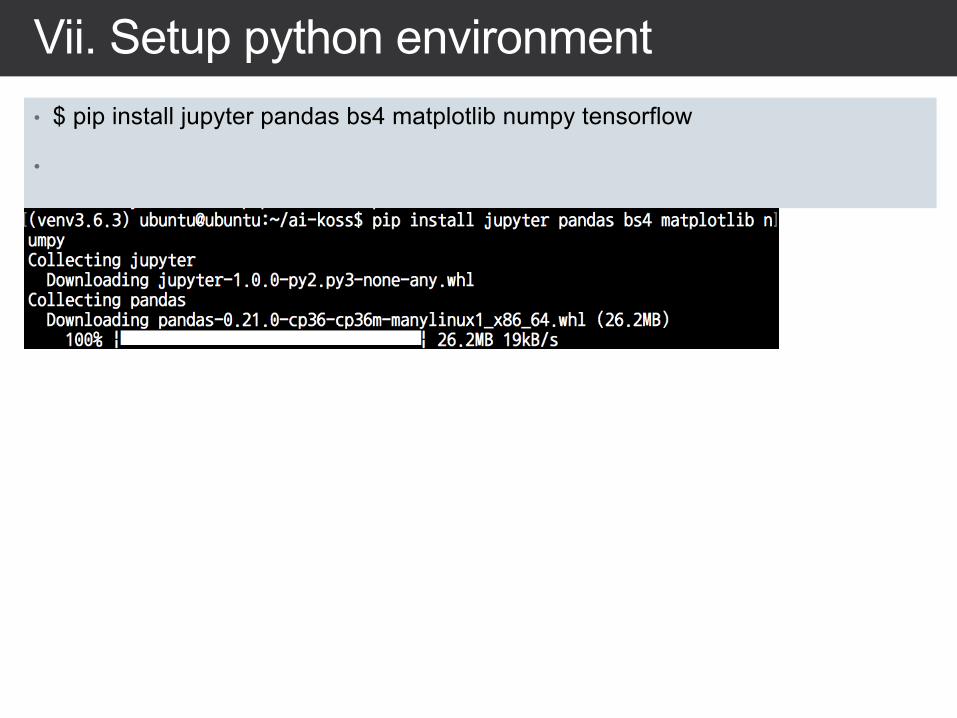
Vii. Setup python environment• $ pip install jupyter pandas bs4 matplotlib numpy tensorflow
•
•
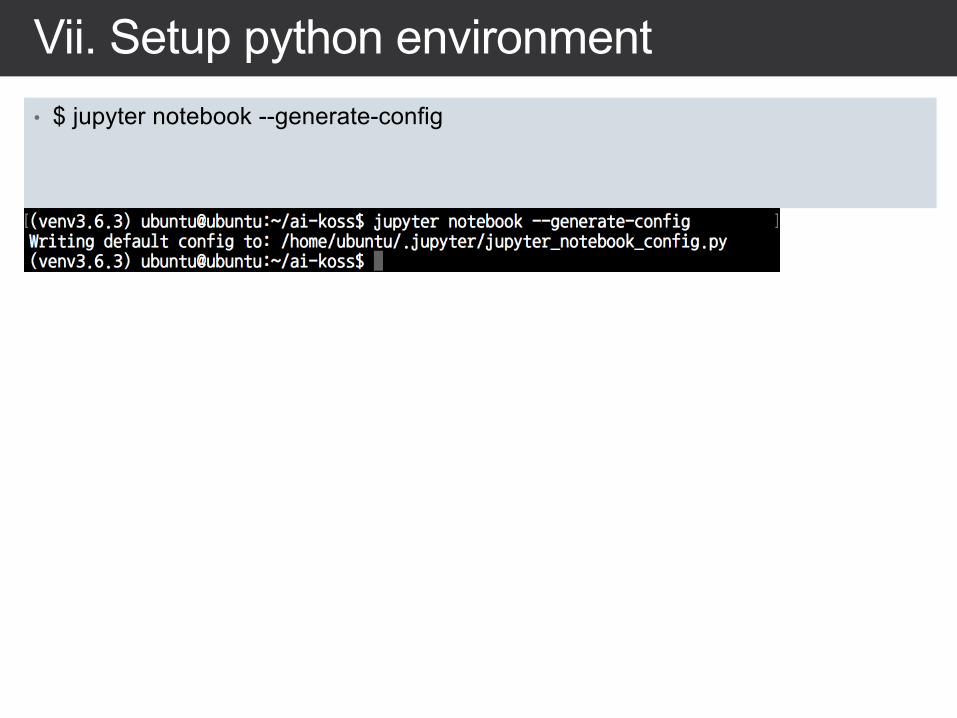
Vii. Setup python environment• $ jupyter notebook --generate-config
•
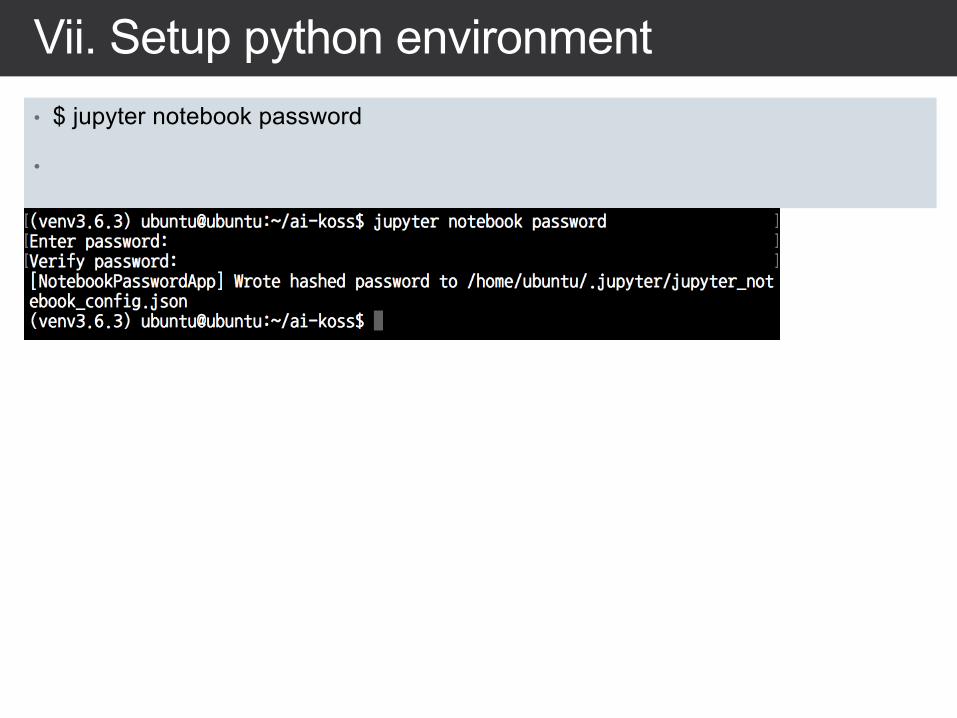
Vii. Setup python environment• $ jupyter notebook password
•
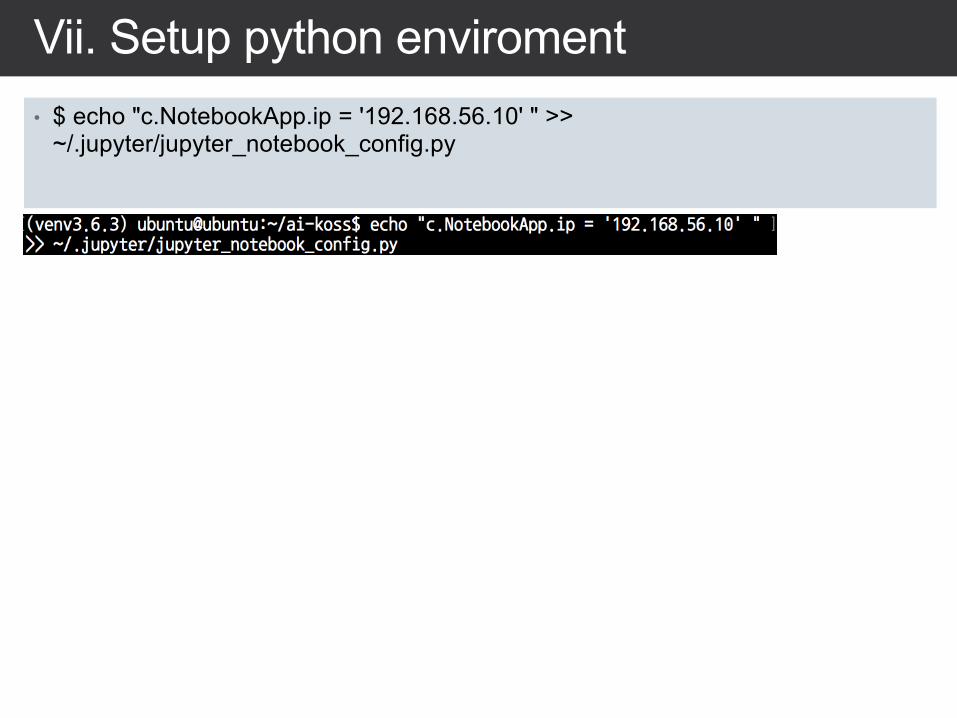
Vii. Setup python enviroment• $ echo "c.NotebookApp.ip = '192.168.56.10' " >>
~/.jupyter/jupyter_notebook_config.py
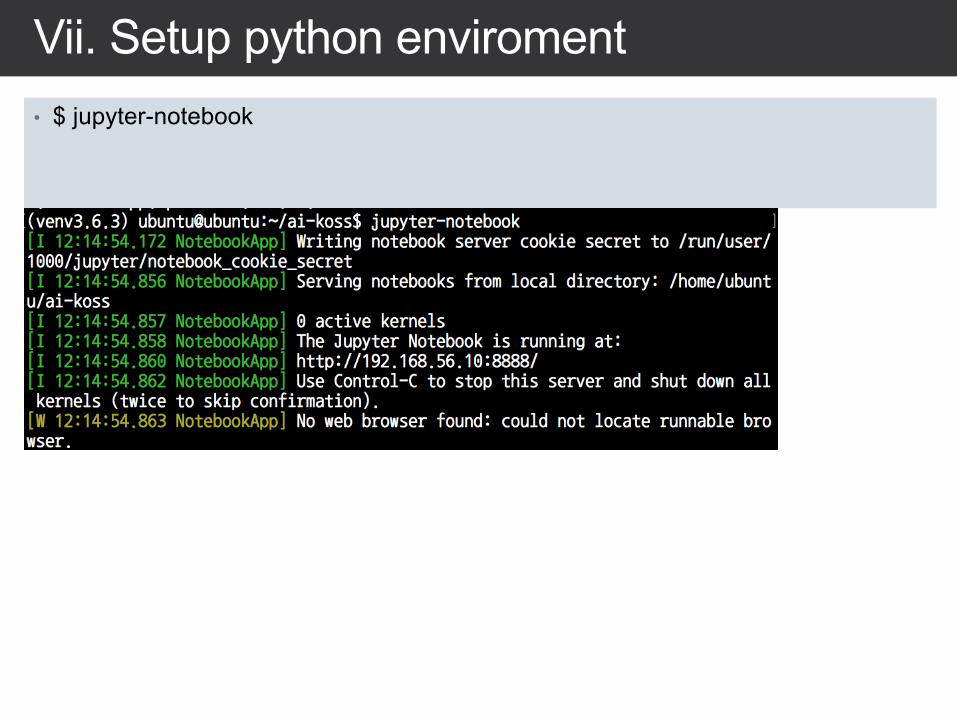
Vii. Setup python enviroment• $ jupyter-notebook
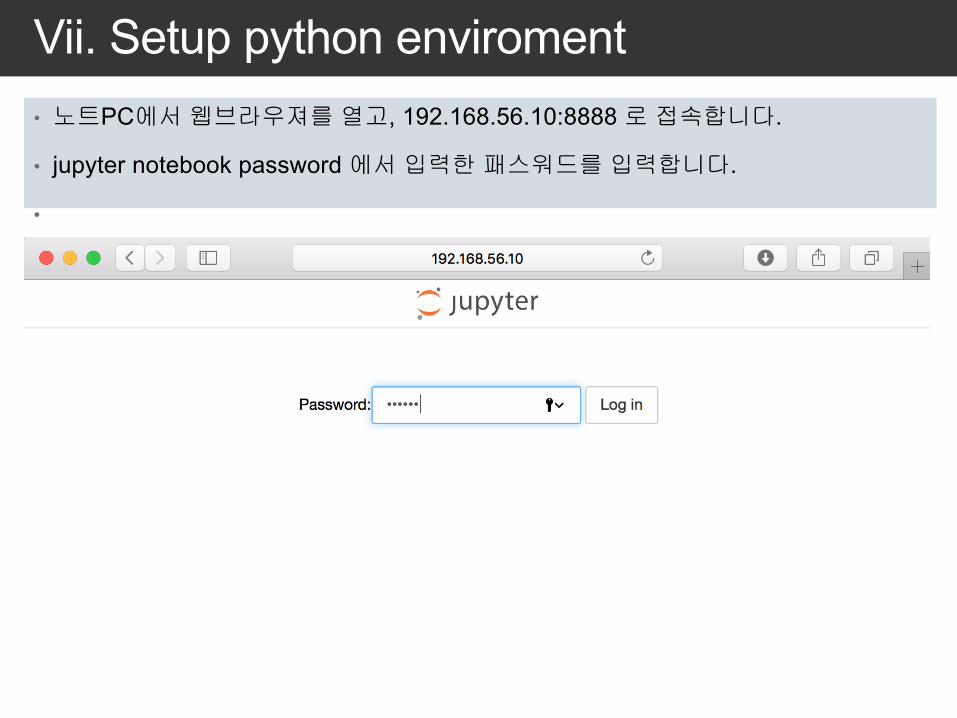
Vii. Setup python enviroment• 노트PC에서웹브라우져를열고, 192.168.56.10:8888 로접속합니다.
• jupyter notebook password에서입력한패스워드를입력합니다.
•
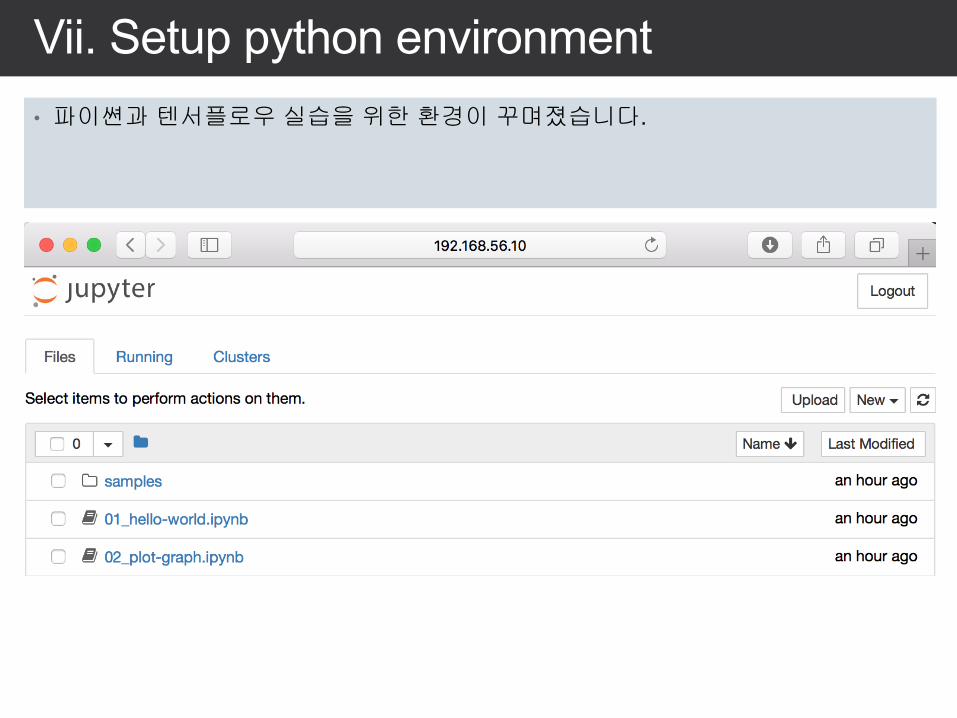
Vii. Setup python environment• 파이쎤과텐서플로우실습을위한환경이꾸며졌습니다.
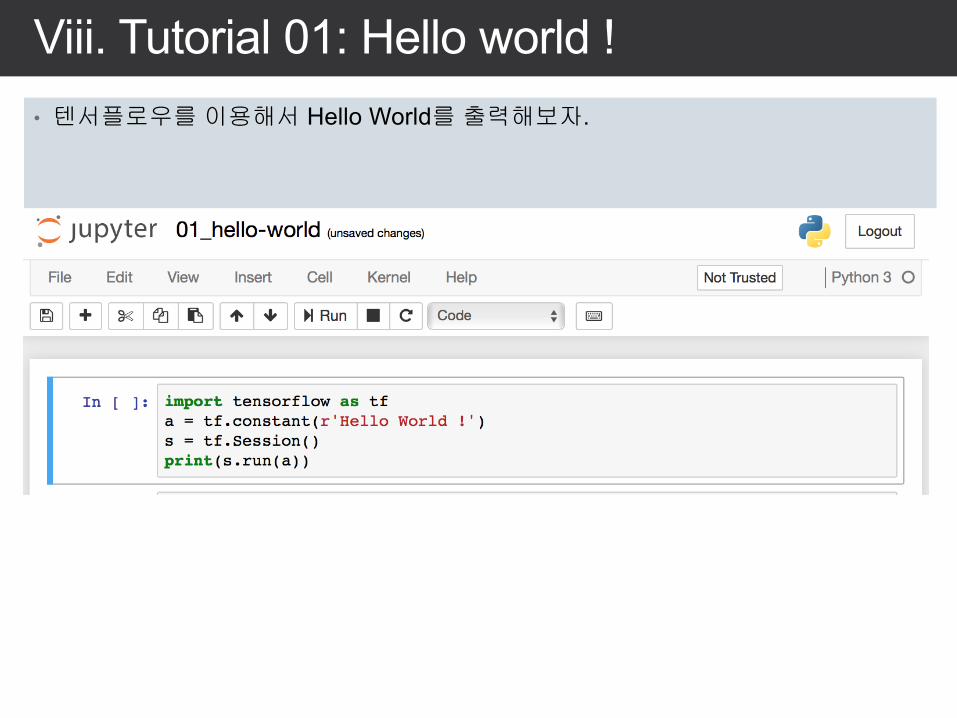
Viii. Tutorial 01: Hello world !• 텐서플로우를이용해서 Hello World를출력해보자.

Viii. Tutorial 02: Plot Graph• 파이썬으로수식을입력하고그결과를그래프로그려보자.

Viii. Tutorial 03: computational graph• 텐서플로우가사용하는계산그래프에대해서알아보자.
• 텐서플로우의계산그래프를이용해서행렬연산을해보자.
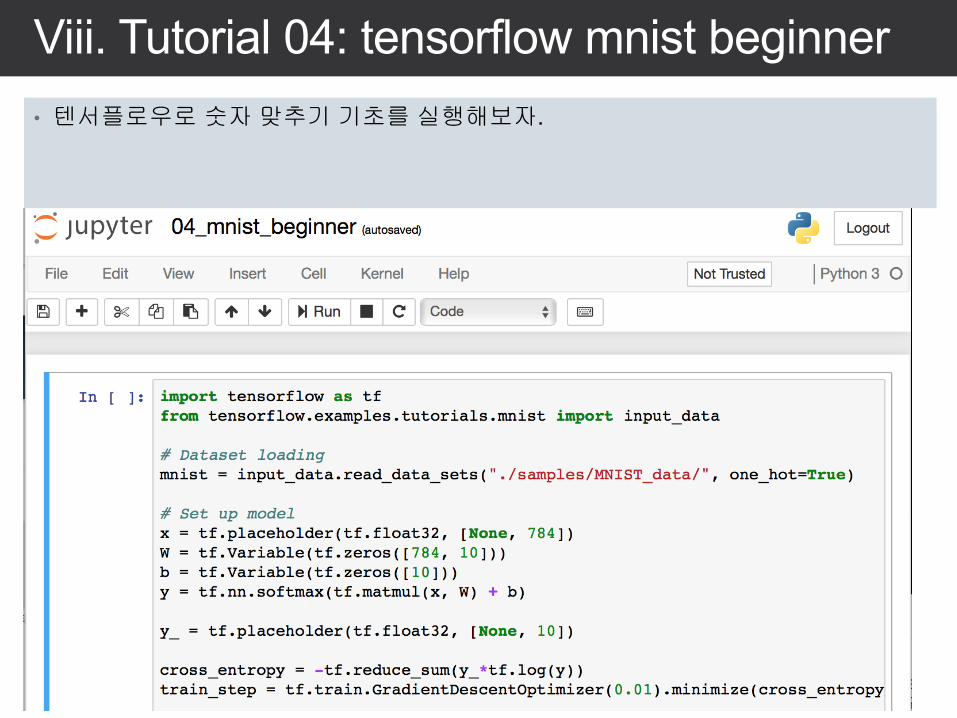
Viii. Tutorial 04: tensorflow mnist beginner• 텐서플로우로숫자맞추기기초를실행해보자.
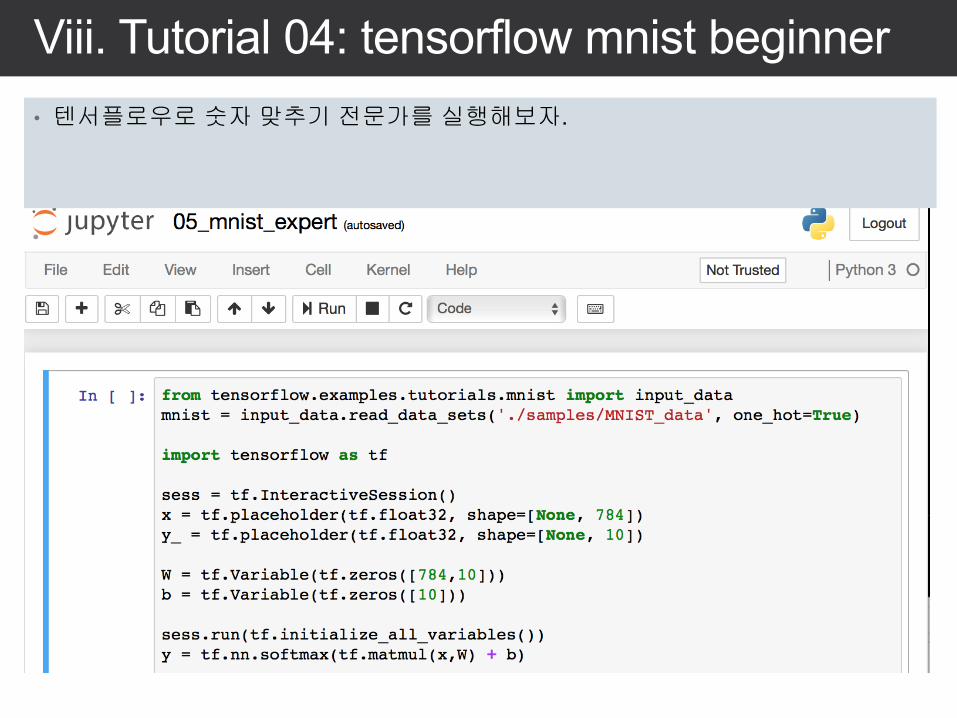
Viii. Tutorial 04: tensorflow mnist beginner• 텐서플로우로숫자맞추기전문가를실행해보자.
iX. System Down
• Shutdown immediately and halt�$ sudo shutdown –h now.

Thanks you!
Q&A
Related Documents