HOW TO BUILD A SHED? 10. HOW TO BUILD A SHED DOOR

10. How to build a shed door
Jan 18, 2015
Step by step instruction on how to build a shed. This presentation shows you how to install asphalt roo
Welcome message from author
This document is posted to help you gain knowledge. Please leave a comment to let me know what you think about it! Share it to your friends and learn new things together.
Transcript

HOW TO BUILD A SHED?
10. HOW TO BUILD A SHED DOOR
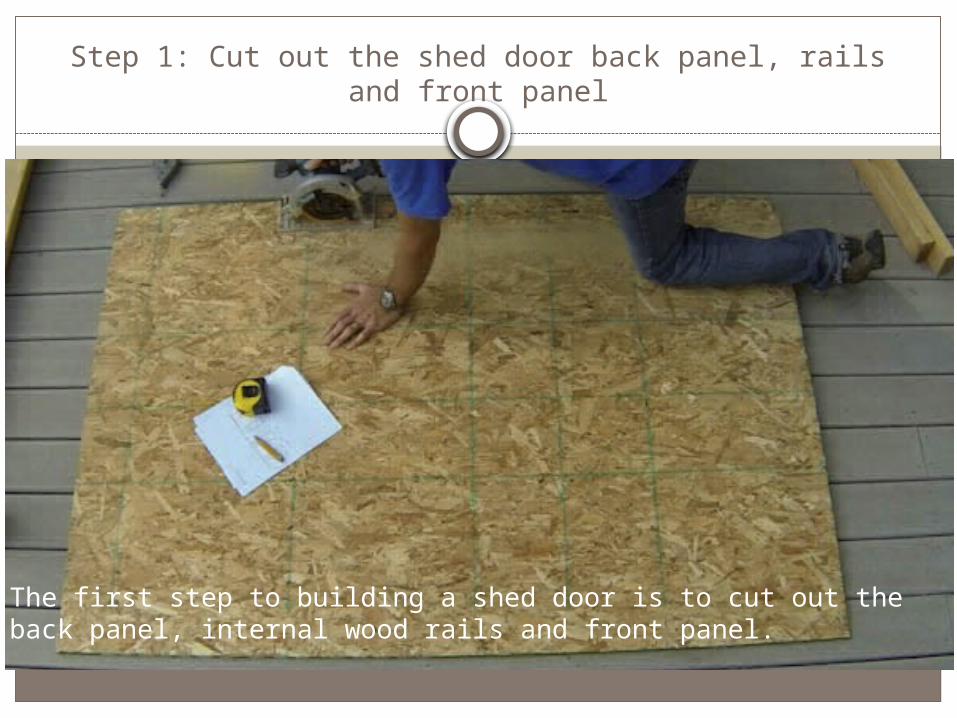
Step 1: Cut out the shed door back panel, rails and front panel
The first step to building a shed door is to cut out the back panel, internal wood rails and front panel.
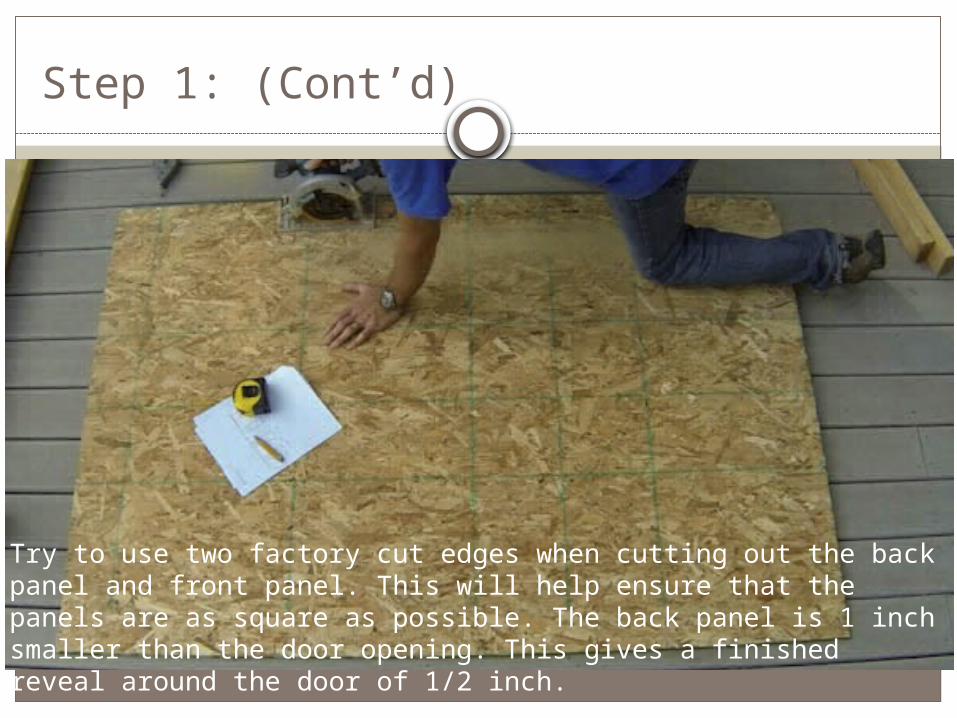
Step 1: (Cont’d)
Try to use two factory cut edges when cutting out the back panel and front panel. This will help ensure that the panels are as square as possible. The back panel is 1 inch smaller than the door opening. This gives a finished reveal around the door of 1/2 inch.
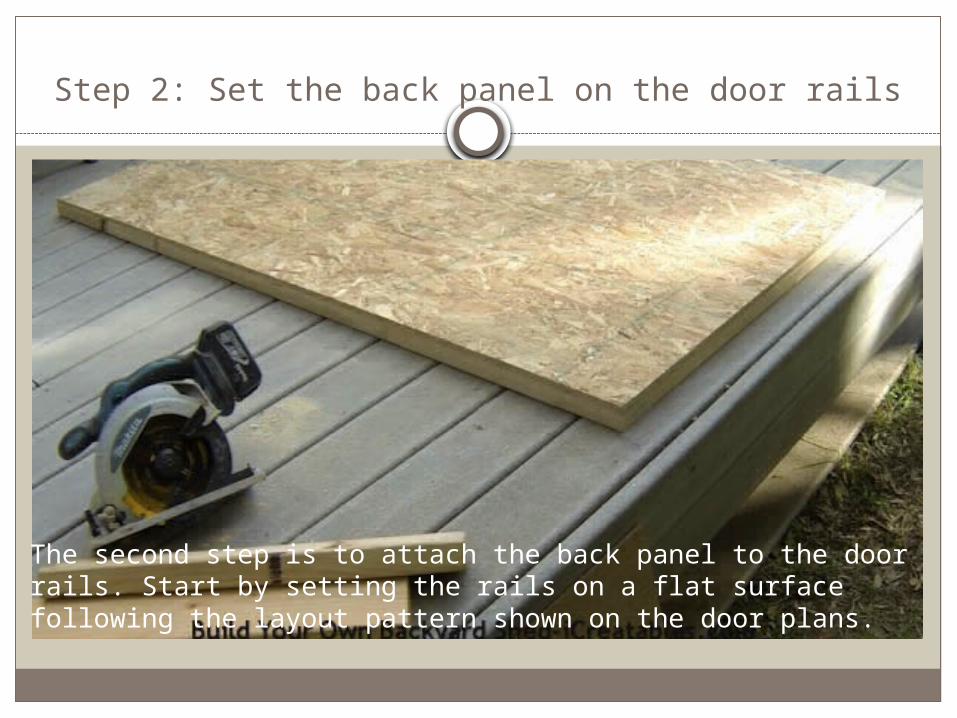
Step 2: Set the back panel on the door rails
The second step is to attach the back panel to the door rails. Start by setting the rails on a flat surface following the layout pattern shown on the door plans.
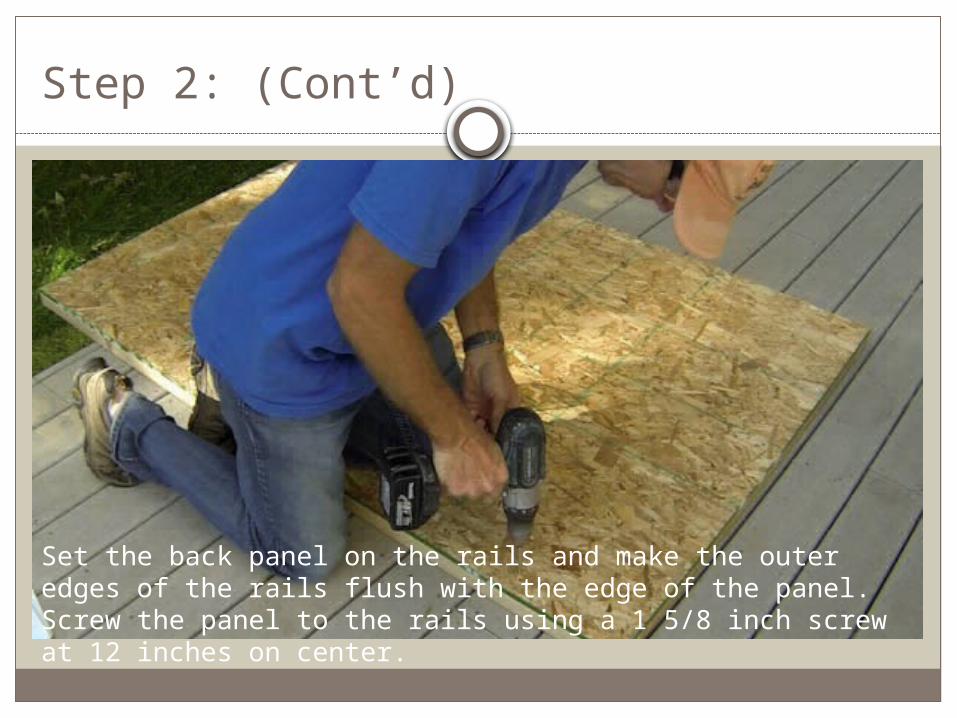
Step 2: (Cont’d)
Set the back panel on the rails and make the outer edges of the rails flush with the edge of the panel. Screw the panel to the rails using a 1 5/8 inch screw at 12 inches on center.

Step 3: Attach the front panel
The third step is to attach the front panel to the rail and back panel assembly you just made.
Start by flipping the door over and setting the front panel on it.

Step 3: (Cont’d)
Use a tape measure to measure and adjust the front panel until the overhang is one and a quarter inches on all sides. It works best to measure at the corners.
This step takes several adjustments to make sure the overhangs are all equal.
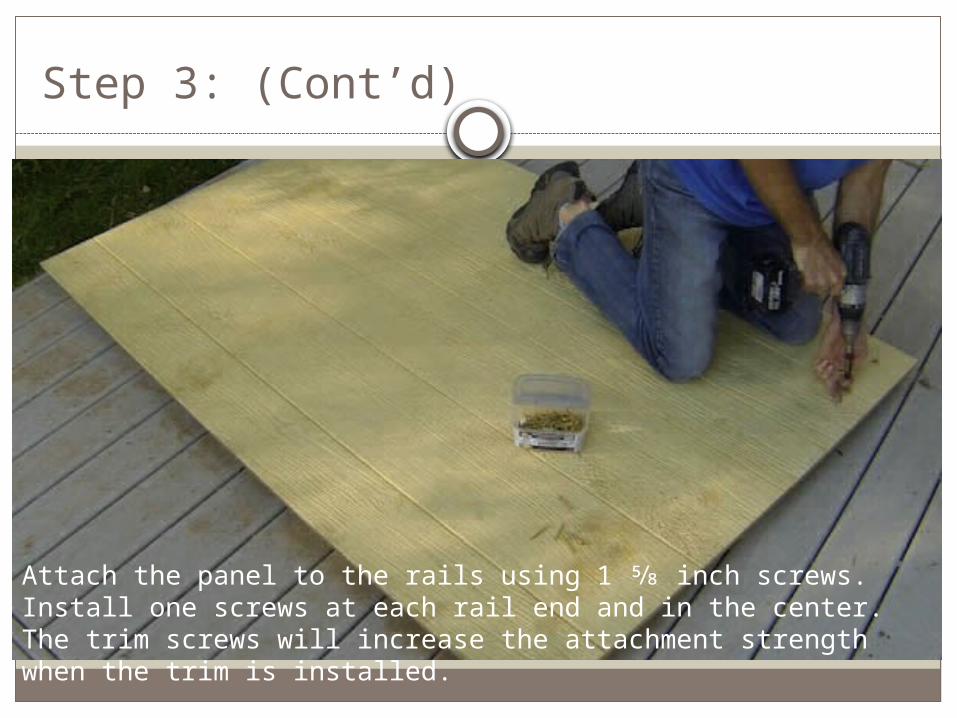
Step 3: (Cont’d)
Attach the panel to the rails using 1 ⅝ inch screws. Install one screws at each rail end and in the center. The trim screws will increase the attachment strength when the trim is installed.
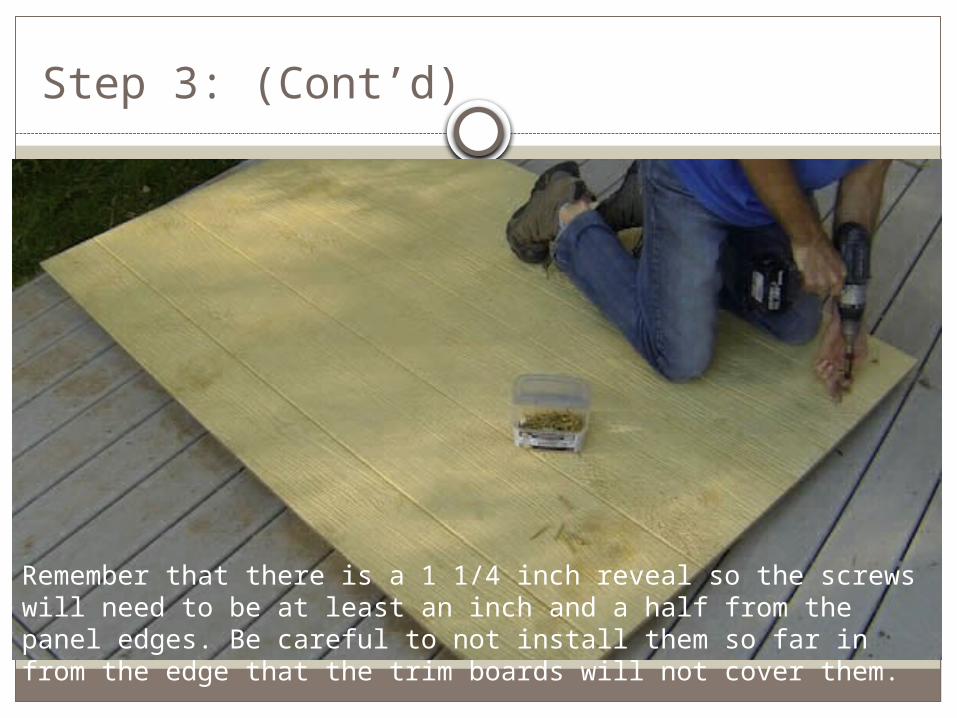
Step 3: (Cont’d)
Remember that there is a 1 1/4 inch reveal so the screws will need to be at least an inch and a half from the panel edges. Be careful to not install them so far in from the edge that the trim boards will not cover them.
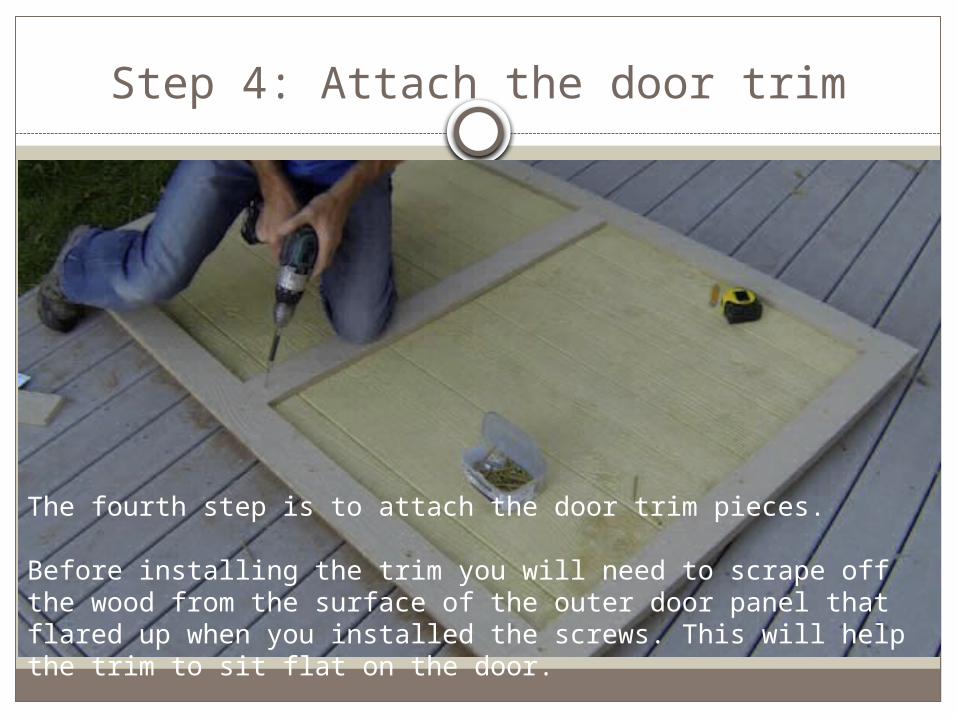
Step 4: Attach the door trim
The fourth step is to attach the door trim pieces.
Before installing the trim you will need to scrape off the wood from the surface of the outer door panel that flared up when you installed the screws. This will help the trim to sit flat on the door.
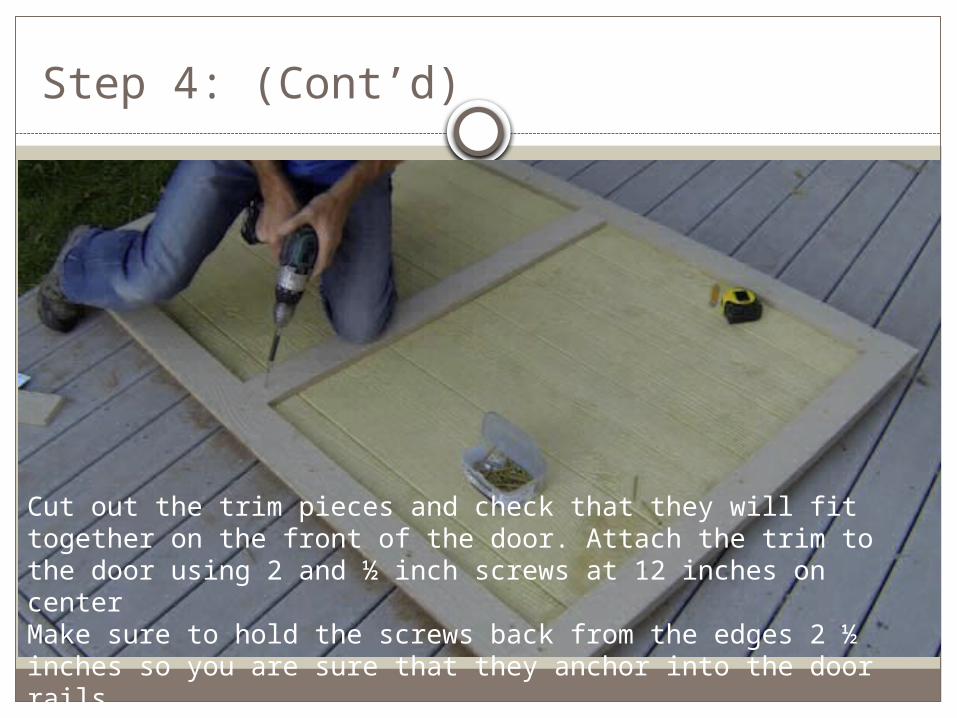
Step 4: (Cont’d)
Cut out the trim pieces and check that they will fit together on the front of the door. Attach the trim to the door using 2 and ½ inch screws at 12 inches on centerMake sure to hold the screws back from the edges 2 ½ inches so you are sure that they anchor into the door rails.
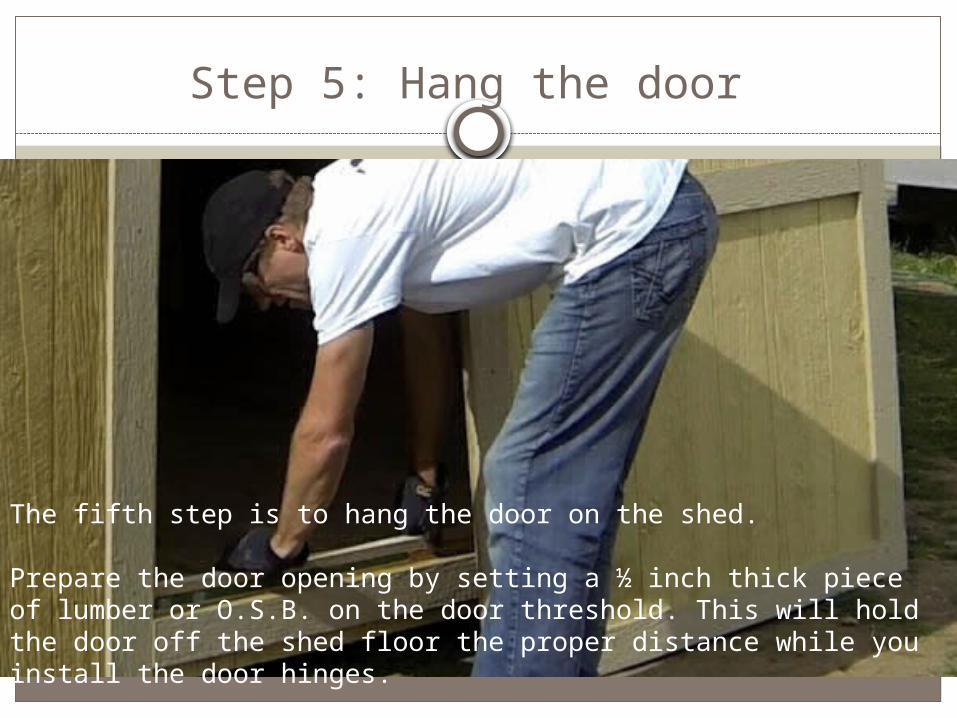
Step 5: Hang the door
The fifth step is to hang the door on the shed.
Prepare the door opening by setting a ½ inch thick piece of lumber or O.S.B. on the door threshold. This will hold the door off the shed floor the proper distance while you install the door hinges.
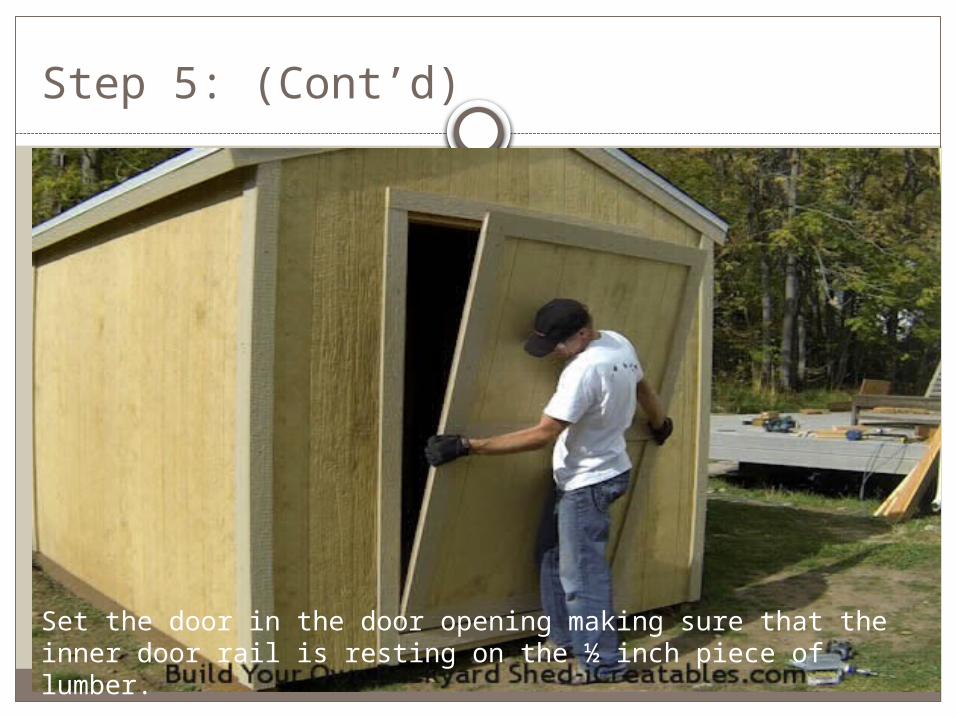
Step 5: (Cont’d)
Set the door in the door opening making sure that the inner door rail is resting on the ½ inch piece of lumber.
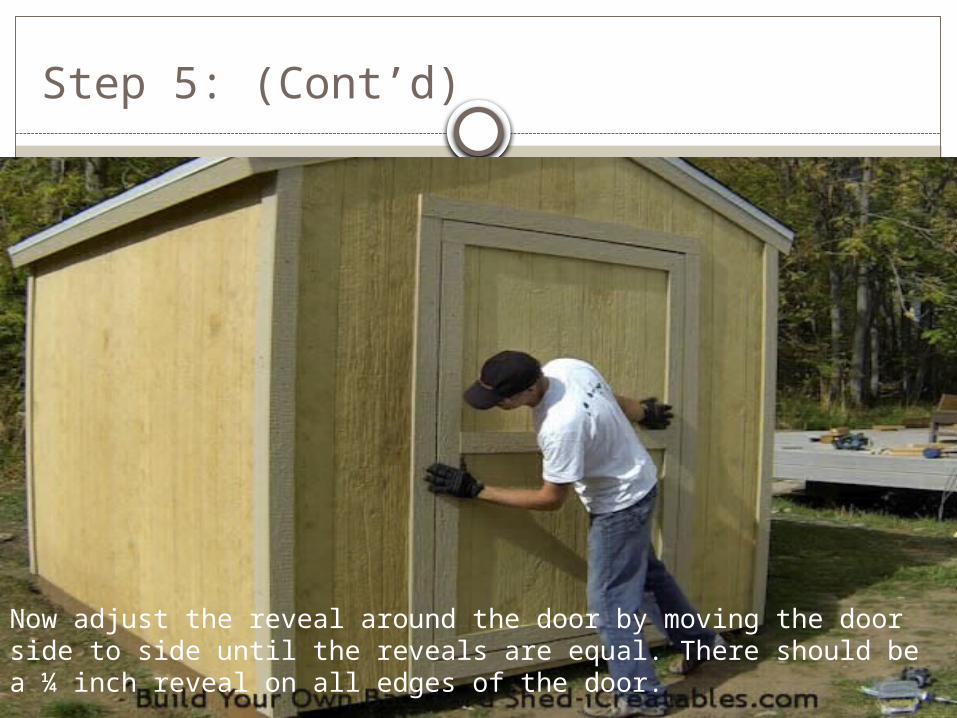
Step 5: (Cont’d)
Now adjust the reveal around the door by moving the door side to side until the reveals are equal. There should be a ¼ inch reveal on all edges of the door.
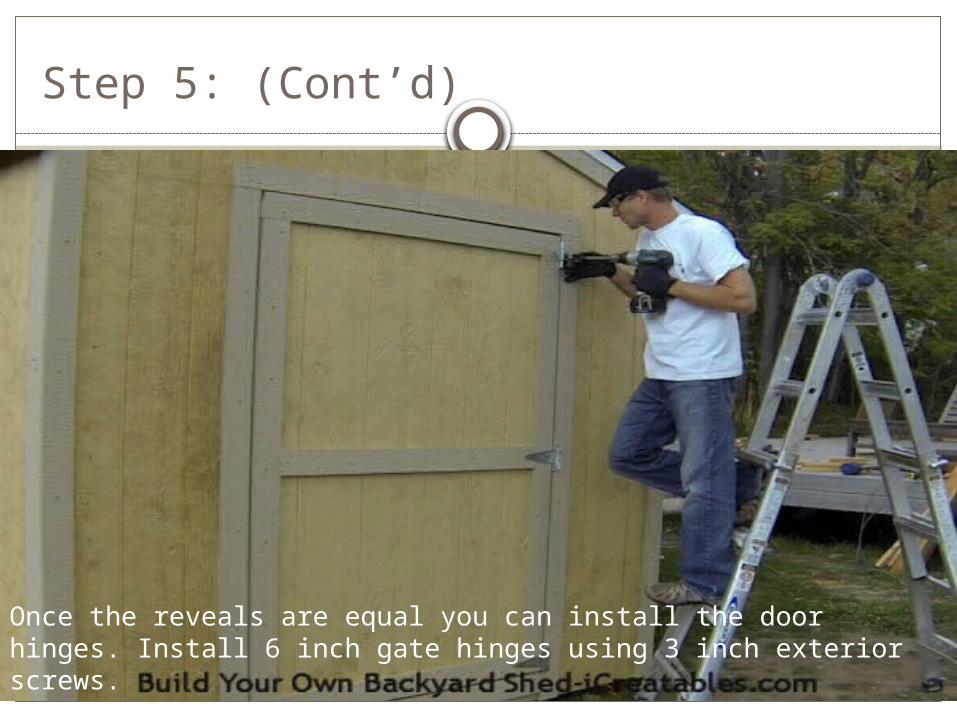
Step 5: (Cont’d)
Once the reveals are equal you can install the door hinges. Install 6 inch gate hinges using 3 inch exterior screws.

Step 5: (Cont’d)
Remember that the door rails are 1 1/4 inches from the door edges so you must angle the screws that are not over the door rails so that they hit the door rails.

Step 5: (Cont’d)
The bolt of the hinges should be centered on the gap between the door and the shed trim. The bolts should also be aligned vertically with the gap. When the hinge bolts are not in line with the door they cause the door to bind when it is opened.

Step 5: (Cont’d)
The top and bottom hinges should sit so that their edges just pass over the inside corner of the door trim. This helps insure that the screws will hit the inner door rail.
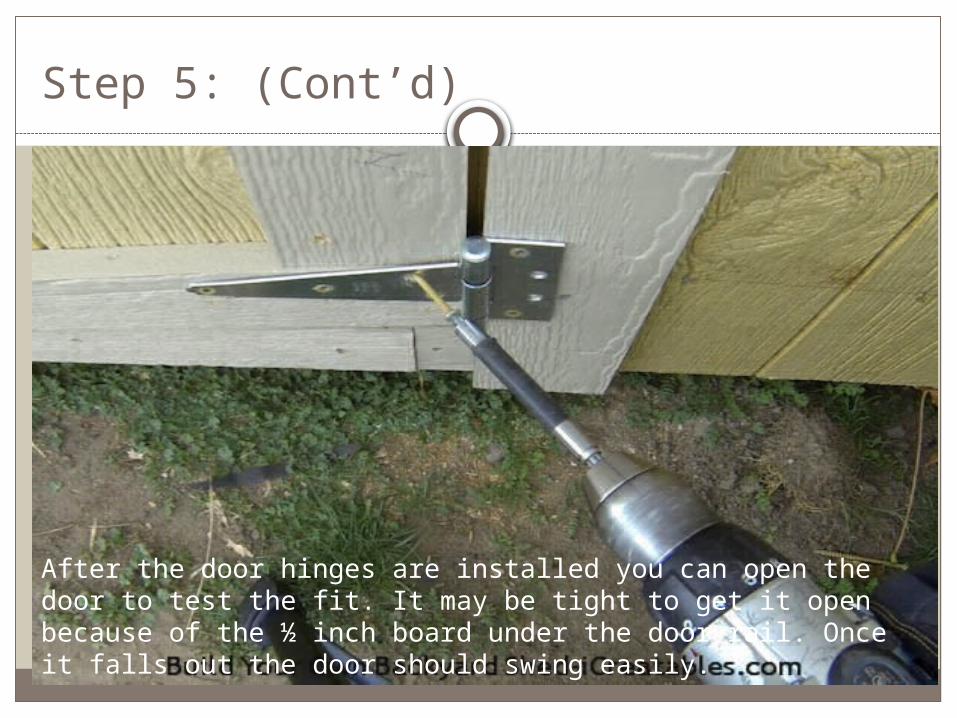
Step 5: (Cont’d)
After the door hinges are installed you can open the door to test the fit. It may be tight to get it open because of the ½ inch board under the door rail. Once it falls out the door should swing easily.
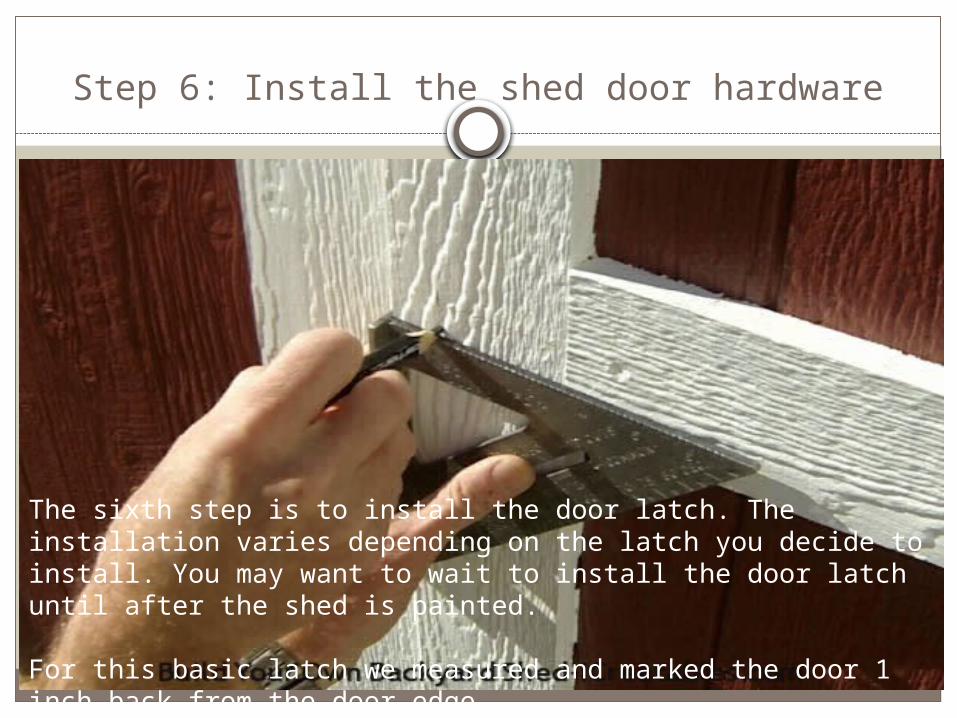
Step 6: Install the shed door hardware
The sixth step is to install the door latch. The installation varies depending on the latch you decide to install. You may want to wait to install the door latch until after the shed is painted.
For this basic latch we measured and marked the door 1 inch back from the door edge.
Step 6: (Cont’d)
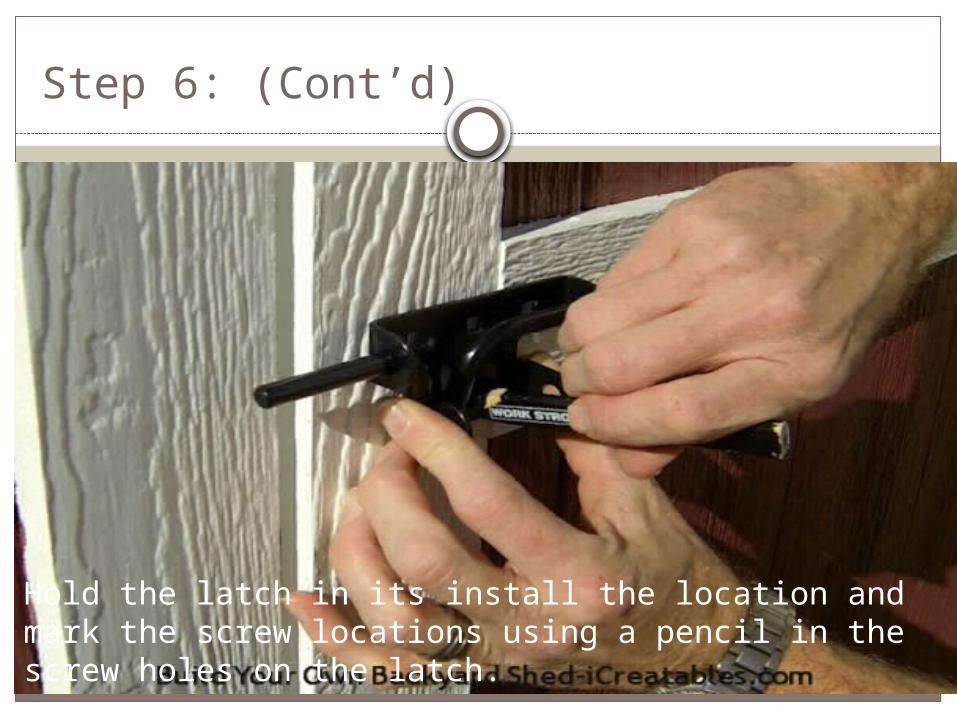
Hold the latch in its install the location and mark the screw locations using a pencil in the screw holes on the latch.

Step 6: (Cont’d)
Attach the latch to the shed door using 2 ⅝ inch screws through each of the holes
Make sure to angle the screws if necessary so that they hit the interior door rail. Install the remaining screws.
Step 6: (Cont’d)
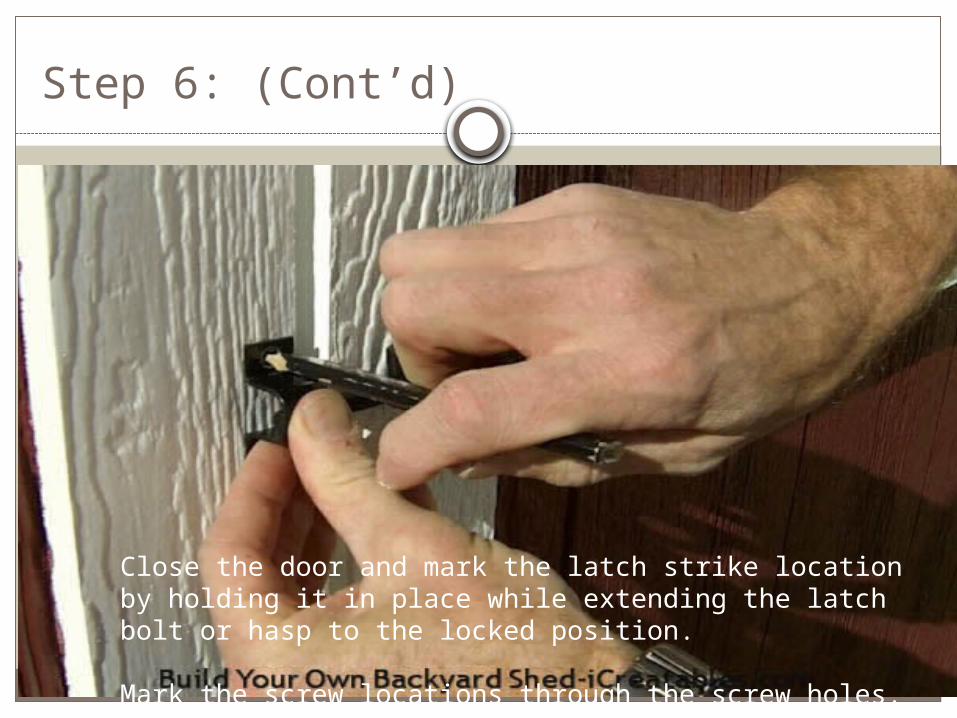
Close the door and mark the latch strike location by holding it in place while extending the latch bolt or hasp to the locked position.
Mark the screw locations through the screw holes.
Step 6: (Cont’d)
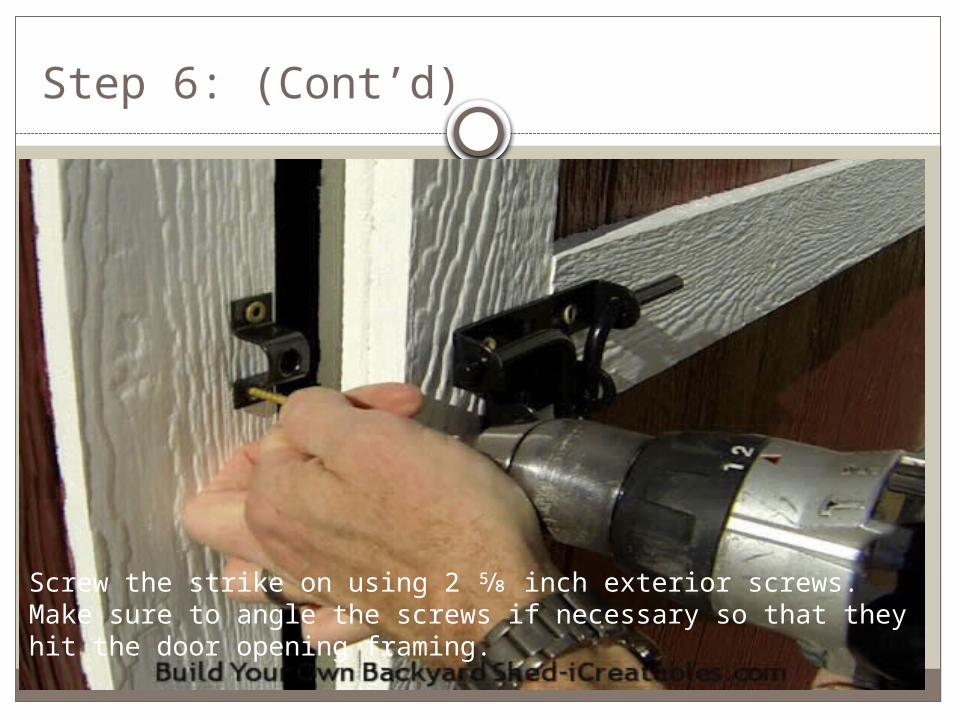
Screw the strike on using 2 ⅝ inch exterior screws. Make sure to angle the screws if necessary so that they hit the door opening framing.

NEXT STEP: HOW TO PAINT A SHED
Continue learning about shed building through other presentations.
Related Documents